Monthly Archives: February 2011

First Steps

As I mentioned in my previous post, I planned to discuss the steps I went through in creating my first puzzle.  This is going to be a burr puzzle, with a twist.  Rather than being able to see the pieces, they will be contained inside a cube.  In reality, the walls of the cube will be attached to the pieces, so that the completed puzzle will form a cube rather than putting the pieces into a cube.  Don’t worry, it will make sense as I go!

The first of those steps was to get some sort of idea of how the puzzle would look, what the pieces were going to be, and to verify that it would actually work as a puzzle.  I drew a few paper sketches and had the idea in my mind as to what I wanted.  From there I was introduced to Burr Tools.  Check out the links on the right for more on the tool.  It’s an excellent program and allowed me to create a virtual prototype of the puzzle, and verify that everything would would the way I intended it to.

Now, I’m not going to pretend that this is fool proof.  You need to work with the program as it has some limitations, and you really need to understand the mechanics of your puzzle to be able to get the program to do what you need.

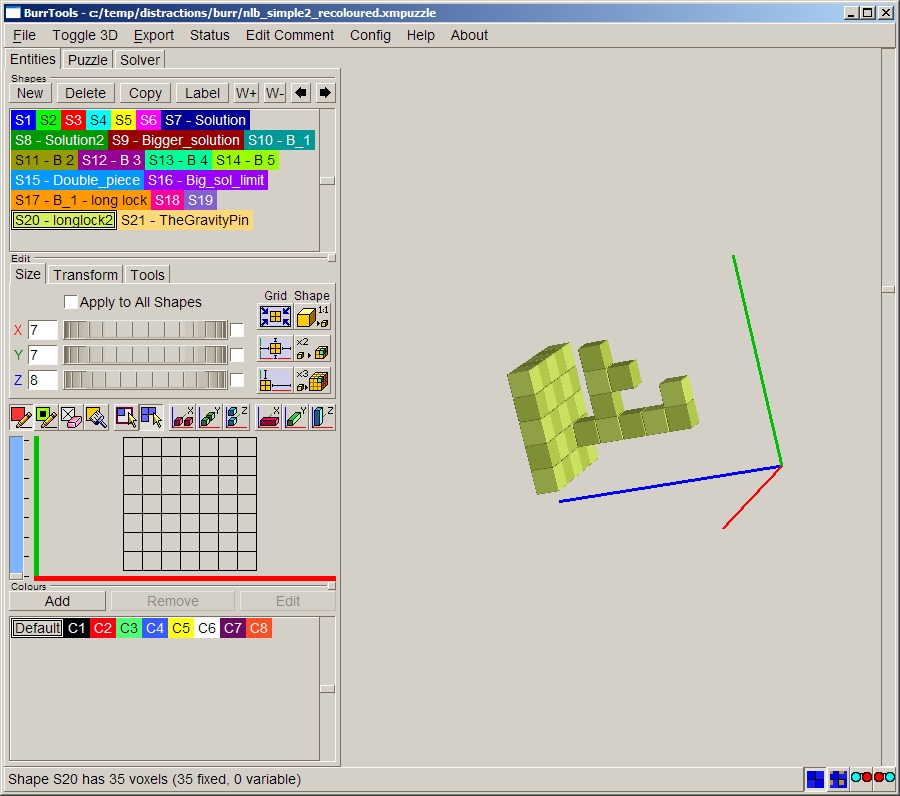
The image below shows just one of the sides that I created.  As you can see, both the internals, and the external side are there, and the top left shows all the pieces I created.  I spent a lot of time working with the program to make sure that the pieces held each other in place and didn’t just fall out when the puzzle was assembled.

The one thing I wanted to do was have the final piece (in my original idea, that was the piece shown below) to work like a key, which you would turn once inserted which would lock the entire puzzle in place.  Burr Tools doesn’t have the facility to deal with rotations, however I could still use it to check this would work.

As it turns out,I didn’t use this feature for the first version of the puzzle, as it is possible to build it without, and my prototyping material (Lego) doesn’t make that rotation easy.  In wood, I could curve the ends so that they would turn past each other, but without a lot of work that ‘s not possible in Lego. 

I ended up with two distinct versions created in Burr Tools.  The first was a non-rotation version, and the second followed my original plan and retains the turning key to finish.

With the virtual puzzle complete, next step was to make it into something I could handle and check how it worked.  There are a number of tools out there to do that, and you can even export the shapes from Burr Tools and upload them to a site like shapeways for 3D Laser printing if you want.  I’ll talk more about that in the next post though.

For now, as you can see from the image above, Burr Tools gives you nice easy to follow cubed units to allow you to translate the design into whatever prototype you’re going to make.

Can I really create my own puzzles?

So I’ve been toying with the idea of creating a few puzzles of my own for some time now.  I love Japanese puzzle boxes, and have a couple in my collection.  I also love wooden puzzles, probably because I like the feeling of wood.  There’s something about the way wood feels when you work with it, and no two puzzles made from wood will ever be the same thanks to the grain and so on.

Anyway I digress.  I’m not a wood worker, and have limited experience working with wood so I know that I have no chance currently at making any sort of worthwhile Japanese puzzle box.  However I was asked just before Christmas to make a pencil case for my girlfriend.  So I got some wood, dusted off the tools and got to it.

Now at this point I had virtually no power tools, so everything was done by hand.  The wood was marked up, and sawn using a hand saw, I added dowels which I made just using a hand drill, and mitered the bottom to place the base in using my Dremel. 

Ok, so why is all of this relevant?  Well having completed this simple project, I realised that in fact I’m not all that bad at this, and maybe I can start doing something a little better.  So what now?

One of my friends is also a puzzle designer, and I really like the things he’s done.  He creates burr puzzles, and variants of burrs, and that seemed like a sensible place to start.  After all, in its simplest form, a burr puzzle is just lots of cubes stuck together.  Well my friend pointed me to a great software program called ‘Burr Tools’.  It allows you to not only create the pieces for your puzzle, but it can also solve it for you.  Well I wasn’t interested in solving puzzles I owned, but in creating my own.  I had an idea for a puzzle cube, where the burr would be internal and unseen and set about creating it.

The next few posts will follow the creation of that first puzzle from it’s initial idea, through modelling in Burr Tools, to my first prototype and then hopefully the first finished version created in wood.  Keep checking back to see the progress!

Just Getting Started

Welcome!  I’m glad you’ve found me.

I’ve been a puzzler for over 20 years now, and have a reasonable number of puzzles in my collection.  A few of my friends have been blogging about their puzzles for a while now and it seemed like a good idea.  I thought I’d try to do something a little different though.

I’ve started designing and building my own puzzles, so I thought I’d try to blog about that as well as the puzzles I own.  I know many people who think “Wouldn’t it be cool to design my own puzzle”, and hopefully be reading through my experiences you’ll see that it’s not that difficult, and there are many good tools out there to help!

If you enjoy it, or you’re doing something similar yourself, then I’d love to hear from you!

Take it easy,

Neil