- Marcel Gillen’s Rolling Pin
- Marcel Gillen’s Bolt #6
- Marcel Gillen’s Little Rolling Pin
Happy New Year to all my readers. Here’s wishing all of you a great year in 2014. I hope it’s a puzzling one, for all the right reasons. This year, I kick off the reviews with a set of rather special puzzles from Marcel Gillen. Over the next few posts, I’ll review some of Marcel’s hidden maze puzzles.
Marcel Gillen Hidden Maze Puzzles
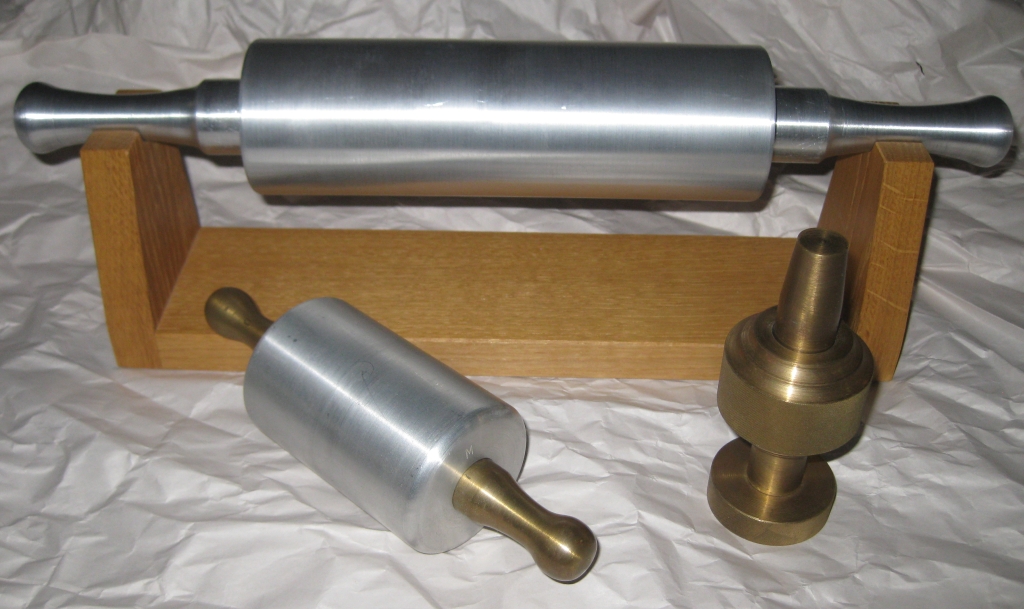
I’m very lucky to have been able to borrow these puzzles from a good friend who knows that I’ve solved all of the Revomaze puzzles, and suggested that I should play with the puzzles pictured above. He really wanted my thoughts on Marcel’s puzzles, given that they predate the Revomaze by quite some time, and have very similar puzzling aspects.
This review will focus on the large rolling pin, sitting on the stand in the photo above. This is probably one of the heaviest puzzles I’ve played with. If you think the Revomaze is heavy, weighing in at ~600g, this is in the ultra heavyweight class. The Puzzle is solid Aluminium, and weighs in at a whopping 1714g, yes it’s nearly three times heavier than a revo! One thing that I really had to get used to was working with the weight of this puzzle. It’s not easy to spend a lot of time working on something quite this heavy.
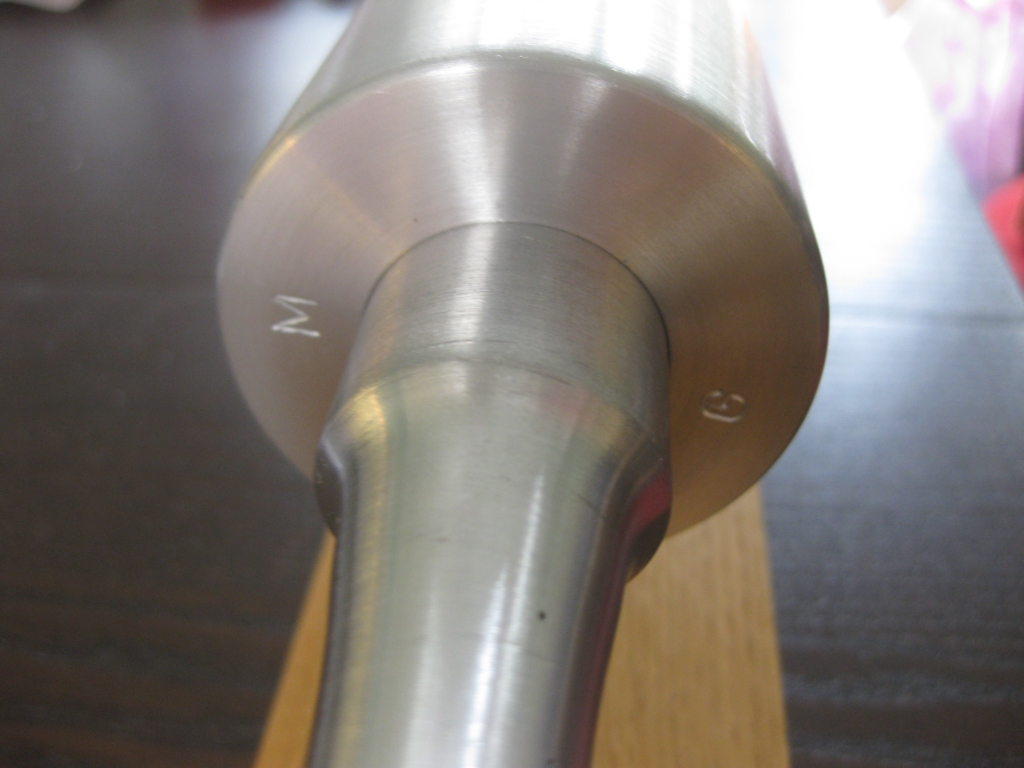
Marcel’s signature initials on the end of the sleeve
End to end, the puzzle measures 15″, with the main body of the pin being 7.5″ long. The body of the puzzle is 2.25″ in diameter, and the handle is 1.25″ in diameter. On one end of the body Marcel’s signature initials can been seen on either side of the handle. As you might expect, they will serve some purpose as a reference when solving the puzzle.
I first wrote about this puzzle back in June 2012 after attending a local California Puzzle Party where I didn’t manage to solve it, but did make what I thought was pretty good progress. To my knowledge the puzzle hadn’t been opened by its owner, however at one point it was sent back to Marcel as it had a problem and needed to be fixed. When it came back, the solution to the maze was marked on one end of the handle. Seems like Marcel needed a little help opening it. Even with those helpful markings, it still hadn’t been opened. One of the requests I was given when I borrowed the puzzle was to clean off the black marker which showed the solution, so before I started playing with it again, that’s exactly what I did. After all, what’s the point in the puzzle if you already have the solution!
Taking on the challenge of opening this beast, I set about understanding what was going on. If you’ve read my comments about the puzzle previously, you’ll know that there’s a hidden maze which is etched into the handle of the puzzle. There’s a sprung pin on the inside of the sleeve which is used to traverse the maze. (Sound familiar to anyone?) As you start the puzzle, you can feel the tension as the pin rides up onto the top of the maze, and for anyone who is familiar with the Revomaze puzzles, that familiar click is present when you take a wrong turn and drop off the maze.
Unlike the Revomaze, there’s no quick reset back to the start in this puzzle, and when you make a mistake, you’ll have to navigate the traps all the way back to the start of the puzzle to try again. While other maze puzzles have walls which you can rest the pin against, there’s no such feature here. This is a one way trip riding on top of the walls. Think of it as one long bridge with no walls.
I should probably note that mapping the puzzle is a lot simpler than other hidden maze puzzles I’ve played with since you can use the traps to map the maze. By falling off, then carefully mapping the traps, you can figure out what’s left. With a single way back to the start, it’s much harder to map using such a method, so I do believe that this is much simpler to solve for anyone familiar with mapping techniques used for hidden maze puzzles.
After around an hour of figuring out and mapping the path, falling off many times along the way, I reached the end of the maze.

Having solved the maze once, this is the reward
At least I assumed I had reached the end, as I was able to see the brass circle in the photo above. At this point I was a little disappointed that I was unable to remove the handle from its sleeve, to be able to see the maze, but was pretty happy that I’d made it to the end. Investigating a little more, I found that the circle was in fact a brass rod which came out of its hole…
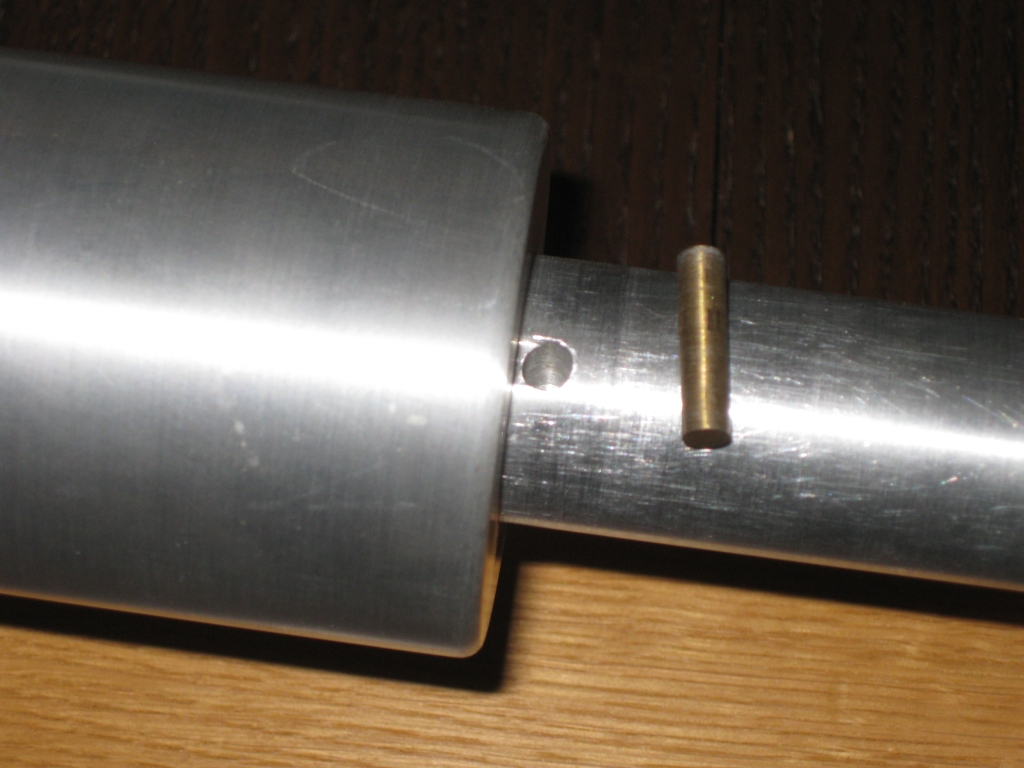
The Brass rod as a prize for solving the maze once
The question now is what to do with that rod. My first thought was that if I removed it, then returned the puzzle back to its starting position, perhaps it would allow the pin to drop into the hole I’d left by removing the rod, and let me remove the maze that way. Given that Marcel is an expert designer, I assumed that he wasn’t going to let me remove something from the puzzle which would lead to it ending up broken, I set the pin aside, and returned the puzzle back to its starting position, hoping that it would now allow me to remove the maze. I was wrong, but I was in for a surprise.
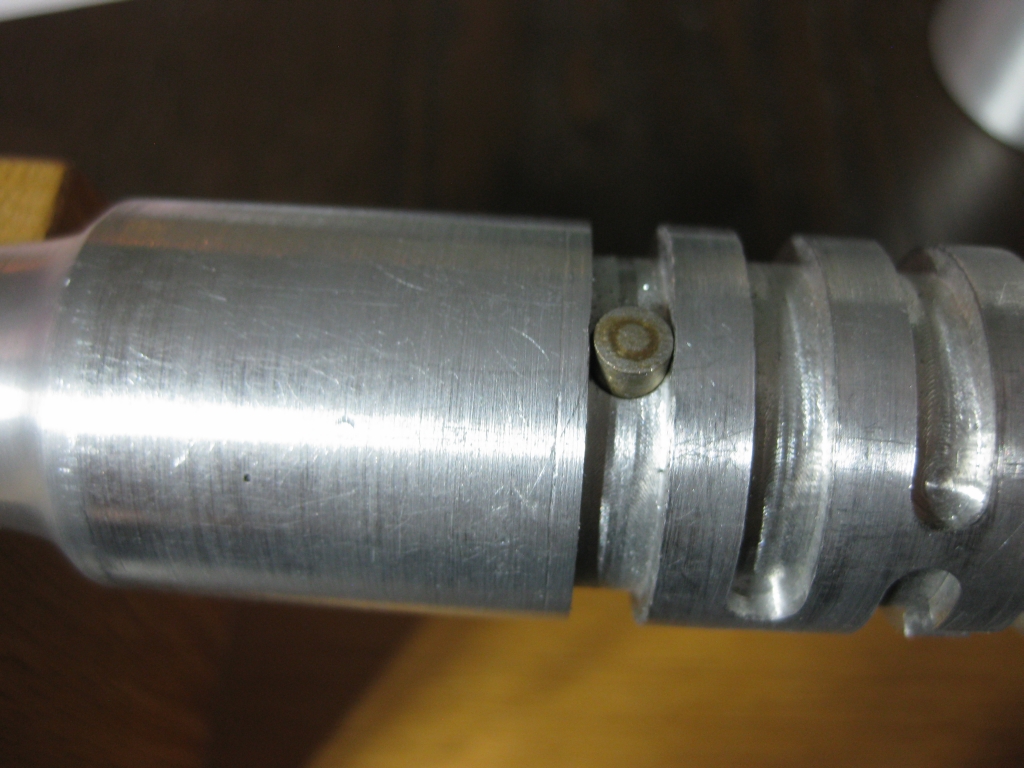
When I got back to the start, the core traveled a little further back that it had been able to previously, and exposed a new hole at the other end of the puzzle. It was just the right size to accept the brass rod, so that’s exactly where I put it. Of course now I need to solve the puzzle again! So back to the start, I go ahead and solve the puzzle again. This time it takes me a much more respectable 15 minutes to get back to the end, but I still can’t remove the handle.
After engaging the old grey matter, I realise what is going on. The brass rod is creating a bridge at the end of the puzzle allowing the pin to cross over what would otherwise be a trap, and lets me remove the handle. It took me a good few attempts to get this to work properly, but fortunately Marcel hasn’t been too nasty, and has provided a ramp in the last trap of the puzzle allowing me to take as many attempts as I need to find and cross my new bridge.
Rolling Pin maze exit
Having finally removed the handle, you can see exactly what the brass rod was doing, creating a narrow bridge, at the same height as the main maze, allowing the pin to remain compressed and move onto the outer side of the handle, freeing the maze to be seen in all its glory.
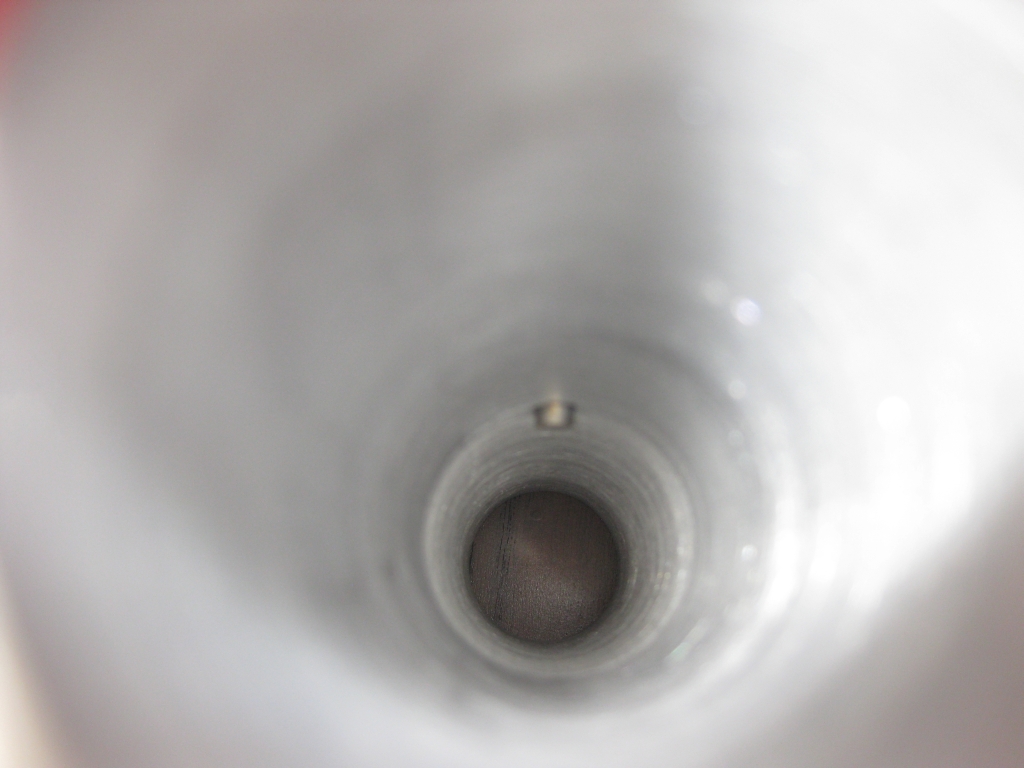
The pin used no navigate the maze inside the sleeve
Looking down the inside of the sleeve you can see the maze pin in the middle of the sleeve. It’s a sprung pin, fixed inside the sleeve and isn’t removable. Probably a good thing as it’s a fairly small part and would be easily lost. (I managed to drop the brass rod at one point, and watched it roll under the table I was sitting at. It’s big enough that I found it easily, but being non-magnetic, it could have been a problem!)
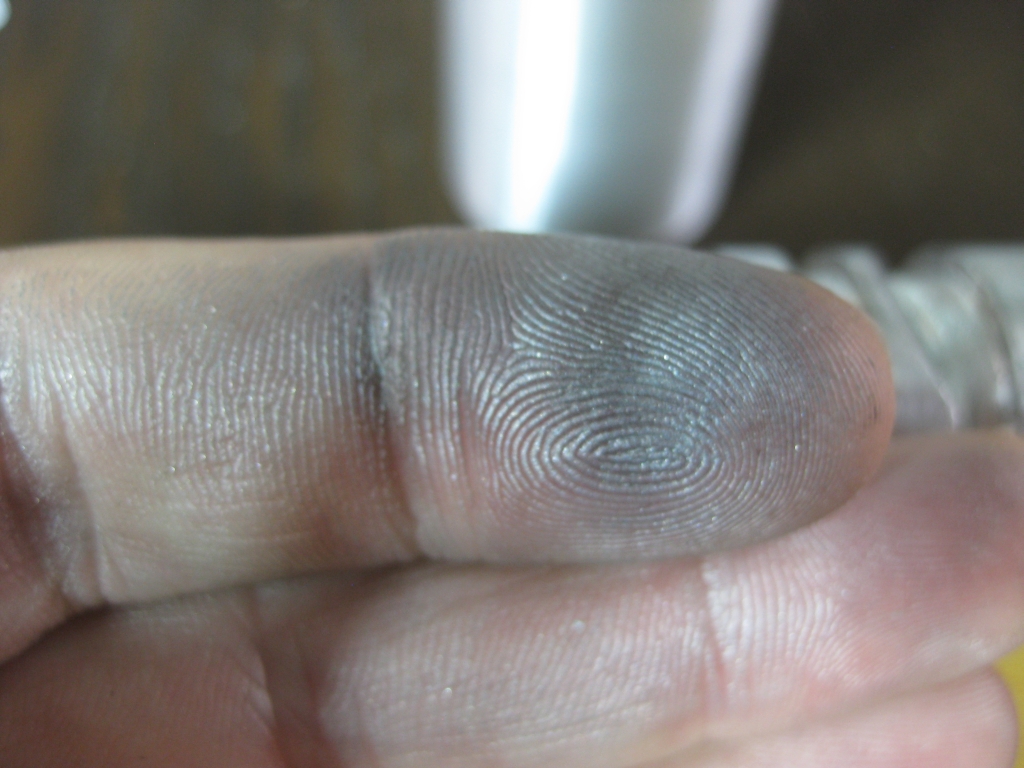
My fingers after solving
Given that the puzzle is raw aluminium, it had a rather interesting side effect, in that it left my fingers rather silver. Exactly the same thing happened when I played with it at the Puzzle party so I was expecting it this time. I’m not entirely sure whether there’s just some aluminium dust on the puzzle as a result of the pin rubbing against the surface, or whether the natural oils in my skin react with the aluminium. Regardless, I needed to wash my hands, and took the opportunity to clean the entire puzzle at the same time. (Ed: Don’t worry, no water was used in the cleaning of this puzzle.)
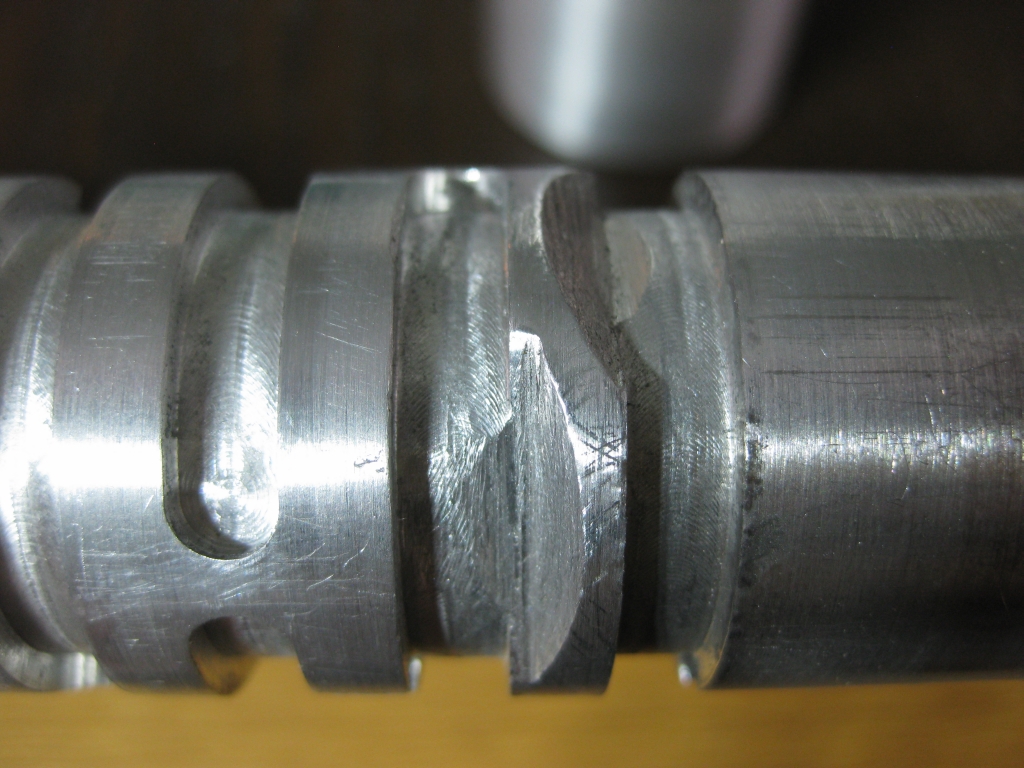
Rolling Pin ramps
Having a close look at the maze, you can see the ramps which are etched into the walls of the maze to allow the pin to move from the traps back up onto the level of the maze. Pictured above are the two ramps at the start of the puzzle. One from the start point to enter the maze, and one from the end of the traps back to the start of the puzzle. While I’m not going to show the entire maze here, the small section you can see shows how the puzzle works. The Pin rides on the higher area of the puzzle, and the lower cut-out sections are the traps. This is where you end up when to take a wrong turn. As you can see, the puzzle is incredibly well made, and it has stood up very well to many years of use.
Overall this is a great puzzle, with many similarities to the Revomaze puzzles. Perhaps this is closest to the Green Revomaze puzzle if I were to draw a comparison, however this puzzle does pre-date Revomaze by many years and includes the feature that the maze must be solved not once, but twice in order to truly say that the puzzle is solved and remove the core. No chance of getting lucky in opening this puzzle!
What I found to be even more impressive is how you reset the puzzle for the next person. To reset the puzzle, simply take the brass rod, and return it to the deep hole at the start of the maze, then slide the handle back into the sleeve. The maze pin simply rides onto the handle, then drops back into the maze. Navigating back to the start takes a few seconds, and the puzzle is ready to be solved again. Very clever, and so simple.
I had a lot of fun playing with the rolling pin. There’s no gimmicks here, and the clever mechanism which allows the maze to be removed is very well executed and adds an extra challenge to the puzzle that I found to be very rewarding, especially after understanding what was required.
I’ll review the other two puzzles soon, so stay tuned for more of the Marcel Gillen Puzzles.
Neil,
I’m very jealous! It looks fabulous! Unfortunately it’s impossible to obtain these now – they’re seldom seen at auction and go for absolutely huge prices when they do sell. I need to find someone who will lend it to me for a while……. Allard? Wil? Steve? Anyone? Can you hear the crickets?
Kevin
Puzzlemad
…I’m sure James D has a selection of them… you could always visit him.
Hmm! James D? Yes that is a possibility – unfortunately I doubt that I can solve it in a single sitting! I really need someone who might be able to lend it to me for a while!
Kevin
PuzzleMad
Well I’ll not tell you how long I’ve had them for Kevin, and just how little progress I have made with the #6 bolt in the picture!