Tag Archives: Coordinate Motion

Blind Burr

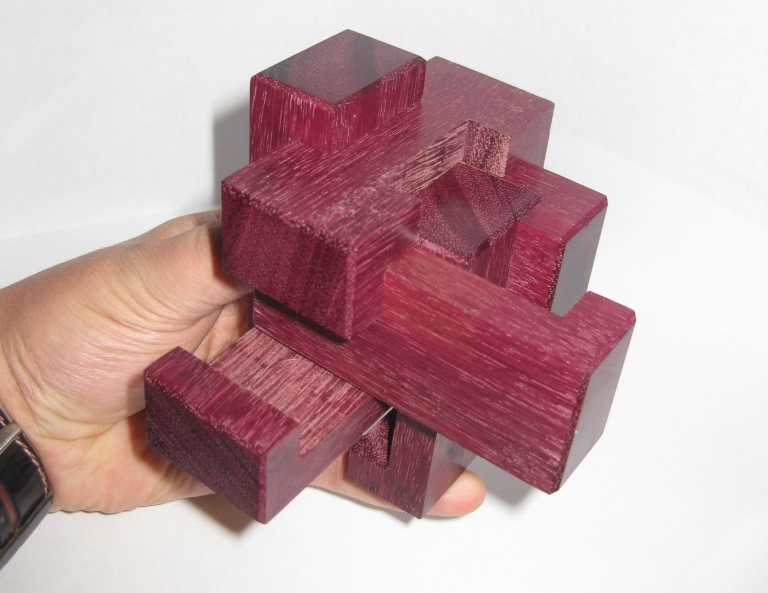
One of the Top 10 Vote Getters at this years IPP design competition was the Blind Burr, designed by Gregory Benedetti and made by Maurice Vigouroux. I had the great pleasure of being able to talk to Gregory about his puzzle designs and certainly enjoyed playing with his entry in the puzzle competition, so when I had the chance to pick one up on the day of the puzzle party, I didn’t hesitate.

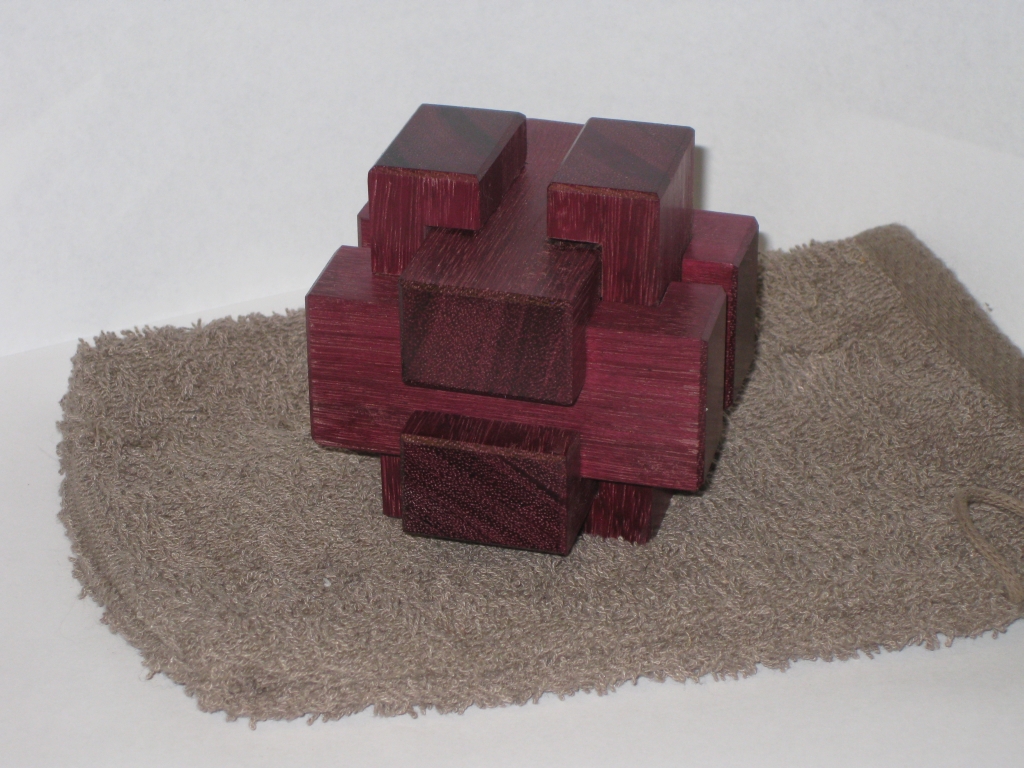
Blind Burr by Gregory Benedetti

Blind Burr by Gregory Benedetti

Made from some beautiful slabs of purple heart, the puzzle measures 3.25″ x 3.25″ x 3.25″. Each piece is cut from a solid chunk of purple heart, measuring a full inch thick, so the pieces are incredibly sturdy and finished to the high standard that is common for work from Maurice Vigouroux. Each of the pieces is polished to a high shine, and the ends of the pieces have been chamfered to really finish the puzzle nicely.

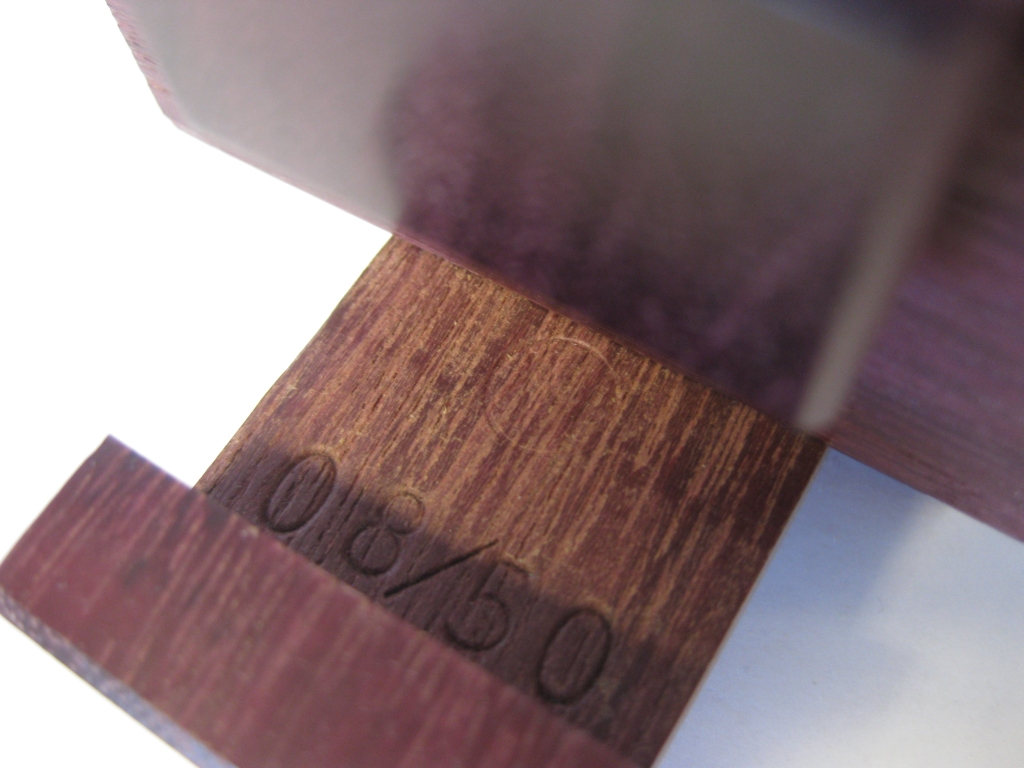
Limited edition number and Maurice's stamp

Limited edition number and Maurice’s stamp

As you can see each puzzle was numbered in a limited edition of 50, and the number is stamped into the wood, along with Maurice’s signature. There was a very interesting discussion on one of the Puzzle Forum’s about what makes a puzzle Limited Edition, which showed that there are many definitions to many different people. It turns out that in this case it’s limited because Maurice agreed to make 50, and no more! The reason why is fairly obvious when you start to play with the puzzle.

I’ve probably mentioned before that I’m not a huge Burr puzzle fan. There’s many other puzzle types out there that I get far more excited about than Burrs. So why did I make sure to get a copy of this one. And why’s it called a Blind Burr …. in my experience pretty much all Burr’s are blind. Well I’m not sure I can answer the second question, but I will answer the first. And the answer is pretty simple, this is no ordinary burr!

Edit: I can’t answer why it’s called the Blind Burr, but Greg did. Check out the comments for the answer!

Lots of movement but little progress

Lots of movement but little progress

Immediately on picking up the puzzle, you find that there are three pieces which are pretty loose, and move a fair distance. Looking at the inner part of the piece which slides out you’ll see it’s completely smooth, so whatever burrs exist, they are only in the top 1/3 of the piece which remains hidden in the centre of the puzzle. Of course all of this movement doesn’t really help much, as there is no movement at all in the remaining three pieces. Strange and definitely not an average burr.

Despite the piece on the right in the image above leaving enough space for the top piece to slide over it, that piece won’t budge. Something in there is keeping it in place and there’s no real hint of movement. Time to go back to the drawing board and figure out what else can move in the puzzle.

After some feeling around, you start to see that there may be another way to make progress, and sure enough that yields a little more movement in one of the pieces, and after that the rest of the puzzle will come apart using coordinate motion. It’s a really beautiful movement if not particularly difficult, and well worth the time to understand.

The pieces of the Blind burr (some details hidden)

The pieces of the Blind burr (some details hidden)

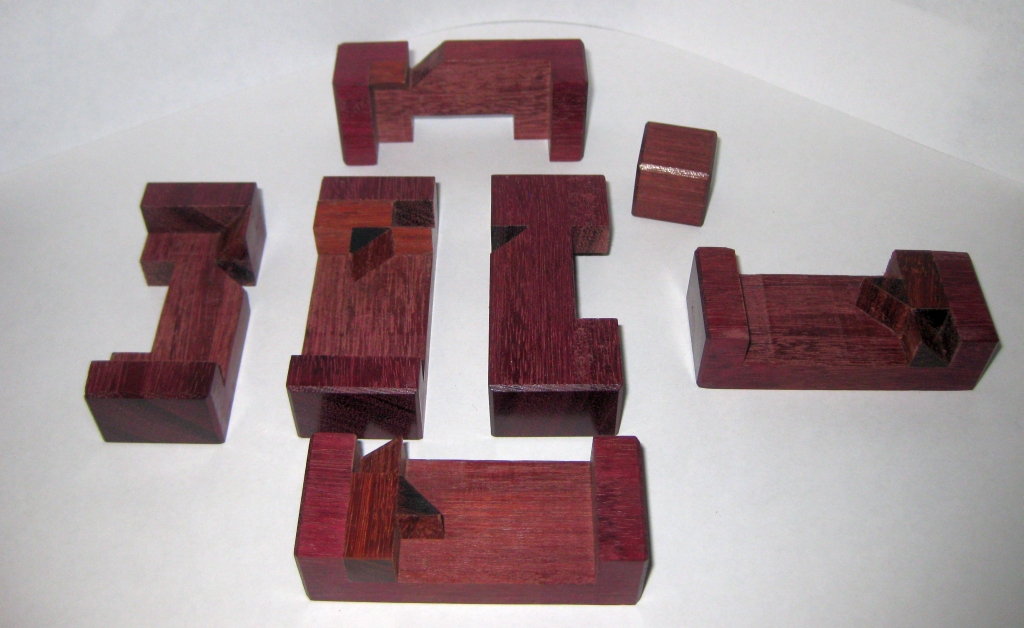
I don’t want to give too much away, as the discovery of the puzzle mechanism is a joy but you can see the seven pieces which make up the puzzle, with some familiar 45 degree blocks in there which are used in the coordinate motion. That cube was a bit of a surprise!

Putting the puzzle back together is marginally trickier than taking it apart as some dexterity is required during the assembly, and despite taking it apart and putting it back together a number of times now, I still struggle a little to get the first three pieces aligned correctly.

All in all it’s a great design, and rather deserving of its Top 10 vote. All of these are currently sold, but if you see one come up for sale, grab it. It really is a fun puzzle, and even for a non-Burr fan like me, you’ll enjoy it.
Vinco’s Double Desk Box

Most regular readers of my blog will be familiar with Vaclav Obsivac’s work. The ‘Vinco’ puzzles are well known as being very high quality wooden puzzles at very affordable prices. One of my puzzle friends recently moved house, and I was round visiting just before he moved. As we wandered through his garage, stocked from floor to ceiling, and wall to wall with boxes, he pulled out Vinco’s Double Desk Box, which was sitting unsolved, and handed it to me saying “See if you can put that back together for me”. After a challenge like that I couldn’t really say no now could I? That would ruin my reputation of being able to actually solve puzzles!

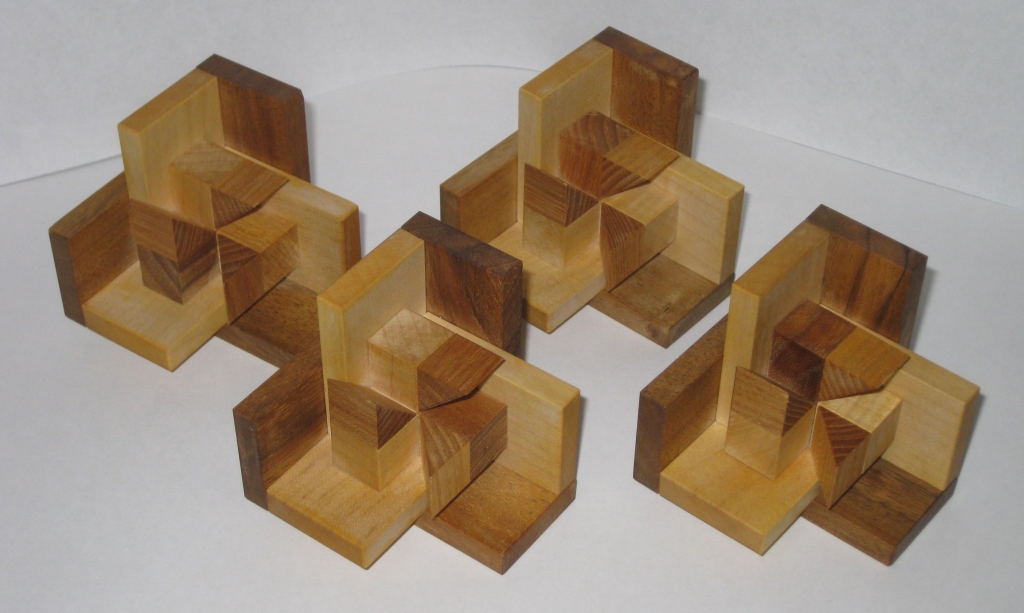
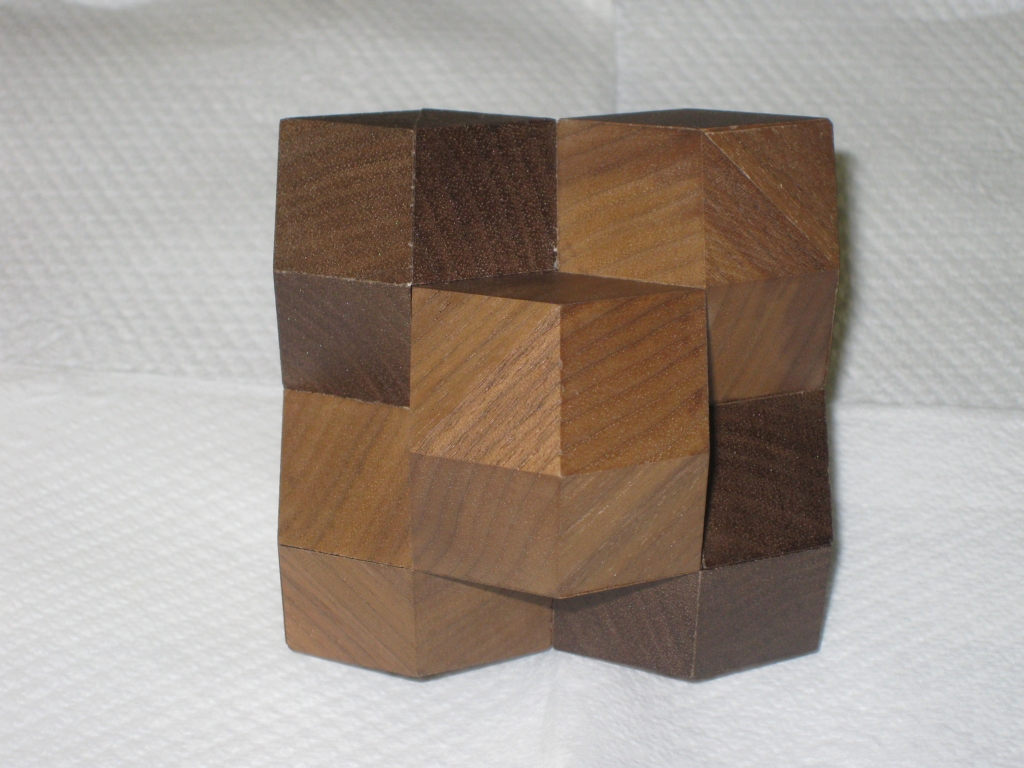
Double Desk Box by Vinco, solved.

Double Desk Box by Vinco, solved.

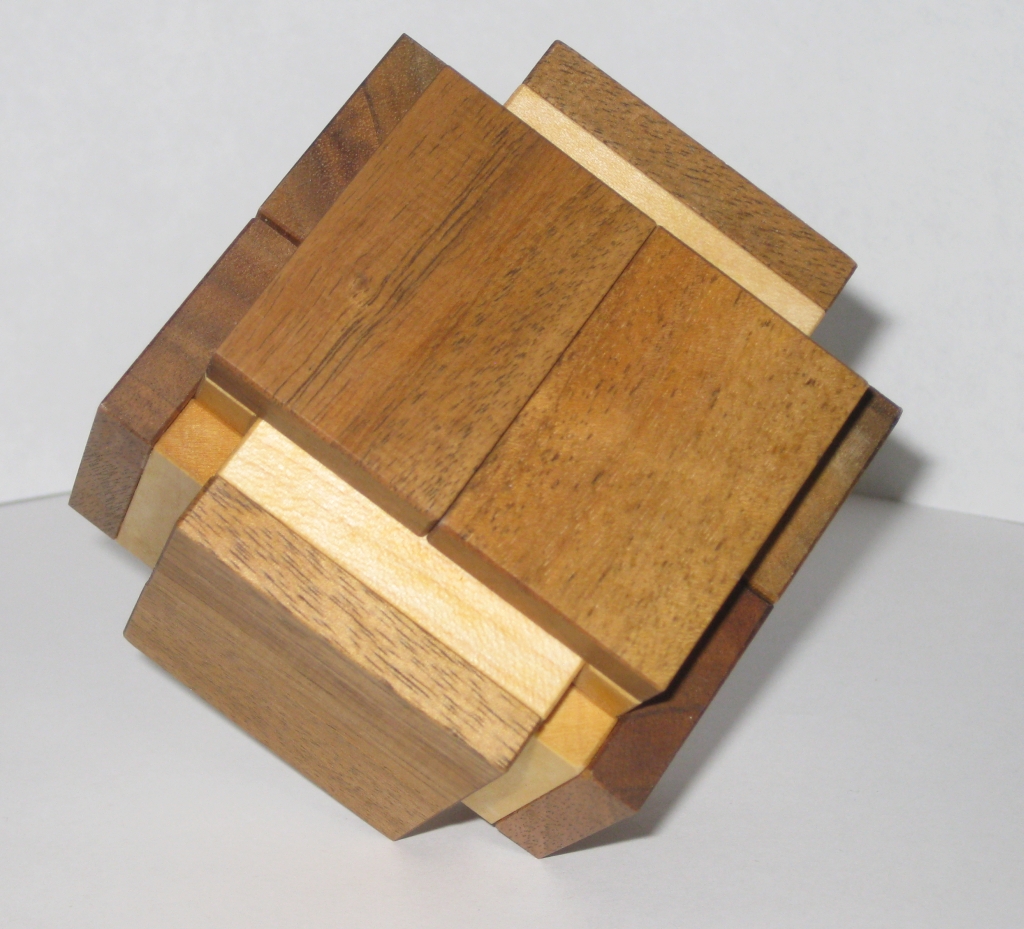
As you can see from the photo above, I was successfully able to put the puzzle back to its original solved state, so for now I’m probably safe.

The puzzle is a four piece co-ordinate motion puzzle. As you’ve heard me mention in the past, co-ordinate motion puzzles are something of a signature for Vinco’s puzzles, and this is another great example. The mechanism is similar to those used in other co-ordinate motion puzzles, so it will not be a huge surprise to anyone familiar with some of Vinco’s other offerings. Of course the challenge with all co-ordinate motion puzzles is figuring out where to put your fingers to be able to start separating the pieces without the puzzle flying apart, leaving you with no idea how to put it back together again!

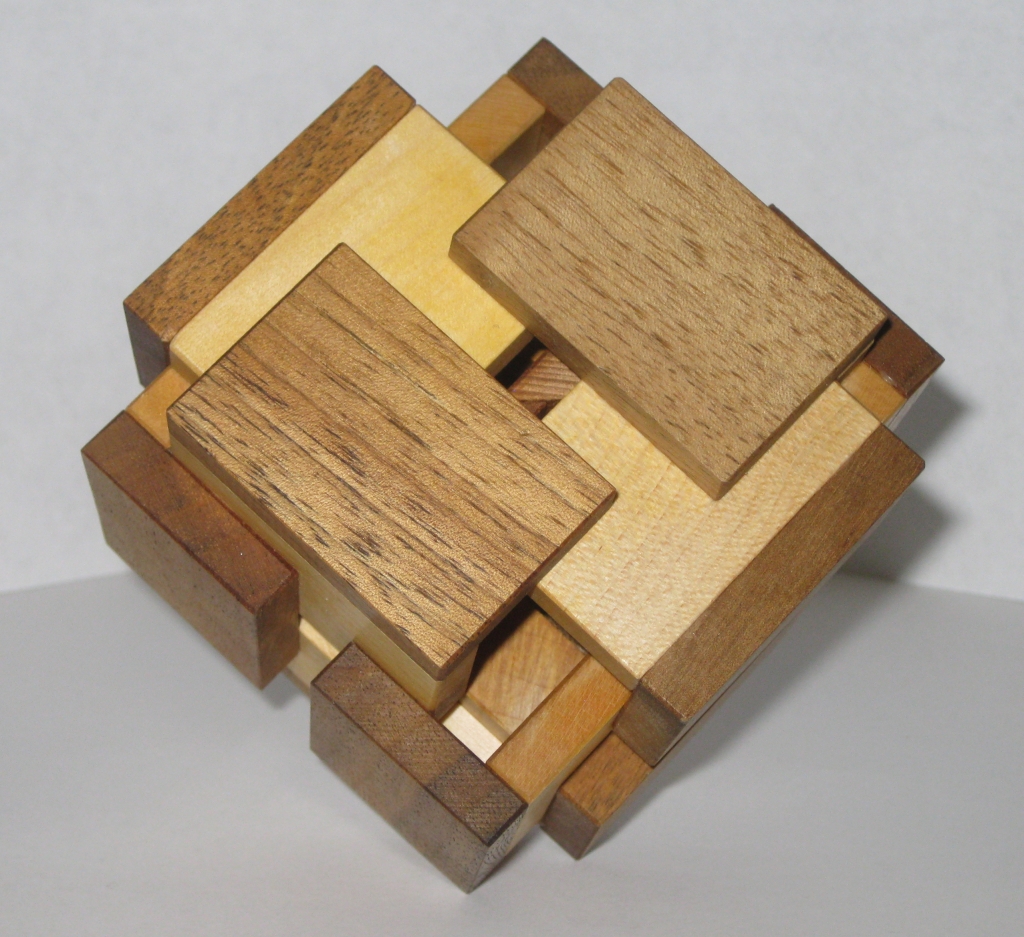
Double Desk Box by Vinco, starting to open.

Double Desk Box by Vinco, starting to open.

The box starts off measuring 3.25″ x 3.25″ x 3.25″, but as you start to open it, it expands to over 4″ before the internal pieces are no longer touching and they fall into a heap. Unfortunately I’m not sure which woods were used for this puzzle as Vinco wasn’t listing the woods when he produced these puzzles. The puzzle is available from Vinco directly, or from Puzzle Master

The four pieces of the Double Desk Box

The four pieces of the Double Desk Box

As you can see above, the four pieces of the puzzle are identical, making re-assembly ‘easier’. Of course with any co-ordinate motion puzzle, assembling requires the puzzle to be expanded to the point of collapse, and then carefully aligning the pieces, while hoping that you don’t move anything causing it to all collapse again. With only four pieces, this is one of the easier puzzles to assemble and disassemble, however there is a reasonable degree of dexterity required, since the tolerances are up to Vinco’s usual standard. (Read, very well made, and darn tricky!)

This is a good looking puzzle and not too challenging to put together. Puzzle master rates this as 9/10 (Grueling), but if I’m honest I don’t think that’s fair. This is much more like a 6, in my opinion. Vinco himself rates it as a 3/5 (or 6 if you include his 5+ scale). All in all a fun puzzle, which is very well made, and great to hand to beginners since you’ll get it back together fairly easily if they give up.

Cast Nutcase

This entry is part 5 of 8 in the series Hanayama Cast Puzzles

Cast Nutcase is another puzzle in the Cast series from Hanayama designed by Oskar van Deventer. Measuring in at 1.25″ diameter, by just under 2″ long, the goal is to remove the small nut encased inside the hollow part of the puzzle by taking the two halves of the puzzle apart. Thanks to Puzzle Master for sending me this puzzle to review.

There is a second goal to the puzzle, but I’ll talk about that later …


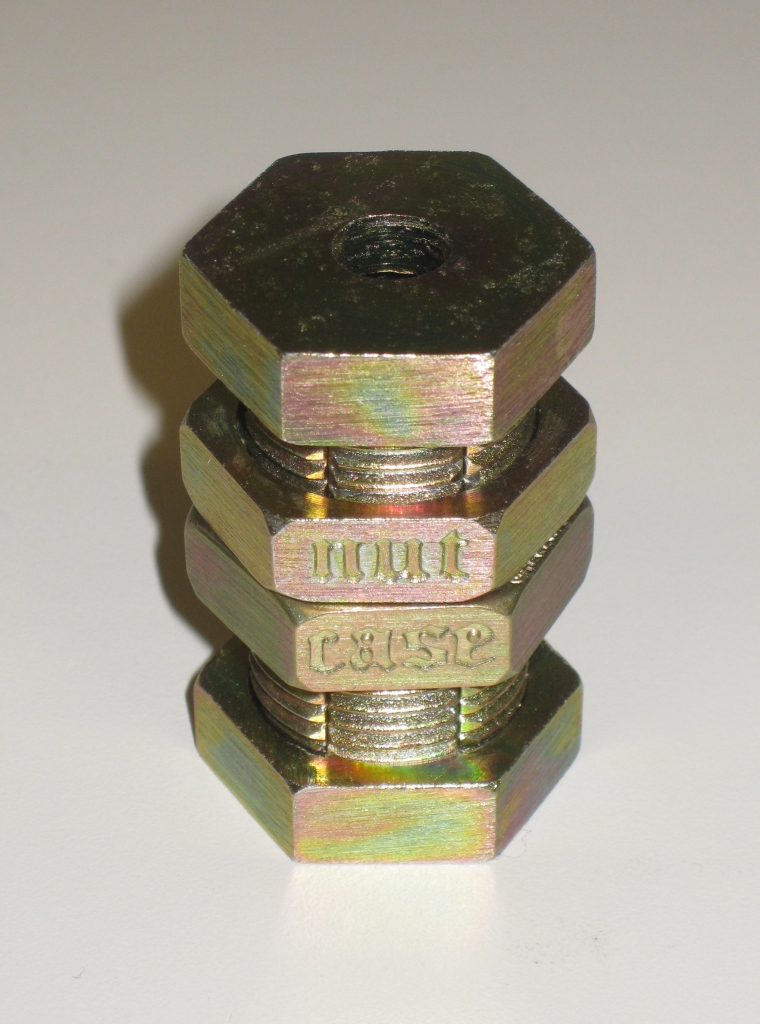
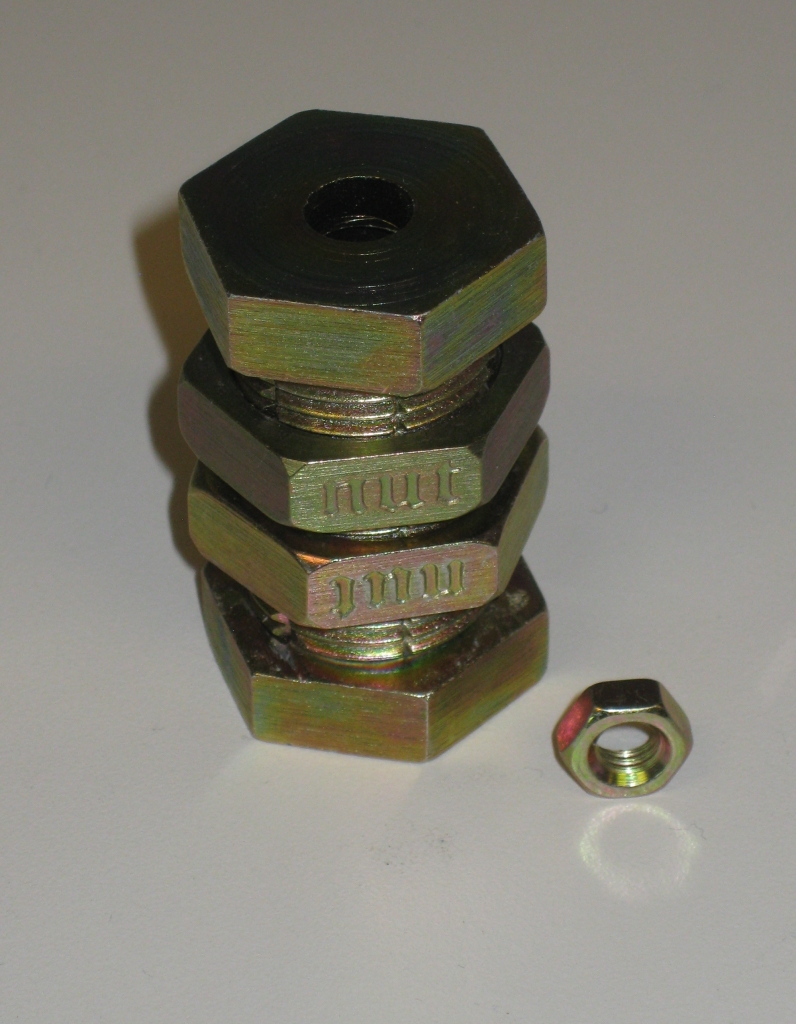
Cast Nutcase in the starting position

Cast Nutcase in the starting position

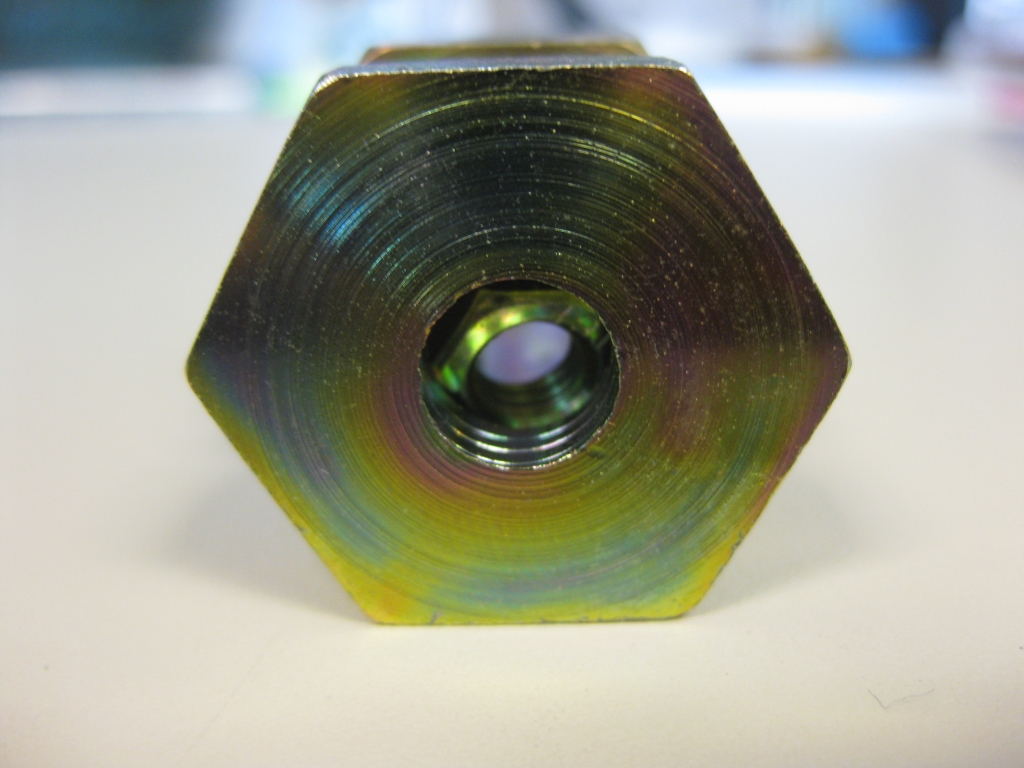
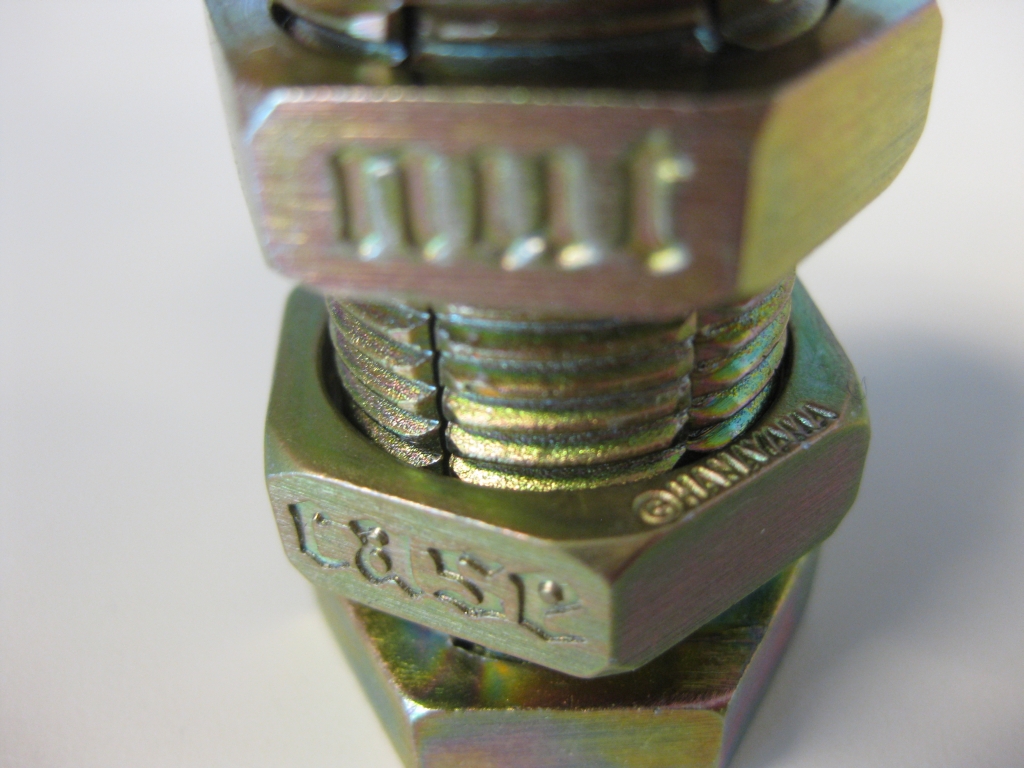
As you’d expect, the puzzle comes in the standard Hanayama black and gold packaging, with the puzzle held in shrink wrapped plastic to keep it in place. The puzzle consists of 5 pieces, including the small bolt that can be seen through holes in the ends of the puzzle. The two bolts threaded onto the centre of the puzzle will spin up and down the threads and each has ‘Cast’ and ‘Nut’ engraved into opposite sides of the bolt. The familiar Hanayama logo is also engraved into the edge of the bolt.

Closeup showing the small nut trapped inside

Closeup showing the small nut trapped inside

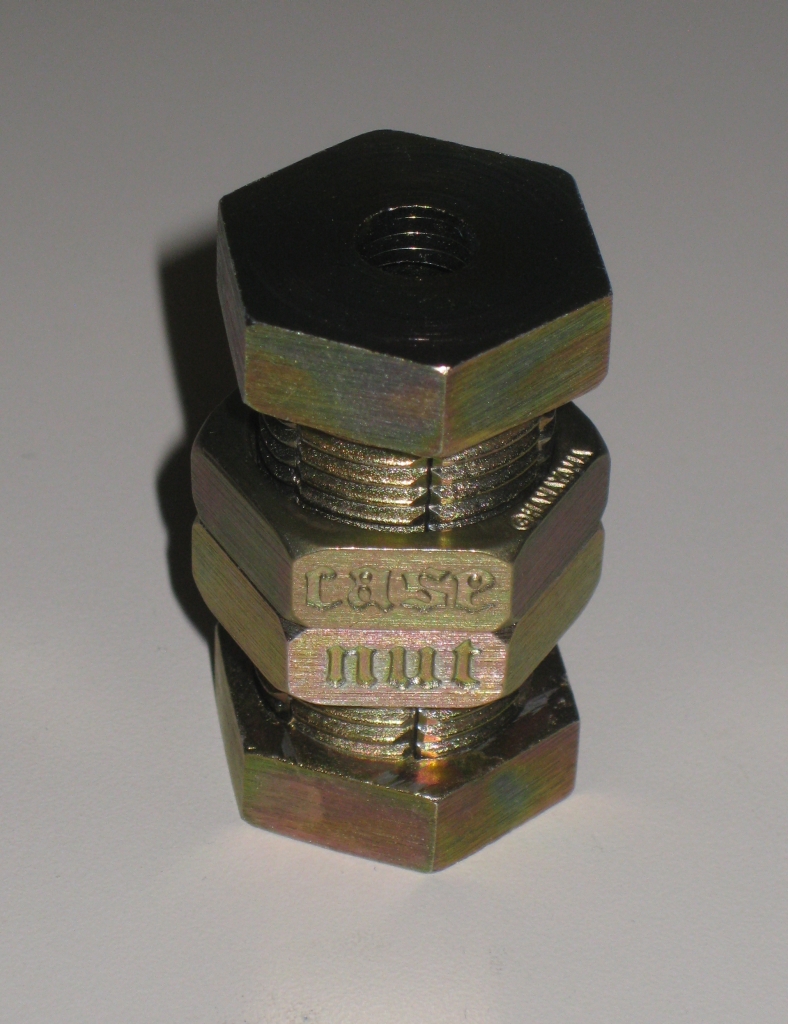
Closeup of the engraving on the nuts

Closeup of the engraving on the nuts

The look of this puzzle is interesting as a galvanised, bronzed bolt, with some interesting patina patterning on various surfaces. It may not be the prettiest of the Hanayama puzzles, but it’s by no means ugly either. Looking at the puzzle, it seems impossible, as the two nuts in the centre of the puzzle are threaded onto a seemingly full thread which extends from one end of the puzzle to the other. The only clue as to what is going on is that the thread is not made from a single piece of metal, and it split into sections. Pulling on each end of the puzzle will show that the sections are alternately connected to either end of the puzzle, so there is some hope that the parts will separate.

Rated as 6/6 by Hanayama and 10/10 – Mind Boggling by Puzzle Master. I have to agree with this rating. It’s a tough puzzle and will certainly test you whether you’re a seasoned puzzler or not. It took me around an hour to open this one, and even then I think I may have been a little lucky. I could certainly see it taking a lot longer to open this puzzle. You should be able to figure this one out by looking closely at how things are put together, and from that work out what’s going on, but there could be a lot of trial and error before you get it opened. If you get really stuck, there’s a solution here. For me, this puzzle is a little like picking a lock, and feeling your way around what’s happening with little changes to the parts of the puzzle as you go.

The small nut free from it's "Nut Case"

The small nut free from it's "Nut Case"

My biggest problem with this puzzle is that the nuts don’t turn smoothly on the threads if there’s any misalignment at all. Given the way that the puzzle opens, and the design on the nuts, this is inherent in the design, and I don’t think there’s much that can be done to avoid it. Sadly, I feel that the sticking of the nuts as you turn them does detract from the overall experience, and I had several times where one of the bolts would lock up, and significant banging of the puzzle on my desk was required to get things moving again. Given that very precise alignment of the various parts is required to solve the puzzle, the stickyness does make things less enjoyable. Having solved this a number of times, keeping the threads aligned by pushing together on each end of the puzzle with one hand while turning the bolts helps however that is only useful for the first half of the solution. If things get misaligned, then it’s tough to get it back in sync.

Overall this is a challenging puzzle, but I fell there’s a little too much guess work and hidden trickery to make this a stand out puzzle. If you want a real challenge, then pick this one up, but if you’re just looking for a fun puzzle, I’d say it’s best to pass this one by.

The Case Nut Puzzle

Now, remember way back at the start, I said there was a second goal …

The second goal for the puzzle, just to prove it's possible

The second goal for the puzzle, just to prove it's possible

If you think that the first goal is tough enough, then I’d say stay away from the second. Once you’ve solved it a few times, and you know what’s going on, give this a shot.

Warning: this is a lot tougher!

The nuts on the puzzle are designed to go on in one orientation, so that when closed they spell “Nut Case”. But it is possible to reverse the orientation so that they spell “Case Nut”. The photo above proves that it’s possible. Now I will say, make sure you understand how to open it normally before doing this, as all the little markers you’ve used to solve the puzzle in its first configuration will be of no use to you! When putting the puzzle into this second configuration, things are much tougher, so don’t say I didn’t warn you. I think this puzzle may just go up to 11!

Coffin’s Rosebud and Cluster Plus

Before my visit to see Scott Peterson’s workshop a few weeks back, I’d been talking with Scott for a while via email. I’d introduced myself, and asked if there was any chance he could make a couple of puzzles for me, including a Rosebud, and a Peanut puzzle. I’d also mentioned that I was starting to make my own puzzles, and Scott was only too willing to help out with tips and advice, answering all my dumb questions with the sort of enthusiasm and excitement that I remember from my high school science teachers.

As it happens, Scott hasn’t made a Peanut puzzle for a very long time, and he tends to make a run of puzzles then move to the next design, however he had just finished a run of Rosebud puzzles. At the time he didn’t have any available, but he thought he may be able to make me one at some point. With an offer like that I duly said thank you and never thought about it again. In the time between that original email, and my visit, we’d exchanged a number of emails, mainly about woodworking, and Scott’s tips to help me get started. Not long after we arranged to meet up, Scott got back to me saying he had a Rosebud available if I still wanted it, and he had a jig too. Like a bobble head on a dirt road, I instantly said ‘yes please’.

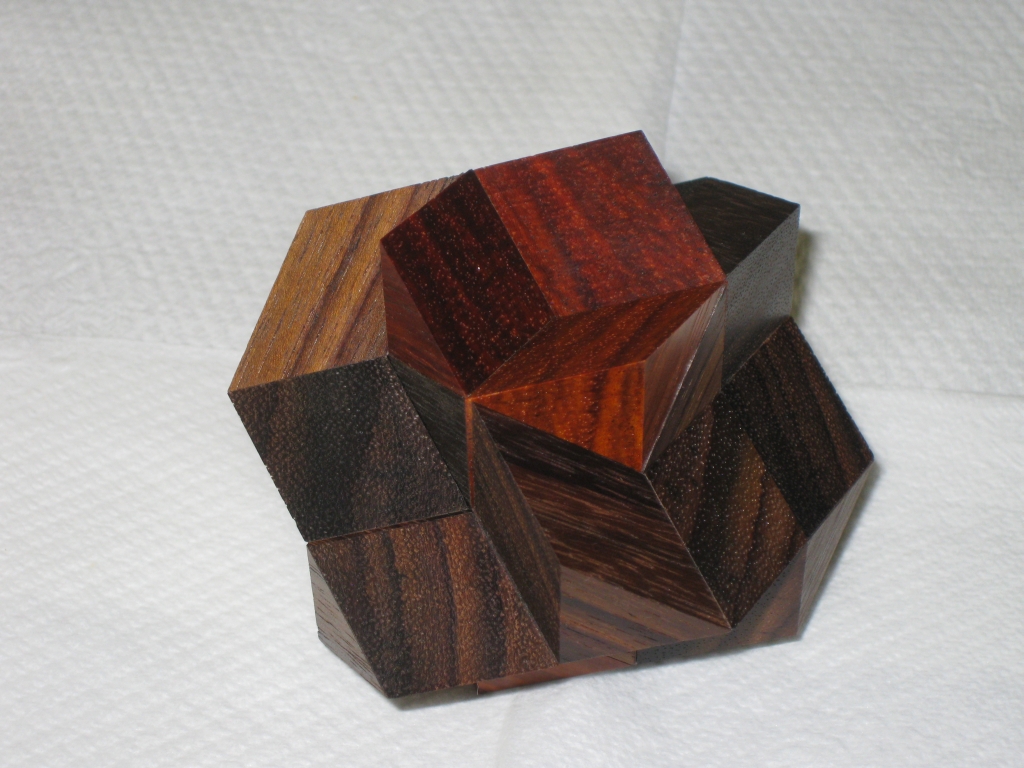
Rosebud in its closed state

Rosebud in its closed state

This particular copy is made from East Indian Rosewood, and Flamewood. The strong red from the Flamewood, and its detailed grain pattern really make this an object of beauty. I must confess that the pictures don’t really do it justice. The finish is glassy smooth, and the fit of the pieces is incredible. This is a tight fitting puzzle, with no visible gaps, and yet the pieces slide past one another with ease.

The Rosebud is Stewart Coffin design #39 in the AP-ART catalogue, and is one of the few three-dimensional puzzles which assembles into more than one solution shape. The image above shows the rosebud in the shape which gives it its name, and is a coordinate motion solution where all six pieces are required to move along their three-fold axis at the same time to both assemble and disassemble the puzzle. Not only is this difficult, but the manner in which they are assembled is not at all obvious and requires considerable dexterity.

Stewart himself says “A few of these puzzles were produced some years ago and sold unassembled. After sufficient time had elapsed and almost none had been solved, the customers were given the opportunity to purchase (for an outrageous price!) an assembly jig and directions. With these, it is easy. Without the jig, it can be done with patience, using tape and rubber bands. Without such aids, it has been done but borders on the impossible.”

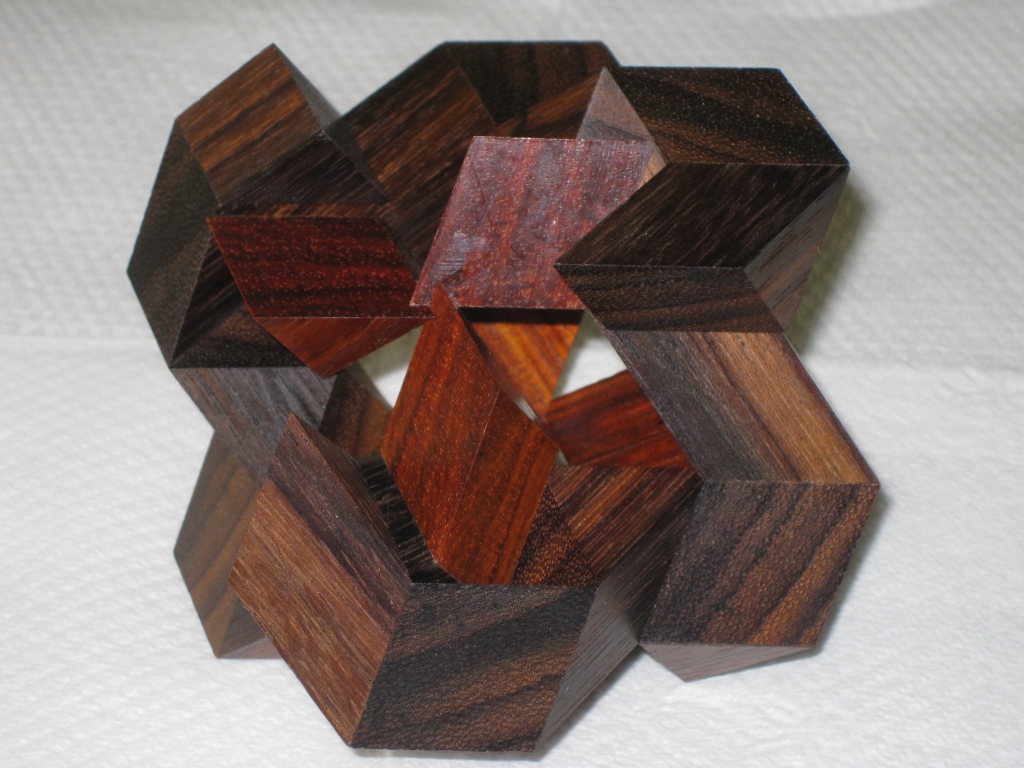
The reward for being insane enough to try this without a jig is a wonderful movement where the puzzle appears to open like the petals of a rose. It really is something which has to be seen to truly appreciate. My video review below will show you just that and give you a chance to see just how stunning the movement (and Scott’s work) truly is.

As you’ll see, both in the video review, and also in the photograph below, Scott’s work really is outstanding. The pieces of the puzzle will expand until just the very tips are touching, and it still remains perfectly stable. Only with very precise construction can you even get close to this, and it’s a testament to the years of puzzle making that Scott’s copy is as good.

Rosebud opened.

Rosebud opened.

As a puzzle, without Scott’s jig, I have assembled the rosebud. I didn’t go down Stewart’s suggested route of tape and rubber bands (as frankly I couldn’t see how a rubber band would help me much) but all I’ll say is it took over an hour, involved a lot of swearing, and wasn’t all that fun an experience. The jig on the other hand makes things much easier, and removes the worry about expanding the puzzle just a little too far. If it does collapse then you can easily re-assemble it. I’m glad I accepted Scott’s offer for the jig!

Cluster Plus

If you’ve watched the video review, then you’ll know this already, but while I was visiting Scott, he handed me a rather special puzzle.

Cluster Plus - Shop Copy

Cluster Plus - Shop Copy

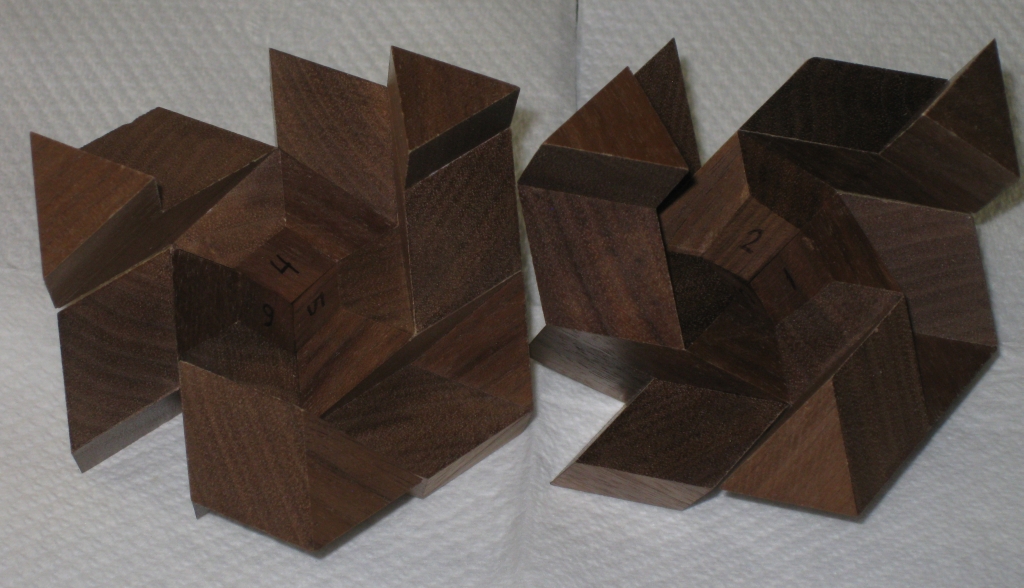
The Cluster Plus puzzle is #114 in the AP-Art catalog, and has a striking resemblance to the Cluster Buster puzzle #49. The final shape however is where the similarities end. Originally only 11 of these were made, and almost half of those were given out as tokens at IPP-17. There don’t seem to be to many people have made these designs since, so that makes this copy even more special. This is one of the prototype copies Scott made with collaboration with Mark McCallum. As such, it’s not a finished quality and has the pieces numbered in the centre to help with assembly. The six dissimilar pieces are joined together in sets of three pieces which require a coordinate motion, and then the two halves of the puzzle are slid together. Looking at the two halves, it’s almost impossible to see how Stewart Coffin came up with this design. Even knowing how to put the pieces together, and the order I still found this a challenge.

Cluster Plus Halves

Cluster Plus Halves

When I first attempted to fully disassemble the puzzle, I split the two halves, then took only one half apart fully, leaving the other still assembled. Now, remember I have the pieces numbered as you can see above, and I’ve only taken one half apart. I still took over 20 minutes to get the puzzle back together.

The coordinate motion really makes it difficult to see how the pieces should come together, and add to that numerous ways that the pieces can fit together, and this is one tough puzzle. As an early copy, the co-ordinate motion on the first three pieces isn’t perfect, and this was something Scott was working on. His initial idea was to leave more of the centre block – one of the standard building blocks in Coffin puzzles, and the number part in the photo in case you’re not sure, with more of the central section un-sanded in the hope that this made things easier to assemble. The trick here was that the centre blocks normally have a pyramid peak. Stewart Coffin removed part of this to allow the coordinate motion which otherwise would not have been possible. In the end Scott removed more of these centre blocks as it turned out that this initial idea wasn’t great.

While Scott and Mark were working on this, Mark believed that there was more than one configuration of pieces which would make up the same shape. I took up that challenge and have been trying to find an alternate configuration. So far I’ve not been successful, however I’ve not given up and I’ll be sure to post if I find it.

At this point, I have a bit of a confession to make. When I was playing with the puzzle, I may have used a little too much force. I should point out that the fit here is not perfect, again since this is a shop copy, and given the nature of the puzzle, any inaccuracy is multiplied out to the end of the ‘arms’ which is where the fit needs to be perfect. Well when putting it back together at the end of a puzzling session, I used a little too much force, and with an impressive snap, one of the arms flew across the table, and the two halves slammed rather abruptly together. Sorry Scott!

A little bit of glue and an hour later, things were back to the way the should be and no real damage done. The glue joint had given out, but didn’t damage the pieces of the puzzle fortunately so it was a simple fix.

Thanks again to Scott for both of these puzzles. There’s great additions to my collection and I promise to try not to break them again!

Building a Matrioshka (Part 3)

This entry is part 3 of 3 in the series Building a MaTRIOshka

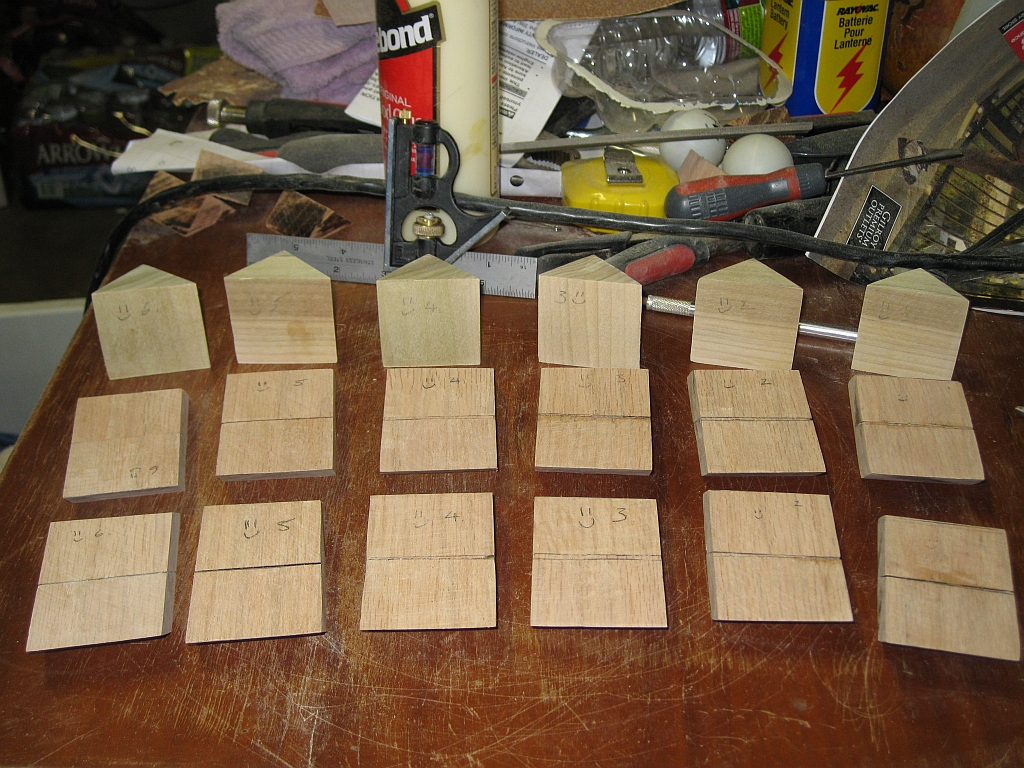
At the end of the last post, I’d finished making all the individual parts that would make up the puzzle, and was ready to start putting things together. The number of individual parts has reduced from the original 54 to just 18, but things are no less daunting at this stage.

All 18 pieces ready for final glueup

All 18 pieces ready for final glueup

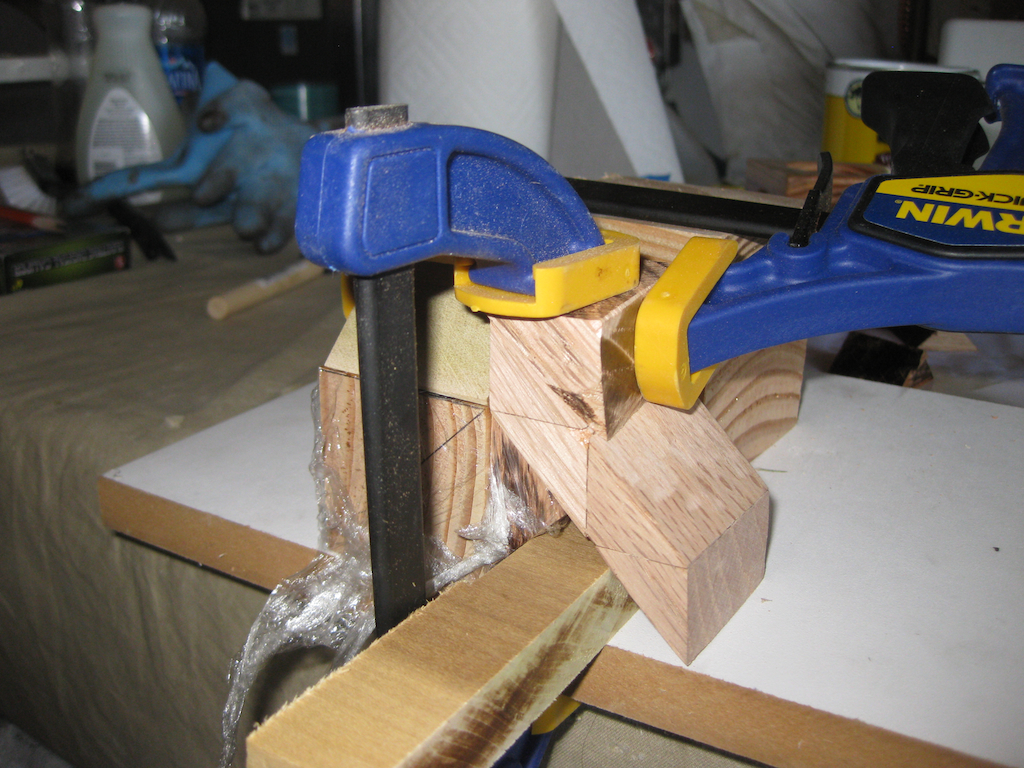
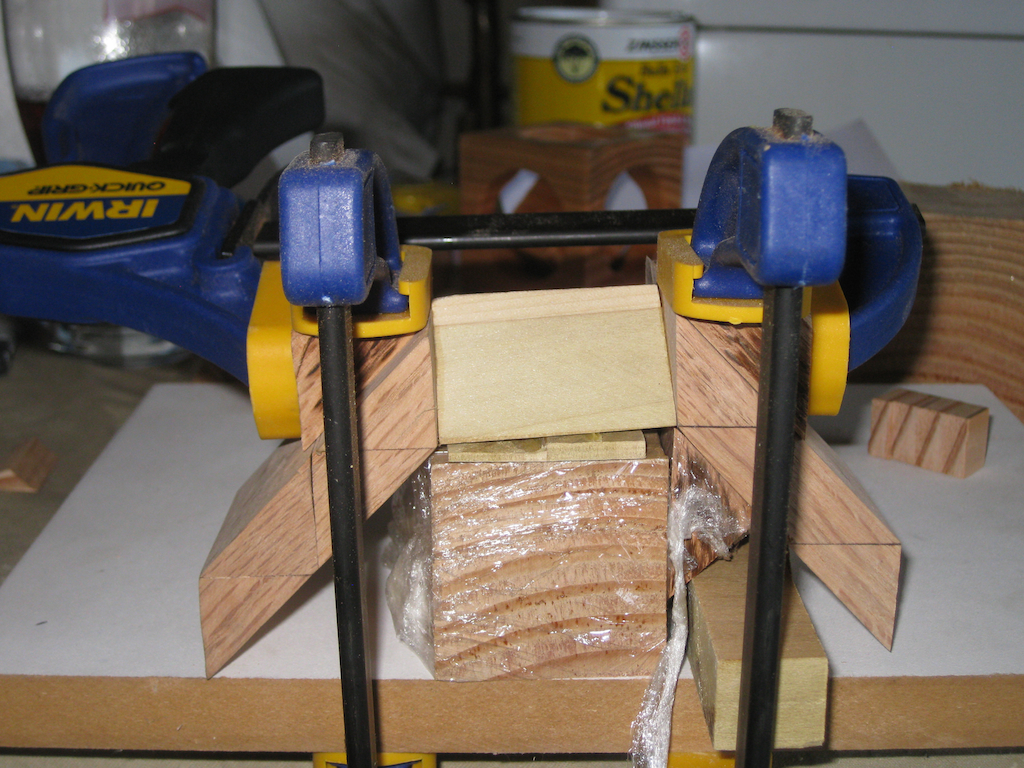
The biggest problem remaining was how on earth I was going to glue the ends to the bridge. There are no square ends on this thing that you can put a clamp on, so it makes holding the pieces together a real challenge. Building a gluing jig was probably the right way to go, but even that made for some interesting clamping!

Gluing Jig

Gluing Jig

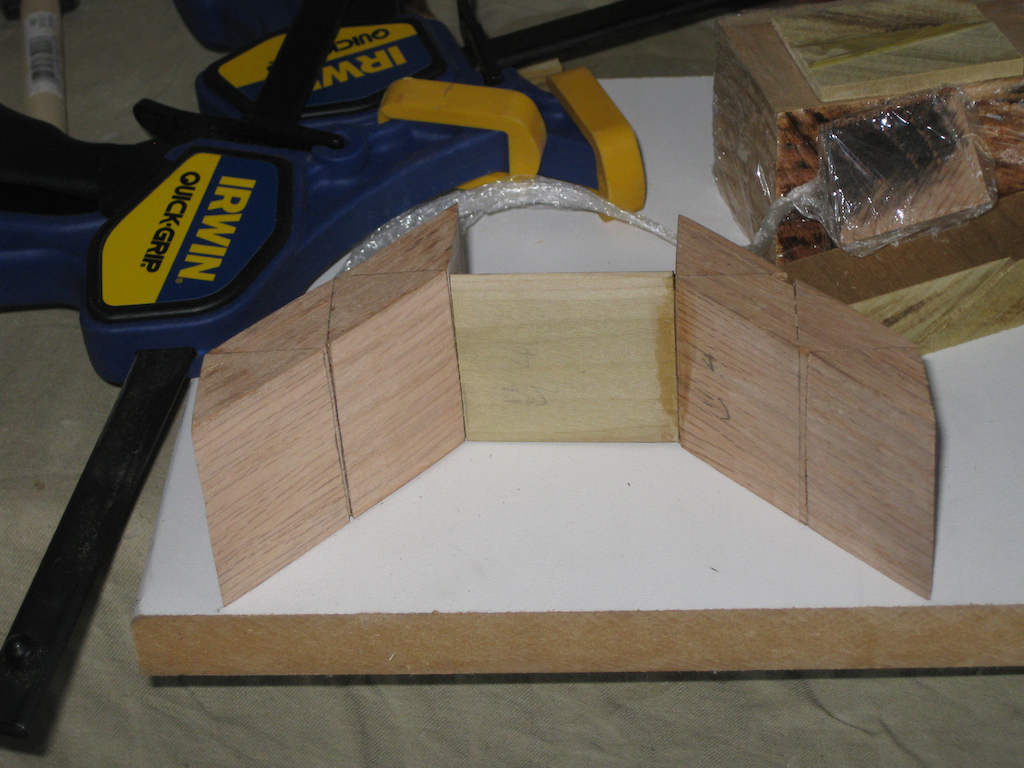
I decided not to try to make a jig that would glue both ends at the same time. I wanted something simple that would support the pieces as I glued them, and in the end, the jig was much simpler than I thought it needed to be. Some of the original scrap pieces I had left served fairly well, and also meant that I could glue both sides at the same time. I’m not an expert woodworker, I don’t have a lot of ‘spare’ or scrap wood lying about (remember I’m only starting out doing this, so no reserve of wood to pick from) so this did the job.

Gluing Jig, yes it's ugly!

Gluing Jig, yes it's ugly!

Sticking with the very simple jig above, I could glue one end at a time and create the pieces. Granted if I were doing this in bulk, or attempting to create something I could sell, I’d be thinking about a more efficient scheme. For now, this works, and is all I needed.

One down, 5 to go!

The first finished piece

The first finished piece

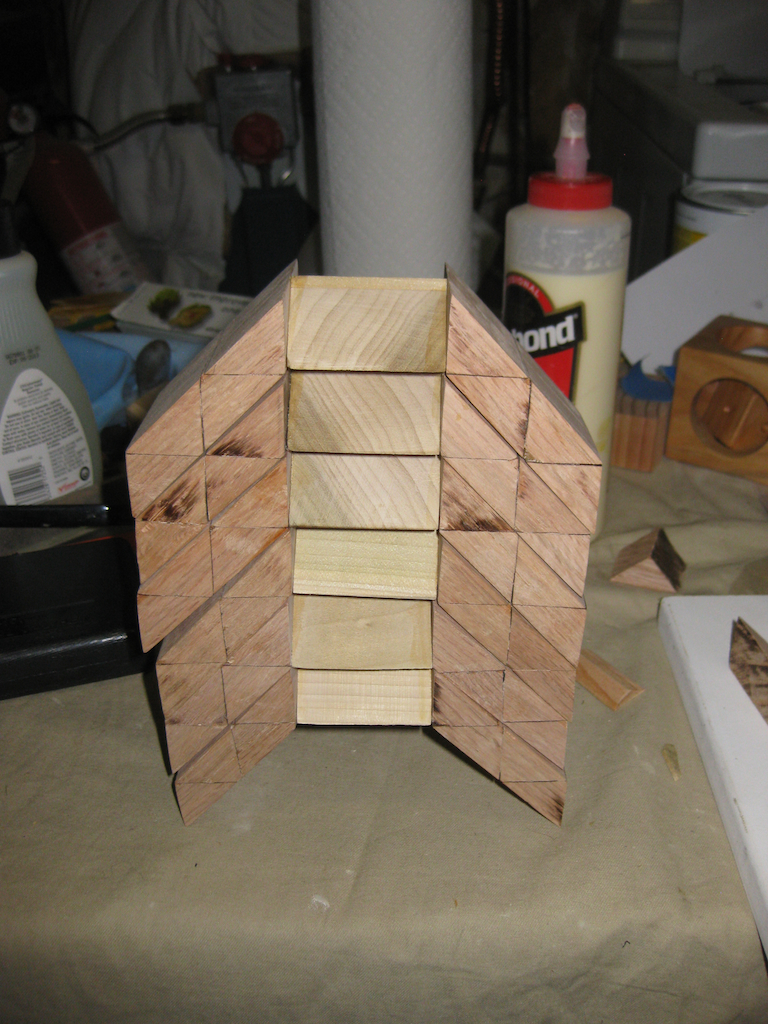
After several hours over the weekend (since I do all this in my spare time, which I don’t have a lot of just now!) I had 6 pieces glued up and ready for a test fit. Yes, the time had come to see how much of a mess I’d made of my first ever serious attempt at making a puzzle!

The six finished pieces

The six finished pieces

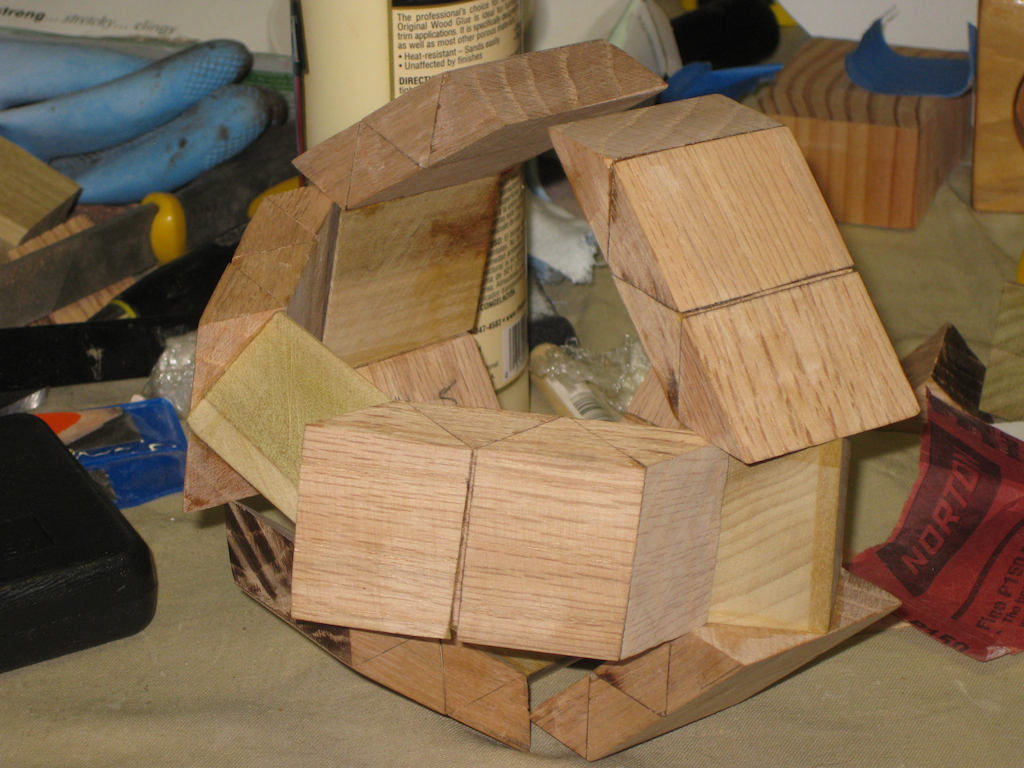
With some hesitancy, I took the plunge and tried to fit the pieces together into the final puzzle … It’s a tight fit, but things were taking shape! I spent a little time with the sandpaper and sanded the pieces down just a hair. Using my digital calipers, the bridge was 1.333″, and the edges were around 1.49″. So there really wasn’t a lot in it, but enough that some work was required. A little bit of sanding on each of the pieces, and I had them down to around 1.32″.

Test fit

Test fit

And here the story ends unfortunately. When I tried to put all six pieces together, tiny inaccuracies in the fit of the pieces, and minute misalignment between the ends meant that the whole puzzle is just enough off that it’s not going to go together and slide the way it is supposed to. Despite the end result, I don’t consider this a failure. You may remember back in the first post, I said that this was a learning experience for me. And I’ve learned a lot through the process. I’m sure I’ll come back to this puzzle in the future, and expect version two to be better!

The Always Empty Box

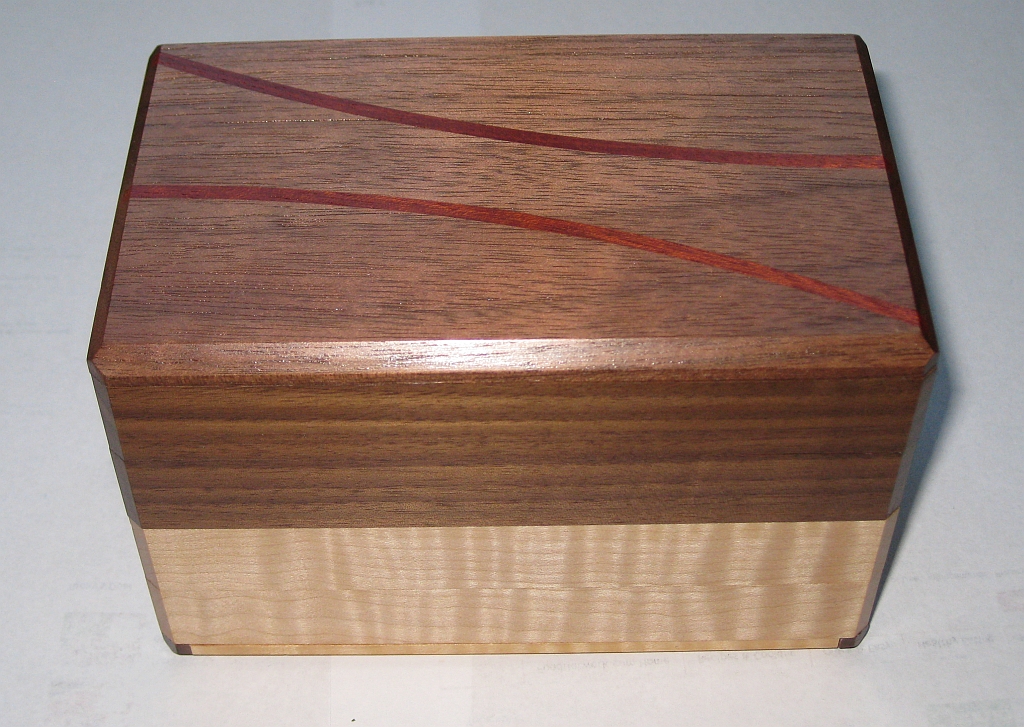
The Always Empty Box created by Phil Tomlinson is his first puzzle box, and what a cracker it is. Phil is a cabinetmaker and woodworker with 35 years experience. He lives in Cincinnati OH, and his business is called WolfAngel Studios.

The Always Empty Box

The Always Empty Box

This is a beautifully made box crafted from Black Walnut, Curly Maple, Bloodwood, Rock Maple and Pawlownia. Opening the card box the puzzle is stored in, you are greeted with a Care, Feeding and General information booklet, with lots of info about the puzzle, and how best to look after it. This did make me chuckle, and the information is all worthwhile, especially if you’re not familiar with wood puzzles. Phil did a great job here, and even before taking the box out of the box you’re left with a smile on your face.

The box itself is beautifully finished as you can see from the photograph, with a wonderful satin lacquer giving the box an almost polished look. It measures 3-1/4″ x 3-1/2″ x 5-1/4″ so is a good sized box, and really wouldn’t look out of place as a work from the Karakuri Group. Yes, the quality is that good in my opinion. Phil notes that only 30 of these boxes will be made, and only 22 were sold on Puzzle Paradise, so I was lucky to be able to get one, as these sold out very quickly.

The fit of the box is very snug, the moving parts move very smoothly, but they are a tight fit, just as mentioned in the care booklet. If I were to be picky, there are a couple of gaps at some of the joins in the box, but really that’s being very picky. Overall, this is a stunning looking box, and looks great beside my other wooden boxes.

Opening the box is a fun experience. Initially nothing much seems to do anything, until you find a co-ordinate motion which moves things a tiny fraction, but no more. Finding the lock to open the box the rest of the way takes a little more exploring. Once the box is opened, Phil is quite right with his description, it is always empty (except for the few wood shavings that were still inhabiting my box). I’ve kept those shavings for what its worth!

The final surprise is left to finding out why the box is always empty. This isn’t disguised as cleverly as I have seen in other puzzle boxes, but it is a nice touch, and Phil has done a great job on the box. The magnetic catch which keeps the box empty is a nice touch.

Having given this box to a fellow puzzler, he also enjoyed opening the box, and likened it to some of the Karakuri works in terms of quality. High praise indeed.

Happy to have added this to my collection, and I’ll be happy to show this one around! Great job Phil. Love the work.