Monthly Archives: July 2011

Building a Matrioshka (Part 3)

This entry is part 3 of 3 in the series Building a MaTRIOshka

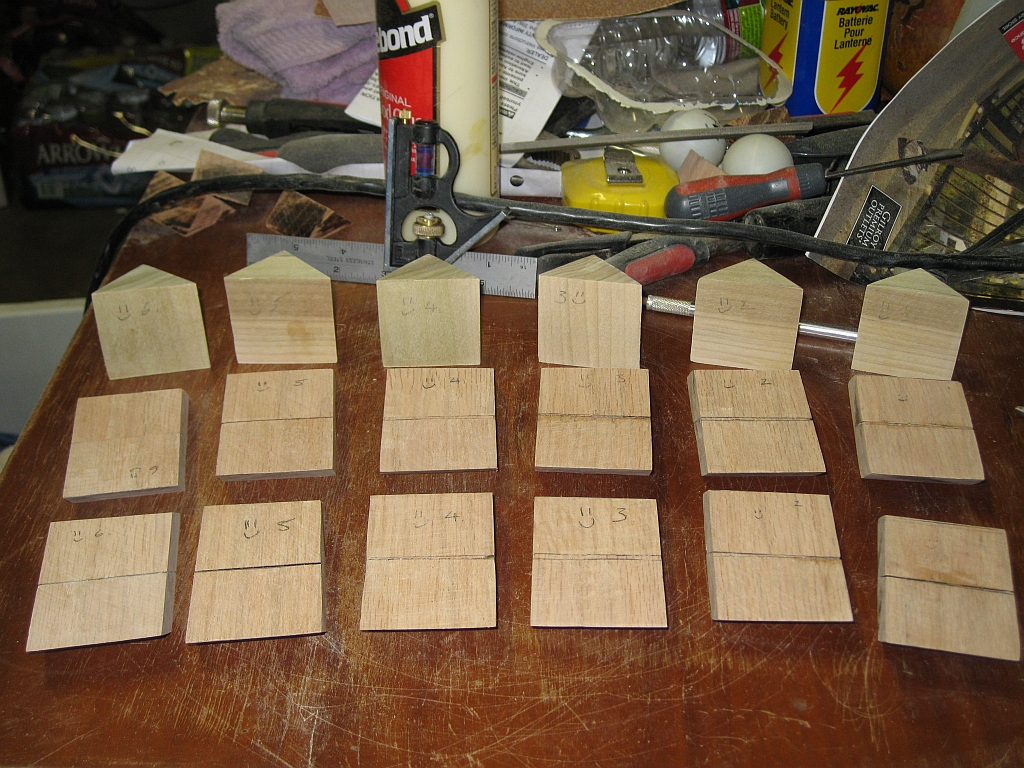
At the end of the last post, I’d finished making all the individual parts that would make up the puzzle, and was ready to start putting things together. The number of individual parts has reduced from the original 54 to just 18, but things are no less daunting at this stage.

All 18 pieces ready for final glueup

All 18 pieces ready for final glueup

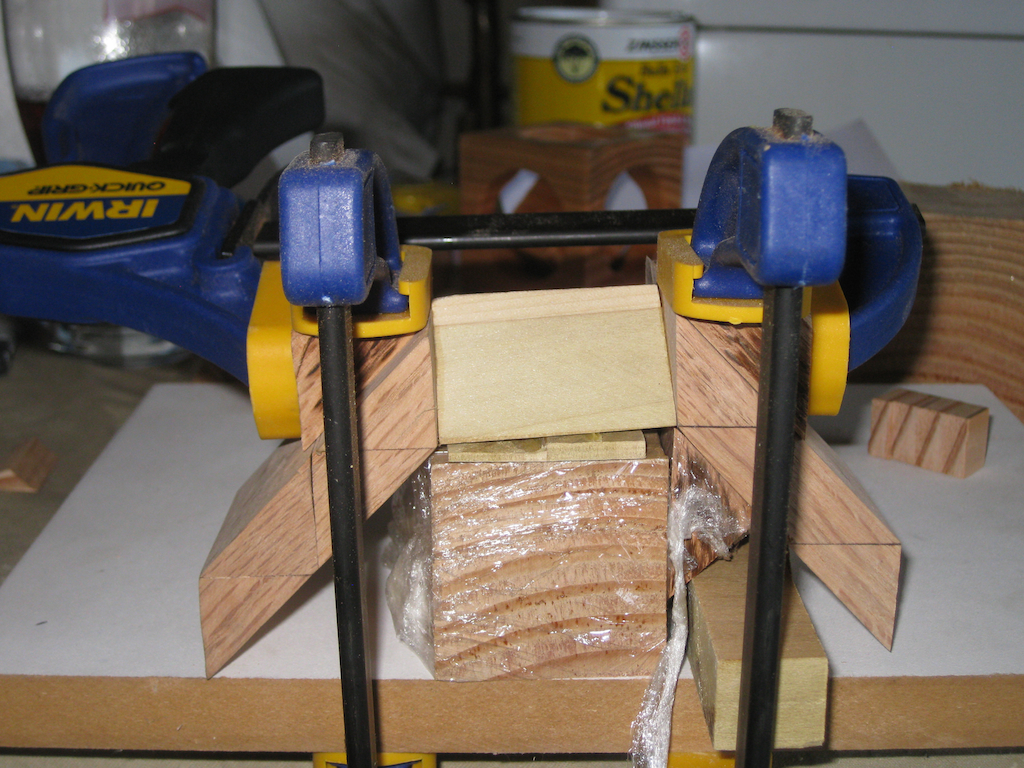
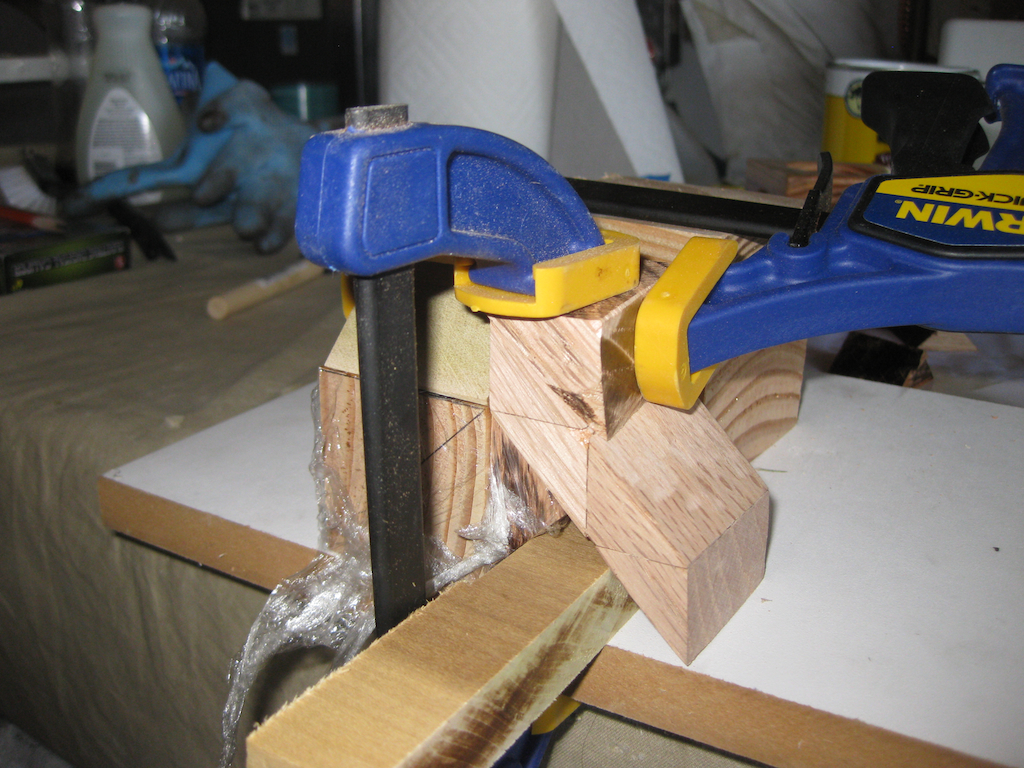
The biggest problem remaining was how on earth I was going to glue the ends to the bridge. There are no square ends on this thing that you can put a clamp on, so it makes holding the pieces together a real challenge. Building a gluing jig was probably the right way to go, but even that made for some interesting clamping!

Gluing Jig

Gluing Jig

I decided not to try to make a jig that would glue both ends at the same time. I wanted something simple that would support the pieces as I glued them, and in the end, the jig was much simpler than I thought it needed to be. Some of the original scrap pieces I had left served fairly well, and also meant that I could glue both sides at the same time. I’m not an expert woodworker, I don’t have a lot of ‘spare’ or scrap wood lying about (remember I’m only starting out doing this, so no reserve of wood to pick from) so this did the job.

Gluing Jig, yes it's ugly!

Gluing Jig, yes it's ugly!

Sticking with the very simple jig above, I could glue one end at a time and create the pieces. Granted if I were doing this in bulk, or attempting to create something I could sell, I’d be thinking about a more efficient scheme. For now, this works, and is all I needed.

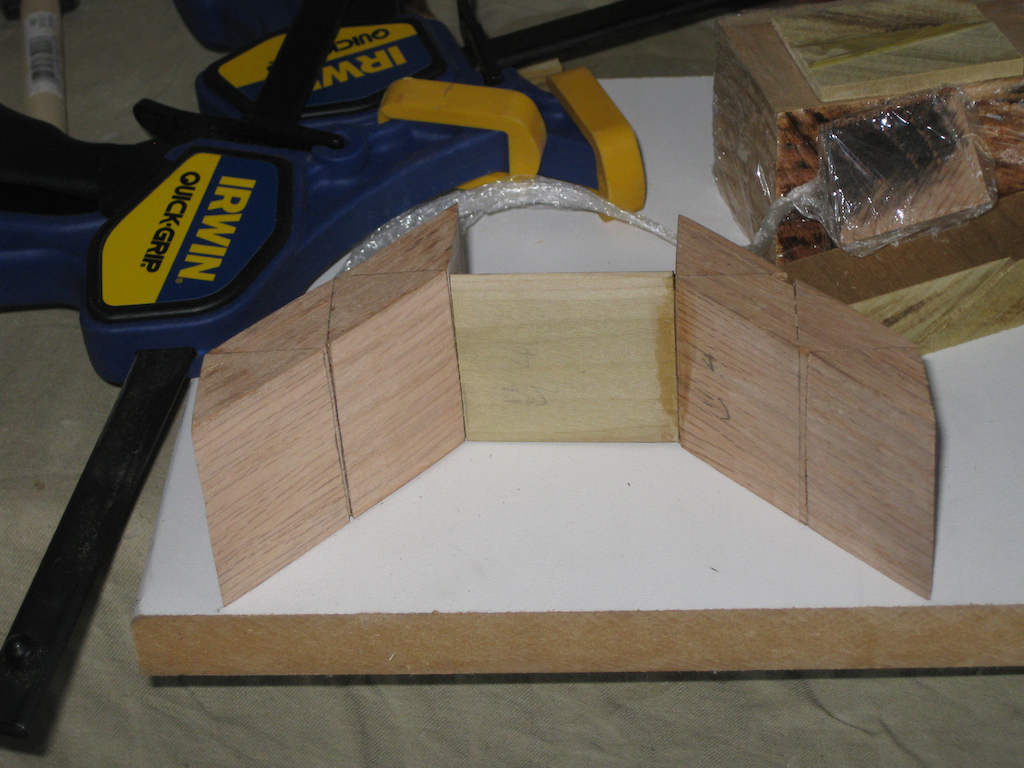
One down, 5 to go!

The first finished piece

The first finished piece

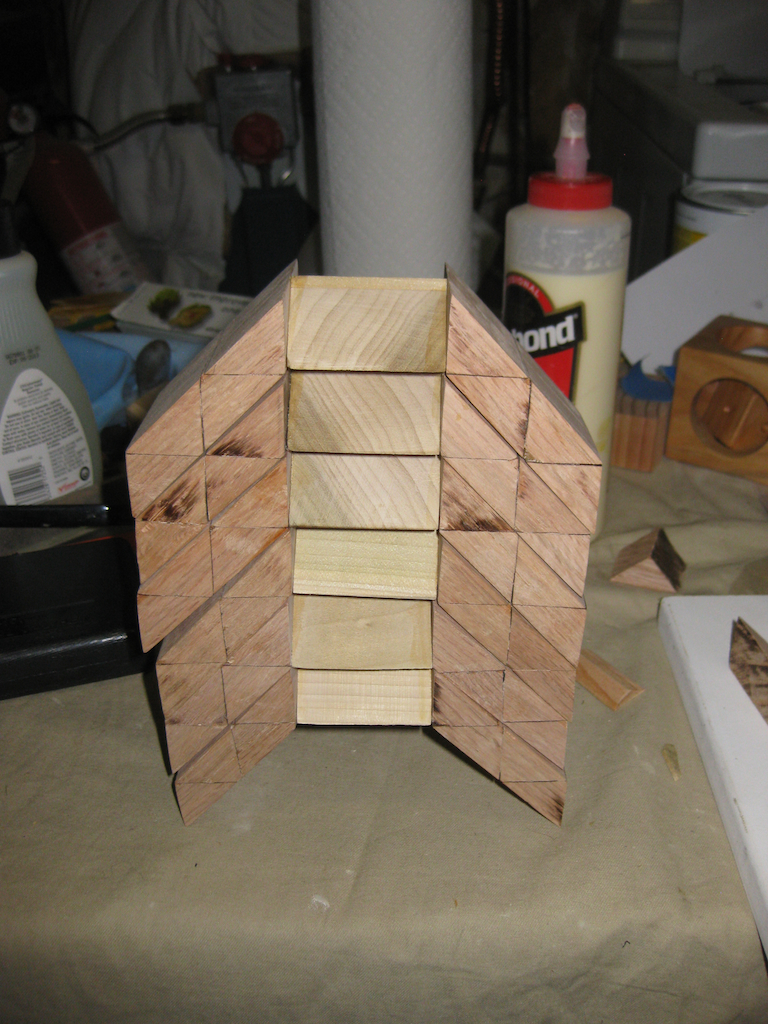
After several hours over the weekend (since I do all this in my spare time, which I don’t have a lot of just now!) I had 6 pieces glued up and ready for a test fit. Yes, the time had come to see how much of a mess I’d made of my first ever serious attempt at making a puzzle!

The six finished pieces

The six finished pieces

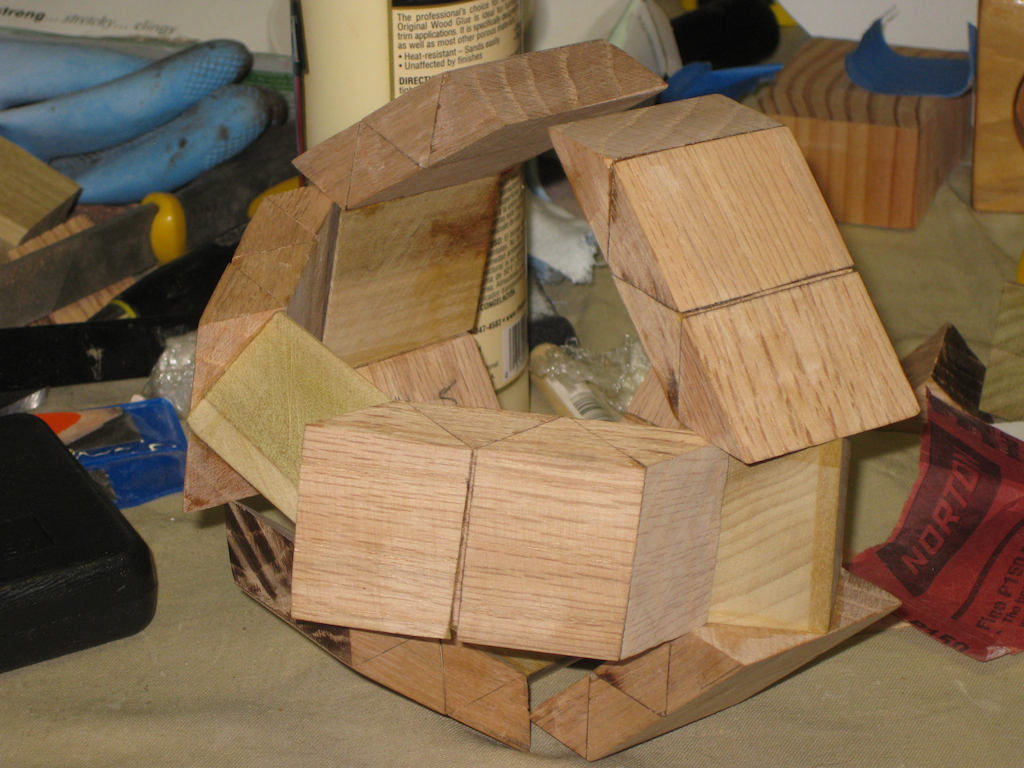
With some hesitancy, I took the plunge and tried to fit the pieces together into the final puzzle … It’s a tight fit, but things were taking shape! I spent a little time with the sandpaper and sanded the pieces down just a hair. Using my digital calipers, the bridge was 1.333″, and the edges were around 1.49″. So there really wasn’t a lot in it, but enough that some work was required. A little bit of sanding on each of the pieces, and I had them down to around 1.32″.

Test fit

Test fit

And here the story ends unfortunately. When I tried to put all six pieces together, tiny inaccuracies in the fit of the pieces, and minute misalignment between the ends meant that the whole puzzle is just enough off that it’s not going to go together and slide the way it is supposed to. Despite the end result, I don’t consider this a failure. You may remember back in the first post, I said that this was a learning experience for me. And I’ve learned a lot through the process. I’m sure I’ll come back to this puzzle in the future, and expect version two to be better!
Wil’s Aluminium Cylinder

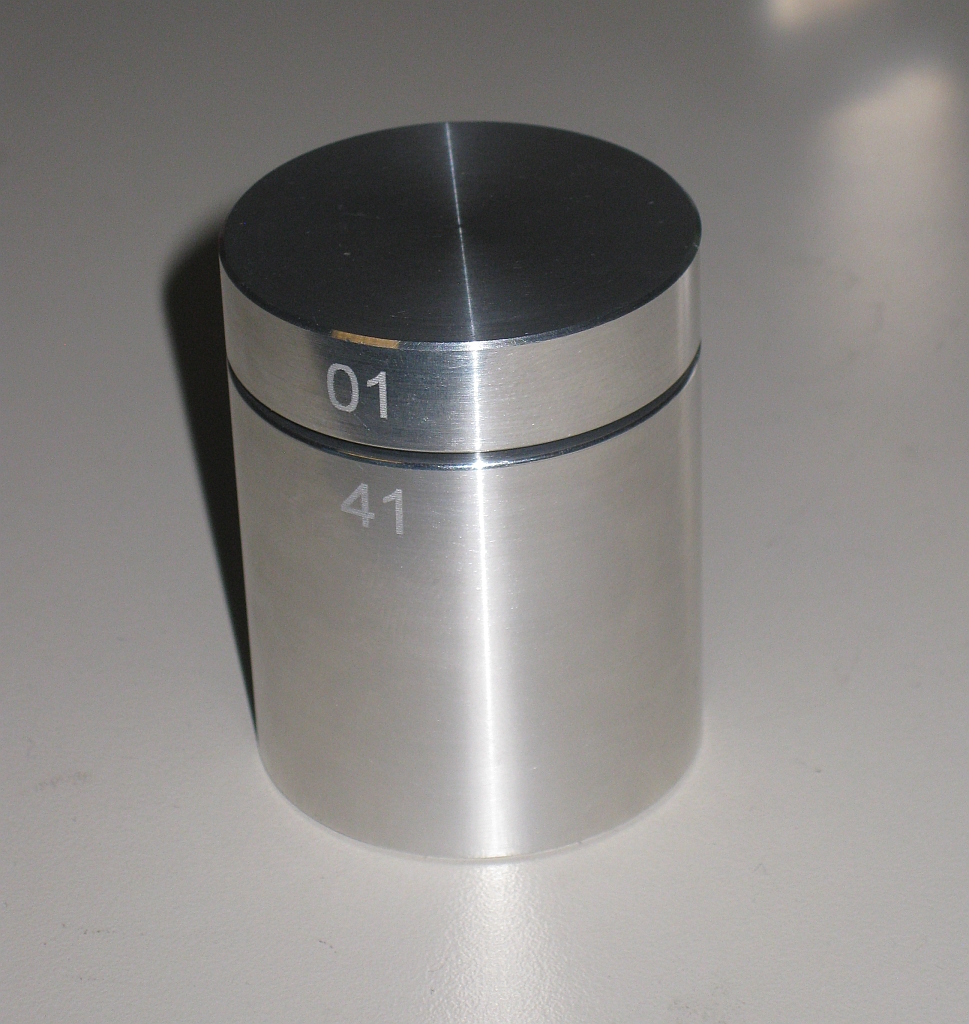
The Aluminium Cylinder is another intriguing puzzle from Wil Strijbos in the Netherlands. Wil has been making metal puzzles for quite some time now, and the quality of his work is excellent. Have a look at my review of Wil’s first ever puzzle design The Aluminium Cross, to see where it all started.

Aluminium Cylinder by Wil Strijbos

Aluminium Cylinder by Wil Strijbos

The object of the puzzle is to remove the lid from the cylinder. The lid will spin 360 degrees in either direction, can be depressed a new millimetres, and the puzzle rattles when you shake it. Other than this, there is a small hole in the bottom of the puzzle which allows you to see into the middle of the puzzle. This hole isn’t much use, but does allow you to see a feature at the far end of the hole which must be useful. Finally, laser engraved into the side of the puzzle are two numbers. These relate to the particular run of the puzzle, and the puzzle number within that run. They may also be useful in solving the puzzle, but I couldn’t comment on that 😉

When I started playing with this, I didn’t seem to make a lot of progress. The puzzle will go silent as you move it around in your hands, then you hear things rattle when you press the lid down. None of this seems to do much other than confuse. After a while I managed to do something useful, and a ball bearing appeared in the hole in the middle of the puzzle. I confess that at this point, I had no idea what I’d done, or how to replicate it. Turning the puzzle upside down and looking in the hole, I watched the ball bearing disappear into the feature at the top of the hole, and it was gone again.

Much puzzling later, I managed to get the ball back out, and again had no idea how I’d done this. I looked at the puzzle when the ball appeared, and tried to figure out what I’d done differently. I still had no idea at this point, and repeating it seemed beyond me. So it was time to think! (c) Allard

Some time later, I finally figured out what was going on, and a few minutes later, the lid popped up with a satisfying sound. Once open the locking mechanism is fully visible, and you’ll be amazed as to just how simple it is. This is a wonderful mechanism, and my hat is off to Wil for creating this. Reversing the opening process closes the puzzle, and returns it to its starting state, ready to confound the next unsuspecting puzzler.

I can now open the puzzle in around 10 seconds, however shutting it still takes me a little longer. For some reason it’s not as simple to close as it is to open!

This is a great puzzle, and highly recommended for any puzzler. Be warned though, this may take a lot of time to solve!

Cube Vinco

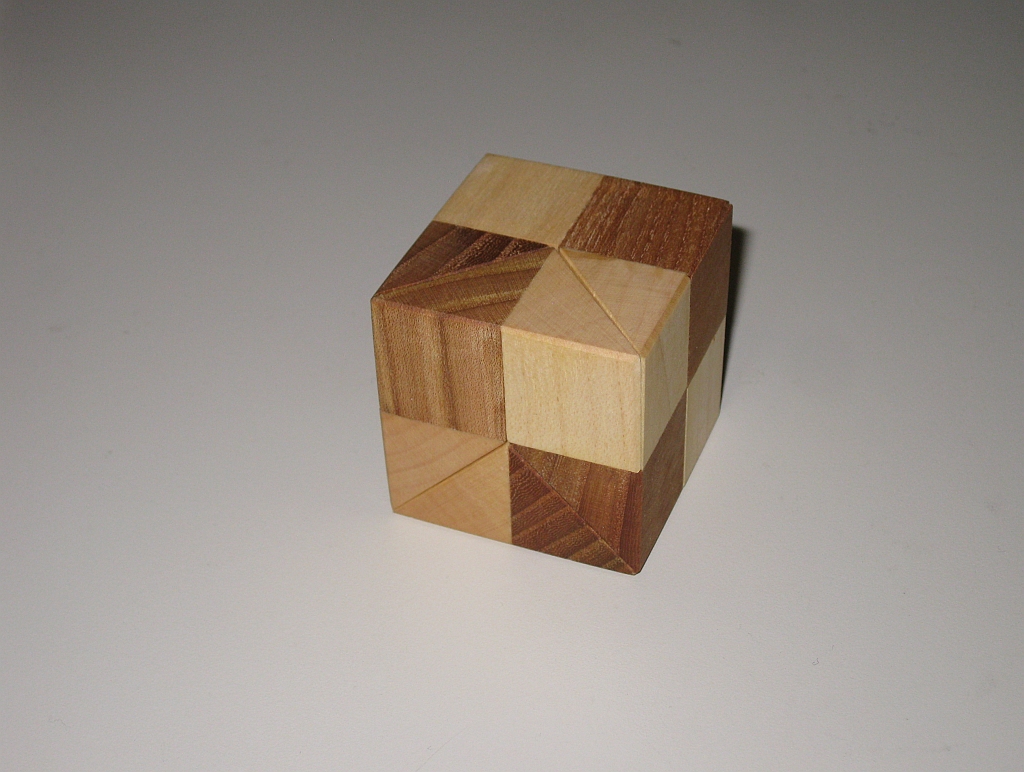
Cube Vinco is a beautifully made puzzle from Vaclav Obsivac. This modest wooden puzzle unlike many other of Vinco’s puzzles is not a coordinate motion, but rather a take apart puzzle, and is made just as well as any of the other items he sells. I got this one from Puzzle Master, for around $15, or you can get it from Vinco directly.

Cube Vinco

Cube Vinco

This is one of the smaller puzzles from Vinco at only 1 3/4″ cubed. The woods used are fairly plain, however the workmanship is excellent. Each of the four pieces fits together very tightly, so that although the seams are easily visible, determining how to take this puzzle apart is not obvious.

One of the nice features of the way this puzzle is created is that most people when they pick it up will hold it such that as they pull on the sides to try to free the pieces, they will actually be holding onto both sides of the same piece, and in fact holding it even more firmly together, making separation impossible. Even when you know how the pieces go together, it takes a few tries to be able to find the correct finger hold to be able to start moving the pieces apart.

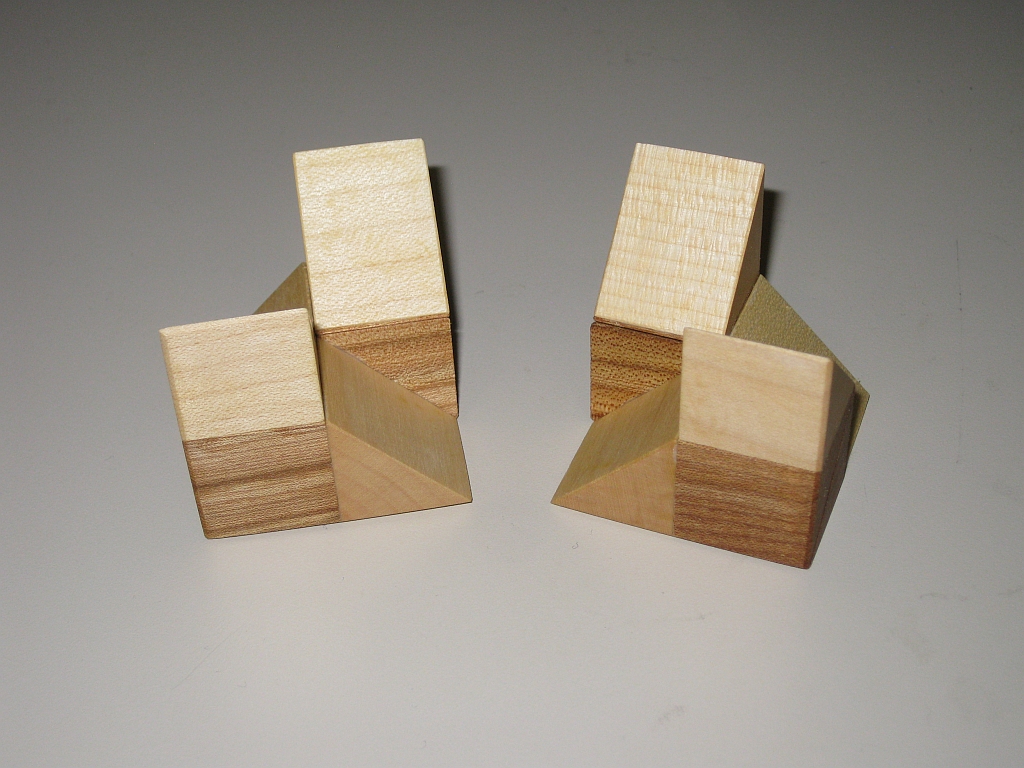
Cube Vinco Halves

Cube Vinco Halves

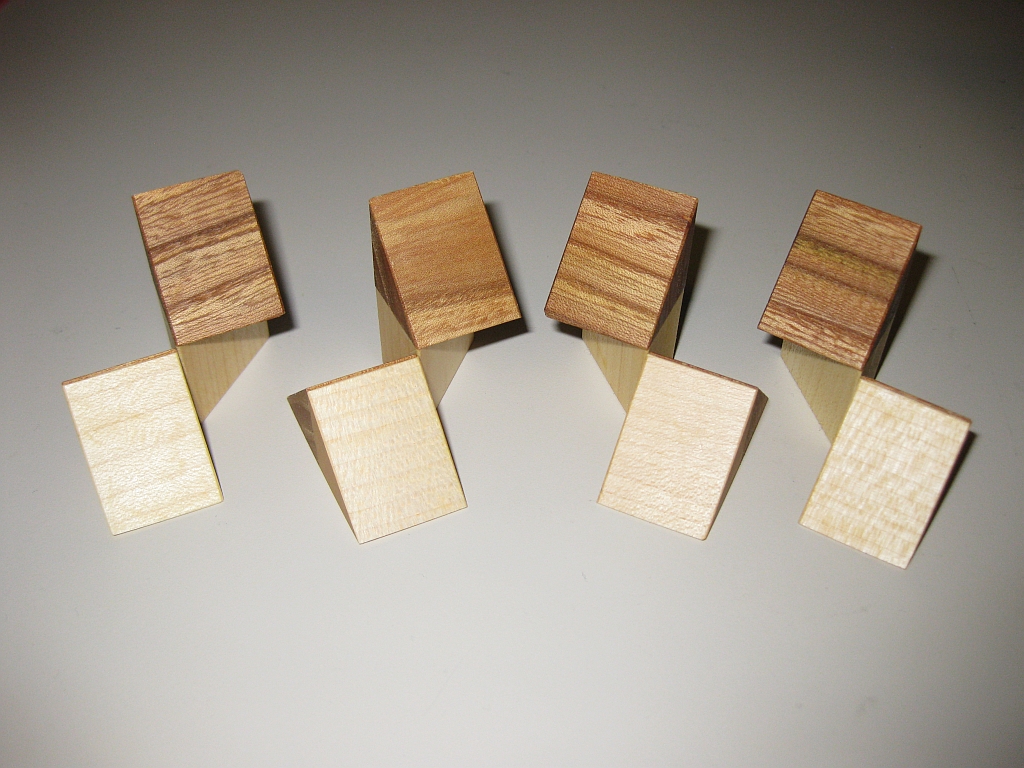
The puzzle is made up of four pieces, which are a set of two mirrored pairs. The only way to put the puzzle together is to create these pairs, then in turn join them together to create the finished cube.

Cube Vinco Halves

Cube Vinco Pieces

Without seeing the pieces being taken apart, this could be a difficult puzzle to put together, even with only four pieces. In fact when taking it apart, due to the very snug fit of the pieces, more often than not, the pieces fly apart in your hands (and across the room) so you’re not going to see how the pieces were assembled.

Puzzle Master rates this as a Level 8/10 puzzle – Demanding, however I have to think this is a little high. While it’s nicely made, quoting Stewart Coffin, “It is more of an amusement than a puzzle” ( taken from “The Puzzling World of Polyhedral Dissections”). That said, I still think this is a great puzzle to own, and at such a low price how can you resist adding it to your collection!

Popplock T6

The Popplock T6 is the latest trick lock to be made by Ranier Popp. This review is a little special as it’s the first video puzzle review I’ve done. Things are a little rough round the edges, and if you like it, then I’ll do more, and hopefully they’ll get better over time.

Despite what I say in the video, the rivets are copper, not brass. Sorry.

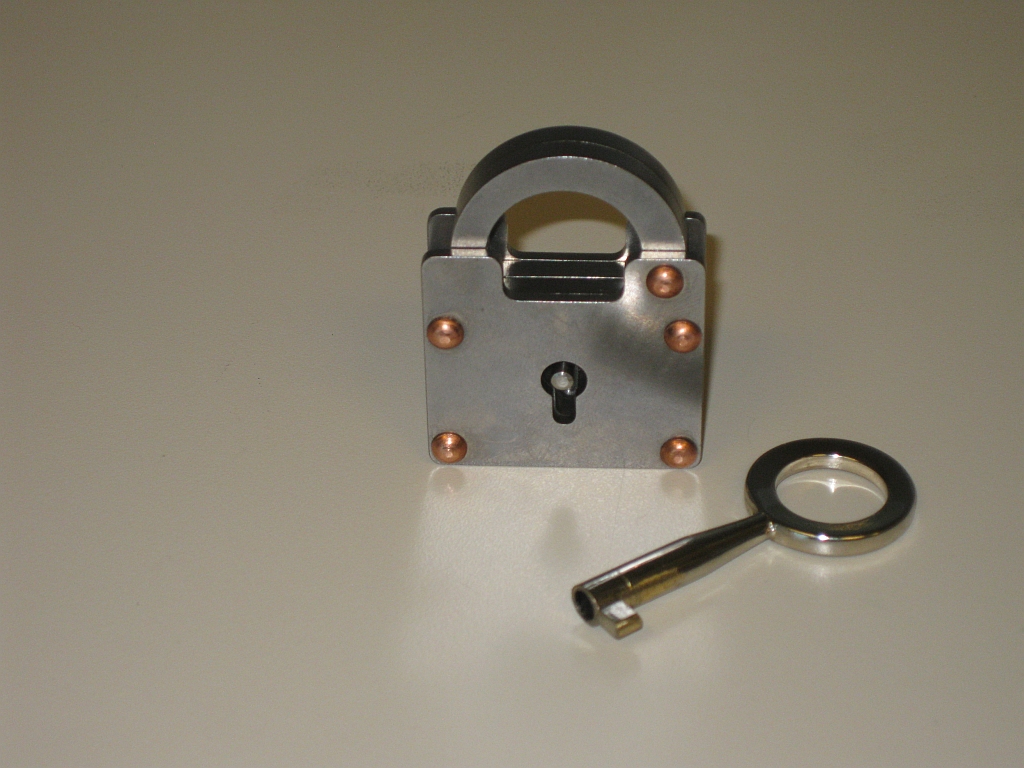
The T6 is 1.5″ square and comes in two different versions. A copper riveted version, and an aluminium riveted version. The mechanism for both is the same, and it’s only the external appearance which differs. Personally, I really liked the copper look so decided to get this version for my collection. An interesting note is that the direction the hasp opens is mirrored between the two versions. You can see the differences on Ranier’s site here. I bought mine through Wil Strijbos, and jumped on the chance when he mentioned he had some available. They are also available currently from Puzzle Master.

Popplock T6 front

Popplock T6

The lock is constructed from stainless steel and as a result is fairly heavy, and very solidly built. There’s no worry about damaging this lock if it’s dropped, or passed around for people to play with. The key supplied looks to be brass (some of the silver plating on mine has rubbed off) so you know they key is solid too, and no chance of it breaking, unlike some early Popplocks where the keys weren’t so robust. As you’d expect all the tools you need to open the lock are included, no paper clips or acetylene torches required.

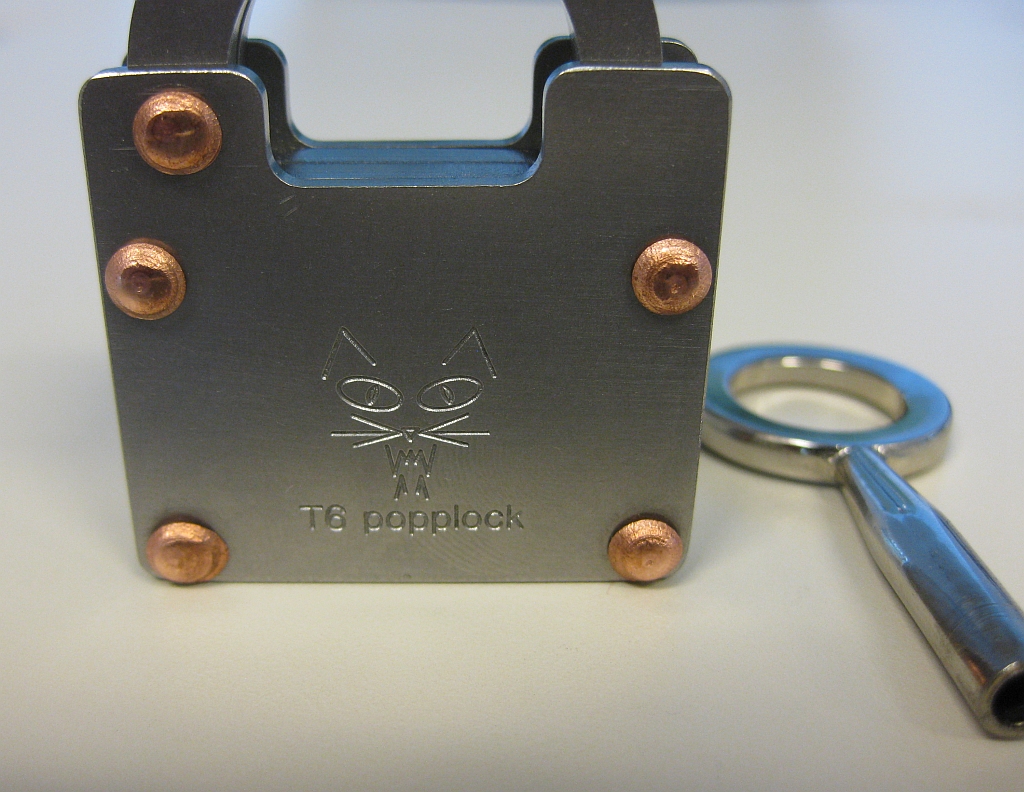
Popplock logo on the back

Popplock logo on the back

The back of the lock sports the familiar feline Popplock logo engraved into the lock, and the copper rivets mirror those on the front.

I freely admit that I’m no expert on solving trick locks. This is the first Popplock I own, and only the second trick lock in my collection. I took a fairly systematic approach to the puzzle, poking and prodding the rivets and anything which may not be as it appeared before putting the key in the lock and turning it. The movement of the key in the lock is very smooth, and there’s no real feedback turning the key in either direction. Not to mention that turning the key in either direction doesn’t open the lock! I can tell you’re surprised by this news.

Fairly quickly I noticed that there are two levels the key can be inserted at, and two ‘discs’ inside the lock which the key turns. The key can only be removed when the top disc is back to its starting position, but the bottom disk can be left at any point. Turning the key you notice a small notch in the upper disk. Surely that is important. Investigating further I found a similar notch in the lower disk and also a dot on the disk. With these reference points, I started to get a feel for what was required to open the lock, but I still had no idea how to execute it.

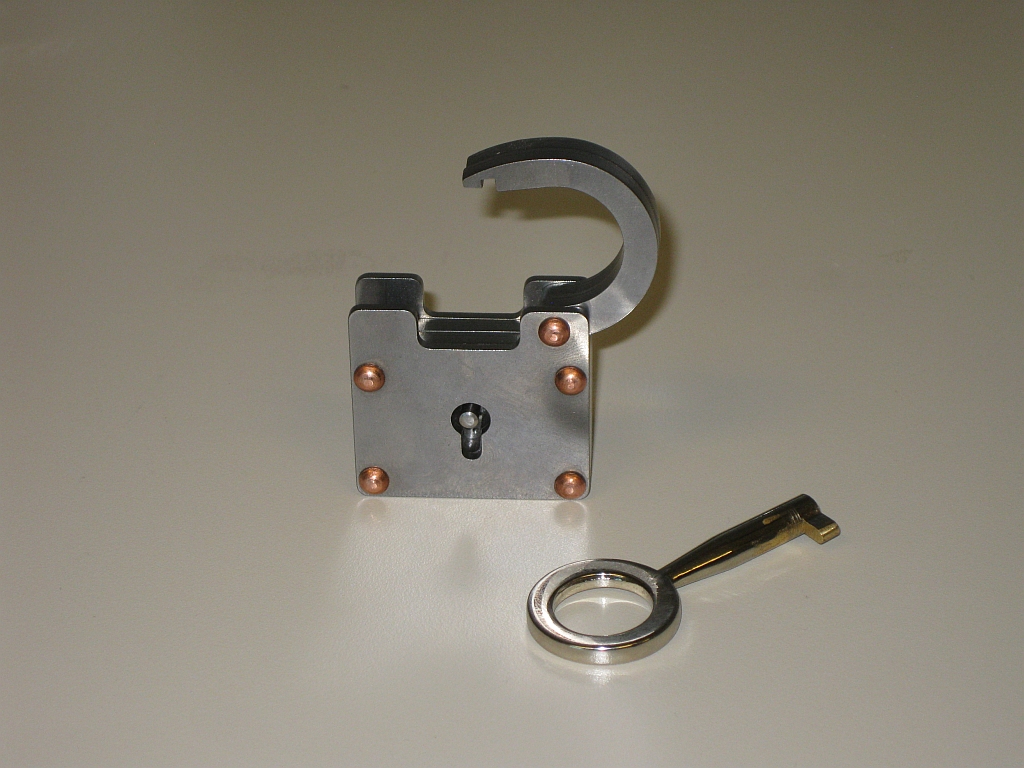
The opened lock

The opened lock

It took around two hours and a lot of trial and error to figure out how to open the lock, and all I can say is that it’s a clever yet simple mechanism. The mechanism is very cleverly disguised and really requires you to examine everything and assume nothing. As Ranier Popp states on his website, it’s not easy to solve. I highly recommend this puzzle, and if you’re new to trick locks, or to the Popplock series, this is a great puzzle lock to own. I may have to hunt down the rest of the series now!

Internal Combustion

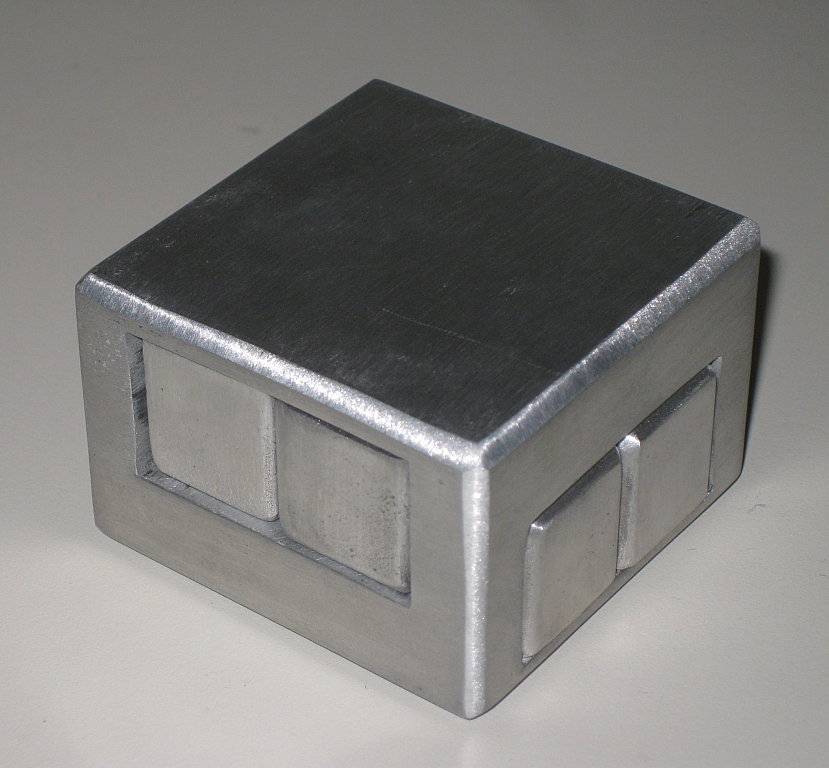
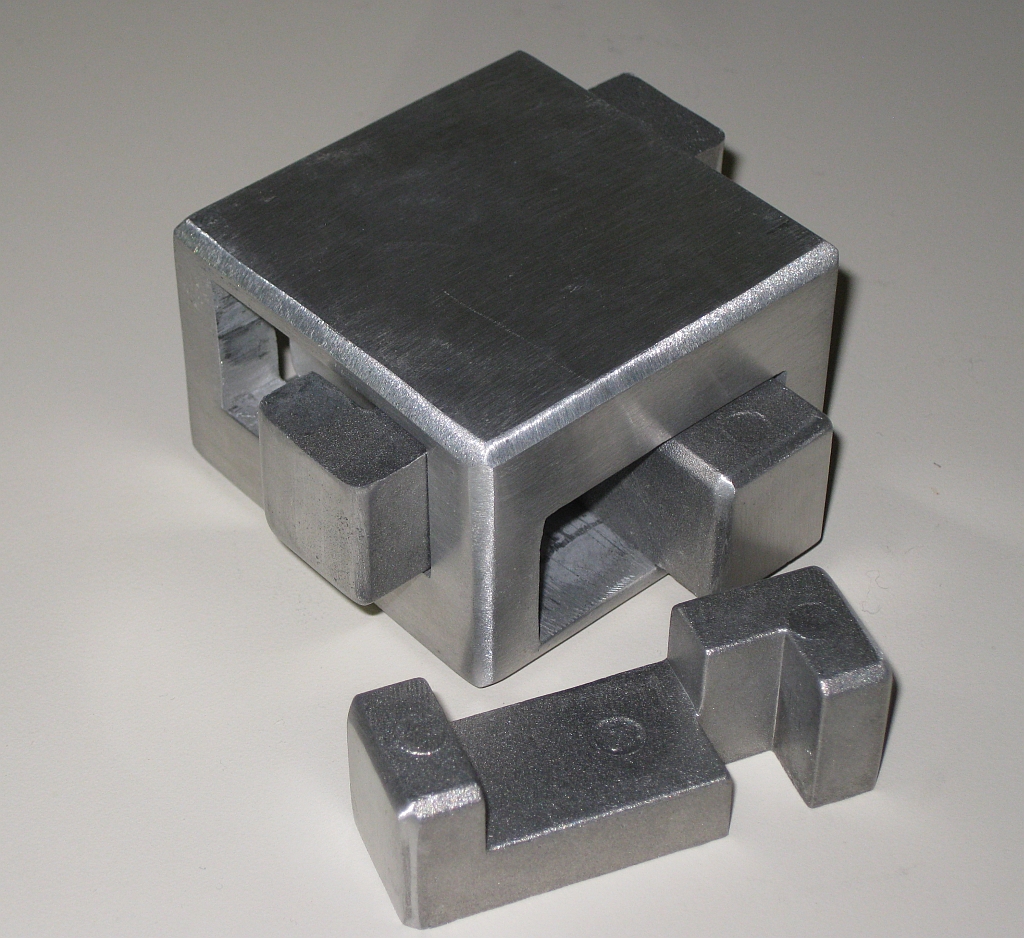
Internal combustion is a nice framed burr puzzle available in a number of formats. This version, available from Puzzle Master is made from a block of aluminuim. Other versions are available, and I have seen copies of the puzzle made in wood. The object is to remove the four ‘pistons’ from the frame. Thanks Puzzle Master for sending me this puzzle to review.

Internal Combustion

Internal Combustion

At 2 1/3″ square by 1 1/3″ high, this is a pretty solid little puzzle. Given that the version I have is made from aluminium, it’s a heavy little puzzle, and really feels good when you’re solving it. I was pleasantly surprised when I started playing with this puzzle that the fit of the pieces was fairly good. I had expected it to be a lot less precise as a mass manufactured puzzle, however that wasn’t the case at all. The movement of each of the internal pieces is smooth and makes the puzzle easy to work with and fun to solve.

Internal Combustion

Internal Combustion

As the name suggests, the movement of the pieces when you’re solving the puzzle is much like that of an engine. Each of the pieces is required to move back and forth much like the pistons of an engine to free each other piece, and eventually remove the first piece, then each of the other pieces in turn. I really like the movement when solving, it has a rhythm to it that you can’t help but enjoy.

It took around 20 minutes to solve the puzzle, then return it to its starting state. Puzzle Master rates it as Level 8/10 – Demanding, which is a fair rating. It’s certainly tougher to put back together than to take apart, especially if you leave the pieces jumbled for a while before going back to re-assemble it.

Overall, this is a good puzzle, and I’d recommend picking up a copy for your collection. See what Oli had to say about it here, and Jerry’s thoughts here

Cast Coil

This entry is part 2 of 8 in the series Hanayama Cast Puzzles

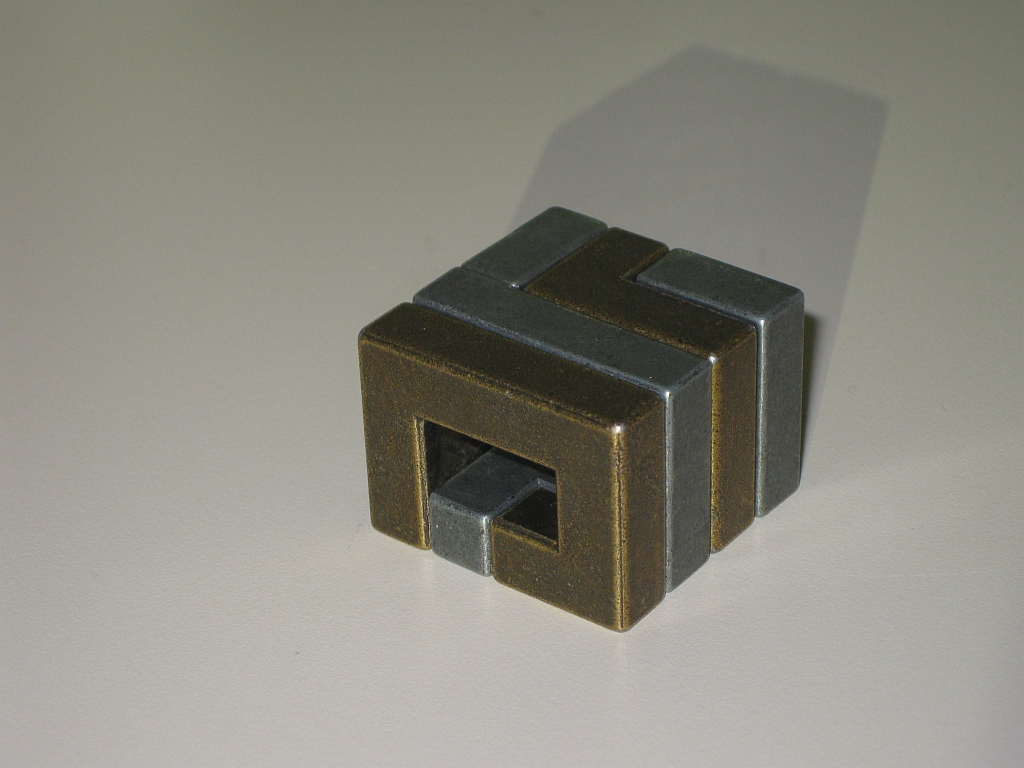
Cast Coil is the newest of the Hanayama cast series of puzzles, and was designed by Edi Nagata of Japan. Thanks to Puzzle Master for sending me this puzzle to review. The objective of the puzzle is to separate the two pieces of the puzzle by sliding and rotating the pieces around each other.

Cast Coil

Cast Coil

At 1 1/3 inches x 1 inch, this is a compact little puzzle, which carries a good weight to it. The Silver and Gold pieces provide a good contrast and make the coil design stand out. There seems to be a rather divided opinion on the look of this puzzle. The aged appearance of the metals used gives it a rough and pitted feel, that many puzzlers don’t seem too happy with. Personally, I think it looks great. I really like the aged appearance and think it suits the puzzle. To see what others are saying, read Kevin’s review here and Brian’s review here.

When I first tried to solve this puzzle, the pieces were a VERY tight fit, to the point that quite a lot of force was required to separate the pieces for the first move. That does seem like a temporary issue however as the more the puzzle is played with, the easier the pieces move. Now that I have solved the puzzle many times over, there is a slight gap between the pieces which was not there initially. The first move is still a little stiff, however that helps to keep the puzzle in the starting state, so isn’t entirely a bad thing.

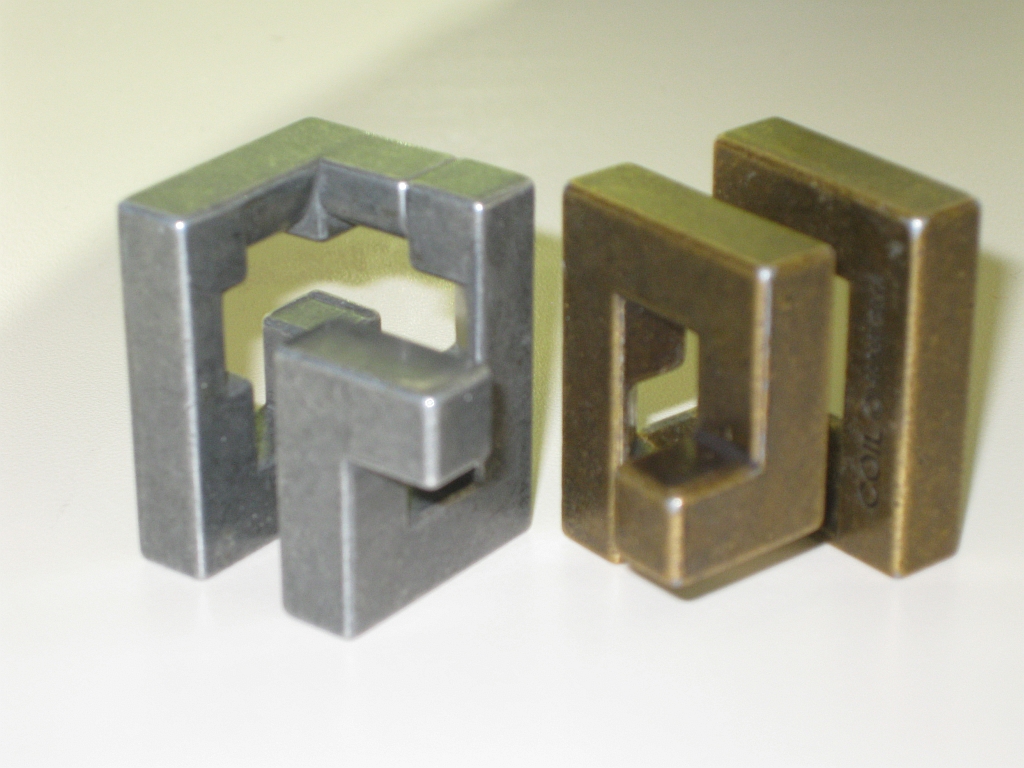
Cast Coil pieces

Cast Coil pieces

The two very similarly shaped pieces have a number of notches cut out at strategic points on the inside of the puzzle to allow the square pieces to pass each other. The only real differences between the pieces are the locations of these cut away sections, so keeping track of them can be a little challenging. Initially it took me around 20 minutes to solve this puzzle, as there are a number of dead ends on the path towards the solution. There is one move which still catches me out, and even though I now know the sequence of moves, I somehow manage to get stuck at the same point fairly frequently.

Given that most of the moves in this puzzle are rotational moves rather than linear moves, it adds a unique element to the puzzle. The number of possible moves are limited thanks to the shape of the pieces, but rather than making things easier it seems to make things harder as you find yourself wanting to rotate the pieces and being blocked. In all you need around 7 distinct moves to separate the pieces, so once you know the path to take, it can be opened very quickly.

I really enjoyed this puzzle, and think it provides just the right level of challenge. Hanayama rates this as a level 3/5 puzzle, and Puzzle Master 7/10 – Challenging, which I have to agree with. I’d highly recommend picking this puzzle up as it’s a clever design and a fun puzzle.