Monthly Archives: August 2011

Coffin’s Rosebud and Cluster Plus

Before my visit to see Scott Peterson’s workshop a few weeks back, I’d been talking with Scott for a while via email. I’d introduced myself, and asked if there was any chance he could make a couple of puzzles for me, including a Rosebud, and a Peanut puzzle. I’d also mentioned that I was starting to make my own puzzles, and Scott was only too willing to help out with tips and advice, answering all my dumb questions with the sort of enthusiasm and excitement that I remember from my high school science teachers.

As it happens, Scott hasn’t made a Peanut puzzle for a very long time, and he tends to make a run of puzzles then move to the next design, however he had just finished a run of Rosebud puzzles. At the time he didn’t have any available, but he thought he may be able to make me one at some point. With an offer like that I duly said thank you and never thought about it again. In the time between that original email, and my visit, we’d exchanged a number of emails, mainly about woodworking, and Scott’s tips to help me get started. Not long after we arranged to meet up, Scott got back to me saying he had a Rosebud available if I still wanted it, and he had a jig too. Like a bobble head on a dirt road, I instantly said ‘yes please’.

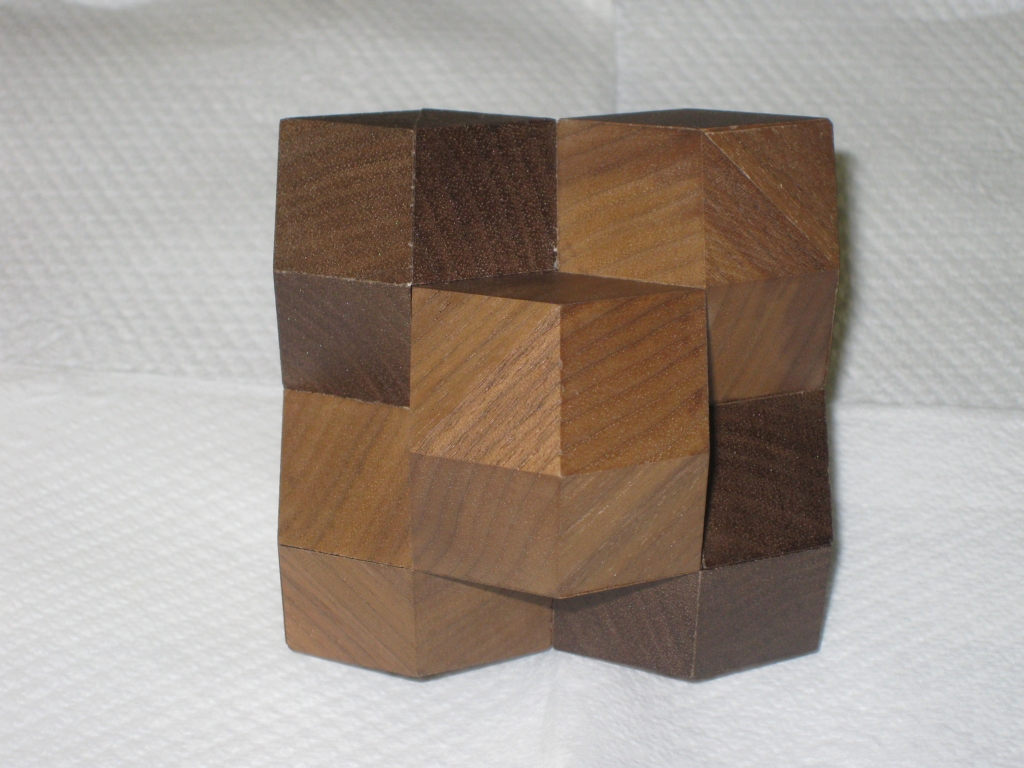
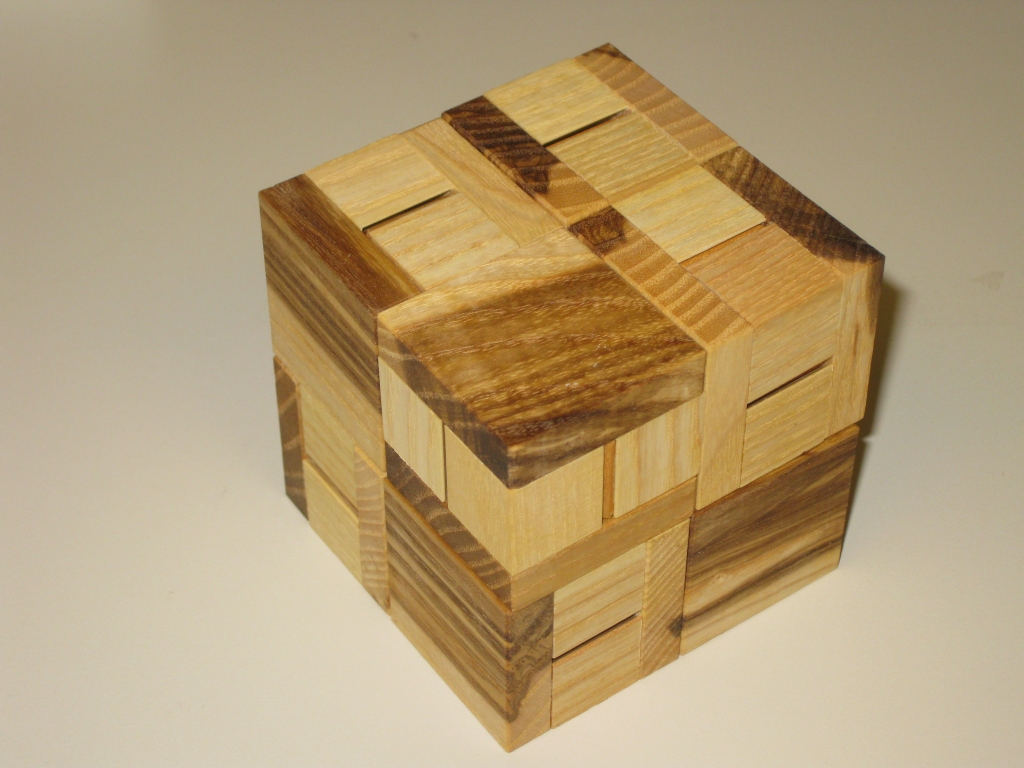
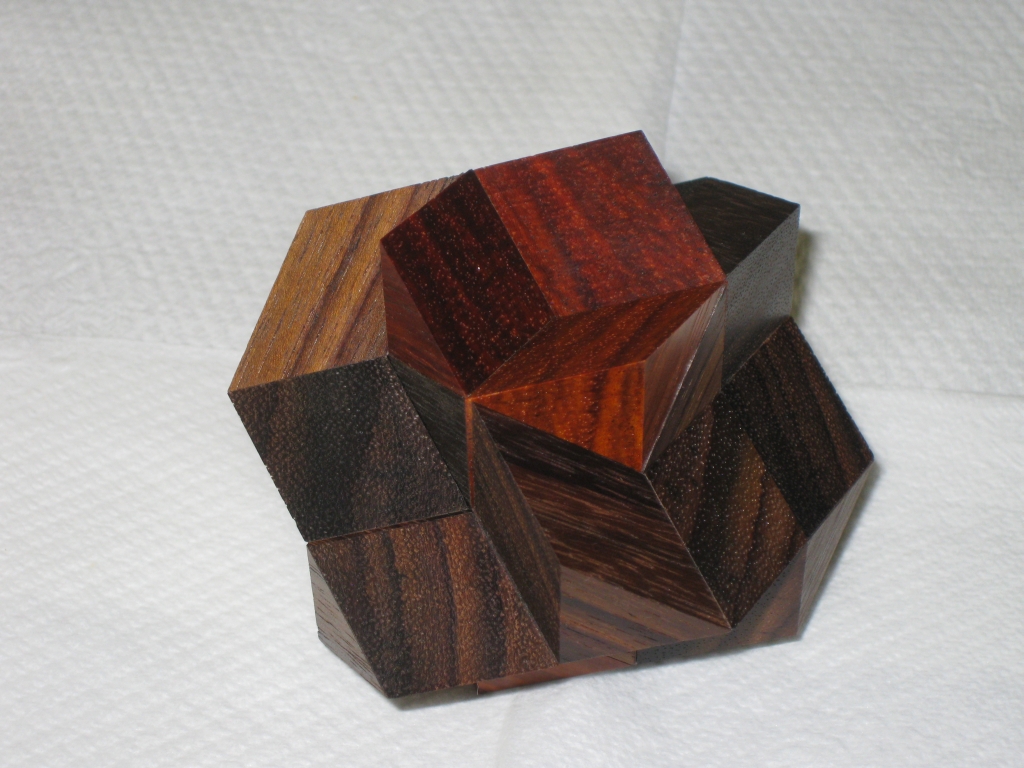
Rosebud in its closed state

Rosebud in its closed state

This particular copy is made from East Indian Rosewood, and Flamewood. The strong red from the Flamewood, and its detailed grain pattern really make this an object of beauty. I must confess that the pictures don’t really do it justice. The finish is glassy smooth, and the fit of the pieces is incredible. This is a tight fitting puzzle, with no visible gaps, and yet the pieces slide past one another with ease.

The Rosebud is Stewart Coffin design #39 in the AP-ART catalogue, and is one of the few three-dimensional puzzles which assembles into more than one solution shape. The image above shows the rosebud in the shape which gives it its name, and is a coordinate motion solution where all six pieces are required to move along their three-fold axis at the same time to both assemble and disassemble the puzzle. Not only is this difficult, but the manner in which they are assembled is not at all obvious and requires considerable dexterity.

Stewart himself says “A few of these puzzles were produced some years ago and sold unassembled. After sufficient time had elapsed and almost none had been solved, the customers were given the opportunity to purchase (for an outrageous price!) an assembly jig and directions. With these, it is easy. Without the jig, it can be done with patience, using tape and rubber bands. Without such aids, it has been done but borders on the impossible.”

The reward for being insane enough to try this without a jig is a wonderful movement where the puzzle appears to open like the petals of a rose. It really is something which has to be seen to truly appreciate. My video review below will show you just that and give you a chance to see just how stunning the movement (and Scott’s work) truly is.

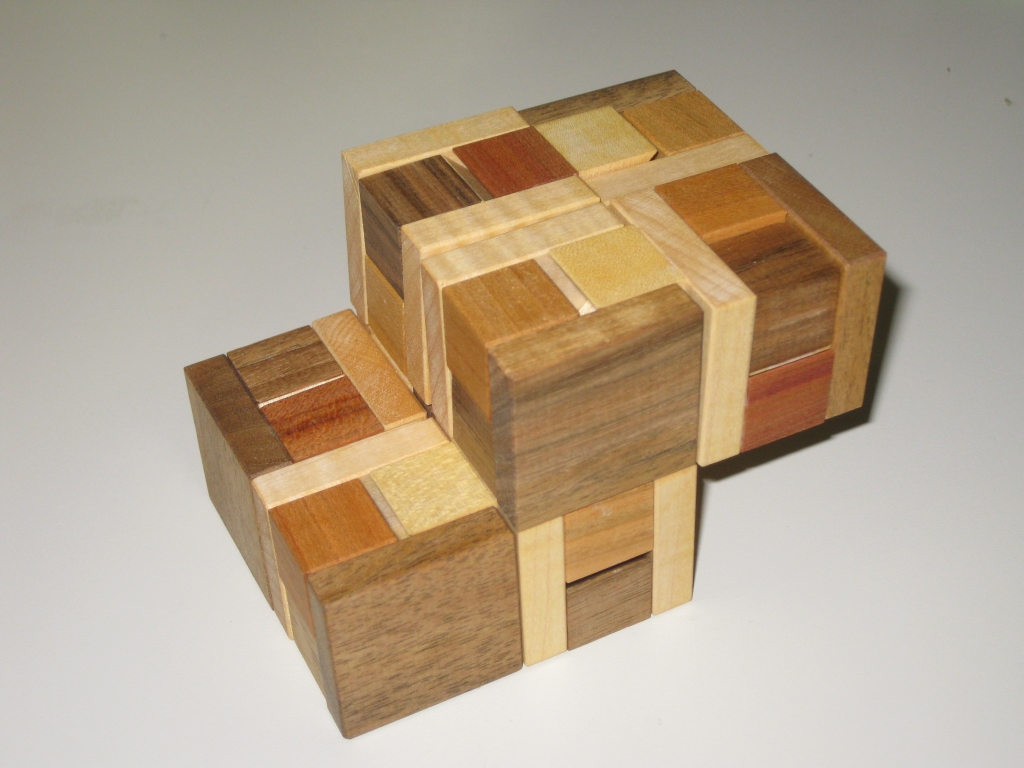
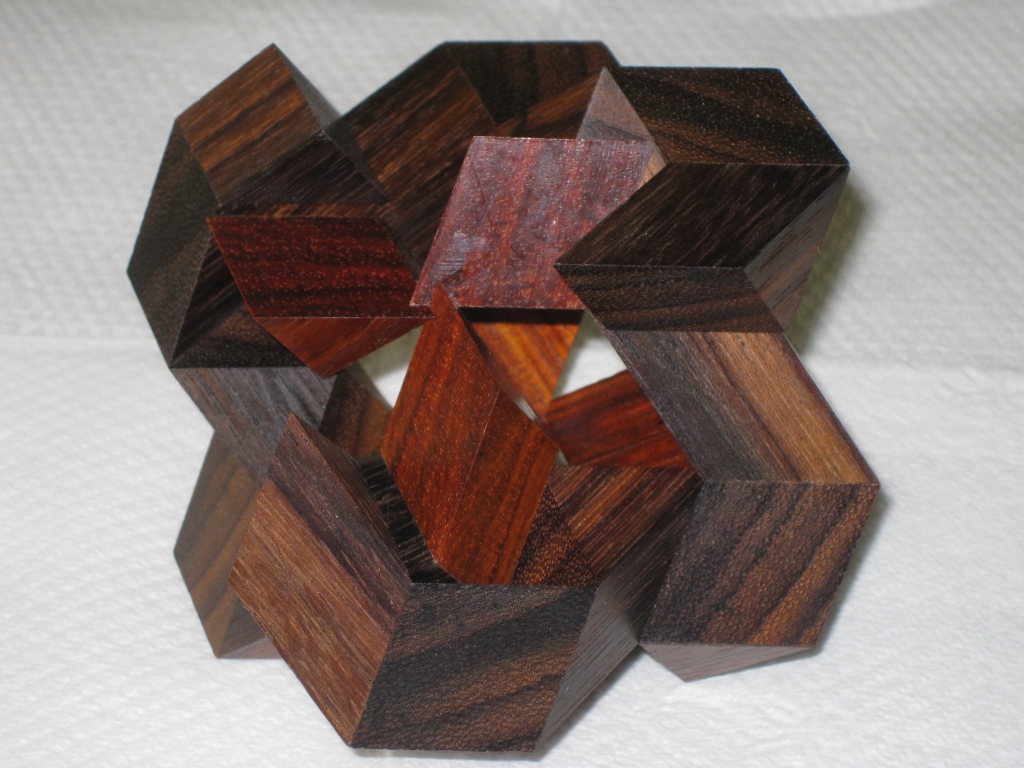
As you’ll see, both in the video review, and also in the photograph below, Scott’s work really is outstanding. The pieces of the puzzle will expand until just the very tips are touching, and it still remains perfectly stable. Only with very precise construction can you even get close to this, and it’s a testament to the years of puzzle making that Scott’s copy is as good.

Rosebud opened.

Rosebud opened.

As a puzzle, without Scott’s jig, I have assembled the rosebud. I didn’t go down Stewart’s suggested route of tape and rubber bands (as frankly I couldn’t see how a rubber band would help me much) but all I’ll say is it took over an hour, involved a lot of swearing, and wasn’t all that fun an experience. The jig on the other hand makes things much easier, and removes the worry about expanding the puzzle just a little too far. If it does collapse then you can easily re-assemble it. I’m glad I accepted Scott’s offer for the jig!

Cluster Plus

If you’ve watched the video review, then you’ll know this already, but while I was visiting Scott, he handed me a rather special puzzle.

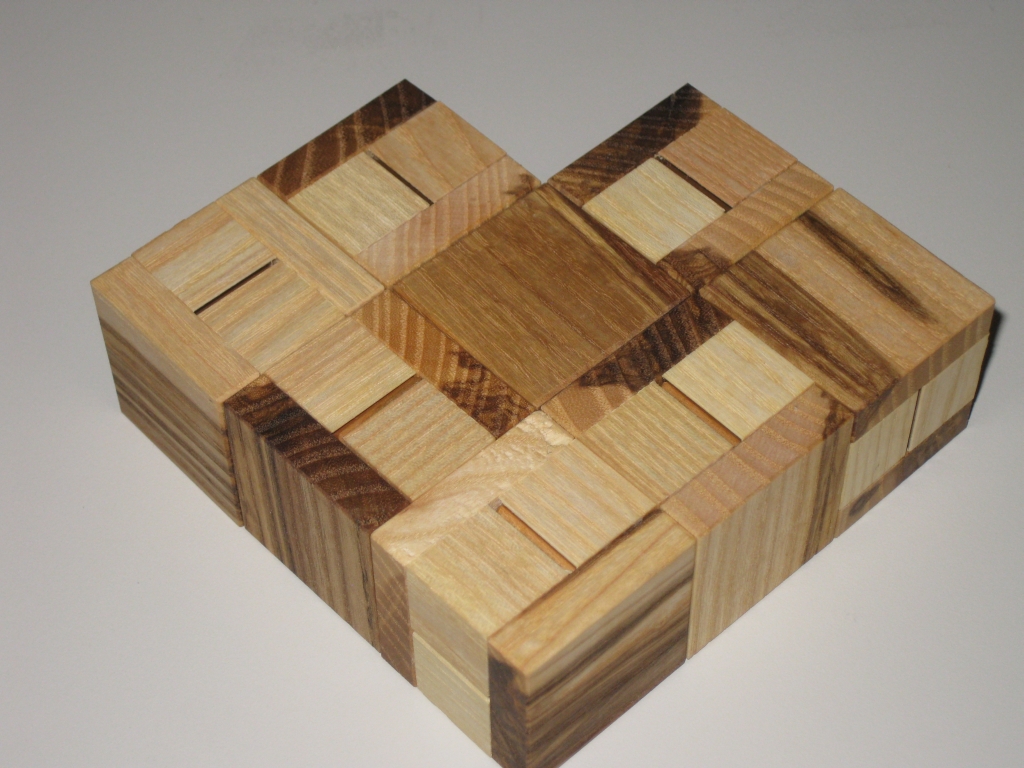
Cluster Plus - Shop Copy

Cluster Plus - Shop Copy

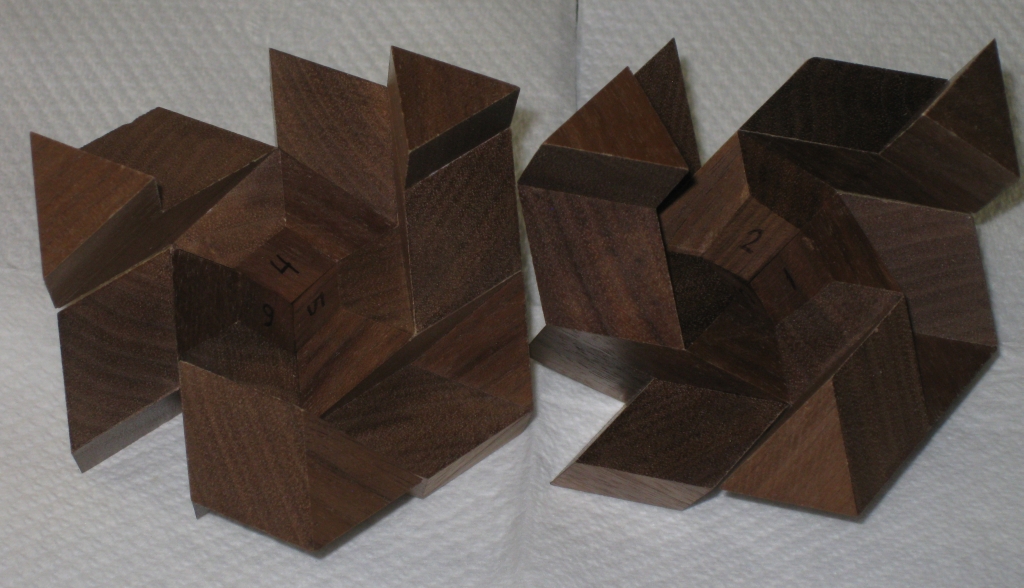
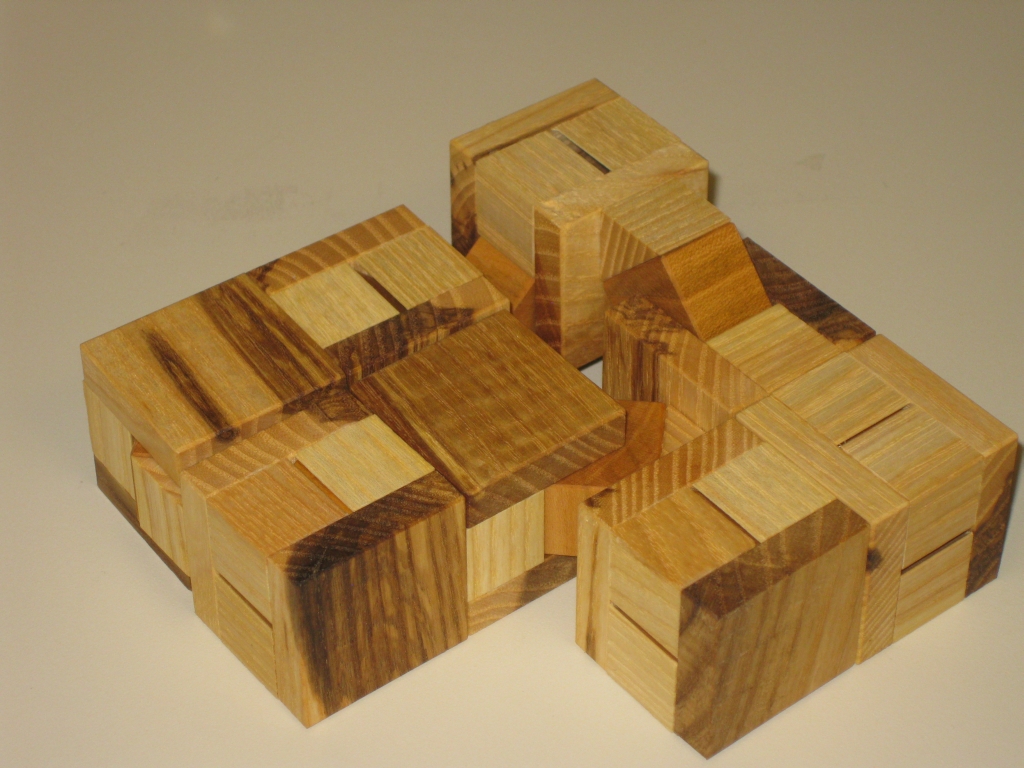
The Cluster Plus puzzle is #114 in the AP-Art catalog, and has a striking resemblance to the Cluster Buster puzzle #49. The final shape however is where the similarities end. Originally only 11 of these were made, and almost half of those were given out as tokens at IPP-17. There don’t seem to be to many people have made these designs since, so that makes this copy even more special. This is one of the prototype copies Scott made with collaboration with Mark McCallum. As such, it’s not a finished quality and has the pieces numbered in the centre to help with assembly. The six dissimilar pieces are joined together in sets of three pieces which require a coordinate motion, and then the two halves of the puzzle are slid together. Looking at the two halves, it’s almost impossible to see how Stewart Coffin came up with this design. Even knowing how to put the pieces together, and the order I still found this a challenge.

Cluster Plus Halves

Cluster Plus Halves

When I first attempted to fully disassemble the puzzle, I split the two halves, then took only one half apart fully, leaving the other still assembled. Now, remember I have the pieces numbered as you can see above, and I’ve only taken one half apart. I still took over 20 minutes to get the puzzle back together.

The coordinate motion really makes it difficult to see how the pieces should come together, and add to that numerous ways that the pieces can fit together, and this is one tough puzzle. As an early copy, the co-ordinate motion on the first three pieces isn’t perfect, and this was something Scott was working on. His initial idea was to leave more of the centre block – one of the standard building blocks in Coffin puzzles, and the number part in the photo in case you’re not sure, with more of the central section un-sanded in the hope that this made things easier to assemble. The trick here was that the centre blocks normally have a pyramid peak. Stewart Coffin removed part of this to allow the coordinate motion which otherwise would not have been possible. In the end Scott removed more of these centre blocks as it turned out that this initial idea wasn’t great.

While Scott and Mark were working on this, Mark believed that there was more than one configuration of pieces which would make up the same shape. I took up that challenge and have been trying to find an alternate configuration. So far I’ve not been successful, however I’ve not given up and I’ll be sure to post if I find it.

At this point, I have a bit of a confession to make. When I was playing with the puzzle, I may have used a little too much force. I should point out that the fit here is not perfect, again since this is a shop copy, and given the nature of the puzzle, any inaccuracy is multiplied out to the end of the ‘arms’ which is where the fit needs to be perfect. Well when putting it back together at the end of a puzzling session, I used a little too much force, and with an impressive snap, one of the arms flew across the table, and the two halves slammed rather abruptly together. Sorry Scott!

A little bit of glue and an hour later, things were back to the way the should be and no real damage done. The glue joint had given out, but didn’t damage the pieces of the puzzle fortunately so it was a simple fix.

Thanks again to Scott for both of these puzzles. There’s great additions to my collection and I promise to try not to break them again!
Stickman #18 – The Sphere Box

Some time ago, I reviewed Stickman #2 from my own collection. My good friend Derek Bosch recently lent me another (large) box of puzzles to keep me busy, including Stickman #18, and also Stickman #23, the Perpetual Hinge Puzzle box. Watch out for a review of that one coming soon.

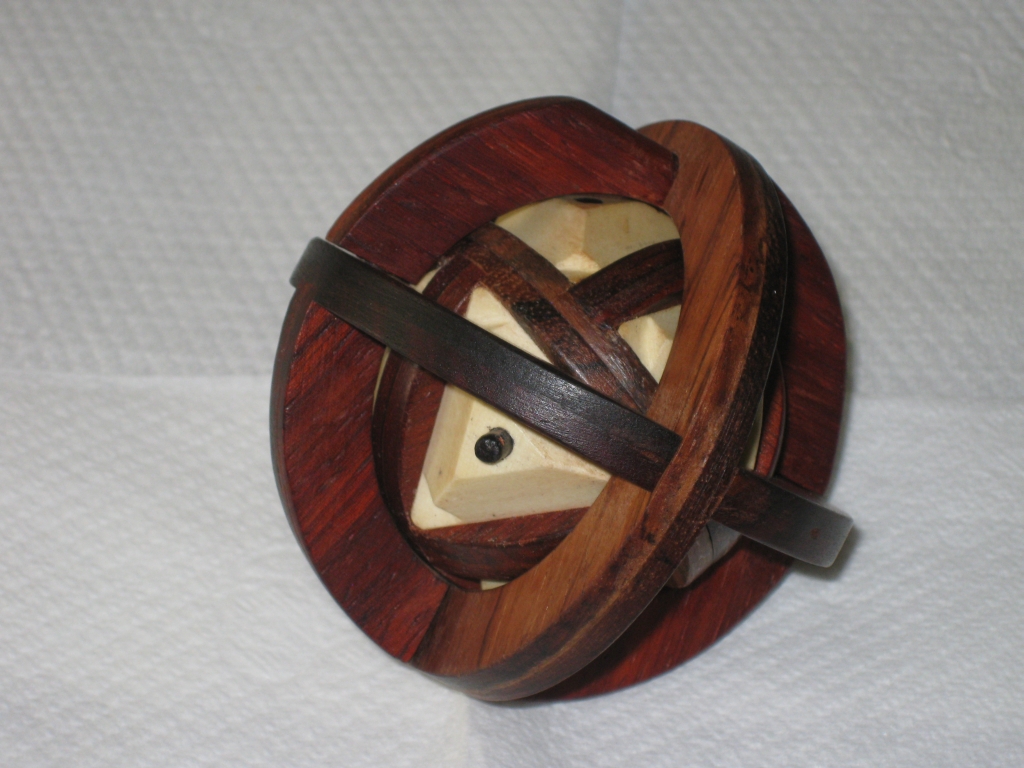
This beautifully made box measures 3″ in diameter, and is made from a selection of exotic woods including padauk, bloodwood, monticello, cocobolo, and holly. Limited to a run of 31 puzzles, like many other Stickman puzzles, this is fairly rare, so I’m very grateful to Derek for lending me his copy.

This sphere inside a sphere does still qualify as a box, since the holly sphere in the centre is hollow. The goal of the puzzle is to open the box, removing the inner sphere from the outer cage, by rotating the inner sphere until it can be slid out of an opening in the cage.

There are a number of black pegs attached to the inner sphere which make this challenging, and even with the two peg shaped gaps in the cage, it’s not always possible to move the inner sphere where you want it. This is where the hidden trick of the cage comes into play. As you may have already realised, if the ball is captured in a solid cage, there’s no way it’s coming out of there. The cage itself is held together with a couple of small magnets, and one quarter of the cage swings out of the way to allow the inner sphere to eventually be removed, but also to allow you to move those pegs into locations that they otherwise wouldn’t be able to move to.

The pegs and gaps form a 3D maze which must be navigated to move the inner sphere into the correct orientation for it to slide out. Initially, I wasn’t sure whether using the extending nature of the cage was permitted, as it seems to make the solution a little too easy, however it’s not possible to move some pegs at all as there are no gaps, as you can see in the photograph below. Derek also confirmed that this wasn’t cheating, and that I did need to do this to be able to solve the puzzle. I feel this makes the puzzle a little too easy if I’m honest.

Stickman #18 - The Sphere Box

Stickman #18 - The Sphere Box

I found the inner sphere to occasionally be a little stiff. Most notably, having opened the box, and removed half of the inner sphere, returning it back to its original state the re-insertion of the half was particularly tight. I’m not sure if I had changed the orientation while I had it open, but after moving the sphere around a little it soon went back to being easy to move.

Overall, this was a fairly easy puzzle box to open, taking me around 15 minutes. It’s a really unique box being spherical, and I must admit that really enjoyed solving it. It’s a fun puzzle to play with, and is finished to a very high standard, as seems to be the Stickman way. If you come across one of these at auction, it’s well worth adding to your collection.

Vinco’s Twisted Halfcubes & Diagra

A while back, I got in touch with Vaclav Obsivac and placed an order for several of his puzzles. Amongst those, I asked for a copy of the Twisted Half Cubes, and Diagra puzzles.

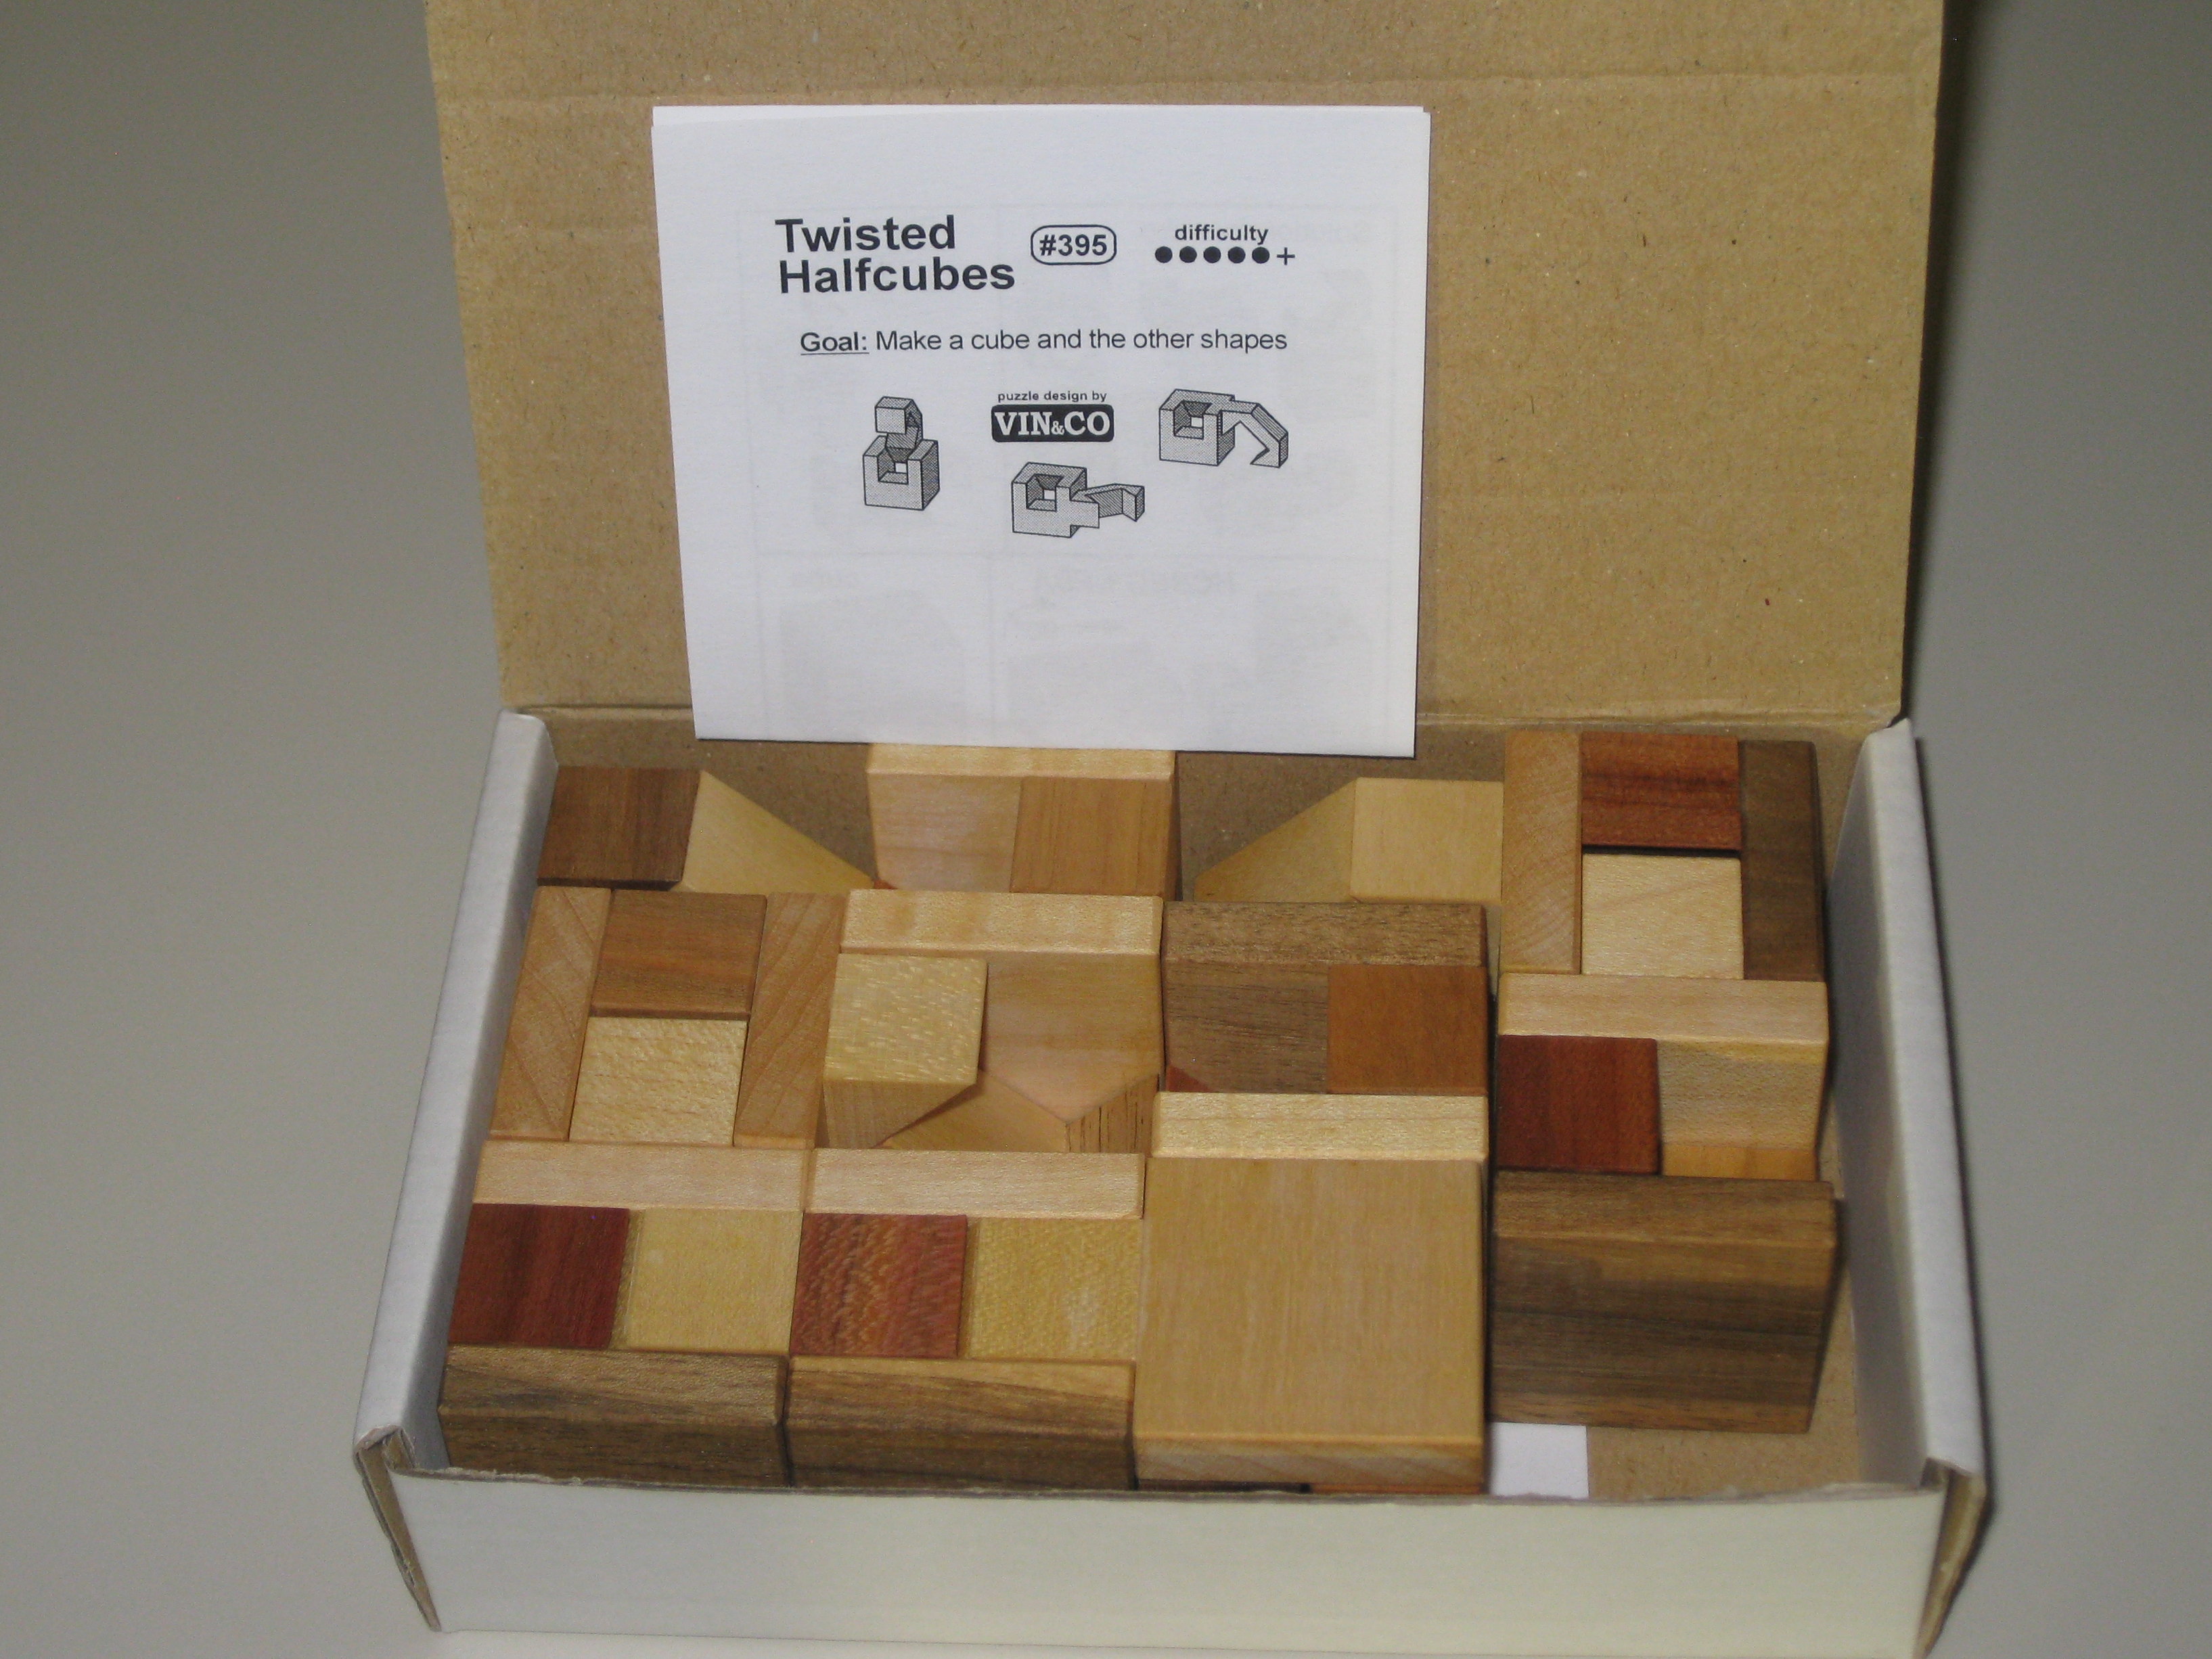
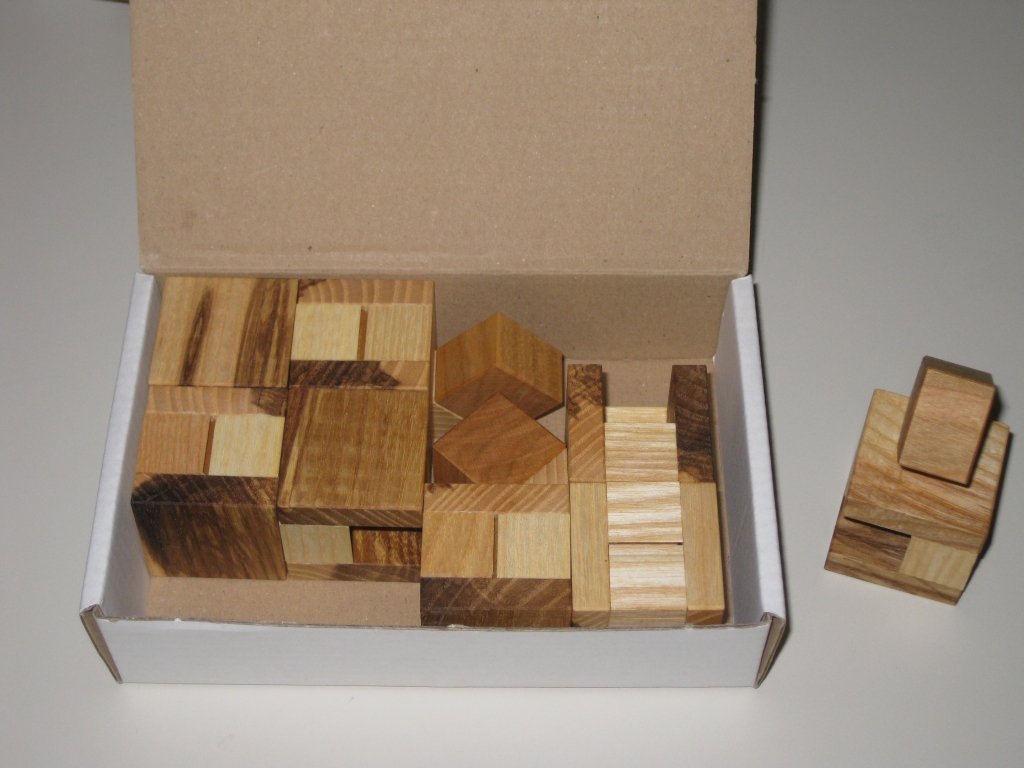
Vinco's Twisted Half Cubes in the box

Vinco's Twisted Half Cubes in the box

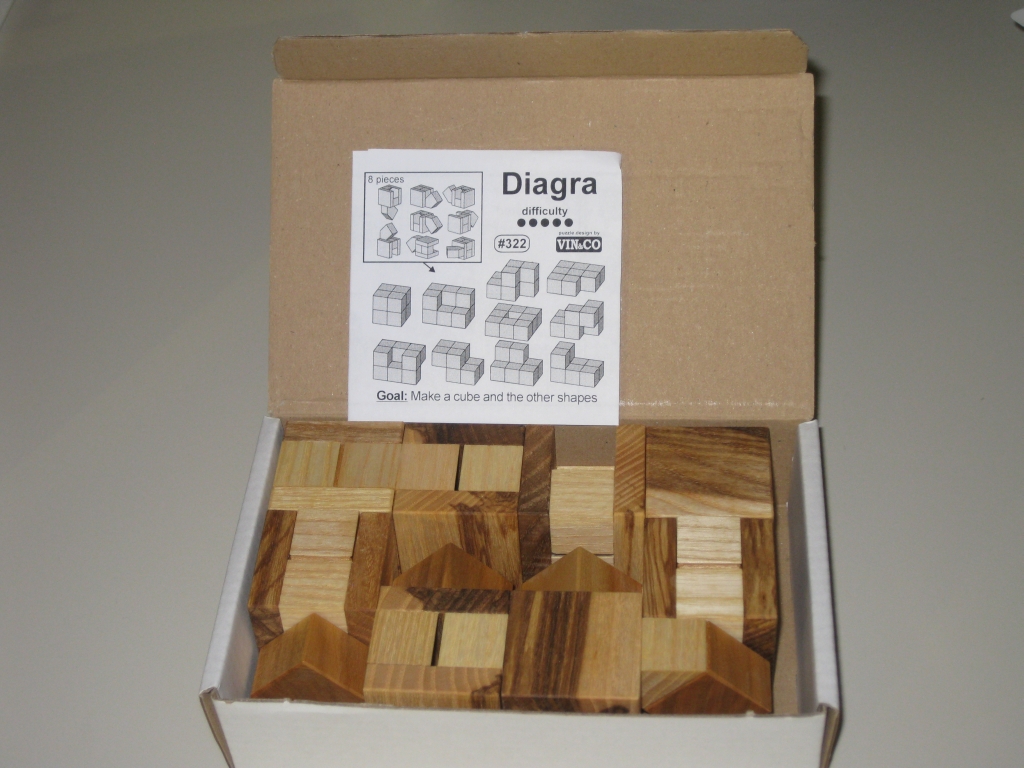
Vinco's Diagra in the box

Vinco's Diagra in the box

Packing the pieces back into the box is a puzzle of its own!

Packing the pieces back into the box is a puzzle of its own!

To look at, both of these puzzles look very similar. Indeed, they have the same basic idea at their root. Both puzzles have eight pieces which combine together to create solid cubes. The goal of the puzzles is to create various solid shapes with no ‘legs’ sticking out of the final assembly. This sounds pretty simple, but I can assure you that it’s really not. In all honesty, putting the pieces back into the box provides a packing puzzle of its own, as the box is too small for all the pieces to be placed in without some level of interconnection!

All of the puzzles in this series are made from varying woods, and have been lightly waxed. No stains are used, so the natural wood is left on show, which is one of the factors that I really admire from Vinco’s puzzles. As with all of the Vinco puzzles, these are made to the same high quality and tolerances that you’d expect from this master craftsman; and none are expensive at around €14 each. At that price, these are really hard to pass up.

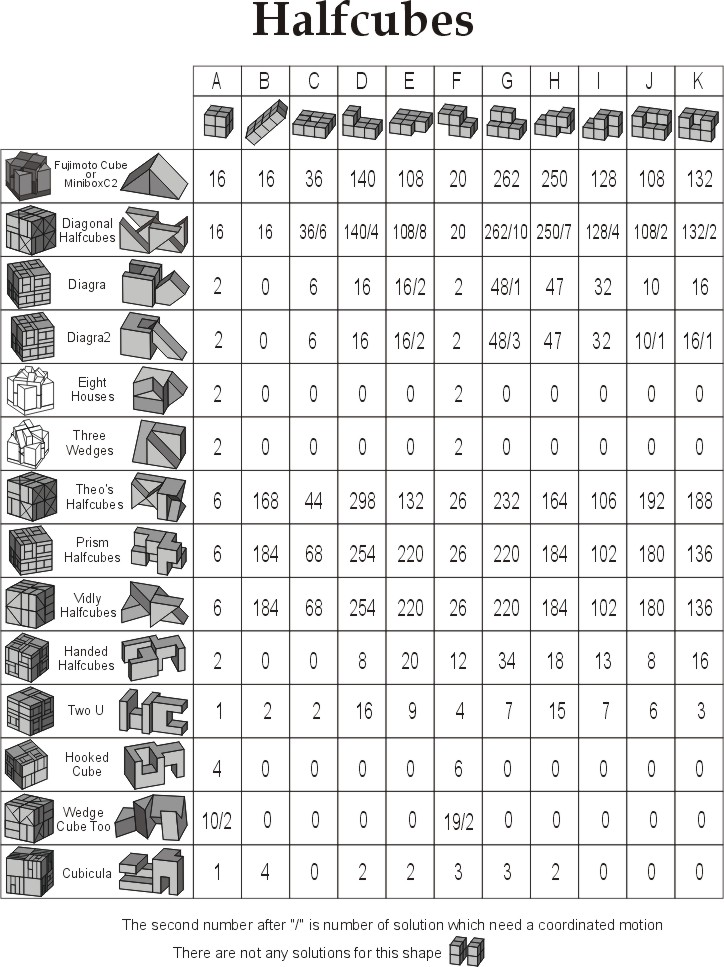
The Halfcubes sets

The Halfcubes sets courtesy of Vinco's website

The beauty of the set of these puzzles, which includes (naming just a few) the Diagonal Halfcubes, Vidly Halfcubes, Prism Halfcubes, Two U, Cubicula, Hooked Halfcubes and Handed Halfcubes, reviewed by Kevin (where he also reviews Diagra), is that you can own all of them and they all provide a new and unique challenge. Despite the basic idea being the same, each puzzle is a new challenge, and requires a new way of thinking to solve it. The partial list is shown in the chart here, along with not only the suggested solution shapes for each puzzle, but also how many different ways each shape can be created. There’s a lot of puzzling possible and that’s if you only try for the suggested solutions. Click on the image to the right to see a list of many of the puzzles in the series in a more readable size.


Twisted Halfcubes

The eight pieces of the Twisted Halfcubes puzzle

The eight pieces of the Twisted Halfcubes puzzle

With the Twisted Halfcubes, the legs of the puzzles are all hook shaped, and hook around the small internal cube on another piece, linking the two puzzle pieces together in such a way that they will support each other. The differing angles at which the legs are attached make the problems more complex, as you need to find the right pieces to take the puzzle in the direction you need. In most cases, it’s not possible to create a closed solution by simply adding the next piece to the previous in a sequential manner. Most closed loops need you to approach the puzzle by thinking about two halves which will rotate together into the final shape. I really like this feature as it adds an extra challenge to the puzzle space, and also limits the use of programs like Burr Tools for solving the shapes.

Twisted Half Cube, Super Cube Solution

Twisted Half Cube, Super Cube Solution

Twisted Half Cubes 'Z' Solution

Twisted Half Cubes 'Z' Solution

Vinco sets a number of possible solution shapes of which just a couple are shown above. The solution on the right shows how the pieces support themselves when placed together, so shapes where some pieces do not need to be resting against the desk are possible. I promise that there’s nothing out of view of the camera holding the pieces up.

Diagra

The eight pieces of the Diagra puzzle

The eight pieces of the Diagra puzzle

Similar in design to the Twisted Halfcubes, here the hooks have been replaced by square blocks, meaning that all pieces slide into each other. The difference here to the Twisted puzzle is that coordinate motion solutions are now possible, as the pieces are no longer hooked to one another but slide together. Again, the interesting location of the ‘legs’ makes for some challenging goal shapes and the approach to joining the pieces together is different from the previous puzzle.

I would say that the basic shapes are easier in Diagra, and perhaps this is a more enjoyable set to play with since it’s faster to put the pieces together and take them apart than it is with Twisted Halfcubes. The challenge level does step up a notch when you start looking for the coordinate motion solutions though, so don’t underestimate the challenge from this one.

Diagra Super Cube solution

Diagra Super Cube solution

Diagra 'Heart" solution which required coordinate motion

Diagra 'Heart' solution - requires coordinate motion

Coordinate motion solutions in Diagra!

Coordinate motion solutions in Diagra!

As noted in the comments for the solution above on the right, a coordinate motion is required to make this shape. The image on the left shows how the three sub-units join together to make the final shape, and all slide together at the same time, with a satisfyingly smooth movement. Have a look at the very short video below to see this in action.


The beauty of these puzzles are that you’re limited only by your imagination as to the shapes you can create. These make a great set of building blocks, and just playing with connecting them in different orientations is as much fun as trying to create the specific patterns on the short instruction sheet provided. I’ve spent a lot of time doing just this, and as such find it a great stress toy when it’s a rough day at work!

You can order these puzzles directly from Vinco or through Puzzle Master, and I highly recommend any of the Halfcubes series. I will certainly be picking up more of them myself.

New Tools

Ridgid Table Saw R4512

Some of you who read my blog may already know that I had purchased a new table saw to add to my arsenal of woodworking tools, and that I’d had a few issues in getting it to me. I purchased this saw from Home Depot, they shipped it to me the next day, and it traveled from the east coast US, to San Jose in the West coast, over the weekend. It then sat in San Jose for a full week before it made it to my house. It was somewhere within 30 miles of me, but not at my house. This was frustrating to say the least, however Home Depot, also frustrated by the length of time to deliver refunded the delivery charges (which were not insignificant!). So thanks to Home Depot for that. Just change your carrier please!

Anyway, now that I have the saw I spent most of my Sunday building the saw, and setting it up. So for those who are interested, here’s my thoughts on setting up the saw, and the saw itself.

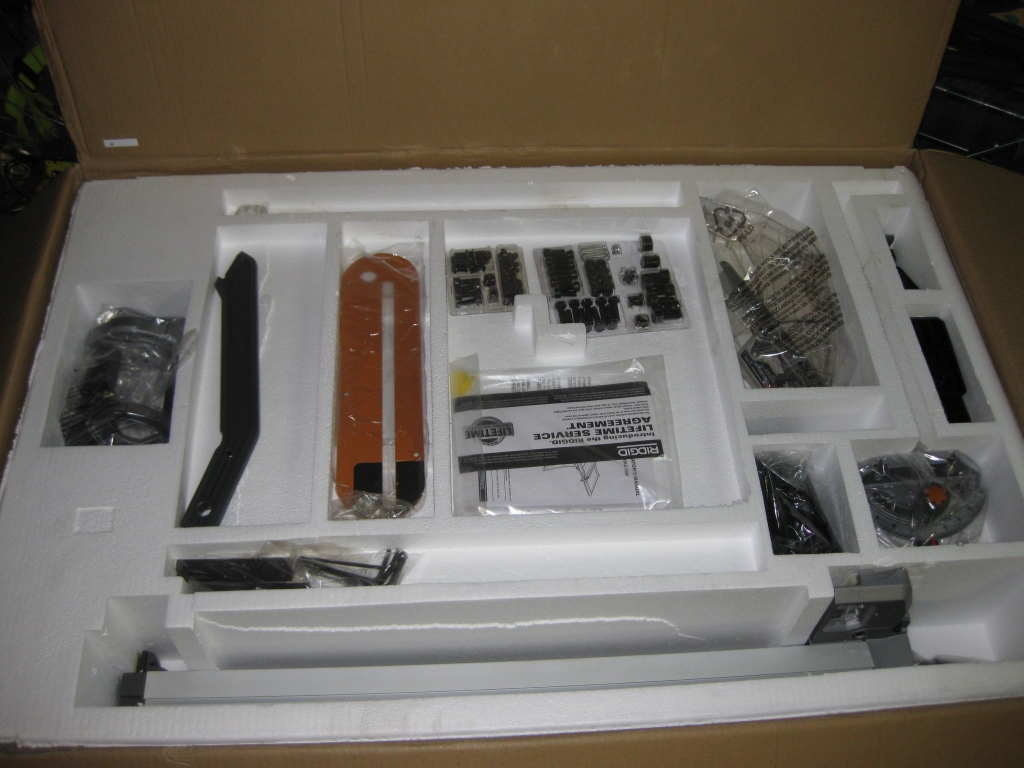
Opening the Box

Opening the Box

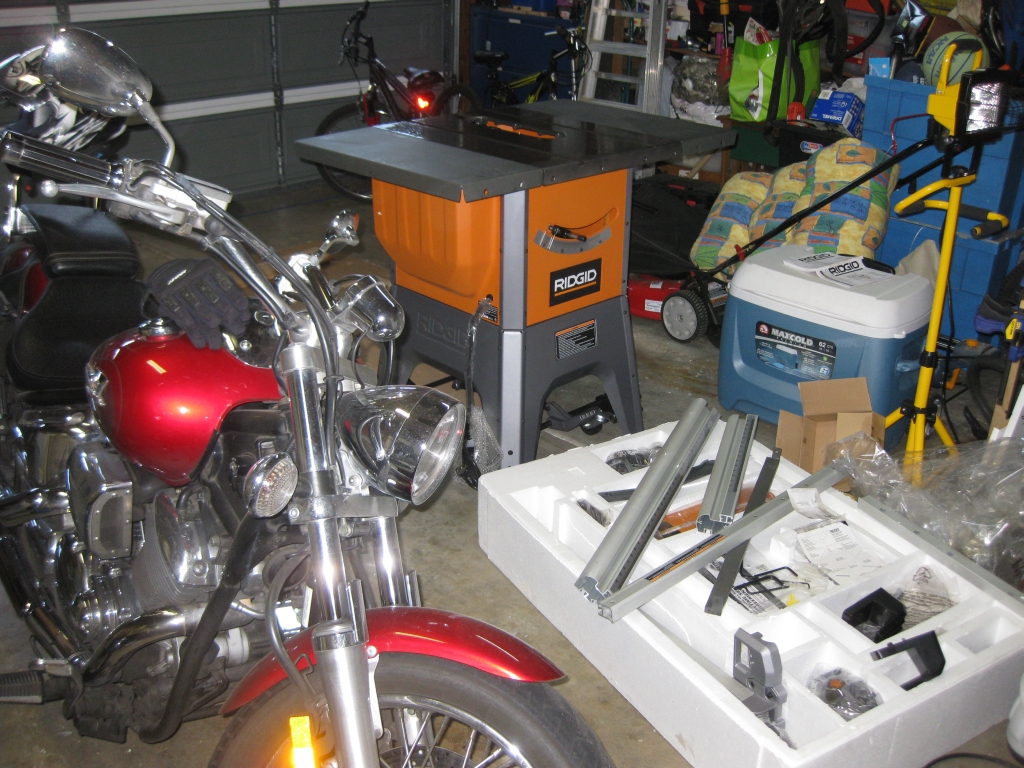
Opening the box and removing the top sheet of cardboard, you’re treated to an array of well separated parts. The fence, mitre, magnetic push stick instructions and screws all have their own spot. My only note here is that the spaces in the pre-formed polystyrene are a little large for a few items, which could lead to things sliding around more than necessary.

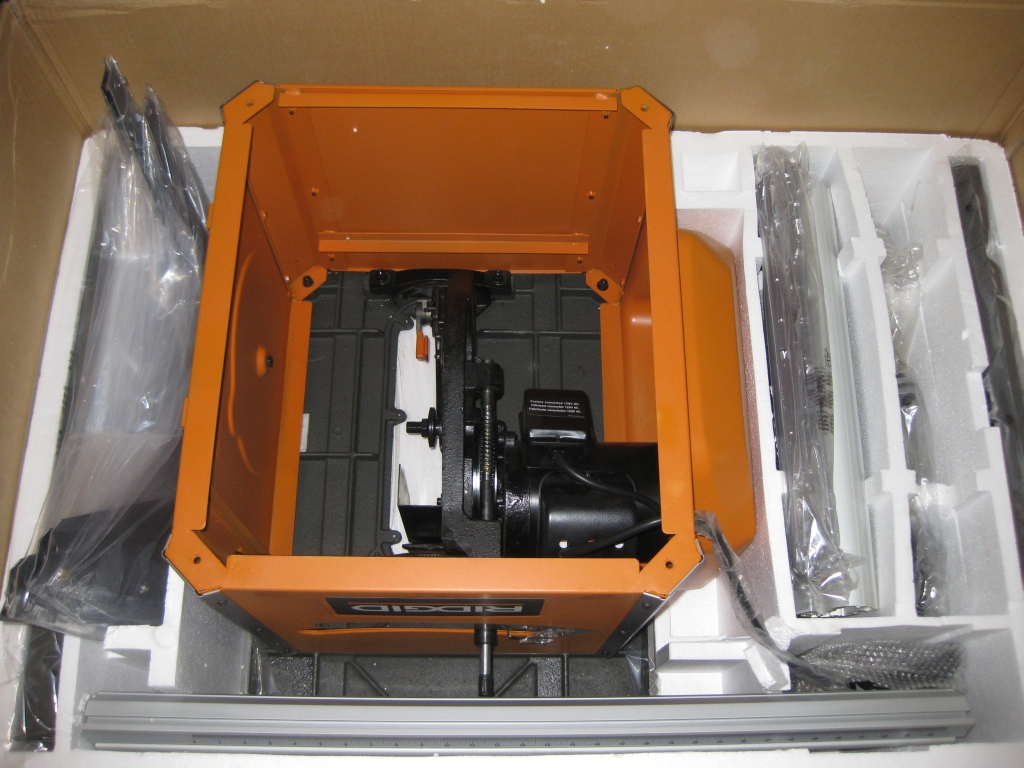
Opening the Box, revealing the saw itself

Opening the Box, revealing the saw itself

Having removed the top layer, the orange body of the saw is exposed along with all the legs and side panels that it will eventually sit on, and the rails for the fence. Again the packaging here isn’t perfect, as that front rail for the fence is rather free to bounce back and forth. Fortunately nothing was damaged. As you can see, the motor on the R4512 is now inside the case, unlike previous models where it was external.

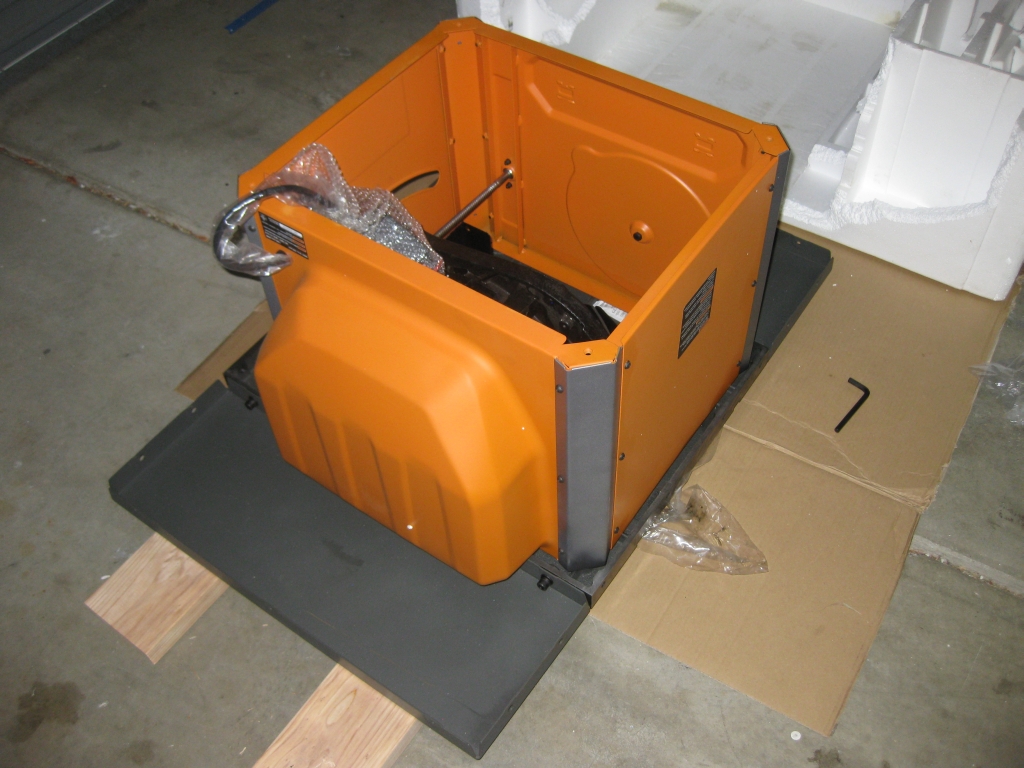
At this point, the instructions tell you to lift the saw out of the box onto two thick planks of wood. Lift …. seriously! I took down a 2×6 board of redwood I had, and ripped it in half to put the saw on as the instructions recommend, then slit the cardboard box open, and with some help, half slid, half lifted the saw onto the boards.

Taking the saw out of the box

Taking the saw out of the box

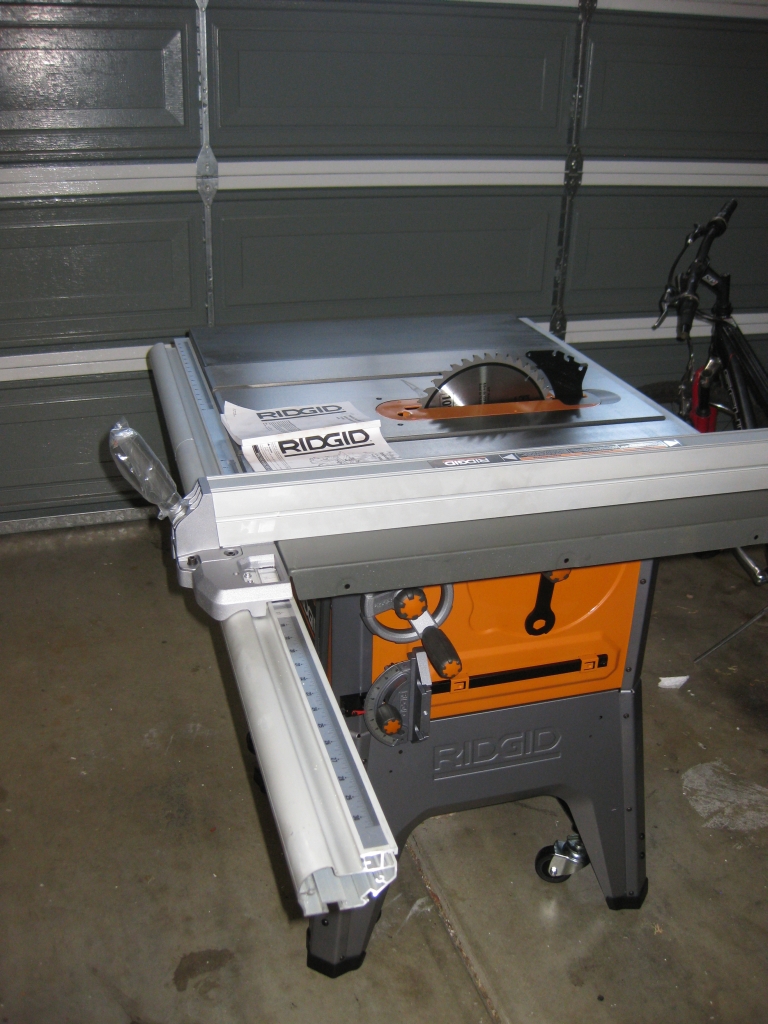
The boards that the saw is resting on are supposed to make assembly easier. It certainly helps for attaching the table top extensions. Here’s my first gripe. The extensions are steel, and not particularly thick steel at that. While the main table top is cast iron, clearly Ridgid have decided to save money and not supply cast iron extensions as they did on previous models. This may work to my advantage as I’m waiting on the Benchdog Router table extension to arrive, which will replace one wing, and allow be to attach the wing I remove to the other side. Given that the steel will be lighter, it should require less support.

Using the cardboard from the top of the box, I assembled the base. The instructions at this point however are pretty poor. Initially, I thought all the panels were the same size. WRONG. I realised this when I was putting the last panel in place and found I had a trapezoid, and not a square (or rectangle) as expected. After a quick adjustment, I was back on track. The instructions state that a particular panel is the front, so that’s fine. What they don’t tell you is that the two sides with the Ridgid name indented in them are different, and it matters (slightly) which one is where. Anyway, I didn’t realise this, and in the end it doesn’t matter, but it would have been nice if it was clearer.

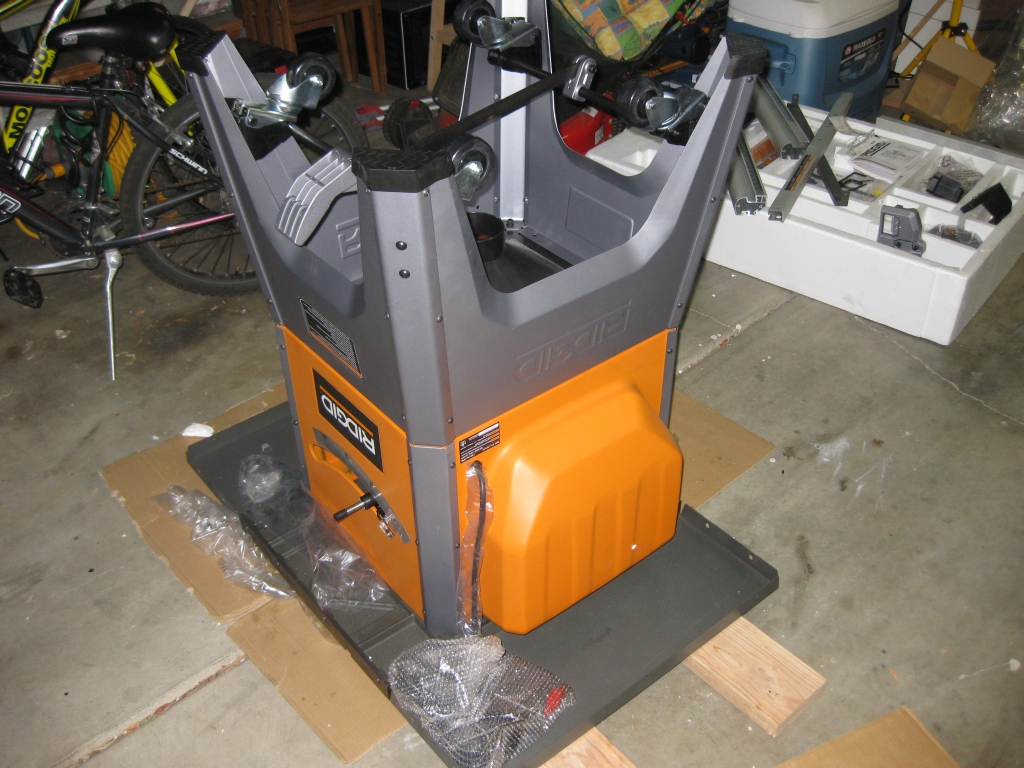
The saw with its legs and lift system assembled

The saw with its legs and lift system assembled

Legs assembled, and dust chute in place, the legs get placed onto the bottom of the saw, and screwed in place. Next up is the lift system to allow you to move the saw around. This is going to make things much easier for me, as I don’t have the space to keep the saw in a single location permanently (yet).

Again, the instructions completely fail here. When putting things together for the lift, the diagram shows the orientation of the pieces, but neglects to mention how the bar has to be rotated before putting the wheels on. As a result, I had all four wheels attached, then had to remove them and start again once it became clear that things weren’t going to work. Not a big problem, but the instructions could have been clearer here.

Getting the saw Upright

Getting the saw Upright

Now it’s time to get the saw upright. Knowing how heavy it is, I draft in some help in the form of my 16 year old son, and my fiancée. Very gently, and carefully the saw is first lowered onto its side, where my fiancée complains that she’s now covered in oil from the coating on the table top. (Perhaps laughing that this point wasn’t my best idea). Then we lift it up onto it’s feet. At this point, I realise just how high the saw is. It’s taller than I had expected, but actually sits at a really good height so you’re not bent over the saw when you’re working. Something that’s going to be important if I’m making lots of repetitive cuts for puzzle pieces.

Nearly there, and looking like a saw now

Nearly there, and looking like a saw now

The next few hours saw me assembling the rails for the fence, the blade, where I shed a little blood to the project, but not in the way you’d expect, and leveling up the extensions to give myself a flat surface across the entire table. Add to that cleaning the oil from the cast iron, and polishing the surface up, and we have a nearly ready saw. So how did I shed blood? Well when installing the blade (I’m still waiting for my new Freud blades to arrive) you have to release the lock for the splitter at the back of the saw. I did so, and unfortunately, caught the skin of my thumb on that splitter as it’s a really tight mechanism. Cursing (more because I was now bleeding on the saw than anything else) I stuck a plaster over it to prevent any further blood getting on the saw and continued assembly.

This is where I found out about the panels on the base needing to be in the opposite orientation. You might see in the picture above the holes either side of the Ridgid name. These are for two brackets which presumably hold the power cable when not plugged in. Needless to say I didn’t bother adding these.

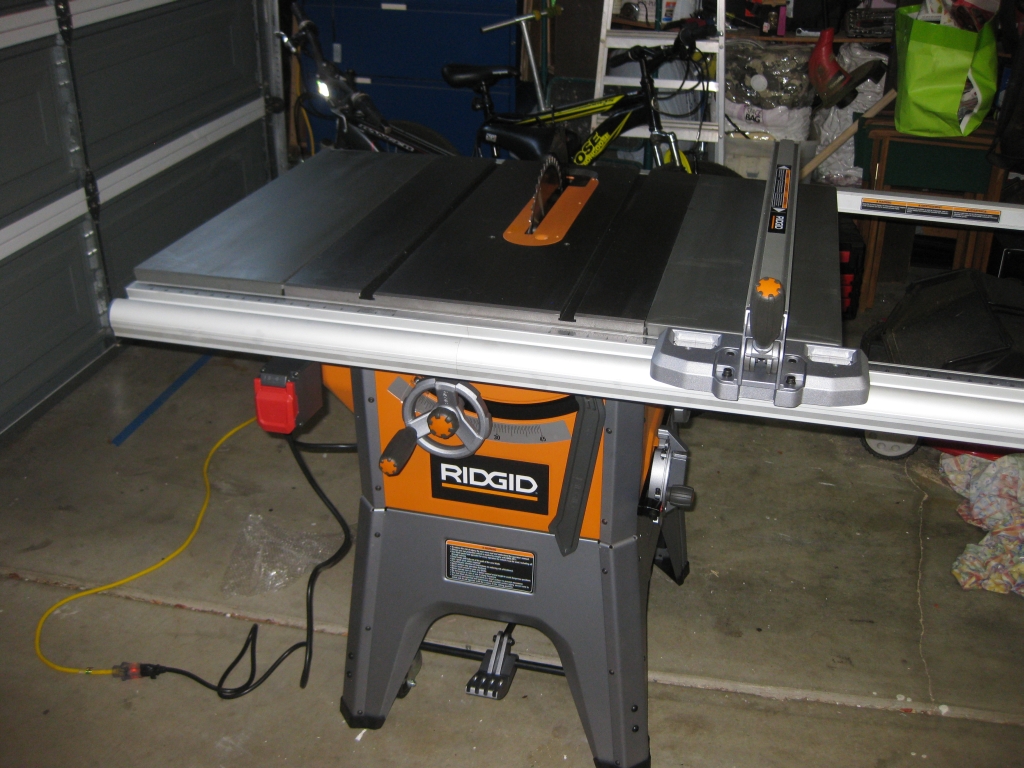
You’ll also notice that the saw has a built in Blade and spanner storage right on the side of the saw. I doubt I’ll put my spare blades there, but the tools will certainly be kept where I’ll not lose them. The miter also slides into some convenient storage on the side of the case as well, keeping it handy, but out of the way.

Ready to cut

Ready to cut

The last thing to do was to install the power switch which hangs from the front rail and turn the saw on. There is a nice touch on the power switch in that it is protected by a larger flap which means turning the saw on requires you to lift the top flap to get to the main power switch (which comes with the usual cutoff key), but turning the saw off you just need to press the larger outer flap. A nice safety feature, and a simple but useful touch.

Included are a kickback prevention attachment, and a blade guard. I haven’t put either of these on the saw since most of my work will be using jigs, so these are just going to be in the way.

So everything together it was time to plug the saw in and turn it on. That’s exactly what I did. The video below is the first time the saw was turned on. The blade isn’t wobbling, it’s just that grey band round the saw isn’t uniform all round the blade, so the optical illusion is that it’s off centre. Honestly, it’s not!

Puzzle Master Trick Locks 1-5

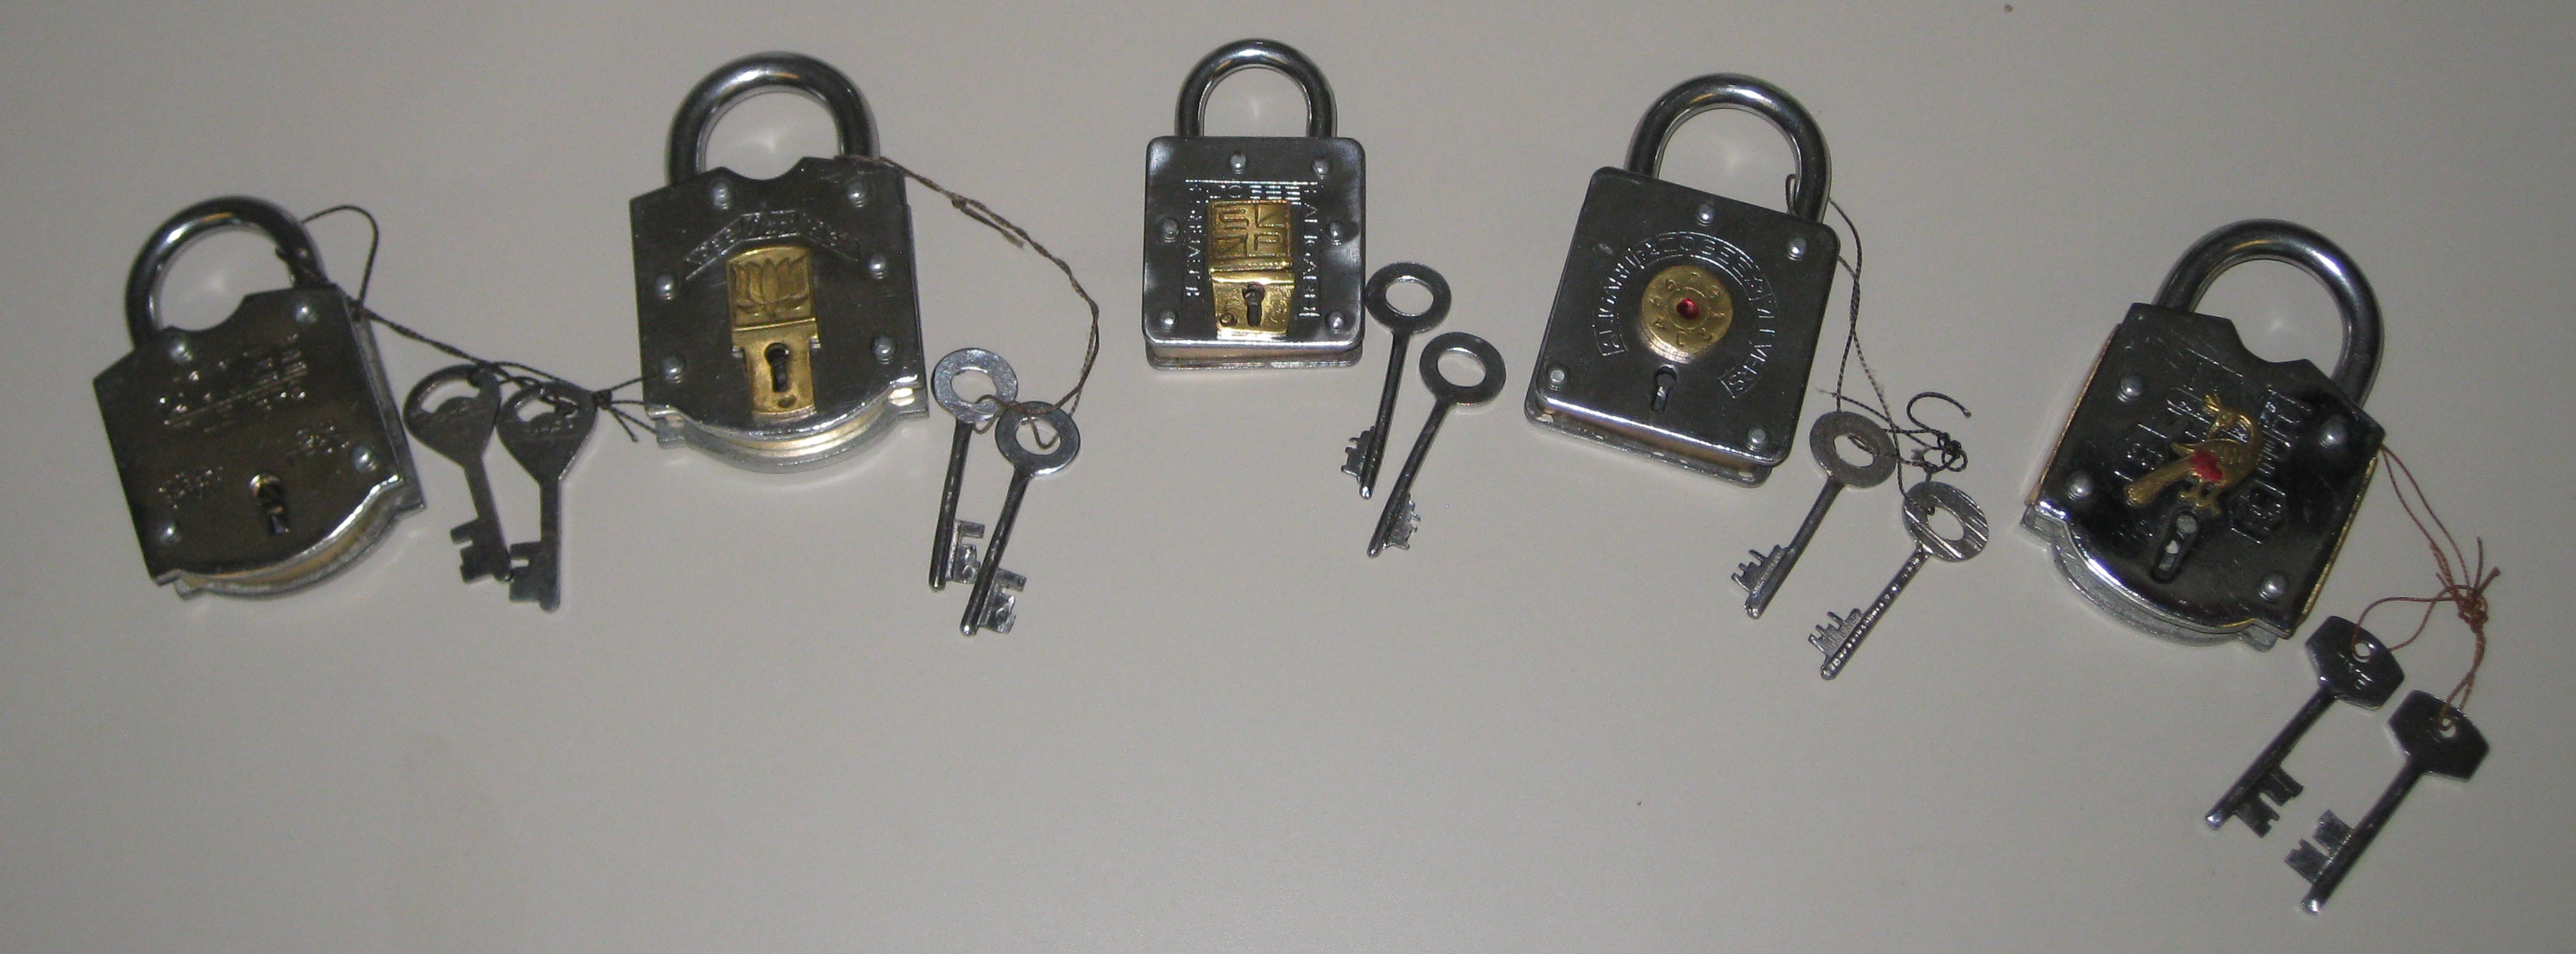
I recently borrowed a set of five Puzzle Master Trick Locks from fellow puzzler Brian Pletcher, through the Puzzle Library run at Renegade Puzzlers. Brian has already reviewed the locks, so check his series of reviews here. Jeff Chiou had the locks before me so I met him over lunch to talk about puzzles and for him to pass on the locks to me, since we work fairly close to one another. Read his thoughts on his blog here

All 5 Puzzle Locks

All 5 Puzzle Locks, from left to right - 1, 3, 2, 4, 5.

Edge Closeup

Edge Closeup

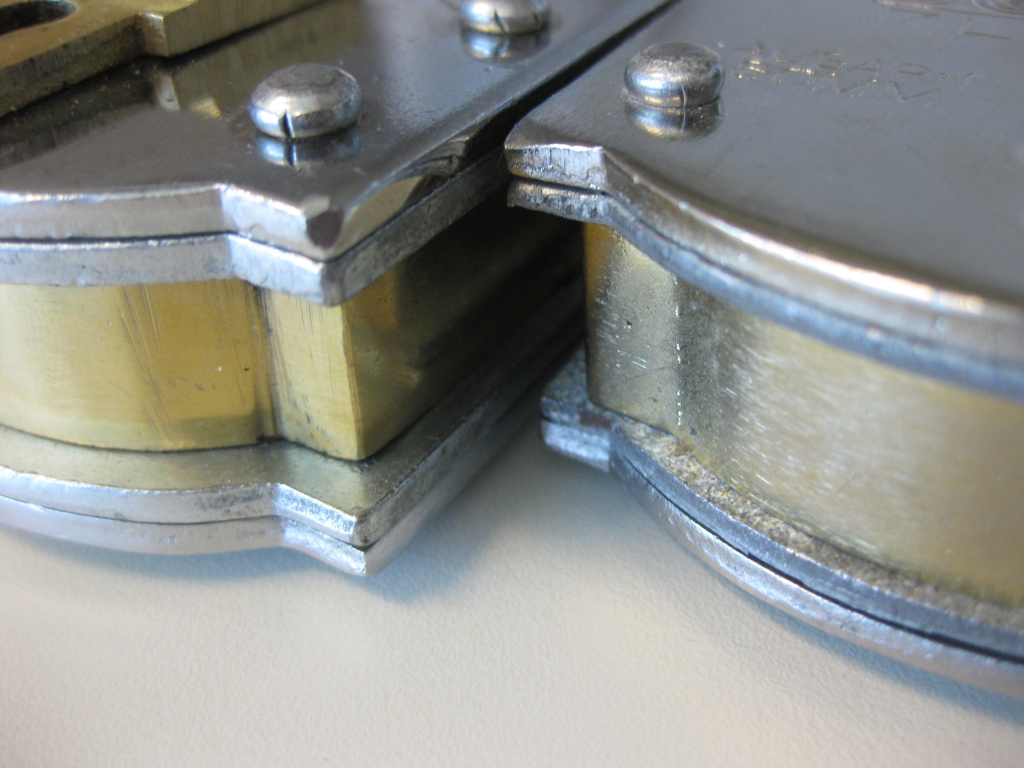
The first thing to note with all of these locks is that they are all solid. They’re constructed from double thick steel plate and brass riveted into stacks as you can see on the right. That gives them a very solid feel, and significant weight to each lock. One thing to note from that however is that it doesn’t mean that these are high quality locks. The fit and finish is rough giving the locks a ‘well used’ feel to them. The keys for the locks seem flimsy by comparison to the build of the locks themselves. Priced between $20 and $30 per lock these aren’t the cheapest puzzles out there, but they are on the low end of the scale when it comes to puzzle locks. That is somewhat reflected in the level of difficulty of the puzzle, as I’d classify all of these as easy. I’m not a trick lock expert, however I opened all of these very quickly. The locks come from India, and to my knowledge, Puzzle Master is the only place to buy them currently.

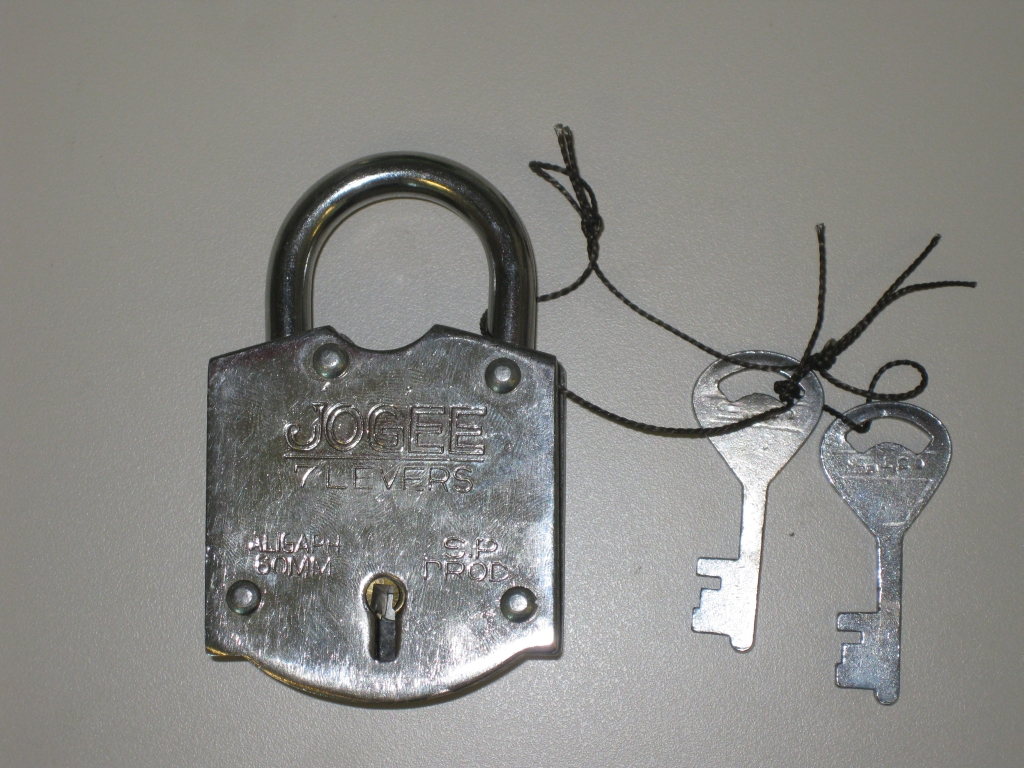
Trick Lock #1

Trick Lock 1

Trick Lock 1

The first of the trick locks is the most traditional looking lock of the set. From the front, there’s nothing unusual, however inserting the key and turning in any direction isn’t going to get you far. The secret to this lock isn’t well hidden, and really is my one big problem with this lock. Had the secret been hidden better, this would have been a far better puzzle lock.

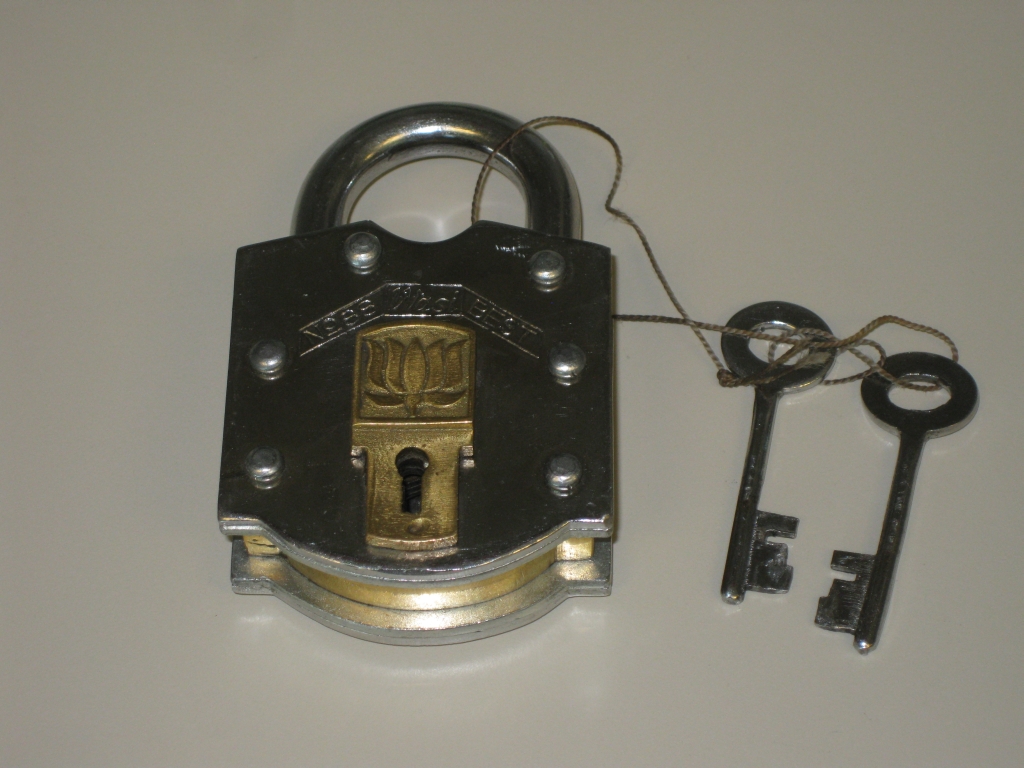
Trick Lock #2

Trick Lock 2

Trick Lock 2

The second lock in the series is both the smallest and lightest of the locks. Inserting the key into the lock you’ll find that it doesn’t even turn so clearly that’s not the solution. This has a novel mechanism which may catch some people out as it’s not entirely obvious. The fit of the mechanism lets it down slightly , but also helps to throw you off the scent as things which really shouldn’t move, do. The back of this lock gives the puzzler a hint as to its solution, however the mark on the back is subtle, and may be easily missed as a manufacturing defect. Given it’s location I’m inclined to believe it was a hint rather than a flaw.

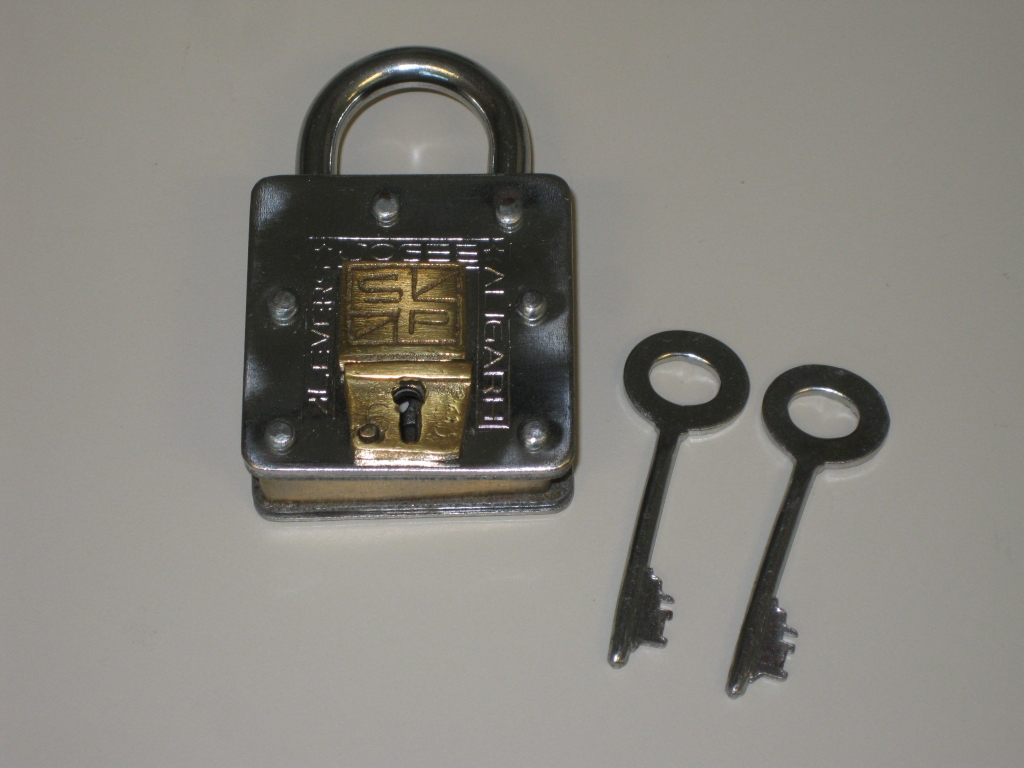
Trick Lock #3

Trick Lock 3

Trick Lock 3

The third lock in the series is a fun lock. The mechanism isn’t obvious, and is possibly the best hidden of the series. I have to agree with Brian’s review that it is entirely possible to open this lock without knowing how you did so, and given that, not reset it back to it’s locked state. The stylised front adds a nice feature and is probably my favorite aesthetically in the series. Again, it’s not a difficult puzzle, and the solution isn’t obvious so this may keep some people guessing.

Trick Lock #4

Trick Lock 4

Trick Lock 4

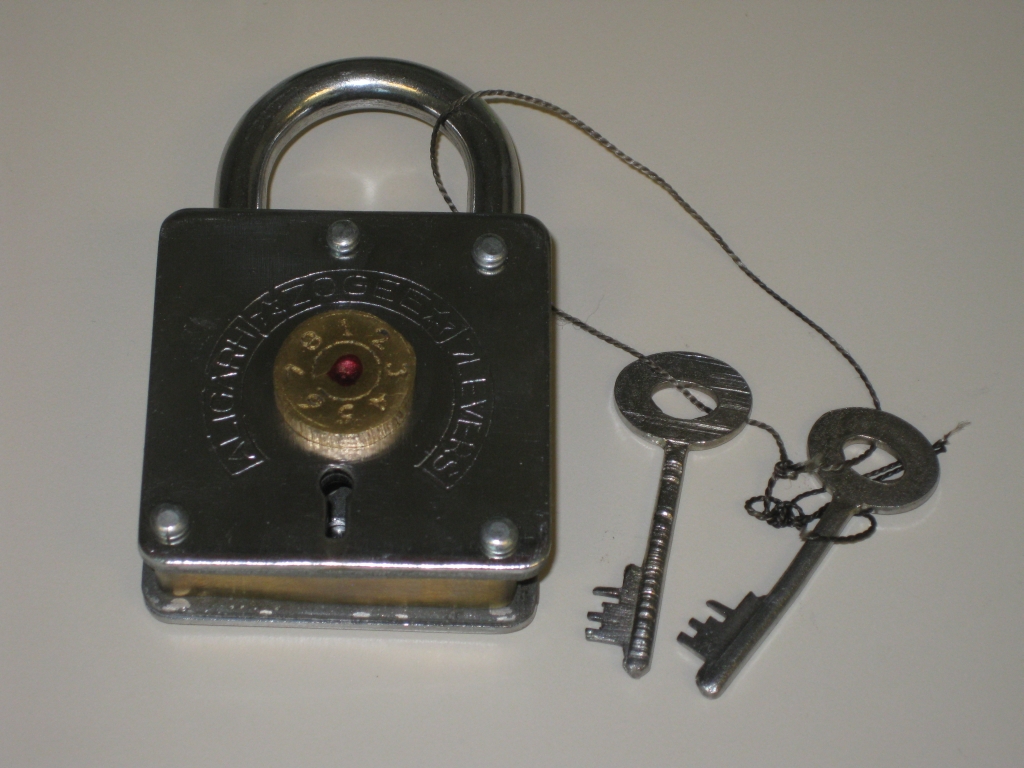
Number four is an interesting lock, with a combination dial on the front face. Again, the back of the lock will come in handy when trying to solve this lock, as there’s a handy clue stamped into the back for you if you’re paying attention. The dial itself is fairly roughly cut and etched with the numbers 1-8, plus a red splodge of ink in the centre. I don’t much care for the red ink, as it really doesn’t add anything, and isn’t particularly well applied. The dial on this particular lock is incredibly stiff, but it is possible to rotate it 360 degrees. It’s easier to stop at 8 and reverse your direction rather than trying to keep going however, so I’d recommend that approach. This is very similar to #2 in the series in terms of opening the lock, but the mechanism is different enough to be worth opening even after solving the earlier lock.

Trick Lock #5

Trick Lock 5

Trick Lock 5

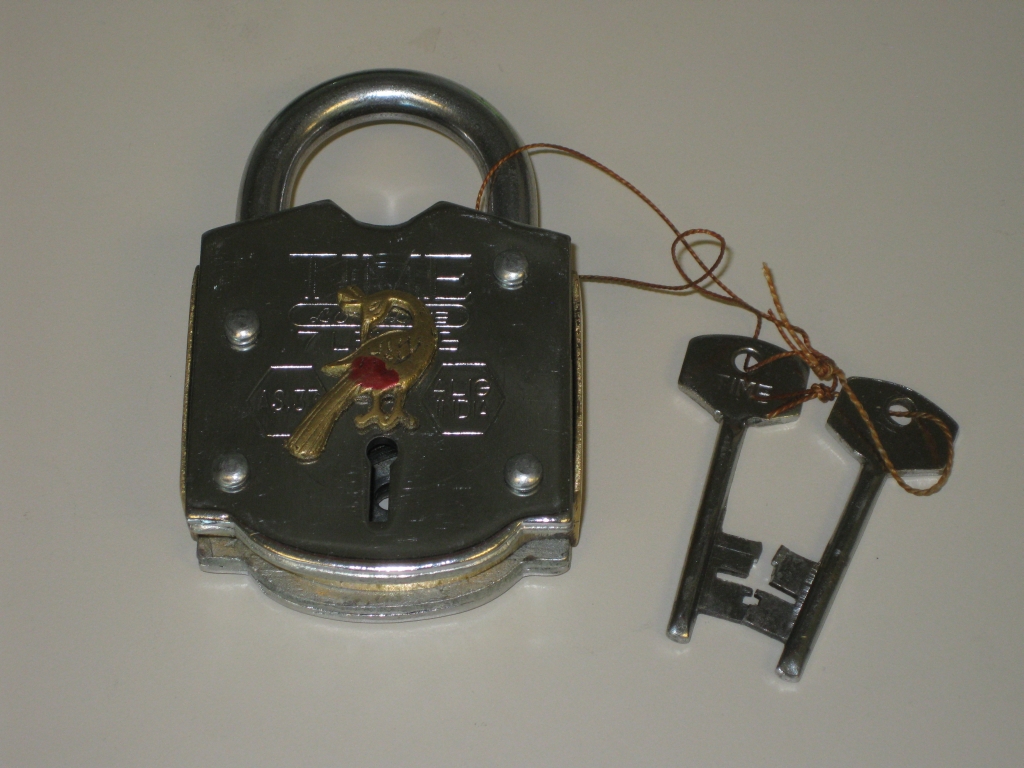
The final lock in the series is the heftiest lock in the set, and the central core of this one looks to be hewn from a solid block of brass, unlike the other locks, which use thinner plate bent to shape. The bird on the front has again been splashed with some badly applied red ink, which really does nothing for the look of the puzzle. This time there’s no obvious hints on the back of the puzzle, so you’re on your own with this one. It’s not the most difficult of locks, but could keep you busy for some time trying to understand how the mechanism works. Even though you can see clearly into the guts of this lock, you’ll not find any clues there either. This is probably my favorite, as it’s the most challenging lock in the series.

Impossible Cubes

There’s been quite a lot of talk on a few of the forums I frequent over the last few months about impossible objects. These are things like packs of cards inside a glass bottle, still with the clear plastic wrapper on them, solid wooden arrows through bottles, and other such seemingly impossible items.

Some time ago, I created a couple of impossible objects as I had just bought some woodworking tools, and wanted a simple project.

Impossible Cubes

Impossible Cubes

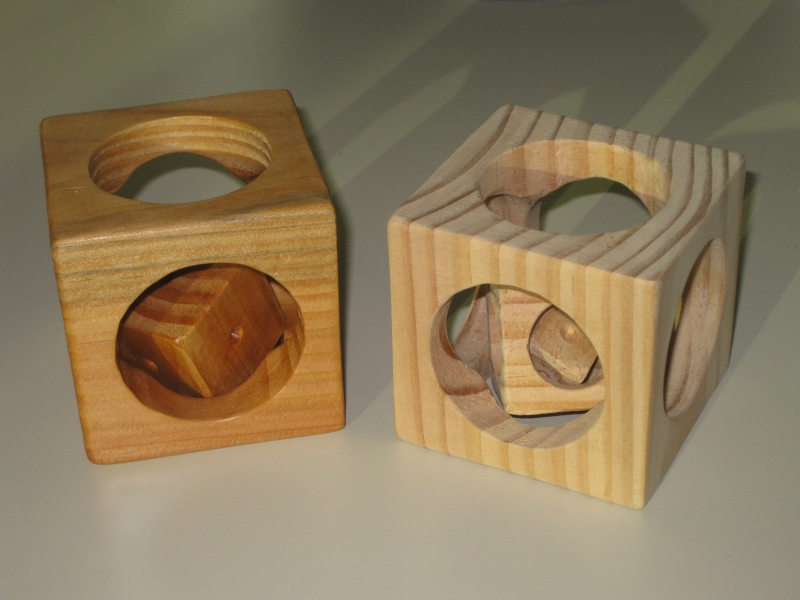
I’ll not explain how these are made, since there’s plenty of videos out there showing how it’s done, but the interesting thing about these is that the small cube trapped inside is too large to fit through the holes, making it a seemingly impossible object. The wood is the same for both of these, the only difference is that the one on the left has had a couple of coats of shellac added.

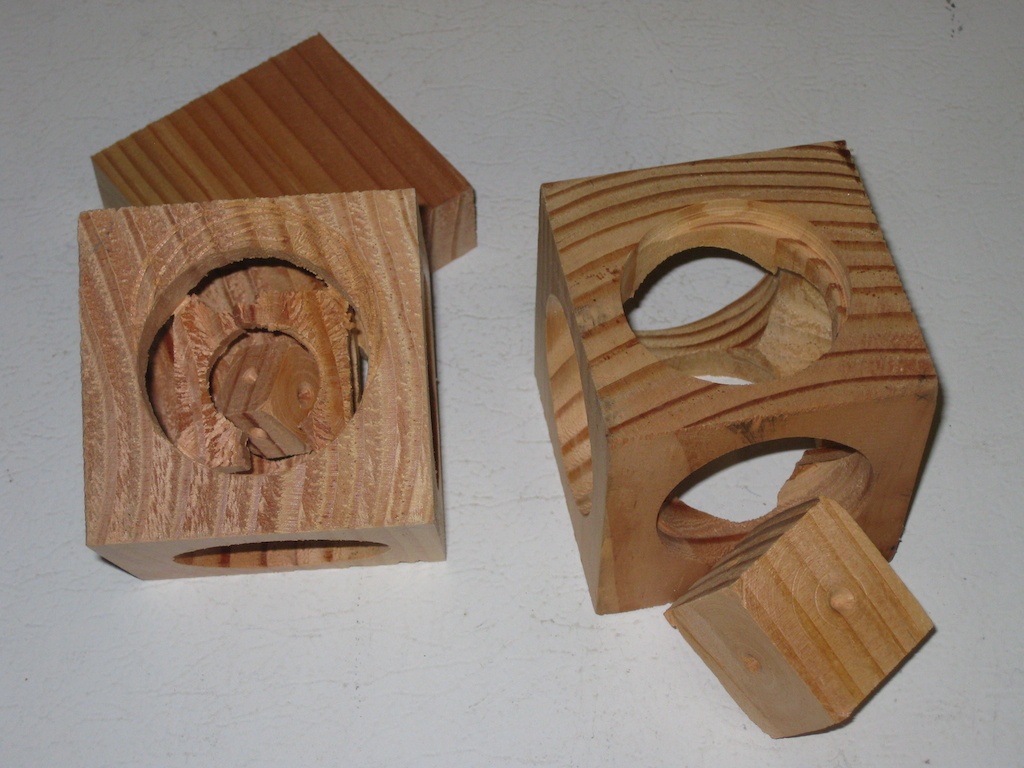
Having created the one on the left, I decided to see if I could go one further. The Cube on the right is the result of attempt number 2. The first attempt didn’t go too well as you can see below.

Impossible Fails

Impossible Fails

The problem with creating such an object in wood is that the end grain is much harder to cut through than the face grain is. As such, weak points appear in the outer cube, and care has to be taken when working on it. I found that by cutting through the end grain first I could minimise problems, as you have the maximum amount of wood supporting the most difficult cut, which reduces the chances of failure.

While I’m not suggesting that these are in any way masterpieces, or a wonderful showcase of my woodworking skills, they are a fun project that you can create in under an hour if you are so inclined. Hand it to and adult and they’ll try to figure out how to remove the inner cube. Hand it to a child, and they’ll roll it around like a die with no care for the internals.

The short video below shows the internal cubes rolling around inside their wooden prison.