Tag Archives: Burr

Blind Burr

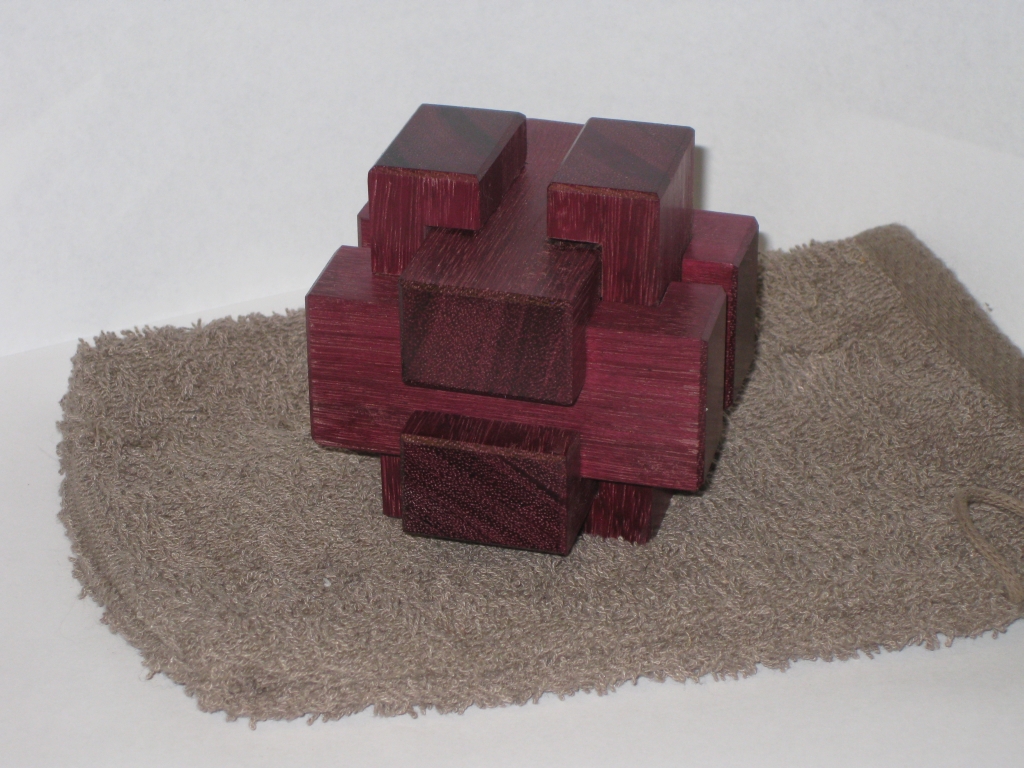
One of the Top 10 Vote Getters at this years IPP design competition was the Blind Burr, designed by Gregory Benedetti and made by Maurice Vigouroux. I had the great pleasure of being able to talk to Gregory about his puzzle designs and certainly enjoyed playing with his entry in the puzzle competition, so when I had the chance to pick one up on the day of the puzzle party, I didn’t hesitate.

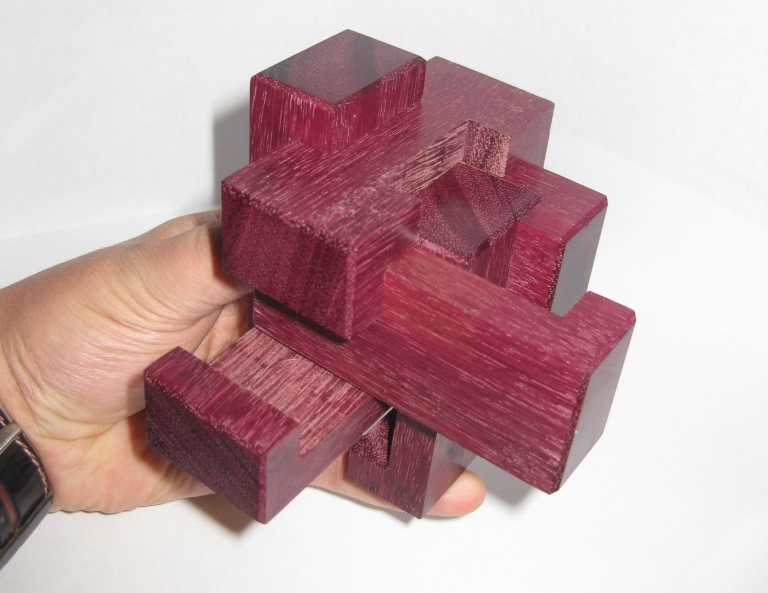
Blind Burr by Gregory Benedetti

Blind Burr by Gregory Benedetti

Made from some beautiful slabs of purple heart, the puzzle measures 3.25″ x 3.25″ x 3.25″. Each piece is cut from a solid chunk of purple heart, measuring a full inch thick, so the pieces are incredibly sturdy and finished to the high standard that is common for work from Maurice Vigouroux. Each of the pieces is polished to a high shine, and the ends of the pieces have been chamfered to really finish the puzzle nicely.

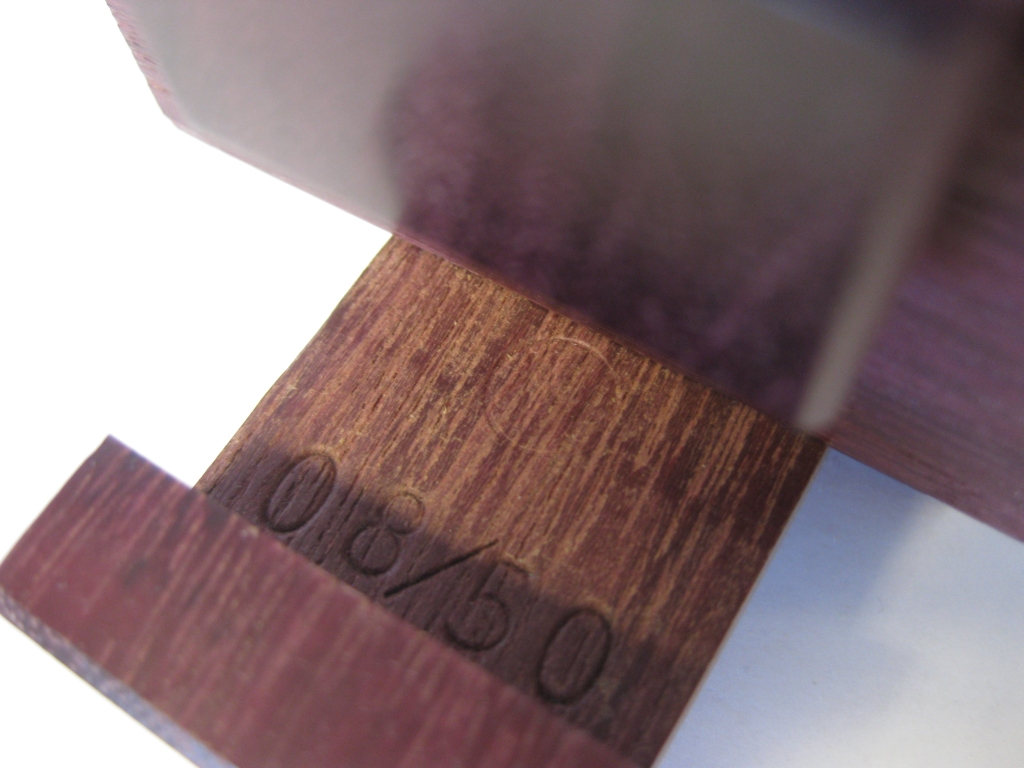
Limited edition number and Maurice's stamp

Limited edition number and Maurice’s stamp

As you can see each puzzle was numbered in a limited edition of 50, and the number is stamped into the wood, along with Maurice’s signature. There was a very interesting discussion on one of the Puzzle Forum’s about what makes a puzzle Limited Edition, which showed that there are many definitions to many different people. It turns out that in this case it’s limited because Maurice agreed to make 50, and no more! The reason why is fairly obvious when you start to play with the puzzle.

I’ve probably mentioned before that I’m not a huge Burr puzzle fan. There’s many other puzzle types out there that I get far more excited about than Burrs. So why did I make sure to get a copy of this one. And why’s it called a Blind Burr …. in my experience pretty much all Burr’s are blind. Well I’m not sure I can answer the second question, but I will answer the first. And the answer is pretty simple, this is no ordinary burr!

Edit: I can’t answer why it’s called the Blind Burr, but Greg did. Check out the comments for the answer!

Lots of movement but little progress

Lots of movement but little progress

Immediately on picking up the puzzle, you find that there are three pieces which are pretty loose, and move a fair distance. Looking at the inner part of the piece which slides out you’ll see it’s completely smooth, so whatever burrs exist, they are only in the top 1/3 of the piece which remains hidden in the centre of the puzzle. Of course all of this movement doesn’t really help much, as there is no movement at all in the remaining three pieces. Strange and definitely not an average burr.

Despite the piece on the right in the image above leaving enough space for the top piece to slide over it, that piece won’t budge. Something in there is keeping it in place and there’s no real hint of movement. Time to go back to the drawing board and figure out what else can move in the puzzle.

After some feeling around, you start to see that there may be another way to make progress, and sure enough that yields a little more movement in one of the pieces, and after that the rest of the puzzle will come apart using coordinate motion. It’s a really beautiful movement if not particularly difficult, and well worth the time to understand.

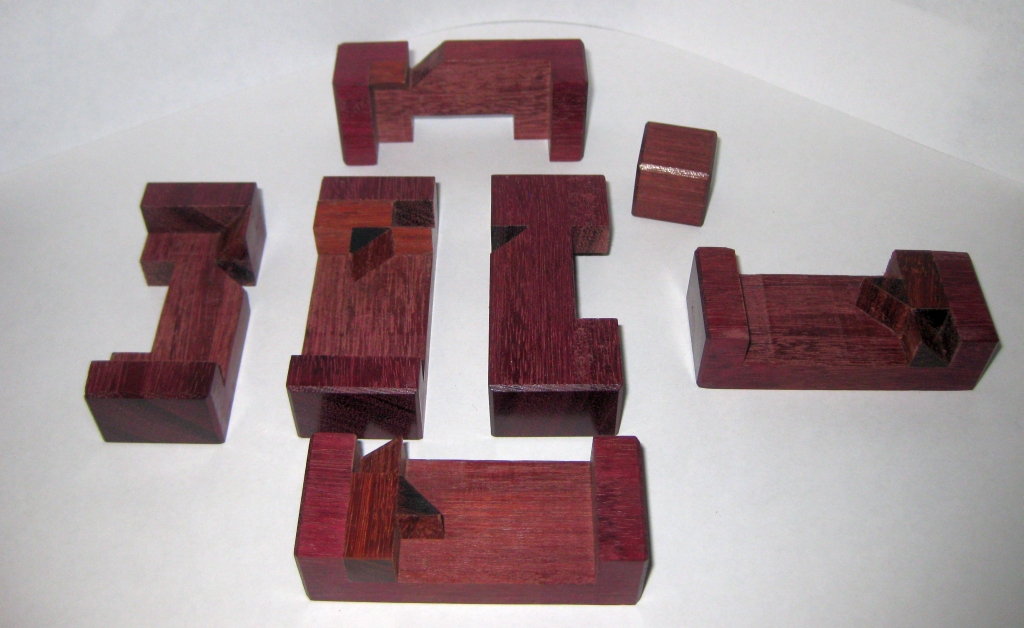
The pieces of the Blind burr (some details hidden)

The pieces of the Blind burr (some details hidden)

I don’t want to give too much away, as the discovery of the puzzle mechanism is a joy but you can see the seven pieces which make up the puzzle, with some familiar 45 degree blocks in there which are used in the coordinate motion. That cube was a bit of a surprise!

Putting the puzzle back together is marginally trickier than taking it apart as some dexterity is required during the assembly, and despite taking it apart and putting it back together a number of times now, I still struggle a little to get the first three pieces aligned correctly.

All in all it’s a great design, and rather deserving of its Top 10 vote. All of these are currently sold, but if you see one come up for sale, grab it. It really is a fun puzzle, and even for a non-Burr fan like me, you’ll enjoy it.
Tubular Burr

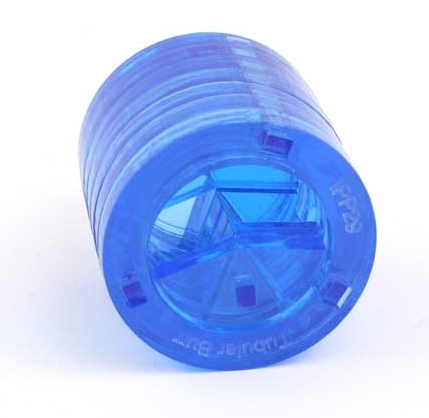
The Tubular Burr is a 3D printed puzzle, created by a good friend of mine Derek Bosch. The goal of the puzzle is simple. Remove the two black pieces from the cylinder and put them back. Derek kindly gave me this version when I gave him a copy of the Involute puzzle by Stewart Coffin I made recently.

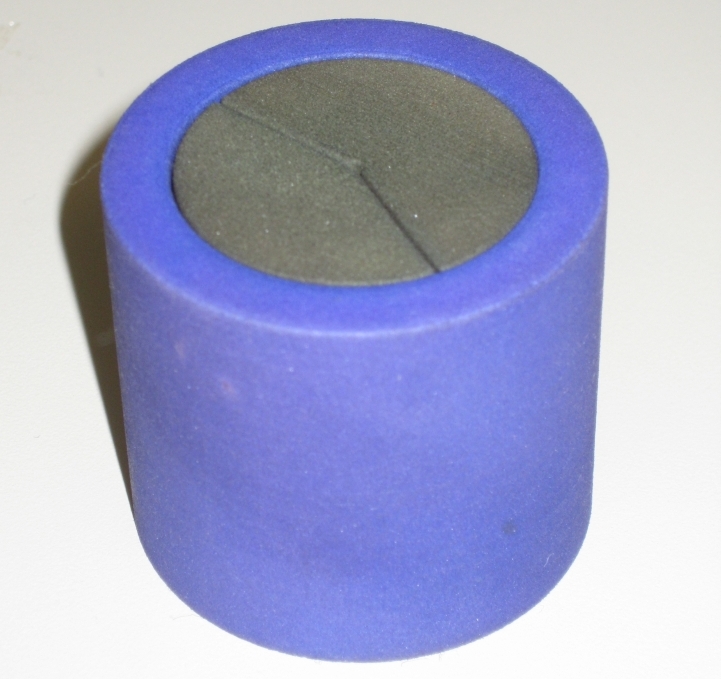
Tubular Burr by Derek Bosch

Tubular Burr by Derek Bosch

Measuring 1.5″ tall x 1.75″ diameter it’s a good sized puzzle, and as you can see from the photos, having the puzzle dyed with different coloured pieces from the cylinder really makes the puzzle pop. The White Strong and Flexible material really stands up well in the puzzle, and despite the model being hollow, there’s no worry about anything breaking.

Inside the cylinder are a couple of notches, and both pieces are also notched. These notches all interact with one another inside the cylinder to make for a fairly tricky puzzle. Don’t be put off by the fact that this is a 3 piece puzzle. I’ll attest to it not being easy to solve. (See my later comments on that!) It total it takes 14 moves to re-assemble the puzzle so it’s a good challenge.

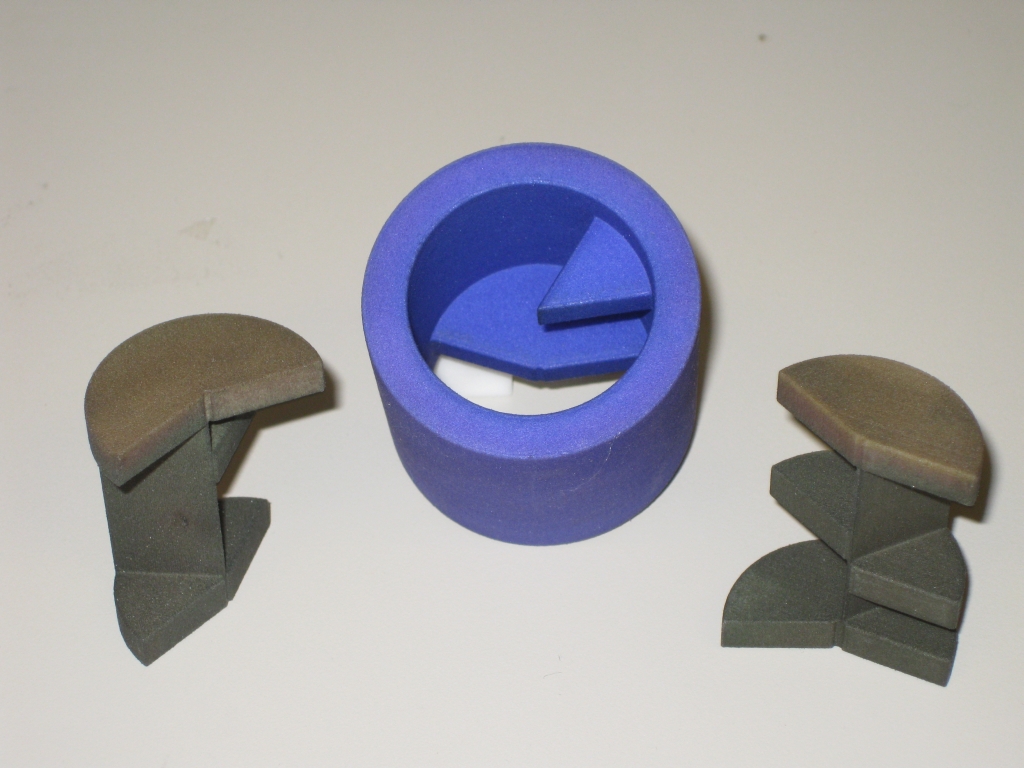
Tubular Burr Open

Tubular Burr Open

Tubular Burr IPP Entry

Tubular Burr IPP Entry

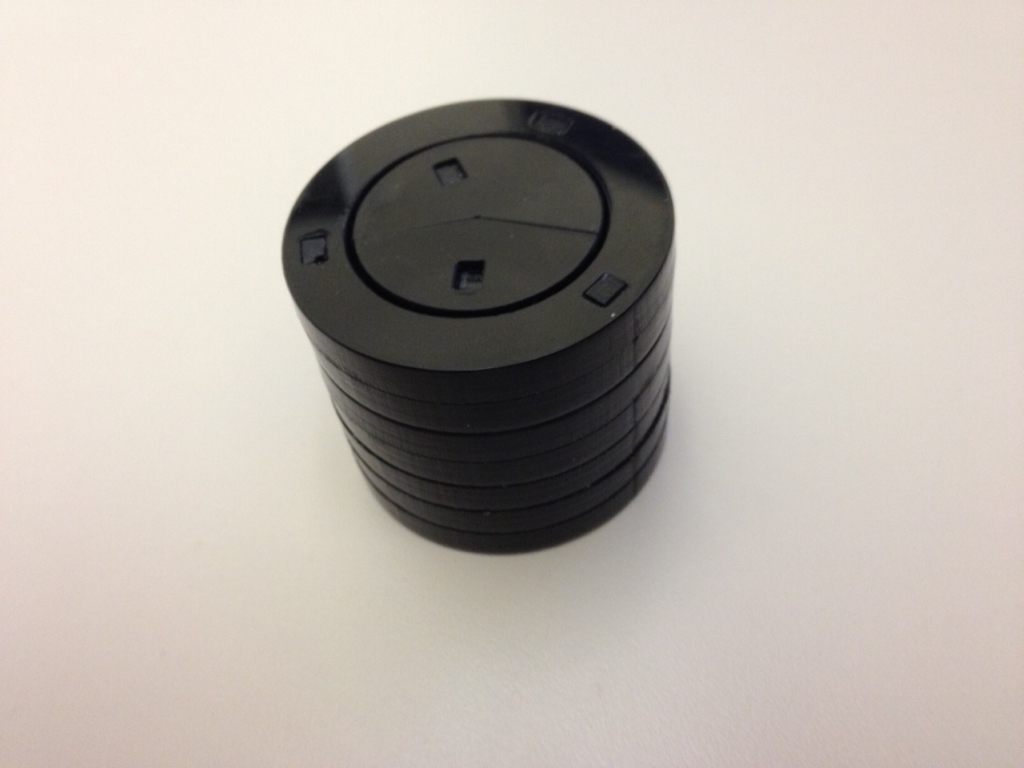
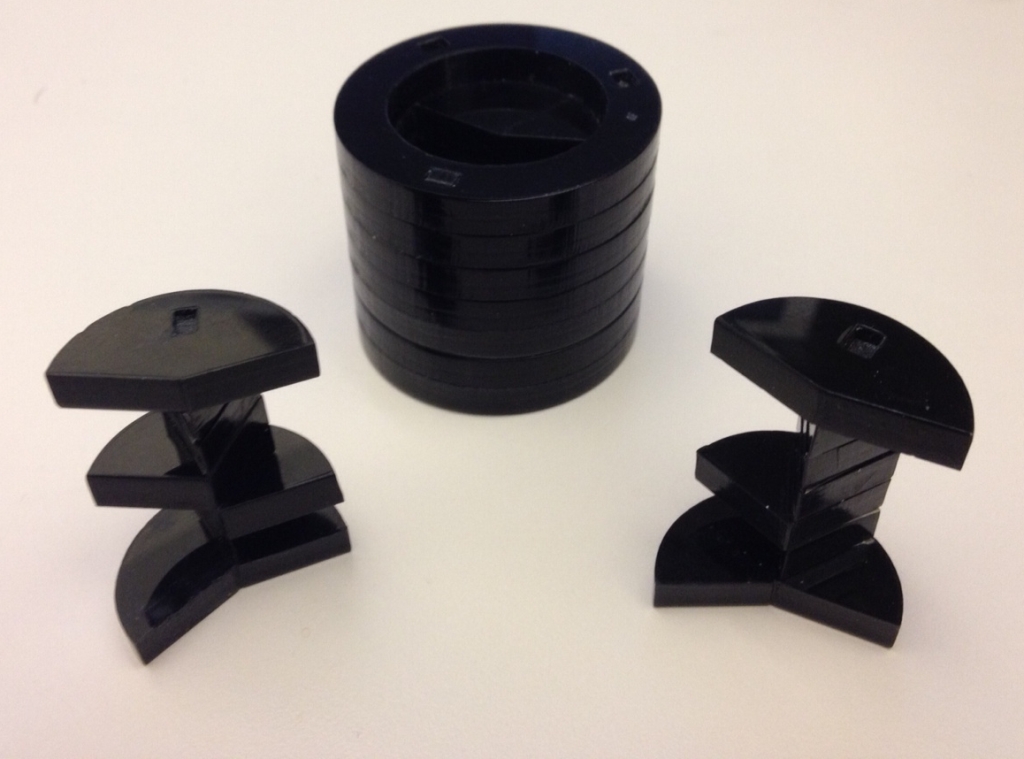
Derek originally created this for IPP29 in San Francisco as his design puzzle entry, where it was created from sheets of laser cut acrylic which were glued together. He also used it as his Exchange party puzzle that year too. The puzzles for the IPP were created from a clear blue acrylic, however the first time I was able to play with this puzzle was with Derek’s prototype “Darth Vader” version which is made from solid black acrylic. If I’m honest, I love this clear version, and can only imagine that it makes things even more infuriating as you can see everything that’s going on inside the cylinder! Truly an excellent puzzle as nothing is hidden.


Darth Vader Prototype

Darth Vader Prototype

Darth Vader Prototype pieces

Darth Vader Prototype pieces


Derek first gave me this puzzle to play with one morning at work, and I took the pieces apart and placed all three pieces back on his desk. He told me that wasn’t good enough, put it back to the way it was when he handed it to me. When I first played with the puzzle it took me around 5 minutes to take the pieces out of the cylinder, and less than a minute to put the pieces back in. When I handed it back to Derek less than a minute after he’d told me to put it back, he was astonished. I had put it back together far faster than anyone else had, and generally, he notes that it’s much harder to put the pieces back in than it is to remove them.

I can confirm that having played around with the copy Derek gave me, I’ve not repeated this incredibly fast re-assembly, and in fact the second attempt took me a good 20 minutes to put the pieces back in! (going back to the Involute I gave him, he’s still not taken it apart in over 2 months, so I think on average I’m still up – or rather Stewart Coffin is!)

Going back and resolving it several times now, it still takes me on average 5-10 minutes to put it back together, so perhaps my first attempt was beginners luck! I am getting quicker as I remember the solution but I get the feeling that leave this for a few months and come back to it and you’ll still find it a challenge every time.

This is a great little puzzle, and is well worth picking up a copy if you weren’t lucky enough to be part of the IPP exchange. Visit Derek’s Shapeways Shop to pick one up, or one of his Maze Cubes. They’re offered both dyed and undyed, and while frustrating me that I didn’t solve it as quickly the second time, it proves that it’s not a simple puzzle, and well worth owning.

The Wine Barrel Puzzle

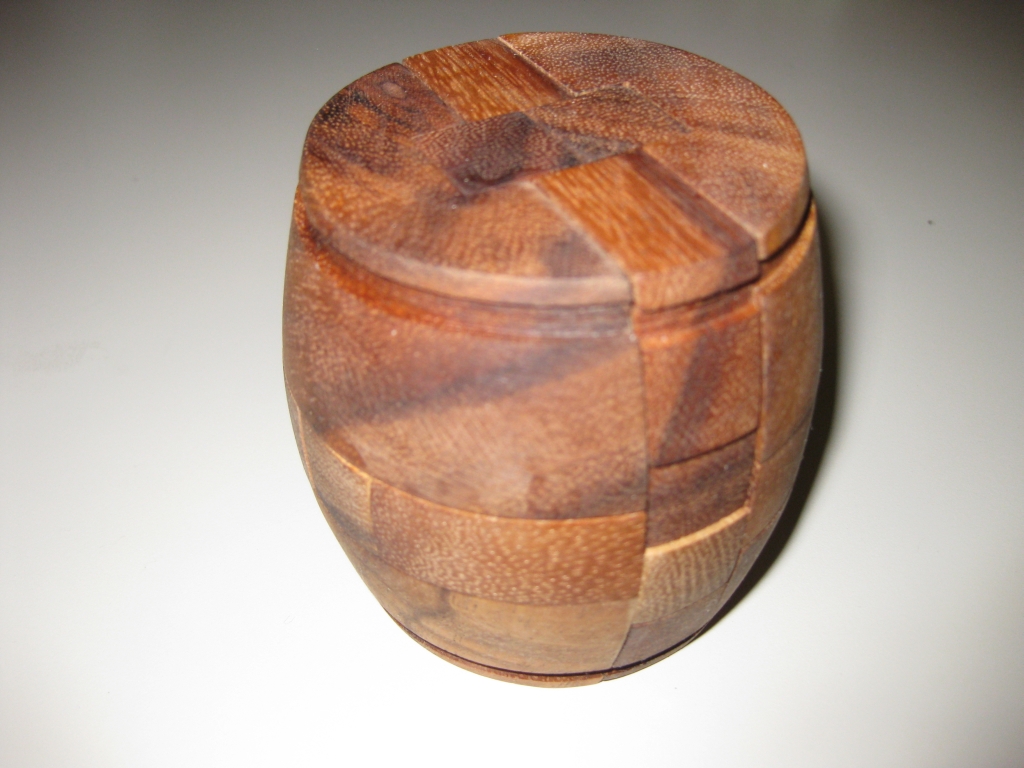
The Wine Barrel Puzzle is a 12 piece Burr Puzzle, and another of the Puzzles I picked up while in Calico (Death Valley). This is a nicely made puzzle from Creative Crafthouse. To read about some of the other puzzles I bought while in Death Valley head here.

Wine Barrel Burr puzzle from Creative Crafthouse

Wine Barrel Burr puzzle from Creative Crafthouse

This is an old puzzle, dating in origin to somewhere around the early 1900’s, and is an interestingly turned burr. When assembling the puzzle, the last two pieces are inserted together to form a key piece which keeps the puzzle in its barrel shape, holding all 12 pieces together. Fairly easy to take apart, once you find the key pieces, as with most Burr style puzzles, this isn’t as easy to put back together, however the Creative Crafthouse version does come with the solution on a folded sheet of paper if you get stuck.

I’m no expert on Burr style puzzles, but I managed to put this back together in a very respectable 15 minutes, having left the pieces alone for a bit after dis-assembly, so it was less likely I could just remember how they came apart.

This particular puzzle is offered in two different sizes, and the one I have is around 3″ high, and 3″ in diameter, making this the large version. I have no idea what the wood used is, however it has a very interesting grain pattern, and makes for a nice looking puzzle.

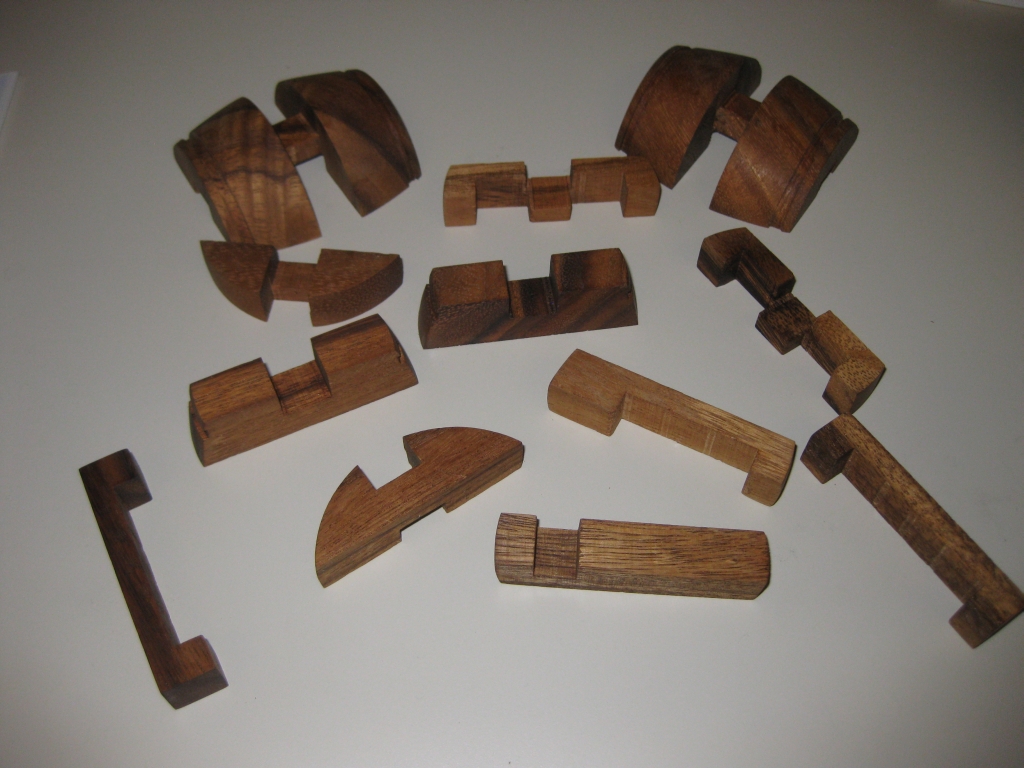
The 12 pieces of the puzzle

The 12 pieces of the puzzle

As I mentioned, the puzzle comes apart into 12 pieces, 5 pieces are pairs, which make up either side of the barrel, and the remaining two are unique. Overall, the build quality is fairly good. A couple of the pairs of pieces aren’t exactly the same size, so putting them into the solution back to front does leave a slightly misaligned finish, however it certainly doesn’t stop the puzzle going together very smoothly.

Slight damage on one piece

Slight damage on one piece

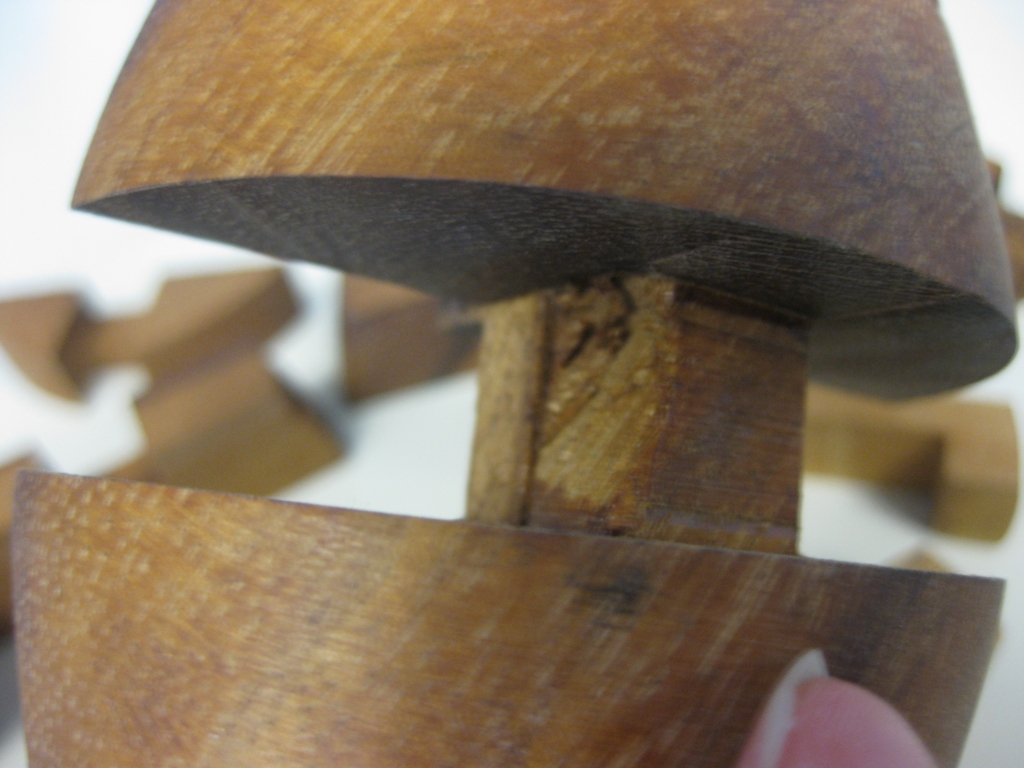
On one of the larger pieces in my copy, there’s a section of tearout, however again, this is entirely cosmetic, and hidden inside the puzzle, so really is of little consequence.

All in all a really nice version of this puzzle, offered for a very reasonable price. Well worth the money!

Buffalo Nickel

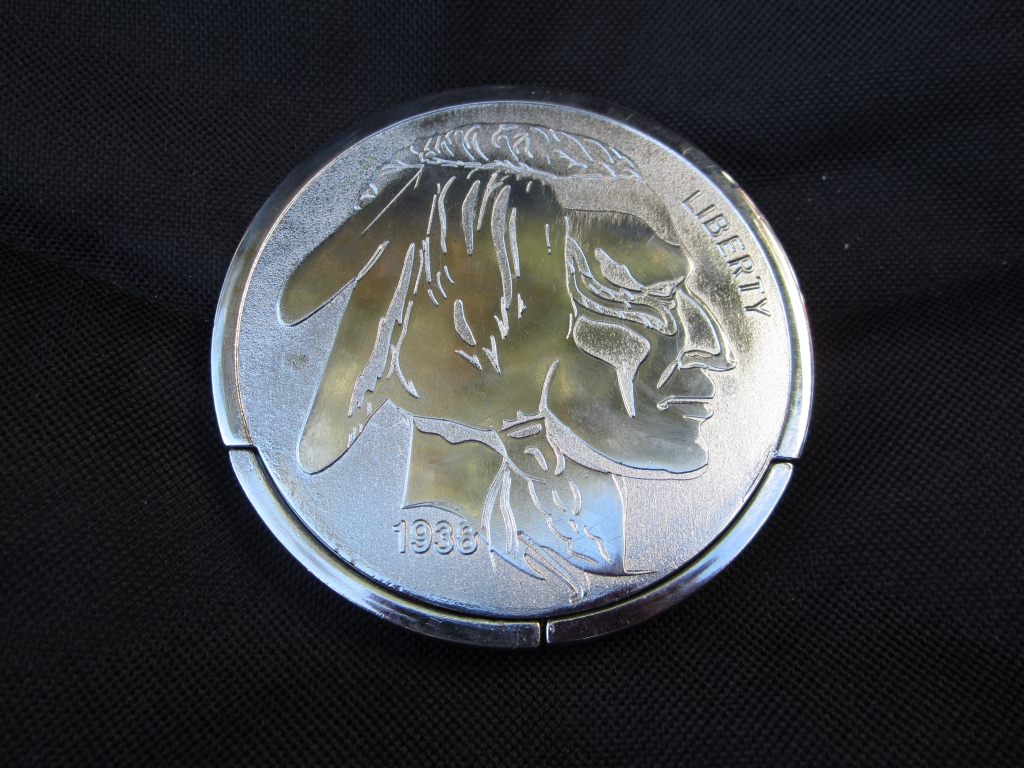
The Buffalo Nickel is based on a puzzle design by Oskar van Deventer and was made by George Miller for IPP 20 in Los Angeles is a large burr style puzzle where the object is to fit the two burr pieces into the main body of the coin to complete the border of the coin. It takes 9.5 moves to put the three pieces together into the solved state. I’m not quite sure where the half move comes from, but I’ll take George’s word for it (more on that later).

The front of the Buffalo Nickel

The front of the Buffalo Nickel

The back of the Buffalo Nickel

The back of the Buffalo Nickel

This puzzle was brought to me by a friend after they visited my house recently and I showed them a few of the puzzles in my puzzle cabinets. Her daughter who was with her mentioned that they had this big coin puzzle where you had to put the two pieces into the coin and it was really hard. She had spotted it in a garage sale, and bought it as she thought it looked pretty neat. Unfortunately, she hadn’t been able to solve it, and nor had her mum so it was sitting in its three pieces. Before I could say much my fiancée announces that I’ll solve it for them if they bring it to me. Well, not much I can really say at this point other than, “Sure, I’ll give it a go”. After all how can you disappoint an 11-year-old when she’s been drooling over the puzzles in the cabinets.

The puzzle promptly appears over the weekend and an excited 11-year-old hands me the puzzle and says there you go.

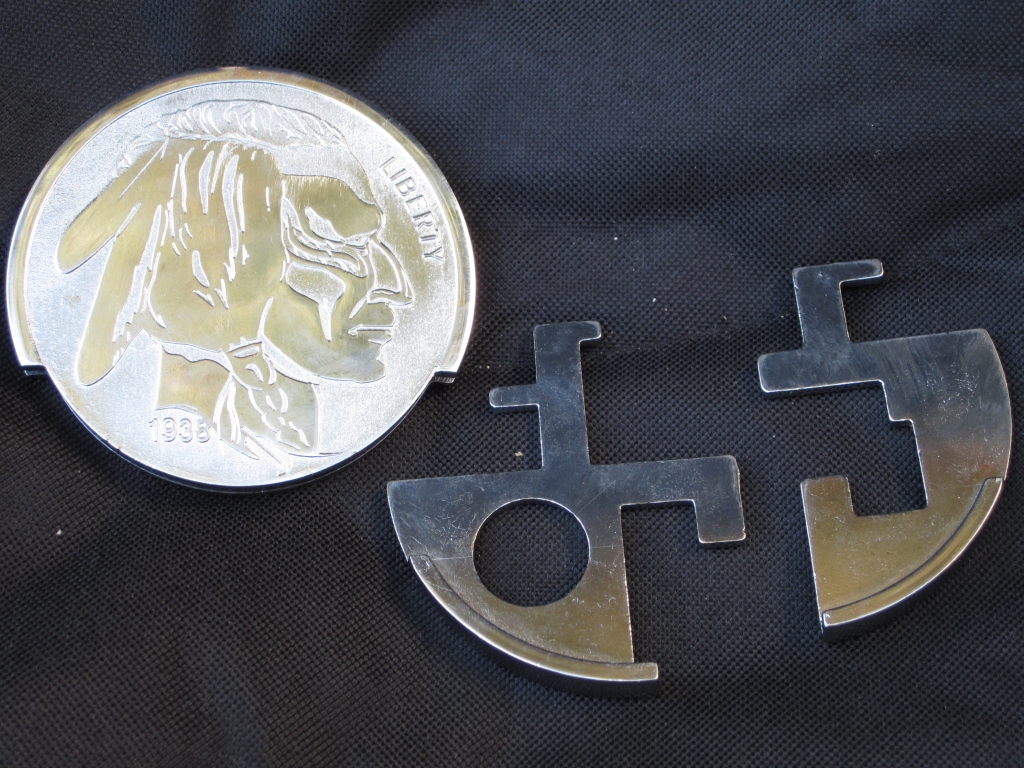
The three pieces of the Buffalo Nickel

The three pieces of the Buffalo Nickel

As you can see the two pieces are simple burr pieces which both interact with each other inside the puzzle and with ledges and holes inside the body of the coin. It’s a big puzzle, measuring around 4″ diameter, and being metal has a good weight to it.

I should point out that when I was handed this puzzle, I was at my Son’s football game (American Football, not Soccer for all those back home in the UK), where I was in charge of the grill. I had just sat down to eat some lunch, so had a burger in my hand when I was given the puzzle. With an excited 11-year-old in front of me I thanked her, and said I’d try once I finished eating.

So finishing my burger, I take a look inside the body to see how much I can see, and look at how the two pieces interact. It seemed fairly straight forward, so I insert both pieces, and play around with how they interact inside the puzzle. I’m able to get the right hand piece in place fairly quickly, but it’s blocking the left hand piece from falling into the correct spot. Taking the pieces out, I play around with just the left hand piece to see how it fits, and it becomes pretty clear that it has to be very carefully aligned to drop into place. The tab on the left has to fit very precisely into the body, and any small angle in the piece prevents it from being inserted.

With that knowledge, I put both pieces back into the puzzle, and have it solved a minute or so after that. All in all it took less than five minutes for me to solve.

Getting up from my seat, I take the solved puzzle to my friend and I’m greeted with “What, What, how, you ….”. I just laughed and said that it was a very nice puzzle, did she mind if I took a few photos to allow me to put up a review of it.

Given that this was an IPP puzzle, the card which accompanied the puzzle for IPP 20, has the following information about the puzzle. The copy that my friend has doesn’t have the card with the puzzle, or its original box.

The Buffalo Nickel Puzzle is based on the Nine-and-a-half-Moves puzzle by M. Oskar van Deventer. It is composed of just three pieces that fit together in such a way to hide a secret compartment. Although the three pieces are flat and lie in a single plane, it takes a remarkable 9 1/2 moves to solve.

There is a very interesting article from Oskar about the puzzle, that does contain the solution (you’ve been warned) which you can read here if you’re interested. I know I mentioned at the top that I didn’t know where the half move came from, however in Oskar’s article, he describes the slide and rotate which is required in the solution as a move and a half. So that explains where the half came from!

I’m very happy to have been given this puzzle to try, and it was a fun little puzzle to play with. Thanks to my friend to lending it to me. Now she has to go solve it herself as she knows it’s possible now!

A Humbling Experience

Many of you know me on a few of the forums around and about the puzzling community, and a fairly well known Puzzle Box maker, let’s go with Allard’s name for him and call him ‘Stick guy’ posted asking what I was up to. It’s no secret I’ve bought a bunch of tools, and even started to use them to create the building blocks of puzzles, but I’ve never really mentioned what I was planning.

Well I answered Stick Guy’s “challenge”, and put up a brief summary of what I had been doing and what I was doing. You’ll know if you’re a regular reader that I designed a puzzle which I call Lock Cube some time back. I even prototyped it in Lego, then had it printed at Shapeways. Well at some point I’ll be making it out of wood too. (At least that’s the plan)

So here’s where things get interesting, and when I get to the point of the title of the post. Seems like a few people out there are interested in owning a copy of my Lock Cube, when I make it.

Now at this point, many things go through my head, including a few that I can’t print…

“Are you serious?”
“You really want one?”
“People want to own a puzzle I designed?”
“Is my puzzle good enough?”
“What will people think of it?”

The bottom line is that I was truly humbled by the response from quite a few people asking if I’d make a copy for them. I never expected to make more than just the one for myself, so this was a shock for me, and really left me not quite sure what to say. Quite impressive really since I’ve written an entire post about it!

So to everyone that has already shouted ‘Me please’ for a copy of a puzzle that I’ve not yet made from wood – Thank you.

If you want a copy, let me know. I’m not promising anything at this point, but I’ll keep it in mind as I make those early copies.

Zauberflote – Magic Flute

Eric Fuller recently offered a few new puzzles through Cubic Dissection and I picked up “Zauberflote” designed by Gregory Bendetti as well as “Stand Py Me” which I reviewed recently. Both puzzles sold out very quickly.

Zauberflote translates as “Magic Flute” and is an opera in two acts composed in 1791 by Wolfgang Amadeus Mozart. Gregory wanted to make a series of puzzles which had a link to the opera which he enjoys.

Zauberflote - Königin der Nacht pieces

Zauberflote - Königin der Nacht pieces

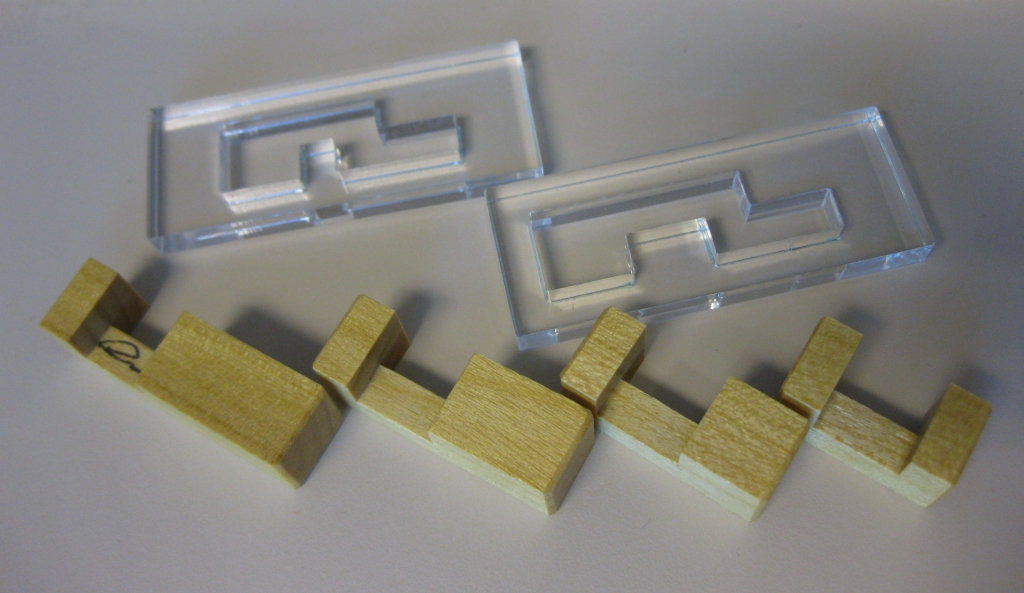
In a change from my usual style, I’m not showing the completed puzzle at the top of the post, but rather the pieces. I’ll get to the reason why soon enough. Eric has created this 4 piece version of Zauberflote from acrylic and yellowheart, and describes it as a pocket puzzle, given that its full length is just 2.25″. Gregory gave the four piece version the full name “Zauberflote – Königin der Nacht”, and each of the puzzle in the series with a different number of pieces in the flute has a different sub-name. I really like the use of the acrylic here, as even when the puzzle is solved (as you’ll see below) you can still see the internal burr of the wooden pieces, which is a nice touch. Eric made 45 copies of this puzzle, and they are all signed with Eric’s usual squiggle.

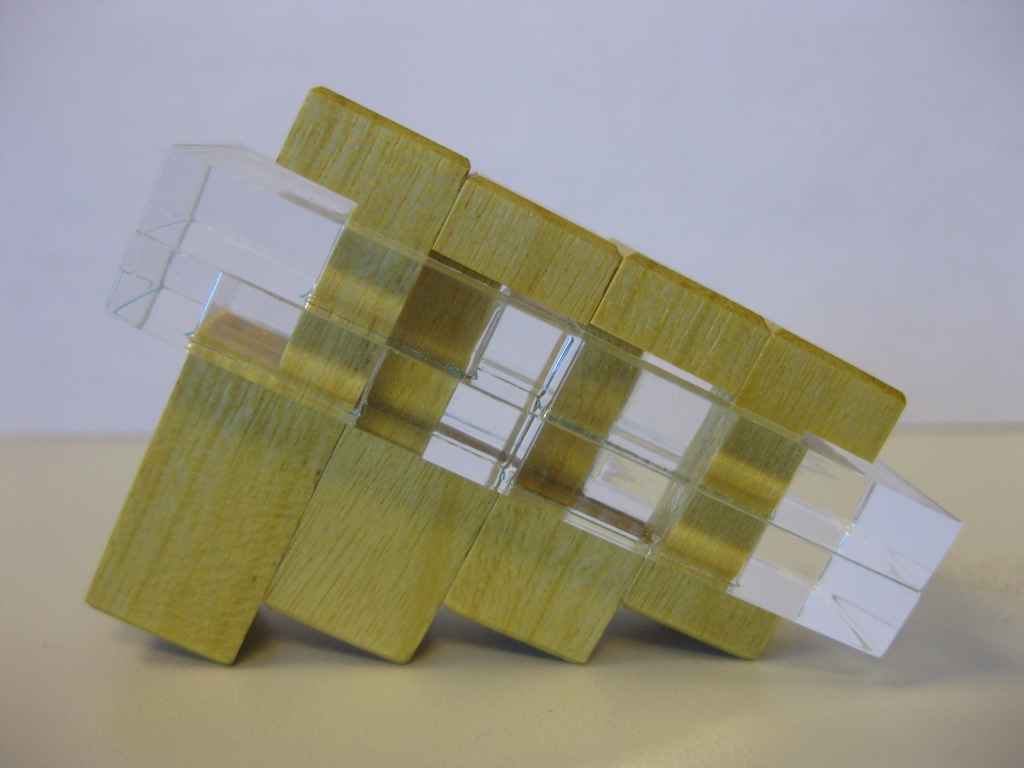
I spent about 30 minutes working on this puzzle, and after a few false starts I found a way to get all the pieces in place and the flute shape (or possibly more of a set of pan pipes) is easy to see. When I was solving it, I started by putting the smallest piece in first, and I required a couple of rotations to get the pieces into their final location.

My solution requiring rotations

My solution requiring rotations

Feeling quite happy with myself I put the puzzle aside for a few days. When I came back to it, I opened the trusty Burr Tools and created a model of the puzzle there. Now I fully expected burr tools to be able to put the pieces in place, but I didn’t expect it to be able to give me an assembly given that rotations were needed (when I solved it). To my surprise, Burr tools came back with 72 solutions and one assembly!

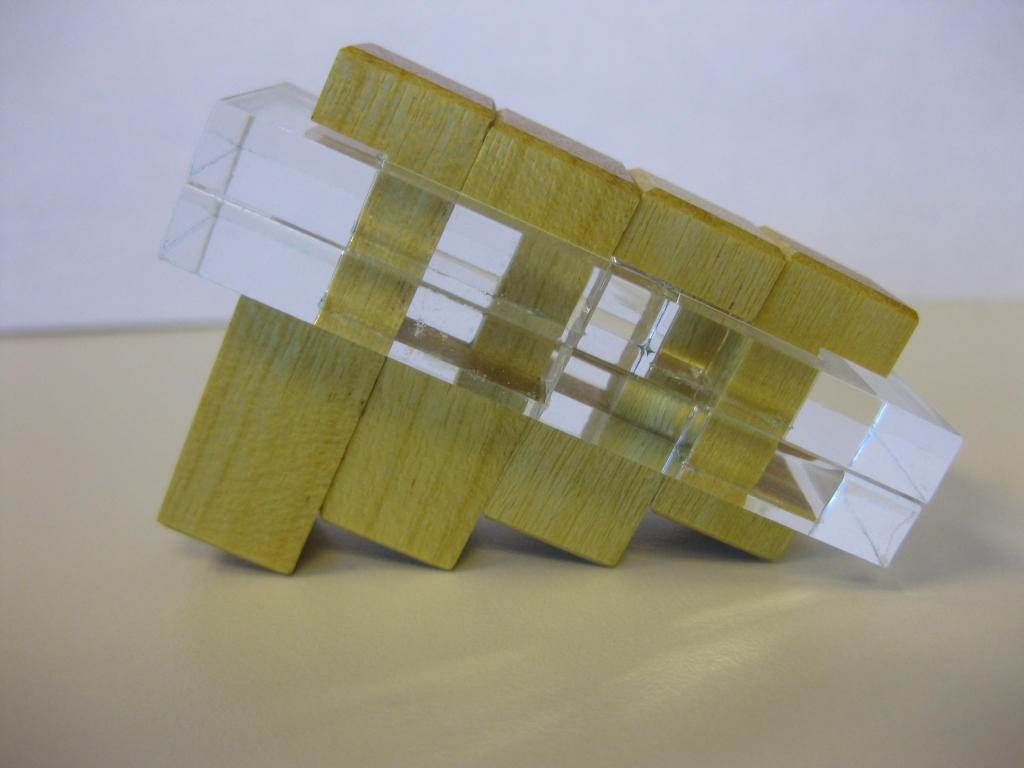
Solution found by Burr Tools

Solution found by Burr Tools

Burr tools notes a 14.4.2 assembly and shows that it is possible to solve the puzzle without using rotations as I had. If you look very closely at the two images, you’ll see that the internal burrs are in different locations showing that clearly it’s a different solution. Also Burr Tools puts the largest piece in first, although I believe it is possible to insert the pieces in any order.


So having used burr tools, I think there are more solutions than it shows, even without the rotations. I did talk with Gregory as to whether rotations were intended, and he admitted that he hadn’t checked for rotations, but it wasn’t cheating, since I still solved the puzzle without forcing the pieces, and had found a solution that he hadn’t. The solution with rotations is much shorter at 7.1.1.2 (if my counting is correct).

Overall, this is a fun puzzle, which isn’t too hard and is very nicely made by Eric.