RPP Puzzle Pickups

Hi everyone, and sorry for my long absence. Hopefully I’m back and will be getting many more reviews up in the coming days, weeks and months. As you know I’ve moved from California to Michigan, and I’m in the process of setting up my shop and my new home. Part of that is unboxing the puzzle collection, and I’ve taken it upon myself to review all the puzzles in my collection as I unbox them. On video. And here. I must be insane! Even doing one a day it would take a few years to get through my collection! Wish me luck!

With that out of the way, here’s the first video where I talk about the mammoth task ahead of me and review the four puzzles I picked up while at the Rochester Puzzle Picnic a few weekends ago. I hope you enjoy, and as ever, feel free to throw me a comment below.

If you watched the video then you may not even want to bother reading my ramblings, however if you want a little more info about each of the puzzles then read on.

Chain Store

Chain Store by Goh Pit Khiam

Chain Store by Goh Pit Khiam

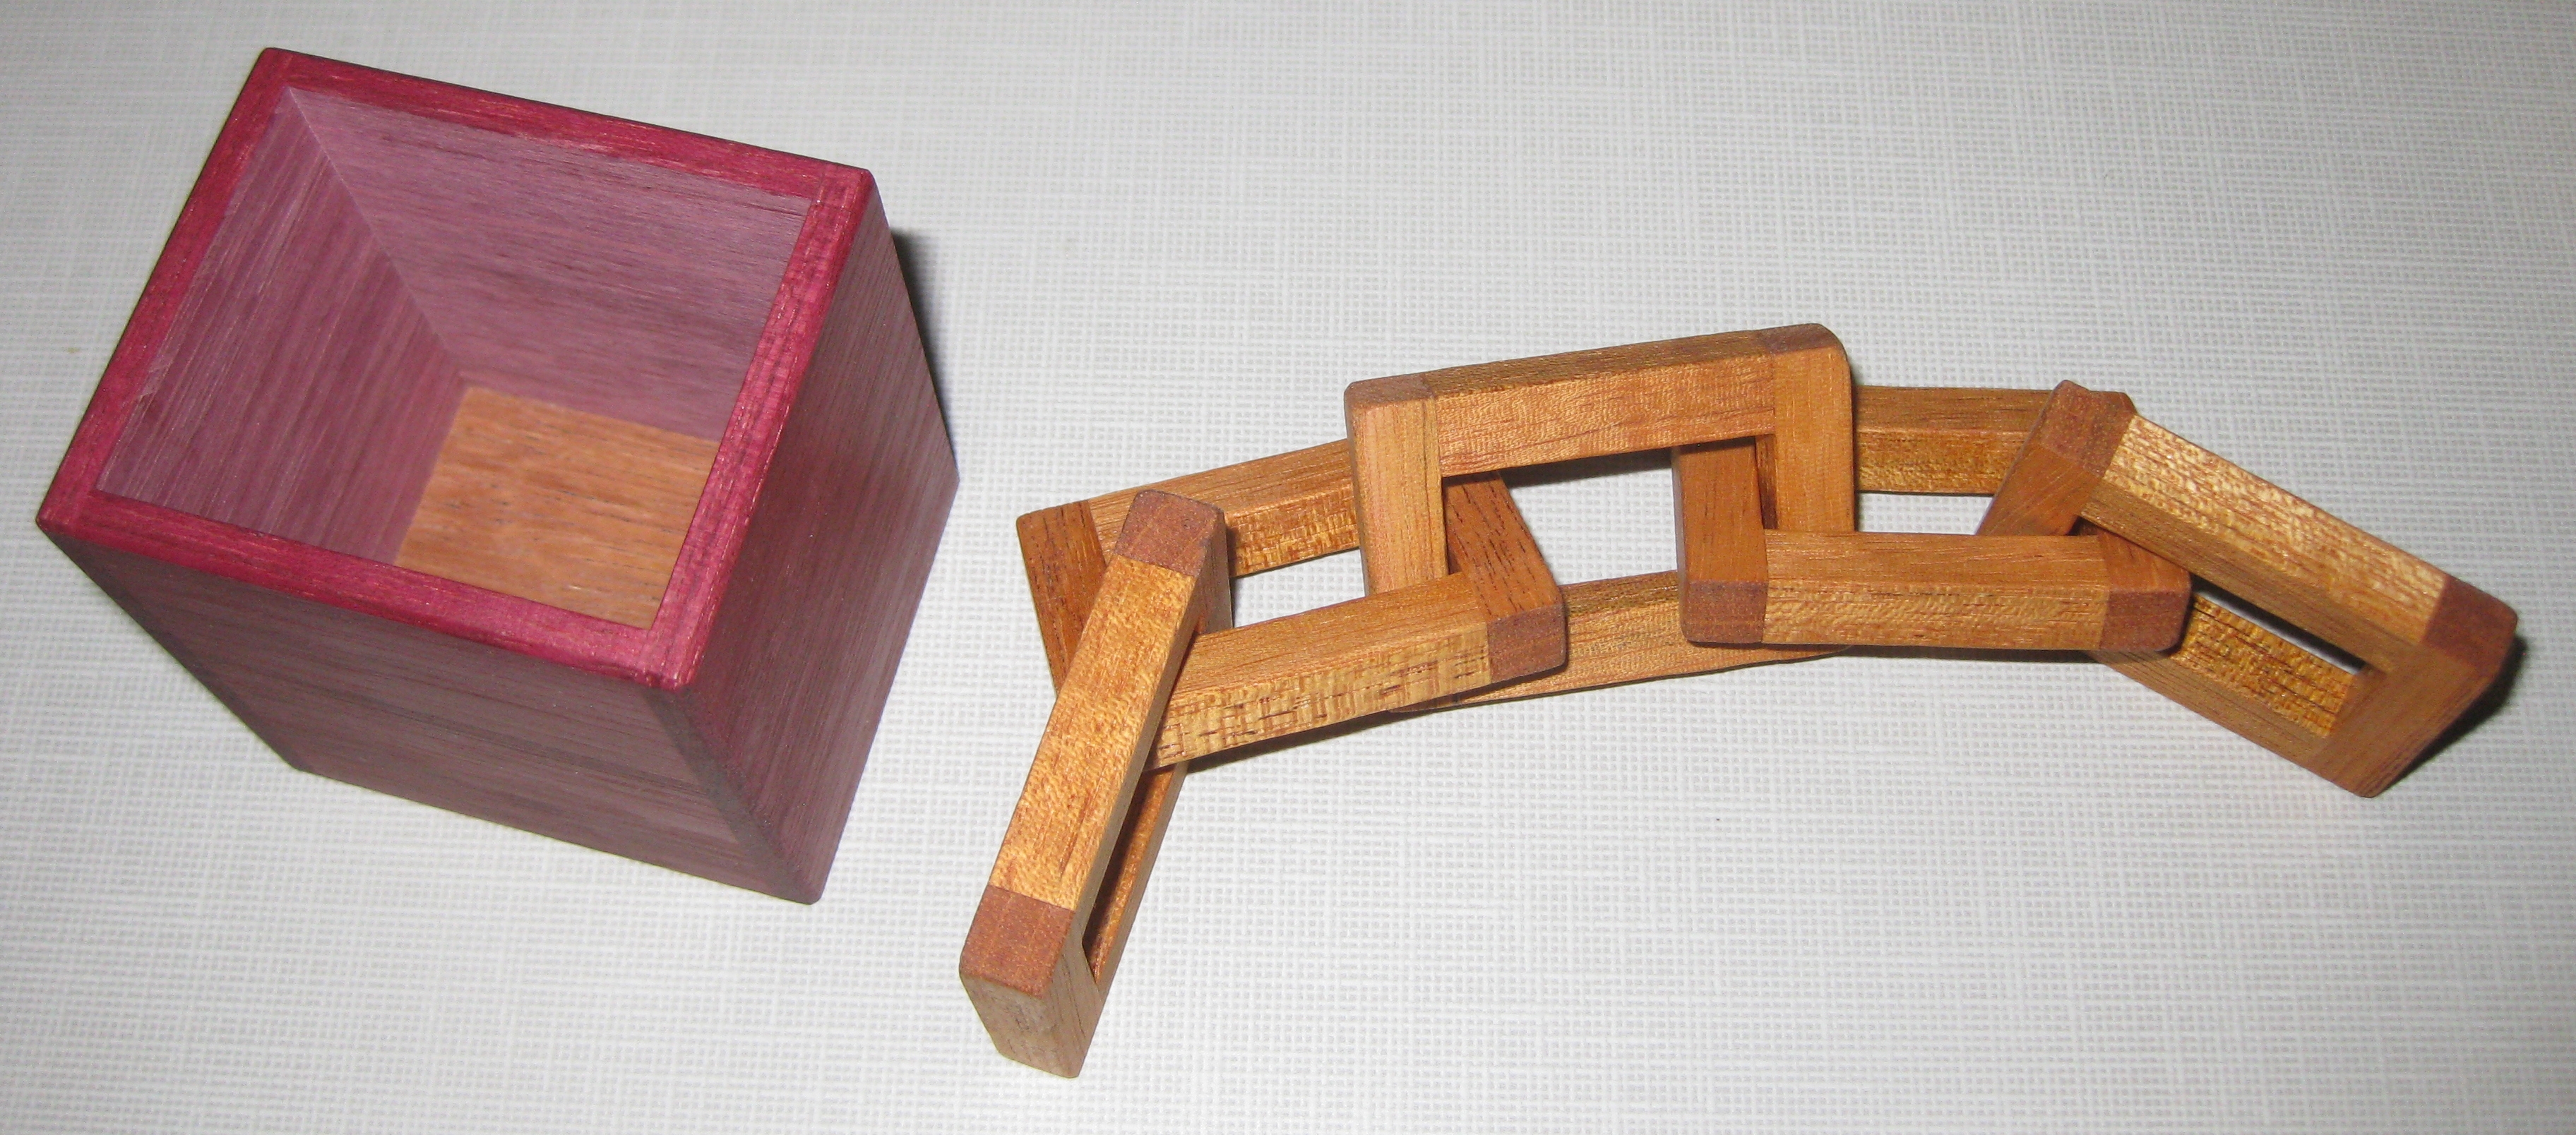
Chain Store was designed by Goh Pit Khiam and my copy was made by Tom Lensch. Tom had several copies with him at RPP, and given that it’s such a fun puzzle, I had to pick one up. Made from Purple-heart and Mahogany it looks great and given that this was a Jury Honourable Mention at IPP36 it was worth seeing what all the fuss was about.

The puzzle measures in at 2 1/4″ x 1 7/8″ x 2 3/8″ and bears the TL stamp on the bottom of the box that is Tom’s signature. Interesting fact about the TL, it’s not burned into the wood and nor is it stamped. It’s actually a stencil Tom had made that uses carbon dust to leave the signature.

I’m a little disappointed in the construction of the chain links. The rectangles forming each link are butt jointed, which in my mind is not a strong joint. I’d much rather have seen a half lap or similar joint, especially given the way the pieces need to be manipulated, and the slight tightness of the pieces.

Tom had a few issues making this puzzle, as the original version he had guessed at the size of the box, and guessed 3/32″ too big. Now that’s a chasm when it comes to a packing puzzle, and by shrinking that box, there’s now only one solution and it’s a little tougher to find. If you’ve made a copy, the solution requires that all the pieces be rectilinear, and I’ll say that the solution is anti slide once in there.

My copy is a little tight when manipulating the pieces, but nothing that prevents the solution. I may now have to deal with the humidity problems on my puzzles thanks to Michigan weather.

Impossible Cube Triangles

Impossible Cube Triangles

Impossible Cube Triangles by Andrey Ustjuzhanin

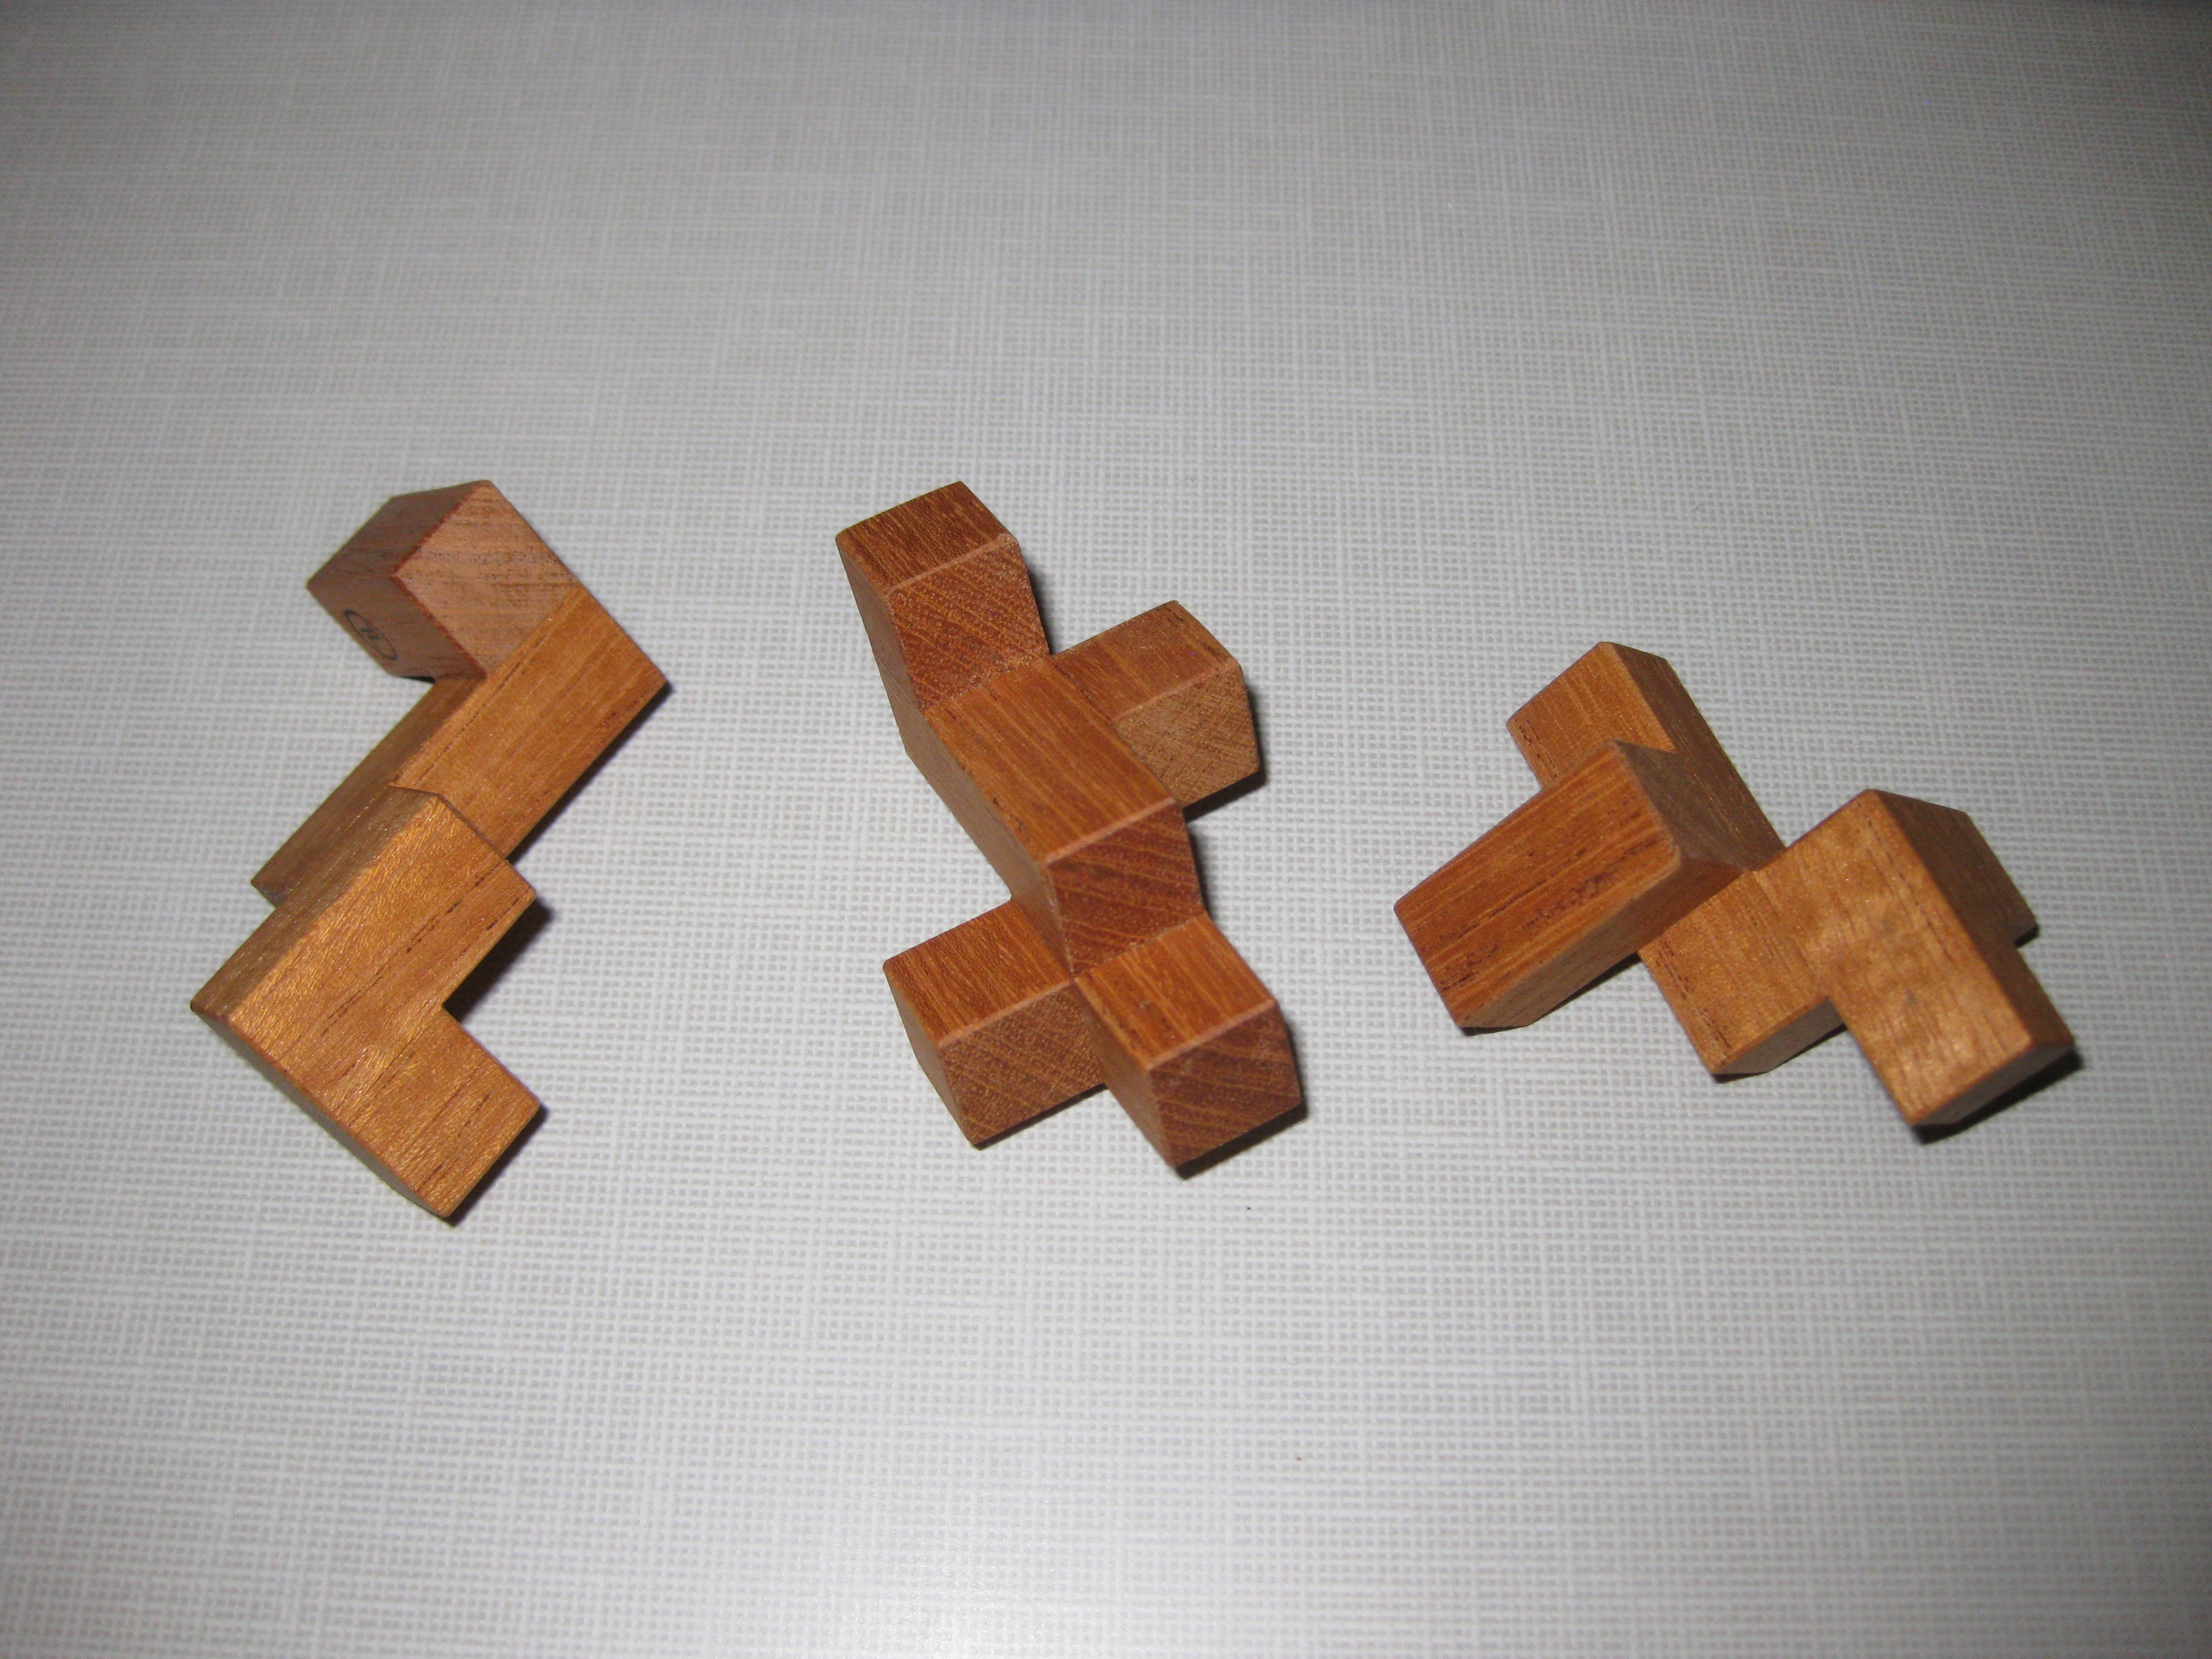
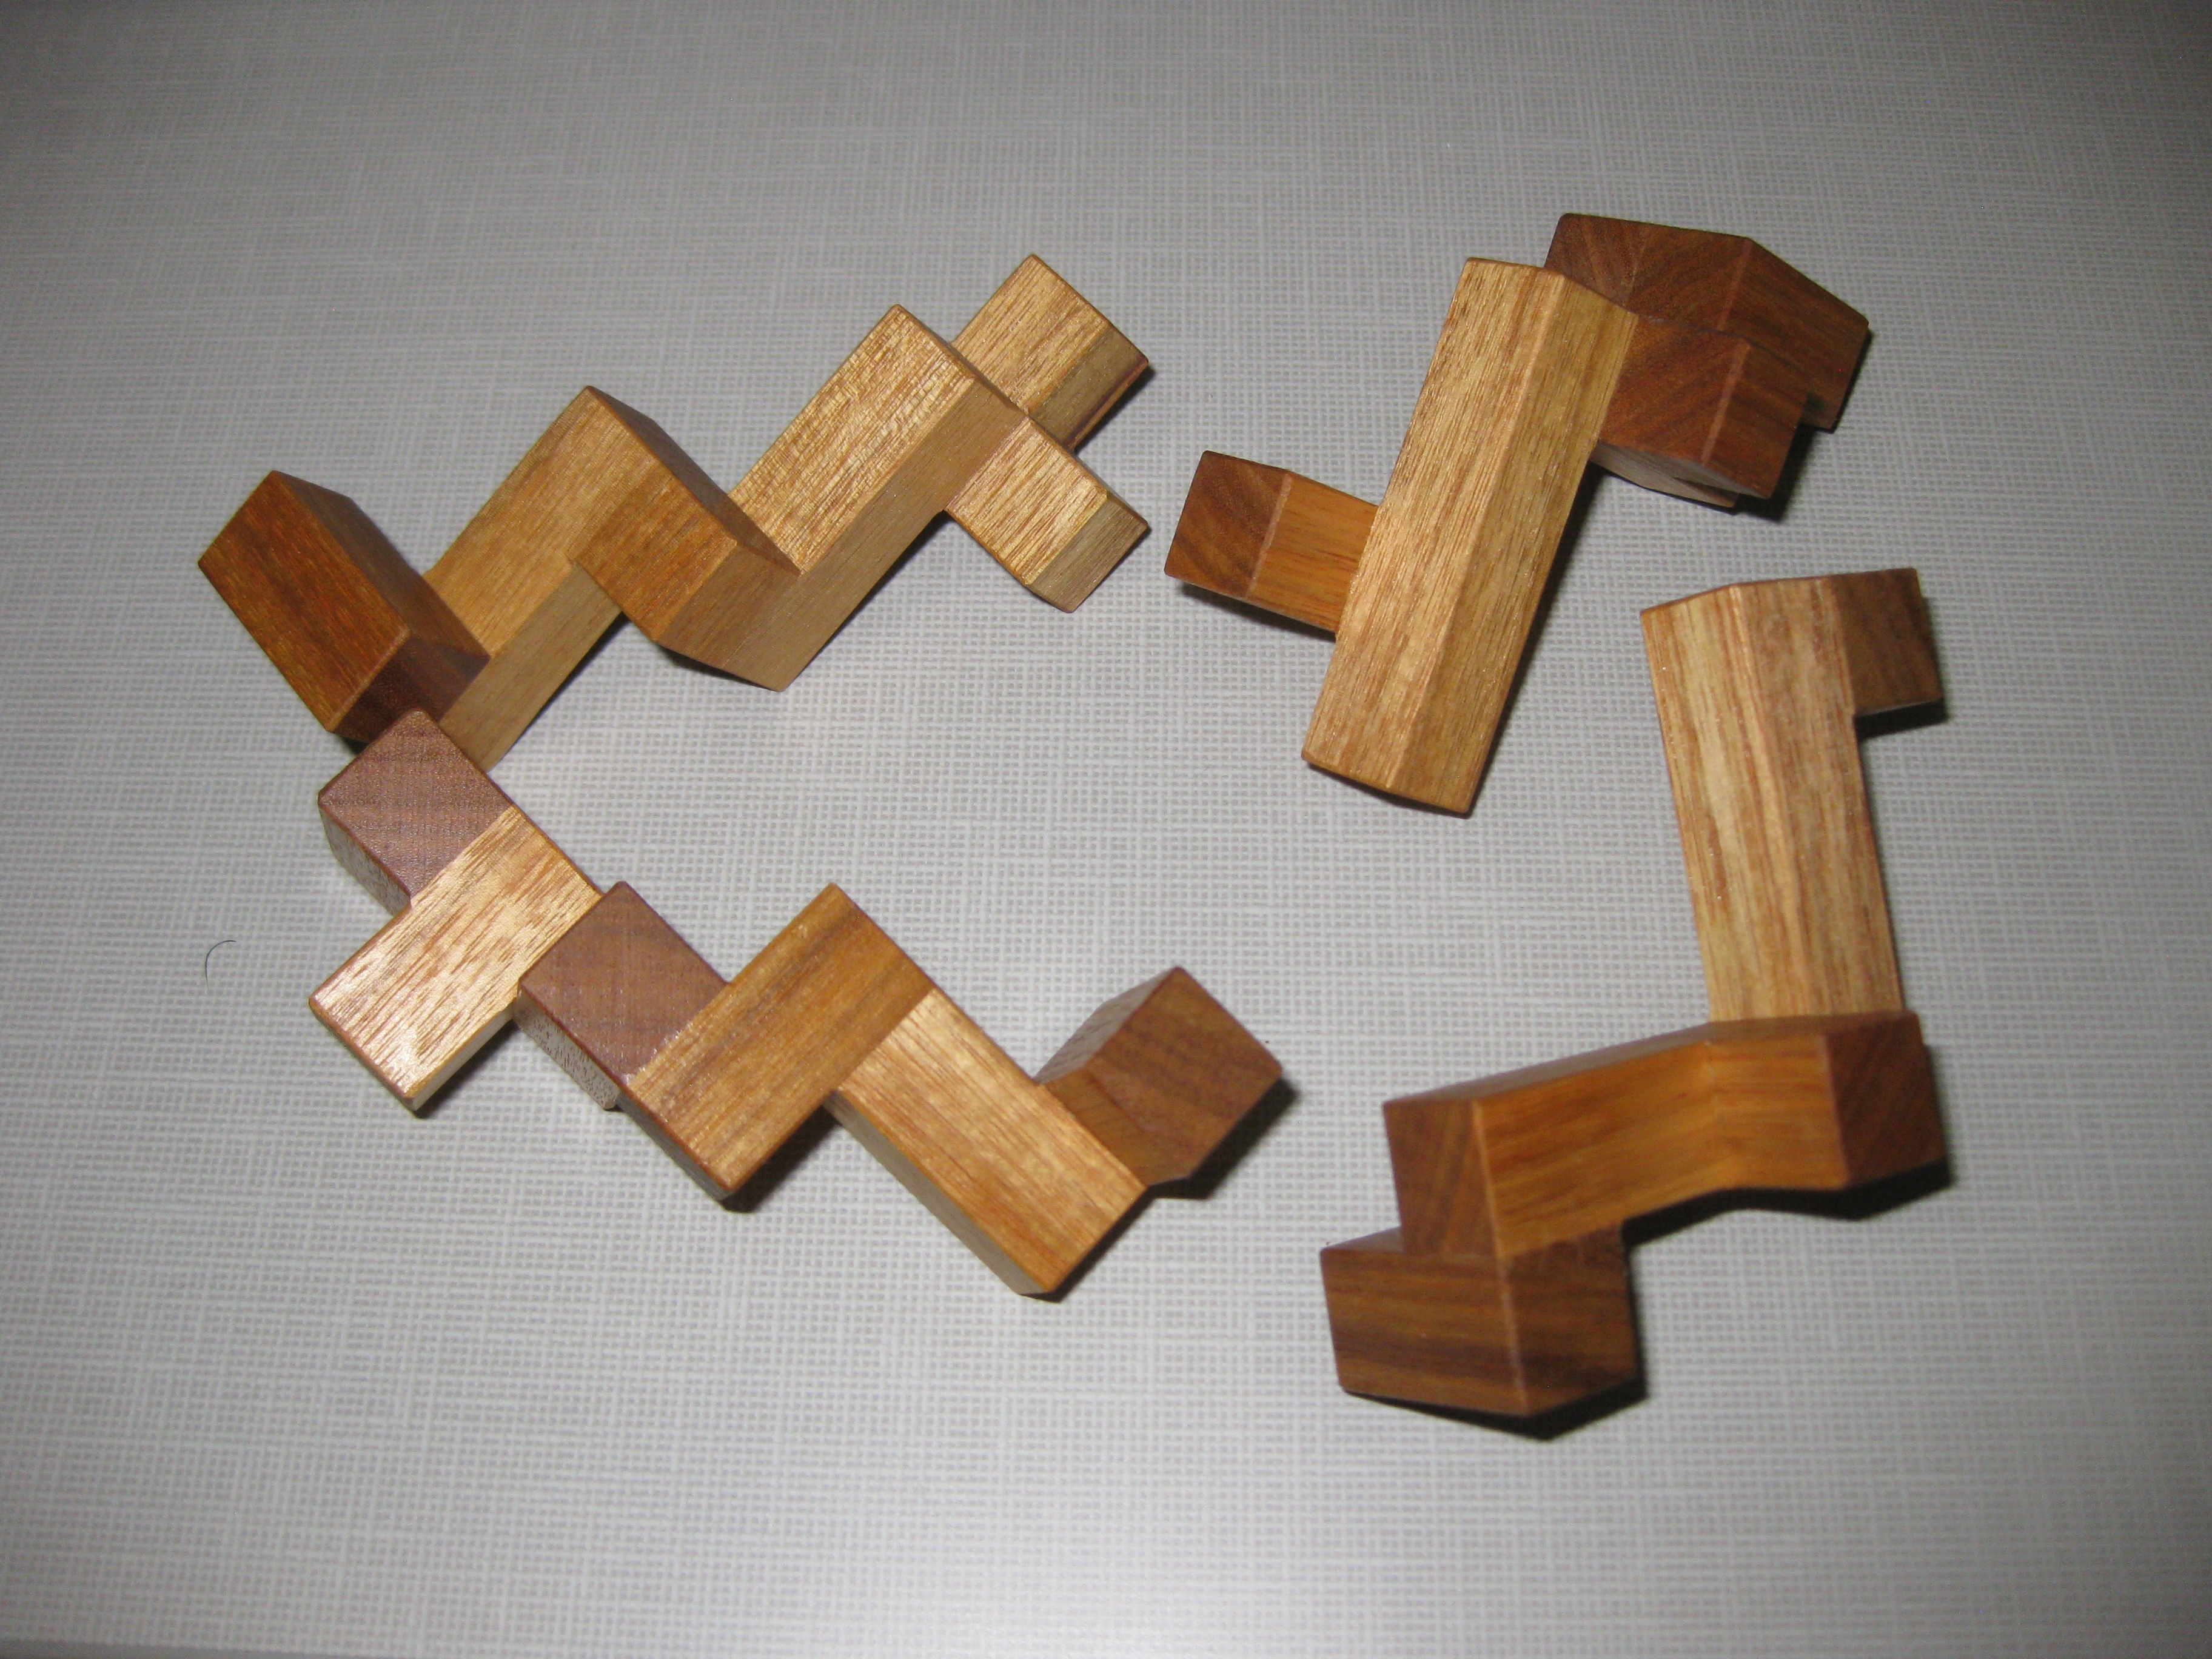
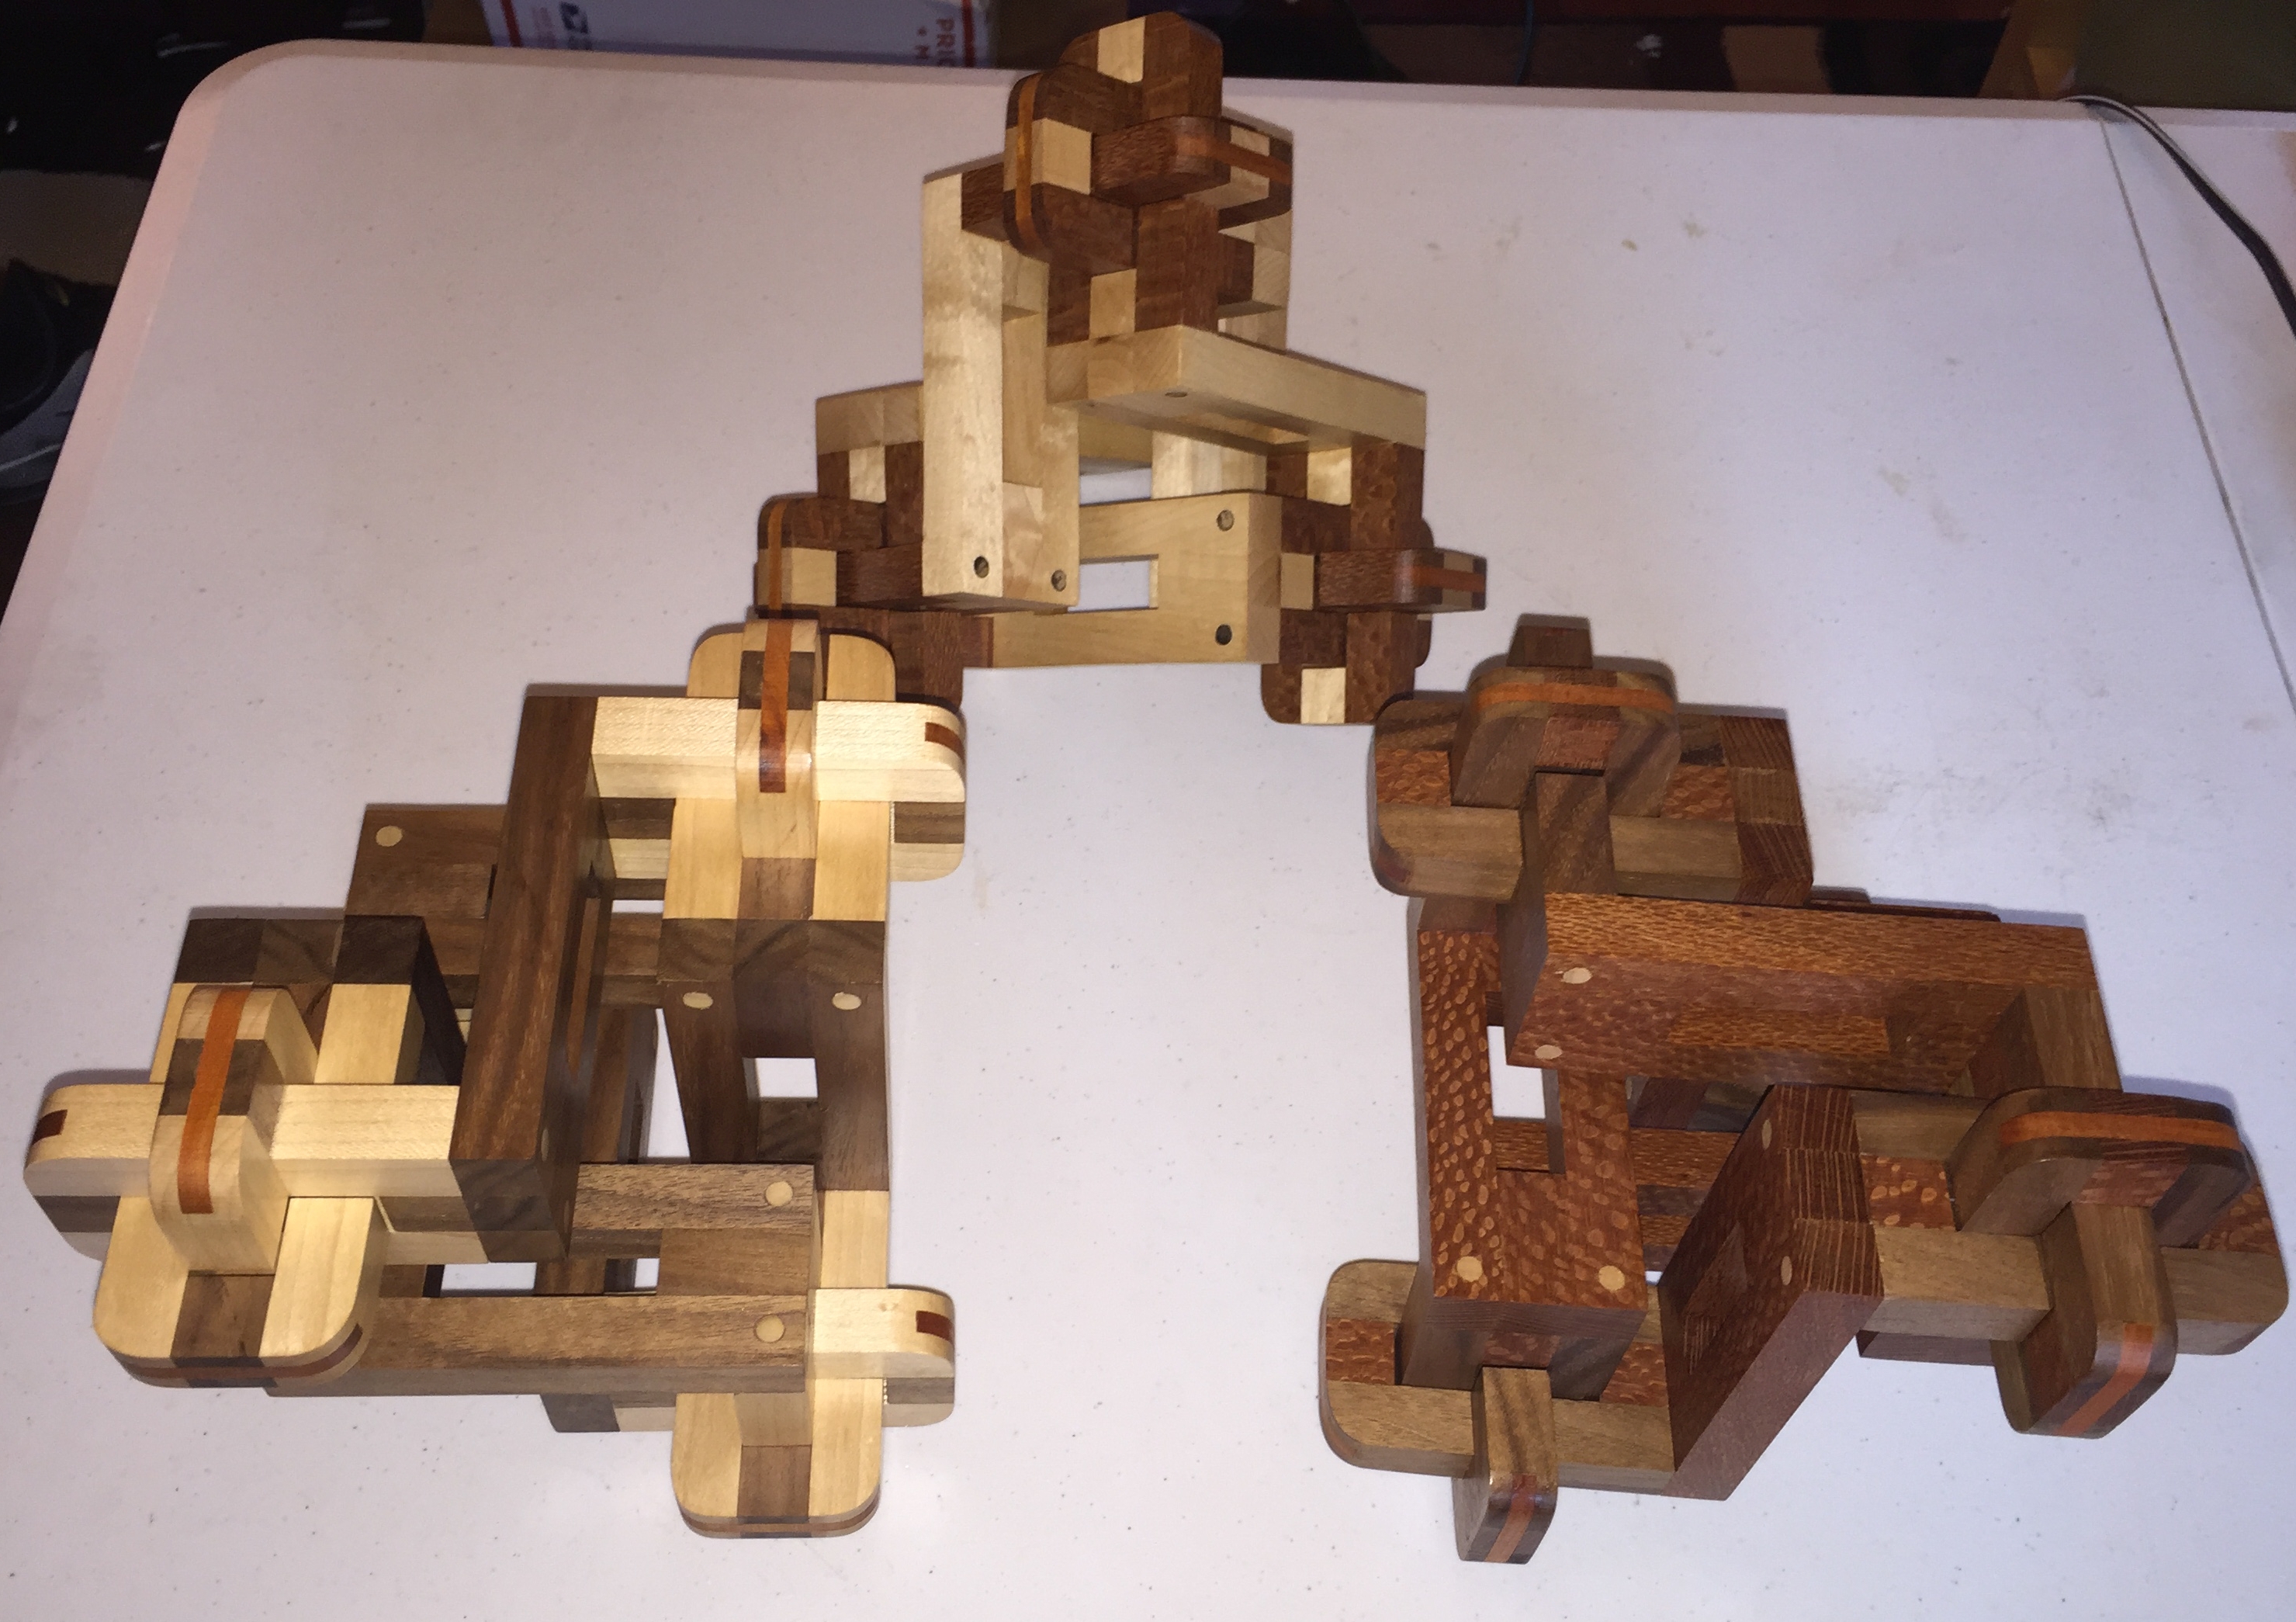
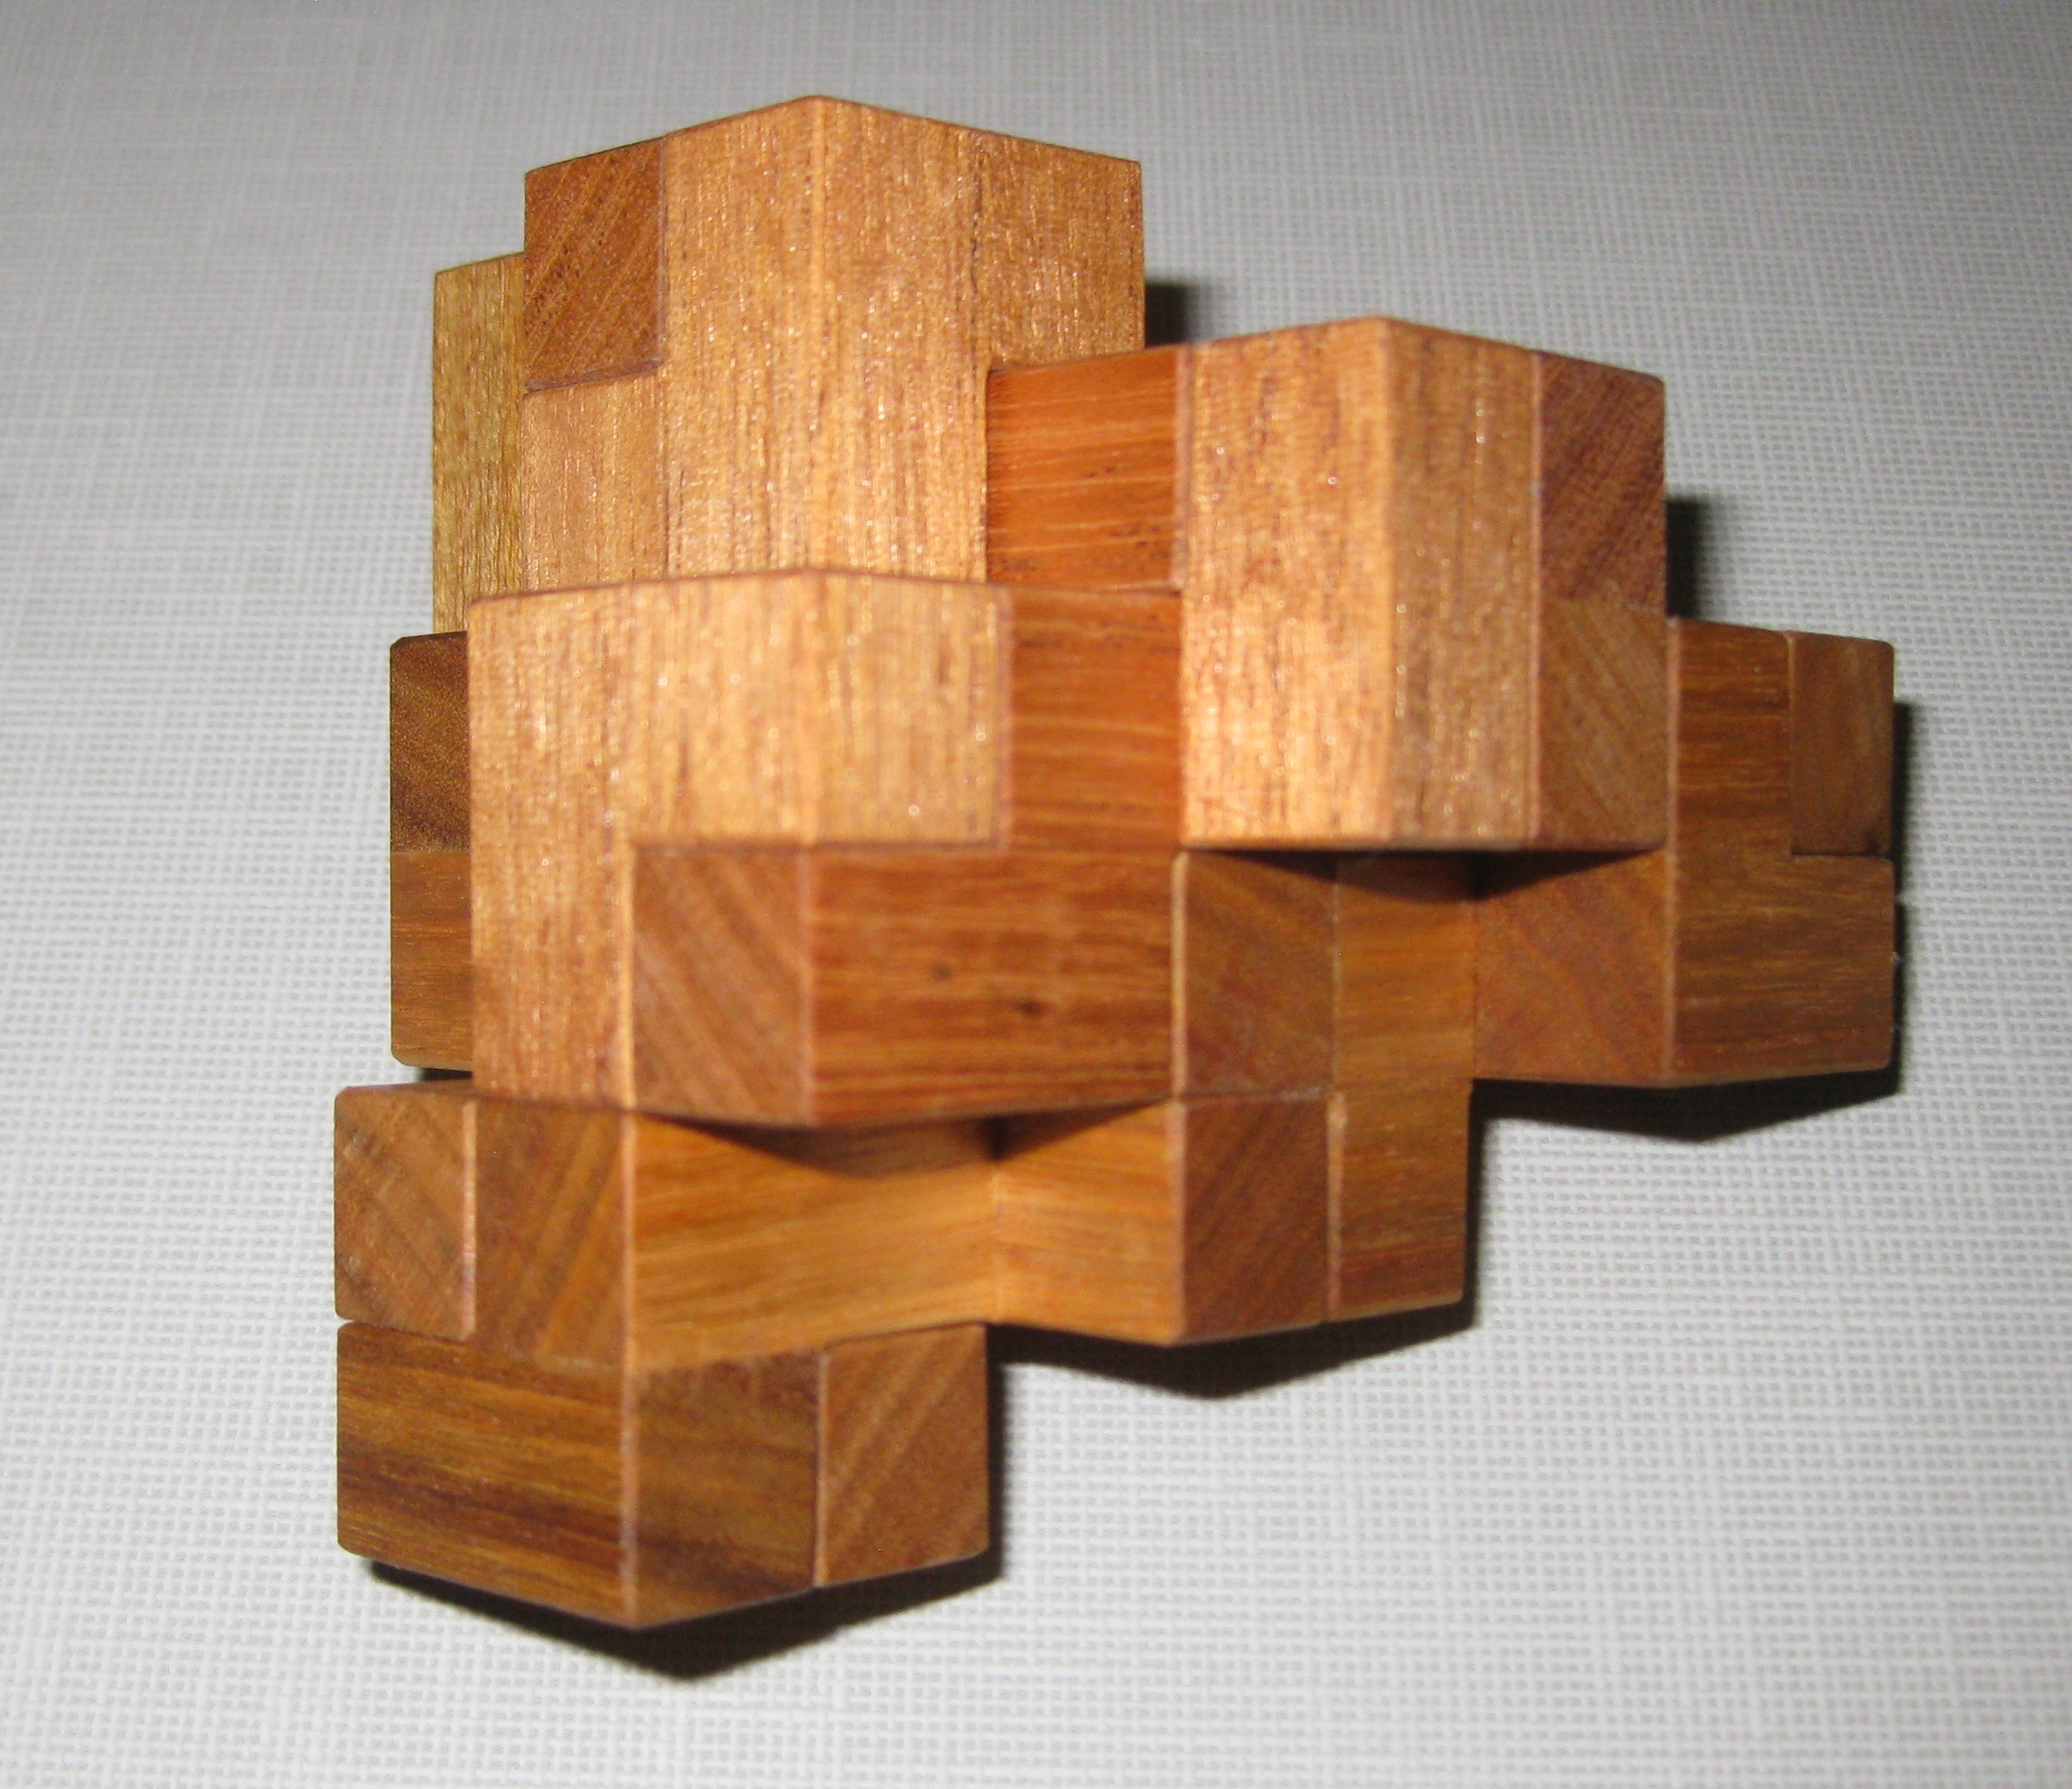
Next up is a great set of two puzzles from designer Andrey Ustjuzhanin. The Impossible 3 Cube Triangle and Impossible 6 Cube Triangle are two fun interlocking solids that should keep you puzzling for a little while (unless you’re Brian Pletcher. Ed). Both made by Tom after he recently got permission they are really good puzzles and after Tom threw down the challenge to solve it as quickly as possible at RPP, I had to pick up a copy. (Sneaky that Tom, giving us a puzzle to play with … no correlation to then buying said puzzle at all here!)

Impossible 3 Cube Triangle

Impossible 3 Cube Triangle

I didn’t manage to solve the 6 Cube version at RPP, and even knowing the solution shape, it still took me a good hour or more to finally solve it. The 3 Cube version is much simpler, with only 3 pieces and certainly makes for a fun puzzle in itself. Each cube is 1″ and both versions stack nicely together as you can see above.

Impossible 6 Cube Triangle

Impossible 6 Cube Triangle

The six Cube version has 4 pieces and is a much tougher challenge. There’s not as many clues as you have with the 3 piece and it really needs you to think out of the box to solve it, or perhaps I should say out of the triangle? The solution to both is nice and leaves you with a nicely interlocked solid shape that won’t fall apart to display it. If Tom has any of these left, I’d move quick as they’re well worth having.

Little Bruce

Little Bruce

Little Bruce by Ken Irvine

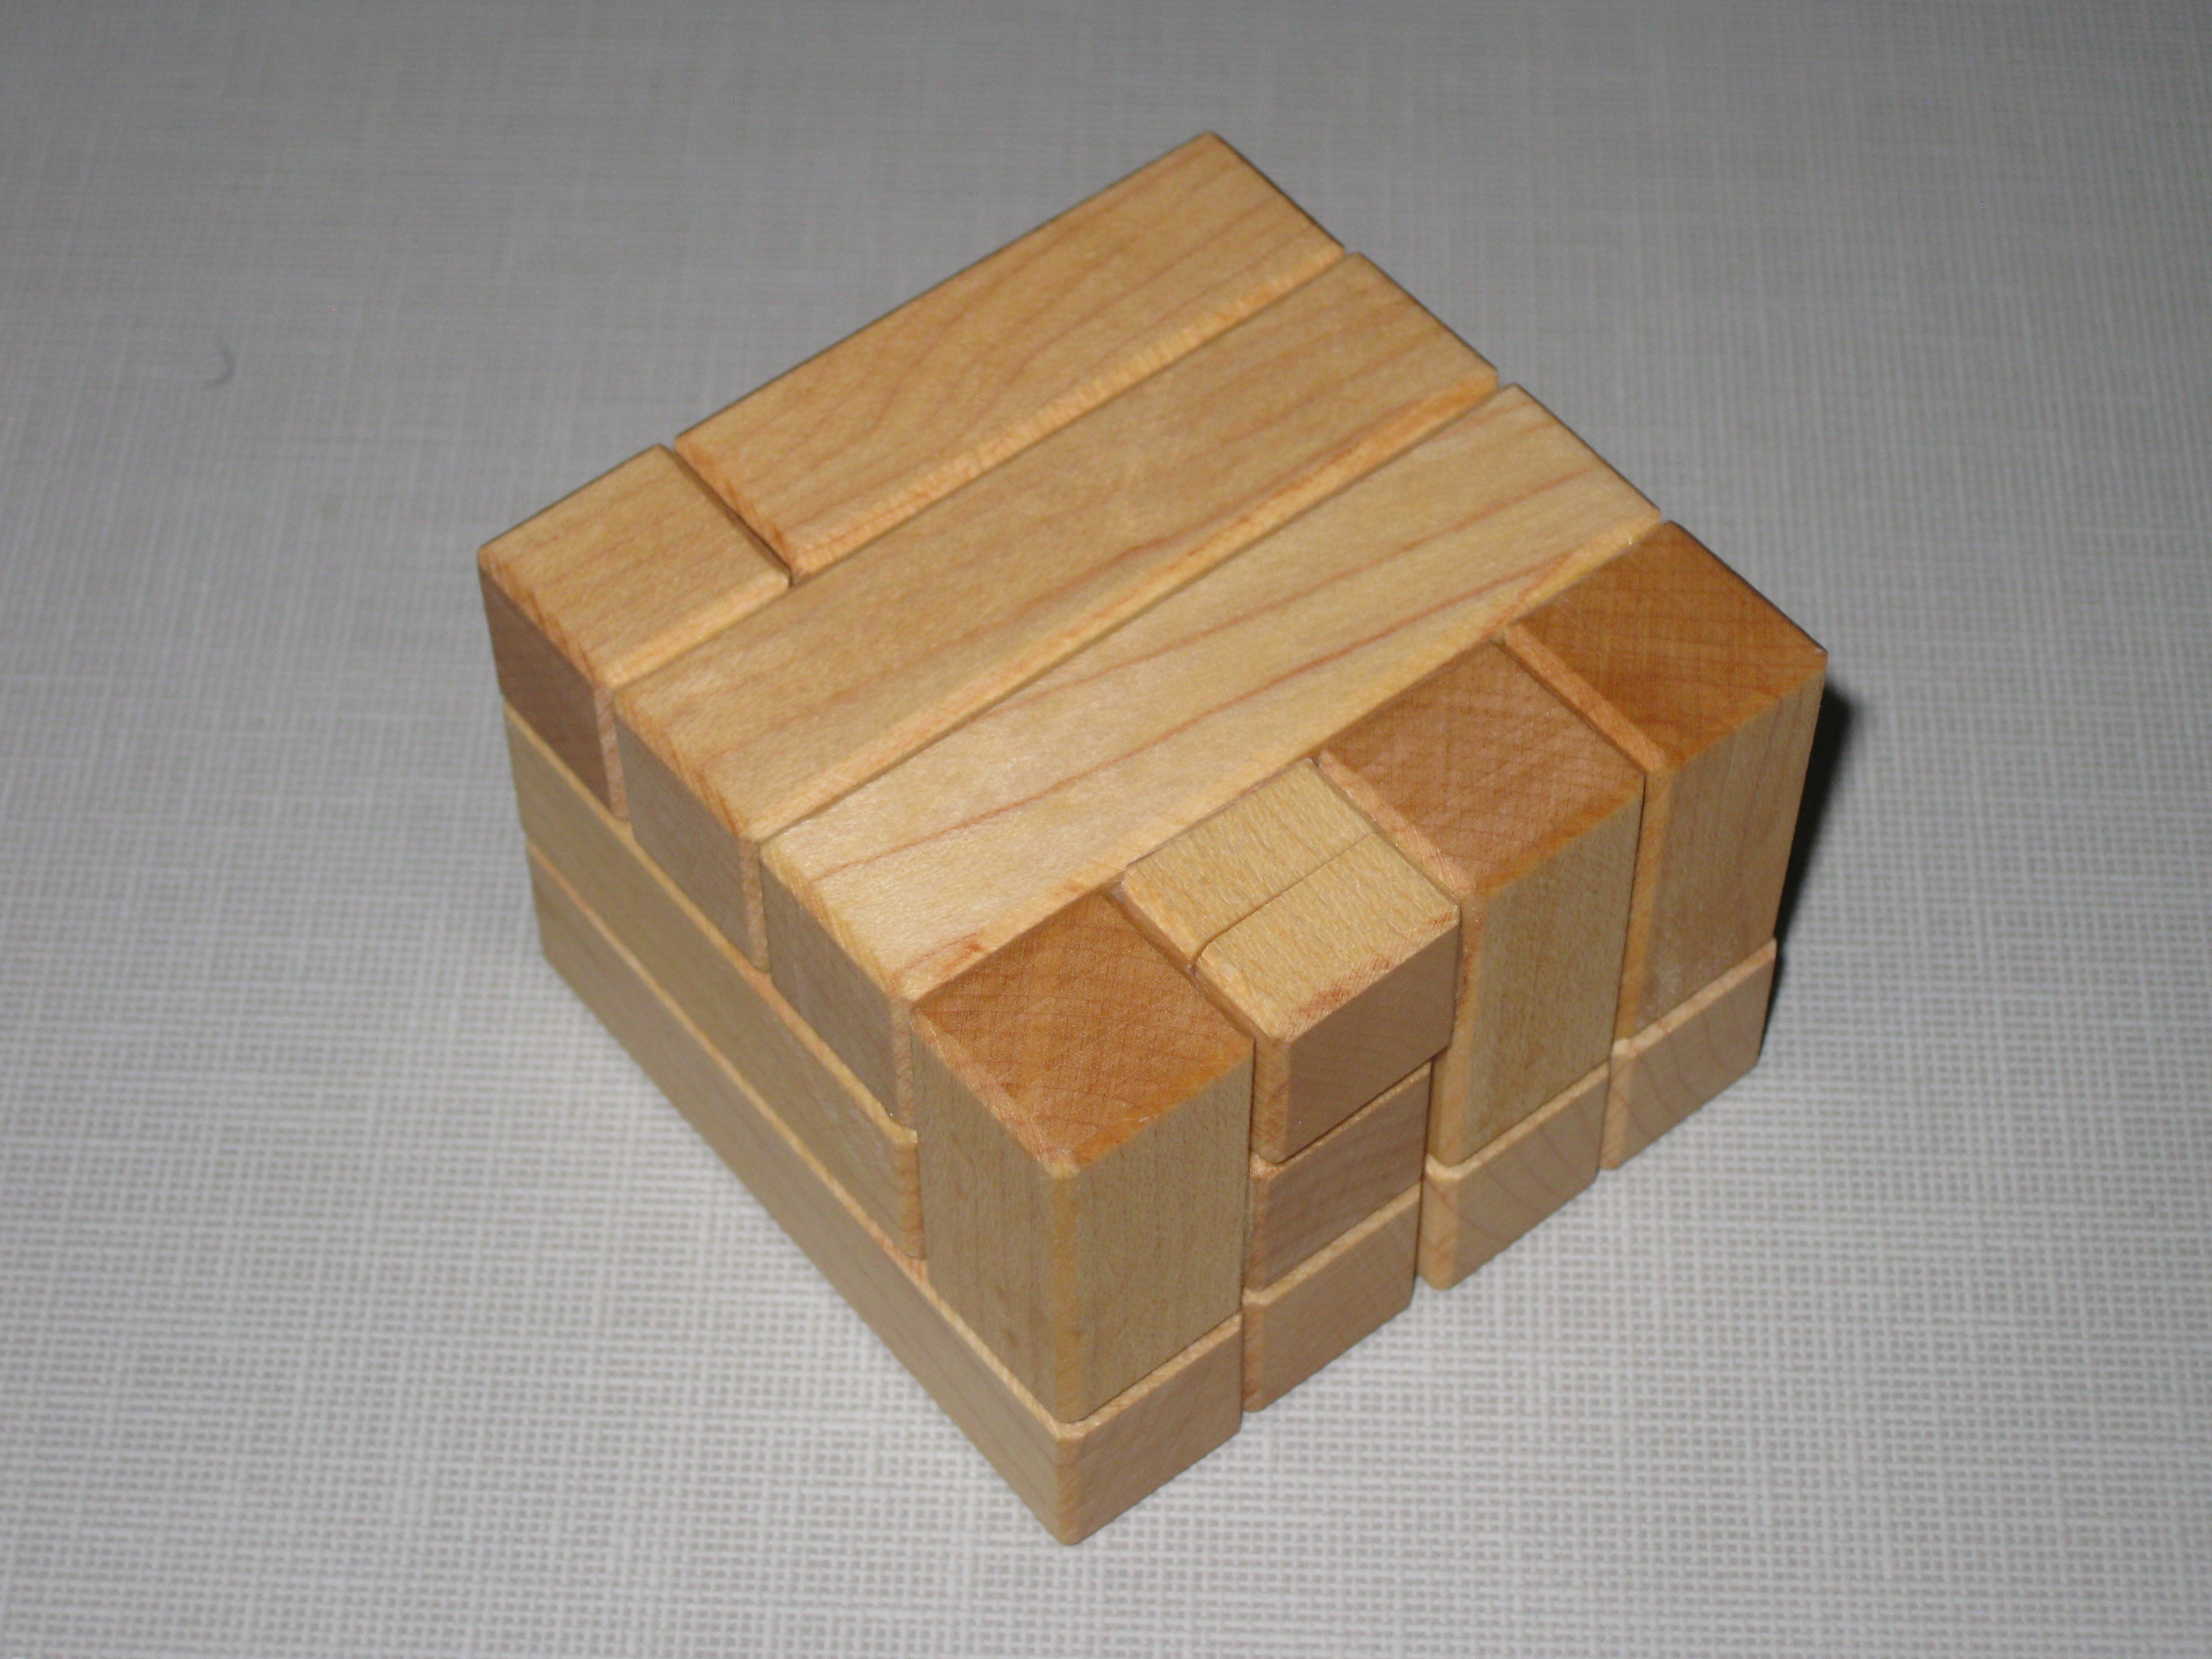
The final puzzle I picked up at RPP was Little Bruce which Ken was kind enough to hand me in four pieces at one point. I was fortunate enough to be given a copy of “Little Kenny” last year, and this is a suitable follow up to that puzzle.

Little Bruce is made from Maple, and measures in a t 2 1/2″ x 2 1/2″ x 1 3/4″. It’s really nicely made and finished, and Ken has signed one of the pieces.

Little Bruce

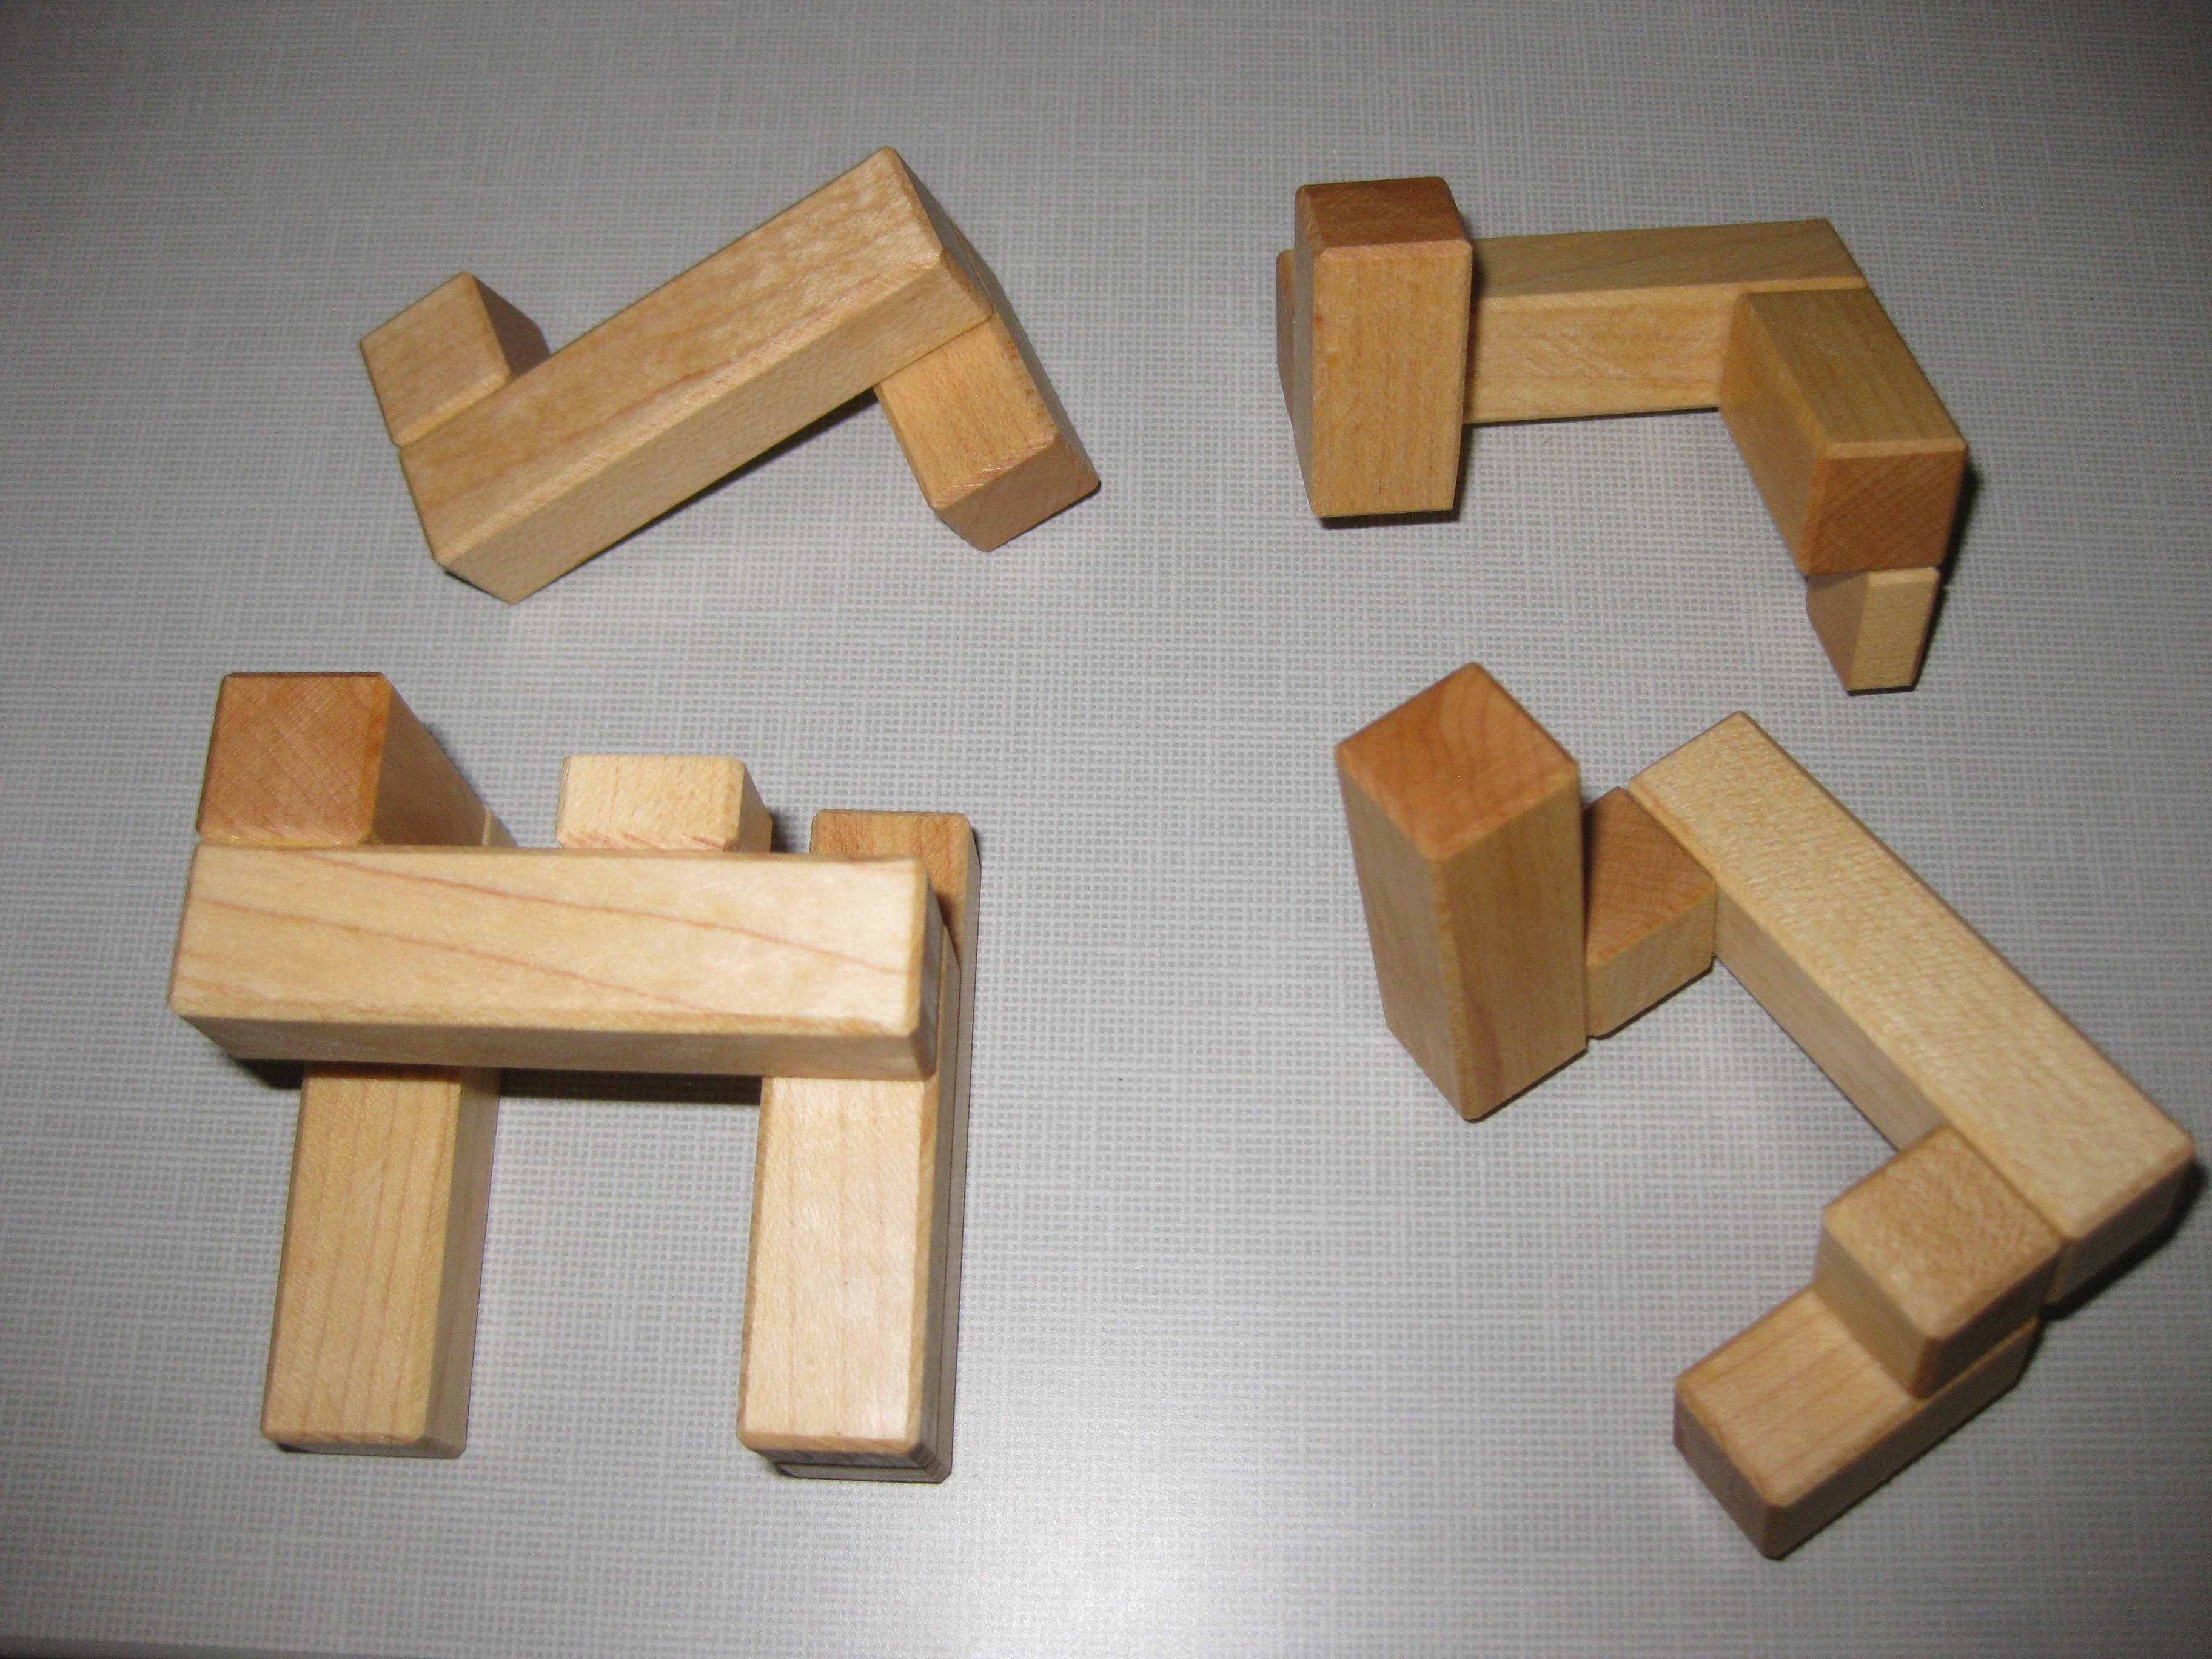
Little Bruce in pieces

I may have sworn at Ken for his use of “Half Cubes” in his puzzles. For some reason those half cubes seem to give me all sorts of problems. Where you’d normally be able to make a move that cube just gets in the way. Ken just laughed at me and said “It’s a clue”. He’s not wrong, but it is equally an obstacle to solving the puzzle. As with all of Ken’s puzzles I’ve played with the solution is delightful, with more than enough clues that mere mortals can solve it, and even enjoy solving it. There’s a couple of Aha moments along the way, and the twist to the puzzle is great.

Thanks again Ken for allowing me to add another Ken original to my collection. I’m honoured.

Well that’s all for this review, I hope you enjoyed it, and I look forward to writing a lot more in the near future.
Really Bent Board Burr

It’s been a while since I’ve sat down and shown the process of making a puzzle, mainly because I’ve been busy in the shop working on making puzzles, and haven’t had time to write, however the Really Bent Board Burr by Derek Bosch is one that is worth writing about.

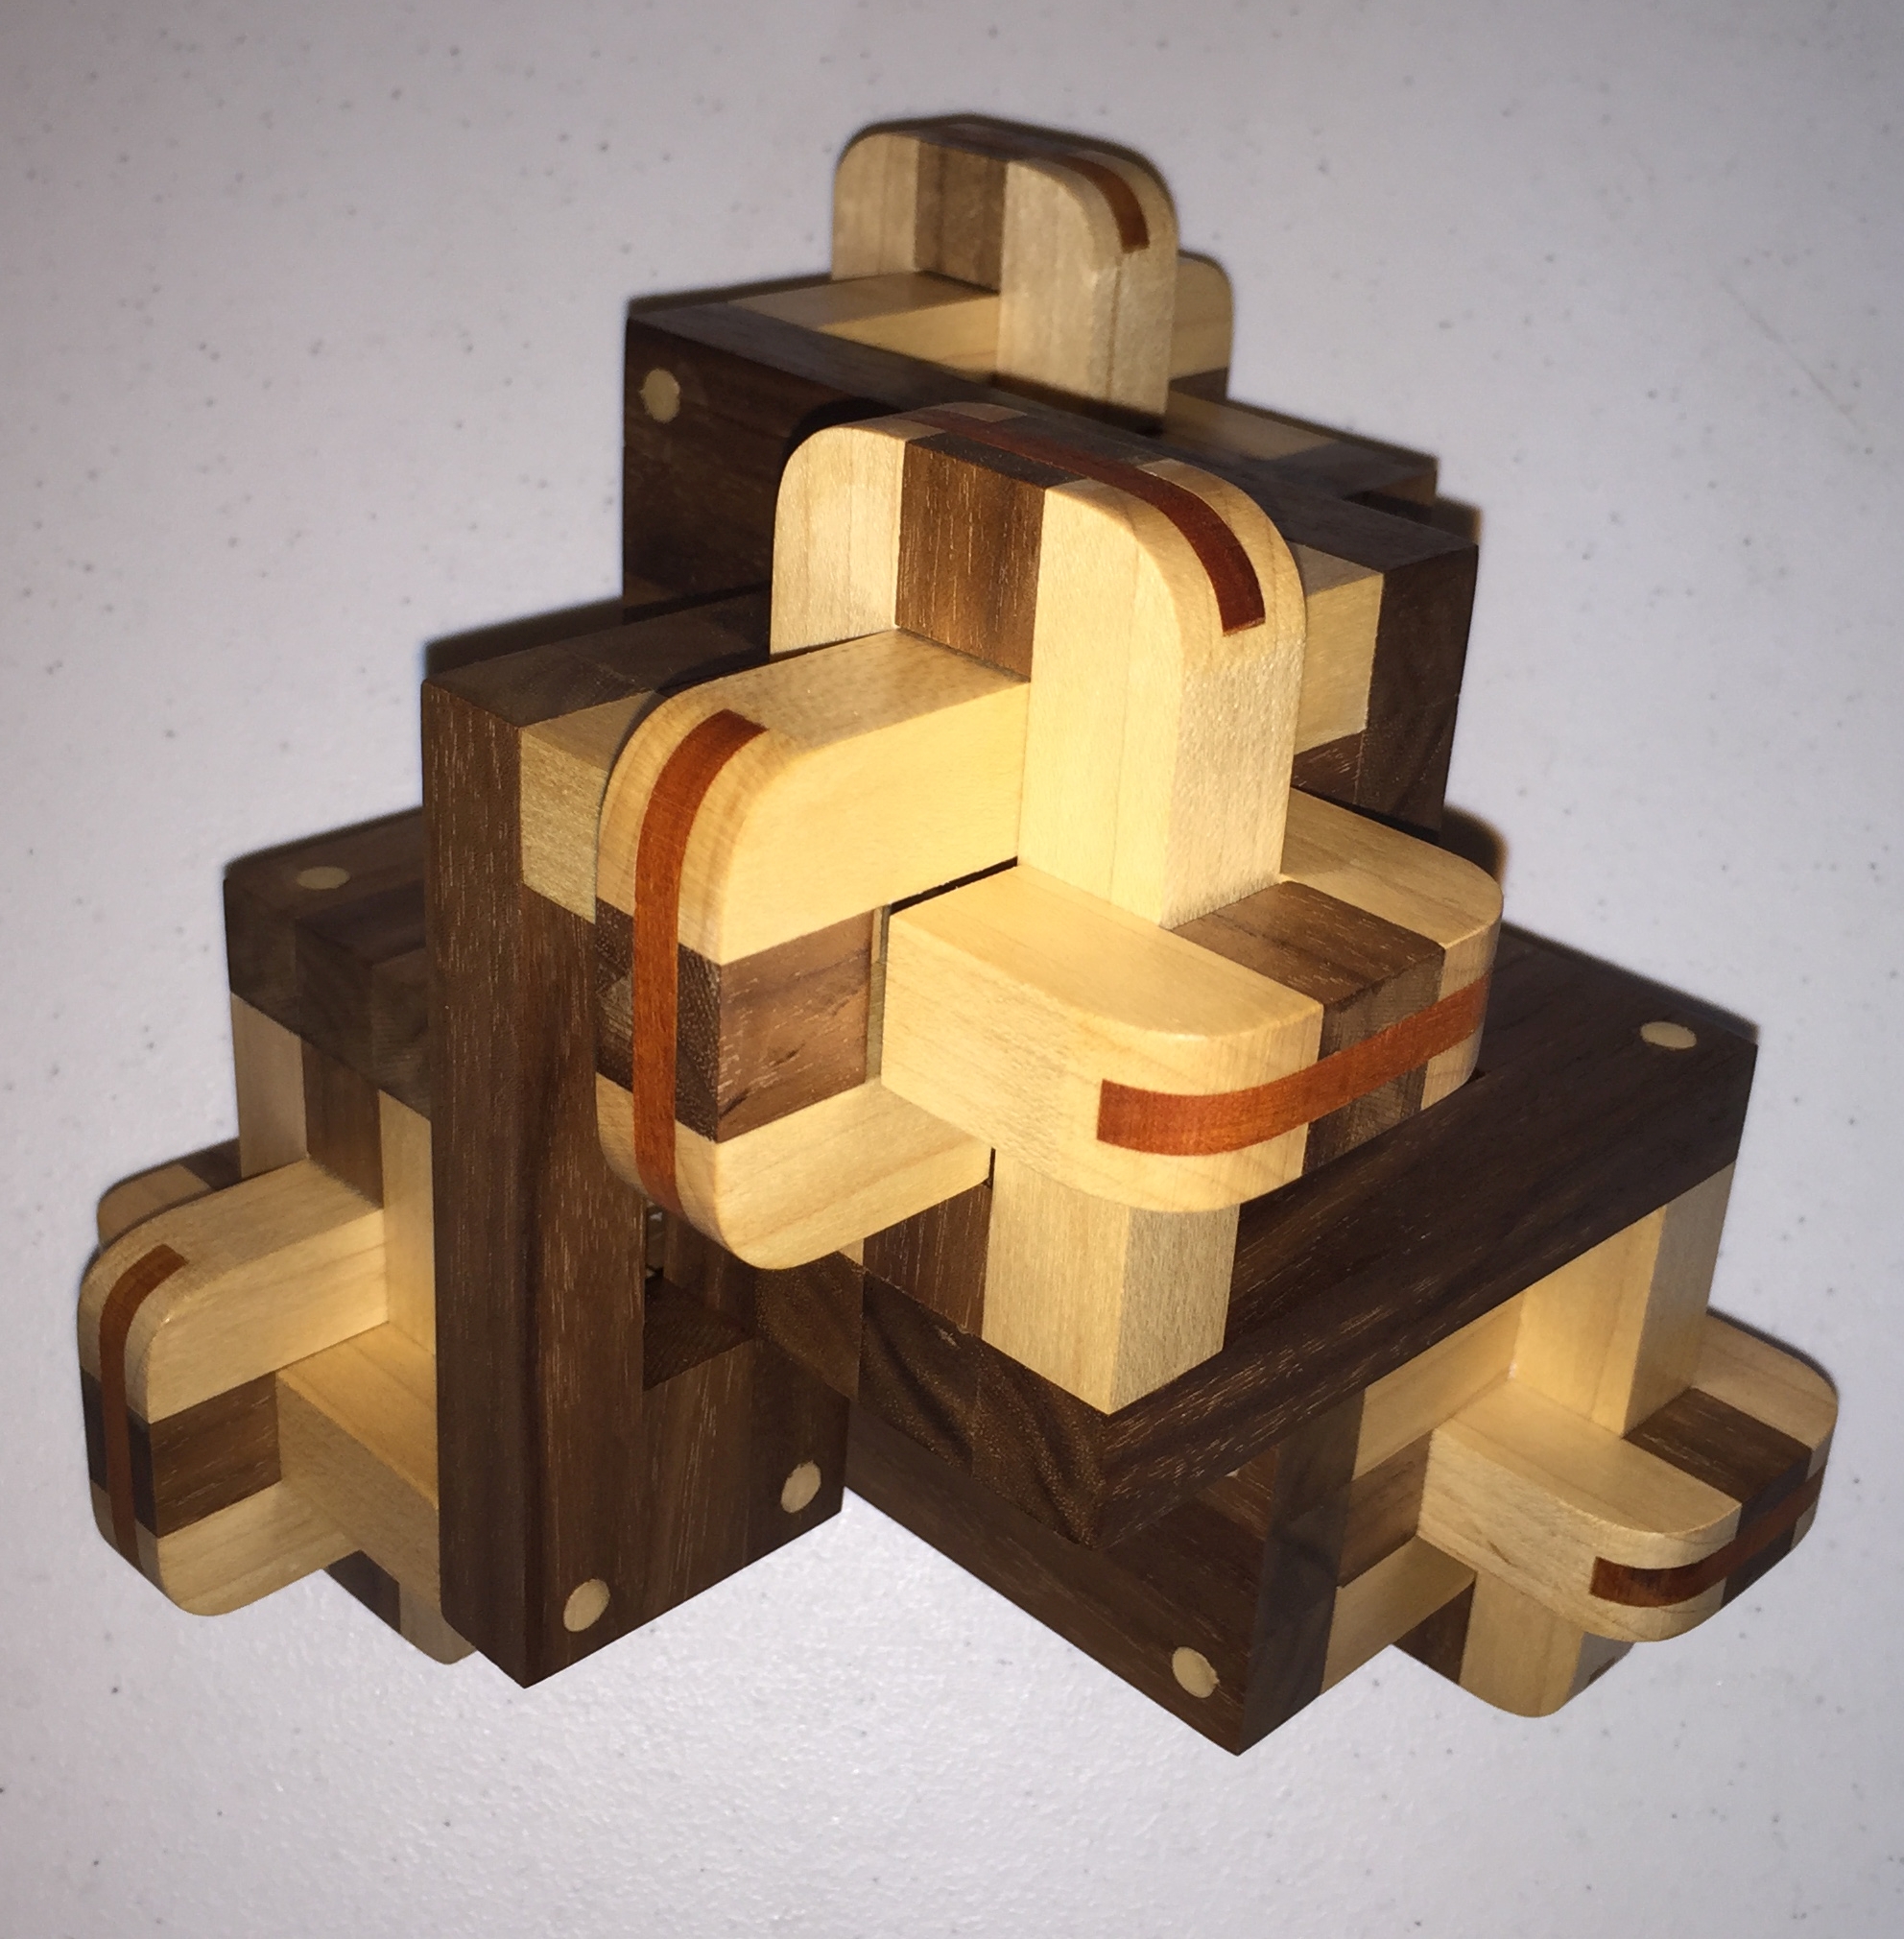
The Final puzzle

The Final puzzle

I’ve never owned a copy of this puzzle, and it has always intrigued me. I’ve talked about making copies for long enough, and now I finally have, so here’s a little bit of insight to the puzzle, and the process of creating it. The puzzle was originally produced by Tom Lensch back in 2007 and the craftsmanship as you’d expect was superb. Hopefully I’m able to do it justice, but I’ll let you be the judge of that.

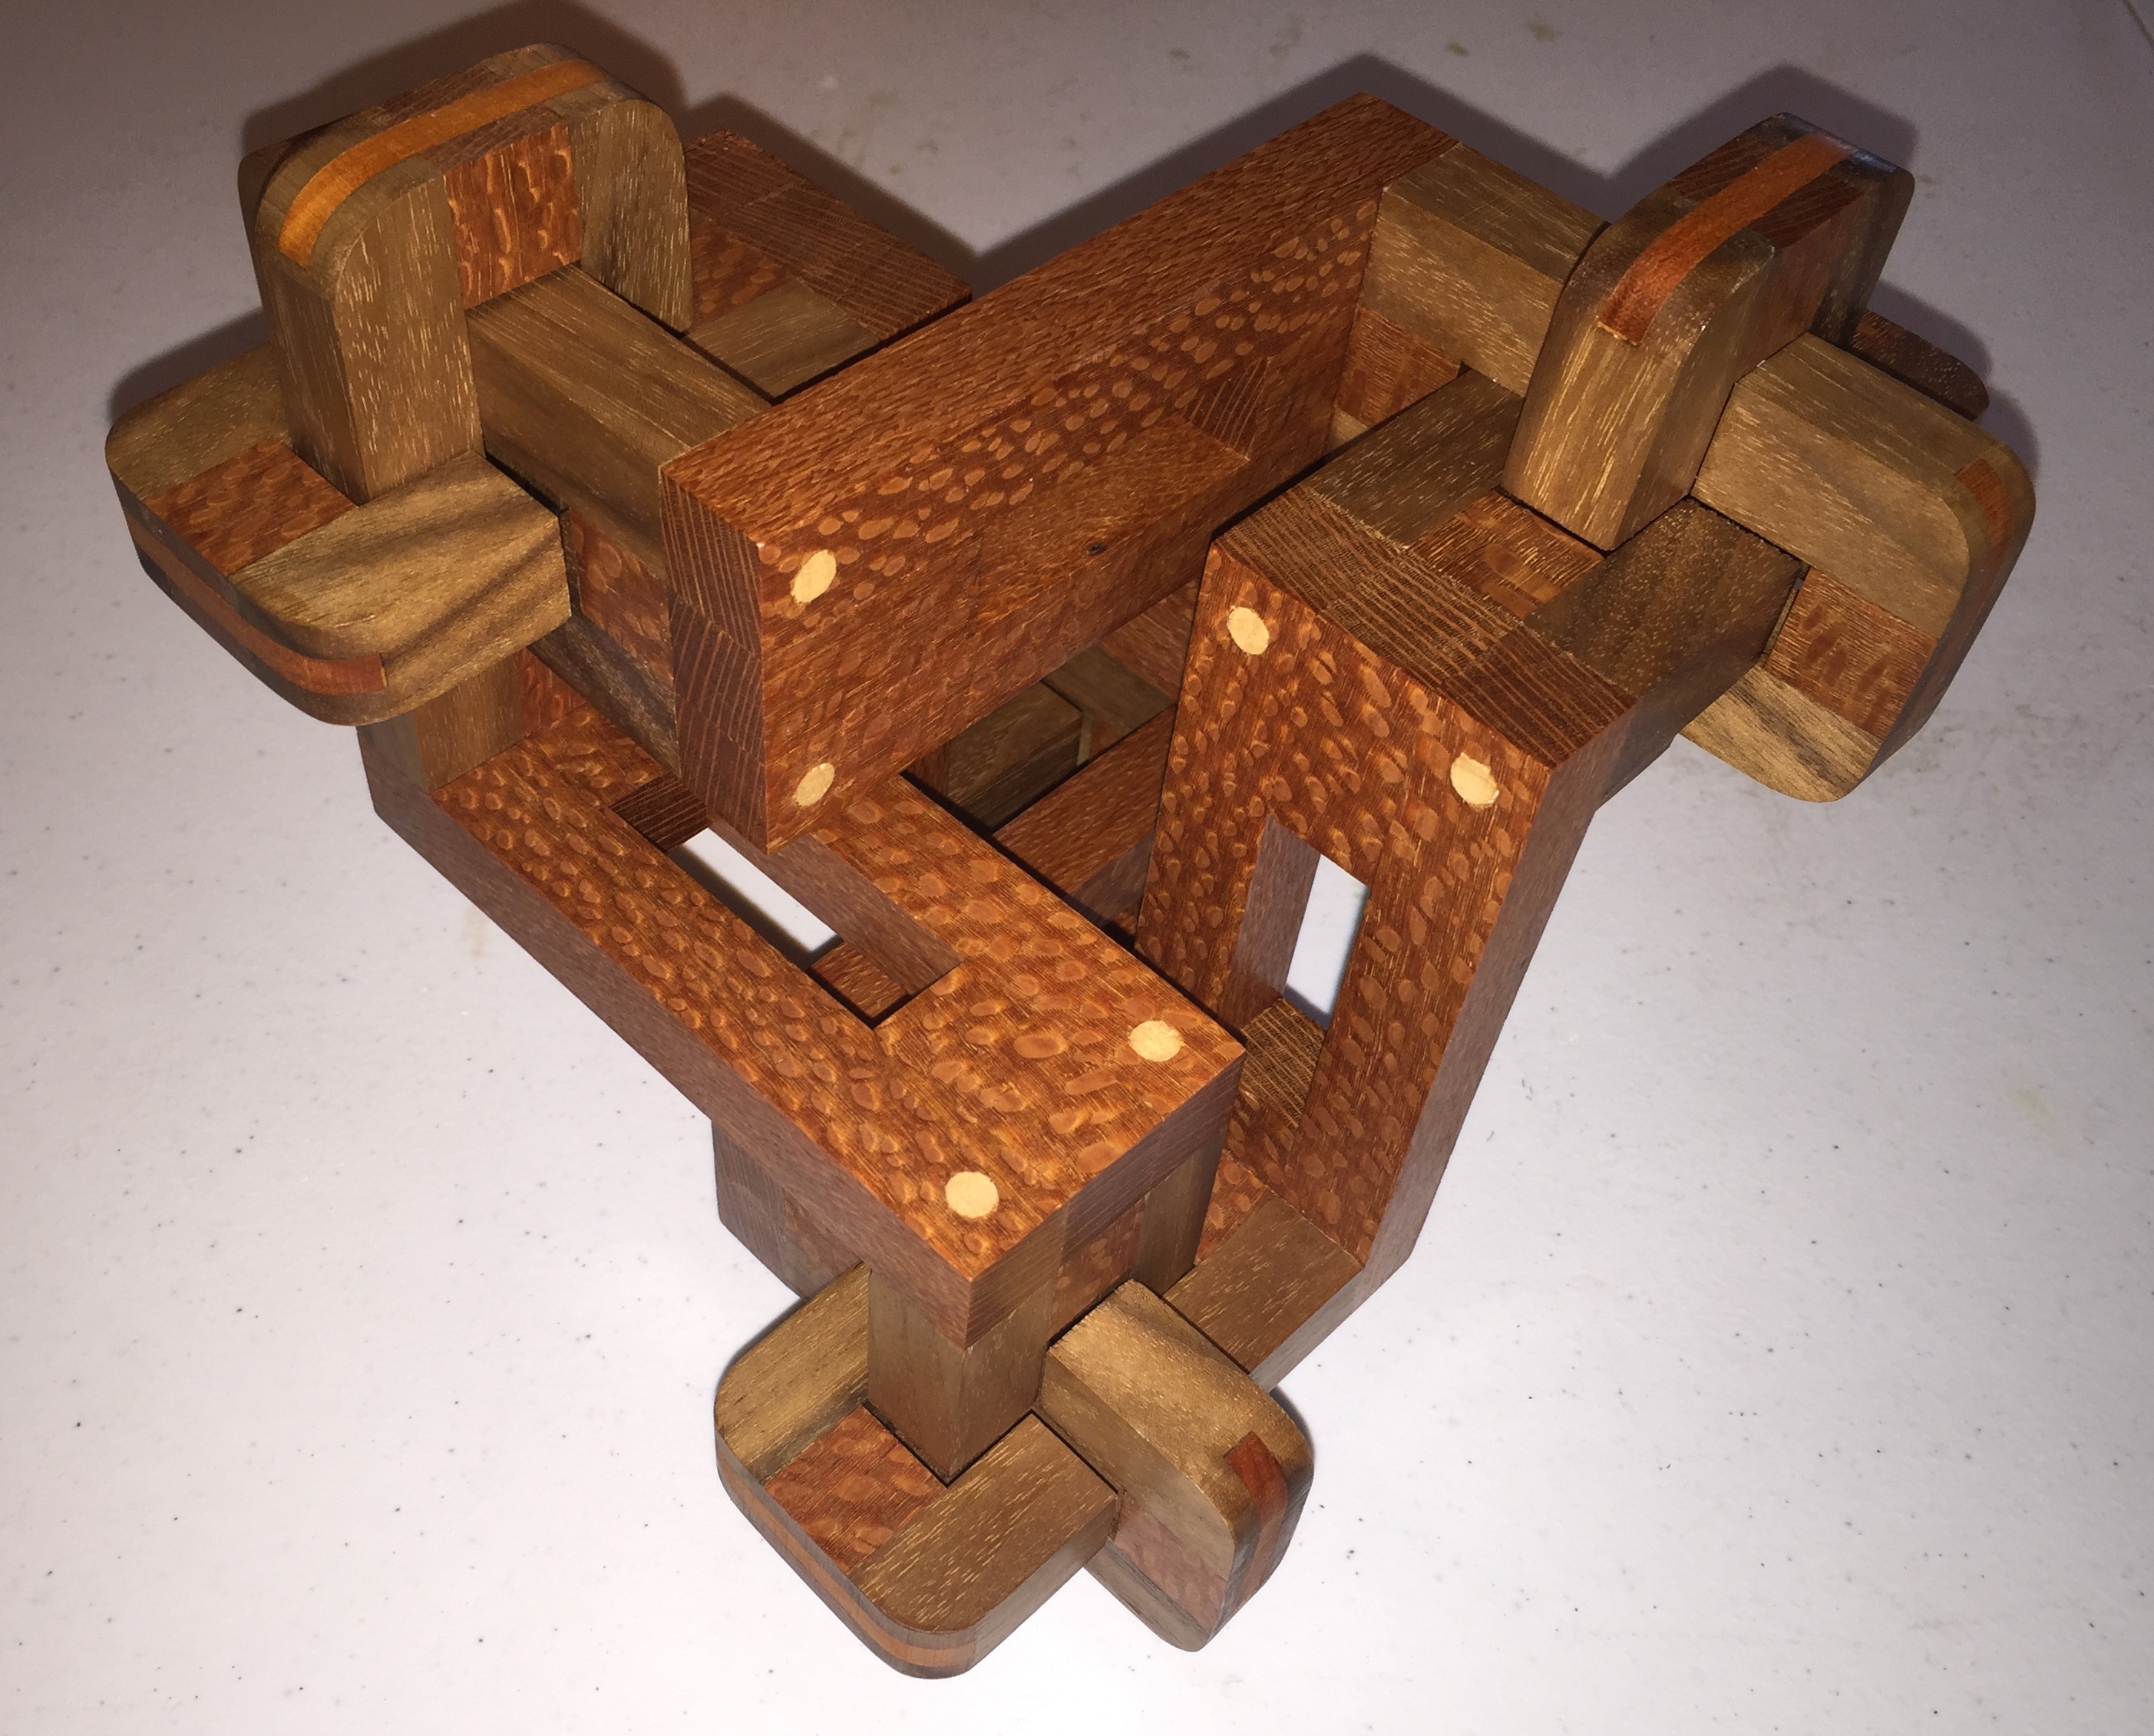
An alternate angle

An alternate angle

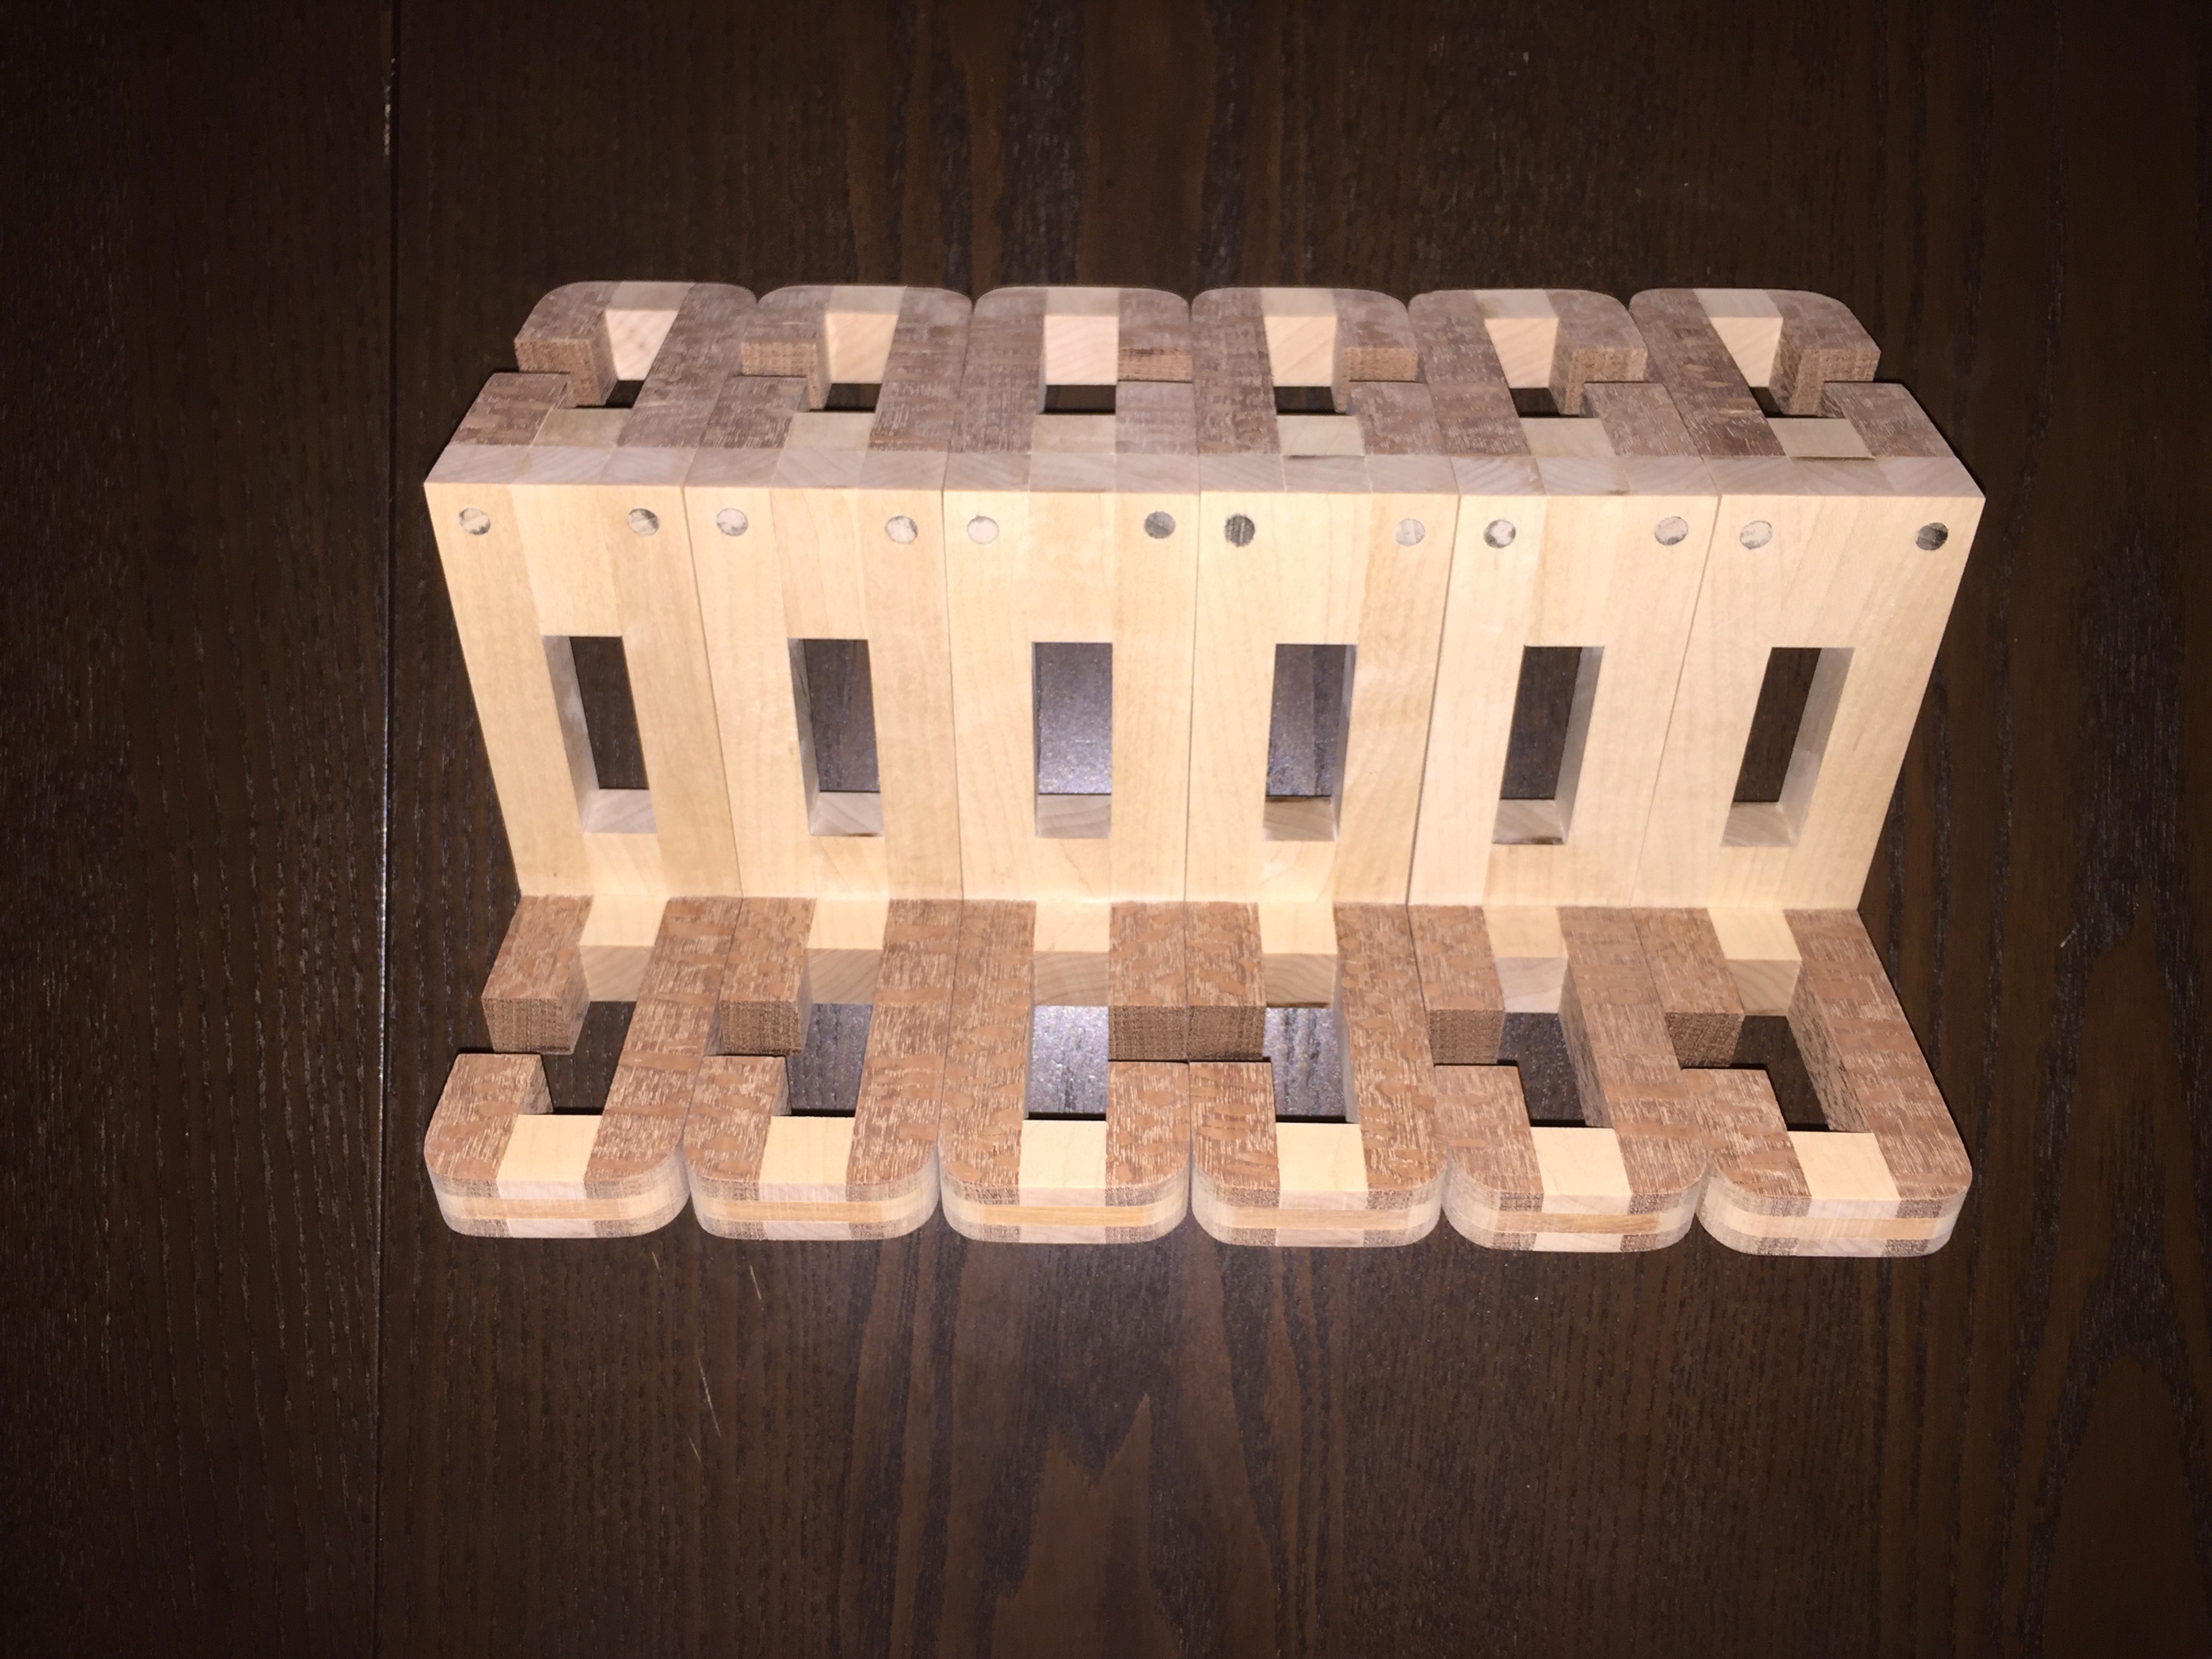
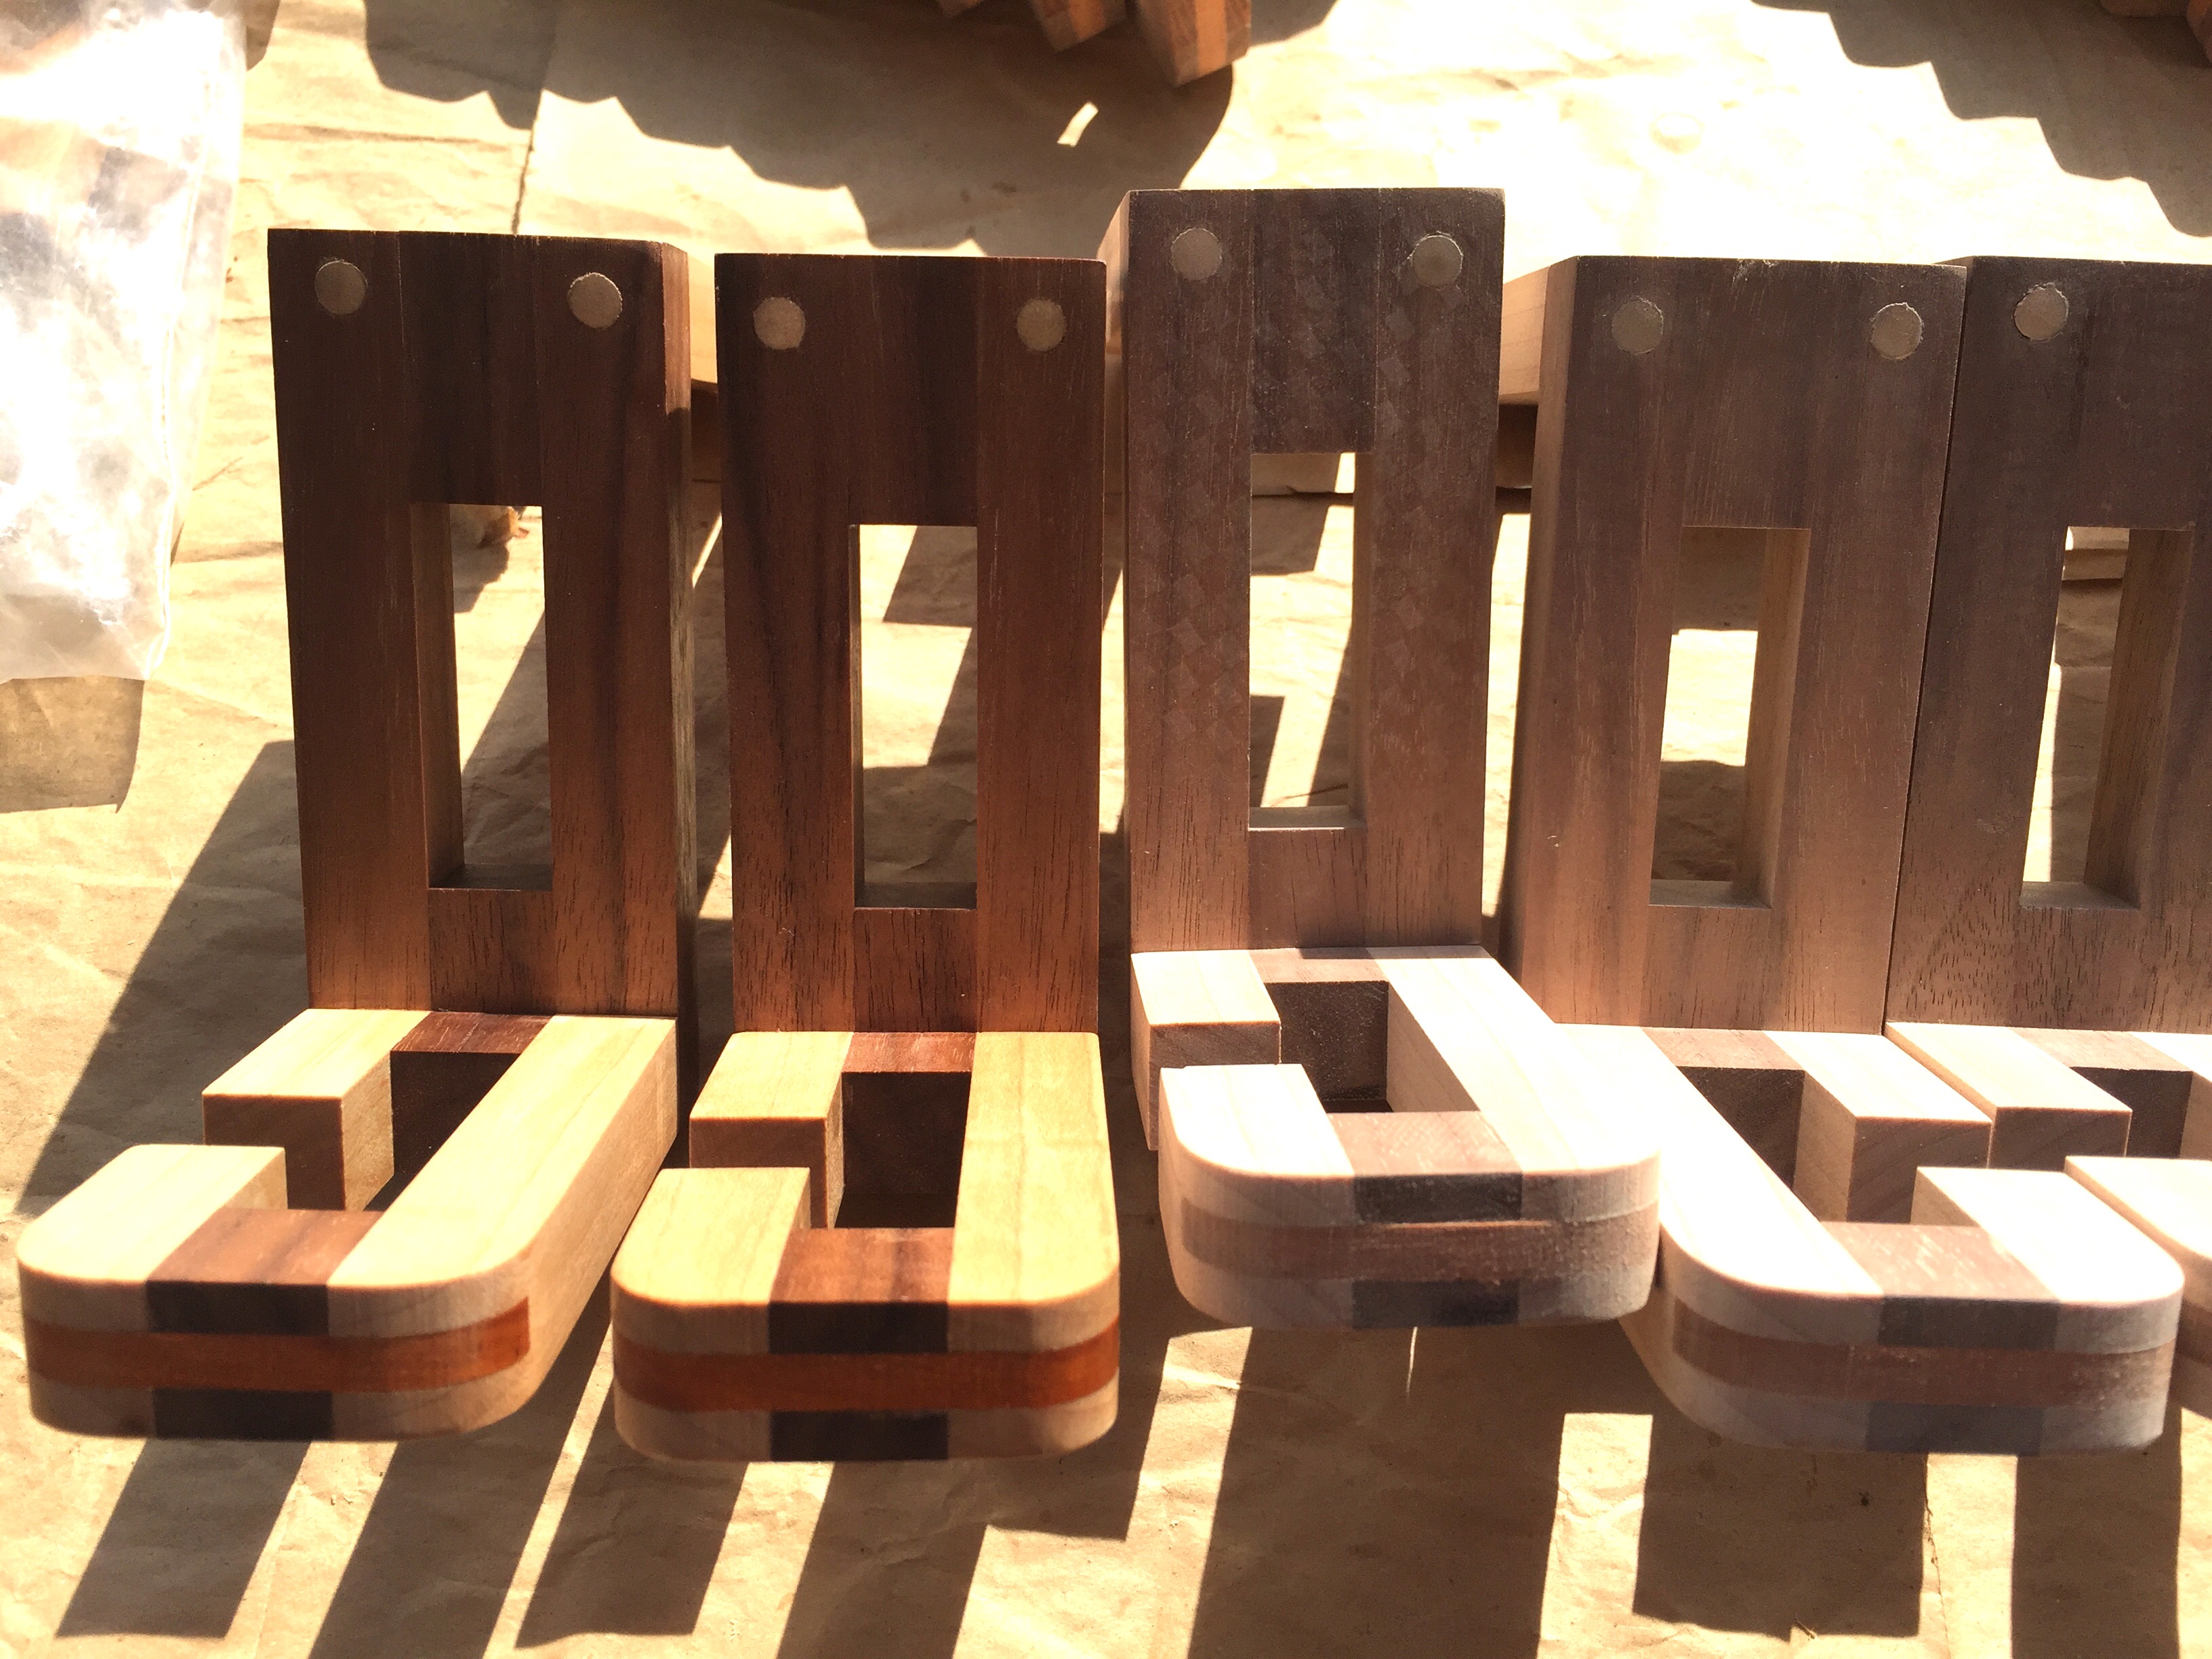
Before I get into the details of making this puzzle, here’s a few interesting things about the puzzle. It’s hard to tell from the assembled puzzle, but this is a 6 piece puzzle, with three different types of pieces used in the construction. Each piece forms a ‘Z’ shape with two ‘C’ pieces attached to a central ‘O’ piece. The puzzle itself has two different solutions using the same 6 pieces. An easy and a hard solution. The easy solution is a level 10.6.1.4 while the hard is a staggering 20.2.10. In all honesty calling the easy solution easy is a joke. This is a really tough puzzle both to assemble and dis-assemble, however the final shape is well worth the time to solve. (And no, I’m not smart enough to assemble it without help!)

All six pieces that make up the RBBB

All six pieces that make up the RBBB

The pieces form a set where three of the Z’s have the C’s attached with the opening facing in opposite directions, two with the opening in the same direction, and the final is a mirror image of the second piece type. Given the length of the C’s and the minimal gluing surface to the central structure, the joints need to be reinforced to prevent them from breaking. Equally, the end of the C’s need to be reinforced to prevent them breaking too. All told there’s a lot of work to producing such a puzzle, however the end result is in my opinion worth the extra effort.

Starting with square sticks

Starting with square sticks

The start of any such puzzle is with the preparation of the stock. Square sticks need to be accurately milled from the boards giving straight, consistent sticks as a starting point. For this run of puzzles, I had a selection of Maple, Walnut and Lacewood to work with. Fortunately all the stock I had was 8/4, meaning that I could create sticks that were over 1/2″ in diameter, resulting in a very pleasing and not small final puzzle. Overall, each puzzle requires 12 feet of wood to make, and 2 feet of dowel to pin the pieces ensuring they are strong enough. That’s a lot of wood!

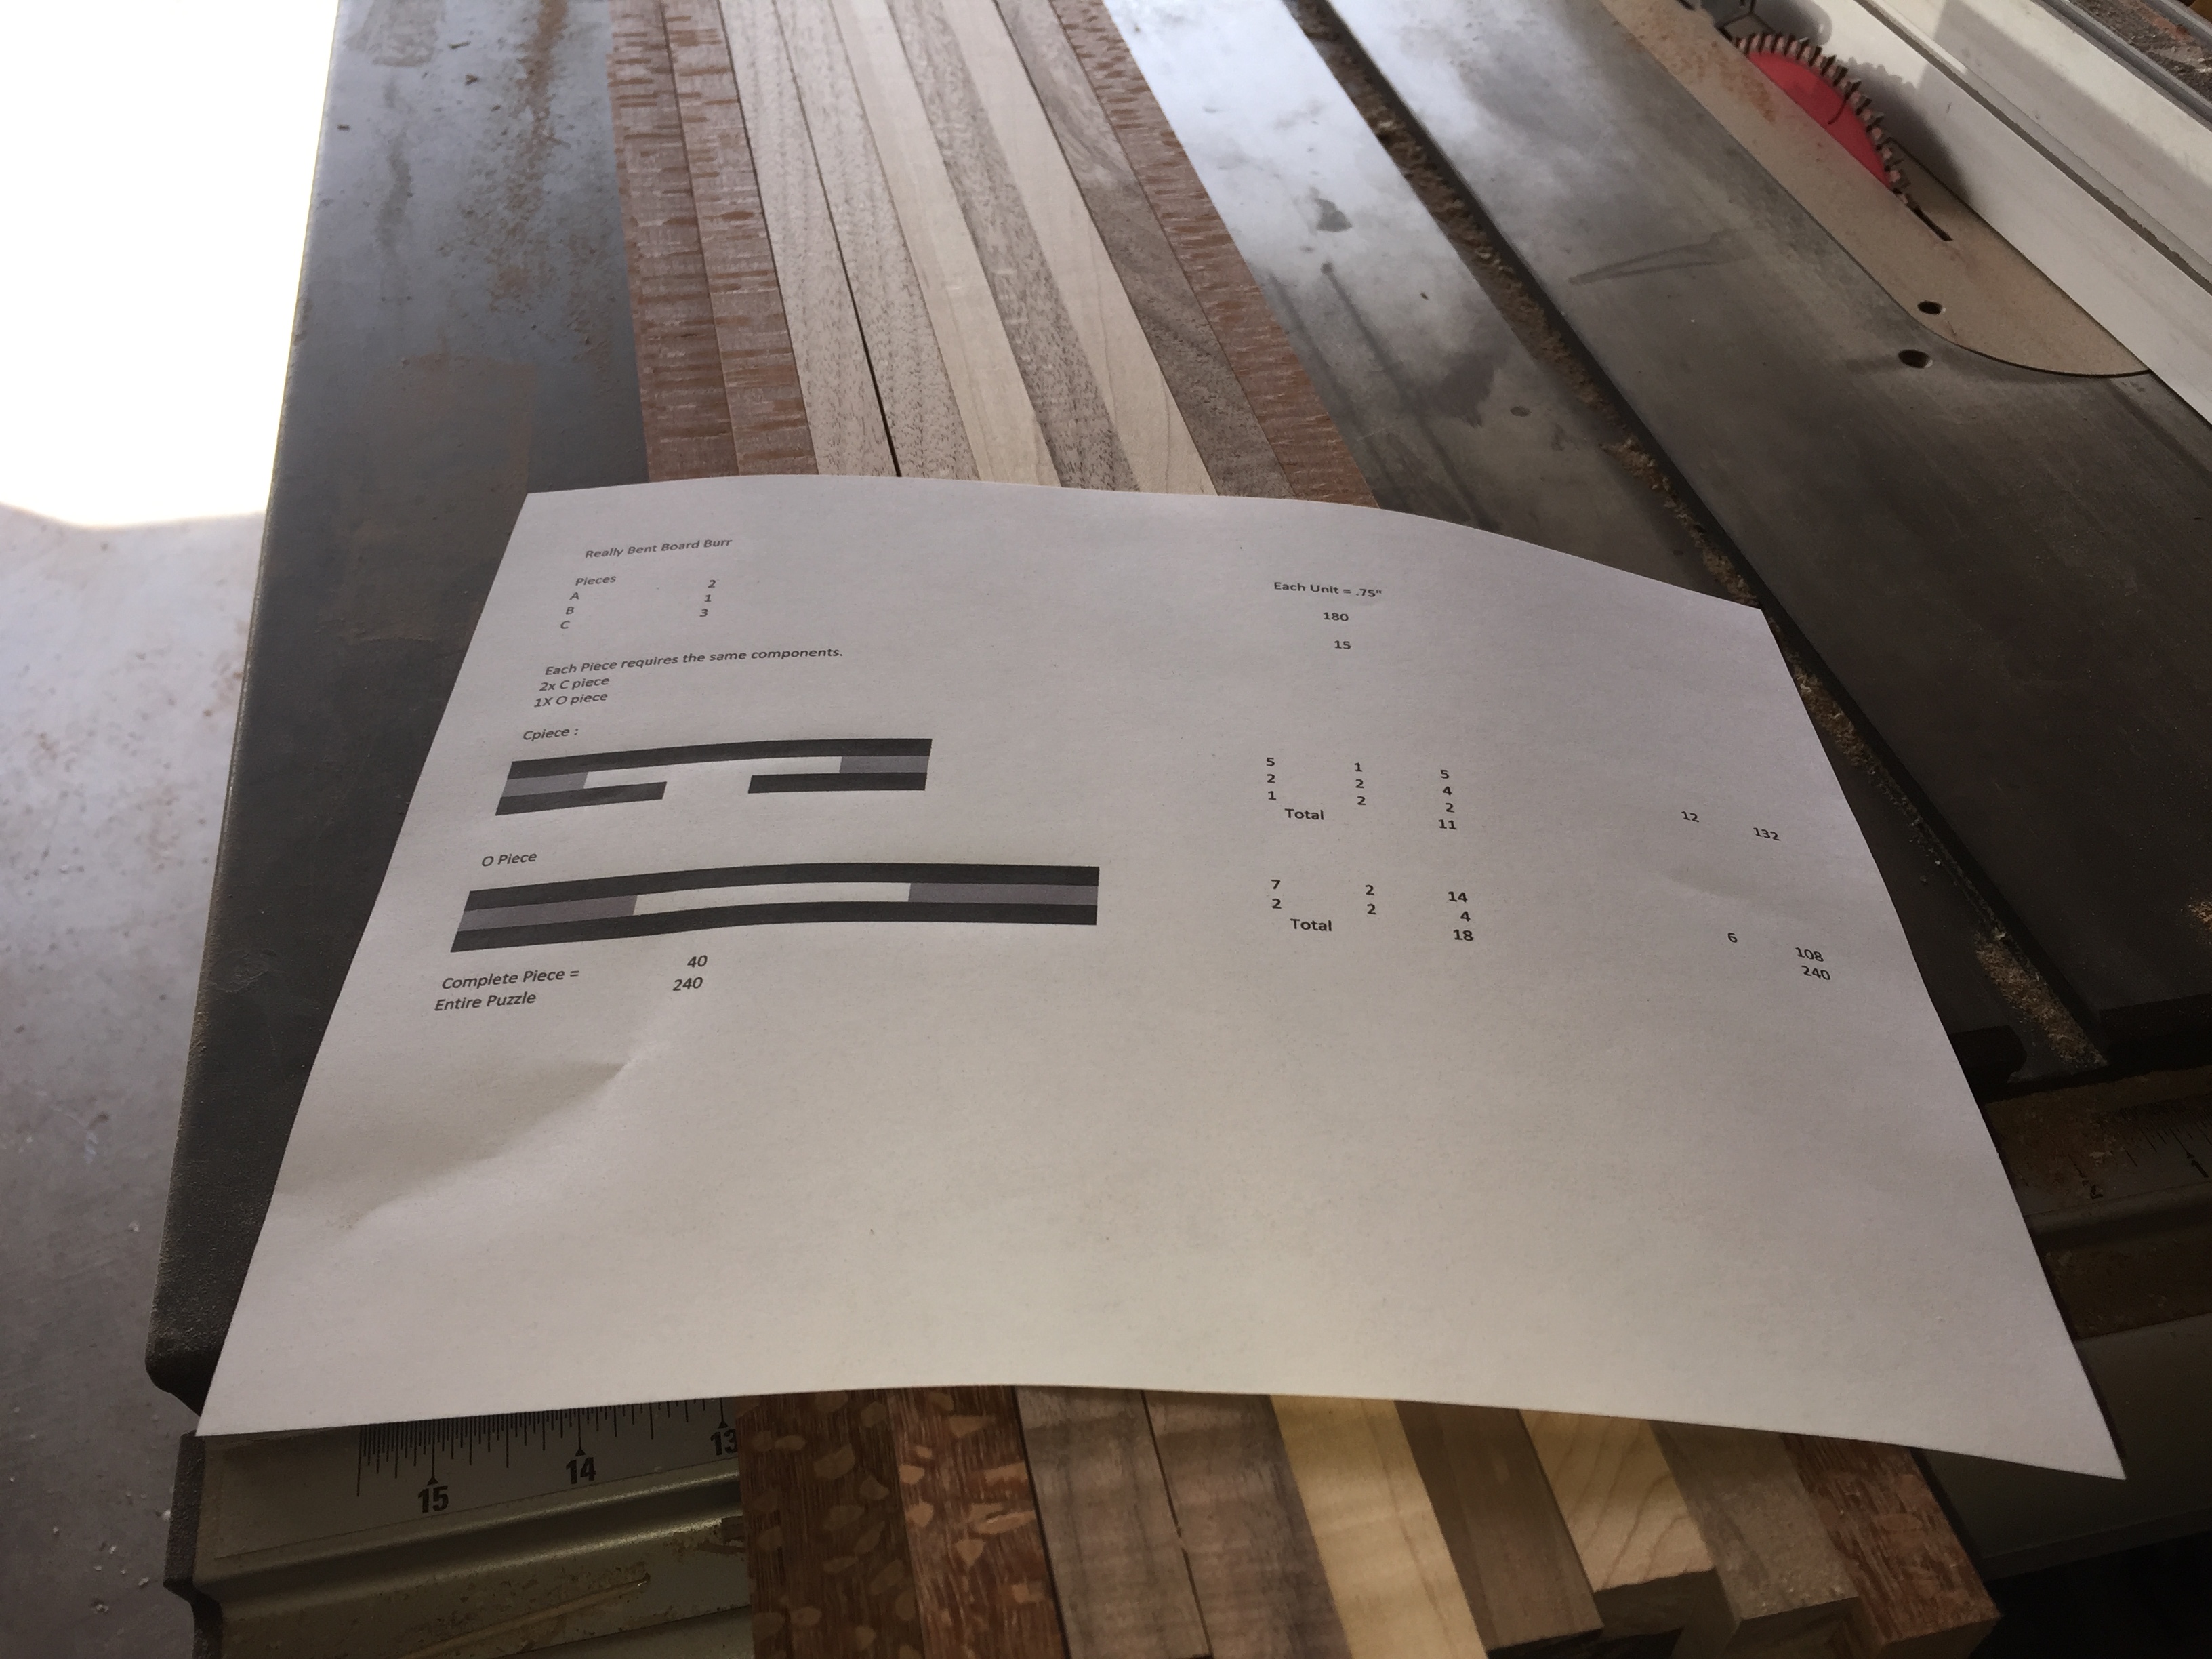
You can see my cheat sheet in the image above, where I mapped out the pieces and produced a cut list for the individual sticks needed to create the final puzzle. The colouring on the pieces on my cheat sheet is partly to make seeing each piece easier, but it also helps with the wood selected for each piece, resulting in a pretty interesting final puzzle piece.

The size of each of the pieces is determined from the width of the square stock. That sets the size of a single cube, and from there the units required are 1×1, 1×2, 1×5 and 1×7. I made a set of these pieces, which are easily created my combining the smaller units, all cut from the stock I’m using to ensure their size is accurate. You can see them in one of the photos below, sitting on my saw.

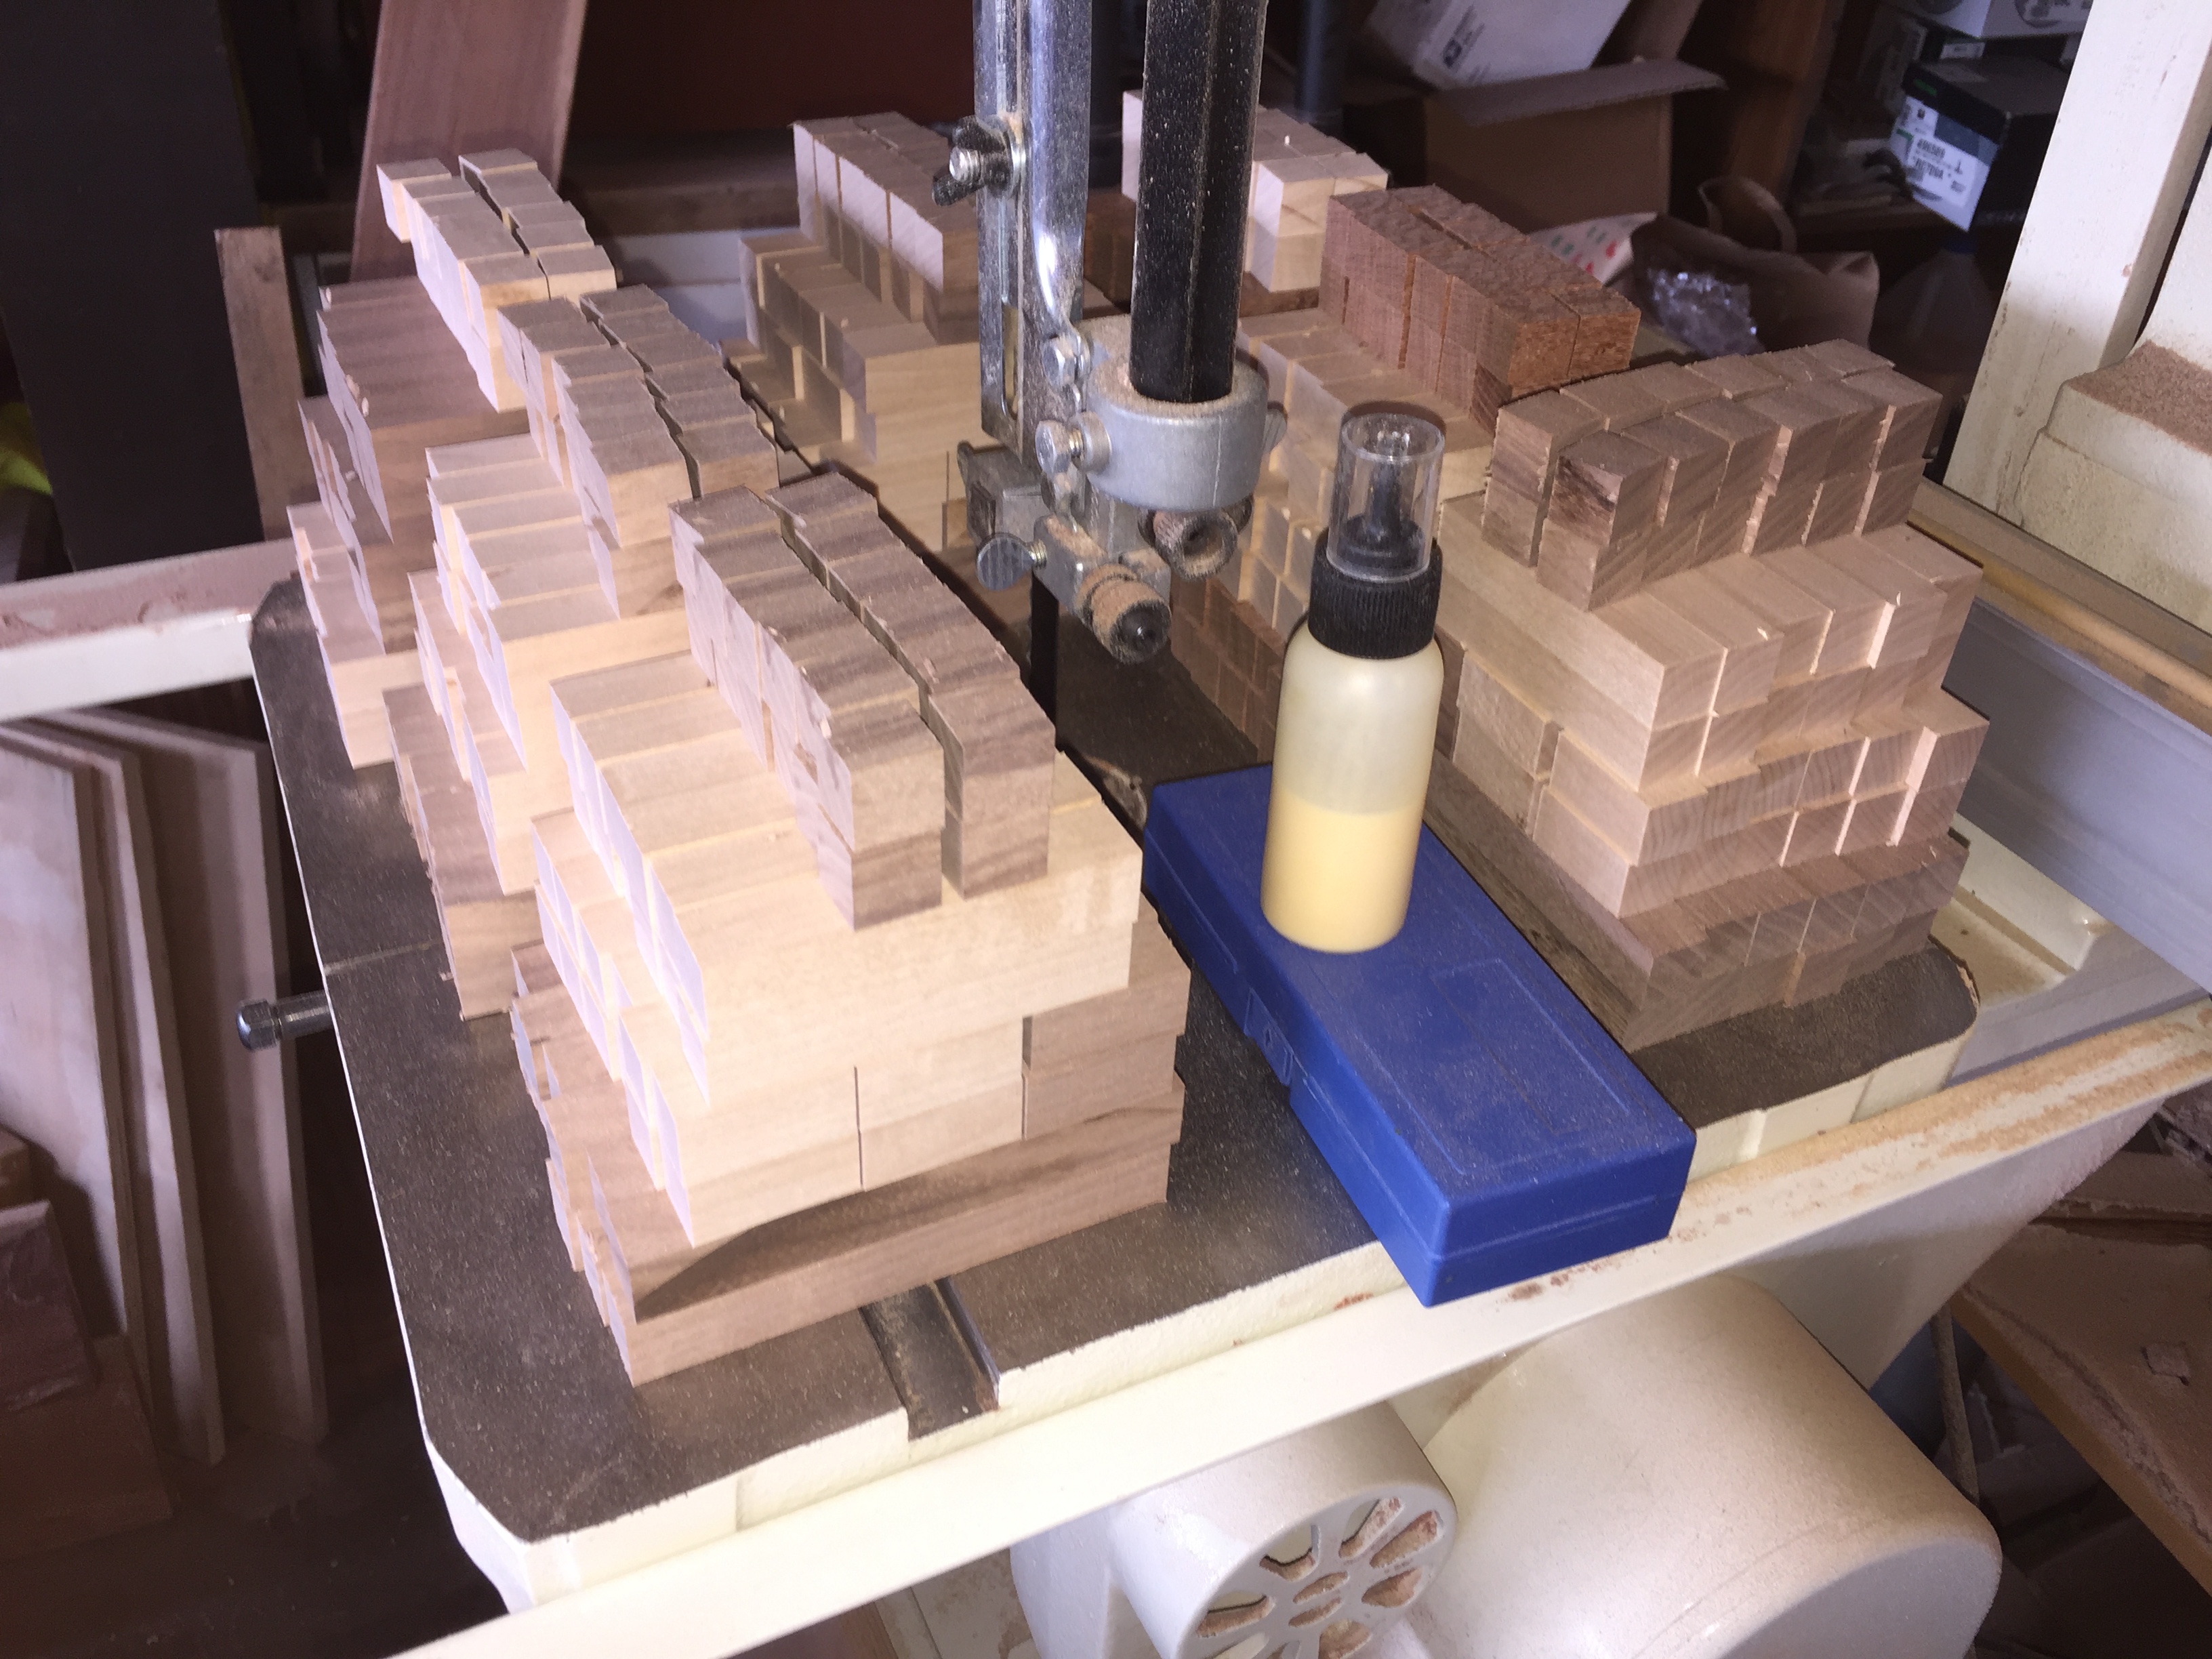
Stacks of pieces.  Each stack is one puzzle

Stacks of pieces. Each stack is one puzzle

The square sticks are cut to the correct lengths for each puzzle in batches, and then stacked to create the pieces for each puzzle. In total, I cut enough pieces for 10 copies of the puzzle to be made. As I’ve mentioned before, once the jigs are setup to make the cuts required, the effort to create 10 copies is not significantly more than to create one, so it just makes sense to make multiple copies. I’m sure there are people out there who will be interested in a copy.

Making the C's

Making the C’s

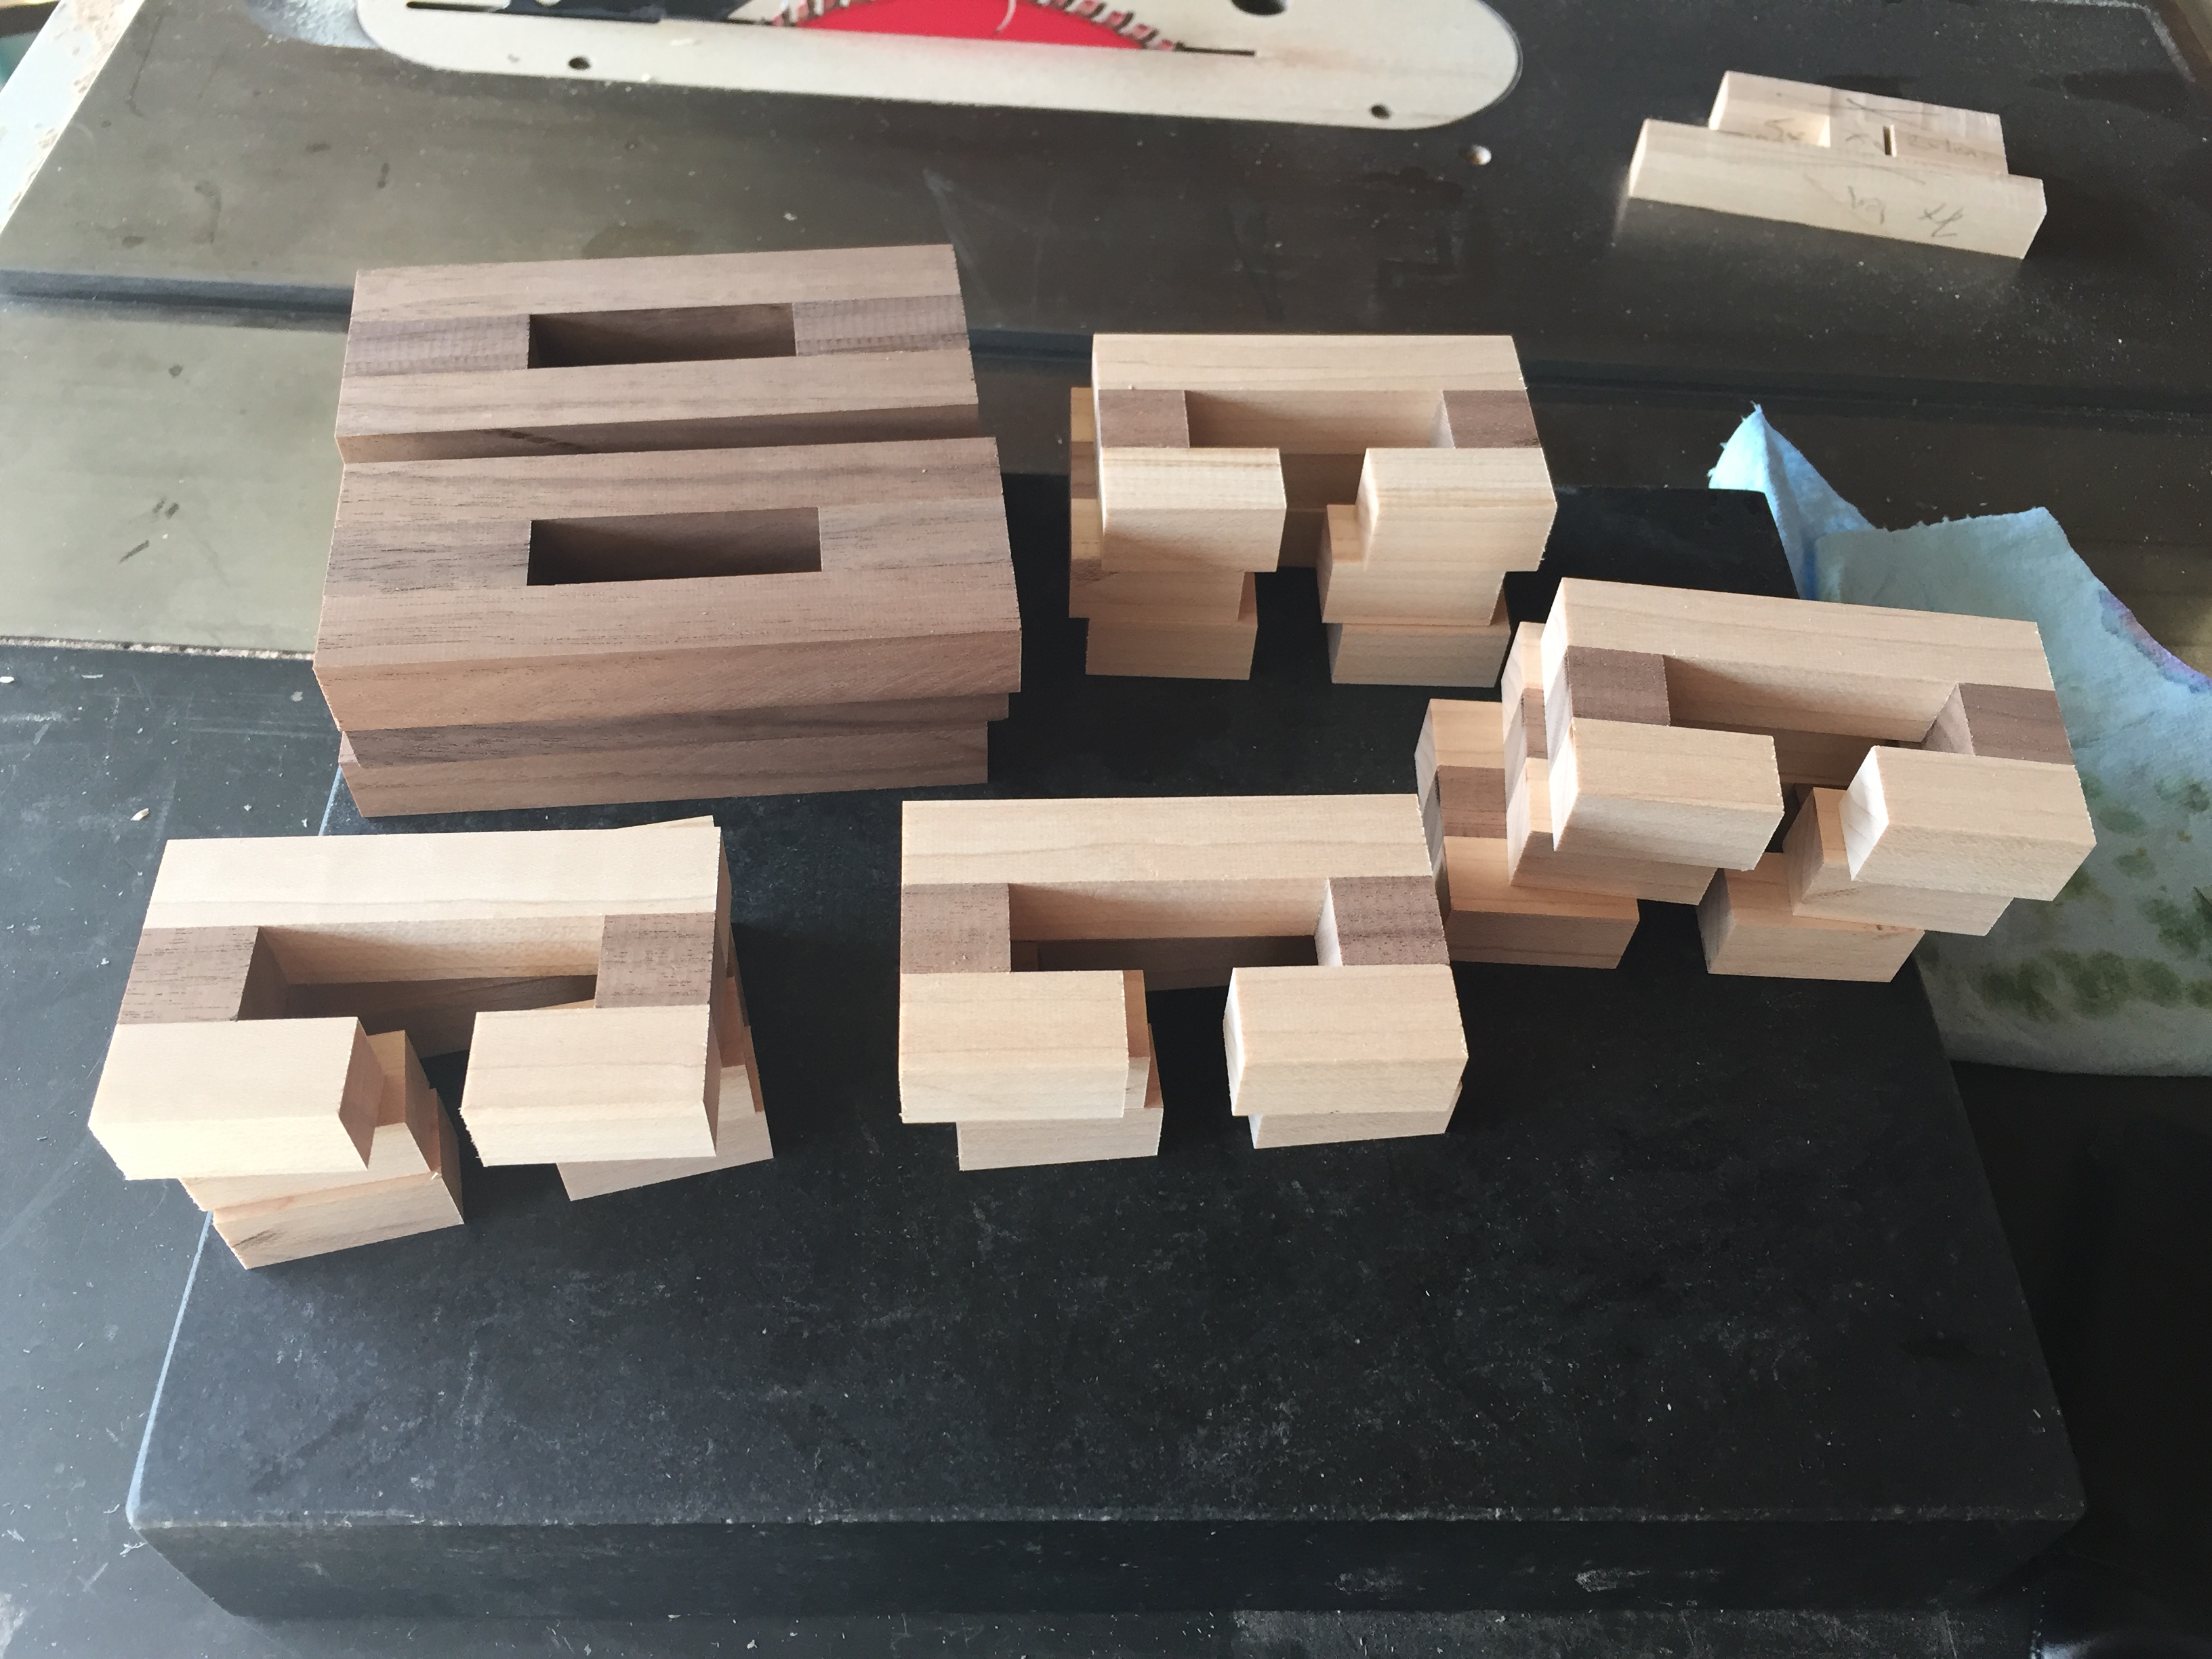
C's and O's

C’s and O’s

From each pile of sticks, the individual components of each individual puzzle piece are created. Since each piece consists of two C’s and an O, those can be created en-mass, and then assembled into the correct puzzle piece.

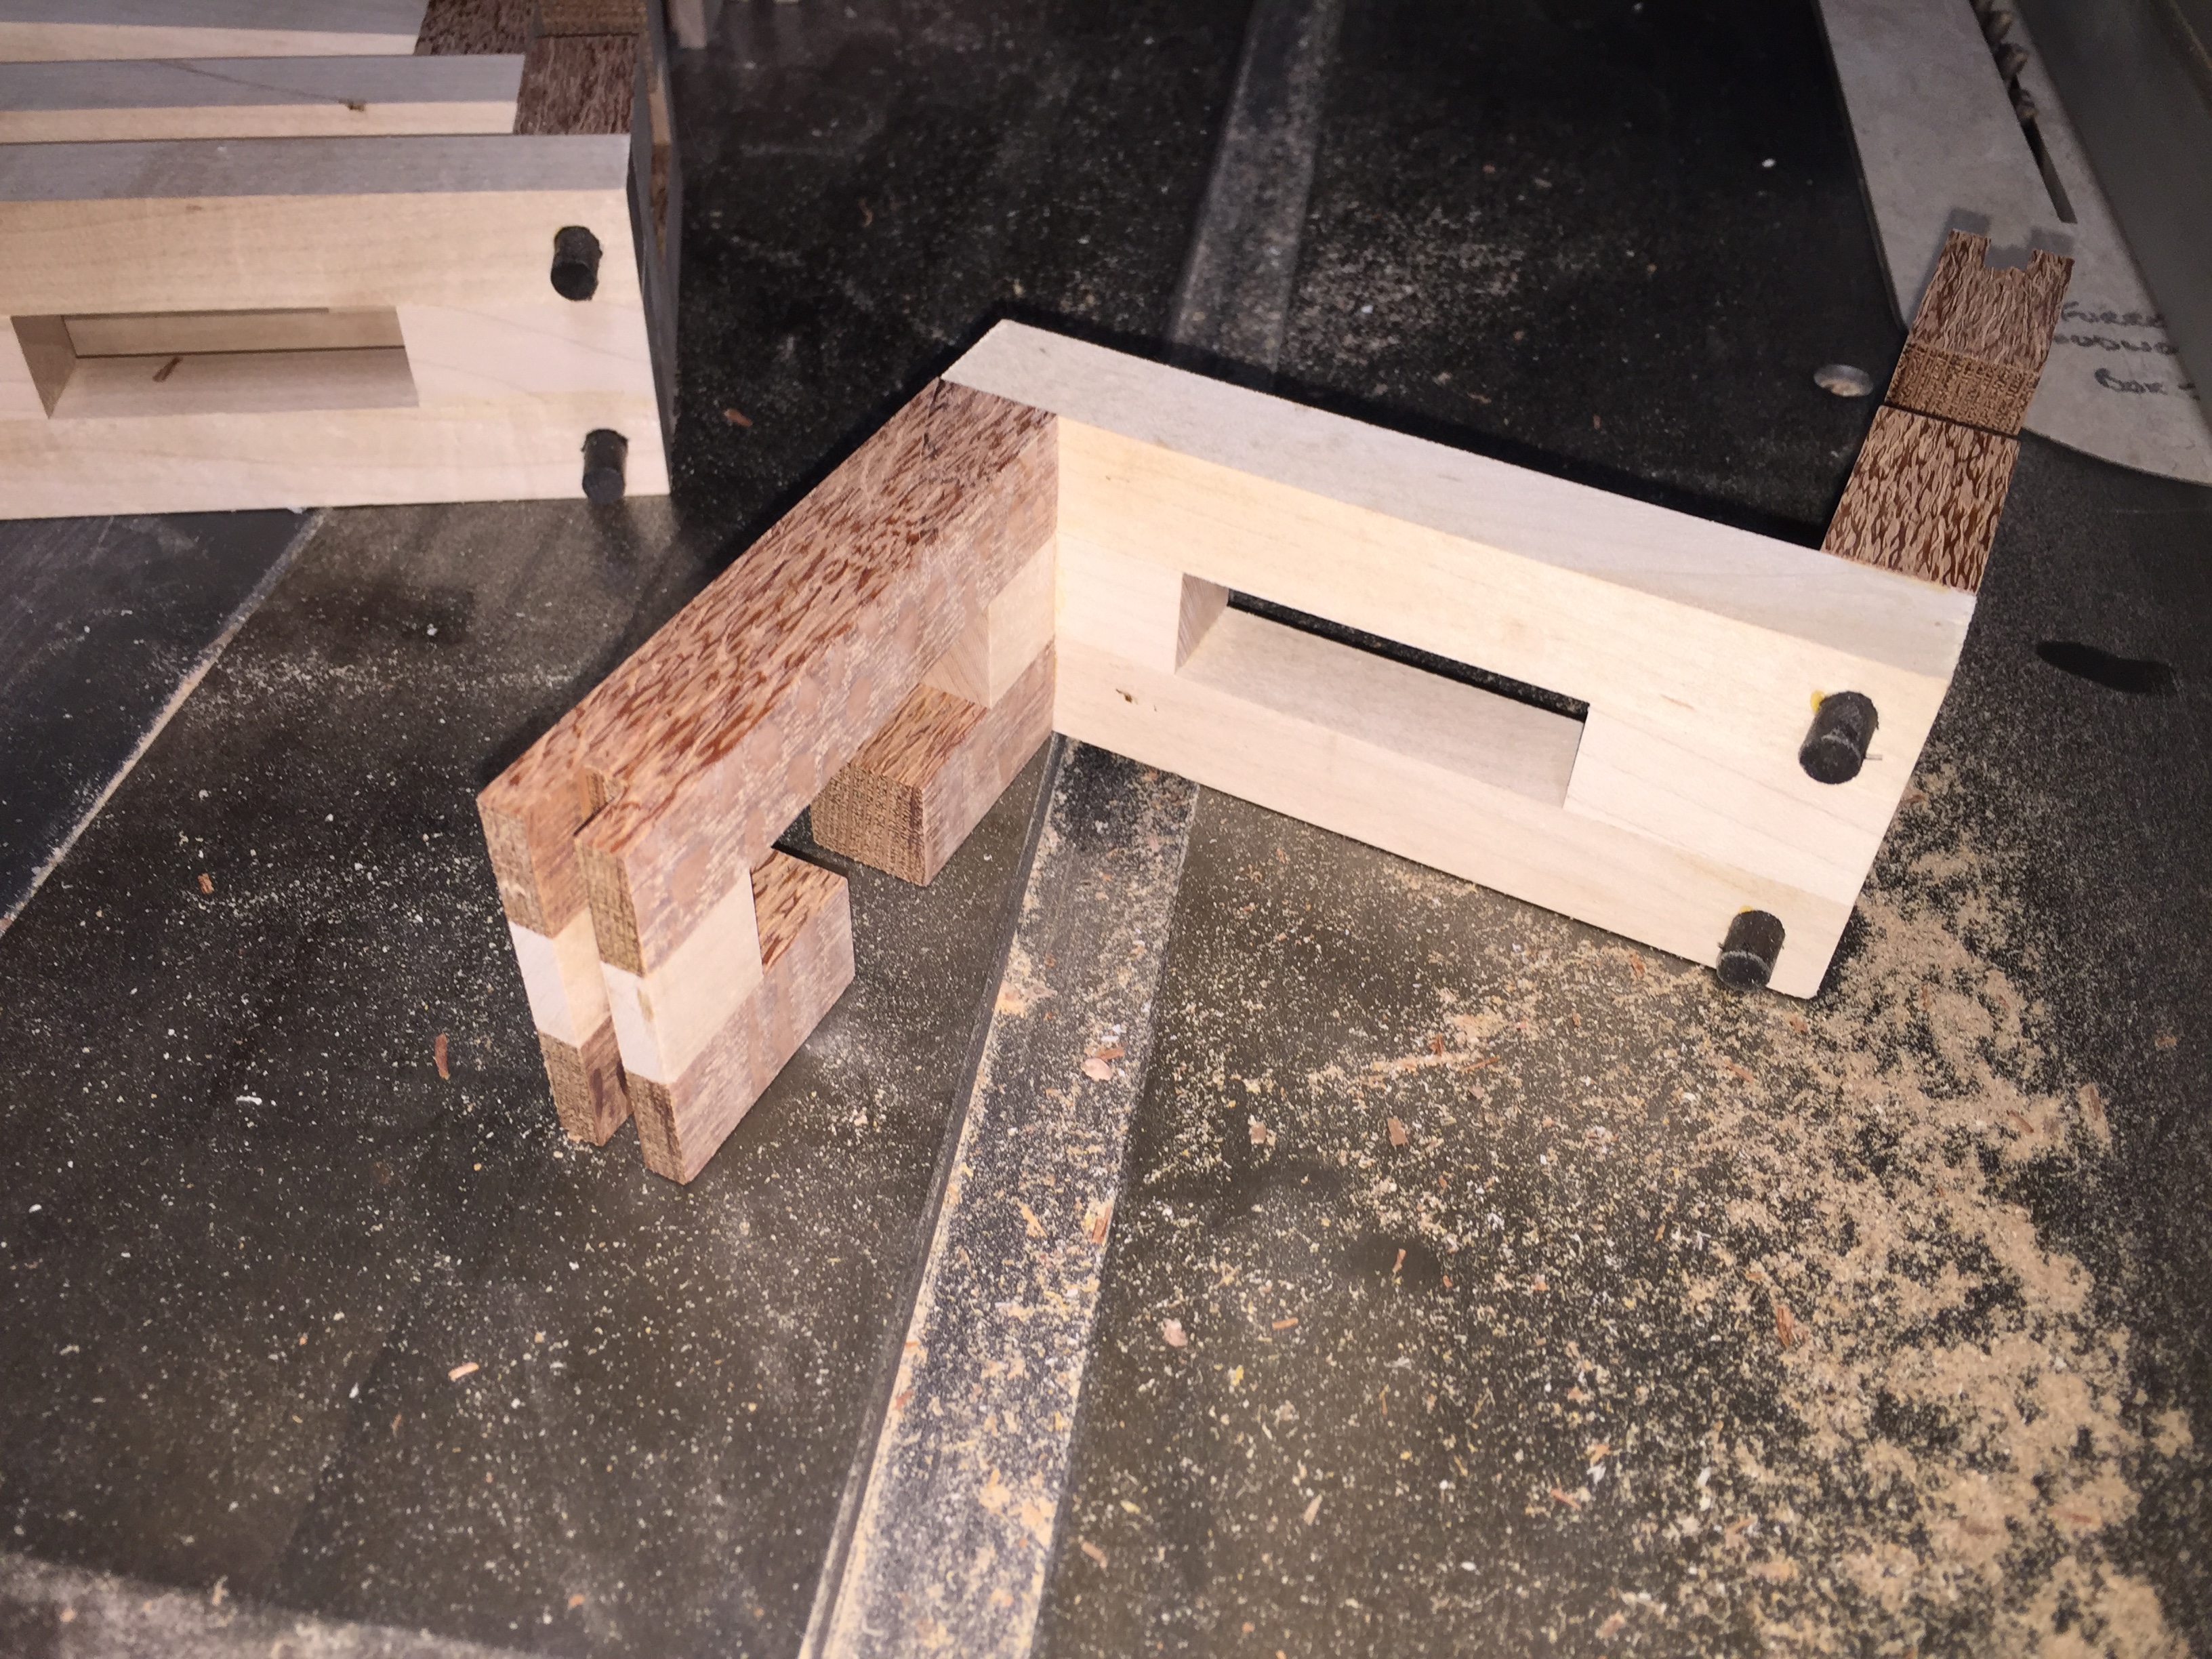
Dowels glued in place and slot cut for the spline

Dowels glued in place and slot cut for the spline

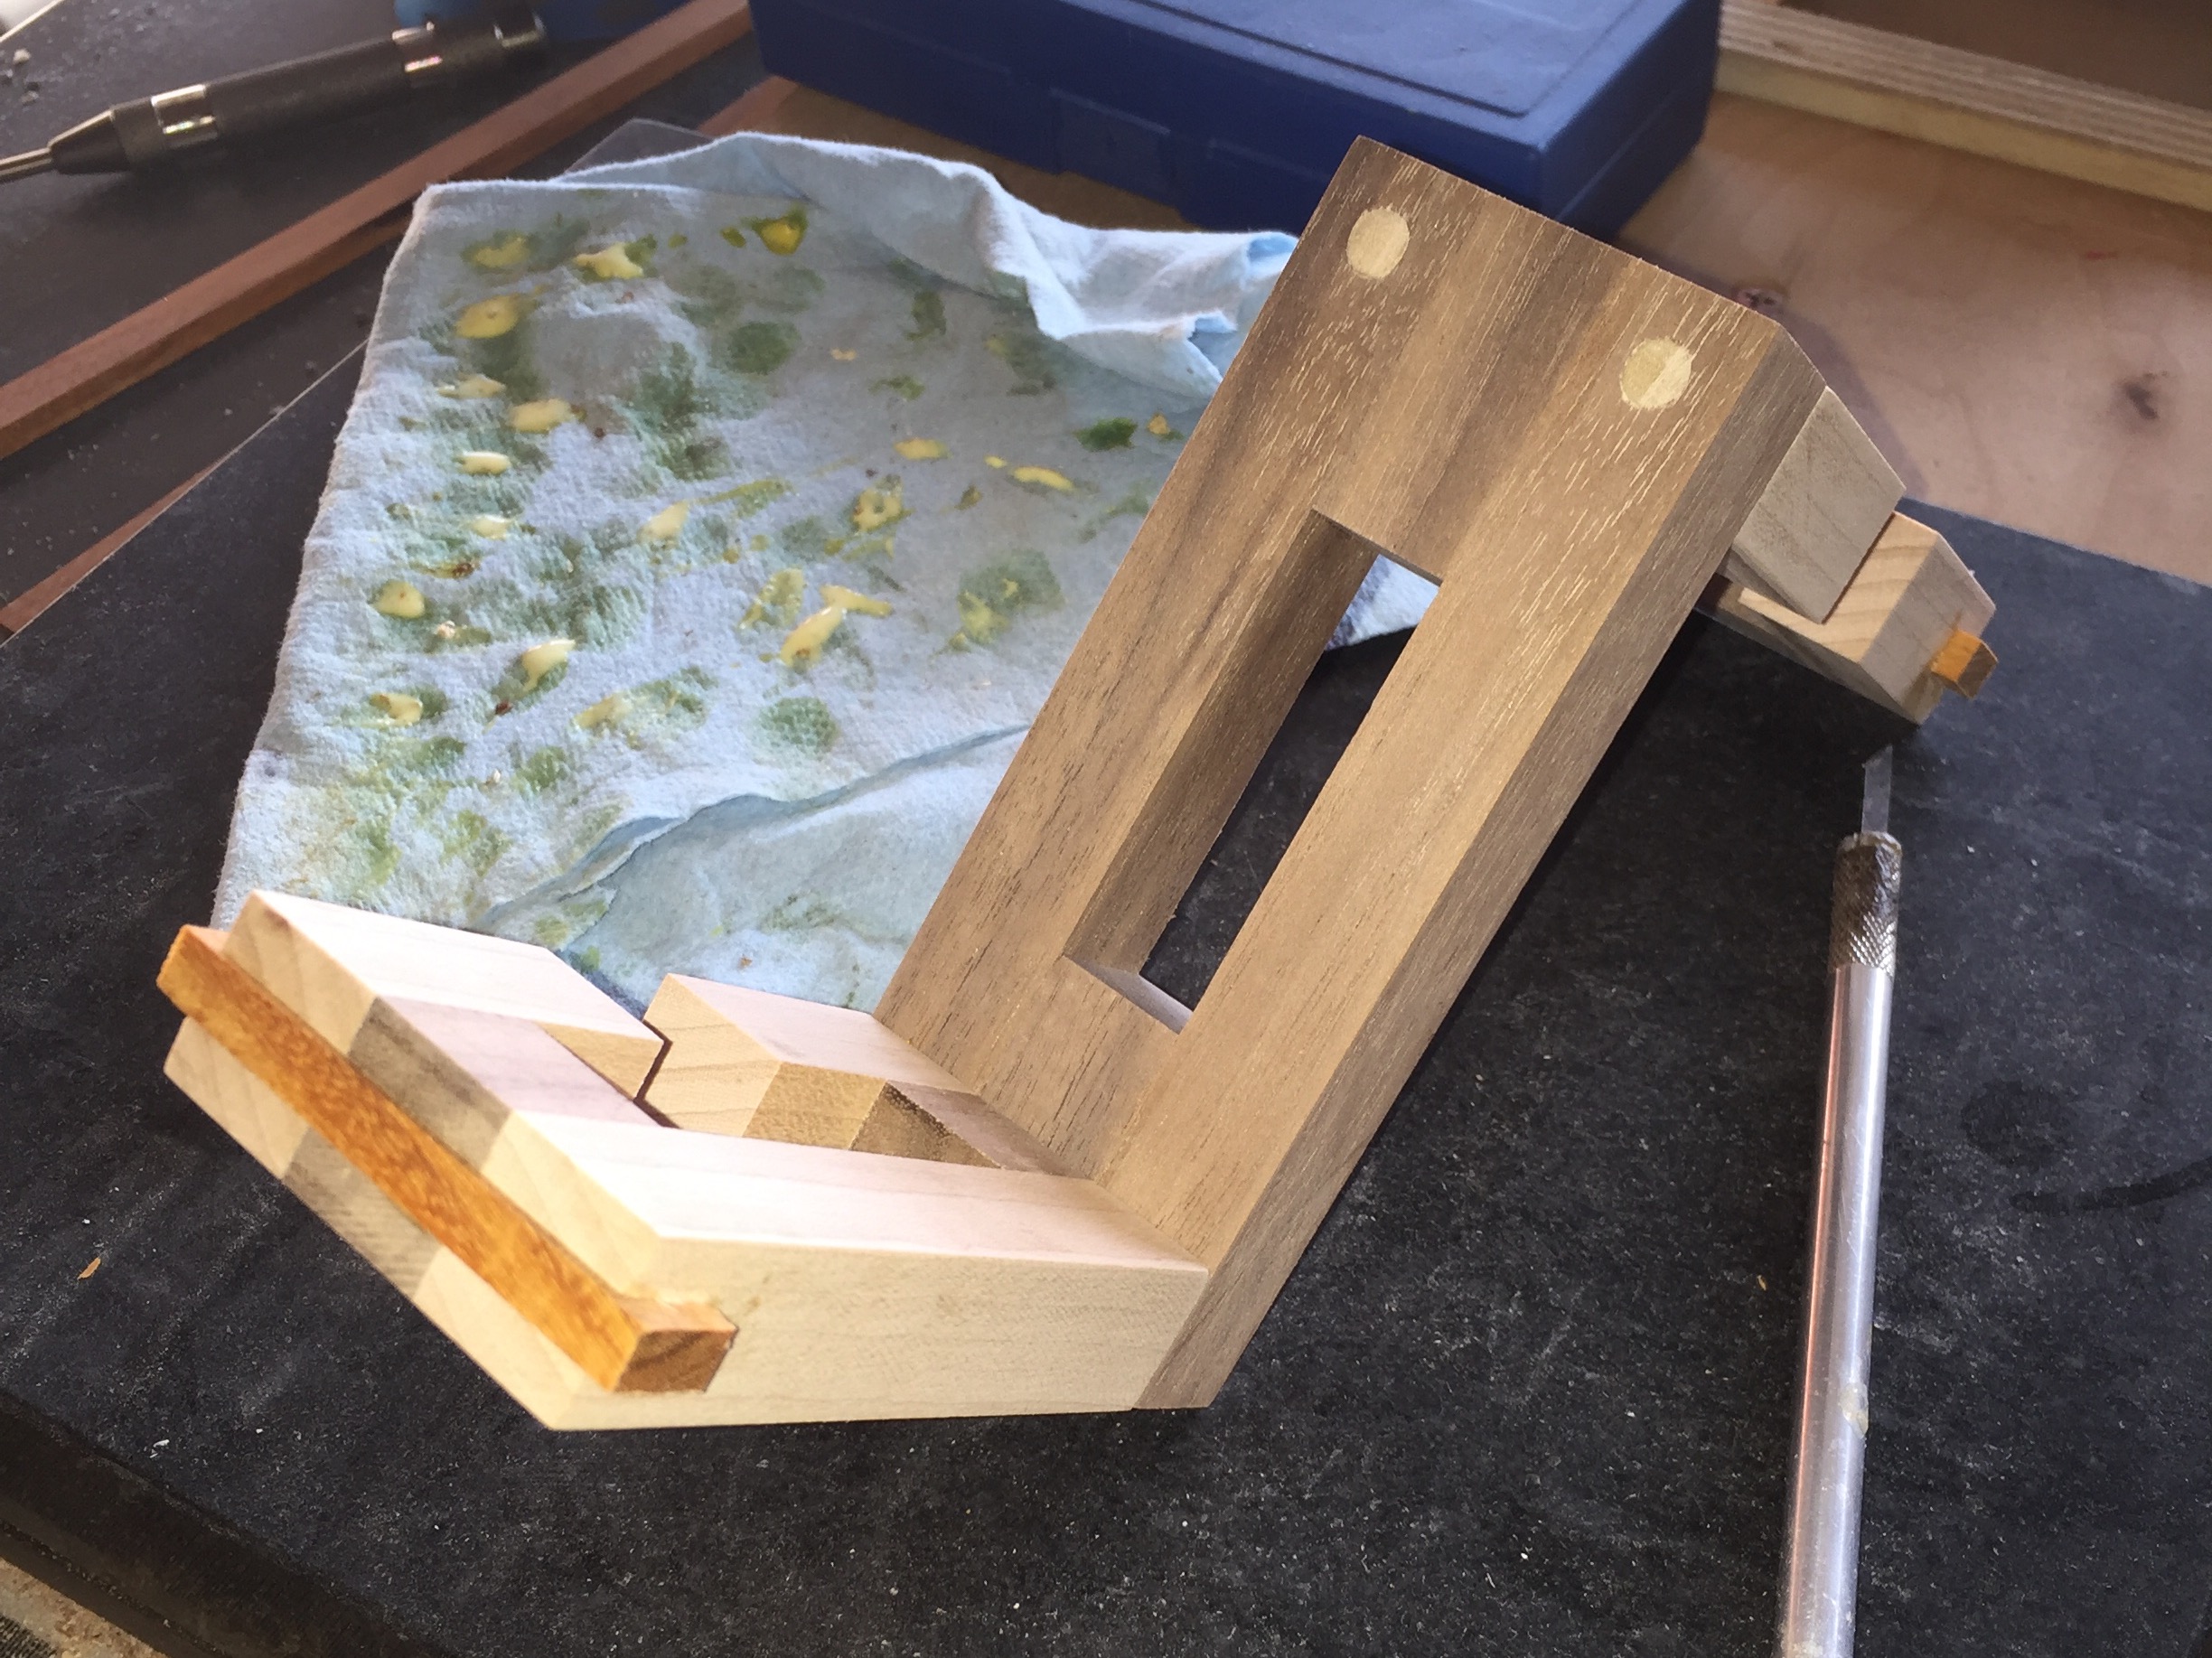
Splines glued in place

Splines glued in place

After the individual components are completed, they are glued together to form the final puzzle pieces, and then holes are drilled through the O’s to allow dowels to be glued into place, forming a much stronger joint between the components and helping to ensure that significant force would be needed to break the pieces. At the same time, the pieces are run across the table saw to add a flat bottomed groove in the ends of the pieces to allow a spline to be added. That spline will reinforce the ends of the C’s again helping to ensure that the pieces will not break when the solver is playing with the puzzle. These ends are very weak without some additional support since there is very little gluing surface, but lots of force available given the length of the pieces.

Once the glue has dried, the dowels are trimmed with a special saw which does not mark the surface the blade rests against, and the ends of the c-pieces are rounded to both clean up the spline, and add a visual element to the puzzle pieces in the assembled state. The other advantage to doing this is that is hides any tearout that was created from cutting the groove in the ends of the pieces. Normally I will back-up the cut with another piece of wood against the back of the piece where the blade will exit. This prevents the wood fibers which are unsupported otherwise from being ripped away from the piece, however with this type of cut that is very difficult, and taping the joint is only partially successful. So from my perspective as a craftsman, this rounding is both useful and pleasing to the final puzzle piece.

Applying finish really brings out the beauty of the wood

Applying finish really brings out the beauty of the wood

At this point, the puzzle can be tested to ensure that all the pieces fit together. Unlike many other puzzles I’ve made there’s no way to test the puzzle sooner. That means that I could have spent 10 hours making the pieces, and have nothing but scrap to show for it. Unfortunately, the pieces are so long that without all the dowels and splines, they are not strong enough to be put together into the final puzzle meaning that it’s an all or nothing build. Fortunately with the experience I have gained over the last few years, the puzzles went together without issue. Only minor sanding was required in a couple of places on one of the puzzles to ensure a good fit.

With the pieces tested and fitting together, they can be final sanded up to 600 grit to ensure a smooth and tactile surface, then finish can be applied to bring out the beauty of the wood. My go-to finish for puzzles is still a thinned lacquer then the Beall Triple Buff system to really make the pieces shine.

Just a few finished puzzles

Just a few finished puzzles

That’s about all there is to it. Each puzzle takes around 15 hours to make from start to finish, and I’m now very happy to have one of these excellent puzzles in my collection. They are a lot of work to make, and I’ll be honest, as happy as I am to have one in my collection now, I’ll not be making more of these any time soon! Hopefully the write-up was interesting, and hopefully I’ll be back to writing more soon.

Mini Maria

Not all puzzles are pretty, and not all puzzles can be considered art, however one name stands out in the puzzle/art category. Miguel Berrocal. Born in 1933 in Malaga, Spain, died in 2006. He studied mathematics and architecture at the University of Madrid and then art in Paris and Rome before settling in Negrar, a suburb of Verona. Over his life he produced many sculptures, and works of art, many of which appeal to puzzlers due to the complex interlocking nature of the pieces which make up each sculpture.

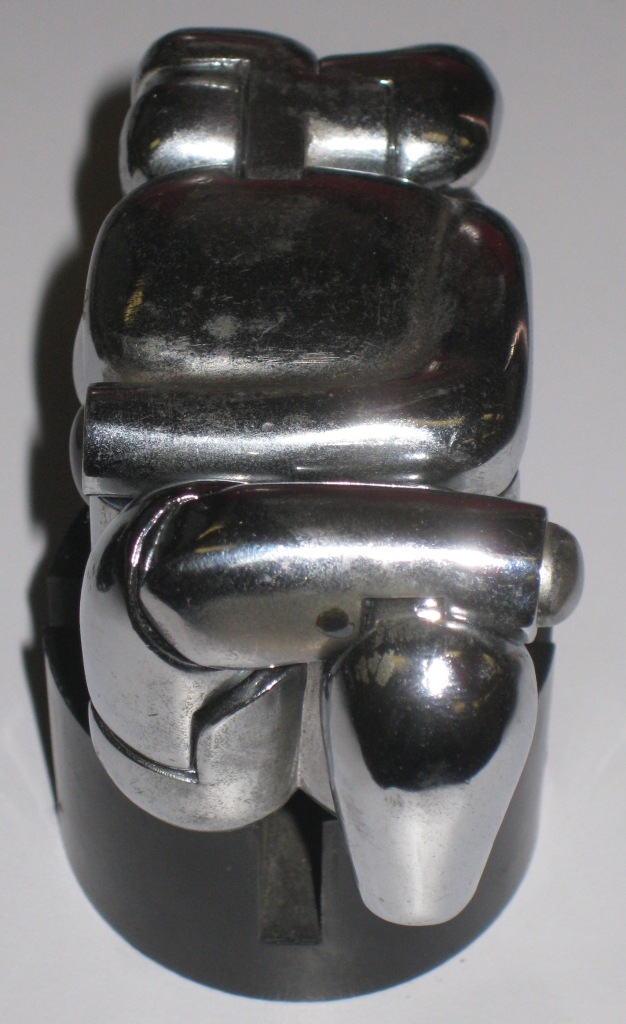
Mini Maria by Berrocal

Mini Maria by Berrocal

I will agree, that these puzzles are not going to appeal to everyone out there. Most are rather strange and abstract looking and the price tag alone is enough to put most people off. Some of the larger sculptures out there, you may think twice about taking apart just due to the huge number of pieces and complexity of assembly. These are like burr puzzles on steroids.

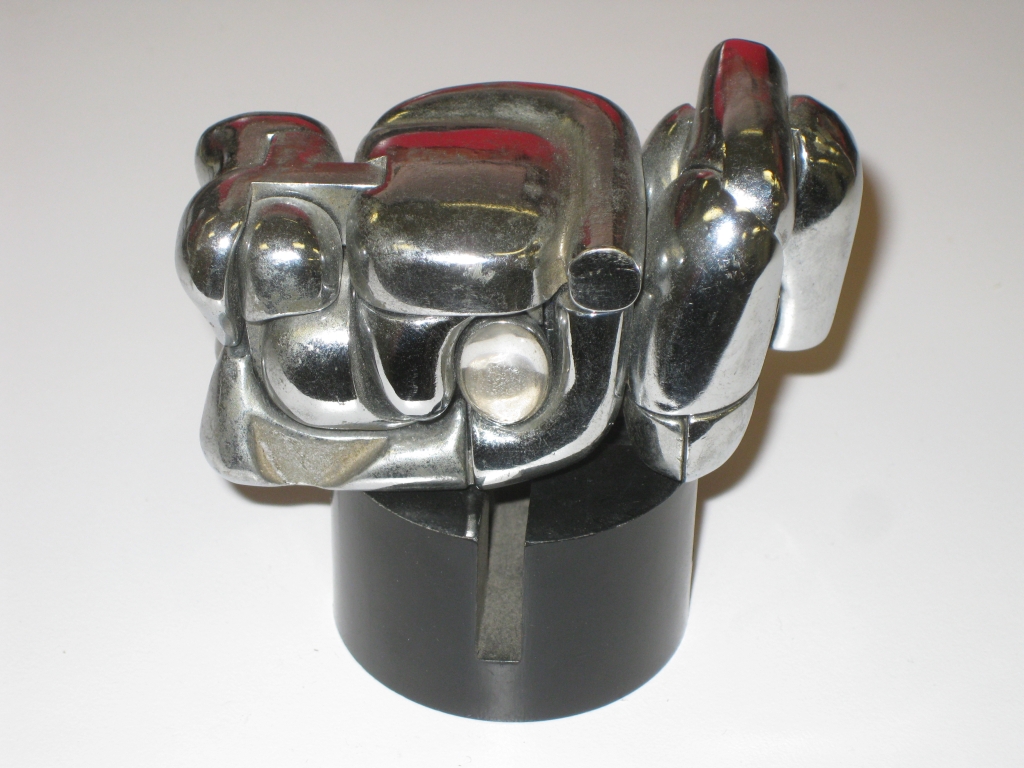
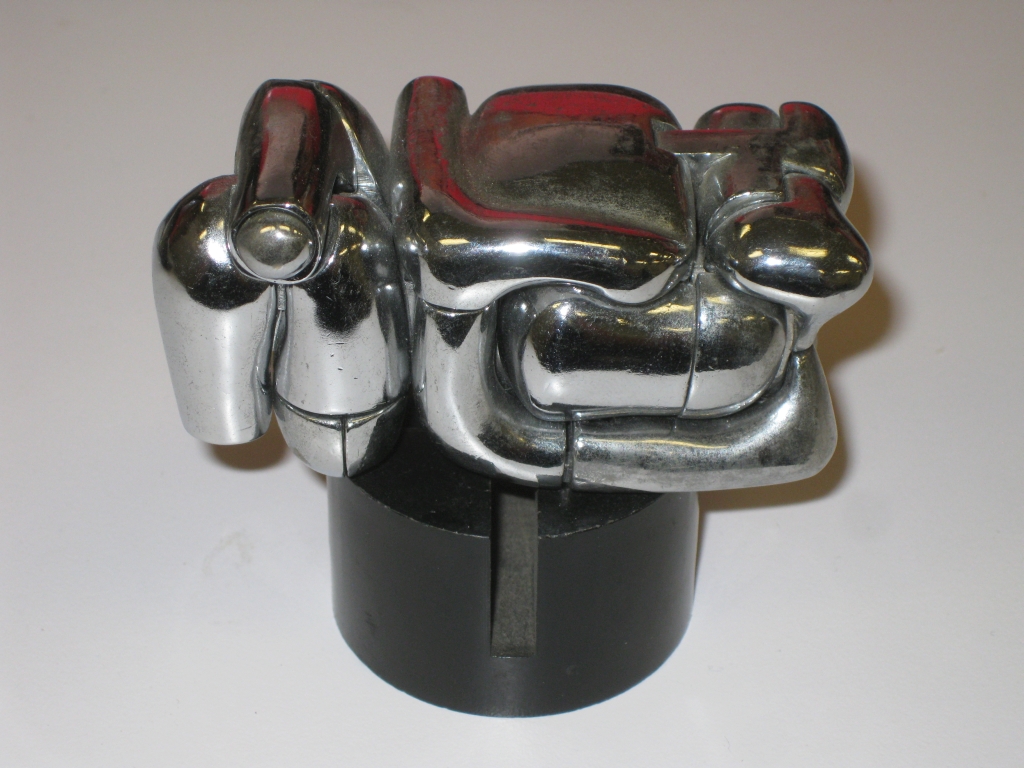
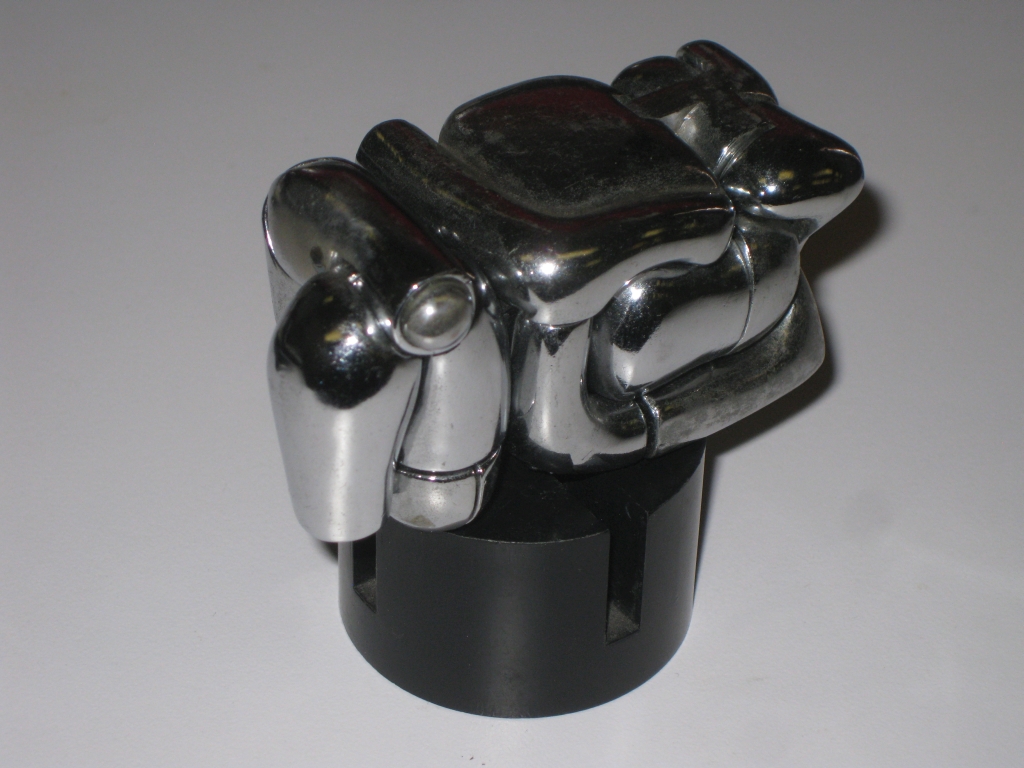
Mini Maria was made in a run of 10,000 starting in 1969, and 6 of the copies were made in gold. As is common in Berrocal’s work, there is a ring embedded in the design. You can see the stone setting of the ring in the image above. The puzzle is fairly small, measuting 3.25″ x 1.25″ x 1.5″ (3″ on the base). That in itself makes some of the work more impressive as there’s not a lot of free space in there, and all the parts fir together very nicely.

Mini Maria by Berrocal - Corner View

Mini Maria by Berrocal – Corner View

Mini Maria by Berrocal - Back View

Mini Maria by Berrocal – Back View

It’s hard to see what the sculpture is until you look at the elevated end view. If you squint, perhaps you can see a woman, lying on her back with her legs crossed and one arm across her stomach? Regardless, you’ll either like or hate it, there’s not much of a middle ground.

Mini Maria by Berrocal - End View

Mini Maria by Berrocal – End View

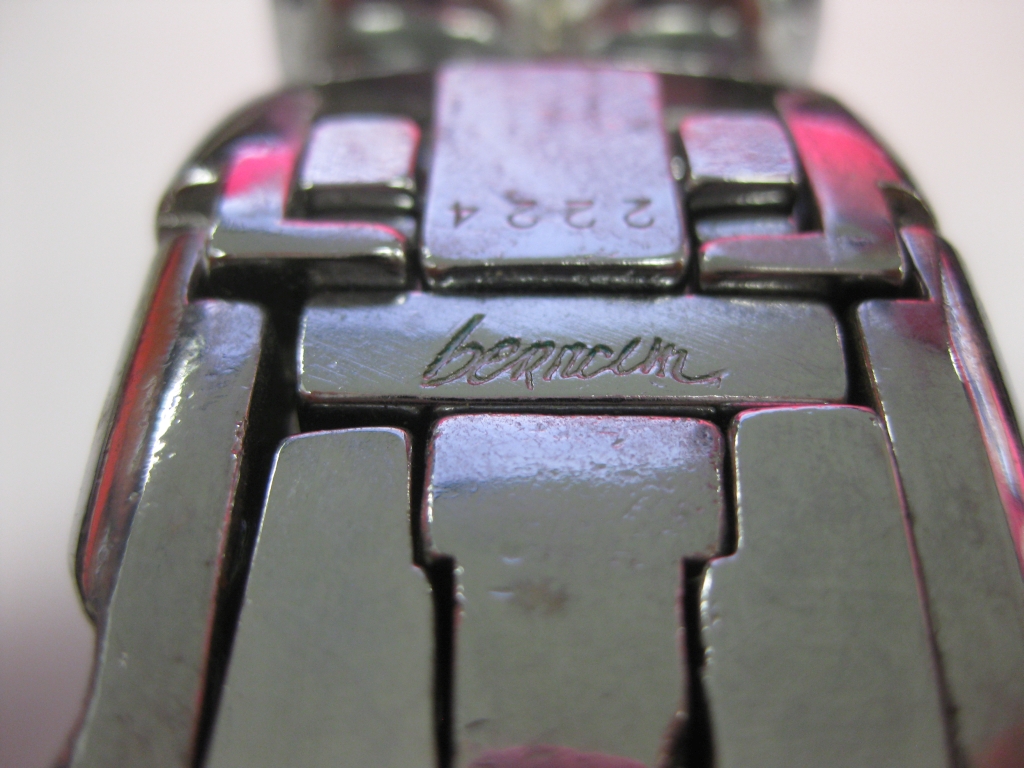
Each of Berrocal’s pieces are signed and numbered as can be seen in the closeup below.

Mini Maria by Berrocal

Mini Maria by Berrocal

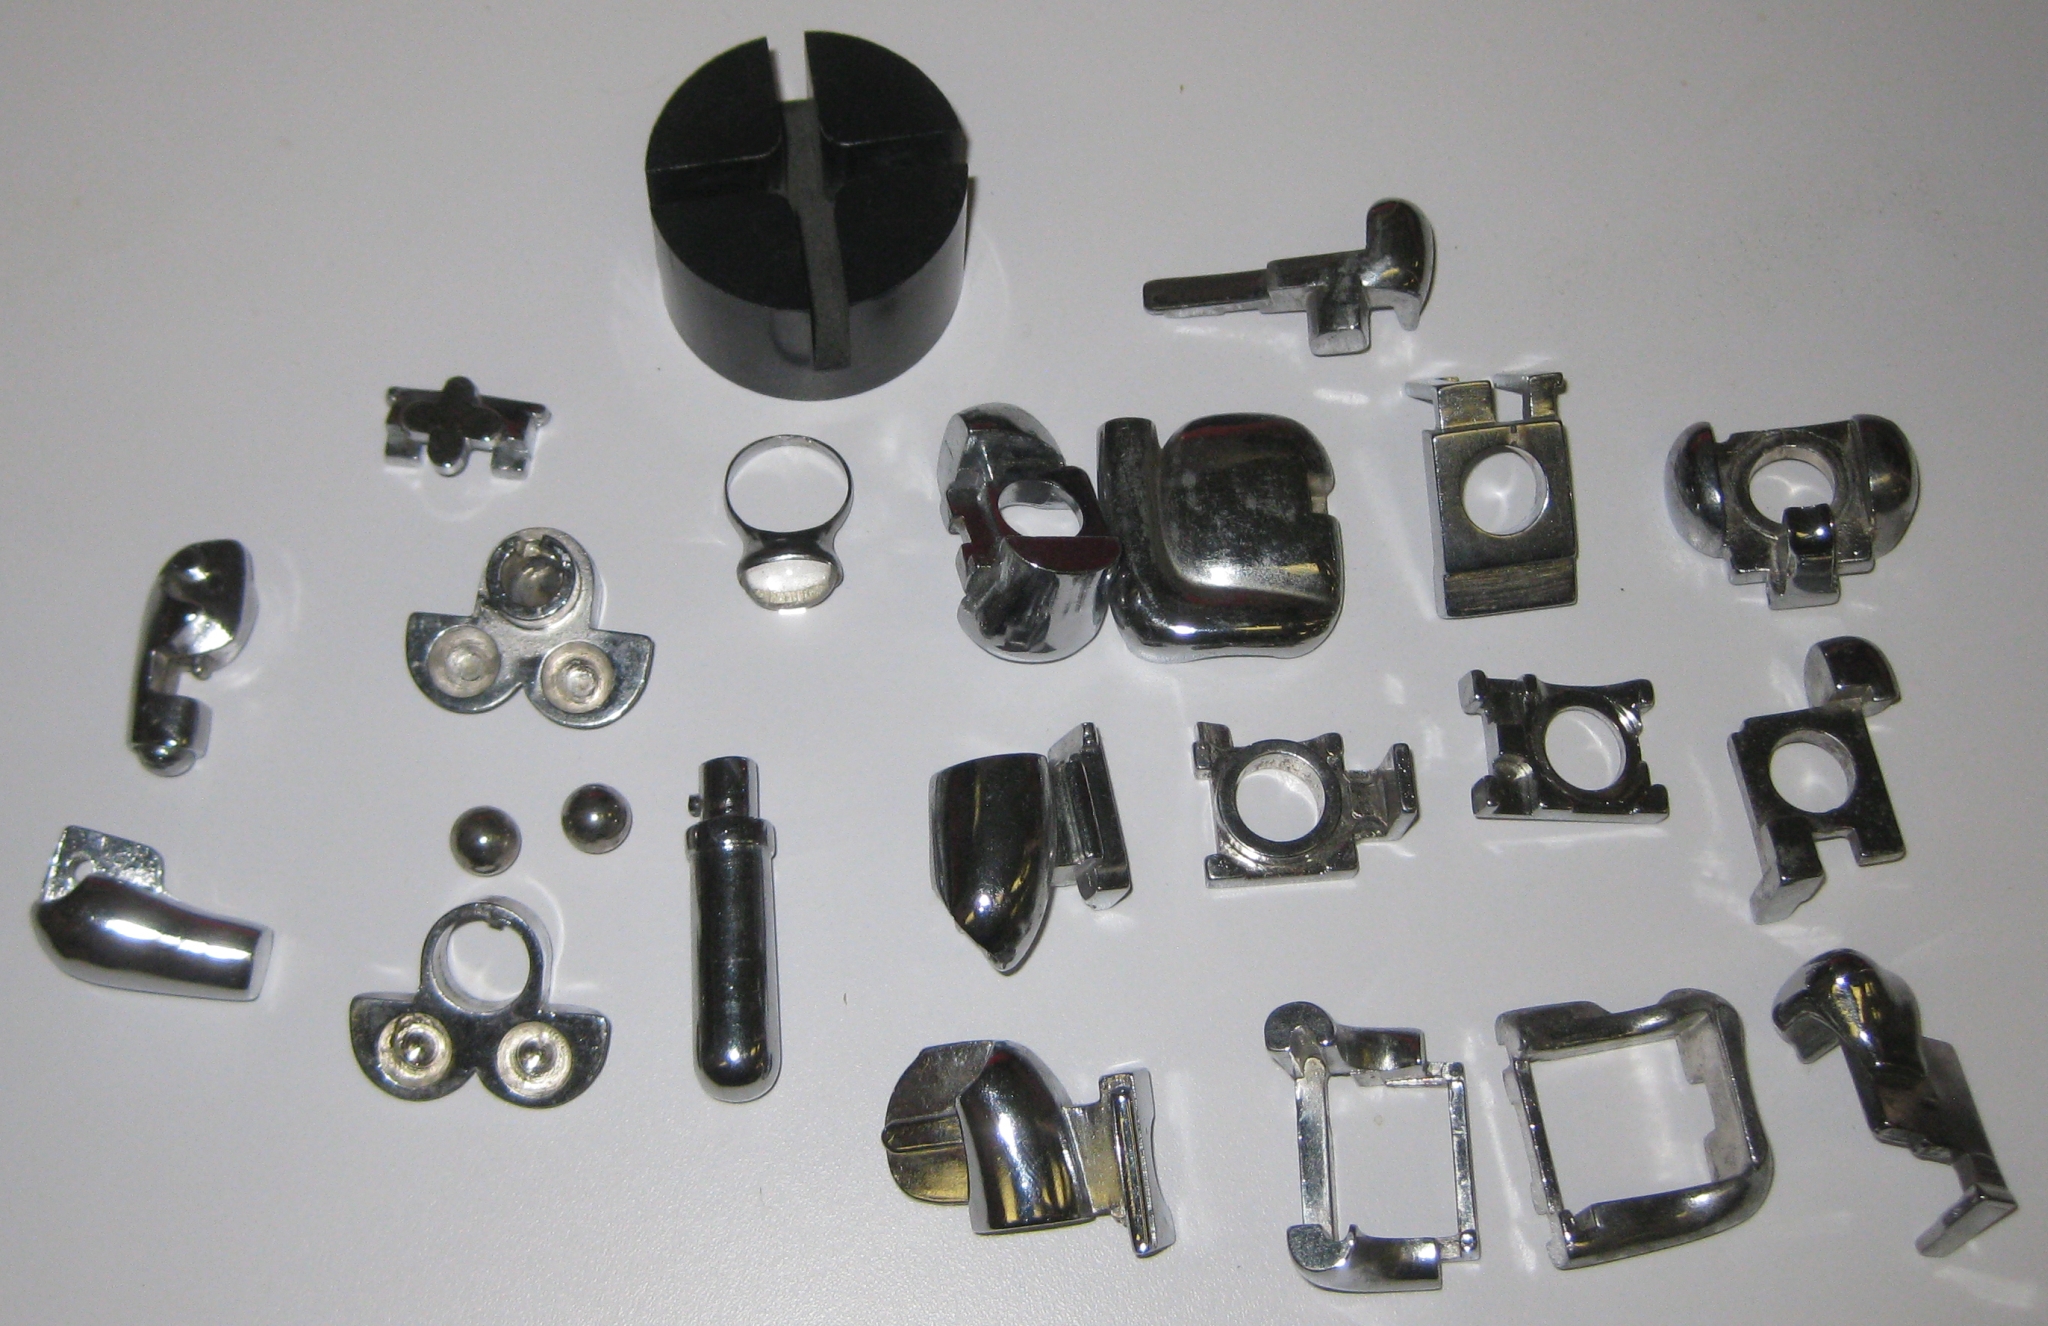
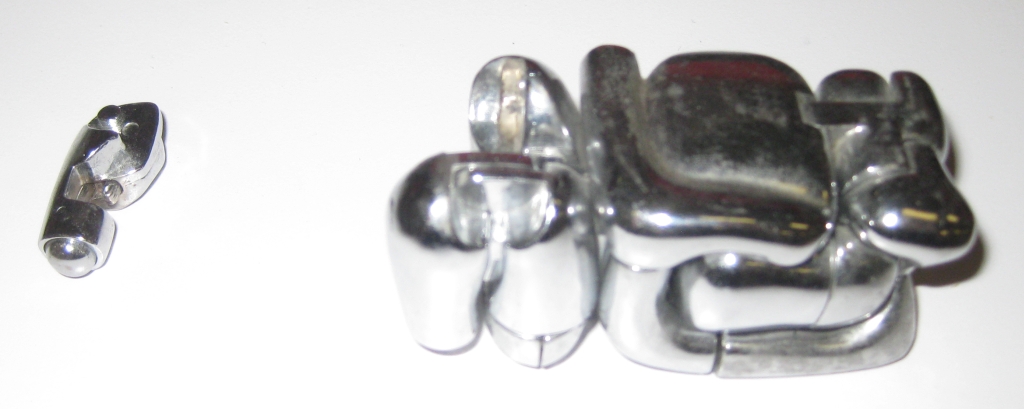
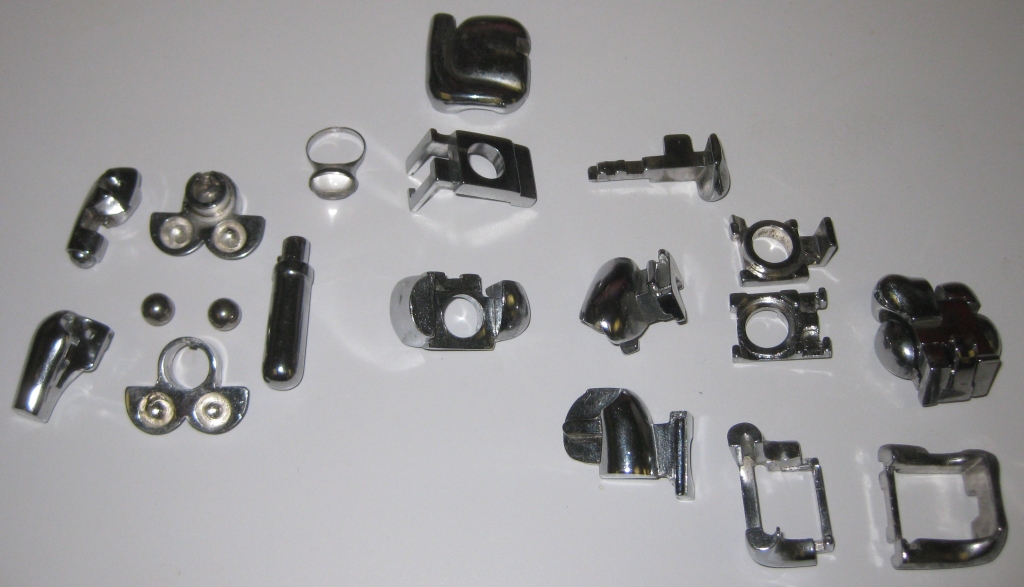
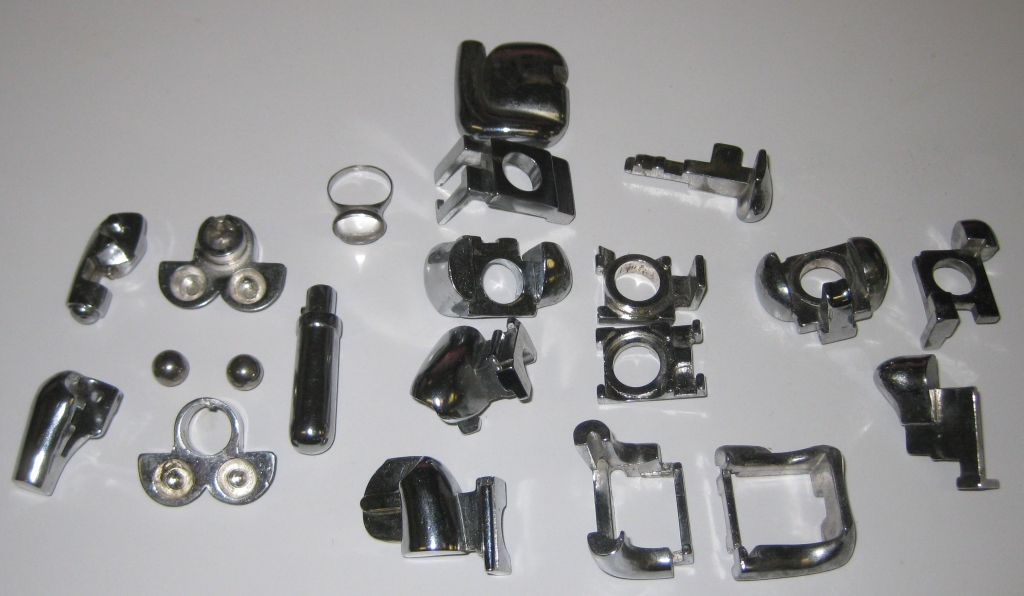
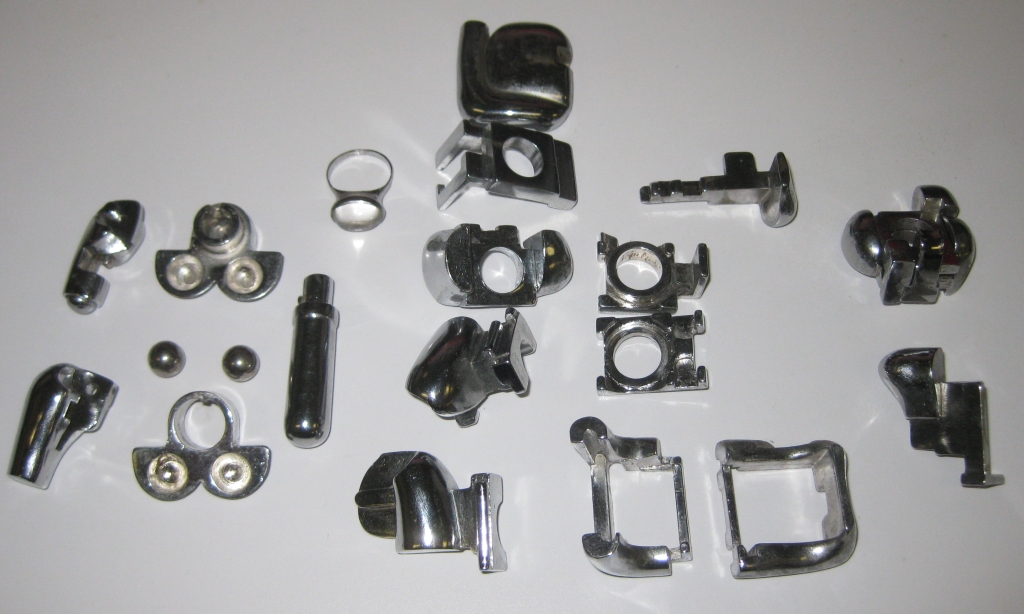
The puzzle itself consists of 22 pieces, and is an interlocking assembly puzzle. The disassembly process starts by pushing in a small button on the end of one of the legs which allows the first piece to pivot up and then be removed. From there on, it is a process of finding the next section which can be removed, until the entire sculpture is nothing more than an array of complicated pieces on the table in front of you.

While I generally avoid showing solutions to puzzles, I have included the full sequence to take Mini Maria apart by clicking the image below. Given that this is the type of puzzle that many people won’t see a copy of, I think it’s a valid reason to show everything. If you don’t want to see all the steps, don’t click below. Don’t worry, if you don’t want to see the steps, none of the other images above will show the steps if you click on them.

Mini Maria by Berrocal

Mini Maria by Berrocal

Mini Maria does have another interesting surprise hidden within her. If you click through the solution (from the image above) you’ll see what I mean. There’s a set of male genitalia, complete with “balls” stuffed inside Maria. Not exactly what you’d expect from a puzzle, but I think it fits with the style of the piece.

I know that Berrocal puzzles are not for everyone, but I do recommend that if you have the chance to play with one, take it. They’re very interesting puzzles, and provide quite the challenge.

Mini Maria

Mini Maria

Mini Maria

Mini Maria

Mini Maria

Mini Maria

Mini Maria - Yes that's a bit rude

Mini Maria – Yes that’s a bit rude

Mini Maria

Mini Maria

Mini Maria

Mini Maria

Mini Maria

Mini Maria

Mini Maria

Mini Maria

Mini Maria

Mini Maria

Mini Maria

Mini Maria

Mini Maria

Mini Maria

Mini Maria

Mini Maria

Mini Maria

Mini Maria

Mini Maria

Mini Maria

Mini Maria

Mini Maria

Mini Maria

Mini Maria

Transparent Lock

I’ve been slowly adding to my collection of trick locks over the last few years, and first saw the Transparent Lock by Gary Foshee a couple of years back, but sadly missed out back then as they sold incredibly quickly. I was lucky enough to be able to borrow one, and solve it, and at that point I kicked myself for not being quicker off the mark in trying to get one.

When I heard from Gary himself that Wil Strijbos had some with him at IPP 35 for sale, I was pretty quick in finding Wil and asking if I could please lighten his luggage and take one off his hands.

Transparent Lock by Gary Foshee

Transparent Lock by Gary Foshee

Transparent Lock boxed with Gary's Signature

Transparent Lock boxed with Gary’s Signature

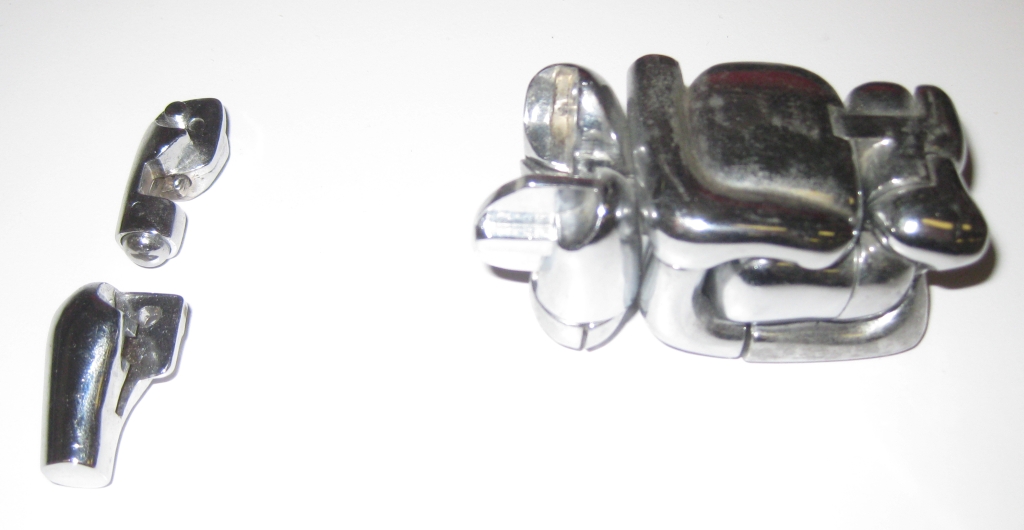
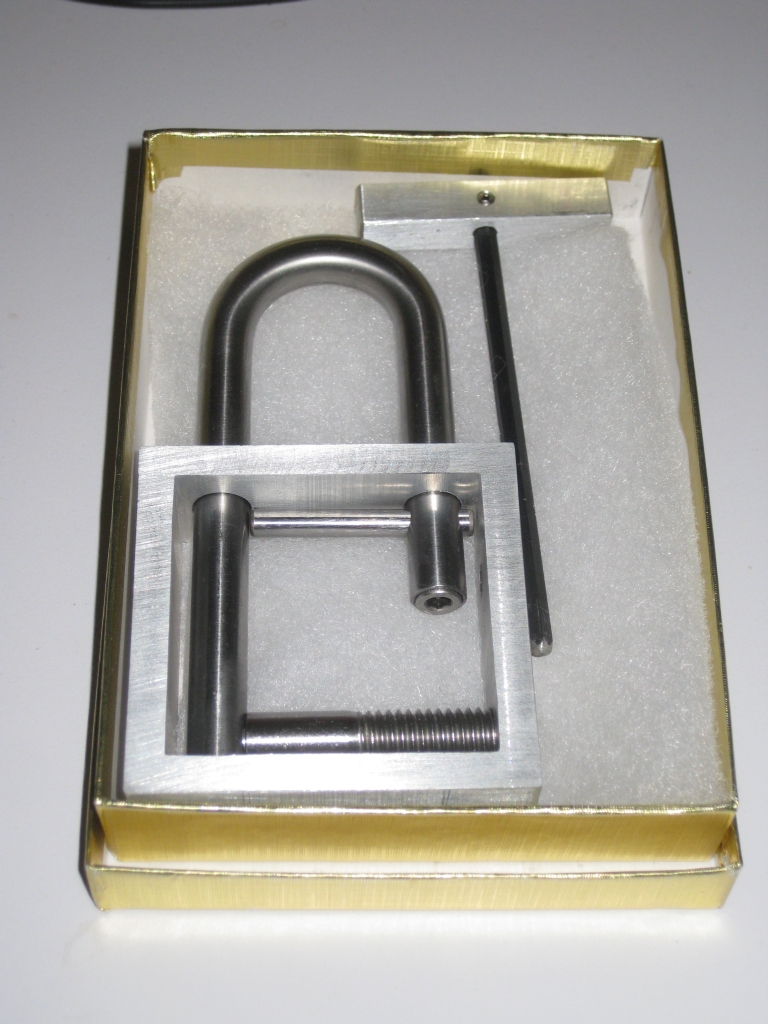
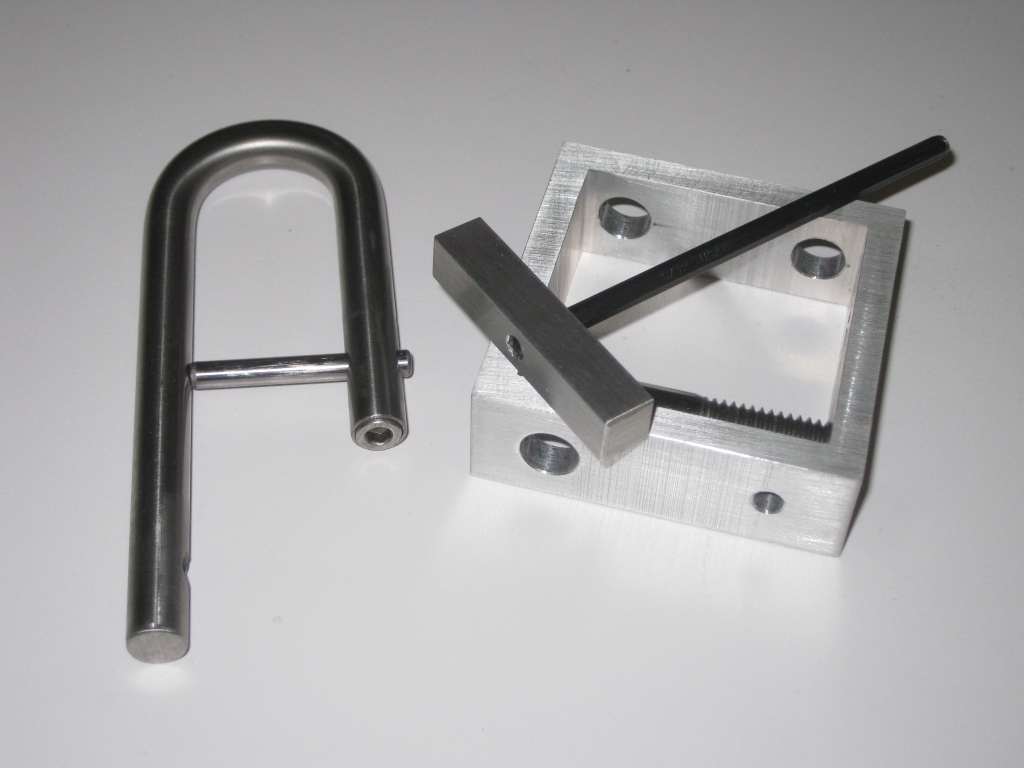
The puzzle looks exactly as you’d expect for a transparent lock (or as it’s also known, the Open Lock). It looks pretty simple, with a square frame, a shackle, and a few bits and pieces attached to the frame. You also get a handy hex wrench with a handle, which given that it comes with the puzzle, we can safely assume is not considered an external tool.

The puzzle comes in a fairly plain gold box, and as you can see, mine is the 2015 version of the puzzle. It’s the same as the older version, so no need to try to hunt one of these down if you have the first release version. In the bottom corner is Gary’s little cartoon signature, which looks uncannily like the man himself.

Made almost entirely from aluminium the puzzle has a fairly rough look to the body and the hex handle, showing lots of tool marks, while the rest of the puzzle has a polished and clean finish. It’s a little disappointing, given the quality of some of the aluminium puzzles out there, and some of Gary’s other work I’ve seen. With a little polish I’m sure the frame could be cleaned up, so it’s really a small nit, but given the price of the lock, you do expect a certain level of finish.

Measuring in at 2.5″ x 4.5″ x 0.8″ it’s about a standard size for a lock, and it has a good solid feel to it. I doubt that you’d damage much other than your toes if you dropped it. Given how solid it is, it’s easily a puzzle that you can pass round and let people play with, and there’s really not much they can do wrong.

These are fairly limited in production because Gary has to make the shackles himself, and having talked to him about them, they’re a real pain to make. Apparently they’re cold forged and the process is pretty difficult to get the results he needs. Let’s just say that he’s not the biggest fan of making these!

Could this be useful?

Could this be useful?

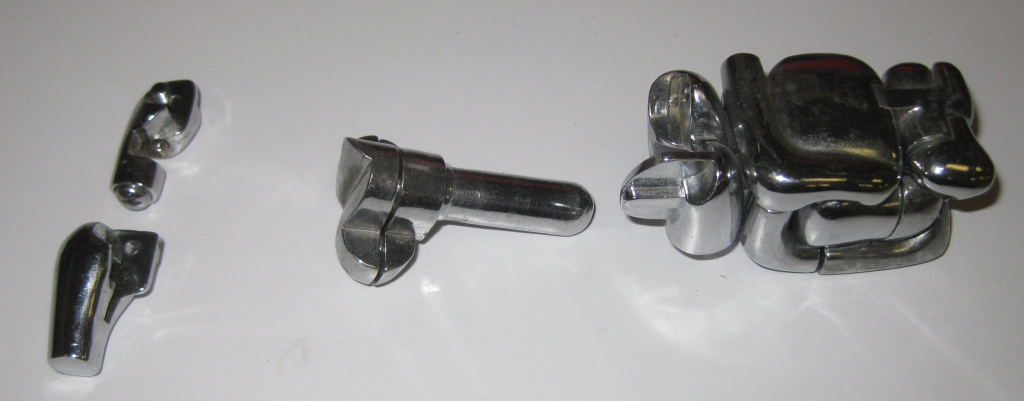
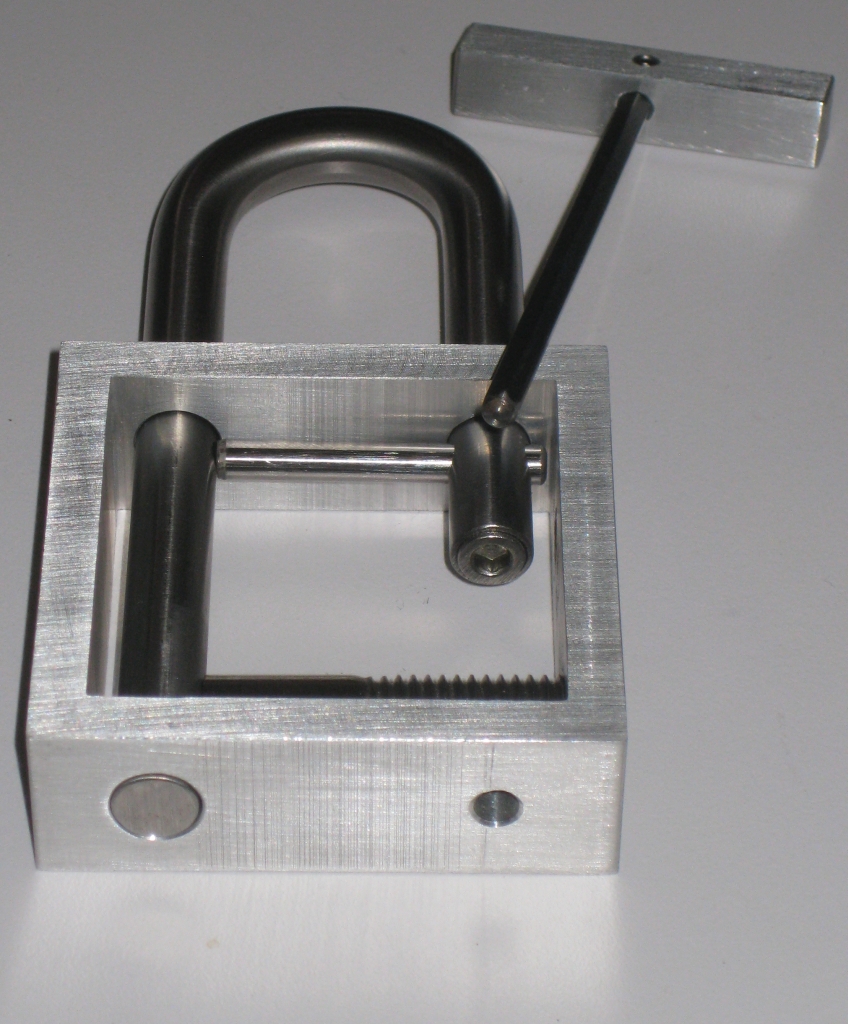
Looking over the puzzle, there’s a couple of fairly obvious things to try, like the screw thread at the bottom of the lock. You will also notice the hex head inside the shackle, and you’ll probably make the obvious leap that it’s useful, and that you should probably do something with it. Unfortunately, it’s not going to be quite that easy to open the shackle, and if we’re honest you wouldn’t want it to be that easy.

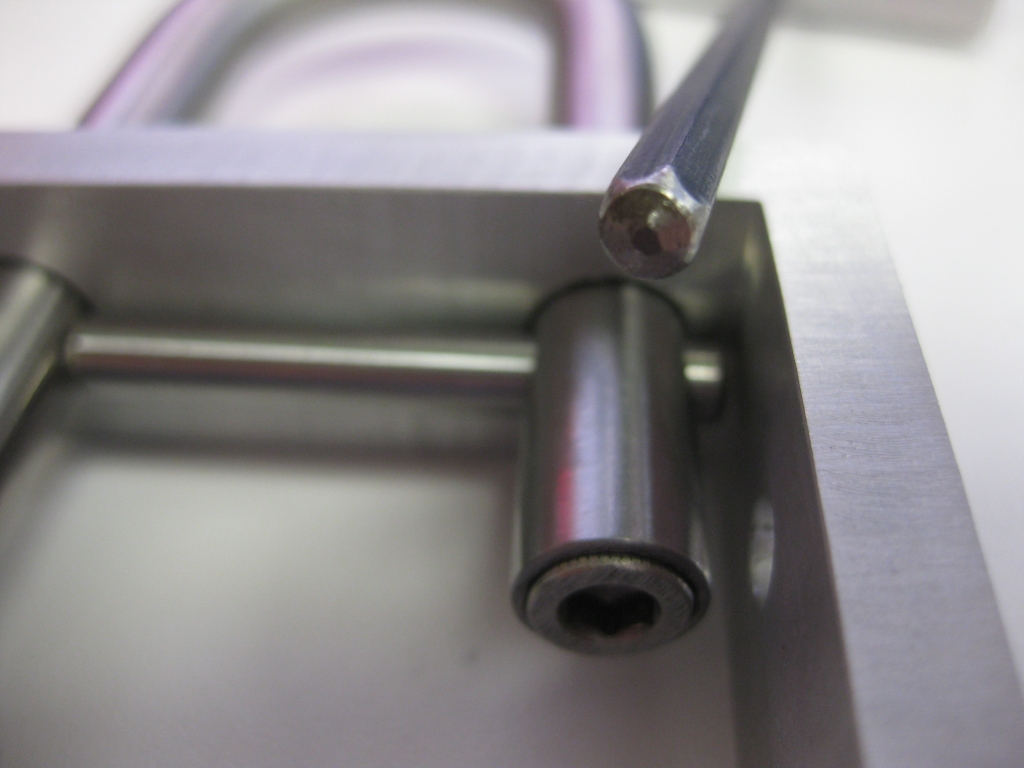
Gary helpfully rounded the ends

Gary helpfully rounded the ends

At this point, you’re probably yelling at the screen “Use the hex tool”, and you’d think that would be useful. Unfortunately, Gary has very helpfully rounded over the ends of the hex tool, making it entirely useless. Of course there are things that you’ll find useful, and the puzzle has much more hidden around it than you’d think at first. There’s a reasonable sequence of steps to discover various tools and useful bits that will get the puzzle open.

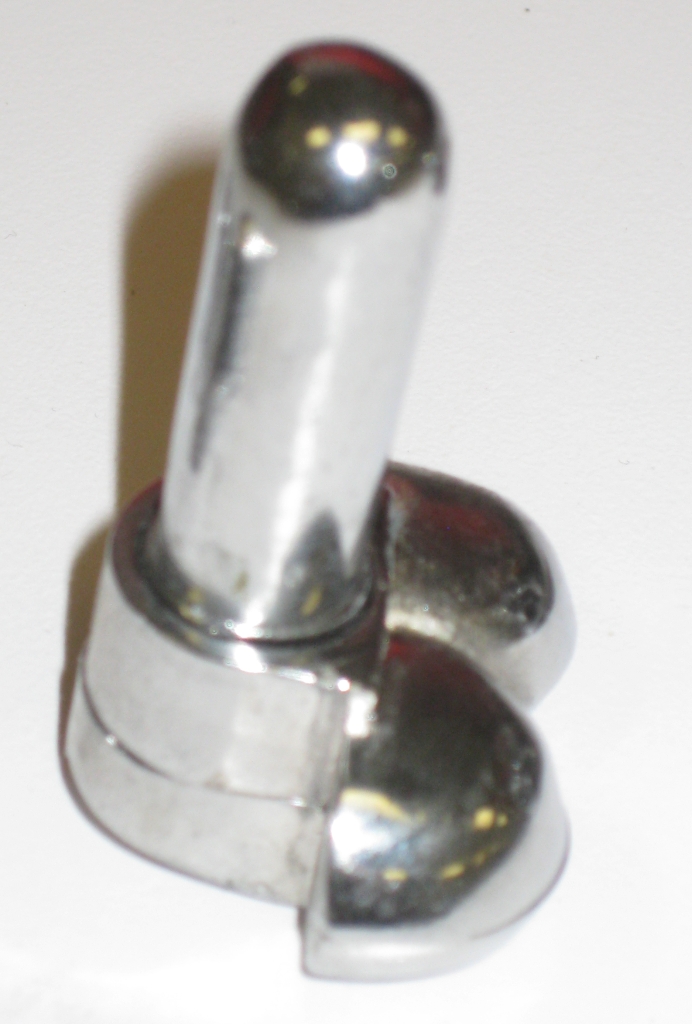
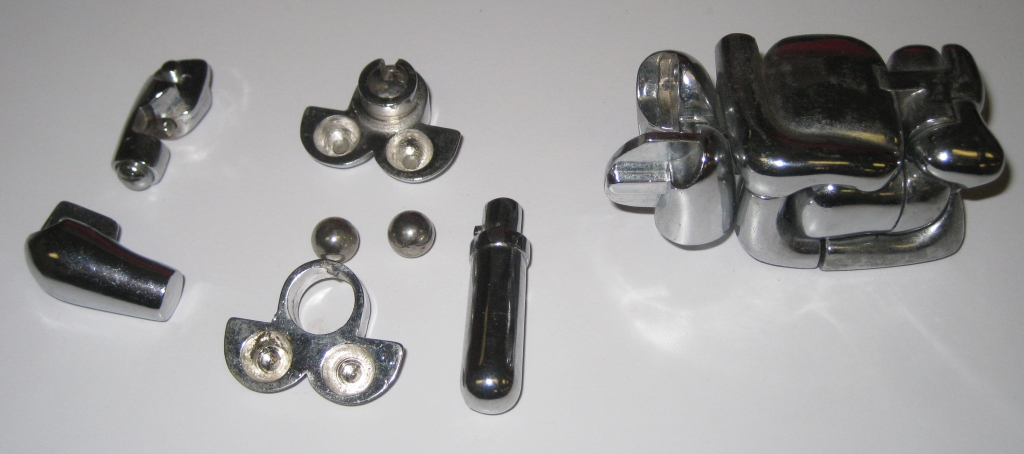
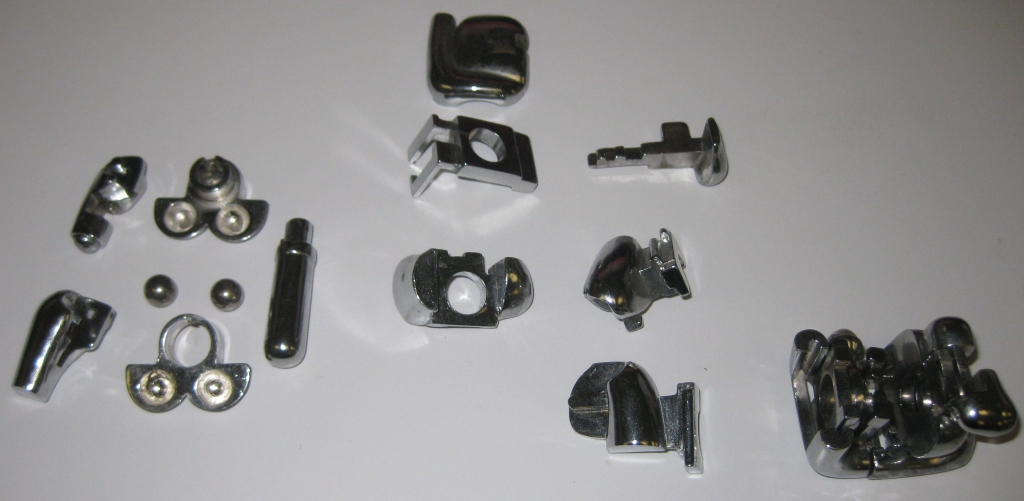
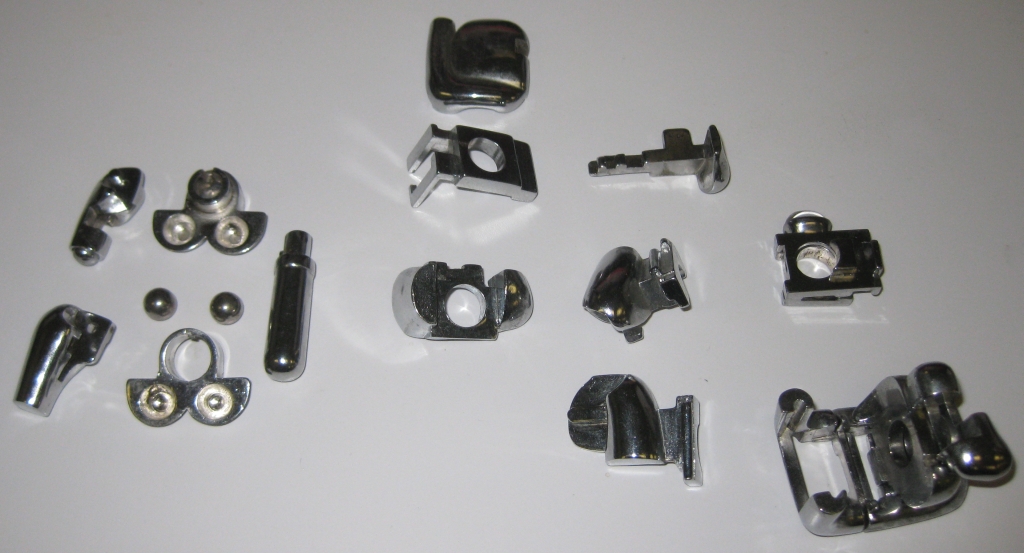
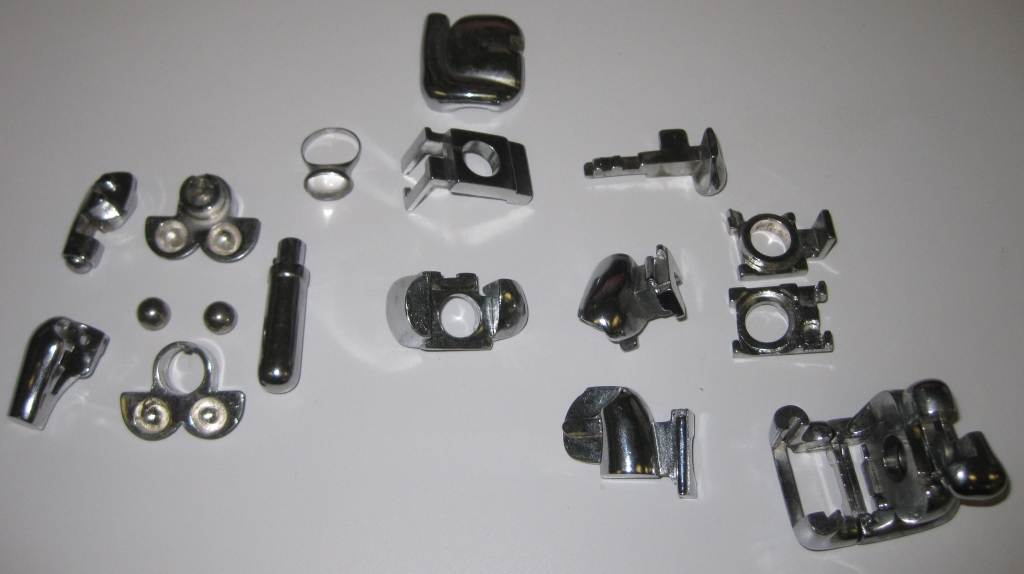
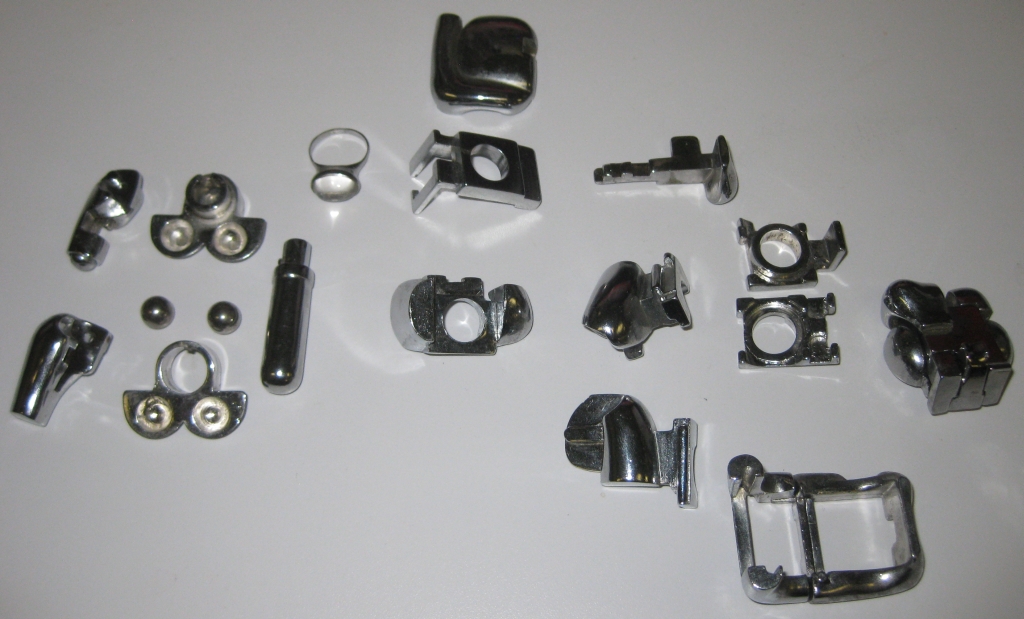
Once you remove the shackle from the frame, you can entirely disassemble the puzzle and leave yourself with an array of parts on the table. I think this is one of the reasons I like the puzzle as much as I do, since it really lives up to its name. Once open it really is transparent.

Finally open

Finally open

While it’s not a difficult puzzle, and took only a few minutes for me to open the first time I played with one, it is well made, and it’s a fun puzzle. If you’re looking for a challenge on the order of a Popplock, then you’ll want to look elsewhere as I feel you will probably be disappointed.

Having been trying to get one of these for a while, and missing them at auction I’m happy to have picked one of these up. It’s a great addition to my collection, and one of Gary’s puzzles I’m very happy to have. Allard was able to get his hands on one of the original run, so head over here to read Allard’s thoughts.

Open for Business

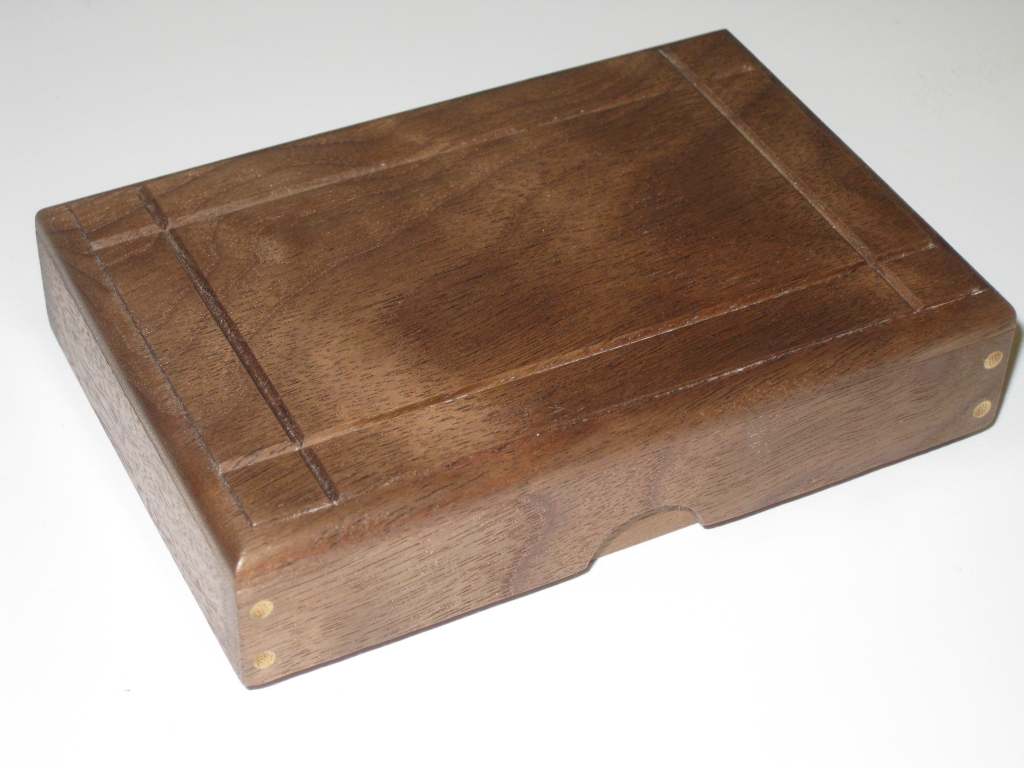
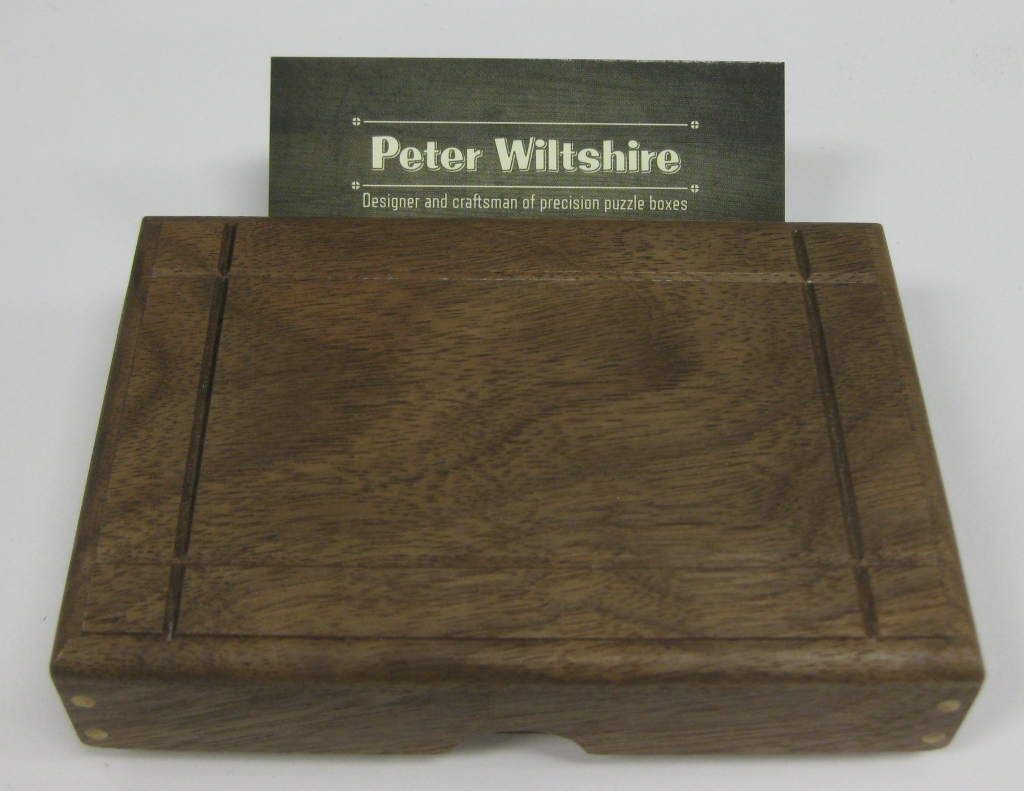
I have been an admirer of Peter Wiltshire’s work for some time, and whenever he releases a new puzzle I try to pick up a copy. I’ve not always been successful, as his work is highly sought after, however this time I was lucky enough to be offered a copy of his latest puzzle, “Open for Business”. It’s a beautifully crafted wooden puzzle box, designed to store business cards.

Open for Business by Peter Wiltshire

Open for Business by Peter Wiltshire

The box itself is made from Walnut, measures 4.75″ x 3.25″ x 1.25″ and has enough space inside for around 30 business cards (Ed: or about 10 if you have the really thick cards I have). That’s more than enough for the typical business meeting, and depending on your preference, or the type of meeting; more time may be spent trying to open the box by your clients than talking about whatever dull subject the meeting was intended to cover. If nothing else, they’ll go away with a good memory of the meeting (or possibly frustration, but no way to contact you about it!)

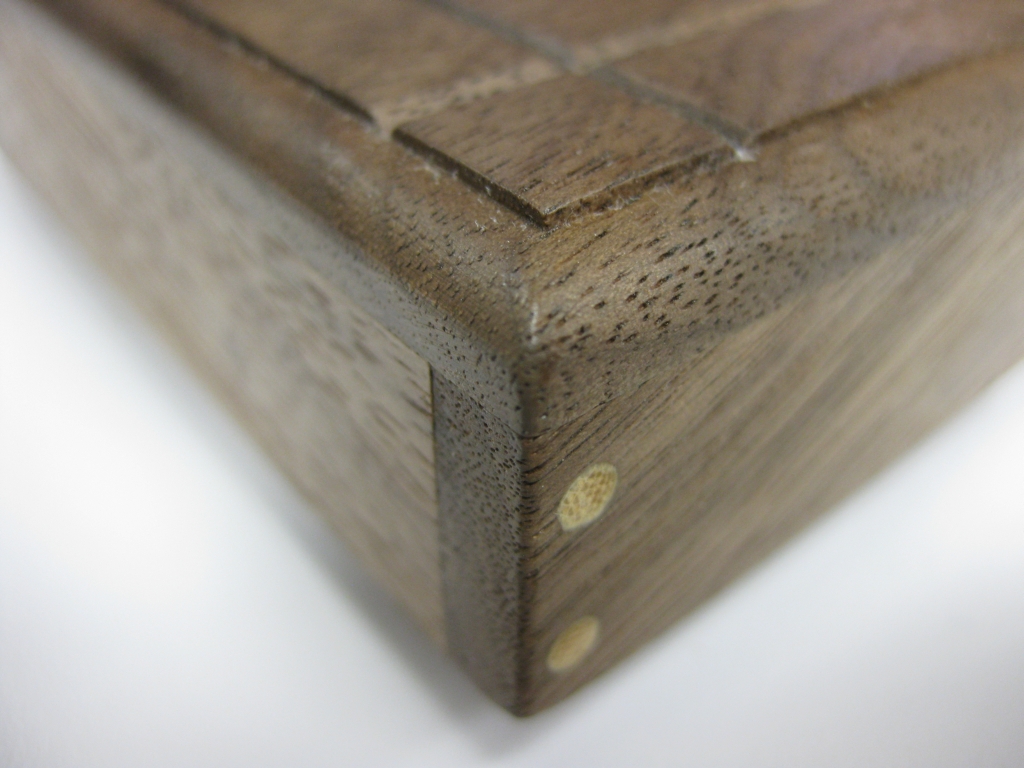
Open for Business corner details

Open for Business corner details

The box is beautifully finished, with the grooved details on the top of the box, something of a signature in many of Peter’s boxes, and bamboo pins in the end of the box to give it strength along the joints, as well as add a golf ball like detail which really makes the corners stand out.

I spent several hours poking and prodding this box, trying to see what might move. Peter has hidden things incredibly well in this two moves to open box, and from what I hear it’s kept a good few puzzlers locked out for longer than we might like to admit. When I did finally figure out the first move, there was a huge grin on my face as it’s a real ‘aha’ moment, and entirely unexpected. After that it’s fairly plain sailing, however that first move is just beautiful.

Open for Business by Peter Wiltshire

Open for Business by Peter Wiltshire

Once open you’re treated to one of Peter’s new business cards and you can then load up your own cards to have handy. I’ve left Peter’s card at the bottom of by box, so that the curious colleagues in my office can see who made such a fun box.

Sadly if you’re hoping to add one of these to your collection you may be out of luck. Peter had sold all of the boxes before the Puzzle Party at IPP35, which to my mind is just a testament to his work. Thanks again Peter, it’s a great box, and I’m very happy to own one.

Revomaze Copper

This entry is part 11 of 11 in the series Revomaze

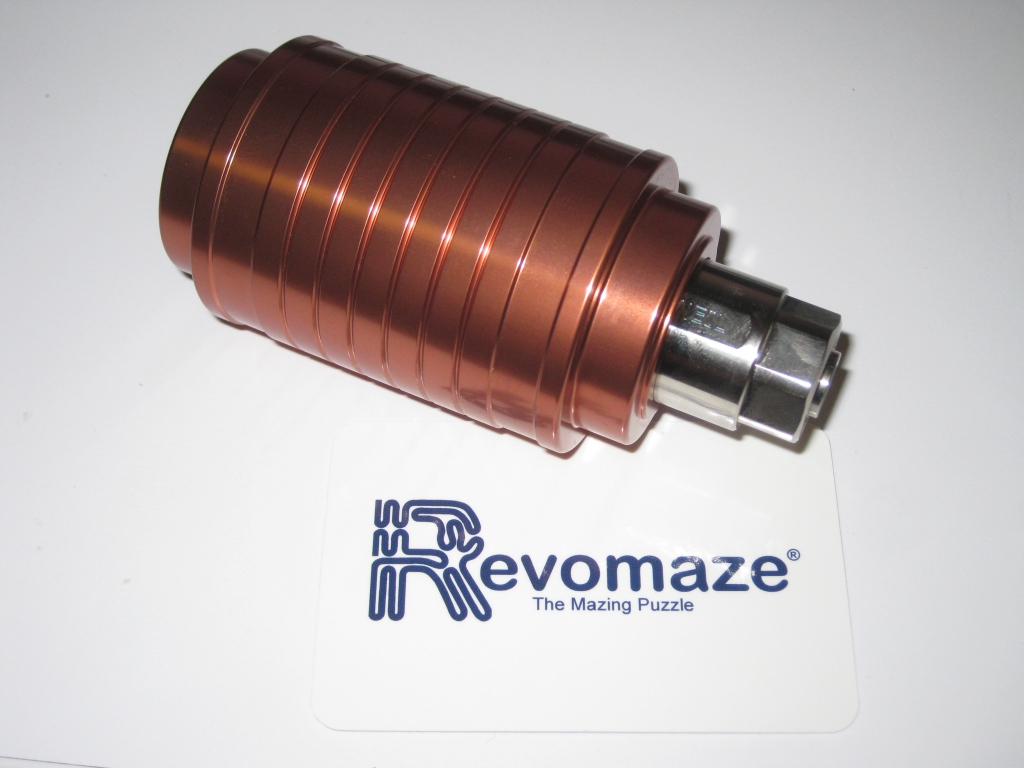
It’s been quite a while since I’ve sat down and written anything on my blog, and I’m sure many of my readers had given up on me. I am still here, I’m still puzzling, and still making more new puzzles, so nothing has really changed. Life sometimes just gets busy, and the time to sit down and write something worthy of reading is the thing that slips through the cracks first. That said, today I’m looking at the newest puzzle to come from Revomaze, which they kindly sent me a copy to review for you. This is the Copper V1 puzzle.

The Revomaze R1 Copper

The Revomaze R1 Copper

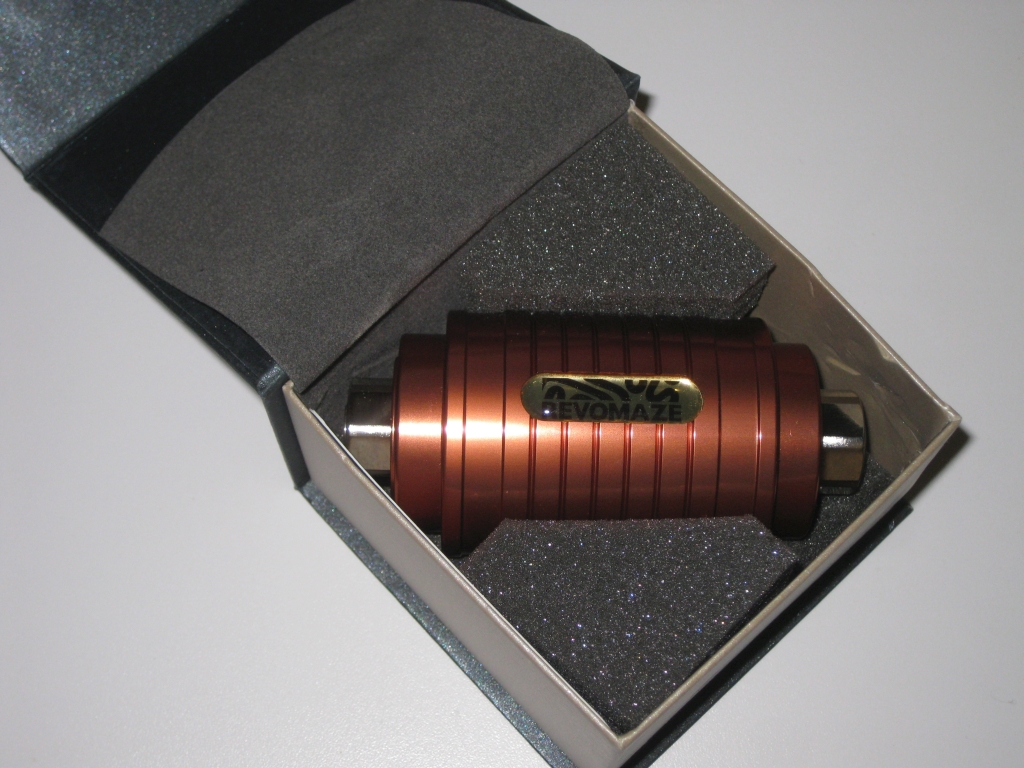
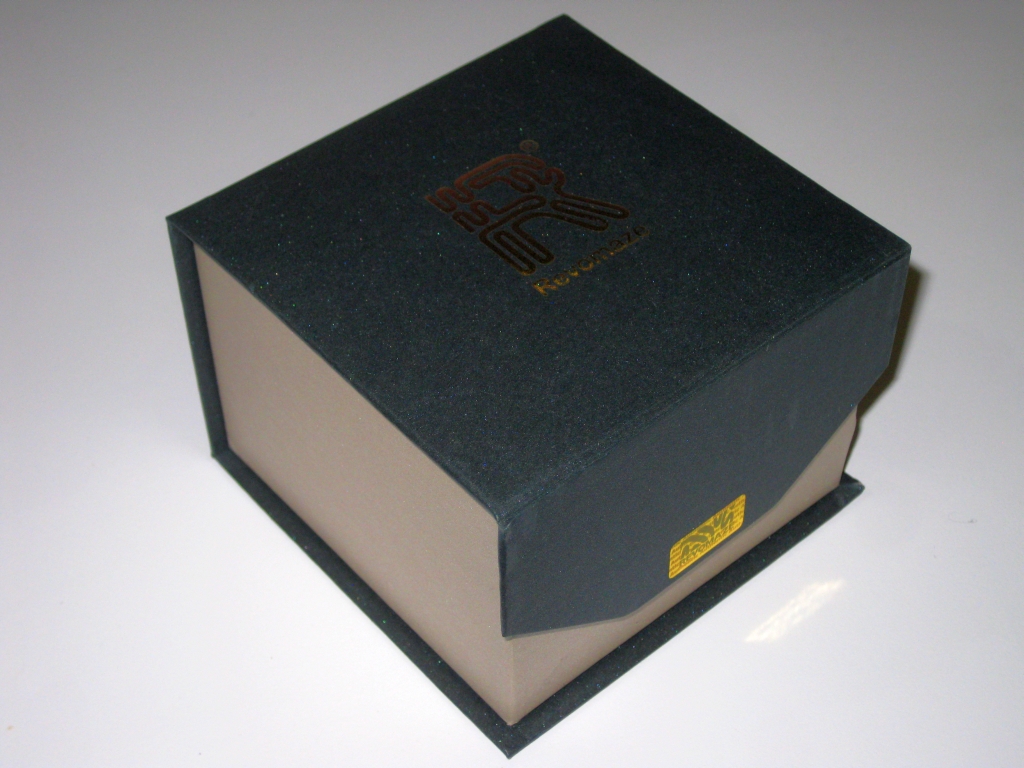
The newer puzzles coming from Revo HQ are showing up in these nice new boxes, which give the puzzle a little extra padding during transit, and leave you with a good looking box to keep the puzzle in when you’re not solving it or displaying it somewhere else. There’s still a little work needs to be done on the box to prevent the core from taking a knock during transit but this is a good step forward from the old fish net and plastic bag wrapping we had seen. Much more fitting of a puzzle in this price range, and quality.

New Boxes

New Boxes

As with all the Revo puzzles I’ve had in the past, the initial look and feel is great. These are still high quality puzzles, made with an attention to detail. The Copper, like it’s predecessors weighs in around the 600g mark and certainly put a strain on my hands again.

It had been over a year since I’d worked on a Revo R1, and the familiar sore hands and fingers were back. It’s recommended to work on the puzzle in short sessions, and I can’t agree more. If you’ve not played with one for a while, your hands are going to thank you for taking a break. Fortunately there are convenient spots in the puzzle where you can put it down and not lose progress.

The Copper is a move back to the original static maze style, such as the Blue and Green puzzles, which I and many other puzzlers really enjoyed. There’s no moving sliders, or free floating ball bearings in this puzzle to confuse and confound you. Just a traditional maze, with Chris’ own devilish traps and pitfalls to navigate. That said it’s not all old and familiar stuff in here. There’s been a couple of modifications to the pin that are going to catch the unwary puzzler, so be warned, this isn’t simple by any measure.

As a regular reader you’ll know I own (almost) all the available Revomaze puzzles, and have successfully opened all of them with varying solve times from a few months to a few days. They’re all challenging puzzles, and all for different reasons. I enjoy the puzzles that either make me think or are just enjoyable to solve. Bronze still ranks as my favourite in the series, with Blue being a close second. The reason for those choices comes down to two things. Bronze was a significant challenge to understand the dynamic features, but wasn’t so difficult to be frustrating. Blue is just a really fun puzzle. While initially difficult to understand what was going on, once you understood the principles of the puzzle, it was both repeatable, and enjoyable to solve. Now add to that the Revo Mini which is a tiny scaled version of the blue maze, and there’s a lot of positives from those two designs.

The Copper claims to “Triple the fun”, and I’ll agree to some extent with that statement. The internals are unlike any of the static mazes to have come before, and there’s certainly more in there. As far as the fun, the initial part of the puzzle contains one of my least favourite features in a hidden maze puzzle. The dreaded bridge.

Much like the Green, the bridge frustrated me more than provided fun, and Copper has that same frustration level for me. Don’t take that as a negative on the puzzle as a whole, just that it’s not one of my favourite challenges. The dexterity sections can be overly difficult and if you fail near the end, restarting can be quite off-putting. That said, the satisfaction when you complete it is certainly well earned.

Personalised Serial 'Number'

Personalised Serial ‘Number’

Given that Chris now has many of the machines in house, personalised engraving is possible as you can see from the serial number on my puzzle. I certainly didn’t request this, and it was great to have this reveal as I started working on the puzzle.

One thing of note, at least for me is the strength of the spring in the copy I have. I’m not sure if this is across the board or not, but I feel that the movement of the puzzle is quite “stiff”. The power of the spring along with the modifications to the pin made the navigation more challenging than I remember. There’s a lot packed into this puzzle, and with sore fingers I found it quite the task to keep making progress in a single session. Taking regular breaks is the only way to get through this one. I don’t think we’ll see anyone doing speed runs to get the fasted solve time in the near future. I think most will be happy to solve the puzzle, and see the work that went into the core when they’re done.
If you’re on the fence about getting a Copper, and want a serious challenge, without the worry of ball bearings running awry, or dynamic devices to confound, then go ahead and pick one up. There’s a lot to like about this puzzle.