Tag Archives: Trick Lock

Transparent Lock

I’ve been slowly adding to my collection of trick locks over the last few years, and first saw the Transparent Lock by Gary Foshee a couple of years back, but sadly missed out back then as they sold incredibly quickly. I was lucky enough to be able to borrow one, and solve it, and at that point I kicked myself for not being quicker off the mark in trying to get one.

When I heard from Gary himself that Wil Strijbos had some with him at IPP 35 for sale, I was pretty quick in finding Wil and asking if I could please lighten his luggage and take one off his hands.

Transparent Lock by Gary Foshee

Transparent Lock by Gary Foshee

Transparent Lock boxed with Gary's Signature

Transparent Lock boxed with Gary’s Signature

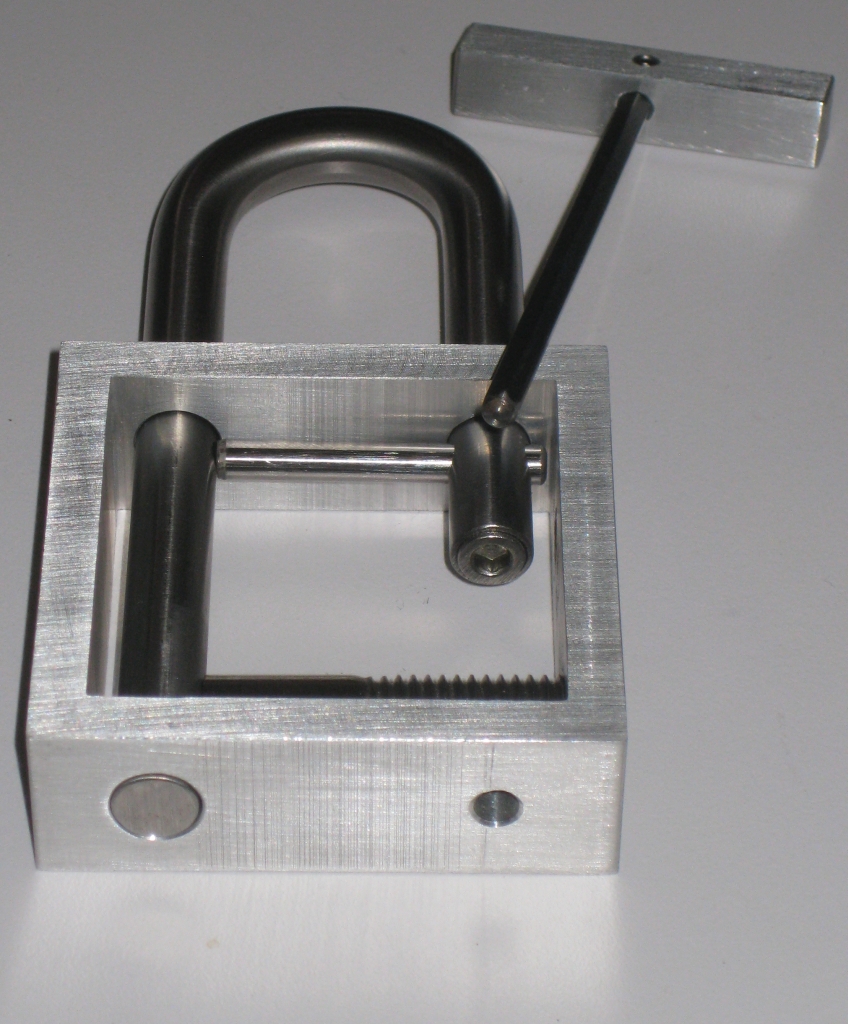
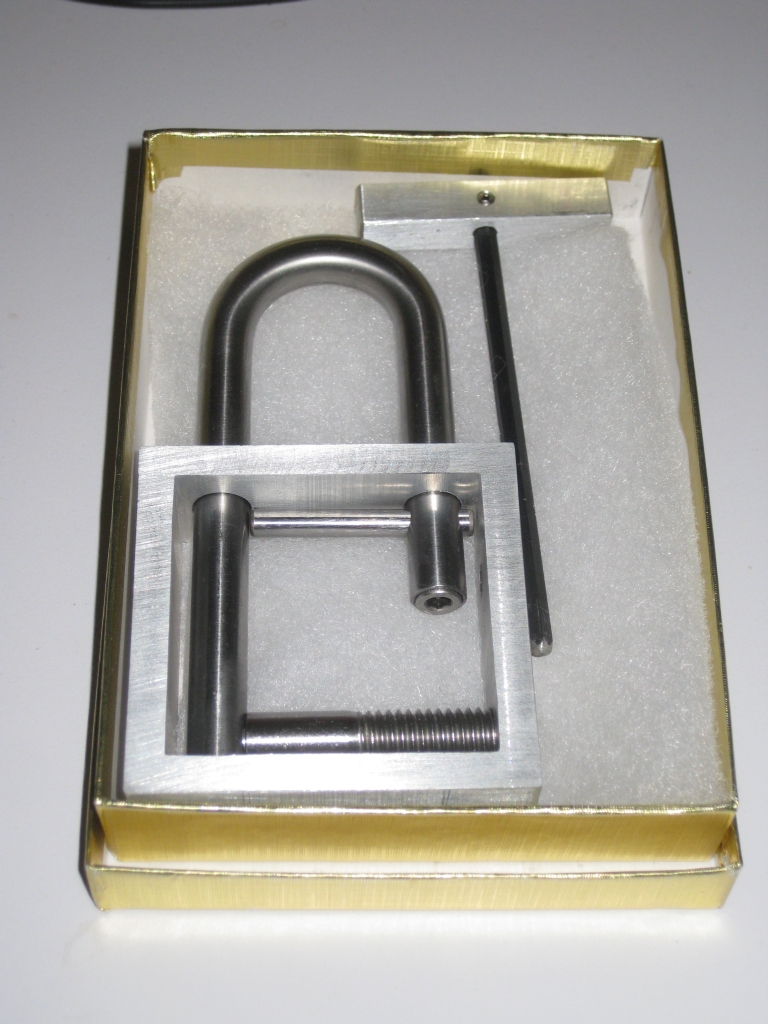
The puzzle looks exactly as you’d expect for a transparent lock (or as it’s also known, the Open Lock). It looks pretty simple, with a square frame, a shackle, and a few bits and pieces attached to the frame. You also get a handy hex wrench with a handle, which given that it comes with the puzzle, we can safely assume is not considered an external tool.

The puzzle comes in a fairly plain gold box, and as you can see, mine is the 2015 version of the puzzle. It’s the same as the older version, so no need to try to hunt one of these down if you have the first release version. In the bottom corner is Gary’s little cartoon signature, which looks uncannily like the man himself.

Made almost entirely from aluminium the puzzle has a fairly rough look to the body and the hex handle, showing lots of tool marks, while the rest of the puzzle has a polished and clean finish. It’s a little disappointing, given the quality of some of the aluminium puzzles out there, and some of Gary’s other work I’ve seen. With a little polish I’m sure the frame could be cleaned up, so it’s really a small nit, but given the price of the lock, you do expect a certain level of finish.

Measuring in at 2.5″ x 4.5″ x 0.8″ it’s about a standard size for a lock, and it has a good solid feel to it. I doubt that you’d damage much other than your toes if you dropped it. Given how solid it is, it’s easily a puzzle that you can pass round and let people play with, and there’s really not much they can do wrong.

These are fairly limited in production because Gary has to make the shackles himself, and having talked to him about them, they’re a real pain to make. Apparently they’re cold forged and the process is pretty difficult to get the results he needs. Let’s just say that he’s not the biggest fan of making these!

Could this be useful?

Could this be useful?

Looking over the puzzle, there’s a couple of fairly obvious things to try, like the screw thread at the bottom of the lock. You will also notice the hex head inside the shackle, and you’ll probably make the obvious leap that it’s useful, and that you should probably do something with it. Unfortunately, it’s not going to be quite that easy to open the shackle, and if we’re honest you wouldn’t want it to be that easy.

Gary helpfully rounded the ends

Gary helpfully rounded the ends

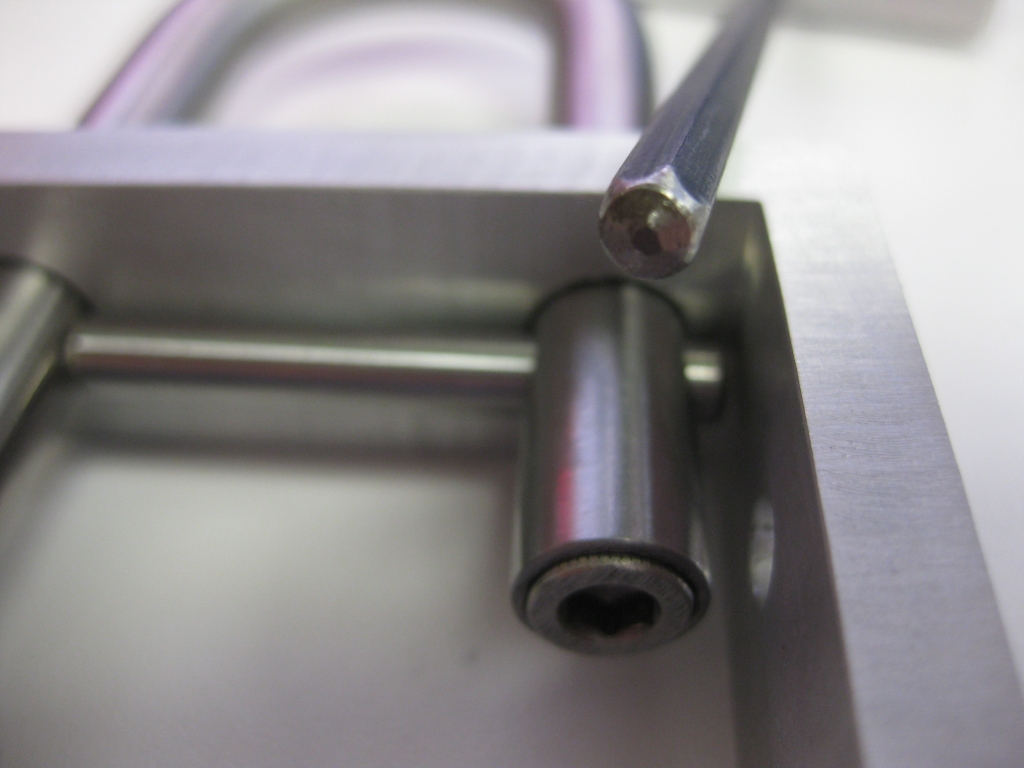
At this point, you’re probably yelling at the screen “Use the hex tool”, and you’d think that would be useful. Unfortunately, Gary has very helpfully rounded over the ends of the hex tool, making it entirely useless. Of course there are things that you’ll find useful, and the puzzle has much more hidden around it than you’d think at first. There’s a reasonable sequence of steps to discover various tools and useful bits that will get the puzzle open.

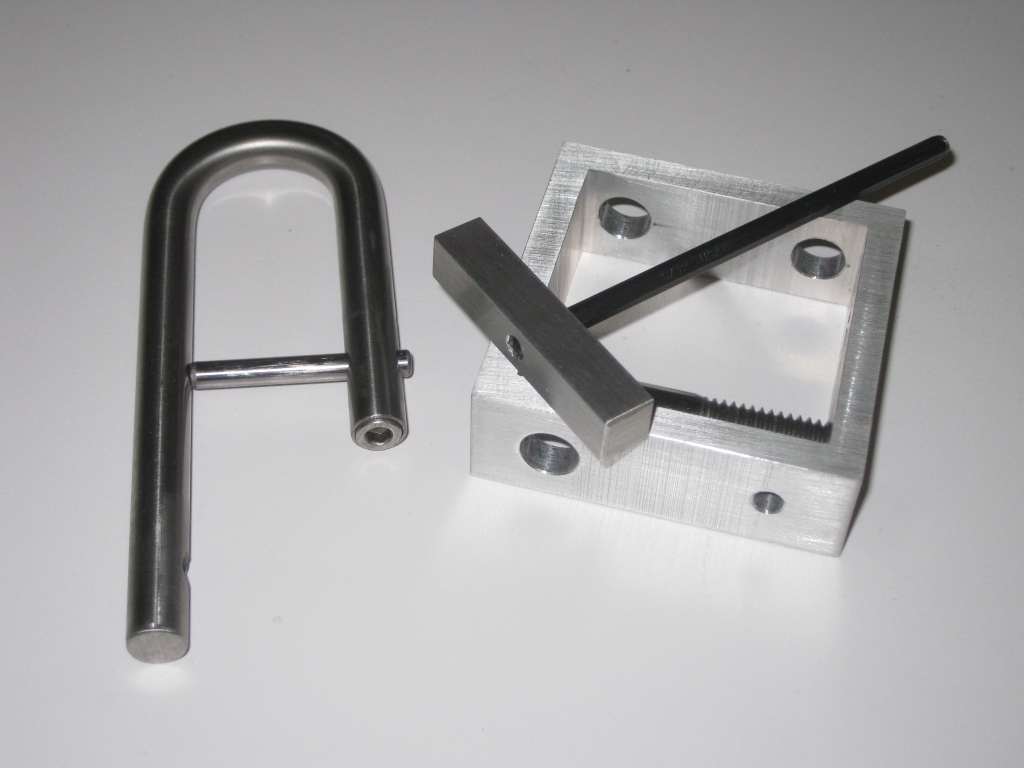
Once you remove the shackle from the frame, you can entirely disassemble the puzzle and leave yourself with an array of parts on the table. I think this is one of the reasons I like the puzzle as much as I do, since it really lives up to its name. Once open it really is transparent.

Finally open

Finally open

While it’s not a difficult puzzle, and took only a few minutes for me to open the first time I played with one, it is well made, and it’s a fun puzzle. If you’re looking for a challenge on the order of a Popplock, then you’ll want to look elsewhere as I feel you will probably be disappointed.

Having been trying to get one of these for a while, and missing them at auction I’m happy to have picked one of these up. It’s a great addition to my collection, and one of Gary’s puzzles I’m very happy to have. Allard was able to get his hands on one of the original run, so head over here to read Allard’s thoughts.
Cast Nutcase

This entry is part 5 of 8 in the series Hanayama Cast Puzzles

Cast Nutcase is another puzzle in the Cast series from Hanayama designed by Oskar van Deventer. Measuring in at 1.25″ diameter, by just under 2″ long, the goal is to remove the small nut encased inside the hollow part of the puzzle by taking the two halves of the puzzle apart. Thanks to Puzzle Master for sending me this puzzle to review.

There is a second goal to the puzzle, but I’ll talk about that later …


Cast Nutcase in the starting position

Cast Nutcase in the starting position

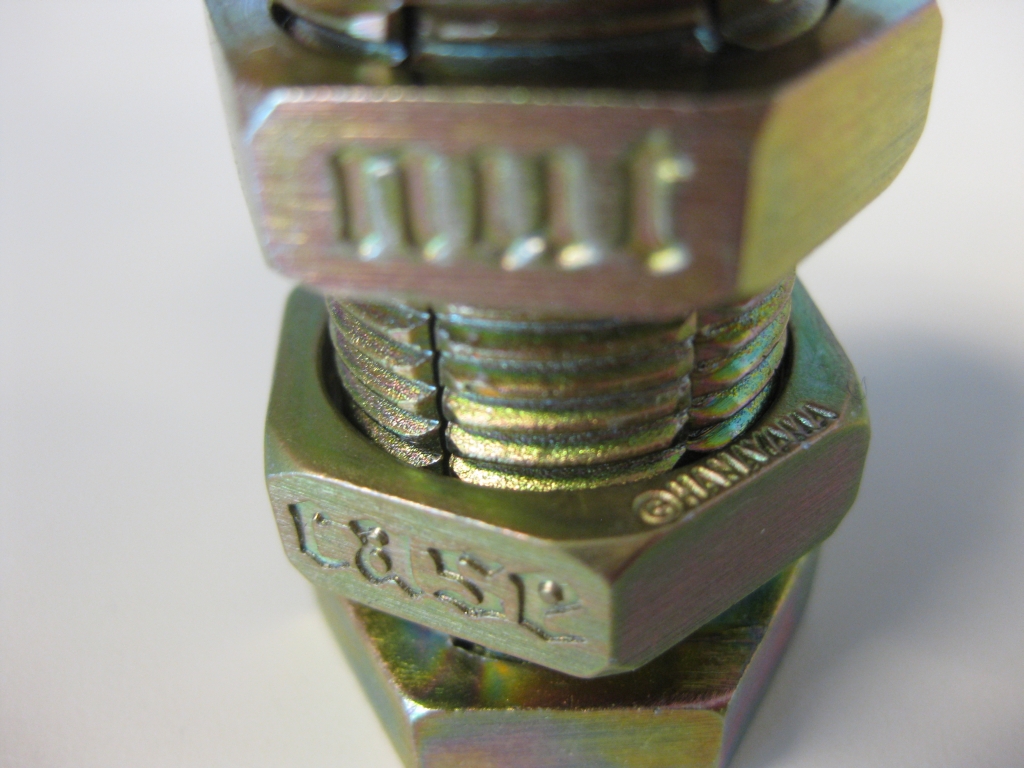
As you’d expect, the puzzle comes in the standard Hanayama black and gold packaging, with the puzzle held in shrink wrapped plastic to keep it in place. The puzzle consists of 5 pieces, including the small bolt that can be seen through holes in the ends of the puzzle. The two bolts threaded onto the centre of the puzzle will spin up and down the threads and each has ‘Cast’ and ‘Nut’ engraved into opposite sides of the bolt. The familiar Hanayama logo is also engraved into the edge of the bolt.

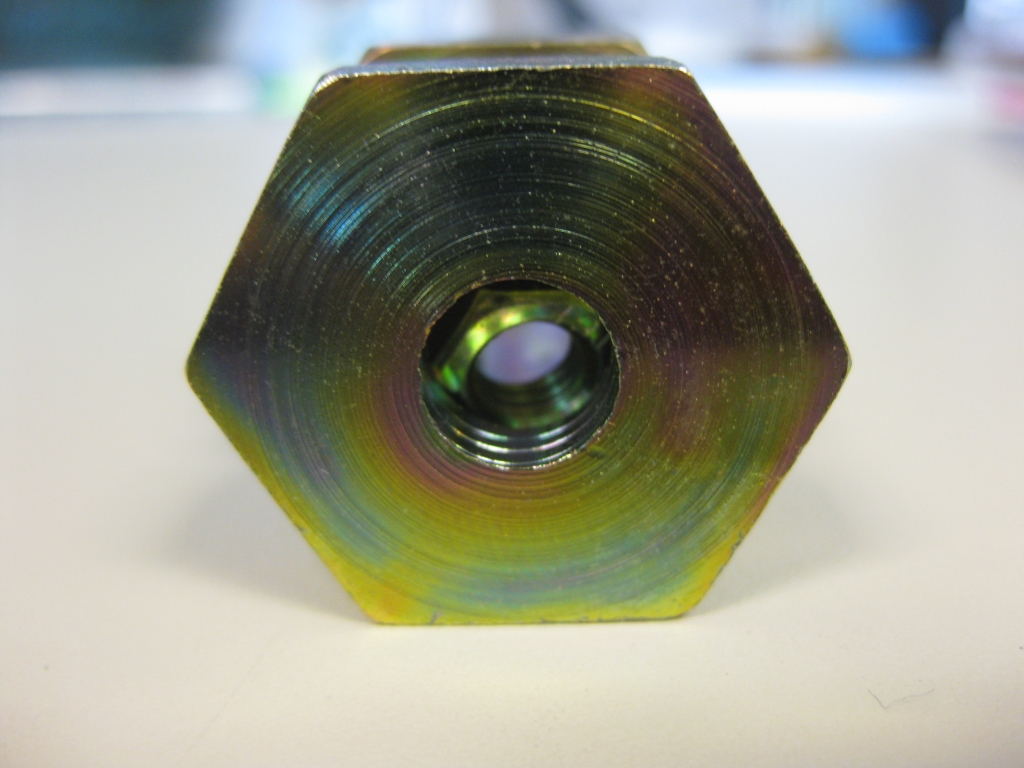
Closeup showing the small nut trapped inside

Closeup showing the small nut trapped inside

Closeup of the engraving on the nuts

Closeup of the engraving on the nuts

The look of this puzzle is interesting as a galvanised, bronzed bolt, with some interesting patina patterning on various surfaces. It may not be the prettiest of the Hanayama puzzles, but it’s by no means ugly either. Looking at the puzzle, it seems impossible, as the two nuts in the centre of the puzzle are threaded onto a seemingly full thread which extends from one end of the puzzle to the other. The only clue as to what is going on is that the thread is not made from a single piece of metal, and it split into sections. Pulling on each end of the puzzle will show that the sections are alternately connected to either end of the puzzle, so there is some hope that the parts will separate.

Rated as 6/6 by Hanayama and 10/10 – Mind Boggling by Puzzle Master. I have to agree with this rating. It’s a tough puzzle and will certainly test you whether you’re a seasoned puzzler or not. It took me around an hour to open this one, and even then I think I may have been a little lucky. I could certainly see it taking a lot longer to open this puzzle. You should be able to figure this one out by looking closely at how things are put together, and from that work out what’s going on, but there could be a lot of trial and error before you get it opened. If you get really stuck, there’s a solution here. For me, this puzzle is a little like picking a lock, and feeling your way around what’s happening with little changes to the parts of the puzzle as you go.

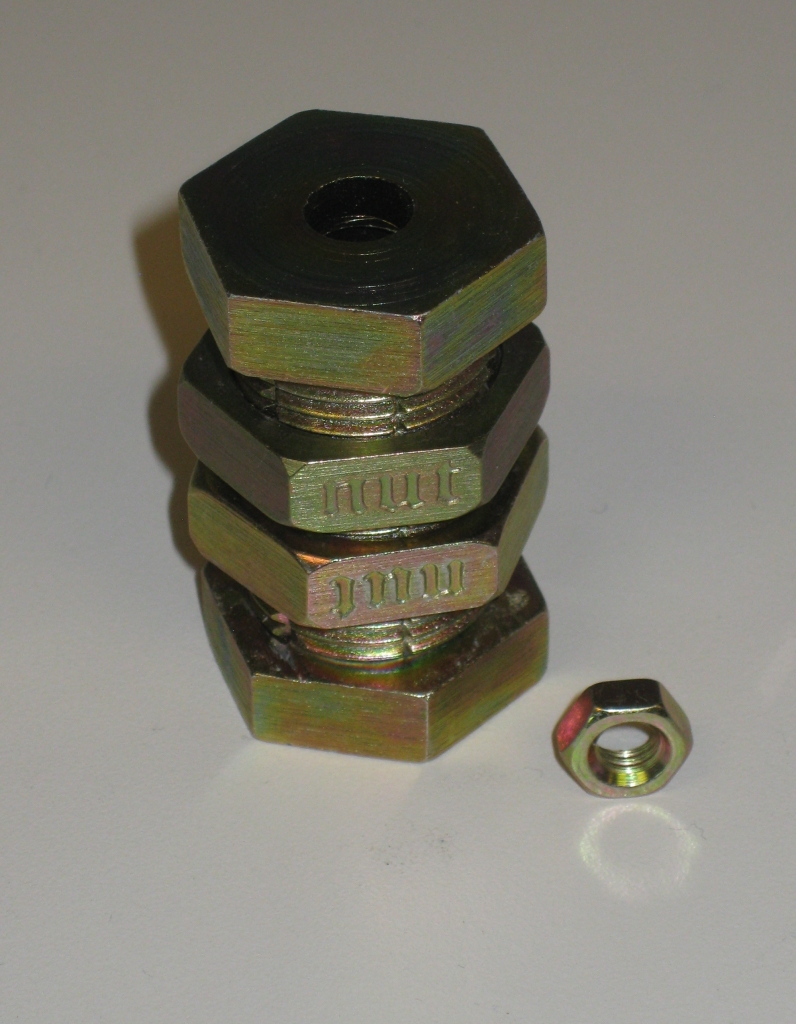
The small nut free from it's "Nut Case"

The small nut free from it's "Nut Case"

My biggest problem with this puzzle is that the nuts don’t turn smoothly on the threads if there’s any misalignment at all. Given the way that the puzzle opens, and the design on the nuts, this is inherent in the design, and I don’t think there’s much that can be done to avoid it. Sadly, I feel that the sticking of the nuts as you turn them does detract from the overall experience, and I had several times where one of the bolts would lock up, and significant banging of the puzzle on my desk was required to get things moving again. Given that very precise alignment of the various parts is required to solve the puzzle, the stickyness does make things less enjoyable. Having solved this a number of times, keeping the threads aligned by pushing together on each end of the puzzle with one hand while turning the bolts helps however that is only useful for the first half of the solution. If things get misaligned, then it’s tough to get it back in sync.

Overall this is a challenging puzzle, but I fell there’s a little too much guess work and hidden trickery to make this a stand out puzzle. If you want a real challenge, then pick this one up, but if you’re just looking for a fun puzzle, I’d say it’s best to pass this one by.

The Case Nut Puzzle

Now, remember way back at the start, I said there was a second goal …

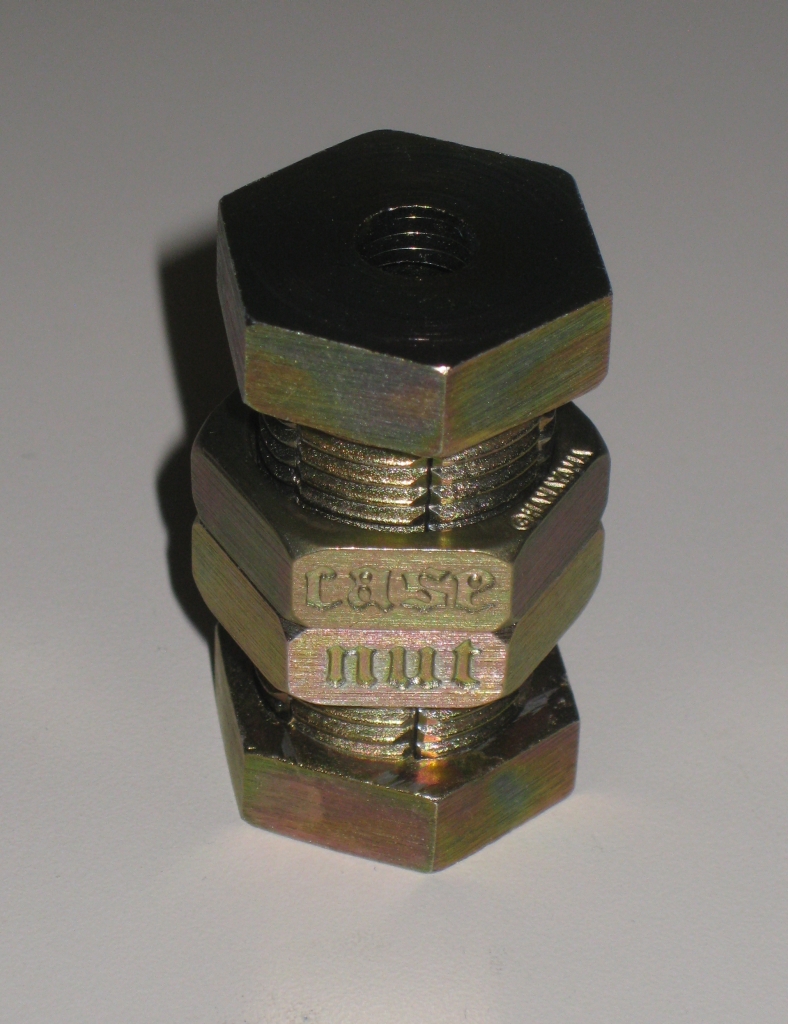
The second goal for the puzzle, just to prove it's possible

The second goal for the puzzle, just to prove it's possible

If you think that the first goal is tough enough, then I’d say stay away from the second. Once you’ve solved it a few times, and you know what’s going on, give this a shot.

Warning: this is a lot tougher!

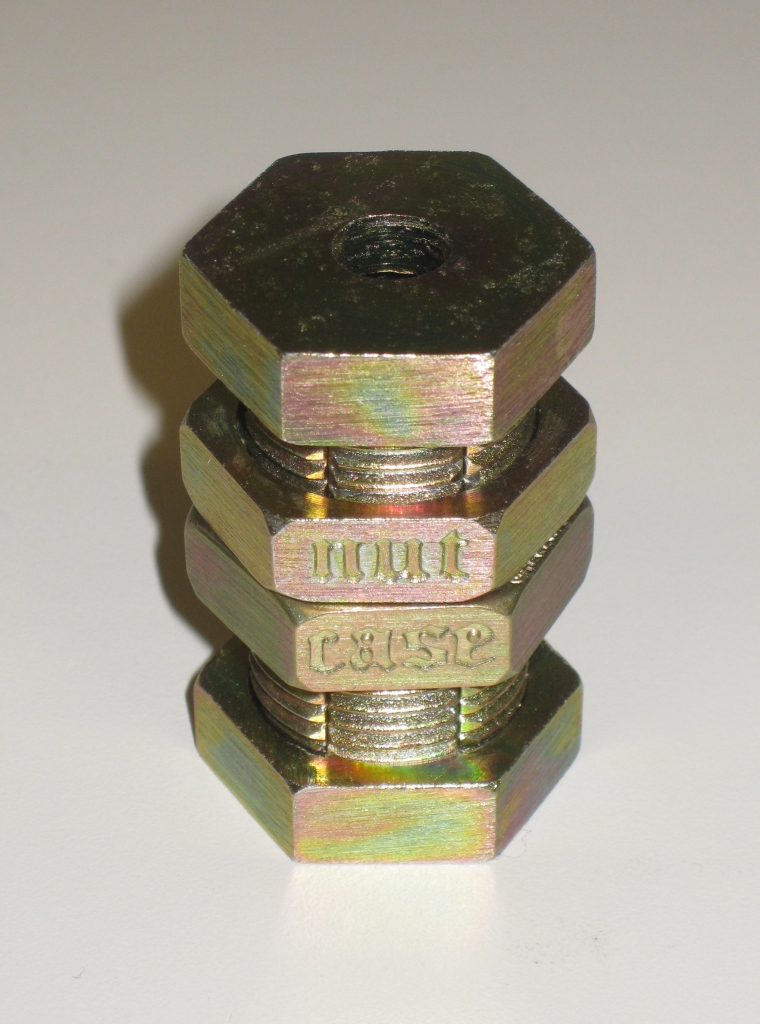
The nuts on the puzzle are designed to go on in one orientation, so that when closed they spell “Nut Case”. But it is possible to reverse the orientation so that they spell “Case Nut”. The photo above proves that it’s possible. Now I will say, make sure you understand how to open it normally before doing this, as all the little markers you’ve used to solve the puzzle in its first configuration will be of no use to you! When putting the puzzle into this second configuration, things are much tougher, so don’t say I didn’t warn you. I think this puzzle may just go up to 11!

The Yot

… not a UFO

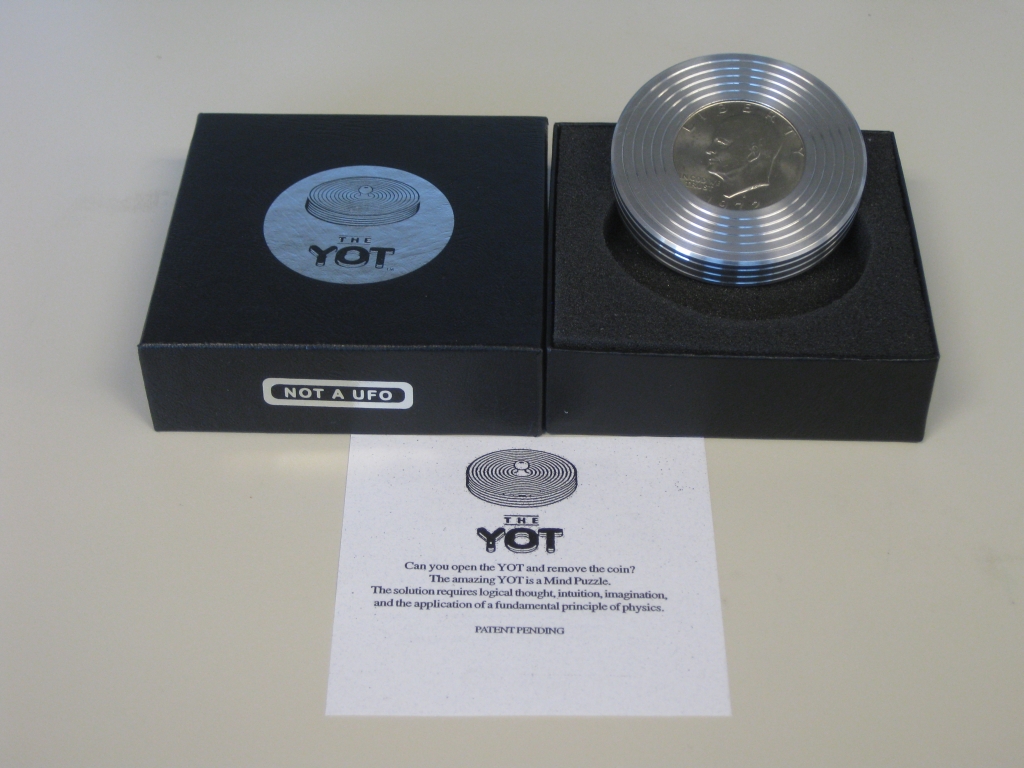
The Yot (or perhaps it’s toY backwards?) from Hi-Q Products is a puzzle which has intrigued me for quite some time now, but I’ve seemed to always have another puzzle that I wanted turn up and mean that I put off getting one. Well that’s no longer the case, as my recent shipment from Puzzle Master included one of these fine puzzles.


Note: Video now available in 720p HD.

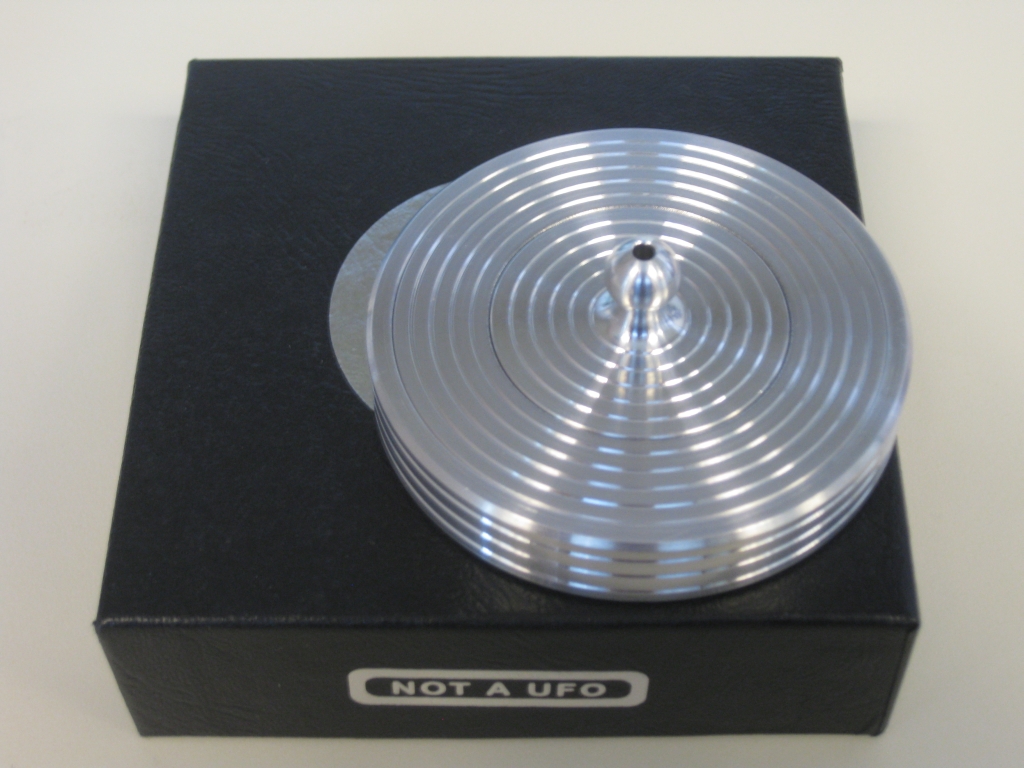
The Yot is a great looking puzzle, carved from a block of aluminium and measuring 2.75″ in diameter with a silver dollar trapped inside. My Silver Dollar is from 1972 so is a little older than I am. As a non American, I wasn’t in the USA when these coins were in regular circulation, so it’s nice to have one, and what better way to keep it than inside a puzzle? The Yot has a really good weight in your hand and the little handle on the top is well shaped giving a very tactile feel to it. There is a hole in that nub in the top of the puzzle, which may lead you to thinking it’s part of the solution. If anything I think it’s there to prevent a vacuum from forming between the lid and the coin, but may help to disguise the real solution.

The Yot in its box

The Yot in its box

The top of the Yot

The top of the Yot

The puzzle itself isn’t terribly difficult to open, and I opened it within a few seconds of taking it out of the box for the first time. The solution is fairly common to a number of puzzles, and really given the shape is one of only a few possibilities that could be hidden in such a small puzzle. Now if you’re reading this, you’re probably thinking, why would I spend nearly $40 on a puzzle that I’ll open so quickly? Well first off, it’s a very high quality puzzle that is well made, and very precisely machined, so from that aspect, it’s worth the price tag. Perhaps the real reason is that given how well made the puzzle is; the simple mechanism, works repeatedly without fail. Even the box it comes in, while simple, is still well finished and adds to the quality feel you get from the puzzle. The only caveat to that is the badly over photocopied piece of paper in the top of the box giving you info about the puzzle.

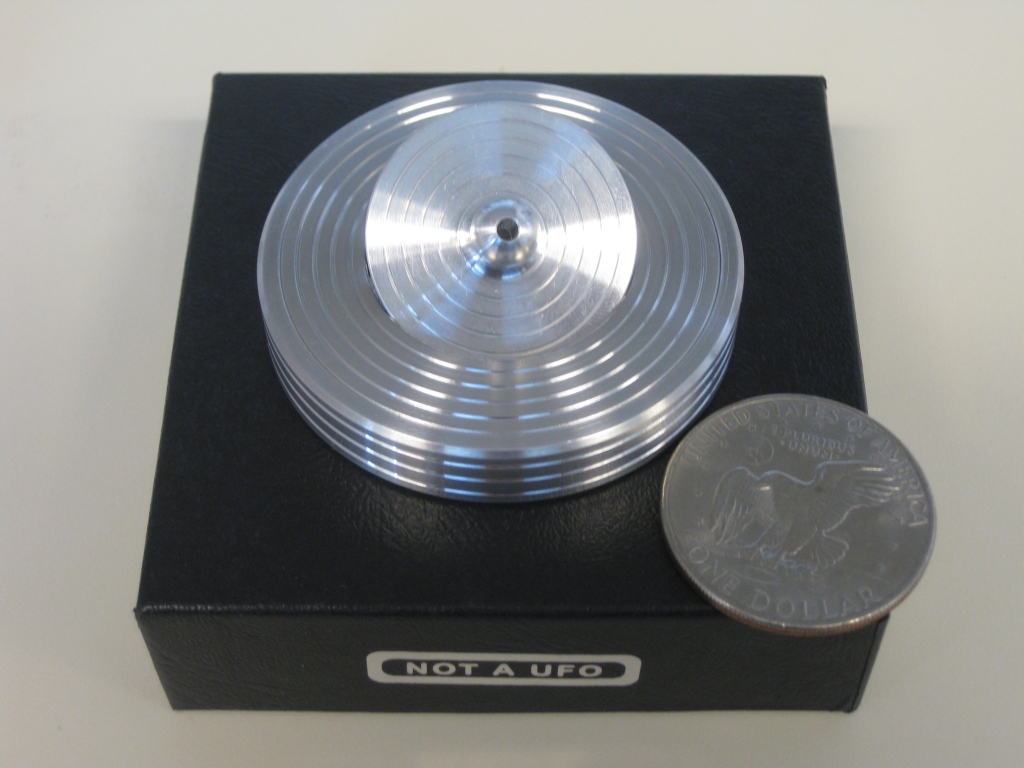
The Yot opened, and no this picture won't help you solve it.

The Yot opened, and no this picture won't help you solve it.

The real fun with the Yot is being able to open it in front of one of your friends, showing them that all you need to do is lift the top straight off, then closing the puzzle and handing it to them, and watch them struggle to open it. It does take a little practice to be able to perform the trick that is required to opening it without your audience seeing what you have done, but once you can, the look on their faces is priceless. Even better, you can hand them it in the solved state, so they can take the top off, and almost invariably, they open it, re-close it then turn it over with a smile of their face, then fail to re-open it when they turn it back around, which just leaves them more puzzled than they were to start with.

As a nice touch, it’s possible to remove the coin from the Yot, and close it back up. Now the base of the removable top is visible, however the mechanism and any clue as to how the puzzle works is still hidden, so you could even pass it out like this to show that there’s nothing tricky about the coin. A nice touch and a good piece of design to boot.

The Yot is also available in a collectors edition from yot.com directly where the body is 18k gold, and has an antique silver dollar trapped inside. While it’s a lot more expensive than the basic version, it’s a nice touch and if you’re a collector it may be worth looking at. I’ll be honest, without the puzzle being a little more challenging I doubt I’d consider getting the collectors version, but if you’ve won the lottery, then why not. Editors note: Given the price of gold today, and the solid silver dollar contained within, this may even be an investment.

The Yot II has a different solution to the original, so I may have to pick one up and see how much different it is. It’s in a larger package, so clearly there’s more room in there for an additional mechanism.

If you need a few hints as to how to open the puzzle, then you can go to the Yot’s website, and they have a few clues there. It’s not a full solution, but really you shouldn’t need it.

There are a number of other puzzlers out there have already reviewed the Yot, so have a look at Brian’s review or Oli’s. Jerry also has written about the Yot and the Yot II, so there’s no shortage of thoughts on this puzzle.

Overall, I’d say if you’re an experienced puzzler, you’re not going to have a problem in opening this very quickly, but opening the puzzle in front of someone then watching their face as they fail to open it by doing “the same thing you just did” is priceless. A fun puzzle, a great coffee table item, plus a nice way to store your silver dollar. If you don’t have one, it’s a nice addition to a collection, and would make a very nice gift.

Puzzle Master Trick Locks 1-5

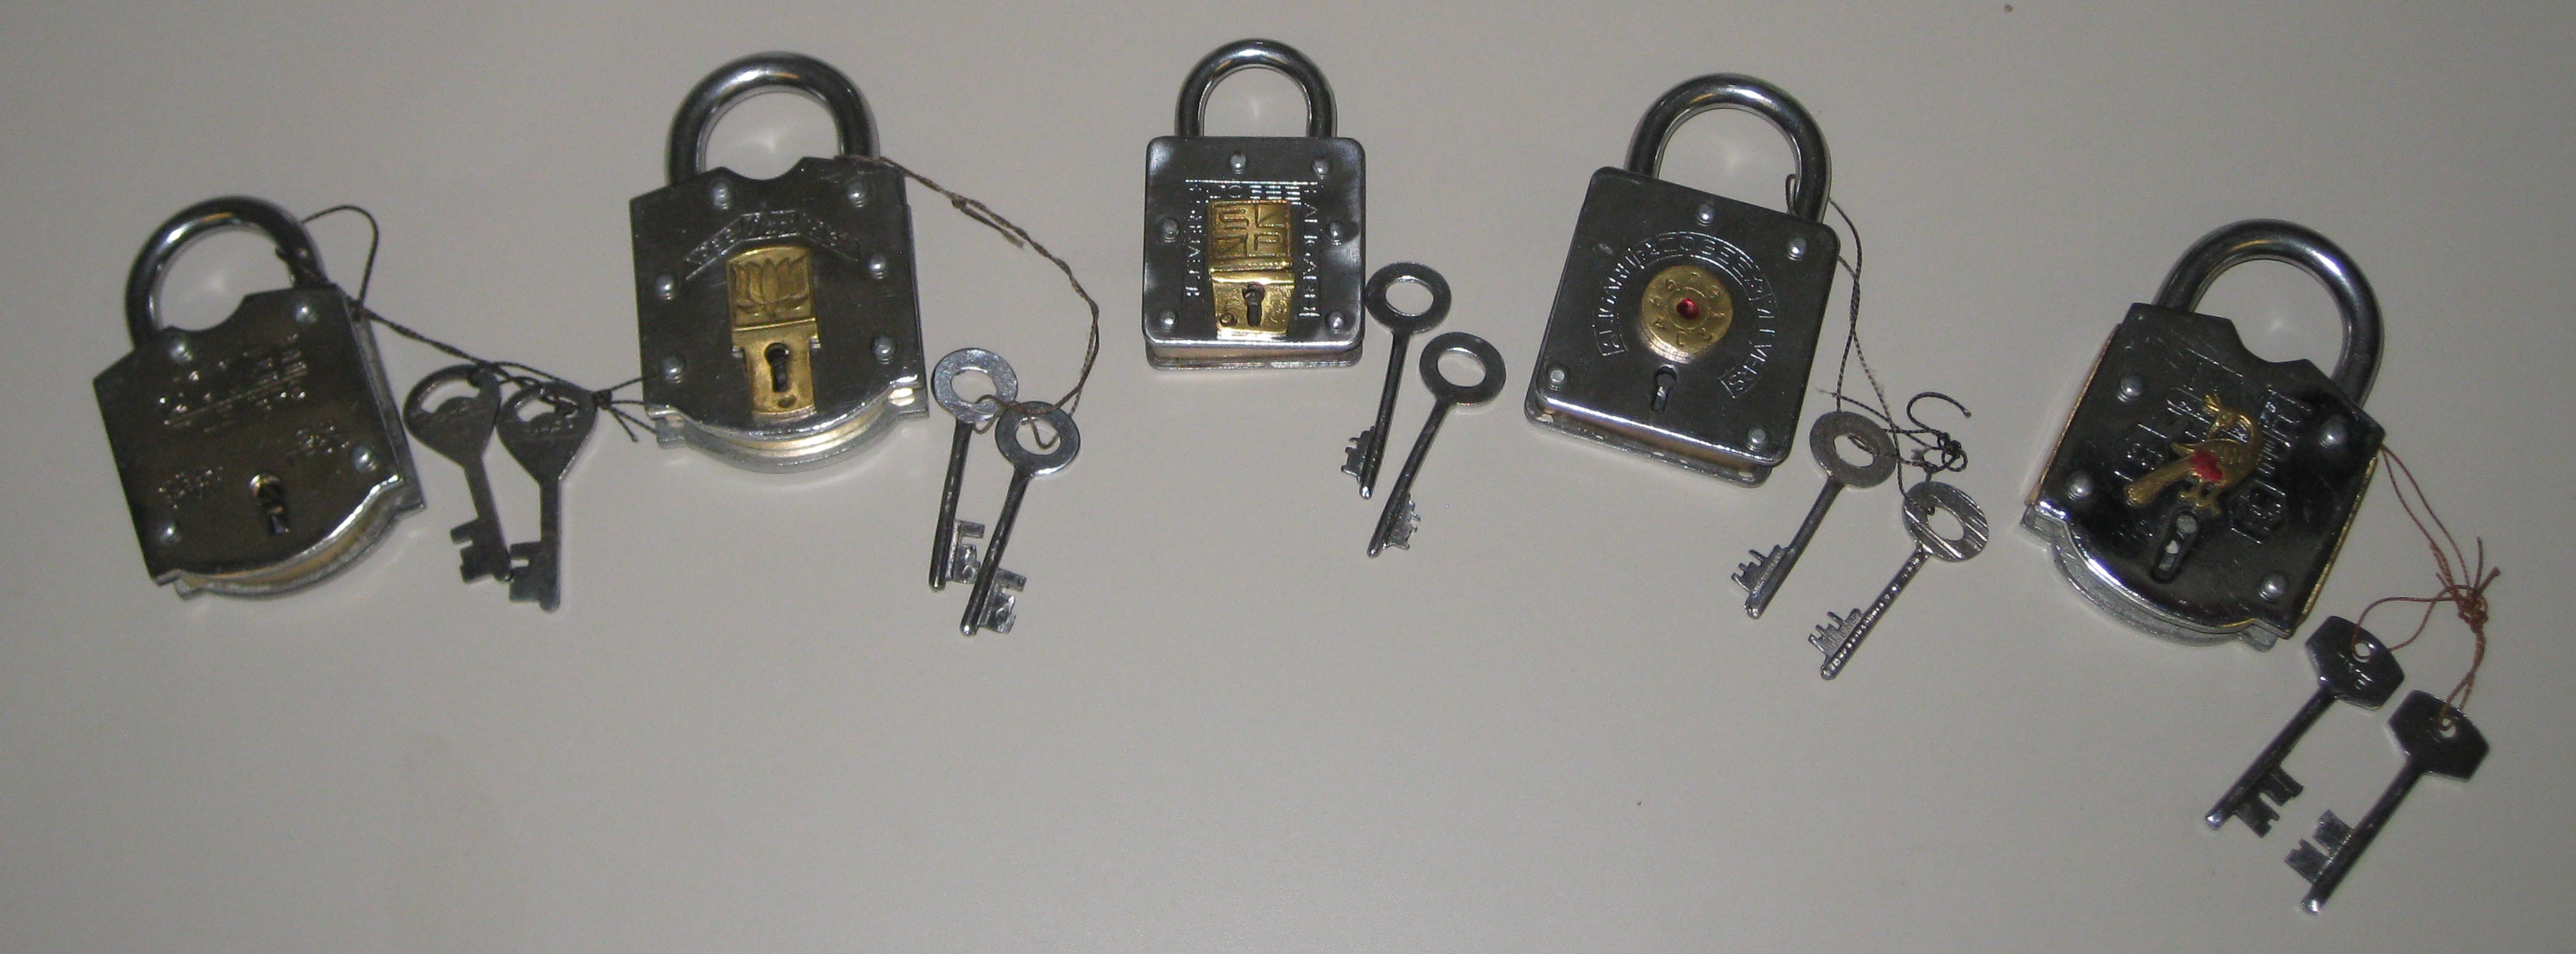
I recently borrowed a set of five Puzzle Master Trick Locks from fellow puzzler Brian Pletcher, through the Puzzle Library run at Renegade Puzzlers. Brian has already reviewed the locks, so check his series of reviews here. Jeff Chiou had the locks before me so I met him over lunch to talk about puzzles and for him to pass on the locks to me, since we work fairly close to one another. Read his thoughts on his blog here

All 5 Puzzle Locks

All 5 Puzzle Locks, from left to right - 1, 3, 2, 4, 5.

Edge Closeup

Edge Closeup

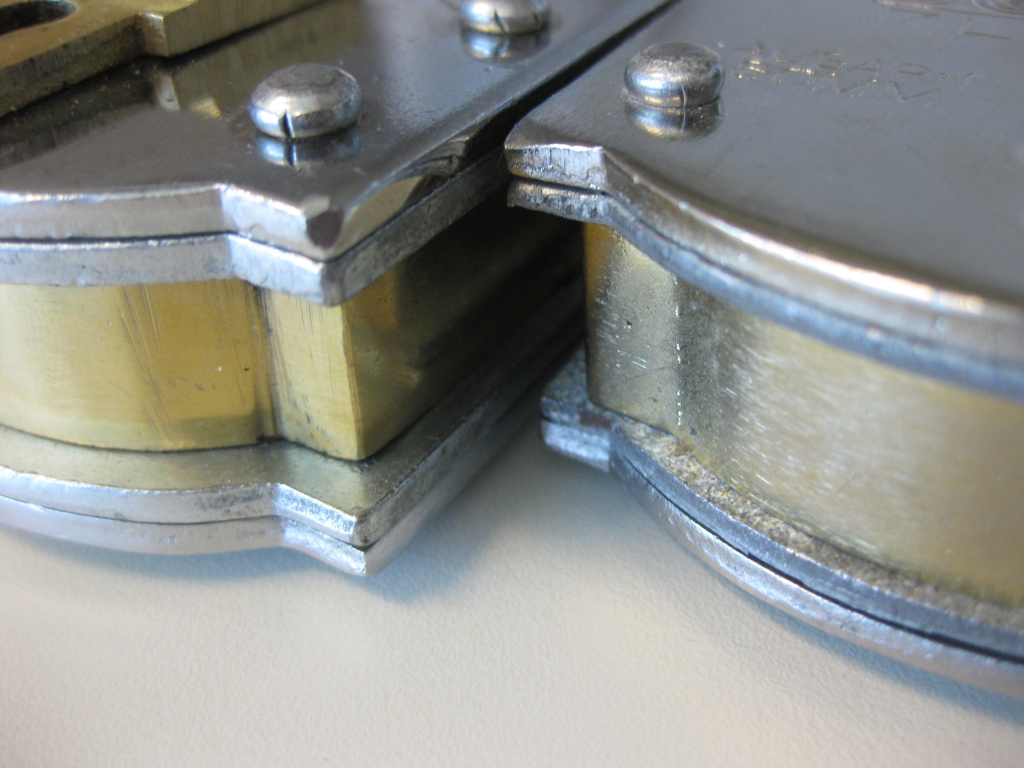
The first thing to note with all of these locks is that they are all solid. They’re constructed from double thick steel plate and brass riveted into stacks as you can see on the right. That gives them a very solid feel, and significant weight to each lock. One thing to note from that however is that it doesn’t mean that these are high quality locks. The fit and finish is rough giving the locks a ‘well used’ feel to them. The keys for the locks seem flimsy by comparison to the build of the locks themselves. Priced between $20 and $30 per lock these aren’t the cheapest puzzles out there, but they are on the low end of the scale when it comes to puzzle locks. That is somewhat reflected in the level of difficulty of the puzzle, as I’d classify all of these as easy. I’m not a trick lock expert, however I opened all of these very quickly. The locks come from India, and to my knowledge, Puzzle Master is the only place to buy them currently.

Trick Lock #1

Trick Lock 1

Trick Lock 1

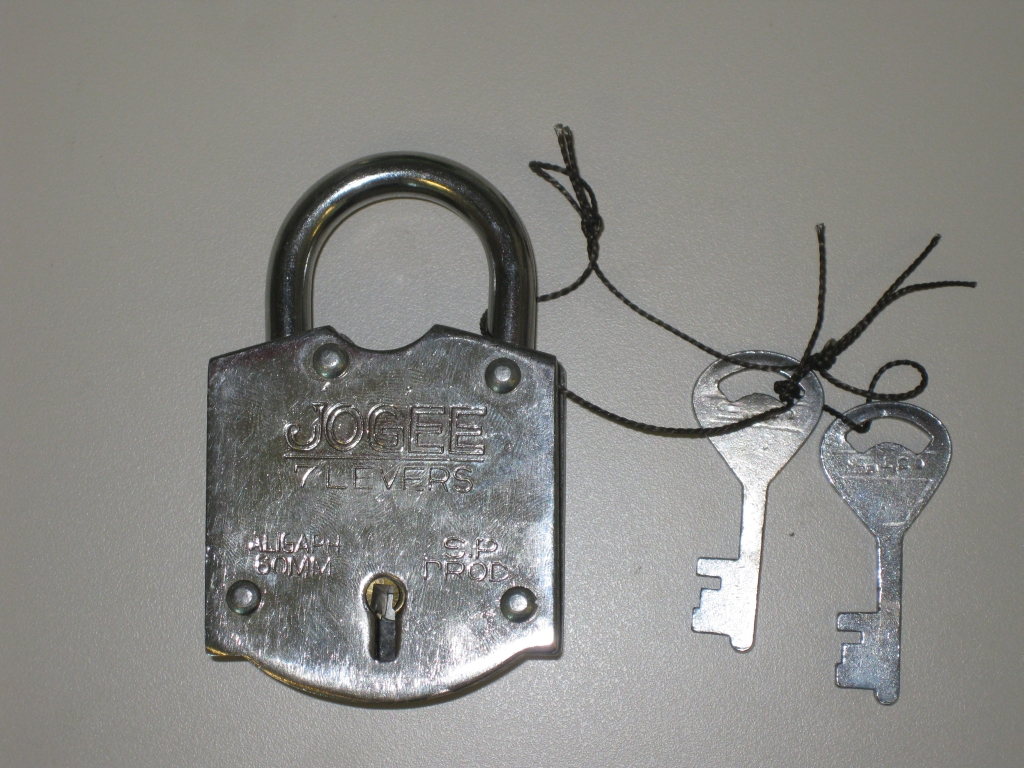
The first of the trick locks is the most traditional looking lock of the set. From the front, there’s nothing unusual, however inserting the key and turning in any direction isn’t going to get you far. The secret to this lock isn’t well hidden, and really is my one big problem with this lock. Had the secret been hidden better, this would have been a far better puzzle lock.

Trick Lock #2

Trick Lock 2

Trick Lock 2

The second lock in the series is both the smallest and lightest of the locks. Inserting the key into the lock you’ll find that it doesn’t even turn so clearly that’s not the solution. This has a novel mechanism which may catch some people out as it’s not entirely obvious. The fit of the mechanism lets it down slightly , but also helps to throw you off the scent as things which really shouldn’t move, do. The back of this lock gives the puzzler a hint as to its solution, however the mark on the back is subtle, and may be easily missed as a manufacturing defect. Given it’s location I’m inclined to believe it was a hint rather than a flaw.

Trick Lock #3

Trick Lock 3

Trick Lock 3

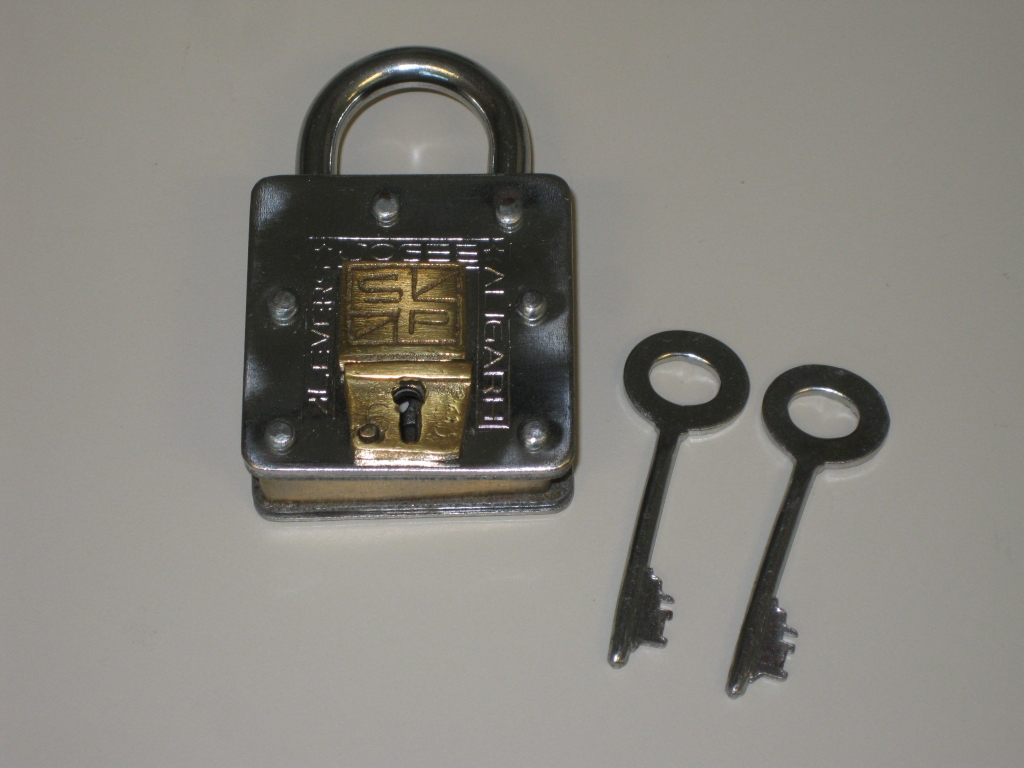
The third lock in the series is a fun lock. The mechanism isn’t obvious, and is possibly the best hidden of the series. I have to agree with Brian’s review that it is entirely possible to open this lock without knowing how you did so, and given that, not reset it back to it’s locked state. The stylised front adds a nice feature and is probably my favorite aesthetically in the series. Again, it’s not a difficult puzzle, and the solution isn’t obvious so this may keep some people guessing.

Trick Lock #4

Trick Lock 4

Trick Lock 4

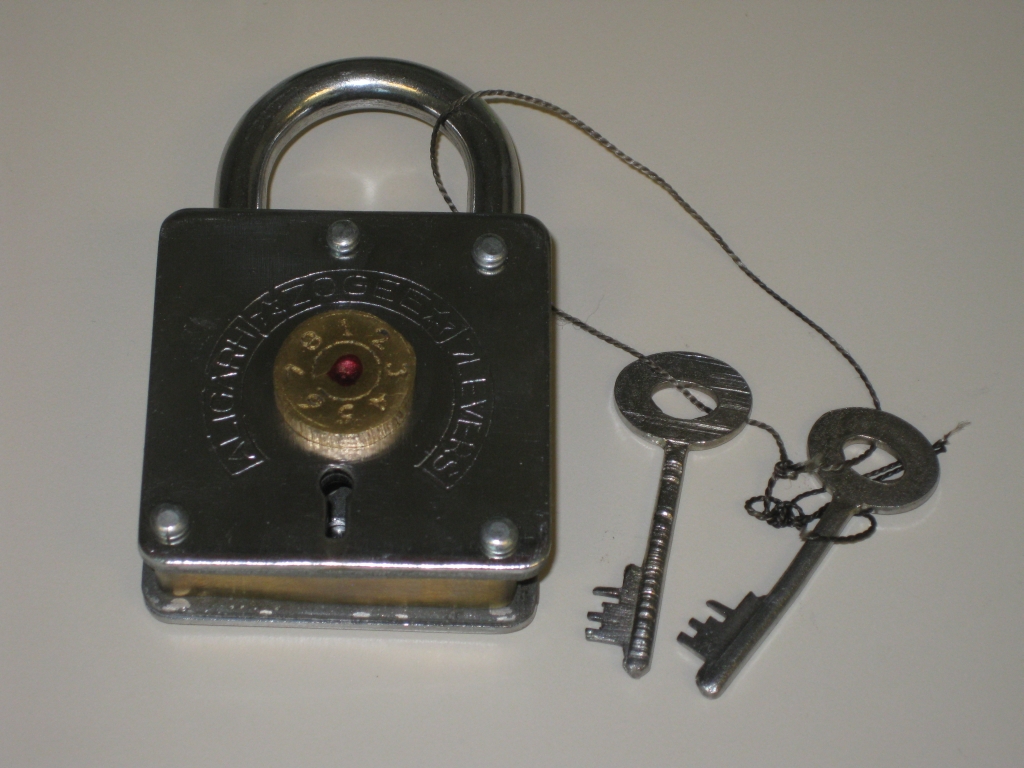
Number four is an interesting lock, with a combination dial on the front face. Again, the back of the lock will come in handy when trying to solve this lock, as there’s a handy clue stamped into the back for you if you’re paying attention. The dial itself is fairly roughly cut and etched with the numbers 1-8, plus a red splodge of ink in the centre. I don’t much care for the red ink, as it really doesn’t add anything, and isn’t particularly well applied. The dial on this particular lock is incredibly stiff, but it is possible to rotate it 360 degrees. It’s easier to stop at 8 and reverse your direction rather than trying to keep going however, so I’d recommend that approach. This is very similar to #2 in the series in terms of opening the lock, but the mechanism is different enough to be worth opening even after solving the earlier lock.

Trick Lock #5

Trick Lock 5

Trick Lock 5

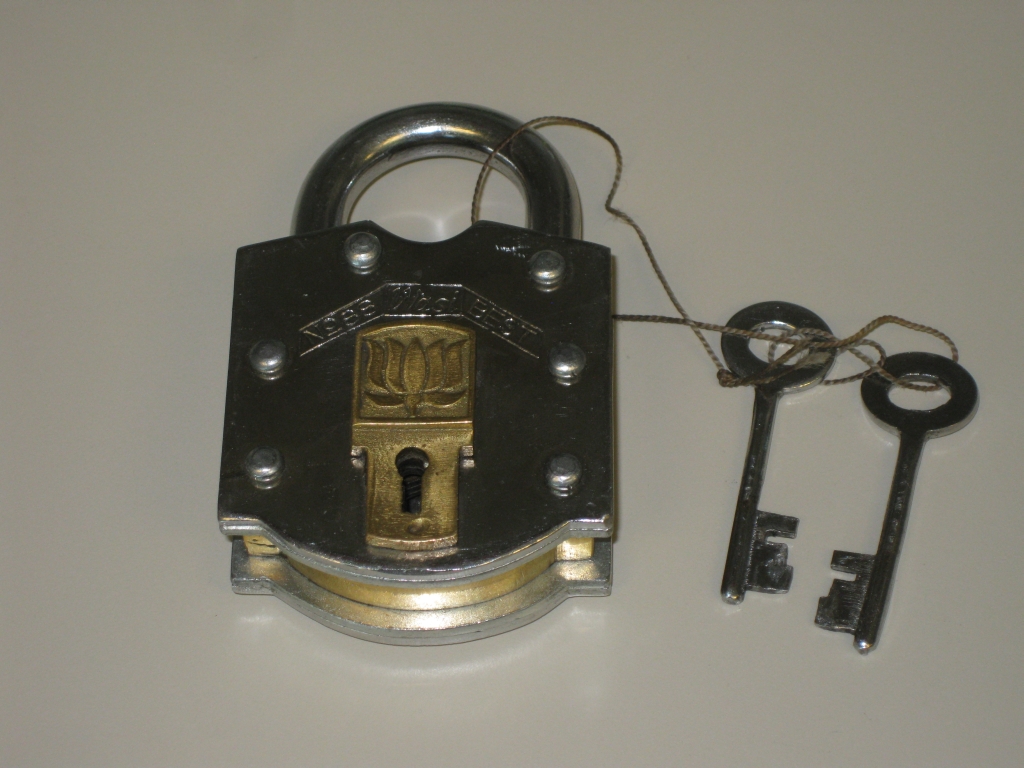
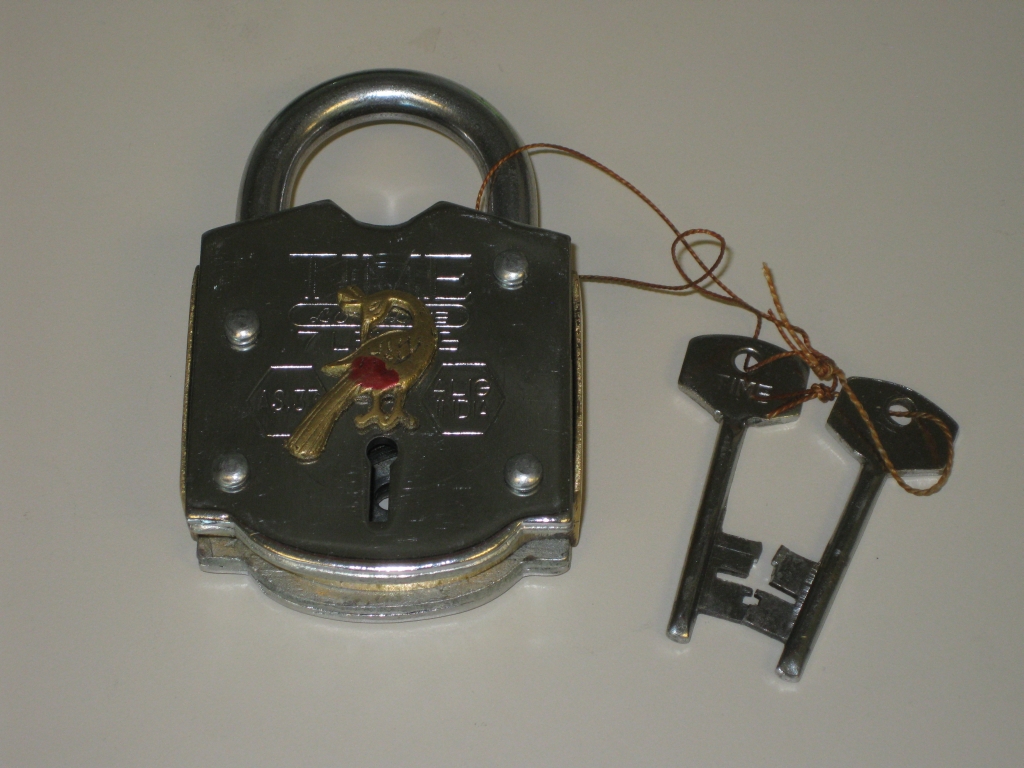
The final lock in the series is the heftiest lock in the set, and the central core of this one looks to be hewn from a solid block of brass, unlike the other locks, which use thinner plate bent to shape. The bird on the front has again been splashed with some badly applied red ink, which really does nothing for the look of the puzzle. This time there’s no obvious hints on the back of the puzzle, so you’re on your own with this one. It’s not the most difficult of locks, but could keep you busy for some time trying to understand how the mechanism works. Even though you can see clearly into the guts of this lock, you’ll not find any clues there either. This is probably my favorite, as it’s the most challenging lock in the series.

Popplock T6

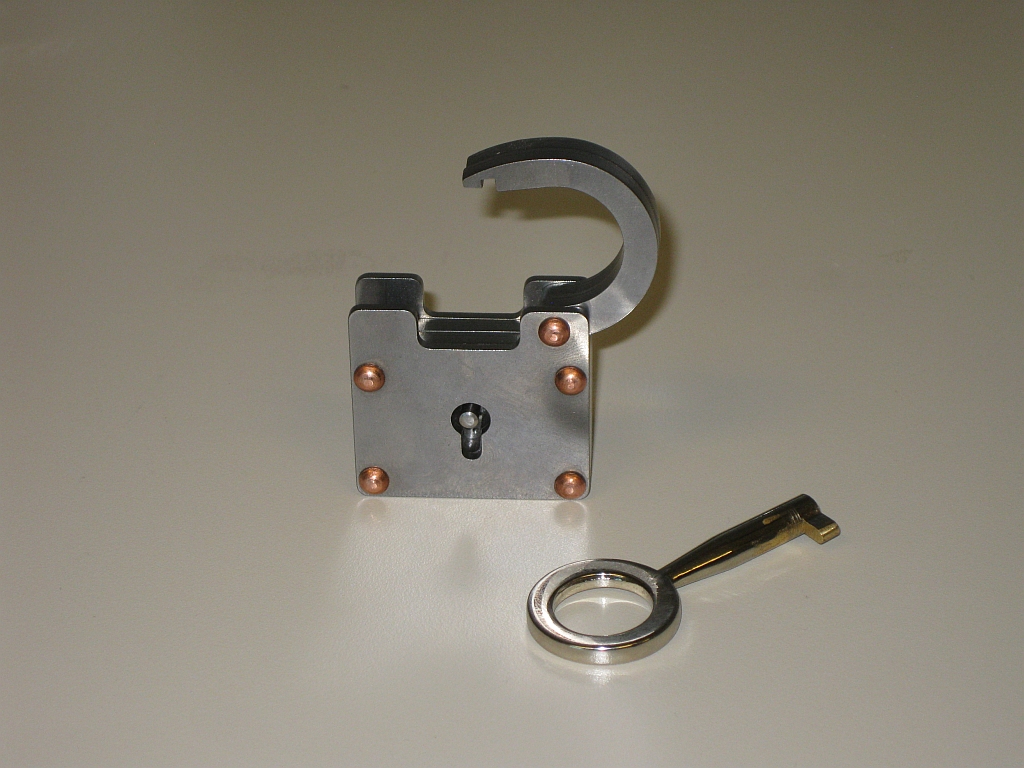
The Popplock T6 is the latest trick lock to be made by Ranier Popp. This review is a little special as it’s the first video puzzle review I’ve done. Things are a little rough round the edges, and if you like it, then I’ll do more, and hopefully they’ll get better over time.

Despite what I say in the video, the rivets are copper, not brass. Sorry.

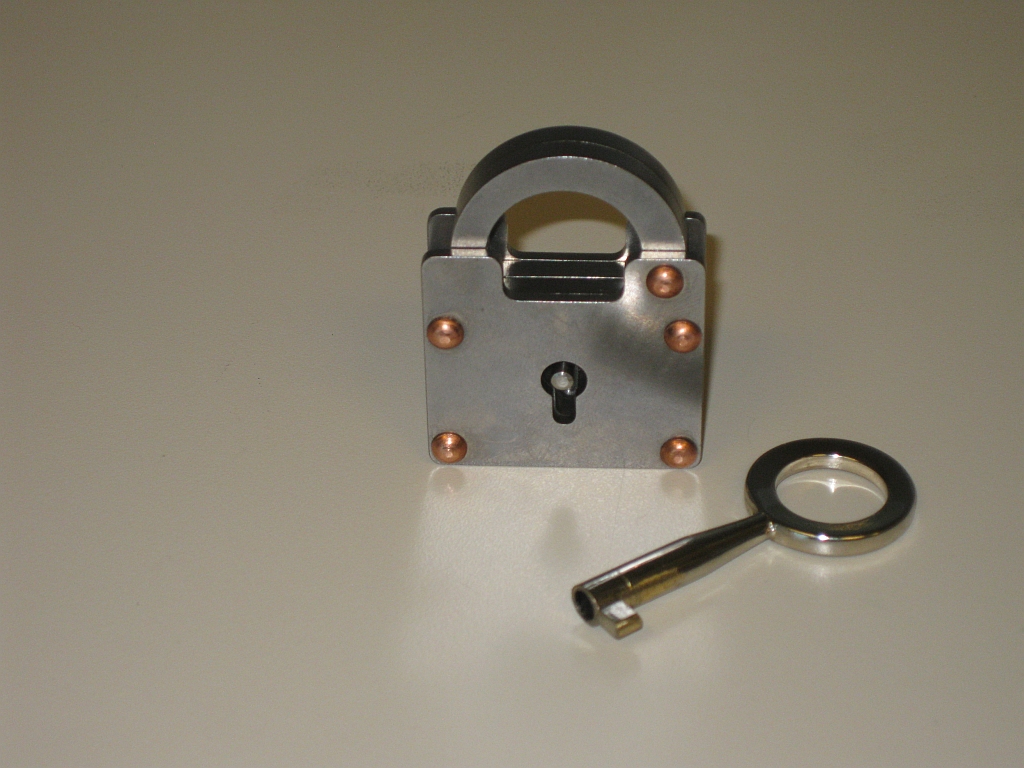
The T6 is 1.5″ square and comes in two different versions. A copper riveted version, and an aluminium riveted version. The mechanism for both is the same, and it’s only the external appearance which differs. Personally, I really liked the copper look so decided to get this version for my collection. An interesting note is that the direction the hasp opens is mirrored between the two versions. You can see the differences on Ranier’s site here. I bought mine through Wil Strijbos, and jumped on the chance when he mentioned he had some available. They are also available currently from Puzzle Master.

Popplock T6 front

Popplock T6

The lock is constructed from stainless steel and as a result is fairly heavy, and very solidly built. There’s no worry about damaging this lock if it’s dropped, or passed around for people to play with. The key supplied looks to be brass (some of the silver plating on mine has rubbed off) so you know they key is solid too, and no chance of it breaking, unlike some early Popplocks where the keys weren’t so robust. As you’d expect all the tools you need to open the lock are included, no paper clips or acetylene torches required.

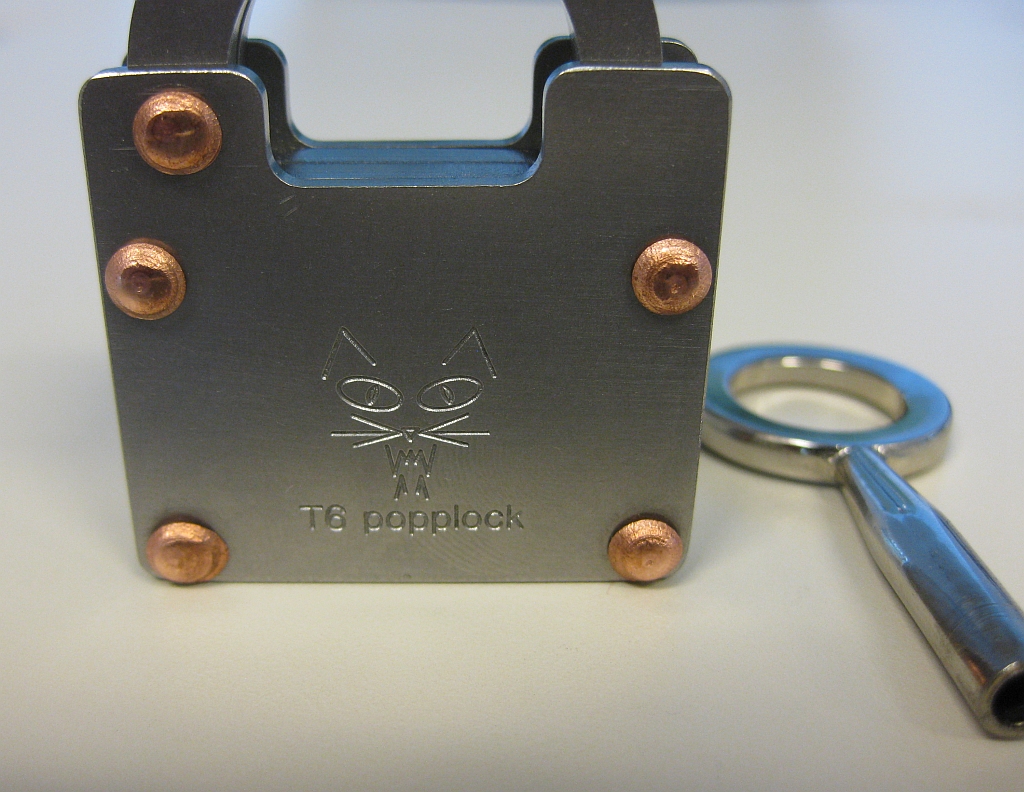
Popplock logo on the back

Popplock logo on the back

The back of the lock sports the familiar feline Popplock logo engraved into the lock, and the copper rivets mirror those on the front.

I freely admit that I’m no expert on solving trick locks. This is the first Popplock I own, and only the second trick lock in my collection. I took a fairly systematic approach to the puzzle, poking and prodding the rivets and anything which may not be as it appeared before putting the key in the lock and turning it. The movement of the key in the lock is very smooth, and there’s no real feedback turning the key in either direction. Not to mention that turning the key in either direction doesn’t open the lock! I can tell you’re surprised by this news.

Fairly quickly I noticed that there are two levels the key can be inserted at, and two ‘discs’ inside the lock which the key turns. The key can only be removed when the top disc is back to its starting position, but the bottom disk can be left at any point. Turning the key you notice a small notch in the upper disk. Surely that is important. Investigating further I found a similar notch in the lower disk and also a dot on the disk. With these reference points, I started to get a feel for what was required to open the lock, but I still had no idea how to execute it.

The opened lock

The opened lock

It took around two hours and a lot of trial and error to figure out how to open the lock, and all I can say is that it’s a clever yet simple mechanism. The mechanism is very cleverly disguised and really requires you to examine everything and assume nothing. As Ranier Popp states on his website, it’s not easy to solve. I highly recommend this puzzle, and if you’re new to trick locks, or to the Popplock series, this is a great puzzle lock to own. I may have to hunt down the rest of the series now!

Danlock ‘B’

Continuing in my puzzle reviews, today I have the pleasure of reviewing my Danlock ‘B’ puzzle lock.

I’m no expert on puzzle locks, and in fact, this is the first and only puzzle lock in my collection. Having spoken with a number of puzzling friends, they all recommended the Danlock, and by most it is considered the Rolls Royce of puzzle locks. So why the high accolade?

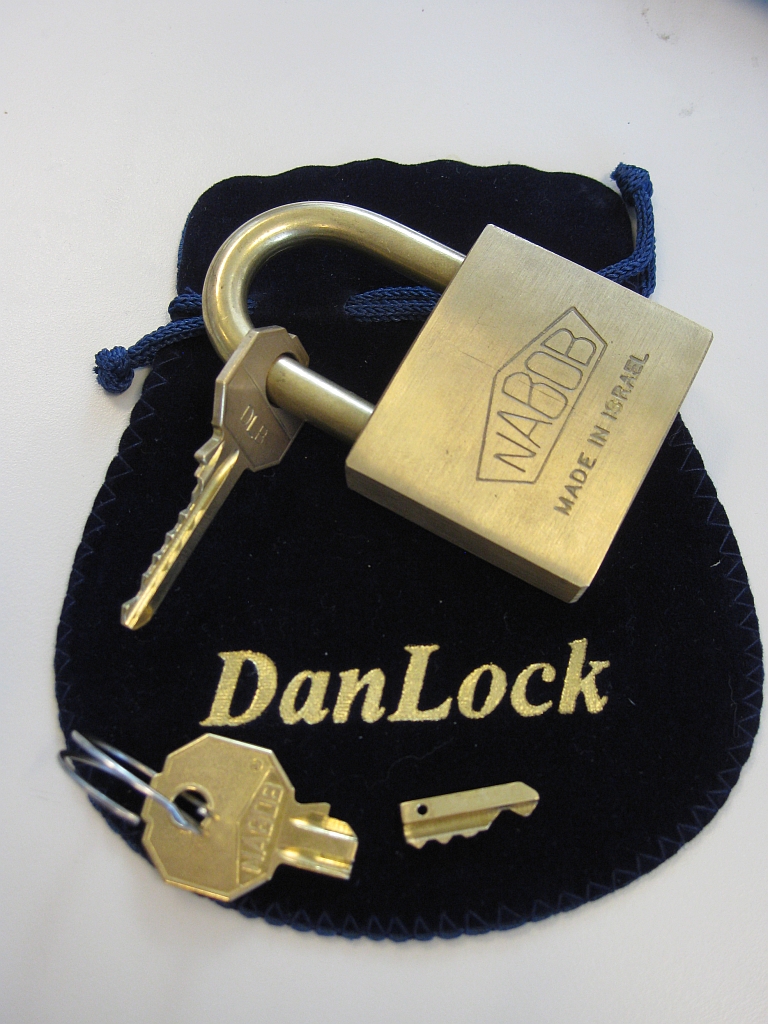
Well the reason comes from the fact that this is a real padlock. Dan Feldman buys the Nabob padlocks, which are made in Israel, and modifies them into these trick locks. So what you have is a solid brass padlock, with a real lock that makes a really solid puzzle. As you can see from mine, the evidence of the conversion is worn on the face of the lock. Mine has several scratches and wear marks from where it was worked on. I don’t think it takes away from the puzzle, and if anything I feel that it adds to the effect.

So down to the puzzle itself. You’re presented with two keys, one shacked to the padlock itself, and the other which Dan has kindly cut in two. The object is to open the padlock, then return it to the state you see in the image above. You’re not allowed to use anything other than that which you find on the puzzle itself, (so no paper clips!) and the best comment I heard was “You can solve this puzzle locked naked in a padded cell”. While I don’t suggest this method, it is true. Everything you need is right there.

With this being my first trick lock, I wasn’t really sure what to expect, but I promptly set about trying to open it. Taking that leap of faith and sticking the broken shard of key into the lock, I quickly had it open, but what next.

All I’ll say is that there are a number of ‘aha’ moments with this puzzle, and it really is well designed and made. All told it took me about an hour to solve the puzzle, and get things back into their original state. A great puzzle, and I can’t recommend it enough to any collector.

So one last thing to say about it. I noted that I have a Danlock ‘B’. Dan made two version of this puzzle. The ‘B’ is revision two if you like and has an added twist over version ‘A’. Having talked with a friend who has the ‘A’ the difference is subtle, and if I’m honest I don’t think it adds a huge amount to the puzzle, however it could prevent someone from finding the final move for just a little longer. If you get the chance, pick up a rev ‘B’ but if you already have an ‘A’ then I’d say there’s not enough extra there to justify adding a second version to your collection.