Tag Archives: Glue

KaraKuri Work Kit – Newton Box

As I mentioned in my review of the Karakuri Work Kit – Kakukaku Box, here’s the second in the series of builds for the Karakuri DIY boxes. This time I’m looking at the Newton Box, which is a little more complicated that the first box in the series, and in my opinion a much better kit and puzzle! Read on to find out what I think of it, and see the video builds and review.

The Video below is a short highlight reel for the build. I skip a lot of detail here, but it will give you the idea of how the build goes, and I have put my thoughts at the end of the video. If you want the detailed 50 minute video showing all the steps in detail, then jump to the Build Instructions section below.

As promised in the video, you’ll find the instructions below, with my guide to building the box. Be aware that this is in no way a translation of the instructions!

General Kit Comments

The Karakuri group offer a reasonable number of DIY puzzle boxes which they refer to as “Work Kits”. Each of the kits consist of a number of pre-cut plywood pieces, some decorative pieces (like the beautifully made acorn on the Acorn Box), and any hardware needed for the mechanism, if it’s not just a straight forward sliding panel or suchlike. The kits are all perfectly cut, and of the kits I own there have been no issues with the fit or finish on any of the pieces.

Something which is worth noting about the kits is the price. They all come in at around the $25 USD mark, so in terms of affordability, these are really affordable boxes. The quality of the cuts on the pieces is excellent and the fit is as good as you will find with anything from the Karakuri group, so I’d say from that side of things, they’re great value.

One thing to note is that the build instructions for the kits are in Japanese language only. Don’t be put off by that however as with a little thought, and some careful study of the diagrams, you’ll build the kits just fine. Failing that, have a look at my Build Instructions section below, where I have detailed the steps (in English) to build the kit.

On this particular kit, there were a number of the pieces which had small burrs or rough edges that I needed to clean up before starting the build. It’s really not a big issue, and there were no pieces which were poorly made or had any sort of problem that would have meant that the kit did not go together easily. After all these are wooden kits, and each piece is unique. A little patience when starting to tidy things up and you should have no issues.

Kakukaku Kit Review

This is the second of the boxes that I bought from the Karakuri Creation group, and as well as looking good, I was very interested to be able to see the mechanism, which you’d otherwise be unable to see.

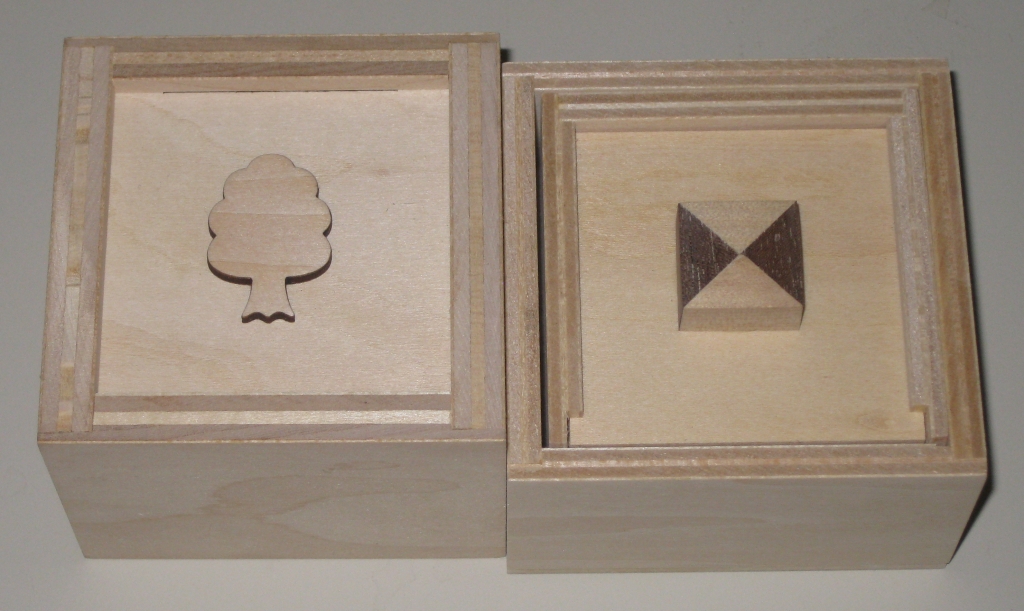
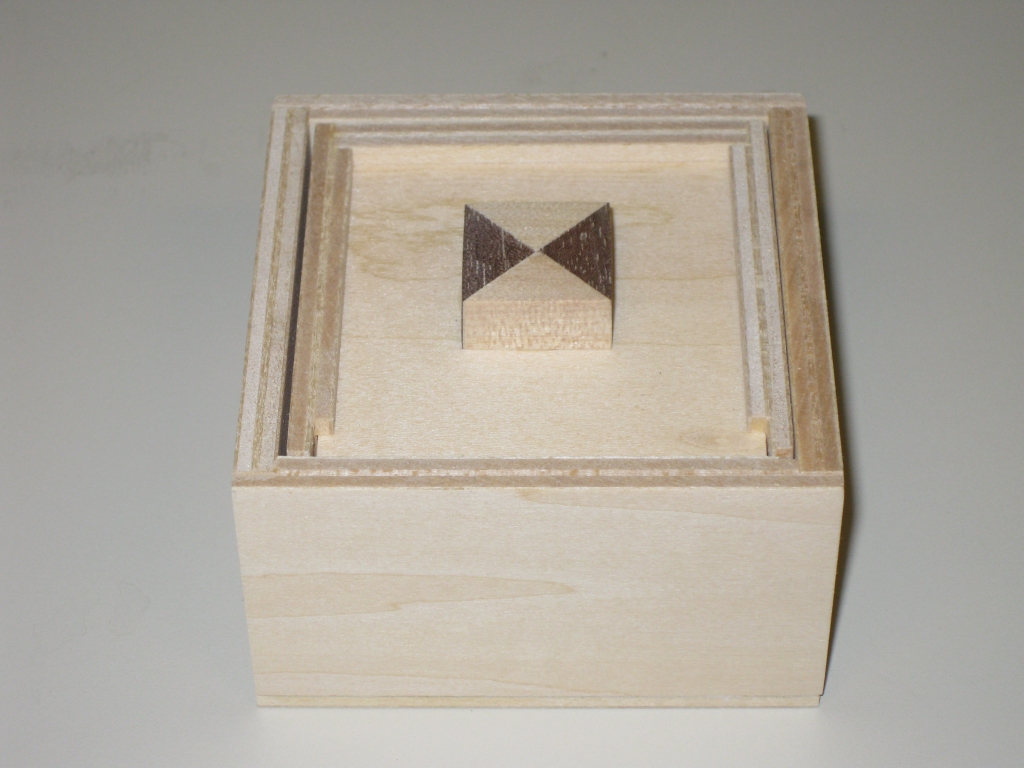
Newton Box Kit completed

Newton Box Kit completed

As you can see from the picture above, the box itself is fairly simple. The ply is visible on the top of the box, but personally I don’t think that’s an issue. If you don’t like having the ply exposed, you could glue some veneer onto the top panel just to make it neater. The decorative handle is made from walnut and maple, and rather than giving you a pre-made piece, you have to put it together yourself, so it truly is a box you built. No pre-made fancy parts here!

Building the kit was fairly simple. There is slightly more to this kit than the Kakukaku box, but the instructions make it easy to follow. The diagrams on the build instructions are very clear, and there’s nothing complicated to this kit, so I didn’t have any issues building it. The build of this box took around 30-40 minutes to put together, and would probably be quicker if you’re not recording a video and talking through everything you’re doing!

I have to confess I really like this kit. The puzzle box is much better than the Kakukaku Box and works perfectly every time. It’s a clever mechanism, but remarkably simple which I like. The box look great, and I think the cube on top really sets it off. The box is slightly deeper than the Kakukaku box, and a little shorter. In total it measures 3.25″ x 3.25″ x 2″ and is a good size in your hands.

As a kit I certainly enjoyed building it, and you will understand the mechanism once you’ve built the box, so it certainly meets the expectations that the Karakuri group set out to achieve. I highly recommend this kit if you’re thinking of buying one (or more!)

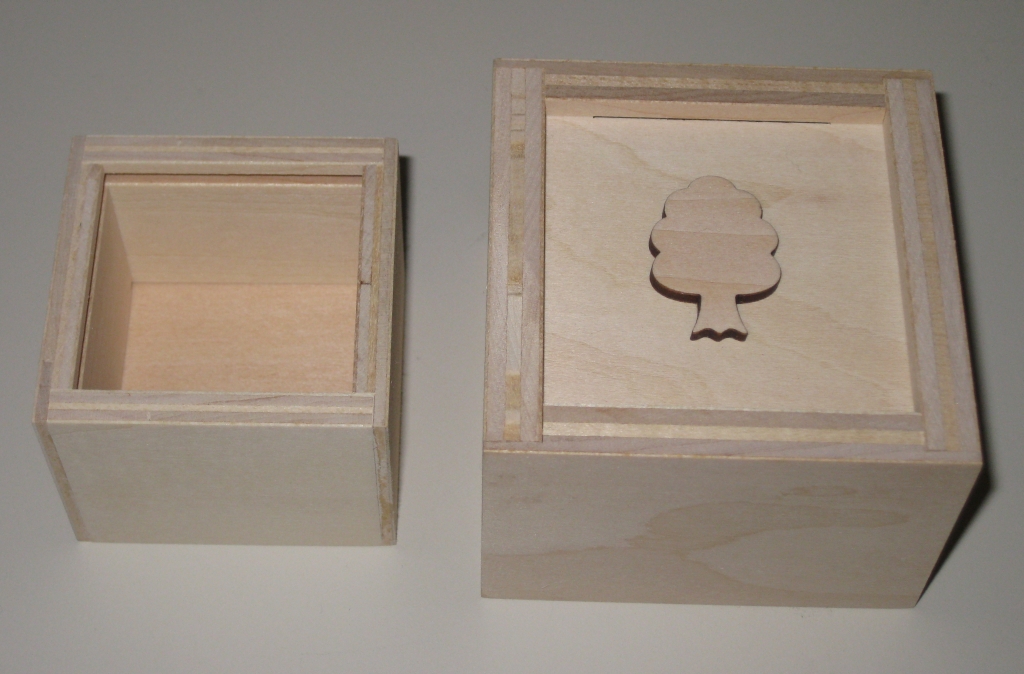
Comparison of Kakukaku and Newton Boxes

Comparison of Kakukaku and Newton Boxes

The image above will give you an idea of the relative sizes of the two kits so far.

Build Instructions

In this section I will try to give my guide to building this kit. Please note that this is in no way a translation of the Karakuri Group’s instructions, but my own instructions based on having built the kit. If you have issues following my instructions, feel free to get in touch and I’ll help you if I can, and update things below to clear up any confusion.

The video below is a full 50 minute uncut build of the box. I show detailed instructions on how to build it, along with tips from my own build experience. If you’re new to this and want some really detailed help, this is the video for you.

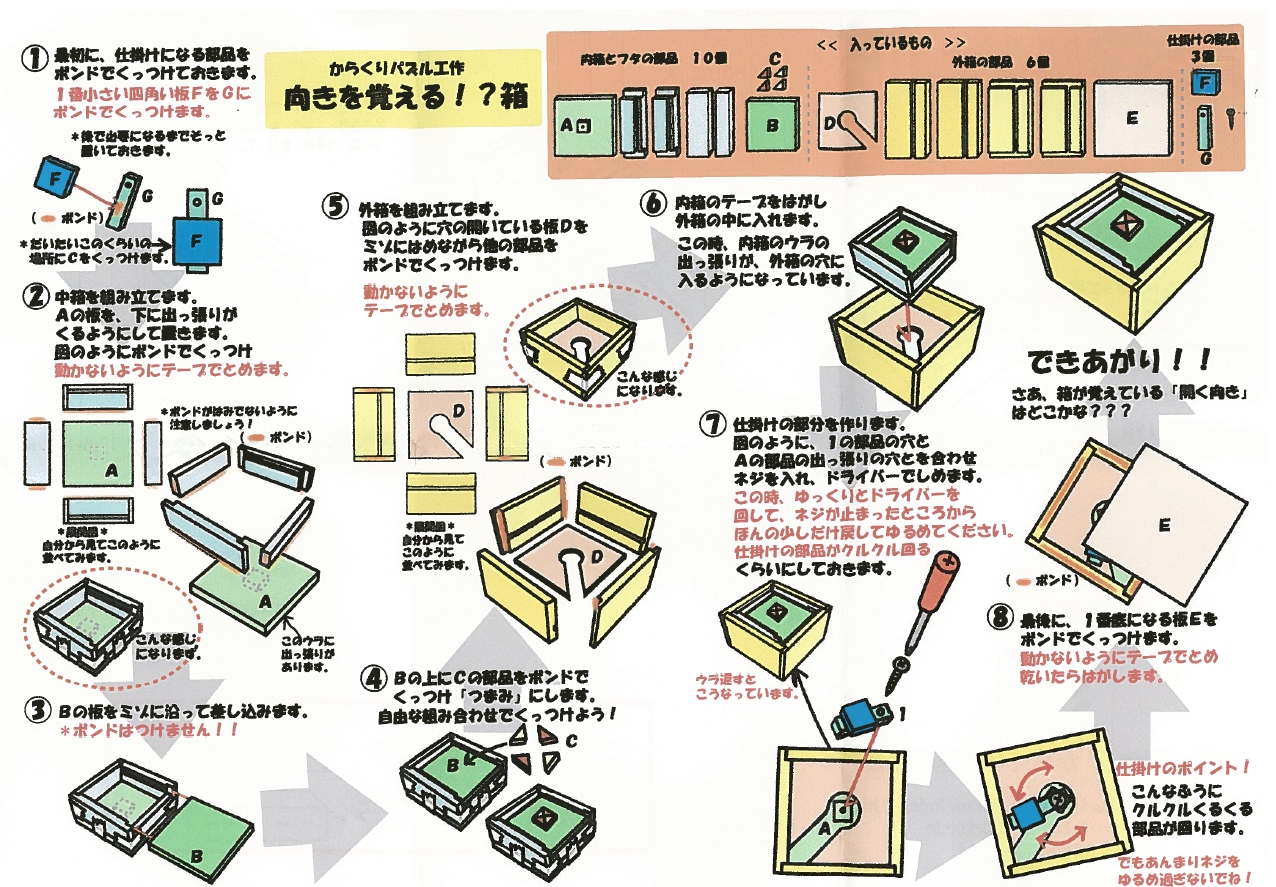
Click on the image below for a full size version of the instructions.

Build instructions - Click image for full size

Build instructions - Click image for full size

The instructions below match to the numbers on the diagram above.

Tools Needed

Before starting, you’ll need a couple of tools.

  • Wood Glue / Elmers hobby Glue
  • Pencil
  • Ruler (or some measuring device)
  • Tape – I recommend blue painters tape
  • Screwdriver (Philips head)
  • Glue Brush (optional)
  • Engineers Square (optional)

      Step 1 – The Pendulum

      First up, sort the parts from the kit into the same order as shown in the top diagram. If you feel like you need to then you can mark the piece numbers in pencil on the inside of each piece. The way the pieces are laid out in the diagram shows the inside, with the exception of piece ‘B’, which will be inside the box and unlikely to be seen so even if you don’t remove the pencil mark, probably not an issue. In my opinion, the pieces are pretty clear so you should need to label them.

      Take piece F and mark a centre line in the middle of the piece.

      Take piece G and mark a centre line down the length of the piece.

      Glue piece F onto piece G, using the centre lines as a guide. As the diagram shows, place piece F towards the bottom of piece G, making sure that the pre-drilled hole is at the top of the assembly, and is not obstructed by piece F.

      Leave the top for around 10 minutes for the glue to dry (note if the glue you are using takes longer to dry, then follow the manufacturers recommendations).

      Step 2 – Inner Box

      Taking the pieces labelled ‘A’ in the diagram, glue the four walls which will make up the sides of the inner box together, making sure that the groove which is cut in two of the pieces is at the top, and the thinner of the two pieces is glued to the bottom such that the groove will allow the piece labelled ‘B’ to slide in and out freely.

      Glue the four walls to the base labelled ‘A’ ensuring that the small pre-drilled cube which is glued to the centre of this piece is underneath (not inside the walls you are gluing to it).

      Make sure that the edges are square to one another and that they are lined up with the base section.

      Using tape, secure the corners of the box, and tape the walls to the base as shown int he diagram. Set this aside to dry.

      Step 3 – The Lid

      Make sure that piece ‘B’ slides freely into the groove in the inner box that you built in step 2.

      Step 4 – Handle / Top decoration

      Using the four decorative pieces labelled ‘C’, glue them together into a square, then glue them to the centre of the piece labelled ‘B’.

      Set this aside to dry.

      Step 5 – The Outer Box

      Using the pieces labelled ‘D’ arrange the pieces as shown in the diagram.

      Apply glue to the pre-cut notches on two of the pieces, then insert the flat plate with the pre-cut hole into the narrow groove in the bottom of the pieces.

      Bring all four corners together ensuring that the flat plate sits in the groove, and tape the corners.

      Put this aside to dry.

      Step 6 – Putting the pieces together.

      Put the inner box from step 2 into the outer box from step 5. Note that the location of the cutout on the outer box will determine the orientation required to open the box. You can put this in any orientation that you want.

      Step 7 – Adding the locking mechanism

      Turn the assembly from step 6 over, and using the supplied screw and a Phillips head screwdriver, screw the pendulum assembly from step one into the pre-drilled hole. You do not want the screw too tight here. The pendulum should turn freely around the screw to ensure correct operation of the mechanism.

      Step 8 – Finishing the box

      Glue the large flat square labelled ‘E’ to the base of the box, hiding the locking mechanism. Using some tape, tape the base to the sides until dry.

      Congratulations, your box is complete!
Karakuri Work Kit – Kakukaku box

As a member of the Karakuri Group, when I renewed my membership at the start of the year I decided to pick up a few of the DIY kits that they offer. After my experience with Bruce Vinney’s designs I was interested to see what Karakuri Group had created, and also to better understand the mechanisms used, which is one of the goals Karakuri set when making the kits.

When I mentioned that I had the kits on one of the puzzle forums, there were requests to show how to build them, so much like I did with the previous kits I built, I decided to show the build process in full. Watch the video below to see the build, and watch the kit come to life. In the video I’ll cover all the tools I use and this isn’t time lapse so you can see everything in real time. I’ll be doing videos for all the kits shown in the video, so check back for more soon.

As promised in the video, you’ll find the instructions below, with my guide to building the box. Be aware that this is in no way a translation of the instructions!

General Kit Comments

The Karakuri group offer a reasonable number of DIY puzzle boxes which they refer to as “Work Kits”. Each of the kits consist of a number of pre-cut plywood pieces, some decorative pieces (like the beautifully made acorn on the Acorn Box), and any hardware needed for the mechanism, if it’s not just a straight forward sliding panel or suchlike. The kits are all perfectly cut, and of the kits I own there have been no issues with the fit or finish on any of the pieces.

Something which is worth noting about the kits is the price. They all come in at around the $25 USD mark, so in terms of affordability, these are really affordable boxes. The quality of the cuts on the pieces is excellent and the fit is as good as you will find with anything from the Karakuri group, so I’d say from that side of things, they’re great value.

One thing to note is that the build instructions for the kits are in Japanese language only. Don’t be put off by that however as with a little thought, and some careful study of the diagrams, you’ll build the kits just fine. Failing that, have a look at my Build Instructions section below, where I have detailed the steps (in English) to build the kit.

Kakukaku Kit Review

The first of the kits I built was (as you already know from the title of this post) the Kakukaku Box. I picked this one for no other reason than liking the look of the box. Interestingly it was the last of the four that I picked, and really the only reason was that I had set a budget and this fit within that budget after having picked the three others I wanted.

The completed top and bottom of the box

The completed top and bottom of the box

As you can see from the picture above, the box itself is fairly simple. The ply is visible on the top of the box, but personally I don’t think that’s an issue. If you don’t like having the ply exposed, you could glue some veneer onto the top panel just to make it neater. The laser cut tree certainly adds to the look of the box, and is also a clue as to the solution.

Building the kit was fairly simple. The diagrams on the build instructions are very clear, and there’s nothing complicated to this kit, so I didn’t have any issues building it. The video is real time, so it took about 15 minutes to put together, and would probably be quicker if you’re not recording a video and talking through everything you’re doing!

As far as the puzzle box itself is concerned, I’ll be honest that I was a little disappointed with the box. I have two reasons for this, and at first they seem contradictory, but bear with me.

The locking mechanism is both too difficult to open, and too easy to open at the same time. If you attempt to open the box using the ‘solution’ provided, it can be very difficult to move the two parts of the box in the right way to get them to open. The fit is pretty good, and as such the movements need to be made very precisely to get the box open. Sadly, there is a much simpler way to open the box. If you hold the top of the box, and shake it, the bottom falls out on its own, making it far too easy!

As a kit I certainly enjoyed building it, and you will understand the mechanism once you’ve built the box, so it certainly meets the expectations that the Karakuri group set out to achieve. If you’re thinking of buying one (or more) of these kits, I’d say that there are better boxes in terms of the end puzzle that you could get, but if you just want to add them all, then go get it!

Build Instructions

In this section I will try to give my guide to building this kit. Please note that this is in no way a translation of the Karakuri Group’s instructions, but my own instructions based on having built the kit. If you have issues following my instructions, feel free to get in touch and I’ll help you if I can, and update things below to clear up any confusion.

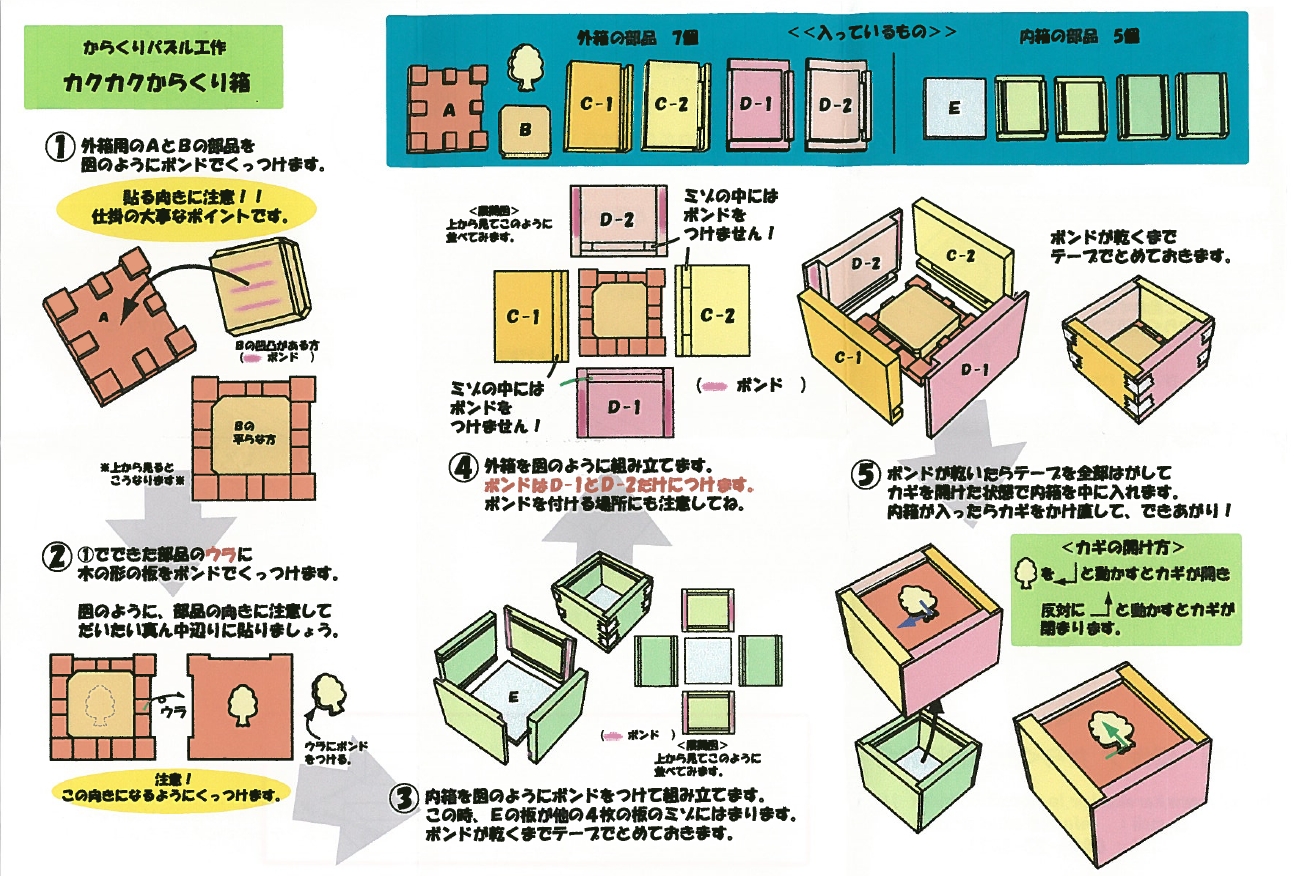
Build instructions - Click image for full size

Build instructions - Click image for full size

The instructions below match to the numbers on the diagram above.

Tools Needed

Before starting, you’ll need a couple of tools.

  • Wood Glue / Elmers hobby Glue
  • Pencil
  • Ruler (or some measuring device)
  • Tape – I recommend blue painters tape
  • Glue Brush (optional)
  • Engineers Square (optional)

      Step 1 – The Locking mechanism

      First up, sort the parts from the kit into the same order as shown in the top diagram. If you feel like you need to then you can mark the piece numbers in pencil on the inside of each piece. The way the pieces are laid out in the diagram shows the inside, with the exception of piece ‘B’, which will be inside the box and unlikely to be seen so even if you don’t remove the pencil mark, probably not an issue. In my opinion, the pieces are pretty clear so you should need to label them.

      Take Piece ‘A’ and lay it as shown in the diagram. The sides with the notches cut out should be at the top and right of the piece as you look at it.

      Take Piece ‘B’ and glue it into the centre of piece ‘A’. The piece fits snugly between the wooden blocks that surround the piece, so no adjustment or fine placement is required. Make sure that the lip on piece ‘B’ is on the left and top as you look at the piece. This can be confirmed by the angled corners as seen in the diagram.

      Leave the top for around 10 minutes for the glue to dry (note if the glue you are using takes longer to dry, then follow the manufacturers recommendations).

      Step 2 – Top Decoration

      Once the top of the box is dry from step 1, flip the piece over so that the cut away sections are now on the top and left of the piece as you look at it.

      Using a ruler, mark the centre of the piece, making note of the cutout which will not be seen once the box is complete.

      With the centre identified, glue the tree piece to the centre as seen in the diagram.

      Step 3 – Inner Box

      Take the parts labelled ‘E’ in the diagram. The flat square is the base of the inner box. There are two sides with notches cut in each end, and two with no notches cut.

      Place the base in the centre and then around that the two pieces with notches in the ends above and below it, then the two without notches at either side as seen in the diagram on the right.

      You will notice that there is a grove running through the with of all of these pieces. The base will go into one of these slots, and the other is part of the locking mechanism.

      Put glue into the notches on either end of the top and bottom pieces and using a brush, spread the glue evenly into these notches. Bring all four sides together around the base as seen in the lower left diagram.

      Once all four pieces have been brought snugly together, tape the corners and check that the corners are square using an engineers square. Note: This check is not really needed as the pieces are designed to give a good square corner.

      Note: You can put tape on the corners before adding the glue. This can make the job of taping the corners easier rather than trying to get tape around the corners after they are in place.

      Leave the inner box to dry.

      Step 4 – Outer Box

      Take the top which was completed in step 2, and place it as seen in the diagram, where the cut-out sections are at the top and right of the piece as you look at it.

      Taking pieces Labelled C-1, C-2, D-1, D-2, place these around the top as seen in the diagram.

      Pieces D-2 and C-2 have a piece of wood inside the groove which ensures the pieces are correctly located in relation to the locking mechanism, and the centre of the box.

      Pieces C-1 and D-1 have no insert in the groove, and will slide freely along the length of the top.

      Apply glue into the notches on either end of pieces D-1 and D-2 and using a brush, spread the glue evenly into these notches.

      Bring all four pieces together around the top as seen in the diagram on the right, starting with pieces D-2 and C-2 which will ensure that the pieces are correctly centred.

      Once all four pieces are in place, tape the corners together and allow the top to dry. You can check the top for squareness before it is dry however as with the inner box, the pieces are designed to give a good square corner even without this check.

      Note: As before putting tape on the piece before gluing can make this easier

      Step 5 – Opening and Closing the box

      To Close the Box, place the outer box onto the Inner box and move the top Right and Up as per the green arrow in the diagram. The box is now locked.

      Top Open the box, move the outer box Down and Left as per the blue arrow in the diagram, then lift the top of the bottom. The box is now open.

Unhappy Childhood

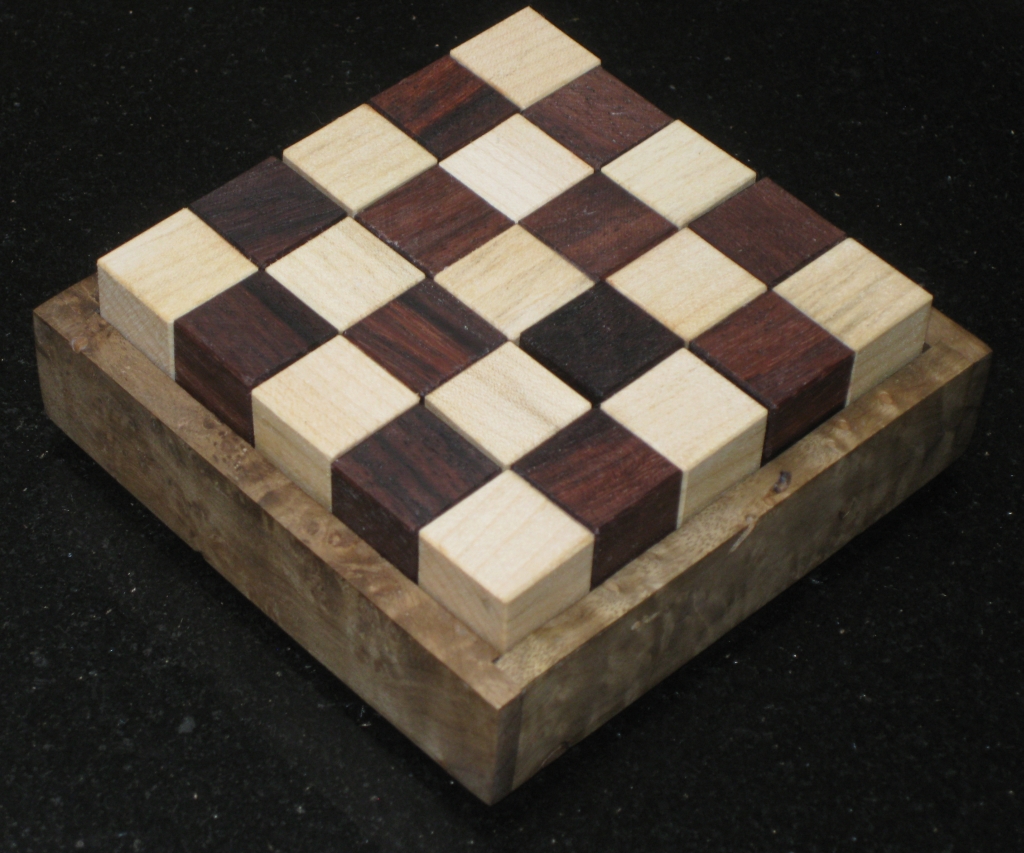
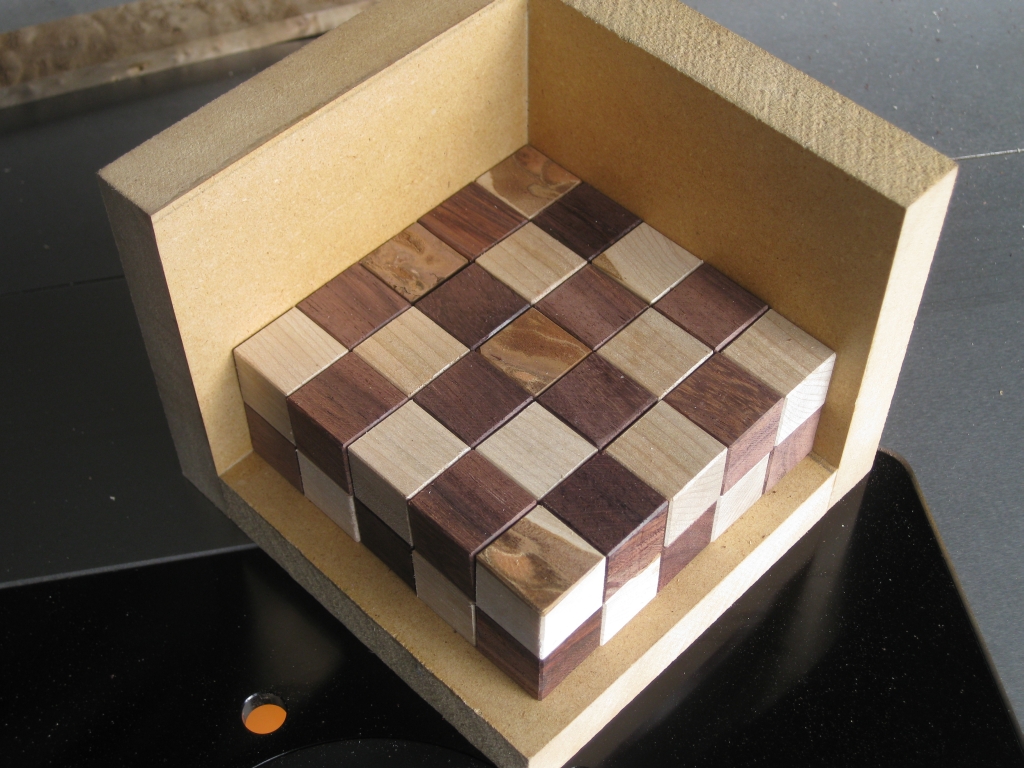
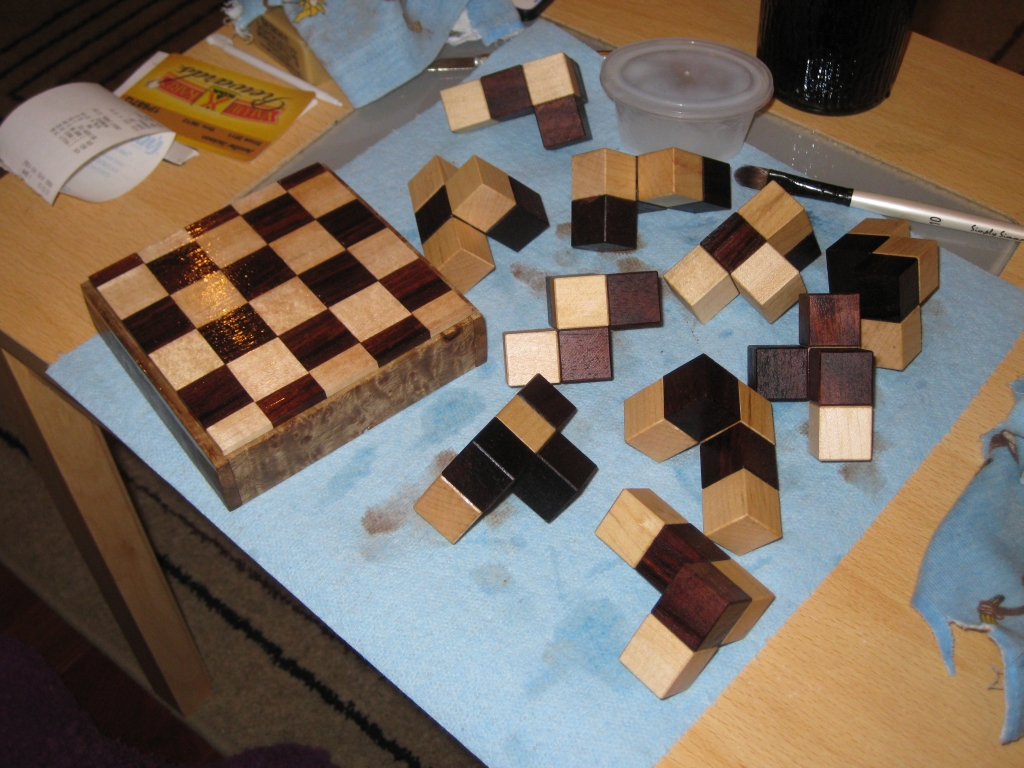
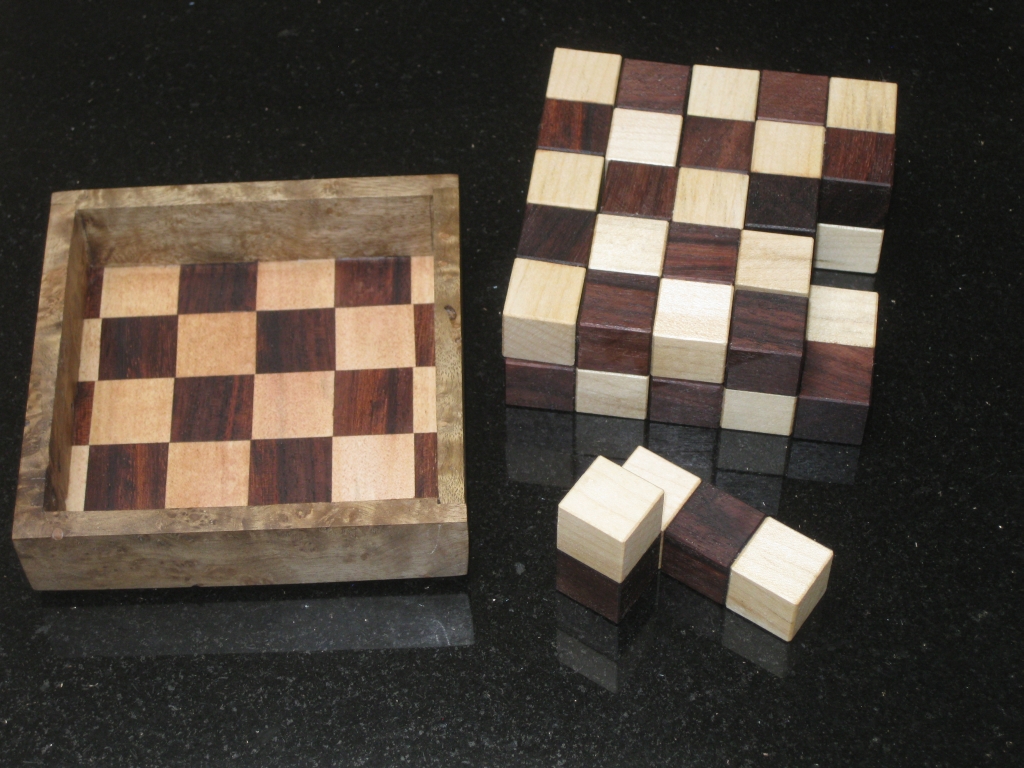
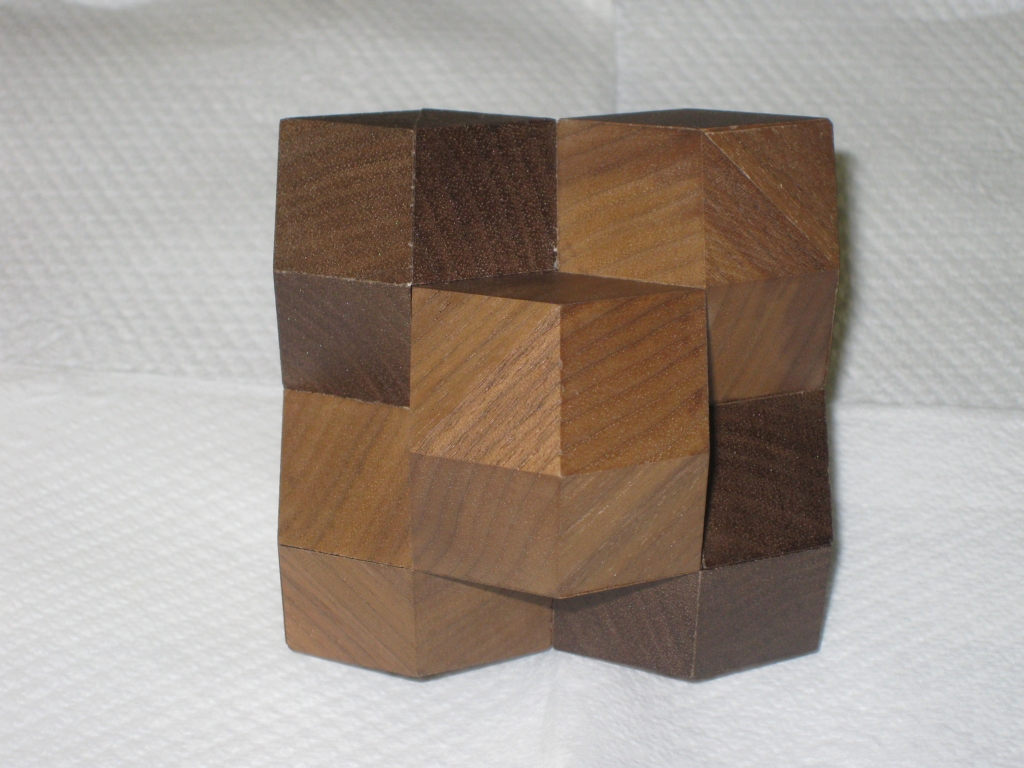
No, this isn’t a post about how I had a hard life growing up, or anything of that nature. I had a pretty happy childhood as it happens. Most of you will know already, that this is one of Stewart Coffin’s puzzle designs, #41 in his numbering system, consisting of 10 pieces, made from 5 cubes each, which come together to form a 5x5x2 rectangle with a checkerboard pattern.

Unhappy Childhood, boxed in the unique checkerboard solution.

Unhappy Childhood, boxed in the unique checkerboard solution.

This particular copy was made by me and is made from Rosewood and Maple, with a Myrtle Burl box. It measures 3.7″ x 3.7″ x 1.5″ for the pieces, and 4.25″ x 4.25″ x 1.7″ in the box.

This is a pretty tough puzzle to solve, as there is only one solution where you end up with the checkerboard pattern on both bottom and top as you can see in the picture above. There are however 2,408 possible solutions if you ignore the checkerboard. So no shortage of ways to get a 5x5x2 solution! (Stewart Coffin reports that “a computer analysis by Beeler, these pieces pack into a 5 x 5 x 2 box 19,264 different ways”, however Burr Tools shows just 2,408)

The following is a look at the creation of this puzzle. Hope you enjoy!

This is one of the puzzle designs that I had been looking at making for a while, since it seems no-one has made any in some time, and I don’t have one in my collection. Really that’s where this all started, looking to add a new puzzle to my collection, and having spent (far) too much on puzzle already this year, what better way than to make it myself.

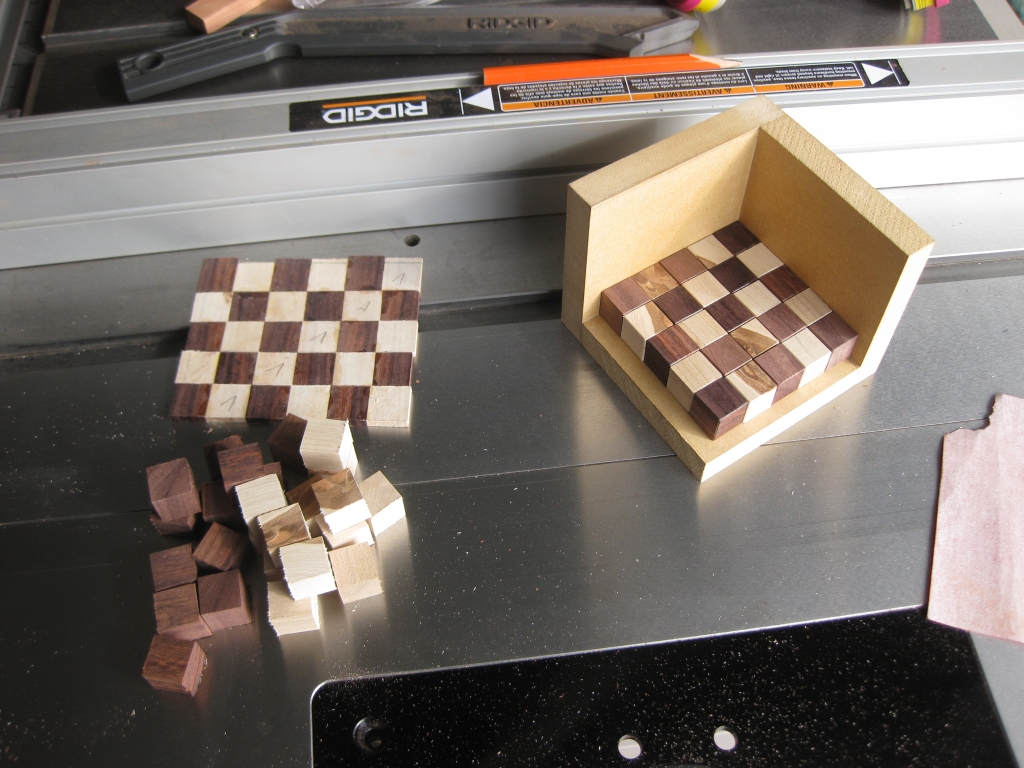
It all starts with cubes

It all starts with cubes

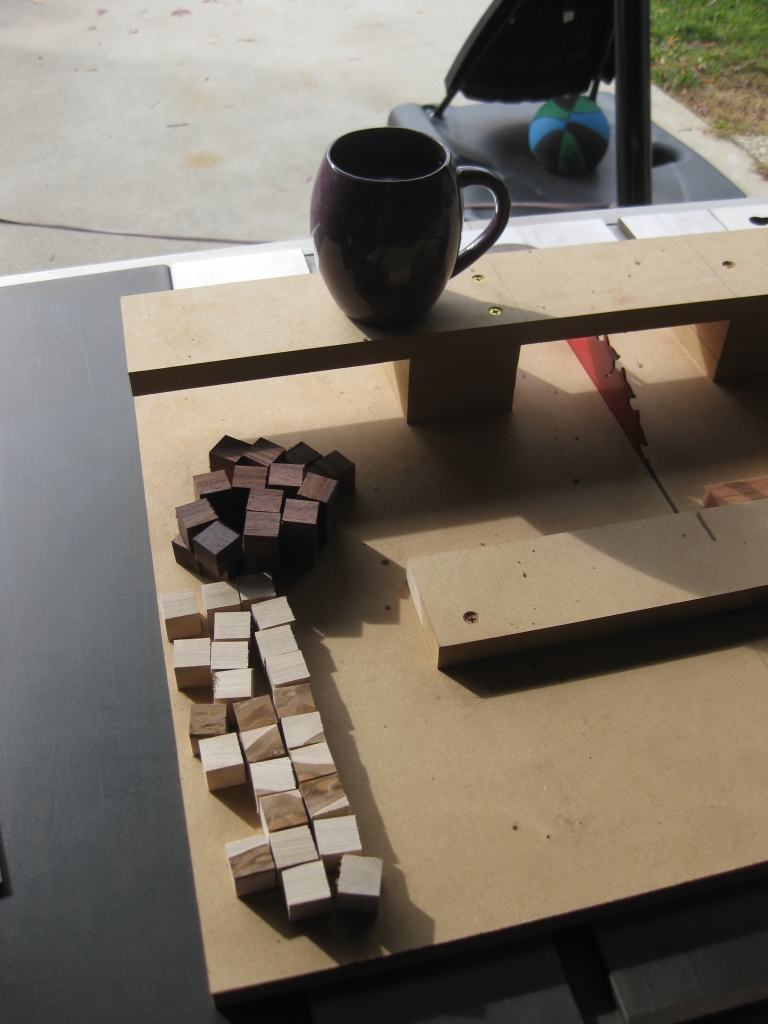
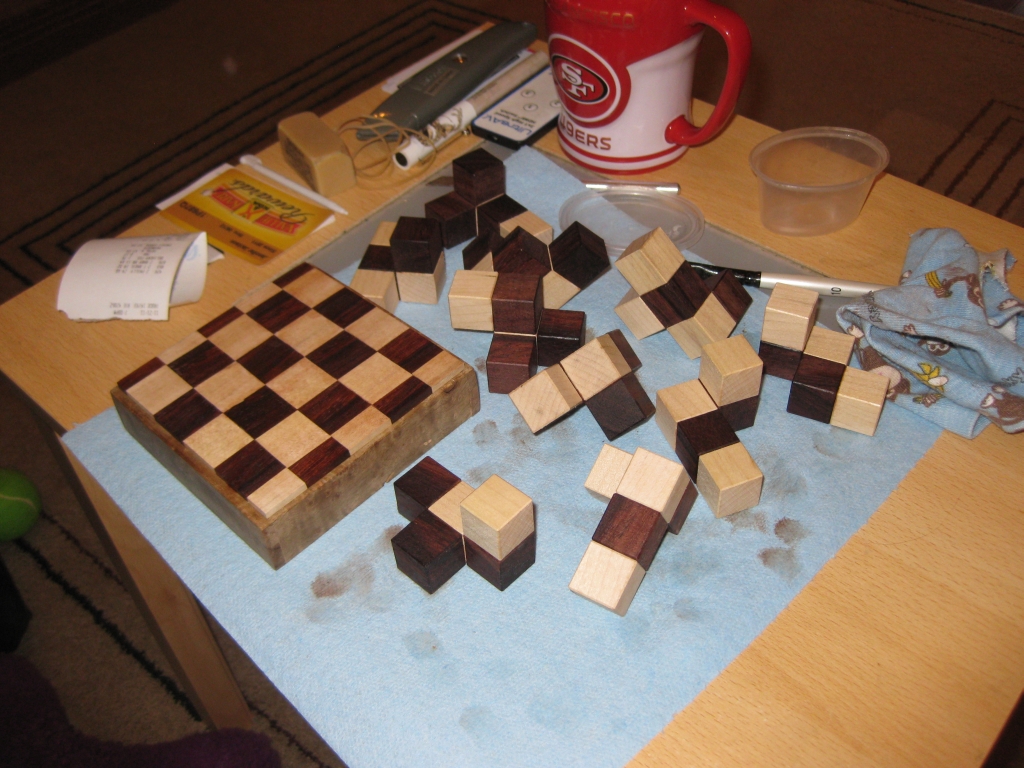
So the puzzles that I’m making currently are all cube based, and that’s where it all starts. 50 wooden cubes, 25 Rosewood, and 25 Maple is the starting point for the UC. The darker tops on some of the Maple cubes at the bottom of the picture is actually the natural wood. Since I love the look of wood, I’m not selectively removing pieces which don’t look perfect. After all each puzzle is unique given the grain and natural colour of the wood, which is something I love. When I put the pieces together, I’ll orient the pieces so that very little of this is visible, because I’m really aiming for the contrast between the two woods in this puzzle. If the couple I’ve made, only one has this distinctive colouring on some of the pieces.

50 Cubes to be Bevelled

50 Cubes to be Bevelled

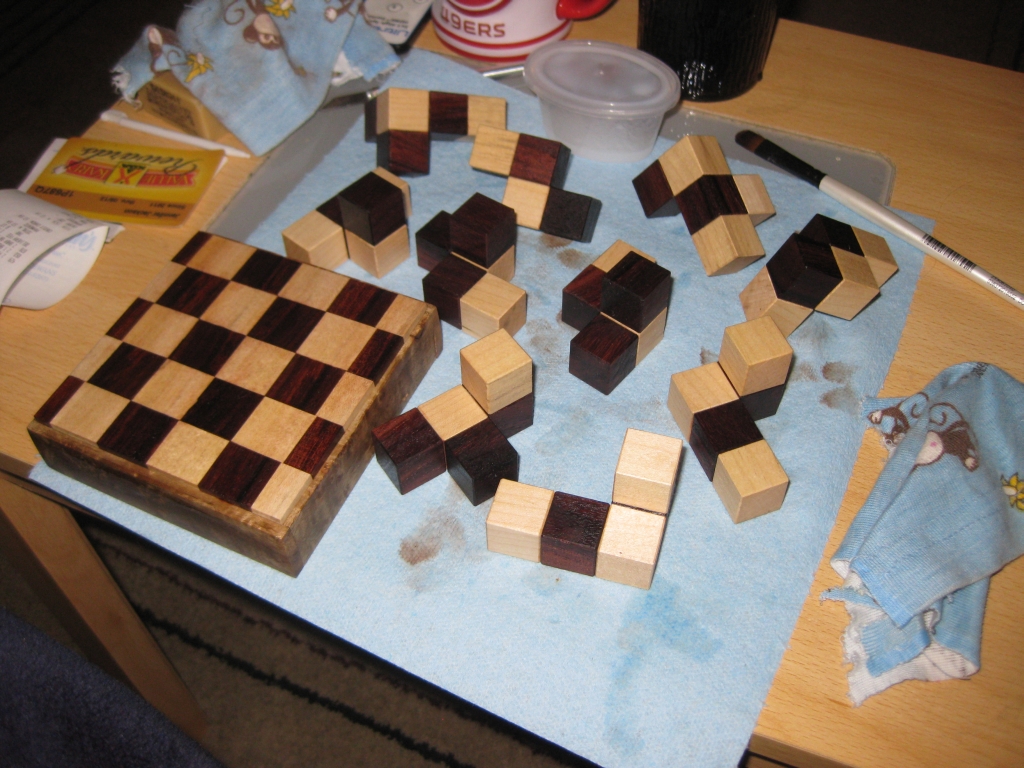
One row done, 9 more still to do!

One row done, 9 more still to do!

Half way there!

Half way there!

Some time later, and I'm done!

Some time later, and I'm done!

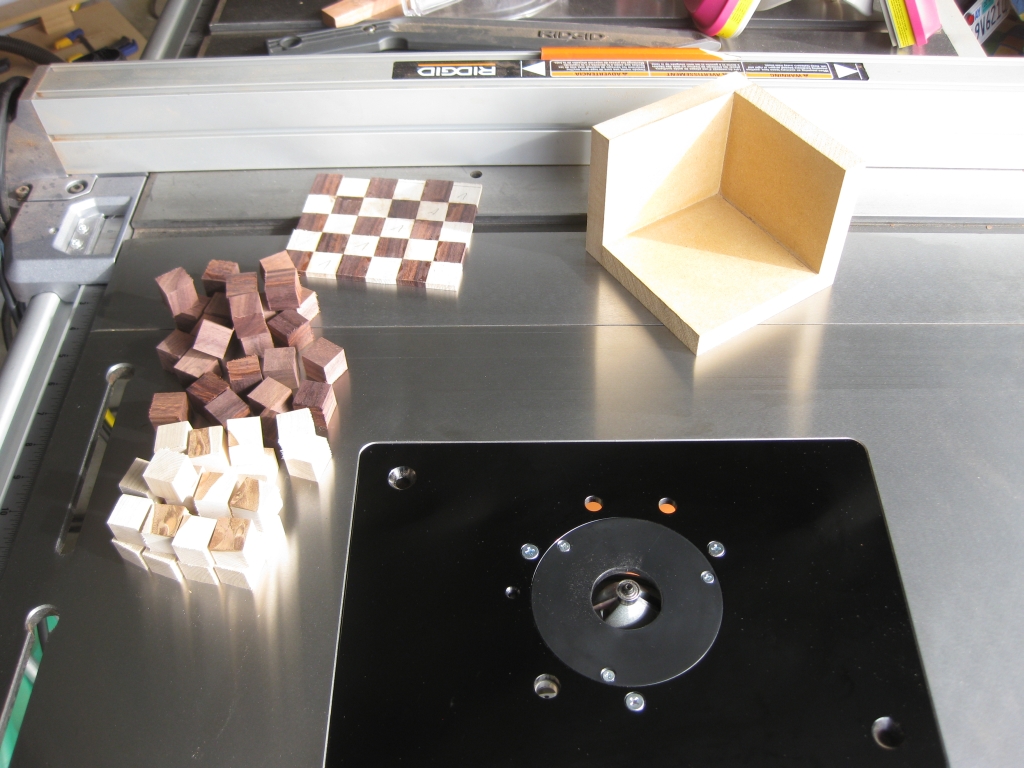
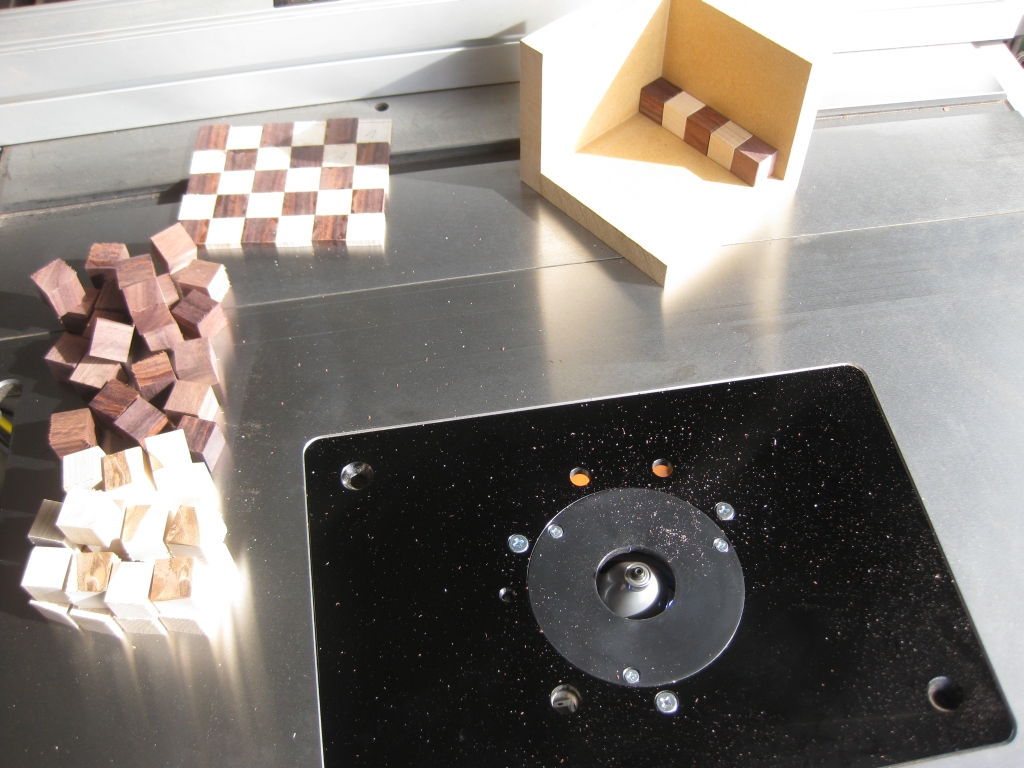
This is one of the most time consuming parts of the process (currently). I have to take all 50 cubes, and put a very small bevel onto each edge of the cube. All in all it takes between 1.5-2 hours with my current method. There’s been a fair old discussion in one of the puzzling forums about beveling cubes, so I’m sure I can cut this down significantly, but that’s going to need a new jig, and some more tools in the shop so for now I’m stuck with what I have.

If you’re interested, the checkerboard piece of wood in the pictures isn’t some sort of template, it’s actually what will become the base of the box that the puzzle sits in. I just happened to be working on it at the same time, hence it ended up in the pictures.

Next up I made the 10 pieces of the puzzle from those 50 cubies, and as it happens I don’t have any pics of the process. I’ll need to take a few from the next one I make and update this at a later point. Anyway with that done, I turned my attention to the box. I now had dimensions for the box, based on the final size of the pieces, so I took the burl I was using to the saw, and cut it to the right lengths for the box, and created a dado in the edges of two sides, to allow me to get a stronger joint for the corners.

The outside edges of the box

The outside edges of the box

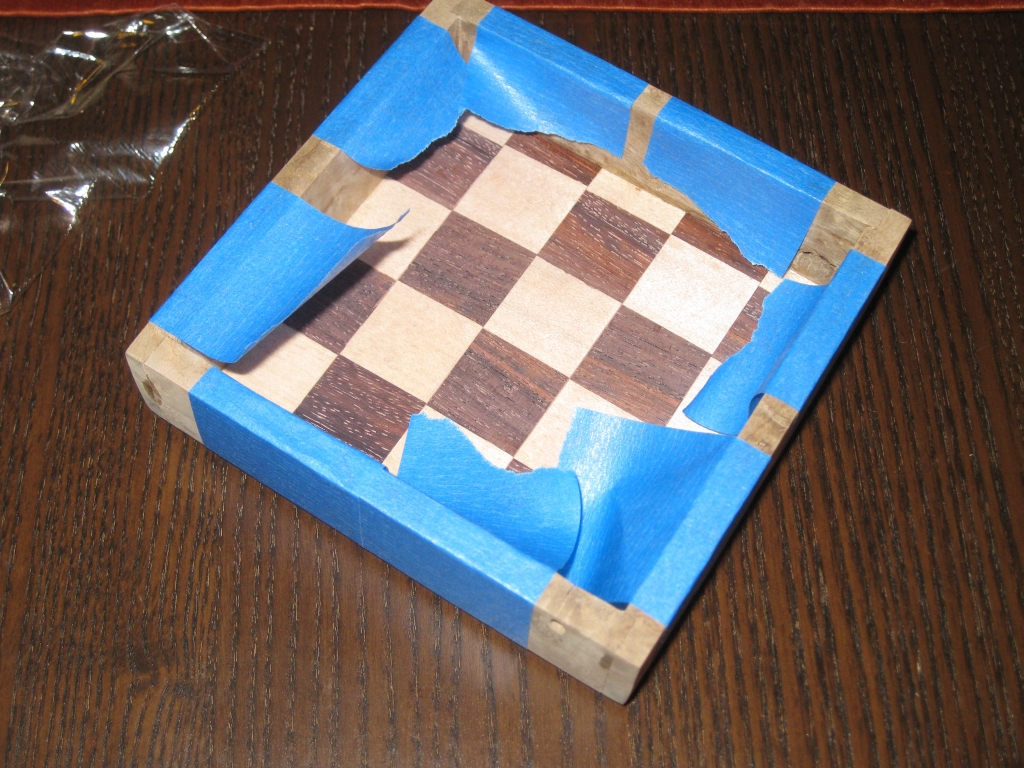
Despite the very small contact area, wood glues are remarkably strong, and will hold the frame together with no issues. In fact, to take it apart would probably break the wood, before the glue would let go. Using blue tape, I tape the corners, (no clamping required) and that will hold the box well enough for the glue to set. I do a quick check to make sure that the corners are square, and leave it to dry, while I turn my attention to the base.

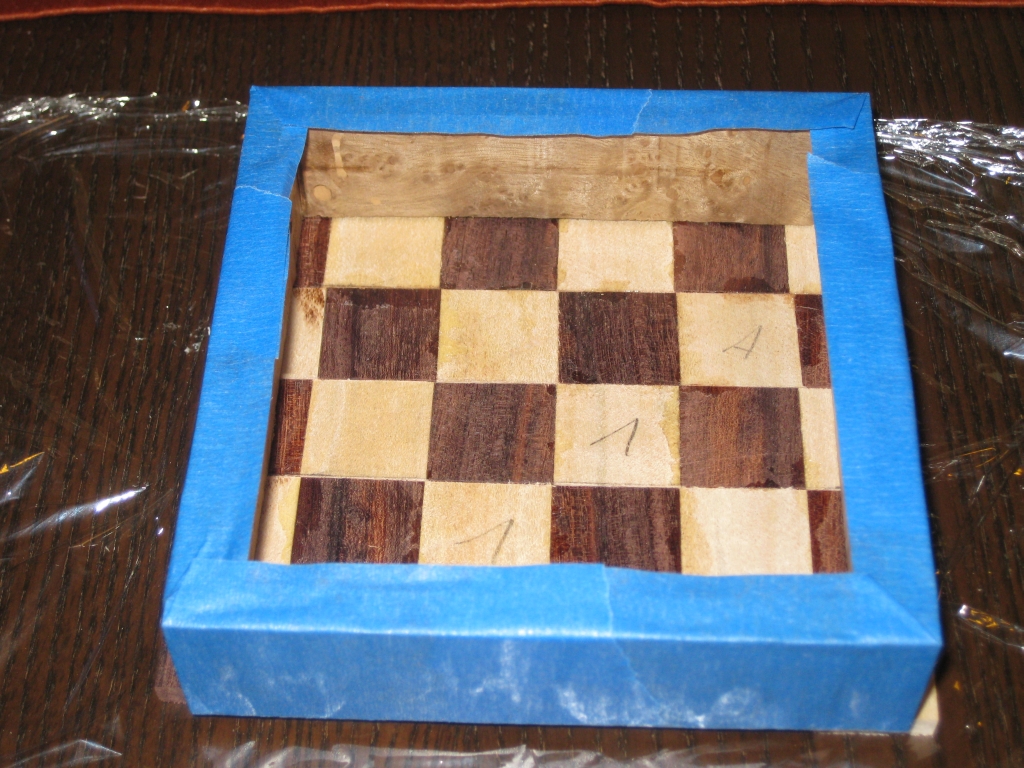
The unfinished base, with the sides sitting on top

The unfinished base, with the sides sitting on top

As you can see, the base is unfinished. The pencil marks were to allow me to line up each of the strips for gluing everything together. As you can see I still have some sanding to do, since there’s glue and all sorts on the base. Thanks to the random oscillating hand sander I got for my birthday, it will make short work of that!

A quick dry fit before gluing the box together.

A quick dry fit before gluing the box together.

With the sanding done, I have a quick dry fit with the pieces in place to make sure everything fits as expected before gluing the base in place. Note at this point, Ive sanded the inside of the box to its final point, as it will be pretty touch to get into the corners once it’s all glued together, so best do that before the final glueup.

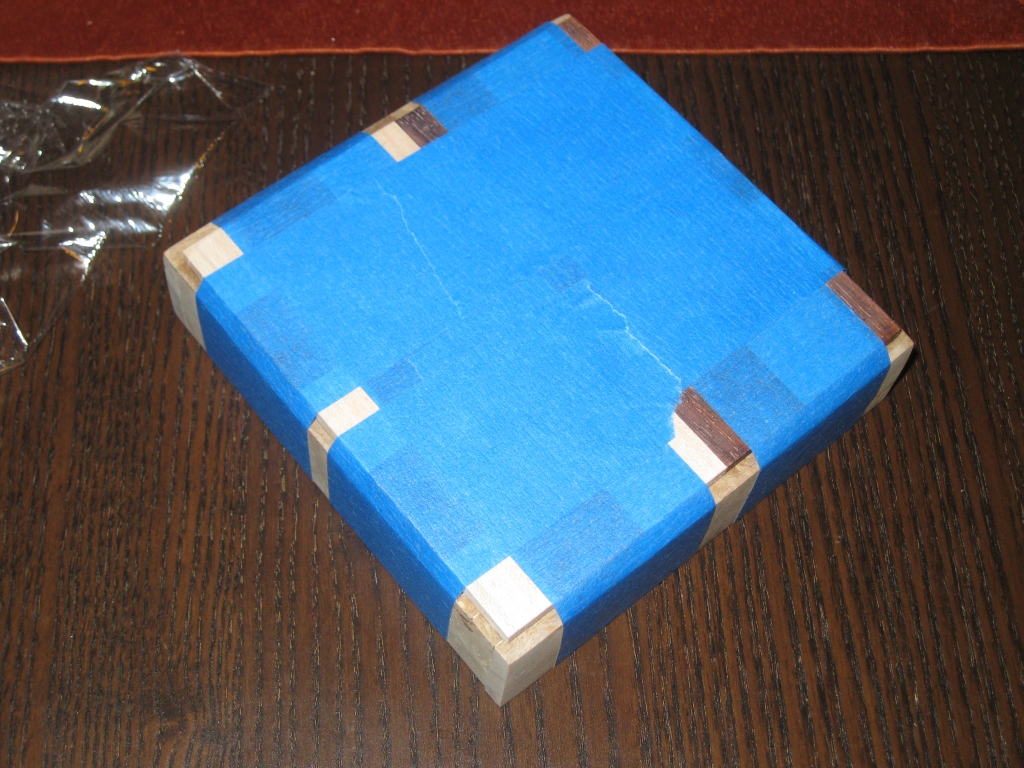
Box glueup from the top

Box glueup from the top


Box glueup from the bottom

Box glueup from the bottom

It’s probably worth pointing out at this stage, that I’ve spent around 3-4 hours making this box. Given that I decided I wanted a checkered base, that meant cutting thin, equally sized strips, gluing them together, then cutting them into strips once dry, flipping the strips to create the checkerboard, and re-gluing, then sanding, etc etc. All in all probably the most labor intensive part of the puzzle build, but hopefully worth it!

Finishing.  First coat of thinned lacquer applied

Finishing. First coat of thinned lacquer applied

With all the individual pieces ready, it’s time to look at finishing the puzzle. The box was all sanded on the outside, and it’s looking pretty good. I start off by applying a coat of thinned lacquer to all the pieces. It’s 1 part lacquer, 2 parts thinner that I’m using. It gives a very thin coat, but does the job or really making the grain pop. If you compare this to the pictures of the dry fir you’ll see what I mean.

First Coat of Watco Satin Wax.

First Coat of Watco Satin Wax.

Second Coat of Watco Satin Wax.

Second Coat of Watco Satin Wax.

Once that’s dry, the puzzle gets two coats of wax. I’m using a liquid wax, Watco Satin Wax to do the job. I leave the wax for around 5-10 minutes, then wipe off any excess with a rag. This is building up a nice finish on the pieces, but there’s still one more step to complete the process. That’s a final buffing with some Renaissance Wax.

The pieces, next to the finished box

The pieces, next to the finished box

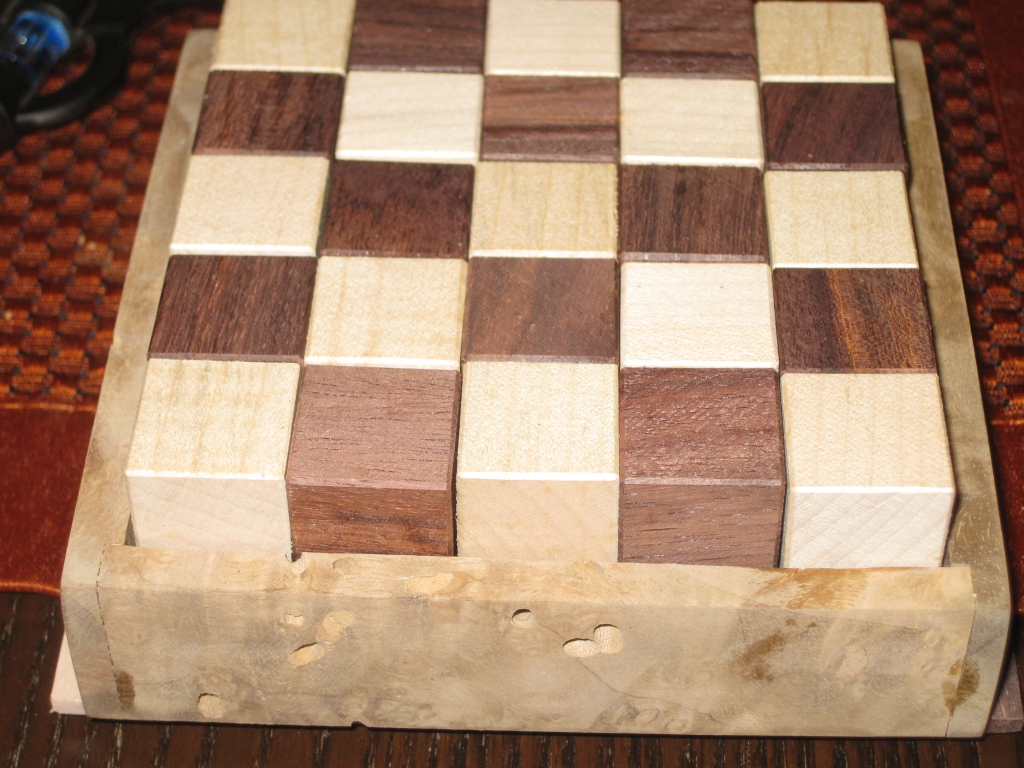
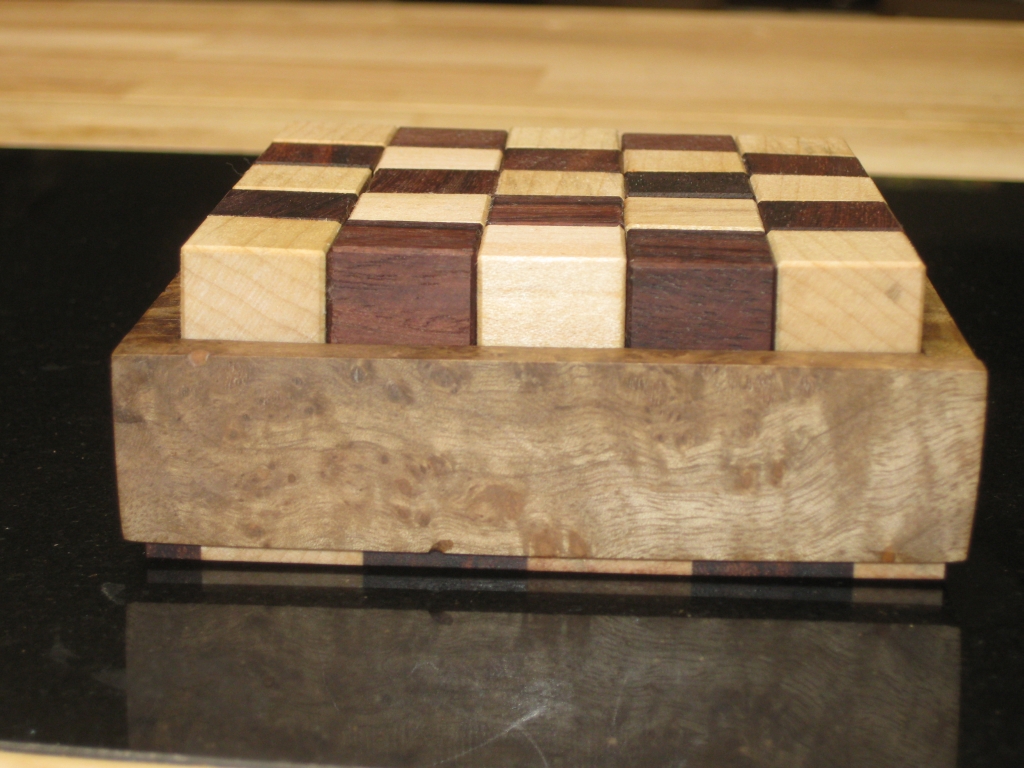
A final view from the side, showing the effect of the checkered base.  The myrtle burl box almost looks like its floating.

A final view from the side, showing the effect of the checkered base. The myrtle burl box almost looks like its floating.

The final puzzle ready to be played with!

So there you have it. I hope you enjoyed the build as much as I enjoyed making it.

Coffin’s Rosebud and Cluster Plus

Before my visit to see Scott Peterson’s workshop a few weeks back, I’d been talking with Scott for a while via email. I’d introduced myself, and asked if there was any chance he could make a couple of puzzles for me, including a Rosebud, and a Peanut puzzle. I’d also mentioned that I was starting to make my own puzzles, and Scott was only too willing to help out with tips and advice, answering all my dumb questions with the sort of enthusiasm and excitement that I remember from my high school science teachers.

As it happens, Scott hasn’t made a Peanut puzzle for a very long time, and he tends to make a run of puzzles then move to the next design, however he had just finished a run of Rosebud puzzles. At the time he didn’t have any available, but he thought he may be able to make me one at some point. With an offer like that I duly said thank you and never thought about it again. In the time between that original email, and my visit, we’d exchanged a number of emails, mainly about woodworking, and Scott’s tips to help me get started. Not long after we arranged to meet up, Scott got back to me saying he had a Rosebud available if I still wanted it, and he had a jig too. Like a bobble head on a dirt road, I instantly said ‘yes please’.

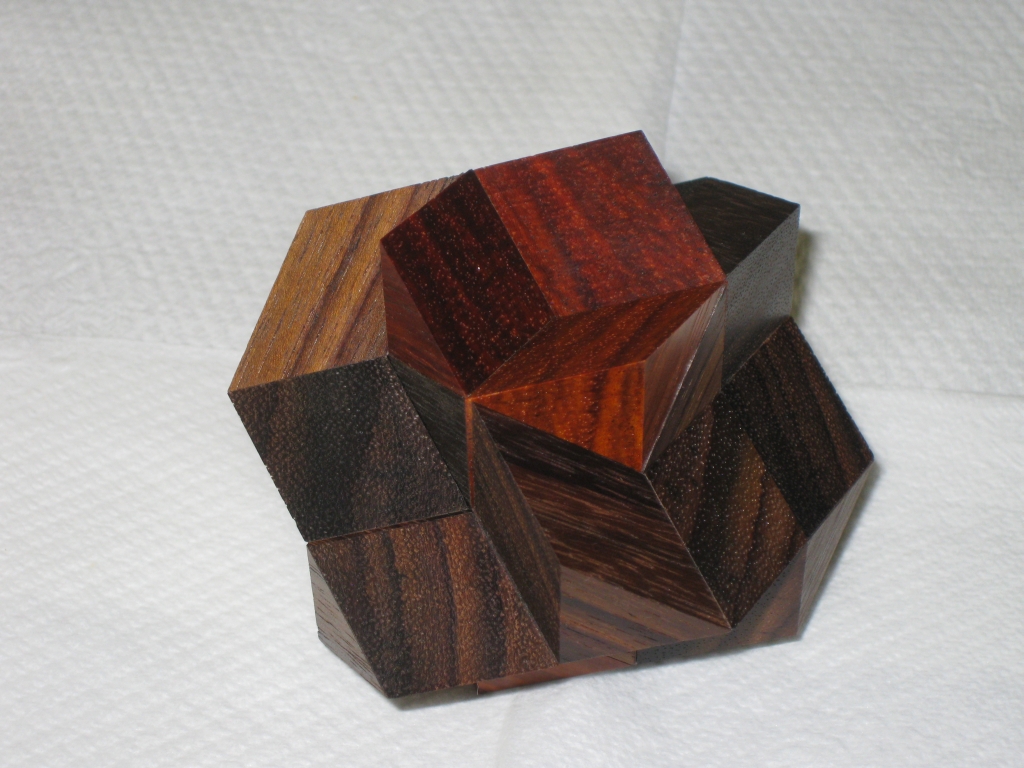
Rosebud in its closed state

Rosebud in its closed state

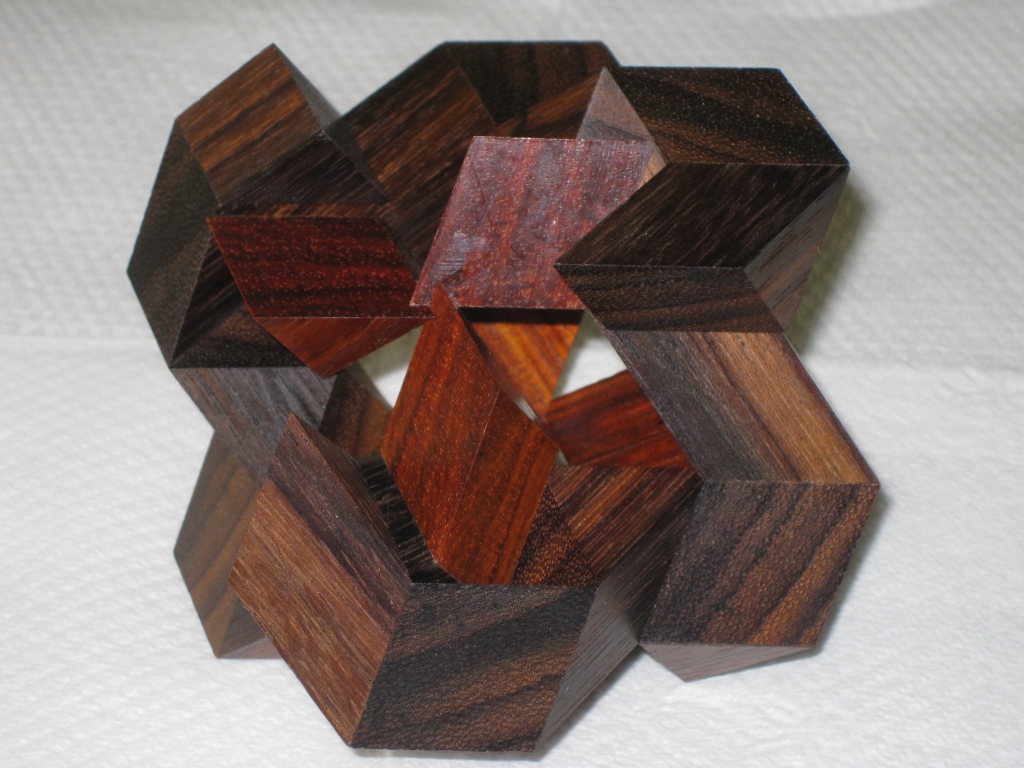
This particular copy is made from East Indian Rosewood, and Flamewood. The strong red from the Flamewood, and its detailed grain pattern really make this an object of beauty. I must confess that the pictures don’t really do it justice. The finish is glassy smooth, and the fit of the pieces is incredible. This is a tight fitting puzzle, with no visible gaps, and yet the pieces slide past one another with ease.

The Rosebud is Stewart Coffin design #39 in the AP-ART catalogue, and is one of the few three-dimensional puzzles which assembles into more than one solution shape. The image above shows the rosebud in the shape which gives it its name, and is a coordinate motion solution where all six pieces are required to move along their three-fold axis at the same time to both assemble and disassemble the puzzle. Not only is this difficult, but the manner in which they are assembled is not at all obvious and requires considerable dexterity.

Stewart himself says “A few of these puzzles were produced some years ago and sold unassembled. After sufficient time had elapsed and almost none had been solved, the customers were given the opportunity to purchase (for an outrageous price!) an assembly jig and directions. With these, it is easy. Without the jig, it can be done with patience, using tape and rubber bands. Without such aids, it has been done but borders on the impossible.”

The reward for being insane enough to try this without a jig is a wonderful movement where the puzzle appears to open like the petals of a rose. It really is something which has to be seen to truly appreciate. My video review below will show you just that and give you a chance to see just how stunning the movement (and Scott’s work) truly is.

As you’ll see, both in the video review, and also in the photograph below, Scott’s work really is outstanding. The pieces of the puzzle will expand until just the very tips are touching, and it still remains perfectly stable. Only with very precise construction can you even get close to this, and it’s a testament to the years of puzzle making that Scott’s copy is as good.

Rosebud opened.

Rosebud opened.

As a puzzle, without Scott’s jig, I have assembled the rosebud. I didn’t go down Stewart’s suggested route of tape and rubber bands (as frankly I couldn’t see how a rubber band would help me much) but all I’ll say is it took over an hour, involved a lot of swearing, and wasn’t all that fun an experience. The jig on the other hand makes things much easier, and removes the worry about expanding the puzzle just a little too far. If it does collapse then you can easily re-assemble it. I’m glad I accepted Scott’s offer for the jig!

Cluster Plus

If you’ve watched the video review, then you’ll know this already, but while I was visiting Scott, he handed me a rather special puzzle.

Cluster Plus - Shop Copy

Cluster Plus - Shop Copy

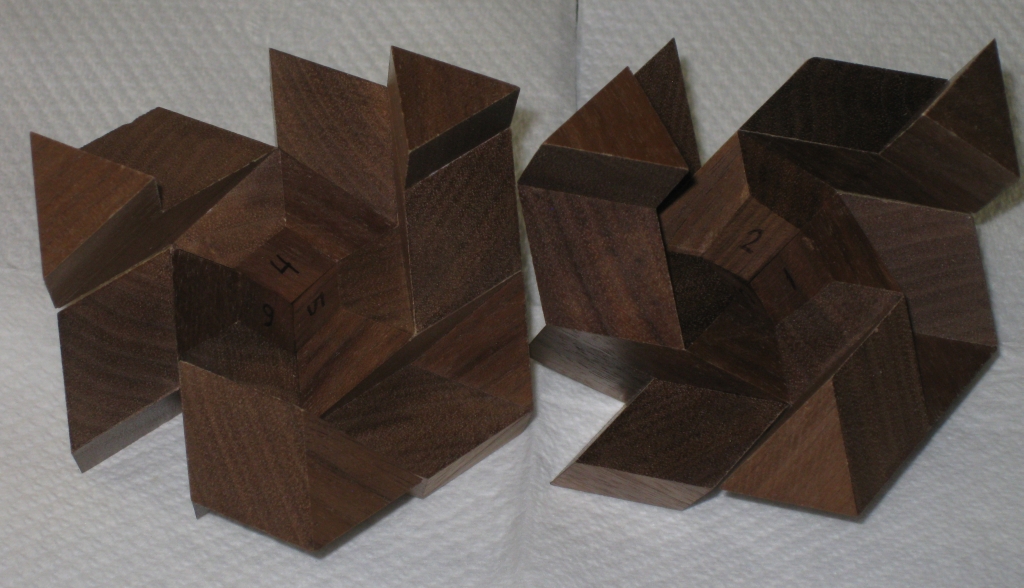
The Cluster Plus puzzle is #114 in the AP-Art catalog, and has a striking resemblance to the Cluster Buster puzzle #49. The final shape however is where the similarities end. Originally only 11 of these were made, and almost half of those were given out as tokens at IPP-17. There don’t seem to be to many people have made these designs since, so that makes this copy even more special. This is one of the prototype copies Scott made with collaboration with Mark McCallum. As such, it’s not a finished quality and has the pieces numbered in the centre to help with assembly. The six dissimilar pieces are joined together in sets of three pieces which require a coordinate motion, and then the two halves of the puzzle are slid together. Looking at the two halves, it’s almost impossible to see how Stewart Coffin came up with this design. Even knowing how to put the pieces together, and the order I still found this a challenge.

Cluster Plus Halves

Cluster Plus Halves

When I first attempted to fully disassemble the puzzle, I split the two halves, then took only one half apart fully, leaving the other still assembled. Now, remember I have the pieces numbered as you can see above, and I’ve only taken one half apart. I still took over 20 minutes to get the puzzle back together.

The coordinate motion really makes it difficult to see how the pieces should come together, and add to that numerous ways that the pieces can fit together, and this is one tough puzzle. As an early copy, the co-ordinate motion on the first three pieces isn’t perfect, and this was something Scott was working on. His initial idea was to leave more of the centre block – one of the standard building blocks in Coffin puzzles, and the number part in the photo in case you’re not sure, with more of the central section un-sanded in the hope that this made things easier to assemble. The trick here was that the centre blocks normally have a pyramid peak. Stewart Coffin removed part of this to allow the coordinate motion which otherwise would not have been possible. In the end Scott removed more of these centre blocks as it turned out that this initial idea wasn’t great.

While Scott and Mark were working on this, Mark believed that there was more than one configuration of pieces which would make up the same shape. I took up that challenge and have been trying to find an alternate configuration. So far I’ve not been successful, however I’ve not given up and I’ll be sure to post if I find it.

At this point, I have a bit of a confession to make. When I was playing with the puzzle, I may have used a little too much force. I should point out that the fit here is not perfect, again since this is a shop copy, and given the nature of the puzzle, any inaccuracy is multiplied out to the end of the ‘arms’ which is where the fit needs to be perfect. Well when putting it back together at the end of a puzzling session, I used a little too much force, and with an impressive snap, one of the arms flew across the table, and the two halves slammed rather abruptly together. Sorry Scott!

A little bit of glue and an hour later, things were back to the way the should be and no real damage done. The glue joint had given out, but didn’t damage the pieces of the puzzle fortunately so it was a simple fix.

Thanks again to Scott for both of these puzzles. There’s great additions to my collection and I promise to try not to break them again!

Building a Matrioshka (Part 3)

This entry is part 3 of 3 in the series Building a MaTRIOshka

At the end of the last post, I’d finished making all the individual parts that would make up the puzzle, and was ready to start putting things together. The number of individual parts has reduced from the original 54 to just 18, but things are no less daunting at this stage.

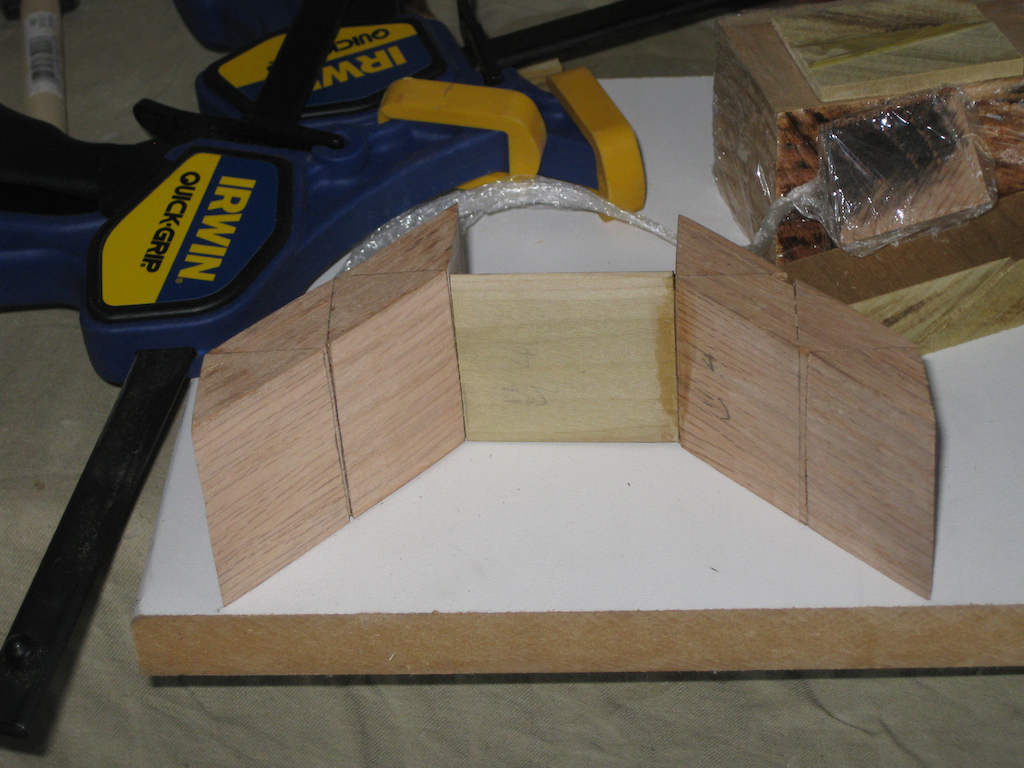
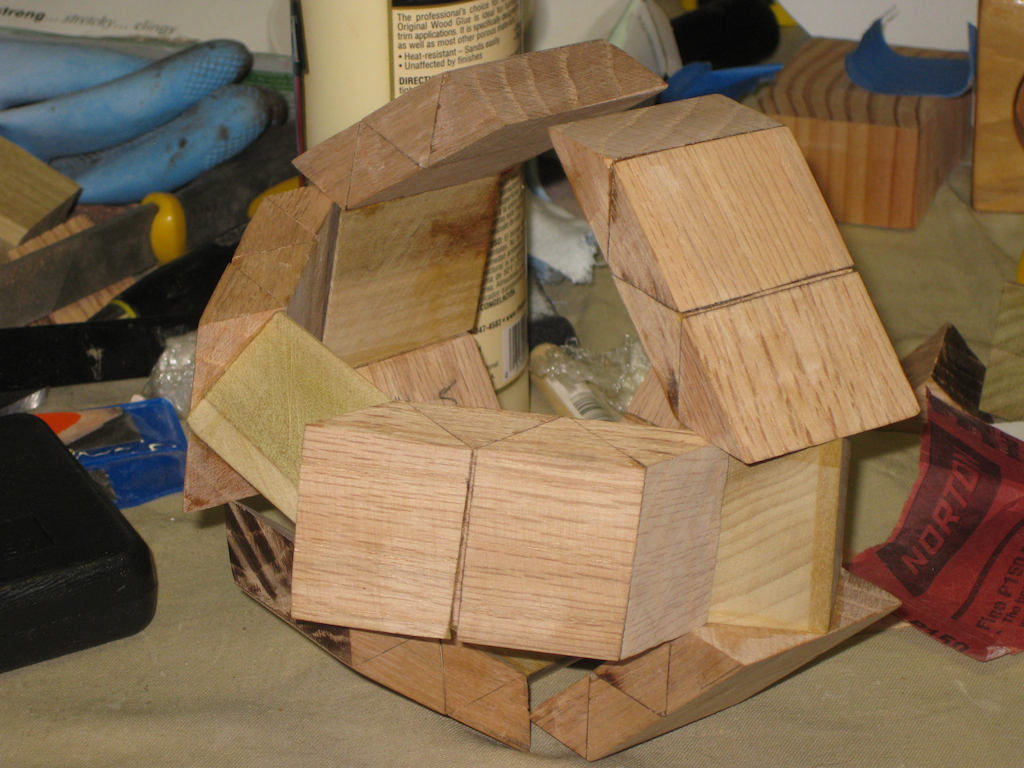
All 18 pieces ready for final glueup

All 18 pieces ready for final glueup

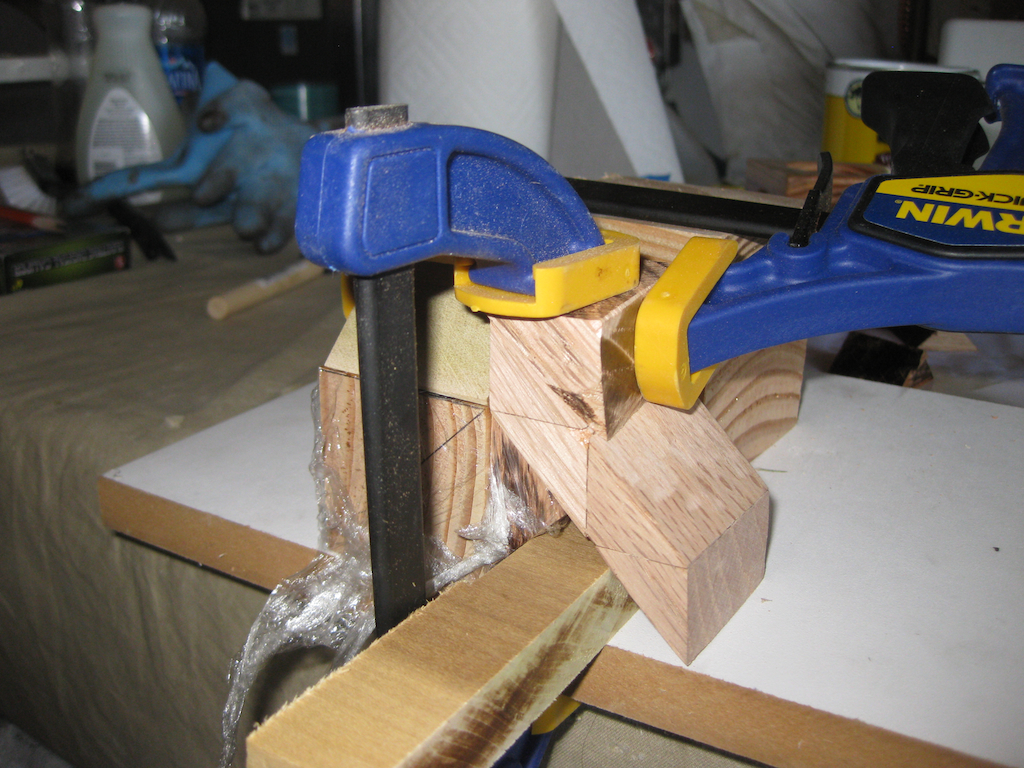
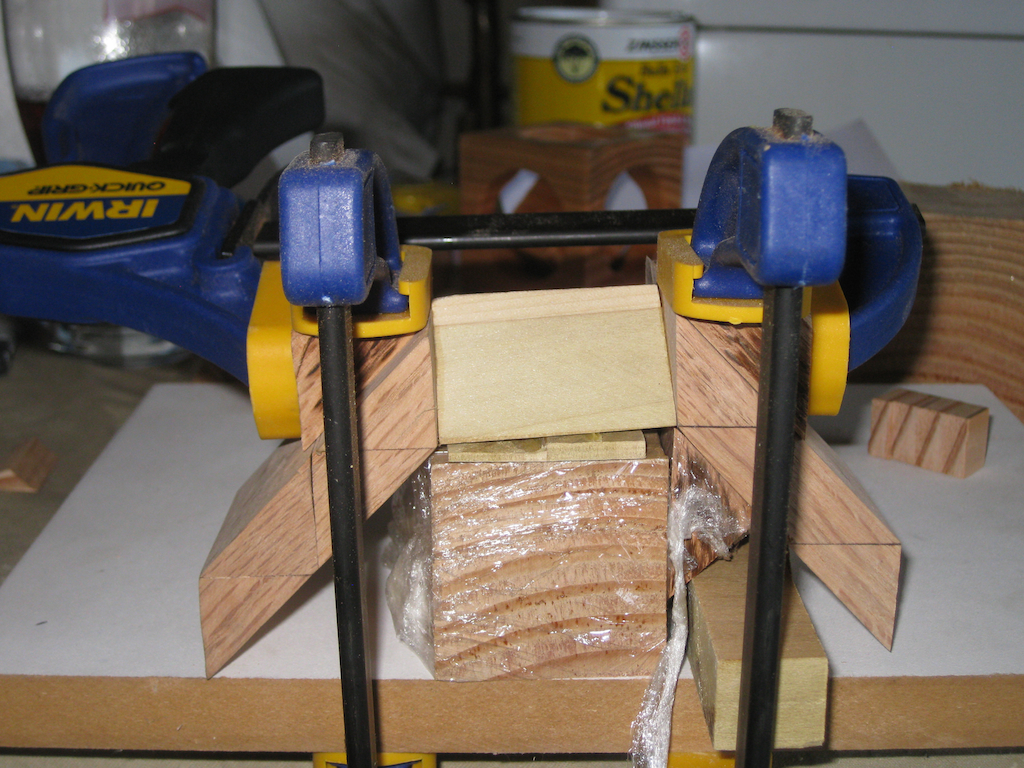
The biggest problem remaining was how on earth I was going to glue the ends to the bridge. There are no square ends on this thing that you can put a clamp on, so it makes holding the pieces together a real challenge. Building a gluing jig was probably the right way to go, but even that made for some interesting clamping!

Gluing Jig

Gluing Jig

I decided not to try to make a jig that would glue both ends at the same time. I wanted something simple that would support the pieces as I glued them, and in the end, the jig was much simpler than I thought it needed to be. Some of the original scrap pieces I had left served fairly well, and also meant that I could glue both sides at the same time. I’m not an expert woodworker, I don’t have a lot of ‘spare’ or scrap wood lying about (remember I’m only starting out doing this, so no reserve of wood to pick from) so this did the job.

Gluing Jig, yes it's ugly!

Gluing Jig, yes it's ugly!

Sticking with the very simple jig above, I could glue one end at a time and create the pieces. Granted if I were doing this in bulk, or attempting to create something I could sell, I’d be thinking about a more efficient scheme. For now, this works, and is all I needed.

One down, 5 to go!

The first finished piece

The first finished piece

After several hours over the weekend (since I do all this in my spare time, which I don’t have a lot of just now!) I had 6 pieces glued up and ready for a test fit. Yes, the time had come to see how much of a mess I’d made of my first ever serious attempt at making a puzzle!

The six finished pieces

The six finished pieces

With some hesitancy, I took the plunge and tried to fit the pieces together into the final puzzle … It’s a tight fit, but things were taking shape! I spent a little time with the sandpaper and sanded the pieces down just a hair. Using my digital calipers, the bridge was 1.333″, and the edges were around 1.49″. So there really wasn’t a lot in it, but enough that some work was required. A little bit of sanding on each of the pieces, and I had them down to around 1.32″.

Test fit

Test fit

And here the story ends unfortunately. When I tried to put all six pieces together, tiny inaccuracies in the fit of the pieces, and minute misalignment between the ends meant that the whole puzzle is just enough off that it’s not going to go together and slide the way it is supposed to. Despite the end result, I don’t consider this a failure. You may remember back in the first post, I said that this was a learning experience for me. And I’ve learned a lot through the process. I’m sure I’ll come back to this puzzle in the future, and expect version two to be better!

Building a Matrioshka (Part 2)

This entry is part 2 of 3 in the series Building a MaTRIOshka

At the end of the first post on my Matrioshka build, I’d finished gluing up the ‘ends’ as I think of them for each of the puzzle pieces. I still hadn’t cut out the centre sections (or as I’m referring to them, the bridges) that join the two ends of each puzzle piece together, and I still had a lot of sanding to do so that the pieces were all the same size. In this second part, I go through that process, and get closer to the finished puzzle.

On a side note, I originally referred to this project as a MaTRIOshka, however what I’m actually building is a single layer of Vin&Co’s puzzle. Stewart Coffin originally referred to this assembly in “The Puzzling World of Polyhedral Dissections”, which I have been reading recently as the Expanding Box puzzle. There Mr. Coffin refers to this as a curiosity more than a puzzle, but I’m going to continue on none the less with this build. It is helping me learn about puzzle creation and improve my skills, although I dare say that as with most puzzle creators early works, this will be less than impressive. The bottom line is that it is still a nice co-ordinate motion puzzle.

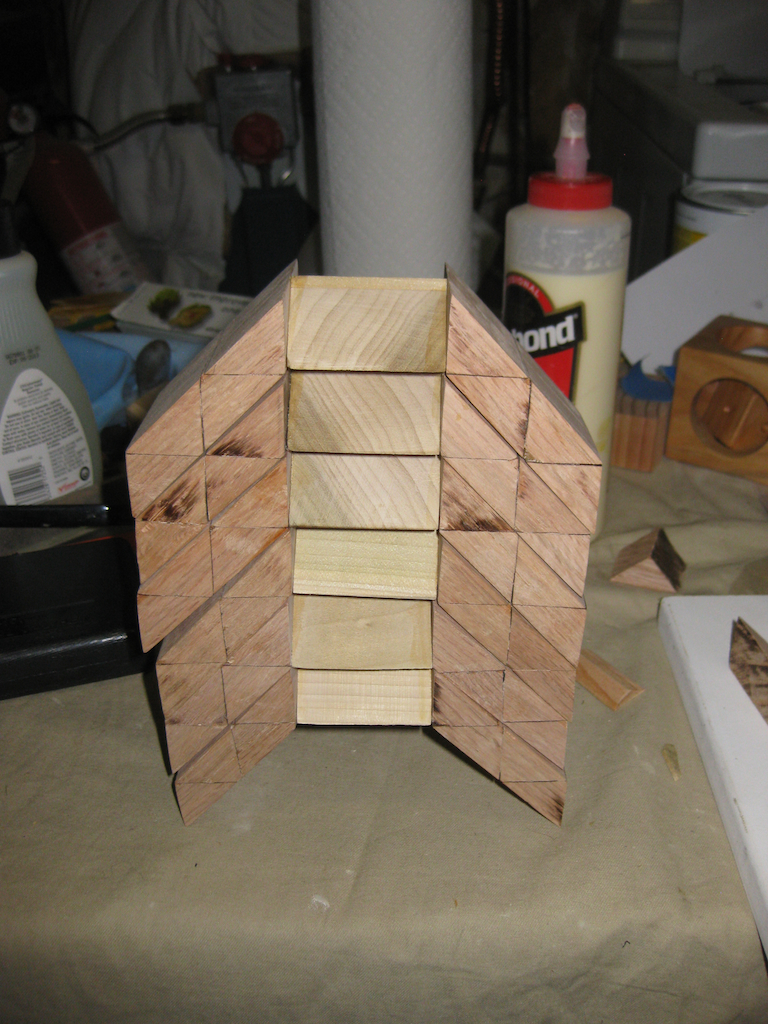
With 12 ‘ends’ all glued together, I had quite a task to remove all the excess glue from the pieces, and sand them all down to a nice smooth finish. I had deliberately left the pieces slightly larger than they would be for the final glue-up, so that I had some room for cutting errors and the like. This is fairly standard, as it’s easier to correct for problems with your saw being slightly off, or gluing issues when you have a little extra material to work with.

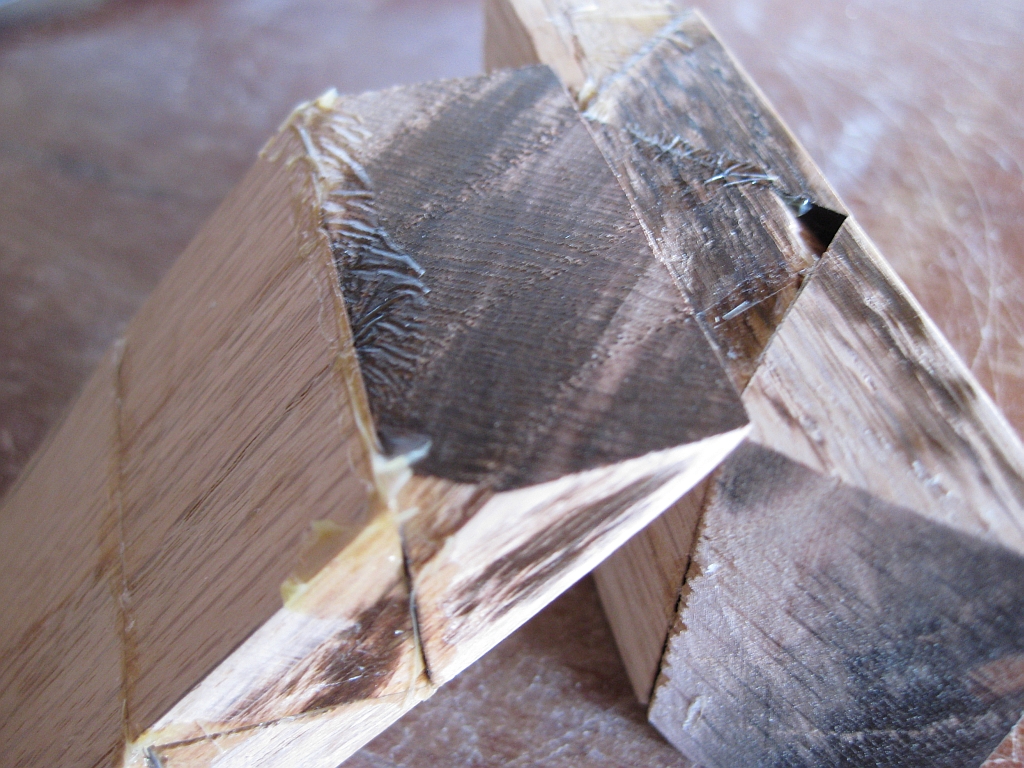
Puzzle Pieces before sanding

Puzzle Pieces before sanding - not pretty!

As you can see from one of the pieces, things weren’t exactly pretty at this stage. Yes I could probably have allowed the glue to set for about 30 minutes, and then scraped off the excess, but I let things sit overnight without touching them, so I may have created more work for myself here that I needed to. You’ll also note that there are apparent gaps between the individual pieces. As I mentioned, this is a learning experience, and I expected that I would have a problem like this! (Oh, and the large lump of tearout on one of the pieces is pretty obvious too.)

If you’re wondering about the interesting pattern in the dry glue, this is because I’m using plastic wrap to prevent glue getting onto my clamps. It’s effective at keeping the glue where it needs to be, but until I build some gluing jigs, I’m left with this sort of mess.

After a lot of sanding, and some time measuring each piece against a ‘perfect’ reference piece, I was left with 12 identical pieces. The puzzle has six sides, which are all identical, so this would be the basis of the finished pieces. (ok, so I only photographed 10 pieces. The other two were on my workbench.)

Sanded End Pieces

Sanded End Pieces

As yet I still hadn’t cut any wood for the join between each end of the piece. I’ll be honest here, I still hadn’t entirely figured out how these should be cut, the angles required on the cut etc.

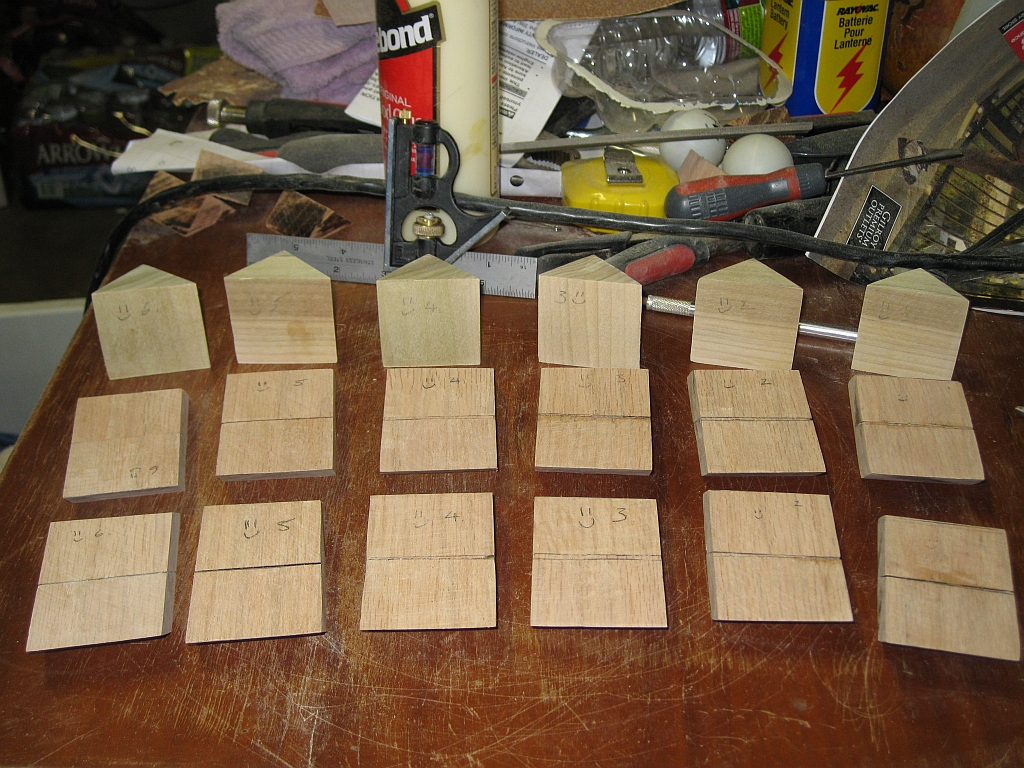
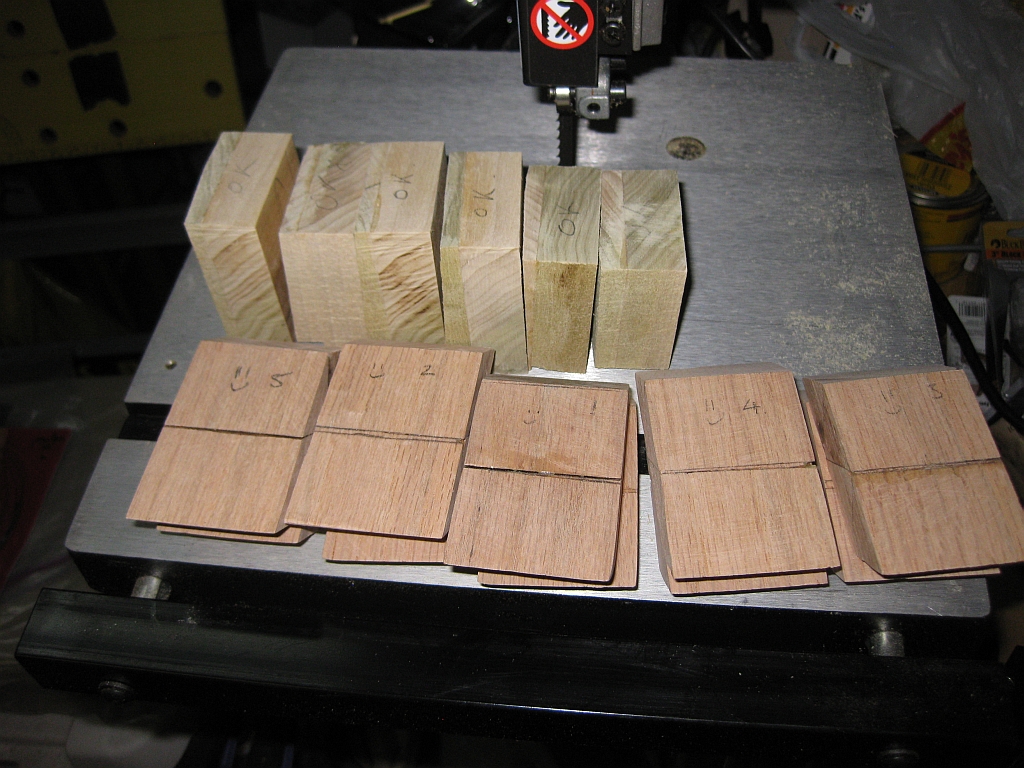
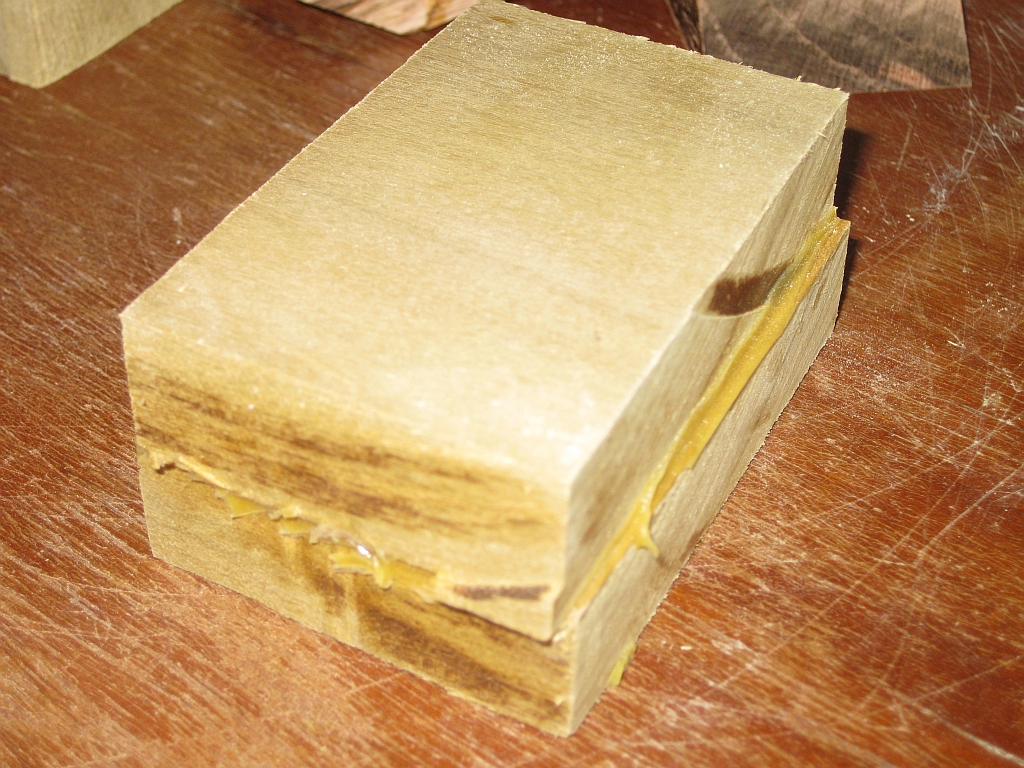
Some stock laminated together to give the thickness I needed

Some stock laminated together to give the thickness I needed

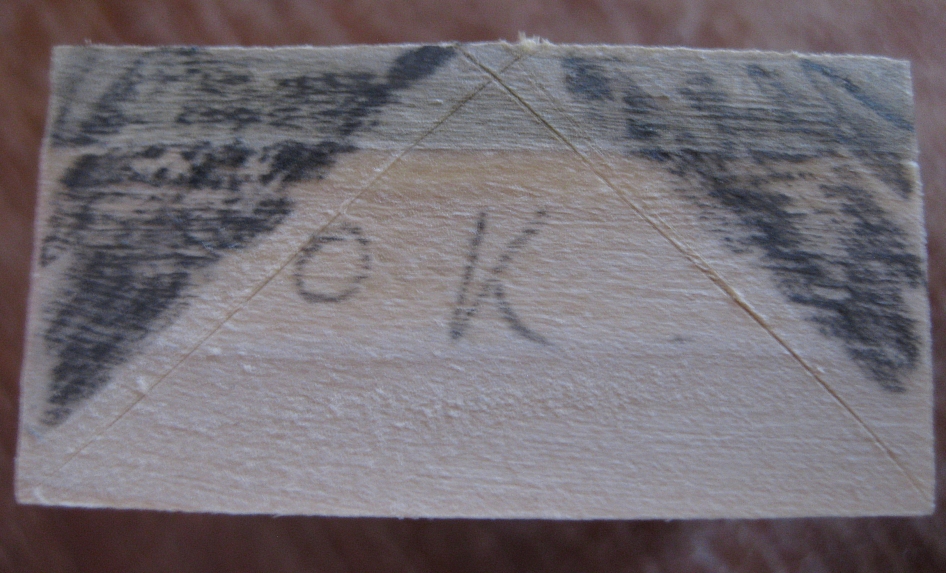
All I could tell from the pictures I was working from was the length of the piece, and that the base touched one side of the end and the top of the triangle touched the other side. Note: I had not started reading Stewart Coffin’s book at this point which told you exactly how to make this! (Thanks Stewart) With that information on hand, I decided the best thing to do was to just go for it. I cut six rectangular blocks which were a match for the dimensions of the end of my end piece, marked the mid point on the end, and took to the band saw. (These rough cut pieces are what you see in the image above. Note that they were only true on one side, as I was cutting to a point on the other so I didn’t care!)

The rectangular stock marked up for cutting to make the bridge

The rectangular stock marked up for cutting to make the bridge

As I have learned, I cut close to my lines, but didn’t go over, to allow me to sand the pieces to the perfect size. You may notice from the image, that my lines are not in pencil Given the accuracy of the cuts I wanted, I used a hobby knife to make the lines. This gives a much more accurate line than pencil, since the edge is much thinner, and also helps to prevent tearout by severing the ends of the fibres if you’re working across the grain. Yes, these marks are in end grain so it’s not helping me here, but I though it worth mentioning.

Note: If you’ve not figured it out already, all the images I upload are at least twice the size you see here. Click the image to see the full size version, and to browse all images for this blog entry.

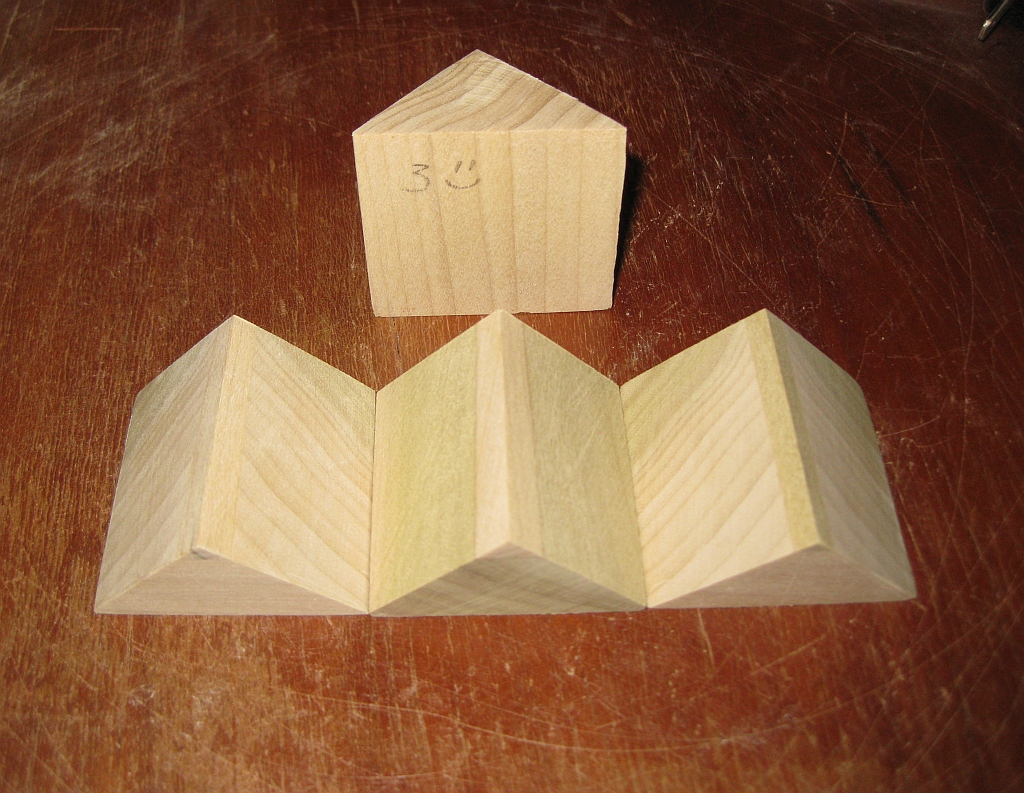
The result was six identical pieces which would form the bridge between each end of each puzzle piece. So far, so good. Now the interesting thing I found out taking this approach, and working purely from pictures, is that the piece required for the bridge is a standard triangular cross-section, the same as the rest of the pieces in the puzzle. The only difference is that the bridge is slightly taller than the end pieces. Going back to Coffin’s book, this is exactly what he shows, so this was confirmation that I had this right.

The Bridge pieces ready for assembly

The Bridge pieces ready for assembly

In the next part, I’ll look at tackling the problem of gluing up the final pieces and seeing if this thing actually works. On a side note, I have my copy of Vinco’s Matrioshka now, and the puzzle I’m building is large enough that the Matrioshka will fit inside it. So does this mean I’m actually building a Quadrioshka?