Tag Archives: Cube

RPP Puzzle Pickups

Hi everyone, and sorry for my long absence. Hopefully I’m back and will be getting many more reviews up in the coming days, weeks and months. As you know I’ve moved from California to Michigan, and I’m in the process of setting up my shop and my new home. Part of that is unboxing the puzzle collection, and I’ve taken it upon myself to review all the puzzles in my collection as I unbox them. On video. And here. I must be insane! Even doing one a day it would take a few years to get through my collection! Wish me luck!

With that out of the way, here’s the first video where I talk about the mammoth task ahead of me and review the four puzzles I picked up while at the Rochester Puzzle Picnic a few weekends ago. I hope you enjoy, and as ever, feel free to throw me a comment below.

If you watched the video then you may not even want to bother reading my ramblings, however if you want a little more info about each of the puzzles then read on.

Chain Store

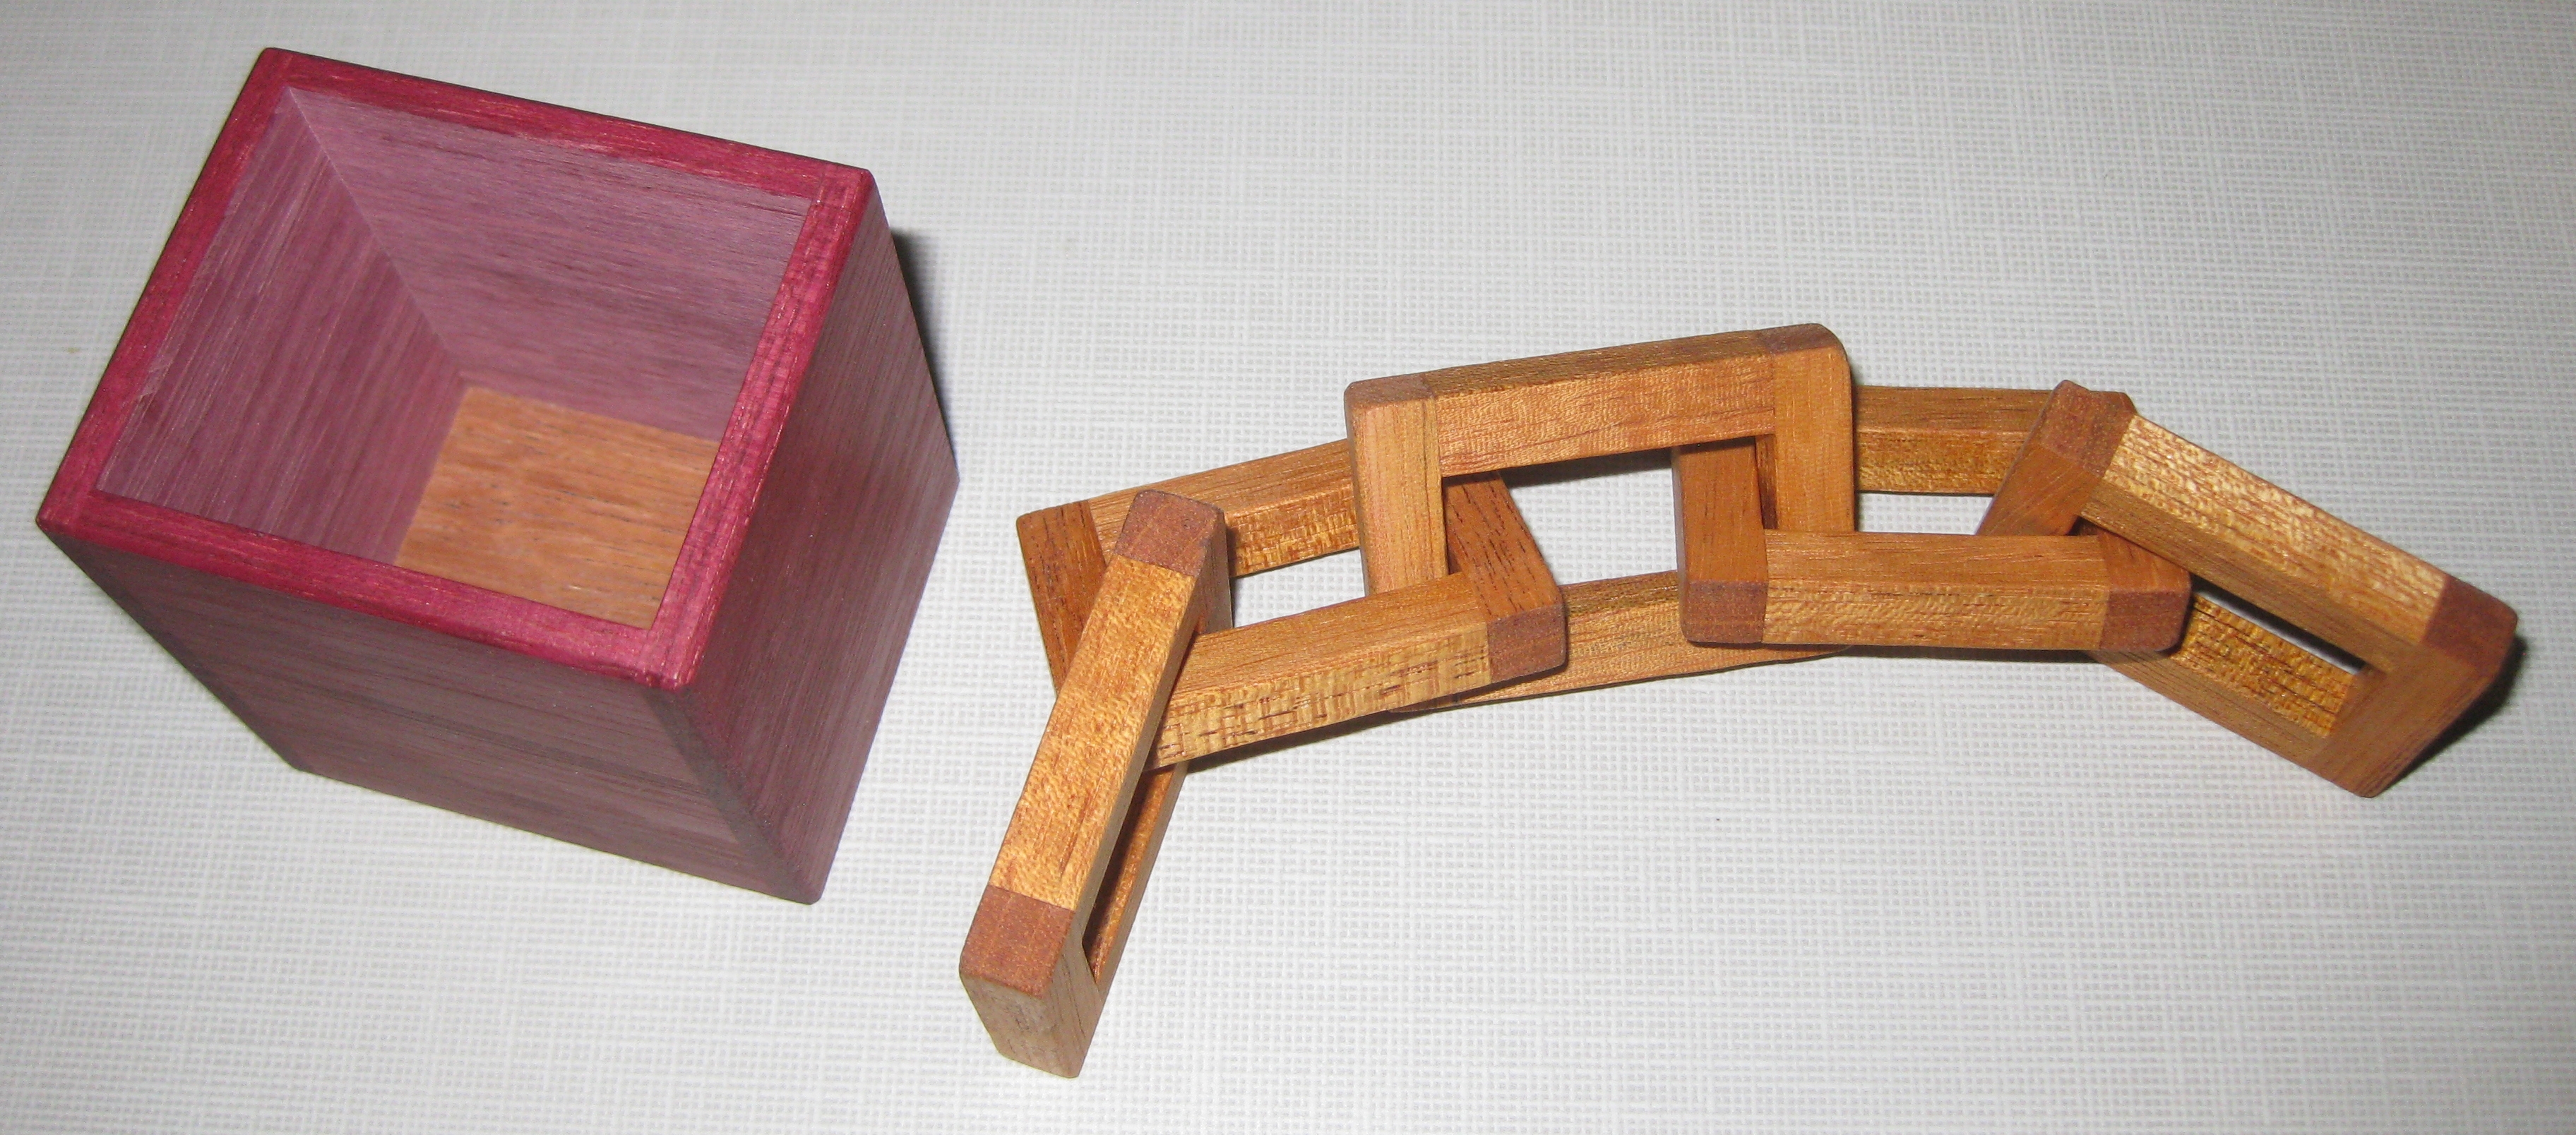
Chain Store by Goh Pit Khiam

Chain Store by Goh Pit Khiam

Chain Store was designed by Goh Pit Khiam and my copy was made by Tom Lensch. Tom had several copies with him at RPP, and given that it’s such a fun puzzle, I had to pick one up. Made from Purple-heart and Mahogany it looks great and given that this was a Jury Honourable Mention at IPP36 it was worth seeing what all the fuss was about.

The puzzle measures in at 2 1/4″ x 1 7/8″ x 2 3/8″ and bears the TL stamp on the bottom of the box that is Tom’s signature. Interesting fact about the TL, it’s not burned into the wood and nor is it stamped. It’s actually a stencil Tom had made that uses carbon dust to leave the signature.

I’m a little disappointed in the construction of the chain links. The rectangles forming each link are butt jointed, which in my mind is not a strong joint. I’d much rather have seen a half lap or similar joint, especially given the way the pieces need to be manipulated, and the slight tightness of the pieces.

Tom had a few issues making this puzzle, as the original version he had guessed at the size of the box, and guessed 3/32″ too big. Now that’s a chasm when it comes to a packing puzzle, and by shrinking that box, there’s now only one solution and it’s a little tougher to find. If you’ve made a copy, the solution requires that all the pieces be rectilinear, and I’ll say that the solution is anti slide once in there.

My copy is a little tight when manipulating the pieces, but nothing that prevents the solution. I may now have to deal with the humidity problems on my puzzles thanks to Michigan weather.

Impossible Cube Triangles

Impossible Cube Triangles

Impossible Cube Triangles by Andrey Ustjuzhanin

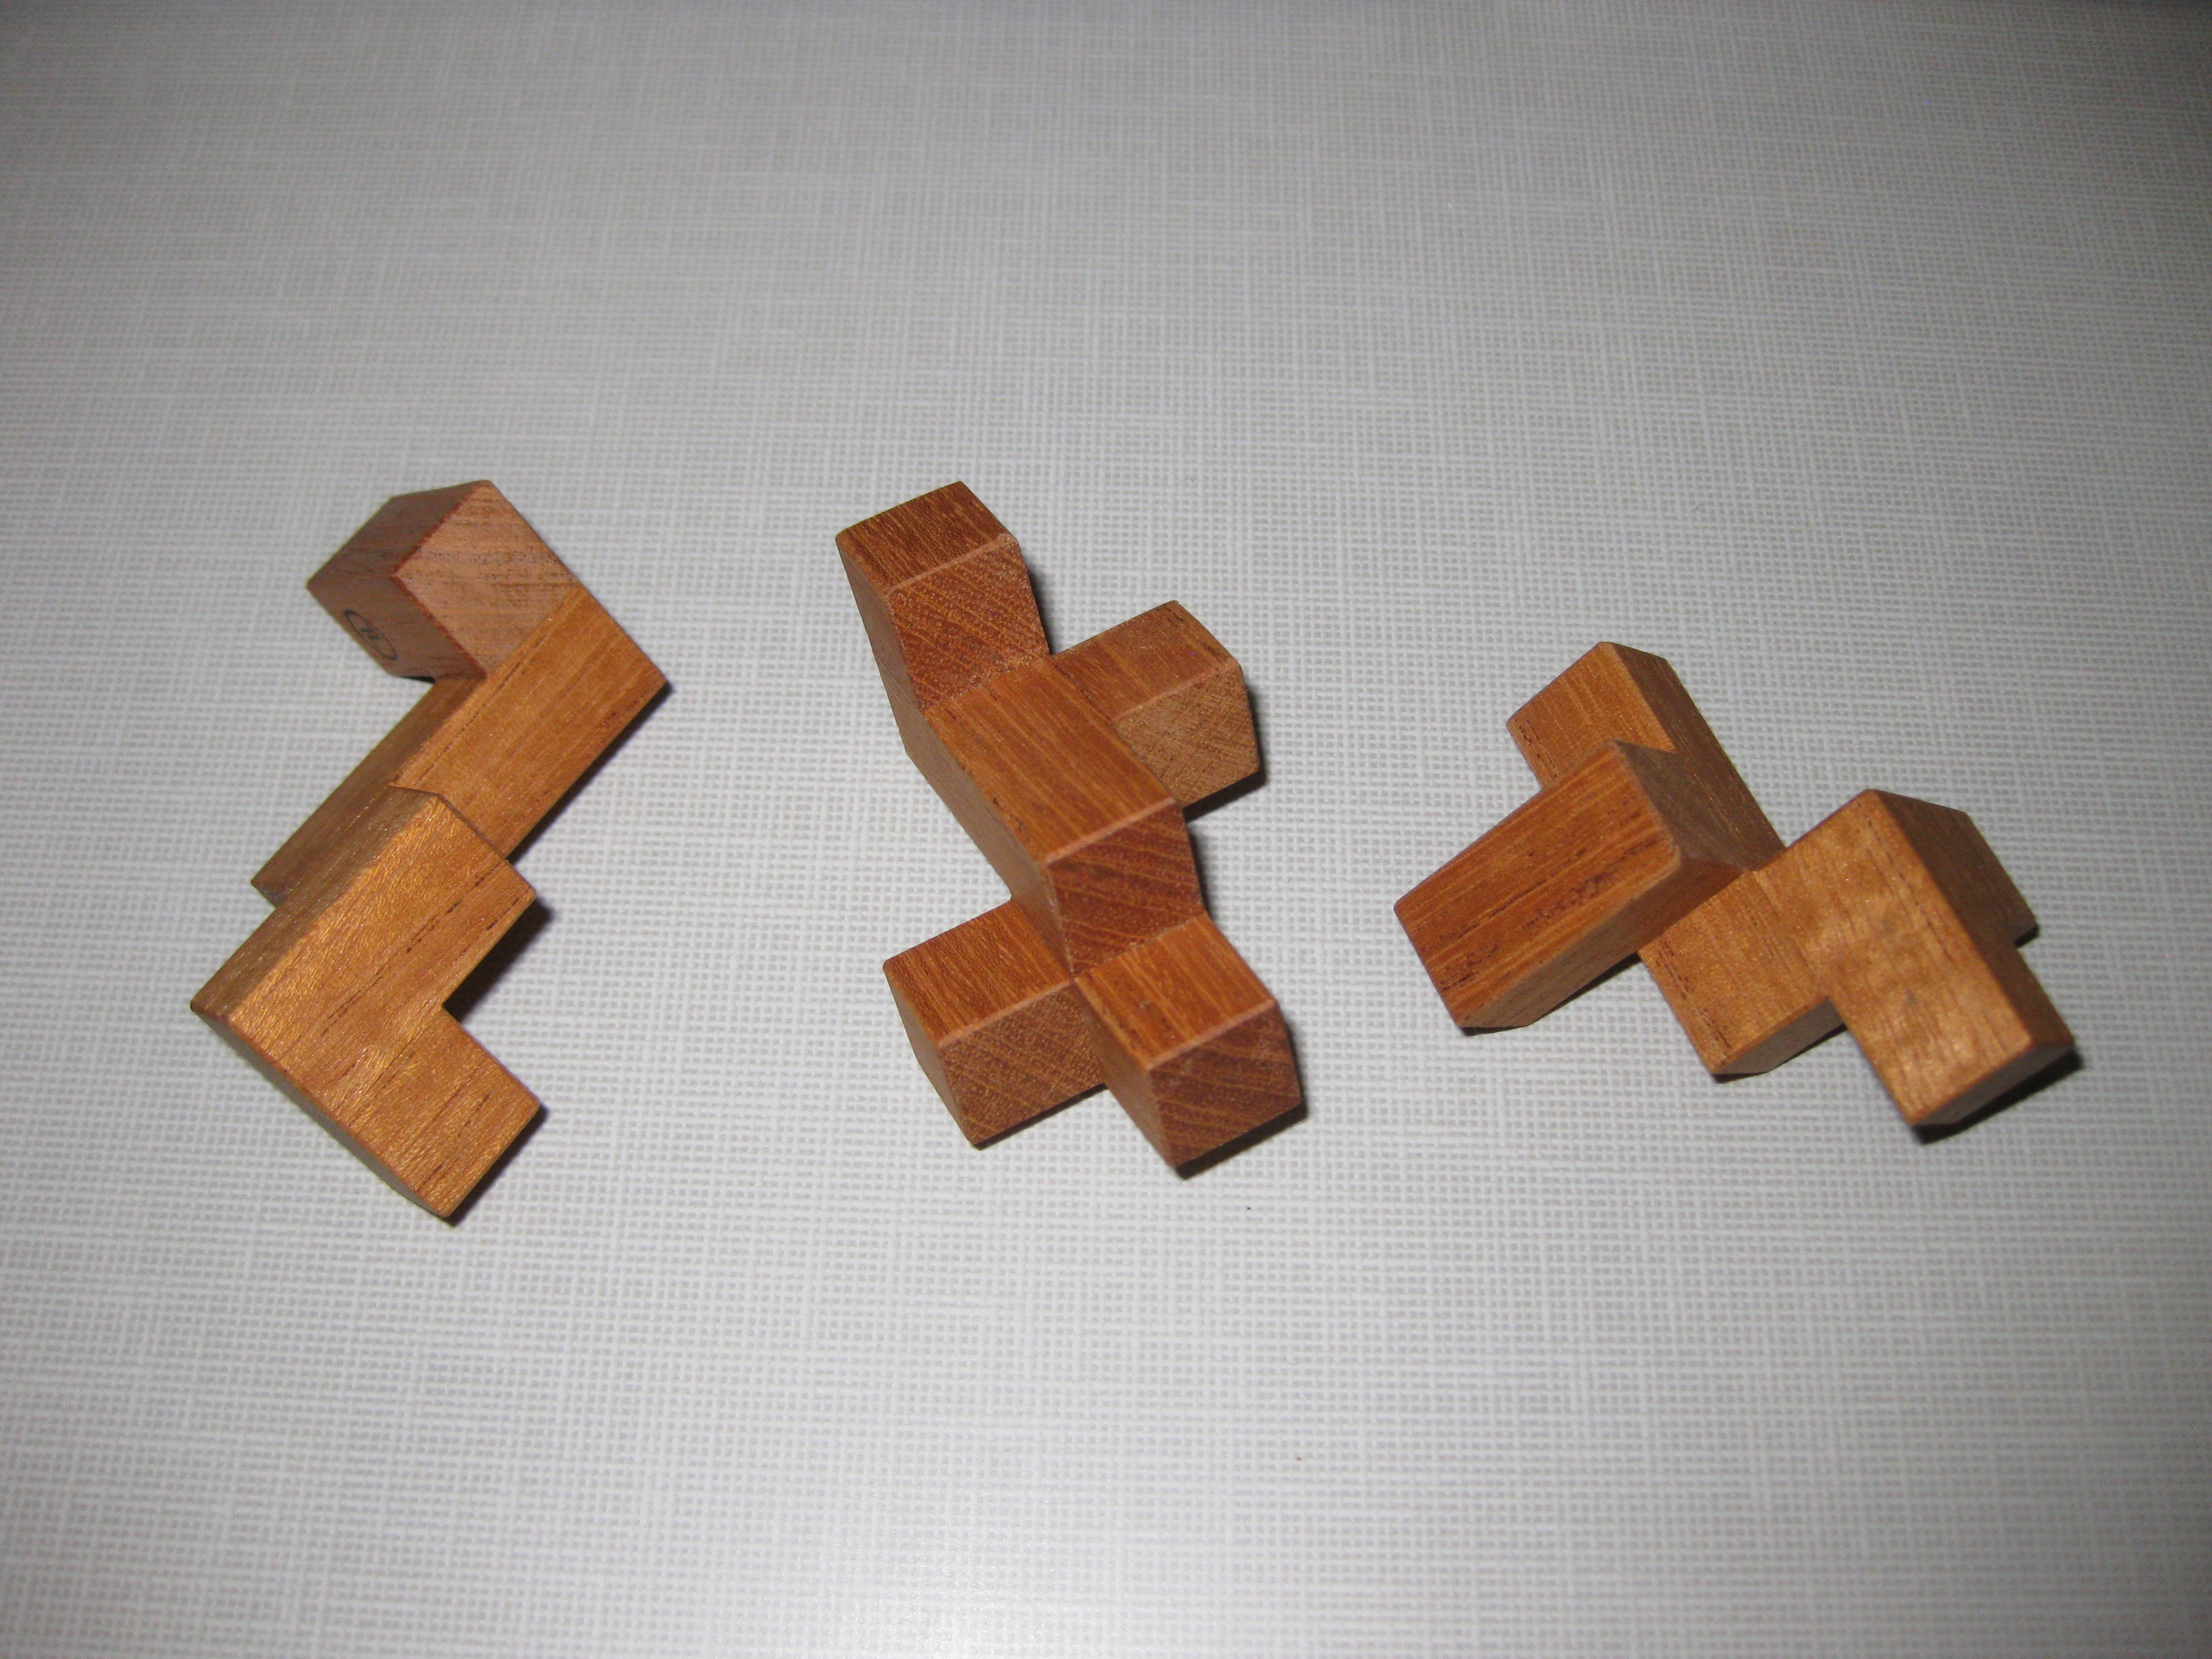
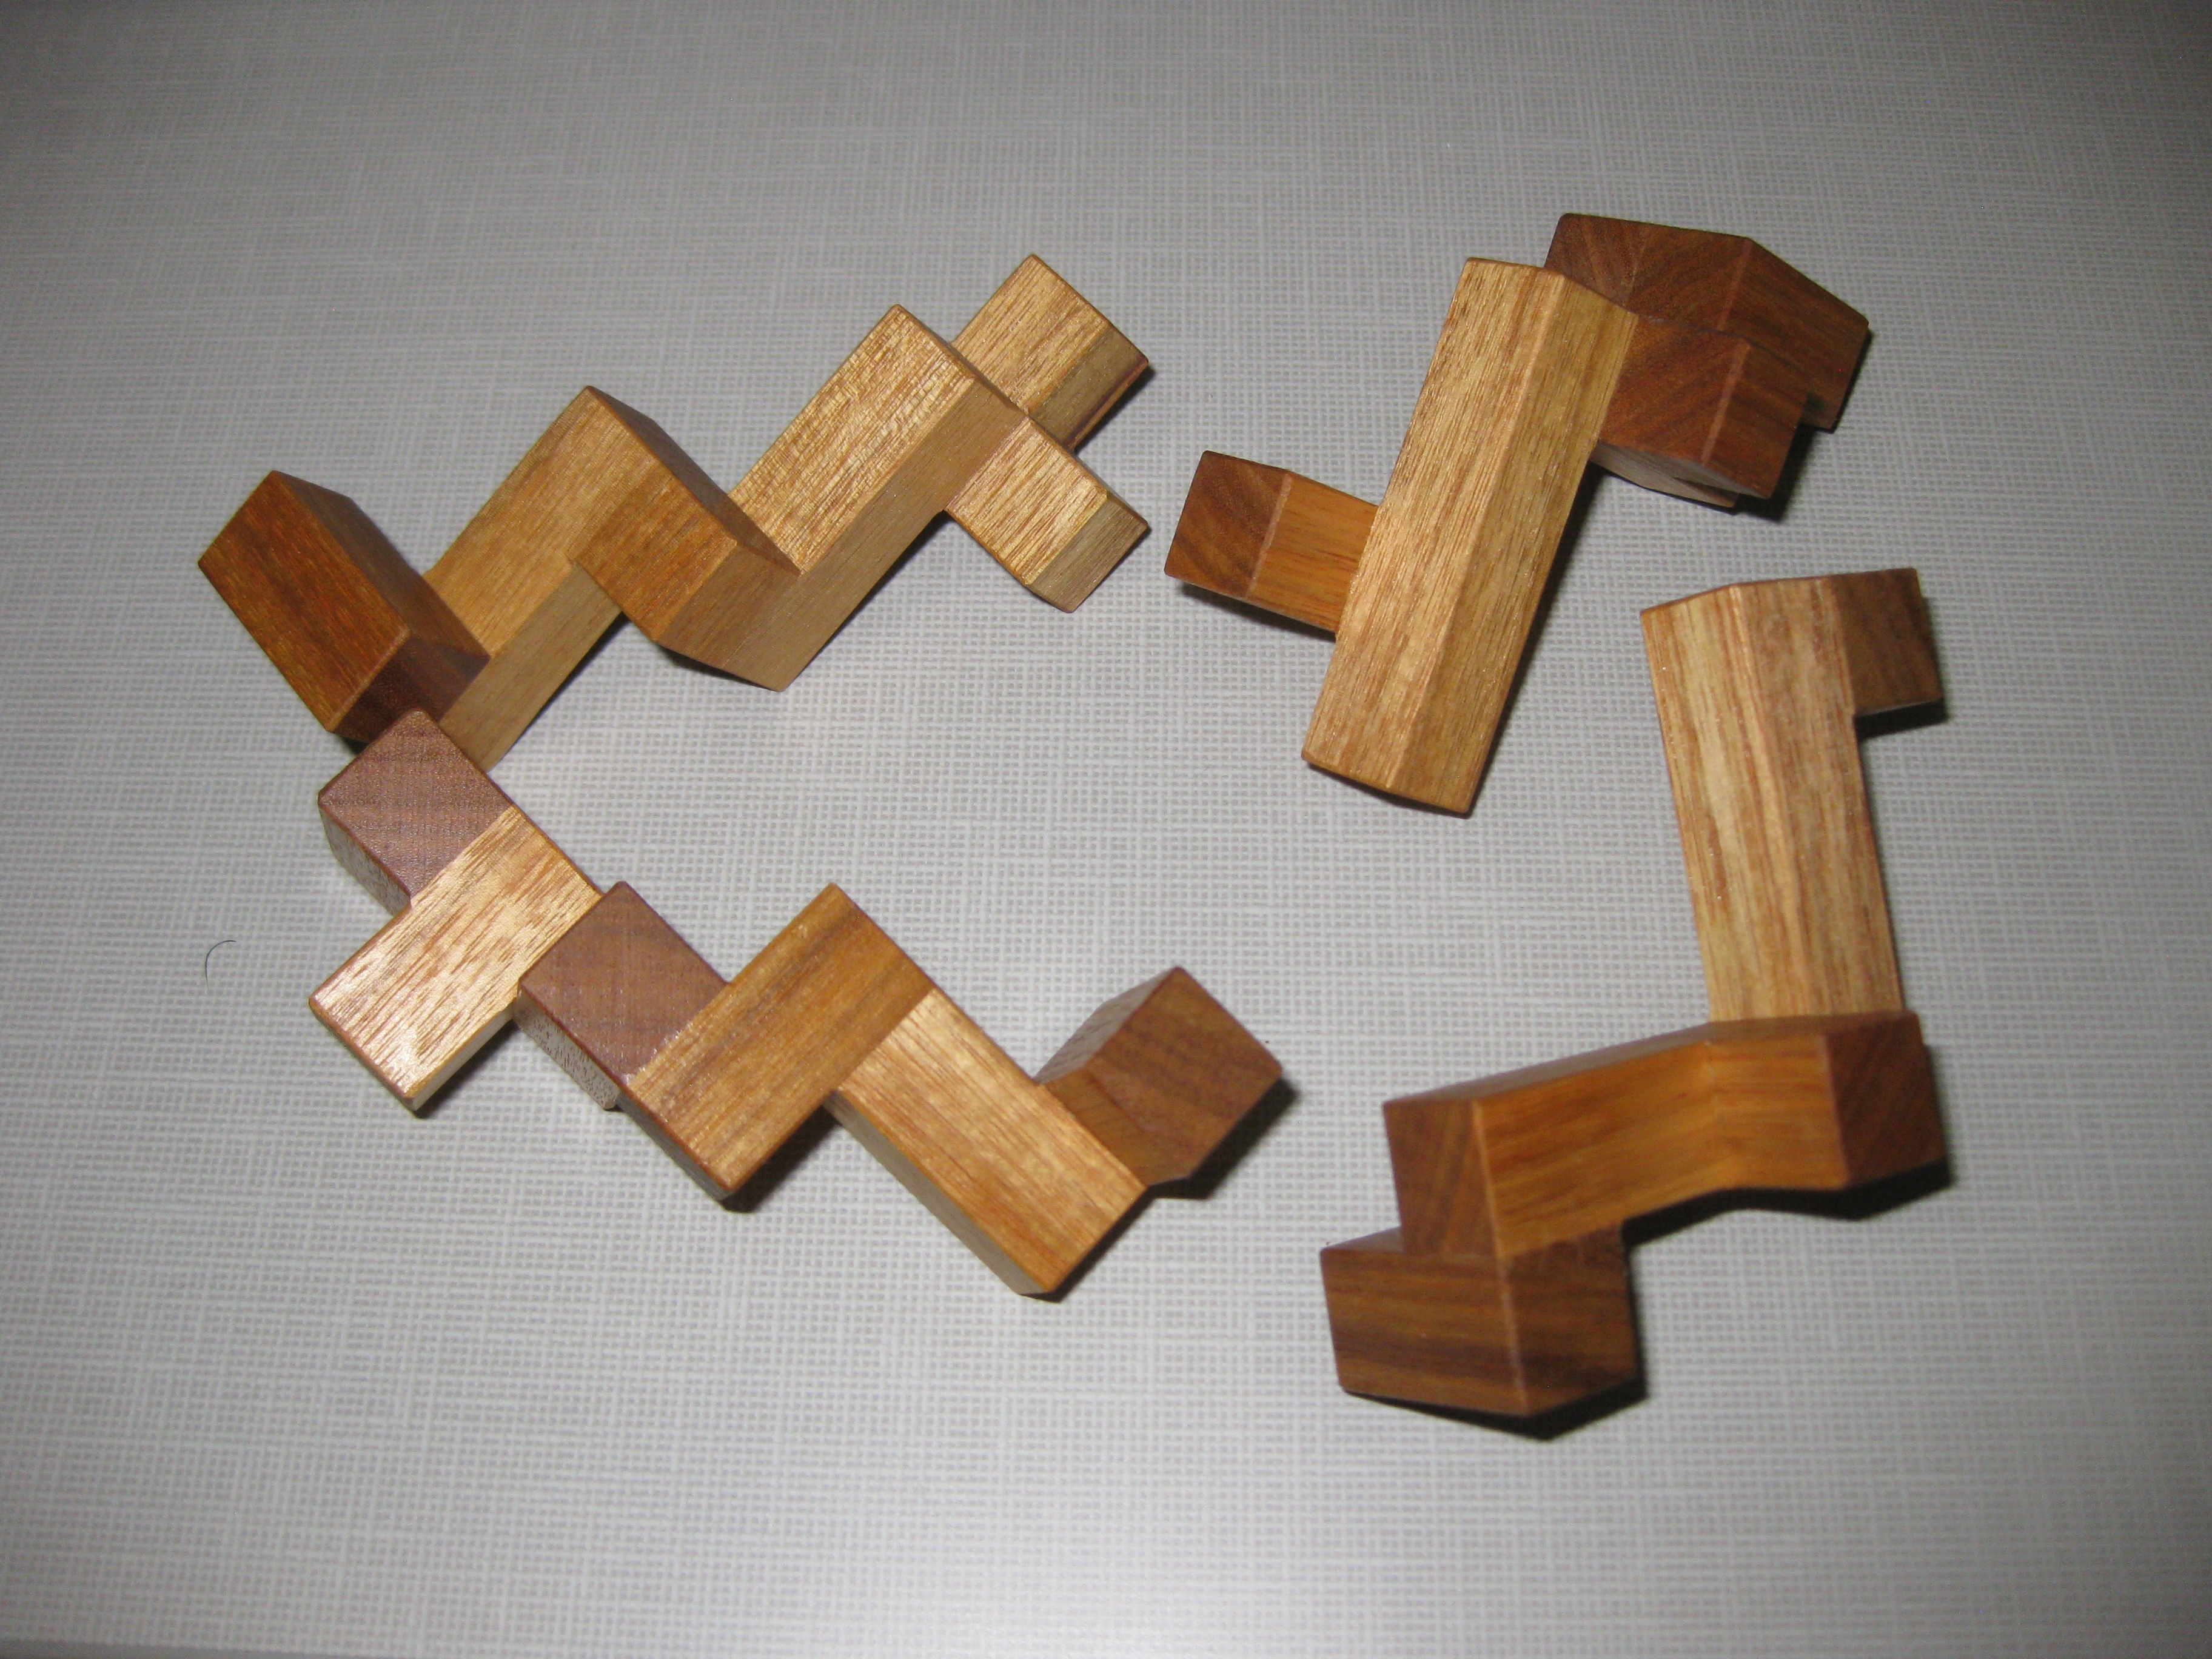
Next up is a great set of two puzzles from designer Andrey Ustjuzhanin. The Impossible 3 Cube Triangle and Impossible 6 Cube Triangle are two fun interlocking solids that should keep you puzzling for a little while (unless you’re Brian Pletcher. Ed). Both made by Tom after he recently got permission they are really good puzzles and after Tom threw down the challenge to solve it as quickly as possible at RPP, I had to pick up a copy. (Sneaky that Tom, giving us a puzzle to play with … no correlation to then buying said puzzle at all here!)

Impossible 3 Cube Triangle

Impossible 3 Cube Triangle

I didn’t manage to solve the 6 Cube version at RPP, and even knowing the solution shape, it still took me a good hour or more to finally solve it. The 3 Cube version is much simpler, with only 3 pieces and certainly makes for a fun puzzle in itself. Each cube is 1″ and both versions stack nicely together as you can see above.

Impossible 6 Cube Triangle

Impossible 6 Cube Triangle

The six Cube version has 4 pieces and is a much tougher challenge. There’s not as many clues as you have with the 3 piece and it really needs you to think out of the box to solve it, or perhaps I should say out of the triangle? The solution to both is nice and leaves you with a nicely interlocked solid shape that won’t fall apart to display it. If Tom has any of these left, I’d move quick as they’re well worth having.

Little Bruce

Little Bruce

Little Bruce by Ken Irvine

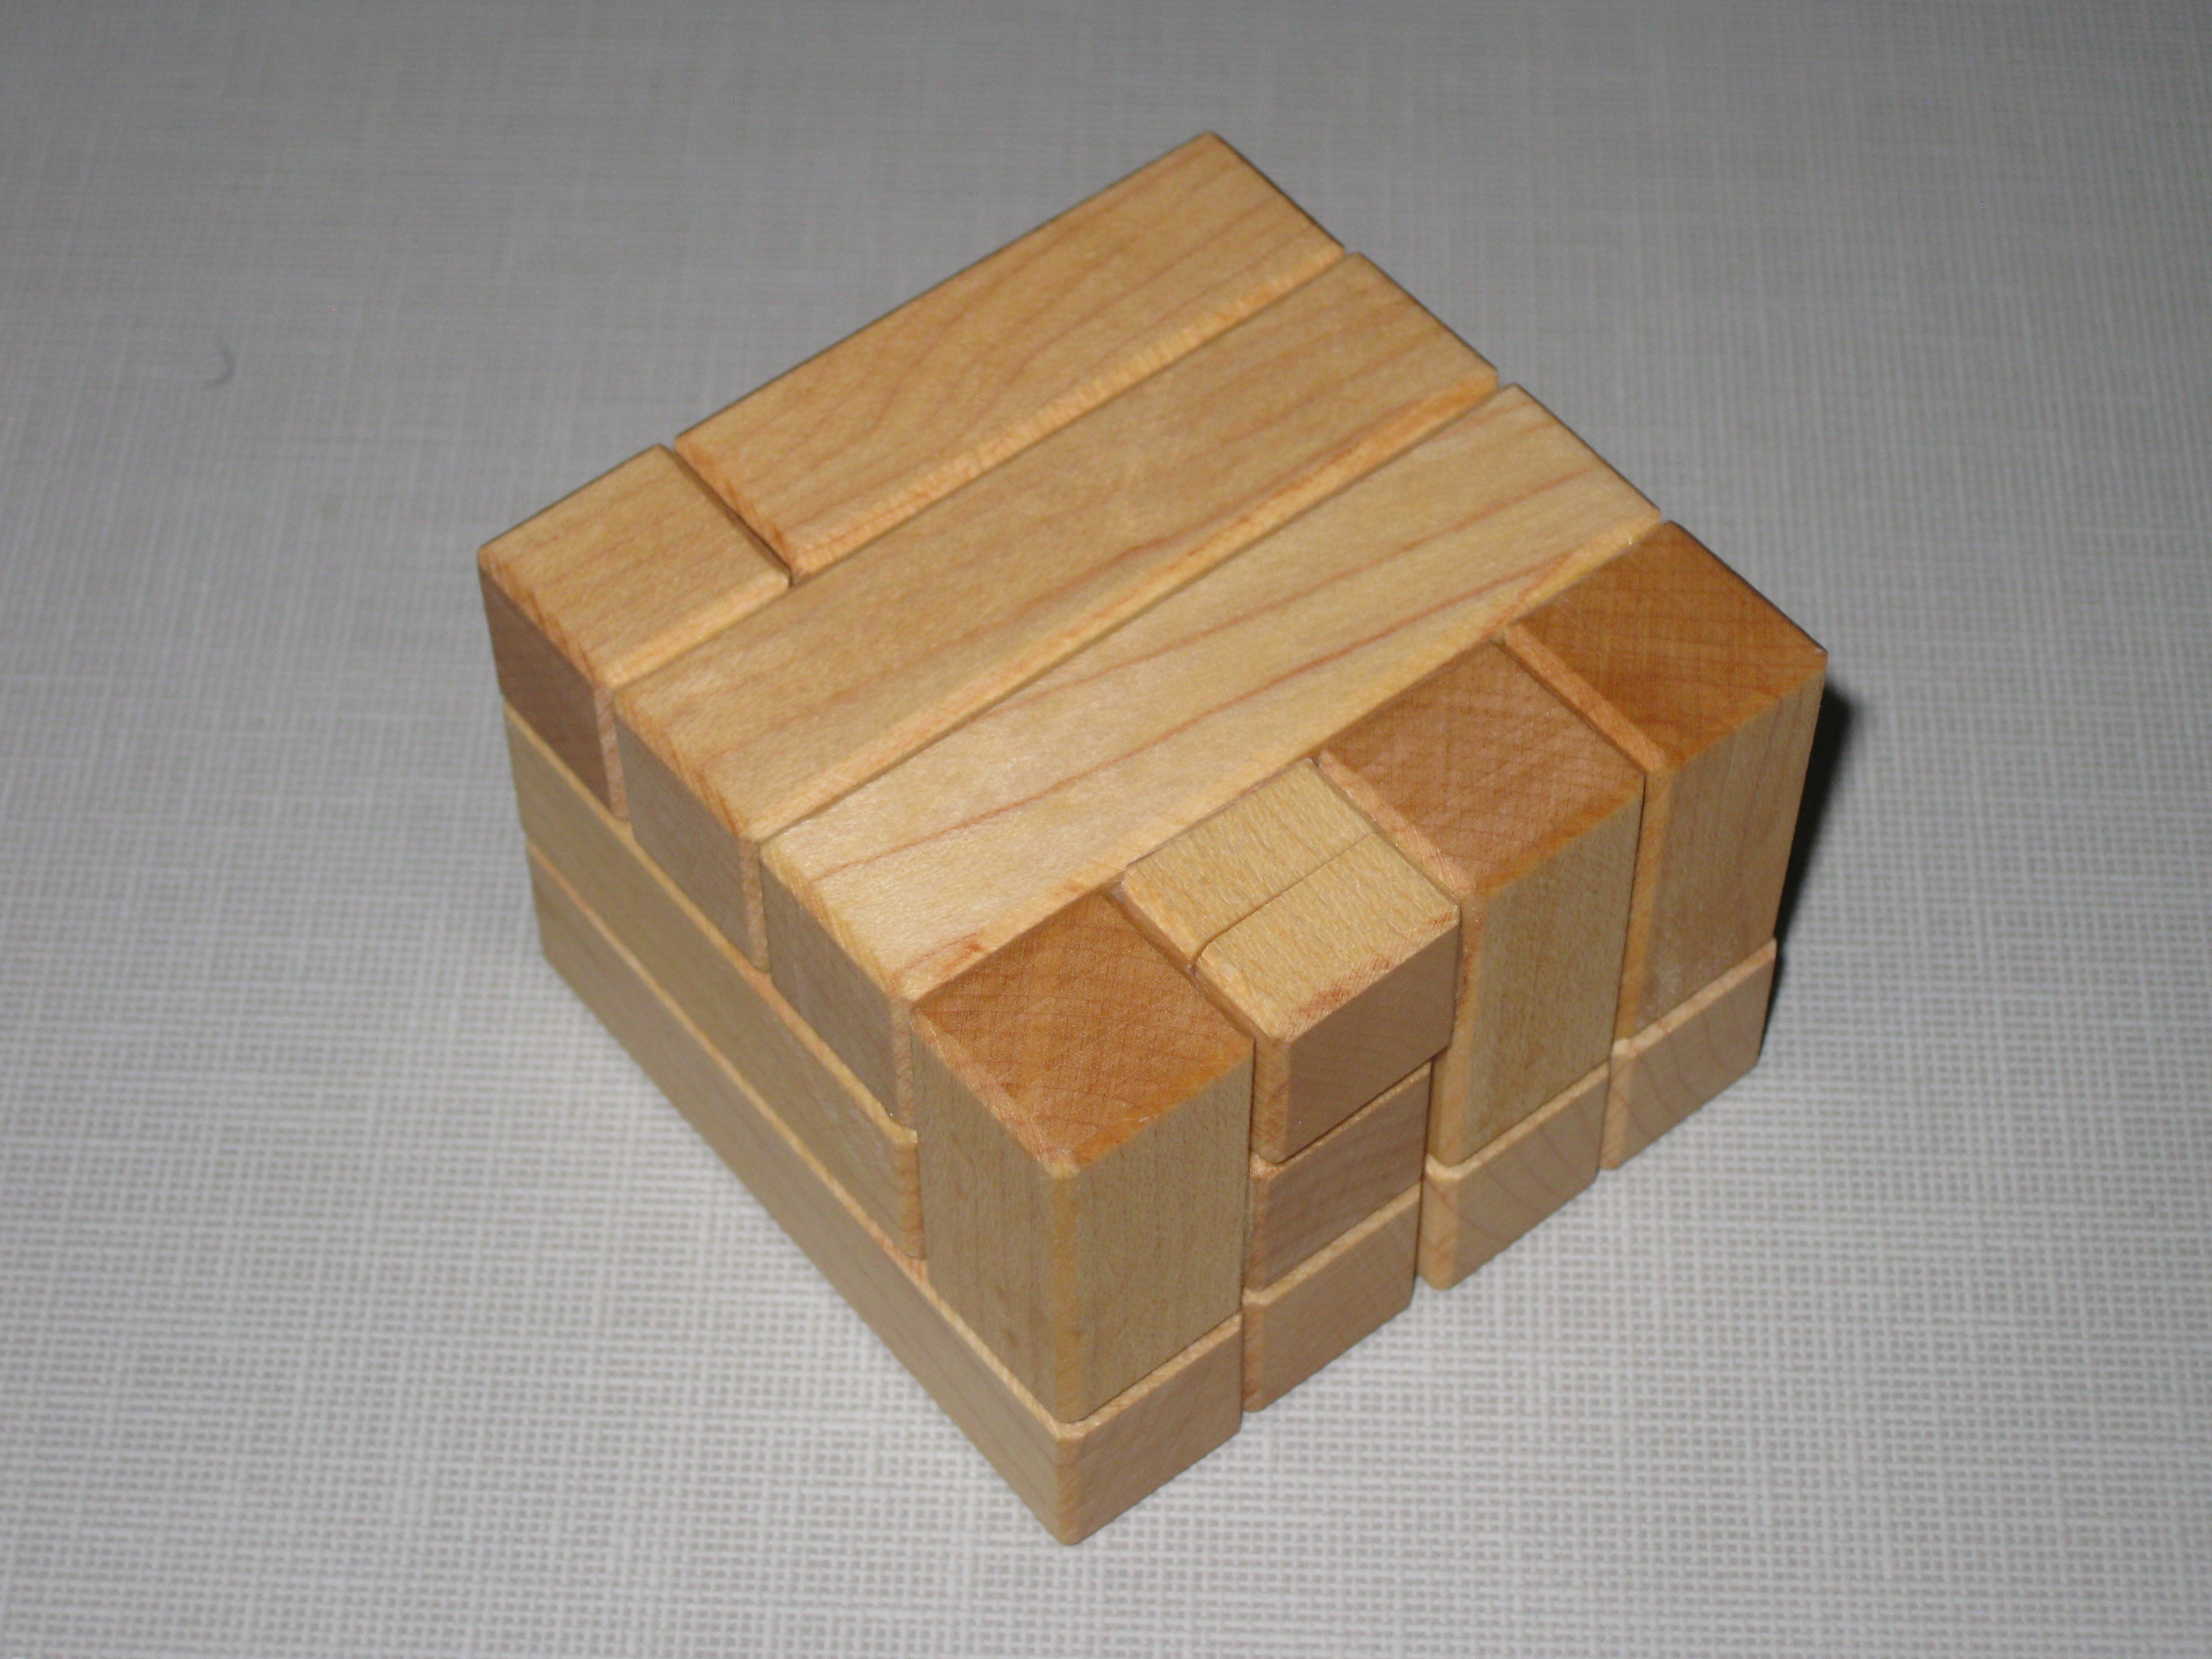
The final puzzle I picked up at RPP was Little Bruce which Ken was kind enough to hand me in four pieces at one point. I was fortunate enough to be given a copy of “Little Kenny” last year, and this is a suitable follow up to that puzzle.

Little Bruce is made from Maple, and measures in a t 2 1/2″ x 2 1/2″ x 1 3/4″. It’s really nicely made and finished, and Ken has signed one of the pieces.

Little Bruce

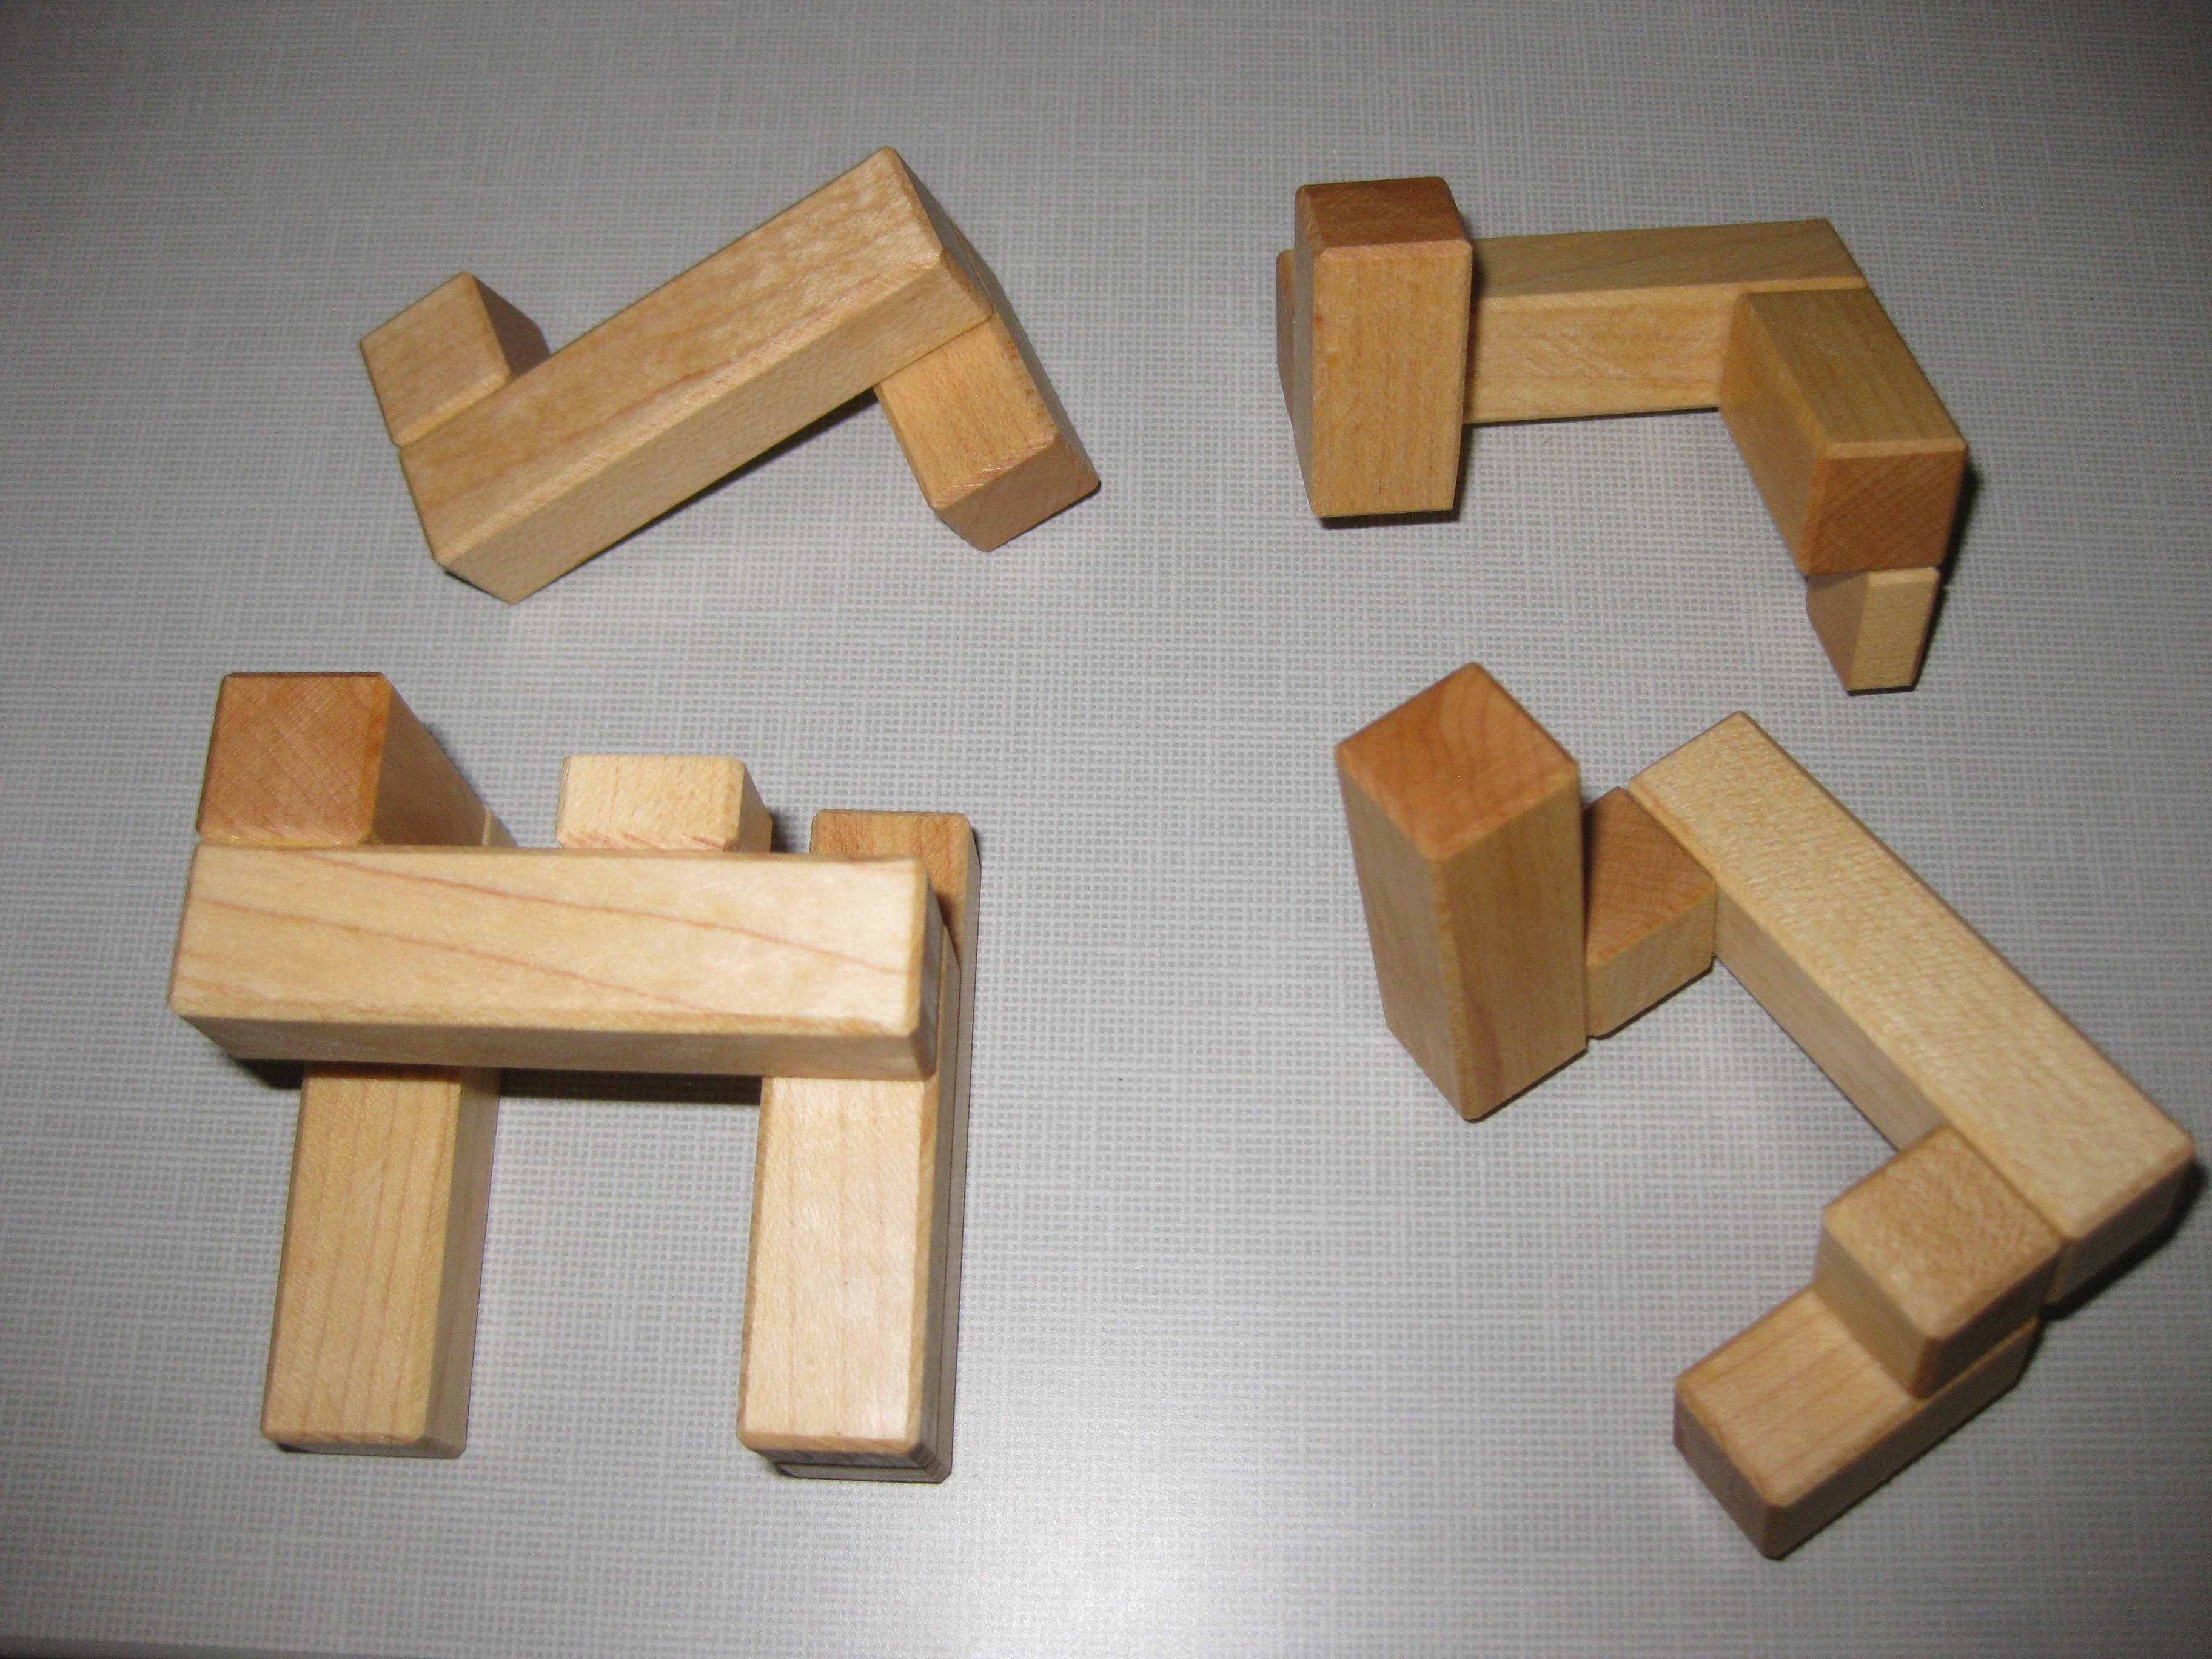
Little Bruce in pieces

I may have sworn at Ken for his use of “Half Cubes” in his puzzles. For some reason those half cubes seem to give me all sorts of problems. Where you’d normally be able to make a move that cube just gets in the way. Ken just laughed at me and said “It’s a clue”. He’s not wrong, but it is equally an obstacle to solving the puzzle. As with all of Ken’s puzzles I’ve played with the solution is delightful, with more than enough clues that mere mortals can solve it, and even enjoy solving it. There’s a couple of Aha moments along the way, and the twist to the puzzle is great.

Thanks again Ken for allowing me to add another Ken original to my collection. I’m honoured.

Well that’s all for this review, I hope you enjoyed it, and I look forward to writing a lot more in the near future.
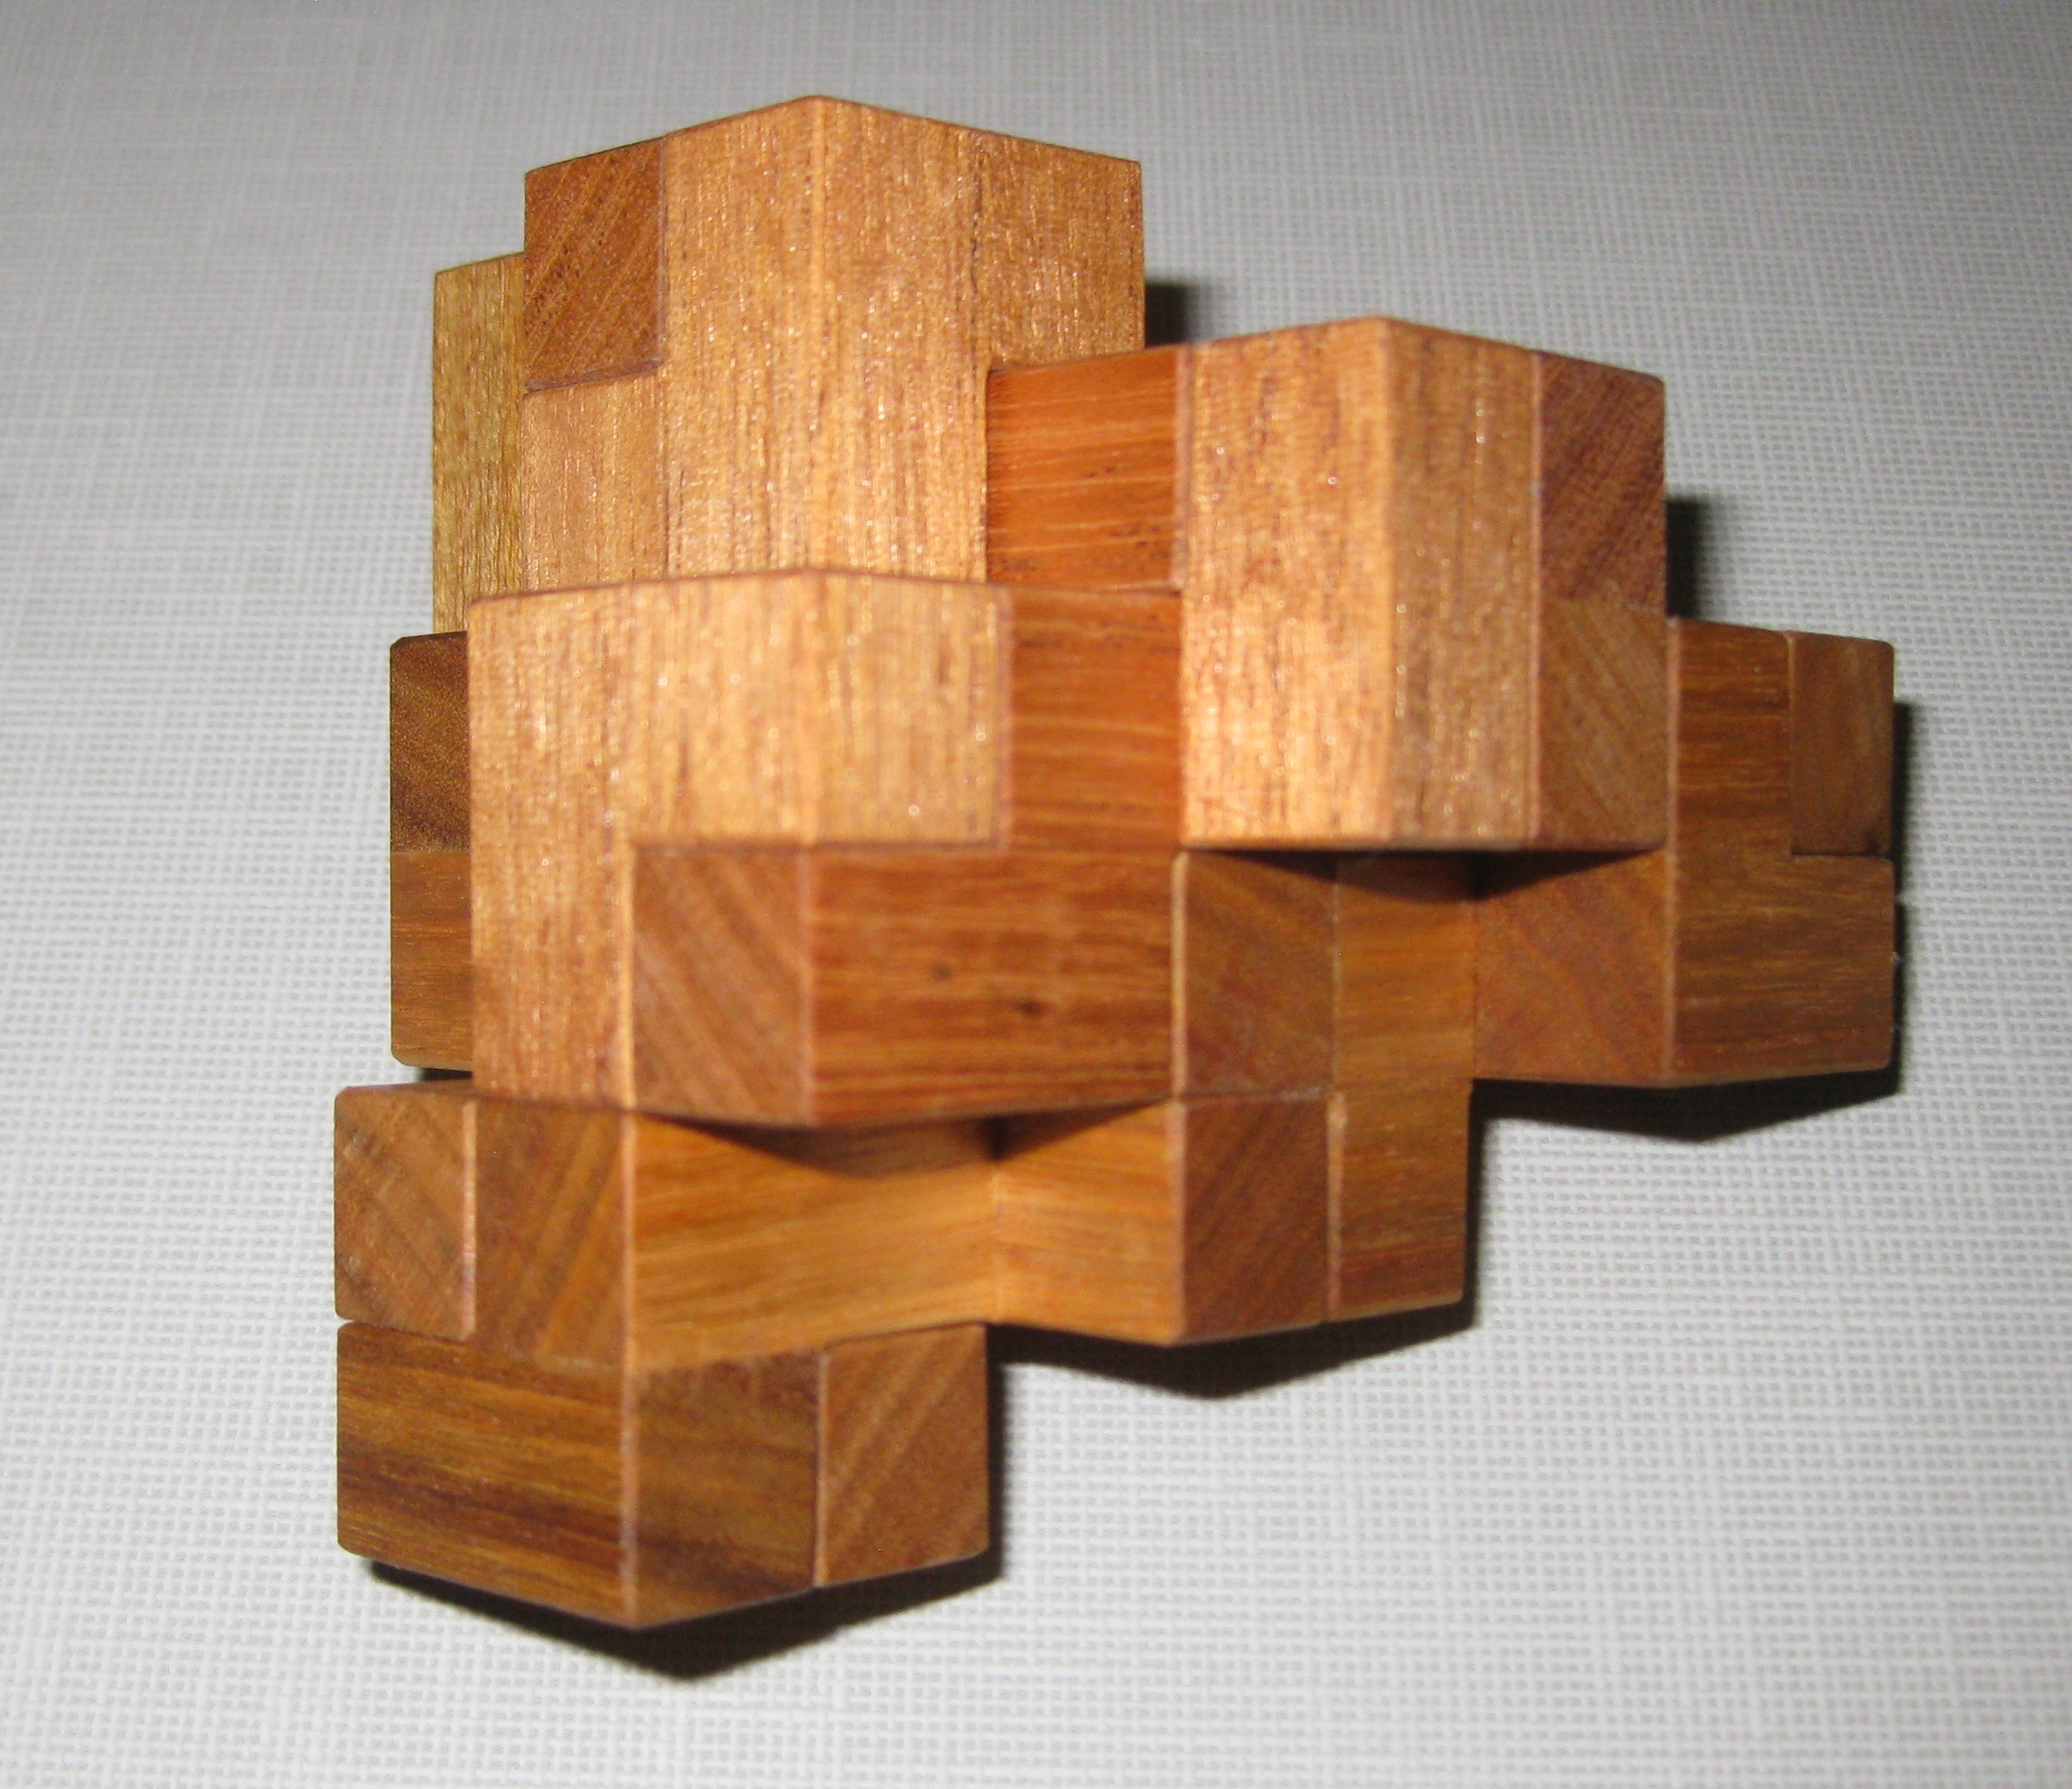
2 Halves Cage 4 A

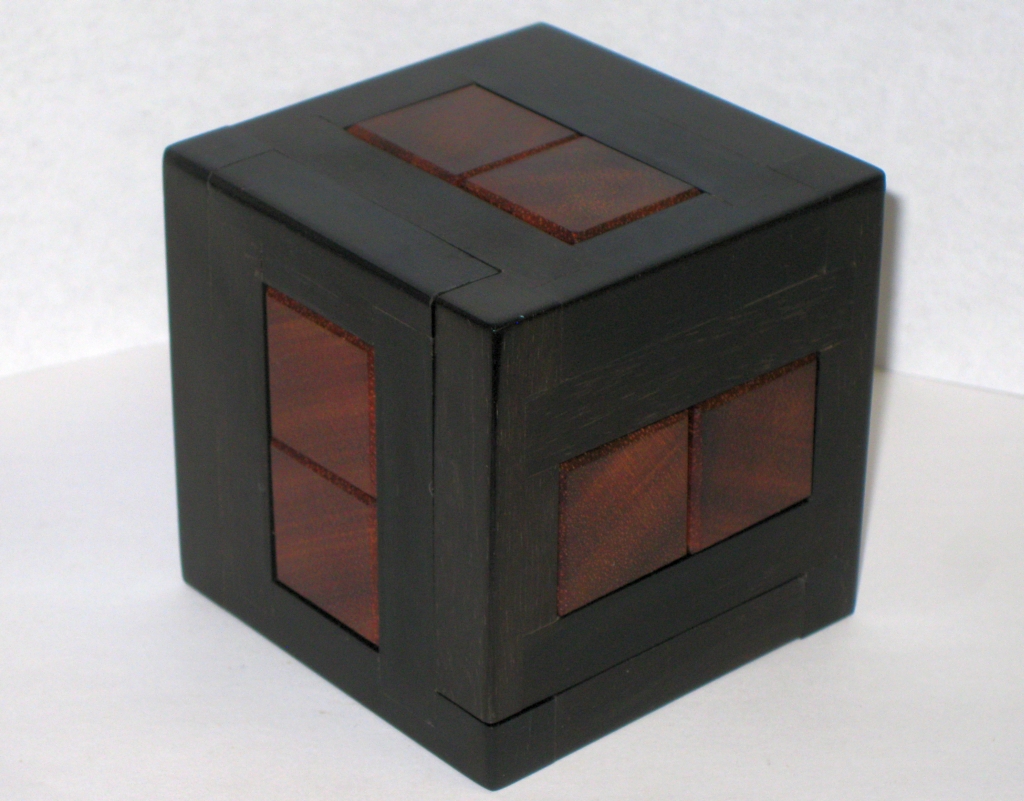
Well that’s a bit of a mouthful isn’t it! 2 Halves is a burr puzzle designed by Gregory Benedetti, with my copy being made by the very talented Maurice Vigouroux. Back in November 2013, this came up for sale on Puzzle Paradise with a couple of options for woods used. Seeing the Ebony cage and Bloodwood pieces, I didn’t hesitate, and bought it there and then. I certainly wasn’t disappointed.

2 Halves Caged 4 A by Gregory Benedetti

2 Halves Caged 4 A by Gregory Benedetti

Despite not being particularly good with Burr puzzles, this doesn’t look like a burr, and the jet black Ebony surrounding the deep red of the Bloodwood makes it look imposing. That’s probably a good thing, as this is not a simple puzzle. It’s not a small puzzle either. Each cubie is 7/16″, making it 3″ x 3″ x 3″ overall, meaning that Maurice was working with 1″ thick stock to make the burr pieces. It’s a great size and manipulating the pieces inside the frame is easy given the size of the pieces. It’s heavy too. Ebony is a very dense heavy wood, so this puzzle has a really solid heft to it. The fit and finish are excellent with the Ebony being polished to a reflective shine. The pieces all slide past each other perfectly, and the tolerances are spot on.

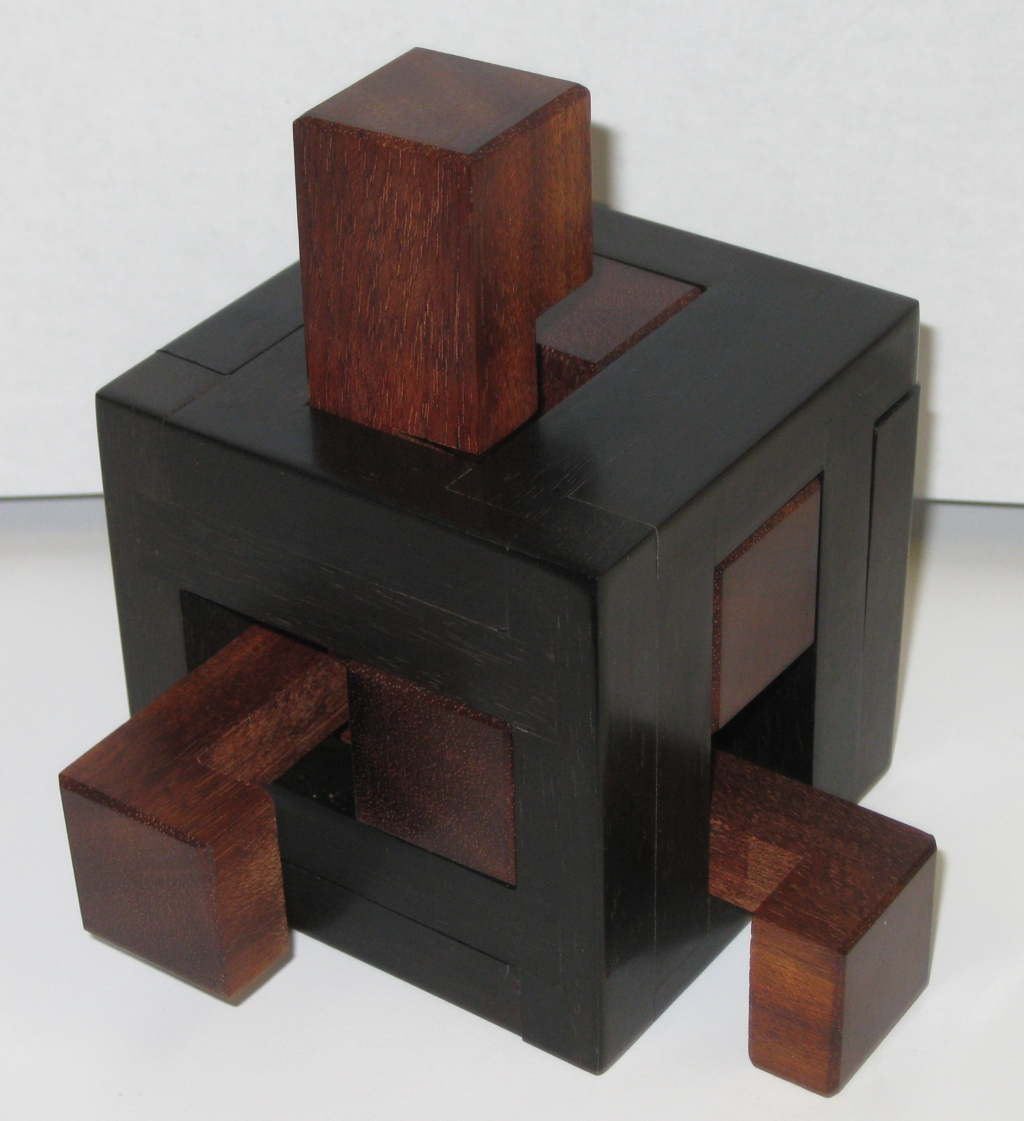
The first night I spent around 40 minutes playing around with the puzzle and managed to create some space in the cage to move the burr pieces around a little, but I hit a dead-end and couldn’t see a way to progress further. There seemed to be a huge amount of space in the puzzle, but the cage was still firmly held in place, and the was no way I was sliding any of the burr pieces out of the cage.

Partially solved with pieces sticking out like a Hedgehog

Partially solved with pieces sticking out like a Hedgehog

This carried on for a few days where I’d spend 20 minutes or so each night trying to make progress and really getting nowhere. As often happens, things got busy, and the puzzle was left on a shelf for a while with pieces sticking out of the sides, looking a little like a hedgehog. Recently I had a little free time, and picked this up again, since it was sitting looking at me and I felt bad that I’d not finished it.

After about an hour, I finally managed to shuffle the burr pieces into the right locations to be able to remove one half of the cage! Progress. It was quite the achievement to have made it this far, and spurred on by my success, I carried on to remove the rest of the pieces. I thought I was past the difficult part and the remainder was going to be easy. After all, I now had a lot of space, and removing the remaining pieces should be easy!

Isn’t it great when you’re totally wrong. The puzzle is a level 17.14.9.5.3 puzzle. So removing the first half of the cage, I’d only finished the first 17 steps. I had another 14 to remove the first burr piece, and then another 9 to remove the second. This is one tough puzzle. I spent another 15 minutes figuring out how to move the pieces around and take that first burr piece out of the remaining cage half, but I finally got there. Let’s just say I didn’t do it in just 14 moves!

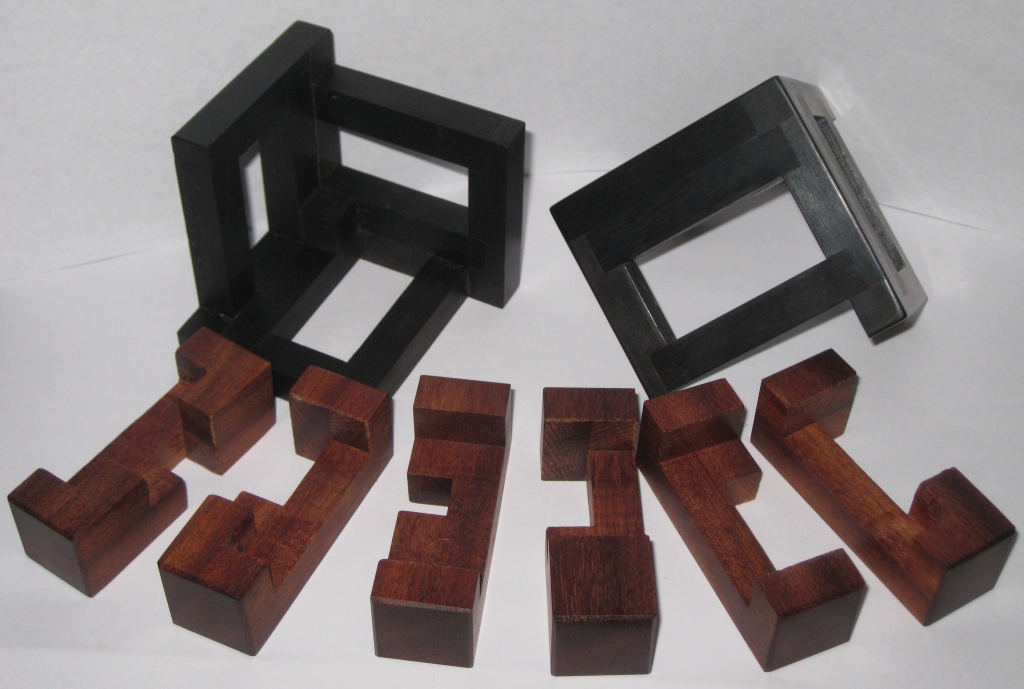
Six burr pieces, plus the two cage halves

Six burr pieces, plus the two cage halves

As far as value for money goes, this has been a great puzzle. I’ve had a lot of puzzling time out of it, and I have to admit that I really enjoyed it. This is a little worrying for me, as I’ve never really found much fun in playing with Burr’s. Maybe I’ve found something else that I do enjoy after all.

The 2 Halves is certainly a different style of Burr, with the cage interacting with the burr pieces in such a way that it really adds an extra challenge. The cage itself blocks your view of the voids in the burr, making it much more difficult to see how to progress, and it also adds some structure, keeping the pieces in the right locations without needing an extra hand to prevent them from falling or rotating into a position which makes it difficult to move the next piece.

Now, I freely admit that I’m not good enough with burr’s to be able to re-assemble this one on my own. It was enough of a challenge to just take it apart. Not to mention that I didn’t pay any attention to how the pieces came out, or the order, so I didn’t even have a reference to how to put them back.

There’s only one possible assembly out of 1,844 possible orientations of the pieces in the final shape, so it could take a very long time to put this back together with trial and error. I know when I’m beaten, and turned to the trusty Burr Tools to help. Even there it took me three attempts to get the pieces entered correctly for Burr Tools to be able to solve the puzzle. I have no idea how Gregory designed this, but I have to take my hat off to him. It’s a great design, and I can’t recommend it enough, even if you’re like me, and are not a fan of Burr’s normally.

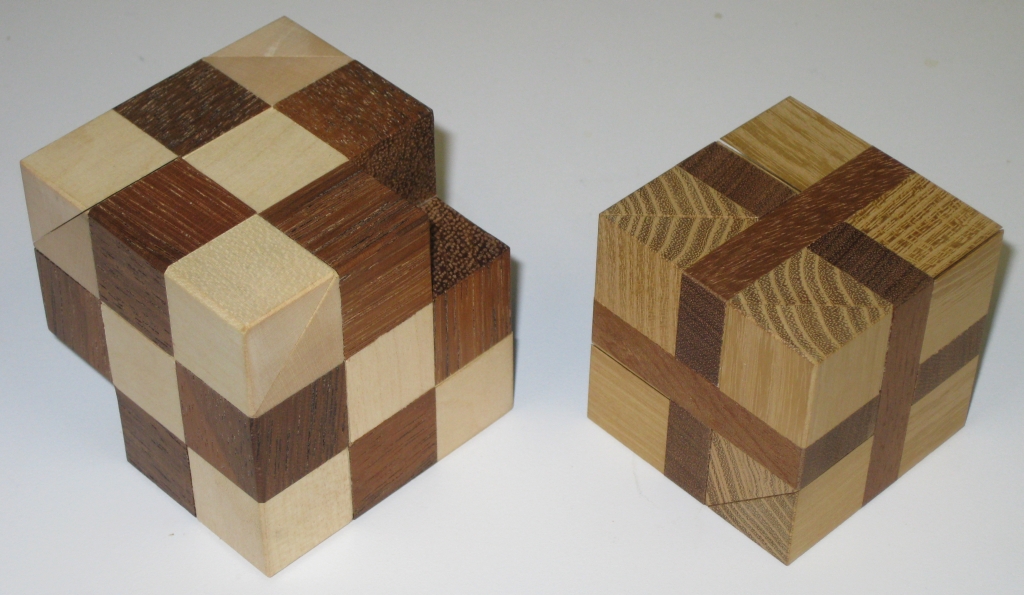
Six Piece Cube & Little Slide Plank by Gregory Benedetti

When it comes to co-ordinate motion puzzles, the master is generally regarded as Vinco, however Gregory Benedetti has been doing a lot of work in creating clever dissections which require co-ordinate motion. I was lucky enough to pick up a couple of his puzzles last year from Bernhard over at Puzzlewood. Seems that I’ve had them long enough that I should really write about them!

Two Co-ordinate motion puzzles from Gregory Benedetti

Two Co-ordinate motion puzzles from Gregory Benedetti

Gregory himself admits that he was influenced by Vinco, and his work on co-ordinate motion puzzles, which gave him the push to try to create some co-ordinate motion puzzles himself. There’s a great interview by fellow blogger Saul on his blog Seeking Ariadnes Thread with Gregory if you’d like to read about Gregory’s thoughts. It’s a great read and I highly recommend it.


Little Slide Plank

Little Slide Plank by Gregory Benedetti

Little Slide Plank by Gregory Benedetti

The first, and smaller of the two puzzles is “Little Slide Plank” which is about as minimal as you can get from a co-ordinate motion puzzle. This three piece, 2×2 cube with one small void in the centre is a pretty elegant puzzle. It’s only 2″ cubed, made with a contrasting wood for the planks. If I were to guess, I’d say Ash for the main pieces, and Mahogany for the planks.

Little Slide Plank opening

Little Slide Plank opening

While many people shy away from co-ordinate motion puzzles due to the challenge of reassembling them, this is great for any level of puzzler. The unique dissection leaves you with some very interestingly shaped pieces, and while it’s not difficult to take apart or re-assemble, it has that fiddle factor that makes a great puzzle. You just want to pick it up and play with it.

Little Slide Plank pieces

Little Slide Plank pieces

The pieces themselves are interesting, and all unique making this a very pleasing design. As I mentioned, it’s not difficult to find the correct orientation to put the pieces back together, and unlike many co-ordinate motion puzzles, you don’t need a third (or fourth) hand to get it together, nor the dexterity and precise positioning that is needed from some other puzzles in this category. Overall, I highly recommend it


6 Piece Cube

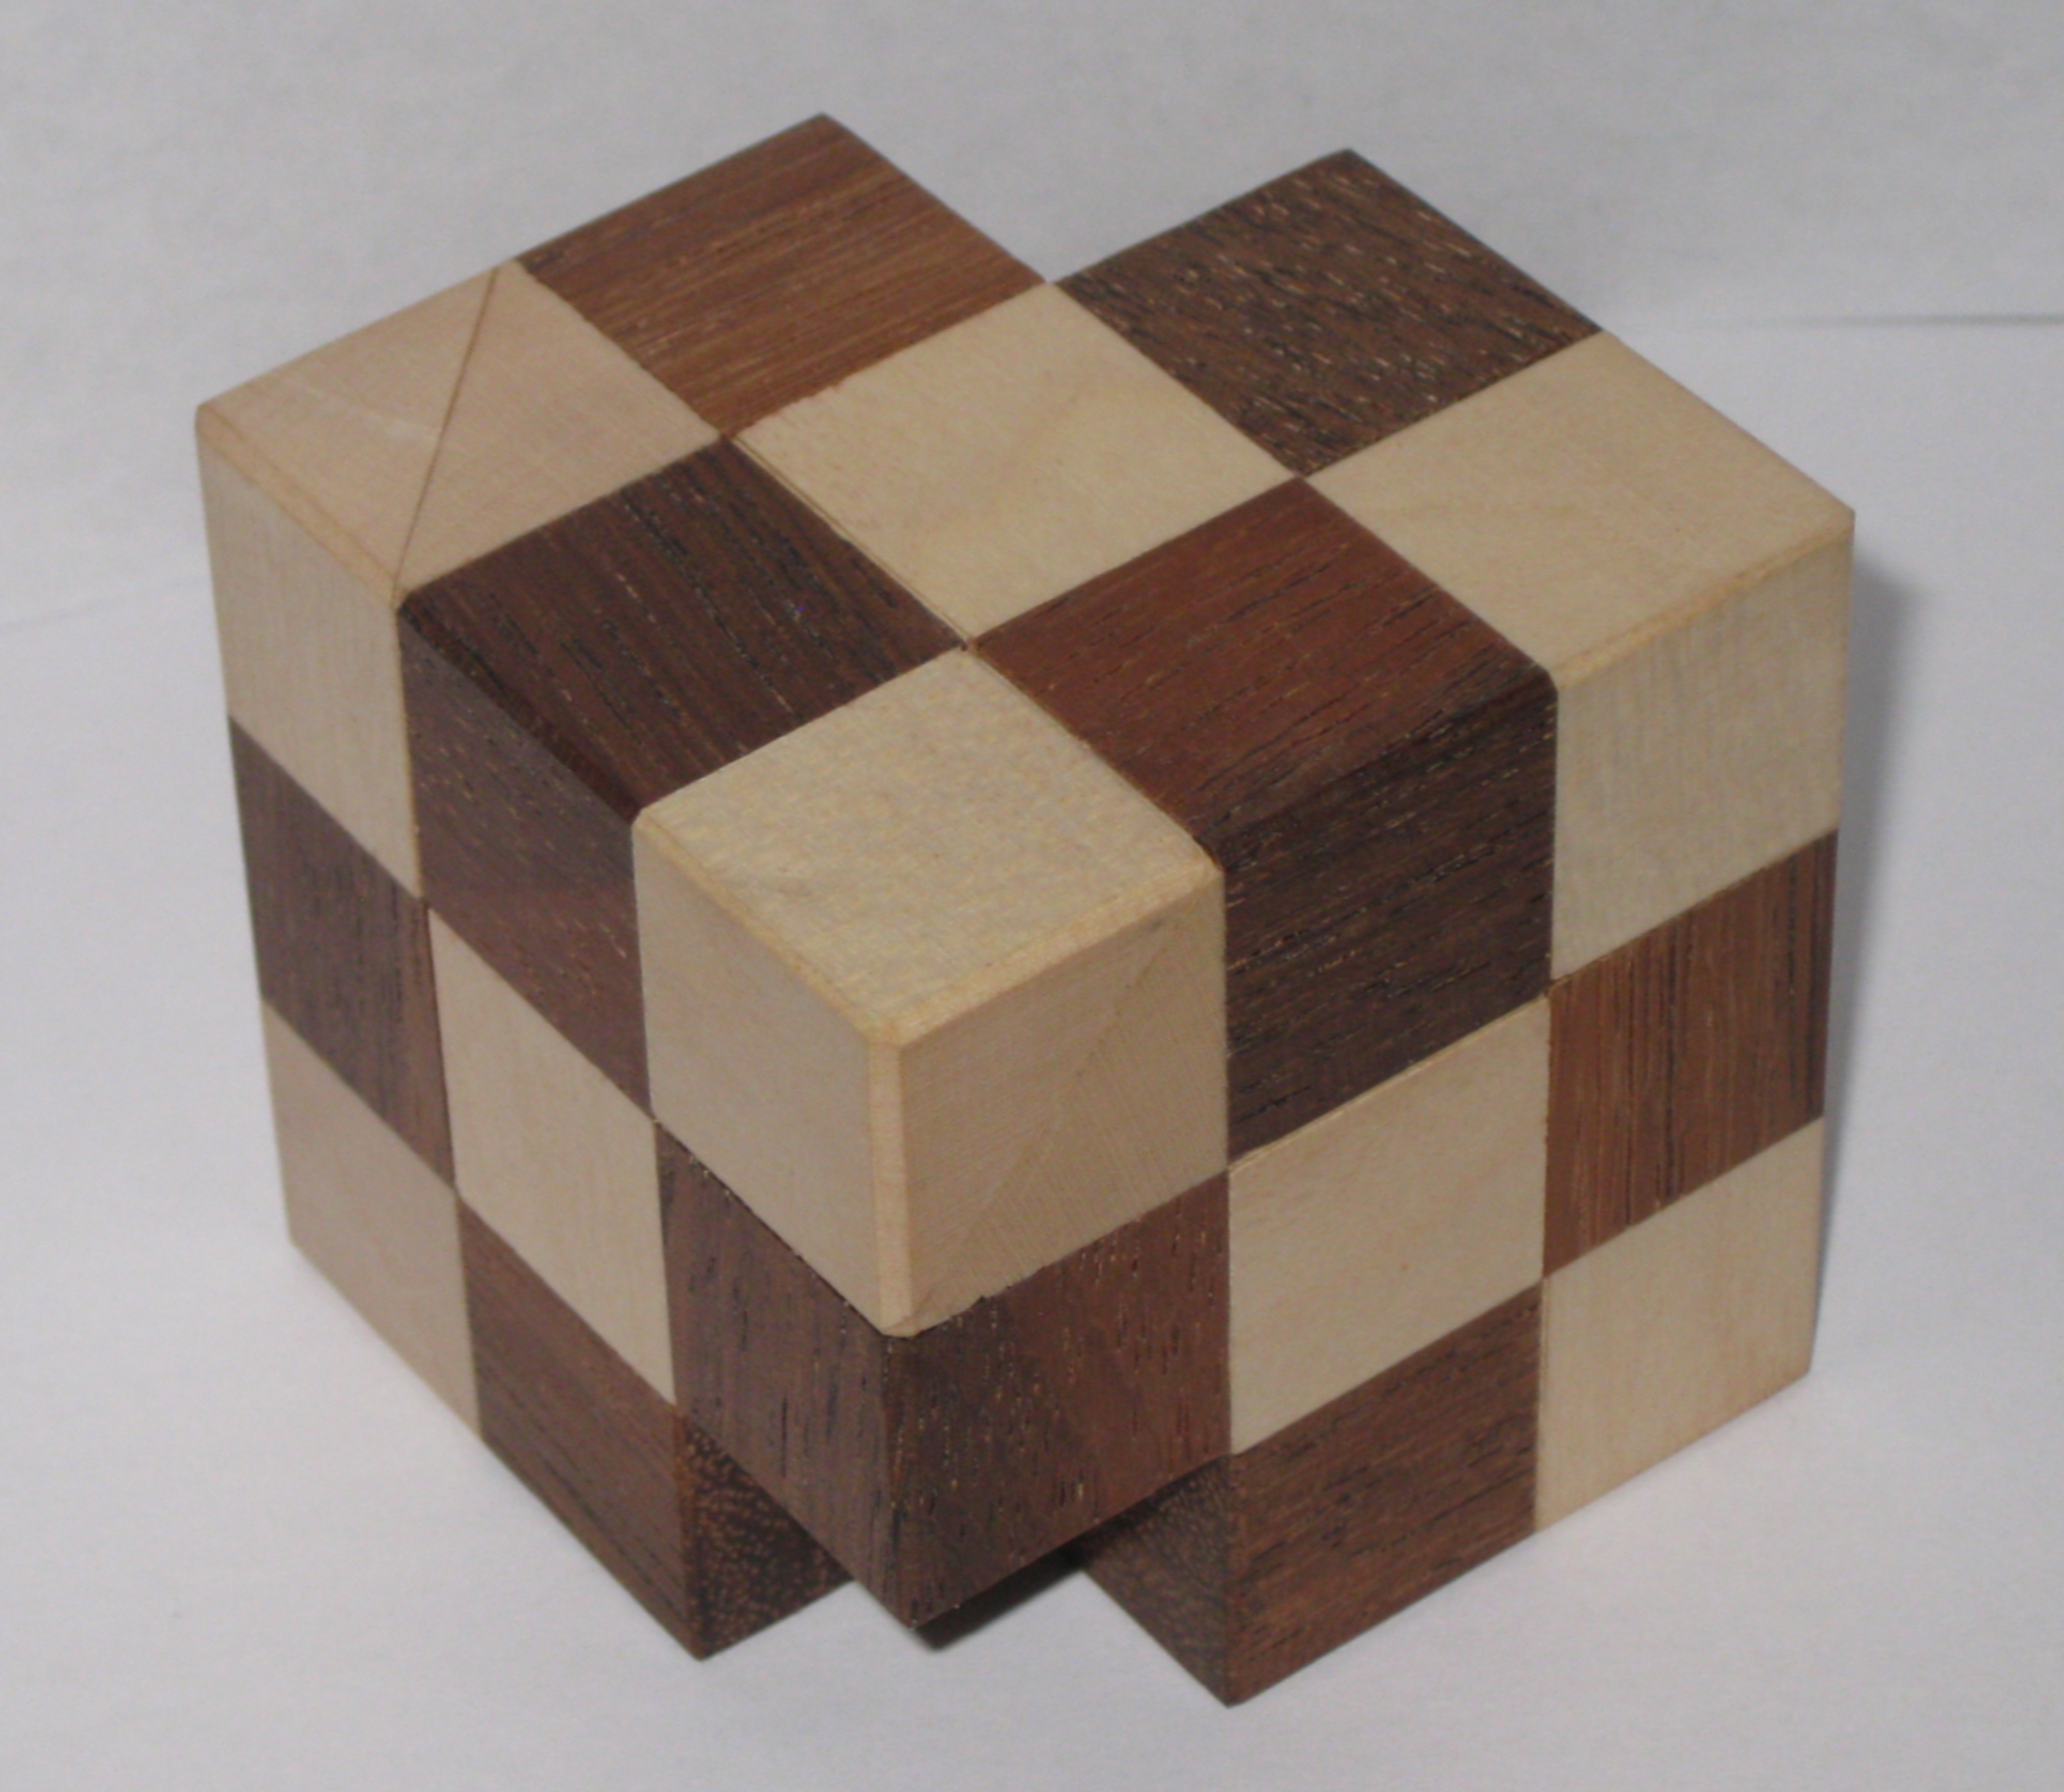
6 Piece Cube from Gregory Benedetti

6 Piece Cube from Gregory Benedetti

The other design from Gregory is his “6 Piece Cube”. Interestingly, this cube is missing a couple of cubies, meaning it’s not really a cube, but I’ll not fault the design name based on that. Those missing cubies are very useful! This is the slightly larger of the two puzzles, at just under 2.5″ cubed made from walnut and Maple, the contrast of the checkerboard appearance is a good look.

Being a six piece puzzle, the difficulty in this one does go up a notch. Finding the correct grip on the puzzle to allow the pieces to start sliding past each other can be challenging until you know how to hold the puzzle, as often you’ll find a finger is blocking the motion you need. Remember I said those missing cubies were useful?

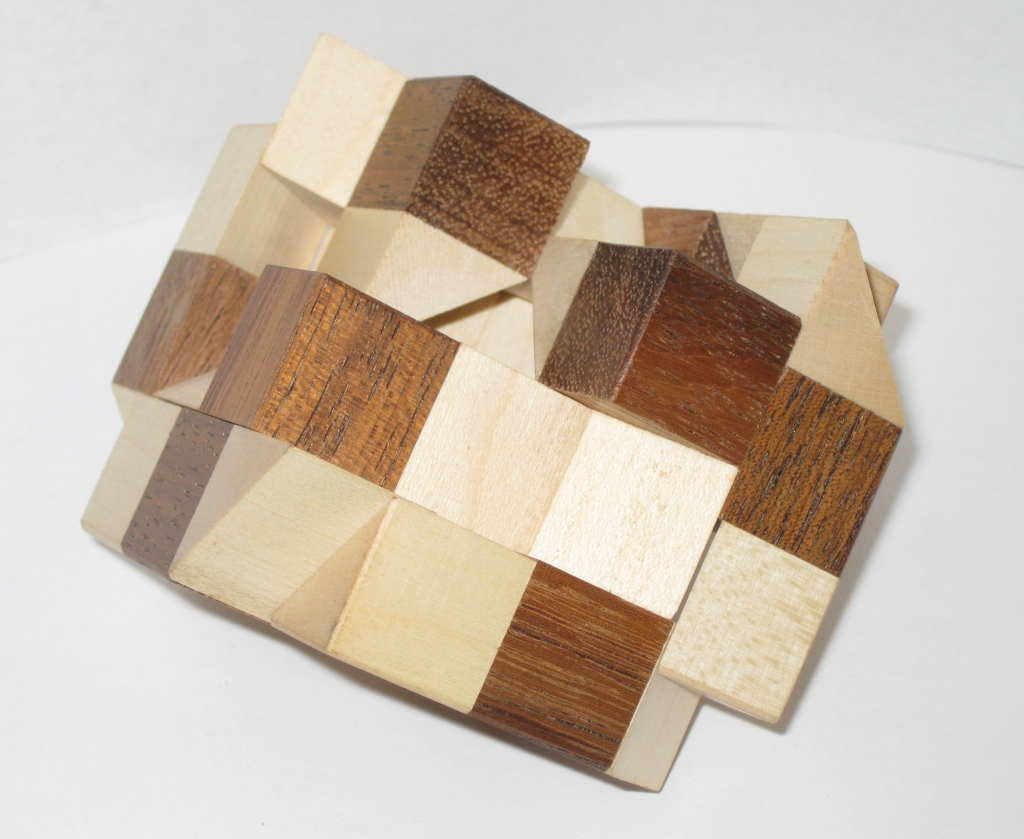
6 Piece Cube opening

6 Piece Cube opening

Once you find the correct axis, the pieces will side past each other, creating some interesting triangular geometry in the voids between pieces. As with any other co-ordinate motion, the puzzle expands in size, right up tot the point where it falls apart in your lap. My copy is very well made, with excellent tolerances. The puzzle is tight as it expands, allowing the pieces to hold onto each other until the very last fibers before they crumble into a pile of six pieces.

6 Piece Cube pieces

6 Piece Cube pieces

The pieces in this puzzle are made from two sets of congruent pieces. It’s not too hard to see how the pieces go back together, however with six pieces, it takes a little longer than it does with the first puzzle. Then the real challenge starts. Once you have found the correct orientation, getting all the pieces back together is far more challenging. The puzzle needs to be expanded to near collapse to allow a piece to be inserted, and the easiest way I found was to add one piece at a time … so I had to do this more than once, and try not to mishandle a piece and put myself right back to the start of the assembly.

It’s a much more challenging puzzle, but has a great motion as it comes apart, and is achievable by most people. An experienced puzzler should have no problems, and will enjoy the interesting geometry in the puzzle. I do hope Gregory continues his exploration of the co-ordinate motions, as these two puzzles are a great start!

Triskele

It’s been a while since I managed to sit down and write anything new. Not that I don’t have lots to write about, just seems that with a wedding coming up, and things being rather busy with the day job, I’ve not had much time. Anyway, that said, here’s a nice Karakuri box to give you something to read about.
525px
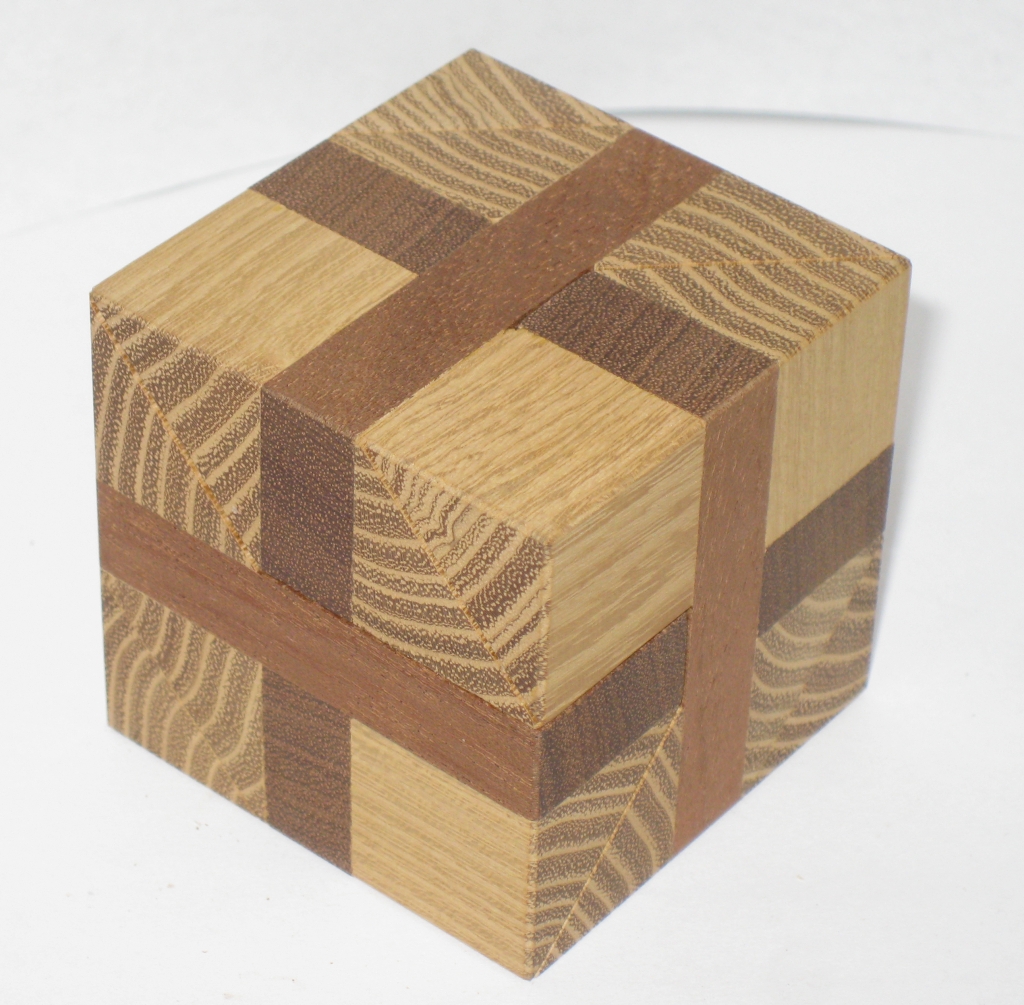
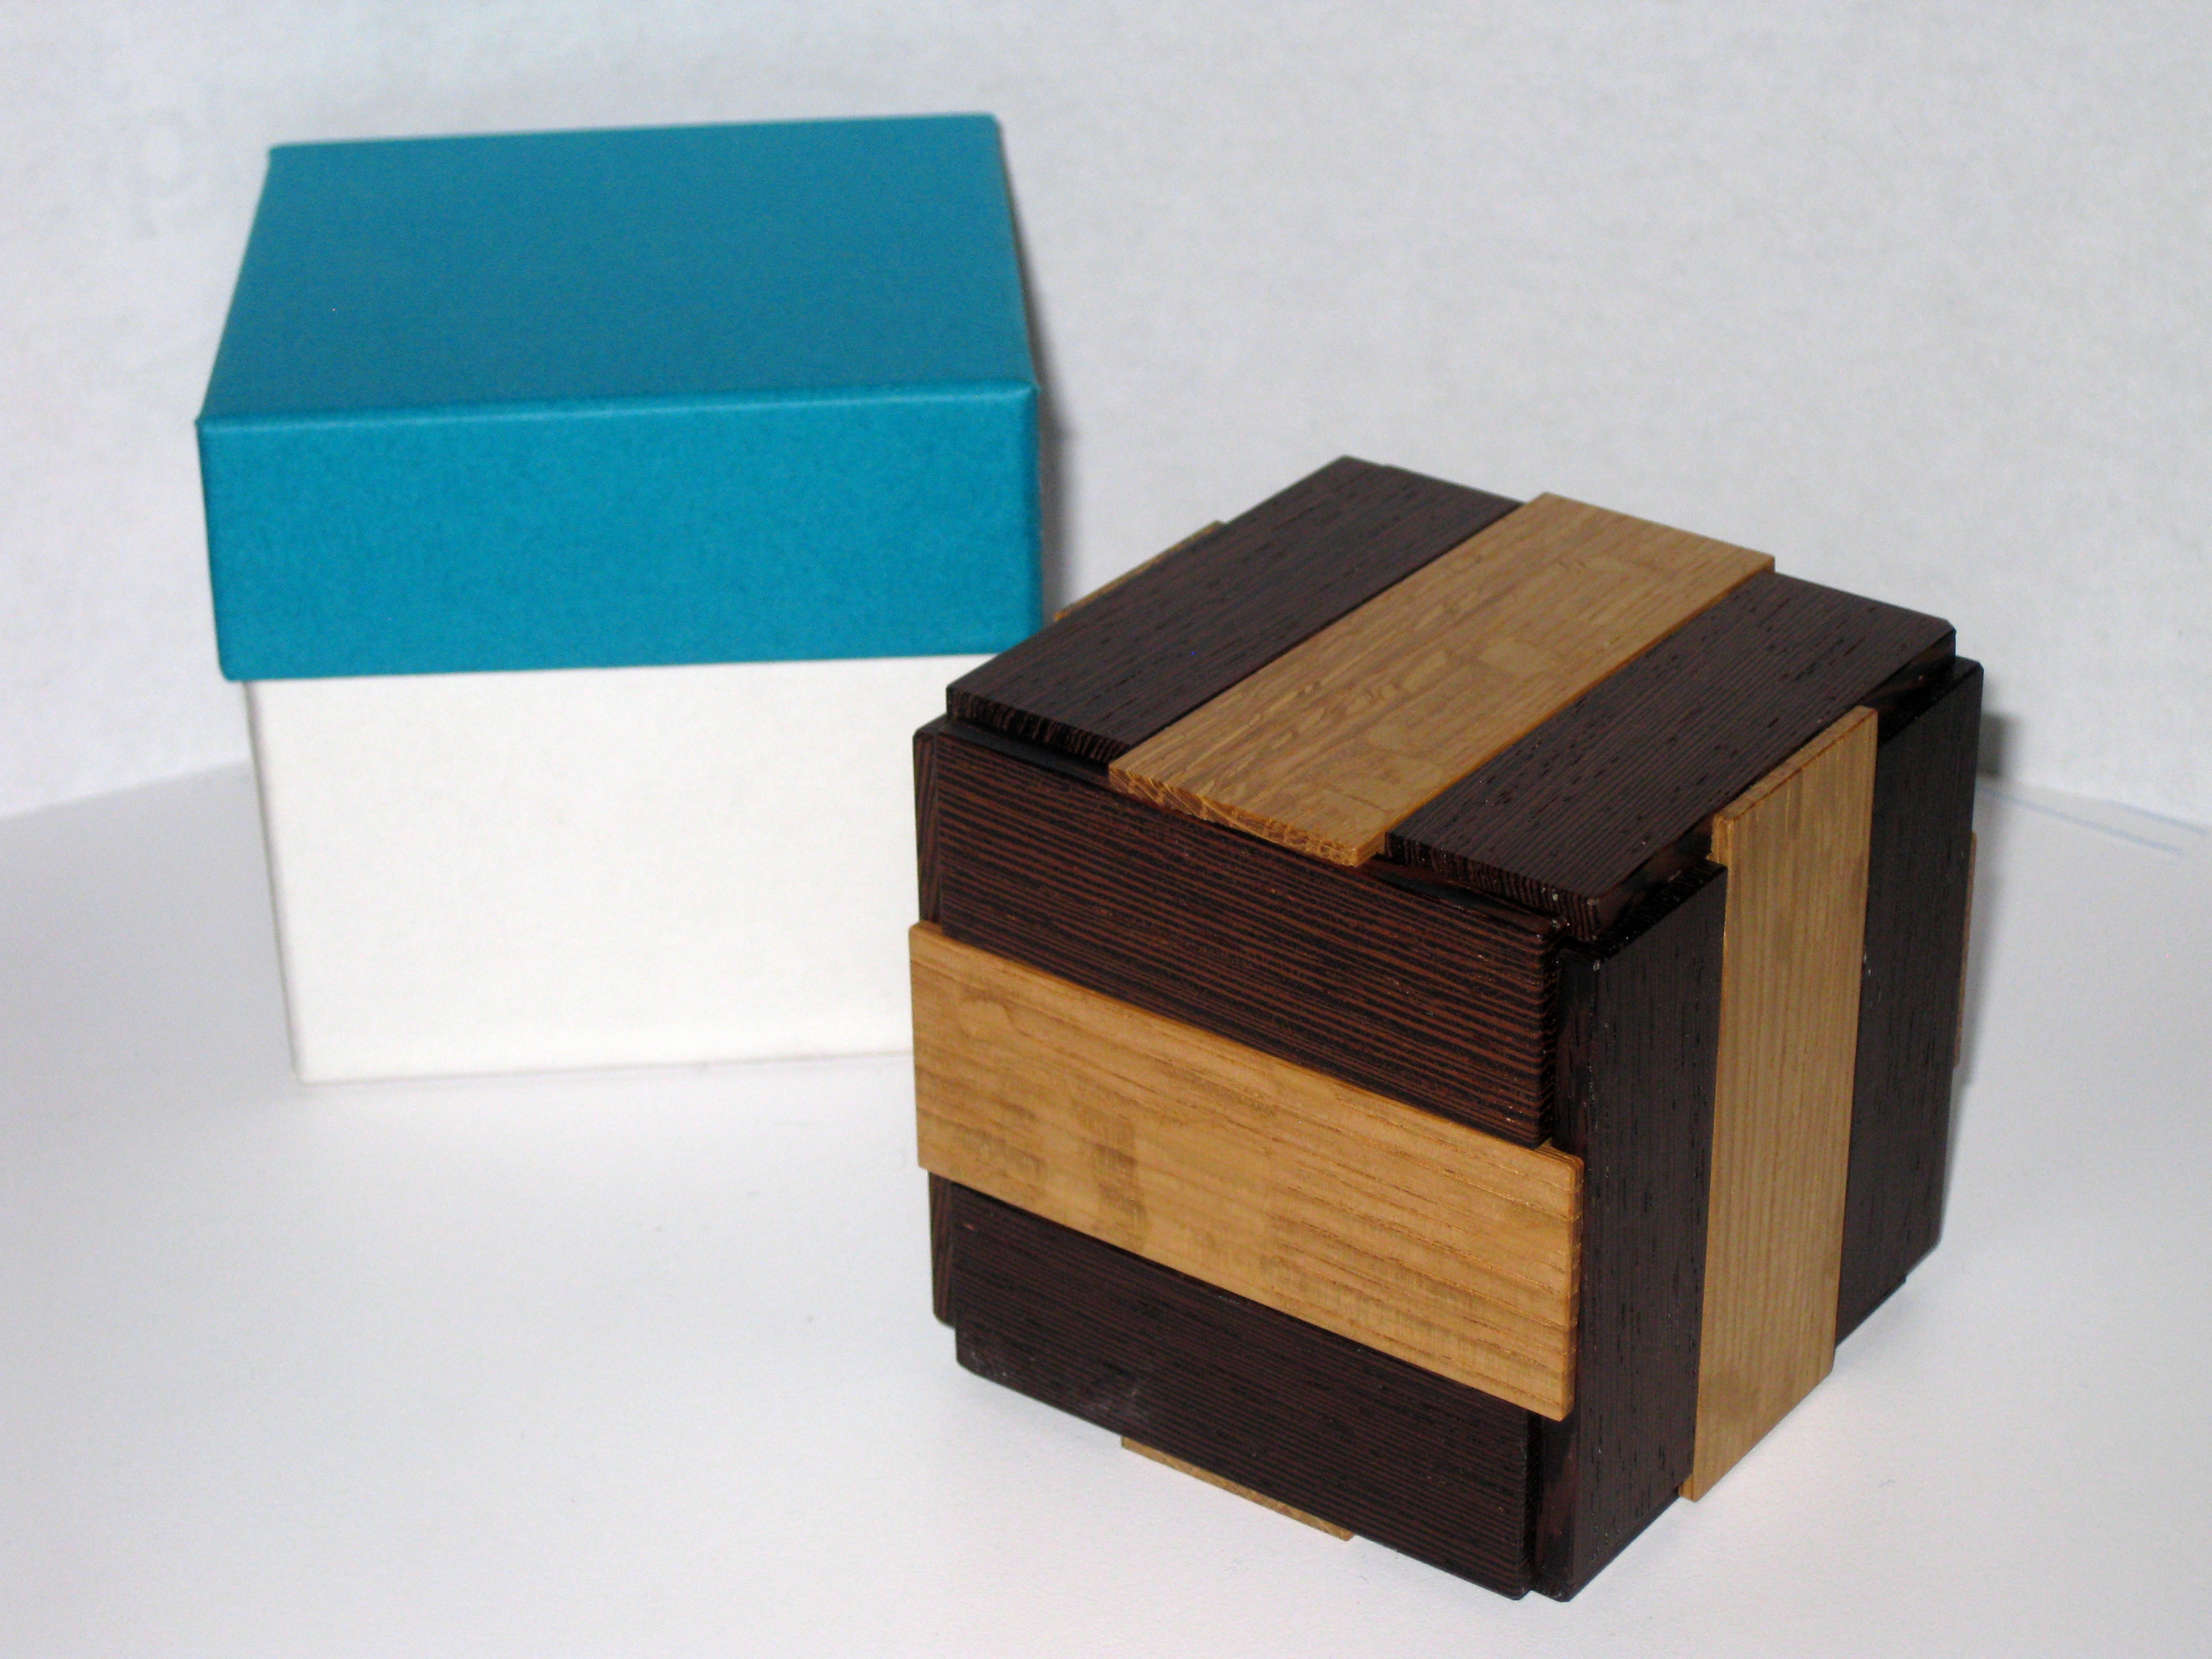
The Triskele is a puzzle box designed by Hideaki Kawashima. It’s a beautiful looking puzzle, as you’d expect from the Karakuri group, and it hides it’s secrets well. I spent quite a bit of time fiddling with this one, and seeming to make absolutely no progress on it.

Triskele by Kawashima

Triskele by Kawashima

Only 25 of these were made for an exhibition that Kawashima was taking part in, so I believe from the Karakuri site, that these are reasonably rare. Kawashima notes that the mechanism is not his design, and he’s not made this style of puzzle until now. So what is this you may ask?

Well it’s a cube, measuring 2.8″ x 2.8″ x 2.8″ made from Birch, Magnolia, Wenge and Oak. As you can see from the image above the panels have been selected carefully to give a stunning external appearance, and the fit is so precise that it gives no hint as to how it will open.

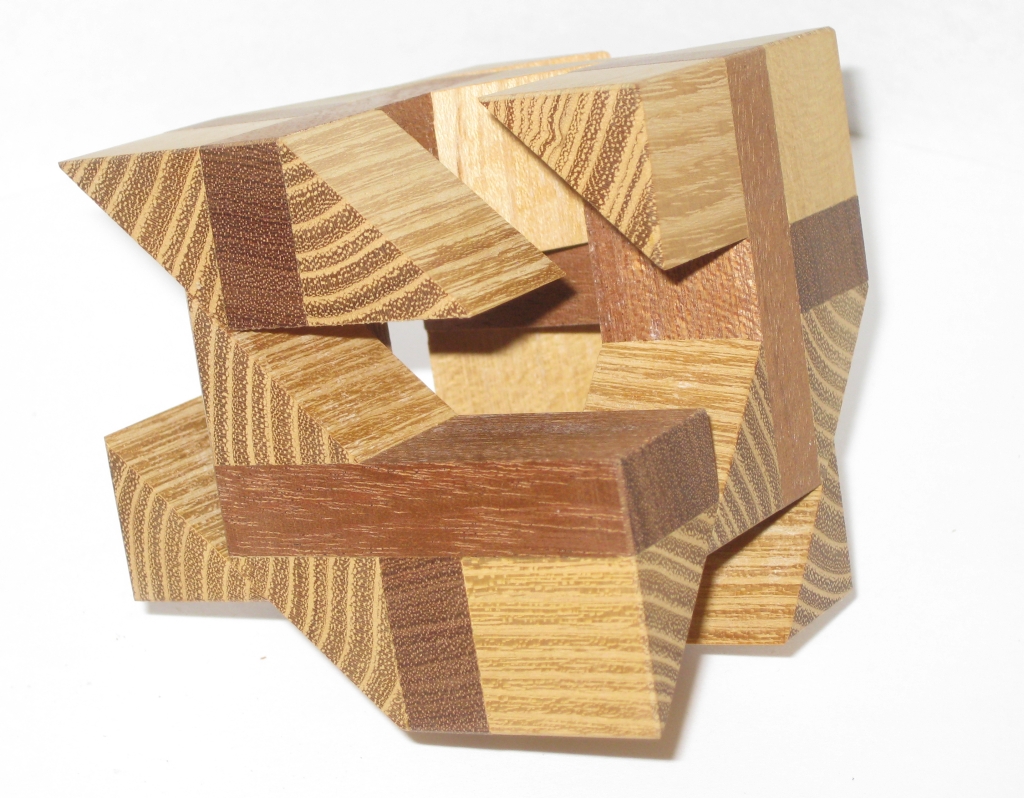
Sadly for me, on finding out how the box opens, it’s a simple Expanding box, using the same design as Stewart Coffin’s Expanding Box puzzle. It’s a beautifully made copy, don’t get me wrong, but from a puzzling aspect, it’s certainly not a new idea. The particular copy I have been playing with is incredibly stiff, and the humidity changes, have caused it to become very challenging to open, which if you didn’t know how it opened would make it near impossible to solve.

It’s a good looking box, but sadly it’s not new, and unless you want a very good looking but costly copy of an expanding box puzzle, I’d say leave this one alone. Go have a look at some of Vinco’s versions if you’re just interested in the puzzle itself.

Karakuri Work Kit – Kakukaku box

As a member of the Karakuri Group, when I renewed my membership at the start of the year I decided to pick up a few of the DIY kits that they offer. After my experience with Bruce Vinney’s designs I was interested to see what Karakuri Group had created, and also to better understand the mechanisms used, which is one of the goals Karakuri set when making the kits.

When I mentioned that I had the kits on one of the puzzle forums, there were requests to show how to build them, so much like I did with the previous kits I built, I decided to show the build process in full. Watch the video below to see the build, and watch the kit come to life. In the video I’ll cover all the tools I use and this isn’t time lapse so you can see everything in real time. I’ll be doing videos for all the kits shown in the video, so check back for more soon.

As promised in the video, you’ll find the instructions below, with my guide to building the box. Be aware that this is in no way a translation of the instructions!

General Kit Comments

The Karakuri group offer a reasonable number of DIY puzzle boxes which they refer to as “Work Kits”. Each of the kits consist of a number of pre-cut plywood pieces, some decorative pieces (like the beautifully made acorn on the Acorn Box), and any hardware needed for the mechanism, if it’s not just a straight forward sliding panel or suchlike. The kits are all perfectly cut, and of the kits I own there have been no issues with the fit or finish on any of the pieces.

Something which is worth noting about the kits is the price. They all come in at around the $25 USD mark, so in terms of affordability, these are really affordable boxes. The quality of the cuts on the pieces is excellent and the fit is as good as you will find with anything from the Karakuri group, so I’d say from that side of things, they’re great value.

One thing to note is that the build instructions for the kits are in Japanese language only. Don’t be put off by that however as with a little thought, and some careful study of the diagrams, you’ll build the kits just fine. Failing that, have a look at my Build Instructions section below, where I have detailed the steps (in English) to build the kit.

Kakukaku Kit Review

The first of the kits I built was (as you already know from the title of this post) the Kakukaku Box. I picked this one for no other reason than liking the look of the box. Interestingly it was the last of the four that I picked, and really the only reason was that I had set a budget and this fit within that budget after having picked the three others I wanted.

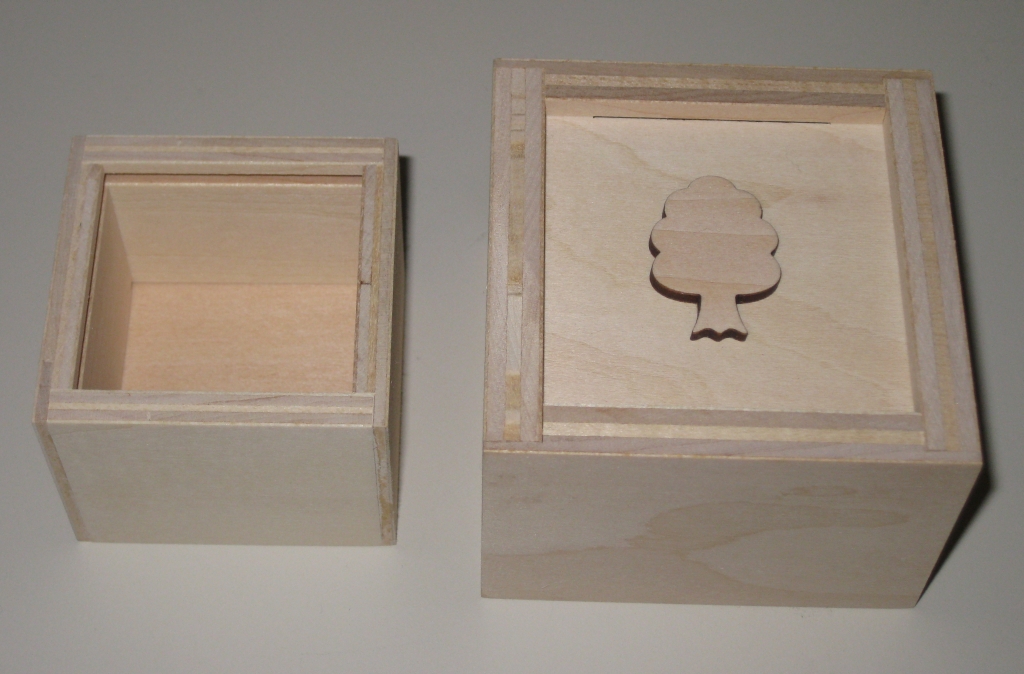
The completed top and bottom of the box

The completed top and bottom of the box

As you can see from the picture above, the box itself is fairly simple. The ply is visible on the top of the box, but personally I don’t think that’s an issue. If you don’t like having the ply exposed, you could glue some veneer onto the top panel just to make it neater. The laser cut tree certainly adds to the look of the box, and is also a clue as to the solution.

Building the kit was fairly simple. The diagrams on the build instructions are very clear, and there’s nothing complicated to this kit, so I didn’t have any issues building it. The video is real time, so it took about 15 minutes to put together, and would probably be quicker if you’re not recording a video and talking through everything you’re doing!

As far as the puzzle box itself is concerned, I’ll be honest that I was a little disappointed with the box. I have two reasons for this, and at first they seem contradictory, but bear with me.

The locking mechanism is both too difficult to open, and too easy to open at the same time. If you attempt to open the box using the ‘solution’ provided, it can be very difficult to move the two parts of the box in the right way to get them to open. The fit is pretty good, and as such the movements need to be made very precisely to get the box open. Sadly, there is a much simpler way to open the box. If you hold the top of the box, and shake it, the bottom falls out on its own, making it far too easy!

As a kit I certainly enjoyed building it, and you will understand the mechanism once you’ve built the box, so it certainly meets the expectations that the Karakuri group set out to achieve. If you’re thinking of buying one (or more) of these kits, I’d say that there are better boxes in terms of the end puzzle that you could get, but if you just want to add them all, then go get it!

Build Instructions

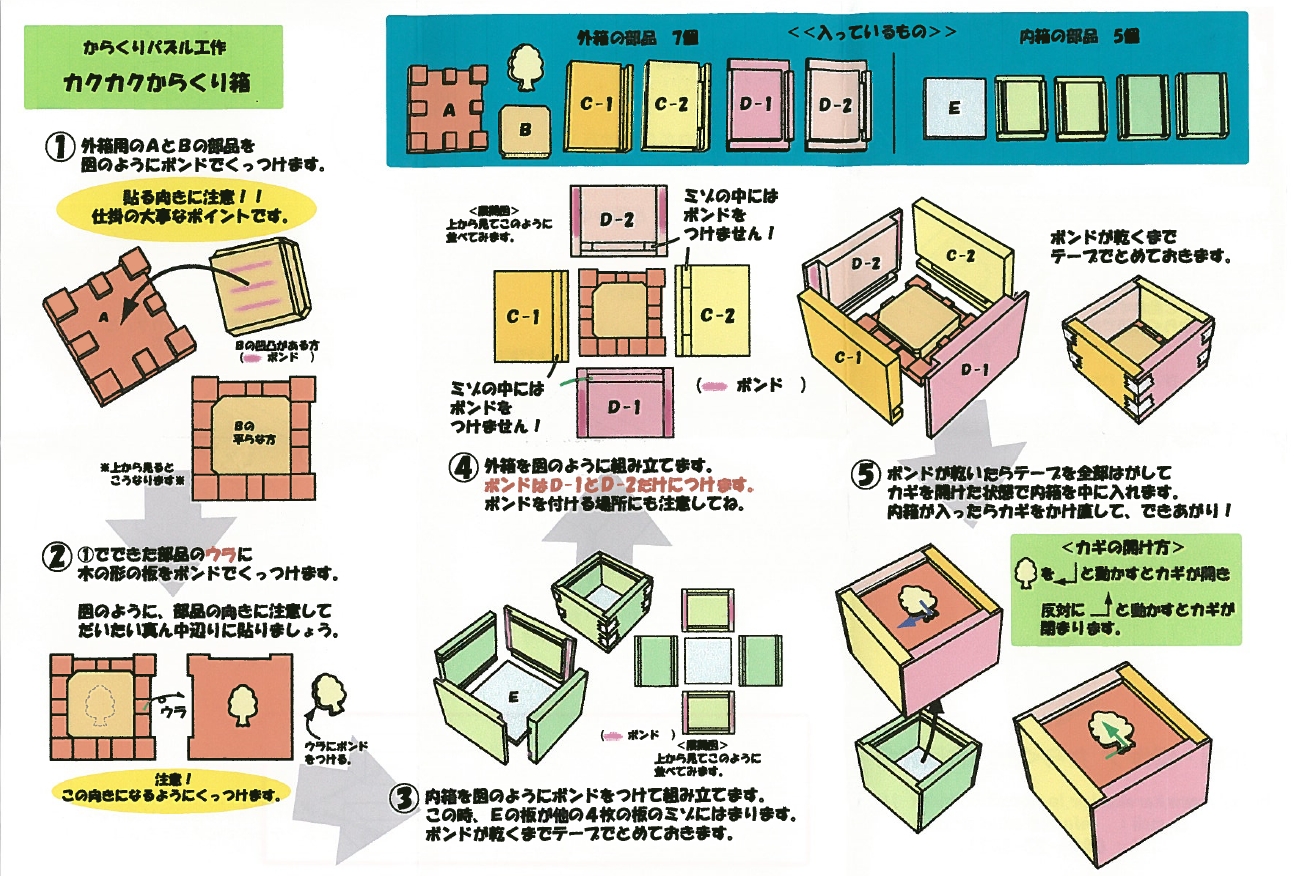
In this section I will try to give my guide to building this kit. Please note that this is in no way a translation of the Karakuri Group’s instructions, but my own instructions based on having built the kit. If you have issues following my instructions, feel free to get in touch and I’ll help you if I can, and update things below to clear up any confusion.

Build instructions - Click image for full size

Build instructions - Click image for full size

The instructions below match to the numbers on the diagram above.

Tools Needed

Before starting, you’ll need a couple of tools.

  • Wood Glue / Elmers hobby Glue
  • Pencil
  • Ruler (or some measuring device)
  • Tape – I recommend blue painters tape
  • Glue Brush (optional)
  • Engineers Square (optional)

      Step 1 – The Locking mechanism

      First up, sort the parts from the kit into the same order as shown in the top diagram. If you feel like you need to then you can mark the piece numbers in pencil on the inside of each piece. The way the pieces are laid out in the diagram shows the inside, with the exception of piece ‘B’, which will be inside the box and unlikely to be seen so even if you don’t remove the pencil mark, probably not an issue. In my opinion, the pieces are pretty clear so you should need to label them.

      Take Piece ‘A’ and lay it as shown in the diagram. The sides with the notches cut out should be at the top and right of the piece as you look at it.

      Take Piece ‘B’ and glue it into the centre of piece ‘A’. The piece fits snugly between the wooden blocks that surround the piece, so no adjustment or fine placement is required. Make sure that the lip on piece ‘B’ is on the left and top as you look at the piece. This can be confirmed by the angled corners as seen in the diagram.

      Leave the top for around 10 minutes for the glue to dry (note if the glue you are using takes longer to dry, then follow the manufacturers recommendations).

      Step 2 – Top Decoration

      Once the top of the box is dry from step 1, flip the piece over so that the cut away sections are now on the top and left of the piece as you look at it.

      Using a ruler, mark the centre of the piece, making note of the cutout which will not be seen once the box is complete.

      With the centre identified, glue the tree piece to the centre as seen in the diagram.

      Step 3 – Inner Box

      Take the parts labelled ‘E’ in the diagram. The flat square is the base of the inner box. There are two sides with notches cut in each end, and two with no notches cut.

      Place the base in the centre and then around that the two pieces with notches in the ends above and below it, then the two without notches at either side as seen in the diagram on the right.

      You will notice that there is a grove running through the with of all of these pieces. The base will go into one of these slots, and the other is part of the locking mechanism.

      Put glue into the notches on either end of the top and bottom pieces and using a brush, spread the glue evenly into these notches. Bring all four sides together around the base as seen in the lower left diagram.

      Once all four pieces have been brought snugly together, tape the corners and check that the corners are square using an engineers square. Note: This check is not really needed as the pieces are designed to give a good square corner.

      Note: You can put tape on the corners before adding the glue. This can make the job of taping the corners easier rather than trying to get tape around the corners after they are in place.

      Leave the inner box to dry.

      Step 4 – Outer Box

      Take the top which was completed in step 2, and place it as seen in the diagram, where the cut-out sections are at the top and right of the piece as you look at it.

      Taking pieces Labelled C-1, C-2, D-1, D-2, place these around the top as seen in the diagram.

      Pieces D-2 and C-2 have a piece of wood inside the groove which ensures the pieces are correctly located in relation to the locking mechanism, and the centre of the box.

      Pieces C-1 and D-1 have no insert in the groove, and will slide freely along the length of the top.

      Apply glue into the notches on either end of pieces D-1 and D-2 and using a brush, spread the glue evenly into these notches.

      Bring all four pieces together around the top as seen in the diagram on the right, starting with pieces D-2 and C-2 which will ensure that the pieces are correctly centred.

      Once all four pieces are in place, tape the corners together and allow the top to dry. You can check the top for squareness before it is dry however as with the inner box, the pieces are designed to give a good square corner even without this check.

      Note: As before putting tape on the piece before gluing can make this easier

      Step 5 – Opening and Closing the box

      To Close the Box, place the outer box onto the Inner box and move the top Right and Up as per the green arrow in the diagram. The box is now locked.

      Top Open the box, move the outer box Down and Left as per the blue arrow in the diagram, then lift the top of the bottom. The box is now open.

Shippers Dilemma

This is to be the first in a series of posts in the run up to Thanksgiving Day here in the US. So what better to be thankful about than new puzzles to play with?

You’ll have to indulge me for a few minutes here, as this set of puzzles comes with a bit of a story. Don’t worry, there’s puzzles in here too! So back in June, my parents came to visit me here in California. It’s the first time they’ve traveled since my dad went through all his Cancer operations, and it was the end of a long road for him. Both he and my mum were in need of the break, and having not seen them other than the quick trips back to Scotland for work, it was the perfect time to catch up. While they were here we had planned a bit of a road trip. None of us (either my parents or my new family) had been to the Grand Canyon or Death Valley, and since it was likely to be the last time my parents would be able to make such a long trip, we took the 2000 mile round trip in an RV.

Entrance to Calico Silver mining town

Entrance to Calico Silver mining town

While we were in Death Valley, we stopped at an old Ghost Town by the name of Calico. This is an old silver mining town which has been restored and has the tourist trap costumed inhabitants wandering around. One of the shops there was a modestly sized Puzzle shop; Calico Woodworks, selling ‘old west’ puzzles, including various disentanglement puzzles, tavern puzzles and wooden puzzles. I must have spent an hour in the shop (much to the dismay of the rest of the family who wanted to see the town) browsing, and talking with the owner, who had a fantastic knowledge of the puzzles she was selling.

Calico Woodworks

Calico Woodworks

As it happens, we struck up quite the little banter, and I have no doubt our discussions helped her sales for the day as the shop was packed when I left. Not long after I walked in, and I was animatedly pointing things out to Jen and my Mum, she hands me a puzzle which she calls the ‘Manhood Puzzle”. Clearly its something she hands to all the men as it comes with a story that if I can’t solve it, she’ll have to change my name to something girly. The puzzle she hands me is a nut and bolt puzzle, which as it happens I’ve seen before. I play along for a minute, and poke and prod at the split washer which is secured in the middle of the screw between the head and a nut which is soldered to the screw, before unscrewing the bottom section and removing the washer.

2 Piece Pyramid Puzzle

2 Piece Pyramid Puzzle

She then picks up a few other puzzles to show me, and entice me into buying. As she’s off finding the puzzles, I spot a two piece pyramid puzzle sitting on the counter, and promptly solve it. (After all it was sitting there un-solved!) She comes back, spots it solved and asks if I did it. “Yes”, I reply. She curses me, then proceeds to tell the story of having received it from Creative Crafthouse, spent days not being able to solve it (having received 1,000 of these), and calls them telling them their puzzle is broken. When they told her how to solve it, I believe a large chunk of pride and humble pie was swallowed!

She picks up a series of three puzzles, which for the Shippers Dilemma series. It turns out these are made by Creative Crafthouse and come both individually and as a nice set of three. As it happens, she didn’t have the first in the set available, but I did end up buying the other two puzzles from here (amongst other things).

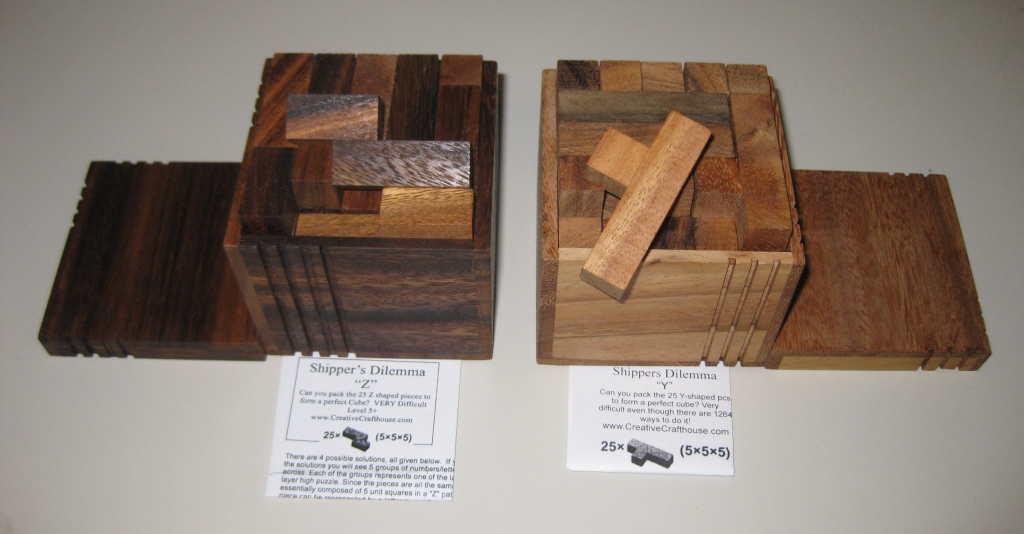
Shippers Dilemma's

Shippers Dilemma's

So now that I’m done with my story, back to the puzzles at hand! The two puzzles I ended up getting are Shippers Dilemma ‘Y, the middle difficulty puzzle, and Shippers Dilemma ‘Z’ the very hard puzzle.

Both puzzles come in their own wooden boxes, which have been routed with a number of grooves to signify the difficulty of the puzzle. It’s a nice touch and means you can easily tell which puzzle you’re picking up without having to leave the lids off! Also, the ‘lid’ is really the base, and the puzzle can be built inside it then the rest of the box slipped on top to put it away (that is if you get it back into a cube)!

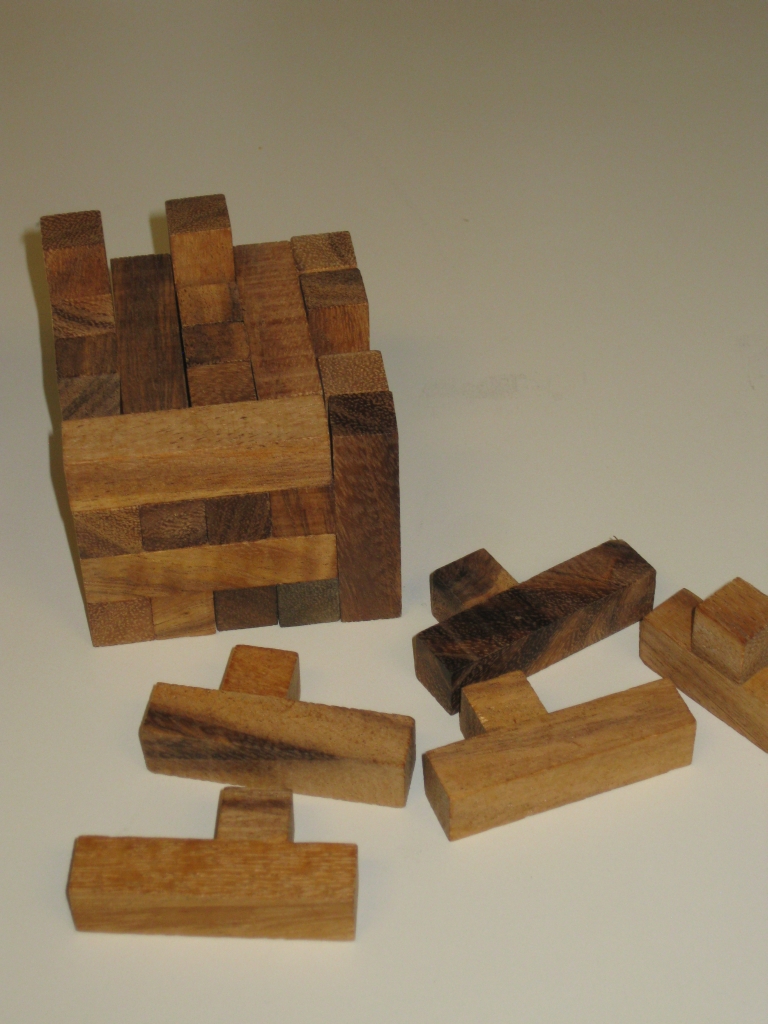
Pieces for Shippers Dilemma 'Y'

Pieces for Shippers Dilemma 'Y'

The first of the two puzzles is made entirely of ‘y’ shaped pieces, 25 to be exact, which have to be placed together to make a 5x5x5 cube. The puzzle was designed by David Klarner and published in the Journal of Recreational Mathematics in 1970, so its not a new puzzle. Originally thought to have just 236 solutions, Burr Tools shows there to be 1264 solutions possible. Never the less, this is still a challenging puzzle, and it’s unlikely you’re going to solve it in 5 minutes. I think I played around for about 30 minutes to get one solution, and was happy enough with that.

There are a number of other shapes that you can make from the pieces, including a 10x5x1 rectangle from 10 pieces, and a 15x4x2 using 24/25. So lots to keep you occupied with this particular puzzle. It does come supplied with a solution sheet showing 4 possible solutions, and the other shapes you can try, so if you’re struggling with the 5x5x5 then one of the others may prove easier!

The pieces of the puzzle themselves are unfinished and fairly rough. While the fit is fairly precise between pieces, there’s evidence of glue on some of the pieces, and not all the small cubes are glued perfectly straight onto the longer ‘base’ section. That said, this isn’t an expensive puzzle, and given that it’s well worth the money.

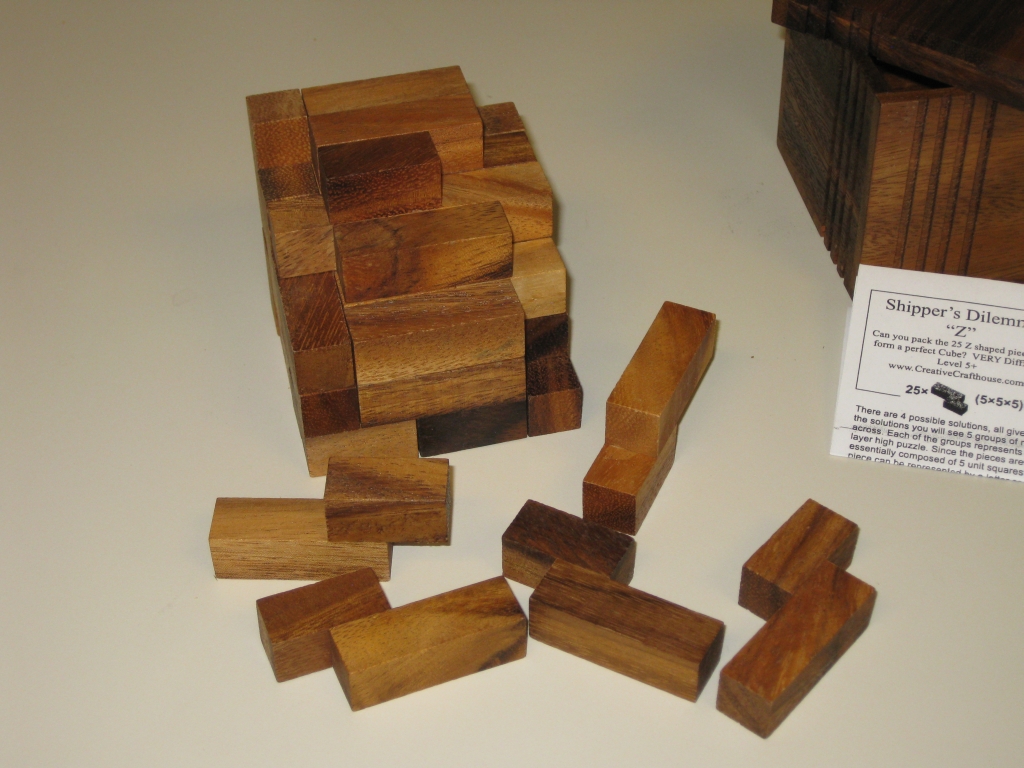
Pieces for Shippers Dilemma 'Z'

Pieces for Shippers Dilemma 'Z'

The second of the two Shippers Dilemma puzzles is ‘Z’. You’ll not be surprised when I tell you that this puzzle is made from 25 ‘Z’ shaped pieces (or N in pentominoes sets) which need to be made into a 5x5x5 cube. Like it’s little brother there are a number of other possible solution shapes using varying numbers of pieces which are listed with the puzzle, so again plenty to keep you occupied. This is listed as a very hard puzzle, and given that there’s only 4 solutions, which are provided, I can see why. Around an hour found me a solution that let me put it back in its box, and I was pretty happy with that. Burr Tools confirms that there’s only 4 solutions.

This puzzle is made from a darker wood, but again, I’m not sure what sort of wood has been used. It’s of a similar quality and price to the previous puzzle, so all in all good value for money and a serious challenge regardless of how many times you solve it!

I may have to puck up the first in the series, as it has a beautiful symmetry to the way the pieces fit inside, which I really liked. That’s one for another day though. Funny that I traveled all the way to Death Valley to pick up my first puzzles from Creative Crafthouse, but I’ve not been disappointed, and will likely buy more from them in the future.

Come back tomorrow to see the other puzzles I picked up while in Death Valley!