Tag Archives: Stewart Coffin

Cube-16

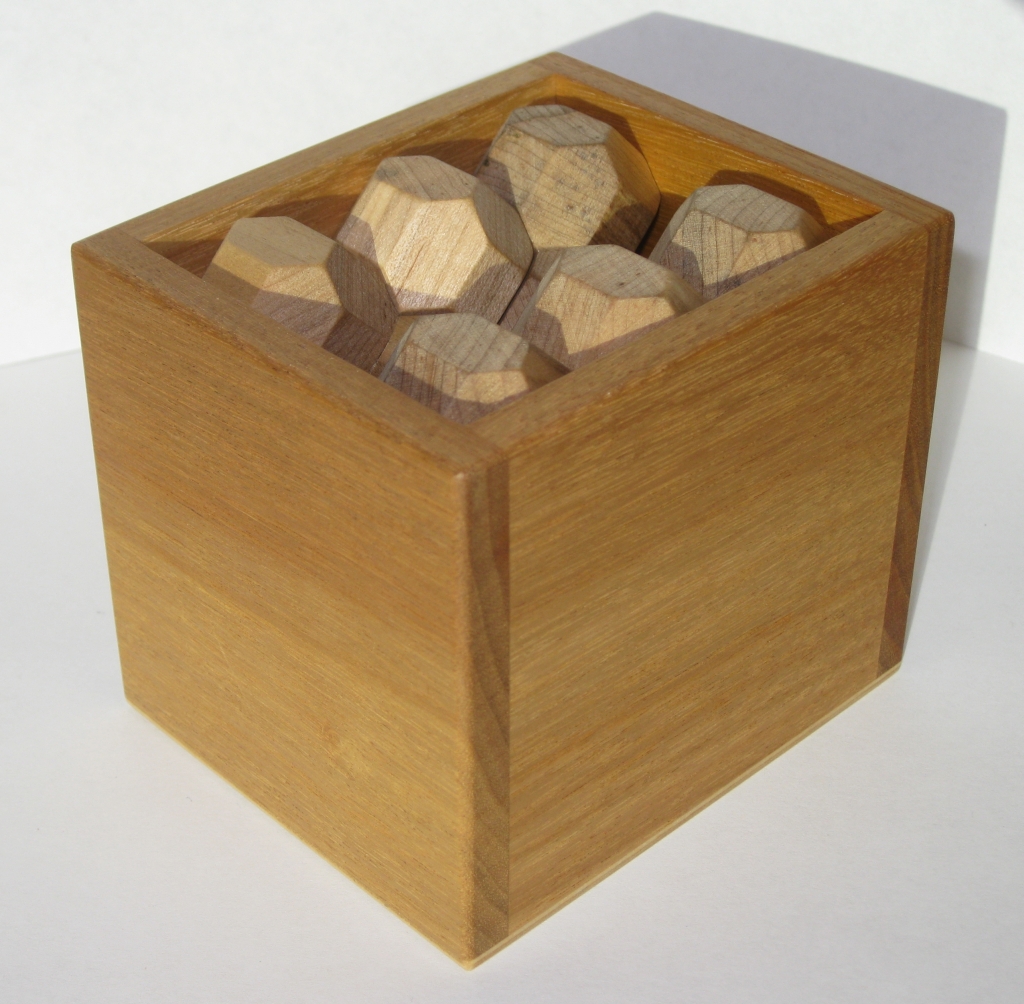
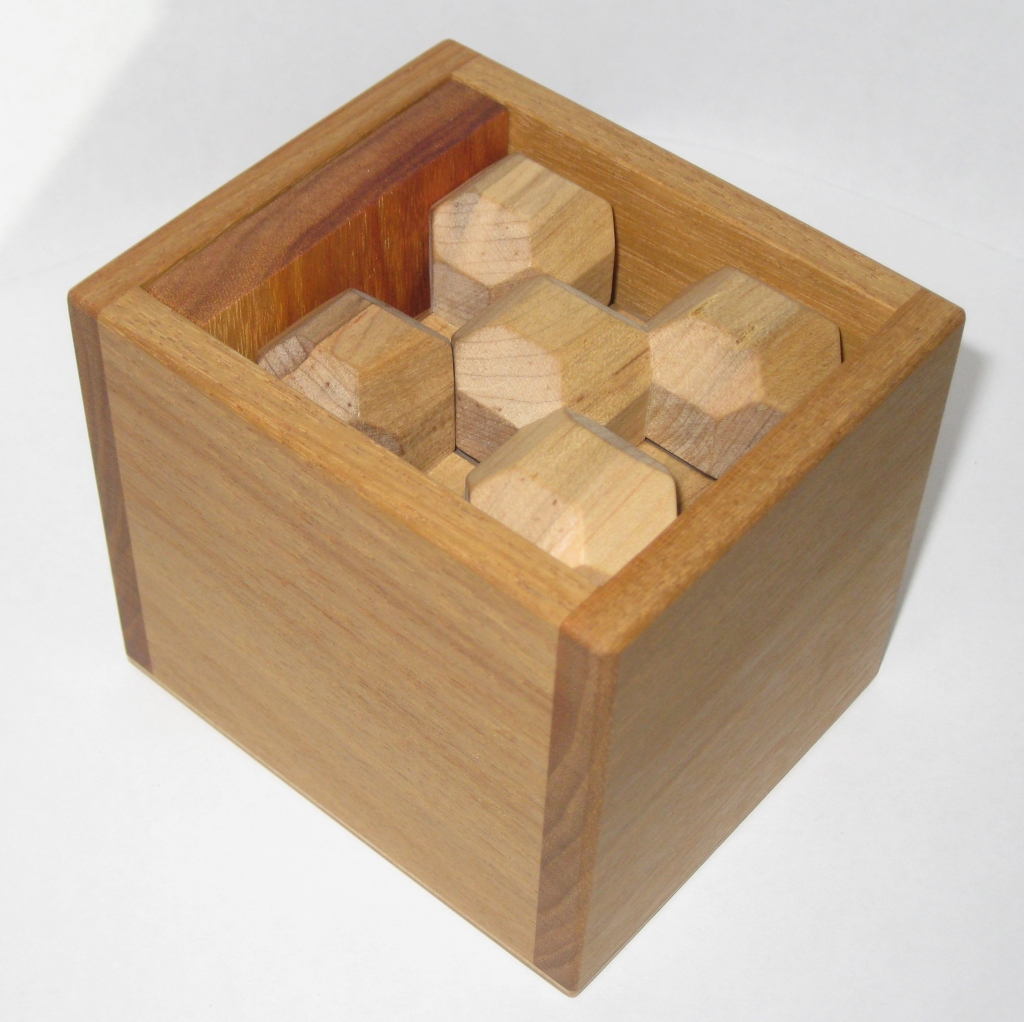
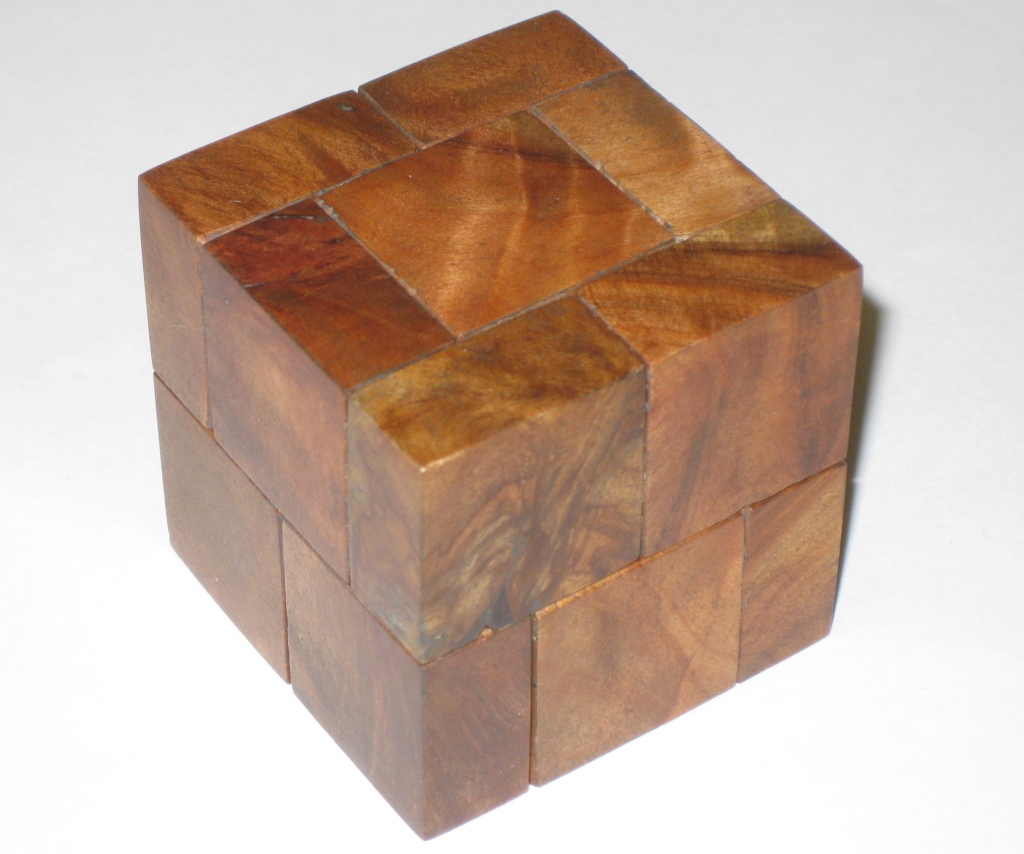
Cube-16 is another Stewart Coffin design which is an improvement on his earlier design Patio Block (STC#82). Cube-16 is numbered STC#205 in Stewart’s numbering scheme and the goal is to take apart the cube, and then return it to its original state. My copy was made by John Devost, and I was lucky enough to pick up a copy when he recently offered them on Puzzle Paradise.

Cube-16

Cube-16

The external appearance of the cube is identical to the earlier Patio Block design so it would be easy to confuse the two until you pick the puzzle up. Patio Block was an eight piece non-interlocking puzzle, so without a box to hold the pieces, it would come apart easily when you tried to move it. Cube-16 on the other hand is a fully interlocking cube, so you can pick it up with no problems. Of course with it being interlocking, finding the first piece to remove can be a challenge.

I’m not aware of too many copies of this puzzle being out there, so when John Devost announced that he’s made a few copies I jumped at the chance. John hadn’t been making wooden puzzles for a long while, and many of us in the puzzle world thought he’d hung up his tools and given up. I’m pleased to say that it looks as though he’s back, and making some great puzzles again. Welcome back John.

The puzzle itself measures just under 2″ x 2″ x 2″, and is made from Afzelia Burl. As you can see, the appearance of this wood is stunning with beautiful waves and swirls and eyes throughout the pieces, but what you can’t see is how the wood smells. This is an amazingly fragrant wood, even after it’s been lacquered and polished by John. I really can’t describe quite how strong it is. The best I can do is to say it’s like walking into a loose leaf tea shop and smelling that sweet aroma. Yes, it’s that strong. The fit on my copy is good. John mentioned that it was a little tight when he had finished making it so he shipped it with a couple of spacers marking the key piece to make sure that I didn’t end up breaking anything trying to find the first move. Hopefully after a little while here in California, it will loosen up nicely and there should be no problems with the fit.

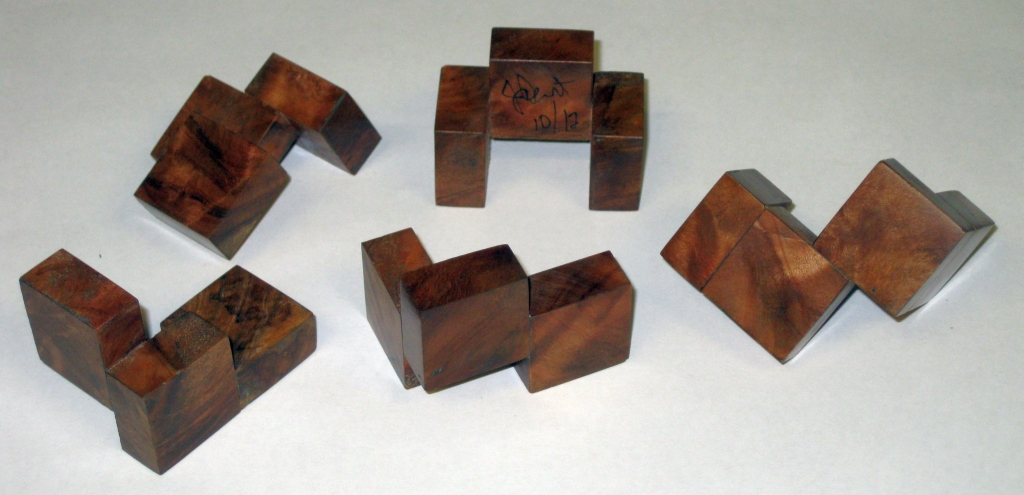
While the Patio Block design was an eight piece puzzle, Cube-16 is a five piece puzzle, but that doesn’t mean to say it’s significantly easier than the original design. I should probably clarify ‘original’ here. Even Stewart’s original Patio Block was inspired by an even earlier puzzle. The inspiration for the Patio Block design was a ten piece puzzle created by Toshiaki Betsumiya, and another similar puzzle which was an eight piece version by Kevin Holmes. All of these designs came out of studies to create 4x4x4 cubes with external symmetry. Stewart took those ideas and created the Patio Block, and later Cube-16.

Cube-16 Pieces

Cube-16 Pieces

Each of the five pieces are unique as is the case with many of Stewart’s puzzles which adds to the challenge. That said, I wouldn’t say it’s that hard. I expect that most people will be able to find the solution in around half an hour making it a very approachable puzzle.

I’m glad I was able to get my hands on a copy of this puzzle, and John has suggested that it would be a good design for me to make a few copies of. I may just have to do that, although I doubt I’ll have any wood which will look quite as stunning as the Afzelia Burl.
California Puzzle Party – hosted by Nick Baxter

It’s been a while since I’ve updated the blog, as I’ve been pretty busy with work, and with progress on a certain puzzle I’m making, but I thought this one was worth the wait. Before I say much more, I’ll give you two pictures. As ever, click them to see a larger version…

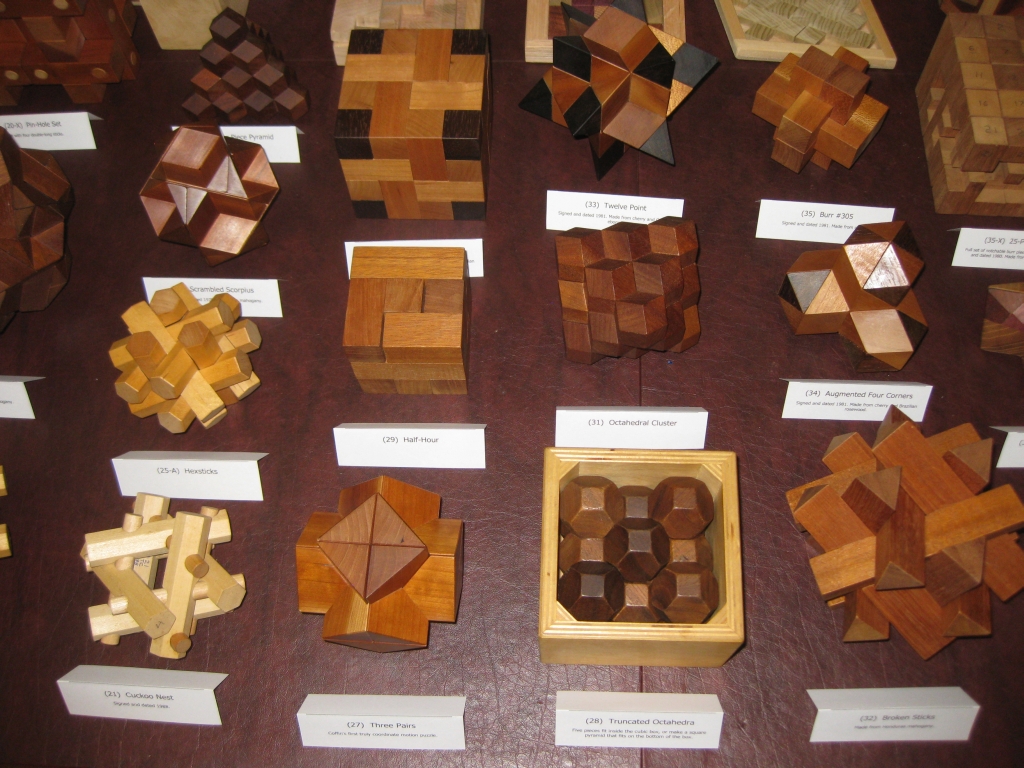
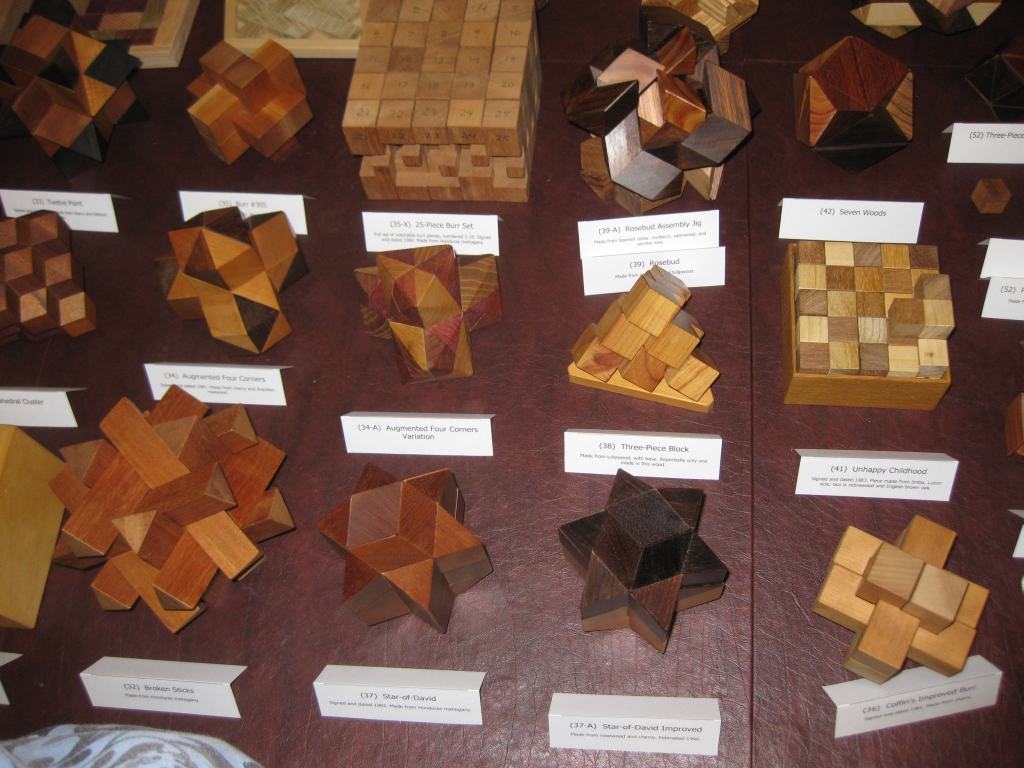
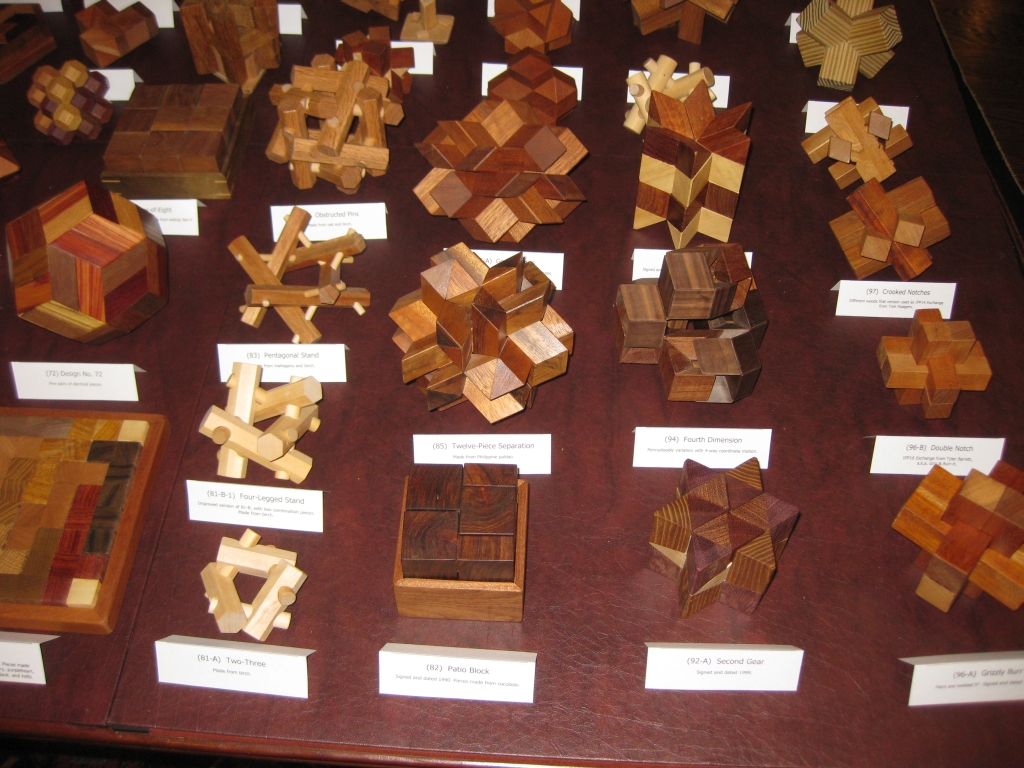
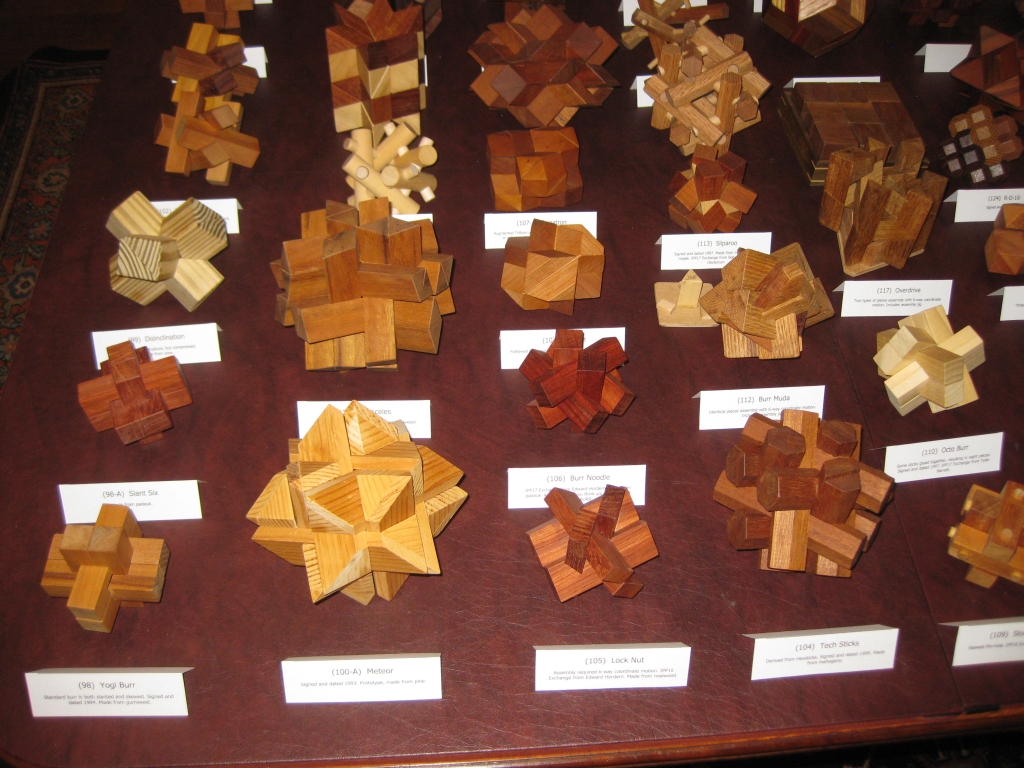
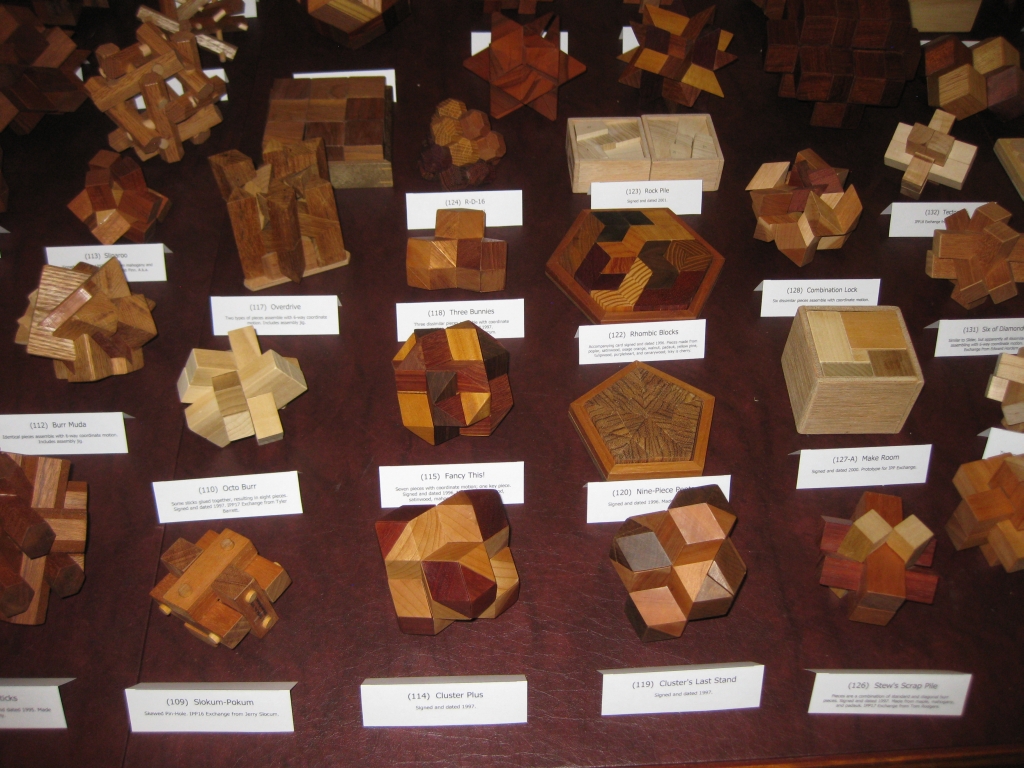
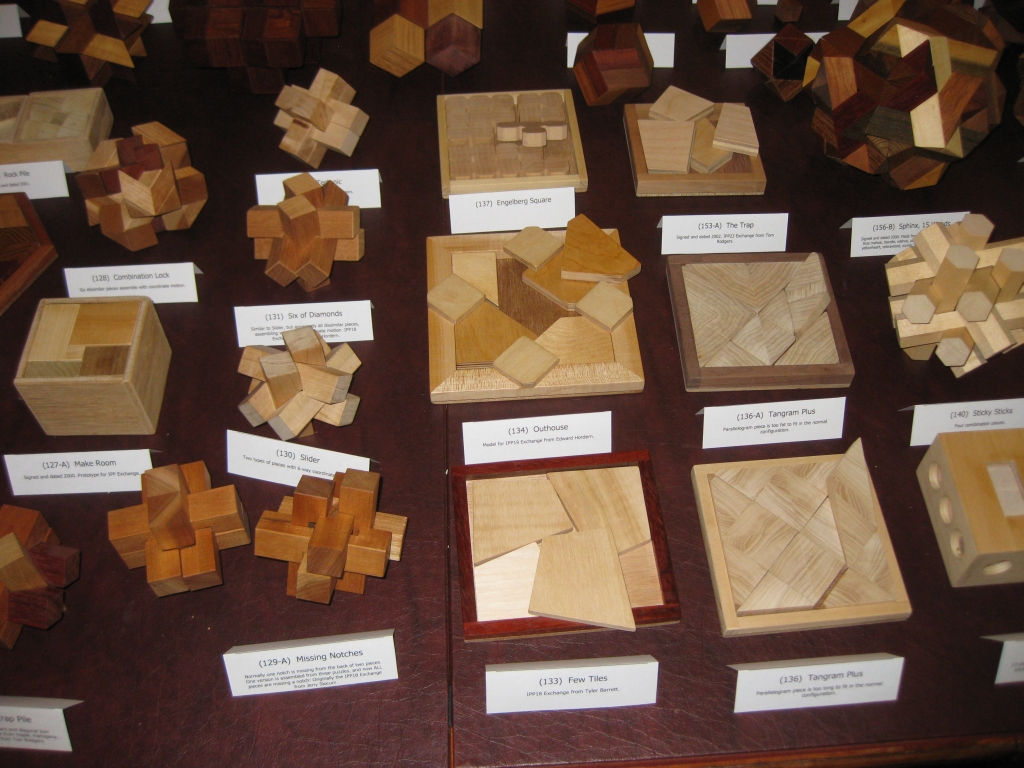
Nick Baxter's entire collection of Stewart Coffin Originals

Nick Baxter's entire collection of Stewart Coffin Originals

Nick Baxter's entire collection of Stewart Coffin Originals

Nick Baxter's entire collection of Stewart Coffin Originals

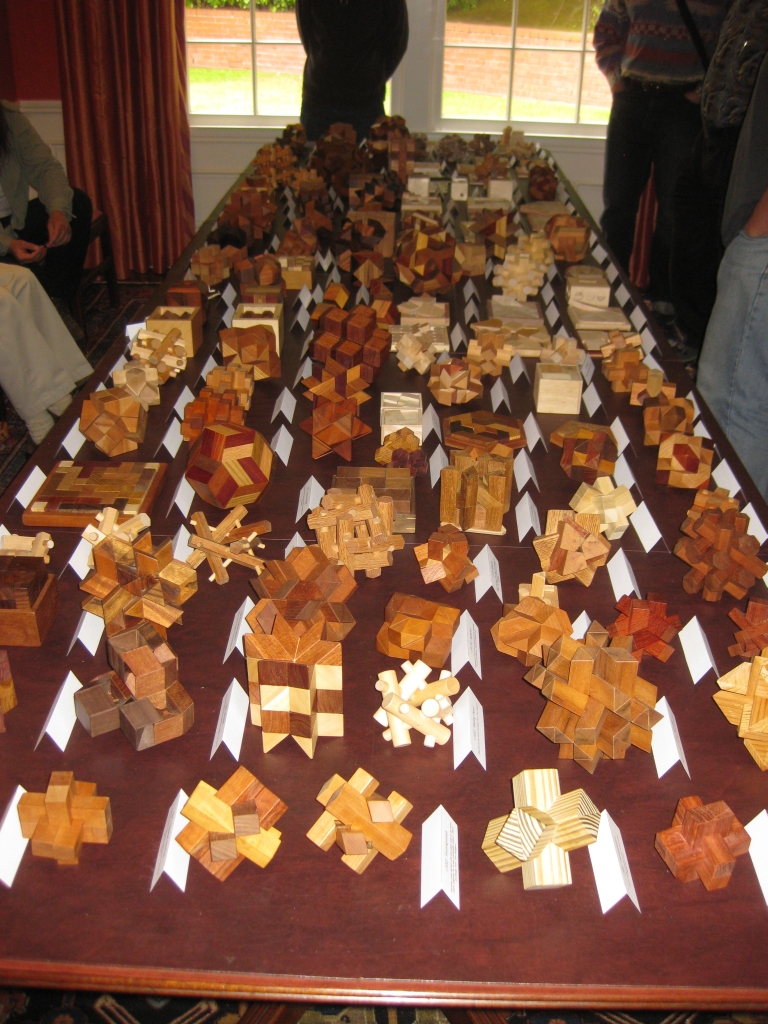
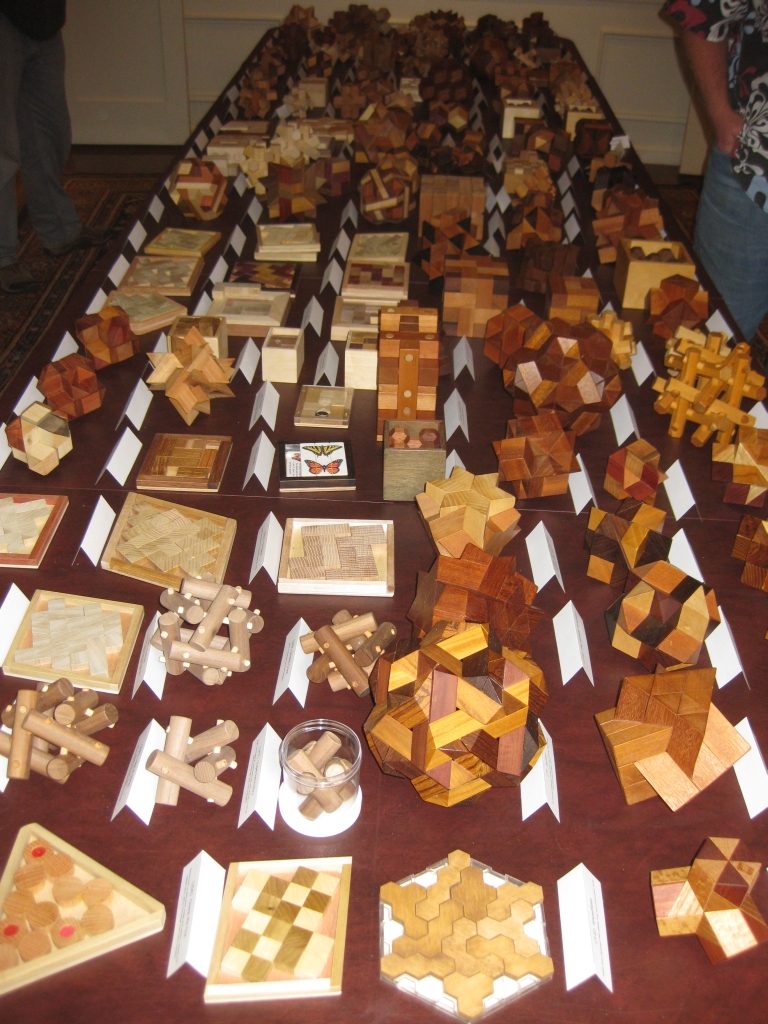
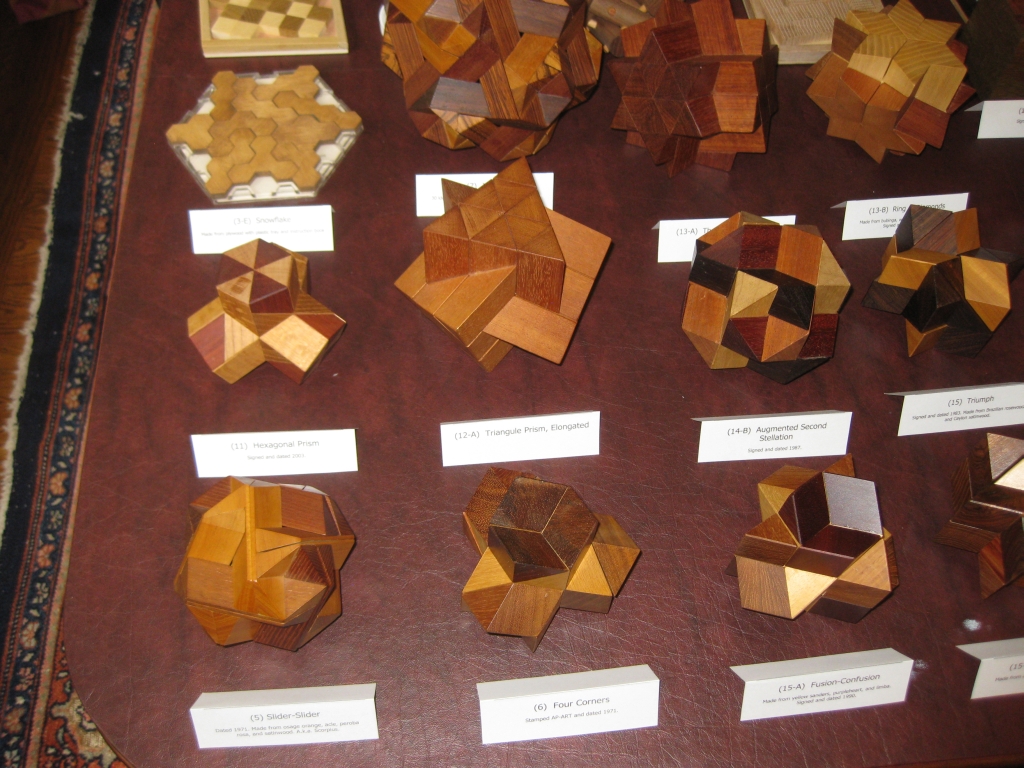
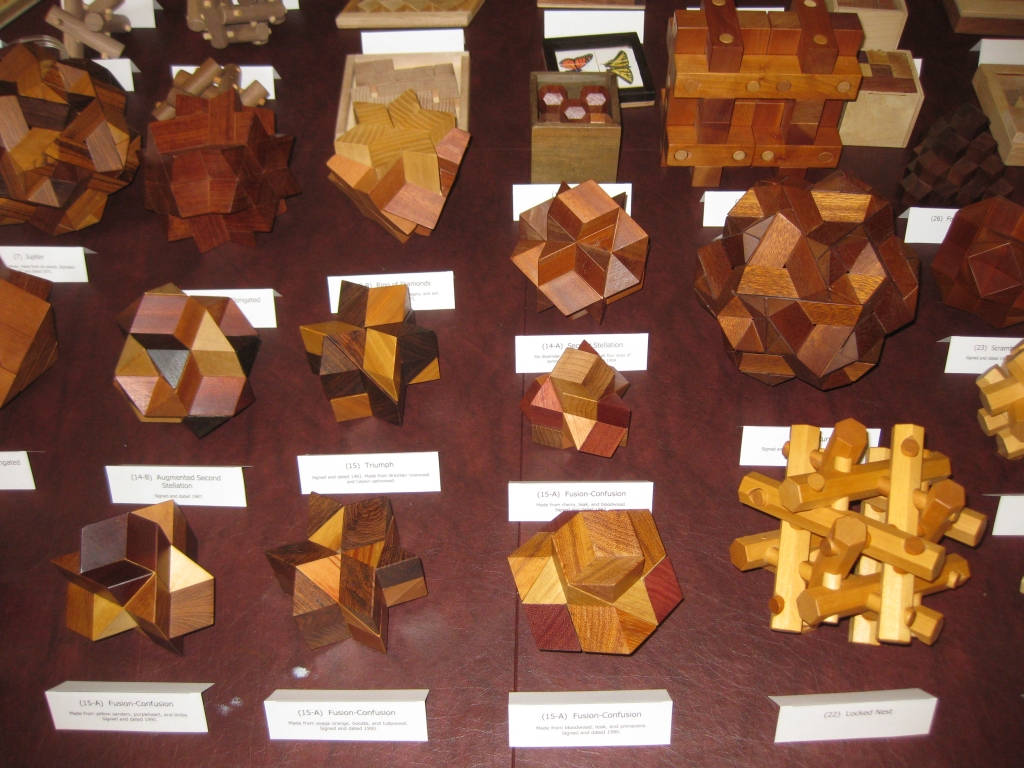
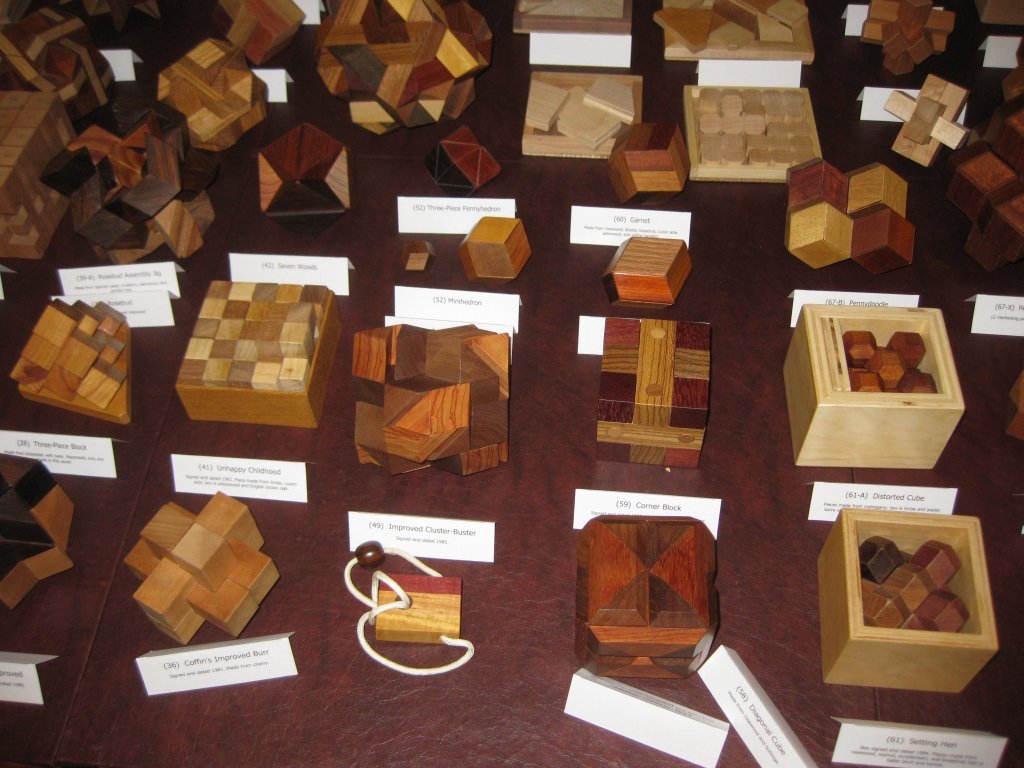
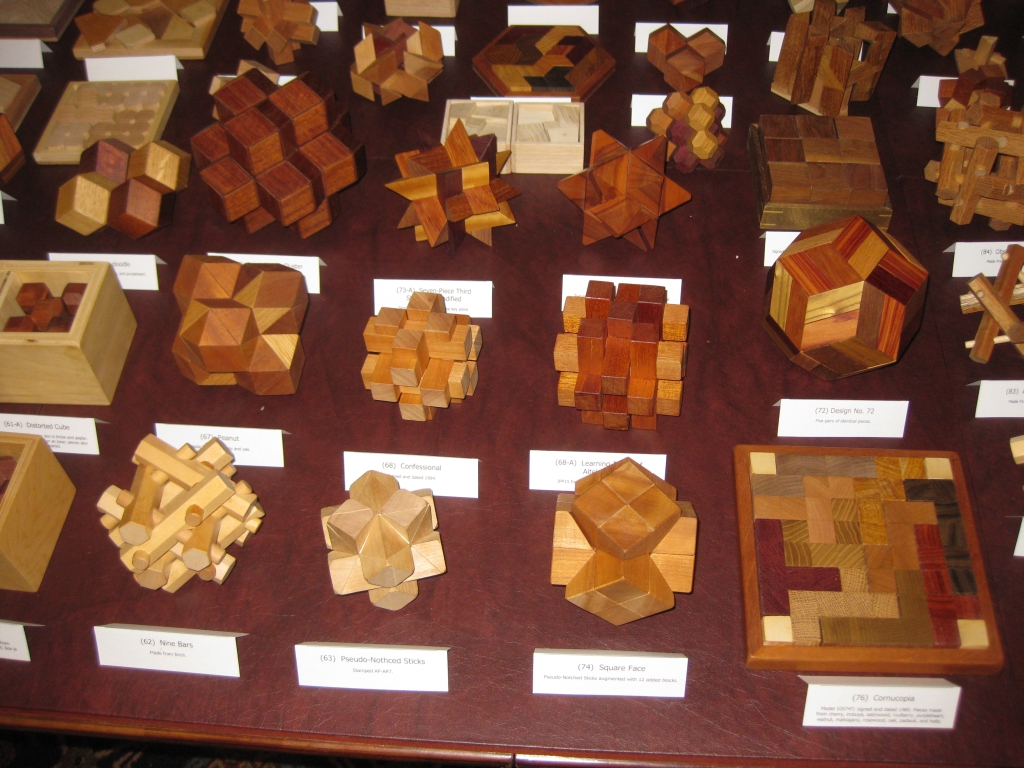
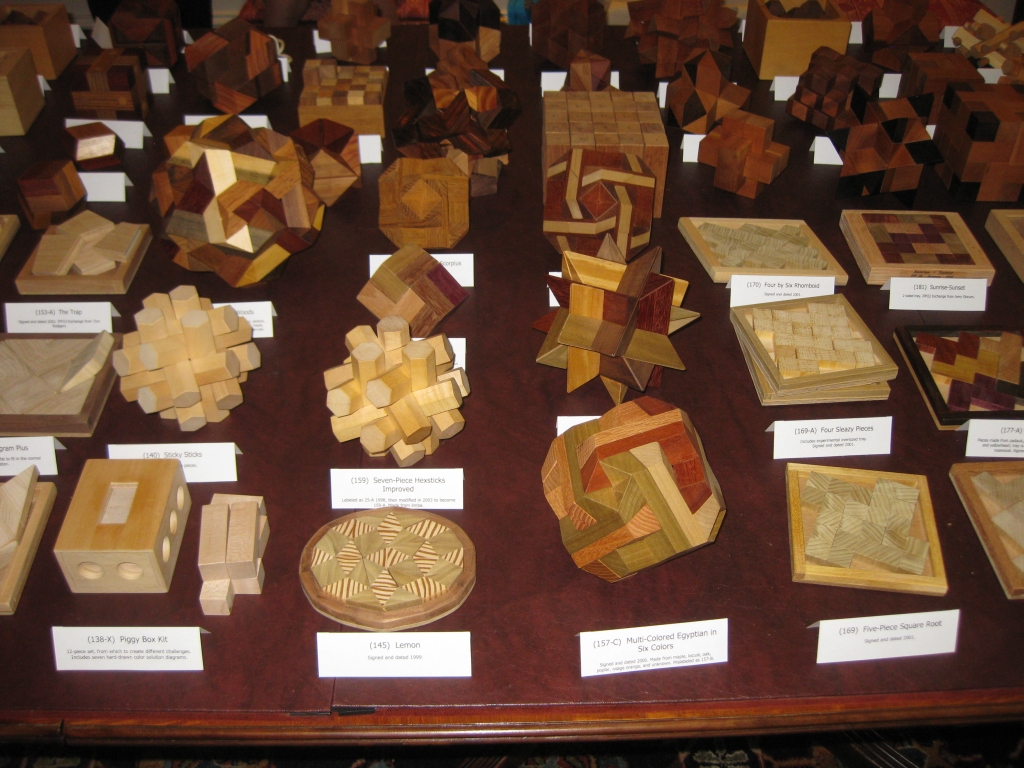
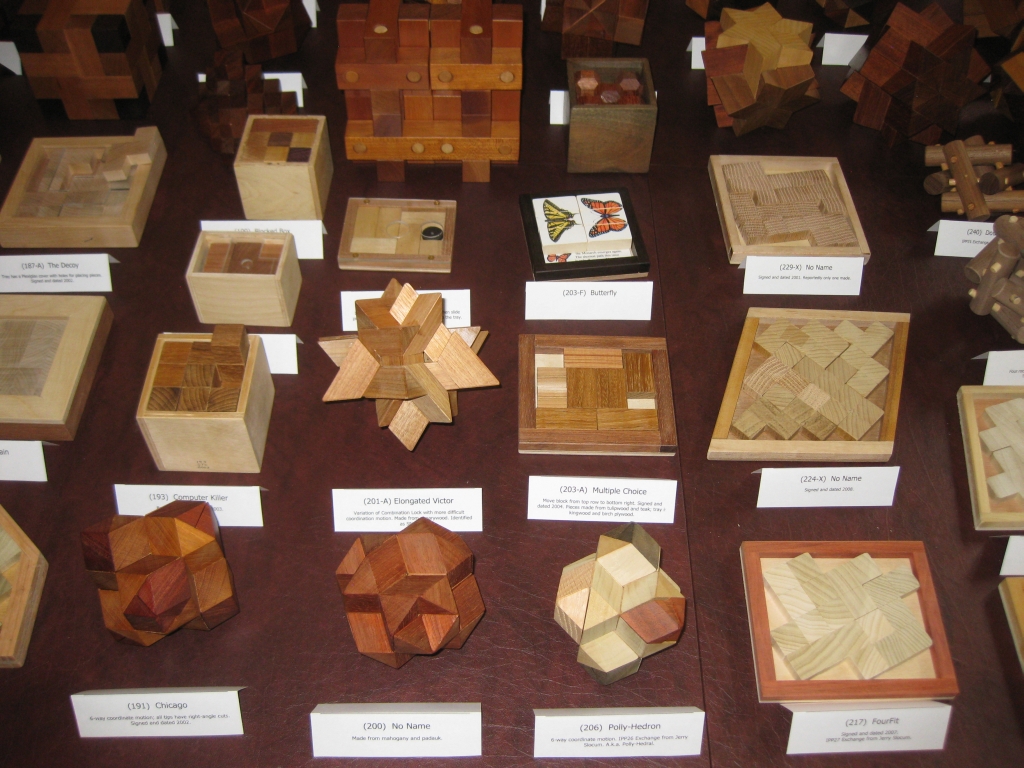
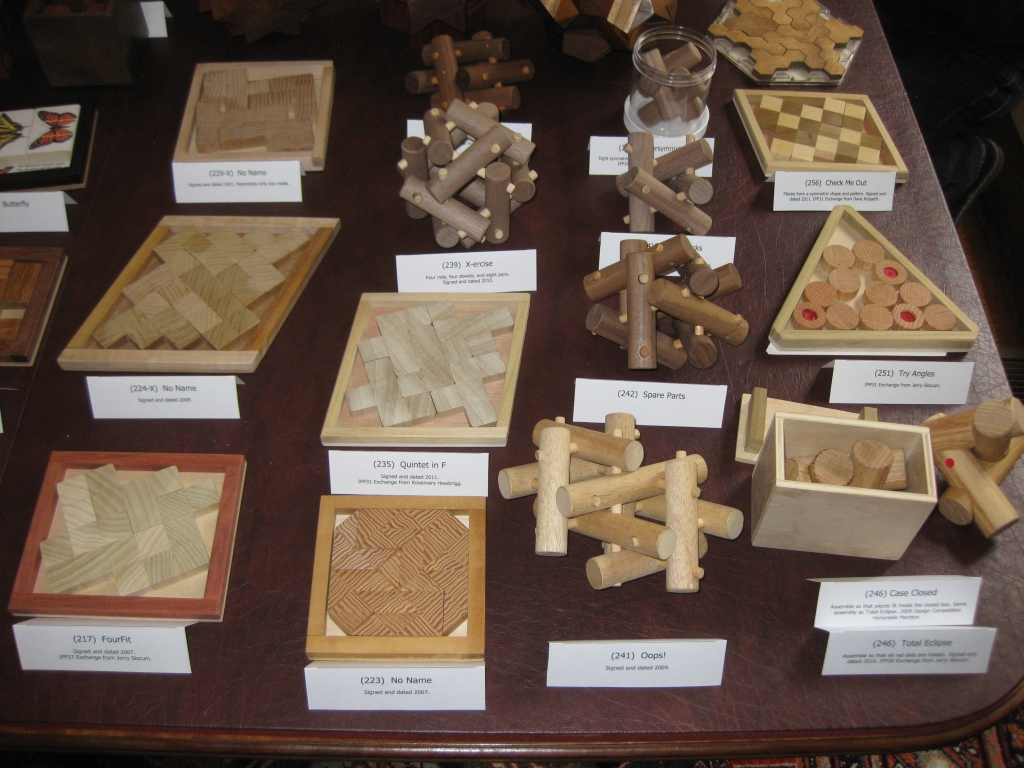
Yes, that table, measuring probably 16′ long is a lifetime of work from puzzle designer, builder and inspiration to many; Stewart Coffin. In a rare occurrence, Nick who graciously invited us to a puzzle party at his house, had the entire collection out and on display for cataloging. Not only that, but he was happy to let us play with the puzzles, and for others demonstrate some really unique movements to some plain looking puzzles. To see the collection through the pictures I took really doesn’t do it justice.

The video shows a scan of both sides of the table, and hopefully gives a better idea of what’s there. Obviously, the larger images below show the collection in more detail, but sometimes a video is more useful. Something incredibly interesting that a few of the people who were there commented on, including Scott Peterson, who is well known for some stunning Coffin reproductions was that the size of the puzzles gets smaller as the numbers get higher. Now this may fit with how many people thing about your skills as a wood worker progress over the years. Start big, get smaller as you go, but we came to a different conclusion. When Stewart started making puzzles, he was able to get his hands on lumber in much greater thicknesses than is readily available today. So as the years go on, and the lumber gets thinner, the size of the puzzle pieces you can make gets smaller. Maybe other people out there have thoughts, but that was ours!
The series of photos which follow, show the collection. Enjoy.

The collection

The collection

The collection

The collection

The collection

The collection

The collection

The collection

The collection

The collection

The collection

The collection

The collection

The collection

The collection

The collection

The collection

The collection

The collection

The collection

The collection

The collection

The collection

The collection

The collection

The collection

The collection

The collection

All I can really say personally is WOW. Thank you to Stewart Coffin for creating so many unique and beautiful puzzles for us to play with, and thanks to Nick for letting us see them!

Now that you’ve stopped drooling, the collection of Coffin’s was only one small part of the day.

There were many familiar faces present, including Bram Cohen, Alan Boardman, Abel Garcia, Scott Peterson, Derek Bosch, Marc Pawlinger, Stan Isaacs and a few faces I didn’t recognise. Nick’s wife was also there, and had laid on quite a spread of food including some excellent chilli to keep the puzzlers well fed throughout the afternoon.

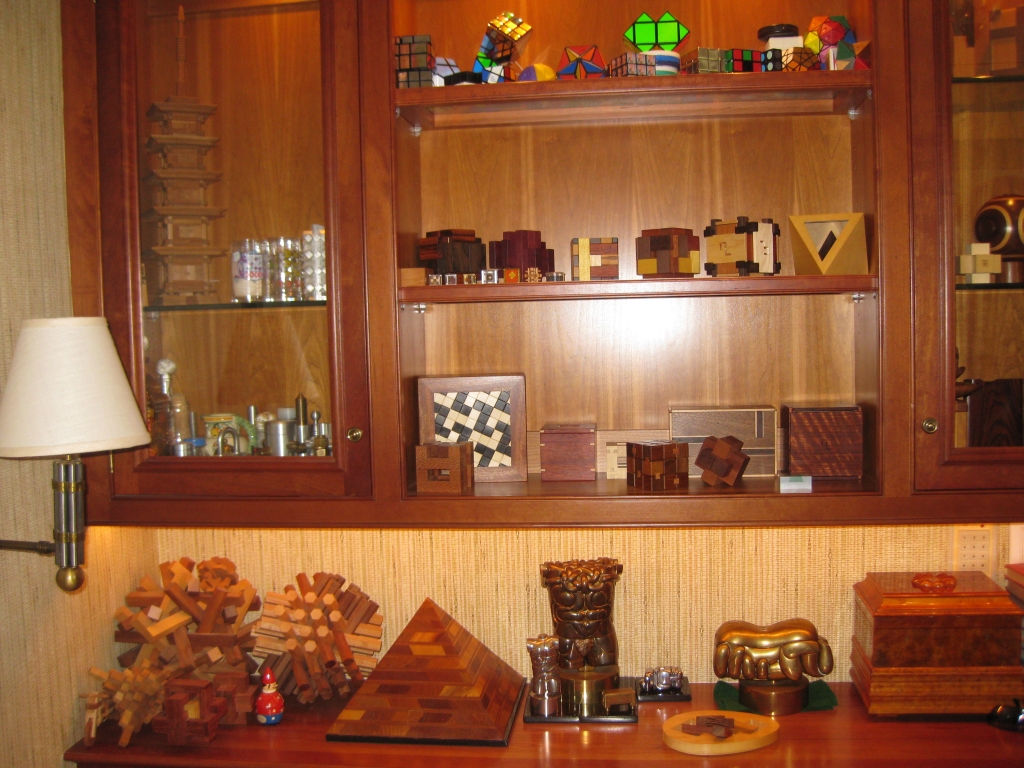
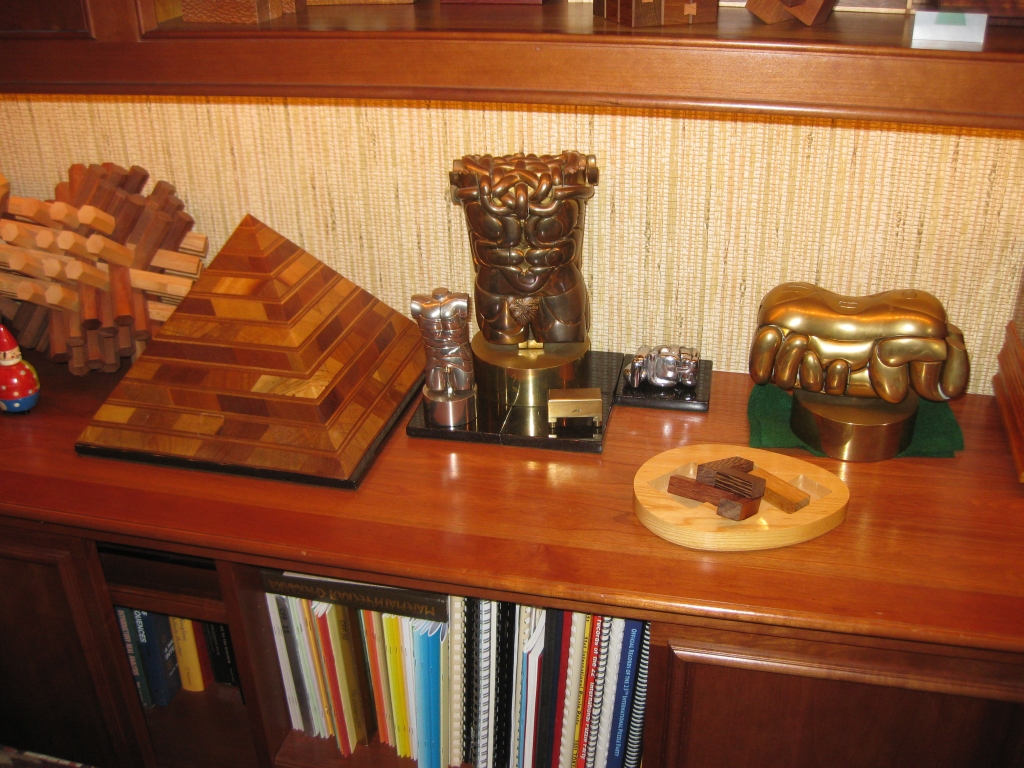
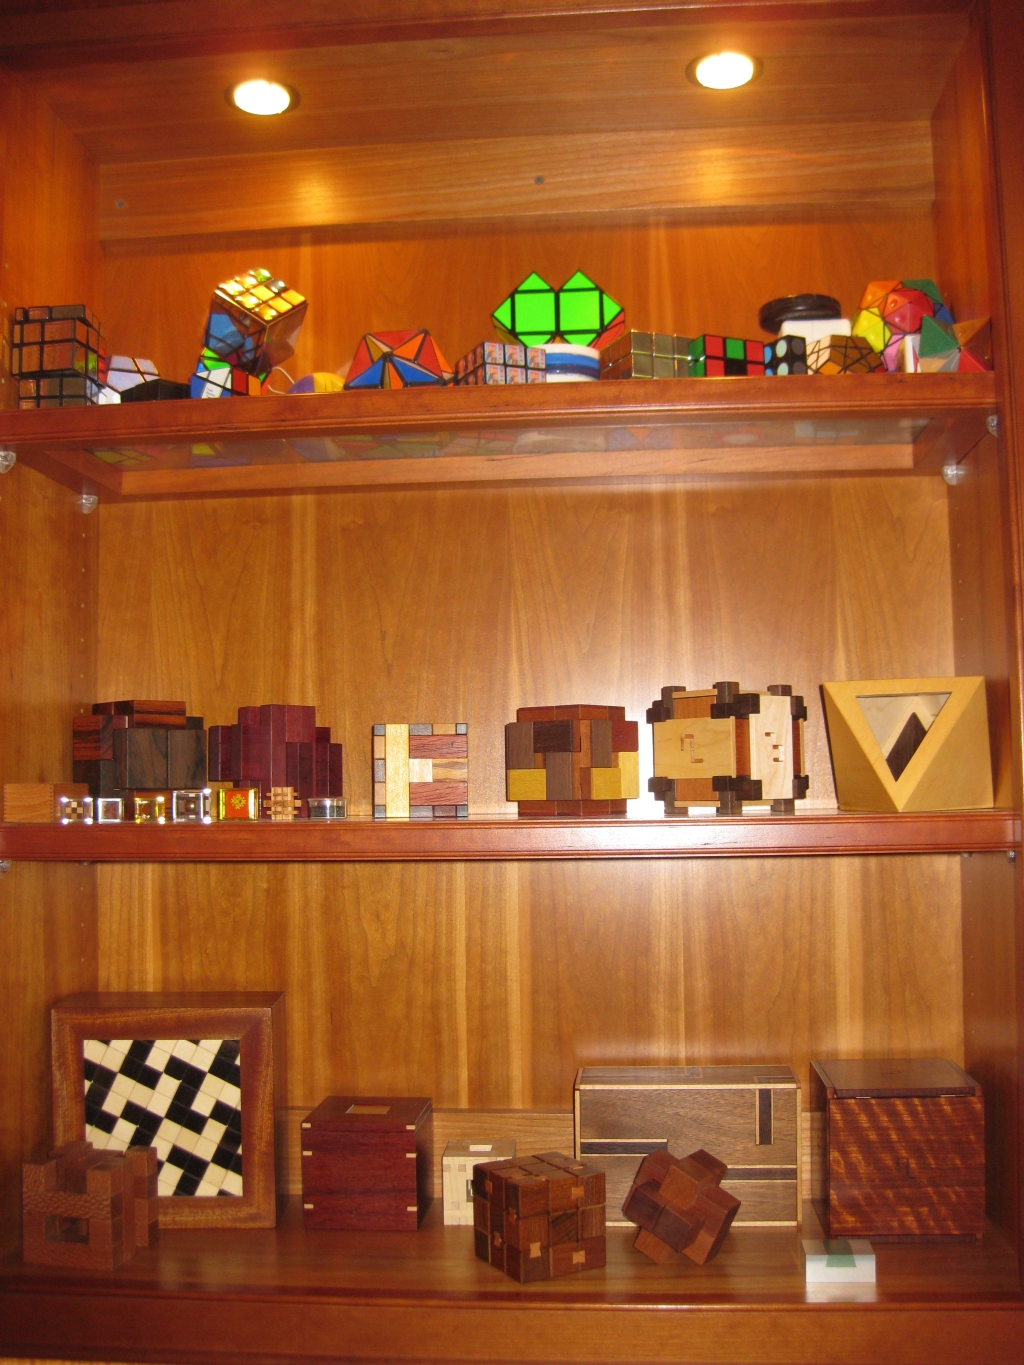
As this was the first time I’d been to Nick’s house I had a good wander around to see what puzzling delights were on show. In the puzzle room there’s quite a few familiar puzzles on display. I recognised a couple of Kagen Schaefer’s boxes, as well as Berrocal’s and many of Eric Fuller’s puzzles, plus a pretty nice collection of Marcel Gillen’s work. I didn’t have time to play with many of the puzzles on the shelves, but I’ll come back to the Marcel Gillen puzzles…

Nick's puzzle room

Nick's puzzle room

Nick's puzzle room - Berrocal

Nick's puzzle room - Berrocal

Nick's puzzle room

Nick's puzzle room

Nick's puzzle room

Nick's puzzle room


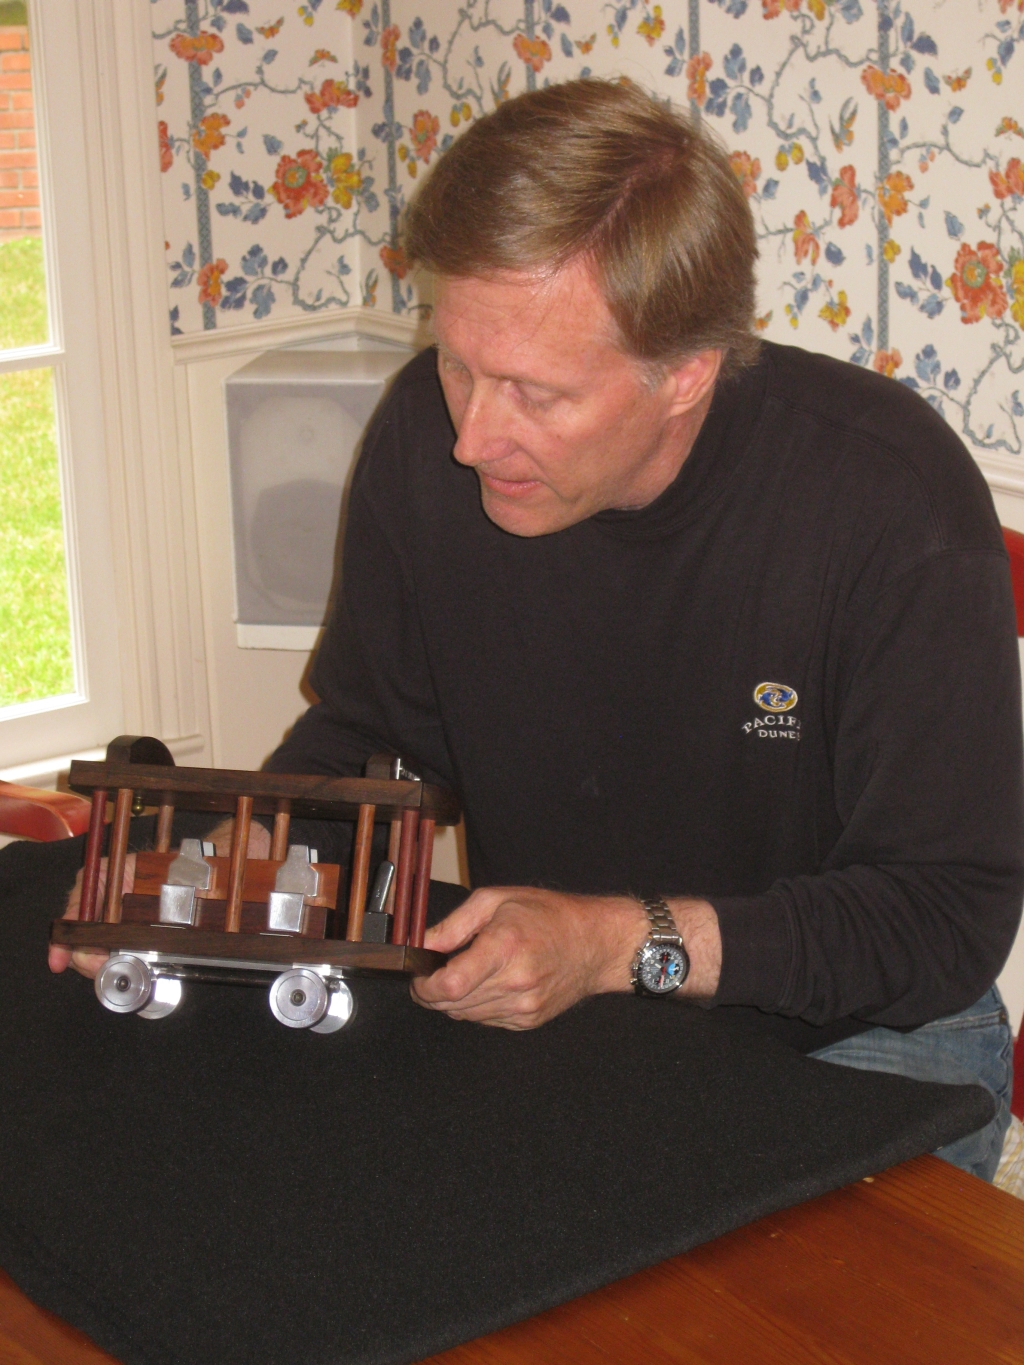
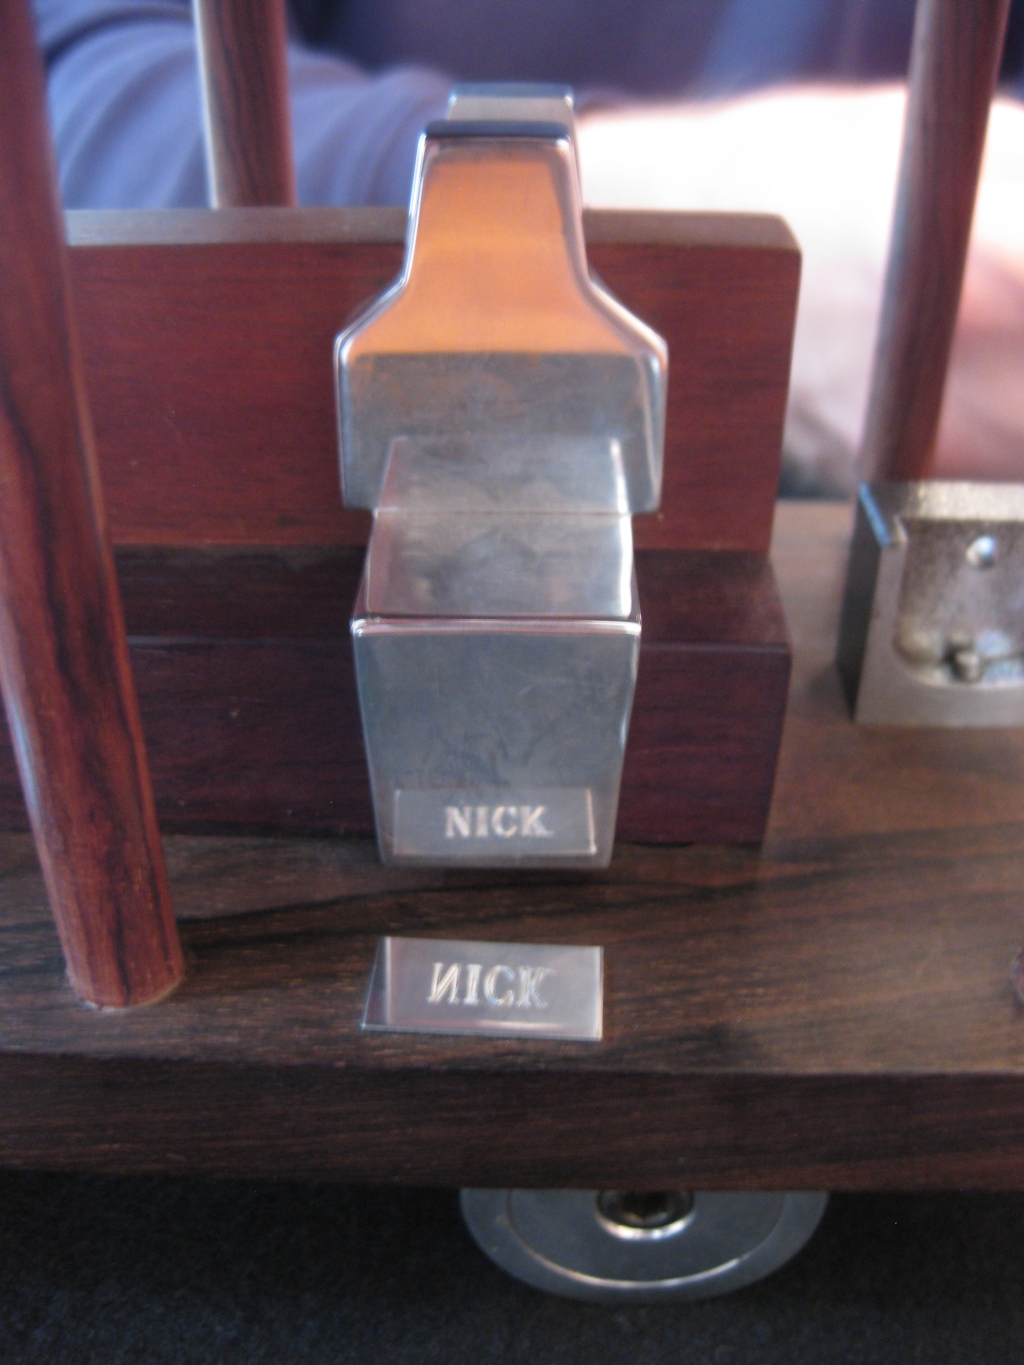
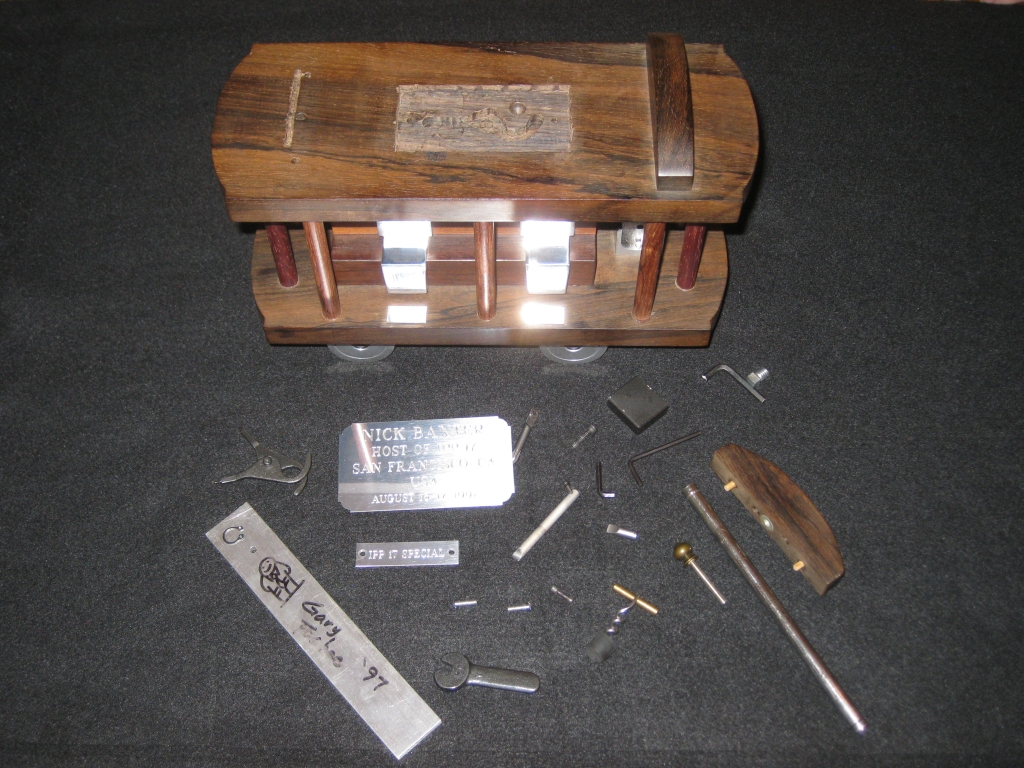
While I was browsing the room, Nick announced that he was going to be doing a guided solve of the Host gift from IPP 17, made by Gary Foshee. Well I didn’t want to miss that, having seen the Trolly Car sitting on Nick’s dining room table when I walked in. It is a sequential discovery puzzle where each part of the puzzle opened reveals new tools, or parts of tools which must be combined in some clever ways to be able to get to the next part of the puzzle. The object is to remove the four passengers, whose names are inscribed in plaques at their feet. I’ll do a full review of that puzzle in part two of the writeup for the Puzzle party as I took pictures throughout the disassembly, but here’s a couple of quick pictures to let you see just how much is hidden in the puzzle.

The IPP17 Host Gift

The IPP17 Host Gift

The IPP17 Host Gift

The IPP17 Host Gift

IPP 17 Host Gift

IPP 17 Host Gift

After Nick had spent 20 minutes or so taking the puzzle apart, with suggestions from the collected audience, a few of us remained around the table for the assembly process to restore the puzzle to its start point, including myself, Abel and obviously Nick. As we talked the topic of the Revomaze puzzles came up and I mentioned that I’d solved all so far except the Gold, and we discussed my thoughts on the series and also Gold Specifically. Abel asked when I’d received mine as he didn’t have his and we talked a bit more as Nick struggled to remember exactly where each piece came from! After he was finished, he asked me to join him in the puzzle room, which of course I did.

The Gillen Collection

The Gillen Collection

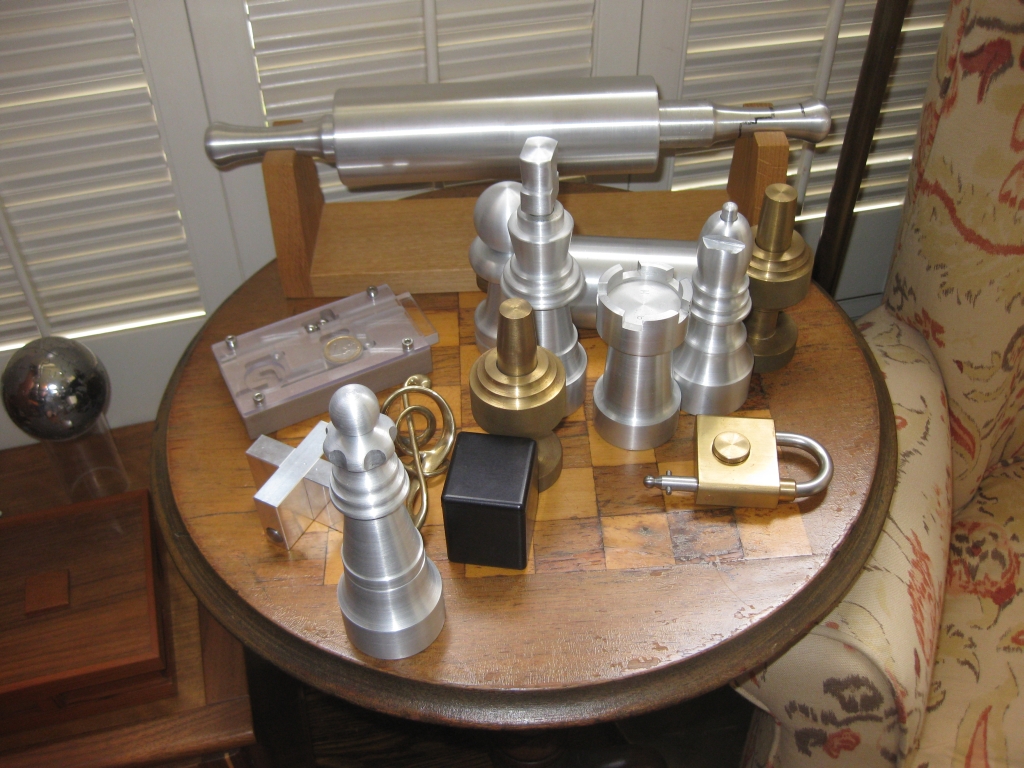
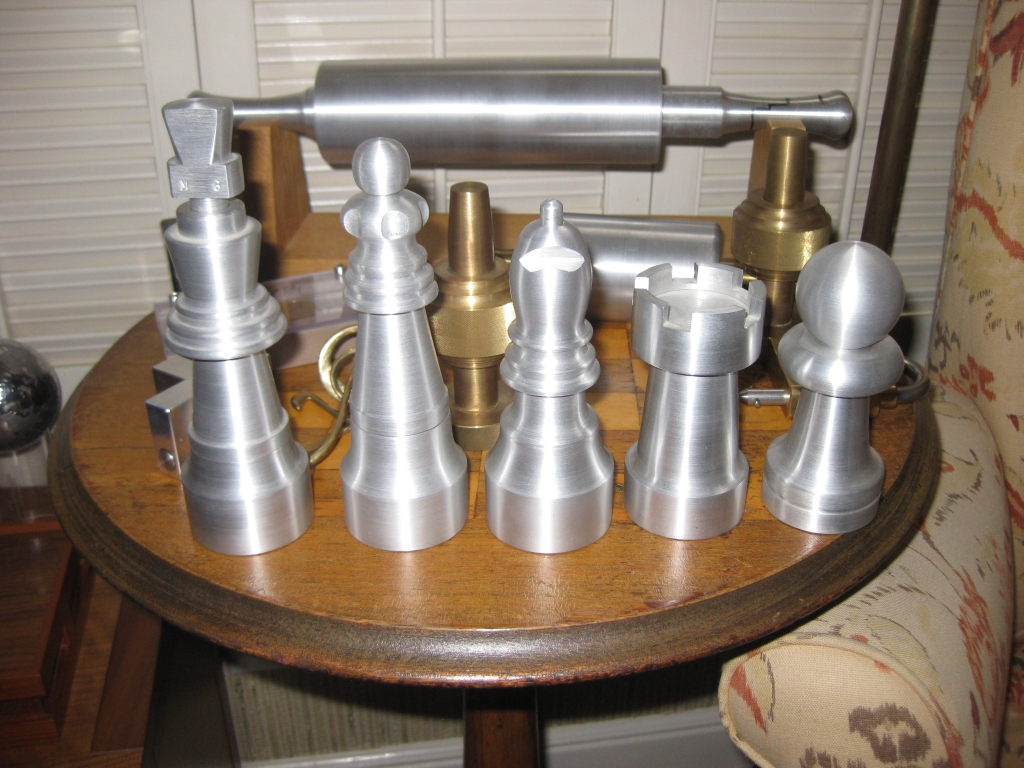
There he picks up the small Marcel Gillen rolling pin puzzle and hands it to me asking “See what you make of that”. So I start playing and quickly find that there’s a maze in there, and the handle of the rolling pin is what is navigating the maze. Sound familiar? Anyway, after a couple of minutes, I find that there’s a sprung pin in there which rides on top of a maze, and gives a distinctive click when you fall off, forcing you to back track to the start and retry. The weight of this puzzle is significant, certainly more than that of a Revomaze Extreme. I quickly find that I can navigate the maze, and moving slowly I can feel the edges of the maze much like you can with practice on the Revomaze. Nick mentions that the larger, entirely aluminium rolling pin is even heavier when I point this out. So I must have a go of that too! The larger one took it’s toll on me. I ended up with my hands silver from all the aluminium dust having spent around half an hour working on it! I believe I made it around half way though the maze as I has able to get from the start to the other end of the pin consistently before falling off. Nick who’s opened the smaller puzzle from IPP13 but only made it half way in the larger says he thinks that’s around half way! For those who have solved a Revomaze, these puzzles significantly predate the revomaze, but lack the ‘quick reset to start’ found in the earlier Revo puzzles.

I did have a play with the much smaller, and lighter Eis Puzzle which I did solve. But I’ll be going back to complete these rolling pins as I’m pretty sure with a little more time I can crack both of them!

Also on that Gillen table was a fair collection of the Chess pieces, so I took the much better picture above since I had remembered my camera that day, unlike the last time at Stan’s

I also spent a while talking to Nick about the current Black Letter labs puzzle series as Nick and I are working together with a team of Renegades solving those. At this time, our team is #2 in the overall rankings with a combined solve time for the first 4 puzzles of 3 days, and it’s been a lot of fun (When we finished both artifacts 3 and 4 we were briefly in first place overall). I’ll write more about that in another post though.

I had a great day and it was good to see a lot of familiar faces. Come back in a few days when I’ll hopefully be able to post the rest of the writeup, including some items from Alan Boardman and his miniature puzzles, and the Trolly Car guided solution.

The Distorted Cube – STC #61-A

What seems like a very long time ago now, way back in August in fact, Tom Lensch offered a number of puzzles through Puzzle Paradise. At that time I picked up a copy of the Two Boxes puzzle which I wrote about some time ago, and this Stewart Coffin Design. It’s taken quite a while to get round to completing all the challenges set by Stewart for the Distorted Cube, but I’ve finally done them all, and it’s about time I wrote about it!

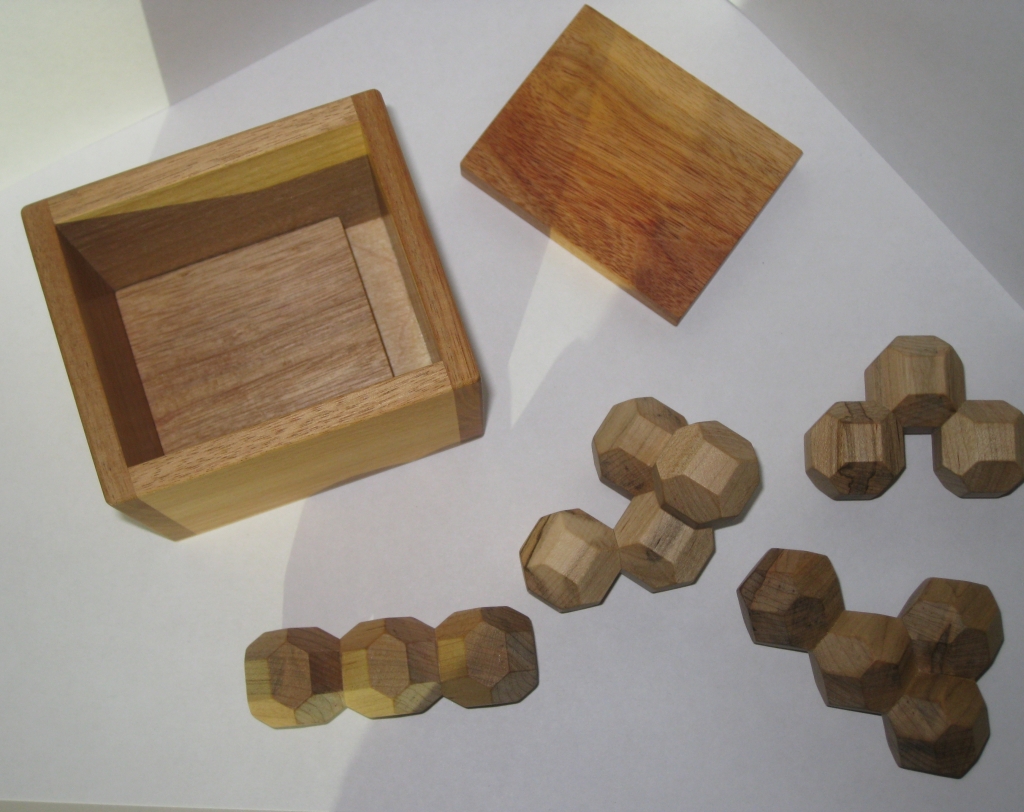
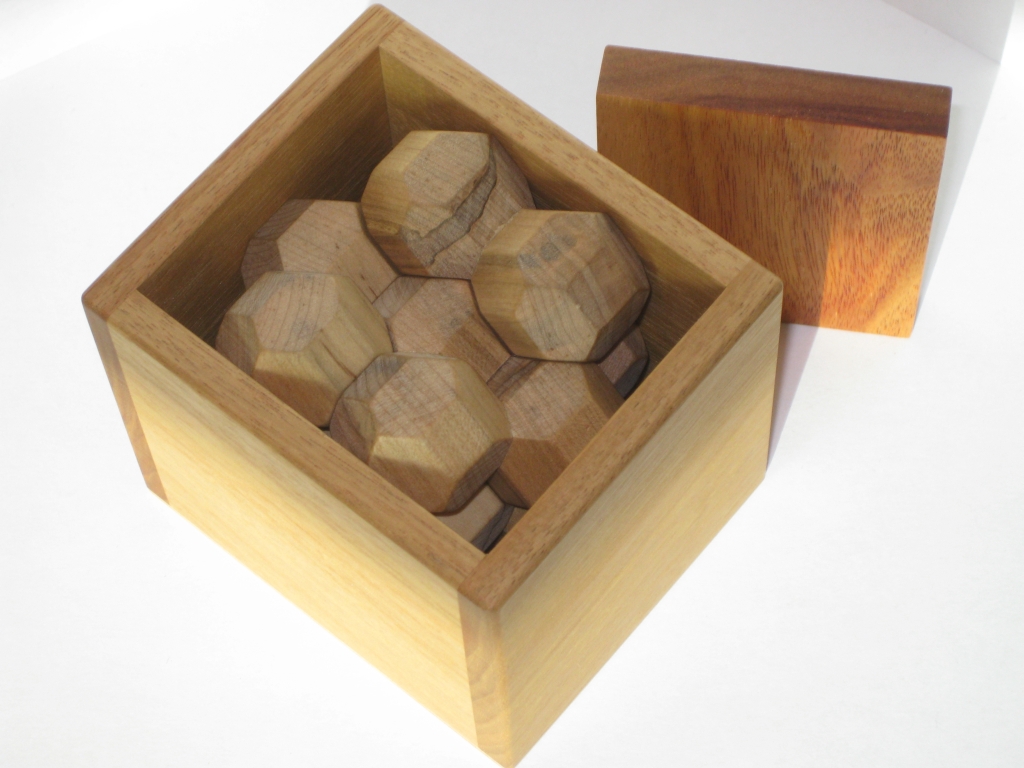
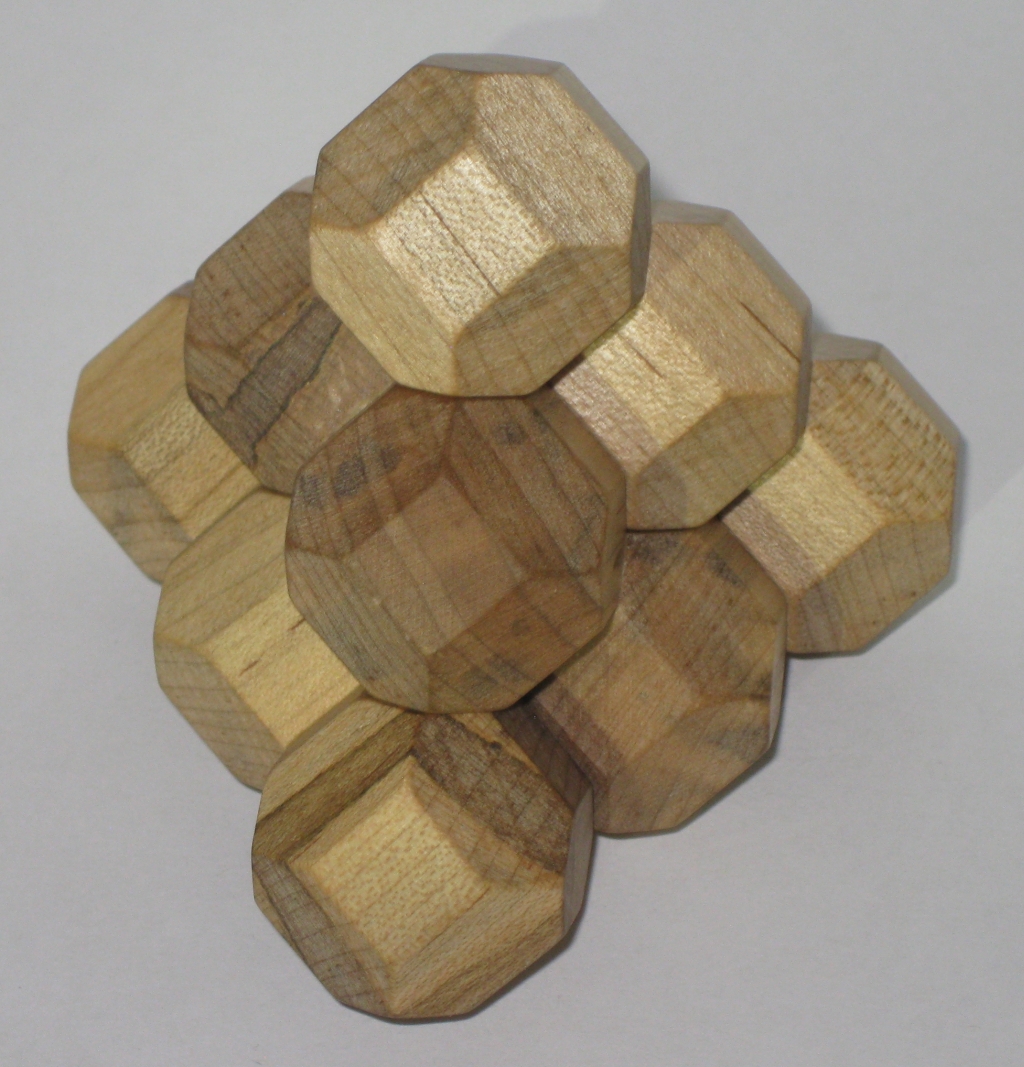
The Distorted Cube, STC #61-A, showing the Box, Lid and Four Pieces

The Distorted Cube, STC #61-A, showing the Box, Lid and Four Pieces

As you can see, the puzzle consists of four puzzle pieces, made from 14 edge beveled cubic blocks, which have been joined together in different ways, as well as a rather unique rectangular covered box (But I’ll come back to that!) The copy I have is made by Tom Lensch, and is from a run he did in August 2011. The box is Canarywood, and the pieces are made from a rather interesting Maple called Ambrosia. Ambrosia maple comes from regular soft maple and Hard Maple trees that have been infested by the ambrosia beetle. The small beetle bores a network of tunnels and short galleries called cradles. A fungus is responsible for the blue, gray and brown streaks and decorative patch work that accompany each tunnel and adjacent wood. The streaks and patch work add a unique look to this hardwood without affecting its structural integrity

Stewart Coffin first made this puzzle in 1988 in a very limited run of about 8 puzzles, and then again in December of 1996 making around 12 copies. He described it in Puzzle Craft in the 1992 edition, and in the 1996 run produced a puzzle sheet to go with the puzzle. You can see that sheet by following the link here.

The puzzle consists of a number of challenges, each of which uses the pieces in a slightly different orientation, which really explores the huge number of possibilities that these four shapes can be combined. One thing I found as I moved from one challenge to the next is that human nature starts to get in the way. As you find one solution, your brain becomes fixated on that orientation, and starts to rule out other possibilities, making finding the solution to the next challenge more difficult.

Challenge #1 Solved

Challenge #1 Solved

The First challenge is to pack the four pieces into the box so that the cover placed on top of them will be flush with the top of the box. A variation of this is to first lay the cover in the bottom of the box, in which case, the puzzle assembly will be flush with the top. Just so you can tell I wasn’t cheating, I went with the latter option.

Challenge #2 Solved

Challenge #2 Solved

Challenge number 2 is to place the lid into the slot at the side of the box, converting it from a rectangular box, to a cubic box. Now place the four pieces into the cubic configuration. Again the top of the assembly will be flush with the top of the box. (No, you’re not allowed to have extra pieces sticking out, despite how many combinations I found where this was the case).

Challenge #3 Solved

Challenge #3 Solved

For the third challenge, the cover for the box is put to the side, and the pieces have once again to be packed into the now much larger space so that they are still flush with the sides and top/bottom of the box. This really shows just how many ways there are to make use of the space (or possibly the holes in the cubes) to pack them more or less efficiently, depending on the space you have available.

I really love the versatility of this puzzle. What seems like a simple configuration of four pieces allows a lot of different configurations, and as I found many hours of happy puzzling.

But the challenges don’t stop there! If you put the box to the side, there are yet another two challenges to try to solve. (And I’m pretty sure from my playing around with the pieces that there are more that Stewart just didn’t list!)

Challenge #4 Solved

Challenge #4 Solved

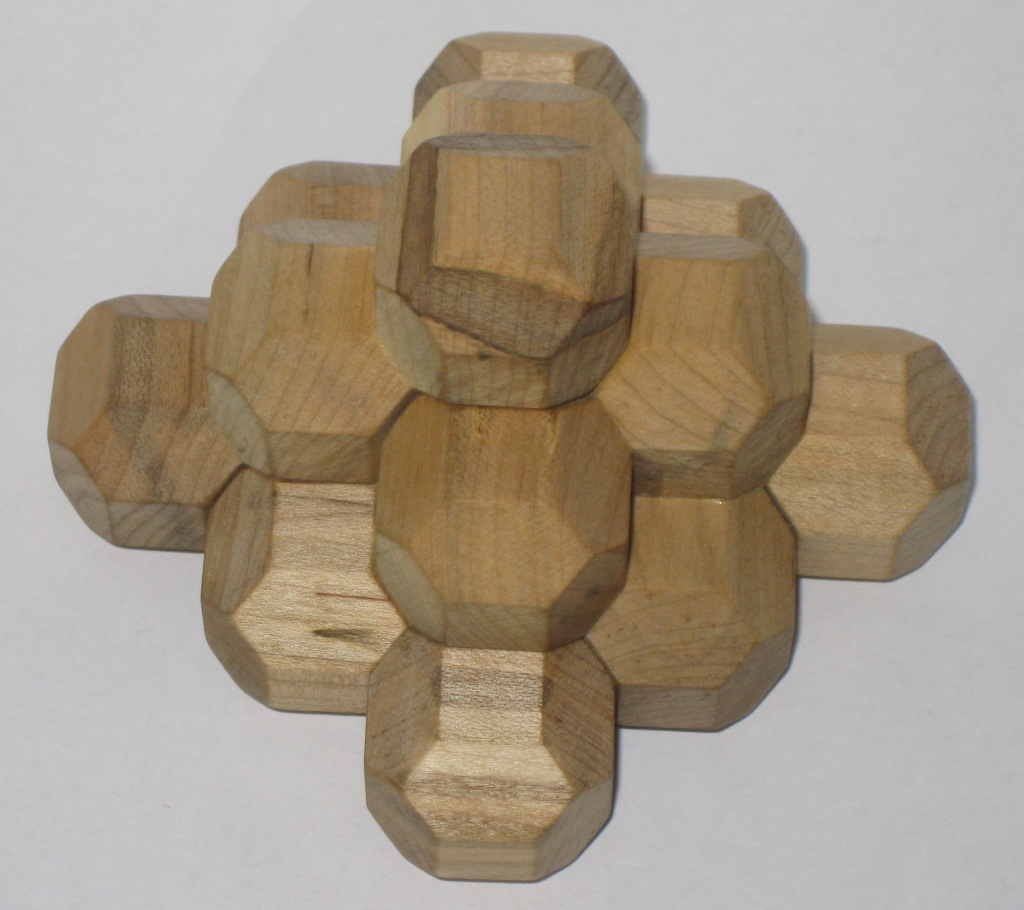
Challenge number 4 has us making a square pyramidal pile using all four pieces.

Challenge #5 Solved

Challenge #5 Solved

The final challenge that Stewart set is to create a triangular pyramidal pile using only three of the pieces. Of course he’s not telling you which three to use. That’s up to the puzzler to figure out!

Overall, this a great puzzle and I’d highly recommend picking up a copy if you see one for sale. I spent many hours playing with this over several months, and still enjoy going back and re-solving the various challenges. I may even look further into the combination of the pieces to see if there are other combinations possible, as there are certainly some combinations of the pieces which were not used in any of the original five challenges.

Sunrise – Sunset

Sunrise – Sunset is a Stewart Coffin design which I recently found for sale on Ebay with a Buy it Now option. Seeing it, I didn’t hesitate as this is a Coffin original, which was going for a very good price so I couldn’t resist. Labelled as design #181 in the Coffin numbering system it was used by Jerry Slocum as his IPP exchange puzzle at IPP22.

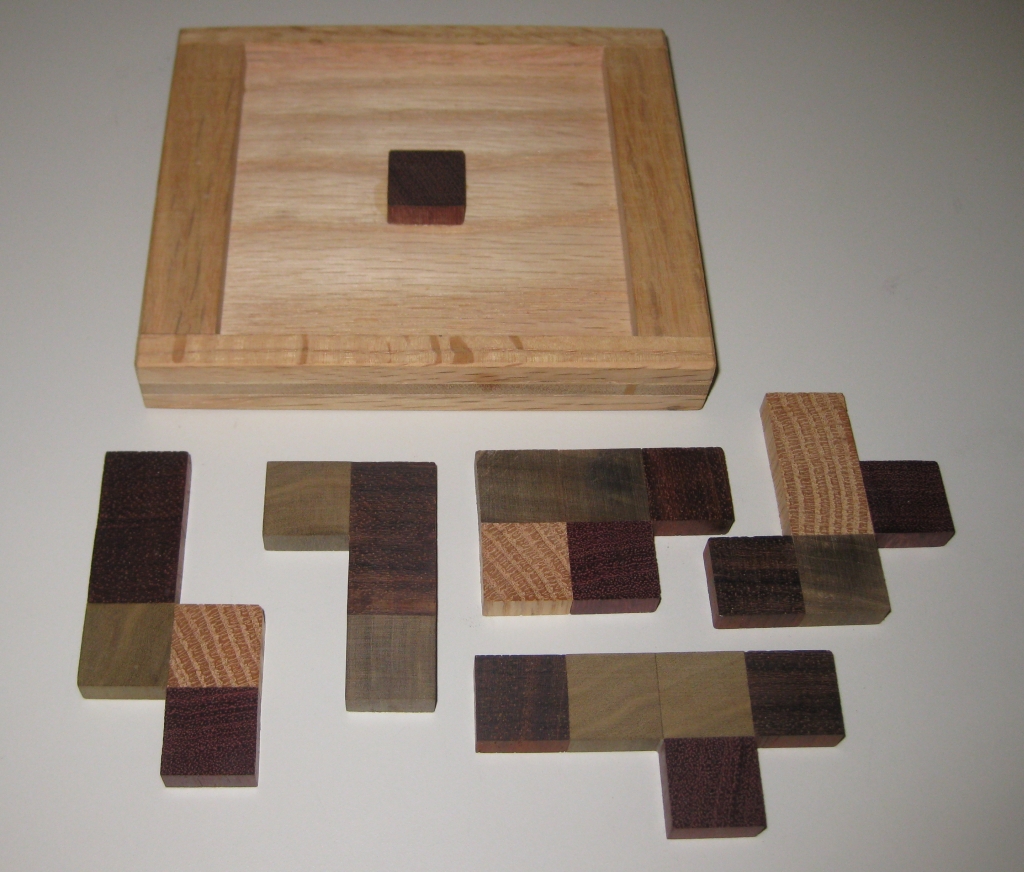
Sunrise - Sunset top tray

Sunrise - Sunset top tray

This is another tray packing puzzle from Stewart, and as I’ve noted in the past, I’m terrible at tray packing puzzles, so I didn’t hold out much hope for this one. If you’ve seen previous reviews of Coffin Packing puzzles, like the Check Me Out puzzle, you’ll know that Coffin is a real sod when it comes to messing with your head, and how you normally go about putting pieces into a square box.

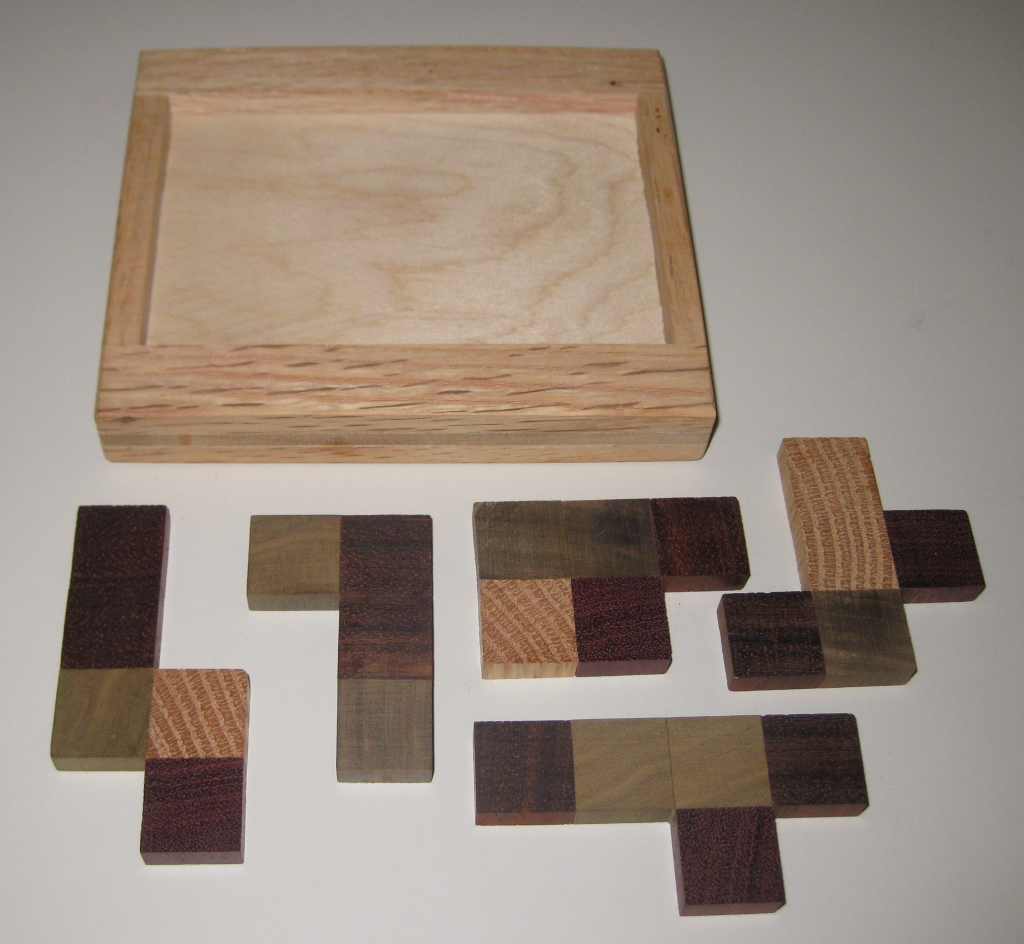
The puzzle itself is a twofold puzzle, hence the name. The tray is two-sided, so you get twice the puzzle from the same pieces. On one side of the tray is a 5×5 grid, with the centre cube permanently stuck in place (representing the sun if I were to guess), and the other side is a 4×6 grid. The idea is simple pack the pieces into one side, then flip the tray over and do the same on the other side.

The base is make from three layers, making for a very solid frame. Guessing I’d say the frame is Mahogany, but that’s a wild guess! Four of the five pieces are five units in size and the fifth is four units and are made from three different woods. If I were to guess, I’d say Bubinga (the almost purple looking wood), Lignum Vitae (green), and Mahogany (light). As you can tell from some quick math, the pieces match the grid sizes, so they’re going to fit exactly in this one, which for me is a good thing, as these strange sized grids really mess with my head!

Sunrise - Sunset bottom tray

Sunrise - Sunset bottom tray

When I sat down to solve the puzzle, I expected to be at this for hours, as I have been with other tray puzzles, but I was shocked and pleasantly surprised when I had solved the first side within 5 minutes. So I flipped the puzzle over and tried the other side, thinking it was going to be a lot tougher. Again I solved it fairly quickly and was very happy with myself. So on the difficulty scale I’d rate this one as easy, but rewarding.

Once of the really nice features of this puzzle is that the solutions (and there is only one per side) have a degree of symmetry to them, which really adds to the effect of the Sunrise / Sunset theme of the puzzle.

This is a great little puzzle, and if you’re like me and not very good at packing puzzles, if you can find a copy of this one, pick it up as you’ll feel better about yourself having solved one!

PS: I make no guarantees about your feelings or success at solving this puzzle 😉

Check Me Out

This entry is part 3 of 6 in the series IPP 31

Quite some time ago now, I mentioned in the post about the Post IPP California Puzzle Party that I’d purchased a copy of Dave Rosetti’s exchange puzzle from IPP31 and that I’d write a review soon. It seems that soon wasn’t very soon at all and it’s taken me months to get round to writing it! But here at last is the review of ‘Check Me Out’ designed by Stewart Coffin, and numbered 256 in his numbering system.

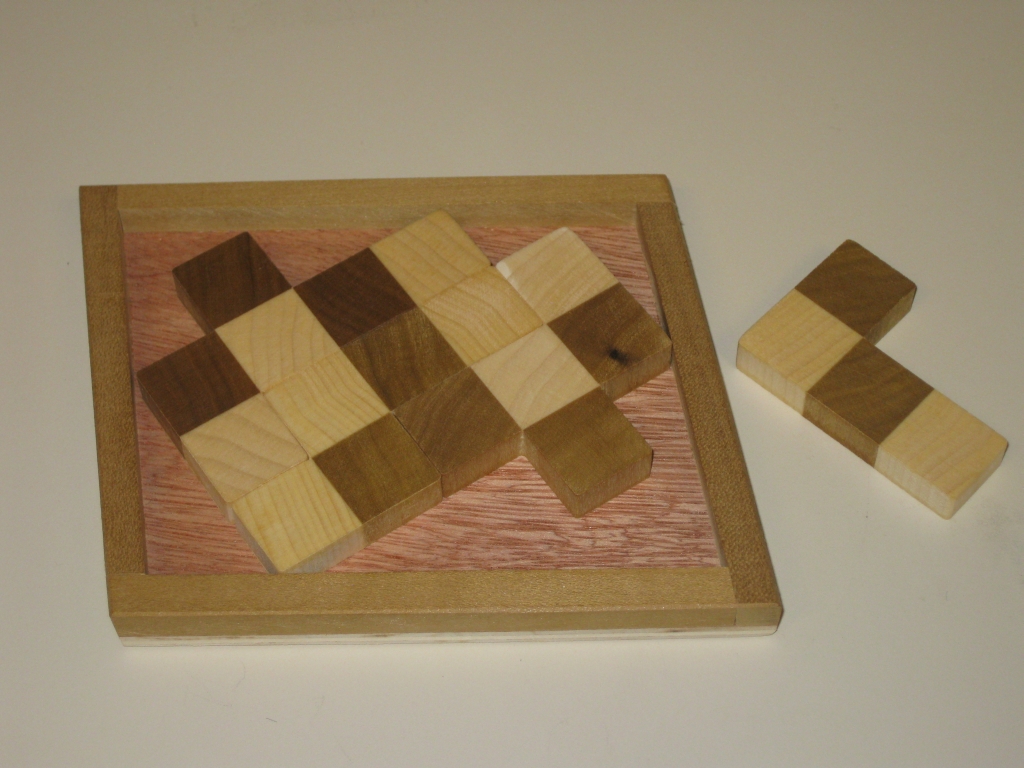
STC #256 - Check me out

STC #256 - Check me out

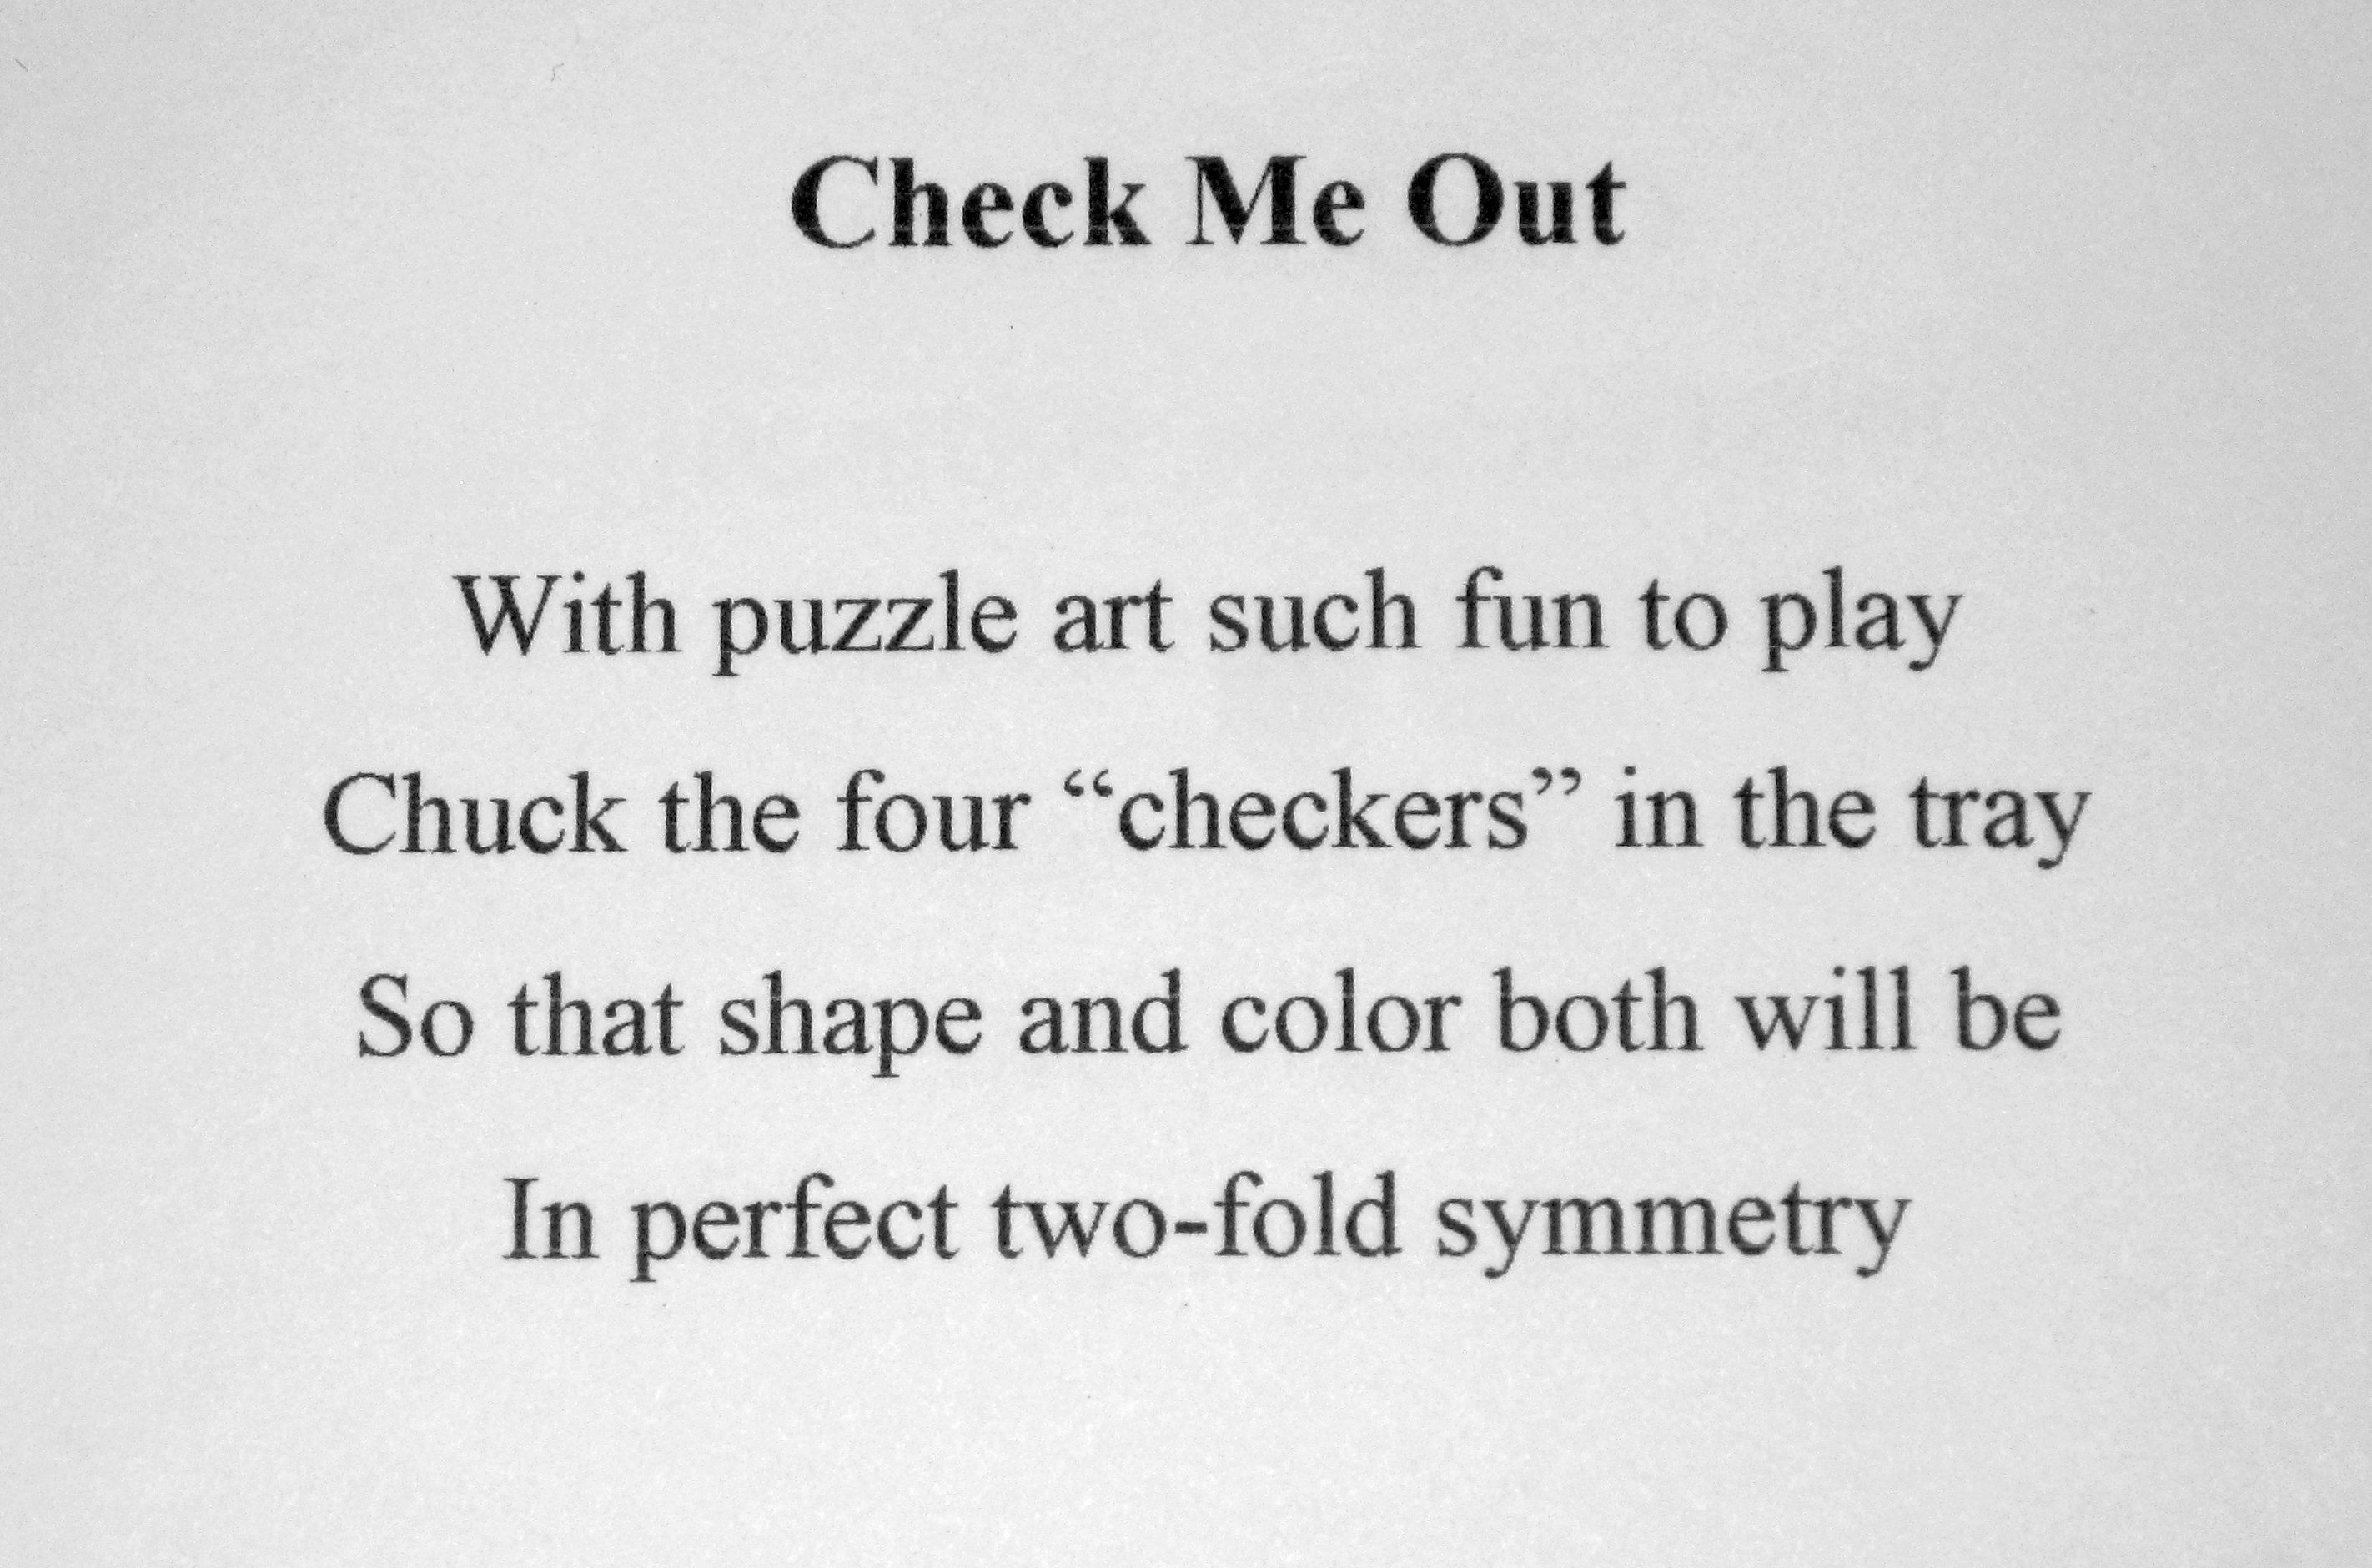
Check Me Out is another devious tray packing puzzle from Mr Coffin, where a mere four pieces have to be packed into the tray. To make things interesting, the tray isn’t square, it’s a nice parallelogram, and one piece is conveniently not placed in the tray. If that wasn’t hard enough, the card which comes with the puzzle kindly states


With puzzle art such fun to play
Chuck the four “checkers” in the tray
So that shape and color both will be
In perfect two-fold symmetry

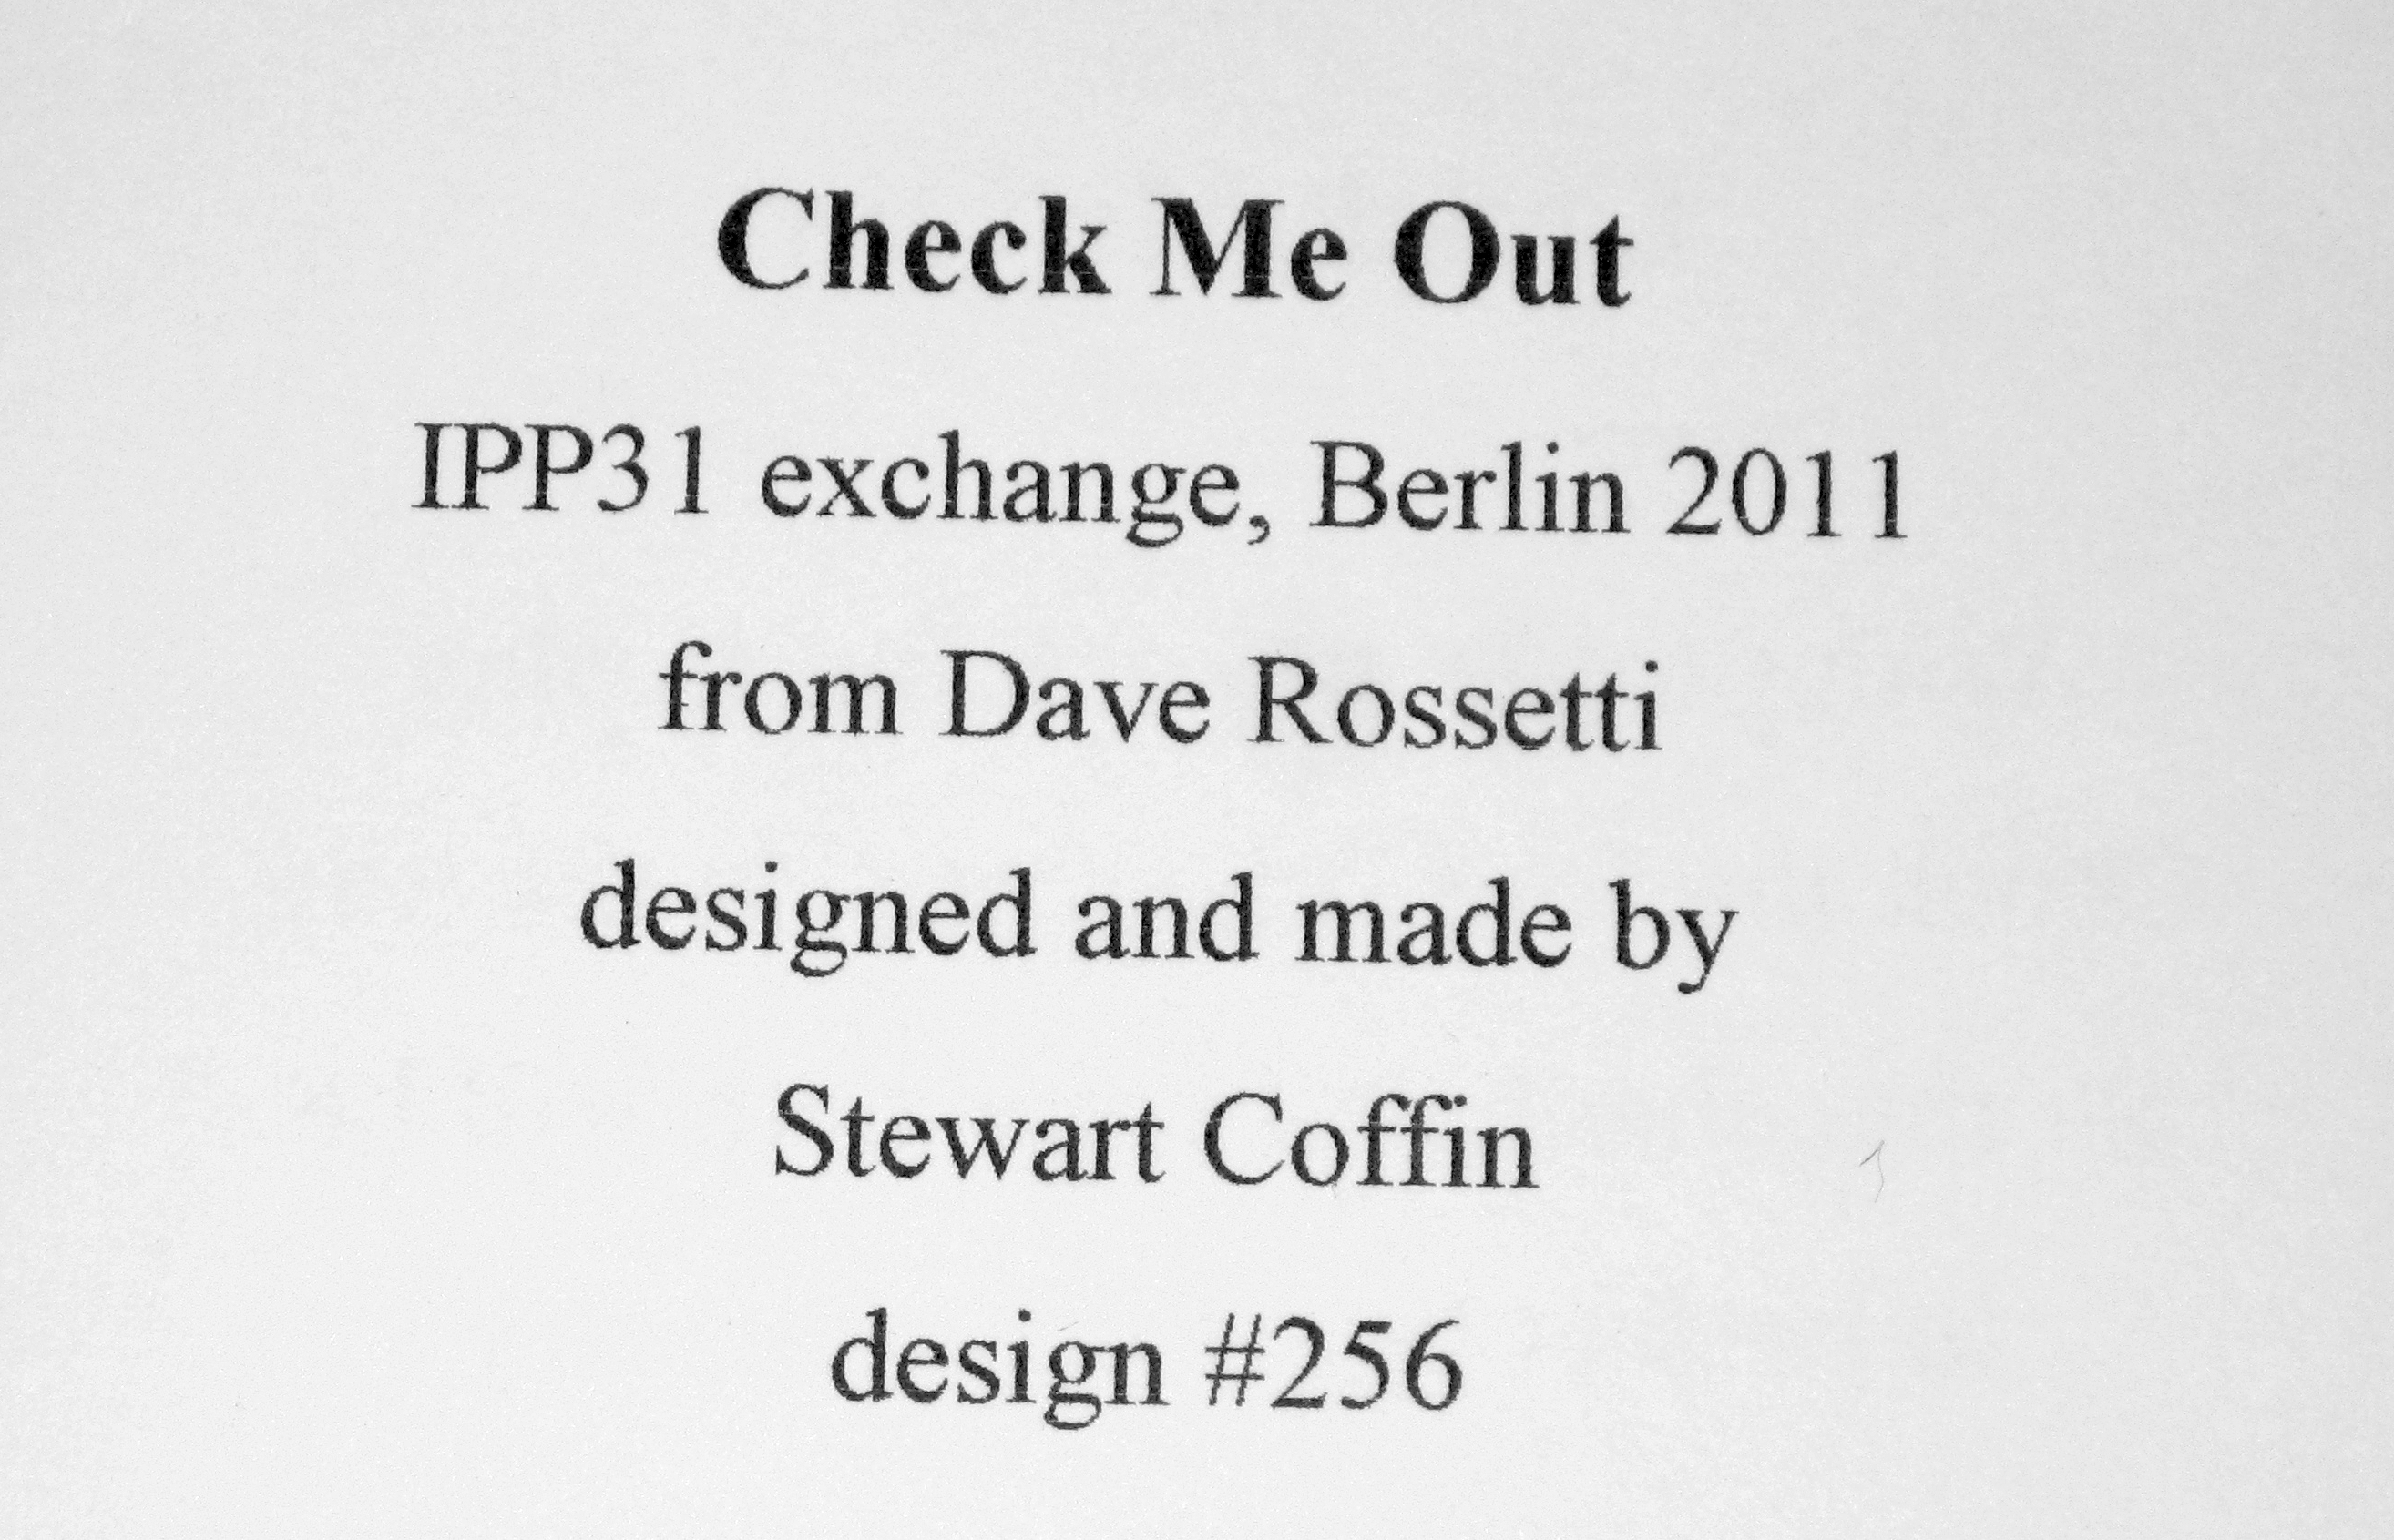
Front of the info card

Front of the info card

Back of the info card

Back of the info card


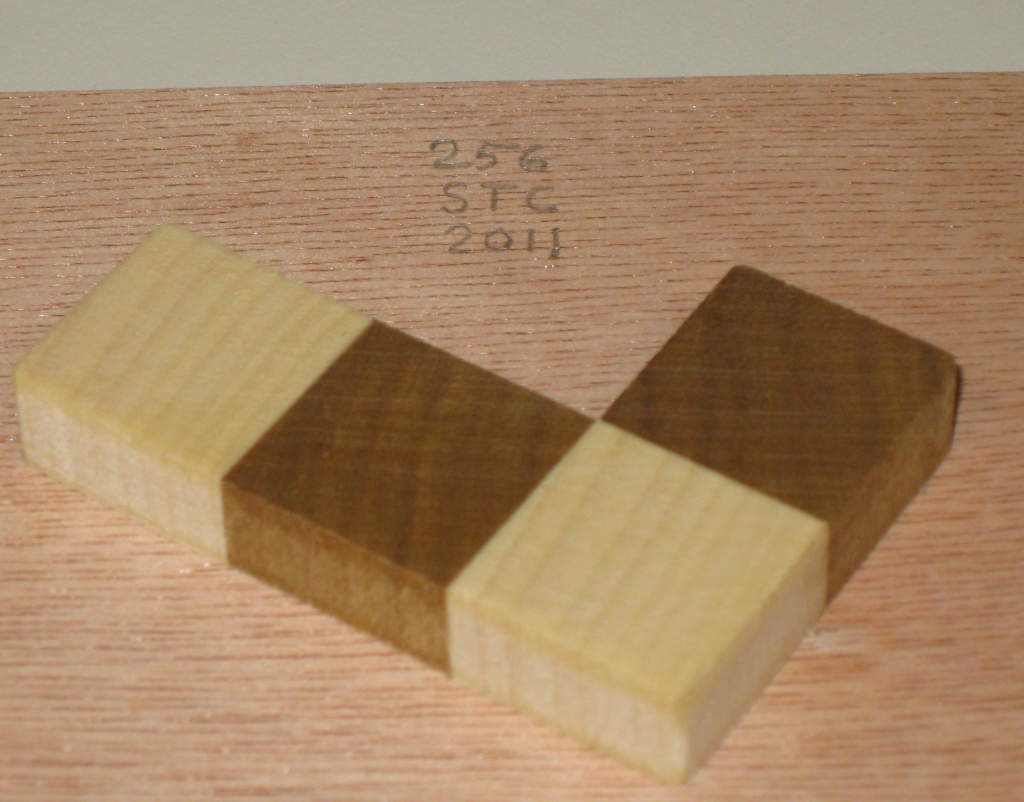
The Puzzle itself is fairly plain. There’s no exotic woods used here (possibly Maple for the lighter wood), and the base of the tray is made from a veneered 3 ply plywood. That said, the grain in the veneer of the base of the tray is nice enough and gives a good contrasting colour to the pieces. Add to that the fact that the grain is offset to the angle of the walls of the tray really helps to mess with your head as you’re solving it. The bottom of the tray is marked in pencil “256 STC 2011”.

Bottom of the tray

Bottom of the tray

Each of the four pieces is very accurately cut and has had the corners rounded very slightly to take the sharp edges away. It’s a small detail, but as a fellow puzzle maker pointed out to me when I started making puzzles, it really does make the puzzle far nicer in the hands when you’re solving it.

Solving this one really took quite a while for me. I spent several hours trying to find a combination where all four pieces could fit in, ignoring the symmetry part of the problem. This is an excellent puzzle that will likely keep you busy for a long time. Who would have known that four pieces could provide such a problem to placing them in a tray?

I’m not going to post the solution here, as that would spoil the fun. If you’re really stuck, then drop me a note and I might help you out by letting you know where one or two of the pieces go!

Unhappy Childhood

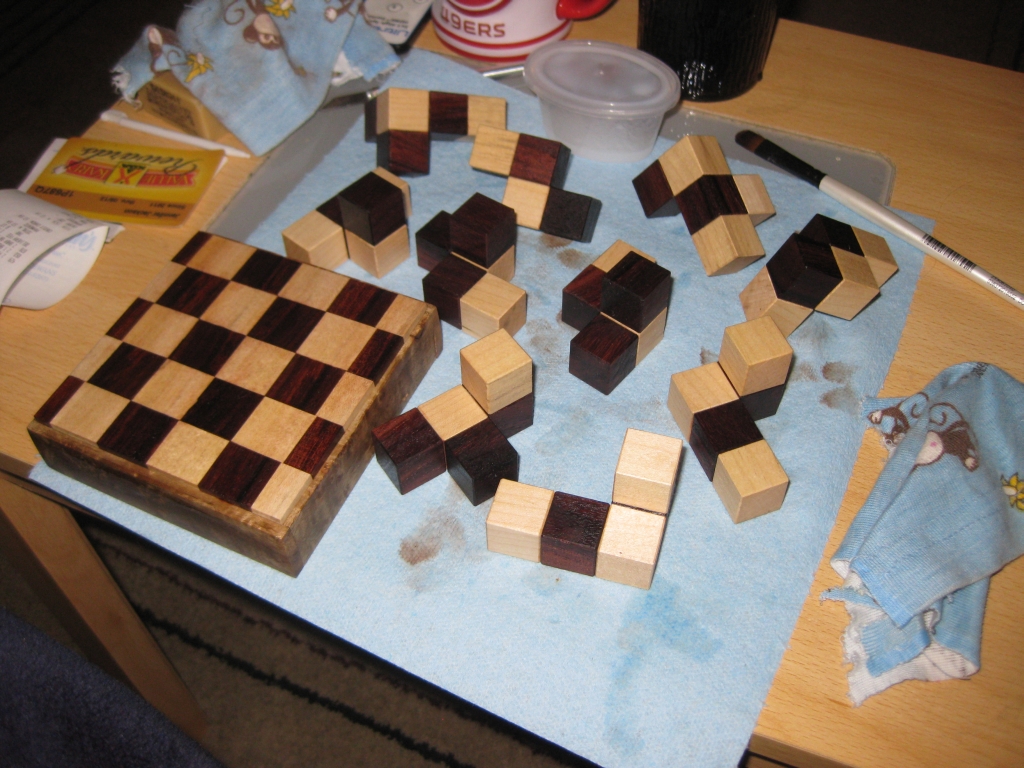
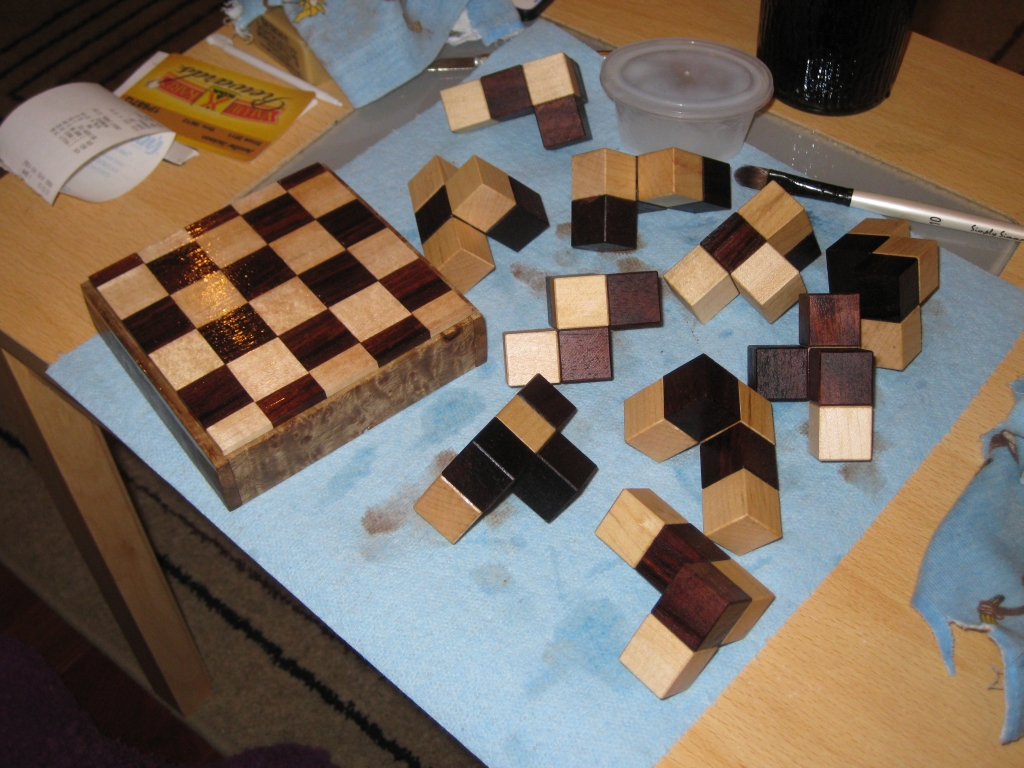
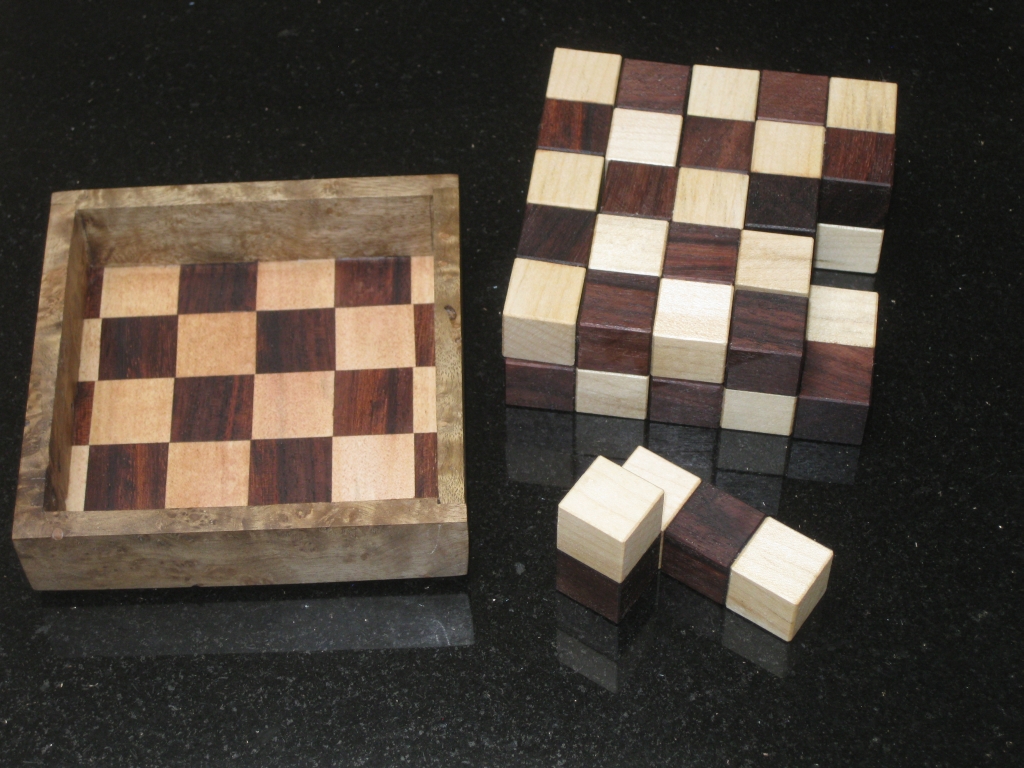
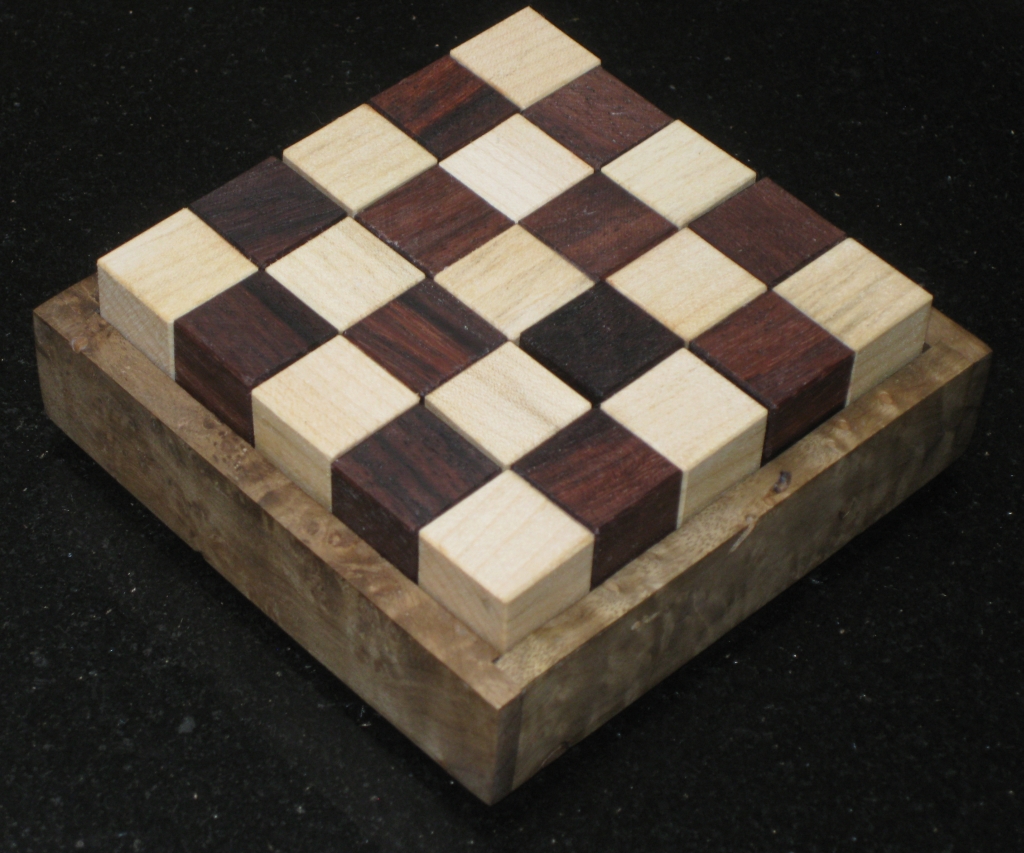
No, this isn’t a post about how I had a hard life growing up, or anything of that nature. I had a pretty happy childhood as it happens. Most of you will know already, that this is one of Stewart Coffin’s puzzle designs, #41 in his numbering system, consisting of 10 pieces, made from 5 cubes each, which come together to form a 5x5x2 rectangle with a checkerboard pattern.

Unhappy Childhood, boxed in the unique checkerboard solution.

Unhappy Childhood, boxed in the unique checkerboard solution.

This particular copy was made by me and is made from Rosewood and Maple, with a Myrtle Burl box. It measures 3.7″ x 3.7″ x 1.5″ for the pieces, and 4.25″ x 4.25″ x 1.7″ in the box.

This is a pretty tough puzzle to solve, as there is only one solution where you end up with the checkerboard pattern on both bottom and top as you can see in the picture above. There are however 2,408 possible solutions if you ignore the checkerboard. So no shortage of ways to get a 5x5x2 solution! (Stewart Coffin reports that “a computer analysis by Beeler, these pieces pack into a 5 x 5 x 2 box 19,264 different ways”, however Burr Tools shows just 2,408)

The following is a look at the creation of this puzzle. Hope you enjoy!

This is one of the puzzle designs that I had been looking at making for a while, since it seems no-one has made any in some time, and I don’t have one in my collection. Really that’s where this all started, looking to add a new puzzle to my collection, and having spent (far) too much on puzzle already this year, what better way than to make it myself.

It all starts with cubes

It all starts with cubes

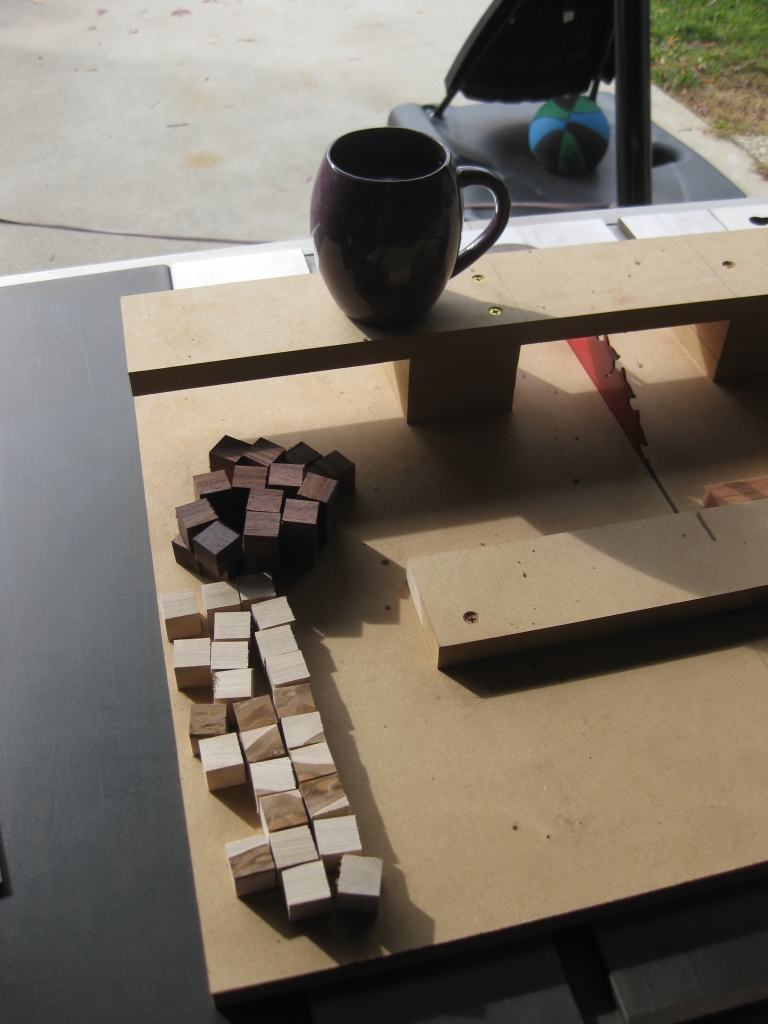
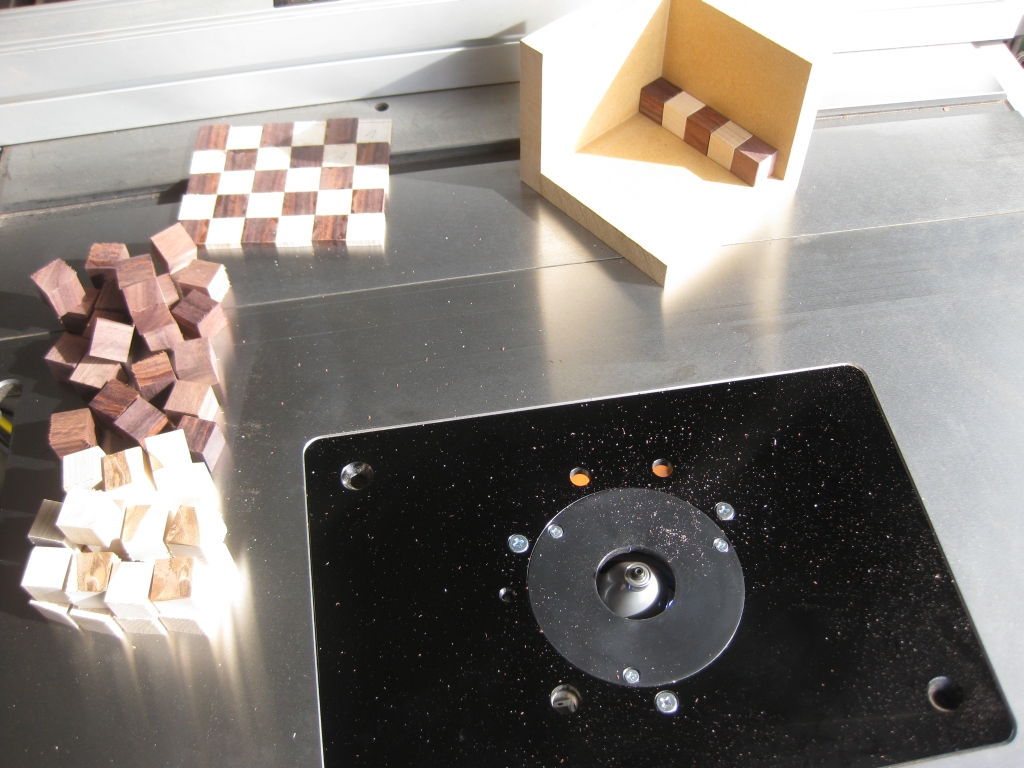
So the puzzles that I’m making currently are all cube based, and that’s where it all starts. 50 wooden cubes, 25 Rosewood, and 25 Maple is the starting point for the UC. The darker tops on some of the Maple cubes at the bottom of the picture is actually the natural wood. Since I love the look of wood, I’m not selectively removing pieces which don’t look perfect. After all each puzzle is unique given the grain and natural colour of the wood, which is something I love. When I put the pieces together, I’ll orient the pieces so that very little of this is visible, because I’m really aiming for the contrast between the two woods in this puzzle. If the couple I’ve made, only one has this distinctive colouring on some of the pieces.

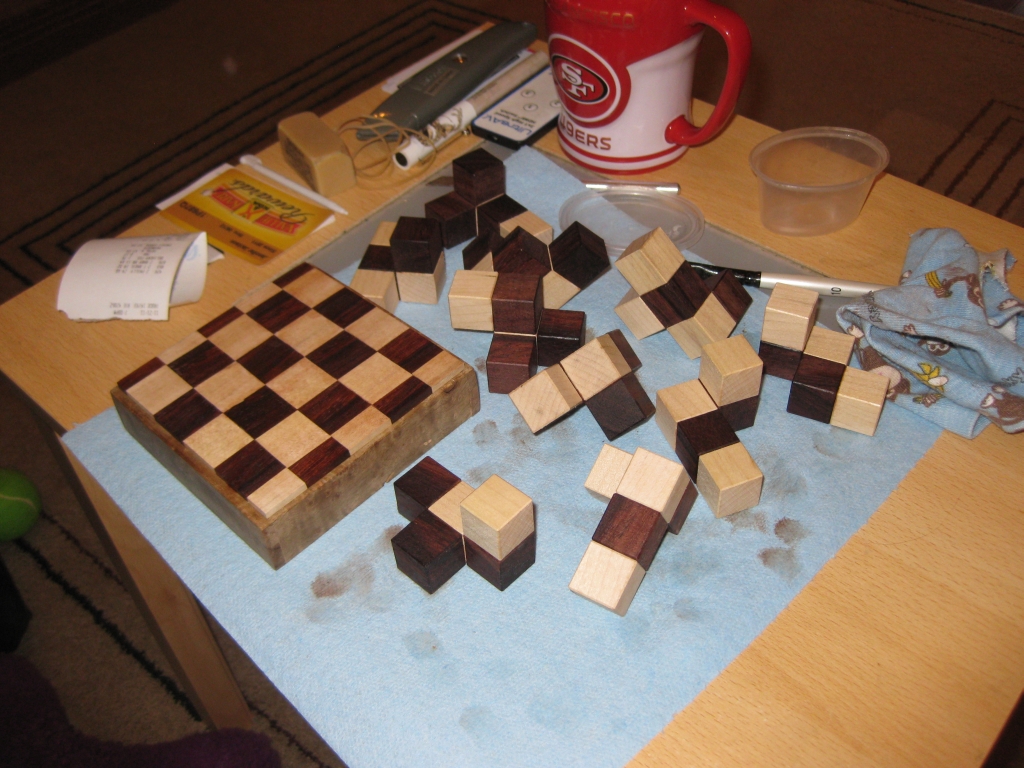
50 Cubes to be Bevelled

50 Cubes to be Bevelled

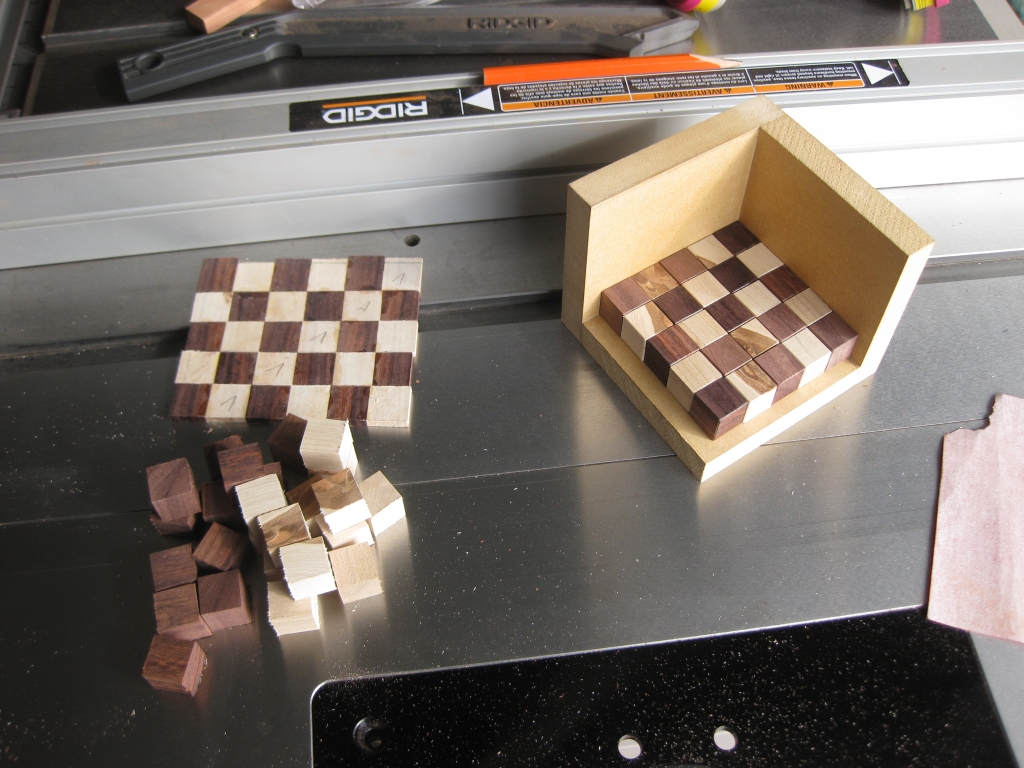
One row done, 9 more still to do!

One row done, 9 more still to do!

Half way there!

Half way there!

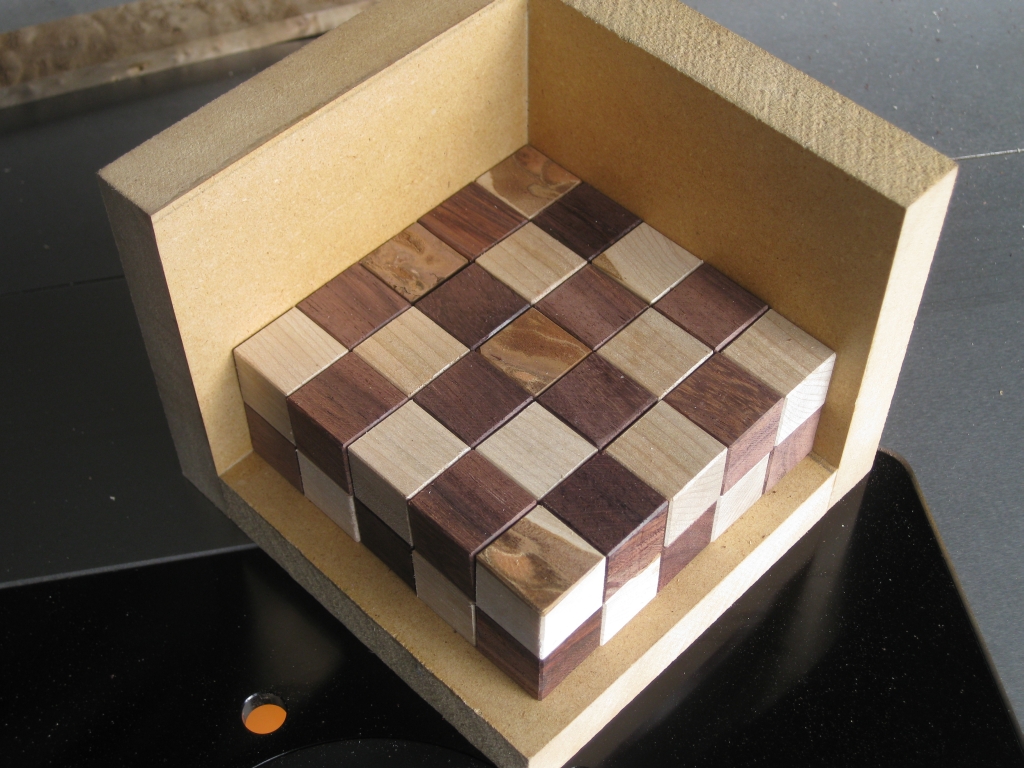
Some time later, and I'm done!

Some time later, and I'm done!

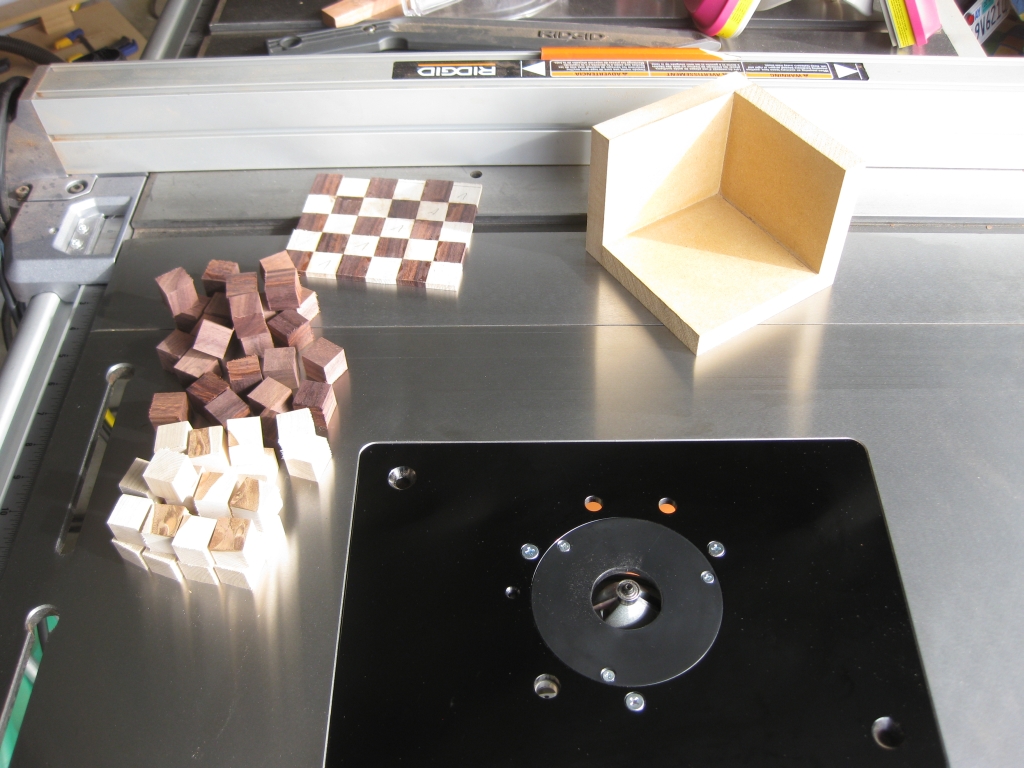
This is one of the most time consuming parts of the process (currently). I have to take all 50 cubes, and put a very small bevel onto each edge of the cube. All in all it takes between 1.5-2 hours with my current method. There’s been a fair old discussion in one of the puzzling forums about beveling cubes, so I’m sure I can cut this down significantly, but that’s going to need a new jig, and some more tools in the shop so for now I’m stuck with what I have.

If you’re interested, the checkerboard piece of wood in the pictures isn’t some sort of template, it’s actually what will become the base of the box that the puzzle sits in. I just happened to be working on it at the same time, hence it ended up in the pictures.

Next up I made the 10 pieces of the puzzle from those 50 cubies, and as it happens I don’t have any pics of the process. I’ll need to take a few from the next one I make and update this at a later point. Anyway with that done, I turned my attention to the box. I now had dimensions for the box, based on the final size of the pieces, so I took the burl I was using to the saw, and cut it to the right lengths for the box, and created a dado in the edges of two sides, to allow me to get a stronger joint for the corners.

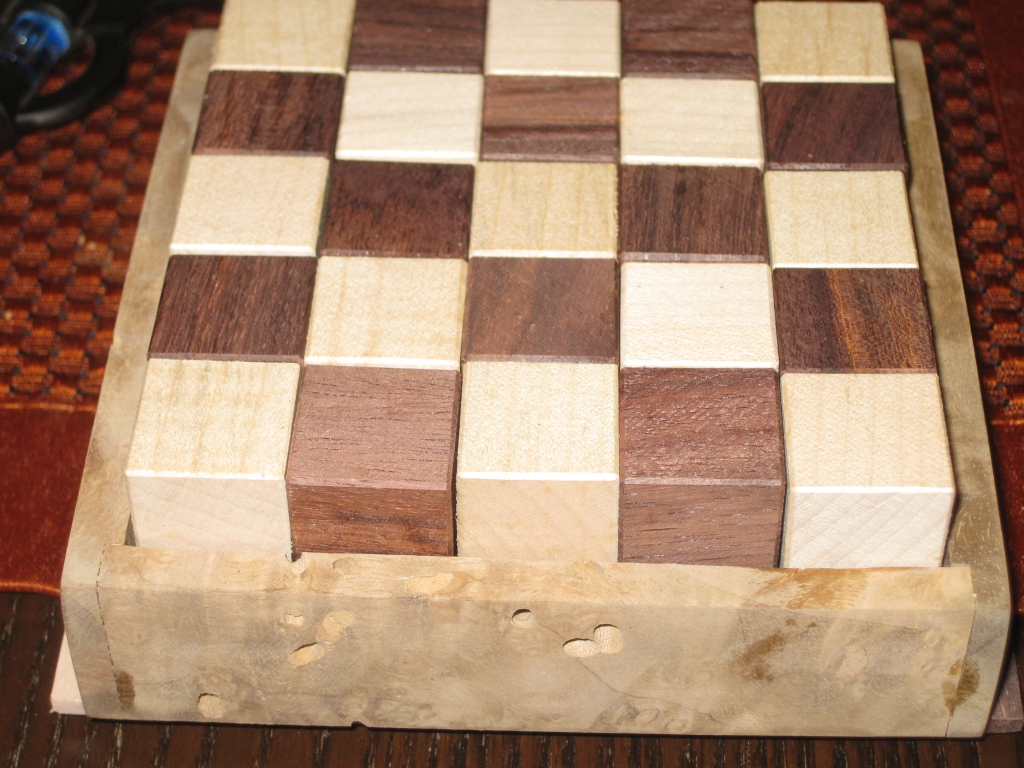
The outside edges of the box

The outside edges of the box

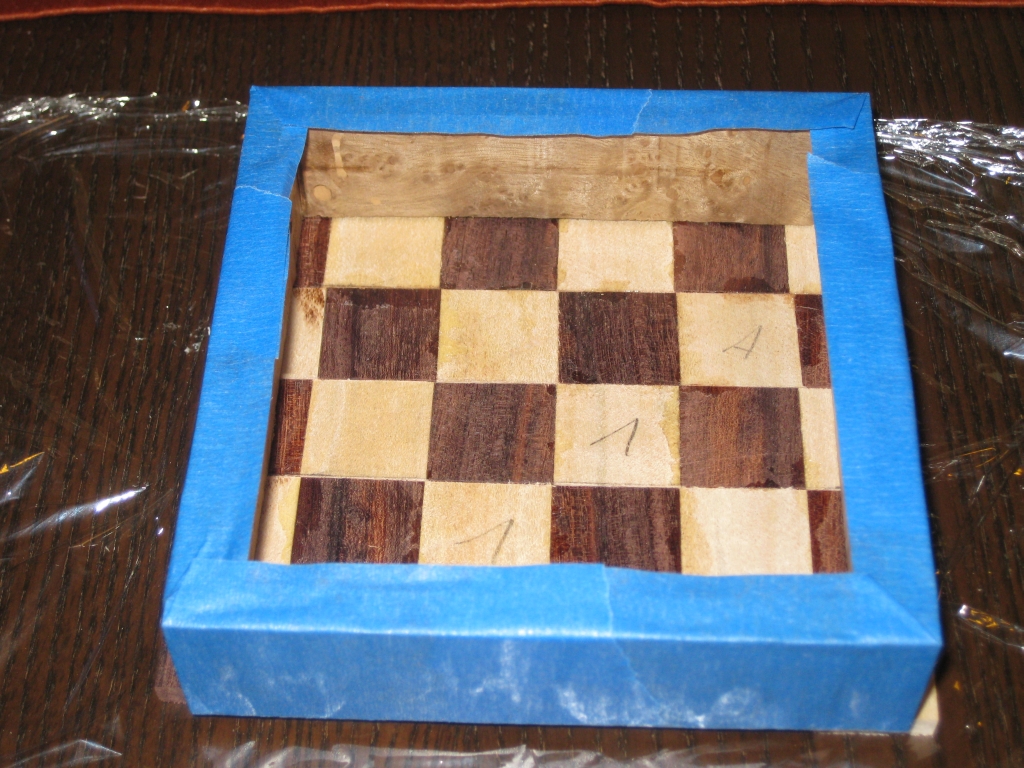
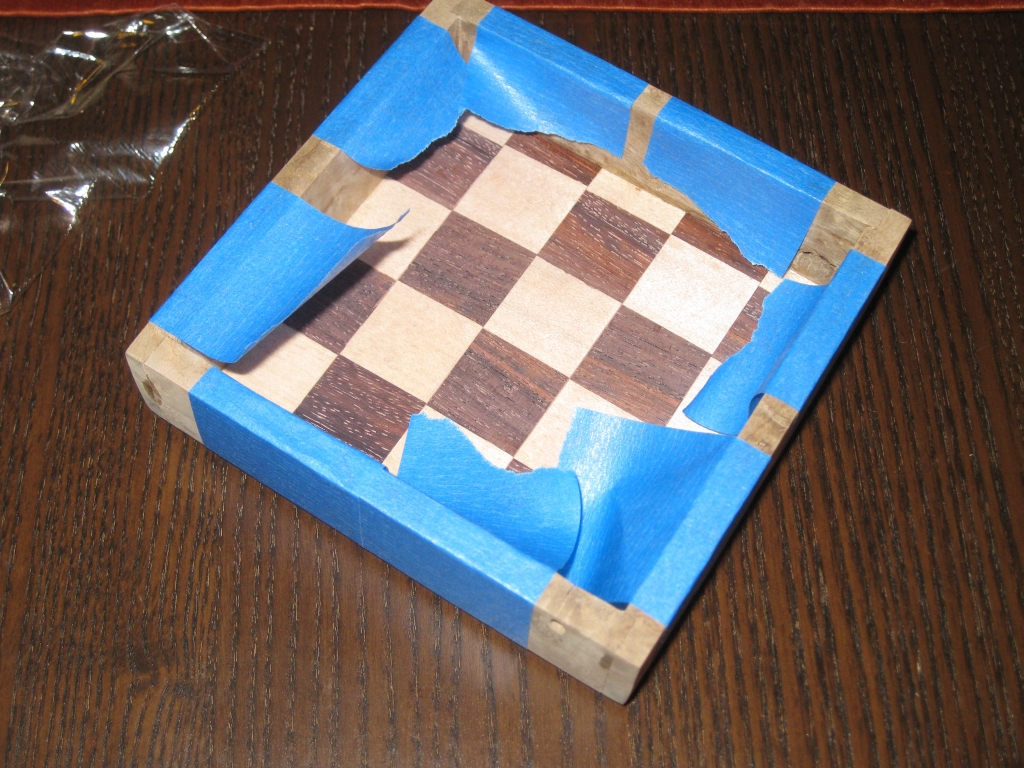
Despite the very small contact area, wood glues are remarkably strong, and will hold the frame together with no issues. In fact, to take it apart would probably break the wood, before the glue would let go. Using blue tape, I tape the corners, (no clamping required) and that will hold the box well enough for the glue to set. I do a quick check to make sure that the corners are square, and leave it to dry, while I turn my attention to the base.

The unfinished base, with the sides sitting on top

The unfinished base, with the sides sitting on top

As you can see, the base is unfinished. The pencil marks were to allow me to line up each of the strips for gluing everything together. As you can see I still have some sanding to do, since there’s glue and all sorts on the base. Thanks to the random oscillating hand sander I got for my birthday, it will make short work of that!

A quick dry fit before gluing the box together.

A quick dry fit before gluing the box together.

With the sanding done, I have a quick dry fit with the pieces in place to make sure everything fits as expected before gluing the base in place. Note at this point, Ive sanded the inside of the box to its final point, as it will be pretty touch to get into the corners once it’s all glued together, so best do that before the final glueup.

Box glueup from the top

Box glueup from the top


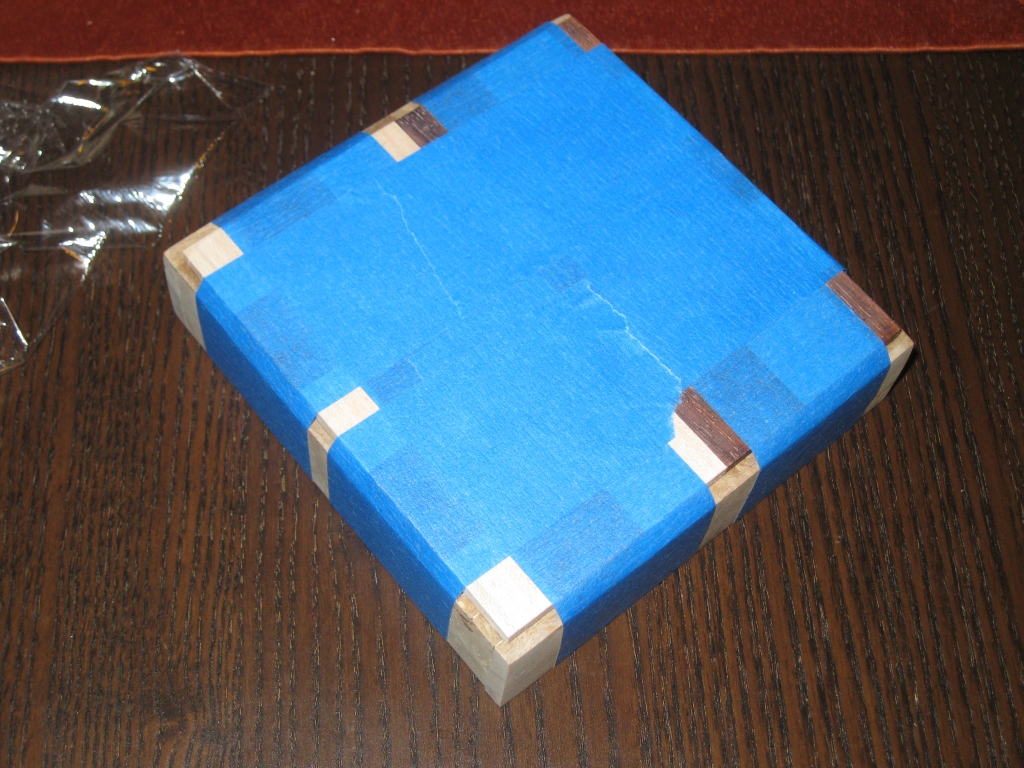
Box glueup from the bottom

Box glueup from the bottom

It’s probably worth pointing out at this stage, that I’ve spent around 3-4 hours making this box. Given that I decided I wanted a checkered base, that meant cutting thin, equally sized strips, gluing them together, then cutting them into strips once dry, flipping the strips to create the checkerboard, and re-gluing, then sanding, etc etc. All in all probably the most labor intensive part of the puzzle build, but hopefully worth it!

Finishing.  First coat of thinned lacquer applied

Finishing. First coat of thinned lacquer applied

With all the individual pieces ready, it’s time to look at finishing the puzzle. The box was all sanded on the outside, and it’s looking pretty good. I start off by applying a coat of thinned lacquer to all the pieces. It’s 1 part lacquer, 2 parts thinner that I’m using. It gives a very thin coat, but does the job or really making the grain pop. If you compare this to the pictures of the dry fir you’ll see what I mean.

First Coat of Watco Satin Wax.

First Coat of Watco Satin Wax.

Second Coat of Watco Satin Wax.

Second Coat of Watco Satin Wax.

Once that’s dry, the puzzle gets two coats of wax. I’m using a liquid wax, Watco Satin Wax to do the job. I leave the wax for around 5-10 minutes, then wipe off any excess with a rag. This is building up a nice finish on the pieces, but there’s still one more step to complete the process. That’s a final buffing with some Renaissance Wax.

The pieces, next to the finished box

The pieces, next to the finished box

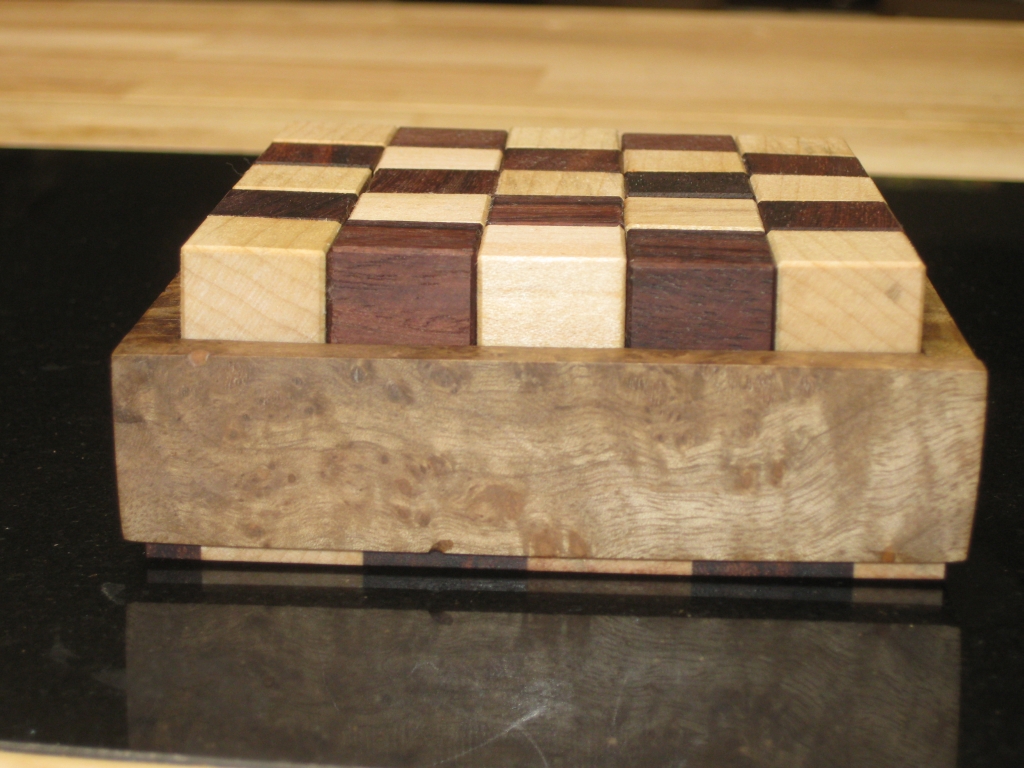
A final view from the side, showing the effect of the checkered base.  The myrtle burl box almost looks like its floating.

A final view from the side, showing the effect of the checkered base. The myrtle burl box almost looks like its floating.

The final puzzle ready to be played with!

So there you have it. I hope you enjoyed the build as much as I enjoyed making it.