Tag Archives: Packing

Triangel by Vinco

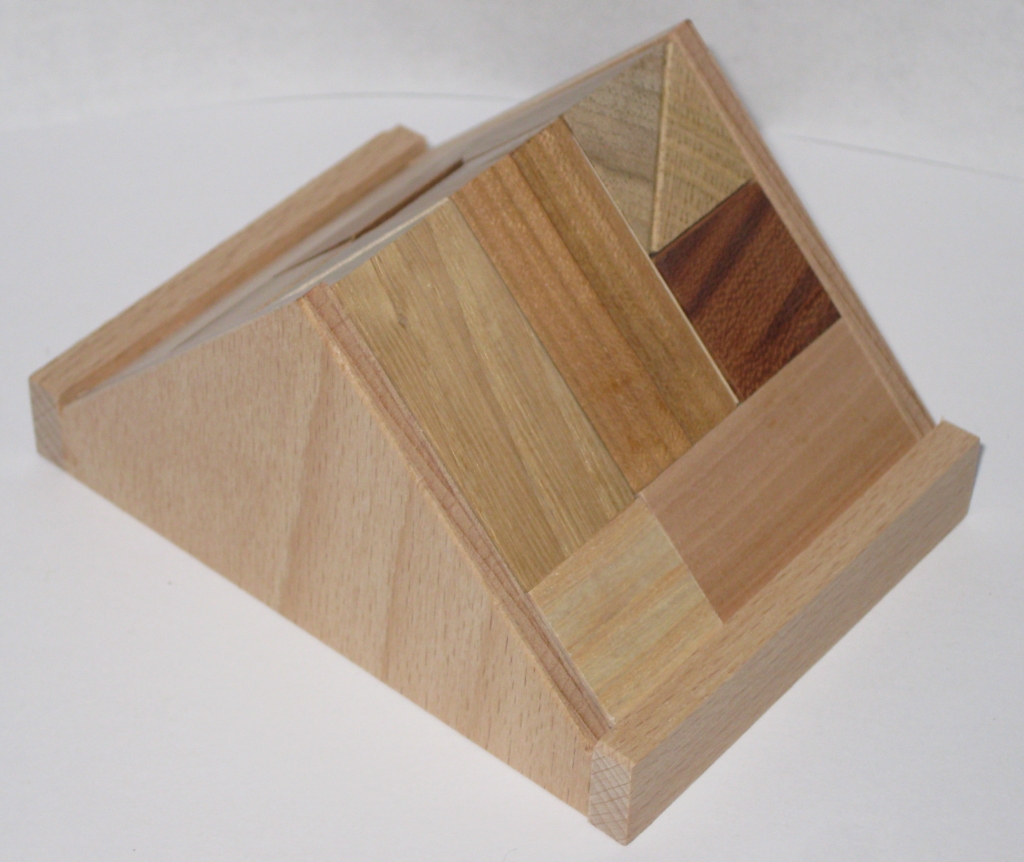
I have time for one last review before I pack my bags and head off on my honeymoon (one year delayed). This time I’m back for another Vinco, in his mass produced line, Triangel. A clever packing puzzle that really seems to mess with my head. I picked this one up from Puzzle Master” a long time ago.

Triangel by Vinco

Triangel by Vinco

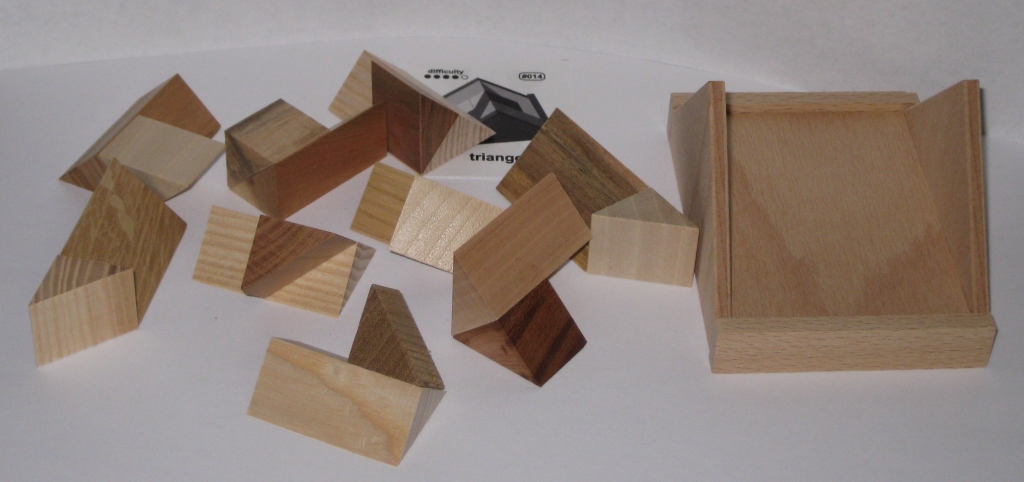
So before you go correcting my spelling, the puzzle isn’t called Triangle, it’s Triangel. I didn’t name it! It’s a 9 piece packing puzzle, where the pieces are not nice cubic pieces, but have been cut at some interesting 45 degree angles with all sorts of shapes created. The tray is fairly basic, made from some Baltic Birch ply, with some assorted hardwoods used for the pieces. The puzzle measures 4.25″ x 3″ x 2.4″ at the peak.

Triangel pieces

Triangel pieces

With only nine pieces, you’d think this wasn’t too challenging. Vinco lists it as 4/5 so fairly tricky. For me I found that the shape of the pieces really challenged me. Having done a lot of packing problems, working with square pieces, I seem to have learned how to tackle them. With these triangular pieces, even finding a good starting point was a challenge. While the end result of a 45 degree triangle is obvious, stacking the pieces to get there seems anything but obvious.

I really enjoyed this puzzle, and it was certainly unlike many of the packing puzzles I’ve played with. A good challenge, and certainly solvable with a little thinking and some time understanding the interactions of the pieces. Go ahead and pick up a copy, you’ll not regret it. Oh, and if this is too easy, Vinco has a harder version that’s a little larger!

9 Parts Packing Problem

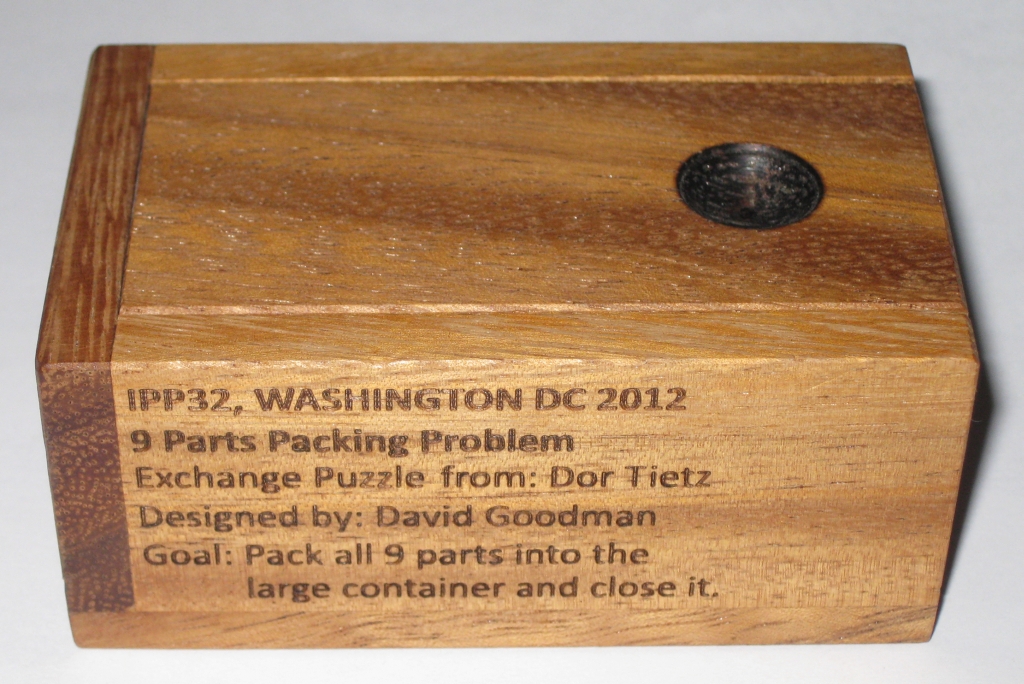
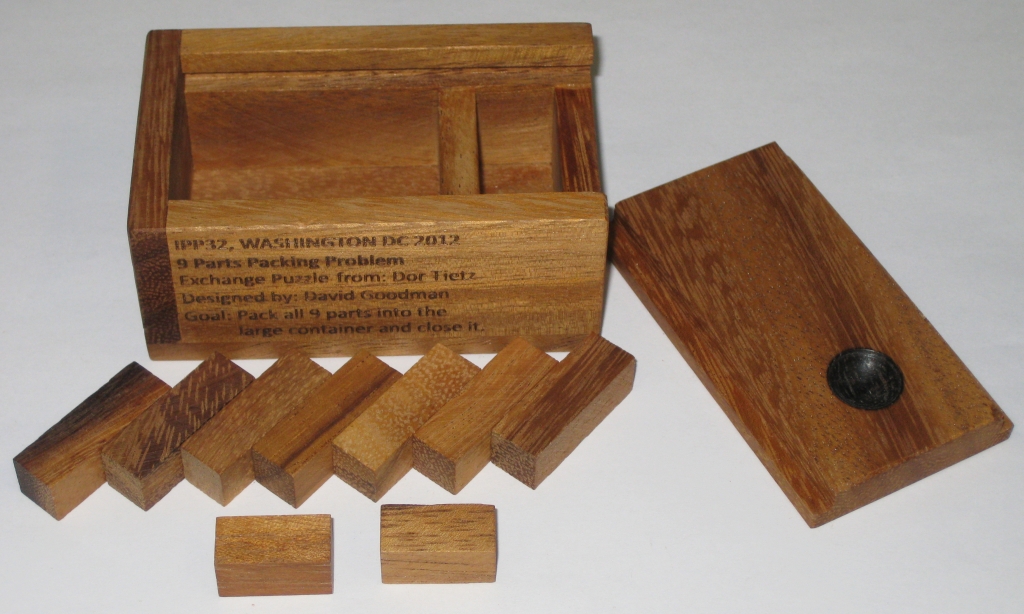
Another of the IPP32 exchange puzzles that I’ve been banging my head on for a while now is the 9 Parts Packing Problem designed by David Goodman, and exchanged by Dor Tietz. I travel to Israel for work fairly frequently, and as such I have the pleasure of meeting up with Dor, David and a few other puzzlers in the area for an evening of puzzling and good (non work related) conversation. This puzzle has been taunting me for quite some time, but having finally solved it, I feel that it’s time I wrote about it.

9 Parts Packing Problem

9 Parts Packing Problem

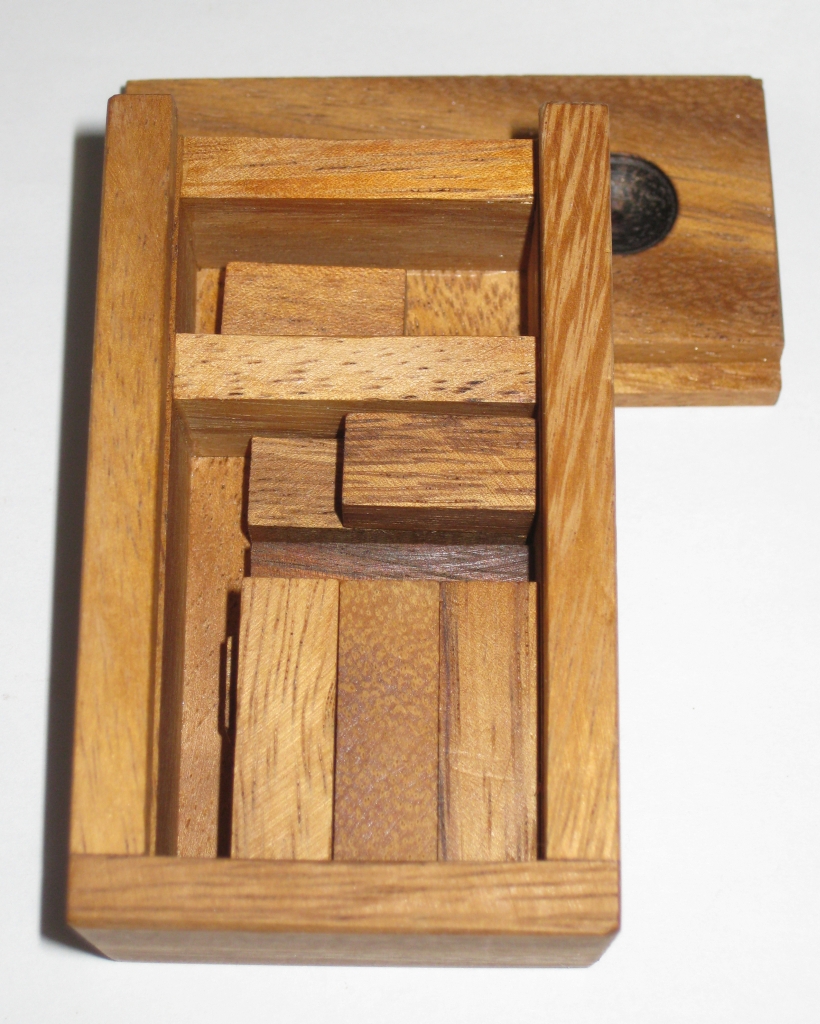
This simple looking puzzle consists of just 9 pieces plus the box, with a sliding lid. Eight of the pieces can be easily packed into the main compartment of the box, leaving a pesky 9th that sticks out, preventing the lid from shutting. Cleverly, David has designed the box to store the ‘9th’ piece, in an extra space, so when frustration sets in, you can put everything back in the box and forget about it for a while. (I may have done this more than once!)

The box measures 3 ⅜” x 2 116” x 1 ½”, units, with the pieces being 1 x 1 x 3 units for the larger block, and 1 x 1 x 2 for the smaller block. As it states on the side of the box, the goal is to pack all 9 parts into the large container (2 x 3.8 x 4.75 units) and slide the lid closed. Sounds simple enough, and given how many packing puzzles I’ve played with over the last couple of years, it should have been easy …

Space for that pesky 9th piece

Space for that pesky 9th piece

While the puzzle isn’t made from fancy exotic woods, and there’s no interesting joinery in the box, it would be easy to overlook this puzzle. I would suggest though that you don’t overlook it. This is a very clever little puzzle, and one which I have struggled to solve for many (many) months. I’m not too proud to admit that I even went so far as to ask for help, posting both a picture, and a plea for help on Facebook, and had a few people send me hints. Nothing that told me how to solve it, but nudges in the right direction. None of them helped sadly.

9 pieces, and not enough room

9 pieces, and not enough room

The puzzle sat on my desk at work, and taunted me for months. I’ve idly picked it up, had a poke at the pieces and put it back down with no real progress. I’ve tried blowing on it, spinning it, shaking it, beating it (it’s very well made!) but nothing seemed to help.

Then earlier this week, I picked it up , and noticed something about the pieces that I’d not noticed before. And moments later, the pieces were all neatly packed into the large container, I slid the lid closed, and sat back with a smug look on my face. (Then I got back to work, writing that document).

This is a really good little puzzle, and well worth a play. If you’re interested in trying to acquire a copy, give me a shout and I’ll pass you David and Dor’s contact information, to see if they have any left. I think you’ll like it!

Edit: Thanks to fellow puzzler Theo, who not only pointed out a mistake in my sizes above, but also made a copy for himself, having checked the dimensions with me, he found two solutions! I’ve corrected the sizes above, and looks like I’m back to trying to find a second solution!

Shake Something

In the recent batch of puzzles from Eric Fuller, Shake Something caught my eye. From a new designer, Dan Fast, this packing puzzle uses four burr pieces in a box to create an interesting challenge. It’s always good to see a new designer creating puzzles which are both fun and different, and when they’re made by Eric, you know they’ll be well made. In this case Eric’s living in the future, but it’s all good.

Shake Something by Dan Fast

Shake Something by Dan Fast

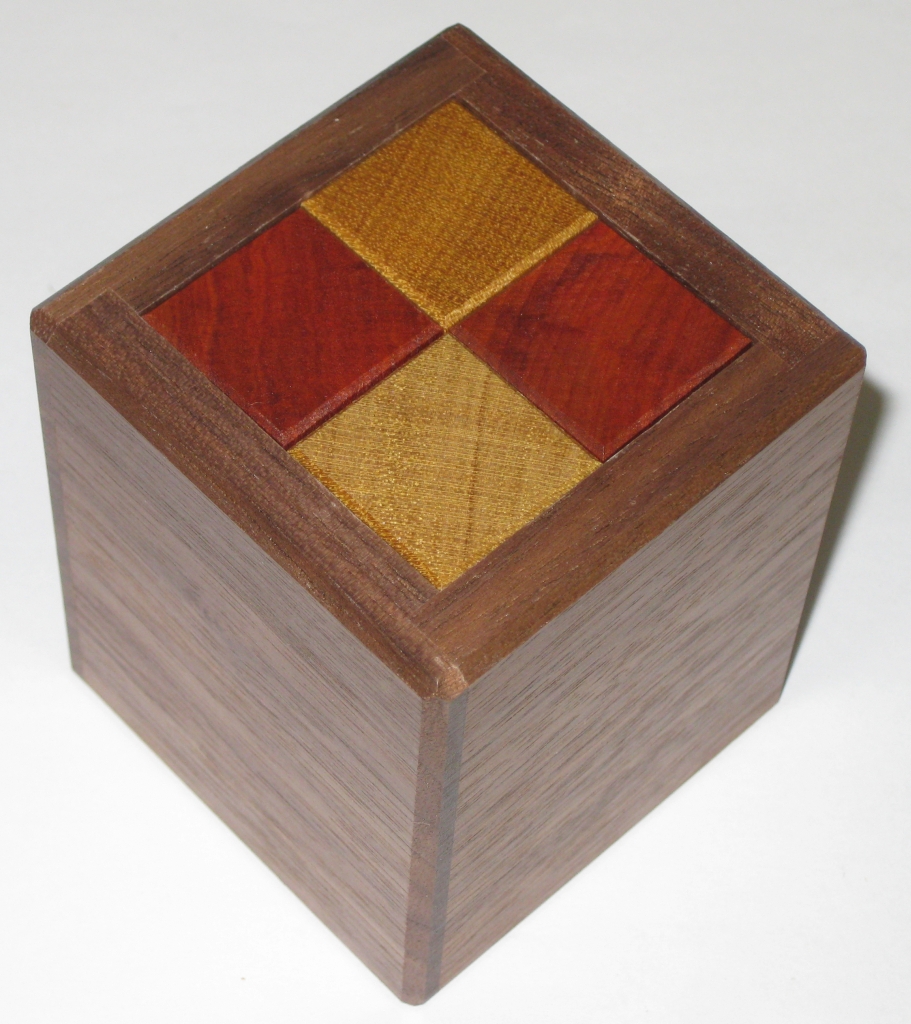
Made from a Walnut box with Paduak base and internal pins, with Yellowheart and Chakte Viga pieces the puzzle looks great. 38 copies were made for sale, and all sold out quickly, as is common for Eric’s puzzles. It’s a good sign for Dan, and I look forward to seeing more of his designs.

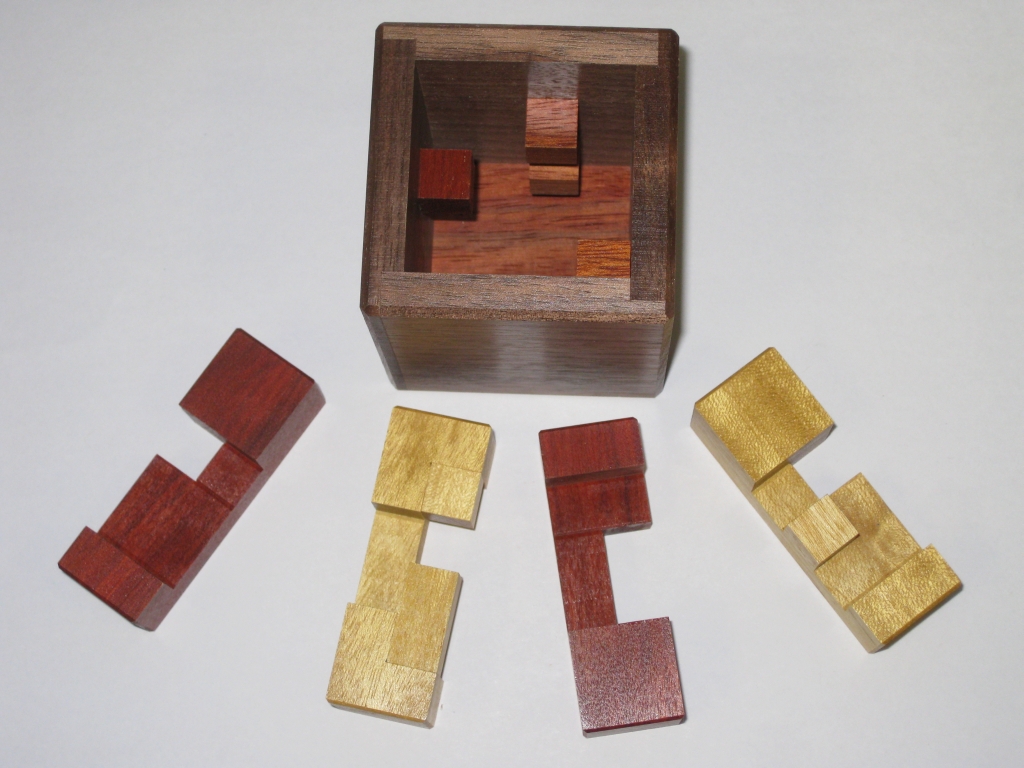
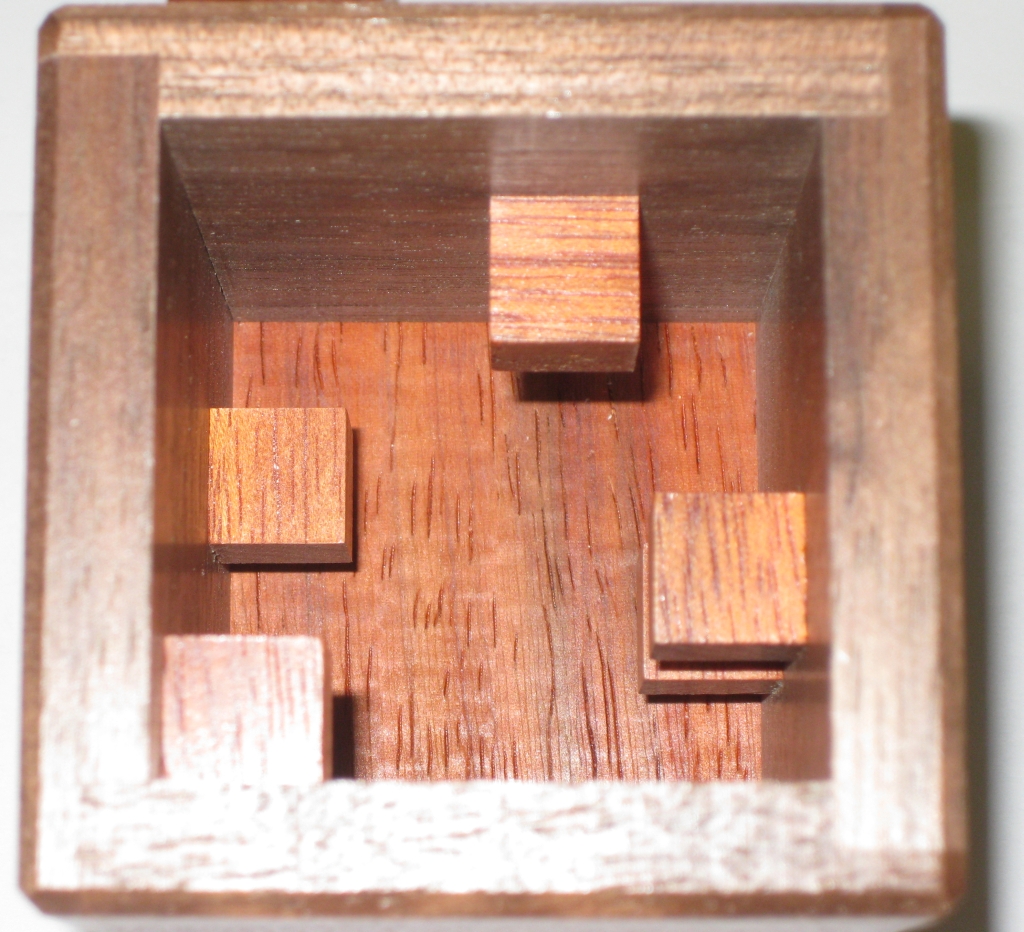
The pieces have a superb contrast, and do make the solution easier. It’s a good sized puzzle, measuring 2.5″ x 2.5″ x 2.825″ making manipulation of the pieces easy. Eric mentioned that there was plenty of room inside the puzzle for wood movement, however I’ve found from my own copy that a couple of the pieces are rather tight. The last piece to come out, I actually believed was glued into the box by the blocks on the walls and didn’t come out. As it happens, it was just an incredibly tight fit, and with a little encouragement it did come out. The pieces are all burr style pieces, and all feel solid so there’s no worry about breaking anything. Equally, the pins are well attached to the box, so they’re unlikely to come off without some serious abuse.

The goal of the puzzle is to remove the burr pieces and return them to their box. What makes the puzzle different is that for the most part, it’s not possible to manipulate the pieces directly, but instead you need to shake, turn and jiggle the box to move the pieces. To make things more interesting, the internal blockages in the box remain hidden, meaning you can’t see the interactions between the pieces, and need to carefully observe and react to the obstructions you find.

Shake Something pieces

Shake Something pieces

In total, there are 14 moves required to remove the first piece, with a total complexity of 14.2.4. I found that removing the pieces wasn’t too much of a challenge, taking around 5 minutes, however I didn’t pay all that much attention to how the pieces came out, and left them scrambled before trying to put them back into the box. I think this was my own folly, as I thought it was fairly straight forward when taking it apart.

As it turns out, I had a much bigger challenge putting it back together, and it took several hours over a few nights to get it back to the starting position. As I mentioned previously, given that I have one piece which I thought was stuck in place, I was only having to worry about 3 pieces, as there was one which had to be in the right place and orientation. Still I got lots of puzzling for my money!

Shake Something's knobbly box

Shake Something’s knobbly box

With all the pieces removed, you can see the blocks on the inside of the box which interact with the burr pieces, and make the puzzle both challenging, and a lot of fun. Having solved the puzzle without the need for help, I was pretty happy, so took the expected step of plugging the puzzle into Burr Tools, and seeing what it came up with. Apparently there are 1924 ways that the pieces can fit in the box, but only 3 ways to assemble the pieces. That means that if you didn’t have the walls of the box glued together, there would be 1924 ways to put the pieces together, however with them glued up, only 3 of the possible combinations can be assembled into the solution. I feel pretty good having found one of the three on my own. It’s certainly manageable, and I highly recommend that you give it a try before just asking Burr Tools to help.

Eric is living in the Future

Eric is living in the Future

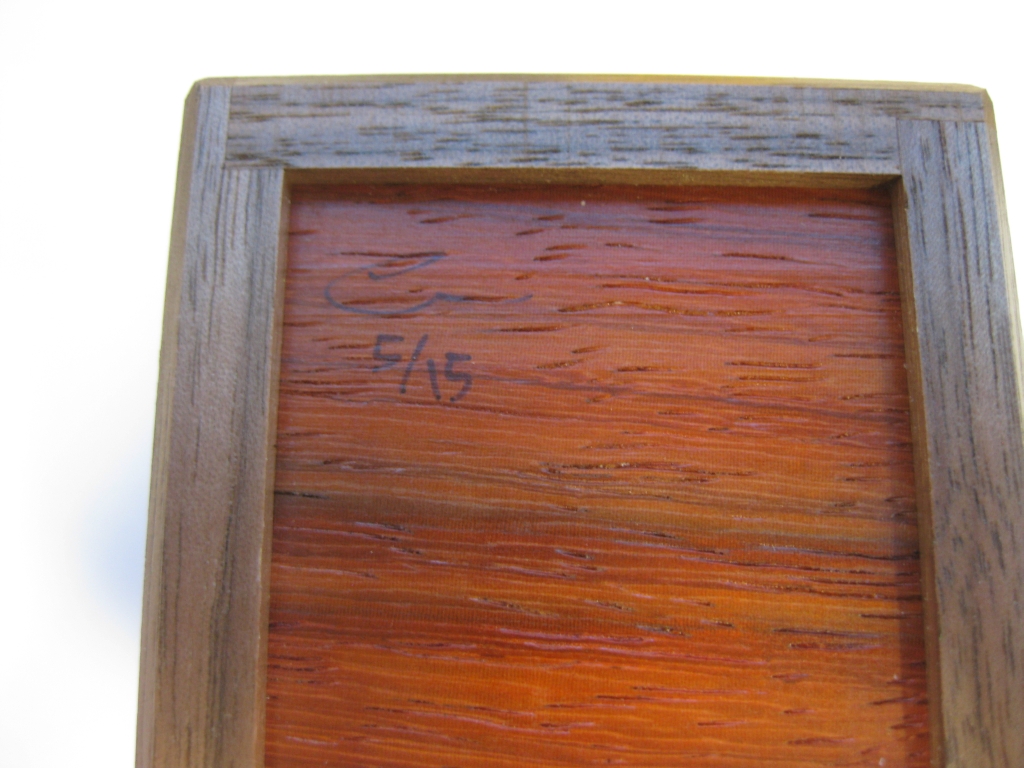
No doubt I confused you at the start of my post, by suggesting Eric was living in the future. Looking at how he signed this box, perhaps my comment makes more sense. Apparently Eric made this in May 2015. Guess I slept well last night! (Either that or Eric has a time machine, and I’d really like to borrow it!)

Lomino Cube 4

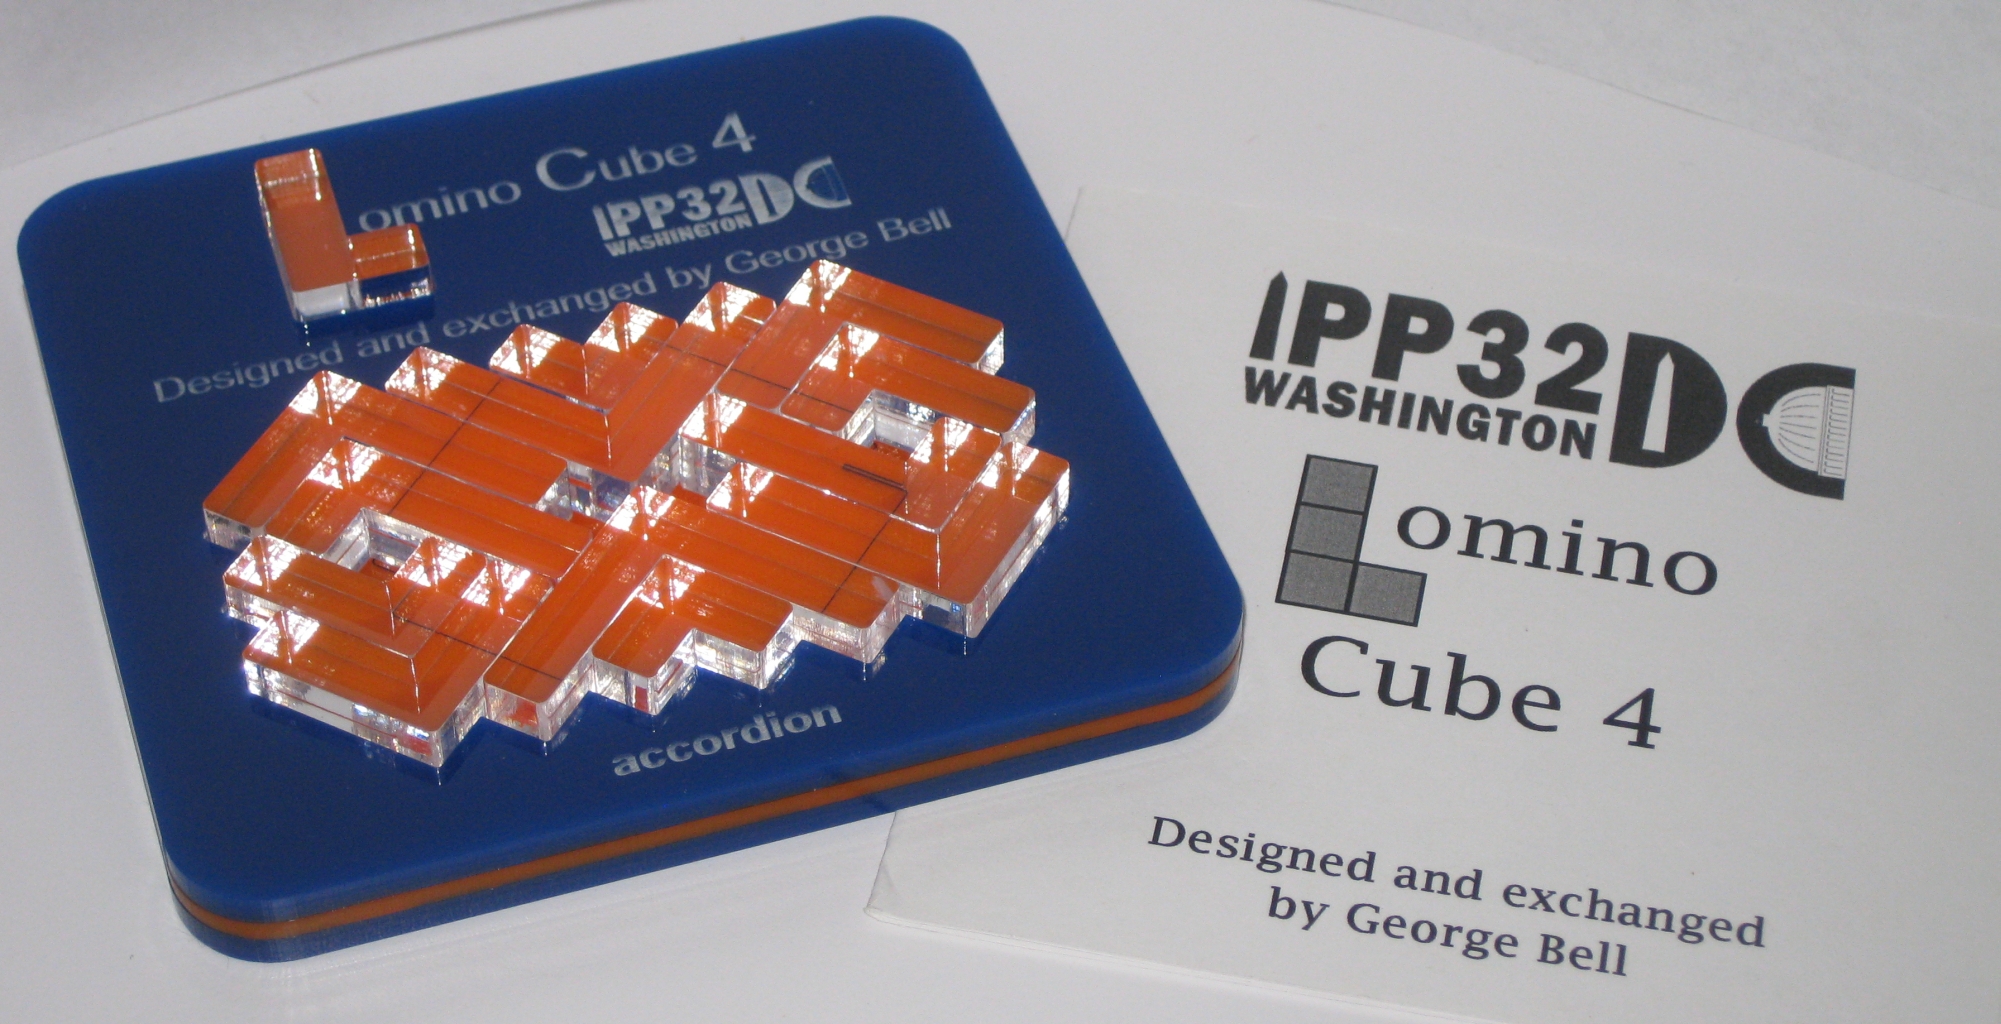
Back in 2012 I was fortunate enough to attend IPP, and during the Puzzle Party day where you can buy and sell puzzles, I was able to purchase myself a copy of George Bell’s exchange puzzle “Lomino Cube 4”. George is a regular reader, and often comments on my posts, so I’m waiting with interest to see what he thinks of this review!

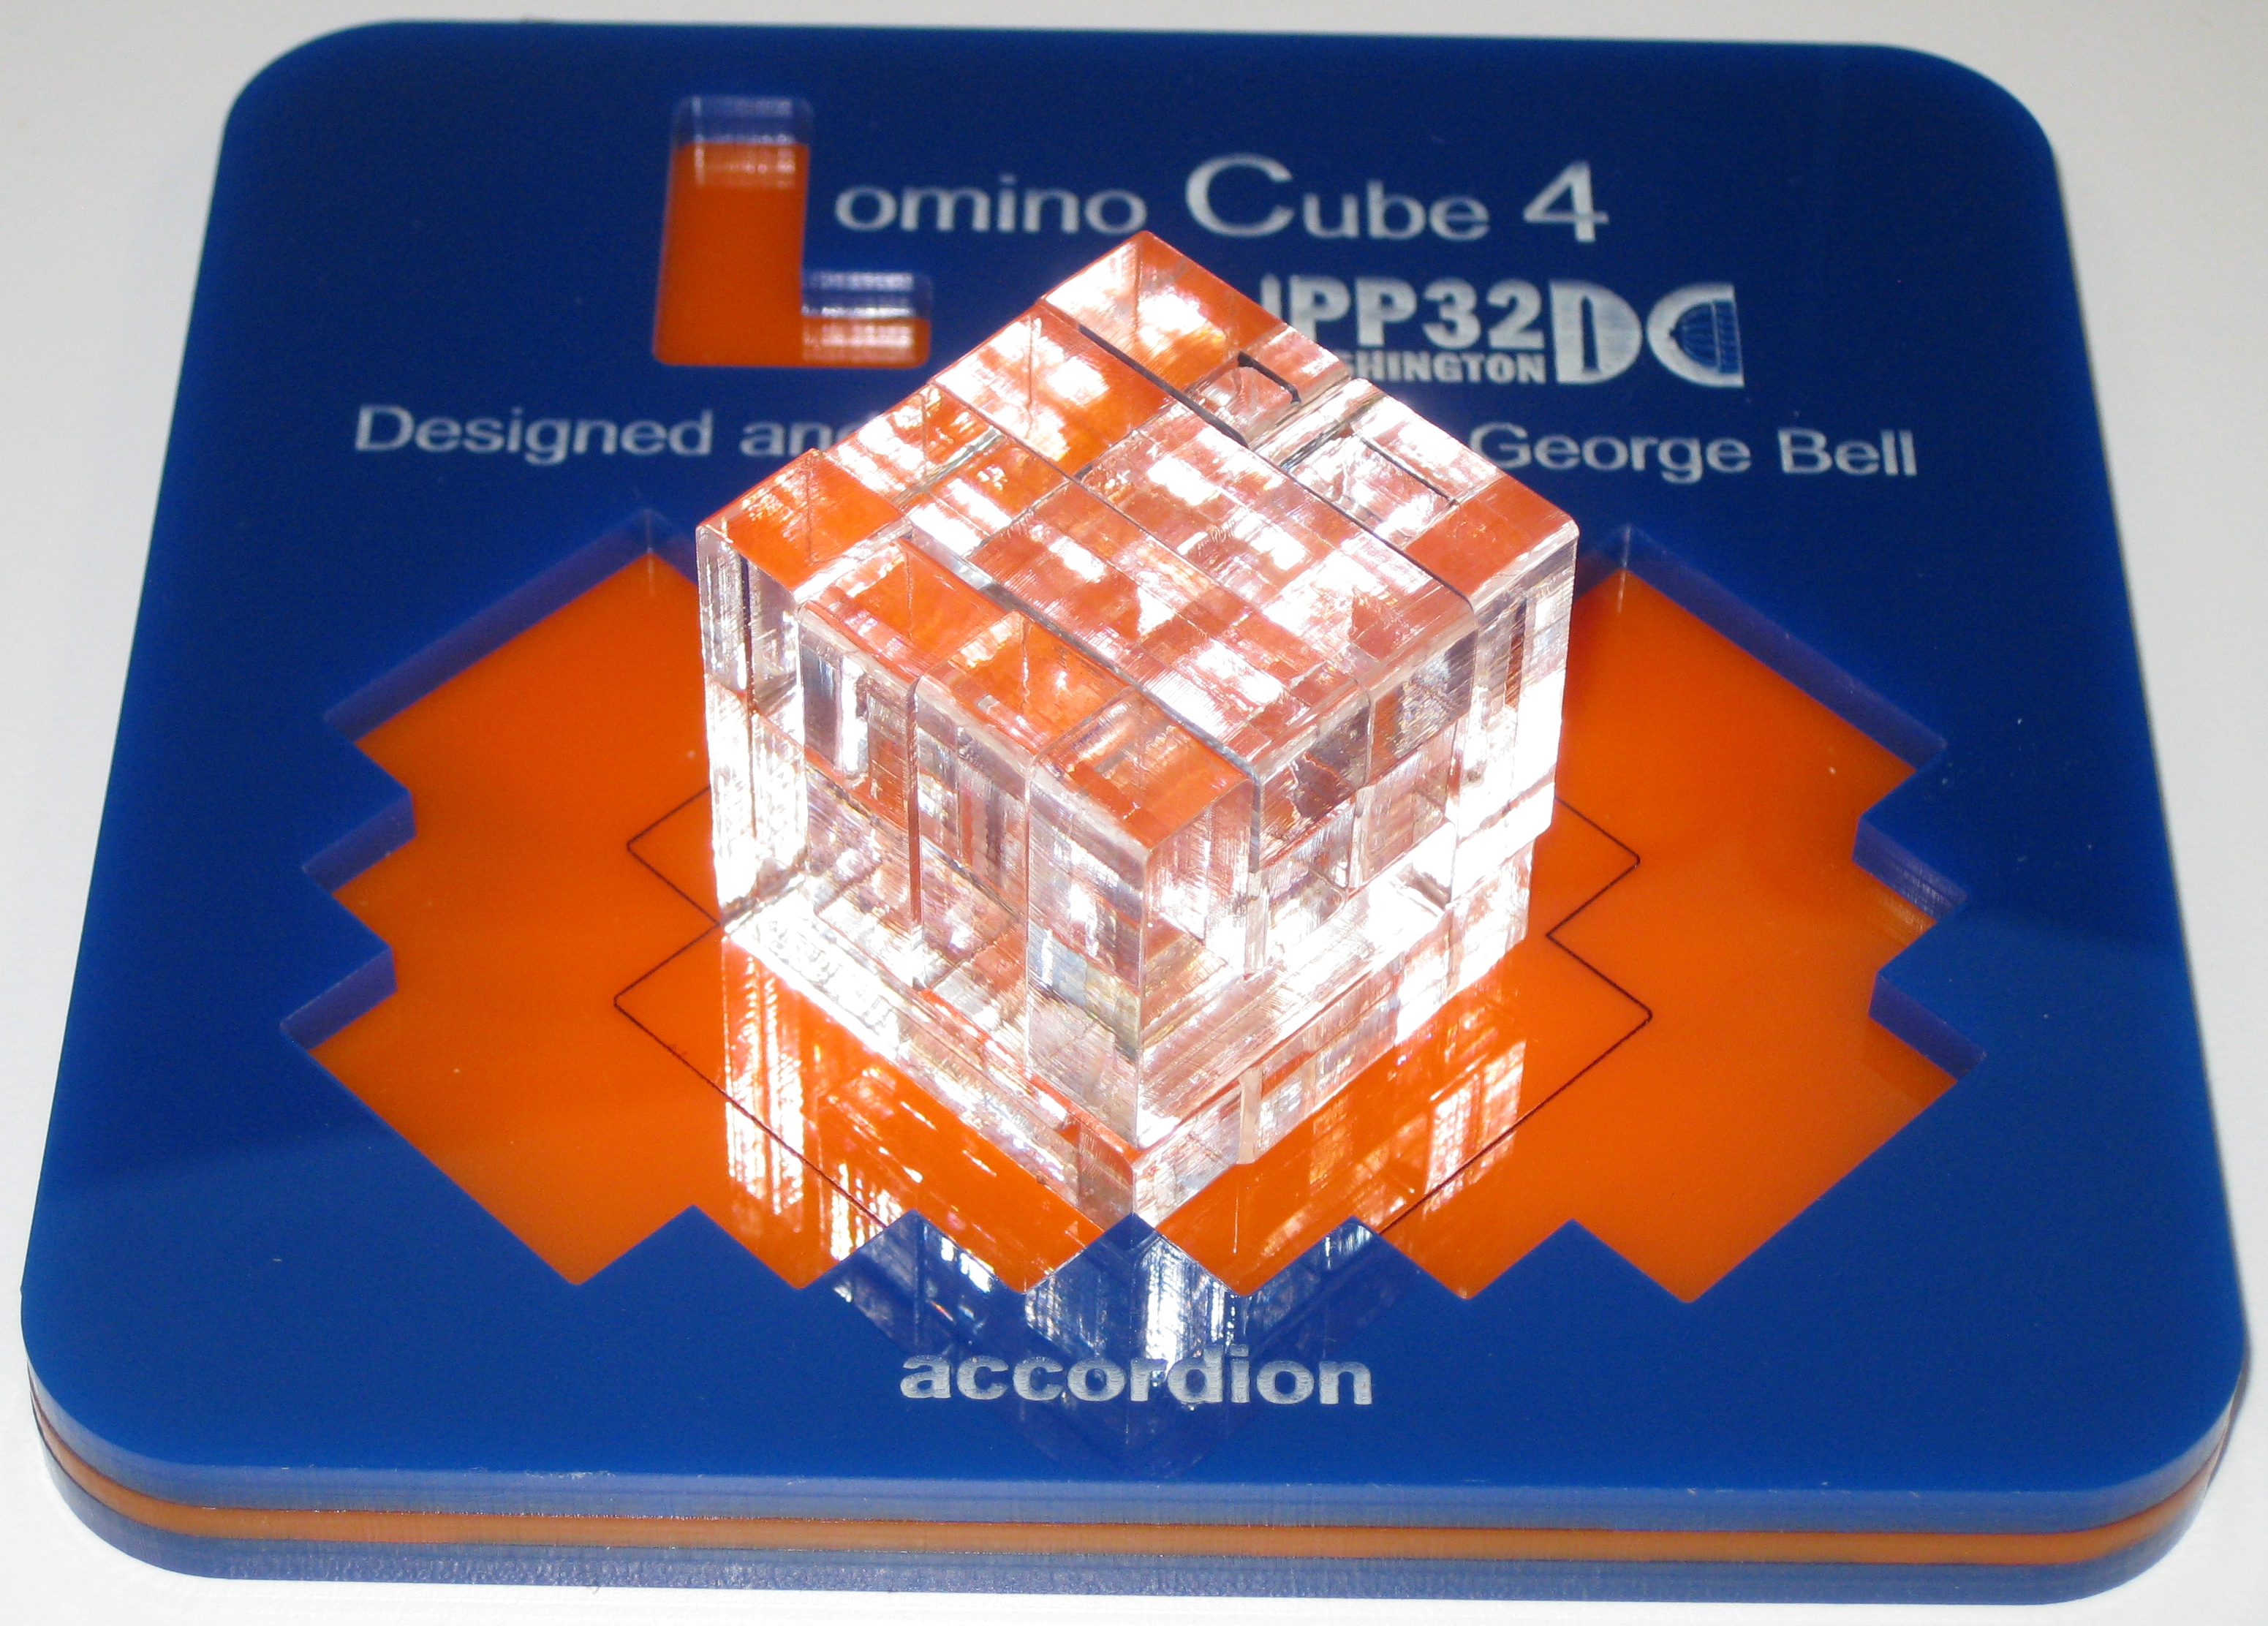
Lomino Cube 4 by George Bell

Lomino Cube 4 by George Bell

So what is a Lomino? Well the puzzle pieces used are all “L” shaped, and were named “Lominoes” by Alan Schoen, or so George tells me in the introduction to the puzzle. Lomino cube 4 is a set of 13 polycubes which have to be packed into various 2D and 3D shapes. A complete set of lominoes of order n consists of all lominoes that fit inside an n x n square. This puzzle consists of two complete sets of order n=4 plus one extra L tetromino (of volume 4). In the accompanying booklet, George sets out ten puzzling tasks which he lists in roughly increasing order of difficulty.

The image above shows the state the puzzle is deliver in, with the two complete sets packed into the “accordion” grid with 4 gaps remaining. As I’m sure you can guess already, one of the challenges will be to put that last Lomino into the accordion along with all the other pieces. But that’s not the first challenge!

The puzzle is made from laser cut parts which are all a good size. Each cubie is 3/8″ and the pieces are cut from clear acrylic. As you will see in the photos, the clear pieces make for some amazing finished objects, and I’m sure if I had more time, you could create some really nice effects with the right lighting. The tray itself is cut from three 1/8″ thick sheets of acrylic, and are joined together to give the striking sandwich appearance with the solution shape showing through in bright orange, against the royal blue of the rest of the tray. Of course it didn’t need to be 3 layers thick, but George added a second solution shape on the back of the tray, adding to the challenges. And that’s not all, there’s a third solution tray shape on the back of the booklet. There’s a lot of puzzling in these ten challenges!

One possible 8x8 solution

One possible 8×8 solution

The first challenge is to create an 8×8 square, using all the pieces. Given that there are several tens of thousands of solutions (814,732 in all), I don’t really have a problem showing just one of them here. I have no doubt that any puzzler with a little time can find a way to fit the pieces into an 8×8 square. From there, the next challenge is a little more difficult. Create a 4x4x4 Cube.

One possible cube solution

One possible cube solution

Now, I may have exaggerated. There’s over 3 million ways (3,391,045 to be exact) to construct a 4x4x4 cube, so again it shouldn’t be too much of a challenge. This time it’s a 3D solution shape and given the reasonably small size of the pieces, and their slick finish, you may find yourself knocking the pieces over as you work toward a solution. That may just have been me and my fat fingers though.

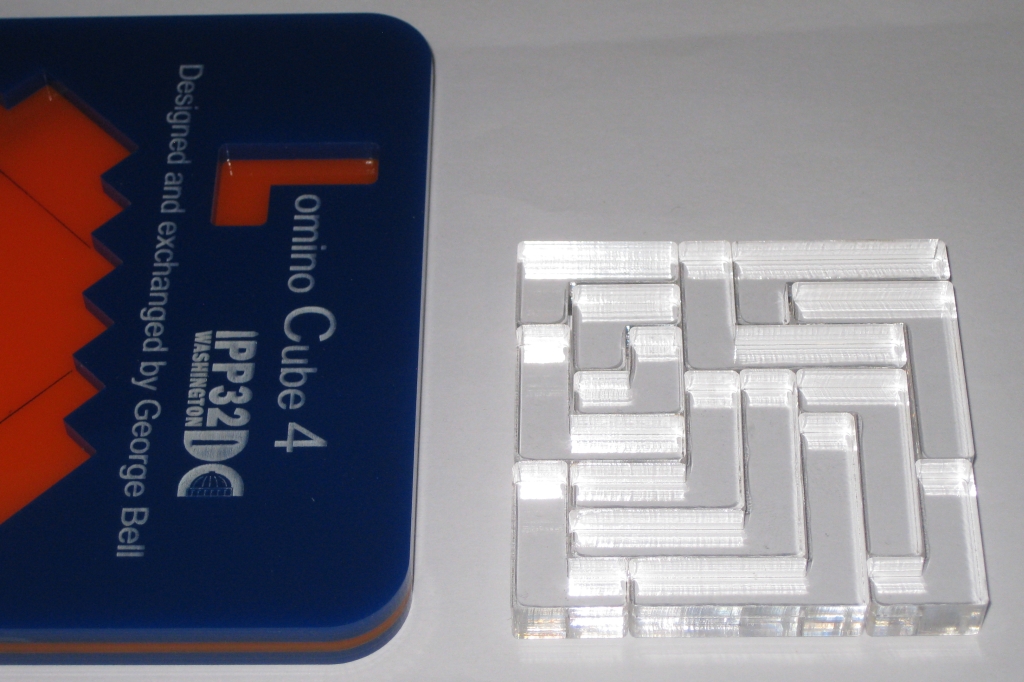
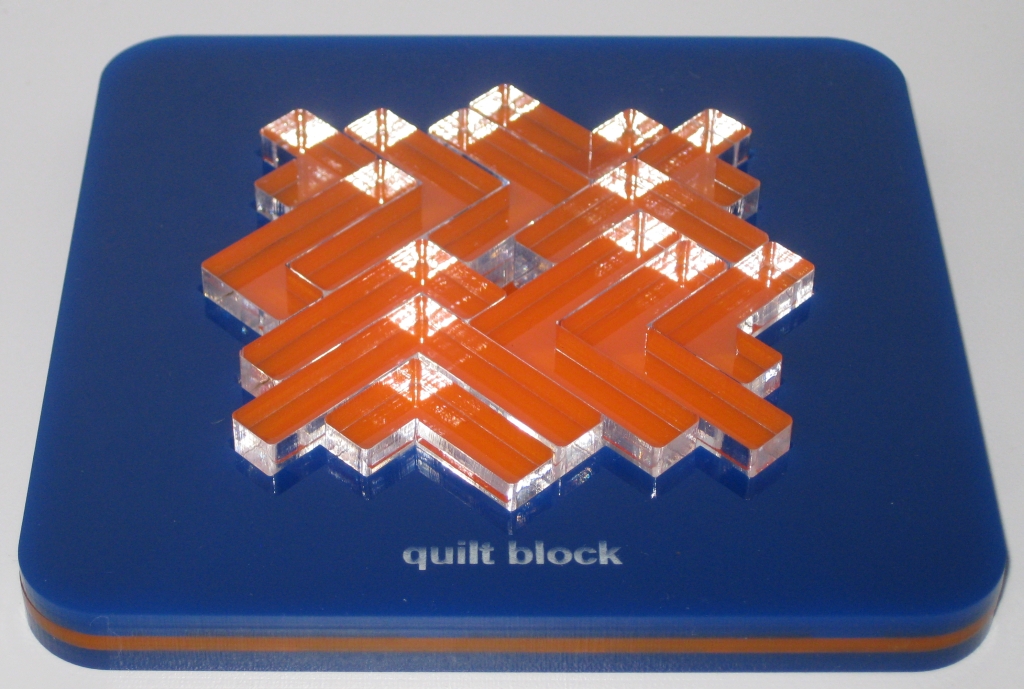
Another tray on the reverse

Another tray on the reverse

Another of the challenges is to fit all the pieces into the “quilt block” shape in the reverse side of the tray. Again there are hundreds of solutions (406 in total) so giving away just one isn’t that much of a help. You’ll have no real problems in finding a solution yourself. There are a few other challenges involving packing the pieces in various ways, the last of which is to create a 3D shape which looks like the Dome on the Capitol Building. George doing his part to help make the puzzle themed to the IPP destination that year.

Once you’ve solved all of those, there’s a set of 4 additional challenges to really test you. I’ll not spoil them, but it’s fair to say that they will make you think, and really add to the challenges. One of the more interesting from my perspective is to pack all the pieces into various solution shapes, where no two identical pieces have touching faces.

Overall, given that I have found a liking for packing puzzles, the Lomino Cube is a very approachable puzzle, with many solutions to each of the challenges (mostly) so that you don’t feel frustrated by not being able to solve one, and can easily lose many hours to the puzzle. It’s also well designed that all the pieces can be fairly readily self-contained, and that makes it a good puzzle for traveling. If you don’t have a copy, head over to George’s website, and see if he has a copy available, you’ll not be disappointed.

One Four All & All Four One!

Not long after my wife and I moved to California, she got in touch with Mr Puzzle and ordered some puzzles for me for my upcoming birthday. Yes, I knew back then she was a keeper! One of the puzzles she decided on was One Four All & All Four One! designed by Arcady Dyskin & Pantazis Houlis. Themed around the Four Musketeers, I guess the look appealed to her, and I certainly wasn’t disappointed when I opened my presents!

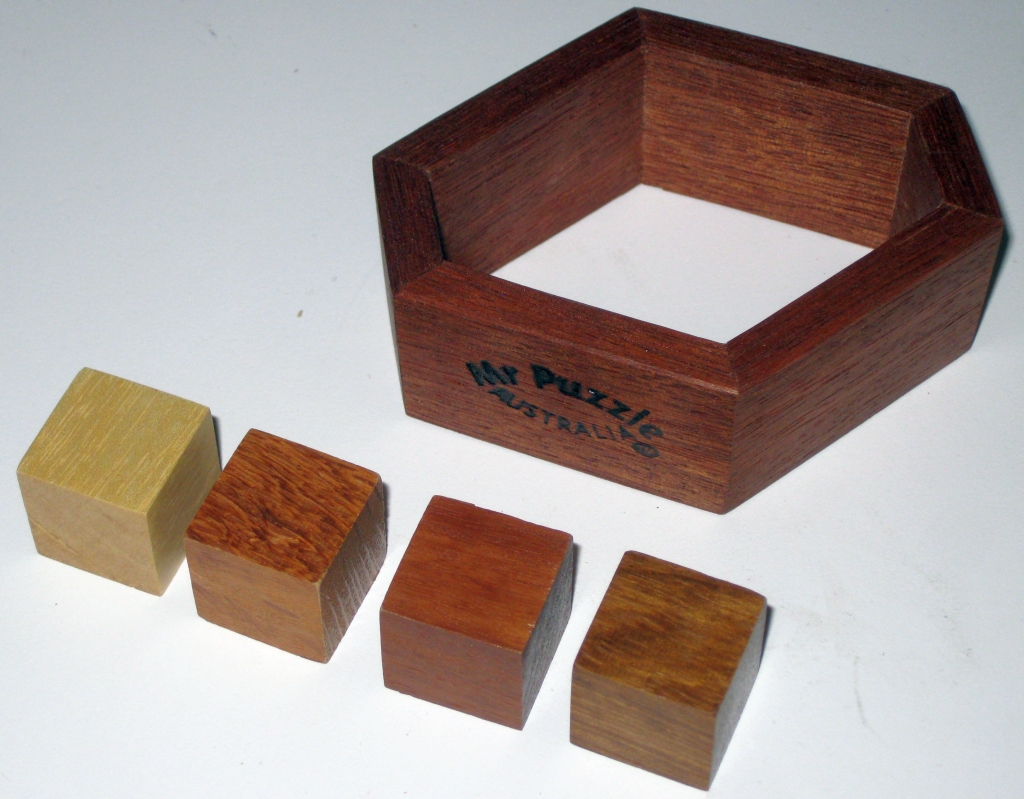
One Four All & All Four One!

One Four All & All Four One!

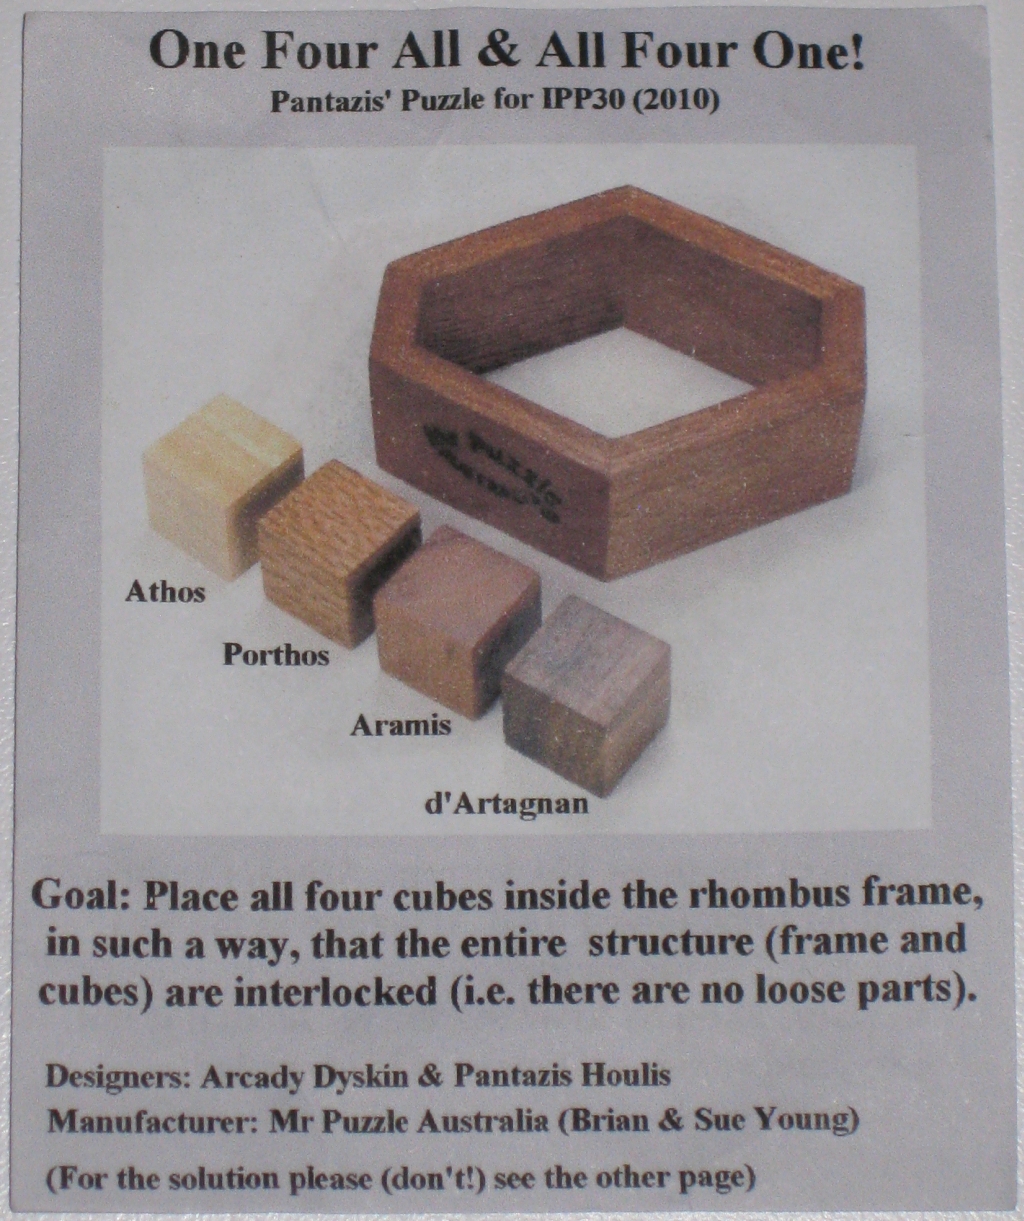
This is a very simple four piece puzzle, with a frame, with the simple goal of “placing all four cubes into the rhombus frame, in such a way, that the entire structure (frame and cubes) are interlocked (i.e. there are no loose parts).” Yes, I used simple twice in that sentence. Do I even need to comment on what that means?

One Four All & All Four One! info sheet

One Four All & All Four One! info sheet


Each of the cubes is 3/4″ and the frame is 3 1/2″ x 3″ x 1 1/8″. The cubes appear to be Maple, Lacewood, and two others probably native to Australia if I know Mr Puzzle. Sadly I can’t find much more information about them, suffice to say they are contrasting woods. This particular copy was used by Pantazis as his exchange puzzle at IPP30. The puzzle was also entered into the design competition at IPP30, and received a top 10 place in the judging. As you can see from the info sheet, each of the cubes has been given the designation of one of the four Musketeers. It doesn’t change the puzzle any, but keeps a nice theme flowing.

As you’ve probably guessed, the reason I’ve not written about this before now is because the puzzle is so simple. It’s so simple in fact, that even with the solution printed on the other side of the card, it took me a very long time to solve. This is not just a logical challenge to understand how to interlock the pieces, but also a dexterity challenge to place all the pieces in the correct orientations within the frame. And trust me, juggling four pieces inside the frame at precise angles is anything but simple.


I don’t normally talk about puzzle solutions, or show them, but in this case I feel I’m justified. Amusingly, on the solution side of the puzzle card, it states “Beware: Even knowing the solution, it is not easy, and some musketeer skill is needed!” Forget musketeer skill, a bloomin’ Ninja would struggle with this one. I have no doubt that when Mr Puzzle made these, he tested the fit of each and every one of them. And I have to commend him for that as this is one infuriating puzzle. If there’s an easy way to get the cubes in place I’ve not found it. Yes, I did solve it, and I took a photo to prove it. If you want to see it, click the link here.

It looks great, and it’s one heck of a challenge. I doubt it will live on my shelves solved as it’s so challenging to put together, but it is a great puzzle, and really deserves some recognition. You may struggle to find a copy, but if you spy one for sale or see it in someone’s collection, don’t pass it up. It is worth a crack.

ODD Puzzle

Way back in 2011, when I was at a puzzle party here in the Bay Area, I had a play with a clever little puzzle, by Iwahiro called the ODD Puzzle. A simple three-piece packing puzzle, that was anything but simple. It’s taken me three years, but I now have a copy of my own …. and I had to make it myself!
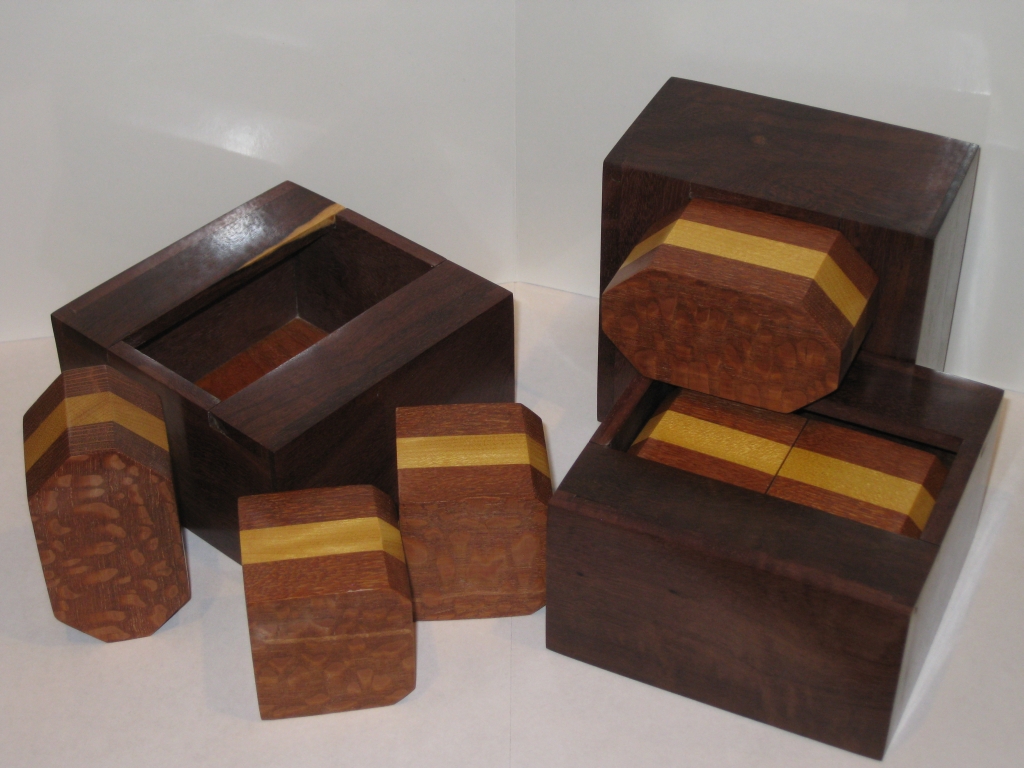
Odd Puzzle by Hirokazu Iwasawa (a.k.a. Iwahiro), made by TheJuggler

Odd Puzzle by Hirokazu Iwasawa (a.k.a. Iwahiro), made by TheJuggler

Back when I first saw the puzzle, the only copy available was a version by Philos. It was made from Beech and measured 4.7″ x 4.7″ x 3″. The fairly plain appearance hid a superb puzzle, that was the grand prize winner at IPP28. Now it’s mostly sold out everywhere you look, and no real indication of when or if it will be available again. The only place I’ve been able to find it is at Puzzle Sport in Germany.

I played around with the copy at Stan’s and really liked the puzzle. It was clever and really needed you to spend time playing with the pieces in the box to understand just how they interacted with each other, and what movements are possible. I was unfortunate that the puzzle was sitting in its solved state when I picked it up, and it was more of a challenge to remove the pieces for me. If I’d not seen the solution I think I would have required a lot more time to understand how it would be possible to get the pieces in there. I had mostly forgotten about this puzzle which if I’m honest is rather a shame.
The Facebook picture that started all this.

The facebook picture that started all this.

Fast forward three years, and I spotted a Craftsman copy of the puzzle made by Iwahiro on one of my friend’s Facebook pages as his profile picture. (ed: There’s a funny story there, but I’ll come back to that.) Seeing that picture spurred me into hunting for a copy, and having failed, I asked a couple of my puzzle friends if anyone had a copy of the puzzle. Amusingly, the closest (geographically) to me had a copy of the puzzle, and agreed to lend it to me. A couple of days later, we met up and exchanged a few puzzles, had the obligatory play with a few new additions to each of our collections, and he left me with a copy of the ODD Puzzle, as well as a puzzle from his collection where a couple of glue joints had broken, that he asked me to fix for him.

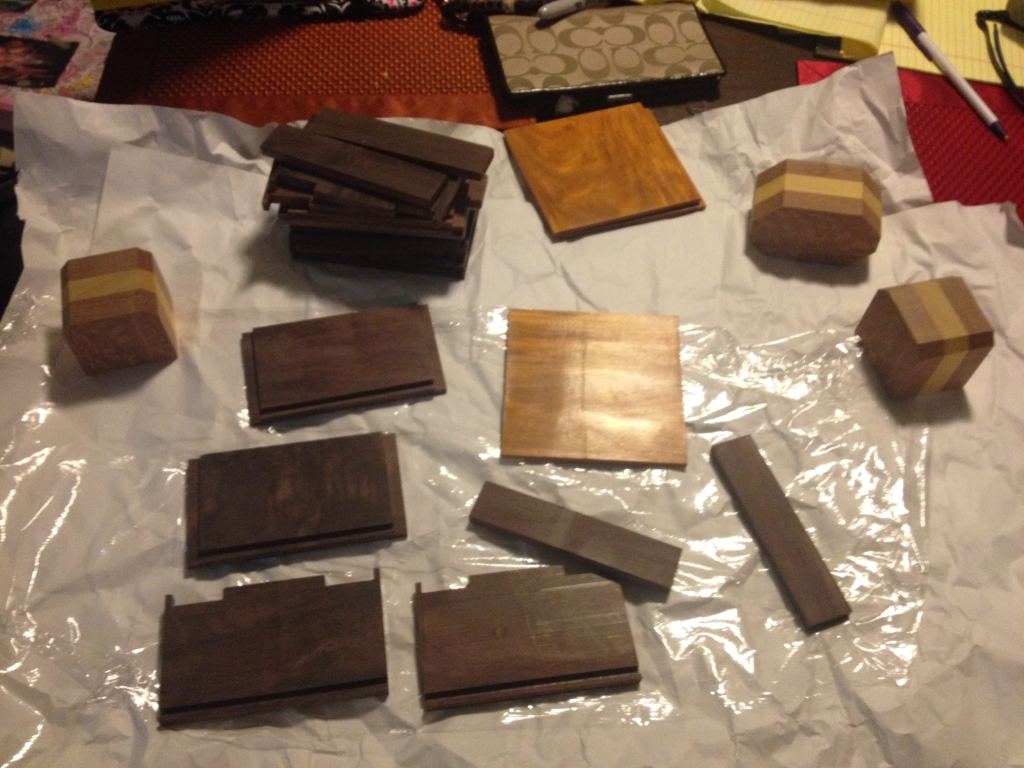
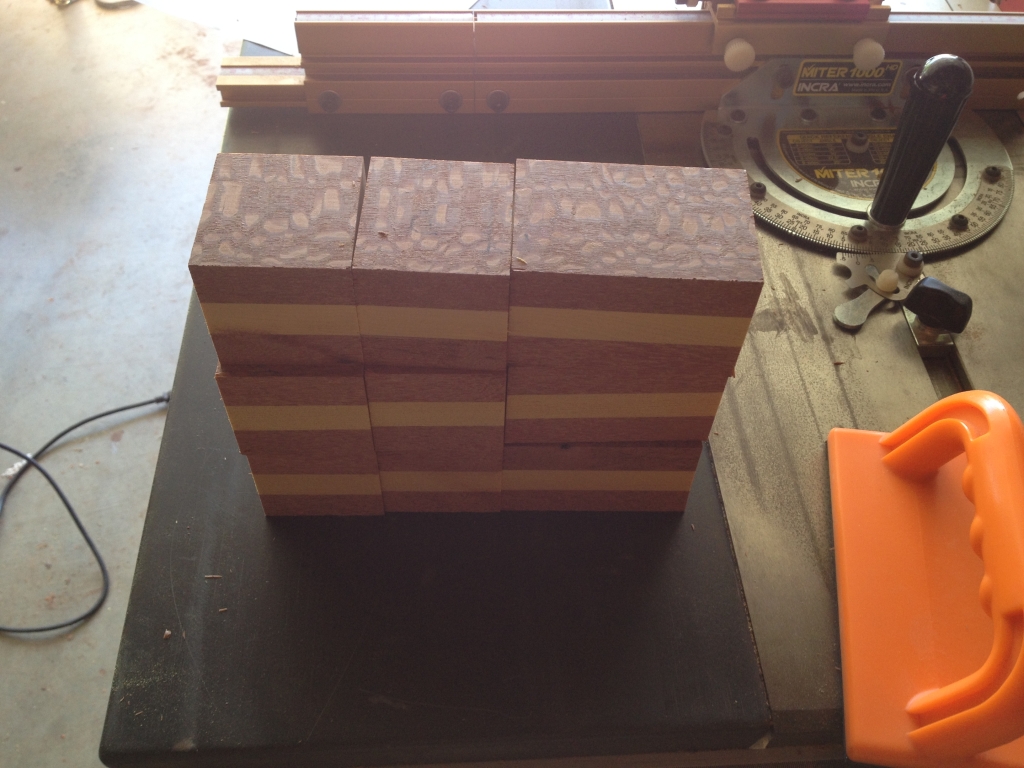
Fairly quickly I took a host of measurements from the reference copy, and set about making a copy of my own. I really liked the look of the craftsman version with the ‘core’ having a different wood to the outer parts of the pieces so looking through my stock, I picked out some Lacewood and Yellowheart to make the pieces. Rather than describe the process in detail, the images below should show the highlights. (As ever, click for larger versions.)
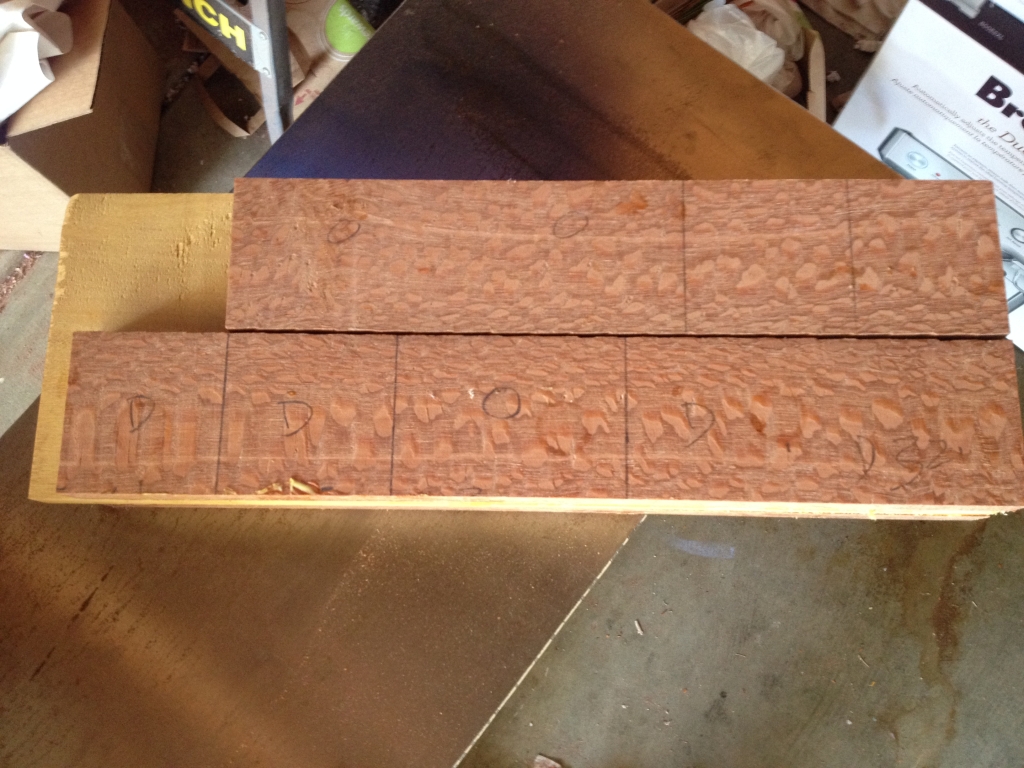
Initial glueup of the pieces
Initial glueup of the pieces

Basic blocks cut
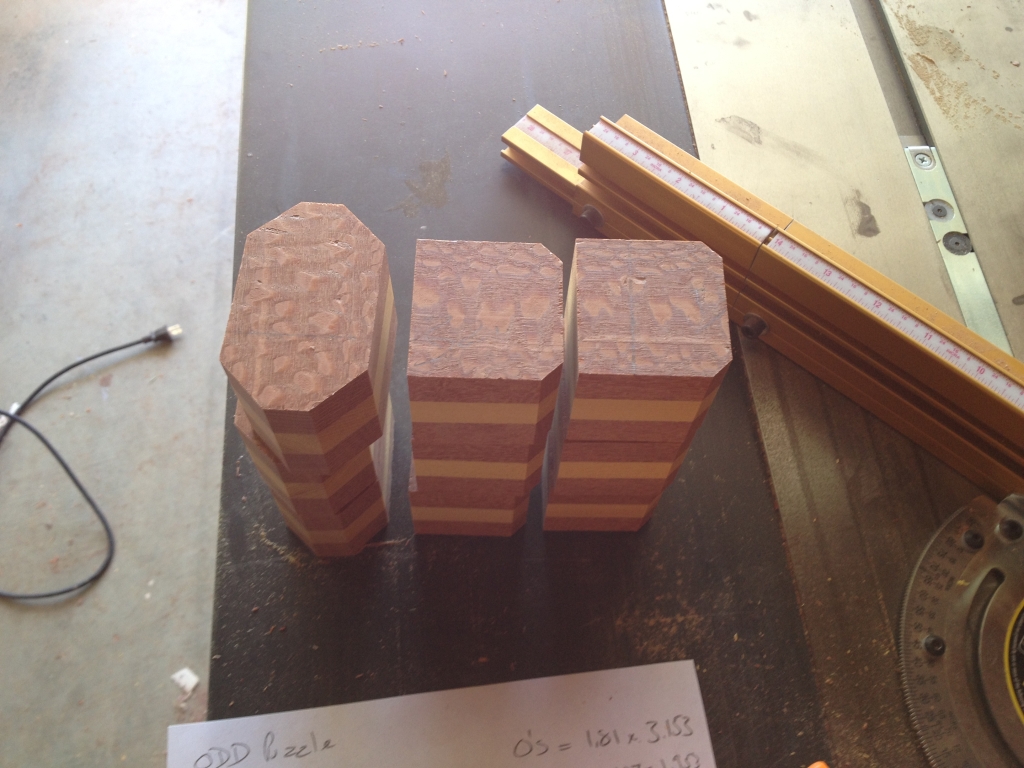
Basic blocks cut


ODD shapes, 'O' still too thick

ODD shapes, ‘O’ still too thick

Boxes cut, and ready for glueup.  Base pre-finished.
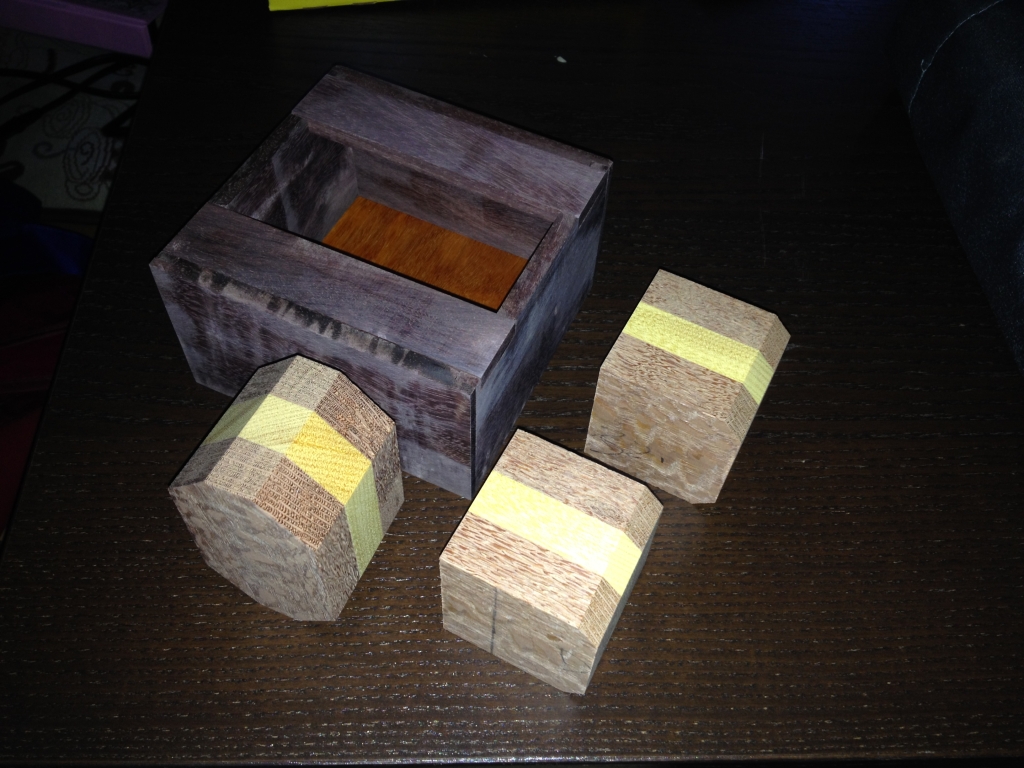
Boxes cut, and ready for glueup. Base pre-finished.


Box glued up, unsanded and still no finish yet
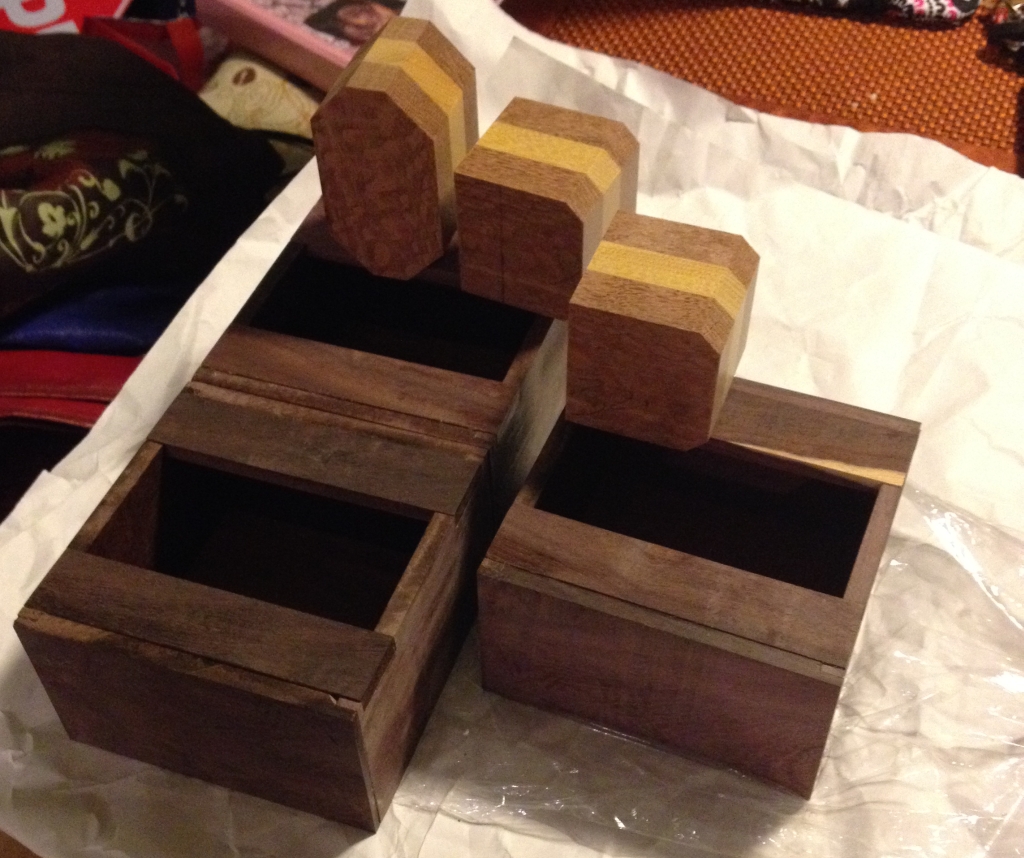
Box glued up, unsanded and still no finish yet

Finished!

Finished!


Of course as you can see, when you’re making one, it’s not a lot more work to make two, or three, so I made three copies. When I was posting pictures, on my own Facebook pages during the build, I was contacted about buying copies, so I’m glad I made extra. One interesting build fact is that I pre-finished the bases before I glued up the boxes. The reason being that I was going to be unable to finish the inside of the base once the box was glued together. One benefit to pre-finishing is that the glue won’t stick to the finish, so the base will be truly floating. I also pre-finished the inside walls of the box before I glued on the strips that create the gap. Again, I wasn’t going to be able to get a brush inside the box to finish it to the level I wanted, so I finished it first, leaving clear areas where I was gluing up the pieces so that the glue would stick.

Iwahiro's version, next to my copy

Iwahiro’s version, next to my copy

As a quick comparison, the pieces for both copies are identical in size, and can be interchanged between the boxes. In Iwahiro’s version he has mitred joints in the box with slip feathers for strength. I used a shoulder joint on my box and didn’t add splines (a.k.a. slip feathers). I did however change the way the top of the box is made, extending my slats all the way through the sides, making that joint stronger, unlike Iwahiro’s version where the slats are entirely inside the box. There’s not real difference, just a choice I made.
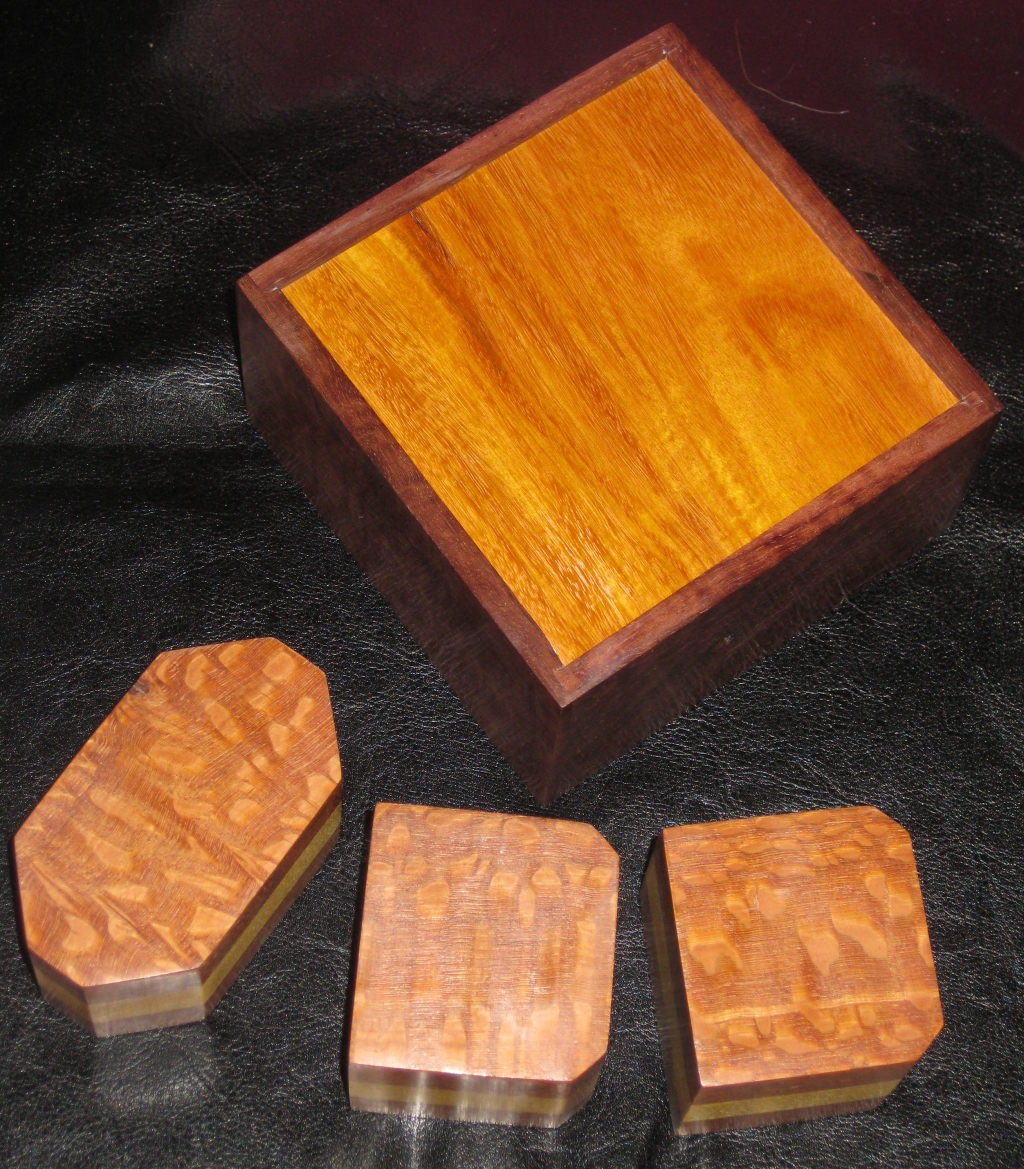
A look at the bottom of the puzzle made from Chakte Viga

A look at the bottom of the puzzle made from Chakte Viga

My the boxes in my copies are made from Katalox with a Chakte Viga base. I think the contrast between the dark, almost black sides with the bright orange base looks great, but then I wouldn’t have done it if I hadn’t.

This was the first time I’d used the Beall Wood Buff system since I bought it. Fellow puzzle maker John Devost uses it on most of the puzzles he makes, and having used it now, I can see why. The finish achieved is incredible. It’s a high gloss shine, which really makes the wood look great, and gives it an amazingly smooth feel. It also means that the pieces in the ODD puzzle slide against each other with virtually no friction. That means that the slick plastic sheet added in the bottom of Iwahiro’s version isn’t needed in the copies I made.

One of my friends commented that the only thing missing from my copy was the slip feathers on Iwahiro’s box. I joked that I’d considered adding Holly slip feathers, but in the end didn’t do so. (Now I didn’t mention at the time that I didn’t have a jig built that would allow me to create slip feathers in a box) All I can say to that now is …
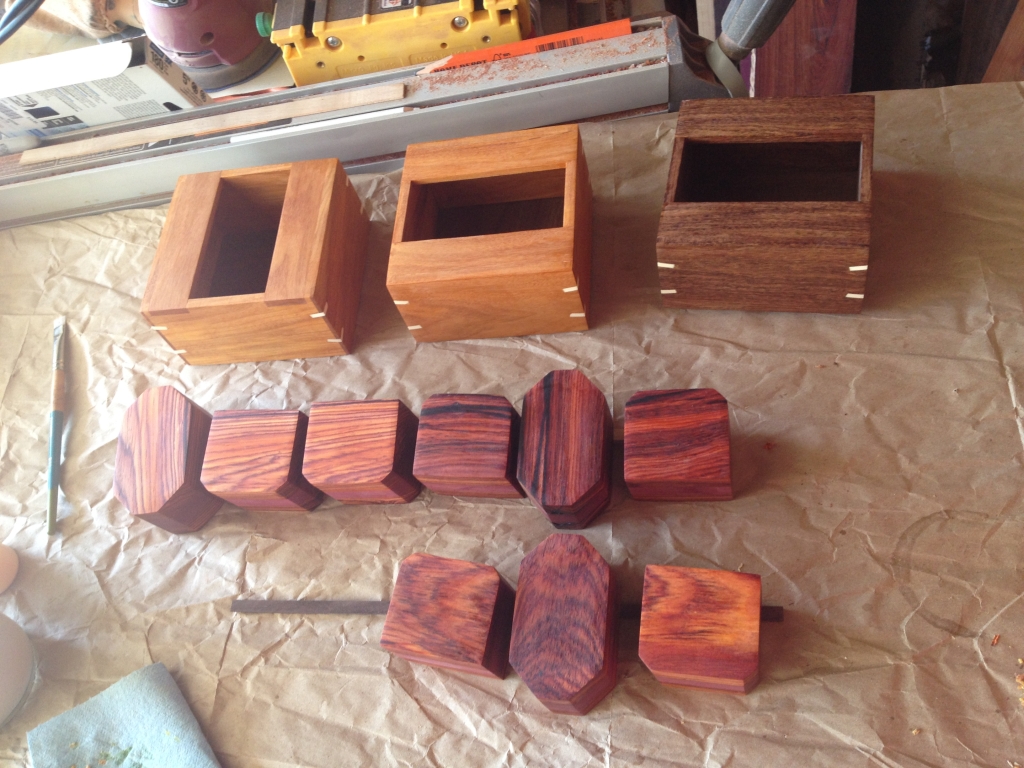
Different wood choices, and slip feathers added

Different wood choices, and slip feathers added

They’re not quite finished yet, (and I’ll update this when they are) but I’ve added the slip feathers, purely for the aesthetic of them, and rather than have them flat, I put them at an angle just to add detail.

I mentioned earlier that there was a funny story related to me making the puzzles. As I mentioned, I was prompted to make these having seen the picture on a friend’s Facebook. After posting pictures of the copy I’d made, the friend who had the picture sent me a message asking if I could send him measurements of the puzzle, so he could make his own. He didn’t have a copy, and seeing me making my copies kicked him into deciding he should make his own copy, since he’d been meaning to do it for a while. So, I was prompted into making a copy having seen his photo, which prompted him … Well it amused me at least!