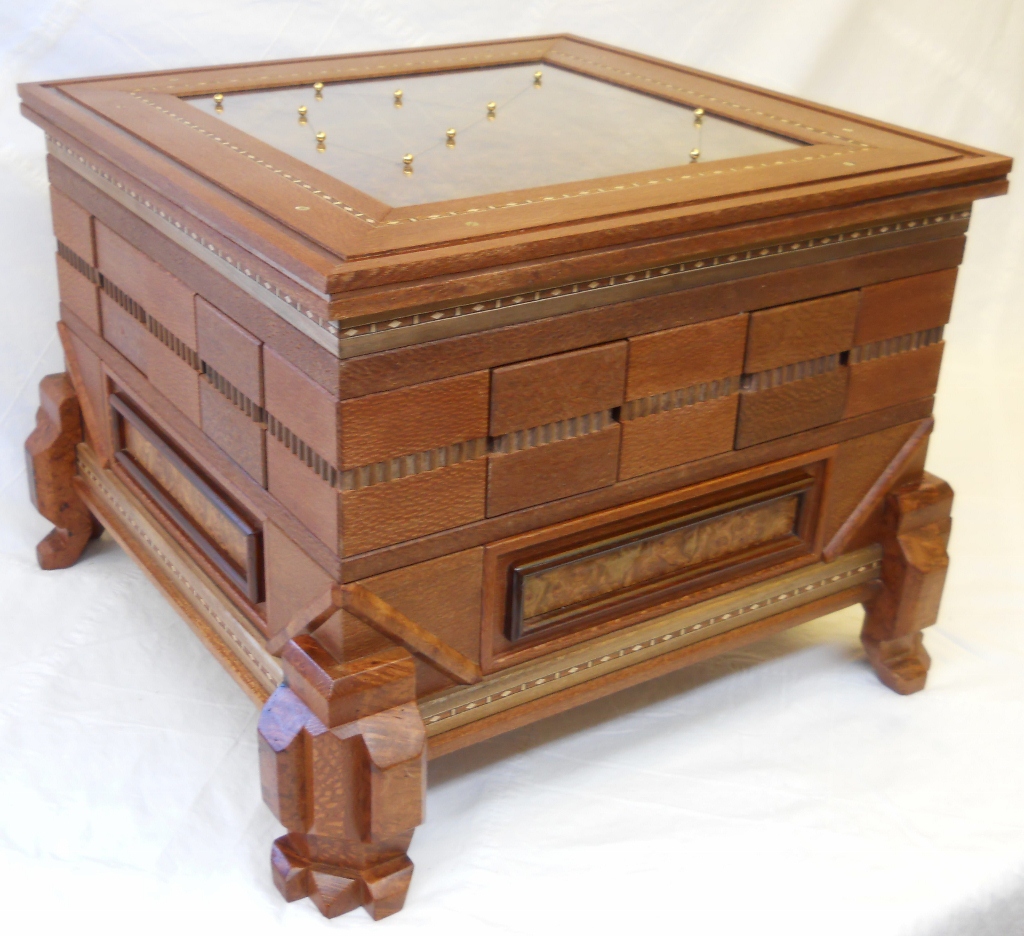
It’s been a little while since I sat down and wrote anything, and it’s not for lack of puzzles to write about, but really because I’ve been so busy in my own shop making puzzles. With IPP looming, I had set myself some lofty goals of designing and producing my first exchange puzzle. That in itself was a lot of work, but I didn’t stop there. I went on to make copies of Iwahiro’s ODD Puzzle, then a small run of puzzles to give away to new IPP attendees, and then I took on my most ambitious project to date. I remade a Stickman box.

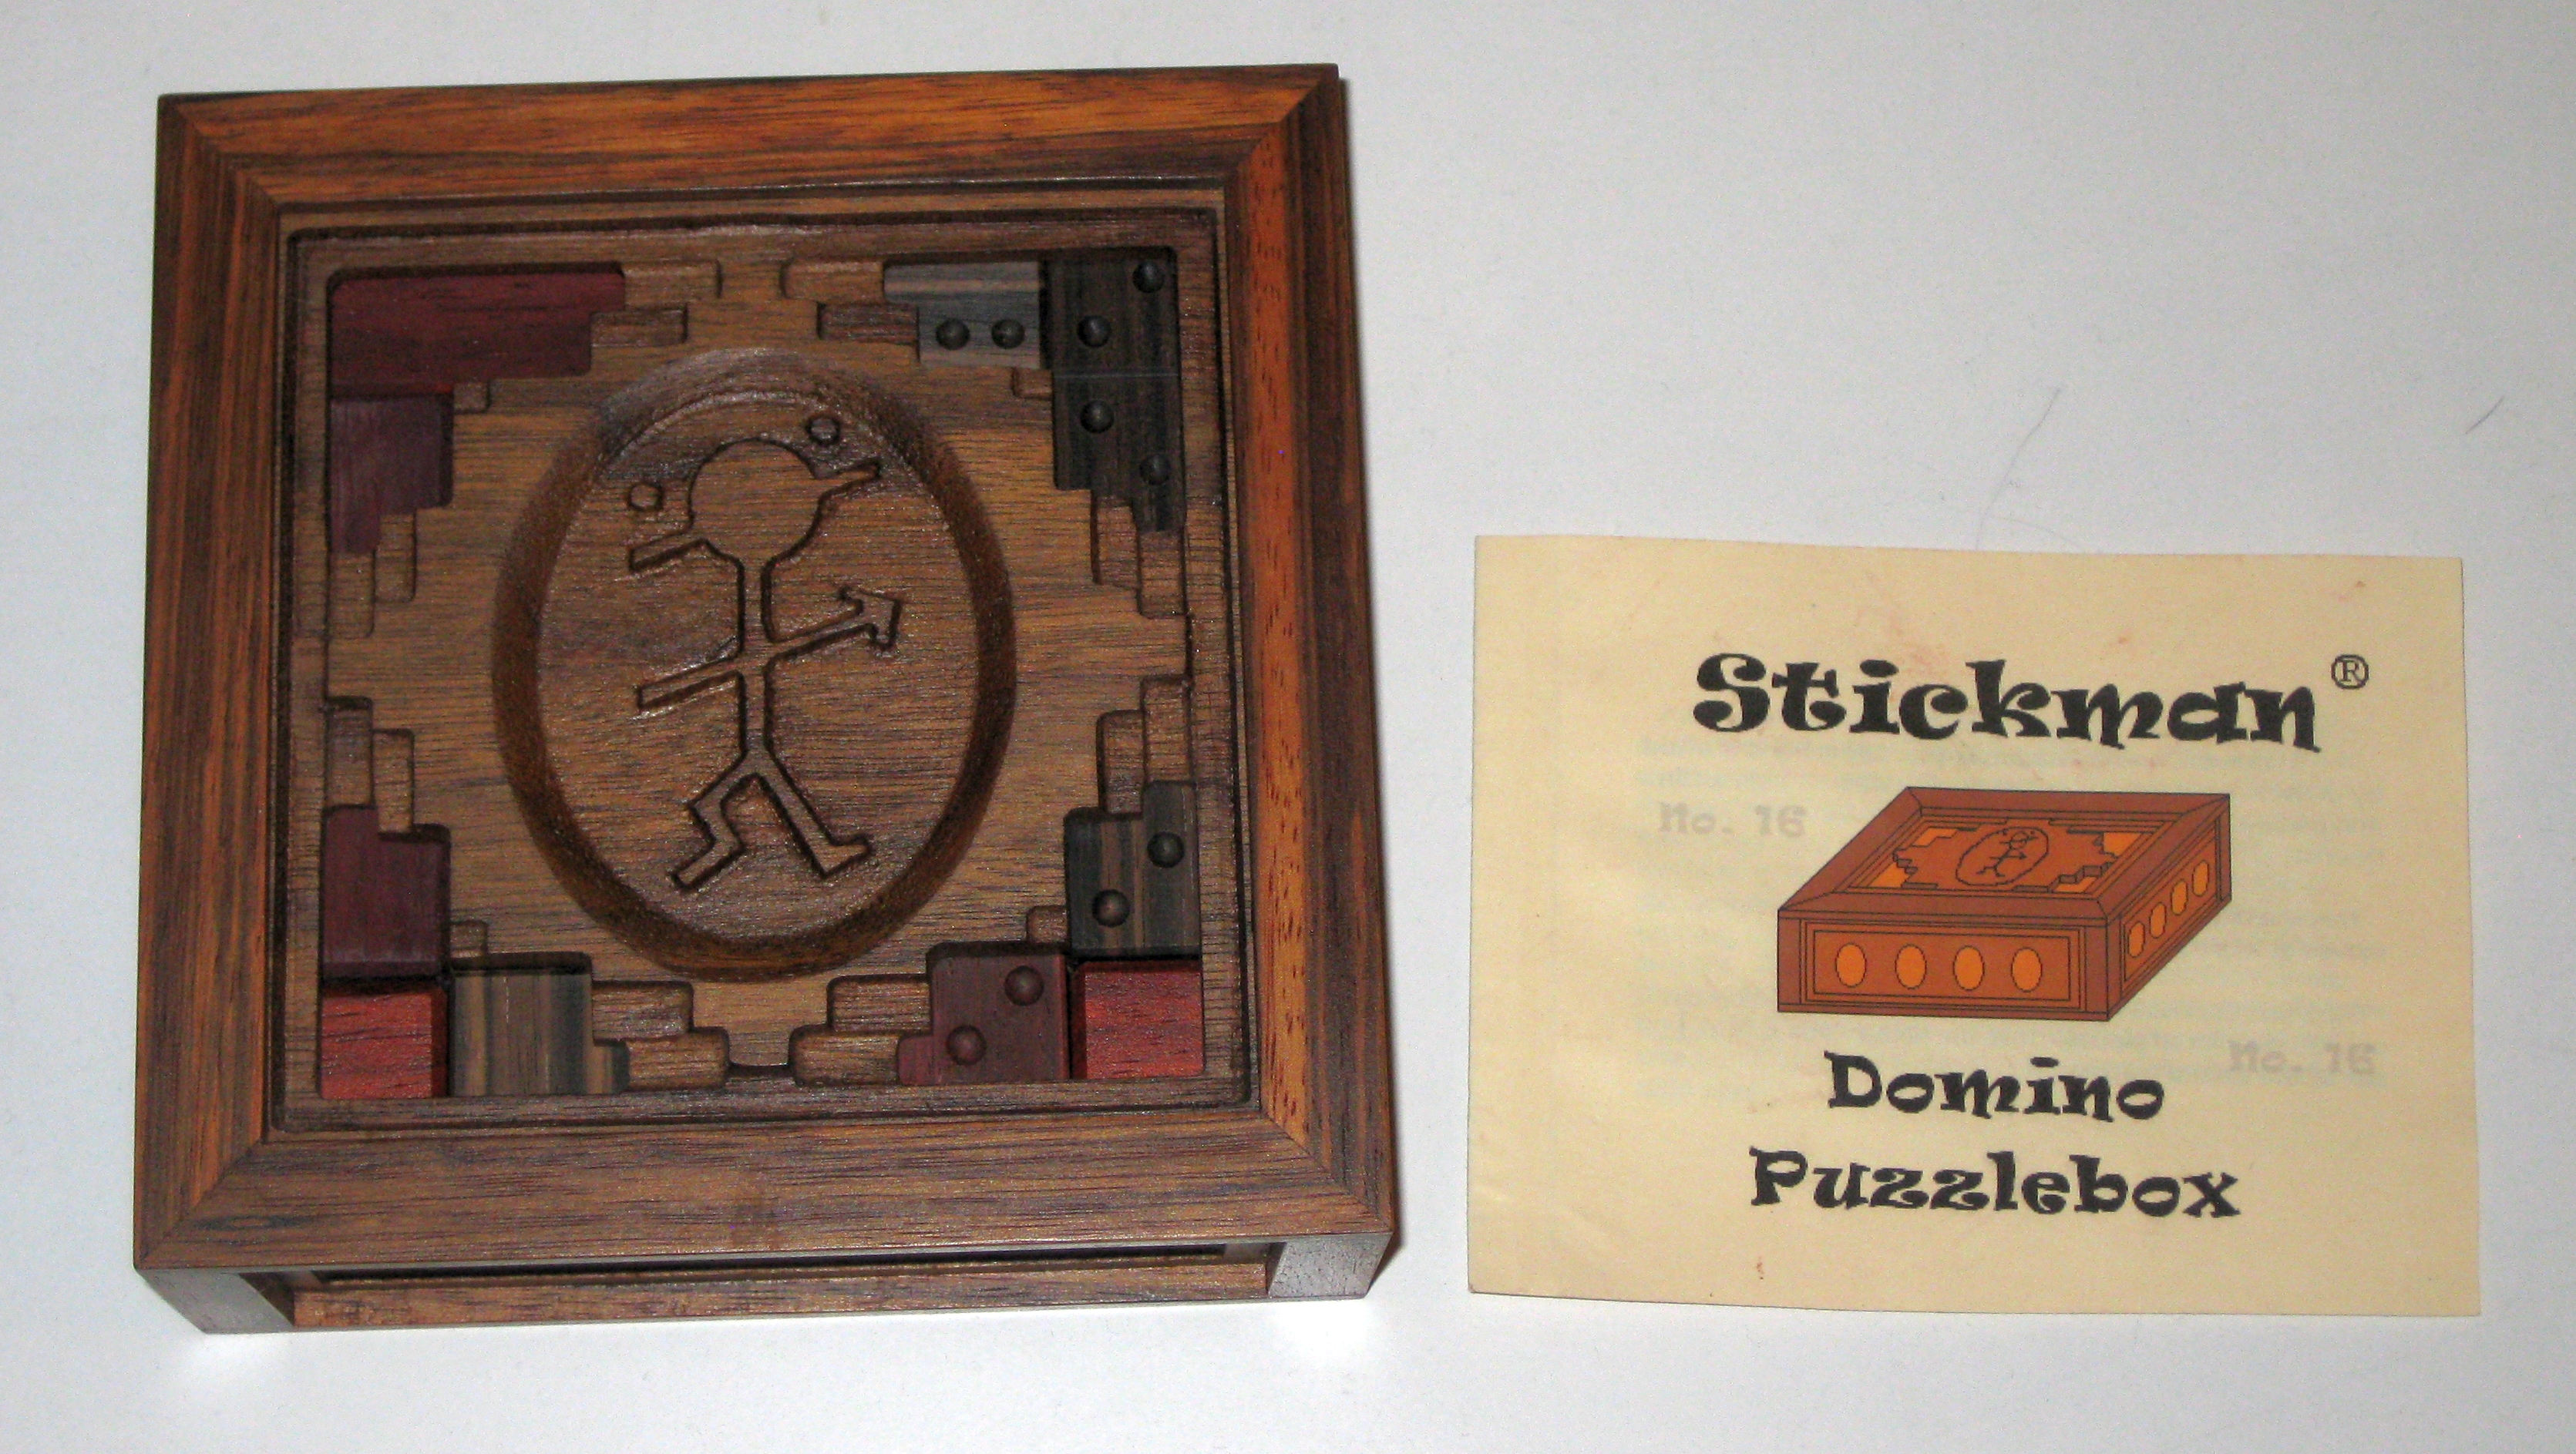
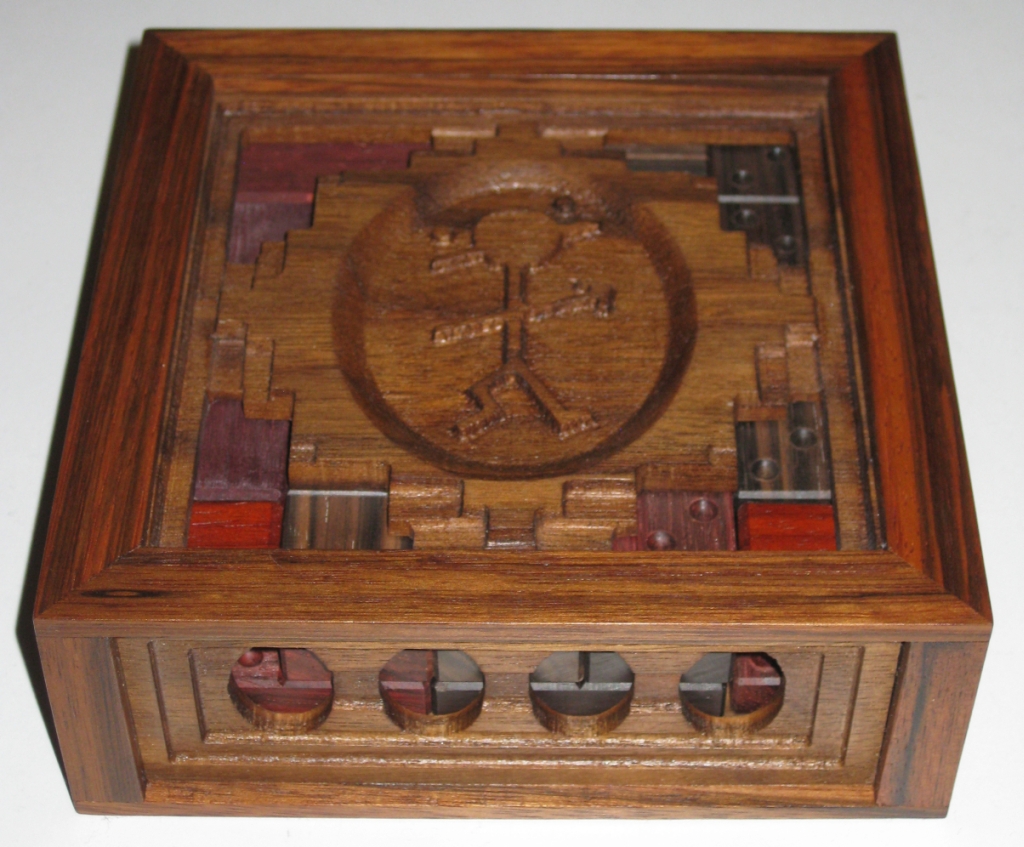
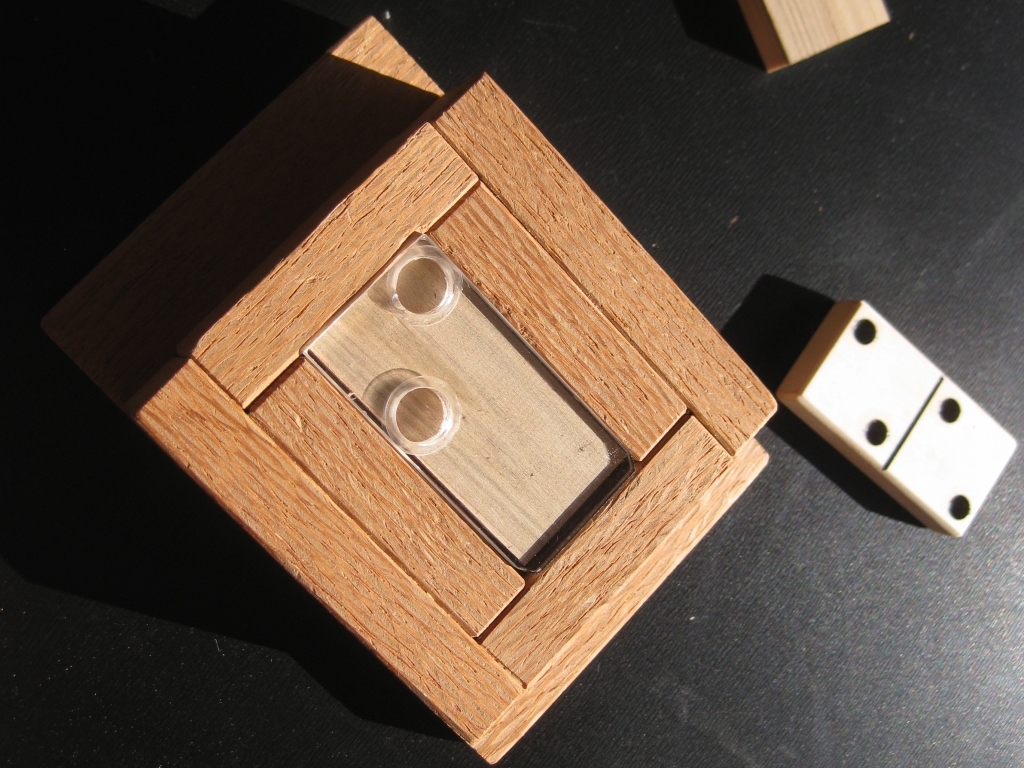
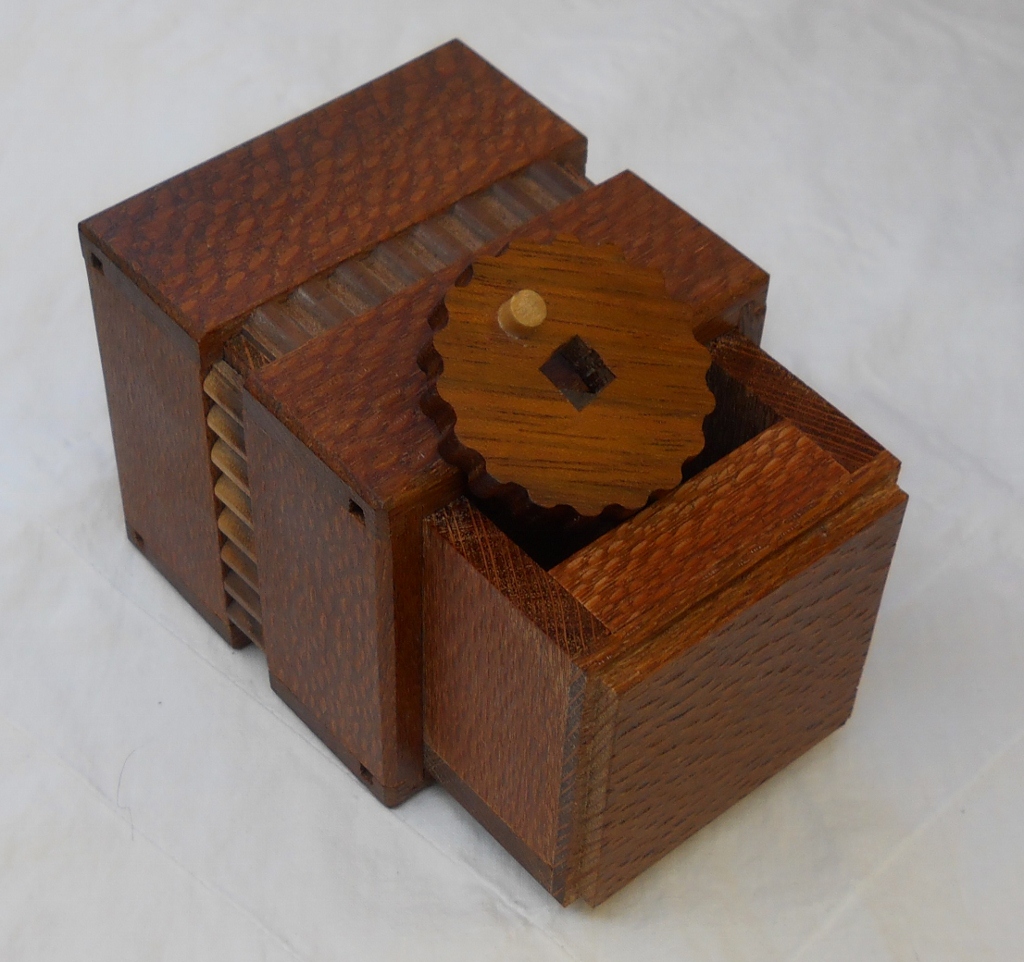
The finished box
If you’re a regular reader, you’ll remember that some time back I won a Stickman Domino Box at auction, which needed a little work to turn it into a fully working Domino Box. Having made the Dominoes, and learned a lot about the box along the way, I had the insane idea that I should make a few copies of the box for other puzzlers. There were only 25 originals made by the Stickman Puzzle Box Company, and it’s such a fun design, it really should be played with by more puzzlers. So with insanity on my shoulder, and time slipping away beneath me, I embarked on the most challenging project to date.
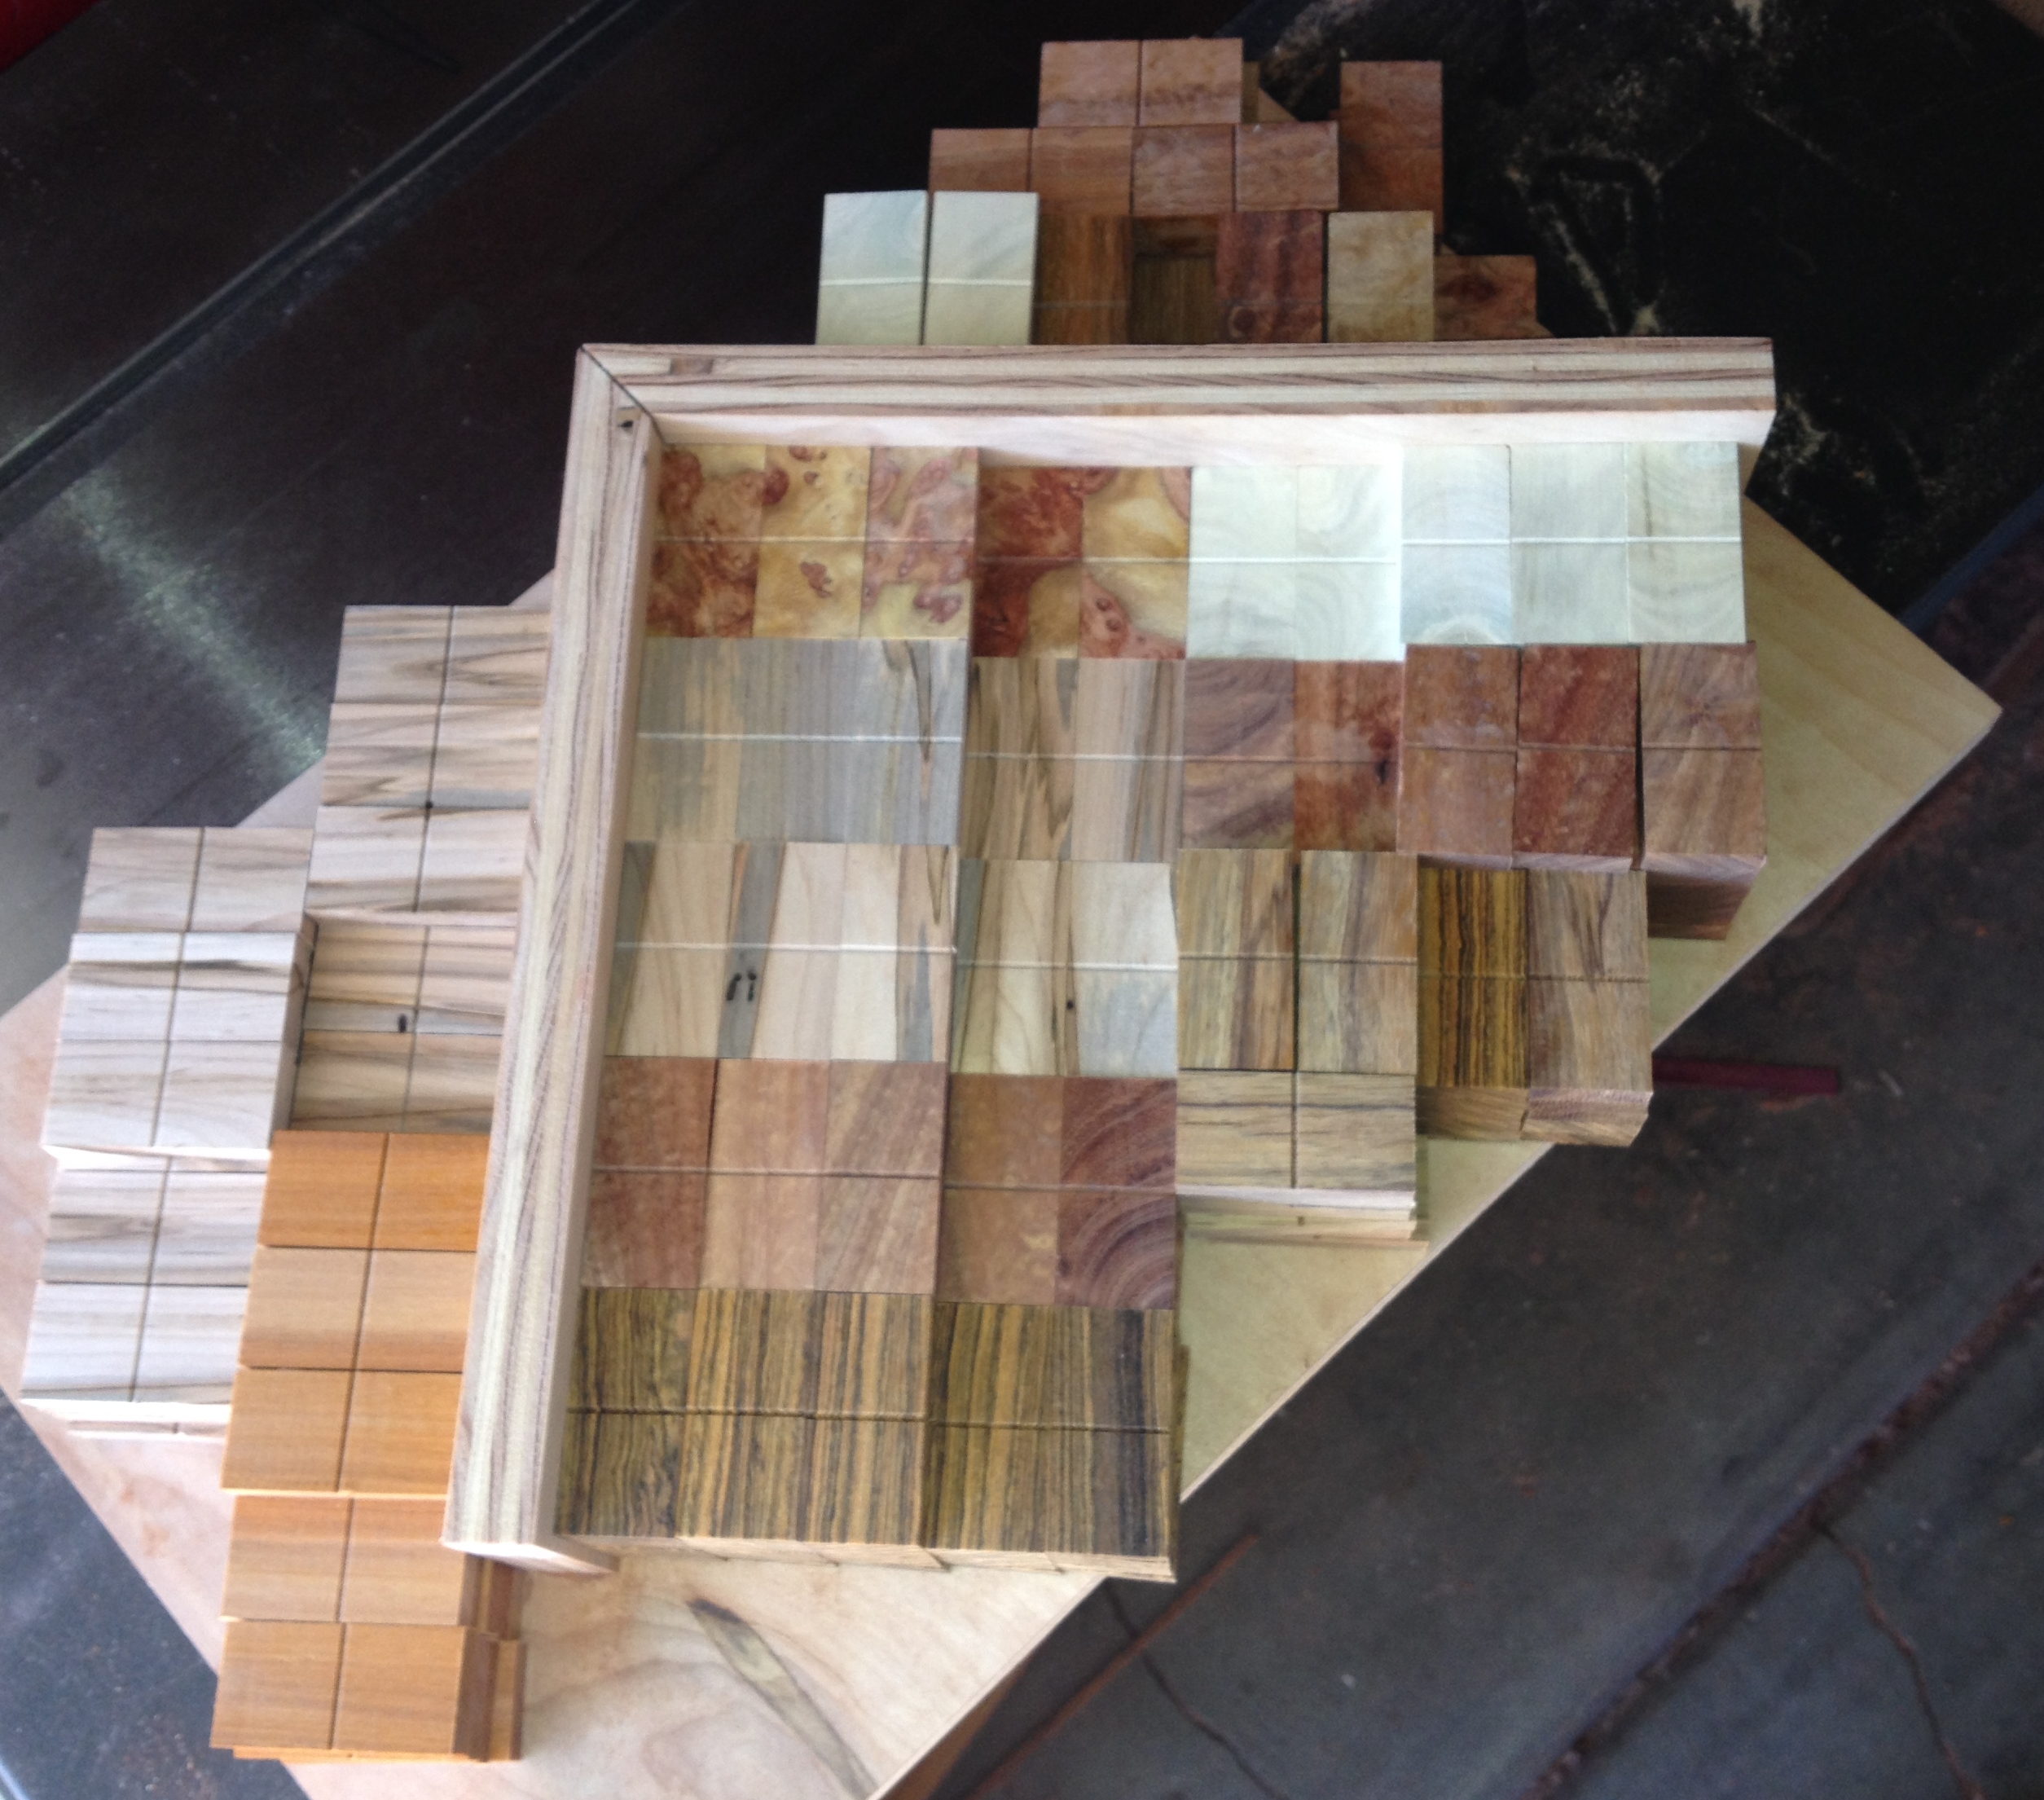
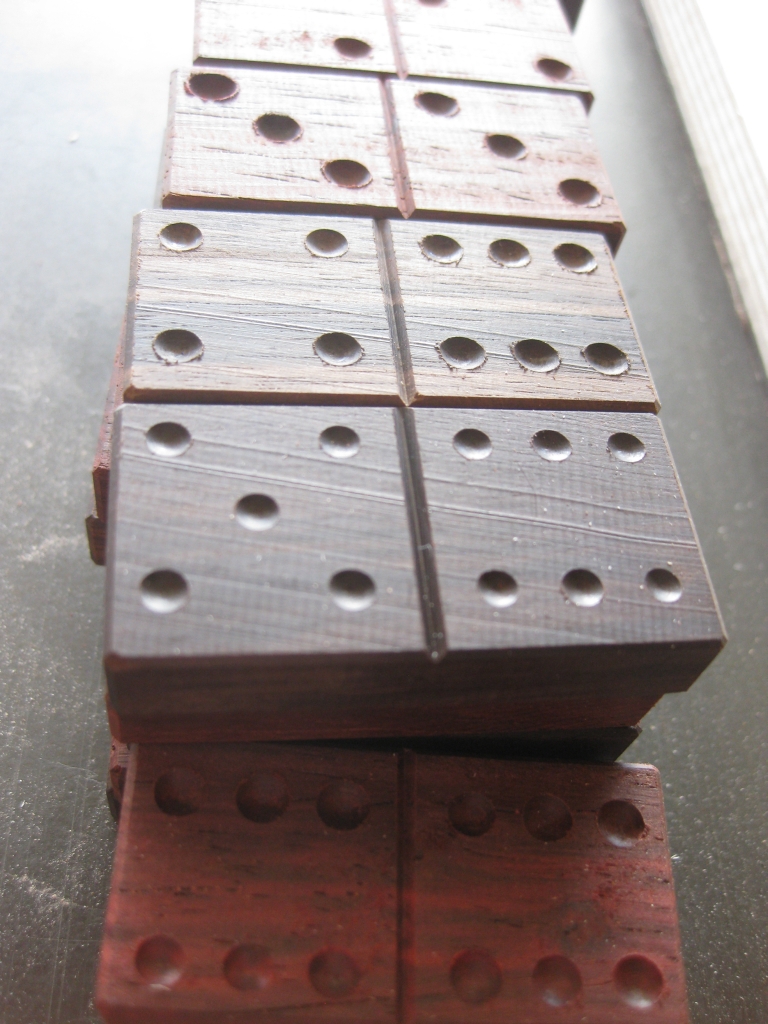
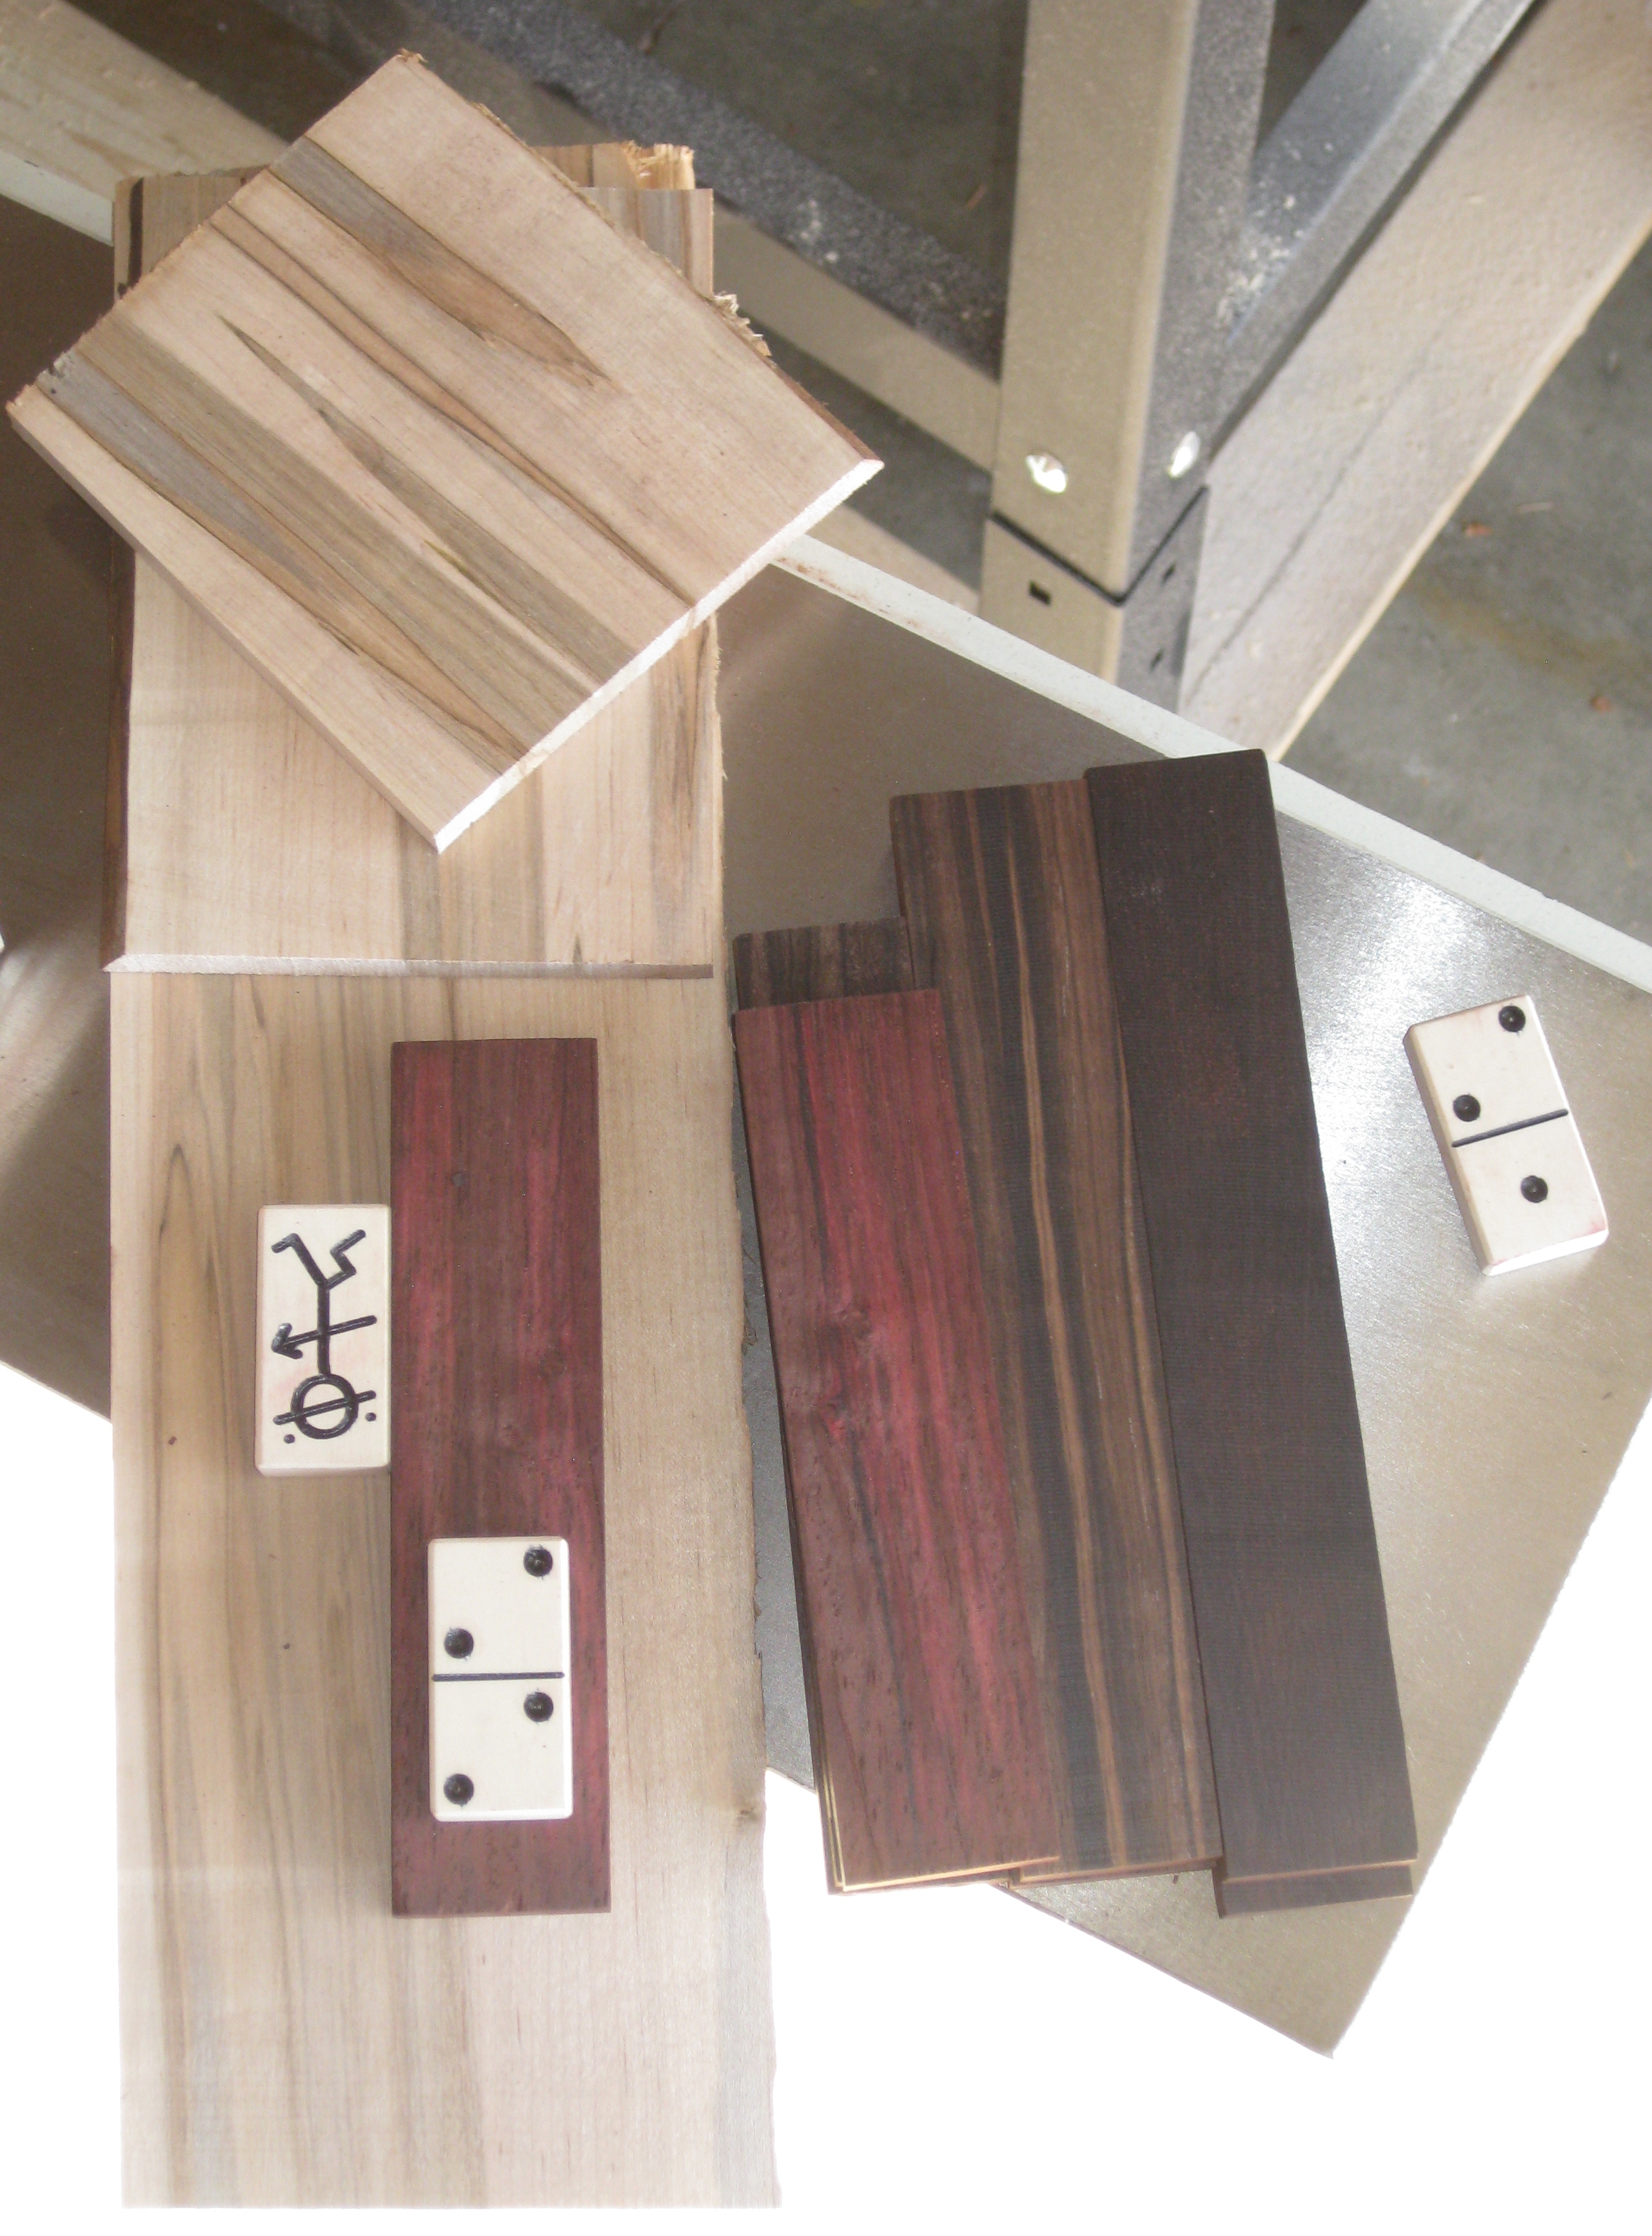
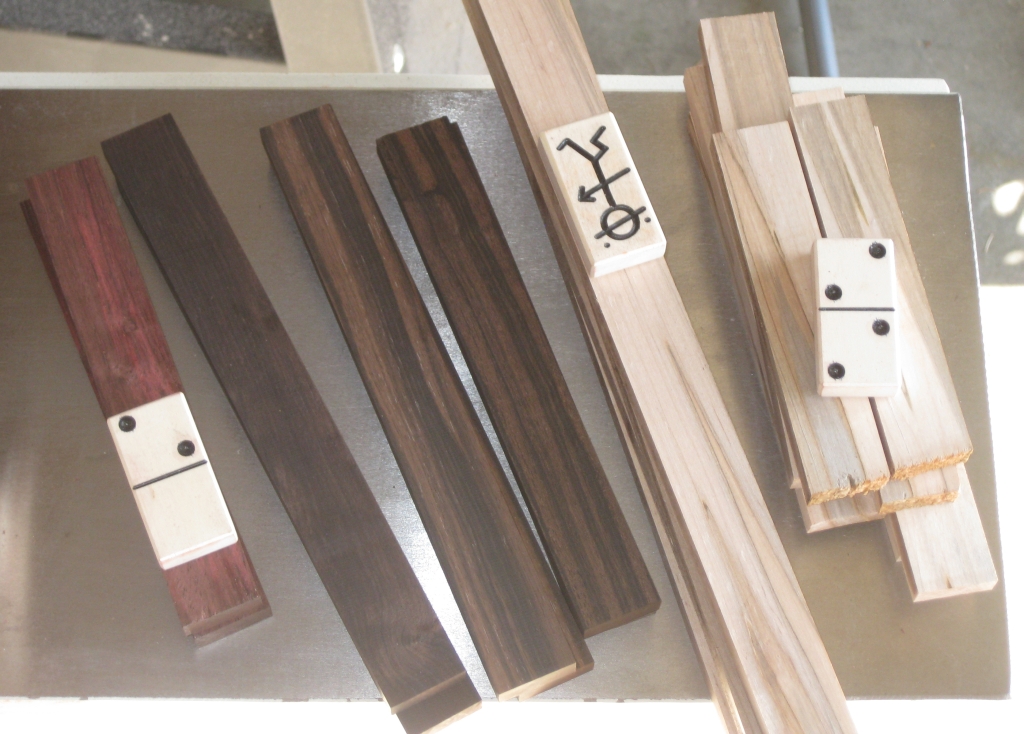
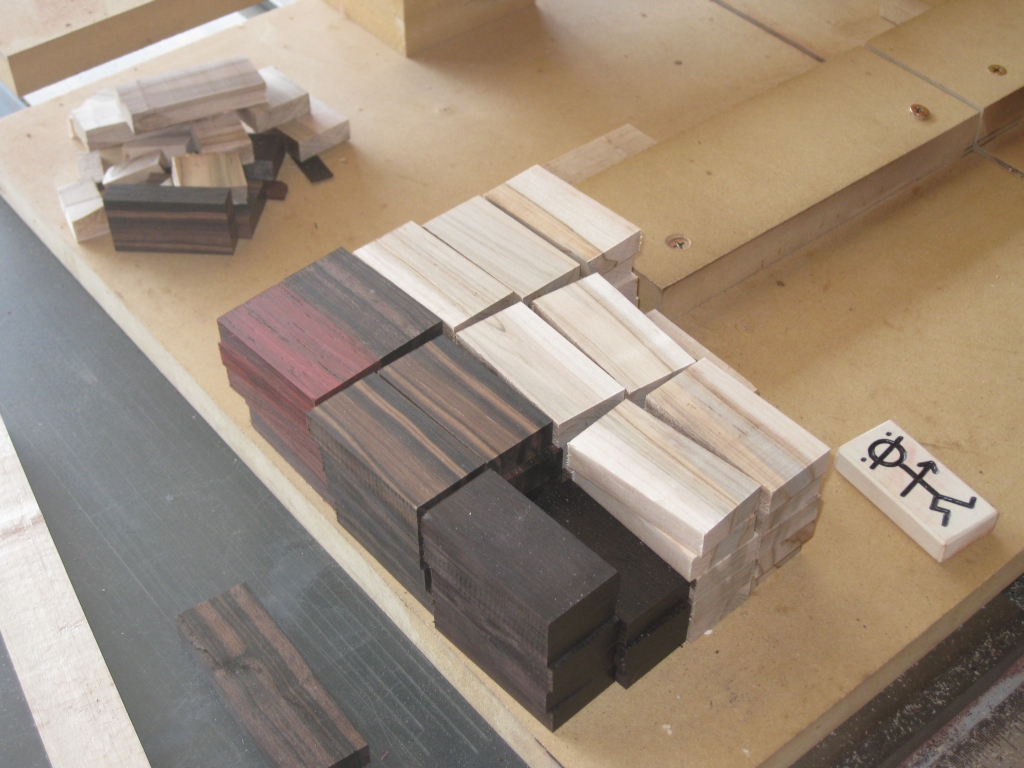
A new batch of Dominoes
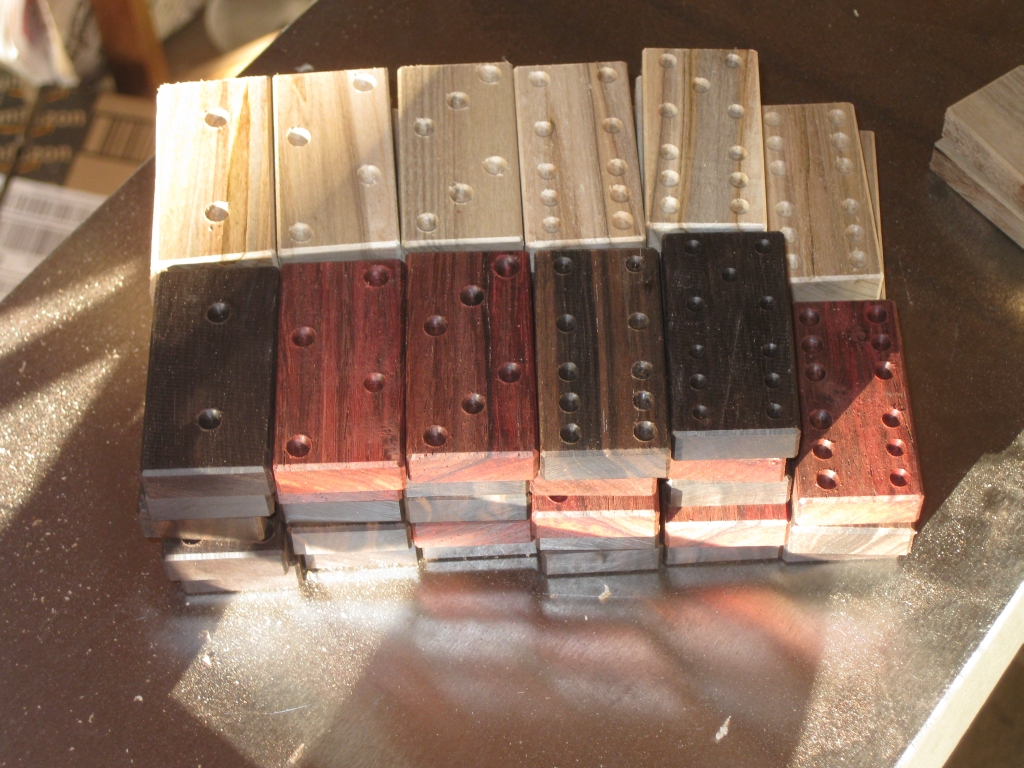
First off, I needed a new set of dominoes, so looking around the growing stockpile of exotic woods that I’ve purchased, I selected a number of boards, and set about the same process as before, and made a bunch of dominoes. I’ll not go into the details, as I’ve covered them elsewhere, but in total I made up 11 sets of dominoes.

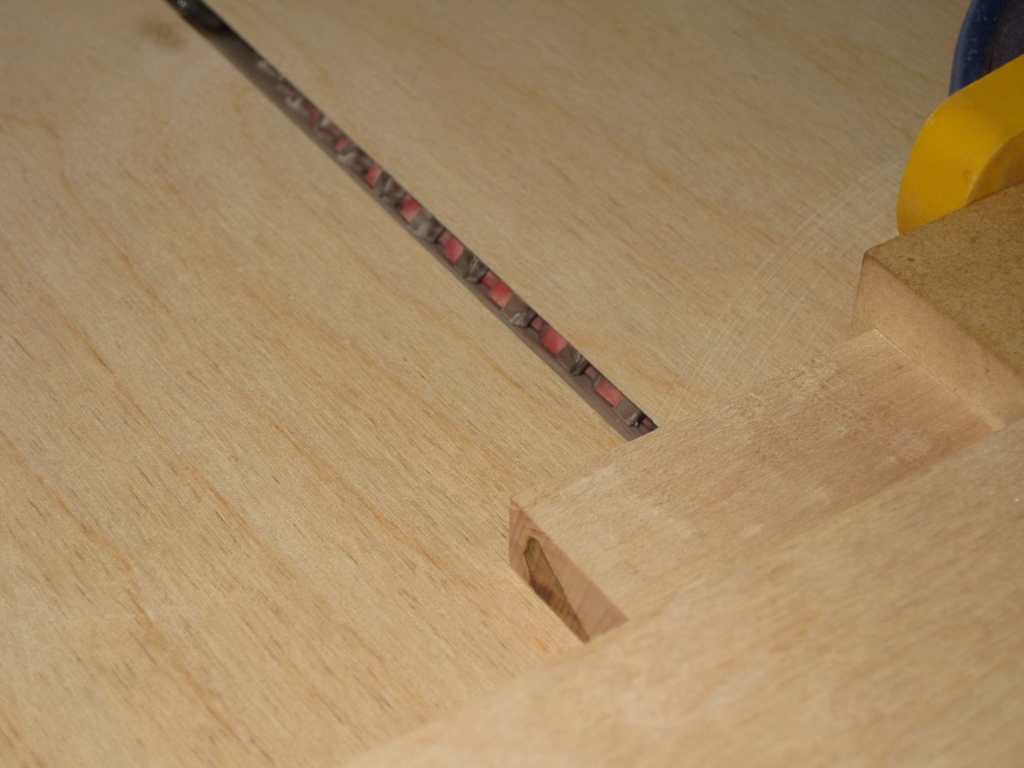
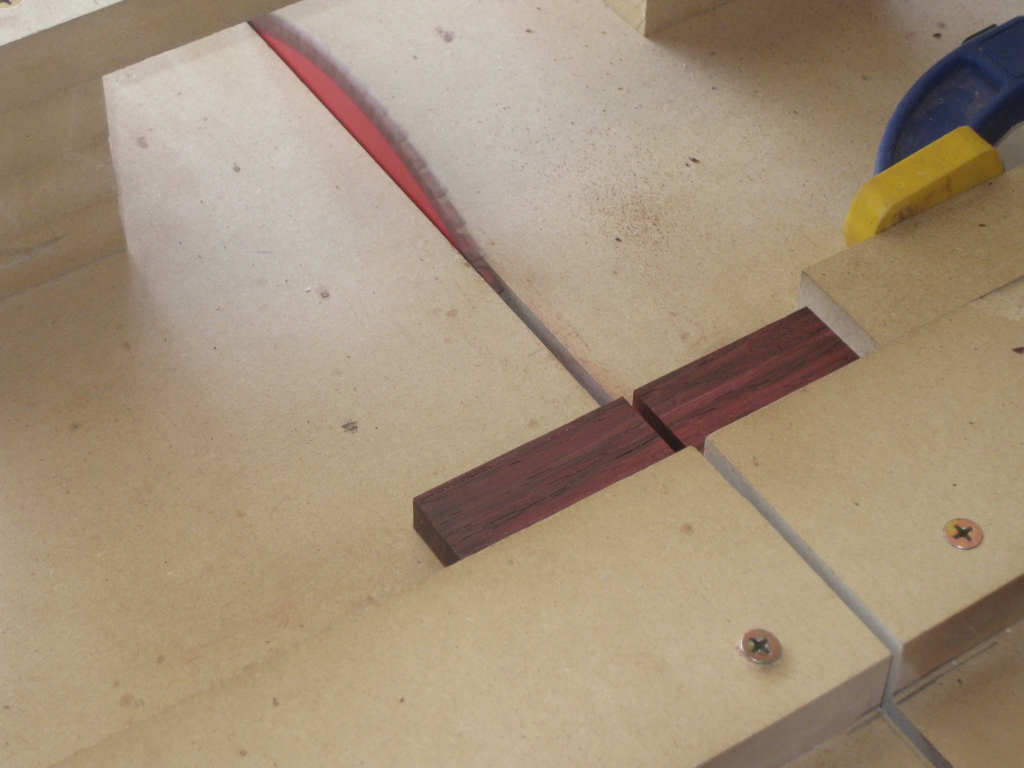
Puzzle Piece Bevel Jig
The last time I’d made the dominoes, I created the bevel on each edge using the router table, with a 45 degree bit. In fact that’s how I’ve done all the bevels for every project so far. I’ve never been too happy with that as a process though. The pieces I tend to work with are a little small, and with a high speed rotating blade, it wouldn’t take much for a piece to slip, and things to go wrong quickly. So taking some advice from fellow puzzle maker Eric Fuller, I created a new jig. As you can see, it’s a 45 degree cradle, where the saw blade pokes out through the centre. This allows me to run the piece to be beveled over the blade pretty quickly, and the amount of the blade sticking out is so small, that it’s almost impossible to stick a finger in the blade. Safety first!
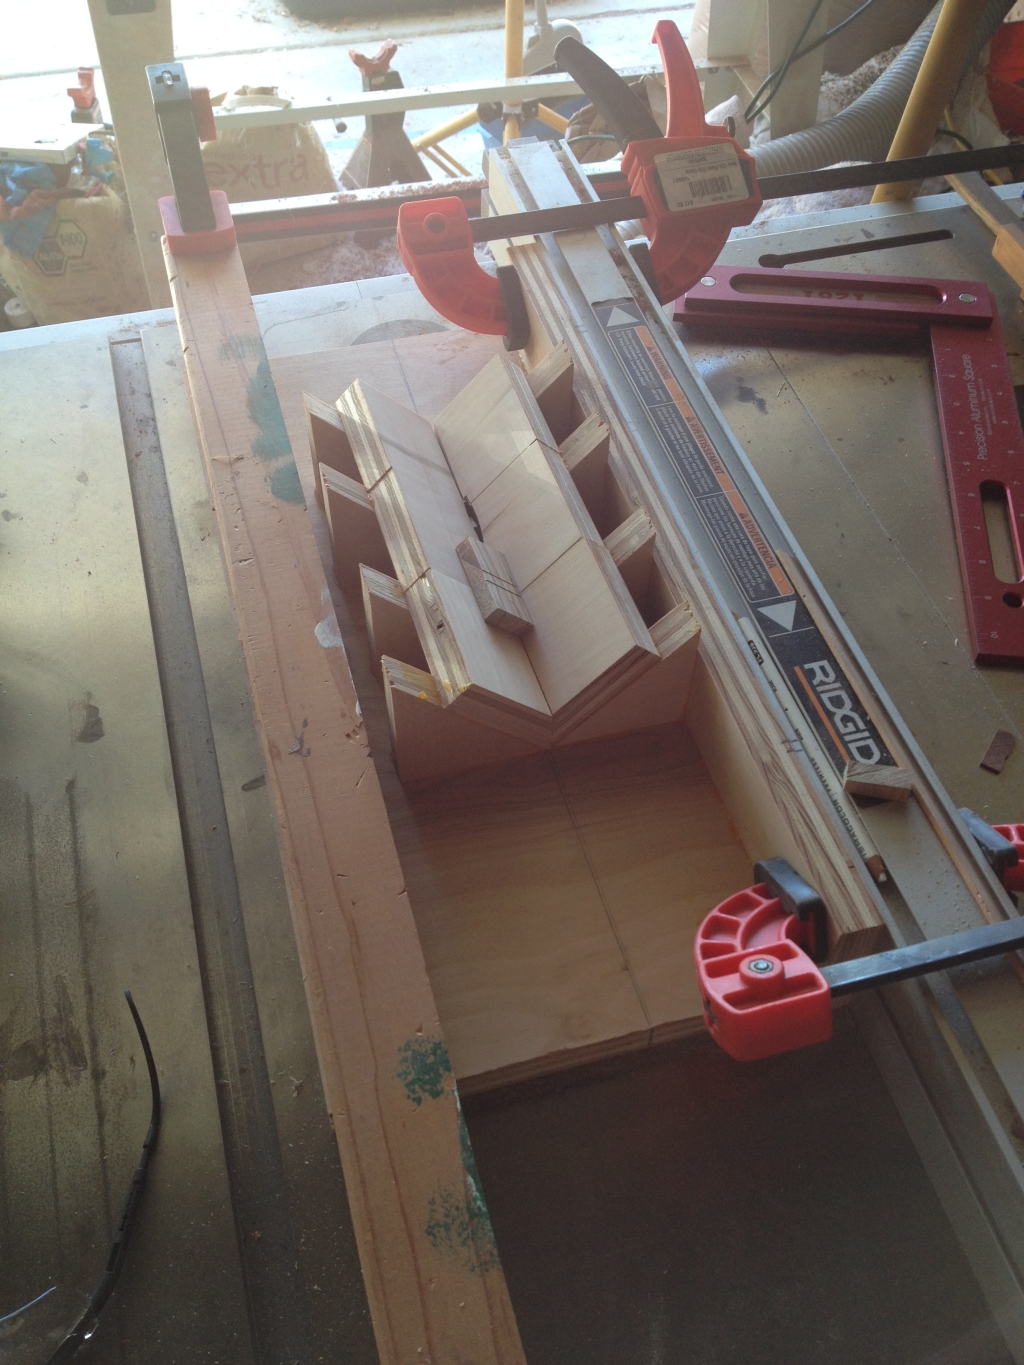
A wider shot of the beveling jig
As you can see from the wider shot, the jig is clamped to my fence, and also clamped to the table, so it won’t move anywhere, making this a pretty safe jig. It’s also fast. Since I don’t need to put a push block onto the piece, and then guide it over the spinning router bit, the whole thing takes much less time.
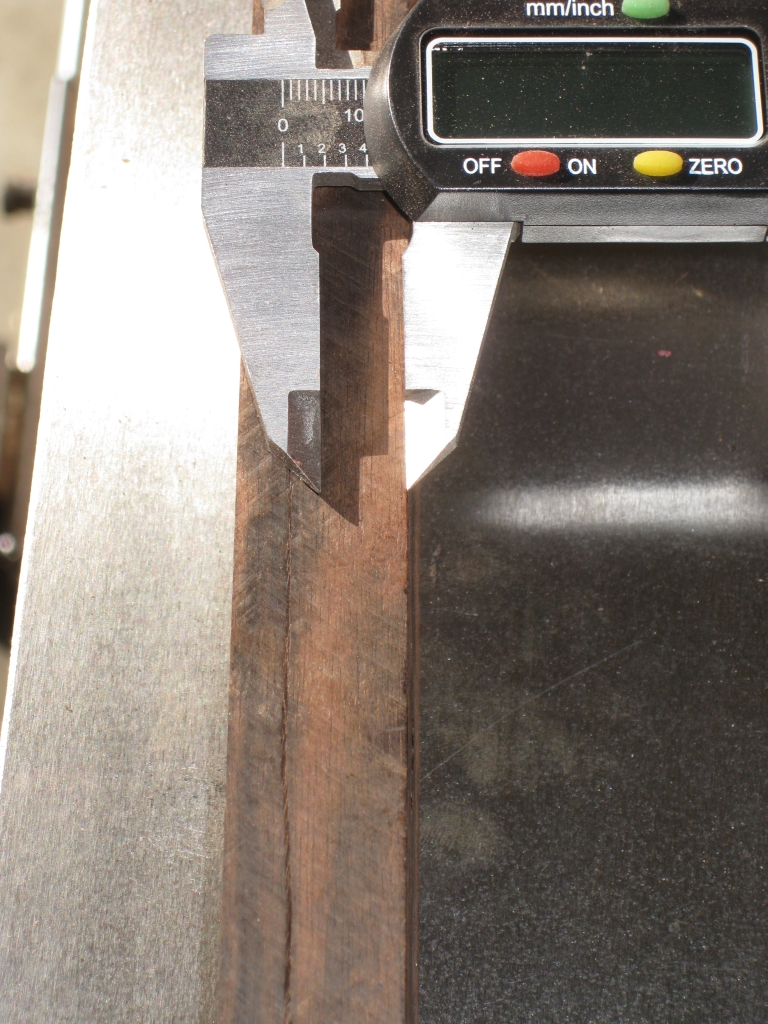
Drilling Domino pips
Much like the last time I made dominoes, I had the jig and templates to cut the dots or ‘pips’ for the dominoes. With 11 sets, or 308 dominoes, or 1848 pips depending on how you want to look at it, there was a lot more work this time round. I’d learned from the last attempt when I ended up with blisters from where the drill rubbed against my fingers, and taped up my fingers at the appropriate points to save any further blistering. Sadly, not everything went to plan.
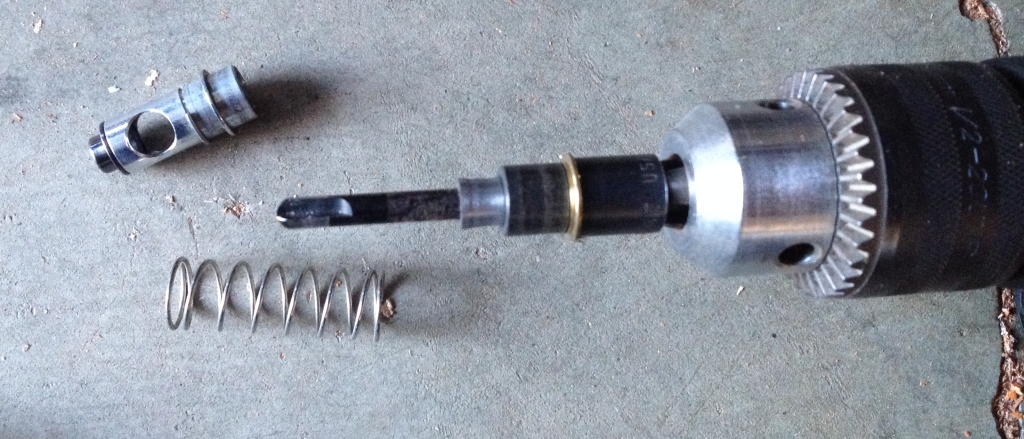
Disaster
Around ¾ of the way through the process I hit a snag. My template drill bit exploded! The bit works by having a collar which is held onto the main body with an angled internal neck. So the collar can’t come past that neck as it increases in diameter. The spring pushes it back to the point where the drill bit is covered, and when you push won inside the template the bit is exposed, allowing it to create a pip. Well it seems that since this drill bit made all the original sets of dominoes, it was just rather worn out, and the neck had work to the point where it no longer held the collar in place. With this, it was impossible to finish the dominoes, and I had to scramble to fins a replacement. Fortunately, Rockler sells the kits, and replacement bits … so by mid week I had a replacement and could finish the pips. Dominoes complete, it was time to turn my attention to the puzzle carcass.
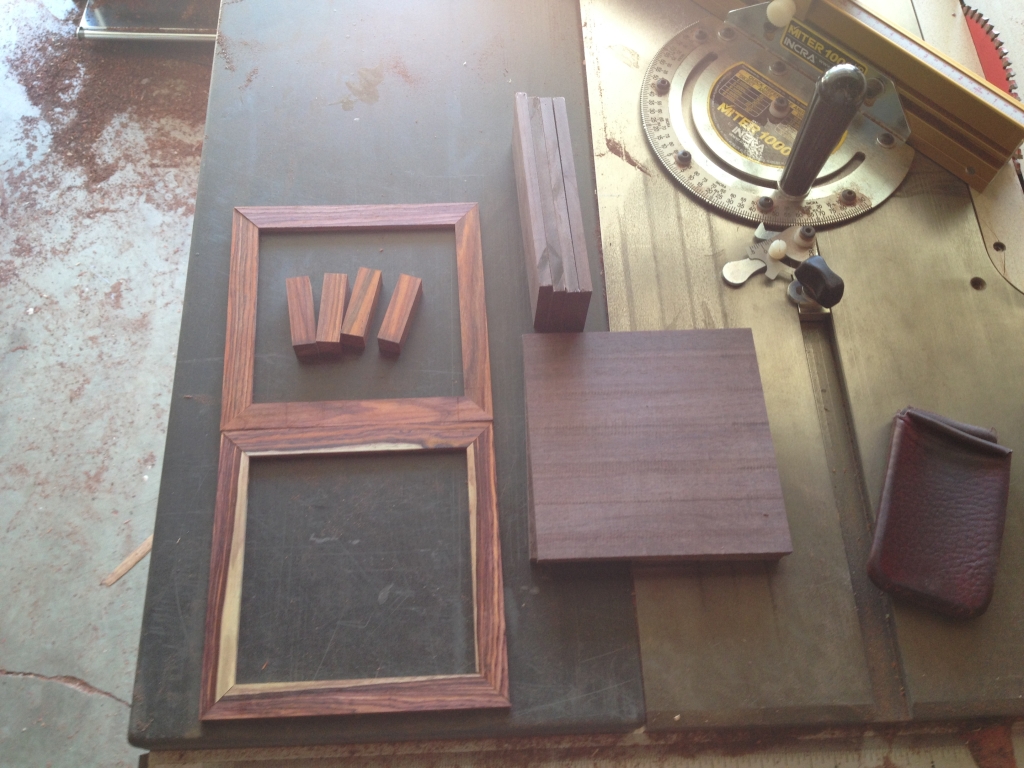
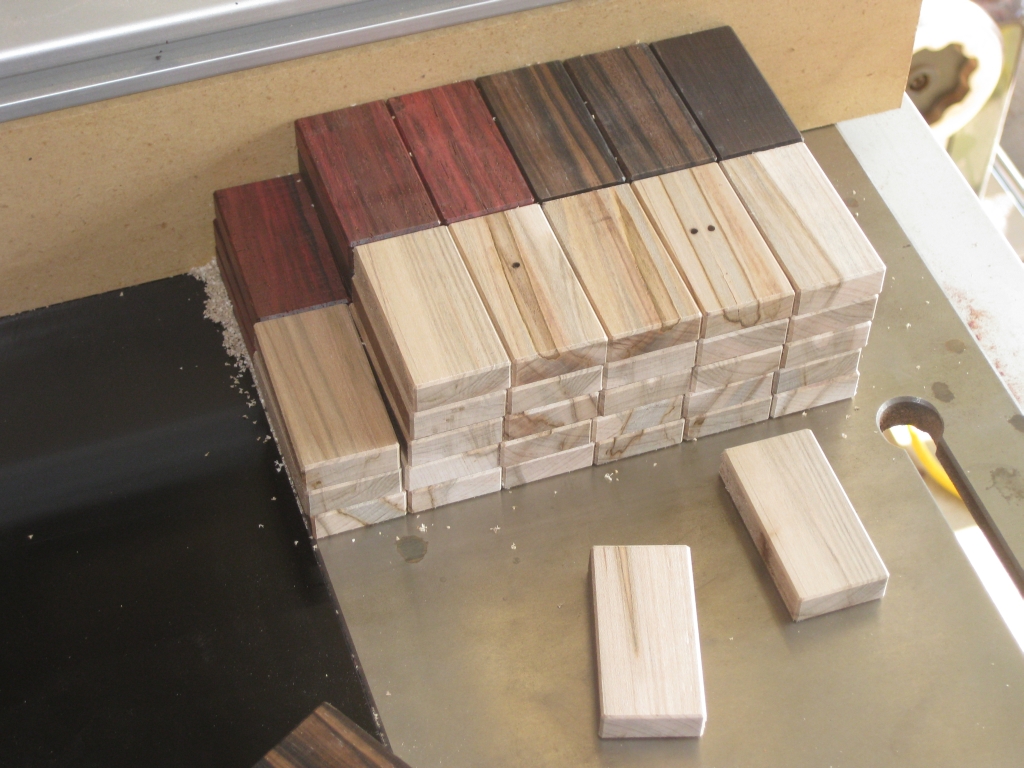
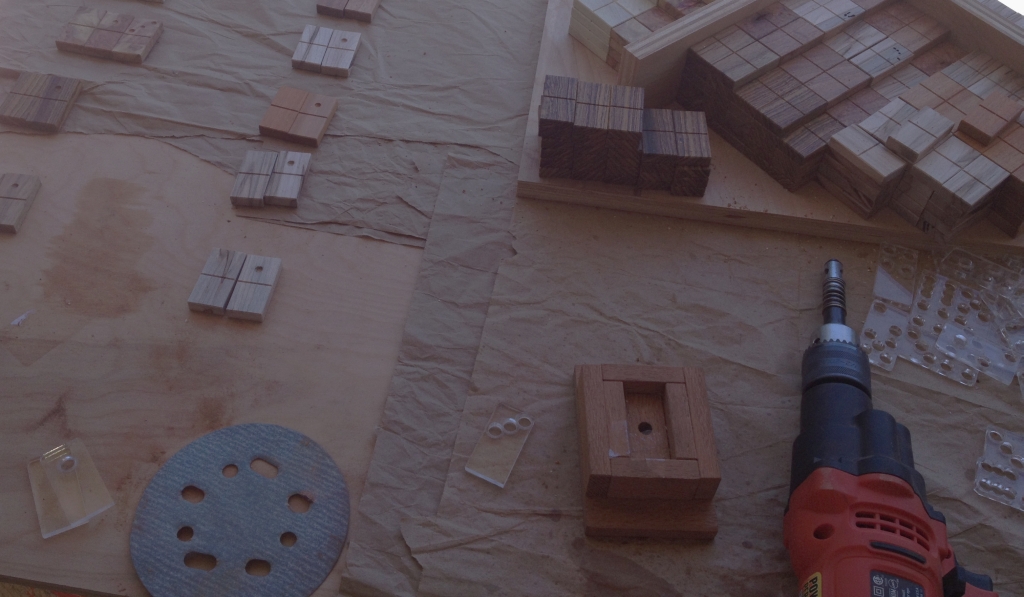
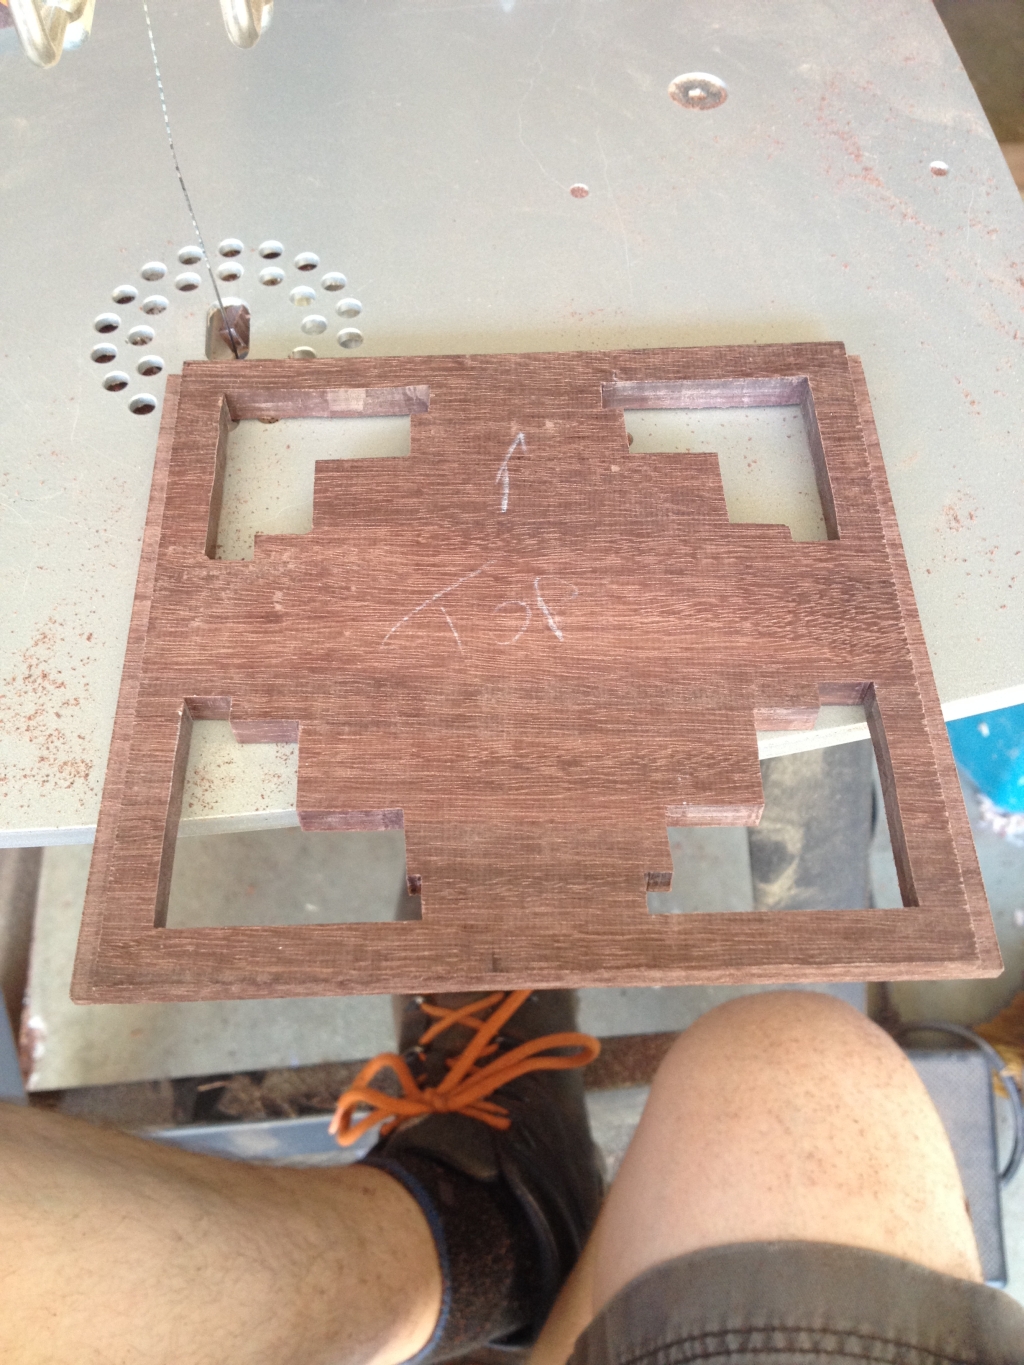
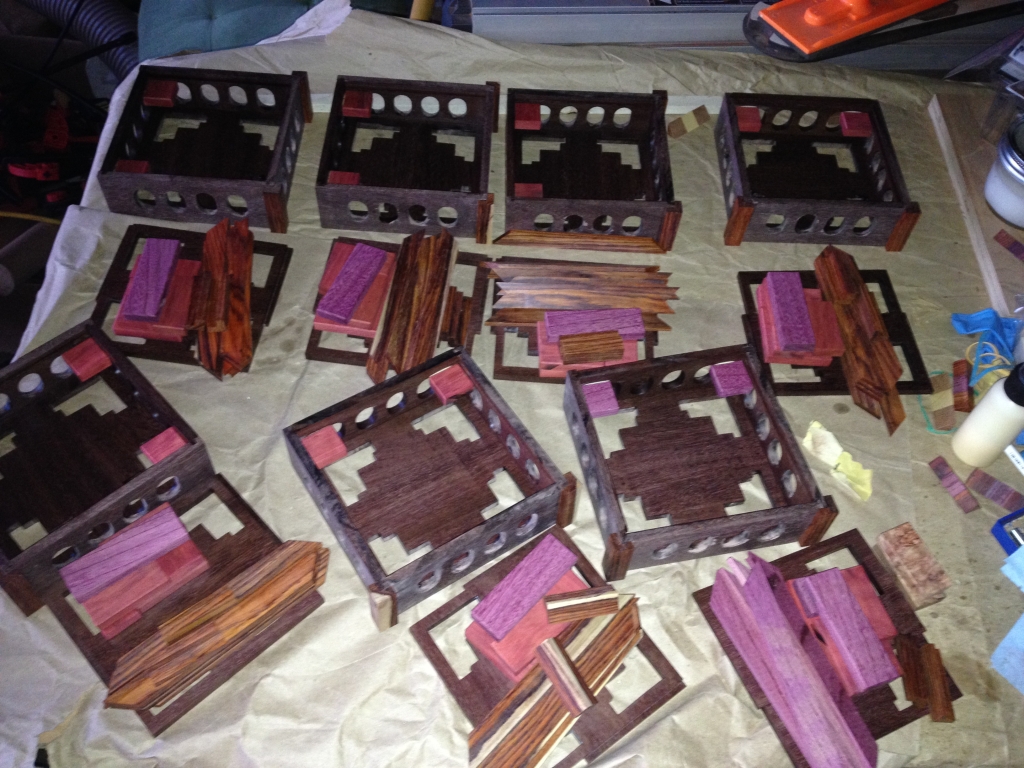
Basic pieces for the carcass
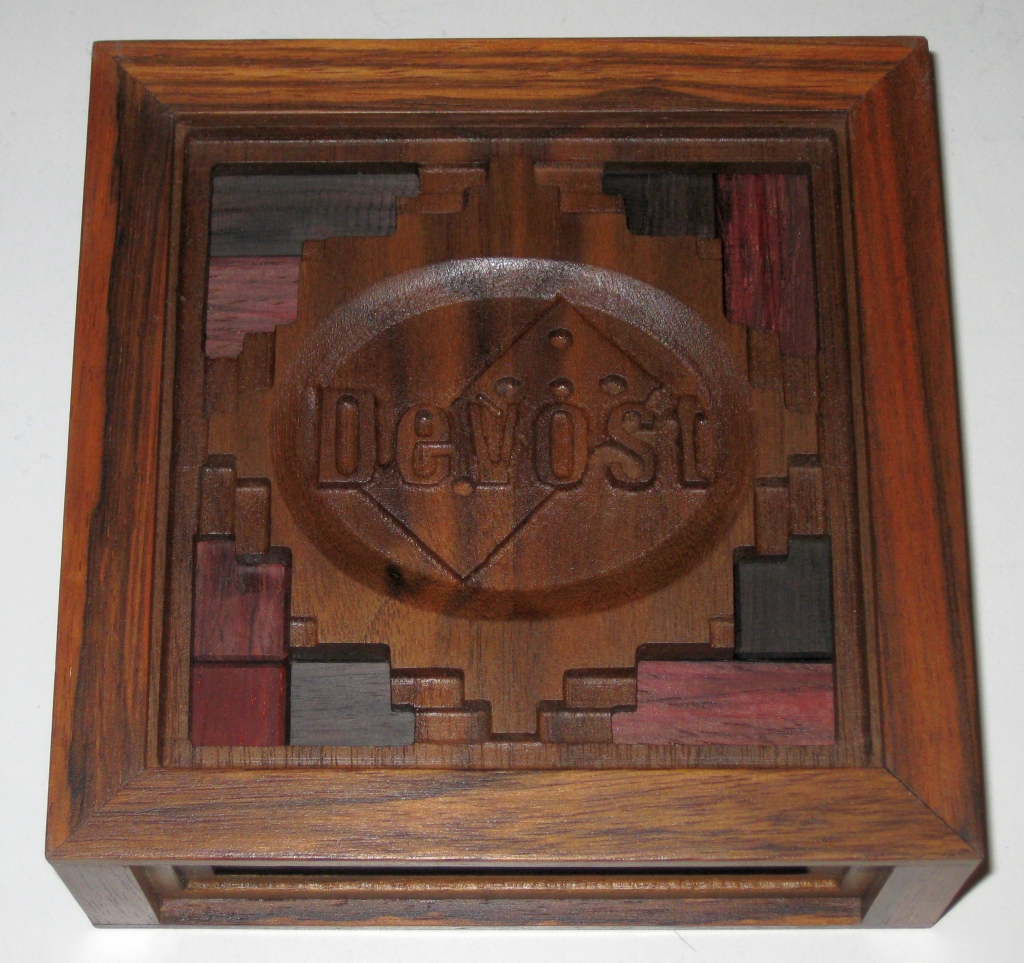
Before starting on making the boxes, I’d been studying the design of the joinery, and how the box had been made for weeks. I’ll freely admit that I really didn’t understand why Stickman had done things the way he had, but I had a good idea of what I was doing, and having taken lots of measurements, I proceeded to start making sawdust. Having surfaced and thicknessed the boards, I cut the basic side panels, the top and bottom, as well as the corner posts, and top/bottom frames. The wood choice was Katalox for the body and Cocobolo for the frame. The Katalox will darken over time to a dark black almost ebony like colour, but starts off as a warm rich chocolate brown. The contrast with the Cocobolo should be quite striking.

Initial test fit with rubber bands to hold things together
After an afternoon’s work, I had all the various grooves cut to both support the panels, and allow the top and front to slide respectively when the box is opened. At this point, I came in from the shop, and announced to my wife that Stickman is a genius. Having not truly understood why the box was created the way it is, and the reasons behind design choices, previously, I now fully understood why each piece existed, and exactly how it interacted. Not only is the construction a work of art, it also requires the minimal number of cuts, and pieces to make everything work perfectly. There is an elegance to the design that I hadn’t appreciated. Having spoken with Stickman about it, he agreed. It’s only once you’ve tried to repair someone else’s work, or remake it, that you truly appreciate the process they went through to make the final design. And yes, I’m lucky to be able to talk to the original designer, and get his input and feedback as I worked through this project!
Yes, that piece is still attached
With the main body cut and fitting perfectly, I turned my attention to the ‘decorative’ elements of the puzzle, namely the corner pillars. I’d cut the pieces to the right dimensions but needed to cut out the centre to create corner sections. My first pass on the saw left a rather fun little piece, but after a small adjustment, things were spot on. The joy of working with jigs is that you can make a small adjustment, re-cut, adjust until you’re good, then just cut lots of exact replicas of a piece quickly and accurately.
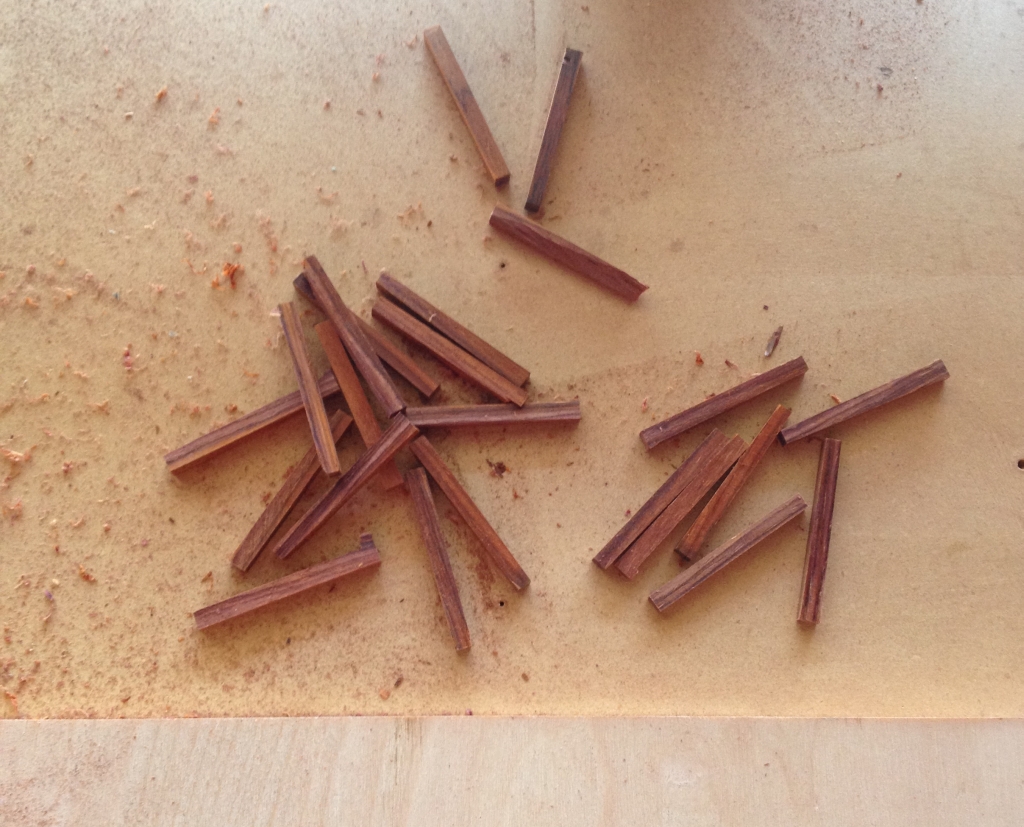
Cocobolo matchsticks
When cutting the corners, I was left with a lot of cocobolo matchsticks. As with any exotics in the shop, these all end up in a scrap bin, and will eventually be used for something else. Nothing gets wasted!
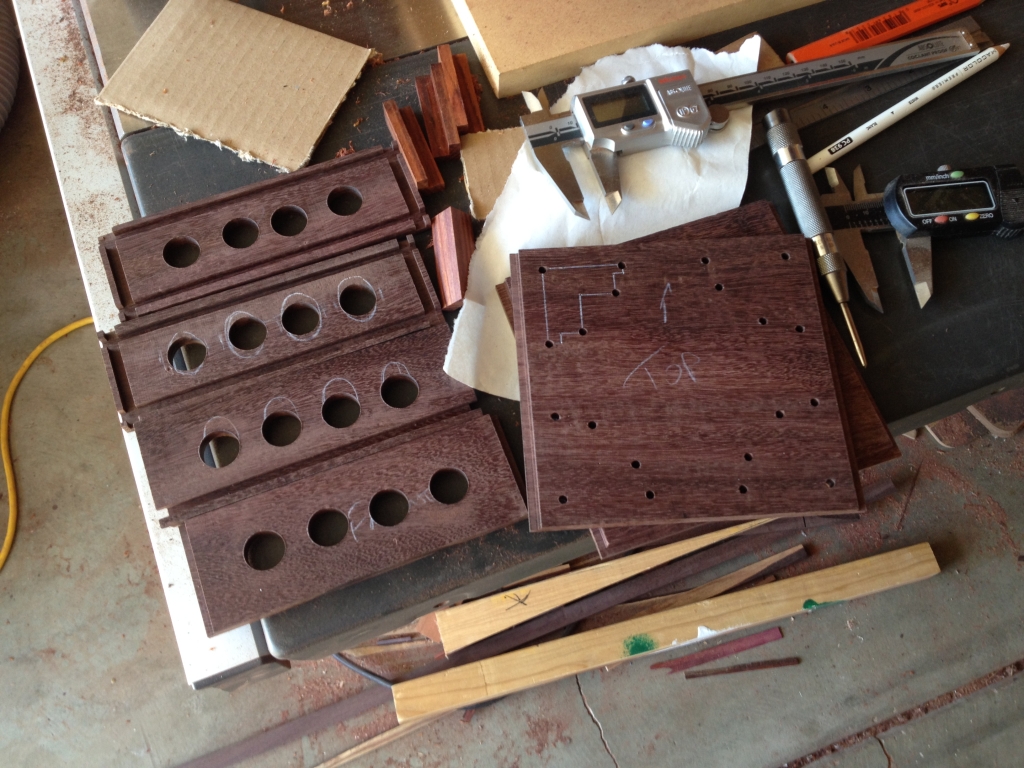
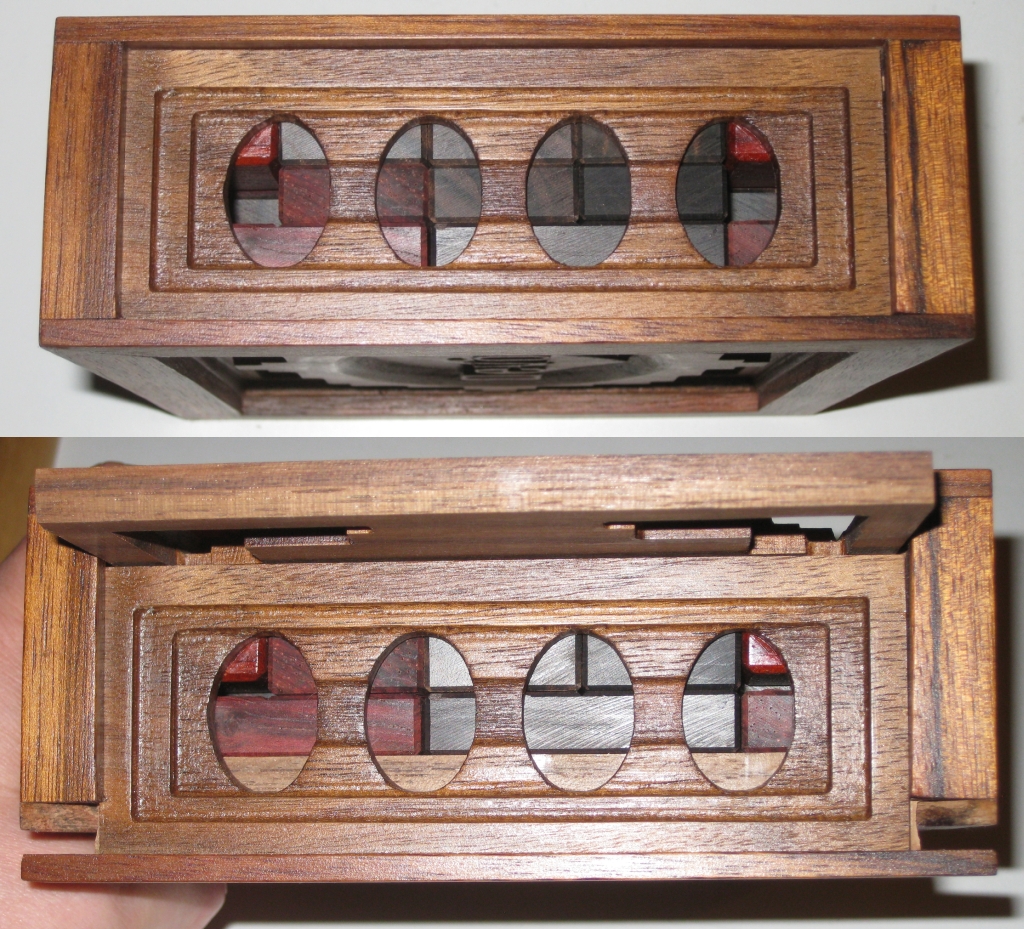
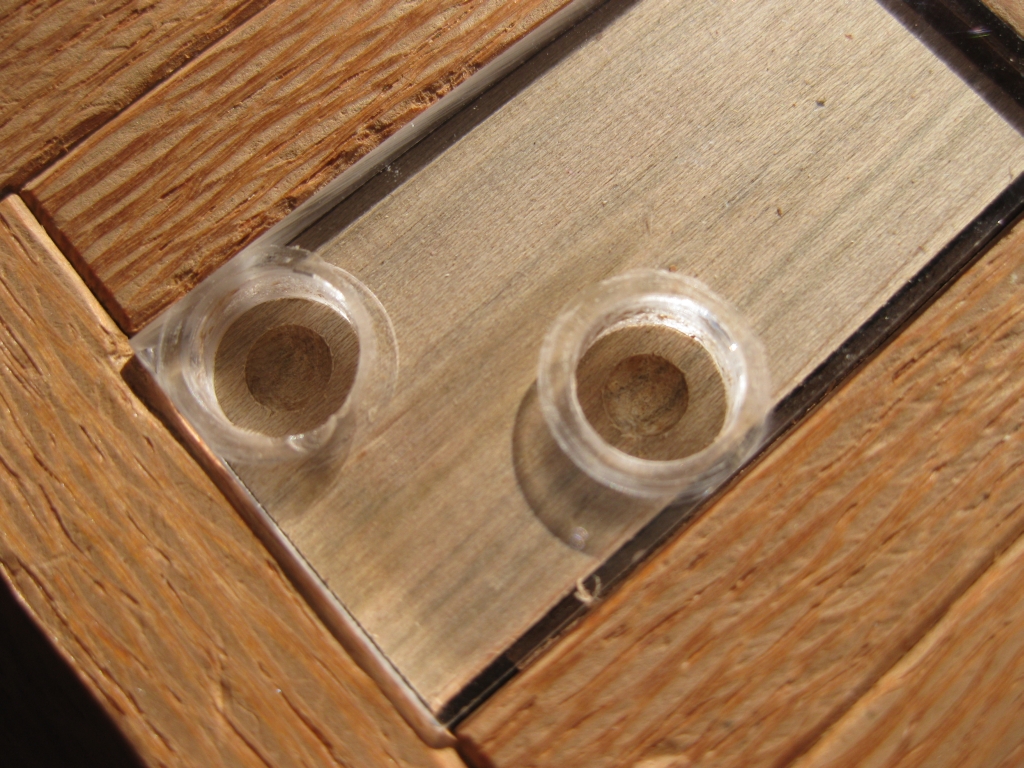
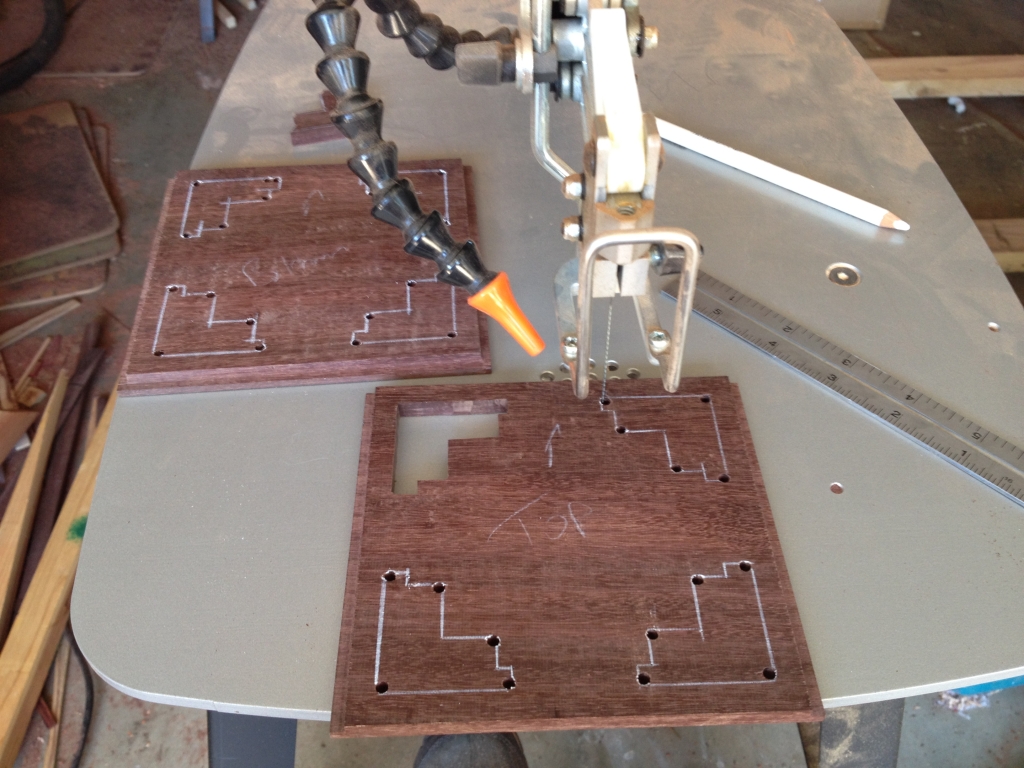
Initial circular holes in the side plates
The original puzzle is peppered with holes and gaps. They’re not just because Stickman wanted to make the puzzle lighter (although in my case, working with Katalox which is a dense, heavy wood it’s not a bad thing) but they’re integral to solving the puzzle. You need to be able to see what’s going on inside, and be able to poke your fingers through the sides to manipulate the dominoes. Stickman did all this work on a CNC machine, where effectively, he clamped the wood down, and let a computer controlling a router bit do all the hard work. I don’t have a CNC machine, but I did need to replicate all the holes, and they had to be pretty close to the originals since larger holes would let dominoes escape.
To create the ovals in the sides, I started at the drill press with a Forstner bit and drilled the centres out. I had planned to then take the pieces to the scroll saw, and carefully cut out the ovals. Having tried this, on the first piece, I was entirely unimpressed with the result, and decided not to proceed with that method. Instead I went back to the drill press, and drilled an additional hole either side of the initial central hole, creating something close to an oval. Then I spent several hours with a Dremel to clean up the inside of the hole, and make the ovals smooth and consistent over all the panels. It might seem like a lot of work, but in the end it was a lot less work than my original idea would have been!

Time for a game of “Join the Dots”
While I was drilling ‘ovals’ for the side plates, I also drilled a lot of small holes in the top and bottom to allow me to create the stepped holes I needed. There’s no clever way for me to do this without the CNC machines, and I had to do this by hand. Drilling holes at the corners allowed me to insert the blade of the scroll saw, and cutout the holes I needed. By having a hole at each corner, I can easily turn the blade, and get square corners. Before I could start working at the scroll saw though, I needed to have a template to follow, so after a game of “Join the Dots” I had reference lines I could follow.
Inserting the blade through the holes
This shows how the blade is inserted into the middle of the piece, and lets me cut out the hole without having to cut through the sides of the board. It might seem obvious, but there are very few tools in the shop that allow you to make such a cut, and the Scroll Saw is the only one that is close to safe, and accurate enough. The blade I was using cuts a saw kerf that is just 0.01″ thick and leaves a very smooth finish, meaning that there was little additional work after cutting. Of course, I still had to take my time, and each plate took around 45 minutes to cut.
Forgive my Scottish knees
With one panel fully cut, there were only 13 more to cut. Over the course of the next couple of days, I slowly worked my way through them (and a good number of fresh blades … Katalox is dense and dulls blades quickly) before sticking some sand paper to a lollypop stick, and sanding the edges of the holes to soften them, making the piece much nicer to hold.
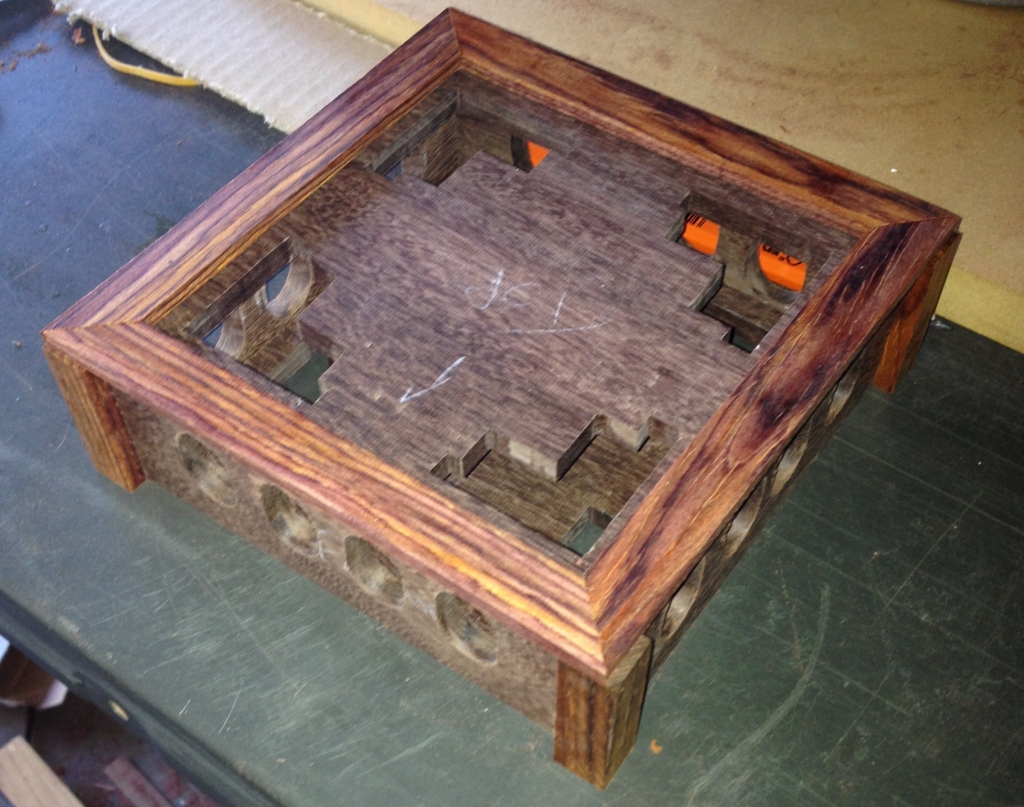
My first dry fit
With all the components cut, I could put the pieces together for the first time, and get a feeling for how the final puzzle would look. There was still a lot of work to be done before I could start gluing up the pieces, but this gave me a good feeling for the fit and the look of the finished puzzle.
Pre-finished front and top panels
Given that I would have to glue the puzzle together with the front and top panel in place, I went ahead and pre-finished those pieces. Once they were in place and the corner posts were added, there would be no way to remove them or access the insides to be able to apply finish. The other benefit to pre-finishing the pieces is that the lacquer and wax would help prevent the glue sticking to them, so if there was any glue squeeze-out, it wouldn’t lock the puzzle solid. After all the work to get to this stage, that’s the last thing I wanted!

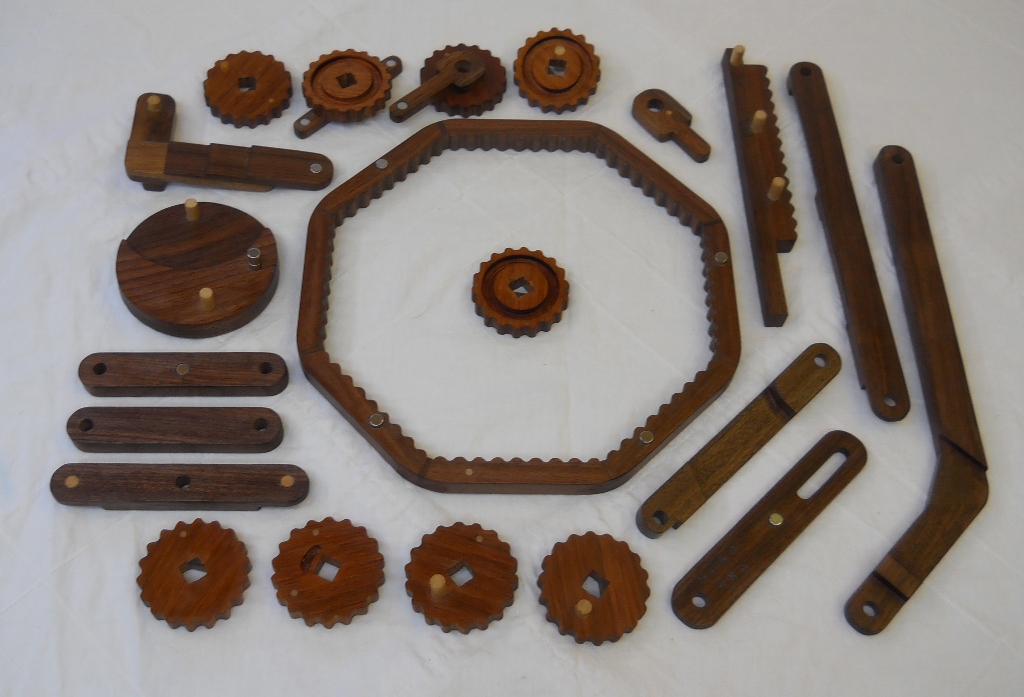
Piles of puzzle box pieces
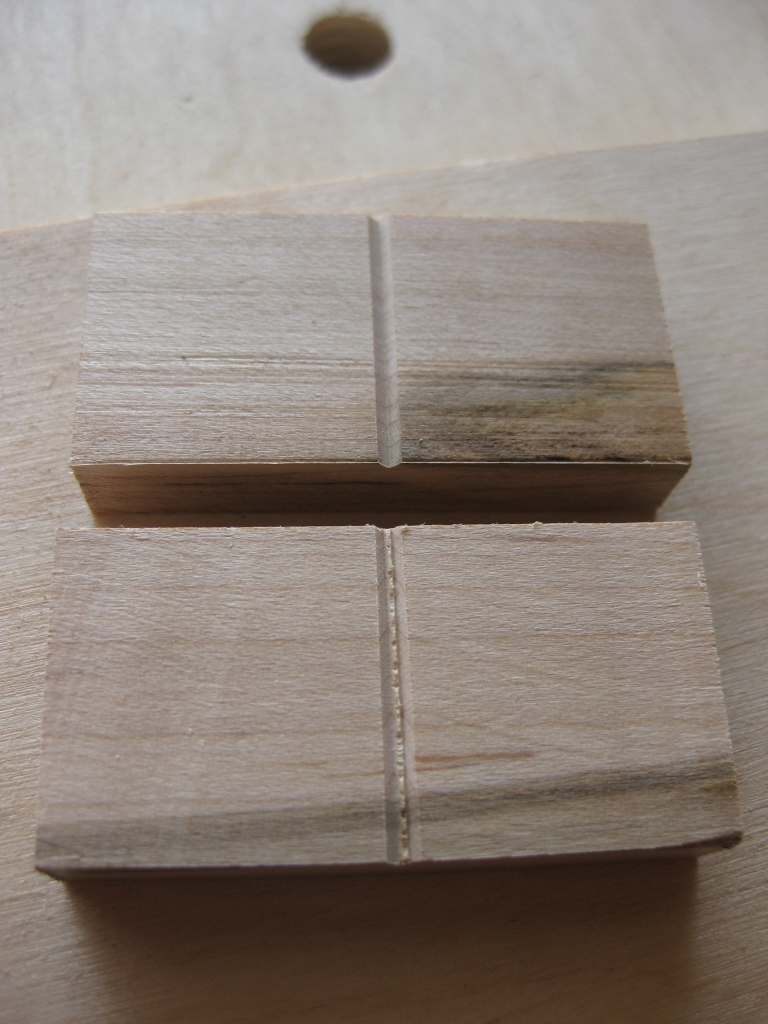
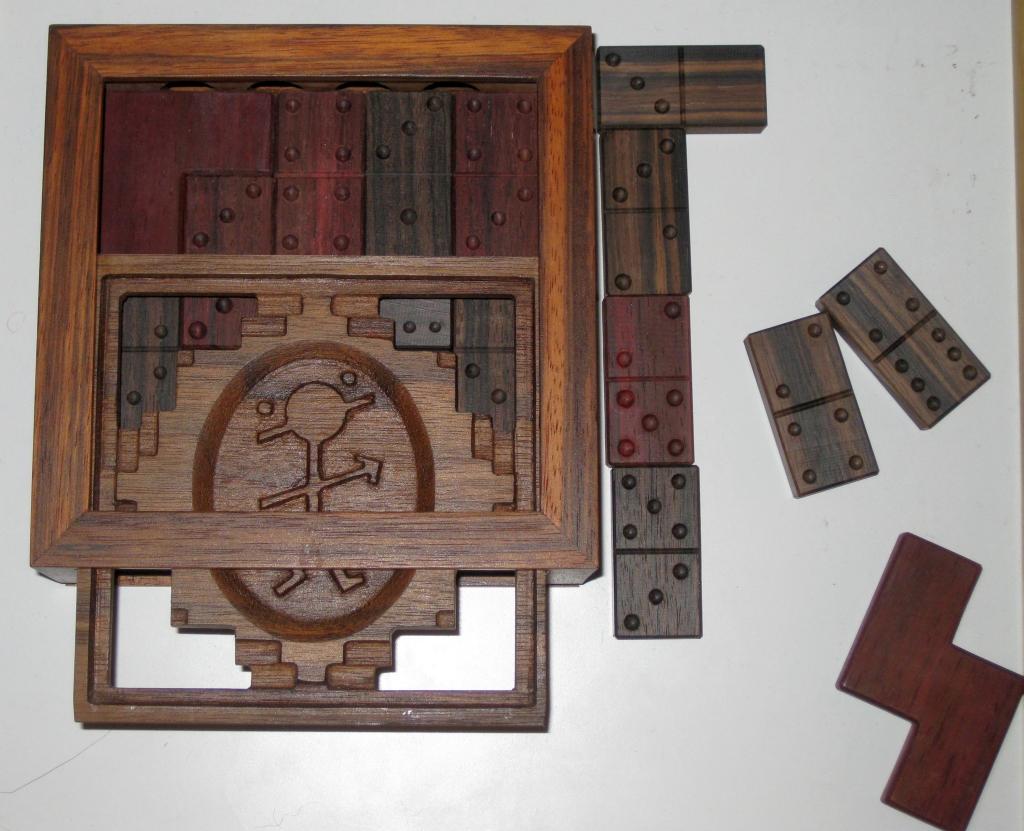
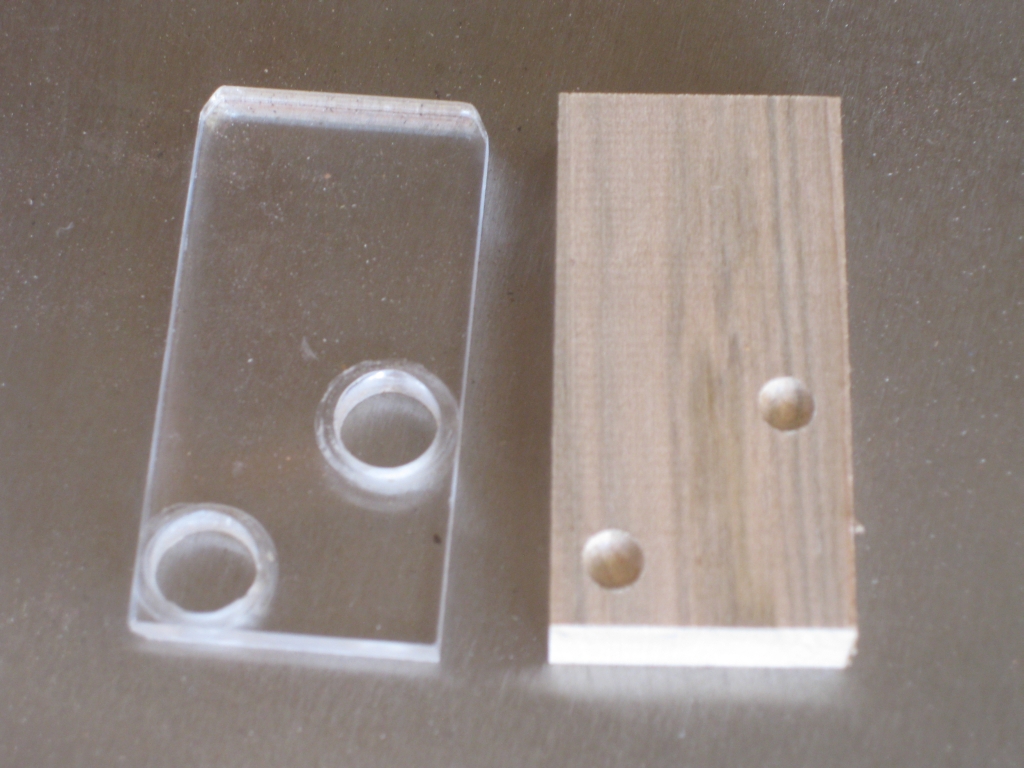
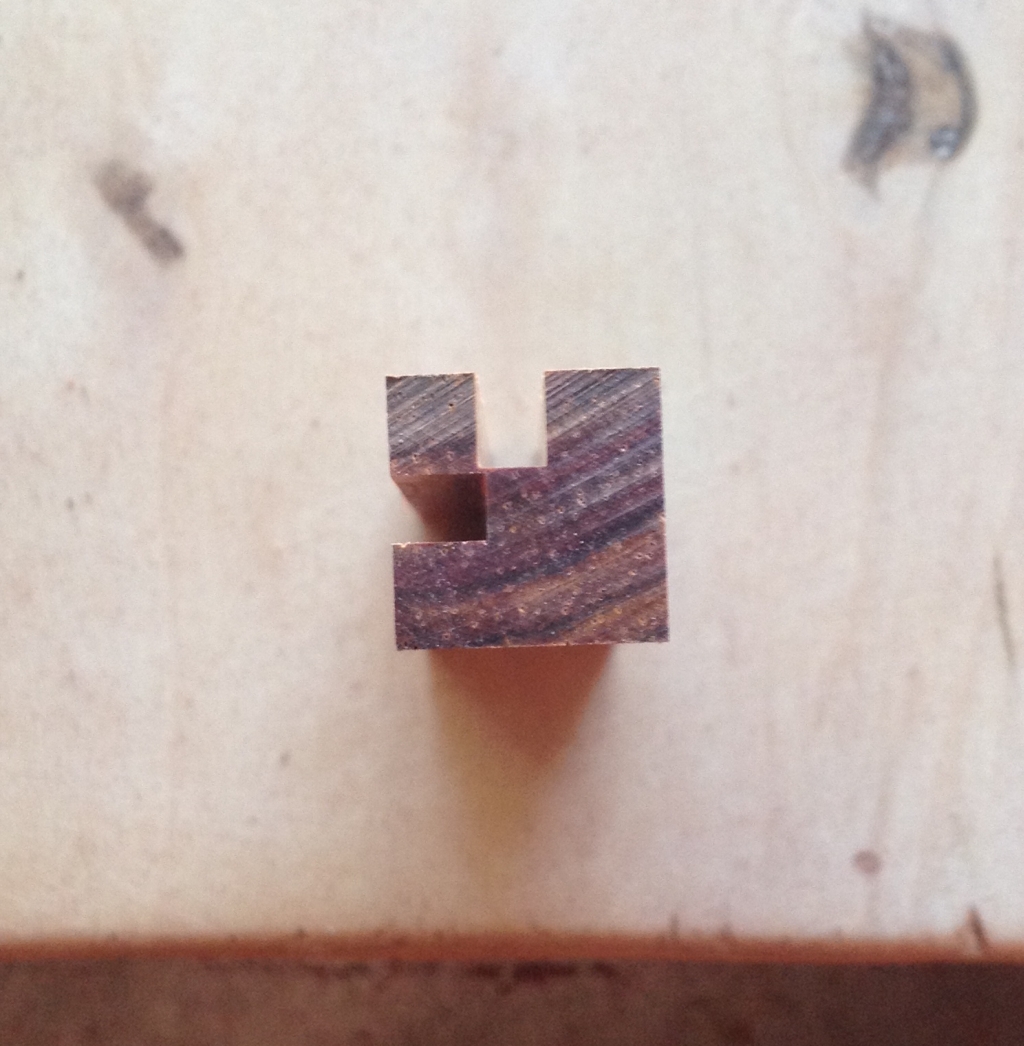
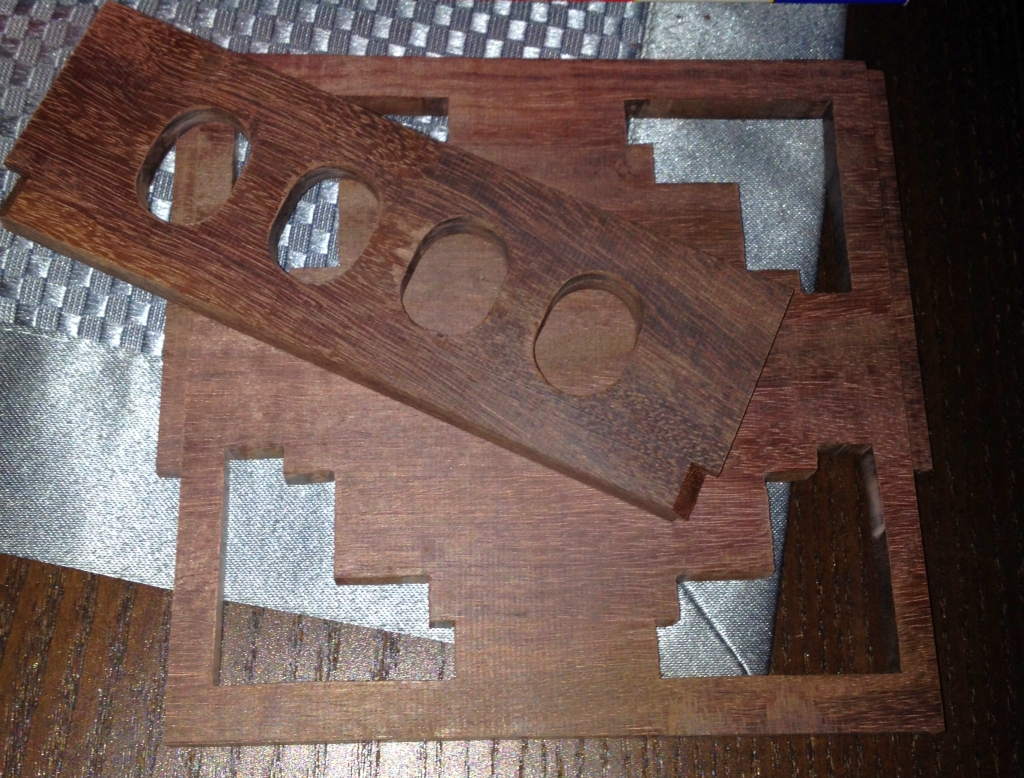
With the boxes mostly taken care of, the dominoes made, there is one additional element needed. There are five additional pieces in various shapes that go into the box to make things more troublesome for the solver. I decided to make these from Redheart and Purpleheart. Each piece is a solid section of wood, and I cut the notches out of the piece. This gives me a nice continuous grain, and a stronger piece. Not to mention that there’s less work for me to cut out a piece than having to cut twice as many pieces, and then re-glue them later. As with the dominoes, these pieces are passed over the bevel jig, to soften the edges, however there is a small problem. Given the internal edges it’s not possible to get the blade into them. This meant that each internal bevel is cut by hand with a chisel. So lots of extra work from my side, but I end up with a clean consistent bevel around the pieces.
Internal blocks glued in place, ready for the final glueup.
On the front panel, there are two blocks which are glued to the inside which are the final part of the locking mechanism. A gap needs to be freed below these blocks to allow the front panel to slide, and then the top to slide. Each piece needs to be added at the right time, or you end up being unable to glue the piece in place, and end up with firewood rather than a puzzle.
By this point it seemed like I’d spent weeks and still had nothing more than a pile of pieces to show for my work. The glueup for the box is rather complicated. Unlike most other projects I’d tackled, the box can’t be glued up, then assembled. The glueup is the assembly. The way things work is that the front panel, and top panel both have ‘wings’ which travel in the grooves of the side panels. In each panel, a section of the wings are removed to allow them to pass the pillars on the corners and the trim on the bottom. So when I mentioned earlier that Stickman is a genius, this is why. Those pieces which look like trim and decoration are actually integral parts of the mechanism. What is means is that for the glueup, the top and front are inserted, then the pillars are glued in place. This prevents the top panel from being removed again, so I had to make sure that everything was in the right place.
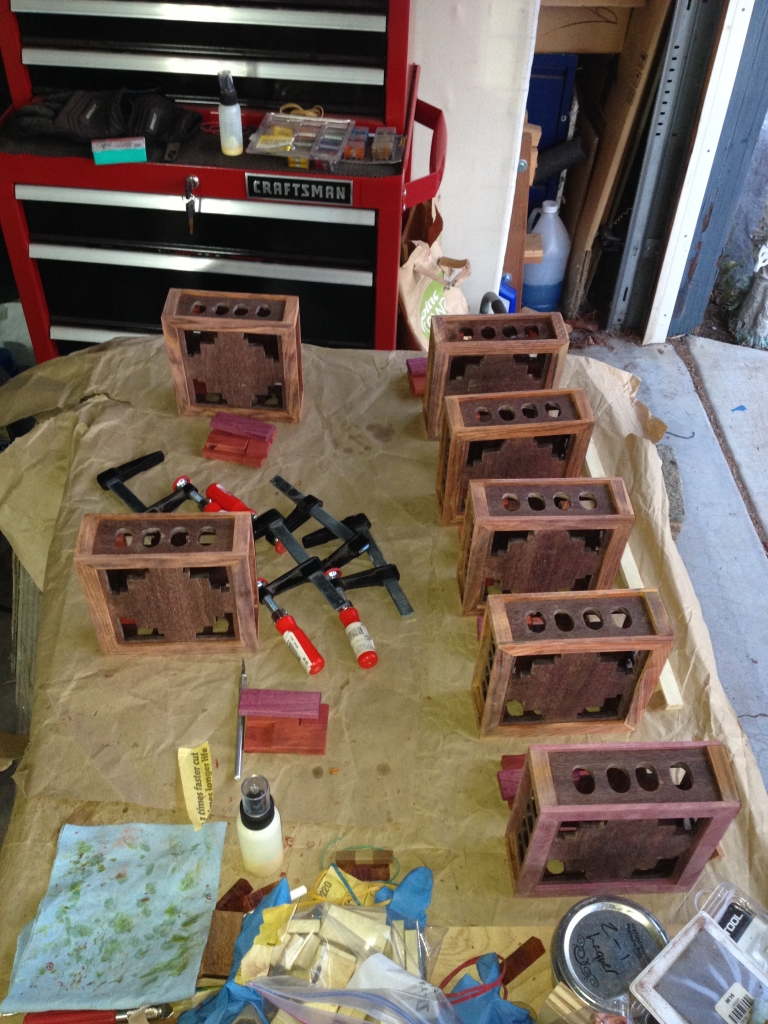
Seven Domino Boxes Standing in a row
So with the blocks in place, the pillars glued on, and a check that everything still moved, I could glue the top and bottom frames in place, finishing the glueup, and being the moment of truth as to whether I had a puzzle box reproduction, or some very expensive (and frustrating) firewood.
While the glue on the frames was drying, I clamped several boxes together back to back and clamped them together. This meant that each box was providing a gluing jig for the one next to it, giving me good clamping pressure across the entire joint, and ensuring that all the boxes were identical.
This is probably the most challenging assembly I’ve attempted, and I’m pleased to say that it all went very well. I’ve clearly learned a lot over the last couple of years, and having three times as many clamps today as I had when I started certainly doesn’t hurt. It really is true, you never can have enough clamps!
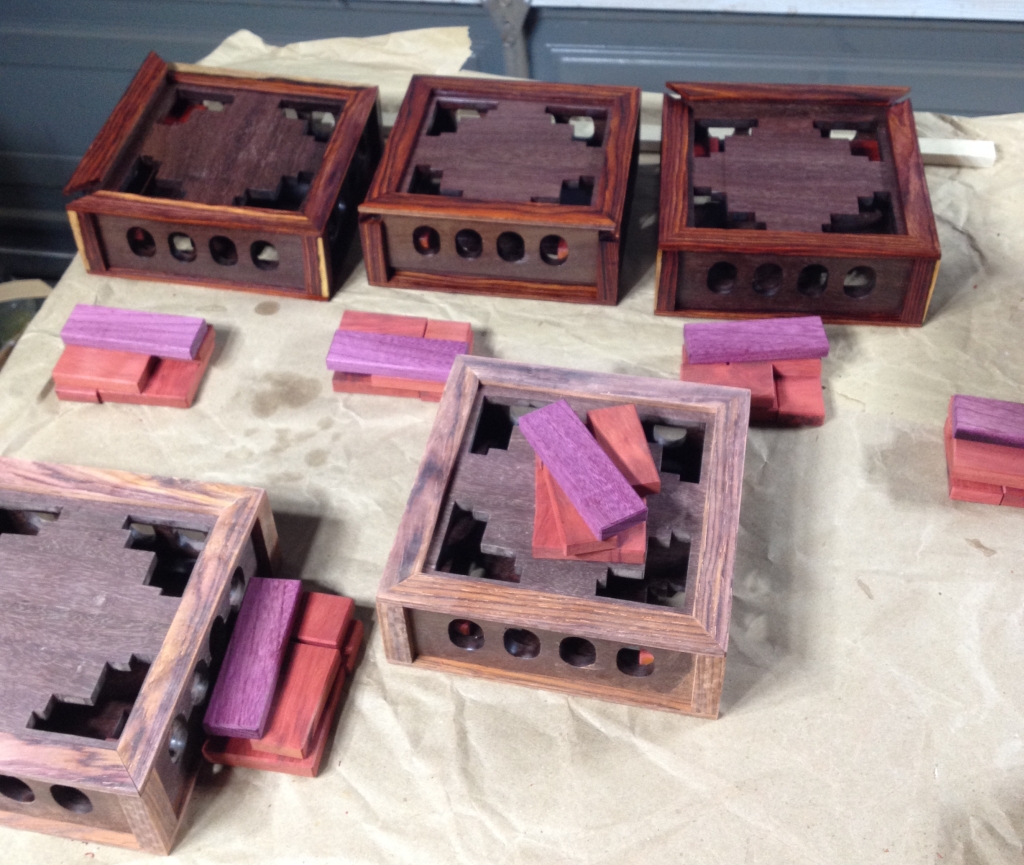
The difference is marked after applying lacquer
The following night, once the glue was dry, I could finally test the mechanism on each box, and confirm that it worked as intended. You have no idea how much of a relief it was that each box slid smoothly and opened as expected… until the last box. The lid didn’t come out past the front pillars! Fortunately, I have some sharp chisels, and I took a few thousands off the top of each of the front pillars, and the lid slid past. The amount I had to remove was so small, it’s unlikely that even I could find the box I had to shave, but it was enough to stop things working. Fortunately, it wasn’t a difficult fix.
The last steps were to finish the puzzles. As you can see the boxes at the back where the first coat of lacquer has been applied really show the true colours of the wood, unlike the boxes at the front which look drab and liefeless without the finish.
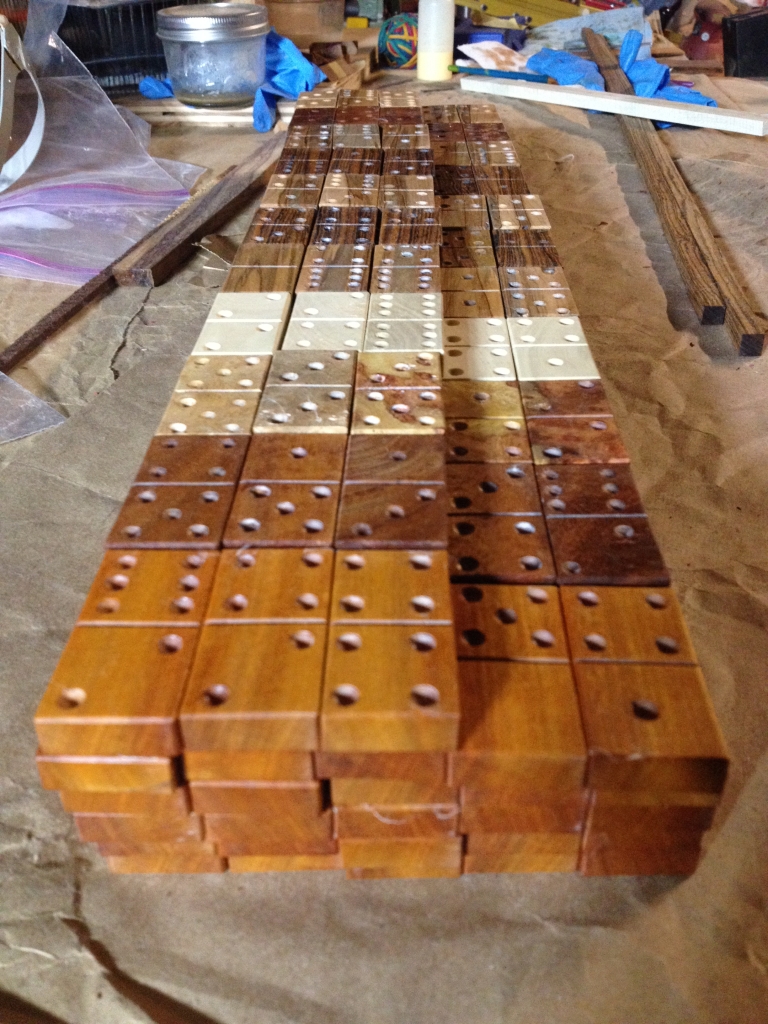
Sets of dominoes all finished
The final steps are to triple buff the puzzles and dominoes, to really make them shine.
Stickman was kind enough to send me the original files for the puzzle booklet, so with a couple of updates, I have been able to create a new booklet which matches the reproduced puzzles. (Ed: Have I mentioned before how nice a guy he is?)
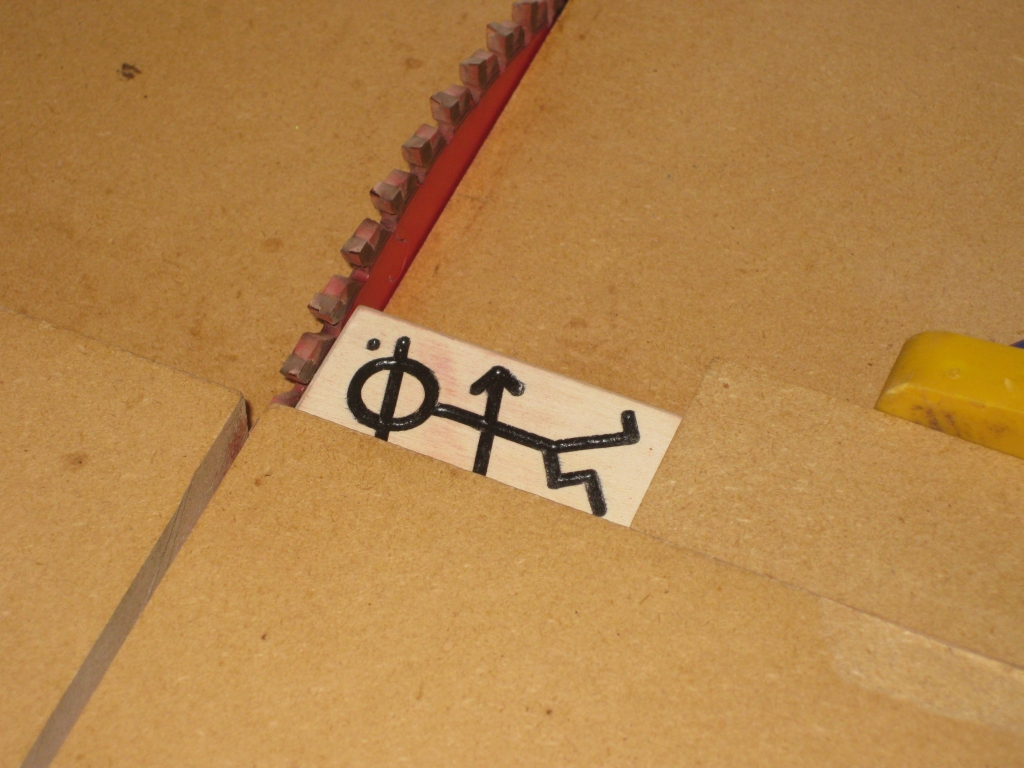
Stickboy
While I was working on the puzzle, I was posting images of the work in progress. Seems that a few of my puzzling friends have suggested that I could be “Stickboy”. I might have taken that idea and run with it. Stickman seemed to like the idea, and agreed to let me use the moniker and a modified version of his logo. I also took his own logo, and created a much higher resolution version for use on Stickman’s next project. After all, I was cleaning things up for my own use. Seemed silly not to let Stickman benefit from my work.

The finished box
After that, it’s a simple case of putting the dominoes inside the carcass, mixing things up and passing them to a new owner. It’s been an interesting project, and one I’m glad that I tackled. The question is which box do I tackle next?