Monthly Archives: March 2011

Trial and Error

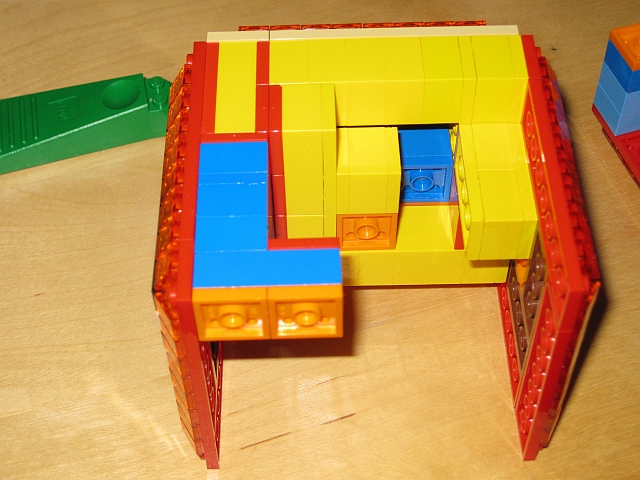
Previously I had completed the prototype and after a little trial and error refined things to a point where I was happy with the results and had glued everything together.

So I was happy, but was it a good puzzle? This is where I turned to my puzzling friends and gave them the puzzle in its solved, locked form. I should probably say something about the locking mechanism. As I described in my original post, I had two ideas for how to ‘lock’ the cube once it was put together and prevent the sides from falling out. My initial design is a simpler version which uses a free floating internal component to ‘lock’ the last side in place. It’s a simple mechanism which uses the puzzle orientation to lock or free the last side.

So having the puzzle completed, and the lock in place, I gave it to a friend to try. I had spoken with him as I was creating the puzzle, so he knew the basic idea, but not much more. When he came back, he hadn’t fully opened the puzzle, as he wasn’t sure whether I wanted him to or not. What was interesting was that by half opening the first side, it allowed the internal lock to move to a different location in the puzzle. So you could think of that as a flaw, however it was interesting as it changed the way the first piece was removed. Interesting and unintended, but shows how things don’t always behave the way you intended.

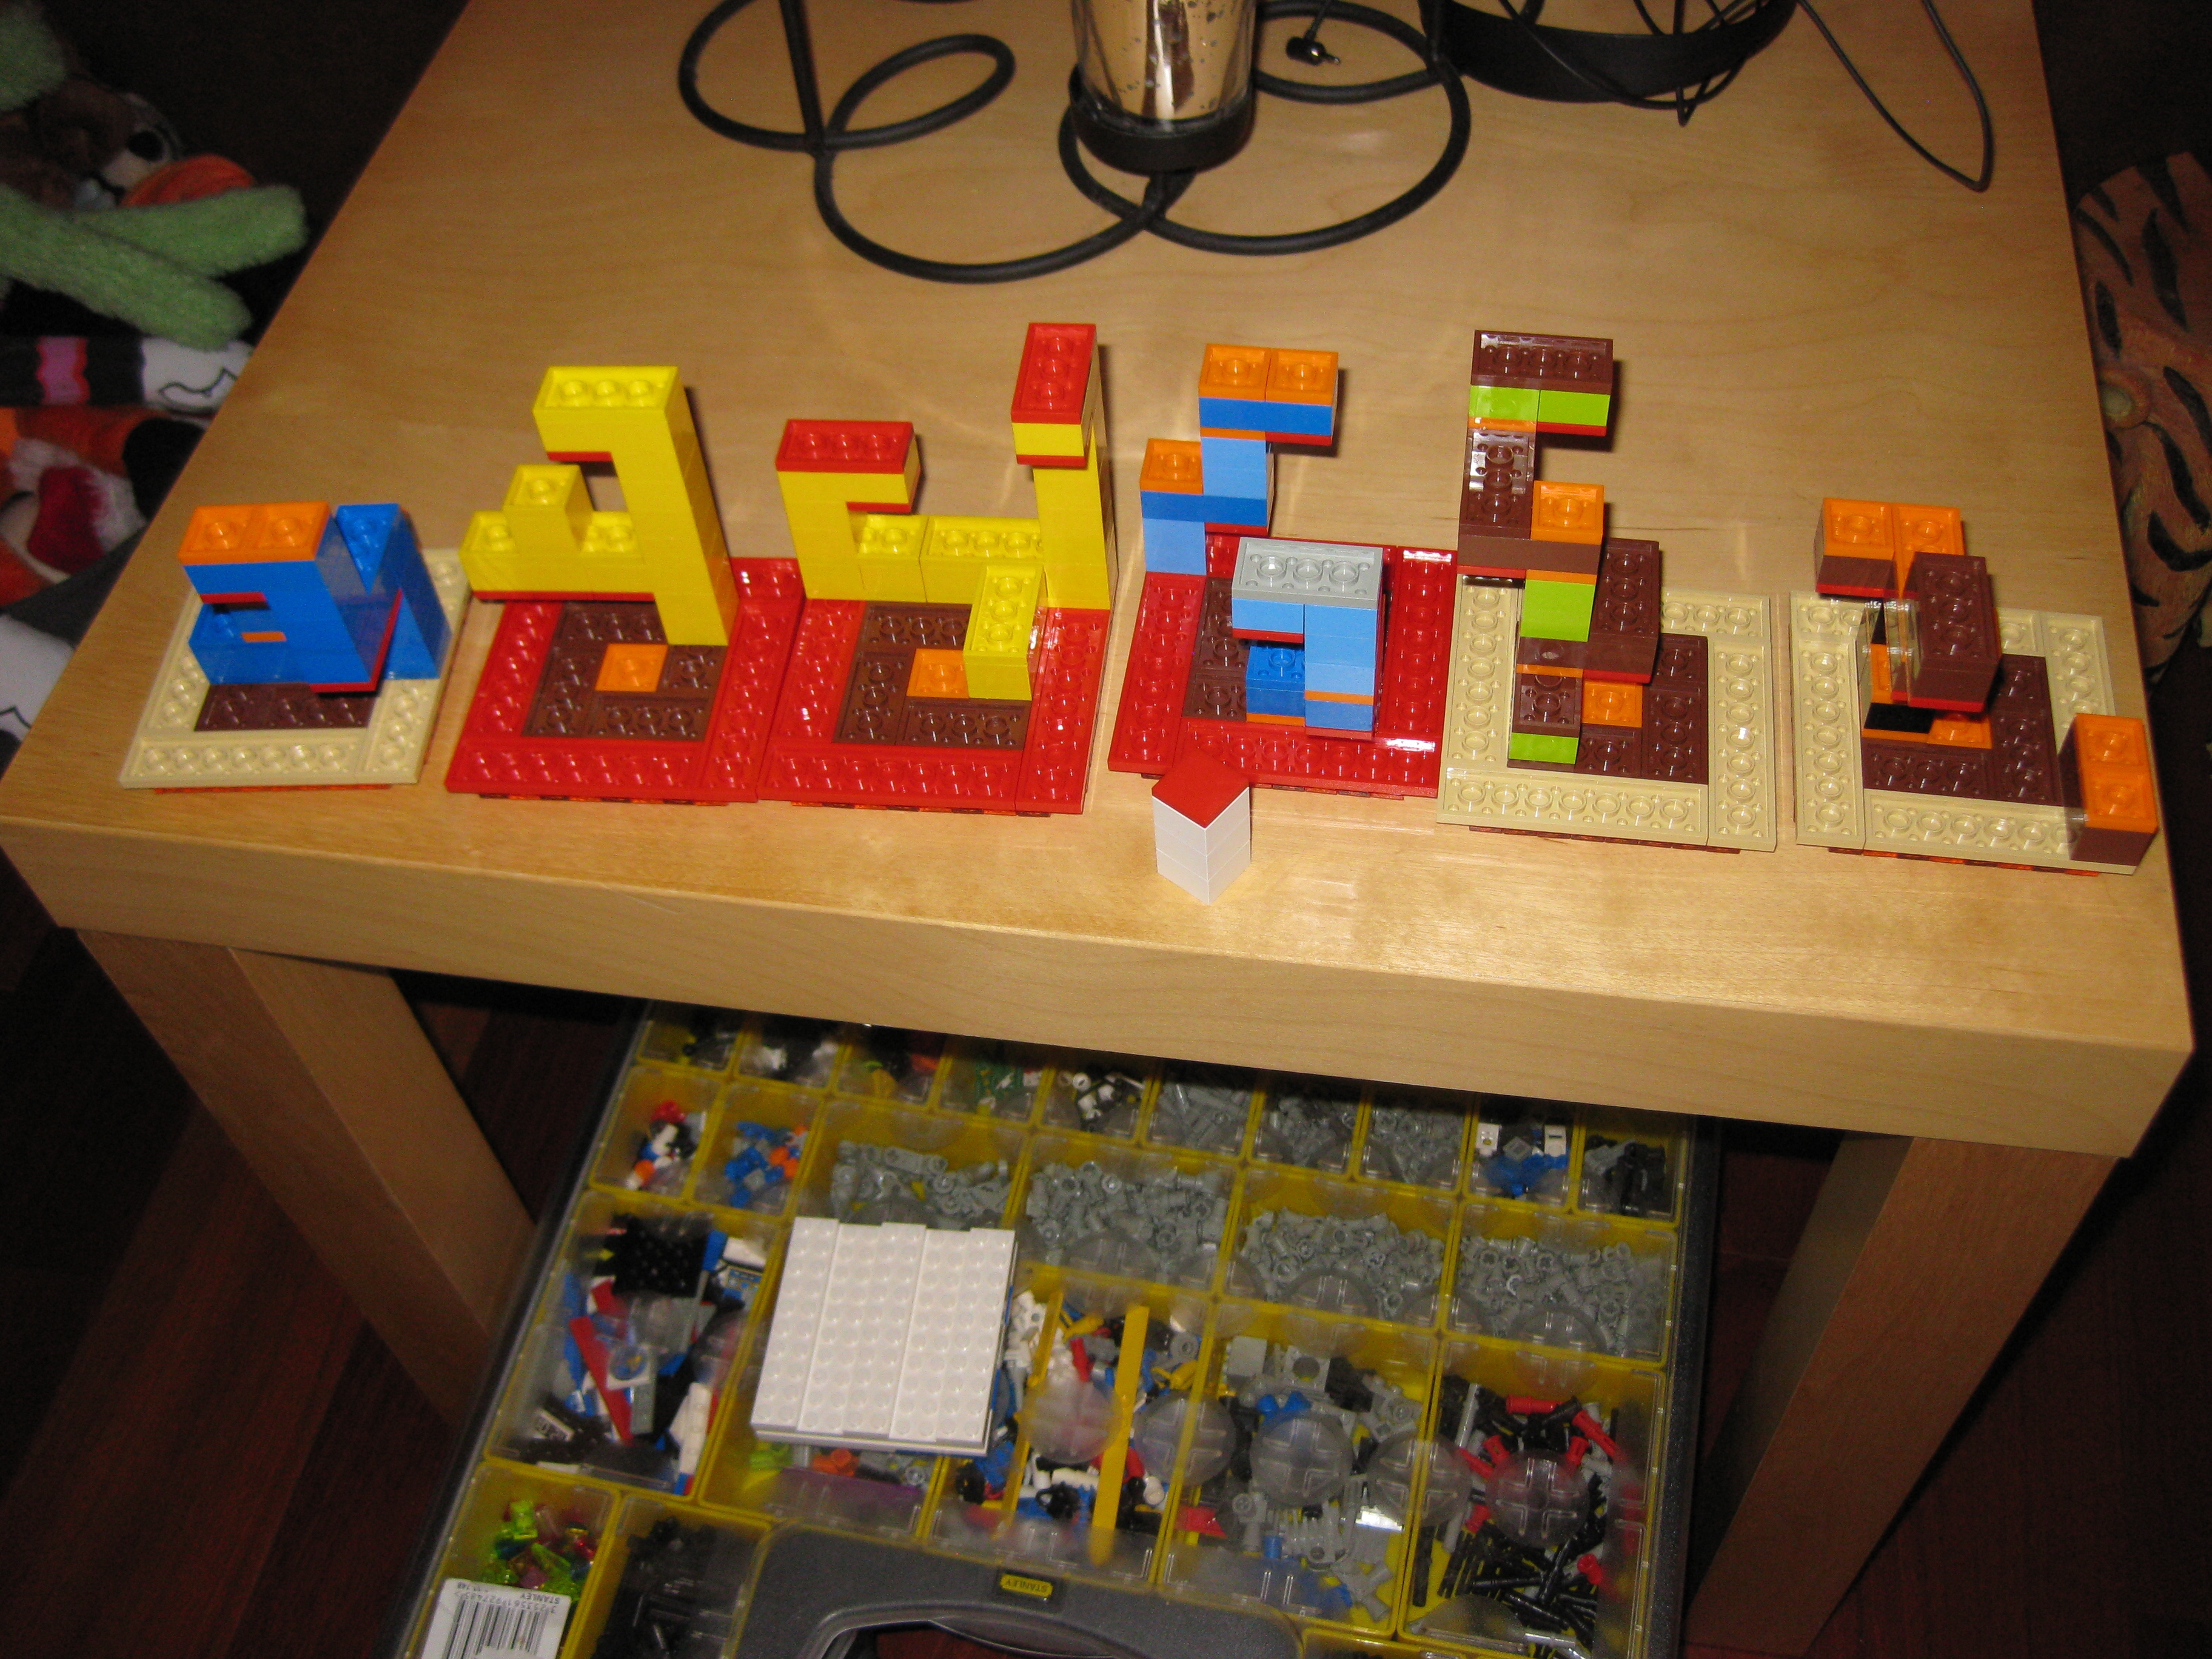
The feedback from my friend on the puzzle was positive, and most people who have seen it really like the Lego ‘pattern’ on the outside faces. So I’m happy, and now I’m left with the decision to move the prototype to wood.

I am excited to do this, as it allows me to take the first design and make it truly robust, but also it will allow me to make version two, with the rotational lock and have two versions of the puzzle, by replacing a couple of sides. That’s a fun idea for me as it means I can modify the puzzle while the external look would be identical.

Next step, pencils and rulers at the ready to get started in wood.

Holding it together

Having put all the pieces of the puzzle together, the next task was to play with it. I wanted something that provided a challenge, but was also solvable. No sense in having something that is too difficult, or has issues with the mechanism. My first attempt to put things together, I didn’t use the locking mechanism I had designed. I wanted to see that things went together and had a good feel to it.

In putting the puzzle together for the first time, I realised fairly quickly that some of the longer pieces I had created were less than solid when made from Lego. My older Lego bricks do much better than newer bricks. It seems that the newer Lego is made from a softer plastic and doesn’t hold together as well. Remember as a kid using your teeth to separate bricks? Well that’s not a problem on new bricks!

With a little bit of care, I was able to put the puzzle together , and it did form the cube I had intended. I will be honest though, I wasn’t entirely happy with the result. There were a couple of the sides which I felt weren’t as good as they should have been now that I could see them and watch how they interacted, so I played around, and redesigned two sides to make things work better.

On my second attempt, I had the same issue as the first time, that the Lego really doesn’t hold together too well. I’m sure I could have made the pieces larger to get more stability from the Lego, but I didn’t want a puzzle that was too large. As it stands, the puzzle is about 4.5″ cubed. It’s a nice size to work with, and doesn’t use every single brick I have lying in my spares box to make it.

So with a little care and a careful hand (along with a jig I made out of blocks to support the pieces as I moved them into position in the solution) I got the cube together. This time I was much happier with the fit, and the way the puzzle pieces interacted with each other. There is a good amount of sliding the pieces together as they interact with each other, preventing a simple push together solution.

The image below shows part of the internals of the cube as I put it together. Each of the pieces here has to be slid into place, and the moved up/down etc to reach its final place in the cube. For someone not familiar with this sort of puzzle, it could be a challenge to see how things will fit in the solved cube.

At this point I was fairly happy, but there was no way anyone else could ‘play’ with the cube. It was too fragile, and the pieces came apart under their own weight, not to mention with someone tugging on them. At this point, there was little other option but to glue the bricks together. So with some suitable glue in hand, and my diagrams beside me to make sure things went back together correctly, I disassembled, glued and re-assembled the sides before leaving things to dry overnight.

Coming back in the morning, the pieces were solid and I could put a good amount of force on the previously weak points without any breaks or problems in the pieces. In an ideal world I would rather not have had to glue things, but at least Lego is cheaper than the Livecubes, and also easier to get, so not a huge loss.

With the prototype complete, time to give it to someone to test …

Building a Prototype

Well all the work is completed in Burr Tools. I now have a fully working puzzle, and a proven assembly and disassembly. That’s all very well, but the virtual world really doesn’t let you know how a puzzle feels to work with, or to manipulate. So for that I needed to create a prototype.

There are a number of tools out there designed for the job. Livecube is one such tool, and given that all the blocks are perfectly square, it makes the job of creating a burr puzzle very easy. The drawback to Livecube is that it’s not easily available, and if you want to be able to seriously test your design, or be able to hand it to someone that doesn’t know the mechanism, then you need to glue the pieces together. In my mind that makes things a little more expensive that I’d like for a prototype, that I don’t know if I’m going to like.

As it happens, I have a huge Lego collection. So I decided to use that. As anyone who is familiar with Lego will tell you, Lego bricks are not perfect cubes. It you take a 2×2 brick, and put it side on to another 2×2 you’ll see that it’s not as high as it is wide. Fortunately it’s easily fixed as you can think of the brick as being 5 units wide by 3 units high. Each flat plate is 1 unit high, so one brick plus two plates gives you a cube.

With that in mind I started building the pieces using the model I created in Burr Tools as my reference.

About an hour later, I had all the pieces made, and it was time to sit down and solve the puzzle…