Yearly Archives: 2011

Twist and Shout

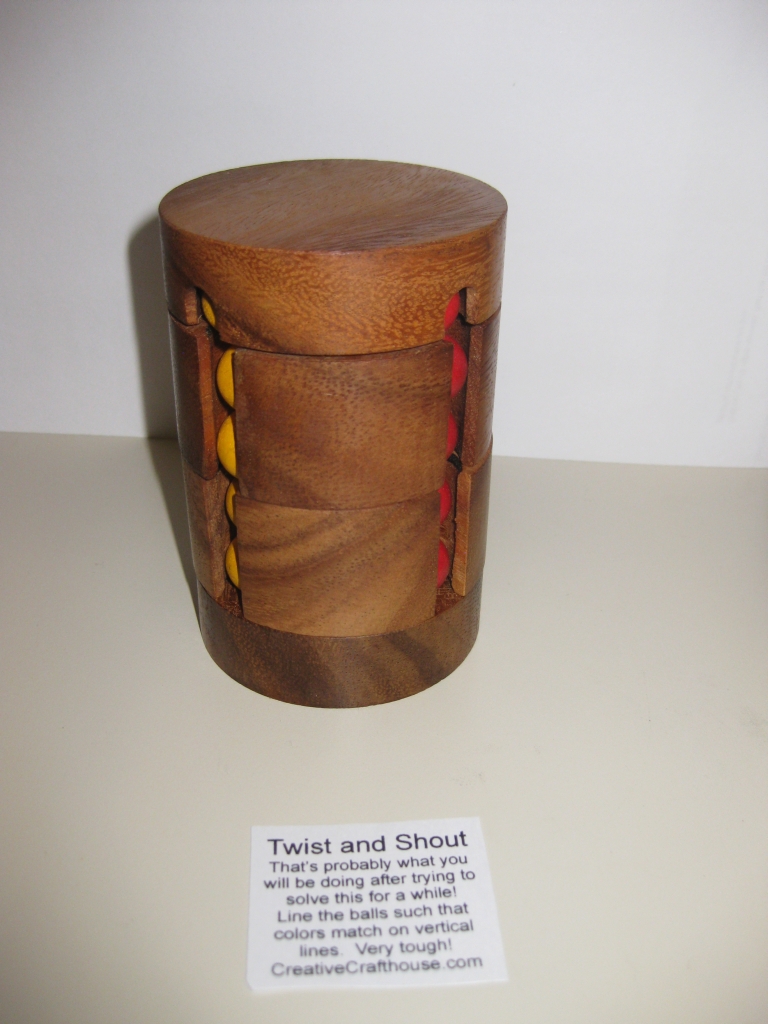
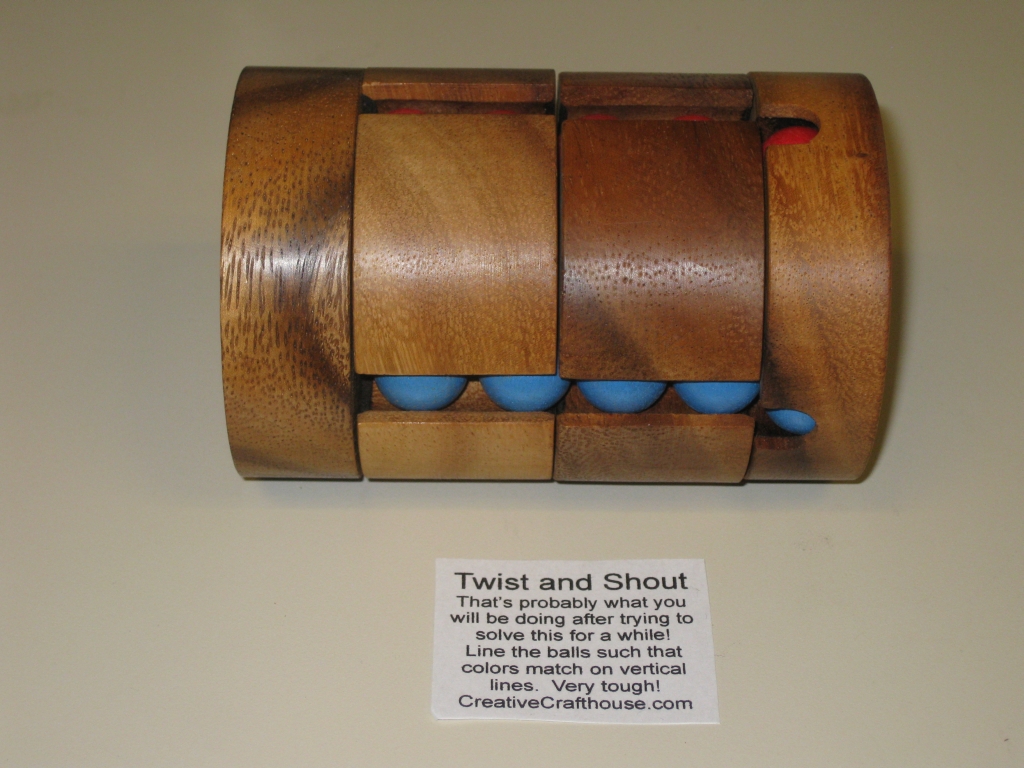
Twist and shout was the fourth puzzle from Creative Crafthouse that I bought while in Death Valley. When I saw this, it reminded me of the Ten Billion Barrel puzzle, that I had as a kid, and really just had to buy it. In truth, this is closer in type to the Babylon/Ivory Tower puzzle or a Whip It puzzle.

Twist and Shout by Creative Crafthouse

Twist and Shout by Creative Crafthouse

The object of the puzzle is to jumble up the coloured wooden beads, and then restore the puzzle back to its grouped coloured columns. Much easier said than done, given the number of possible combinations. There’s no solution provided, as the puzzle comes ‘solved’ but once it’s messed up … well that’s up to you to fix it! There’s four columns of five coloured balls and six rows if you count the top and bottom of the puzzle. Red, Yellow, Blue and Breen painted wooden balls are held in the columns making it stand out as the colours are very vibrant.

Unlike the Ten Billion Barrel puzzle, you move only one ball at a time, when it drops into the spare space at the bottom, so the number of balls in play at any one time is much more manageable (10 at a time for Ten Billion Barrel!)

Twist and Shout

Twist and Shout

I have to say this is a really well made puzzle. I don’t know what wood has been used, but the grain shows some wonderful detail, and the movement is very smooth. There’s no screws in the puzzle, and it’s made from solid pieces of wood. I have to assume that there’s a wooden dowel in the centre which is glued in during assembly. It means you’re not going to be unscrewing the puzzle to solve it, and there’s no stickers on the pieces, so no cheating there either!

Overall, this is a really well made puzzle, and well worth the small price tag that Creative Crafthouse is asking for it. There’s just something about a wooden puzzle that makes it so much more appealing than a plastic version, so in my book, this wins out over the other plastic versions which are available.

The Wine Barrel Puzzle

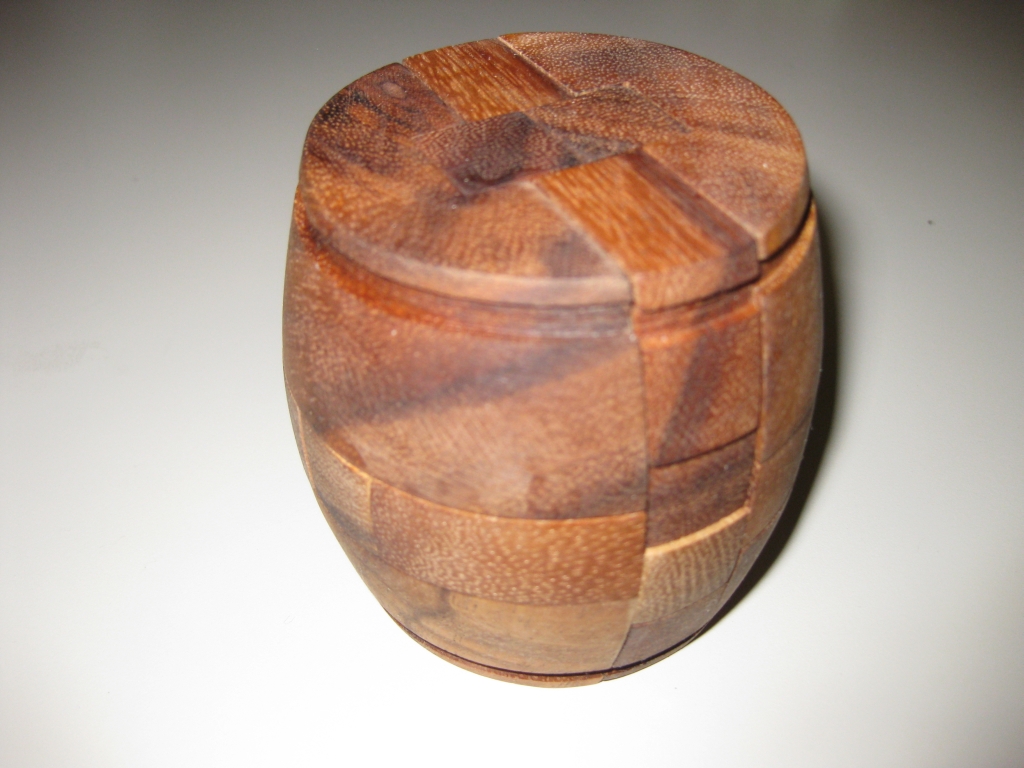
The Wine Barrel Puzzle is a 12 piece Burr Puzzle, and another of the Puzzles I picked up while in Calico (Death Valley). This is a nicely made puzzle from Creative Crafthouse. To read about some of the other puzzles I bought while in Death Valley head here.

Wine Barrel Burr puzzle from Creative Crafthouse

Wine Barrel Burr puzzle from Creative Crafthouse

This is an old puzzle, dating in origin to somewhere around the early 1900’s, and is an interestingly turned burr. When assembling the puzzle, the last two pieces are inserted together to form a key piece which keeps the puzzle in its barrel shape, holding all 12 pieces together. Fairly easy to take apart, once you find the key pieces, as with most Burr style puzzles, this isn’t as easy to put back together, however the Creative Crafthouse version does come with the solution on a folded sheet of paper if you get stuck.

I’m no expert on Burr style puzzles, but I managed to put this back together in a very respectable 15 minutes, having left the pieces alone for a bit after dis-assembly, so it was less likely I could just remember how they came apart.

This particular puzzle is offered in two different sizes, and the one I have is around 3″ high, and 3″ in diameter, making this the large version. I have no idea what the wood used is, however it has a very interesting grain pattern, and makes for a nice looking puzzle.

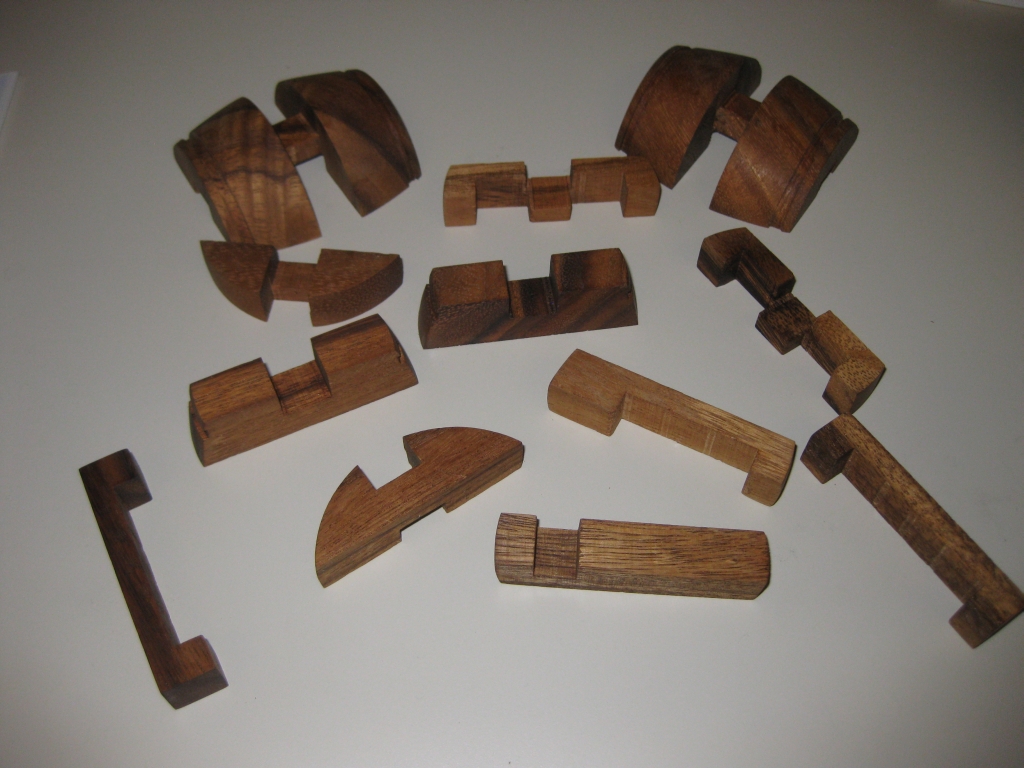
The 12 pieces of the puzzle

The 12 pieces of the puzzle

As I mentioned, the puzzle comes apart into 12 pieces, 5 pieces are pairs, which make up either side of the barrel, and the remaining two are unique. Overall, the build quality is fairly good. A couple of the pairs of pieces aren’t exactly the same size, so putting them into the solution back to front does leave a slightly misaligned finish, however it certainly doesn’t stop the puzzle going together very smoothly.

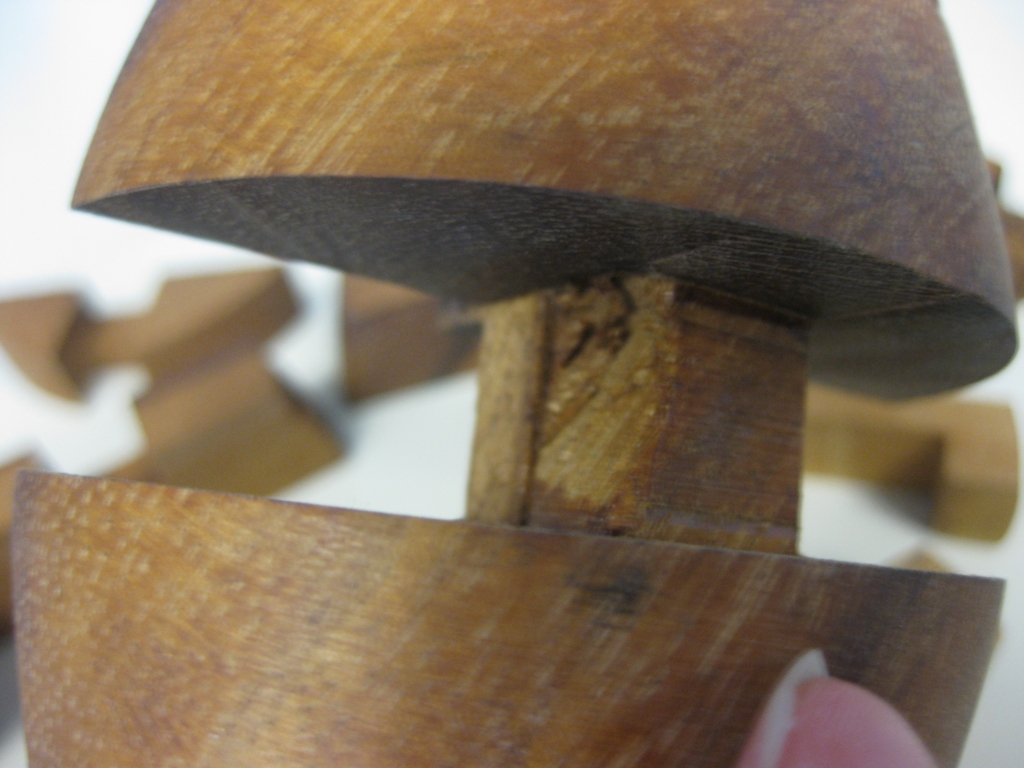
Slight damage on one piece

Slight damage on one piece

On one of the larger pieces in my copy, there’s a section of tearout, however again, this is entirely cosmetic, and hidden inside the puzzle, so really is of little consequence.

All in all a really nice version of this puzzle, offered for a very reasonable price. Well worth the money!

Cast H&H

This entry is part 8 of 8 in the series Hanayama Cast Puzzles

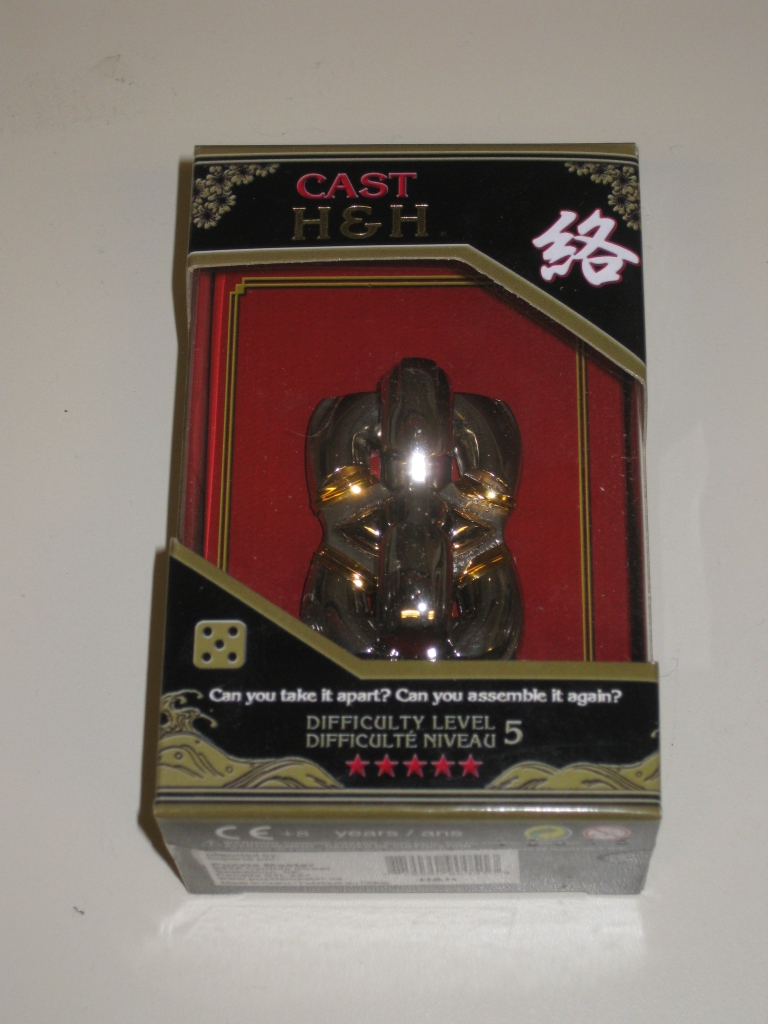
In my latest shipment from Puzzle Master, I received this from the Hanayama Cast series of puzzles. Cast H&H, like its name suggests consists of two pieces shaped like the letter ‘H’ which are entangled around one another. The goal is to separate them and then put the puzzle back to its starting position. Thanks to Puzzle Master for sending me this puzzle to review.

Cast H&H boxed

Cast H&H boxed

This is another puzzle designed by the prolific designer Oskar van Deventer and is ranked 5/6 on the Hanayama scale (9/10 from Puzzle Master). As usual, the puzzle comes packaged in the familiar Hanayama Black and Gold packaging, which I realise I keep talking about but never show. So to rectify that, I’m using a picture of the puzzle boxed here!

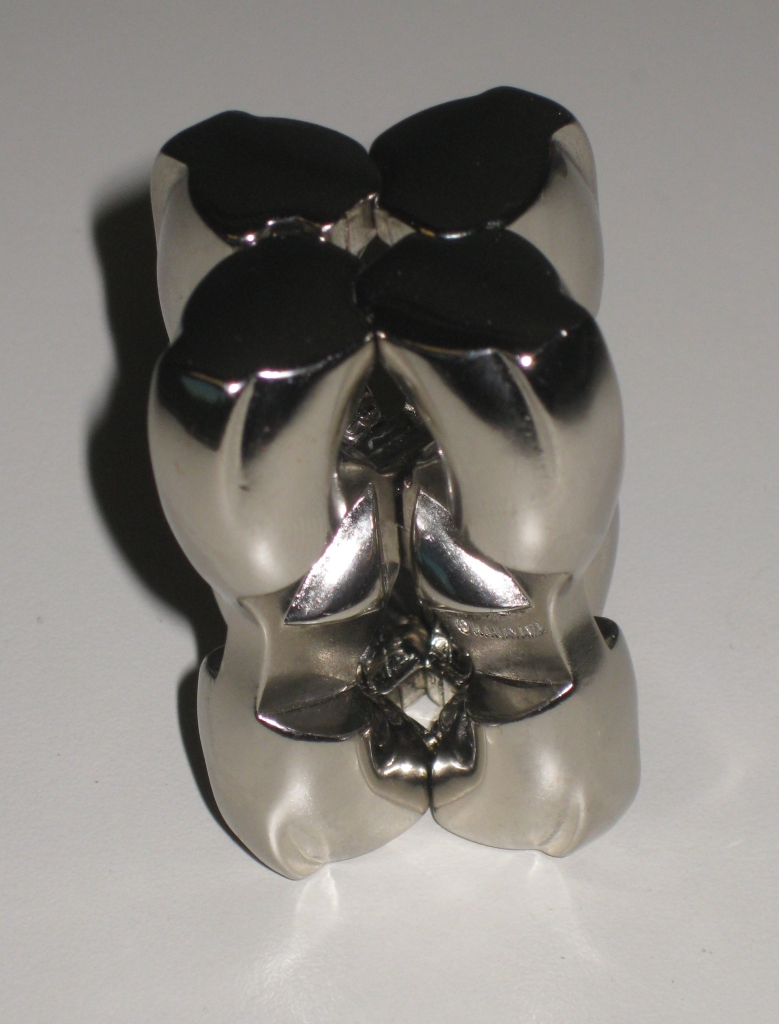
The starting position

The starting position

I really like the look of this puzzle. It’s finished with a highly polished chrome material, and the curves really do make this a great looking puzzle from any angle. There’s something about the sharp lines in the centre, along with the wavy lines of the puzzles profile that makes you want to pick it up. And when you do, you realise just how smooth and tactile a puzzle it really is. As you’ve come to expect, one of the pieces is stamped with the puzzle’s name, and the Hanayama logo. If nothing else, this allows you to keep track of one piece’s location and orientation when trying to solve the puzzle.

Now if you happen to have someone who dislikes the clinking of Metal on Metal while you try to solve a puzzle, then I’d suggest not playing with this while they’re around. It’s very hard to keep this one quiet, so maybe best to play with this one on your own. I found it fairly easy to get turned around when trying to solve this one, and as such it took nearly half an hour to separate the two pieces. Given that it’s not any easier to put it back together, I spent probably the same time again to get it back to the start. Along the way, I managed to re-solve it while trying to re-entangle it, possibly more than once!

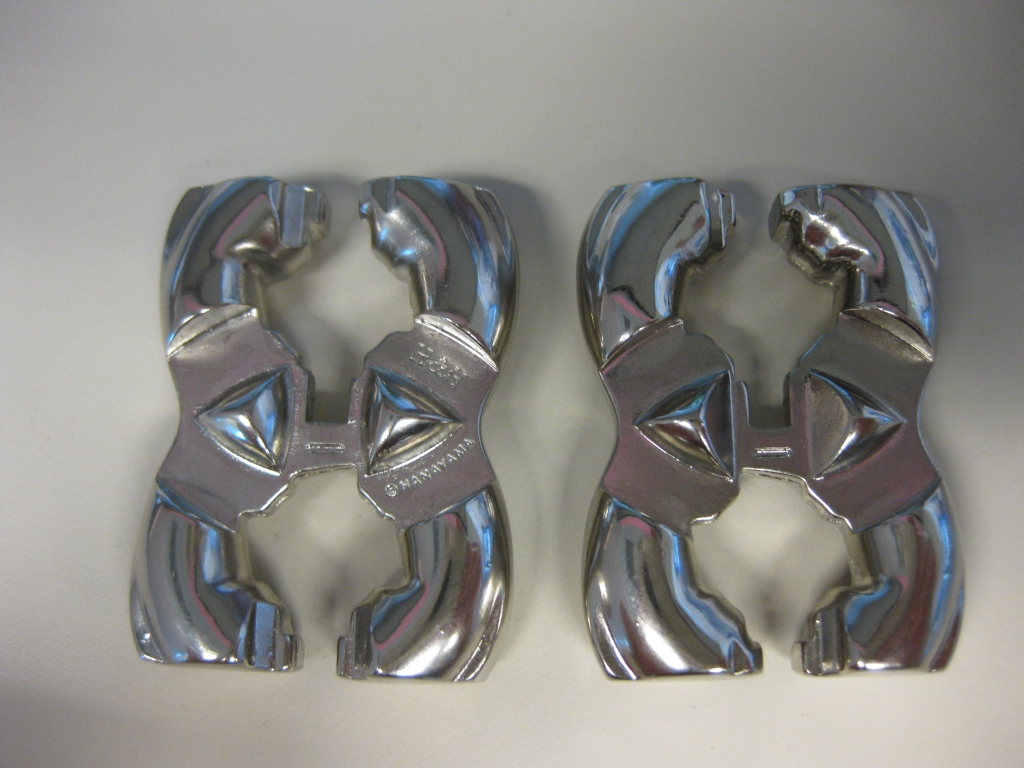
The range of movements between the two pieces is surprisingly high. It’s possible to slide the pieces along their centres, rotate one piece along the outer curves of the other, rotate it in the top or bottom gap that would be the top/bottom of the letter H and also rotate the pieces entirely within themselves. That may sound like gobbledygook, but if you’ve played with the puzzle then you’ll know what I mean. (And if you’ve not, then get one and you’ll understand!)

The two Cast H&H pieces

The two Cast H&H pieces

This fairly large number of possible moves with very similar looking pieces leads to the ease with which you can get turned around while solving this one. But it’s not that easy. The shape of the pieces are very cleverly constructed so that a move that may be possible with one end of the pieces, isn’t possible with the other. Frustrating, but certainly gets you thinking as to how you can maneuver the pieces where you need them.

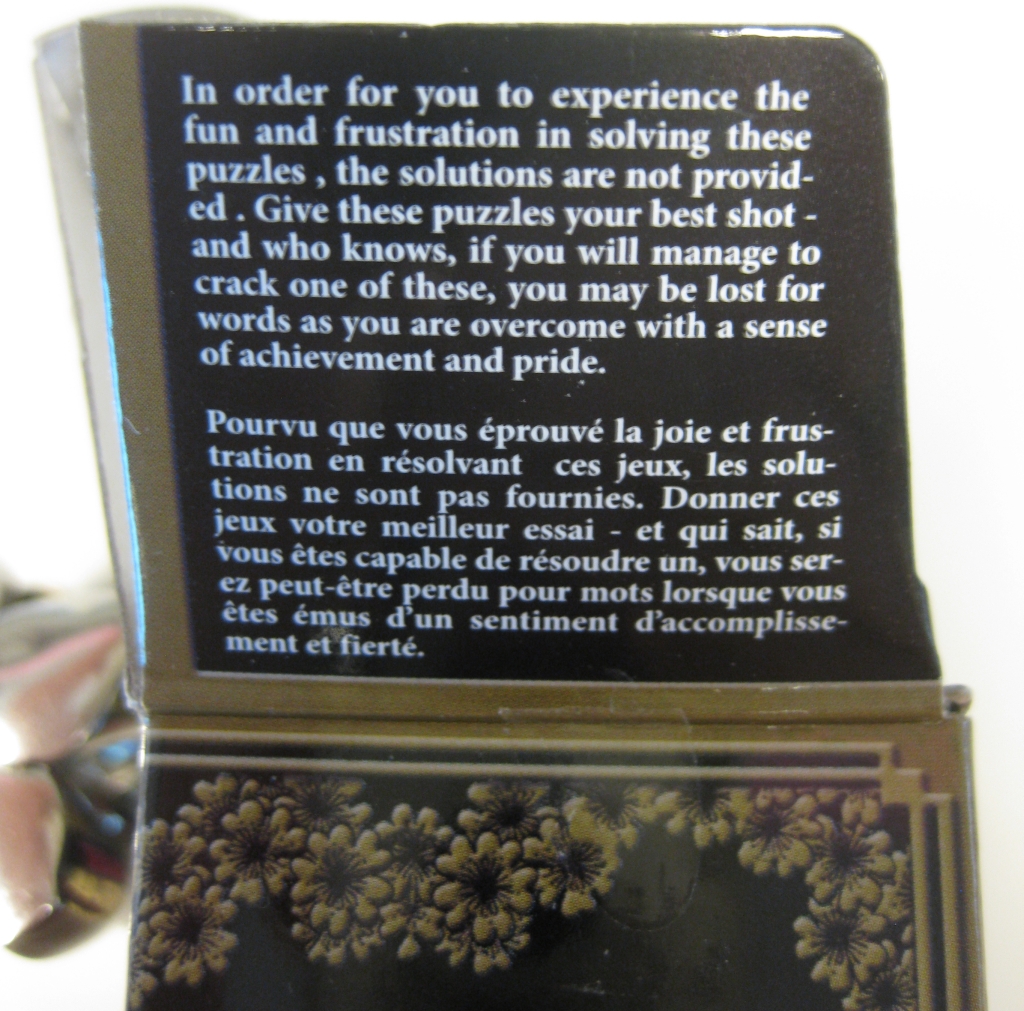
Some 'helpful' text

Some 'helpful' text

No solution is included with the puzzle, again as to be expected from the Hanayama puzzles, but if you’re really struggling then head over here to download one. Since I’d not noticed it before, even the box tells you there’s no solution to be found. After all, we all love the feeling when we solve a new puzzle, so why spoil the experience!

This was a very enjoyable puzzle to work on. Just the right level of frustration, but not so much that you’ll not be able to solve it and be forced to go looking at a solution. As always, the Cast series puzzles are not expensive, and with the holidays coming up, these make great stocking stuffers!

Unhappy Childhood

No, this isn’t a post about how I had a hard life growing up, or anything of that nature. I had a pretty happy childhood as it happens. Most of you will know already, that this is one of Stewart Coffin’s puzzle designs, #41 in his numbering system, consisting of 10 pieces, made from 5 cubes each, which come together to form a 5x5x2 rectangle with a checkerboard pattern.
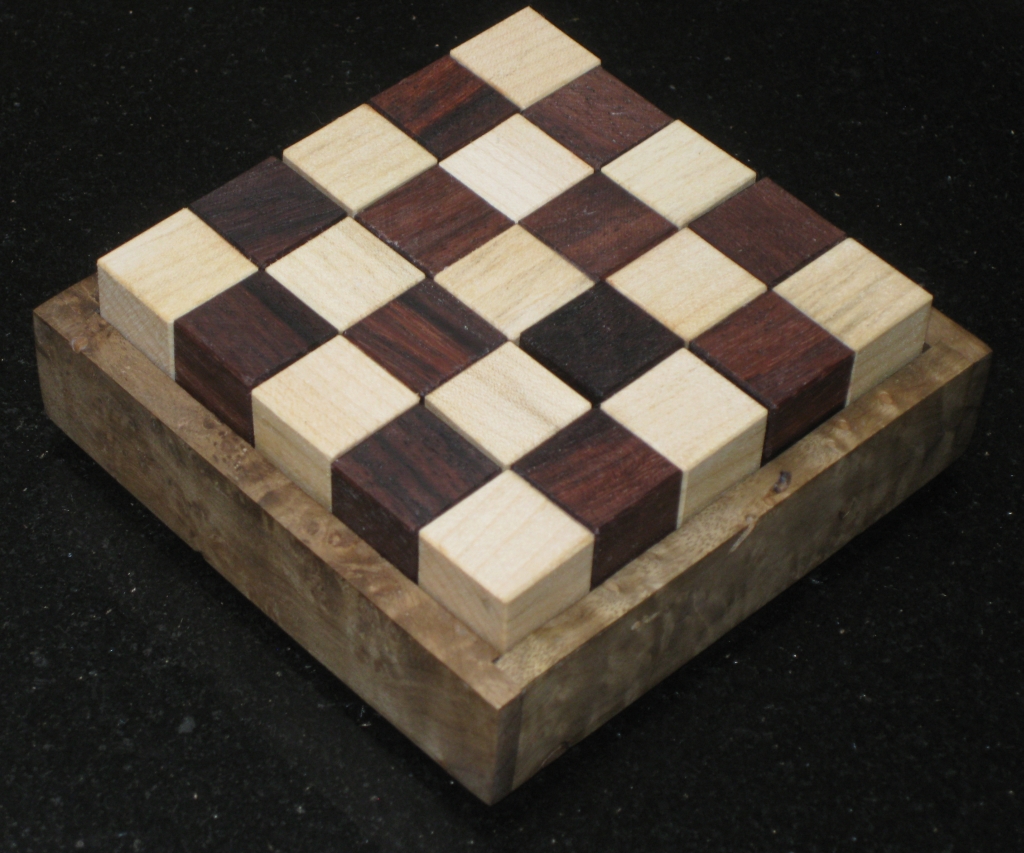
Unhappy Childhood, boxed in the unique checkerboard solution.

Unhappy Childhood, boxed in the unique checkerboard solution.

This particular copy was made by me and is made from Rosewood and Maple, with a Myrtle Burl box. It measures 3.7″ x 3.7″ x 1.5″ for the pieces, and 4.25″ x 4.25″ x 1.7″ in the box.

This is a pretty tough puzzle to solve, as there is only one solution where you end up with the checkerboard pattern on both bottom and top as you can see in the picture above. There are however 2,408 possible solutions if you ignore the checkerboard. So no shortage of ways to get a 5x5x2 solution! (Stewart Coffin reports that “a computer analysis by Beeler, these pieces pack into a 5 x 5 x 2 box 19,264 different ways”, however Burr Tools shows just 2,408)

The following is a look at the creation of this puzzle. Hope you enjoy!

This is one of the puzzle designs that I had been looking at making for a while, since it seems no-one has made any in some time, and I don’t have one in my collection. Really that’s where this all started, looking to add a new puzzle to my collection, and having spent (far) too much on puzzle already this year, what better way than to make it myself.
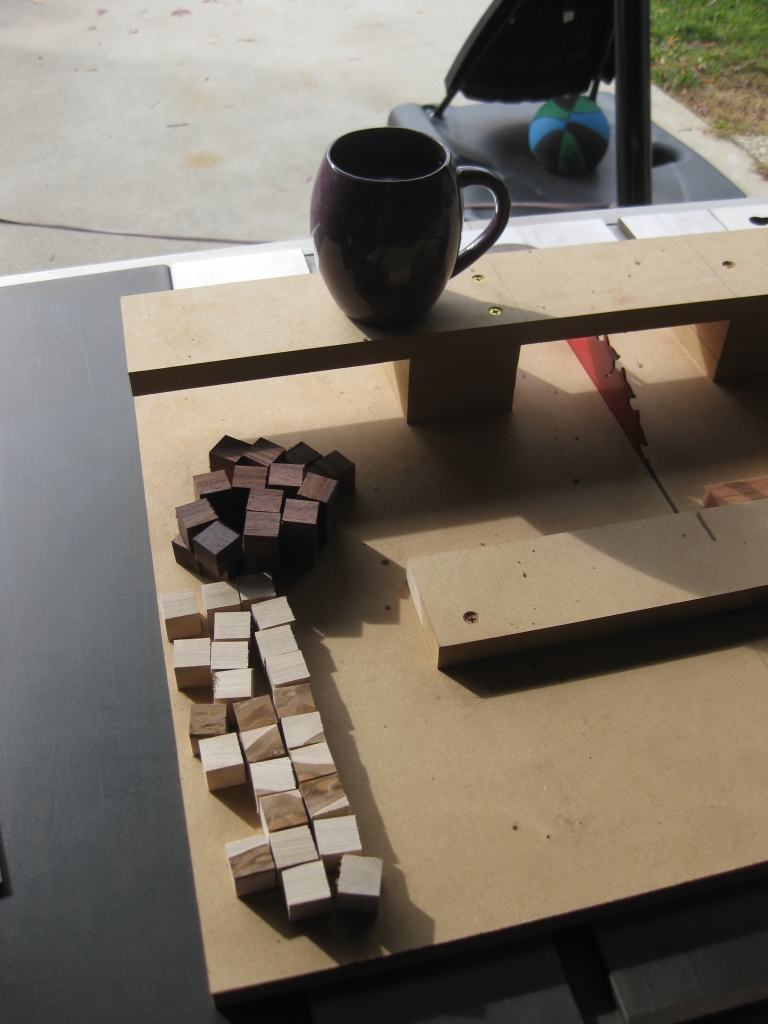
It all starts with cubes

It all starts with cubes

So the puzzles that I’m making currently are all cube based, and that’s where it all starts. 50 wooden cubes, 25 Rosewood, and 25 Maple is the starting point for the UC. The darker tops on some of the Maple cubes at the bottom of the picture is actually the natural wood. Since I love the look of wood, I’m not selectively removing pieces which don’t look perfect. After all each puzzle is unique given the grain and natural colour of the wood, which is something I love. When I put the pieces together, I’ll orient the pieces so that very little of this is visible, because I’m really aiming for the contrast between the two woods in this puzzle. If the couple I’ve made, only one has this distinctive colouring on some of the pieces.
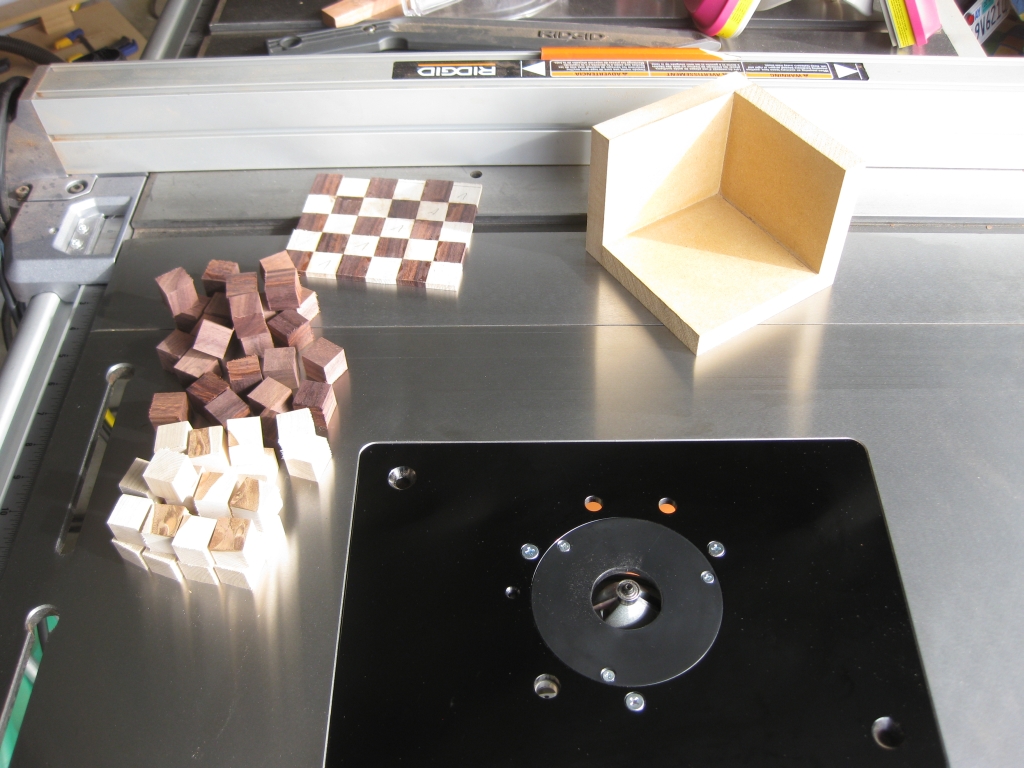
50 Cubes to be Bevelled
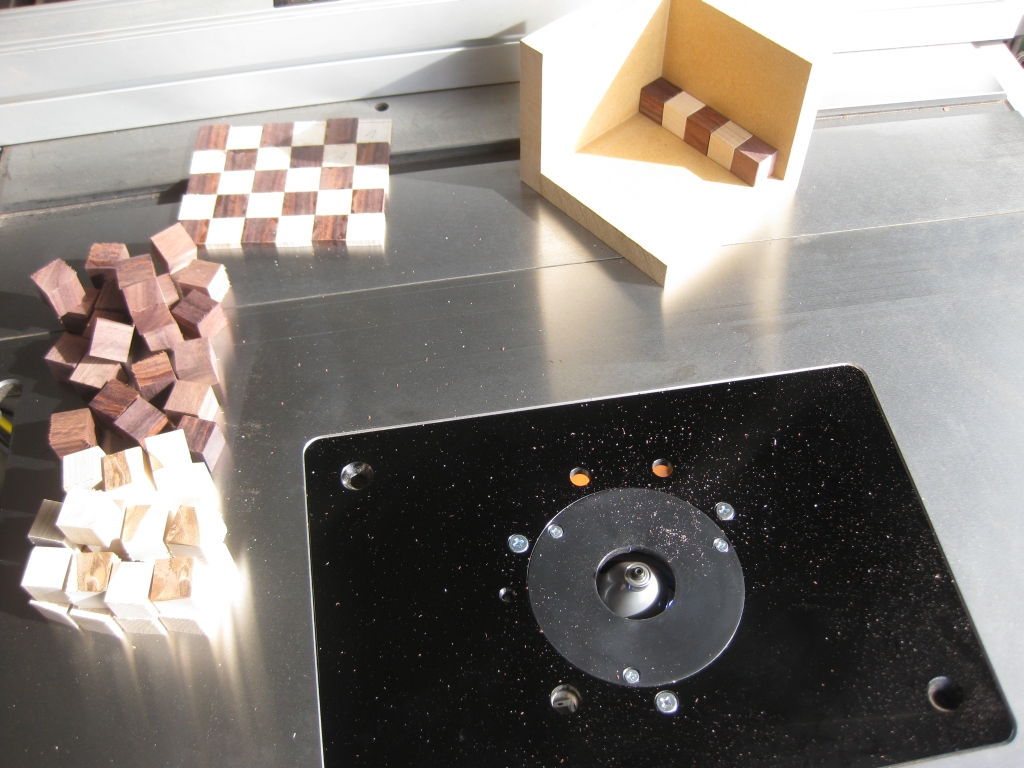
50 Cubes to be Bevelled

One row done, 9 more still to do!
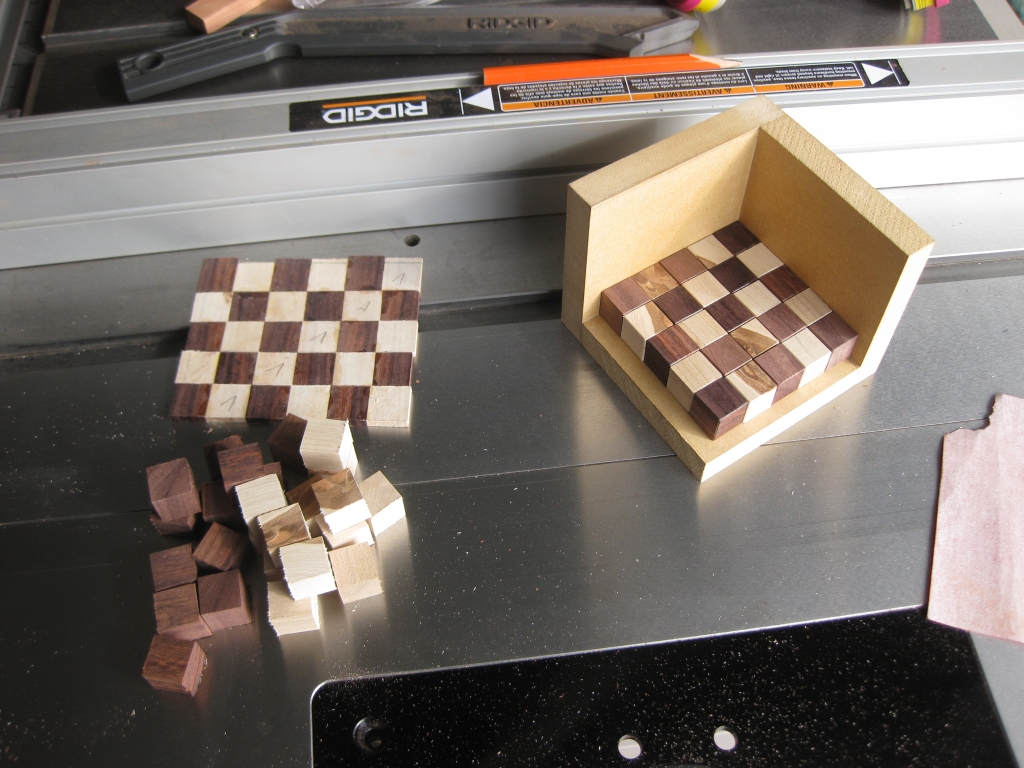
One row done, 9 more still to do!

Half way there!
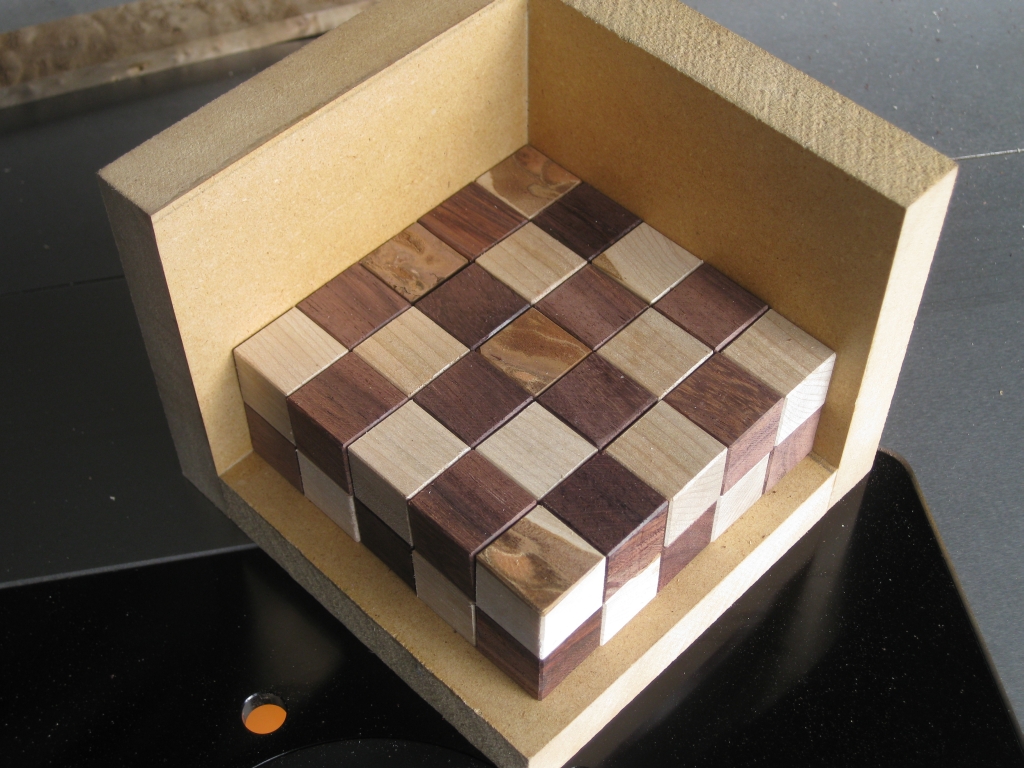
Half way there!

Some time later, and I'm done!

Some time later, and I'm done!

This is one of the most time consuming parts of the process (currently). I have to take all 50 cubes, and put a very small bevel onto each edge of the cube. All in all it takes between 1.5-2 hours with my current method. There’s been a fair old discussion in one of the puzzling forums about beveling cubes, so I’m sure I can cut this down significantly, but that’s going to need a new jig, and some more tools in the shop so for now I’m stuck with what I have.

If you’re interested, the checkerboard piece of wood in the pictures isn’t some sort of template, it’s actually what will become the base of the box that the puzzle sits in. I just happened to be working on it at the same time, hence it ended up in the pictures.

Next up I made the 10 pieces of the puzzle from those 50 cubies, and as it happens I don’t have any pics of the process. I’ll need to take a few from the next one I make and update this at a later point. Anyway with that done, I turned my attention to the box. I now had dimensions for the box, based on the final size of the pieces, so I took the burl I was using to the saw, and cut it to the right lengths for the box, and created a dado in the edges of two sides, to allow me to get a stronger joint for the corners.

The outside edges of the box

The outside edges of the box

Despite the very small contact area, wood glues are remarkably strong, and will hold the frame together with no issues. In fact, to take it apart would probably break the wood, before the glue would let go. Using blue tape, I tape the corners, (no clamping required) and that will hold the box well enough for the glue to set. I do a quick check to make sure that the corners are square, and leave it to dry, while I turn my attention to the base.
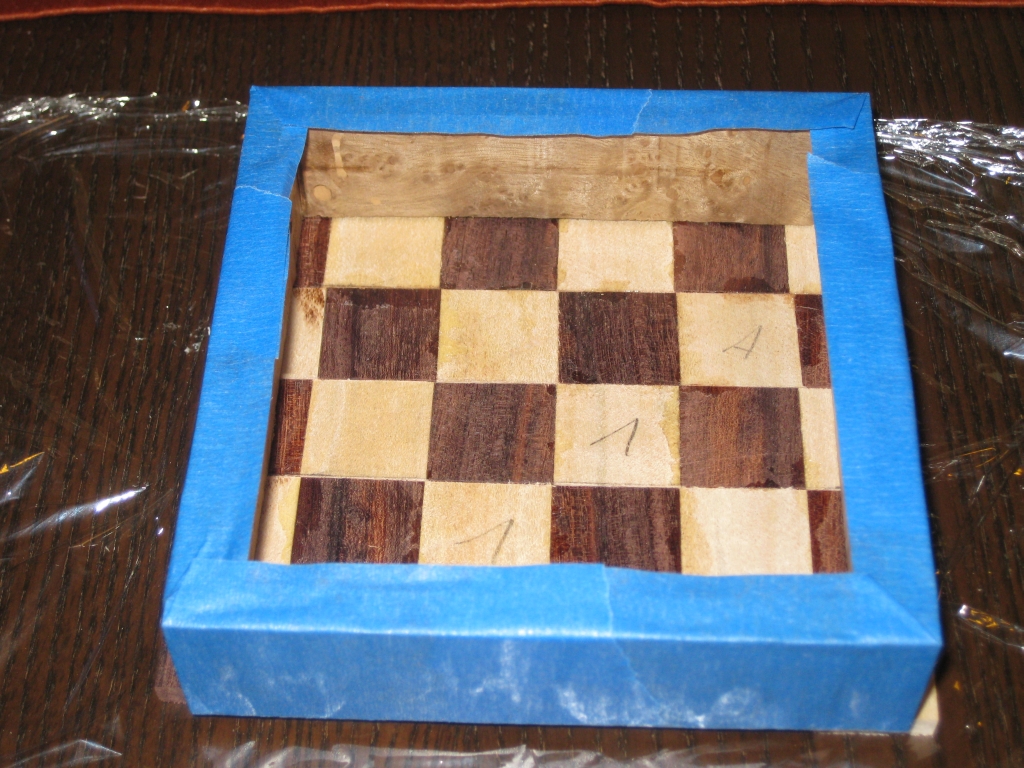
The unfinished base, with the sides sitting on top

The unfinished base, with the sides sitting on top

As you can see, the base is unfinished. The pencil marks were to allow me to line up each of the strips for gluing everything together. As you can see I still have some sanding to do, since there’s glue and all sorts on the base. Thanks to the random oscillating hand sander I got for my birthday, it will make short work of that!
A quick dry fit before gluing the box together.

A quick dry fit before gluing the box together.

With the sanding done, I have a quick dry fit with the pieces in place to make sure everything fits as expected before gluing the base in place. Note at this point, Ive sanded the inside of the box to its final point, as it will be pretty touch to get into the corners once it’s all glued together, so best do that before the final glueup.
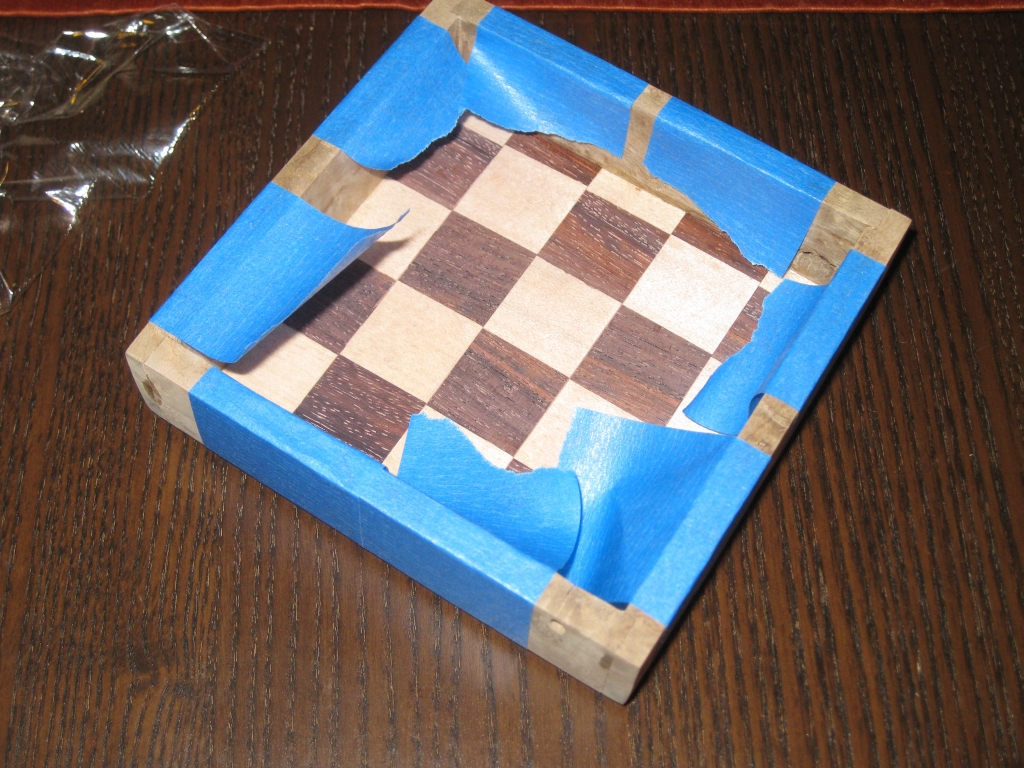
Box glueup from the top
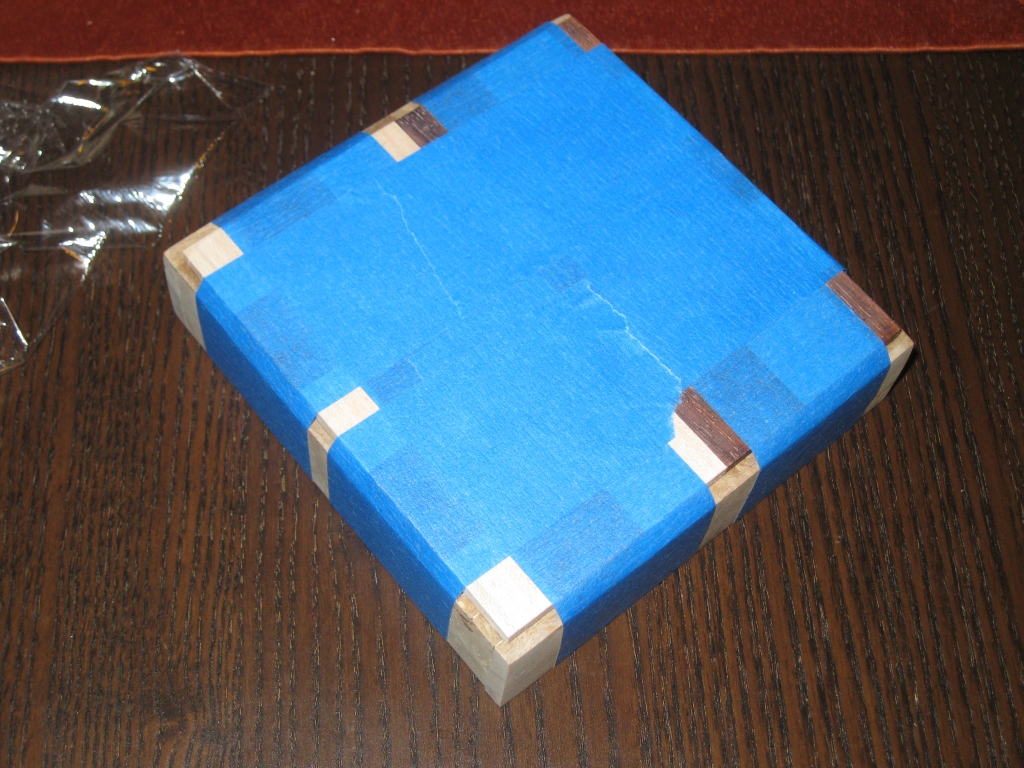
Box glueup from the top


Box glueup from the bottom

Box glueup from the bottom

It’s probably worth pointing out at this stage, that I’ve spent around 3-4 hours making this box. Given that I decided I wanted a checkered base, that meant cutting thin, equally sized strips, gluing them together, then cutting them into strips once dry, flipping the strips to create the checkerboard, and re-gluing, then sanding, etc etc. All in all probably the most labor intensive part of the puzzle build, but hopefully worth it!
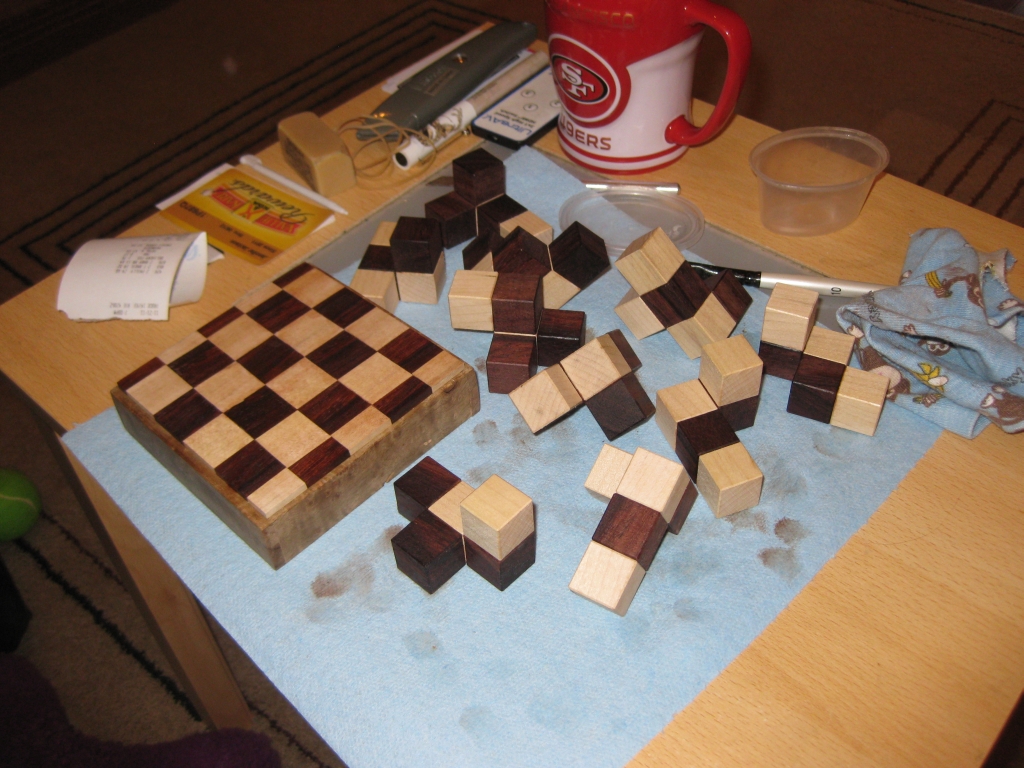
Finishing.  First coat of thinned lacquer applied

Finishing. First coat of thinned lacquer applied

With all the individual pieces ready, it’s time to look at finishing the puzzle. The box was all sanded on the outside, and it’s looking pretty good. I start off by applying a coat of thinned lacquer to all the pieces. It’s 1 part lacquer, 2 parts thinner that I’m using. It gives a very thin coat, but does the job or really making the grain pop. If you compare this to the pictures of the dry fir you’ll see what I mean.
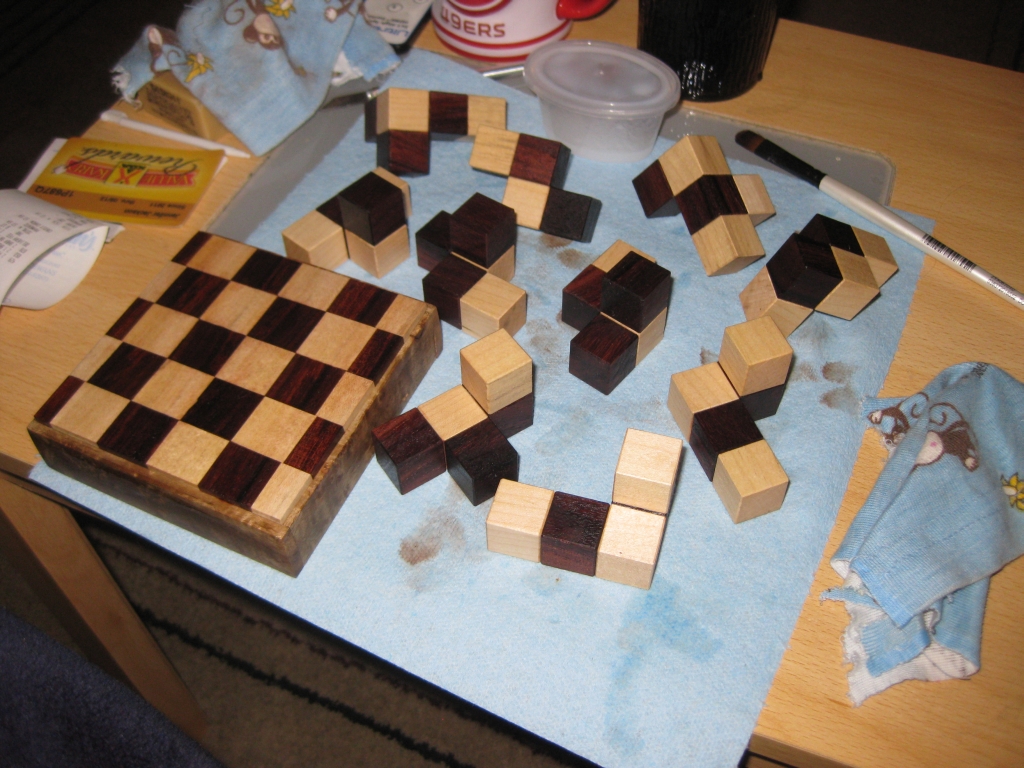
First Coat of Watco Satin Wax.
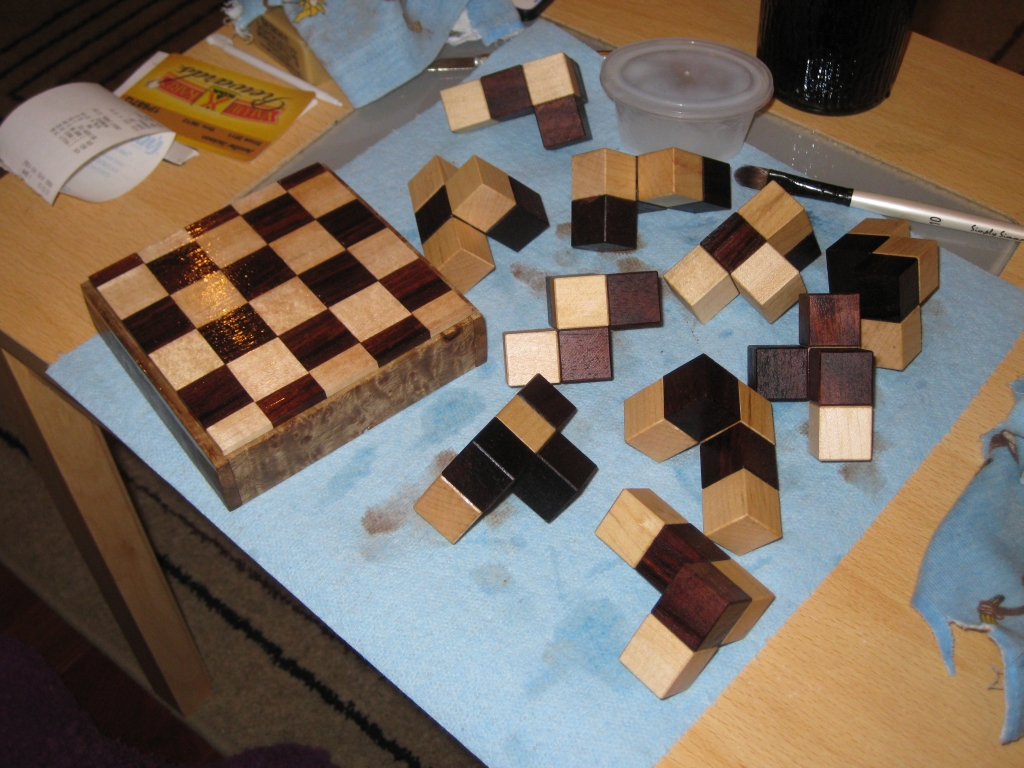
First Coat of Watco Satin Wax.

Second Coat of Watco Satin Wax.

Second Coat of Watco Satin Wax.

Once that’s dry, the puzzle gets two coats of wax. I’m using a liquid wax, Watco Satin Wax to do the job. I leave the wax for around 5-10 minutes, then wipe off any excess with a rag. This is building up a nice finish on the pieces, but there’s still one more step to complete the process. That’s a final buffing with some Renaissance Wax.
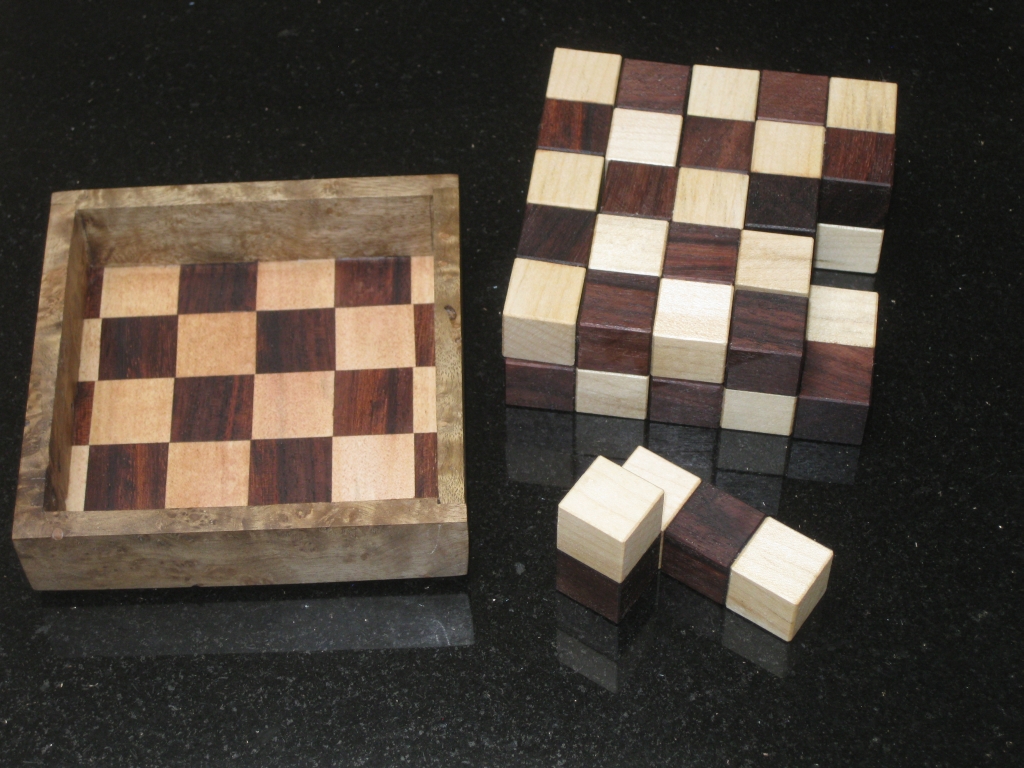
The pieces, next to the finished box
The pieces, next to the finished box

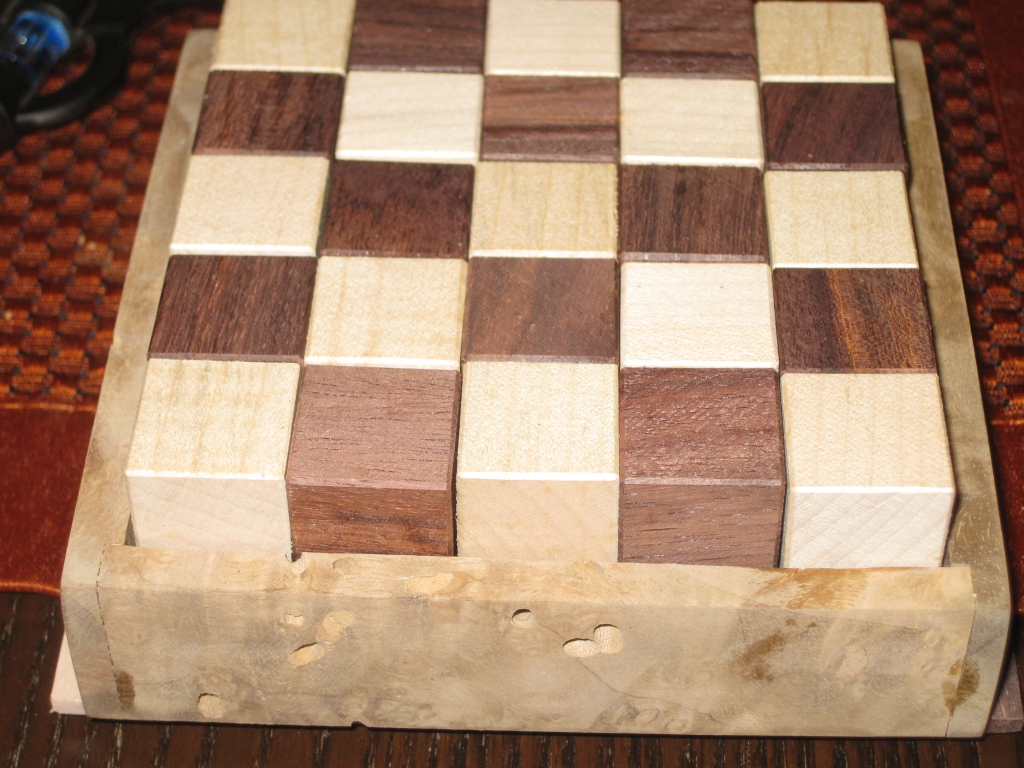
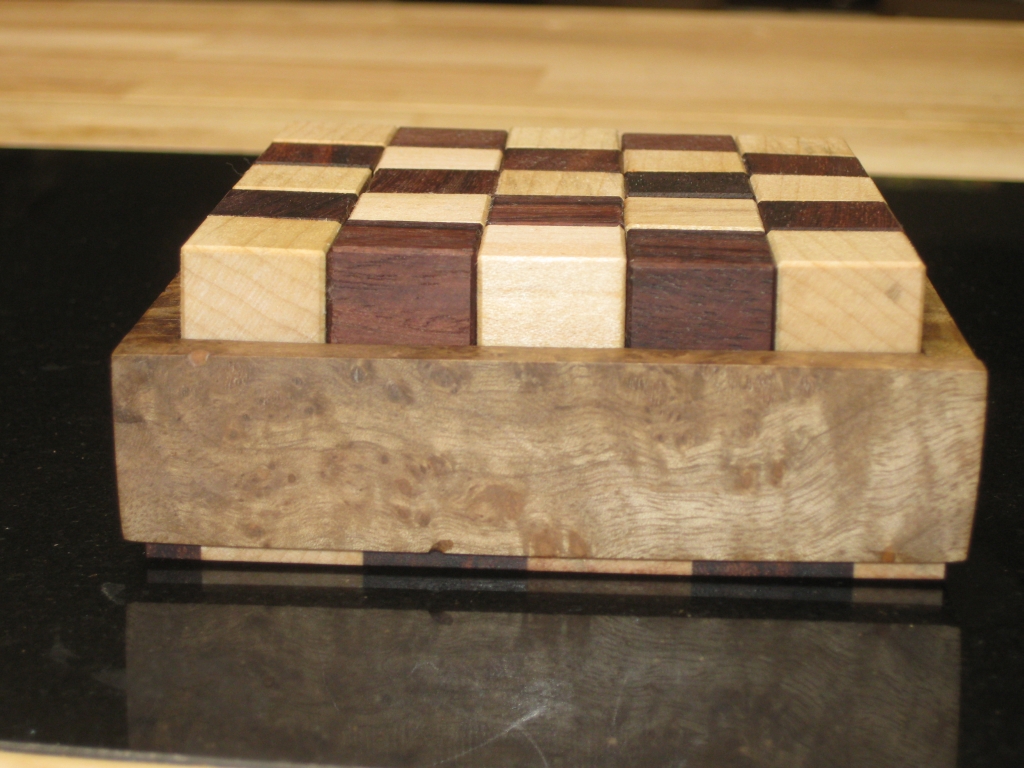
A final view from the side, showing the effect of the checkered base.  The myrtle burl box almost looks like its floating.

A final view from the side, showing the effect of the checkered base. The myrtle burl box almost looks like its floating.

The final puzzle ready to be played with!

So there you have it. I hope you enjoyed the build as much as I enjoyed making it.
Shippers Dilemma

This is to be the first in a series of posts in the run up to Thanksgiving Day here in the US. So what better to be thankful about than new puzzles to play with?

You’ll have to indulge me for a few minutes here, as this set of puzzles comes with a bit of a story. Don’t worry, there’s puzzles in here too! So back in June, my parents came to visit me here in California. It’s the first time they’ve traveled since my dad went through all his Cancer operations, and it was the end of a long road for him. Both he and my mum were in need of the break, and having not seen them other than the quick trips back to Scotland for work, it was the perfect time to catch up. While they were here we had planned a bit of a road trip. None of us (either my parents or my new family) had been to the Grand Canyon or Death Valley, and since it was likely to be the last time my parents would be able to make such a long trip, we took the 2000 mile round trip in an RV.

Entrance to Calico Silver mining town

Entrance to Calico Silver mining town

While we were in Death Valley, we stopped at an old Ghost Town by the name of Calico. This is an old silver mining town which has been restored and has the tourist trap costumed inhabitants wandering around. One of the shops there was a modestly sized Puzzle shop; Calico Woodworks, selling ‘old west’ puzzles, including various disentanglement puzzles, tavern puzzles and wooden puzzles. I must have spent an hour in the shop (much to the dismay of the rest of the family who wanted to see the town) browsing, and talking with the owner, who had a fantastic knowledge of the puzzles she was selling.

Calico Woodworks

Calico Woodworks

As it happens, we struck up quite the little banter, and I have no doubt our discussions helped her sales for the day as the shop was packed when I left. Not long after I walked in, and I was animatedly pointing things out to Jen and my Mum, she hands me a puzzle which she calls the ‘Manhood Puzzle”. Clearly its something she hands to all the men as it comes with a story that if I can’t solve it, she’ll have to change my name to something girly. The puzzle she hands me is a nut and bolt puzzle, which as it happens I’ve seen before. I play along for a minute, and poke and prod at the split washer which is secured in the middle of the screw between the head and a nut which is soldered to the screw, before unscrewing the bottom section and removing the washer.

2 Piece Pyramid Puzzle

2 Piece Pyramid Puzzle

She then picks up a few other puzzles to show me, and entice me into buying. As she’s off finding the puzzles, I spot a two piece pyramid puzzle sitting on the counter, and promptly solve it. (After all it was sitting there un-solved!) She comes back, spots it solved and asks if I did it. “Yes”, I reply. She curses me, then proceeds to tell the story of having received it from Creative Crafthouse, spent days not being able to solve it (having received 1,000 of these), and calls them telling them their puzzle is broken. When they told her how to solve it, I believe a large chunk of pride and humble pie was swallowed!

She picks up a series of three puzzles, which for the Shippers Dilemma series. It turns out these are made by Creative Crafthouse and come both individually and as a nice set of three. As it happens, she didn’t have the first in the set available, but I did end up buying the other two puzzles from here (amongst other things).

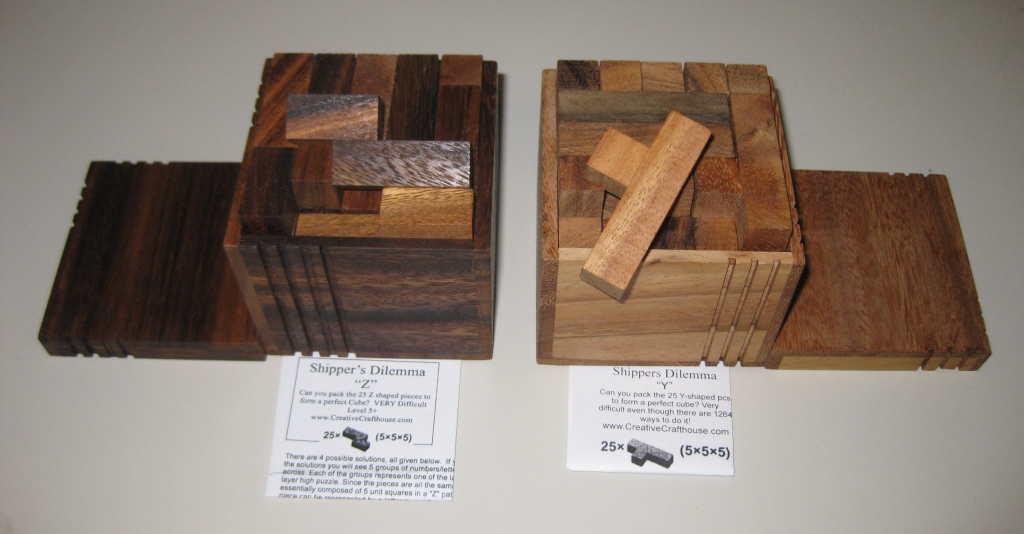
Shippers Dilemma's

Shippers Dilemma's

So now that I’m done with my story, back to the puzzles at hand! The two puzzles I ended up getting are Shippers Dilemma ‘Y, the middle difficulty puzzle, and Shippers Dilemma ‘Z’ the very hard puzzle.

Both puzzles come in their own wooden boxes, which have been routed with a number of grooves to signify the difficulty of the puzzle. It’s a nice touch and means you can easily tell which puzzle you’re picking up without having to leave the lids off! Also, the ‘lid’ is really the base, and the puzzle can be built inside it then the rest of the box slipped on top to put it away (that is if you get it back into a cube)!

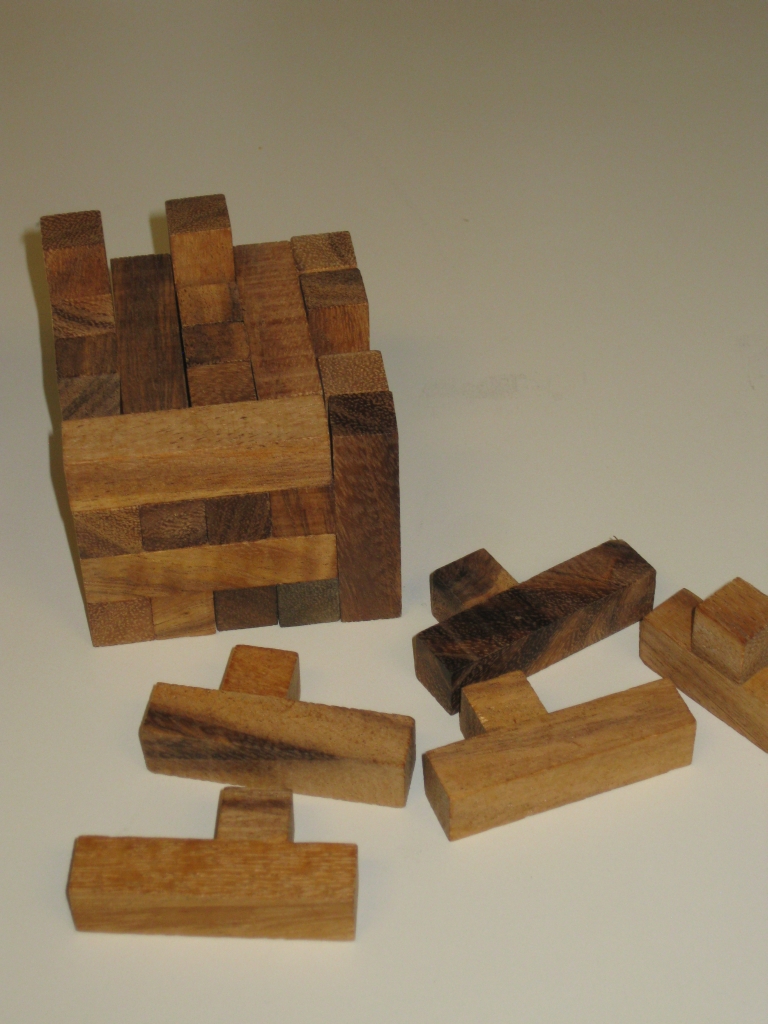
Pieces for Shippers Dilemma 'Y'

Pieces for Shippers Dilemma 'Y'

The first of the two puzzles is made entirely of ‘y’ shaped pieces, 25 to be exact, which have to be placed together to make a 5x5x5 cube. The puzzle was designed by David Klarner and published in the Journal of Recreational Mathematics in 1970, so its not a new puzzle. Originally thought to have just 236 solutions, Burr Tools shows there to be 1264 solutions possible. Never the less, this is still a challenging puzzle, and it’s unlikely you’re going to solve it in 5 minutes. I think I played around for about 30 minutes to get one solution, and was happy enough with that.

There are a number of other shapes that you can make from the pieces, including a 10x5x1 rectangle from 10 pieces, and a 15x4x2 using 24/25. So lots to keep you occupied with this particular puzzle. It does come supplied with a solution sheet showing 4 possible solutions, and the other shapes you can try, so if you’re struggling with the 5x5x5 then one of the others may prove easier!

The pieces of the puzzle themselves are unfinished and fairly rough. While the fit is fairly precise between pieces, there’s evidence of glue on some of the pieces, and not all the small cubes are glued perfectly straight onto the longer ‘base’ section. That said, this isn’t an expensive puzzle, and given that it’s well worth the money.

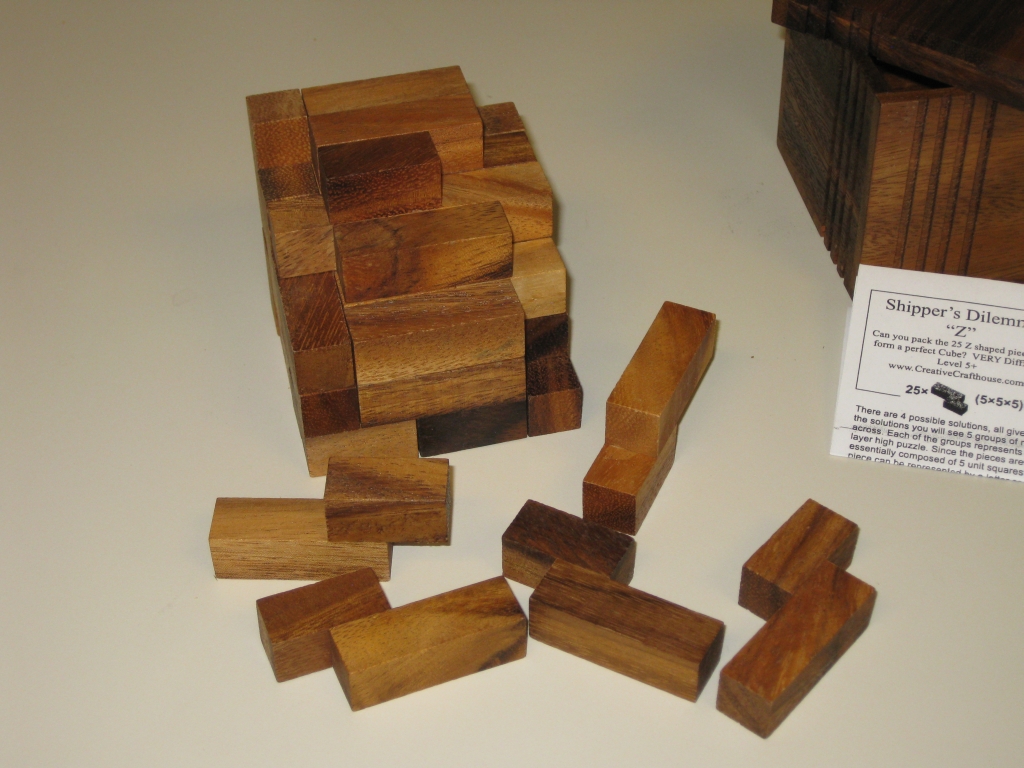
Pieces for Shippers Dilemma 'Z'

Pieces for Shippers Dilemma 'Z'

The second of the two Shippers Dilemma puzzles is ‘Z’. You’ll not be surprised when I tell you that this puzzle is made from 25 ‘Z’ shaped pieces (or N in pentominoes sets) which need to be made into a 5x5x5 cube. Like it’s little brother there are a number of other possible solution shapes using varying numbers of pieces which are listed with the puzzle, so again plenty to keep you occupied. This is listed as a very hard puzzle, and given that there’s only 4 solutions, which are provided, I can see why. Around an hour found me a solution that let me put it back in its box, and I was pretty happy with that. Burr Tools confirms that there’s only 4 solutions.

This puzzle is made from a darker wood, but again, I’m not sure what sort of wood has been used. It’s of a similar quality and price to the previous puzzle, so all in all good value for money and a serious challenge regardless of how many times you solve it!

I may have to puck up the first in the series, as it has a beautiful symmetry to the way the pieces fit inside, which I really liked. That’s one for another day though. Funny that I traveled all the way to Death Valley to pick up my first puzzles from Creative Crafthouse, but I’ve not been disappointed, and will likely buy more from them in the future.

Come back tomorrow to see the other puzzles I picked up while in Death Valley!

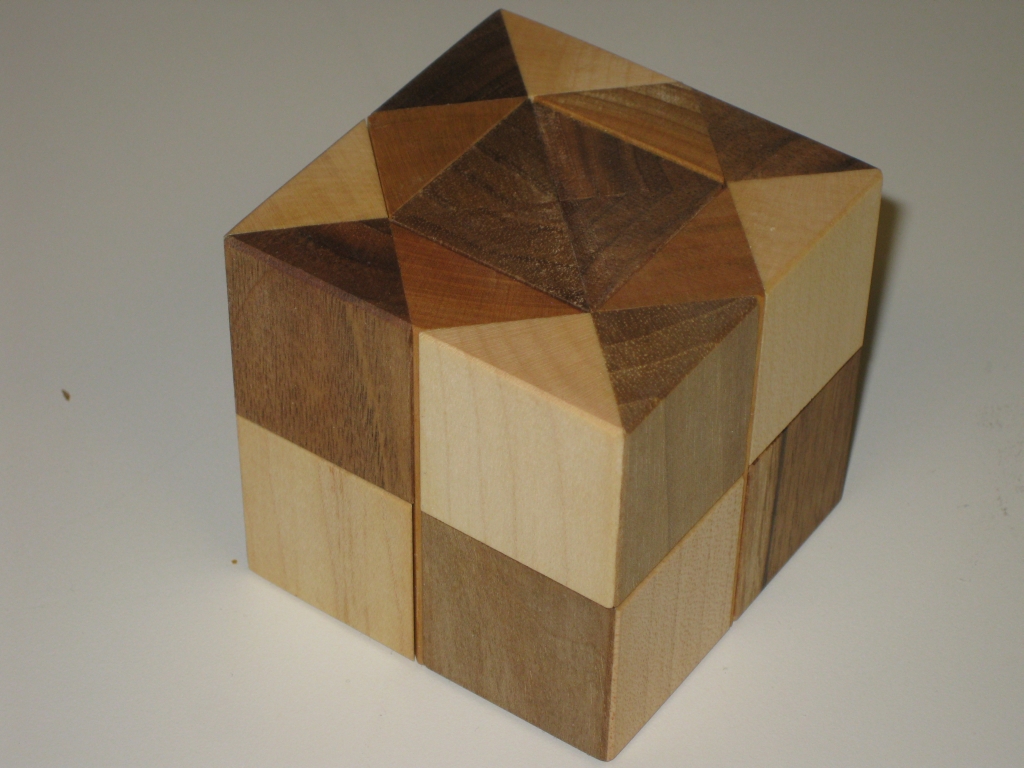
Cubetresor

Cubetresor is a Vinco puzzle which I recently received from Puzzle Master to review. The goal of the puzzle is to “open” the cube, however the rattling coming from inside the puzzle hints at something clever going on inside. Given that the puzzle arrives shrink wrapped in plastic, there’s no real clue as to what it could be.

Cubetresor by Vinco

Cubetresor by Vinco

As you can see this is another beautiful looking puzzle from the workshop of Vaclav Obsivac, measuring 2.5″ x 2.5″ x 2.5″. To be honest, I’ve never seen anything from Vinco that’s not both stunning to look at, and perfectly made. It comes as I mentioned shrink wrapped in plastic, with a small folded paper sheet showing the difficulty and an Ikea style diagram giving you the goal of the puzzle. The solution is given inside the folded paper, so don’t open it if you don’t want to know, but really this isn’t difficult. I should mention, if you’ve not visited Vinco’s website recently, then go have a look. He’s redesigned and cleaned up the website, and is adding lots of new information about the woods he uses, and how he gets them. Well worth a read!

The Cubetresor pieces

The Cubetresor pieces

As I’ve mentioned with a couple of Vinco’s creations, some are less puzzle and more curiosity/art. I feel that the Cubetressor fits into this category as well. Vinco’s own description of the puzzle lists it at a four piece puzzle, but I’m going to revise that and say it’s a five piece puzzle. You’ll remember that I mentioned a rattling sound coming from the puzzle before I opened it. Well as far as I’m concerned that’s the fifth piece. After all it is a piece, and it’s inside the puzzle.

This isn’t a difficult puzzle, and I doubt anyone will have problems in opening it. As ever it looks great, and isn’t an expensive puzzle, so I’d say pick it up. If you don’t want to know more, then stop reading here. If you want more info, including some spoilers, then click the link. Note: I’ll show you that fifth piece, and also how it opens

Continue Reading

Continue reading