Yearly Archives: 2013

Get Charged

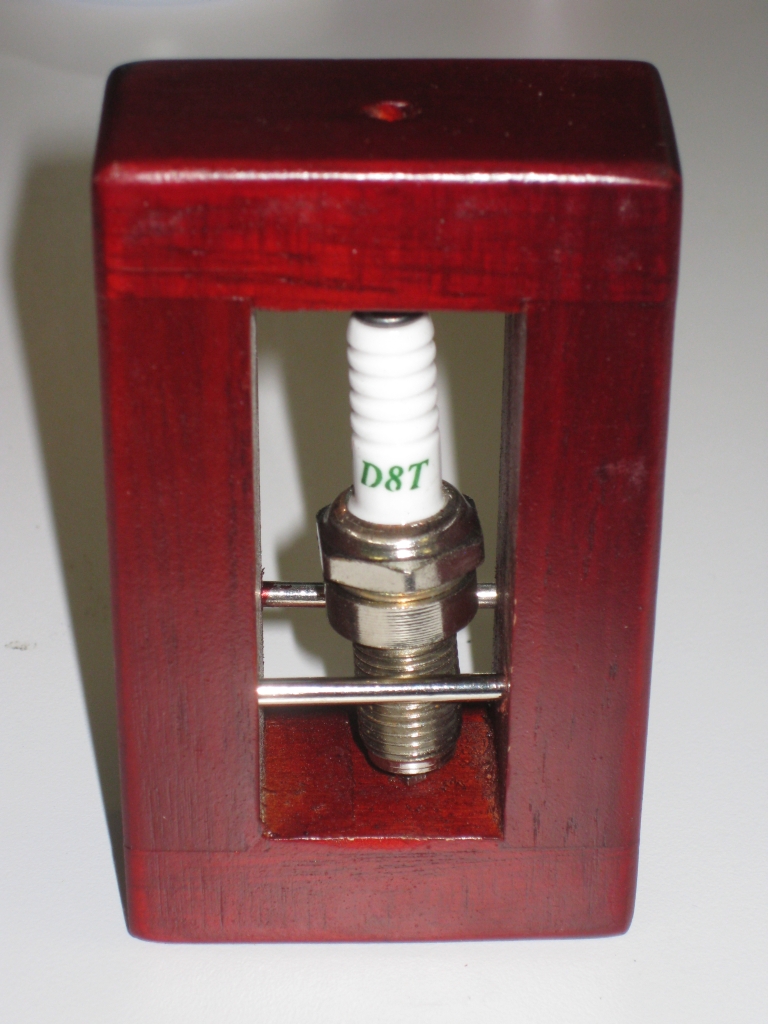
Get Charged is a trapped object puzzle made by Bits & Pieces where the object is to remove the spark plug from its wooden cage. Two steel rods prevent the plug from being removed through either side, and the plug itself is just too long to be slid out, despite the hole in the top which might make you believe otherwise. I received my copy from Puzzle Master.

Get Charged in the start position

Get Charged in the start position

Spurred on by my recent success with the quality of Akio Kamei’s Book Box which is also from Bits and Pieces, I was in high spirits that I’d have another well made puzzle. At first glance, as you can see from the picture above, it does look like a well made puzzle. Measuring 3.75″ x 2.25″ x 1″ and sporting a shiny new spark plug, it looks like a nice puzzle.

It arrived in the usual plain white cardboard box, but when I opened that the puzzle was tightly bubble wrapped, and I was thinking that things were looking good. Sadly when I removed the bubble wrap, I was a little disappointed.

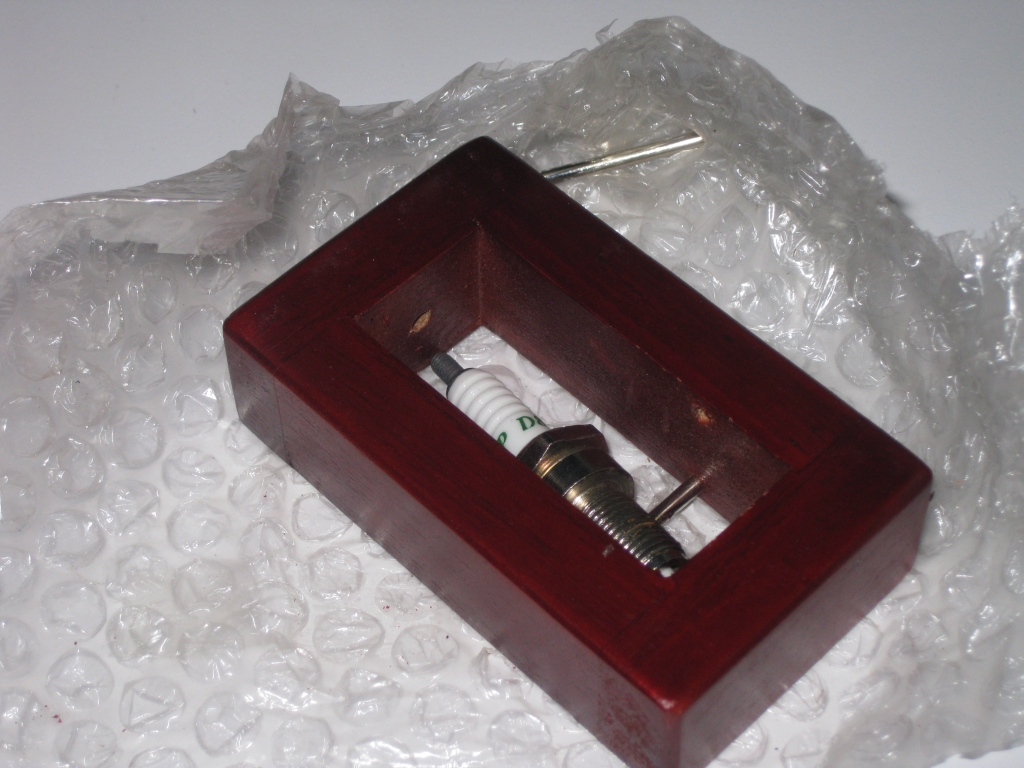
Unwrapping the packing, the spark plug was free, and one of the pins stuck in the corner of the bubble wrap.

Unwrapping the packing, the spark plug was free, and one of the pins stuck in the corner of the bubble wrap.

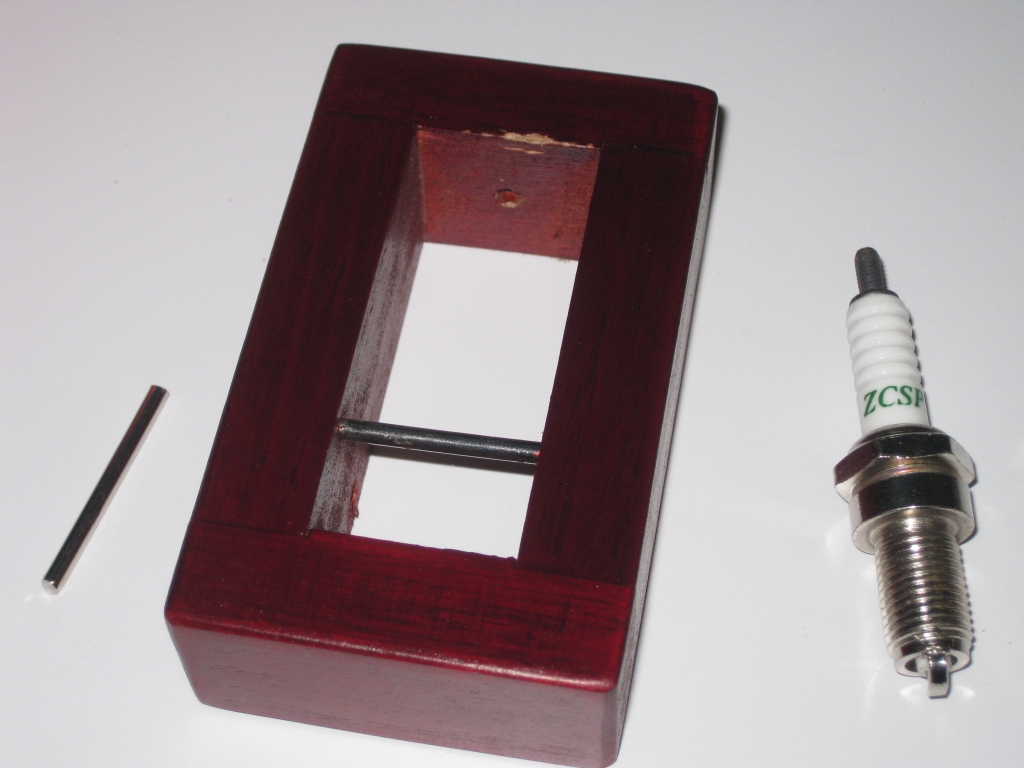
This is what I found when I opened the packaging. Sadly the puzzle was already in the solved state, and before I could play with it by returning it to the starting position, I had to solve it to reset it. I’m actually being a little generous with the photo here, as when I took the puzzle out of the bubble wrap, the second metal bar was stuck inside the bubble wrap and I didn’t find it until I re-checked all the packing, having tried to figure out why the spark plug lifted straight out of the frame, and there were two holes which did nothing in either side of the frame. Given that this is a simple puzzle, and I pretty much knew how it was going to work before it arrive it’s not that much of a problem, but it was rather a shame.

Unfortunately, that’s not my only problem with this puzzle. Unlike the picture on Puzzle Master’s page, the joinery here is pretty poor. Rather than the nice half mortice, we have a butt joint, which works but has no strength. Also the puzzle has been badly slathered in a red paint, and not sanded prior to painting, meaning there are lots of burrs on the inside of the frame, and some sloppy excess paint in there too. Ok, it’s not an expensive puzzle I hear you cry, but it really doesn’t take much more effort or cost to finish the puzzle slightly better.

Drilling straight is not easy

Drilling straight is not easy

Chipped frame after painting

Chipped frame after painting


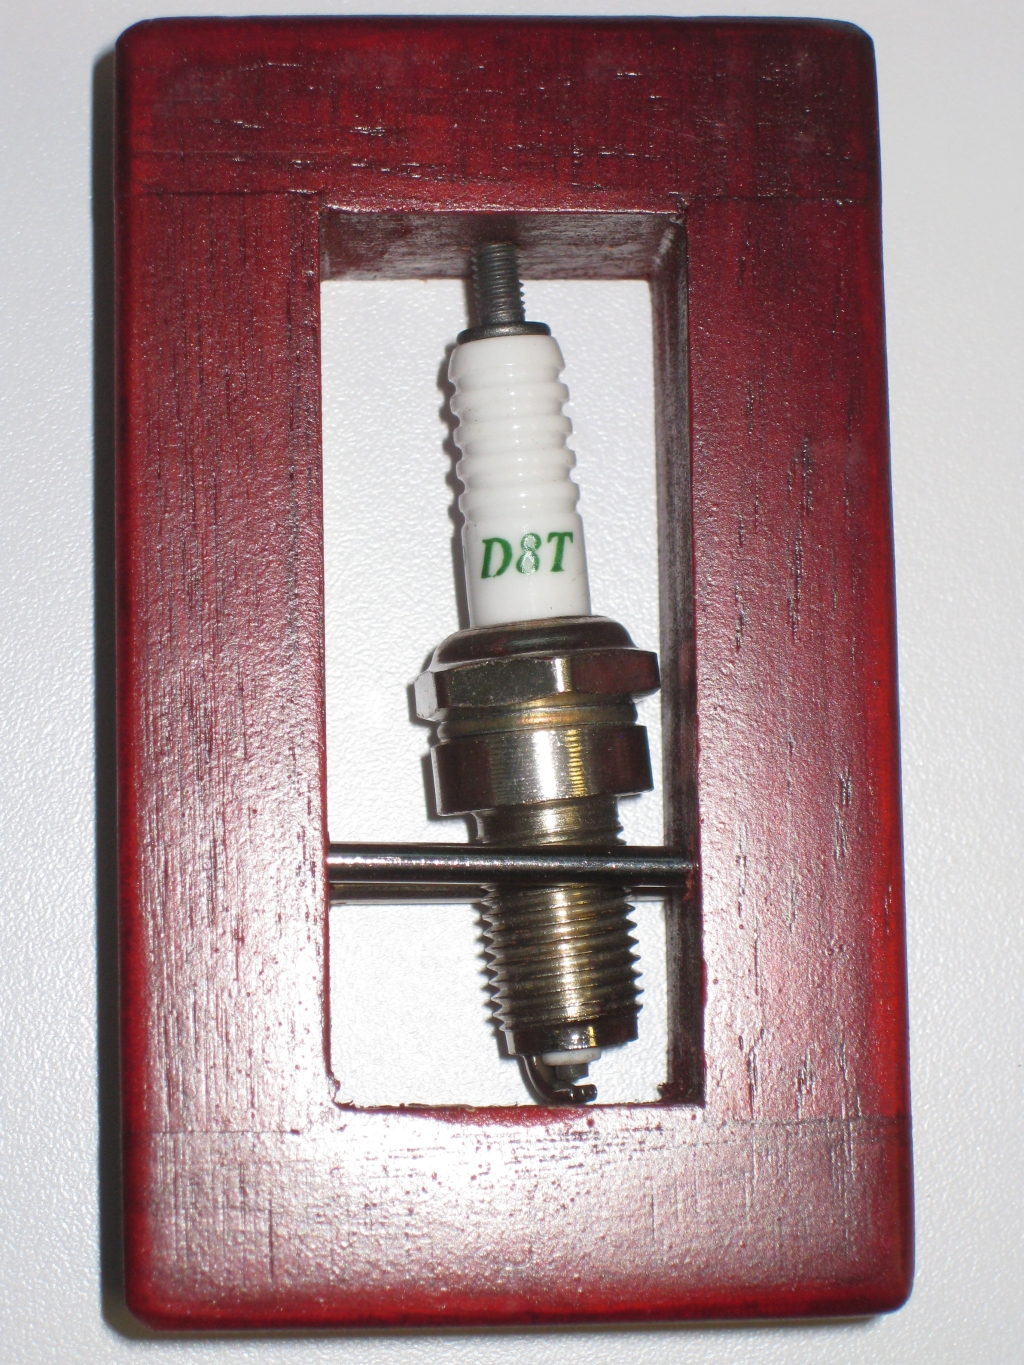
Also the metal bar which prevents removal of the spark plug has been drilled into the frame badly, meaning that it’s squint. It doesn’t affect the operation of the puzzle any, however my OCD for things being straight and parallel really screams at this minor thing. You’ll also see that the frame has been damaged at some point after being painted. That’s just carelessness when the puzzle was being put together.

The puzzle does come with a solution sheet, however I don’t think it’s a particularly well written solution. I doubt you’ll need it though.

So gripes aside, this is a simple puzzle, with a fairly well known mechanism that won’t keep an average puzzler stumped for long. If you’re trying to introduce someone to the world of puzzles, this is a cheap way to show them this style of mechanism, and the puzzle will take some abuse, without you being too upset if it gets a little scratched up. There are better versions of this puzzle available, but depending on who you’re getting it for, this may be an option for you.

Akio Kamei’s Book Box

My favourite type of puzzle is the Puzzle Box, or trick opening box, and being a member of the Karakuri group certainly helps me get my fix of puzzle boxes. Bits & Pieces however have been known to reproduce some of the Karakuri boxes at very reasonable prices. I’ve mentioned some of the problems I’ve had with their work in previous reviews, but I had heard that their puzzle boxes were pretty well done, so when I got the chance to add a copy of the Kamei Book Box to my collection I decided to take the chance. Puzzle Master carries this puzzle if you’d like to pick one up for yourself, although they seem to be out of stock at the time of writing this review.

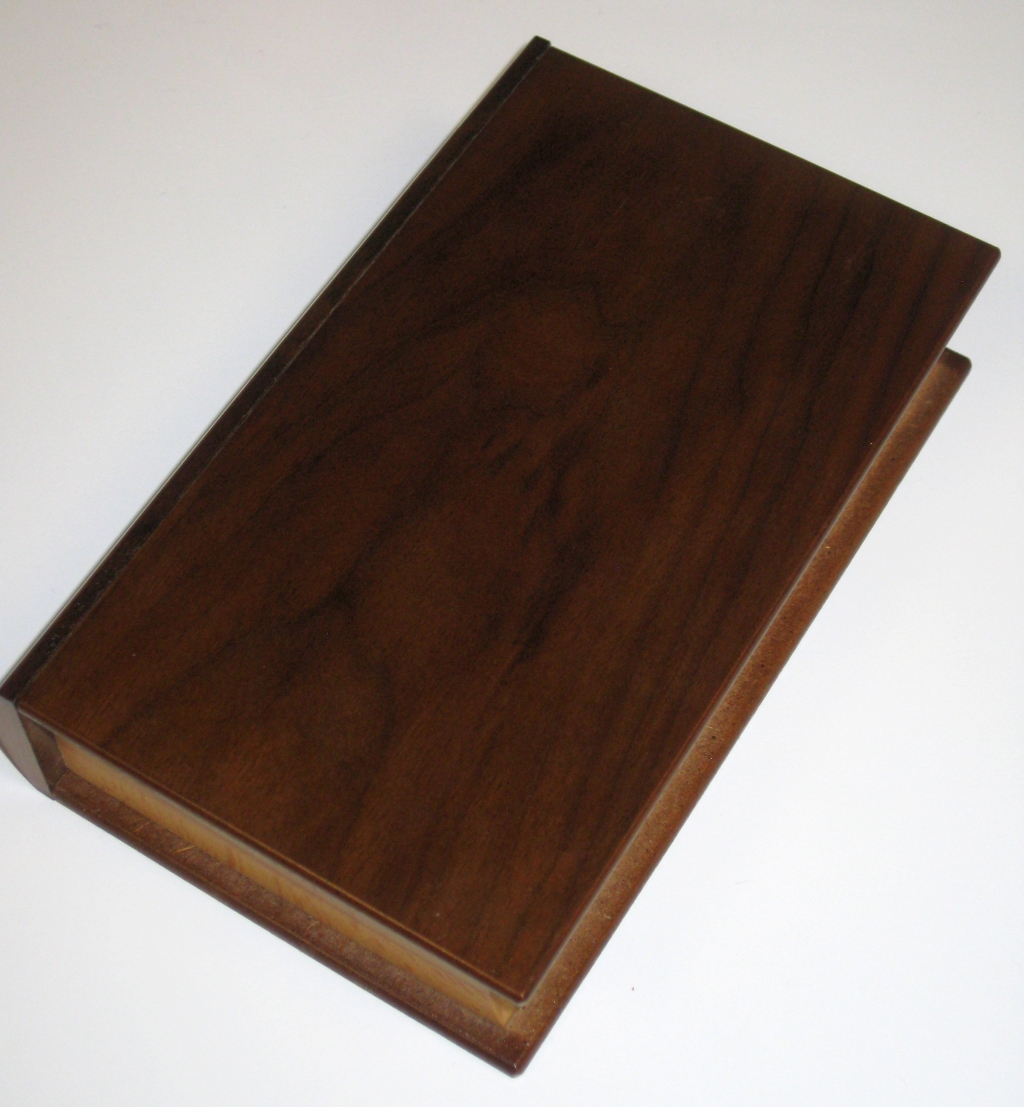
Bits & Pieces version of the Kamei Book Box

Bits & Pieces version of the Kamei Book Box

As you can see, this is a nice looking box. The fit and finish is very good, and there’s no obvious sign of the mechanism. The puzzle measures 4.5″ x 7″ x 1.5″, so would easily pass for a hard backed book sitting on a shelf. The Walnut cover and spine, with maple pages looks like a book and the contrasting colour of the woods used could easily fool a casual passer by that this was a real book. The finish has a nice sheen to it, and while I’d not say it was Karakuri level of craftsmanship, it is well made. The hidden drawer does slide out nearly 1/4″ while the puzzle is ‘locked’ so you know how it will open when you find the mechanism.

The puzzle itself is not difficult, with only one move required to unlock the drawer, however it is well hidden, and the mechanism is tight so it gives nothing away as you investigate each side to try to find the hidden movement. The panels are all solid, and give little away about how the drawer will open, however that is also a clue as to hoe it will open as there are only a few panels on the box.

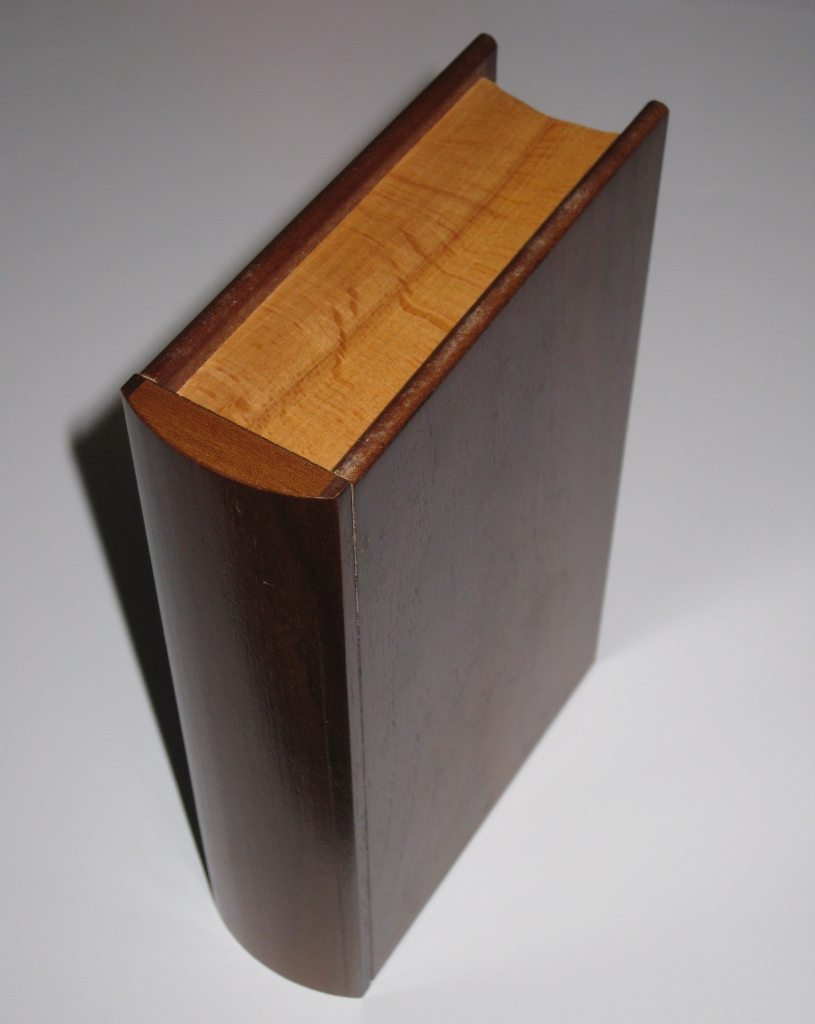
Looking at the edge of the book, it looks like pages of a book

Looking at the edge of the book, it looks like pages of a book

Looking at the pages of the book, the wood used really gives a great impression that there are individual pages in there, and that you could open the book and read it. I have to applaud Bits and Pieces for taking the time here and making full use of the grain in the wood to make a great looking puzzle.

Despite previous reservations, I have to admit that I am fairly happy with this puzzle and wouldn’t have a problem recommending that someone pick up a copy of it for themselves. It is a simple box, so don’t expect to be puzzling over it for hours, however it’s an elegant Kamei design which is made very affordable, and keeps an aesthetic level that you would expect from a Karakuri box.

Note: After posting the initial review one of my puzzle friends got in touch to say that I may have missed something about this box, and in fact there was an extra secret hidden in there. This box works as a sort of magic trick where you can place something into the drawer, and make it disappear. Initially I thought that there was just a little extra play in the B&P version but it turns out I was entirely wrong.

In my mind that makes this an even better version of the box as it fully retains all the original characteristics of Kamei’s design, at a great price and I’m not ashamed to say I totally missed it! I don’t like to look at puzzle solutions, preferring to enjoy solving the puzzle for myself, but having gone back to look at the solution card which came with the puzzle it does not even mention this little secret, so if you have this puzzle, go give it a second look, you may just be surprised!

Lean 2

During IPP 32 last year, Dave Rossetti presented another Stewart Coffin tray packing puzzle as his exchange puzzle. Numbered #255 in Stewart’s numbering scheme, this was isn’t made by Stewart himself, but by the woodworking master Tom Lensch. Given that I have a number of puzzles made by Tom, and I thought I was getting better at these packing puzzles, it seemed like a good idea to pick up a copy of this one.

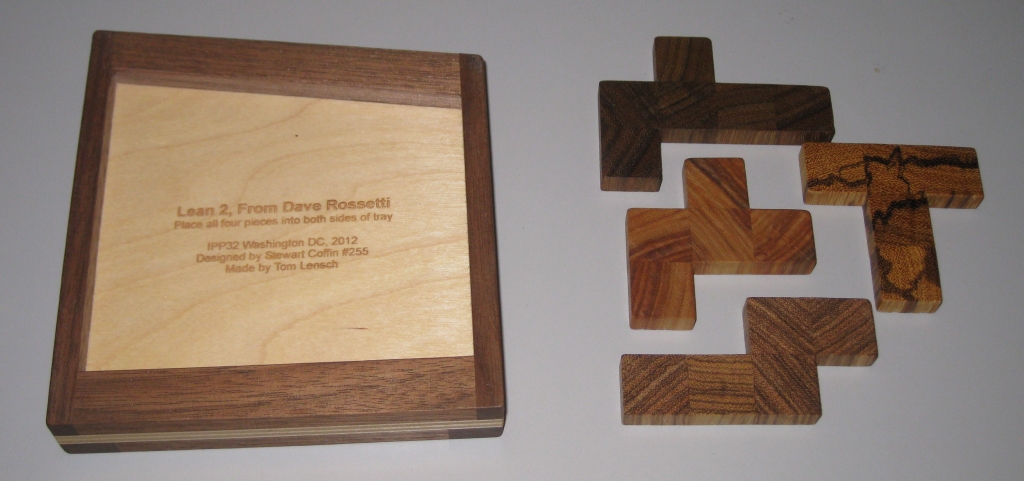
Lean 2 with the four pieces

Lean 2 with the four pieces

As you can see this is another simple four piece packing puzzle. The additional challenge here is that the tray is two sided, meaning twice the puzzling fun … or frustration. Tom has crafted this using four different woods for the pieces, Zebrawood, Marblewood, Canarywood and Bubinga (I’m guessing on the Bubinga) with a Walnut framed tray. Measuring in at 5.5″ x 5″ and nearly 1″ thick, it’s a good puzzle to work on, and not too big that it can’t be slipped into a bag and taken with you.

Given that I picked this up in August, you may ask why it’s taken so long to write about. Well as it happens, I solved the first side fairly quickly. It took me several hours over a month or so as I’d pick it up and fiddle, then put it back down. I was fairly happy with that and feeling quite confident so moved on to the second side, and promptly failed to make much progress.

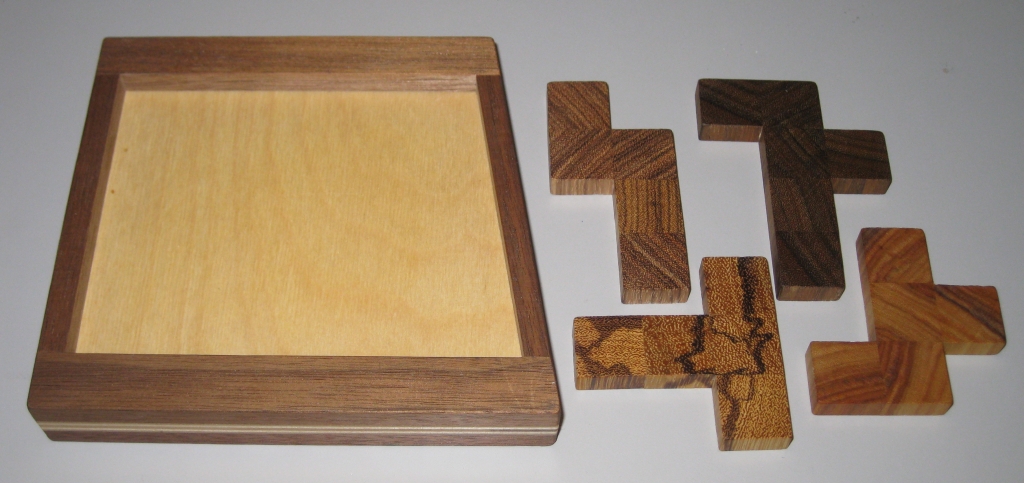
Lean 2's second side with the four pieces

Lean 2’s second side with the four pieces

I was a little disheartened when a good puzzling friend sent out an email asking for people to send him all the solutions they’d found for this puzzle. The suggestion was that there were a couple of false solutions that could be made. Well I got back to it and kept puzzling. After another couple of months, and several emails back and forth with my friend, I’d sent him 4 invalid solutions to the second side, but seemed to be no closer to the actual solution.

After another month of puzzling on this one I have to be honest and let you know I admitted defeat and asked for help. I dropped an email to fellow blogger Allard who had already solved and written about Lean 2 and asked for his help. I wasn’t looking for the solution, I’m not that much of a defeatist, but he kindly took pity on me and sent me a location for one of the pieces. I should note that I’d been sending Allard my ‘solutions’ and none of those I’d found worked on his copy of the puzzle, so he knew that I had given this one a fair shot.

With the hint in hand, I had the second side solved in about 2 minutes. Overall, this is a great puzzle, and kept me busy for many months. If you enjoy packing puzzles, then definitely pick this one up, it’s well worth the money and will keep you busy for quite some time.

Crossex

Crossex is another co-ordinate motion puzzle from the workshop of Vinco. It’s been a while since I looked at any of Vinco’s co-ordinate motion puzzles, so I’m remedying that with this review. Crossex is available from Puzzlemaster, or Vinco directly.

Crossex by Vinco

Crossex by Vinco

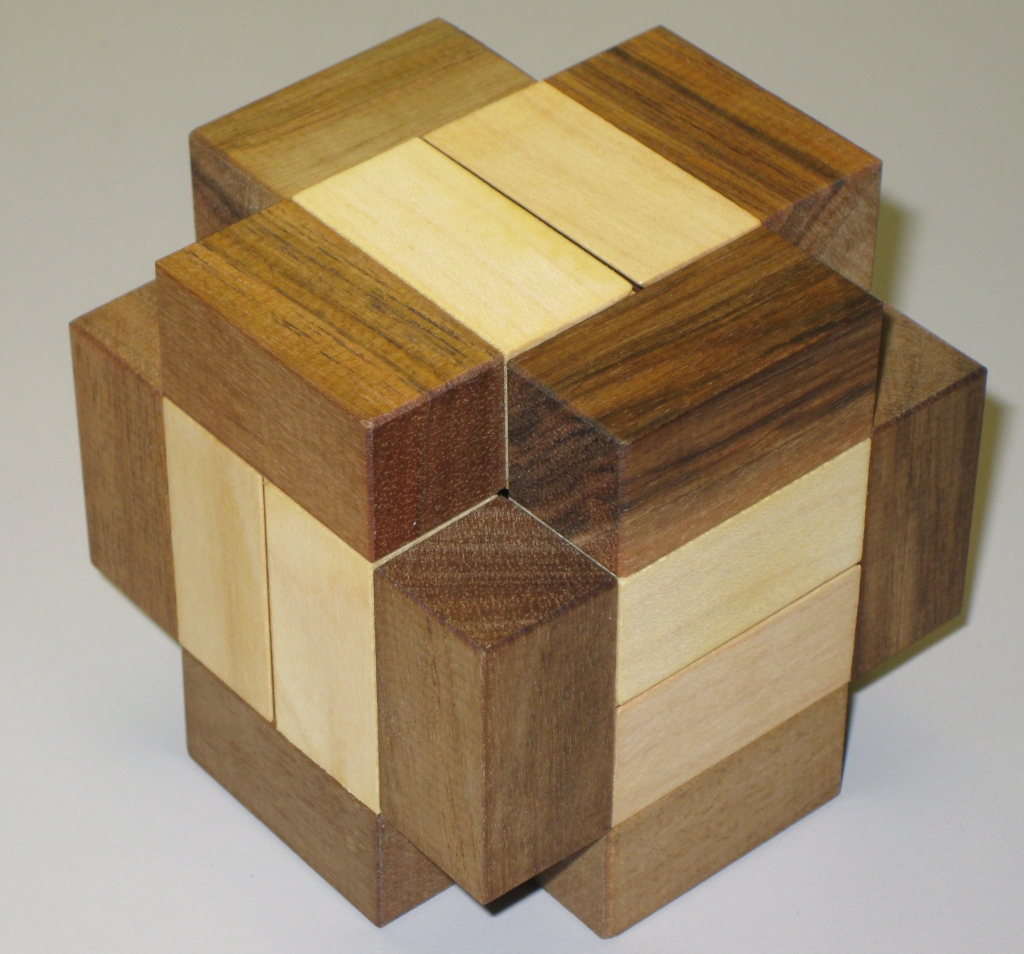
As always, the quality of the workmanship in the puzzle is excellent. It comes shrink wrapped with a small info card which contains the solution inside a folded paper, listing the difficulty rating as 3/5. Given that this is another co-ordinate motion puzzle, it instantly gets a higher rating in my book, but don’t let that put you off. Made from variegated Walnut and Maple there’s a good contrast between the pieces, and despite being part of the commercial line, there is still care and attention to the orientation of the grain in the pieces to make a really pleasing puzzle. I have no idea how Vinco manages this level of quality and still mass produces these.

Crossex by Vinco, partially open

Crossex by Vinco, partially open

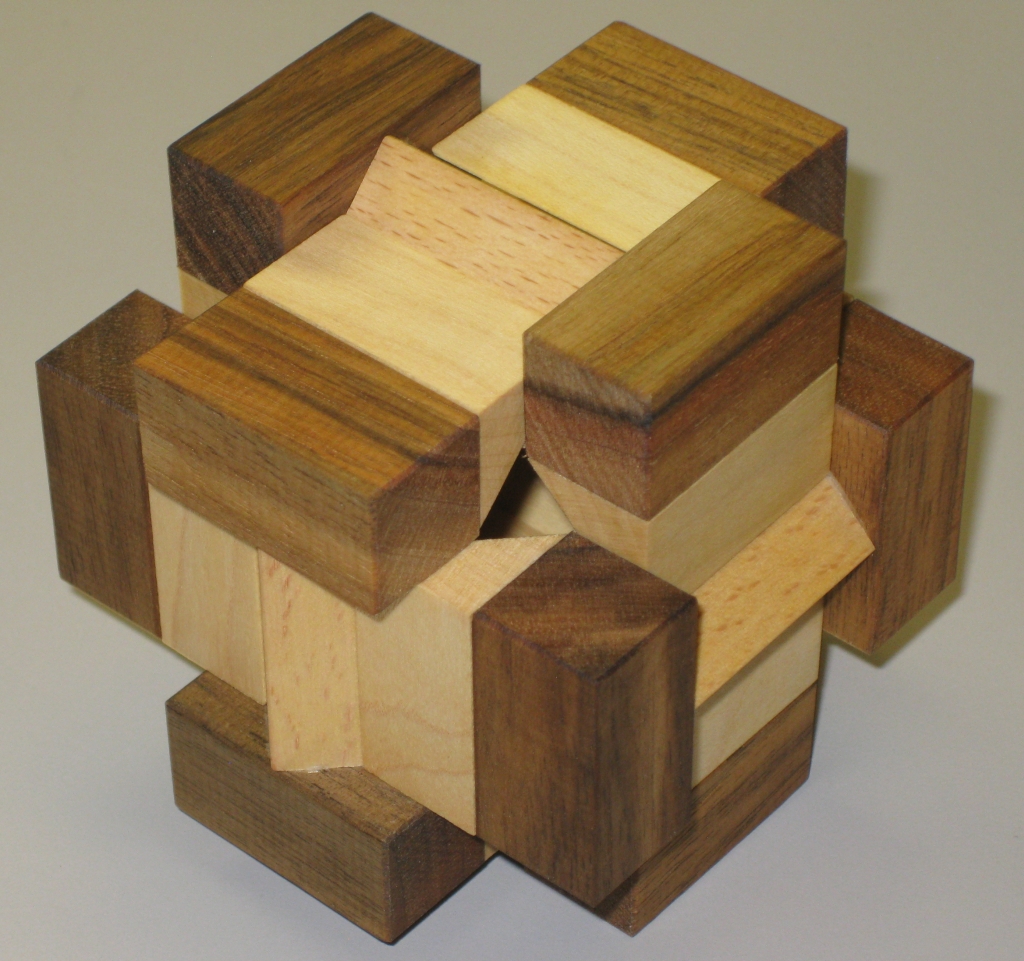
The cube is 2.5″ cubed and expands up to 3.75″ before it will collapse into a pile of pieces. As seems to be Vinco’s current style, there’s a rattling to be found from the inside of the puzzle, but that may or may not have much to do with its operation.

I will admit I was a little disappointed when I pulled the pieces apart on this one to find that it is identical in mechanism to the MaTRIOshka puzzle which is based on Stewart Coffin’s Expanding Box Puzzle. It’s a design I need to revisit after my earlier failed attempts. Given that I’ve learned a lot since that first attempt, and I’ve had a few requests to go back to the design.

If you don’t yet have a copy of Stewart Coffin’s expanding box puzzle, then I’d recommend this version as it’s very well made, and not expensive, especially given the fit and finish of the puzzle.

Great Collision

I don’t own too many metal puzzles, however a while back I spotted a rather interesting looking puzzle in the shape of a spiral galaxy on Puzzle Master’s site. At the time it was out of stock, and it seemed that there were a few people looking for the puzzle. Puzzle Master now has it back in stock, so I picked up a copy of the “Great Collision

Great Collision in the starting position

Great Collision in the starting position

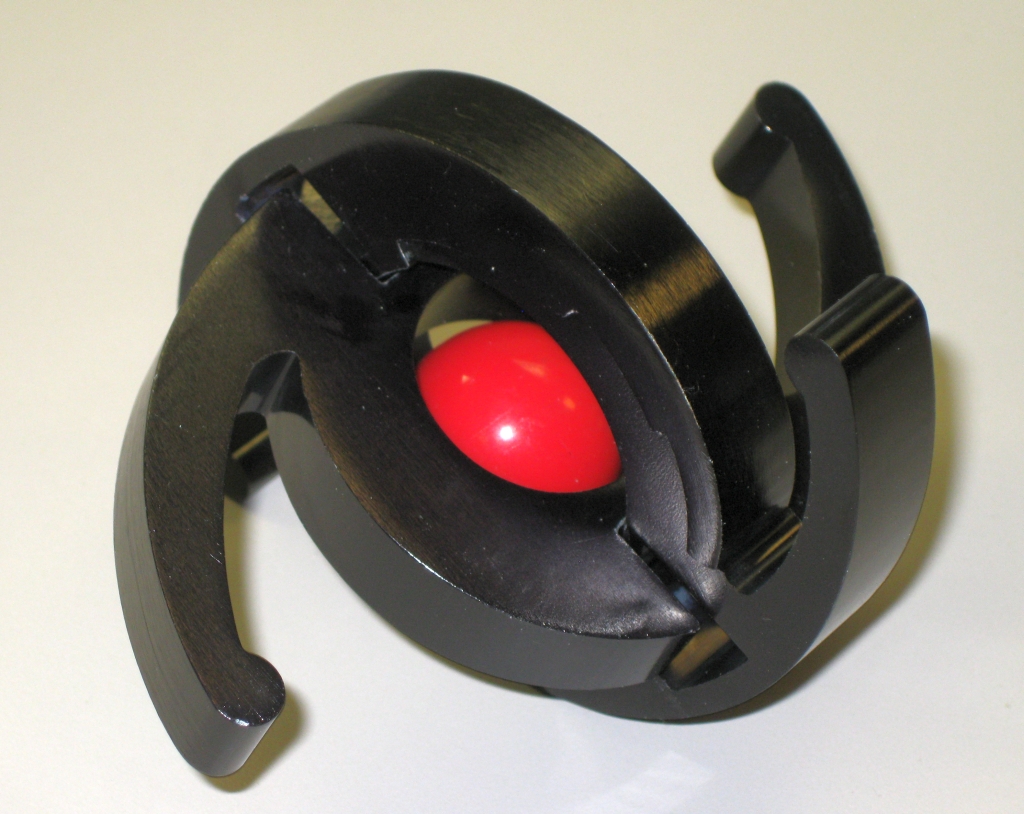
The goal is to separate the metal pieces of the puzzle and release the red ball in the centre. Sounds like a fairly simple task however on first inspection, the pieces seem to be pretty well locked together, and there doesn’t seem to be enough room to separate the pieces.

The puzzle looks great with the black anodised aluminium being well finished, and the red ball in the centre really standing out against the outer pieces. Measuring 4″ in diameter, it’s a good sized puzzle, and easy to manipulate the pieces. Given that it’s solid aluminium it has a good weight as well.

The four pieces of the puzzle

The four pieces of the puzzle

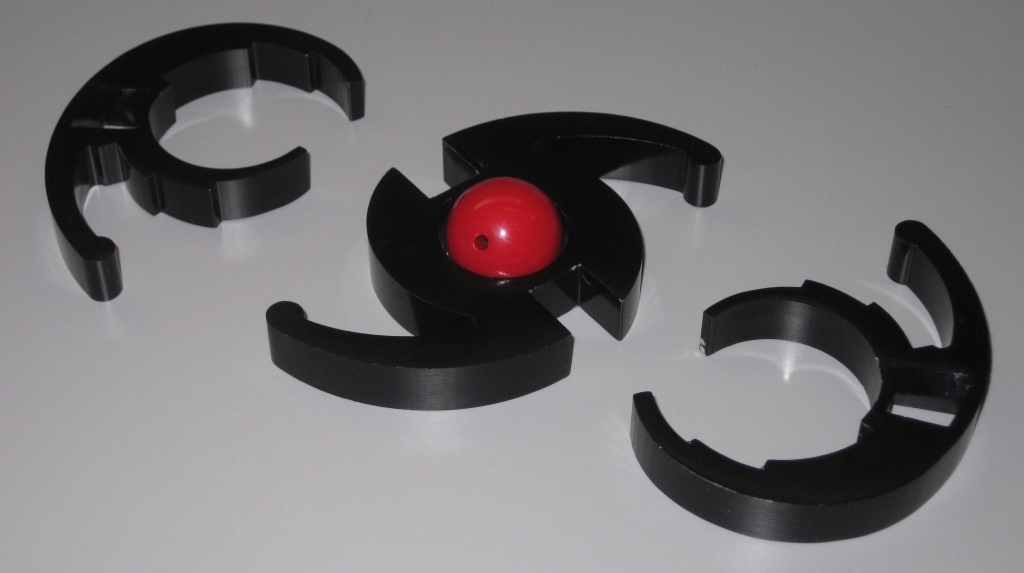
Much like the Yin & Yang puzzle I reviewed a long time ago, I think this is more of a good looking object, than a challenging puzzle. It can be a little tricky to get things into the correct position to allow them to separate, however there’s little challenge to solving the puzzle. Putting the pieces back together is also fairly simple although I found it slightly more tricky. It is possible to force the solution; however if you find yourself doing that then it’s time to think a little as there is no force required to solve this one, and the pieces will glide past each other if you’re on the right track. You shouldn’t need a solution, however if you do, you can download one here.

Overall, this is a simpler puzzle which would suit a new puzzler, or a younger puzzler to get them more interested in puzzling. That said, it will look good on the puzzle shelves given that great contrast, and the striking black spiral arms.

Revomaze Clear Sleeve – Followup

This entry is part 7 of 11 in the series Revomaze

A little while back I wrote about the process of turning a clear sleeve for the Revomaze puzzles, however I hadn’t really completed the project at that time. I didn’t have springs, and I was still trying to figure out how to put a spring in there so that I could complete the project and have a fully working sleeve. I’ve now finished the process, found springs, a way to put them in the sleeve, and have a set of fully working sleeves. Read on to find out the end of the story…
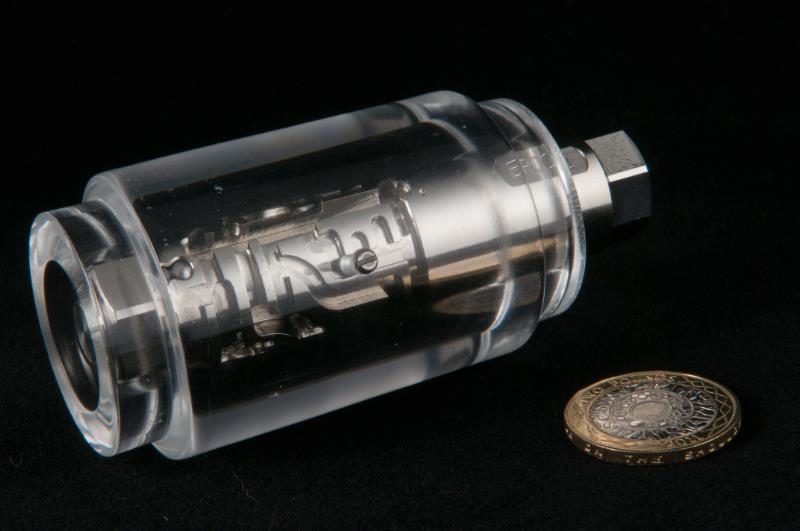
The Finished Sleeve - Photo courtesy of Allard

The Finished Sleeve – Photo courtesy of Allard

Thanks to Allard for the excellent image above. For more of his thoughts and a clear perspective, go have a look at his blog.

Before going off and making many more of the sleeves, I had to make sure that it was possible to make it into a working puzzle. That meant I had to solve the issue of the spring. From the Revomaze website, there is a pin and spring kit listed in case you managed to lose the set from your puzzle. Sadly they were showing out of stock and to be fair, it was a fairly expensive route to take, given that I only needed the spring. I decided to contact Chris Pitt, to see if he could help, or at least help out with dimensions of the spring and also how deep the spring hole is drilled into the sleeve. Sadly I never did receive a response back from Chris, so I had to look at alternate avenues.

Fortunately, a good friend had a spare spring or two and offered to measure it for me so that I could try to find a replacement. He even went so far as to measure the length compressed, and of course managed to have the tiny thing launch itself from the calipers and get lost in the carpet.
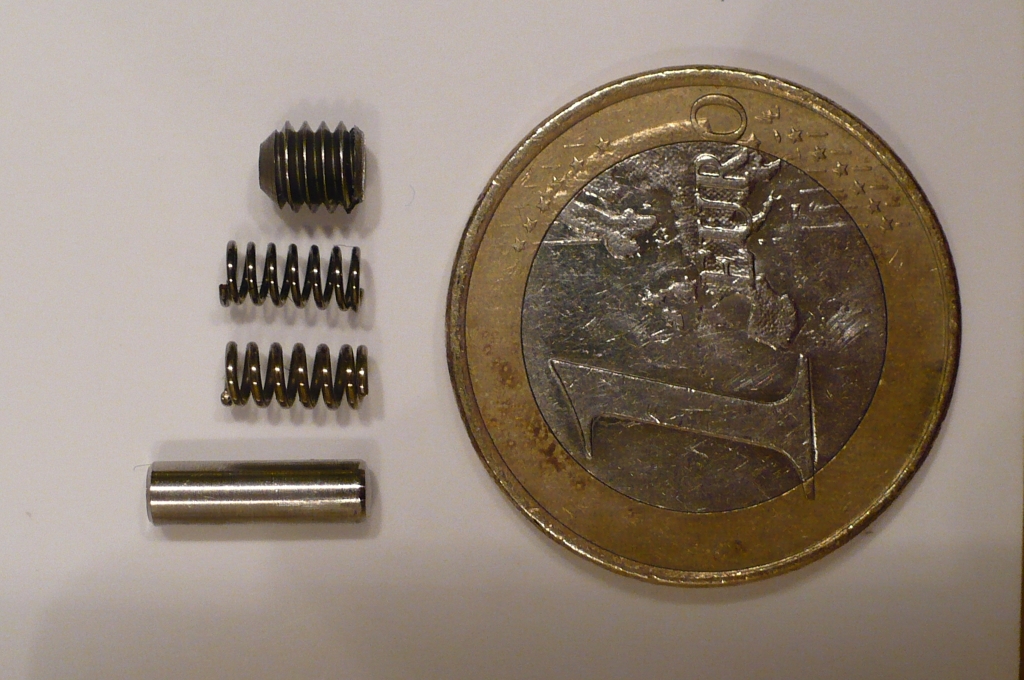
Top to bottom:  Threaded plug, my spring, official spring, official pin.

Top to bottom: Threaded plug, my spring, official spring, official pin.

It turns out that the spring measurements are: Outer diameter 2.90mm, Length 5.98mm and Compressed length 3.9mm. It really is tiny, and therein lies a problem. It’s a completely custom size. I spent a lot of time hunting online spring makers to get an exact match (and that’s without knowing the compression load) and just couldn’t find one. I did finally get something that’s very close and decided to settle on it, but even then it wasn’t cheap. To buy just one of these is $7 each! The price drops as you order in bulk, but still not a cheap part.

As you can see from the photo above, the spring I found is slightly thinner in terms of the wire thickness, but pretty close in the other dimensions. The 1 euro coin should give you a feel for just how small these are.

A week later the spring arrived, and I was a step closer to a working maze. I still had the issue to work out the drill depth for the spring/pin hole. While I had been waiting there was some talk on the Revomaze forums about how to do this, and Thayneq suggested having the pin/spring being removable. Well I went off and experimented with a tap to be able to thread the outer sleeve, and put a screw plug in there. Turns out that a 6-32 tap is too small for the pin, and a 8-32 is too large. In the end though this worked to my advantage. The pin itself is 2.90mm wide, so I was able to drill a hole all the way through one side of the sleeve for the pin, then drill 3.7mm using the larger drill bit to take an 8-32 thread and plug.

This actually solves three problems. Obviously the pin is now removable, so if anything goes wrong when you’re solving a maze, just remove the pin. Secondly, I’ve not had to drill all the way through the sleeve from the other side and then plug the hole. This is the way the official sleeves are made, and the plugged hole is then covered with the Revomaze sticker. As you know I’m not affiliated with Revomaze in any way, and don’t have stickers, so the ‘plug’ was just going to be an eyesore. I’m also pretty sure that I don’t have a long enough drill bit to get all the way through either, so that was a nice bonus. Finally, the screw plug allows the tension of the spring to be adjusted so that the movement in the maze ‘feels right’.

Note: The Image below is deliberately dark to ensure that no solution details for the maze are given away.
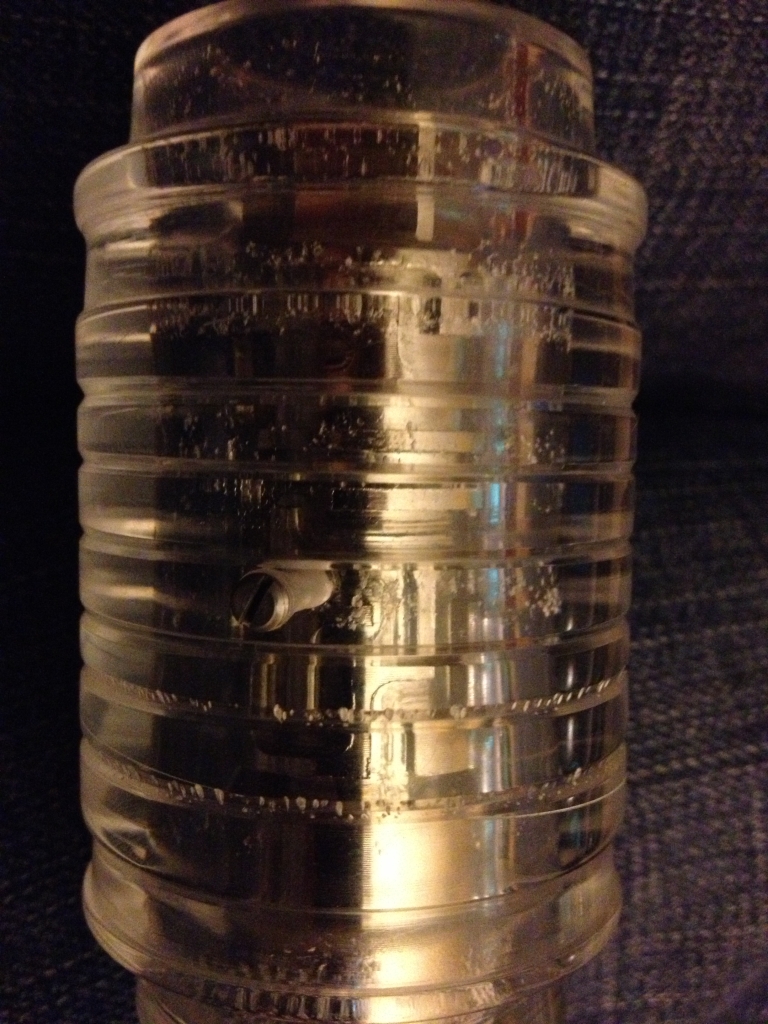
The plug covering the spring without giving anything away of the maze solution.

The plug covering the spring without giving anything away of the maze solution.

With all the pieces in place, I had to take the plunge and try it on one of my test sleeves. I put the ridged sleeve I had in the vice, carefully drilled it, and then re-drilled for the plug. Taking the pin from my blue maze, popping that in the hole, followed by the spring and then the plug I was able to check the compression of the spring, and compare that to the depth the pin sat on the official sleeve. After some fine adjustment of the screw until I was happy, I took the pin back out; assembled the blue core and inserted it into the sleeve.

Having now sent a few of these out, my friend with the spare spring has tried both the official spring, and the one I found, and prefers mine because the spring compresses a little more meaning that the plug can be screwed in a little further. He’s also done some other testing, but I’ll come back to that later.

After a little jiggle the pin dropped into the hole, and I was able to turn the maze and reset it. That familiar click left me with a huge grin on my face, and of course this time I could see exactly what had happened. The question now was whether the maze was solvable!

Very cautiously, I started to navigate the maze. Of course I’m now holding the puzzle ‘upside down’ and looking at the pin rather than the sticker. Despite working with the ridged sleeve, and there being a fair bit of distortion along the length of the maze, the section under the pin is perfectly visible, and it’s easy to navigate. At the first trap, I fall off, and hear that familiar click. Somehow it seems even more satisfying being able to see the pin fall off! After a couple of tries, I make it through the maze, past the tricky section with ease, and the pin easily drops back into the core, and I can remove it from the sleeve. IT WORKS!

As with anything in science, doing it once isn’t good enough, it has to be repeatable, so after picking the pins up from the floor (Ed: You’d think with the number of these I’ve solved I’d not drop the pins by now) I re-assembled the core and put it back in again. Playing around I tried moving to various parts in the maze, and dropping into a reset and restarting; each time grinning because I was controlling the click. Having navigated to the end again, I tried to remove the pin, and found it didn’t want to come out. Puzzled I tried the usual tapping and jiggling, but it wasn’t dropping. Of course I could see the pin and couldn’t work out what was stopping it. No worry though I unscrewed the plug, and removed the pin that way …

… Then realised what an idiot I’d been. Rather than turning the puzzle ‘upside down’ so that the pin fell into the core, I’d been trying to get it to drop into the sleeve hole. Just shows how being able to see what you’re doing doesn’t always help!

So with the proof of concept working, I took a quick video to show the operation and sent that to a couple of close friends. Now I had to start making these as the requests were coming in pretty quickly!
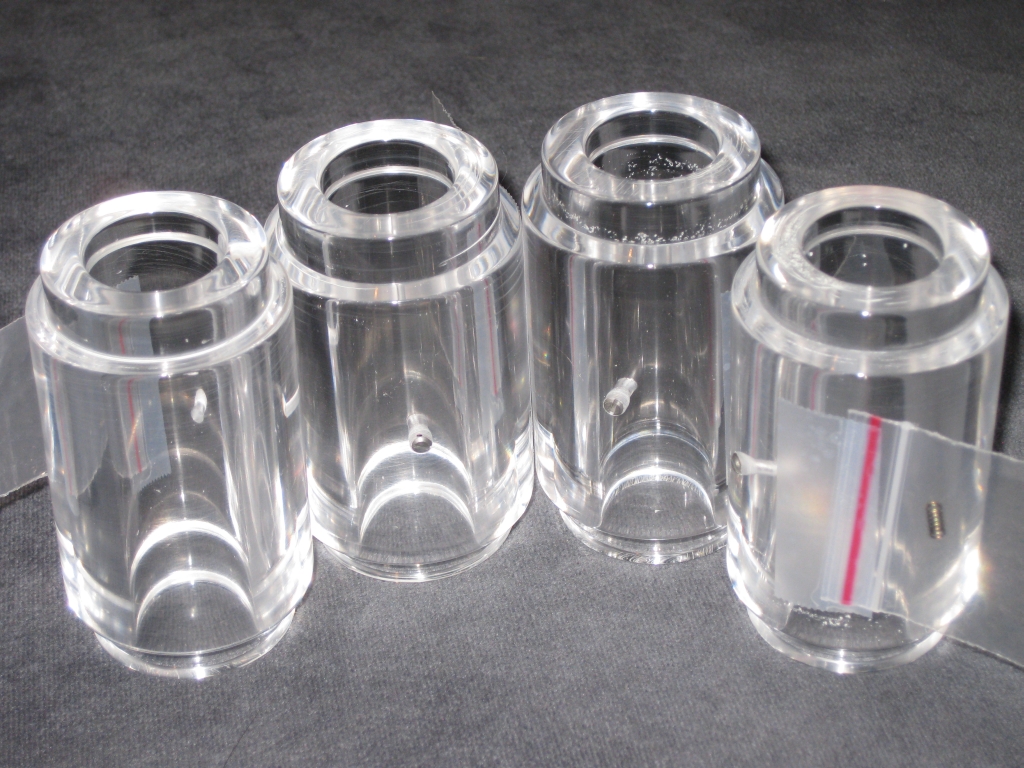
Some of the production sleeves, with a much clearer view

Some of the production sleeves, with a much clearer view

Something which had bothered be about the initial two sleeves I’d made was the ‘bubbles’ which are visible on the inside of the sleeve. This occurs due to the high temperature created by the friction when drilling out the core, but I wanted to try to reduce that and get as close to a clear, unobstructed sleeve as I could. With a little bit of work, and some liquid cooling for the drill bit I think you’ll agree I succeeded, and the sleeves are now much clearer. Just look at that shot at the top of this post from Allard. His images really show off how clear the sleeve is, and I have a good few more from him that I just can’t show as they give huge hints to the solution of the revomaze shown.

Using the saw as a staging area for production

Using the saw as a staging area for production

As you can see, production is now underway. Given that these are all hand turned, and finished, it still takes a good few hours per sleeve, but from the feedback I’ve had from the people who have one, they’re pretty happy, and that makes me pretty happy too.

One thing to point out is that the tolerances on my core are slightly larger than those from the official source. Nothing in the Revomaze design is standard sizes. The core is custom, the sleeve is custom, the spring is custom, the pin is custom, and as such you can’t buy tools which match the dimensions. As such I have had to make things as close as possible, but close is not exact. Having played with some of the mazes, Silver, Lime and Handmade as specific examples, there are elements in these mazes which do not work exactly as expected due to the larger gaps in the internal sleeve dimension. It is possible to solve these mazes, but some extra care is required, and some parts of the solution become trickier than with the official sleeve. I do know that Blue, Green, Bronze, Black, Orange, Gold, Red all work with no issues and really look quite stunning when displayed in these sleeves.

There is one further extension that I am looking at. I had a request for transparent colour matched sleeves for each maze. That requires custom casting of coloured acrylic, so for now it’s further away from reality. I do have paint based pens which are designed for working on acrylic and may add colour bands to the sleeves so you can see which maze is in a sleeve from a distance, but that’s still to come.

Hope you’ve enjoyed the look at the project, and keep an eye out for a time lapse video of the process coming soon…