Category Archives: Puzzle Reviews

Two Keys

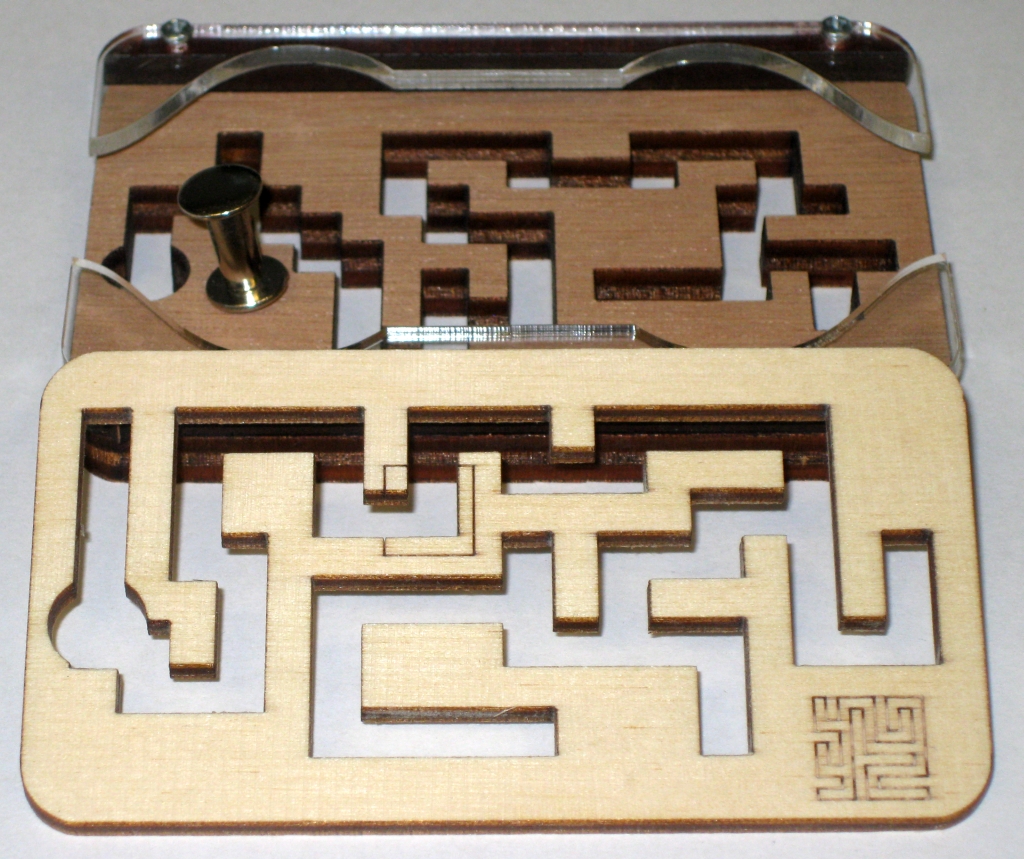
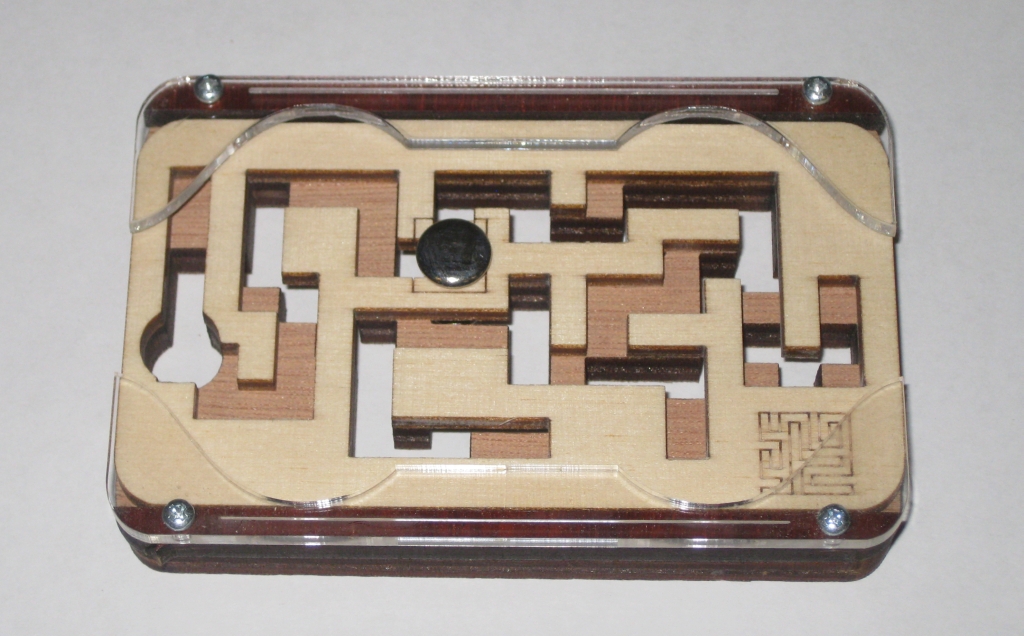
Two Keys is a laser cut dual layer maze designed by Jean Claude Constantine. Thanks to Puzzle Master for sending me a copy of this puzzle to review. This maze puzzle will have you guiding the Steel rivet through two mazes from the start square, to the exit hole.

Two Keys by Jean Claude Constantine

Two Keys by Jean Claude Constantine

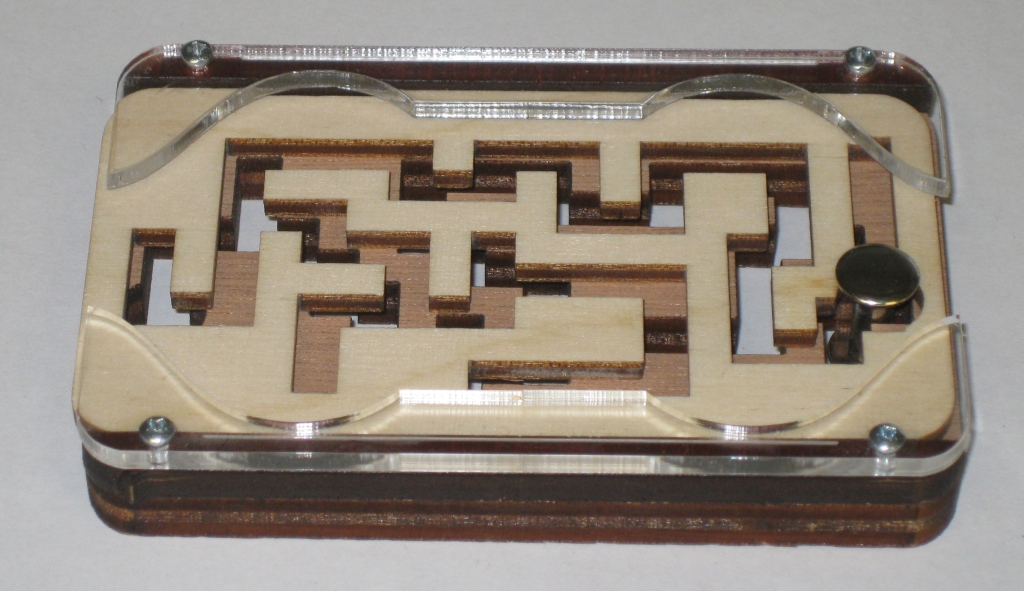
As you can see this is a plain but good looking puzzle which is accurately cut from Maple Ply and Walnut Ply, with a top frame of perspex. Overall, the puzzle measures just 4″ x 2.5″ x 0.5″ so this is almost a pocket sized puzzle. The perspex serves little purpose other than to hold the top Maple maze in place as you navigate the steel rivet through both mazes. The puzzle is very similar in concept to several other puzzles by Jean Claude Constantine such as the Laby Box which I have reviewed previously, and many of his lock style puzzles. Many of his puzzles are based on Gray Code and this is in a similar vein.

One of the dead ends

One of the dead ends

The Lower maze which is fixed interferes with the movement of the pin as you move the upper maze requiring you to backtrack several times to get to the exit. There are a number of dead ends in the maze, however most of these are fairly obvious so should not provide much of an extra challenge.

Two Keys Solved

Two Keys Solved

Puzzle Master ranks this as a Level 5 (Easy) puzzle, and I have to agree. This shouldn’t take more than a few minutes to solve, although it’s a good puzzle to give to new puzzlers since it’s fairly easy to solve, and you can see everything in the puzzle. With no hidden elements, most people will be able to solve this quickly before they lose interest and feel fairly good about doing so.

Two Keys Alternate Challenge

Two Keys Alternate Challenge

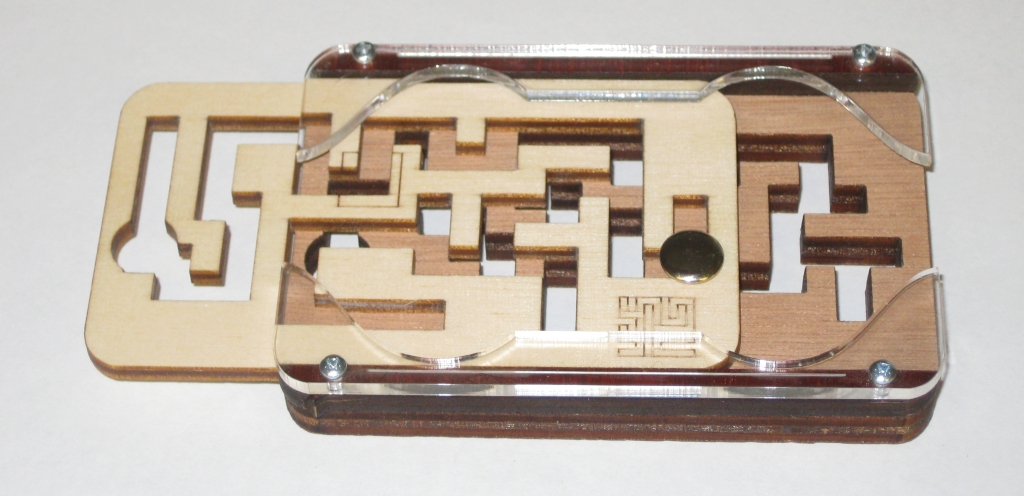
If you’re looking for an extra challenge, then try flipping the top maze section over once you’ve solved, it and re-solve with the maze in as seen above. This adds a slightly different challenge, although not any tougher than the original orientation.

This is a fun puzzle, and a good distraction to sit and idly fiddle with it, moving the pin back and forth through the maze. This is an affordable introduction to many of Jean Claude Constantine’s puzzles, and a good place to start if you’re looking for a simple challenge.

Blind Burr

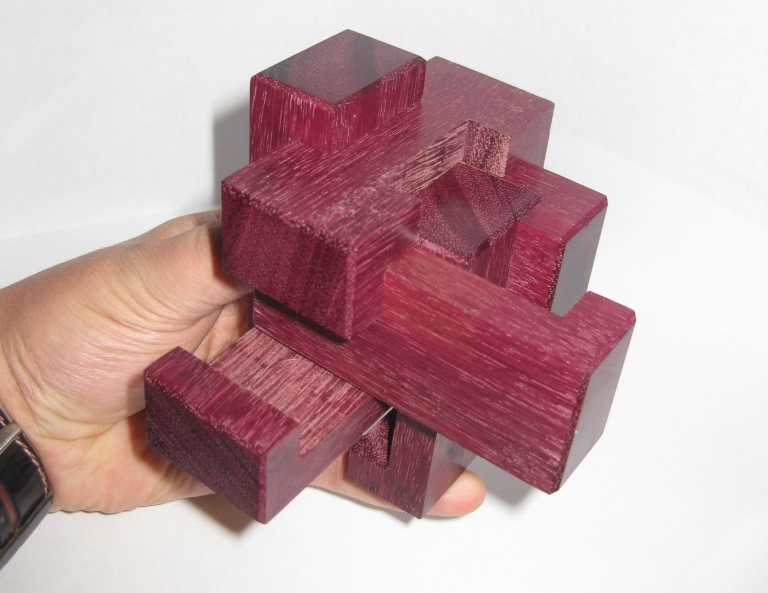
One of the Top 10 Vote Getters at this years IPP design competition was the Blind Burr, designed by Gregory Benedetti and made by Maurice Vigouroux. I had the great pleasure of being able to talk to Gregory about his puzzle designs and certainly enjoyed playing with his entry in the puzzle competition, so when I had the chance to pick one up on the day of the puzzle party, I didn’t hesitate.

Blind Burr by Gregory Benedetti

Blind Burr by Gregory Benedetti

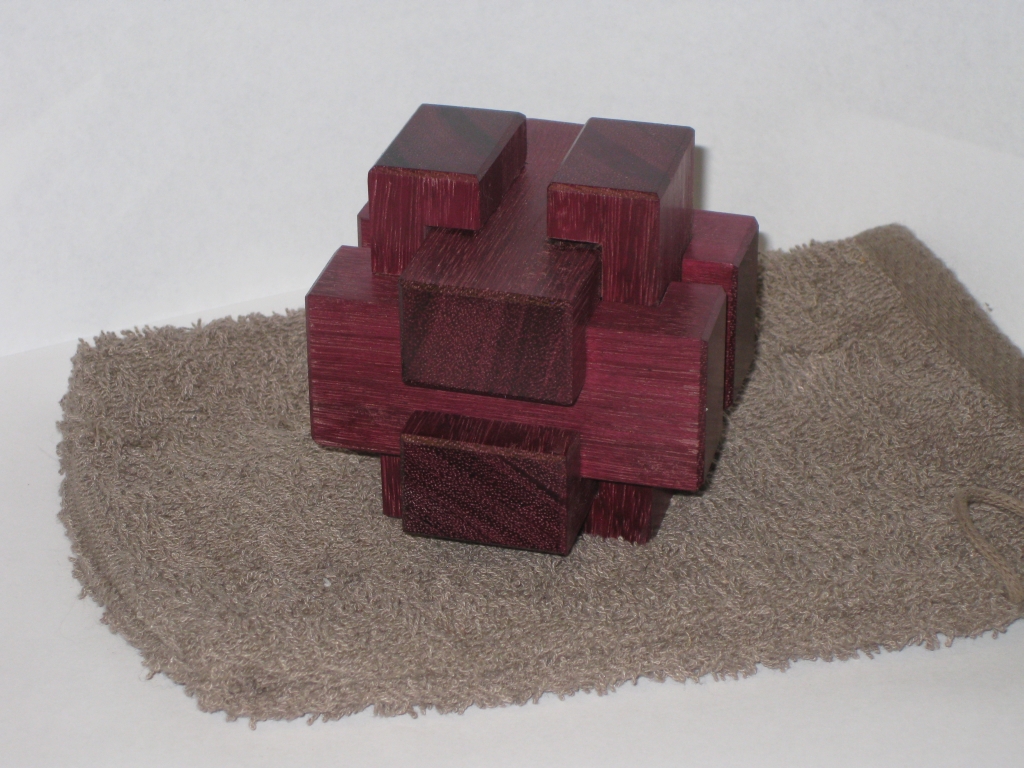
Made from some beautiful slabs of purple heart, the puzzle measures 3.25″ x 3.25″ x 3.25″. Each piece is cut from a solid chunk of purple heart, measuring a full inch thick, so the pieces are incredibly sturdy and finished to the high standard that is common for work from Maurice Vigouroux. Each of the pieces is polished to a high shine, and the ends of the pieces have been chamfered to really finish the puzzle nicely.

Limited edition number and Maurice's stamp

Limited edition number and Maurice’s stamp

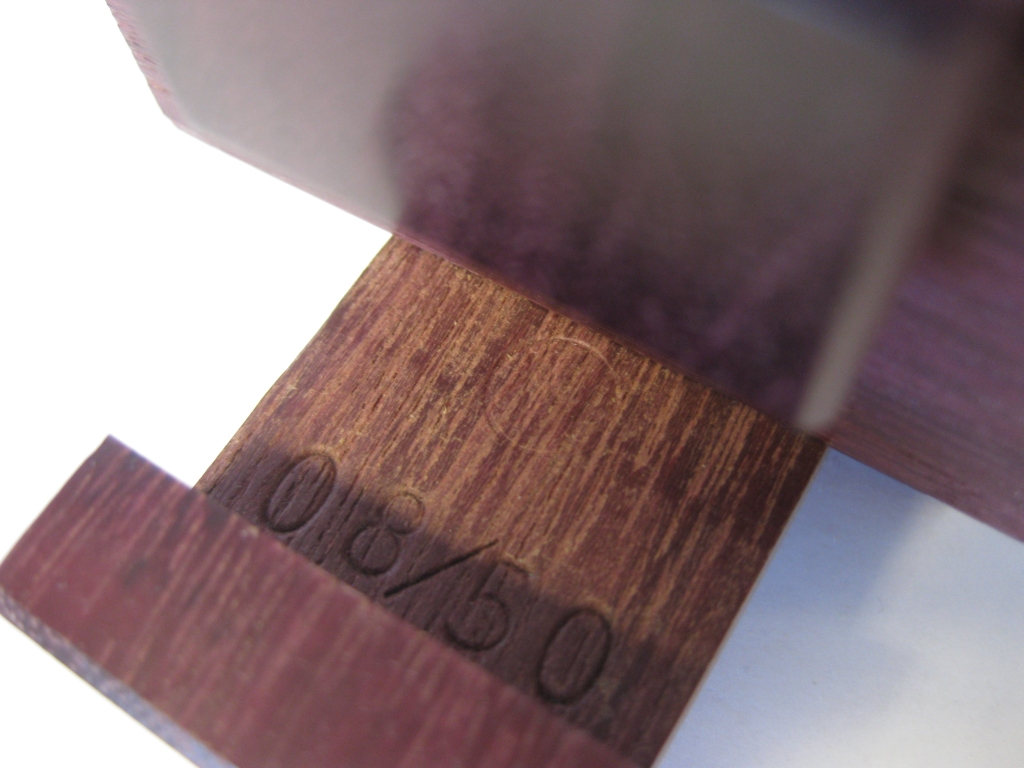
As you can see each puzzle was numbered in a limited edition of 50, and the number is stamped into the wood, along with Maurice’s signature. There was a very interesting discussion on one of the Puzzle Forum’s about what makes a puzzle Limited Edition, which showed that there are many definitions to many different people. It turns out that in this case it’s limited because Maurice agreed to make 50, and no more! The reason why is fairly obvious when you start to play with the puzzle.

I’ve probably mentioned before that I’m not a huge Burr puzzle fan. There’s many other puzzle types out there that I get far more excited about than Burrs. So why did I make sure to get a copy of this one. And why’s it called a Blind Burr …. in my experience pretty much all Burr’s are blind. Well I’m not sure I can answer the second question, but I will answer the first. And the answer is pretty simple, this is no ordinary burr!

Edit: I can’t answer why it’s called the Blind Burr, but Greg did. Check out the comments for the answer!

Lots of movement but little progress

Lots of movement but little progress

Immediately on picking up the puzzle, you find that there are three pieces which are pretty loose, and move a fair distance. Looking at the inner part of the piece which slides out you’ll see it’s completely smooth, so whatever burrs exist, they are only in the top 1/3 of the piece which remains hidden in the centre of the puzzle. Of course all of this movement doesn’t really help much, as there is no movement at all in the remaining three pieces. Strange and definitely not an average burr.

Despite the piece on the right in the image above leaving enough space for the top piece to slide over it, that piece won’t budge. Something in there is keeping it in place and there’s no real hint of movement. Time to go back to the drawing board and figure out what else can move in the puzzle.

After some feeling around, you start to see that there may be another way to make progress, and sure enough that yields a little more movement in one of the pieces, and after that the rest of the puzzle will come apart using coordinate motion. It’s a really beautiful movement if not particularly difficult, and well worth the time to understand.

The pieces of the Blind burr (some details hidden)

The pieces of the Blind burr (some details hidden)

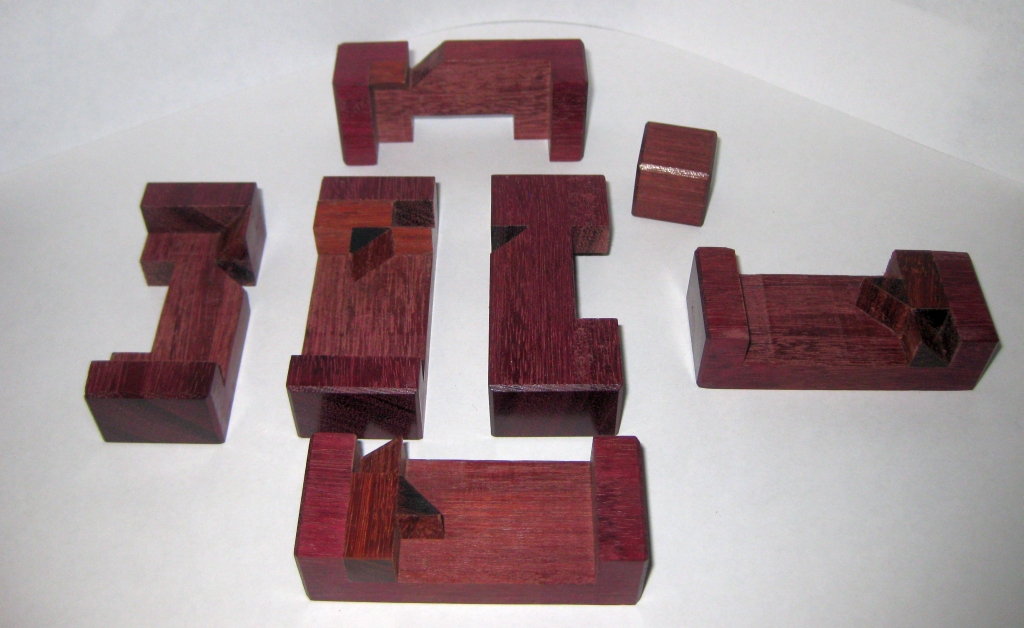
I don’t want to give too much away, as the discovery of the puzzle mechanism is a joy but you can see the seven pieces which make up the puzzle, with some familiar 45 degree blocks in there which are used in the coordinate motion. That cube was a bit of a surprise!

Putting the puzzle back together is marginally trickier than taking it apart as some dexterity is required during the assembly, and despite taking it apart and putting it back together a number of times now, I still struggle a little to get the first three pieces aligned correctly.

All in all it’s a great design, and rather deserving of its Top 10 vote. All of these are currently sold, but if you see one come up for sale, grab it. It really is a fun puzzle, and even for a non-Burr fan like me, you’ll enjoy it.

Washington Monument – IPP32 Exchange

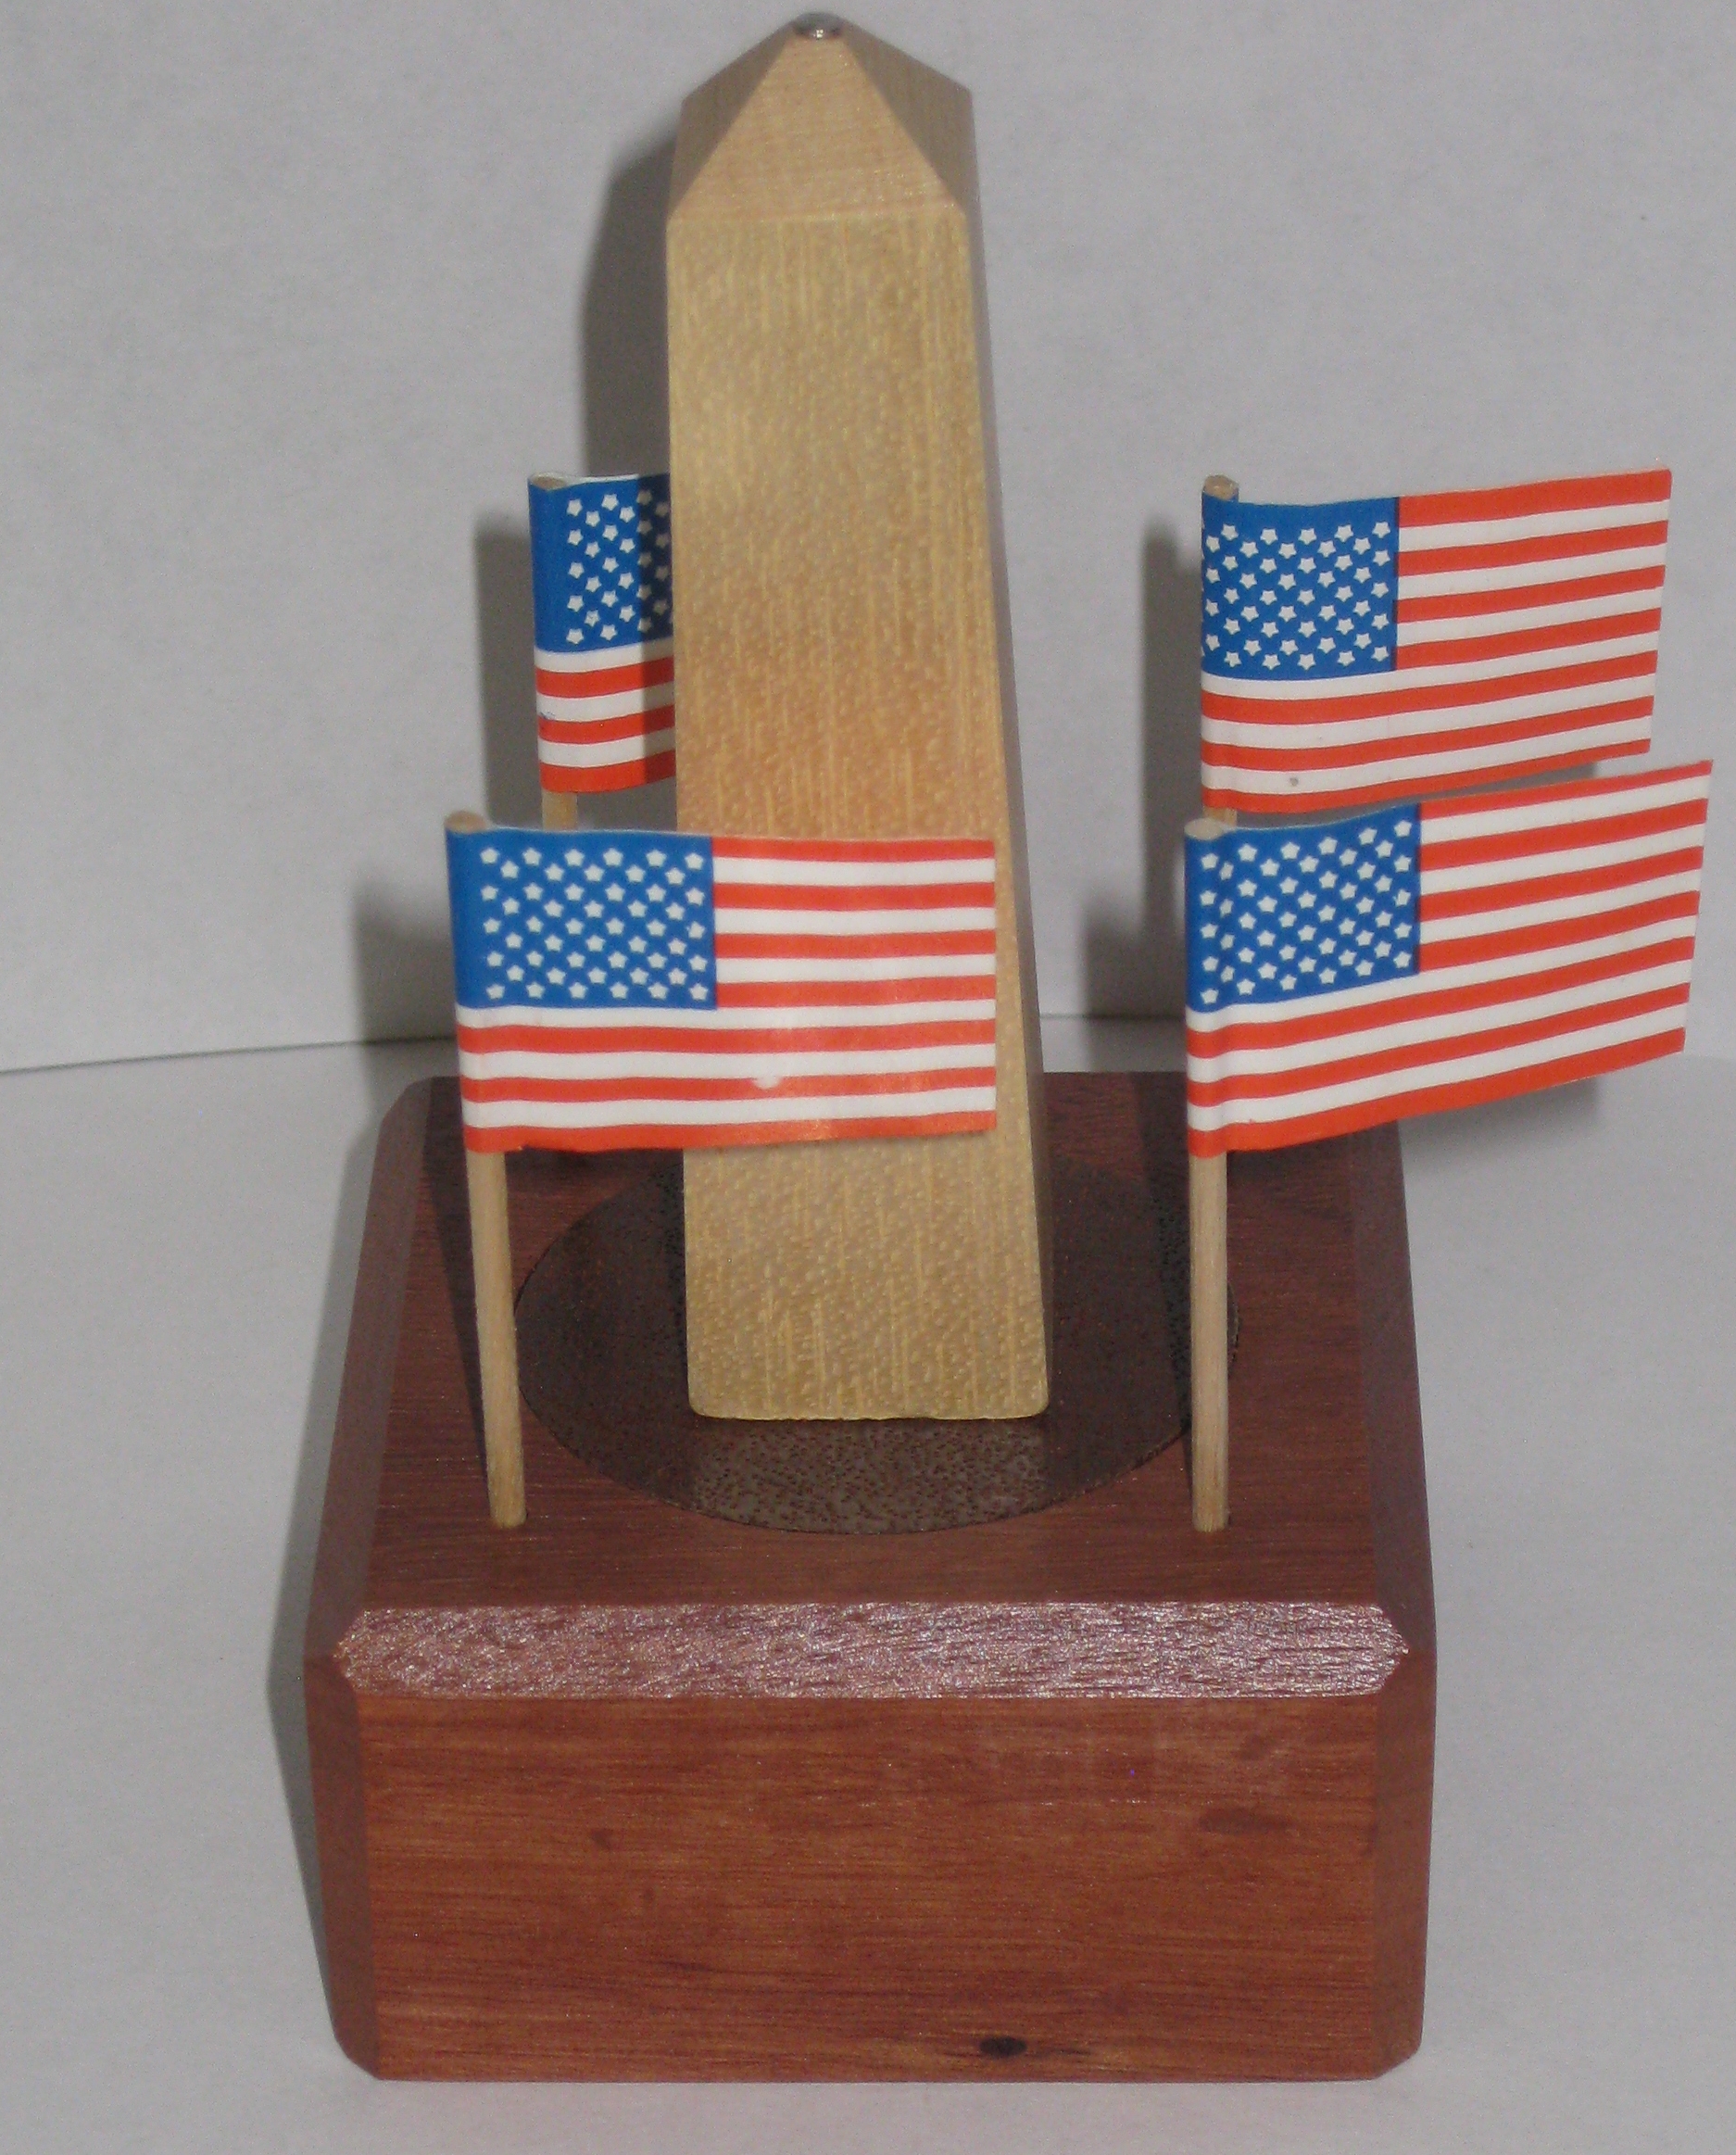
One of the puzzles I really liked the look of while taking part in the IPP32 Puzzle Exchange was Mr Puzzle’s Washington Monument. Brian’s description of the puzzle when he presented it, plus the really high quality and great look of the puzzle meant this was one that I went looking for on the day of the Puzzle Party, and was lucky enough to get one (amongst a number of other puzzles from Brian’s table that day!)

The Washington Monument by Mr Puzzle

The Washington Monument by Mr Puzzle

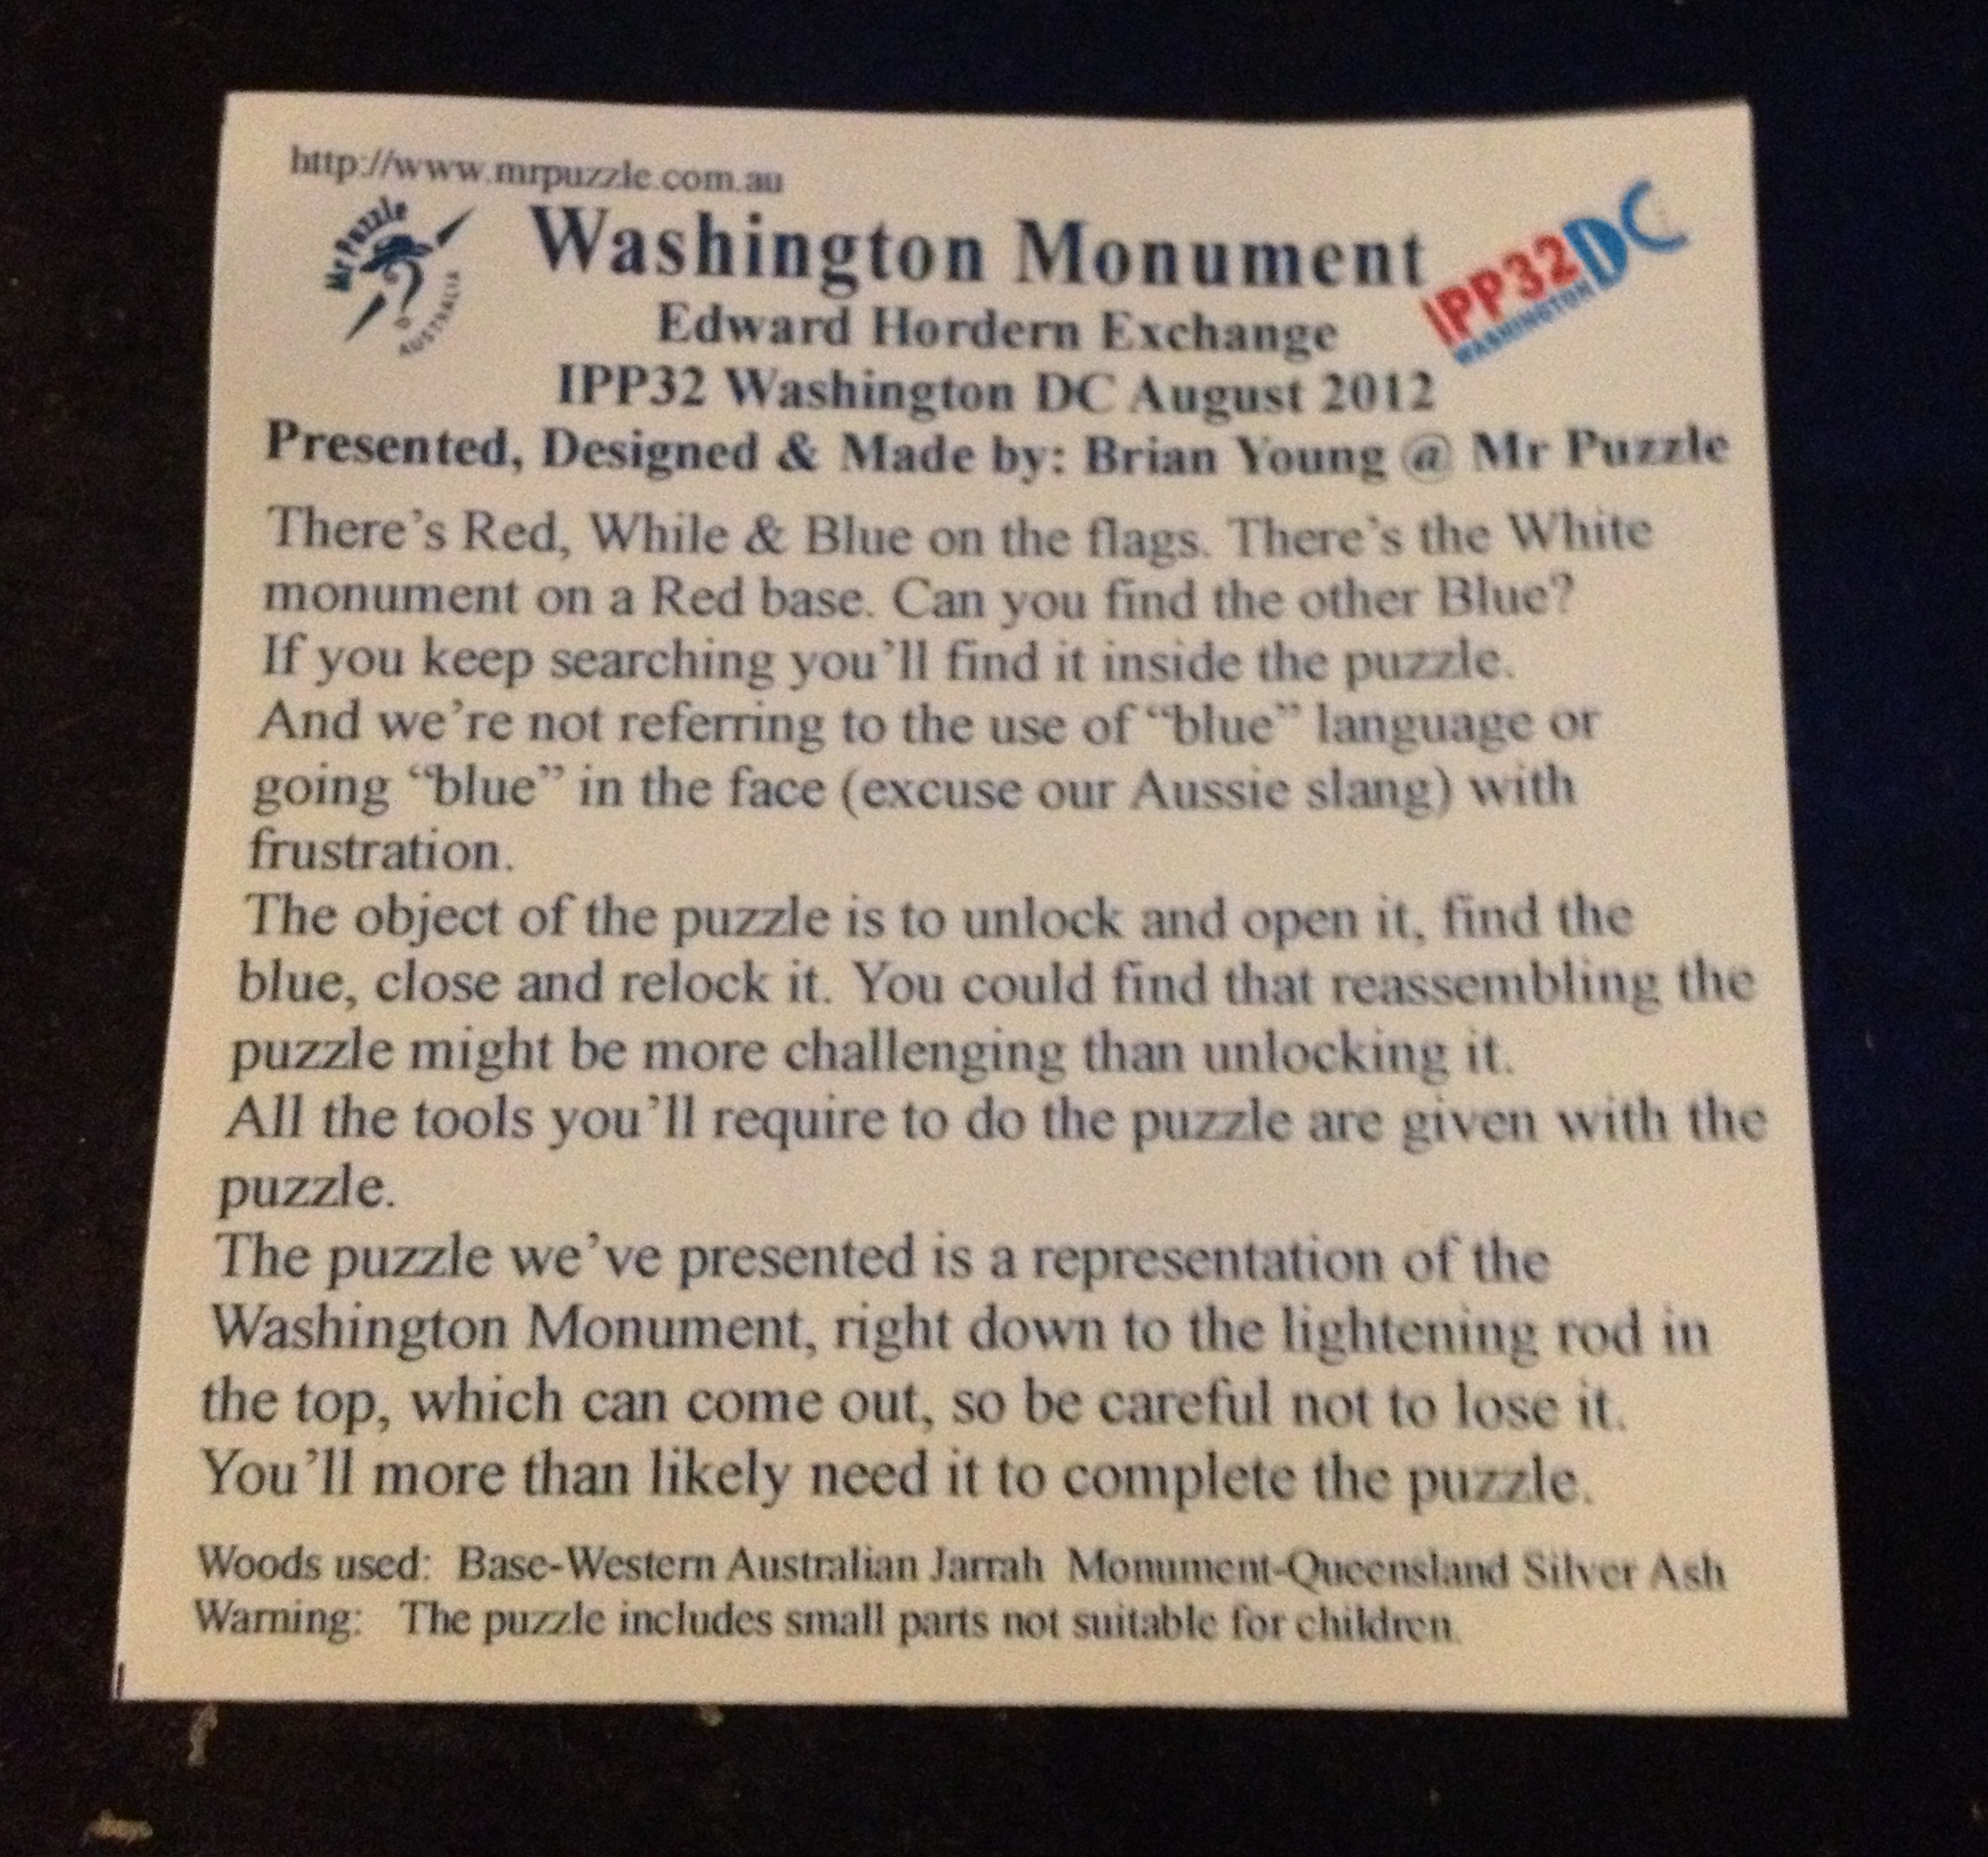
It’s a good looking puzzle which sits at 5″ tall and the base is 2.5″ x 2.5″ which makes for a good sized puzzle. The puzzle is a very close replica of the Washington monument, right down to the lightning rod in the top of the tower, and the flags surrounding the base. Made from Queensland Silver Ash for the monument and a Western Australian Jarrah base there’s a good contrast between the woods, and it makes for a striking puzzle. Brian has also used this in the description of the puzzle which reads:

Washington Monument description card

Washington Monument description card

“There’s Red, While & Blue on the flags. There’s the White monument on a Red base. Can you find the other Blue?
If you keep searching you’ll find it inside the puzzle.
And we’re not referring to the use of “blue” language or going “blue” in the face (excuse our Aussie slang) with frustration.
The object of the puzzle is to unlock and open it, find the blue, close and relock it. You’ll have solved the puzzle when you can complete these two stages.
All the tools you’ll require to do the puzzle are given with the puzzle.
The puzzle we’ve presented is a representation of the Washington Monument, right down to the lightening rod in the top, which can come out, so be careful not to lose it. You’ll more than likely need it to complete the puzzle.”

The monument spins freely 360 degrees on its base and you can hear a number of things moving inside the puzzle. Removing the flags, and looking into the drilled holes, you can see some metal pegs as you turn the monument, so it gives you an idea of what’s going on in there, but not how you’d solve it. In order to have solved it correctly, there’s two extra pieces of information that Brian gave you when the puzzle was exchanged (and now appear on his website):

“First stage:
Lock all gravity pins inside the round base of the obelisk so they do not move.
This will allow you to remove the obelisk from the base.
If you open the puzzle by chance then the gravity pins will still move freely; this is not the intended solution. The first stage is not completed until the gravity pins are locked inside the round base.

Second stage:
Unlock the gravity pins so they flow freely again. This allows you to lock the obelisk back in the square base.
You could find that relocking the puzzle might be more challenging than unlocking it was.”

So when I first opened the puzzle, I’d not completed this first stage correctly. The pins were still lose, and I had ‘got lucky’ in terms of opening the puzzle. Being able to see the insides actually didn’t help that much to be able to understand what I should have done, however I’d already figured out that there was something hiding inside the monument that I hadn’t used so far, and clearly that was key. After another 10 minutes or so playing with the puzzle and applying some physics (no I didn’t blow on it or spin it!) I had found out how the puzzle should be solved, and was left with the challenge of locking the puzzle back up again.

The mechanism is very clever and makes for a fun puzzle. I’m not sure how many people will solve it ‘correctly’ first time, but it certainly is a great mechanism, and very well executed. The puzzle received the 3rd Prize for the themed puzzle at IPP32, and it’s deserving of that recognition, both for its iconic look and for being a genuinely good puzzle. I’d recommend getting a copy of this while there are still some available!

I’ll be reviewing the other puzzles I picked up from Brian soon, as well as many more of the IPP puzzles, so keep an eye out for those soon.

Brass Trasure Chest

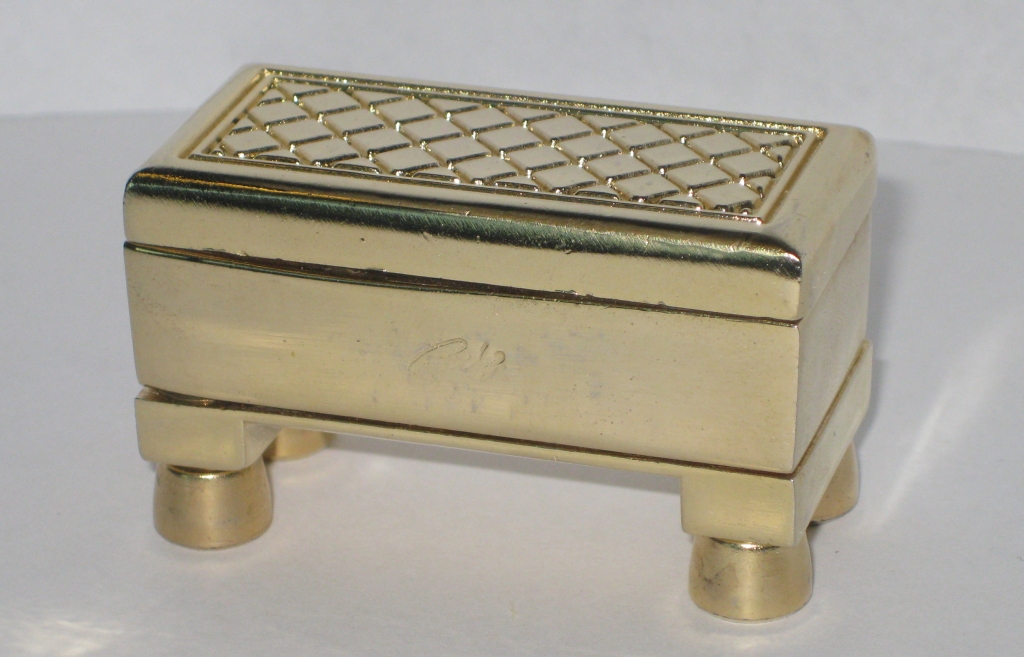
The Brass Treasure Chest is a Rocky Chiaro design, produced by Puzzle Master. As the name suggests, this is a small Brass puzzle which is made to look like a treasure chest, and like many of Rocky’s designs contains a devilish locking mechanism that will keep you puzzling for quite some time.

Brass Treasure Chest by Rocky Chiaro

Brass Treasure Chest by Rocky Chiaro

Having met Rocky Chiaro when I was at IPP, and being able to spend time talking to him at his puzzle table on the day of the Puzzle Party, it was great to see the passion he has for his puzzles, and to see just how happy he was to demonstrate his puzzles, and talk about them in general. Getting insight into why he made a puzzle the way he did, or having him show me a much better way to solve a couple of his bolt puzzles after I bungled my way through the solutions myself was superb. Currently the only one of Rocky’s puzzle design’s I own is the Brass Treasure Chest, and having played with a number of his puzzles now, I will have to remedy that!

The Puzzle itself is quite small, measuring 2 1/8″ x 1″ x 1 1/4″, and has a good weight to it given that it’s made from a big lump of brass. The front of the puzzle has Rocky’s signature scribed into it, and if you’re familiar with trick opening boxes, that can’t just be coincidence, and will surely be useful when you try to solve it. The box is reasonably well made, although there are a few edges on my copy which don’t line up perfectly, and there’s a couple of small gaps in the seams between sections of the puzzle. You’re going to have to look closely to see it, and it doesn’t affect the puzzle at all, so it’s not something that should put you off. And no, it’s not going to help you to solve the puzzle either.

When you first start solving this puzzle, there’s a couple of things you’ll find fairly quickly as the first couple of steps are fairly easy to find and allow the top of the chest to rotate a small amount. After that, you hit a dead end, and that’s where the really tricky part starts. Moving the puzzle around (or shaking it) will let you hear that there’s a couple of loose parts in there rattling around, and figuring out how they move is key to opening the box fully. This is fairly typical of Rocky’s designs so will give you a good idea of whether you’re going to like his style of puzzle boxes.

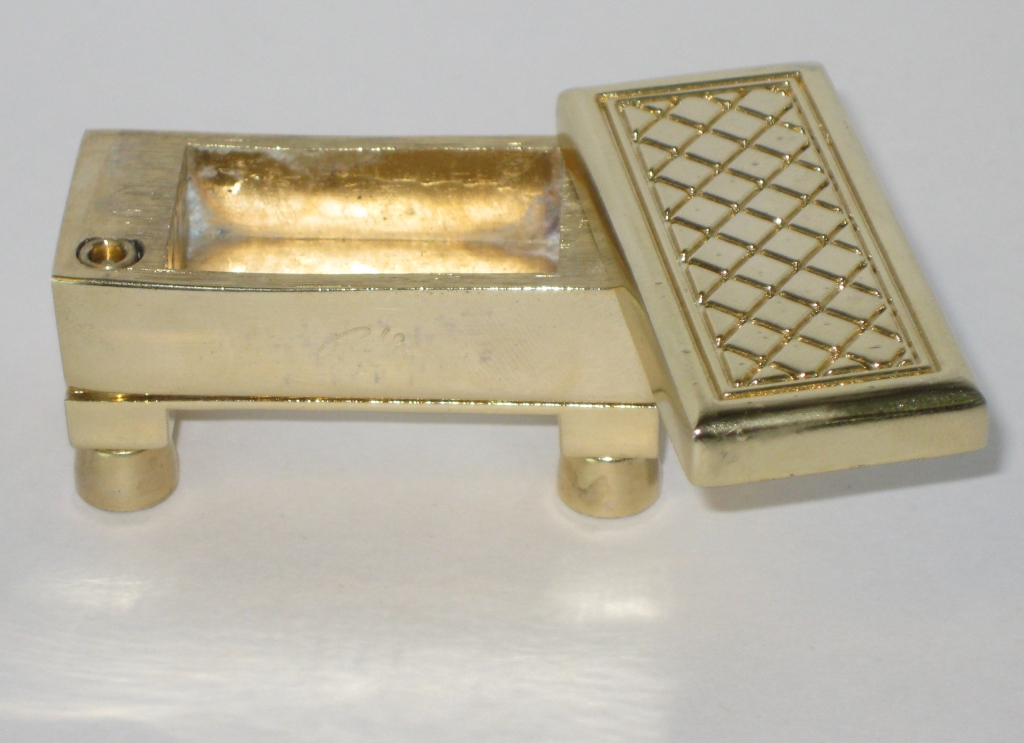
Brass Treasure Chest by Rocky Chiaro opened.

Brass Treasure Chest by Rocky Chiaro opened.

After a lot of what felt like blind stumbling I finally managed to get the box open. I really didn’t understand exactly what I’d done to solve the hidden mechanism, and it took quite a bit of fiddling around with the lid open to understand what I did to allow the lid to swing open freely. It’s a challenging little box, but once you understand the mechanism, it can be opened quickly and repeatedly. The first time took me around 45 minutes over a couple of nights of playing and thinking in-between. No solution is provided with the puzzle, but if you need one, you can find it here.

There’s a small space inside as you can see from the picture which could be used to store a very small item. That said, I’m not sure if anyone would actually store anything inside their puzzle vessels. (I know I don’t)

As an introduction to Rocky’s puzzles the Brass Treasure chest is a very affordable first puzzle, and although the fit and finish isn’t as good as the puzzles that Rocky hand makes, it is a great puzzle for the price. As I mentioned, the mechanism is a classic design so it will give you a good idea of whether you’d enjoy his style of puzzle, before spending a lot more money on a handmade original. Having been fortunate enough to see all of Rocky’s puzzles in person, I can’t praise his work highly enough. Anyone who still makes all his puzzle by hand in brass, with no CNC or computer aids and is able to turn out such high quality puzzles is truly a master craftsman.

Tetraxis at IPP 32

During the Design competition at this year’s IPP I was able to play around with some of Jane and John Kostick’s new designs. In total there were three new designs from Jane this year, and despite not winning any awards, they are all great to play with, and much like the Tetraxis I wrote about yesterday, have a quality that makes you want to take them apart and put them back together. A lot.

This year there were many more puzzling elements to the offerings so rather than just making the complete structure, you could spend a lot of time trying to make the other structures mentioned. First up is the 3 Layer Tetraxis array.
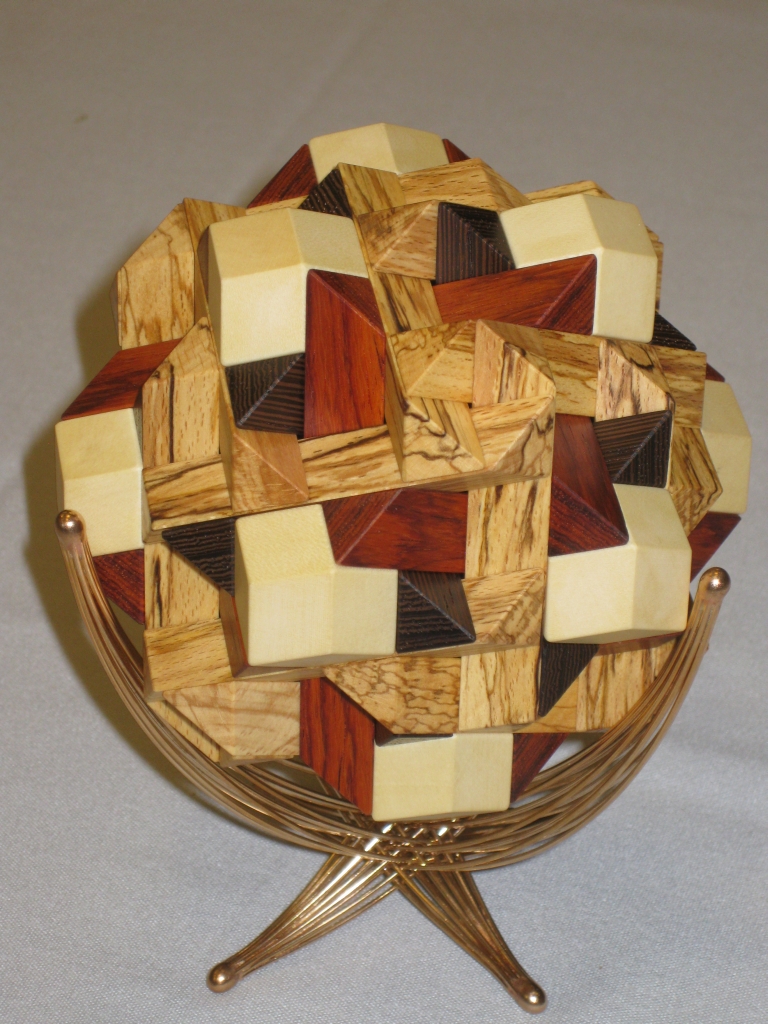
Kostick's 3 Layer Tetraxis array on a bronze star

Kostick’s 3 Layer Tetraxis array on a bronze star

3 layer Tetraxis array

This is the largest of the three structures, measuring 4.5″ when fully assembled. (Thanks Allard for the correct size) Made from a number of exotic woods including Wenge, Maple, and at a guess Bubinga and Spalted Apple, the puzzle looks stunning. Jane’s top quality finish on the pieces is clear and the fit is excellent. As with the Tetraxis array I wrote about yesterday the pieces are embedded with magnets which hold the structure together, and help lead you to the solution.

I had a lot of fun playing with this puzzle. It has the initial appearance that it’s much harder than it looks which may have put some people off, but it’s so much fun to play with that you’re really missing out if you don’t.

There were seven challenges with the 61 sticks and blocks. None were overly difficult, however each creates a stunning structure which would look great in any display. Also it’s worth noting that all of the first three solutions can be made at the same time.

The challenges were to use the set of 61 sticks and blocks to put together seven compositions that symmetrically surround a center:

1. Using one block and the 12 longest sticks
2. Using the 12 blocks and the 12 mid-length sticks
3. Using the 24 shortest sticks
4. Combine 1 & 2
5. Combine 1 & 3
6. Combine 2 & 3
7. Combine 1, 2 & 3

Below are a few images showing some possible combinations, but I’m not going to show all the solutions, you can work them out for yourself!
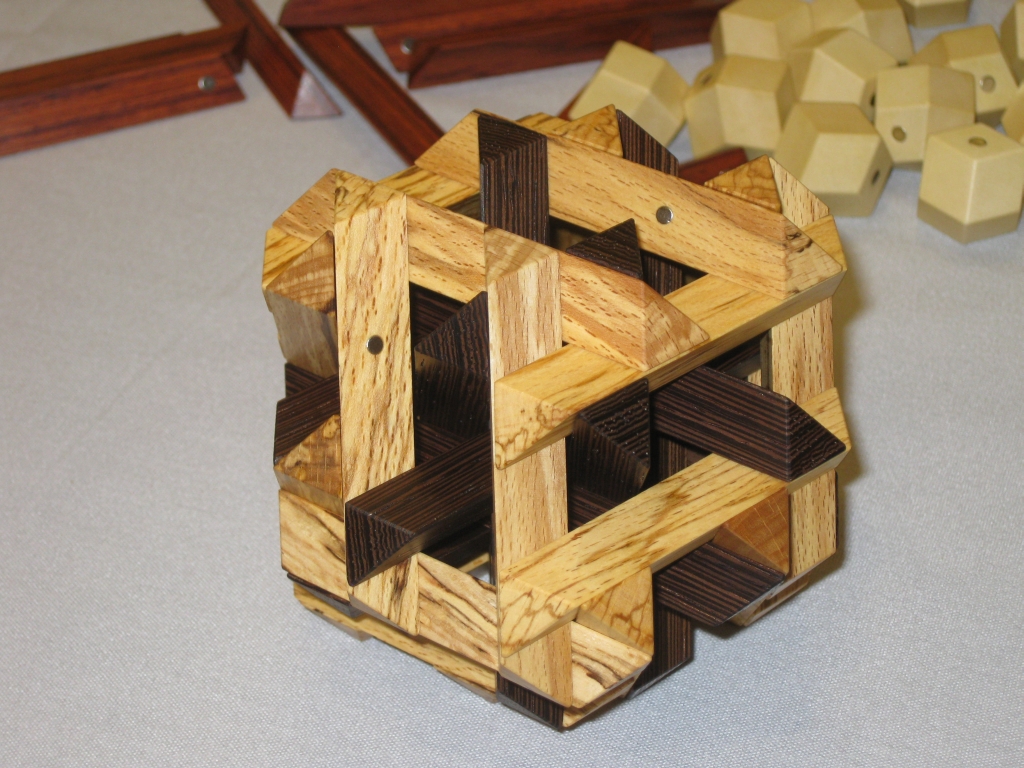
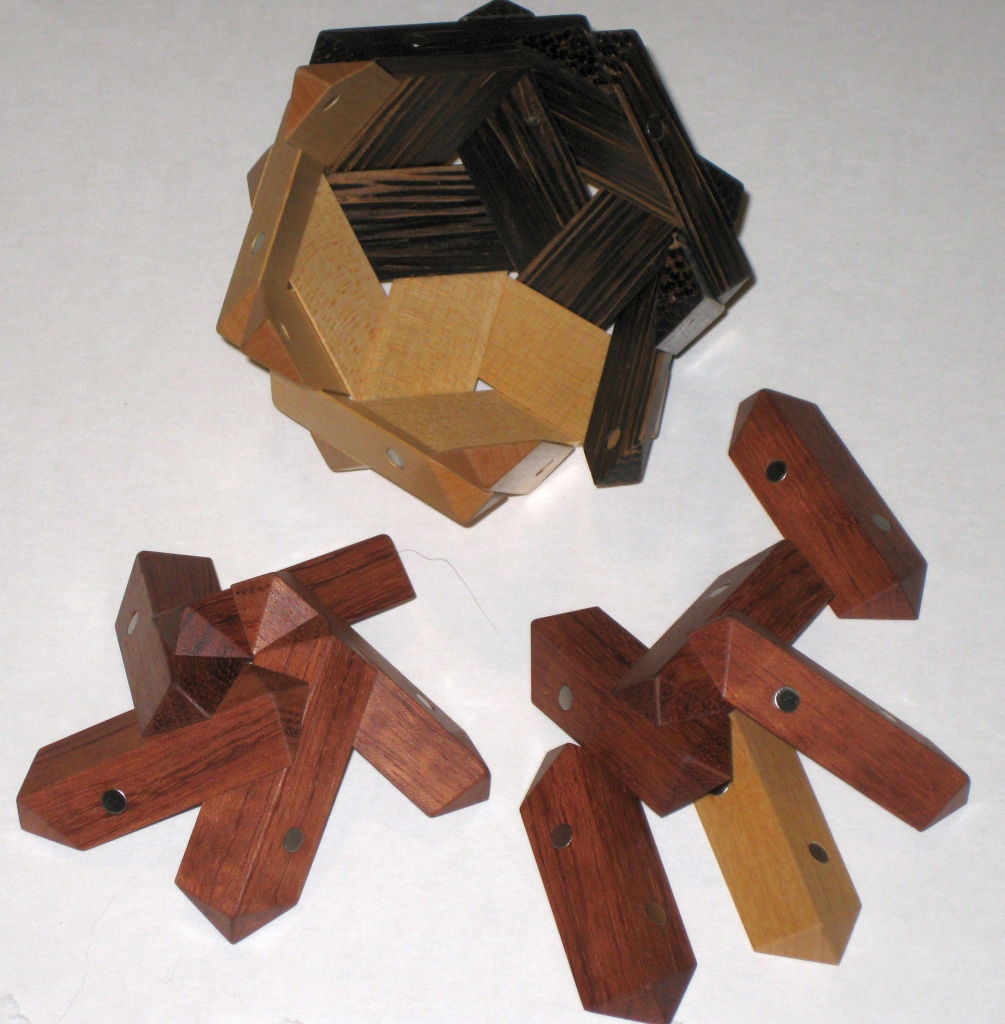
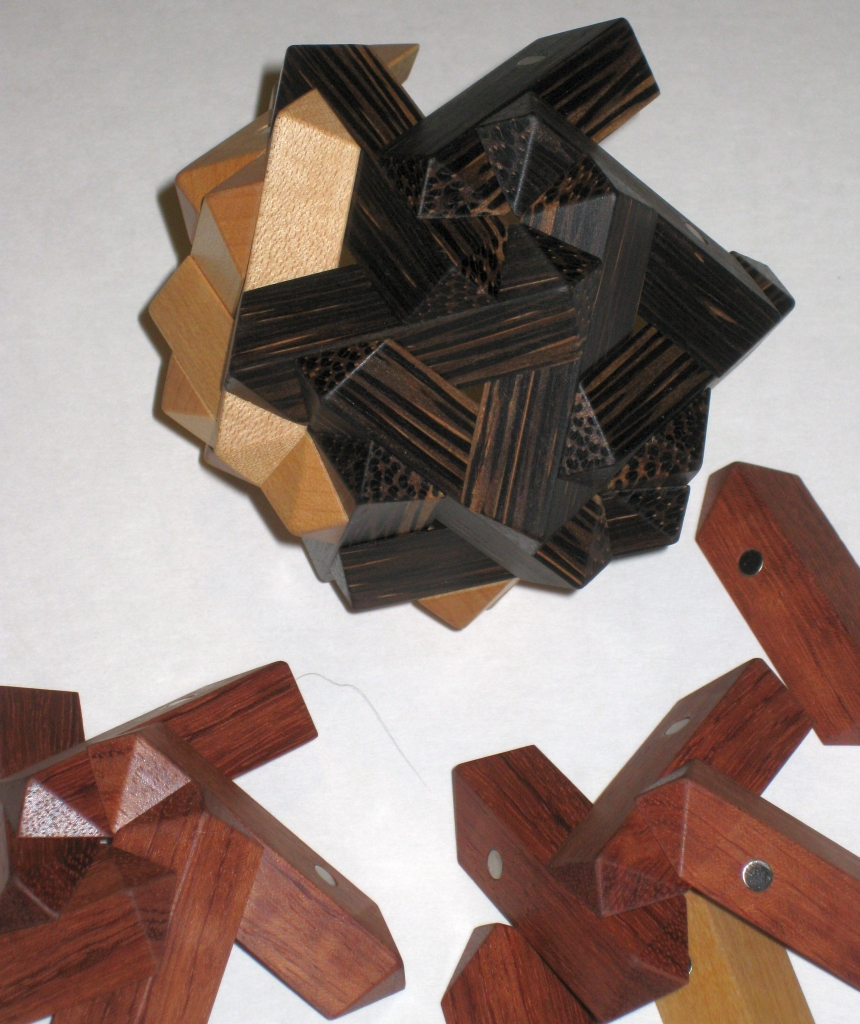
Tetraxis, outer later removed.

Tetraxis, outer later removed.

The outer ‘layer’ removed showing the inner structure.
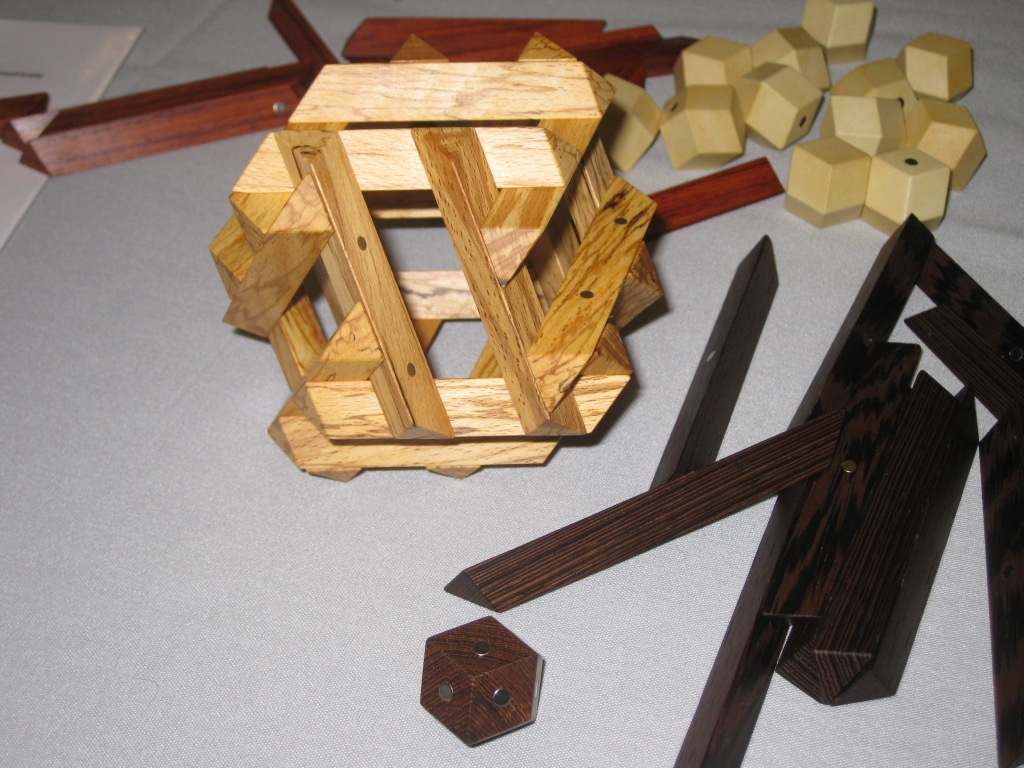
Tetraxis, inner cage

Tetraxis, inner cage

The Wenge ‘core’ disassembled leaving the inner cage. As you can see the magnets and the lattice hold the structure together without any support.
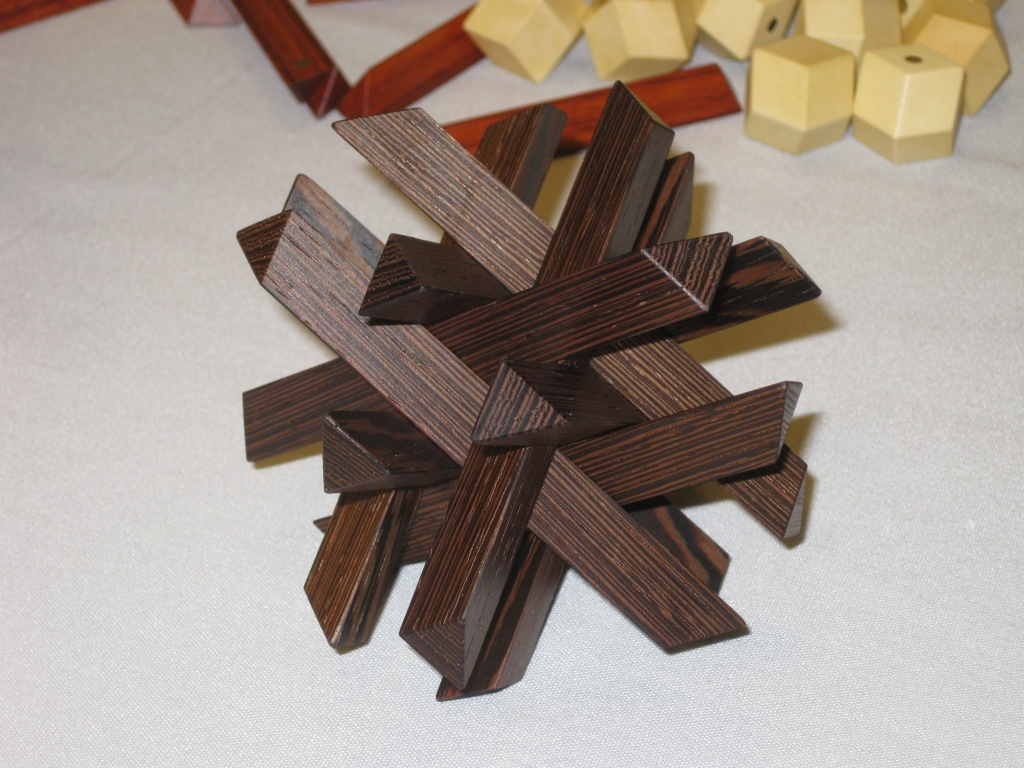
Tetraxis core

Tetraxis core

The Inner symmetric core. I love this structure.
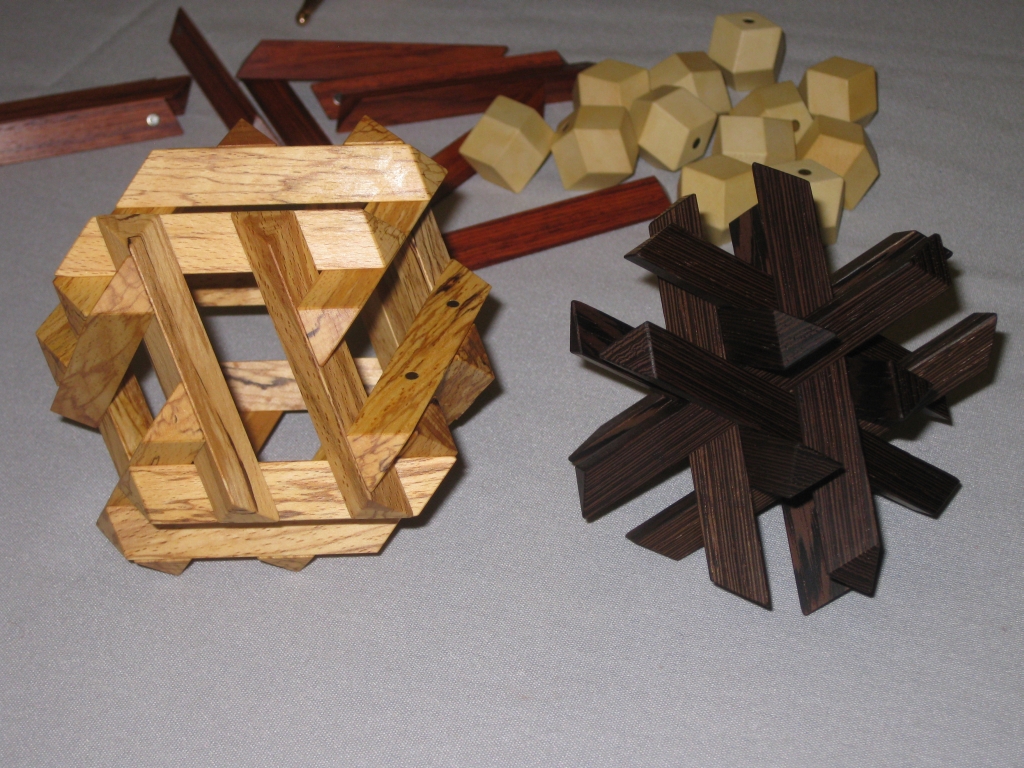
Tetraxis

Tetraxis

Both parts of the inner core assembled separately. If you look closely, you can see the three sticks in each plane.
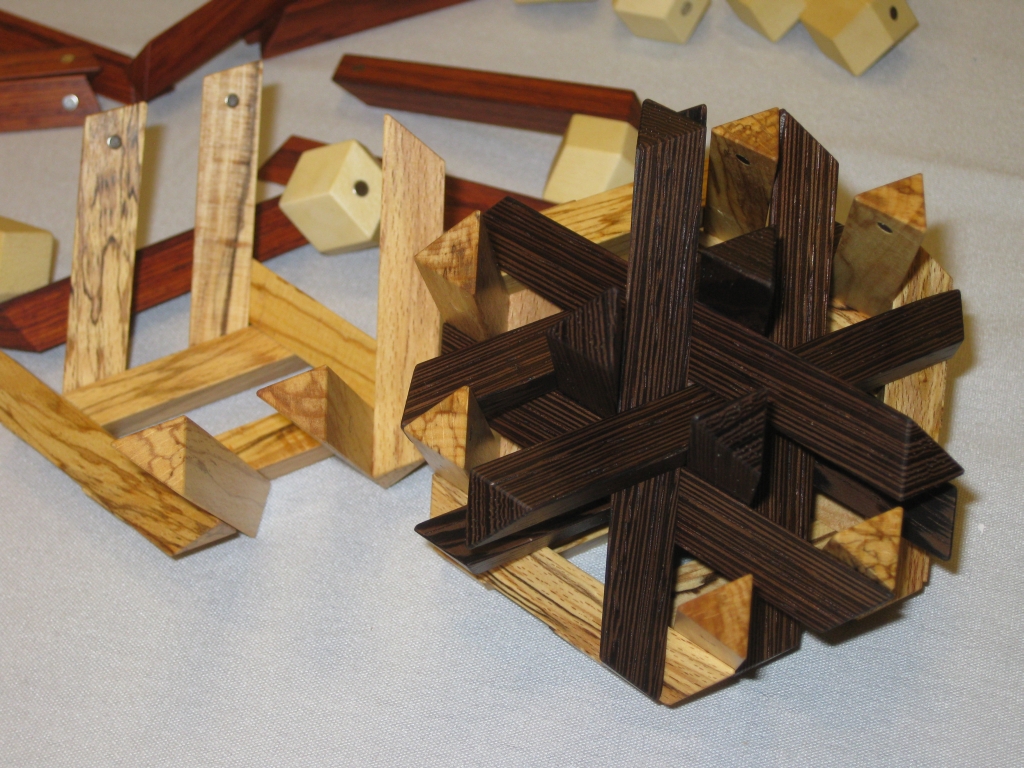
Tetraxis, assembling the core inside the cage.

Tetraxis, assembling the core inside the cage.

Here you can see how the inner code is nested inside the cage.

Chamfered Cube
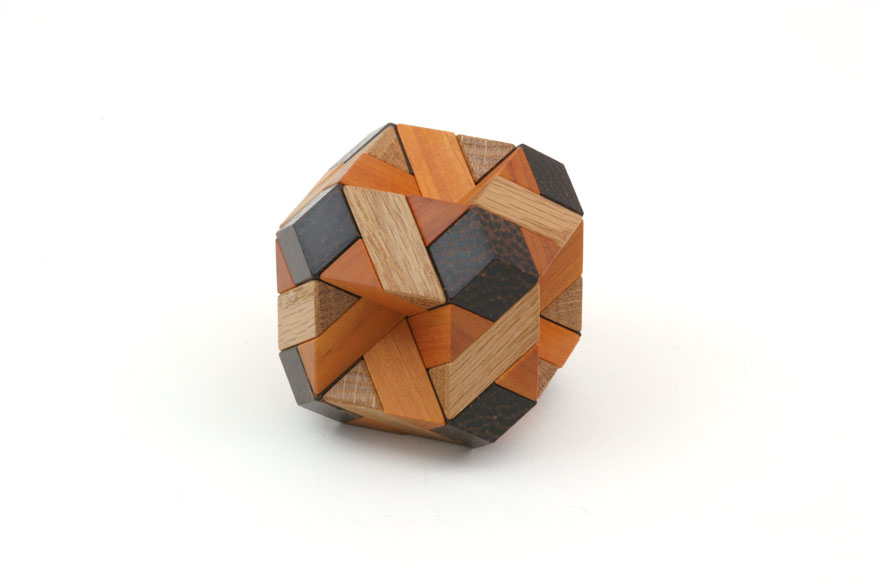
Chamfered Cube

Chamfered Cube

Next up is the Chamfered Cube. This much smaller structure looks exactly as the name suggests, and really stands out with the pyramid shaped indents in each side of the cube. For some reason my photos of the remaining two puzzles didn’t turn out very well, so I’m having to use the competition photos from John Rausch’s site.

The goal for this puzzle is to use either set of 12 sticks to hold the 8 blocks in place at the corners of a cube and then to add the other set of sticks to make a large chamfered cube, which is the shape of the small white block that can fit in the center of the arrangement. This isn’t a difficult challenge as the shape of the ends of the sticks, and the blocks themselves guide you toward the correct solution. Made from Black Palm, Red Oak, and at a guess Chakte Viga it’s a striking looking puzzle.

Double Duals
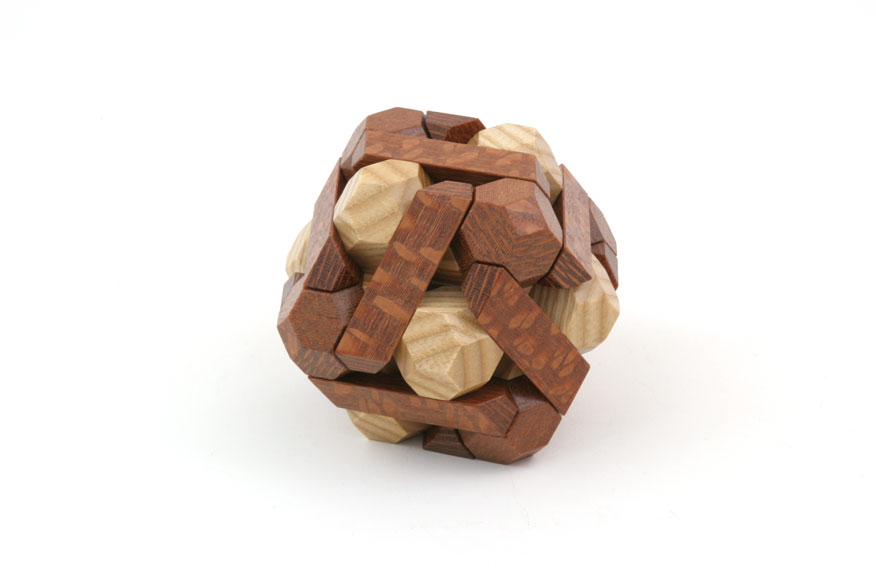
Double Duals

Double Duals

The third entry is Double Duals. Around the same size as the Chamfered Cube, this is another stunning looking puzzle. Made from Leopardwood, and possibly red oak (not sure on the lighter wood), this puzzle is almost an inverse construction of the previous puzzle. Rather than the sticks crossing through the centre of the structure, here they form the outer shell.

The goal of the puzzle is to make a pair of complementary arrangements such that each one contains blocks and 12 sticks symmetrically surrounding a center. Then put them together so that one is inside the other, and they both surround the block without magnets. Then repeat the entire process with each set of sticks making the opposite arrangement.

The clever part here is that as is hinted at, you can swap the sticks between the inner and outer construction. It’s a clever arrangement, and really needs to be played with to be appreciated.

Other KoStick Puzzles from IPP

The competition entries weren’t the only appearance of Jane’s work over the weekend. It turns out that the IPP committee had arranged for Jane to make a very special little puzzle for each of the people who helped run and organise the events over the weekend. That came in the form of a tiny little Tetraxis puzzle.

Brian with his Kostick puzzle as thanks for helping

Brian with his Kostick puzzle as thanks for helping

Brian Pletcher was one of the people helping out and was given one of these beautiful little puzzles. as such I was lucky enough to be able to get a good look at it. It’s not a challenging assembly, however the way the blocks have been cut, there are multiple ways to assemble the pieces.
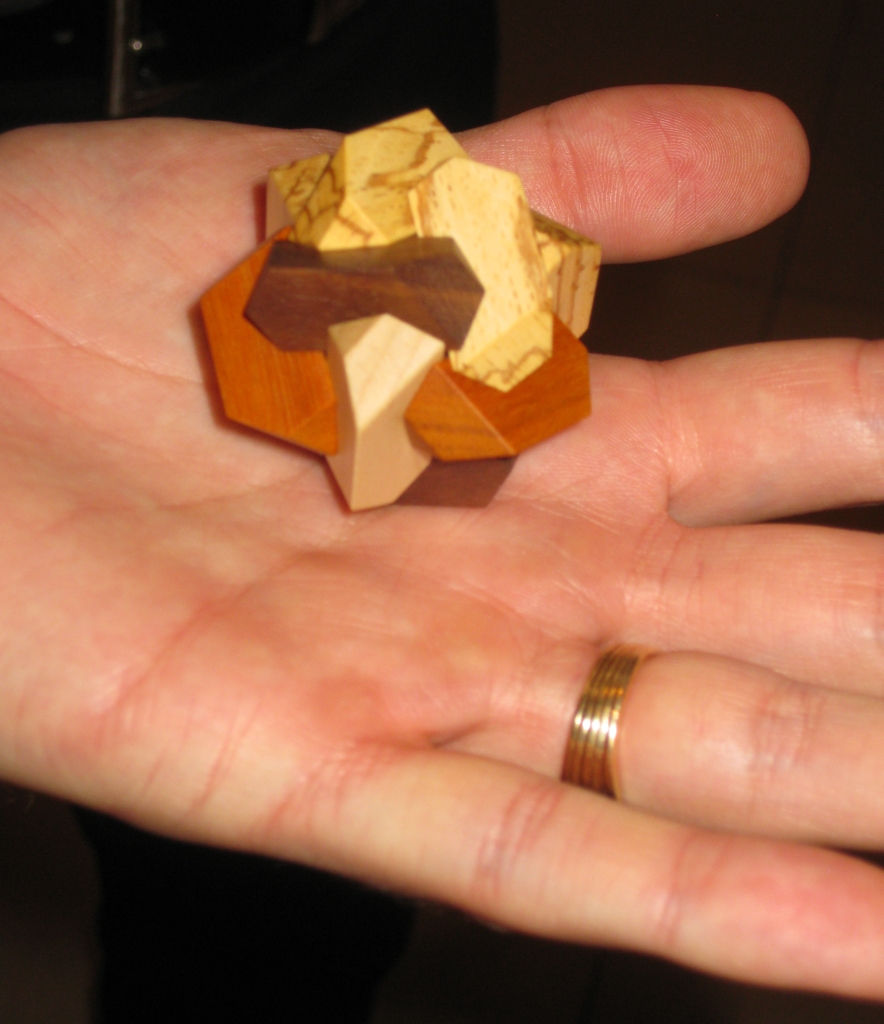
A closeup of the Tetraxis gift made by Jane Kostick
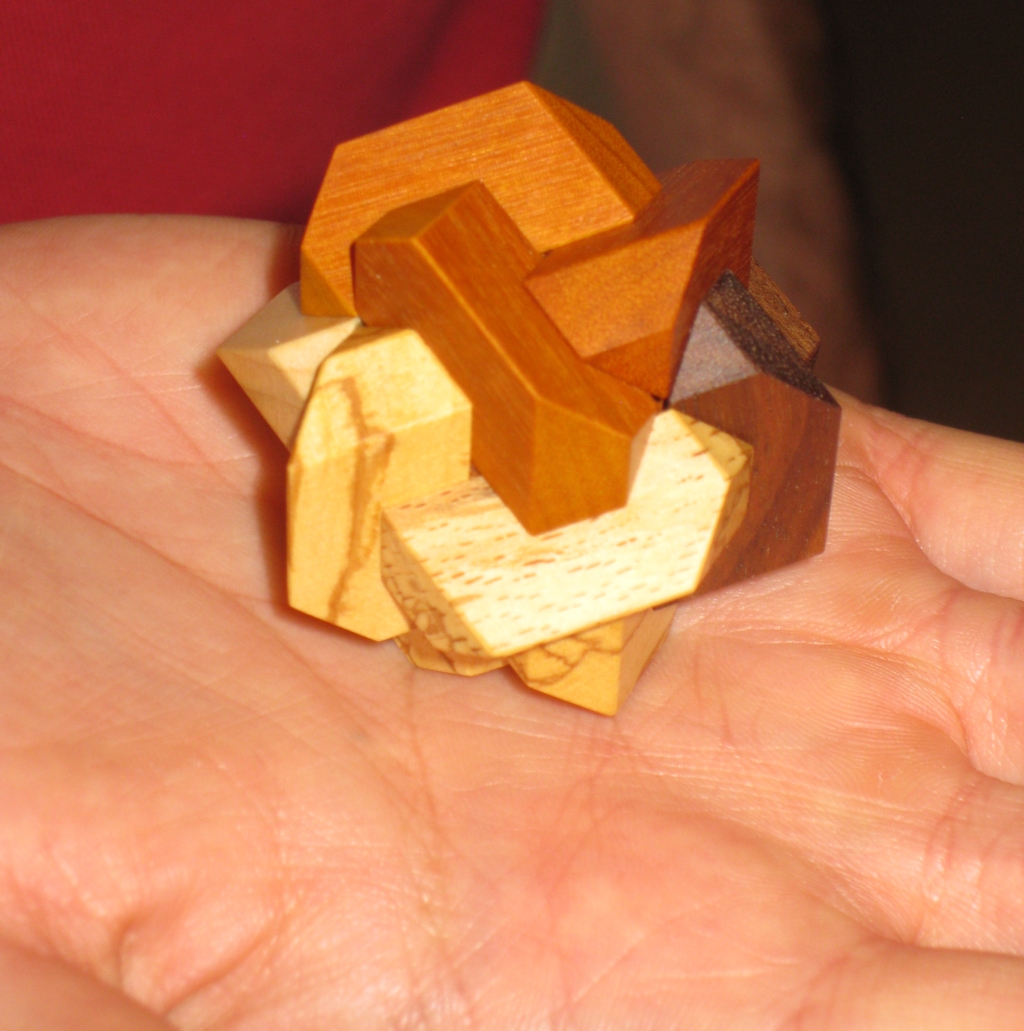
A closeup of the Tetraxis gift made by Jane Kostick

A closeup of the Tetraxis gift made by Jane Kostick

A closeup of the Tetraxis gift made by Jane Kostick


It’s a great looking puzzle, and something I’m sure the IPP organisers will be very happy to have in their collections.

There was one final puzzle from the KoStick range which I played with over the weekend, which was thanks to John Rausch pulling a tube with some of Jane’s pieces out of his pocket and handing them to me. It turns out having talked with Jane that the puzzle was a 2 Layer Tetraxis array, knows as 4P1S. Now I have no idea what the code stands for, but for me it was probably the most challenging of the Tetraxis puzzles that I played with over the weekend.
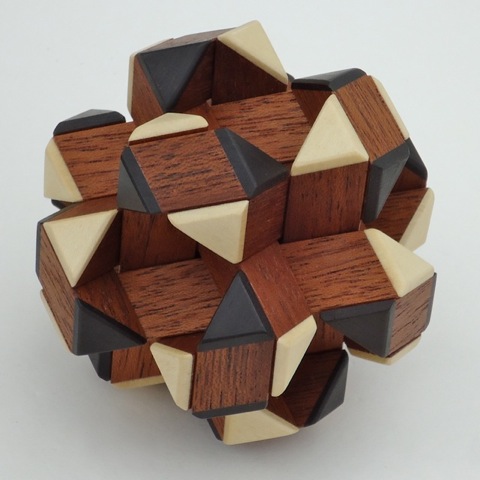
Tetraix 2 layer Array 4P1S

Tetraix 2 layer Array 4P1S

The version John had was in a single wood, however when I spoke to Jane about the puzzle she mentioned that she had two versions available. Seeing the puzzle above in Mahogany with Ebony and Holly tips I was quick to buy it from Jane. The puzzle is very similar to the Chamfered Cubes puzzle however there are no corner blocks to help with the assembly. As such this is a much harder puzzle to put together and as such I found it a lot of fun.

In total there are 24 sticks, 12 long and 12 short which need to be combined to make the shape above. It may look fairly simple, but it’s not as easy as it looks. Starting off, you make two sub-assemblies which you need to interlock, and then build up from there. Seeing how the first two interlock is the real challenge, and once they are in place, the rest comes together fairly quickly from there.

If I were to recommend one of the puzzles to get, it would be this last puzzle. I did!

Overall, Jane’s work is incredible, and really the photos don’t do it justice. It needs to be seen to be appreciated, and the movement of the pieces only really becomes magical when you have it in your hands. The wooden versions are well priced for the work that goes into them, but if you want a cheap version to be able to play with and get a feel for how the pieces interact before spending a lot of money, then I’d recommend some of the plastic versions which you can buy on their web shop.
Tetraxis and Six-Axis

Wow, doesn’t time fly. It’s nearly the end of 2012, and I realise that I still haven’t sat down and written up the Tetraxis puzzles that I received from Jane Kostick over a year ago. Worse that that, I created the video review back in October (last year)! Not only that but after being at IPP and playing with more of Jane Kostick’s excellent puzzles, I’ve bought more from her and really need to review that too. So with all the procrastination out of the way, I hope you enjoy the review of this fine puzzle set.

Some time before IPP31 I came across Jane and John Kosticks website, and really liked the look of their puzzles. Digging around a little, I found that as well as the mass produced plastic versions of the puzzles, Jane also made some rather unique versions from wood as well. So chancing my arm, I got in touch and asked if she would make me a set.

Jane and I chatted back and forth for a while via email, and eventually agreed on some woods to use from Jane’s fairly large stock, and she set about making the puzzle pieces for me. I have to admit that I really enjoyed talking with her about the puzzle itself, how the magnets were attached to the sticks, her experiences with different woods, and many other topics, including IPP. In the year that has passed since then I still talk to Jane via email occasionally and on returning from IPP 32 I threw her another email commenting both on the great puzzles that she had in the Design competition, and also a particular puzzle that John Rausch had given me to play with, but more on that later.

Unbeknown to me, fellow puzzler Allard was also having a set of Jane’s sticks made and unlike me he wrote about them in a much more timely fashion.

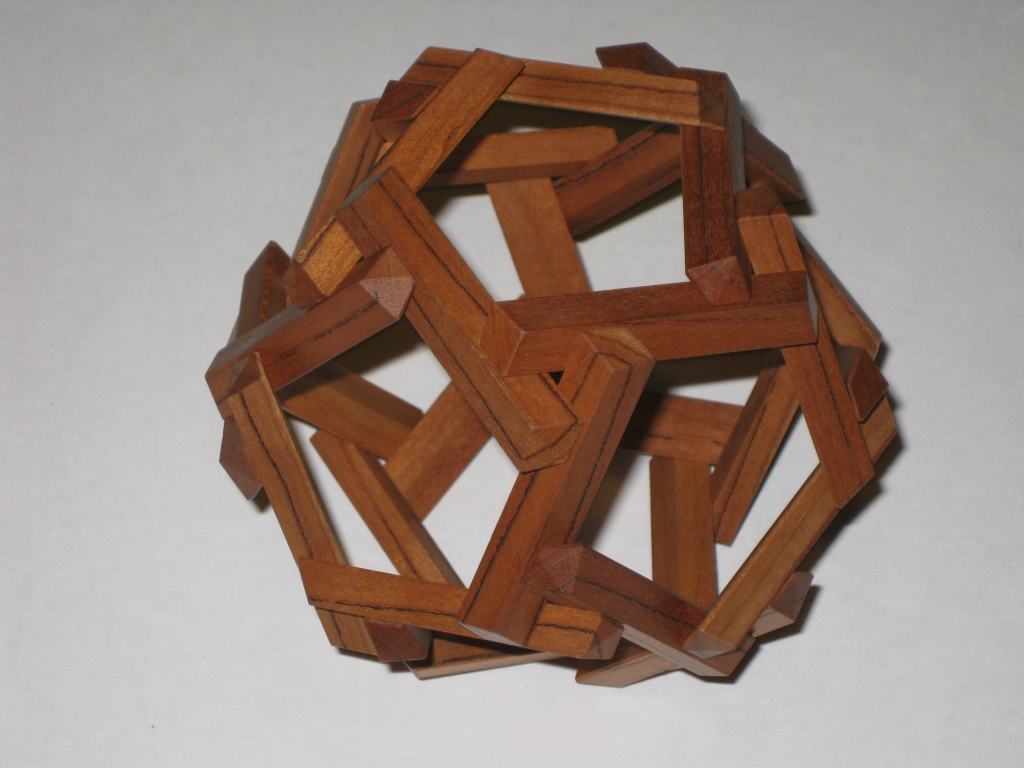
Tetraxis

Tetraxis

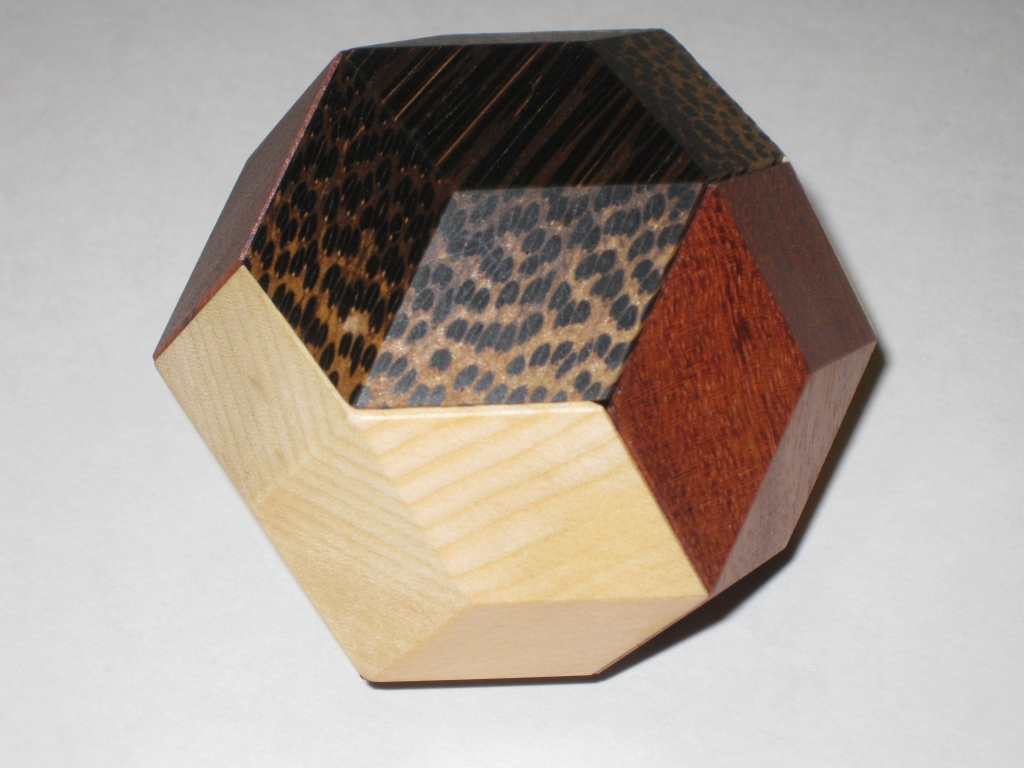
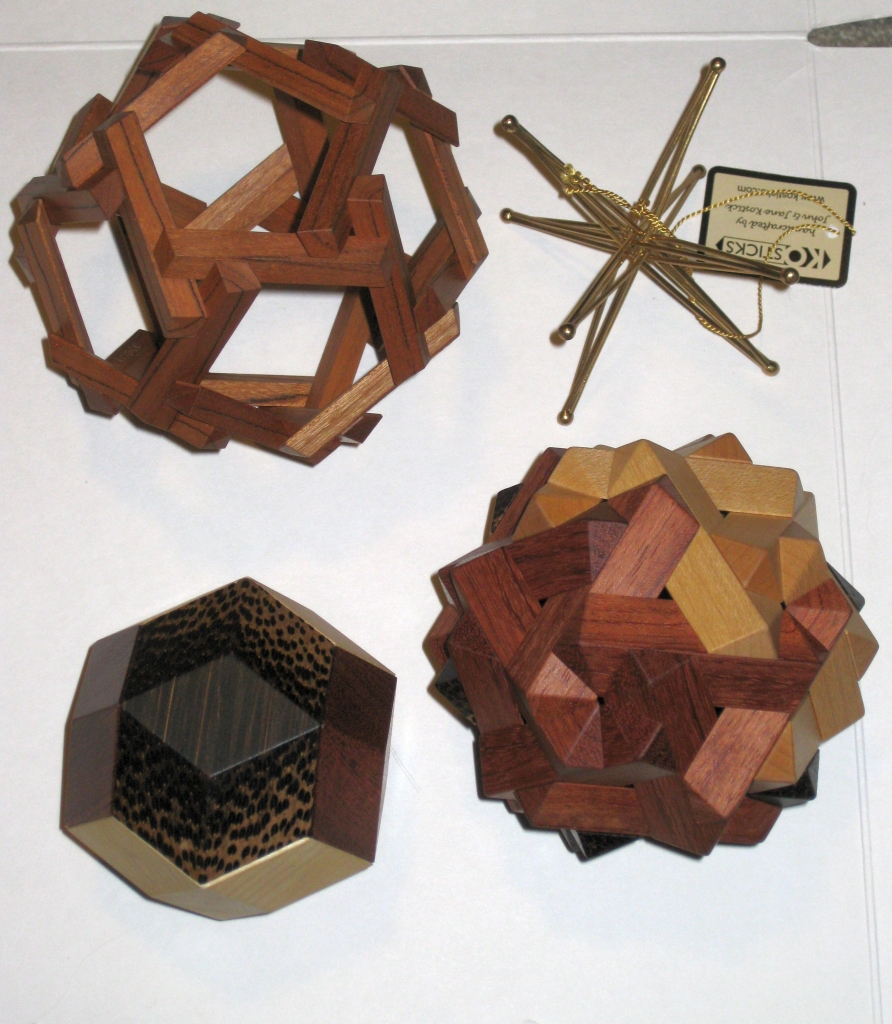
My copy is a three layer puzzle with a rhombic triacontahedron in the centre, then Jane and John’s Six-axis in the middle and a Ten-axis Tetraxis frame on the outside. The inner parts are made from Bubinga, Black Palm and Maple, and the outer Ten-axis is Cherry. They have trademarked the name Tetraxis, and use it to cover all of the puzzles they make including the Tetraxis Star, Tetraxis toy/puzzle, and Tetraxis magnetic sculptures in wood.

The whole structure shows the fantastic geometric relationships that are found in John’s stars and really helps you to visualise the geometry in play. So many puzzles are based on the geometry here, and you’ll probably recognise the shape of the six-axis Tetraxis as the same shape as Stewart Coffin’s Jupiter puzzle (amongst others).

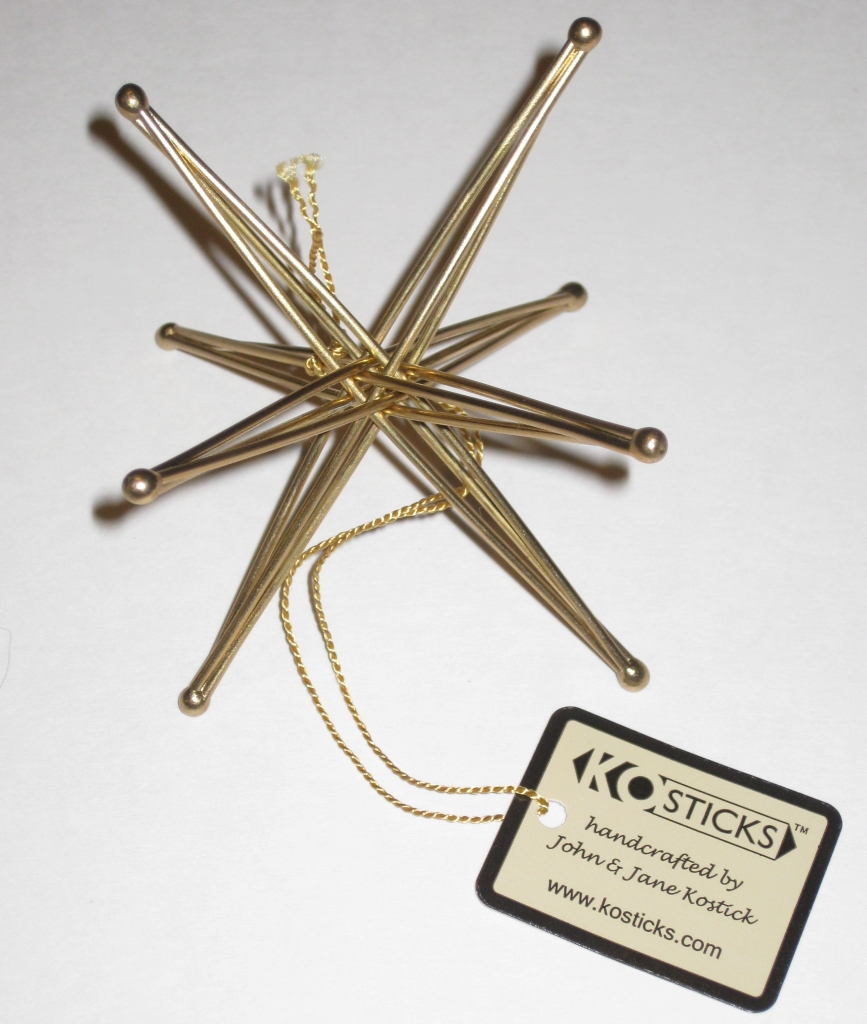
Tetraxis Bronze Star

Tetraxis Bronze Star

When I originally ordered the puzzle from Jane, things took a little longer than she would have liked due to some dull saw blades, so she ended up sending me one of her husbands Tetraxis stars (4 axis) as a little extra to say sorry for the delay. Now given that this was a custom order I really don’t think it took long at all, and the craftsmanship is superb. To my mind there was no delay and really it wasn’t an issue at all, so thanks for the little extra Jane, it’s beautiful too.

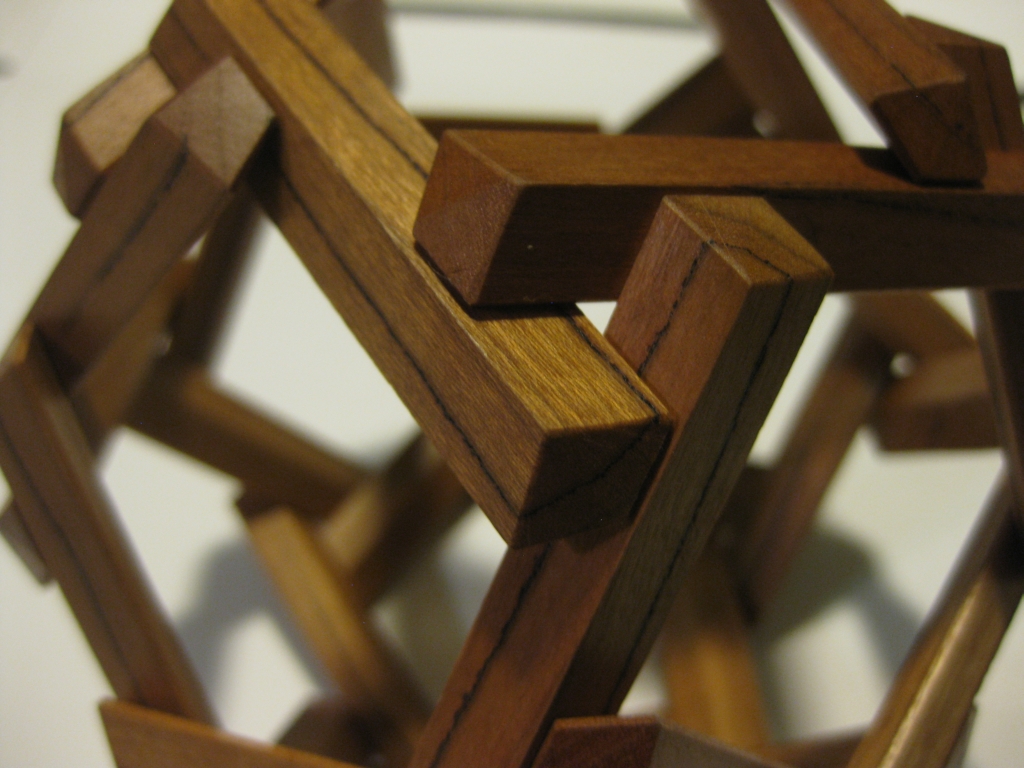
Tenaxis Closeup

Tenaxis Closeup

The Sixaxis partially solved

The Sixaxis partially solved

Sixaxis showing the five sticks coming together

Sixaxis showing the five sticks coming together


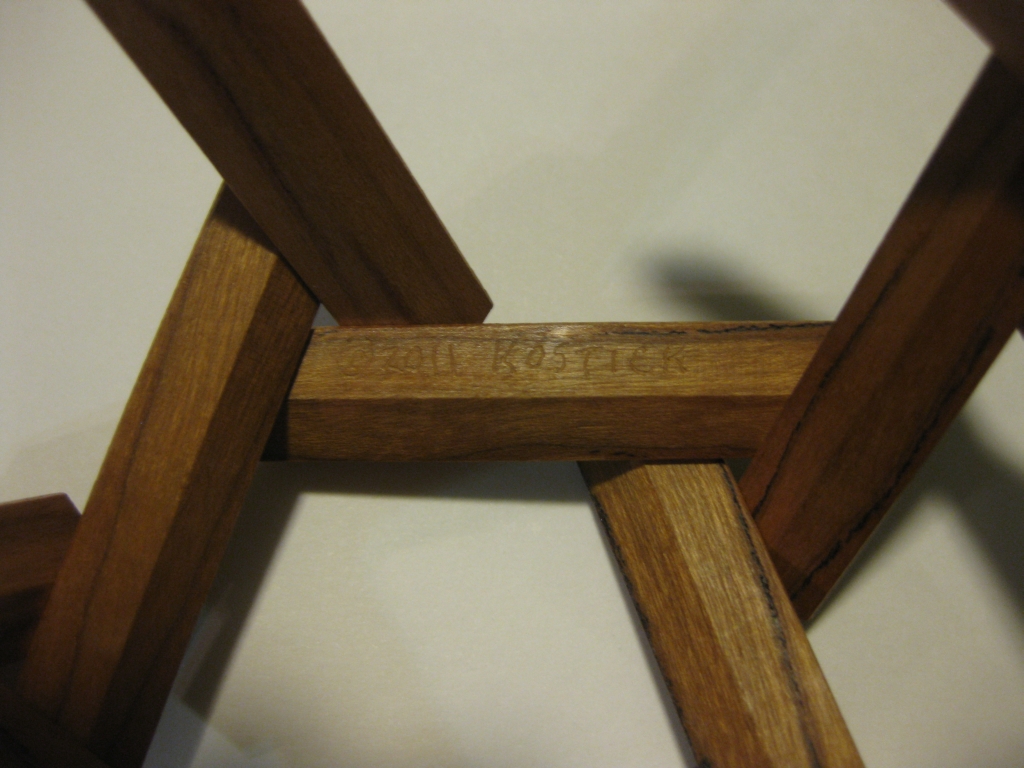
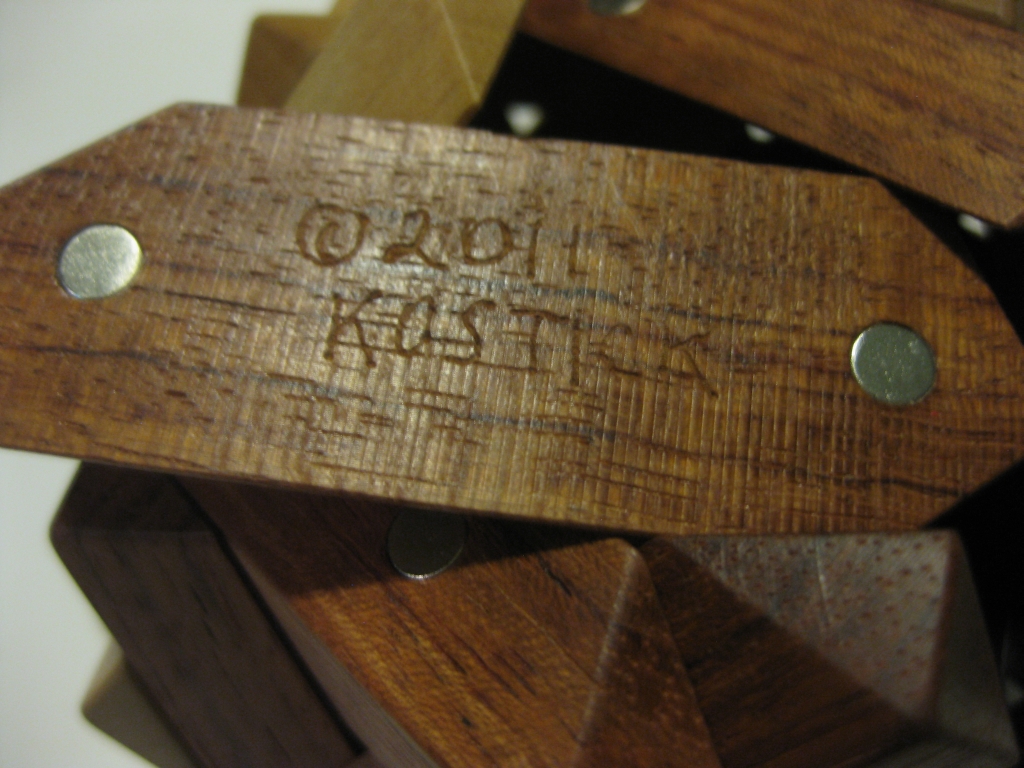
As you can see from the closeup pictures, the fit and finish of the sticks is excellent, and Jane has even signed the pieces which on this scale is no easy task. The overall structure may be fairly large as you can see in the video, measuring 4″ however each stick is just 0.25″ thick on the outer Ten-axis assembly.

Tenaxis Signed

Tenaxis Signed

Sixaxis Signed

Sixaxis Signed

Putting the pieces together isn’t overly challenging, and the magnets pull everything into place nicely so in terms of a challenge, this isn’t the most difficult puzzle you’ll play with, however it is remarkably relaxing to just start putting the pieces together and hear them snap into place. The resulting shape has a sculpture like quality which sits very proudly on my puzzle shelves, and gets a lot of attention from visitors.

Tenaxis Puzzle

Tenaxis Puzzle

The inner Rhombic Triacontrahedron

The inner Rhombic Triacontrahedron

Tetraxis layers

Tetraxis layers

It’s a beautiful puzzle, and truly a work of art. This year at IPP, Jane and John had a number of new designs entered which I was fortunate enough to play with. Not only that but John Rausch had a one off puzzle Jane had made which he handed me to play with. Having talked to Jane about this puzzle after IPP, I now have a copy of that too, so come back tomorrow to read about her IPP entries and a new design that I fell in love with.