Category Archives: Puzzle Reviews

Moeraki Games 4

The series of Moeraki games are produced by Kasimir Landowski, and are a series of sliding tile puzzles, where the object is to scramble the pieces then return them to their unscrambled state. The Moeraki 3 and 4 puzzles can be purchased from Casland Games along with versions 1-5 in electronic format.

In an interesting story, Ivan Moscovich created the same puzzles and patented their design in the US in 1985 (US patent No.4,509,756) and were licensed to Meffert Novelties in 1983. The digital versions were licensed to Sony-Online. Shortly after posting my review I was contaced by Ivan requesting that I consider removing my review as a result of the dispute over the puzzle. Since the original review I did for Moeraki 4, and re-posting this today, Ivan and Kasimir have reached an agreement around the puzzles sale and distribution, and I’m pleased to be able to once again restore the review with full consent of both Mr Moscovich and Mr Landowski!

Moeraki Games 4 (hard version)

Moeraki Games 4 (hard version)

So why Moeraki? The designer happened to stumble across a website on the Moeraki Boulders: round rocks found in New Zealand, near the village of Moeraki on the east coast of the country’s South Island. The rocks are not formed from erosion but were naturally created like pearls and Kasimir thought it suited his puzzle and hence the name.

I ordered both Moeraki 3 and 4, as I like my physical puzzles, however they both come with a PC version of the game included on a CD, so you get both when buying the physical puzzle. Personally I think there’s a lot to be said for being able to physically push the pieces yourself, however it’s a nice bonus, and certainly helps in learning how the pieces interact before messing up such a nice looking arrangement.

Unfortunately, the electronic version is Windows PC only, so if like me you’re a Mac owner you’re out of luck. Fortunately, there is iOS versions available for iPhone/iPad/iPod, including standalone versions of 3 and 4 for $.99 each, and a pack including all 5 for $2.99 which I think is a great deal.

The puzzle itself measures 5.5″ x 5.5″ x 0.75″ and is certainly a well made and solid puzzle. It comes in a clear plastic box wrapped in a cardboard sleeve (entirely in German) which holds both the puzzle, and the CD with the PC version. Sadly mine suffered some rough handling on its way to me and most of the plastic pegs inside the box which hold the puzzle in place had snapped leaving the puzzle free to bounce around inside the box. Fortunately that didn’t damage the puzzle at all, so isn’t a big issue.

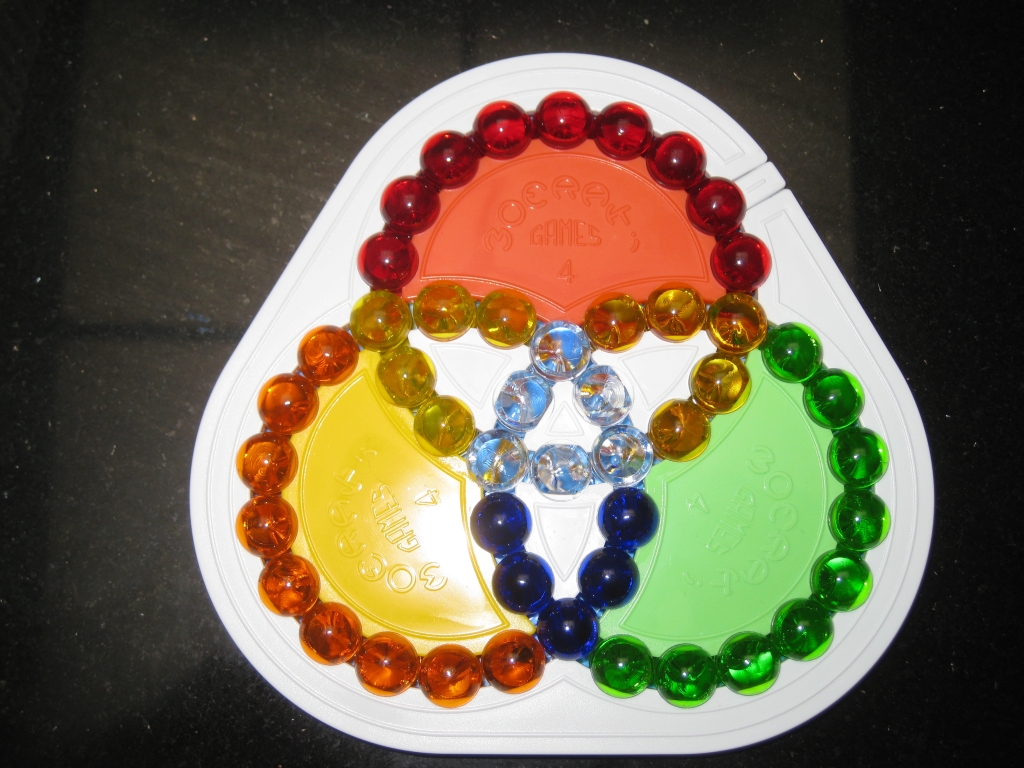
The plastic coloured beads have a glass like quality to them and really reflect the light, giving a lot of depth to the rings. The movement of the pieces is incredibly smooth, and each ring is easily turned by pushing lightly on any one bead. The board itself has coloured inner segments which are a guide for returning the puzzle to its solved state once scrambled. Interestingly, there’s no real reason why you should have to do this, as any colour could be placed at any outer section of the rings, and it certainly adds an additional challenge trying to swap the colours to a different starting position.

The playing board consists of three interlinked circles of coloured beads, which intersect at six points, meaning that moving the beads in one circle affects those in one of the other circles. Given the six points of intersection in the three rings, the interaction between rings in this version is higher which adds to the difficulty level. This is even more true when you look at the version I have where the beads in the centre are not all the same colour!

If you have a look on the website, then you’ll see that the version of Moeraki 4 which is available has only four colours instead of the seven seen in my version. That’s thanks to Kasimir sending me a unique hard version rather than the regular version! It is available as an option on the electronic version as a possible combination to play, but clearly Kasimir has read my blog, and knows I like a challenge! Having played around with the puzzle for a while, solving it by ignoring the colours in the centre isn’t too hard, and I can normally solve it from a well shuffled board in around 8 minutes. Solving for all seven colours however is much harder and takes me around double that time. So I’d rate this as a challenging puzzle, but it’s one that you will be able to solve (unlike me and the Rubiks cube).

From playing the electronic version, there are a number of different possible patterns which can be made from the same basic board, including a version where there are only two colours, and each adjacent bead is an alternating colour, and the version on the website where all centre beads are clear, rather than the three extra colours in my version. The board in the puzzle has a plug which has been glued in place during assembly to prevent the beads being removed, however it would be easy enough to make additional beads available when ordering to make these configurations possible, and be able to configure the game board for some of these options. Maybe that option could be available in future versions.

Overall, I think Moeraki 4 is an excellent puzzle, very well made, and a lot of fun to play with. Now I just need to work on improving my time to solve it. I highly recommend picking up a copy from Casland Games or if you’re more of a mobile puzzler, consider the iPad/iPhone/iPad version which is great value, and every bit as challenging. For €20, which includes the PC version, that’s a great price.

I’ll be reviewing the Moeraki 3 soon, but feel free to look at Gabriel’s review until I do.
Secret Base 2

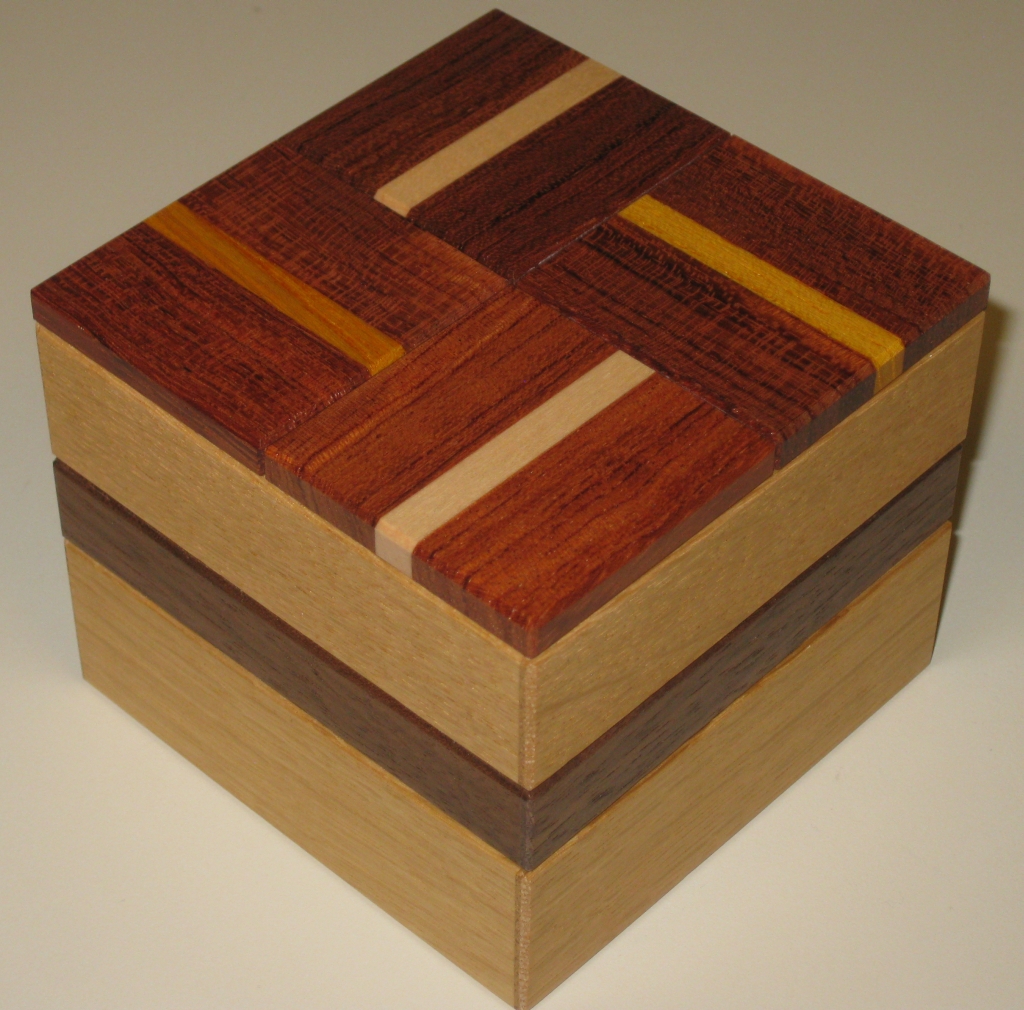
Secret Base 2 was Hiroshi Iwahara’s 2011 Christmas Present from the Karakuri Club. I didn’t have him as one of my designers last year, but I was fortunate enough to be able to borrow this box to play with.

Secret Base 2

Secret Base 2

The Secret Base 2 as you might have guessed is based on the original Secret Base puzzle which I’ve not played with myself, but am aware of how the mechanism works. In this case, I think that partial knowledge may have made my solving of this box more challenging!

Made from Oak, Walnut, Birch and Bubinga this puzzle measures 3.5″ x 3.5″ x 3″ and is beautifully finished as any Karakuri box is. The mechanism is wonderfully smooth, and the first movement seems almost magical as the pieces slide past each other. It’s actually a very difficult puzzle to describe without giving much away.

With my knowledge of the original Secret Base, I found the first move fairly quickly, and even the next step didn’t take me long to identify. After that however I was a little stumped. The final movement is rather unexpected and quite nicely hidden.

Secret Base 2 - Partially Open

Secret Base 2 - Partially Open

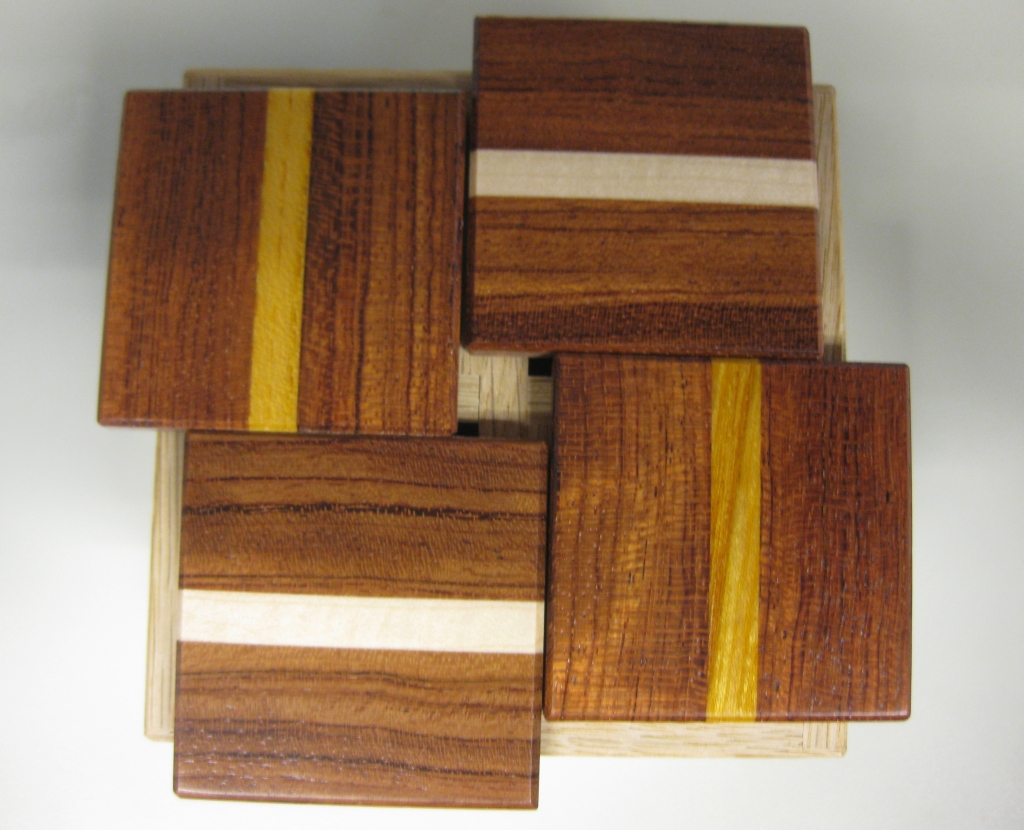
I’ve taken the photo above very carefully to give nothing away about how this opens, but it does at least let you see the movement of the pieces. Once open, there’s a reasonable sized space inside and unlike the original Secret Box, there’s only one compartment to be found in this puzzle.

Overall a nice box with an interesting twist. Well worth picking up a copy.

Allard, Brian, Jeff and Michael have all written about it, so head over to their pages to find out what they thought.

The Distorted Cube – STC #61-A

What seems like a very long time ago now, way back in August in fact, Tom Lensch offered a number of puzzles through Puzzle Paradise. At that time I picked up a copy of the Two Boxes puzzle which I wrote about some time ago, and this Stewart Coffin Design. It’s taken quite a while to get round to completing all the challenges set by Stewart for the Distorted Cube, but I’ve finally done them all, and it’s about time I wrote about it!

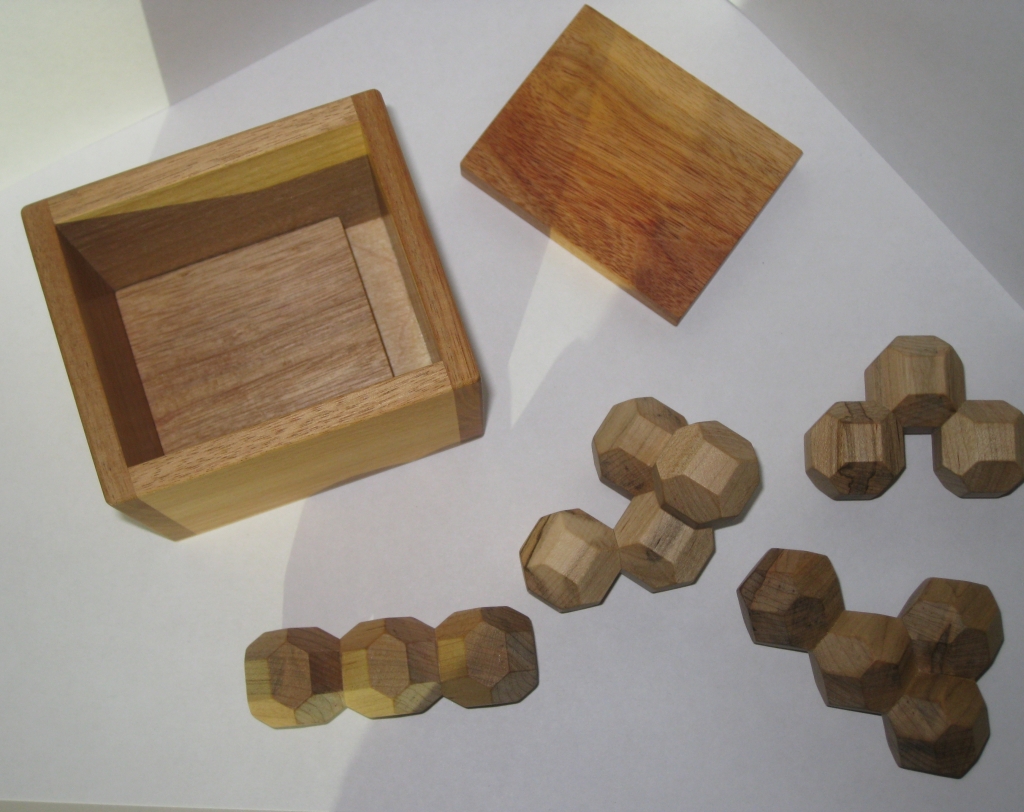
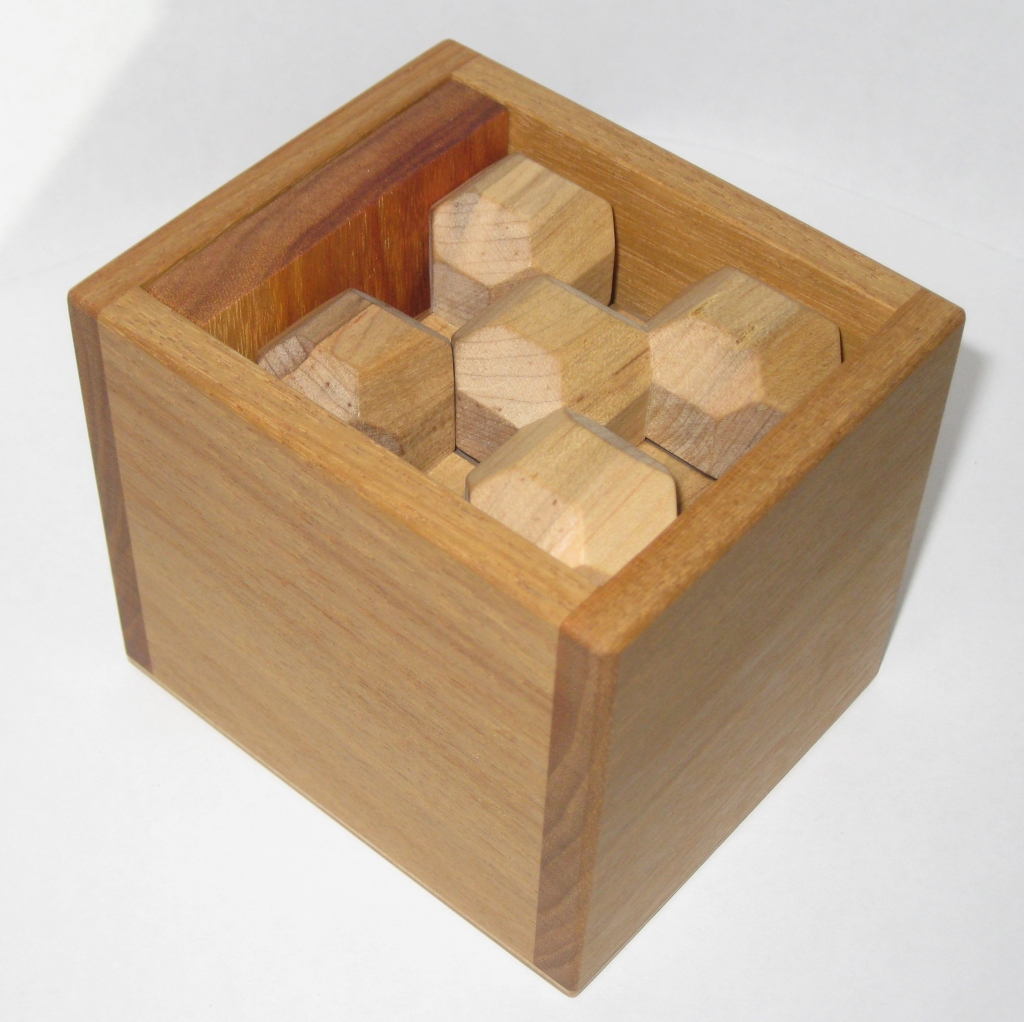
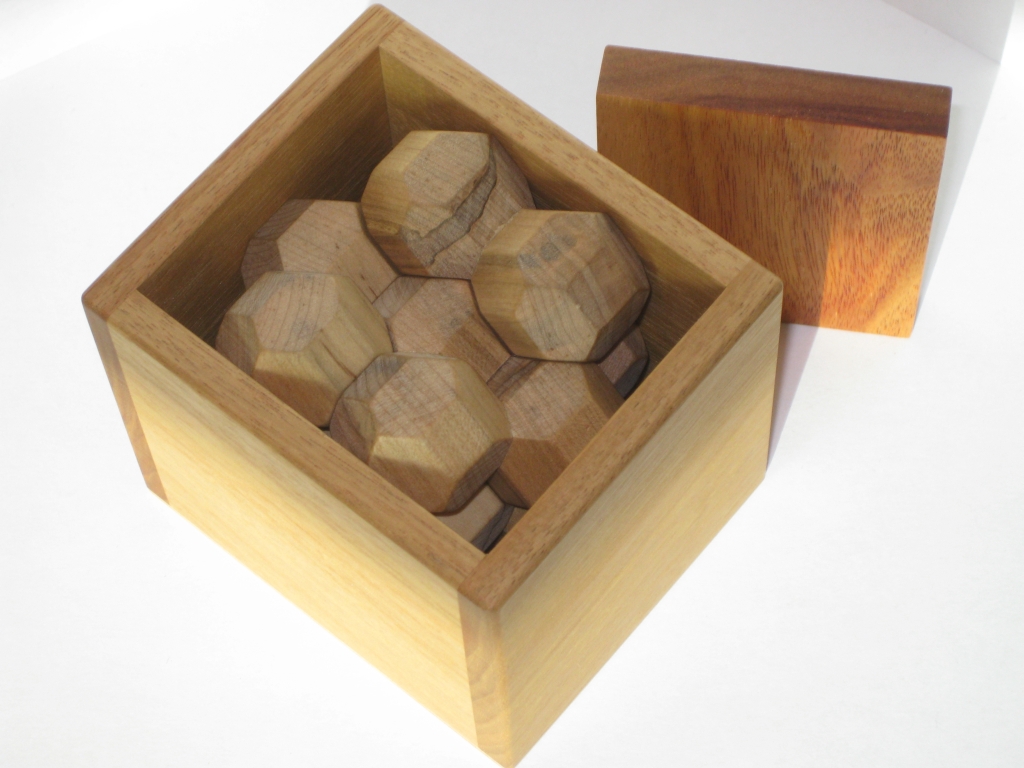
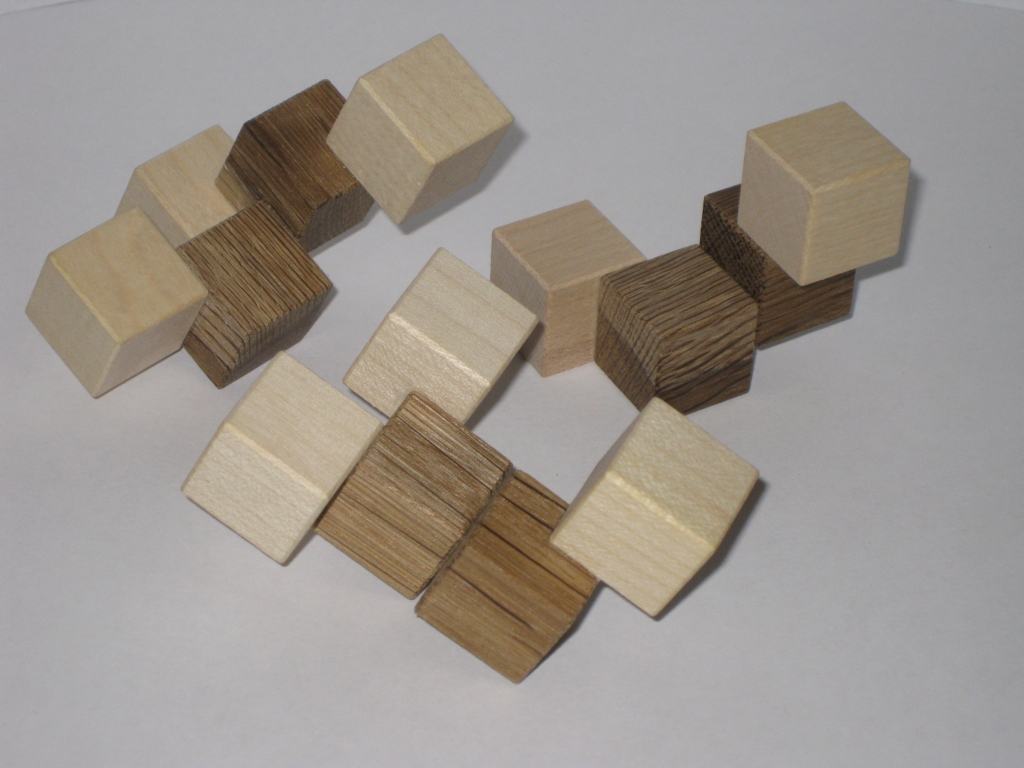
The Distorted Cube, STC #61-A, showing the Box, Lid and Four Pieces

The Distorted Cube, STC #61-A, showing the Box, Lid and Four Pieces

As you can see, the puzzle consists of four puzzle pieces, made from 14 edge beveled cubic blocks, which have been joined together in different ways, as well as a rather unique rectangular covered box (But I’ll come back to that!) The copy I have is made by Tom Lensch, and is from a run he did in August 2011. The box is Canarywood, and the pieces are made from a rather interesting Maple called Ambrosia. Ambrosia maple comes from regular soft maple and Hard Maple trees that have been infested by the ambrosia beetle. The small beetle bores a network of tunnels and short galleries called cradles. A fungus is responsible for the blue, gray and brown streaks and decorative patch work that accompany each tunnel and adjacent wood. The streaks and patch work add a unique look to this hardwood without affecting its structural integrity

Stewart Coffin first made this puzzle in 1988 in a very limited run of about 8 puzzles, and then again in December of 1996 making around 12 copies. He described it in Puzzle Craft in the 1992 edition, and in the 1996 run produced a puzzle sheet to go with the puzzle. You can see that sheet by following the link here.

The puzzle consists of a number of challenges, each of which uses the pieces in a slightly different orientation, which really explores the huge number of possibilities that these four shapes can be combined. One thing I found as I moved from one challenge to the next is that human nature starts to get in the way. As you find one solution, your brain becomes fixated on that orientation, and starts to rule out other possibilities, making finding the solution to the next challenge more difficult.

Challenge #1 Solved

Challenge #1 Solved

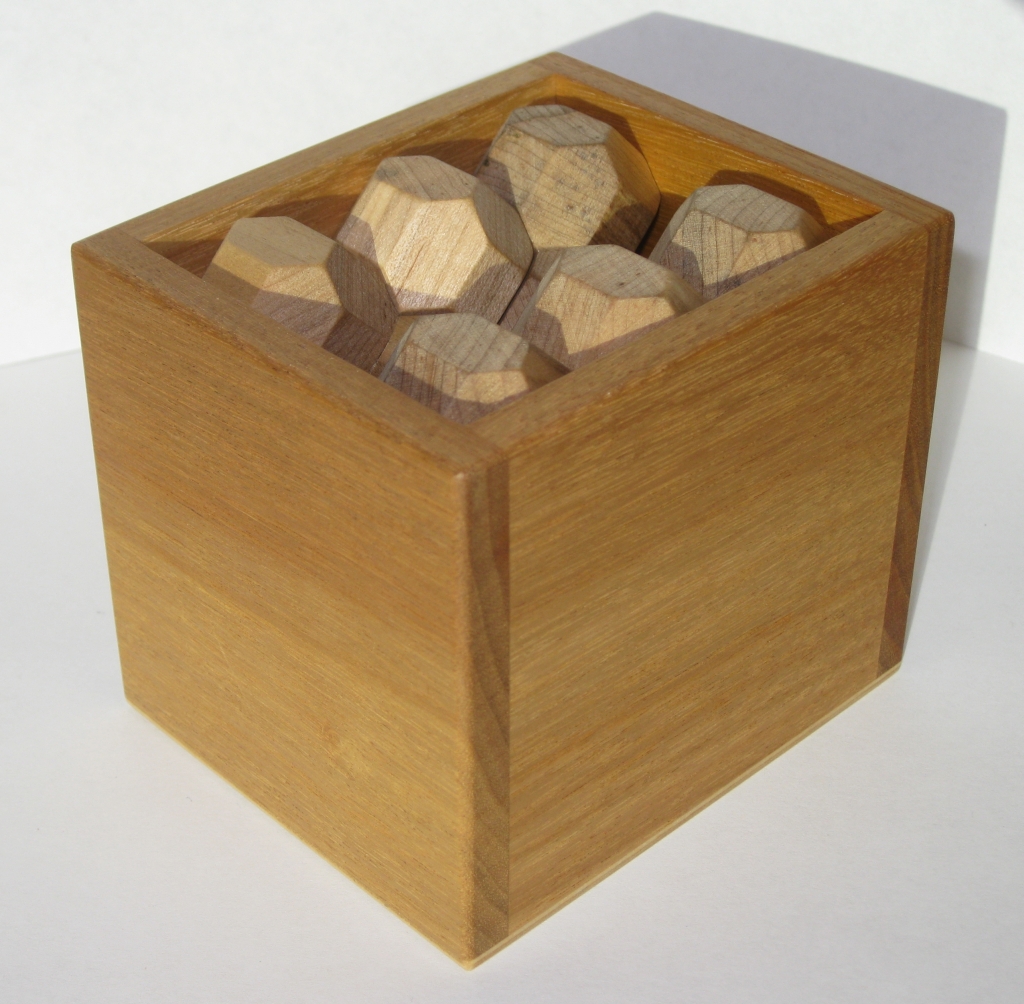
The First challenge is to pack the four pieces into the box so that the cover placed on top of them will be flush with the top of the box. A variation of this is to first lay the cover in the bottom of the box, in which case, the puzzle assembly will be flush with the top. Just so you can tell I wasn’t cheating, I went with the latter option.

Challenge #2 Solved

Challenge #2 Solved

Challenge number 2 is to place the lid into the slot at the side of the box, converting it from a rectangular box, to a cubic box. Now place the four pieces into the cubic configuration. Again the top of the assembly will be flush with the top of the box. (No, you’re not allowed to have extra pieces sticking out, despite how many combinations I found where this was the case).

Challenge #3 Solved

Challenge #3 Solved

For the third challenge, the cover for the box is put to the side, and the pieces have once again to be packed into the now much larger space so that they are still flush with the sides and top/bottom of the box. This really shows just how many ways there are to make use of the space (or possibly the holes in the cubes) to pack them more or less efficiently, depending on the space you have available.

I really love the versatility of this puzzle. What seems like a simple configuration of four pieces allows a lot of different configurations, and as I found many hours of happy puzzling.

But the challenges don’t stop there! If you put the box to the side, there are yet another two challenges to try to solve. (And I’m pretty sure from my playing around with the pieces that there are more that Stewart just didn’t list!)

Challenge #4 Solved

Challenge #4 Solved

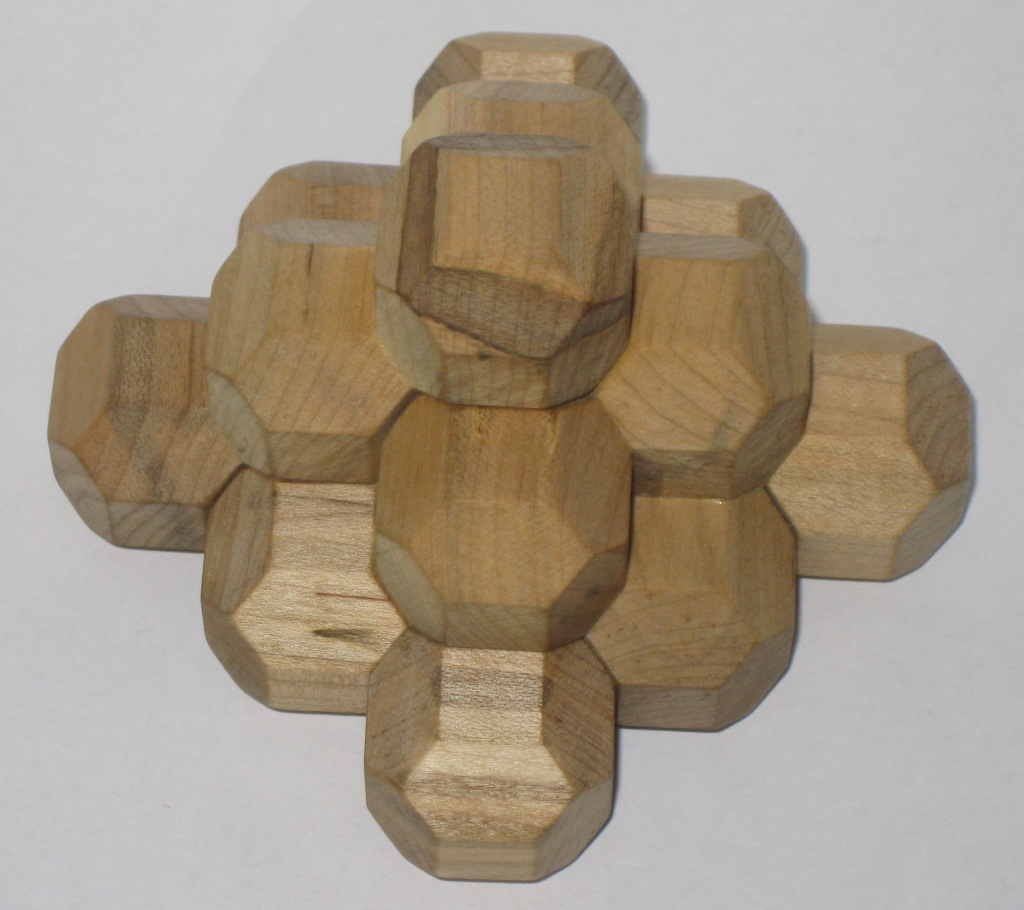
Challenge number 4 has us making a square pyramidal pile using all four pieces.

Challenge #5 Solved

Challenge #5 Solved

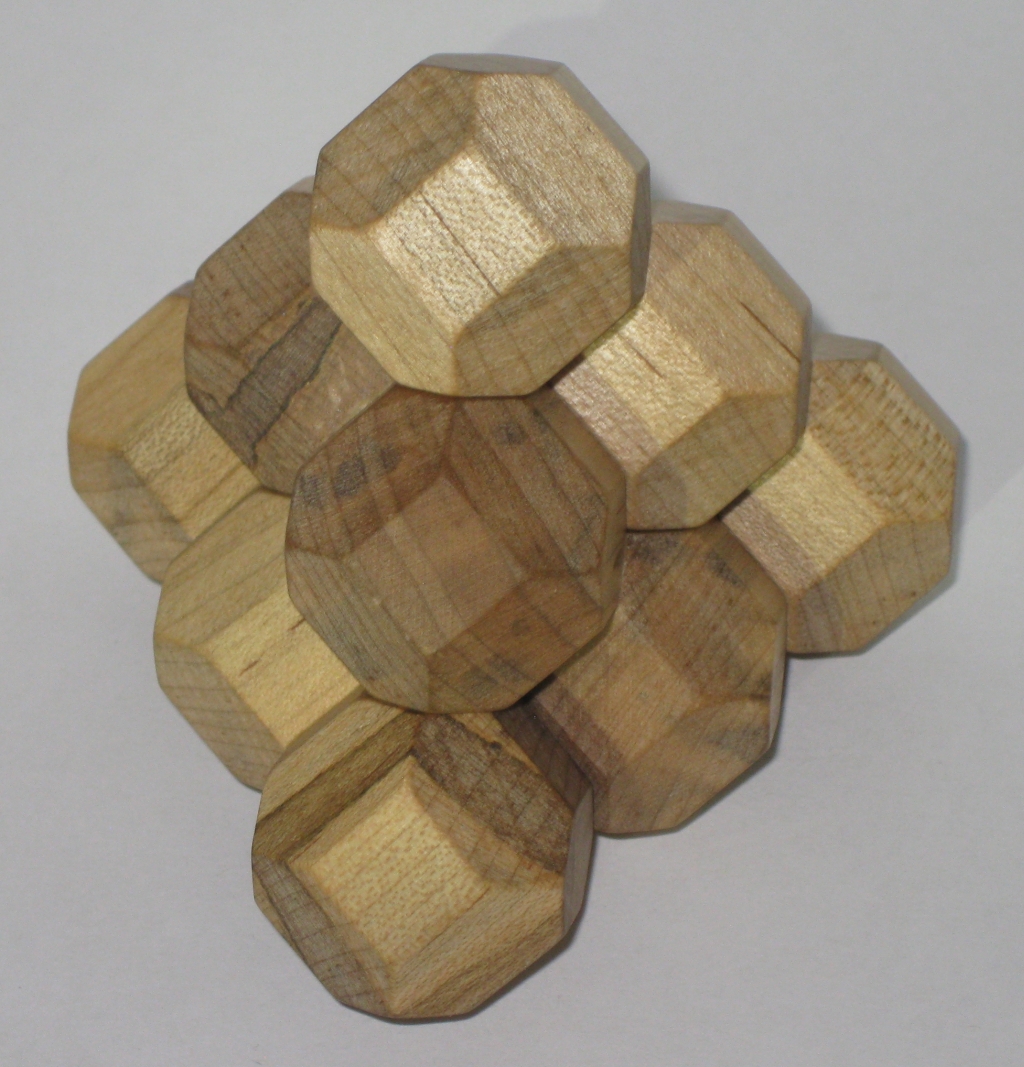
The final challenge that Stewart set is to create a triangular pyramidal pile using only three of the pieces. Of course he’s not telling you which three to use. That’s up to the puzzler to figure out!

Overall, this a great puzzle and I’d highly recommend picking up a copy if you see one for sale. I spent many hours playing with this over several months, and still enjoy going back and re-solving the various challenges. I may even look further into the combination of the pieces to see if there are other combinations possible, as there are certainly some combinations of the pieces which were not used in any of the original five challenges.

Three Piece What ‘sit

This entry is part 6 of 6 in the series IPP 31

At IPP 31 in Berlin George Bell exchanged his Three Piece What ‘sit made by Bernhard Schweitzer in the New Pelikan workshop. The goal, and the only hints you get are to “Assemble the 3 pieces to an allside symmetrical 3D shape”

The Three Piece Whatsit Pieces

The Three Piece Whatsit Pieces

This great looking puzzle is made from Maple and Robina and measures 2.75″ x 2.75″ x 2.75″. The three pieces are a good size in your hands and give little away about how they should be combined. Playing around you’ll quickly find several ways that two of the pieces can be joined, which leave no room for the third to fall into place.

I probably spent around 10 minutes before I found the correct orientation of the first two pieces to allow the third to drop into place correctly, leaving a very pleasing solution shape. Taking it apart and photographing it for the review, it then took me around another 10 minutes to get it back to its solved state again. Since then I’ve taken it apart and put it back together again several more times, and I can solve it fairly reliably now. I’m sure if I left the pieces separate for a while then came back to it, it would take a little time before I could solve it again, so the level of difficulty is reasonable on this one.

Interestingly, at the at same time as George designed this puzzle, Don Charnley also designed the same puzzle, and named it Donz Q’b. The interesting thing is that the puzzles pieces are mirror images of each other. So you may find this puzzle referred to by either name, but in the end it’s the same puzzle.

Solution shape of the What 'sit

Solution shape of the What 'sit

I’ve deliberately, not included the picture of the solved shape as part of the gallery since that’s part of the challenge, but since it’s readily available in a number of places on the web, if you want to see it, click on the image above to see the full shape. Overall, a fun puzzle, and highly recommended if you can get a copy.

Tom’s Square Dance

In the most recent round of puzzles from Eric Fuller, he offered a few copies of Tom’s Square Dance. Sadly I was too slow this time and didn’t manage to get a copy myself. Fortunately my good friend Derek did get a copy, and he happily lent me the puzzle to play with! As the name hints, this is another great puzzle design from Tom Jolly.

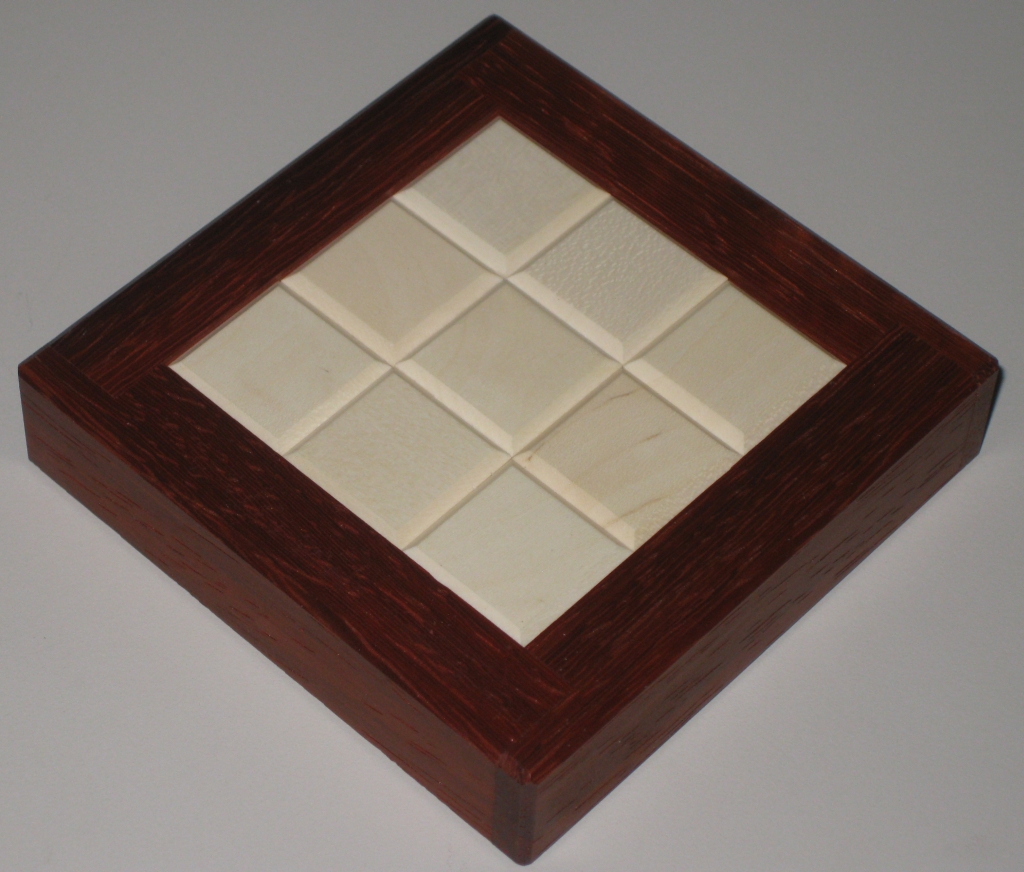
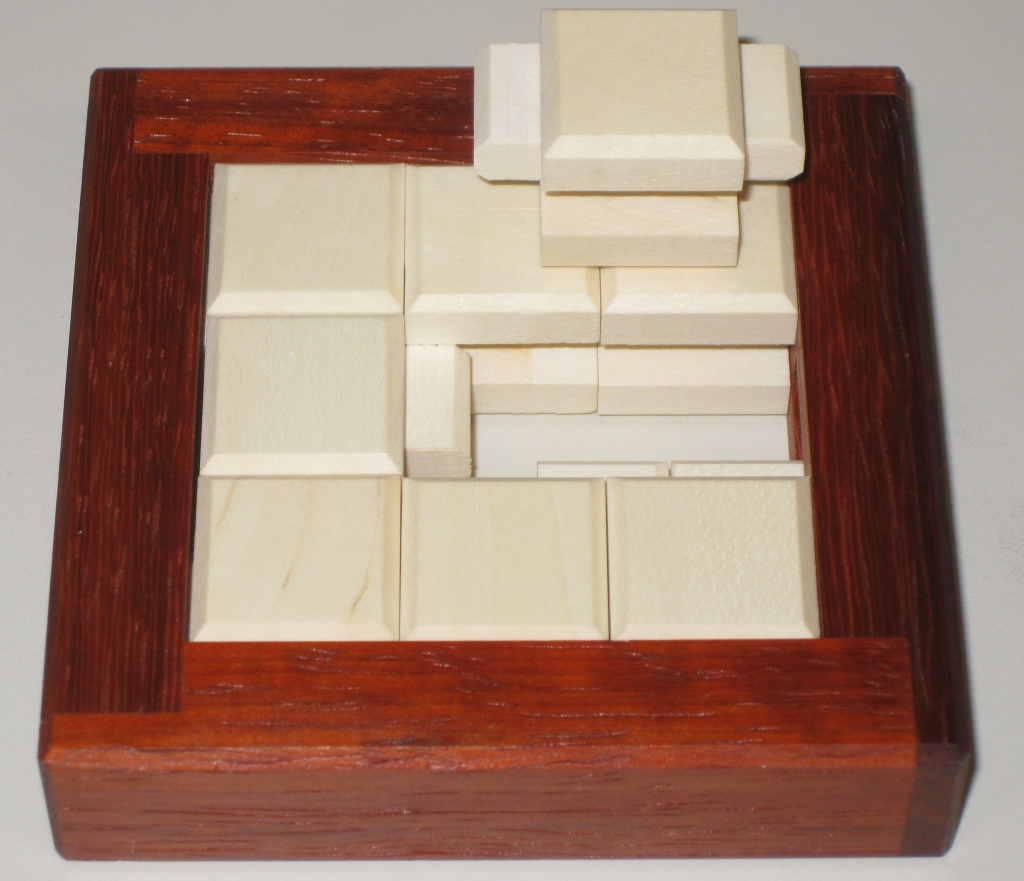
Tom's Square Dance in Paduak and Holly

Tom's Square Dance in Paduak and Holly

The Puzzle measures 3.3″ x 3.3″ x 0.75″ with the ‘cubes’ being 0.75″. The goal of the puzzle is to remove the pieces from the frame and then return them back to their original positions. One of the corner blocks is held in place with a small magnet, and once removed the rest of the blocks can be slid around inside the frame. While it may sound like there’s not much to this puzzle, you soon realise that there’s more to it than it first looks.

First piece signed by Eric

First piece signed by Eric

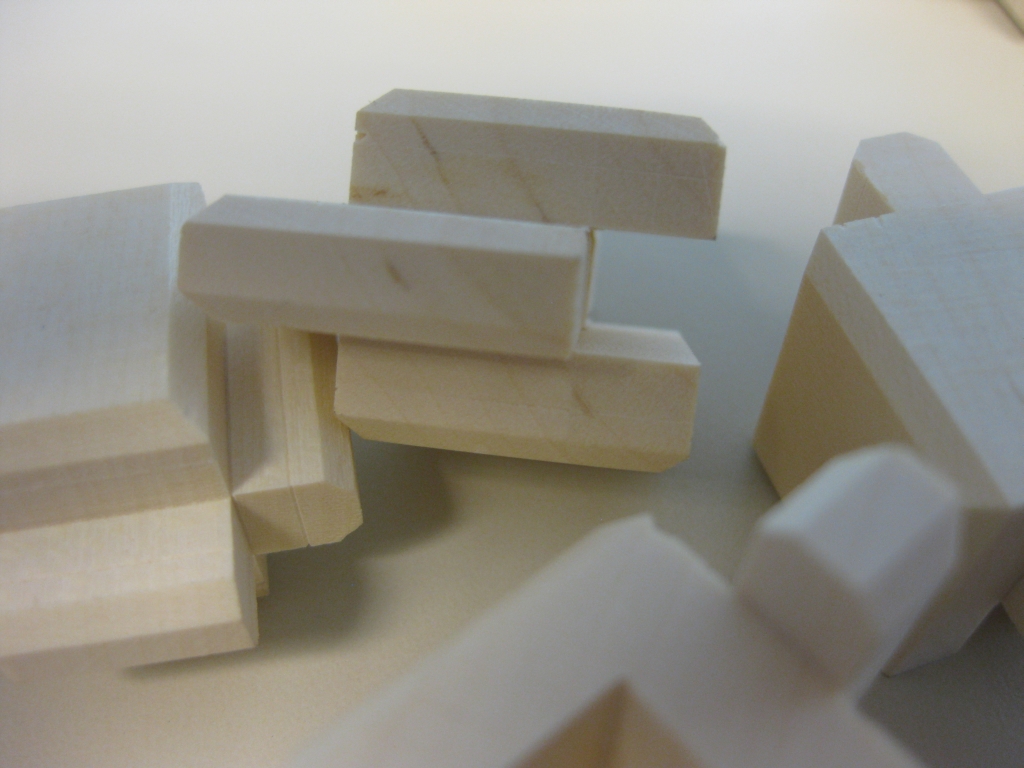
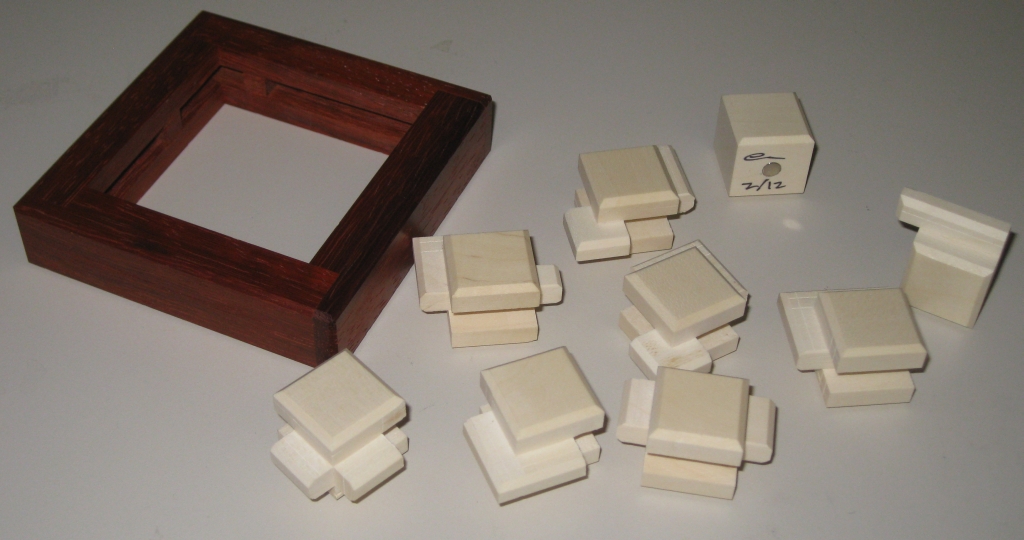
The blocks are not simple pieces, and have various bits sticking out of them so that they both slide against each other, and interact with each other allowing and preventing various pieces from moving. To make things more interesting, hidden around the frame are various blocks which also prevent the inner blocks from moving around!

Closeup of the pieces showing solid construction

Closeup of the pieces showing solid construction

Eric really went all out in making this puzzle. Offered in two different frame options, Bubinga and Paduak, with Holly pieces, the contrast looks great. Over time, the Paduak frame will change from the bright red/orange it is now to a very dark brown. The beauty of this will be that the inner frame which is hidden from the light will remain bright orange, so on solving; it will make for a very pretty reveal.

The thing that really makes this special is that the puzzle pieces are all milled from solid pieces of holly, and not layered pieces glued together. As such the pieces are very strong, and the time to create these pieces is much more labor intensive than gluing the blocks together. Eric has created the pieces such that the tabs are several thousands of an inch thinner than the grooves they run in. The precision of the pieces is really stunning, and shows the quality of Eric’s work. What it leaves you with is some really beautiful pieces, where the grain flows through the entire piece, something that could only be achieved with the time Eric put into the making of the puzzle.

The Second piece removed (oh, and the pic won't help you solve it!)

The Second piece removed (oh, and the pic won't help you solve it!)

To solve the puzzle, after removing the first block, it takes 8 more moves to remove the second piece, and as Allard and Oli have already commented in their reviews, the first piece comes out in a rather unexpected manner. It’s not too difficult to remove the first piece, and the second follows not too long after that. I think the reason is that the obstructions as well as hindering also mean that there’s a fairly linear path to follow to removing the pieces.

All the pieces removed

All the pieces removed

Putting the pieces back into the frame once you’ve taken them out and jumbled them up is a far greater challenge. It took me around 5 minutes to take the pieces out, but a couple of hours to get them all back in. It’s not impossible, but certainly a good challenge.

It total, the solution is listed as a 1.8.5.3.4(.2.2.3.3). The part in brackets really doesn’t count as there’s so much space at that point, that things just fall out! To my mind there is really only one solution however, if you plug the pieces into burr tools once you’ve solved it, you’ll find that it reports a second solution, with a different move count 1.8.5.3.2(.3.2.3.3). Now this alternate solution is actually identical to the original, the only change is that the two identical pieces in the puzzle are placed in the puzzle in a different order. Talking to Andreas about this, he notes that the tool will try to find a short path from the current point to removing the next piece. Depending on the state of the puzzle, this may be different, really only the count to remove the first piece is accurate.

I have to admit, I really enjoyed this puzzle. I think it’s around the right level between frustration, difficulty and solvability. Eric’s copy is superbly made, and while I’m a little sad I didn’t manage to get a copy of my own, I’m very happy to have been able to play with it thanks to the kindness of my puzzling friends.

Judges Gavel

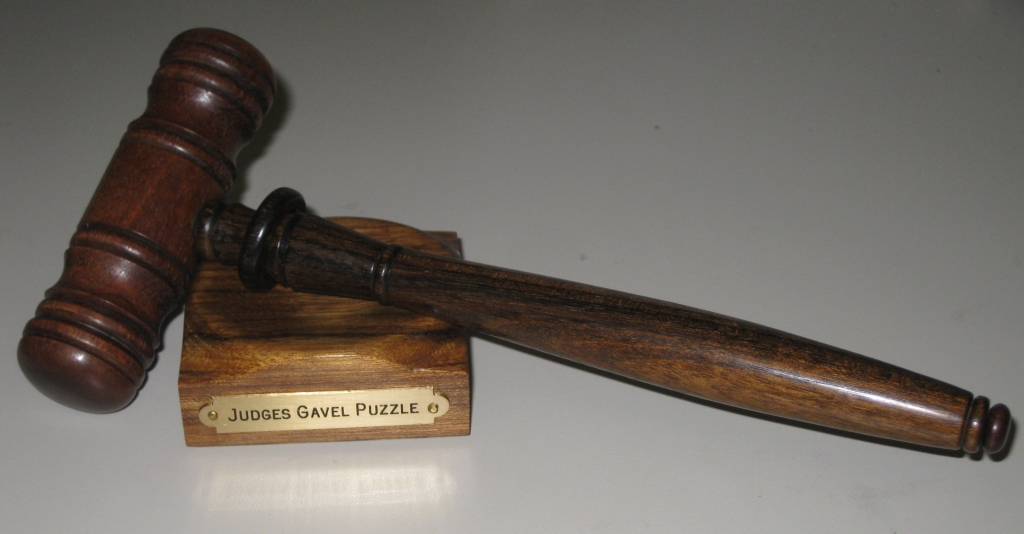
When you think about iconic items in society today, the crack of a Judges Gavel has to be up there. So when Michail Toulouzas took that iconic item and made it into a puzzle, there was little doubt that it would be special. And at IPP 31 in Berlin, the Judges Gavel won First Place.

Judges Gavel

Judges Gavel

Mike recently offered a number of these puzzles for sale and with an award winning puzzle, how could I possibly pass up the opportunity to add one to my collection, so without any thought I clicked ‘buy’ on the Puzzle Paradise auction! Update: Since posting the review, the last of the gavels on paradise has gone.

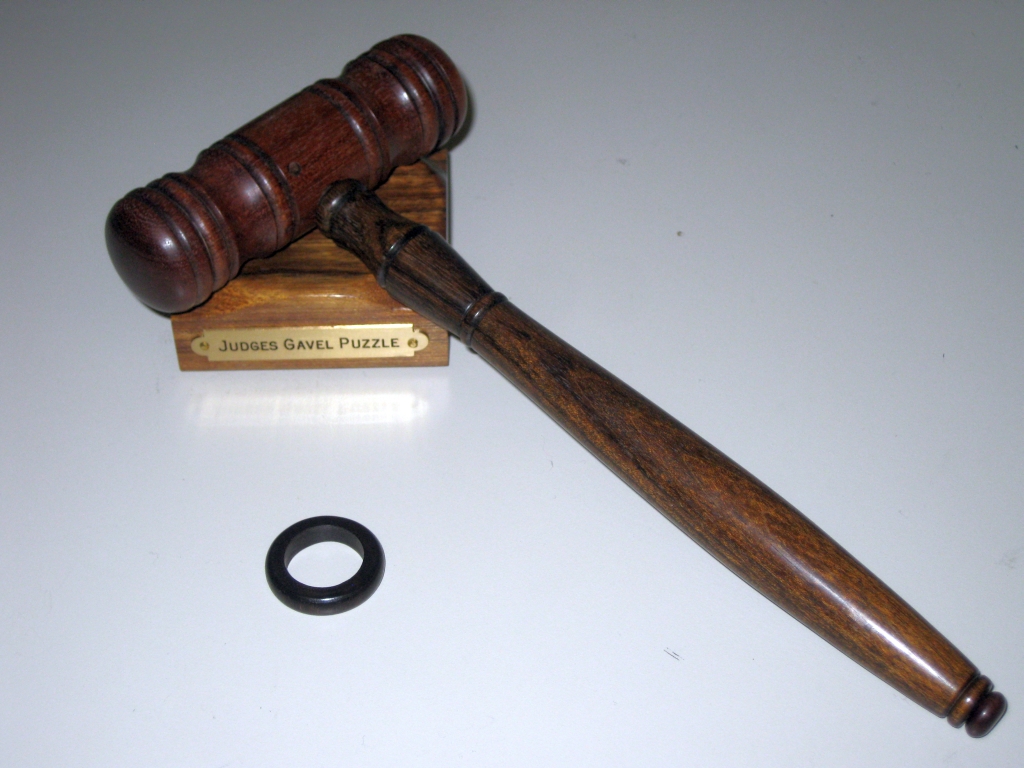
The goal of the puzzle is to remove the Mexican Ebony ring from the handle of the gavel. Sounds simple enough. So before you ask, no it doesn’t come off over the handle. The inner diameter of the ring is too small to allow it to do that, and clearly it’s not going to come off over the hammer end!

Closeup of the stunning woods used.

Closeup of the stunning woods used.

Measuring 4.25″ x 1.25″ x 9″ for the hammer, this version is slightly larger than the IPP entry. Made from a stunning combination of Mahogany, Lignum Vitae and Mexican Ebony, the Puzzle looks stunning. Mike tried to keep the choice of woods dark, rich and full, not fancy, and I’d agree with most of that. The woods certainly are dark and rich, but the Lignum Vitae on the handle and base have such depth and character, that I can’t classify them as anything other than fancy. When you turn the puzzle over in your hands, the light reflects off the wood with an almost magical property… and I love it! The whole puzzle has a warm feel to it; it exudes quality and has a feeling of something expensive and high quality.

Ed: Now returning to your regularly scheduled review …

Ok, so I like the look and feel of the puzzle. You get that!

Sadly I wasn’t in Berlin for the IPP, however those who were (Brian I’m thinking about you) recall that you could tell when someone was working on it thanks to the crack of the gavel hitting the block.

Since Brian had already commented in his review that there was more to the puzzle than just hitting the gavel, I was really looking forward to trying this one out myself. Like Brian I wasn’t disappointed. The puzzle is a piece of master craftsmanship, and there are subtle details that you’ll need to understand to be able to solve it.

Open!

Open!

It’s a clever puzzle, and needs (by my count) 5 steps to solve it and remove the ring. Some of those are fairly obvious, but others are well hidden and really need you to think about what’s going on. The beauty is that this is a solid puzzle, and designed to be used in the way the object it mirrors would be. So giving it a good whack is both part of the solution, and incredibly satisfying as well.

Mike's signature

Mike's signature

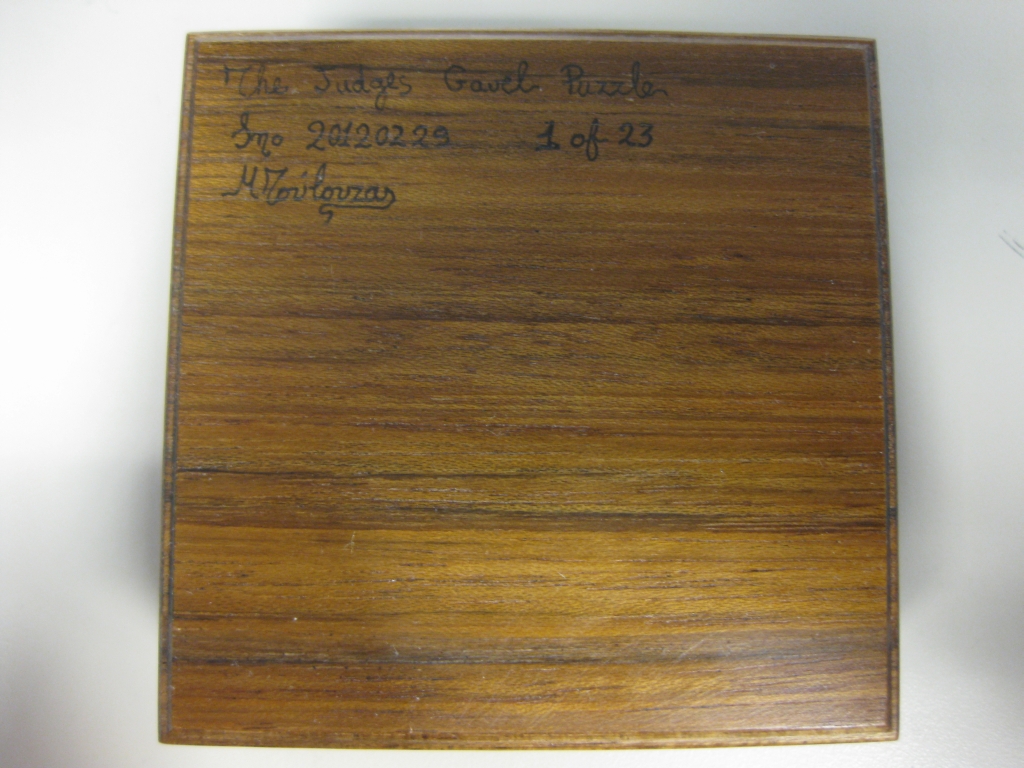
On the base of the wooden block, in possibly some of the neatest handwriting I have seen in a long time is Mike’s signature and a few details about the puzzle including the number in the run and the date it was made.

Ssssh ... we're working!

Ssssh ... we're working!

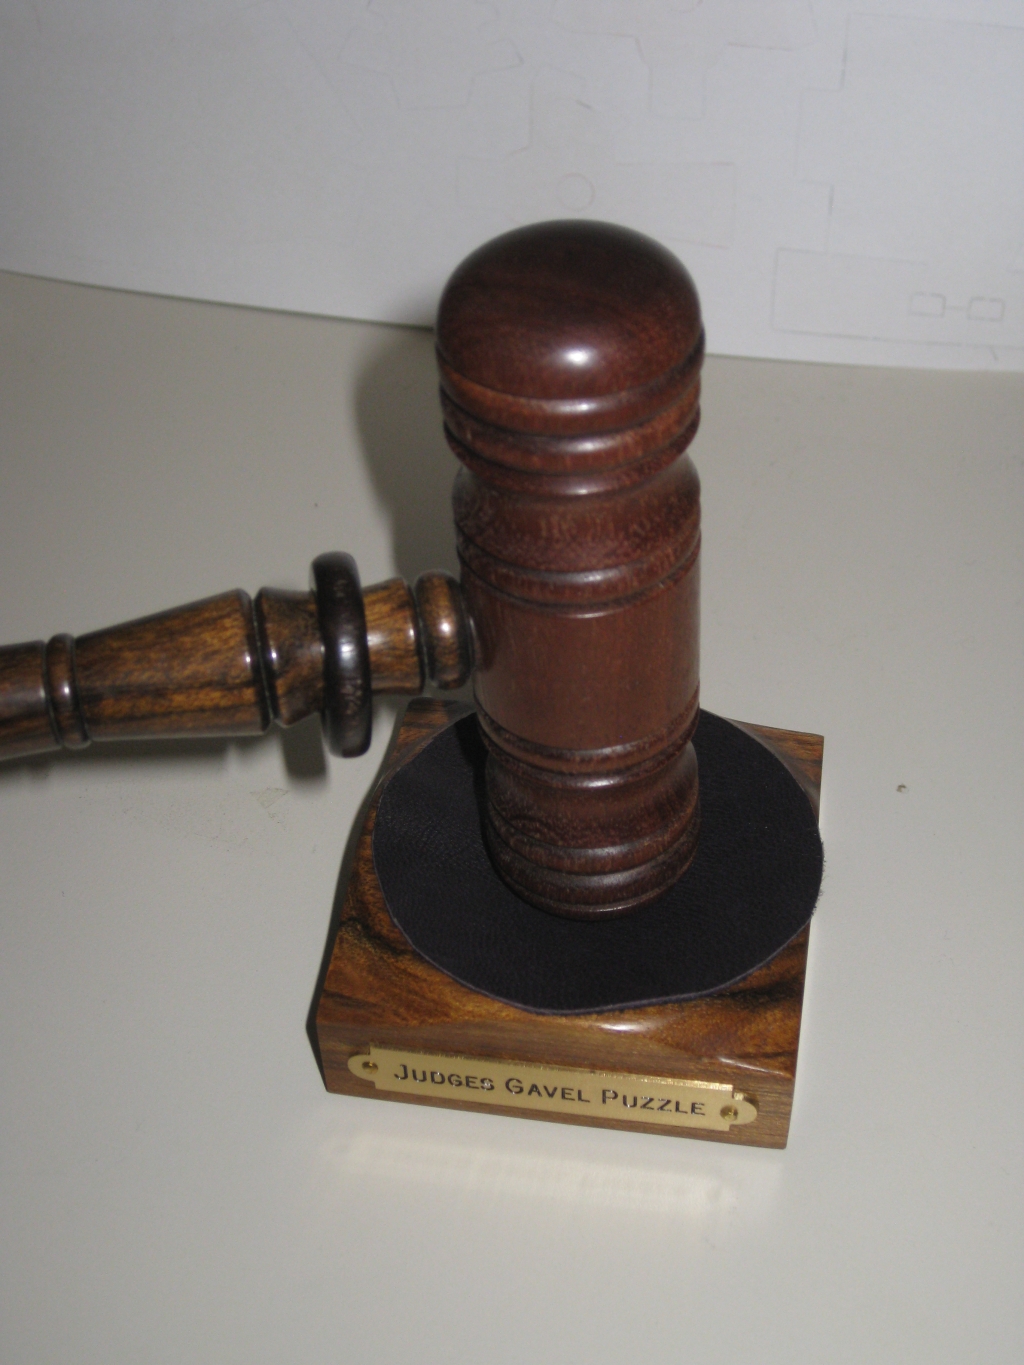
There is one last detail that Mike included with the puzzle, and that’s the small leather round to sit on top of the base to help deaden the sound… but when it makes such a nice sound, why would you want to? Not to mention that it would cover up the beautiful grain that you can see below.

The base looks stunning with the rich grain

The base looks stunning with the rich grain

In summary, this is a great puzzle, and highly deserving of its first place prize. If you’re quick, you should be able to add one to your collection, and in my opinion, you’d not be disappointed if you did!