Category Archives: Puzzle Reviews

Coffin Involute

My first home built Puzzle

After the successes with creating both Square Sticks and Cubes, I had to go do something with them; and see if I could create a puzzle. I decided to make some of Stewart Coffin’s designs, and having been in touch with him, he very graciously gave me permission to try to recreate any of his designs, and encouraged me to do so. With that endorsement, I was off and running. Well, almost!

I had to work out which puzzle I was going to create. There’s so many to choose from that it’s not an easy decision. In the end, I decided to create something that I didn’t already own, so I’d be adding to my collection if it turned out to be any good. So I settled on a copy of STC #214, the Involute puzzle. The Involute is the third in a series of puzzles from Stewart Coffin, each an improvement over the predecessor.

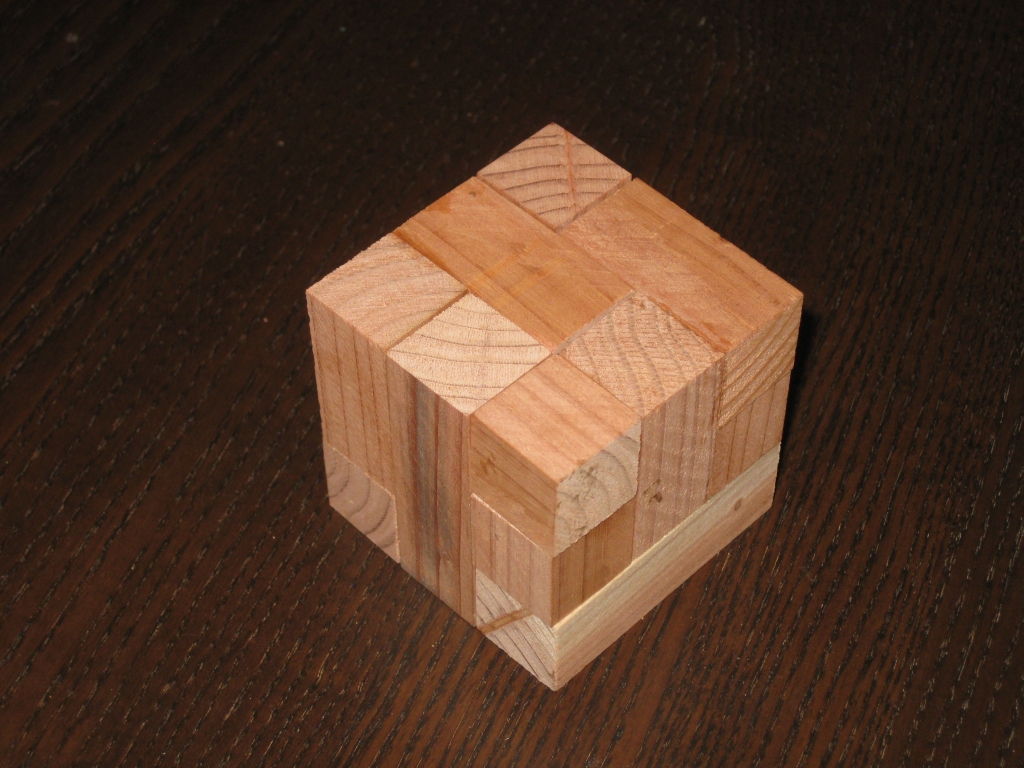
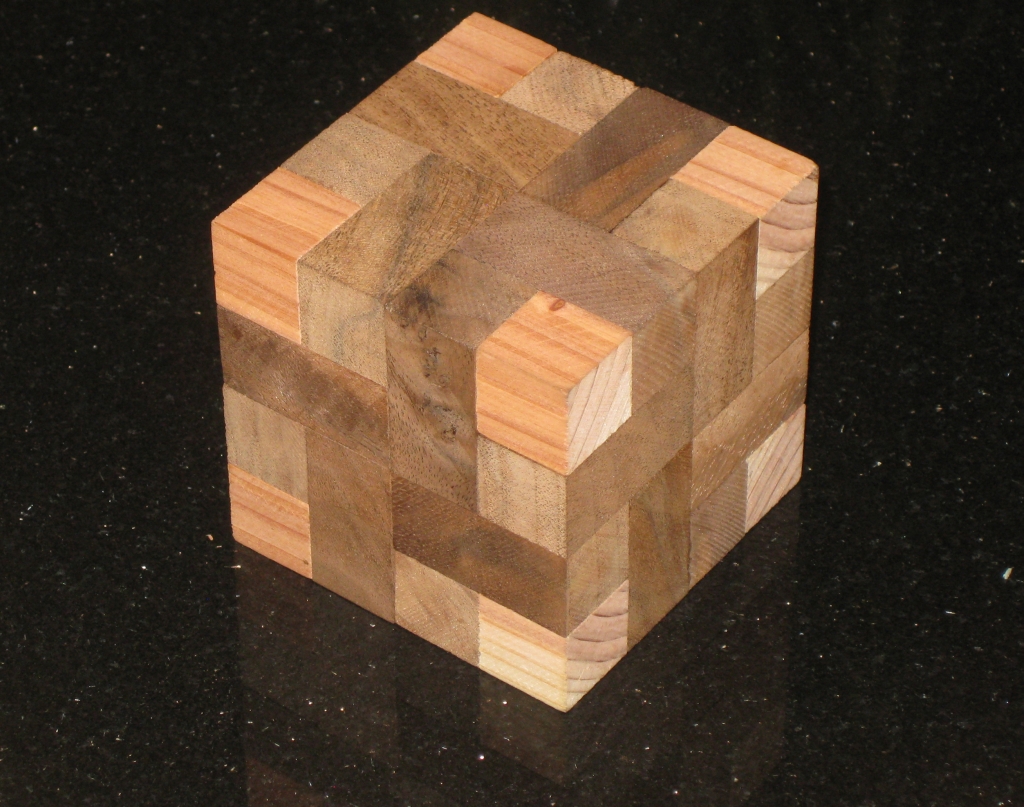
My first attempt - Involute by Stewart Coffin

My first attempt - Involute by Stewart Coffin

The first was Convolution, a 4×4 interlocking cube which requires a rotation in the solution. Due to the rotation, some material needs to be removed from one of the cubes in the solution (if you have a tight fit) to allow the rotation to happen. You can read my review here. Stewart Coffin notes that given the rotation, and the nature of cubes (which don’t like to be rotated when hard against one another), that this design could be improved. In his book “The Puzzling World of Polyhedral Dissections”, he leaves it to the reader to see if they can find a solution to this problem.

At the same time, Stewart Coffin had already solved the problem, and created STC #198, Involution. Again a 4×4 cube with a rotation required in the solution, but this time because of the design of the dissection, no material needs to be removed from the pieces to allow the rotation. I’ll not give away how this is done, as it would spoil the puzzle, but I will say it’s a simple and clever solution! I was able to play with one of Scott Peterson’s copies that he had made on my recent visit to see Scott, so I can say I’ve solved both the Convolution and Involution puzzles at this point.

The third in the series is STC #214, Involute. This is the final puzzle in the series, and is again an improvement over the Involution and Convolution. Again there is a rotation required in the puzzle, and again, no material needs to be removed for the rotation to take place. There’s an extra trick in this puzzle, that I’ll get to in a bit which makes it just that bit more devious.

All three puzzles in the series look identical from the outside, each having the same cross pattern on all six faces, so without knowing which puzzle you have in your hand, it could easily be any one of the three. Have I mentioned that this Coffin is a devious bloke?

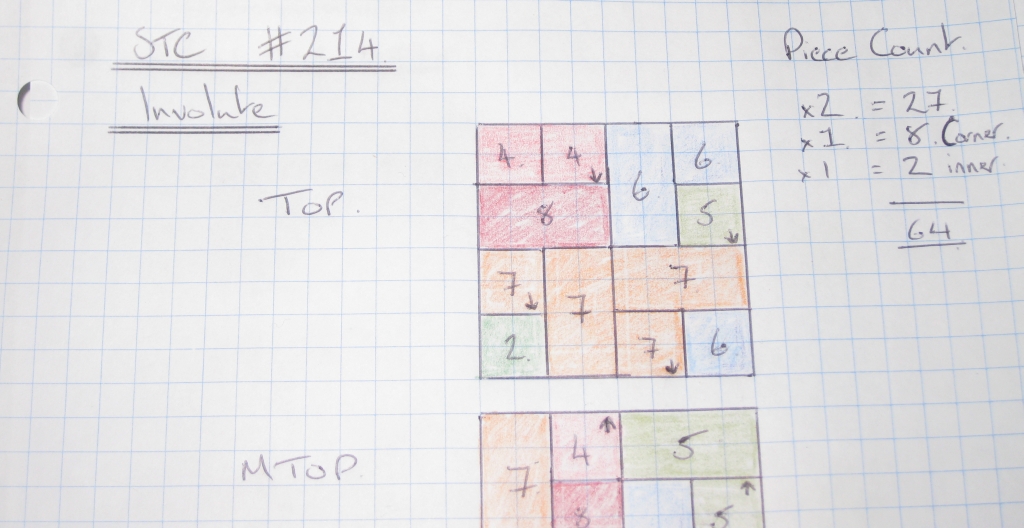
Thanks to Allard and Kevin who both reviewed their copies of the Involute puzzle, I was able to model the pieces in burr tools, and from that create myself a parts list and a gluing diagram to be able to build the puzzle.

My piece and gluing diagrams for the Involute.

My piece and gluing diagrams for the Involute.

Given that it took several hours to create the diagrams, including the time to create the model in burr tools and so on, I’m not going to give you the whole thing. Not to mention it would spoil how to solve the puzzle (or would it – I’ll come back to that thought). But the image above gives you an idea of what I created.

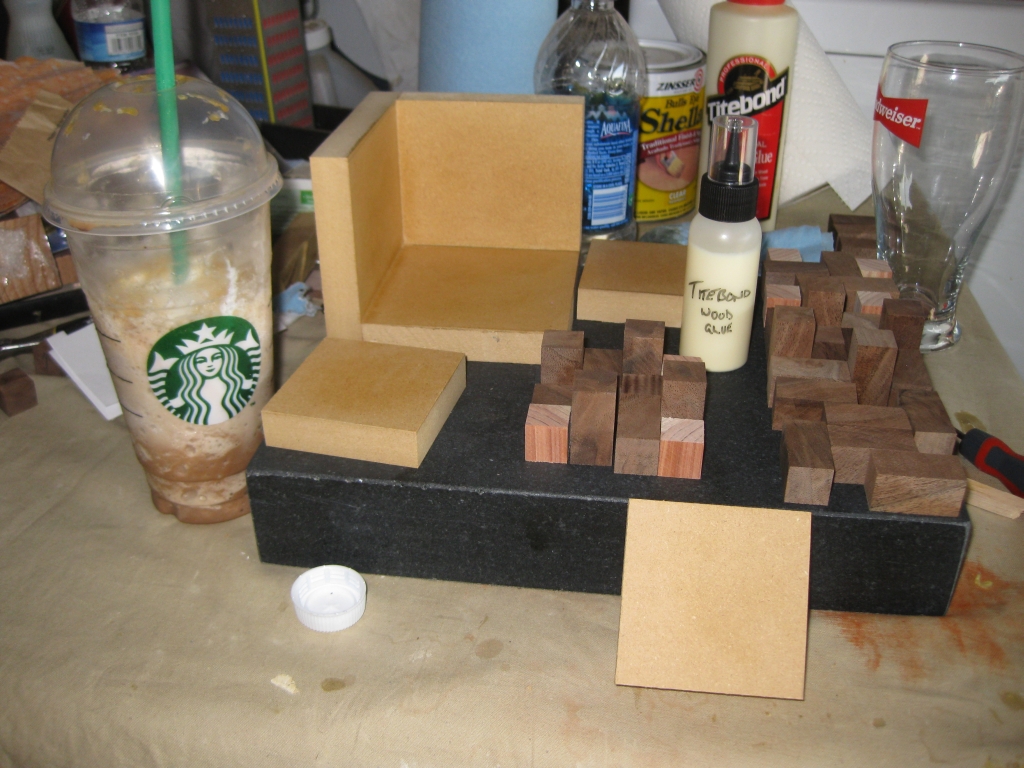
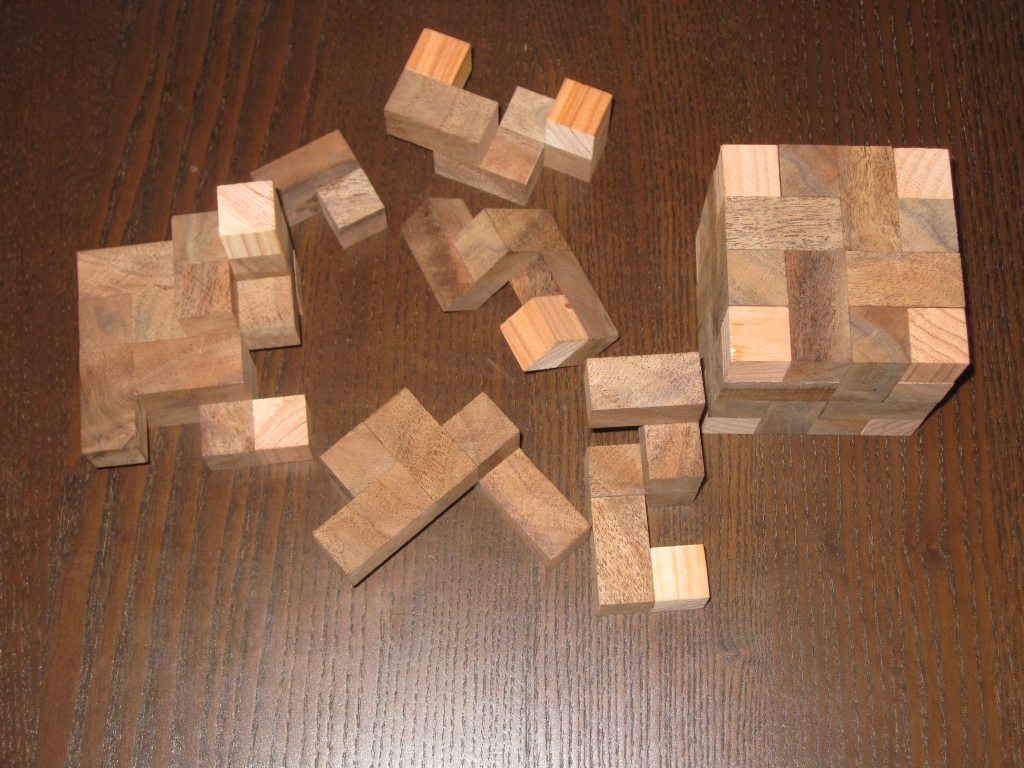
All the pieces needed to build the Involute

All the pieces needed to build the Involute

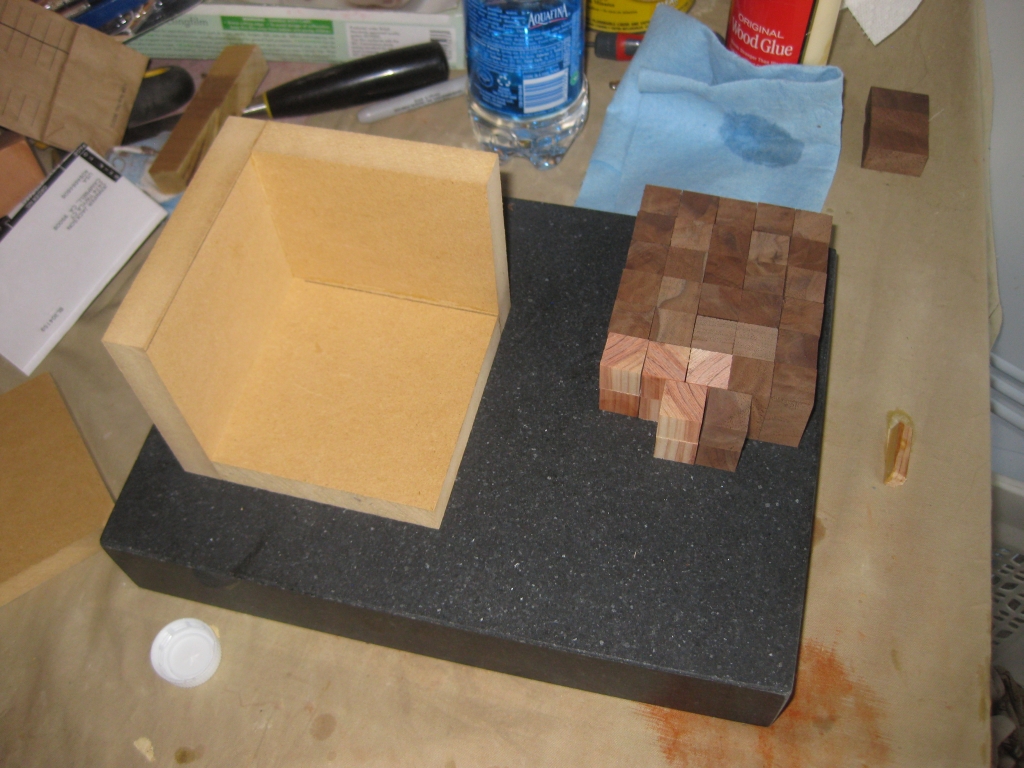
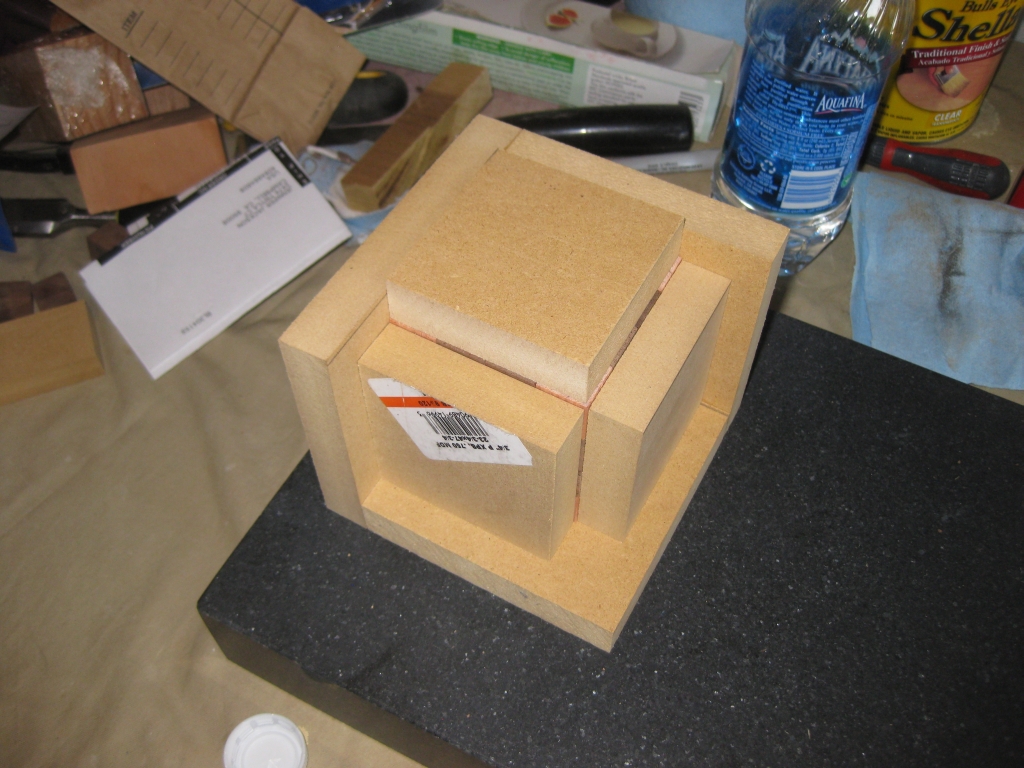
With the design in hand, I went off to the saw, and using the crosscut sled and my stops, I cut all the necessary cubes to make the puzzle. There’s quite an array of pieces there when you see them all sitting together. Also in the picture is one jig I hadn’t talked about previously. This is my cube gluing jig. It’s not overly complicated, just three pieces of MDF cut and glued together to hold a 4×4 cube cut to my 3/4″ stick size which has all edges at 90 degrees, and has been waxed to prevent any glue from sticking to it. I also have three ‘end panels’ which will distribute the clamping pressure evenly across all the blocks so as not to twist the blocks while the glue dries.

At this point I made something of a realisation. Sitting looking at this array of blocks, and my gluing diagram, gluing up one of these puzzles is hugely complicated. You’re working in three dimensions gluing any number of pieces together, all of which needs to be accurate, and with no glue squeeze-out. If you thought Ikea furniture plans were Convoluted, then this is much more challenging!

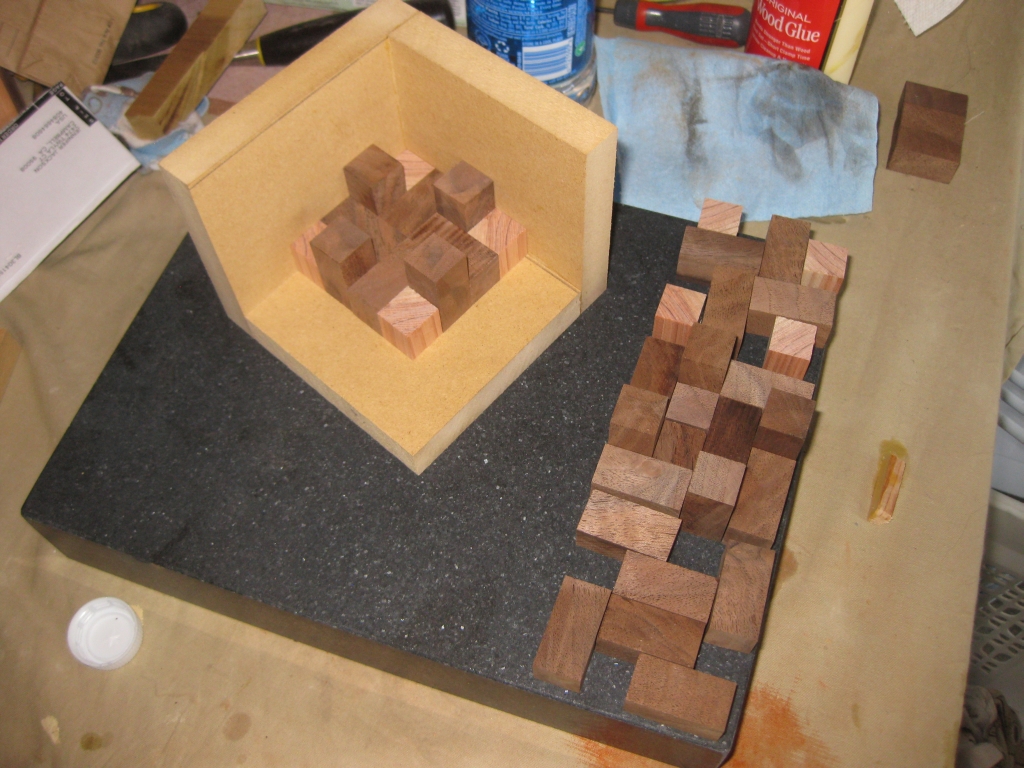
Dry fit in the gluing jig  - bottom layer.

Dry fit in the gluing jig - bottom layer.

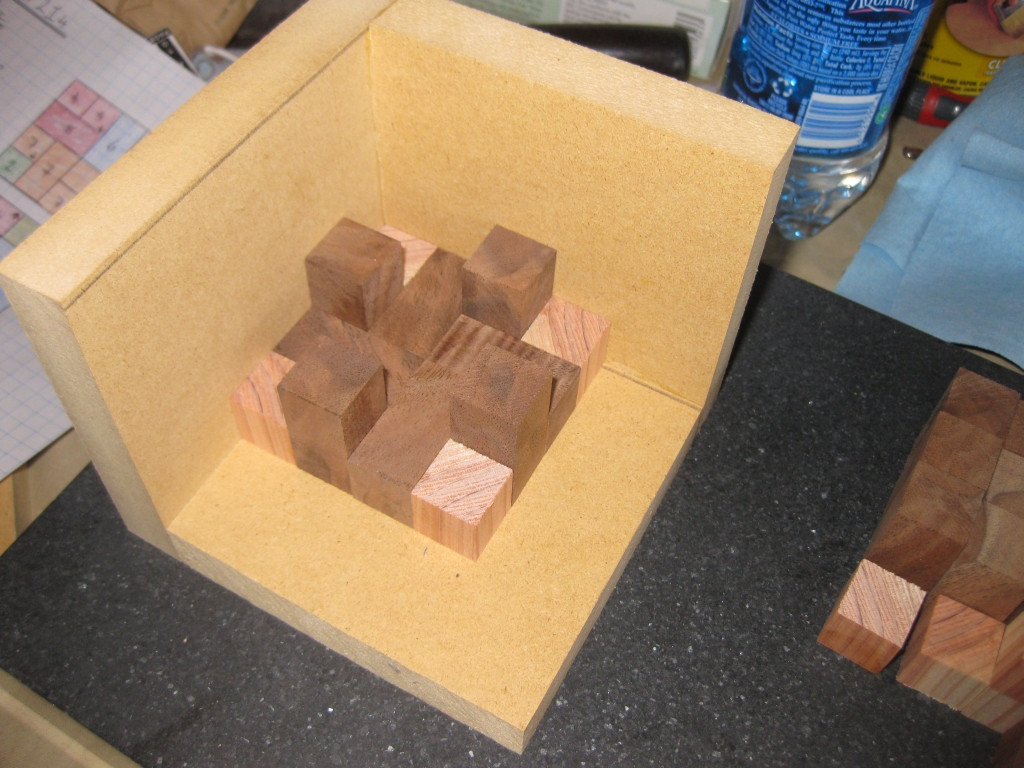
Dry fit in the gluing jig - three layers.

Dry fit in the gluing jig - three layers.

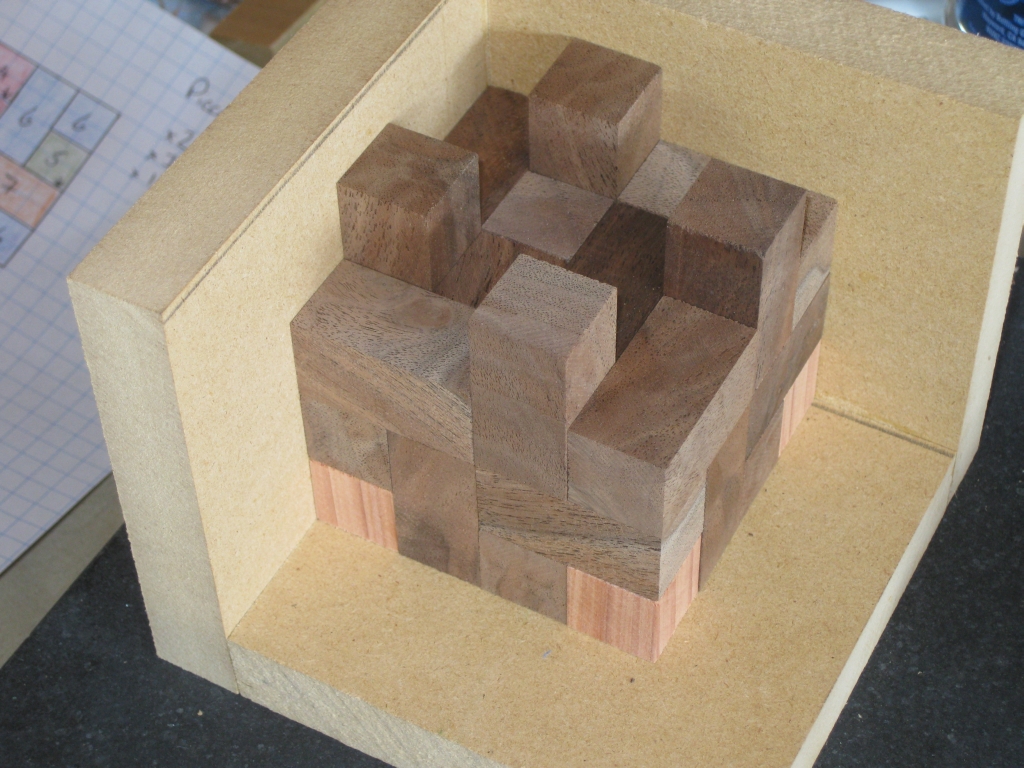
Dry fit in the gluing jig - full puzzle.

Dry fit in the gluing jig - full puzzle.

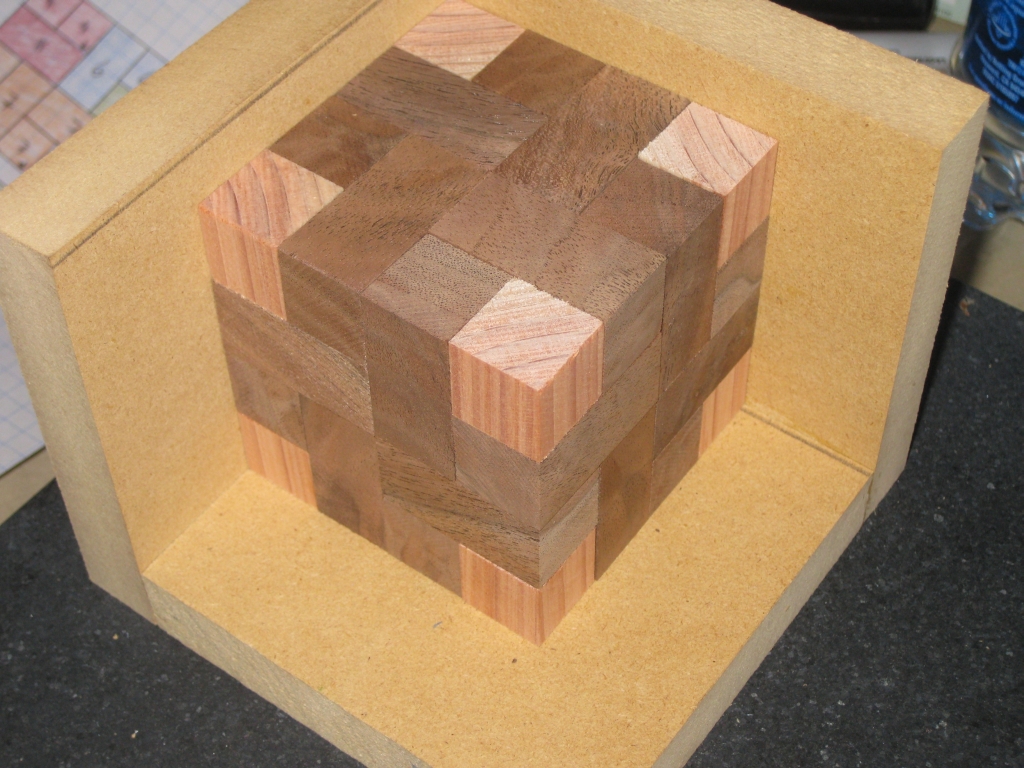
Dry fit in the gluing jig with clamp blocks.

Dry fit in the gluing jig with clamp blocks.

Next up I placed all the pieces into the gluing jig, to match my plans. This serves a couple of purposes. Initially, it shows me how good the fit is, and also verified that my plans were correct (at least in as much that I had the correct number of pieces). The other benefit to the dry fit is that it allows me to select which pieces I want to put where in the puzzle. Looking at the grain in the wood, I can select the ‘nicest’ grain to be on the outside of the puzzle, or look at creating grain patterns by selecting pieces carefully from the pile. Given that this was a first ever attempt, I wasn’t too concerned with the grain pattern, but I didn’t entirely ignore it either.

Since this was the first glueup I’d be doing, I decided to go with gluing up two layers at a time. This meant that I didn’t have to work quite as quickly to get the clamps on the jig to ensure that tight fit I was going for. Fortunately, the way the pieces go together, there is a flat surface after every second layer, which was ideal as a stopping point. I also have a smaller glue bottle, where I’ve decanted some of the glue from my big bottle. This small bottle has a fine nose, and is much easier to work with that the full sized bottle. Given the small amount of glue I’d need for each piece, this is the only way to work.

Involute in layers ready for the glueup

Involute in layers ready for the glueup

With all the pieces separated into layers, I was as ready as I was ever going to be to start putting this together into a puzzle. Fingers crossed!

First layer glued in place.

First layer glued in place.

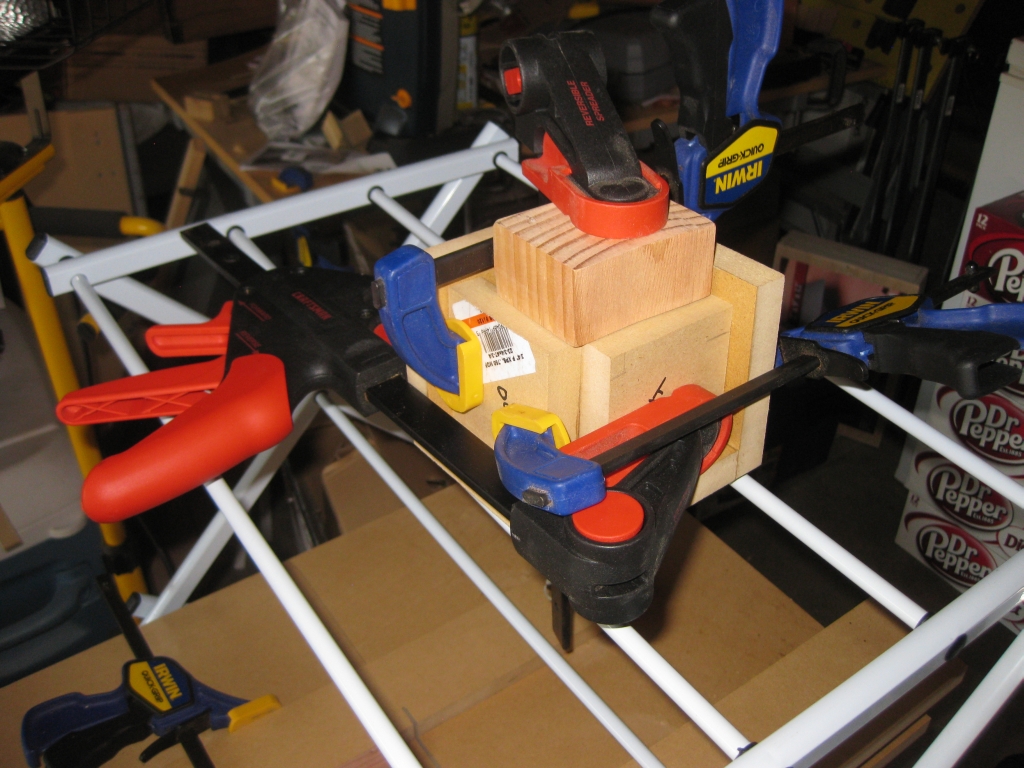
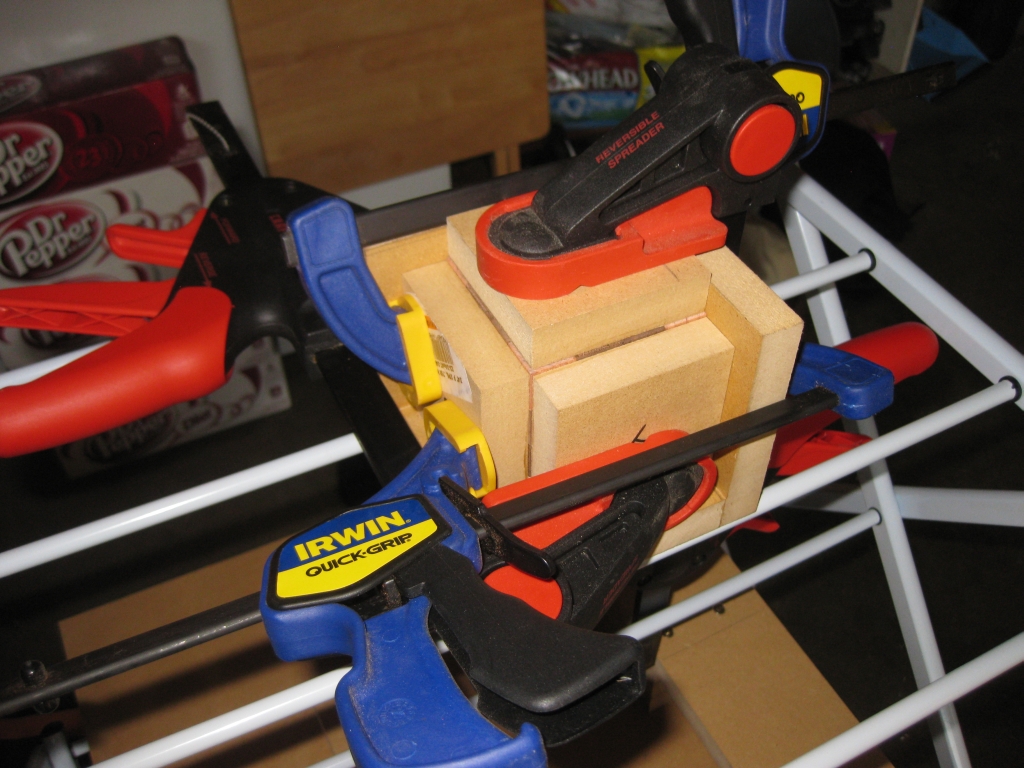
Two layers glued up and clamped.

Two layers glued up and clamped.

Working reasonably quickly, I glued up the first two layers, and thanks to tips from Scott Peterson, I managed to do so with little to no glue squeeze-out. That’s pretty important since any glue squeeze-out will glue blocks together that shouldn’t be, making the puzzle unsolvable. You’ll notice the fairly large block of wood on the top of the gluing jig in the photo on the right. That’s because I only have two layers build at this point, so the puzzle is half way inside the side plates. I needed to add some height to be able to clamp the puzzle effectively.

Glueup completed, clamped and waiting nervously.

Glueup completed, clamped and waiting nervously.

After the glue had set, I came back and added the remaining two layers, building on the two I already had. This time, you can see that the puzzle fills all the space, and there are no extra spacers required. I then had to wait a few hours for the glue to dry properly before I could take the clamps off, and see whether I had created a puzzle or a paperweight.

They may have a been a few of the longest hours I have experienced in a long time. My fiancée was about ready to kill me, as I wanted to go take the clamps off and see what I had, she kept telling me to leave it alone. I was like a kid on Christmas morning waiting to see what presents I had. I could barely sit still! When things had been left for long enough, I was finally allowed to go take the clamps off and see what I had.

I should note at this point, that I have never solved an Involute puzzle prior to making this one. Given that rotations are required in the solution, Burr Tools can show that there is a solution, but it can’t animate the assembly for you (or in my case the dissassembly), so I have no idea how to take the puzzle apart. I’m now in new territory, and given that I don’t know how to take things apart, or whether the pieces are glued together correctly, and not glued to one another I know this is going to be interesting!

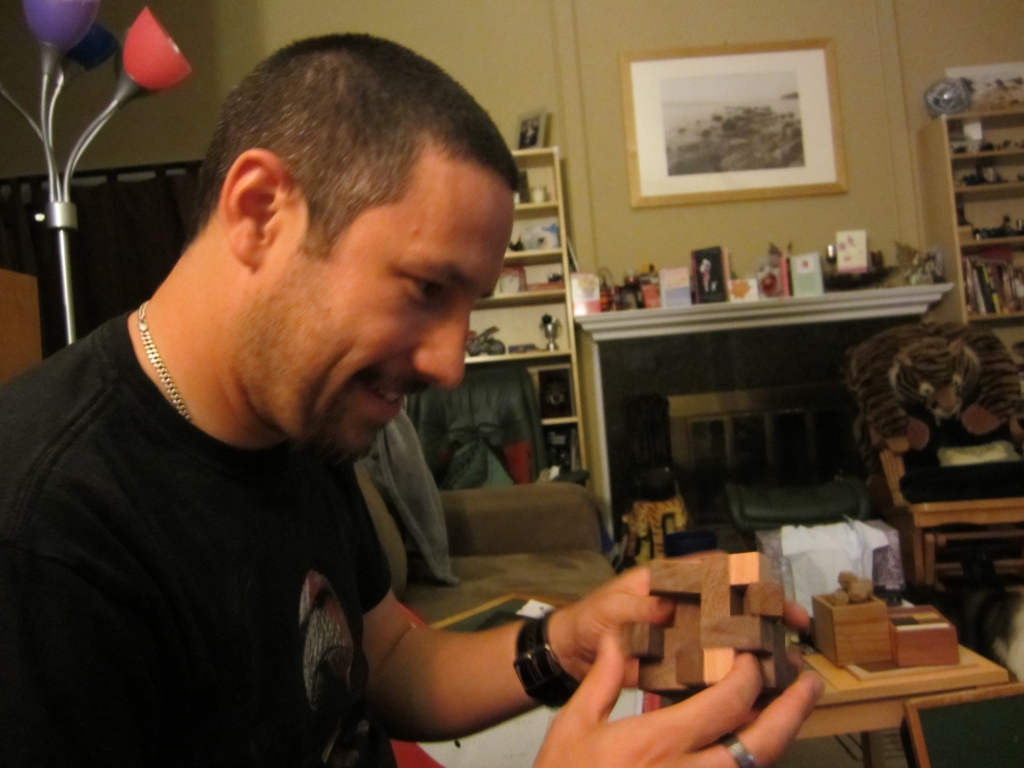
Since I know where the key piece is, I can remove that fairly easily, but then spend the next ten minutes pushing and pulling on various pieces hoping that something else will move in the puzzle. I can see that there is movement in the pieces, so at least it’s not all glued together, but I am having real problems in finding the second move. The pictures that follow were taken by my fiancée, so are unedited as I make progress. That grin on my face is real!

The moment where I figure out move 2.

The moment where I figure out move 2.

Now what?

Now what?

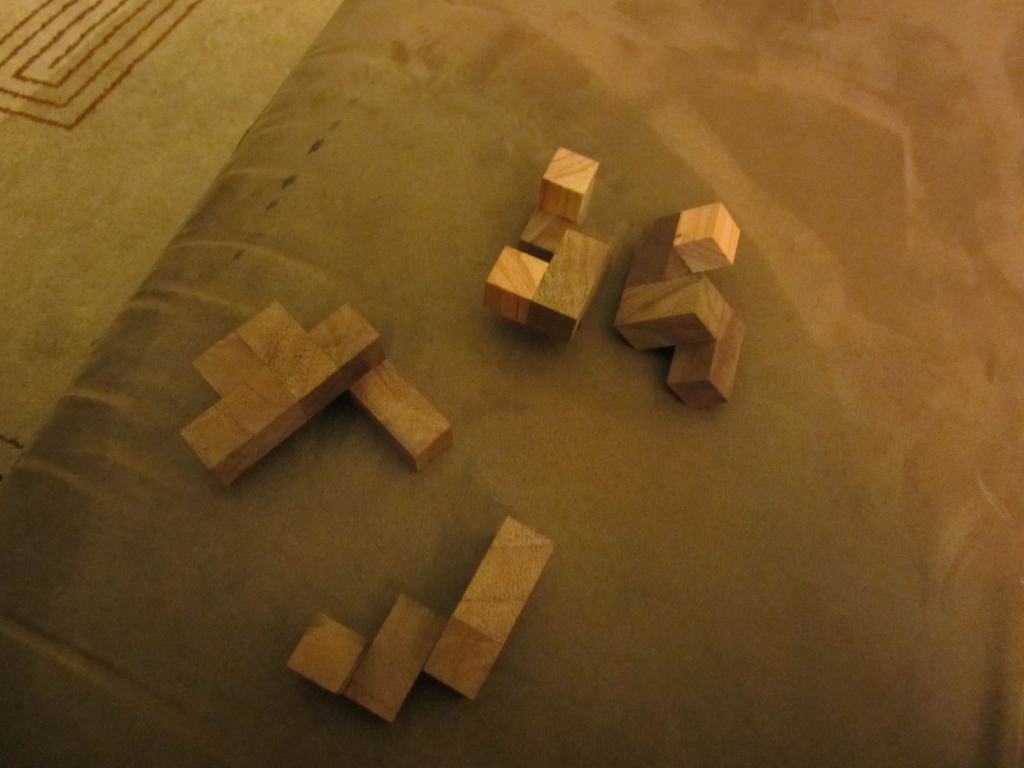
Seeing the individual pieces of the Involute for the first time.

Seeing the individual pieces of the Involute for the first time.

As I mentioned, I’ve never solved the Involute before, so I had no idea how the puzzle was supposed to come apart. The key piece in the puzzle is really well hidden, and without knowing where it was I would have struggled to start, especially not knowing if the puzzle was entirely glued together at this stage. The second move is also very clever. One thing that Stewart Coffin regularly has in his designs is pieces which are created so that the average person will hold the puzzle in such a way that you will be holding the piece you need to move, effectively pushing the puzzle closed and preventing it from being opened. The Involute is no different, and has this very same trick to allow move two. The look on my face when what looked like half of the puzzle slid to the side perfectly must have been quite the picture. I think for me not only was I solving a puzzle for the first time, which always brings a smile to my face, but also it was a puzzle I had built, and seeing it work the way it is supposed to is an ever bigger achievement.

I took the puzzle fully apart, and was left with the eight individual pieces sitting on my sofa, with a huge grin on my face. I then realised that I had absolutely no idea how to put the whole thing back together! In my excitement of taking the puzzle apart, I wasn’t paying any attention to how the pieces were coming apart! I then spent the next 15 minutes with my gluing diagram trying to put the puzzle back together. Remember I mentioned that having the full diagram may not help that much! I did get there, and the smile on my face seeing the puzzle back together was truly from ear to ear.

Closeup of the fit between pieces

Closeup of the fit between pieces

The rotation in the puzzle works perfectly, and I haven’t removed any material from the rotational piece to make that move easier. The fit of the pieces is superb. It’s difficult to tell individual pieces apart as you can see from the closeup above. This makes finding how the pieces come apart even more difficult that if the pieces fitted loosely together as there is no movement between the pieces. In case you’re wondering, that tiny gap that looks like there’s a chunk taken out of one of the pieces isn’t tear-out as a result of a poor cut, but was some natural holes in the walnut. It’s also worth noting here that there is no sanding done on any of the pieces, these are all straight off the saw. Many people in the puzzle community have noted that sanding reduces the accuracy of the pieces, and that a good clean cut can have every bit as good a finish as a sanded piece, perhaps better, since sanding is effectively scratching the surface.

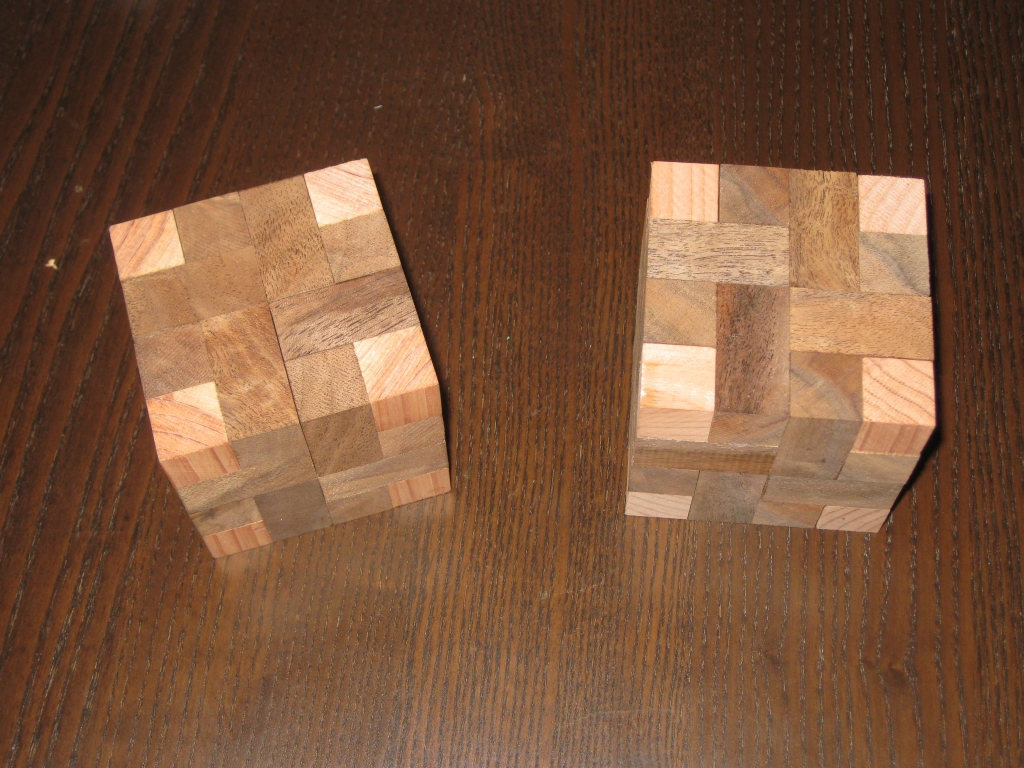
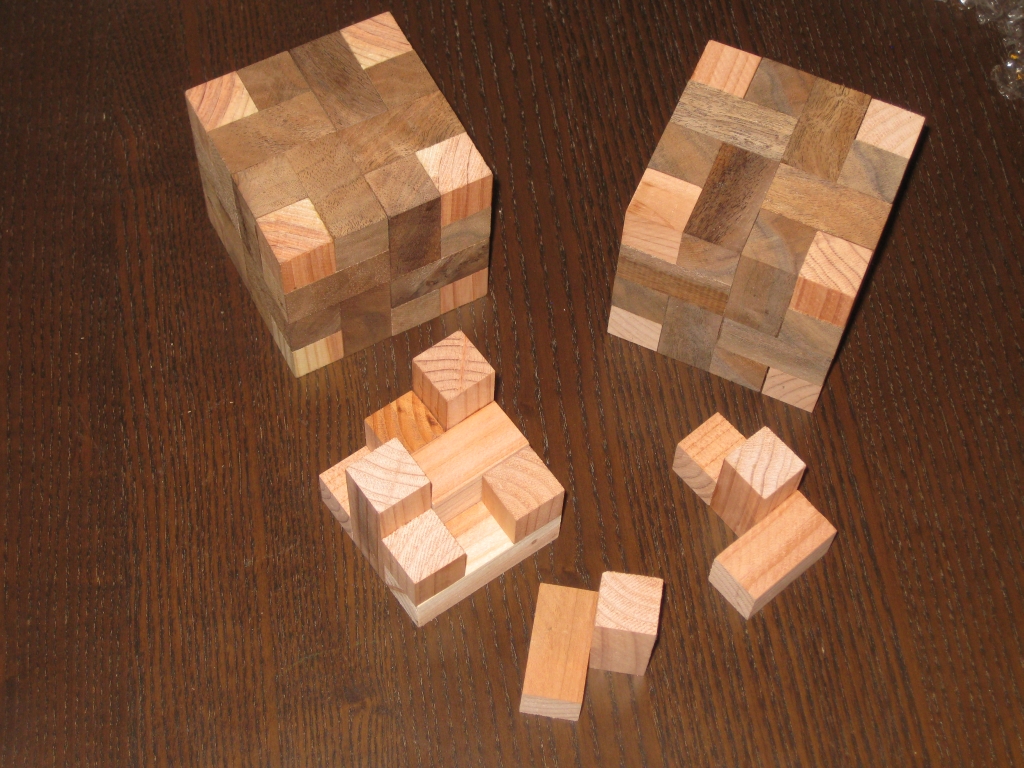
Yes, I made a second to prove it wasn't a fluke!

Yes, I made a second to prove it wasn't a fluke!

To prove that it wasn’t just a fluke and this was a one-off, I went off and created a second copy of the Involute. So what you’re seeing here isn’t some clever photography, but the two copies side by side.

Taking one of the cubes apart

Taking one of the cubes apart

And just to show that it works, there’s a partially assembled version next to the fully solved cube.

I was really happy with the results. Over the weekend I produced two copies of the involute puzzle, and both have a very snug fit, and I’d be happy to add these to my collection. In case you’re wondering, they’re made from walnut with redwood corners. And not to sound like an American advert trying to get you to place an order for something you didn’t want …

But that’s not all!

There’s another of Stewart Coffin’s designs that I’ve wanted to play with for a while. That’s his “Half Hour Puzzle”, STC #29. So I drew up the diagram for that, and made one of those too! The brilliant thing about the half hour puzzle is that even though Stewart coffin designed it to only have the cube solution, there are hundreds of possible solution shapes that can be made with the pieces. I’ve created a burr tools file with many of the solution shapes, so if you’re interested in a copy of the file, just let me know.

STC #29 - Half Hour Puzzle

STC #29 - Half Hour Puzzle

Three Coffin's

Three Coffin's

So there you have it. Three puzzles in one weekend, all which I am very proud of, and is the start of hopefully great things. As Allard has put it, “One day there’ll be a couple of us around who can say that we had one of the very puzzles created by someone the whole puzzling community now knows as the Juggler-guy! :-)” Maybe … one day.
Zauberflote – Magic Flute

Eric Fuller recently offered a few new puzzles through Cubic Dissection and I picked up “Zauberflote” designed by Gregory Bendetti as well as “Stand Py Me” which I reviewed recently. Both puzzles sold out very quickly.

Zauberflote translates as “Magic Flute” and is an opera in two acts composed in 1791 by Wolfgang Amadeus Mozart. Gregory wanted to make a series of puzzles which had a link to the opera which he enjoys.

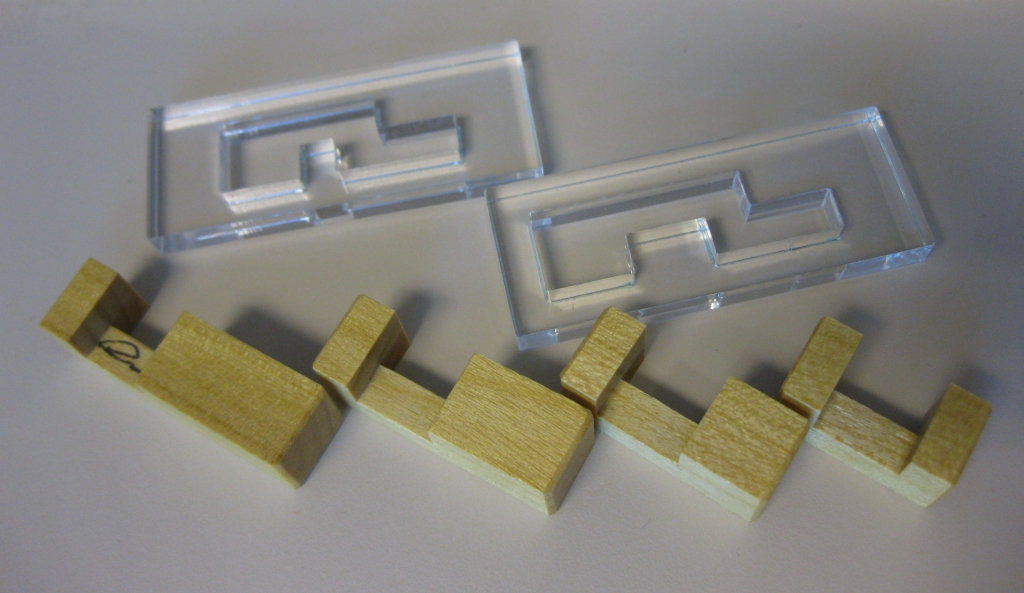
Zauberflote - Königin der Nacht pieces

Zauberflote - Königin der Nacht pieces

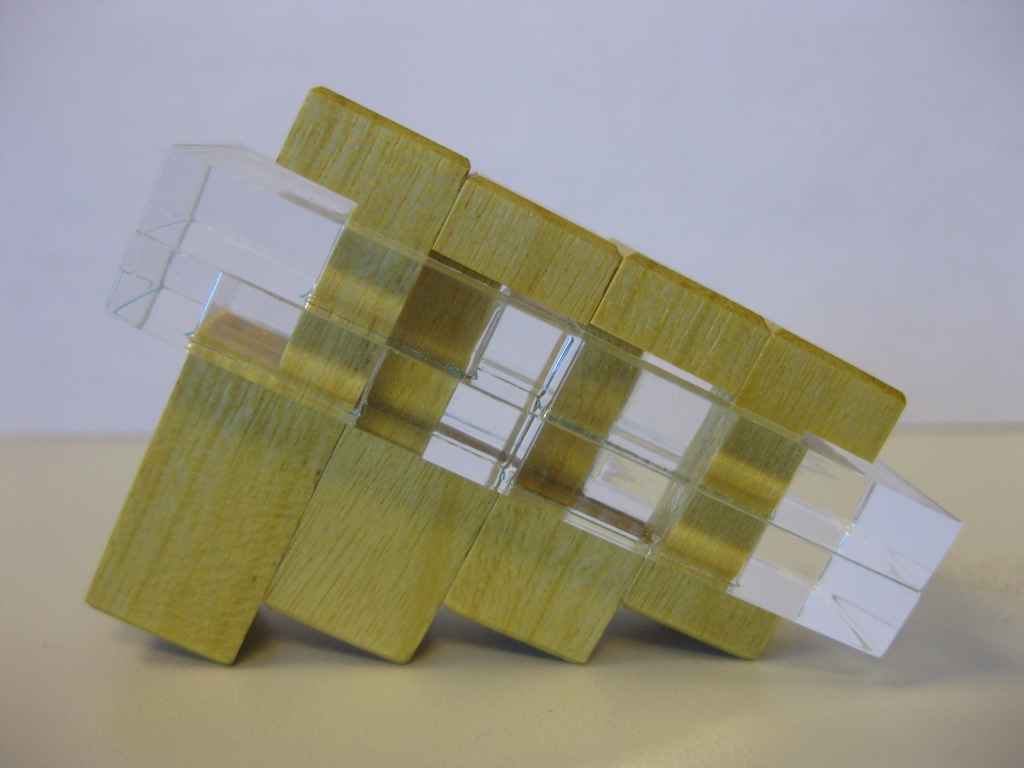
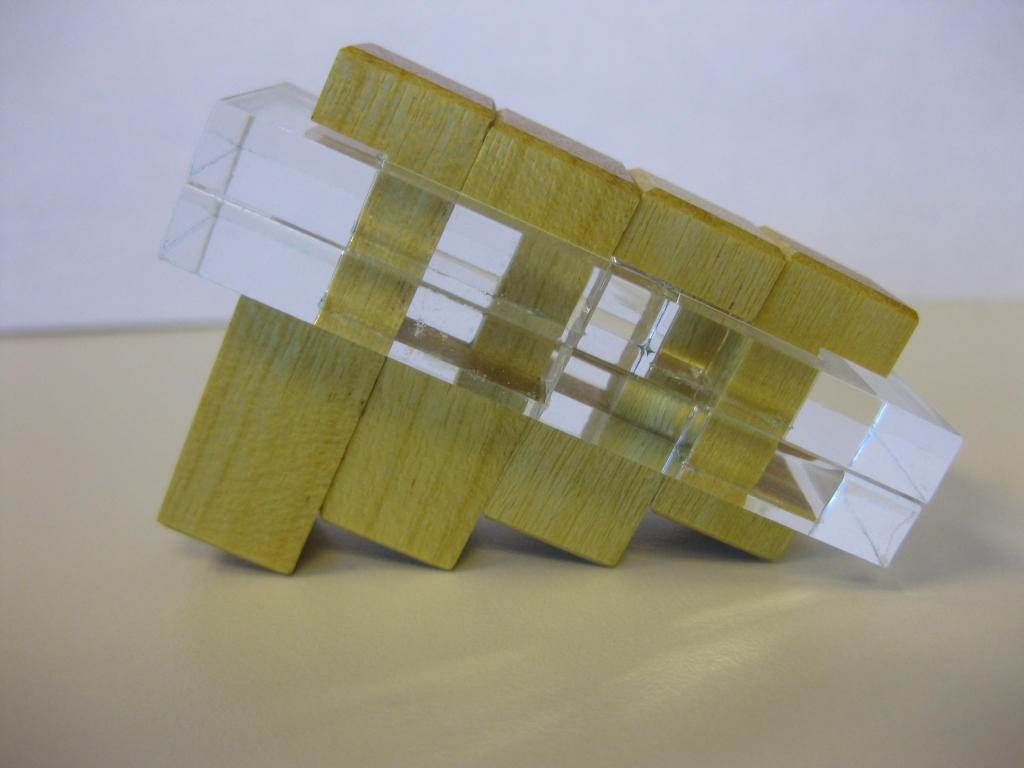
In a change from my usual style, I’m not showing the completed puzzle at the top of the post, but rather the pieces. I’ll get to the reason why soon enough. Eric has created this 4 piece version of Zauberflote from acrylic and yellowheart, and describes it as a pocket puzzle, given that its full length is just 2.25″. Gregory gave the four piece version the full name “Zauberflote – Königin der Nacht”, and each of the puzzle in the series with a different number of pieces in the flute has a different sub-name. I really like the use of the acrylic here, as even when the puzzle is solved (as you’ll see below) you can still see the internal burr of the wooden pieces, which is a nice touch. Eric made 45 copies of this puzzle, and they are all signed with Eric’s usual squiggle.

I spent about 30 minutes working on this puzzle, and after a few false starts I found a way to get all the pieces in place and the flute shape (or possibly more of a set of pan pipes) is easy to see. When I was solving it, I started by putting the smallest piece in first, and I required a couple of rotations to get the pieces into their final location.

My solution requiring rotations

My solution requiring rotations

Feeling quite happy with myself I put the puzzle aside for a few days. When I came back to it, I opened the trusty Burr Tools and created a model of the puzzle there. Now I fully expected burr tools to be able to put the pieces in place, but I didn’t expect it to be able to give me an assembly given that rotations were needed (when I solved it). To my surprise, Burr tools came back with 72 solutions and one assembly!

Solution found by Burr Tools

Solution found by Burr Tools

Burr tools notes a 14.4.2 assembly and shows that it is possible to solve the puzzle without using rotations as I had. If you look very closely at the two images, you’ll see that the internal burrs are in different locations showing that clearly it’s a different solution. Also Burr Tools puts the largest piece in first, although I believe it is possible to insert the pieces in any order.


So having used burr tools, I think there are more solutions than it shows, even without the rotations. I did talk with Gregory as to whether rotations were intended, and he admitted that he hadn’t checked for rotations, but it wasn’t cheating, since I still solved the puzzle without forcing the pieces, and had found a solution that he hadn’t. The solution with rotations is much shorter at 7.1.1.2 (if my counting is correct).

Overall, this is a fun puzzle, which isn’t too hard and is very nicely made by Eric.

Stand Py Me

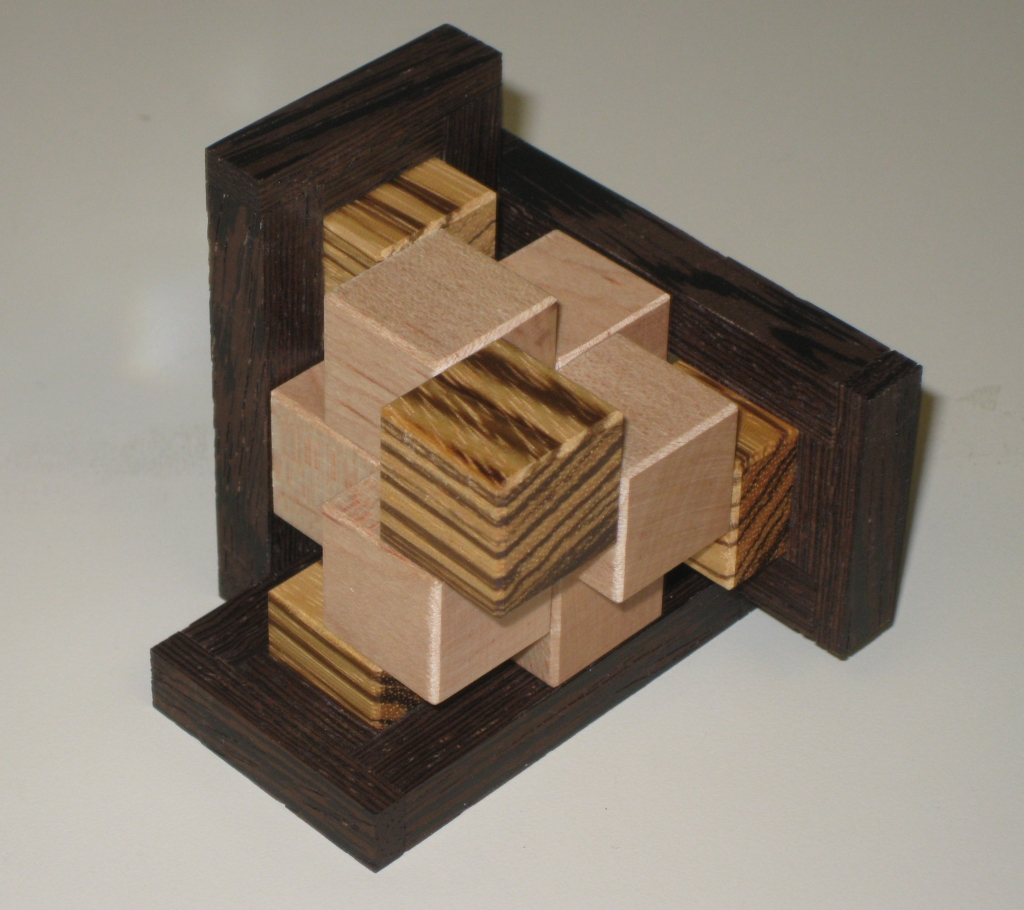
Stand Py Me is a new puzzle from Gregory Benedetti. It’s familiar shape is similar to Stewart Coffin’s Three Piece Puzzle, however it comes as four pieces (plus the stand) not three, and every bit as challenging to solve.

Stand Py Me by Gregory Benedetti

Stand Py Me by Gregory Benedetti

This version was made by Eric Fuller, and stands at 2.75″ with a Wenge frame and Zebrawood and Maple blocks to make the pyramid shape. Gregory comments that the name is a play on words; the Py, not coming from Pi (3.14159265…) but Pyramid. It’s as though a Pyramid is saying “Put me on a stand”. Well regardless of how it was named, it’s a fun name, and really fun puzzle.

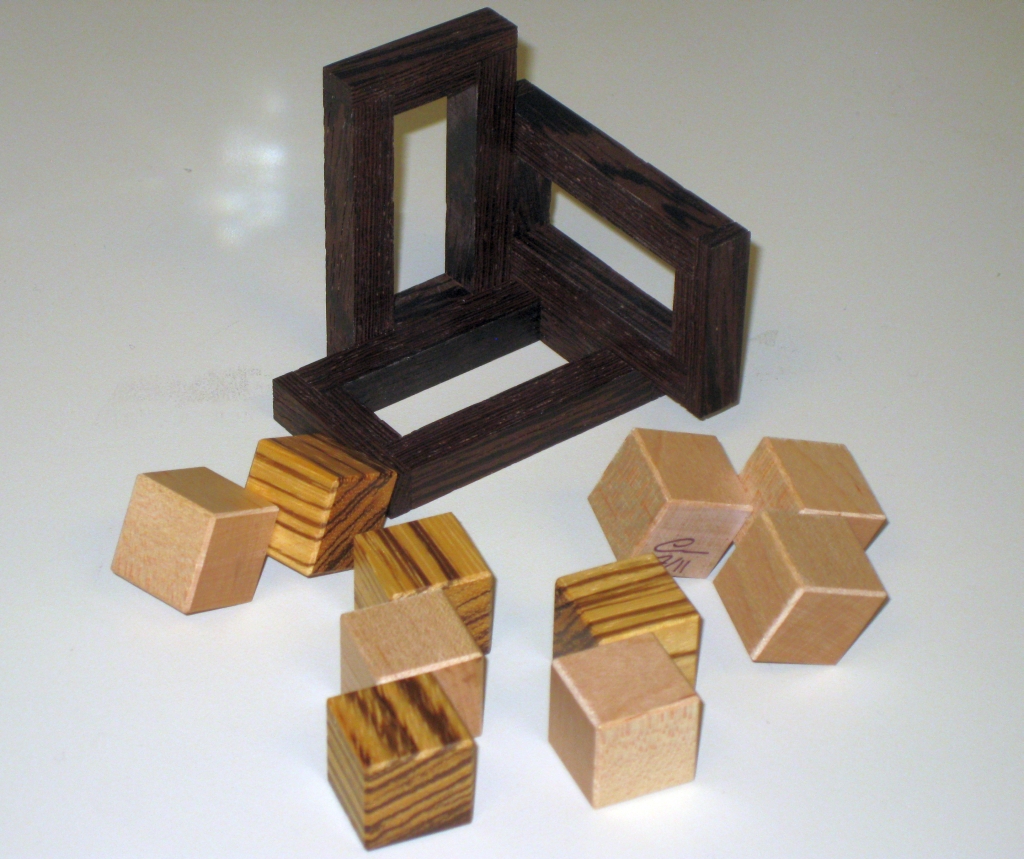
The blocks which make up the puzzle are all joined on a half face or quarter face making for some interestingly shaped pieces. The puzzle is made significantly harder by the addition of the frame. It’s fairly easy to create a pyramid of the blocks outside the frame, but doing it so that the pieces are captured inside the frame is a lot tougher.

Four pieces, plus the frame.  Signed by Eric

Four pieces, plus the frame. Signed by Eric

To get all the pieces in place, you need to move them around much like a standard Burr puzzle, which leads to a 5.1.2 solution. In case you’re not familiar that means 5 moves to insert the first piece, one for the second and 2 for the third. So it’s a tricky puzzle, and took me around 40 minutes to solve it the first time. Now knowing how the pieces fit it takes just a few seconds, although I keep putting the pieces in ‘upside down’ so I don’t end up with the Zebrawood pieces in the corners the way it was made to be.

Having solved it, I modeled the puzzle in Burr Tools, and it confirms the 5.1.2 difficulty, and also points out that there are 2 solutions (not including rotations) but only one assembly.

Eric made 30 copies of Gregory’s design and has signed and dated them. I picked mine up at a recent Puzzle Paradise auction, although they all went very quickly. This is a really well made puzzle, and the choice of woods really shows it off well.

Interestingly, the puzzle doesn’t hold itself inside the stand overly well, and wants to fall out of the gaps, meaning that you really need to turn it upside down and hang it to get it to keep its shape. Not a problem, but it is something that even Gregory admits himself.

Coffin’s Rosebud and Cluster Plus

Before my visit to see Scott Peterson’s workshop a few weeks back, I’d been talking with Scott for a while via email. I’d introduced myself, and asked if there was any chance he could make a couple of puzzles for me, including a Rosebud, and a Peanut puzzle. I’d also mentioned that I was starting to make my own puzzles, and Scott was only too willing to help out with tips and advice, answering all my dumb questions with the sort of enthusiasm and excitement that I remember from my high school science teachers.

As it happens, Scott hasn’t made a Peanut puzzle for a very long time, and he tends to make a run of puzzles then move to the next design, however he had just finished a run of Rosebud puzzles. At the time he didn’t have any available, but he thought he may be able to make me one at some point. With an offer like that I duly said thank you and never thought about it again. In the time between that original email, and my visit, we’d exchanged a number of emails, mainly about woodworking, and Scott’s tips to help me get started. Not long after we arranged to meet up, Scott got back to me saying he had a Rosebud available if I still wanted it, and he had a jig too. Like a bobble head on a dirt road, I instantly said ‘yes please’.

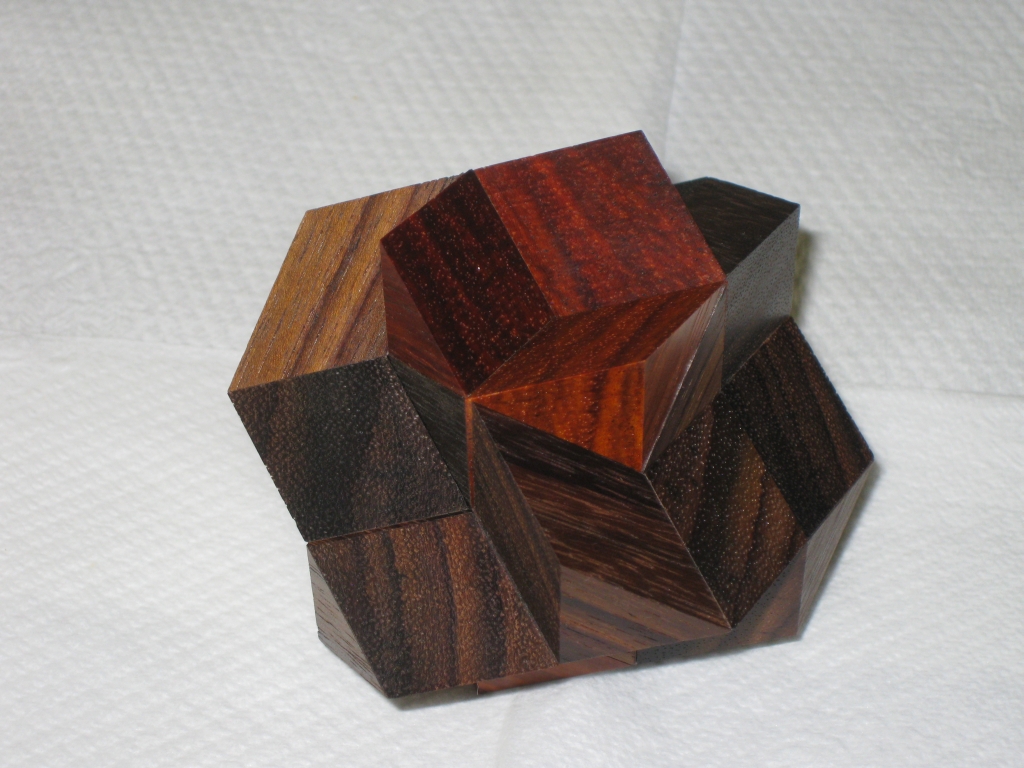
Rosebud in its closed state

Rosebud in its closed state

This particular copy is made from East Indian Rosewood, and Flamewood. The strong red from the Flamewood, and its detailed grain pattern really make this an object of beauty. I must confess that the pictures don’t really do it justice. The finish is glassy smooth, and the fit of the pieces is incredible. This is a tight fitting puzzle, with no visible gaps, and yet the pieces slide past one another with ease.

The Rosebud is Stewart Coffin design #39 in the AP-ART catalogue, and is one of the few three-dimensional puzzles which assembles into more than one solution shape. The image above shows the rosebud in the shape which gives it its name, and is a coordinate motion solution where all six pieces are required to move along their three-fold axis at the same time to both assemble and disassemble the puzzle. Not only is this difficult, but the manner in which they are assembled is not at all obvious and requires considerable dexterity.

Stewart himself says “A few of these puzzles were produced some years ago and sold unassembled. After sufficient time had elapsed and almost none had been solved, the customers were given the opportunity to purchase (for an outrageous price!) an assembly jig and directions. With these, it is easy. Without the jig, it can be done with patience, using tape and rubber bands. Without such aids, it has been done but borders on the impossible.”

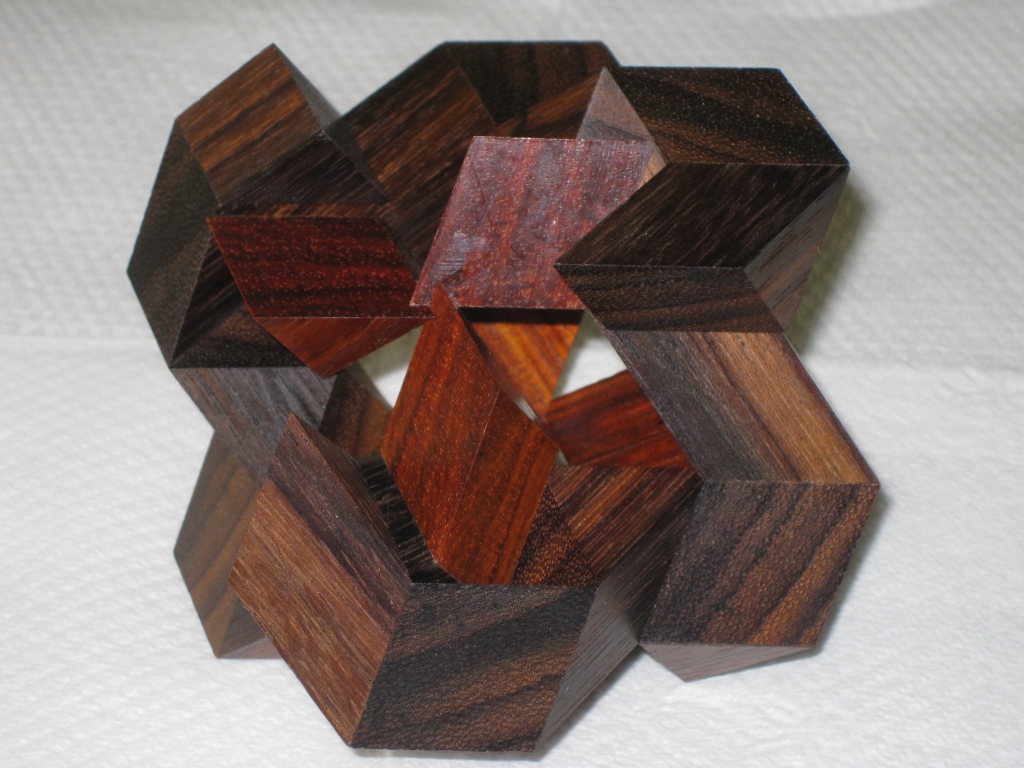
The reward for being insane enough to try this without a jig is a wonderful movement where the puzzle appears to open like the petals of a rose. It really is something which has to be seen to truly appreciate. My video review below will show you just that and give you a chance to see just how stunning the movement (and Scott’s work) truly is.

As you’ll see, both in the video review, and also in the photograph below, Scott’s work really is outstanding. The pieces of the puzzle will expand until just the very tips are touching, and it still remains perfectly stable. Only with very precise construction can you even get close to this, and it’s a testament to the years of puzzle making that Scott’s copy is as good.

Rosebud opened.

Rosebud opened.

As a puzzle, without Scott’s jig, I have assembled the rosebud. I didn’t go down Stewart’s suggested route of tape and rubber bands (as frankly I couldn’t see how a rubber band would help me much) but all I’ll say is it took over an hour, involved a lot of swearing, and wasn’t all that fun an experience. The jig on the other hand makes things much easier, and removes the worry about expanding the puzzle just a little too far. If it does collapse then you can easily re-assemble it. I’m glad I accepted Scott’s offer for the jig!

Cluster Plus

If you’ve watched the video review, then you’ll know this already, but while I was visiting Scott, he handed me a rather special puzzle.

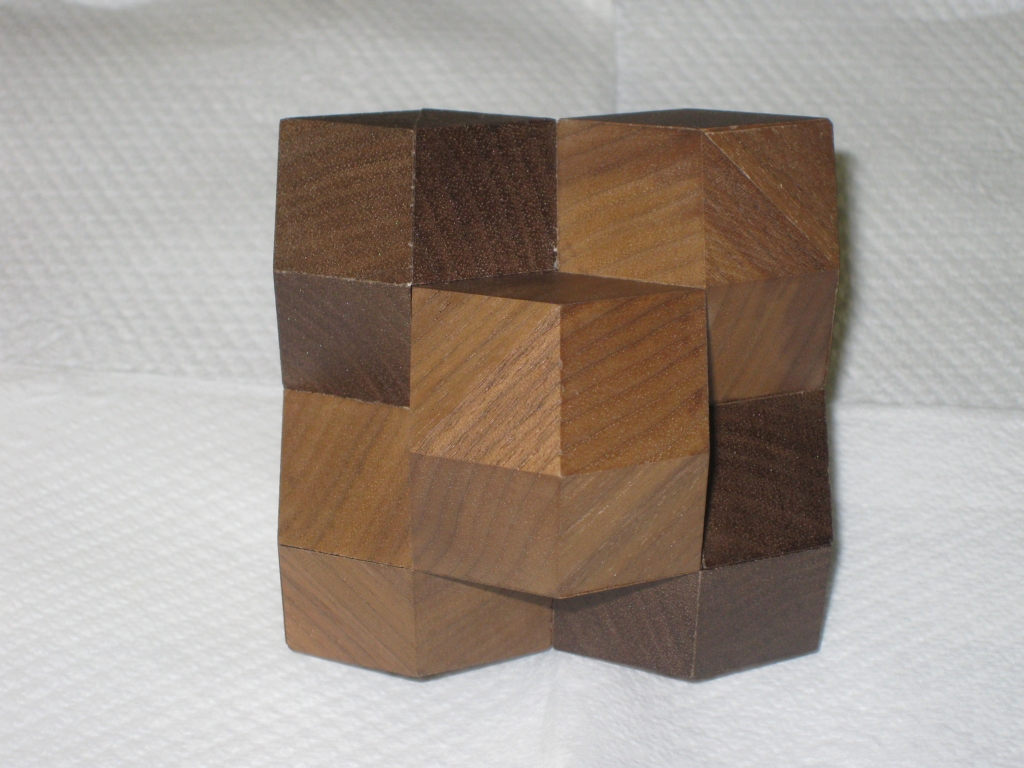
Cluster Plus - Shop Copy

Cluster Plus - Shop Copy

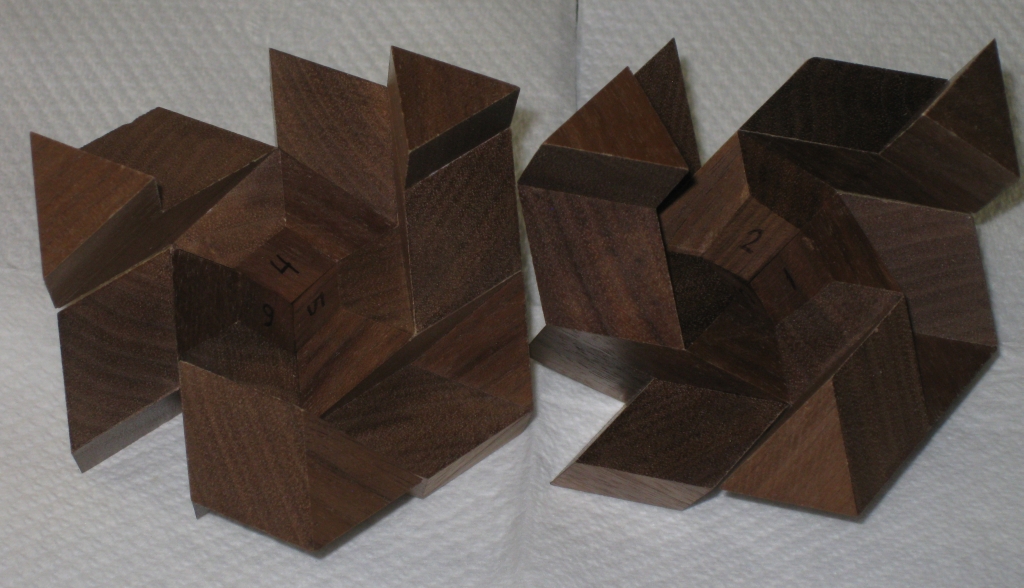
The Cluster Plus puzzle is #114 in the AP-Art catalog, and has a striking resemblance to the Cluster Buster puzzle #49. The final shape however is where the similarities end. Originally only 11 of these were made, and almost half of those were given out as tokens at IPP-17. There don’t seem to be to many people have made these designs since, so that makes this copy even more special. This is one of the prototype copies Scott made with collaboration with Mark McCallum. As such, it’s not a finished quality and has the pieces numbered in the centre to help with assembly. The six dissimilar pieces are joined together in sets of three pieces which require a coordinate motion, and then the two halves of the puzzle are slid together. Looking at the two halves, it’s almost impossible to see how Stewart Coffin came up with this design. Even knowing how to put the pieces together, and the order I still found this a challenge.

Cluster Plus Halves

Cluster Plus Halves

When I first attempted to fully disassemble the puzzle, I split the two halves, then took only one half apart fully, leaving the other still assembled. Now, remember I have the pieces numbered as you can see above, and I’ve only taken one half apart. I still took over 20 minutes to get the puzzle back together.

The coordinate motion really makes it difficult to see how the pieces should come together, and add to that numerous ways that the pieces can fit together, and this is one tough puzzle. As an early copy, the co-ordinate motion on the first three pieces isn’t perfect, and this was something Scott was working on. His initial idea was to leave more of the centre block – one of the standard building blocks in Coffin puzzles, and the number part in the photo in case you’re not sure, with more of the central section un-sanded in the hope that this made things easier to assemble. The trick here was that the centre blocks normally have a pyramid peak. Stewart Coffin removed part of this to allow the coordinate motion which otherwise would not have been possible. In the end Scott removed more of these centre blocks as it turned out that this initial idea wasn’t great.

While Scott and Mark were working on this, Mark believed that there was more than one configuration of pieces which would make up the same shape. I took up that challenge and have been trying to find an alternate configuration. So far I’ve not been successful, however I’ve not given up and I’ll be sure to post if I find it.

At this point, I have a bit of a confession to make. When I was playing with the puzzle, I may have used a little too much force. I should point out that the fit here is not perfect, again since this is a shop copy, and given the nature of the puzzle, any inaccuracy is multiplied out to the end of the ‘arms’ which is where the fit needs to be perfect. Well when putting it back together at the end of a puzzling session, I used a little too much force, and with an impressive snap, one of the arms flew across the table, and the two halves slammed rather abruptly together. Sorry Scott!

A little bit of glue and an hour later, things were back to the way the should be and no real damage done. The glue joint had given out, but didn’t damage the pieces of the puzzle fortunately so it was a simple fix.

Thanks again to Scott for both of these puzzles. There’s great additions to my collection and I promise to try not to break them again!

Stickman #18 – The Sphere Box

Some time ago, I reviewed Stickman #2 from my own collection. My good friend Derek Bosch recently lent me another (large) box of puzzles to keep me busy, including Stickman #18, and also Stickman #23, the Perpetual Hinge Puzzle box. Watch out for a review of that one coming soon.

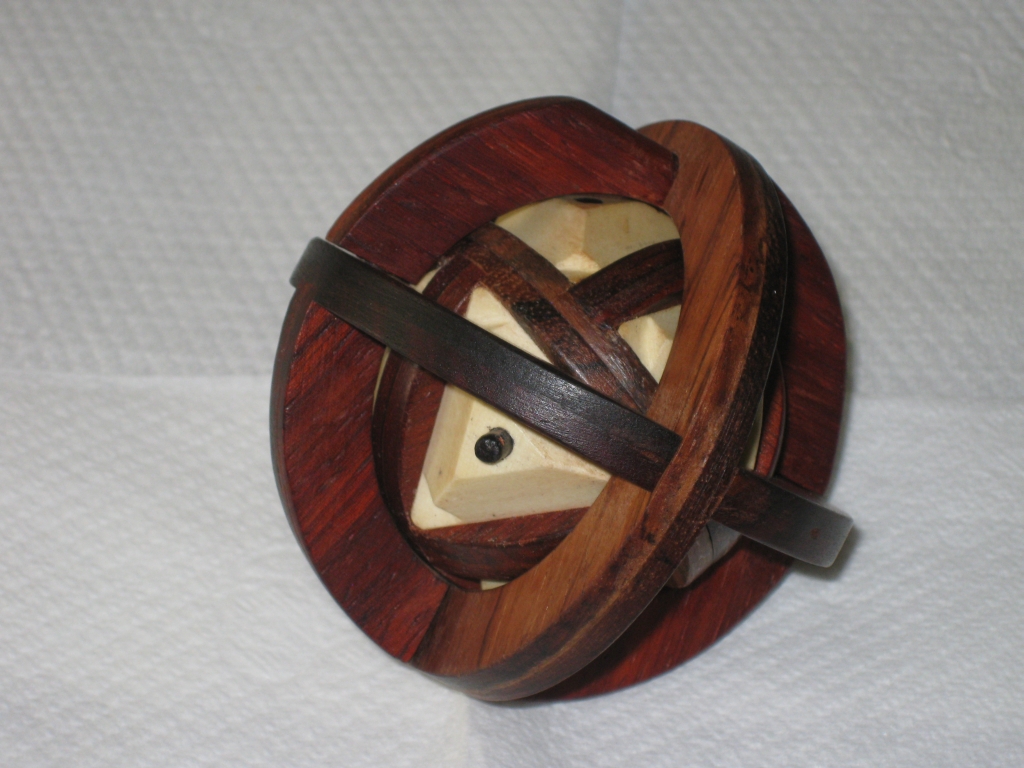
This beautifully made box measures 3″ in diameter, and is made from a selection of exotic woods including padauk, bloodwood, monticello, cocobolo, and holly. Limited to a run of 31 puzzles, like many other Stickman puzzles, this is fairly rare, so I’m very grateful to Derek for lending me his copy.

This sphere inside a sphere does still qualify as a box, since the holly sphere in the centre is hollow. The goal of the puzzle is to open the box, removing the inner sphere from the outer cage, by rotating the inner sphere until it can be slid out of an opening in the cage.

There are a number of black pegs attached to the inner sphere which make this challenging, and even with the two peg shaped gaps in the cage, it’s not always possible to move the inner sphere where you want it. This is where the hidden trick of the cage comes into play. As you may have already realised, if the ball is captured in a solid cage, there’s no way it’s coming out of there. The cage itself is held together with a couple of small magnets, and one quarter of the cage swings out of the way to allow the inner sphere to eventually be removed, but also to allow you to move those pegs into locations that they otherwise wouldn’t be able to move to.

The pegs and gaps form a 3D maze which must be navigated to move the inner sphere into the correct orientation for it to slide out. Initially, I wasn’t sure whether using the extending nature of the cage was permitted, as it seems to make the solution a little too easy, however it’s not possible to move some pegs at all as there are no gaps, as you can see in the photograph below. Derek also confirmed that this wasn’t cheating, and that I did need to do this to be able to solve the puzzle. I feel this makes the puzzle a little too easy if I’m honest.

Stickman #18 - The Sphere Box

Stickman #18 - The Sphere Box

I found the inner sphere to occasionally be a little stiff. Most notably, having opened the box, and removed half of the inner sphere, returning it back to its original state the re-insertion of the half was particularly tight. I’m not sure if I had changed the orientation while I had it open, but after moving the sphere around a little it soon went back to being easy to move.

Overall, this was a fairly easy puzzle box to open, taking me around 15 minutes. It’s a really unique box being spherical, and I must admit that really enjoyed solving it. It’s a fun puzzle to play with, and is finished to a very high standard, as seems to be the Stickman way. If you come across one of these at auction, it’s well worth adding to your collection.
Vinco’s Twisted Halfcubes & Diagra

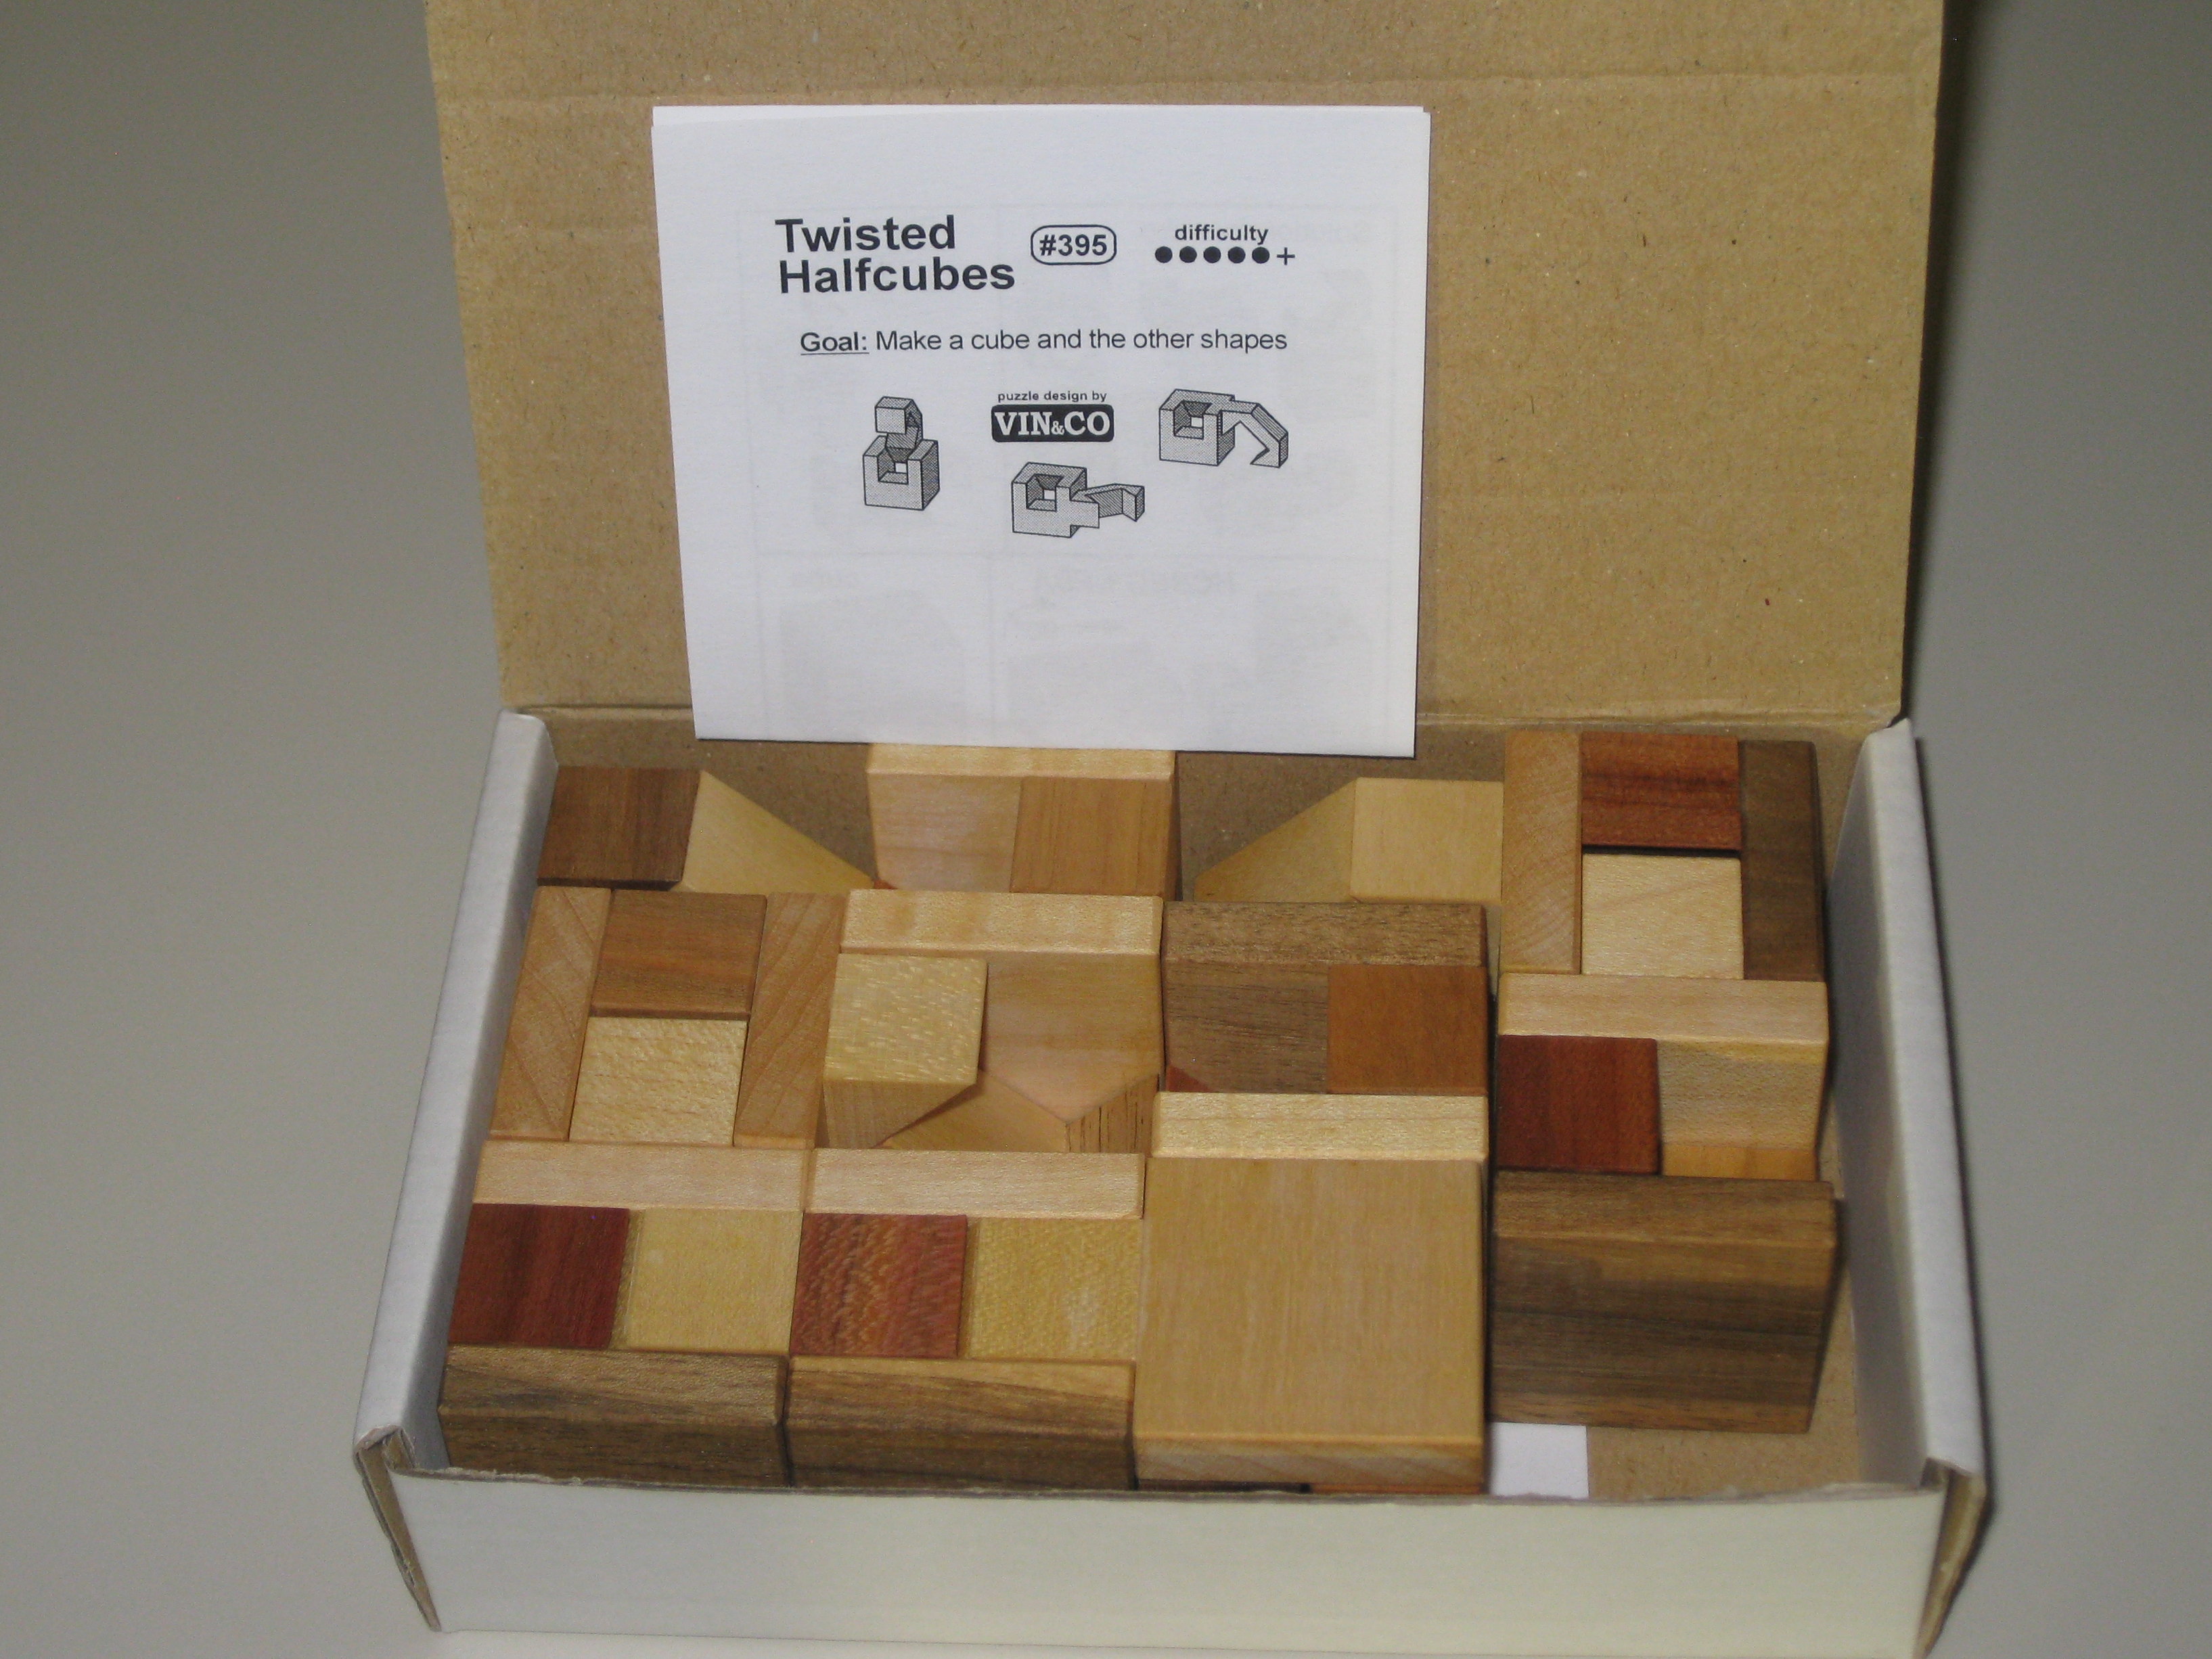
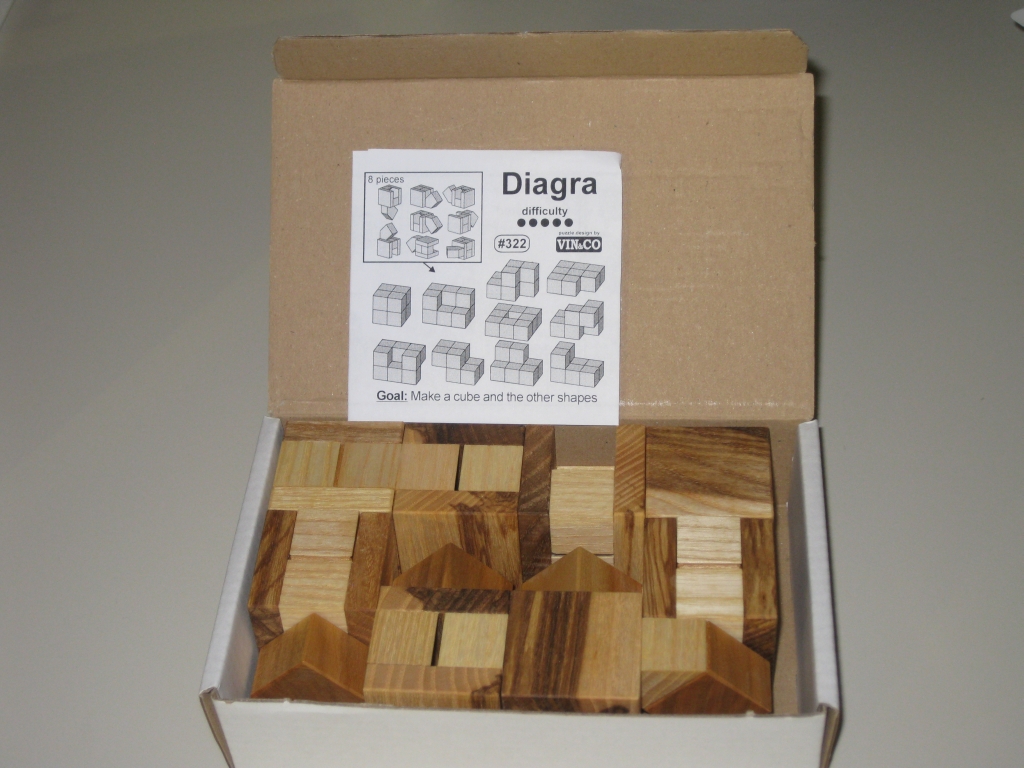
A while back, I got in touch with Vaclav Obsivac and placed an order for several of his puzzles. Amongst those, I asked for a copy of the Twisted Half Cubes, and Diagra puzzles.

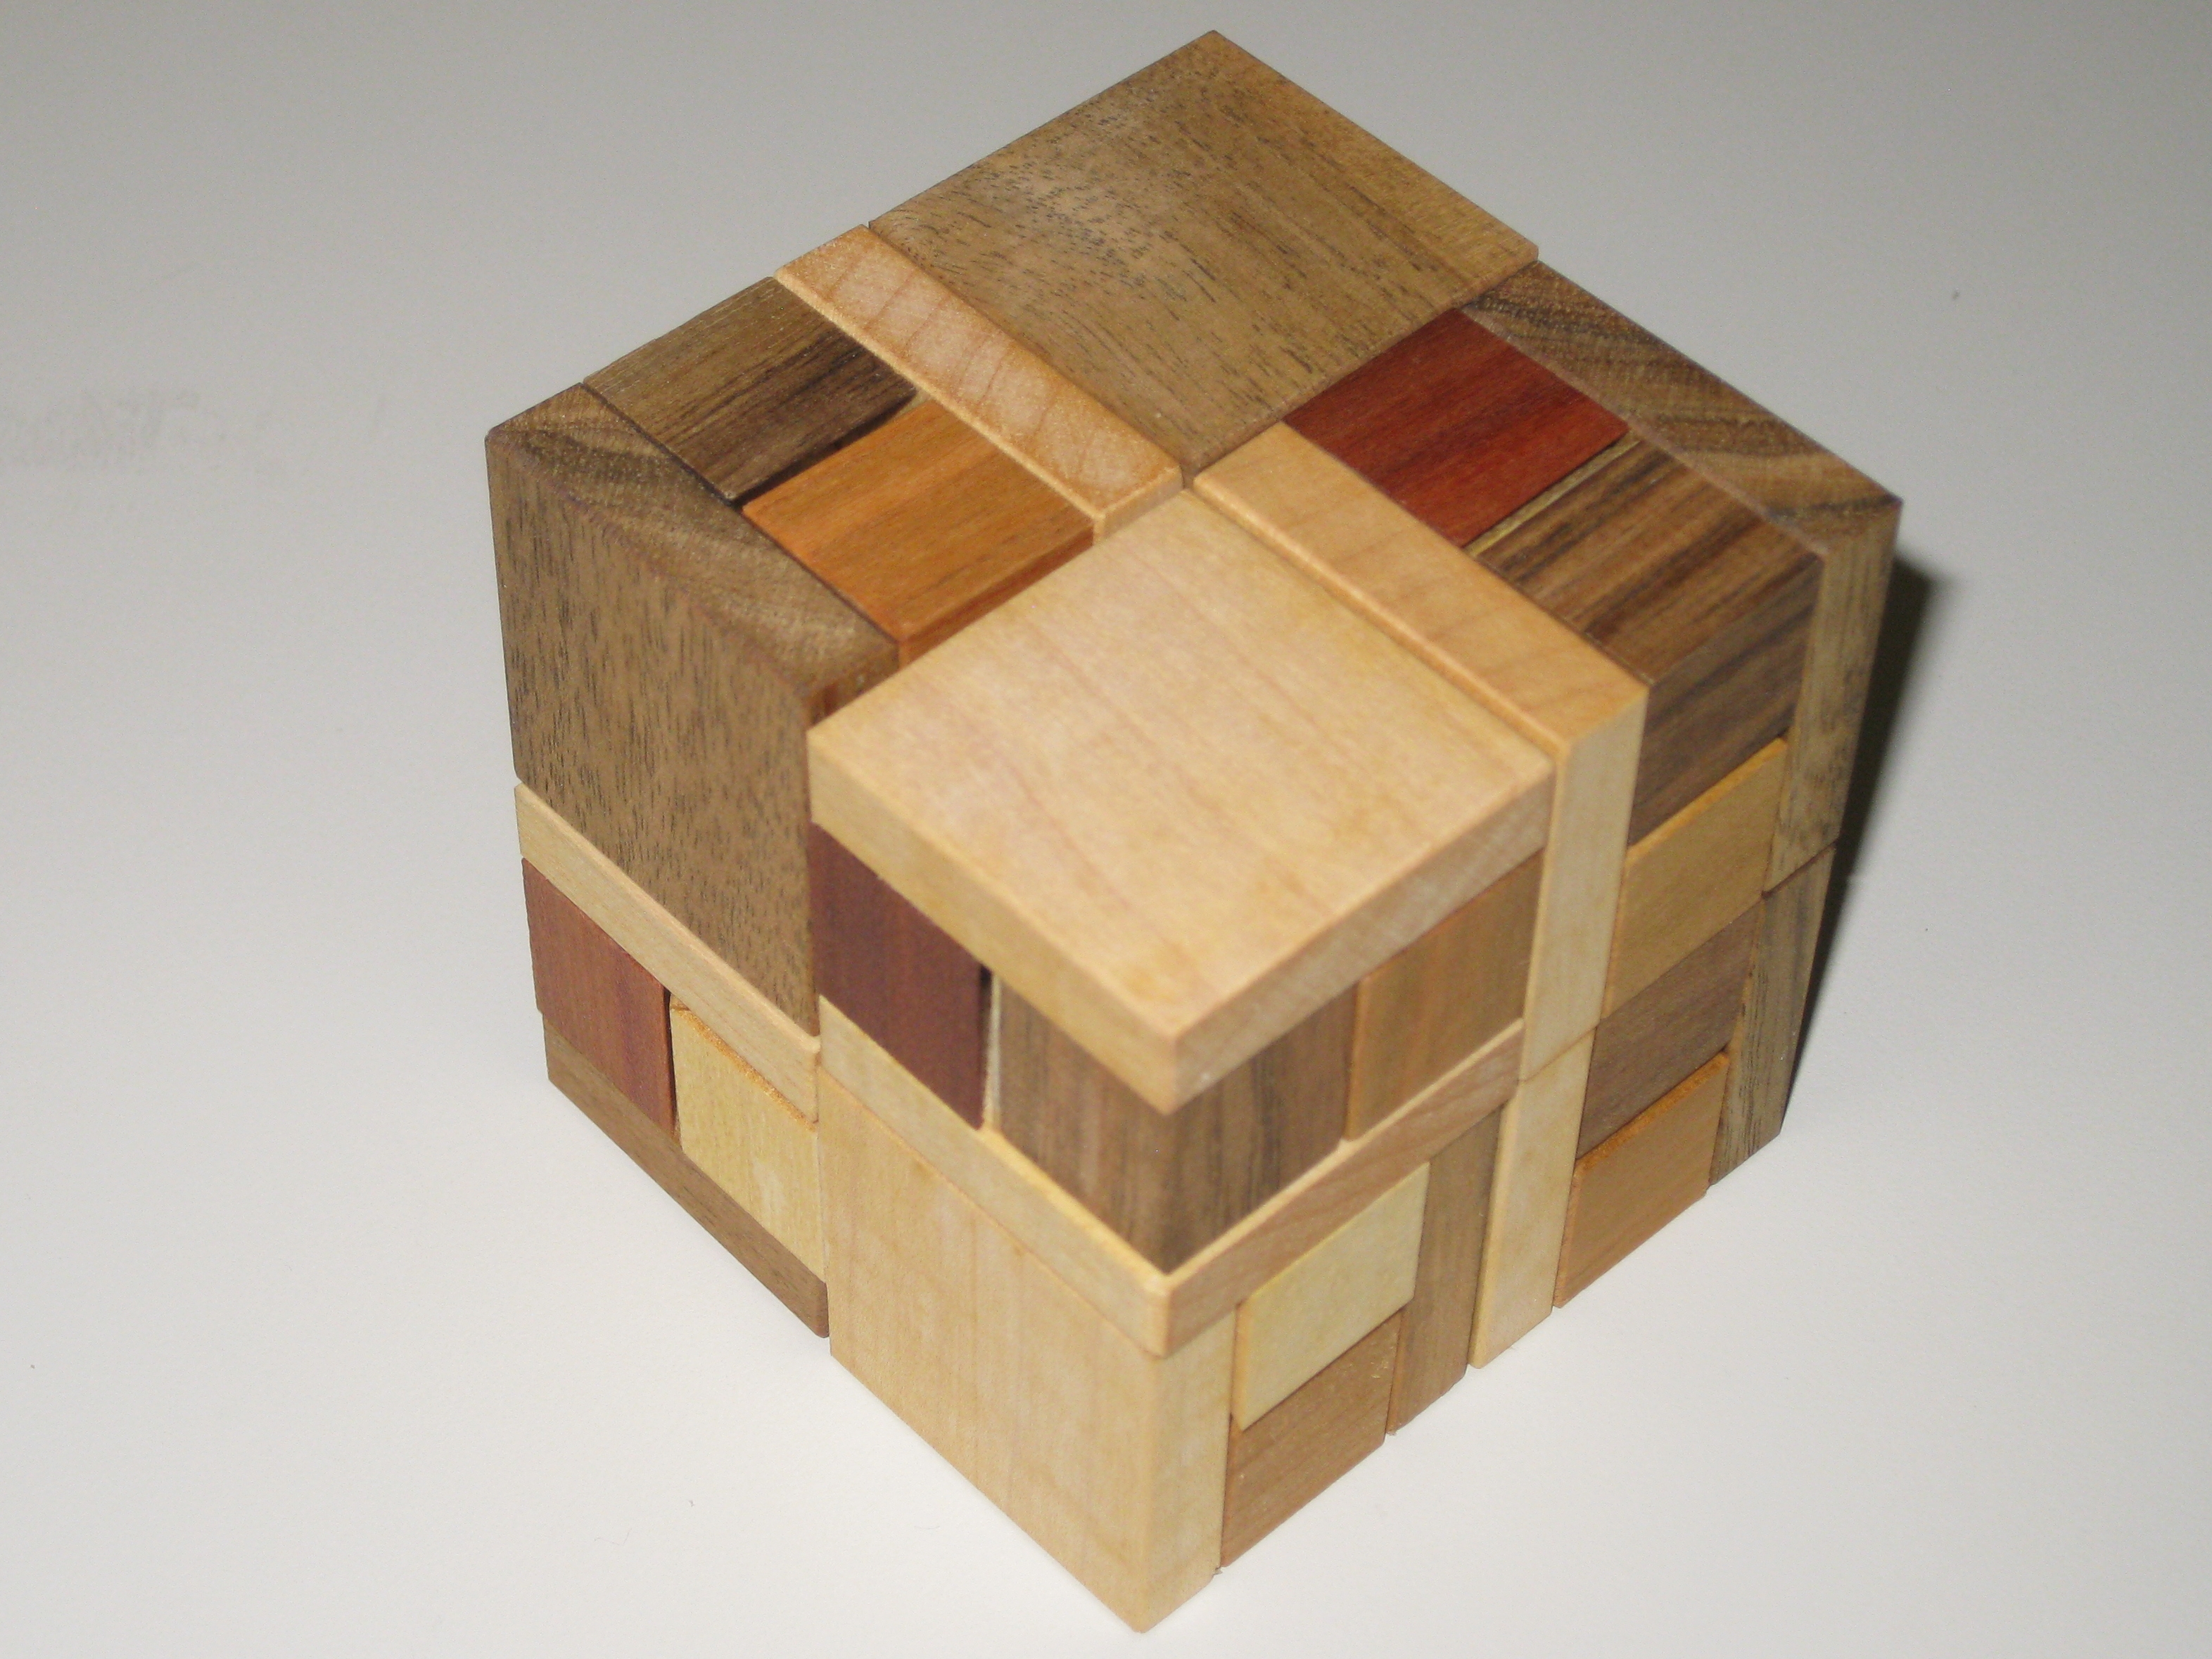
Vinco's Twisted Half Cubes in the box

Vinco's Twisted Half Cubes in the box

Vinco's Diagra in the box

Vinco's Diagra in the box

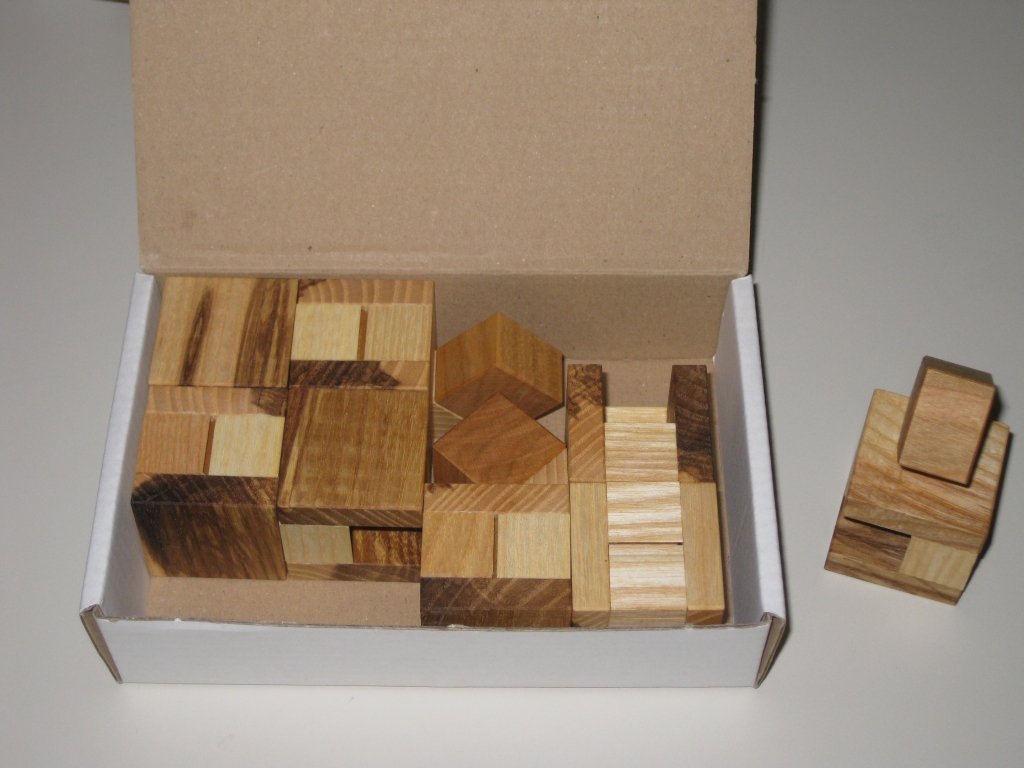
Packing the pieces back into the box is a puzzle of its own!

Packing the pieces back into the box is a puzzle of its own!

To look at, both of these puzzles look very similar. Indeed, they have the same basic idea at their root. Both puzzles have eight pieces which combine together to create solid cubes. The goal of the puzzles is to create various solid shapes with no ‘legs’ sticking out of the final assembly. This sounds pretty simple, but I can assure you that it’s really not. In all honesty, putting the pieces back into the box provides a packing puzzle of its own, as the box is too small for all the pieces to be placed in without some level of interconnection!

All of the puzzles in this series are made from varying woods, and have been lightly waxed. No stains are used, so the natural wood is left on show, which is one of the factors that I really admire from Vinco’s puzzles. As with all of the Vinco puzzles, these are made to the same high quality and tolerances that you’d expect from this master craftsman; and none are expensive at around €14 each. At that price, these are really hard to pass up.

The Halfcubes sets

The Halfcubes sets courtesy of Vinco's website

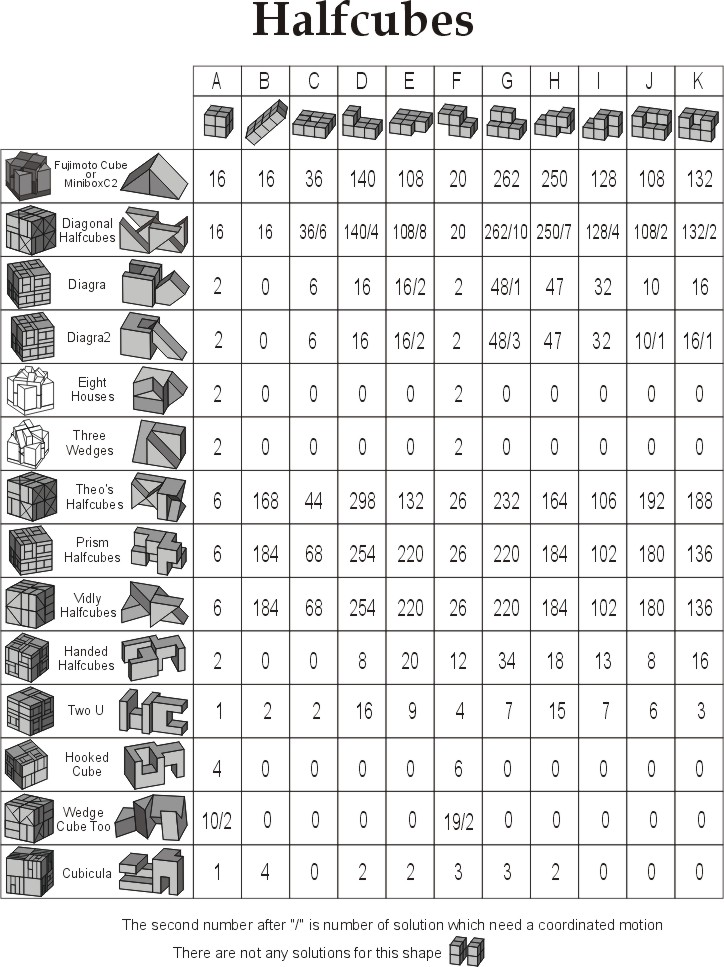
The beauty of the set of these puzzles, which includes (naming just a few) the Diagonal Halfcubes, Vidly Halfcubes, Prism Halfcubes, Two U, Cubicula, Hooked Halfcubes and Handed Halfcubes, reviewed by Kevin (where he also reviews Diagra), is that you can own all of them and they all provide a new and unique challenge. Despite the basic idea being the same, each puzzle is a new challenge, and requires a new way of thinking to solve it. The partial list is shown in the chart here, along with not only the suggested solution shapes for each puzzle, but also how many different ways each shape can be created. There’s a lot of puzzling possible and that’s if you only try for the suggested solutions. Click on the image to the right to see a list of many of the puzzles in the series in a more readable size.


Twisted Halfcubes

The eight pieces of the Twisted Halfcubes puzzle

The eight pieces of the Twisted Halfcubes puzzle

With the Twisted Halfcubes, the legs of the puzzles are all hook shaped, and hook around the small internal cube on another piece, linking the two puzzle pieces together in such a way that they will support each other. The differing angles at which the legs are attached make the problems more complex, as you need to find the right pieces to take the puzzle in the direction you need. In most cases, it’s not possible to create a closed solution by simply adding the next piece to the previous in a sequential manner. Most closed loops need you to approach the puzzle by thinking about two halves which will rotate together into the final shape. I really like this feature as it adds an extra challenge to the puzzle space, and also limits the use of programs like Burr Tools for solving the shapes.

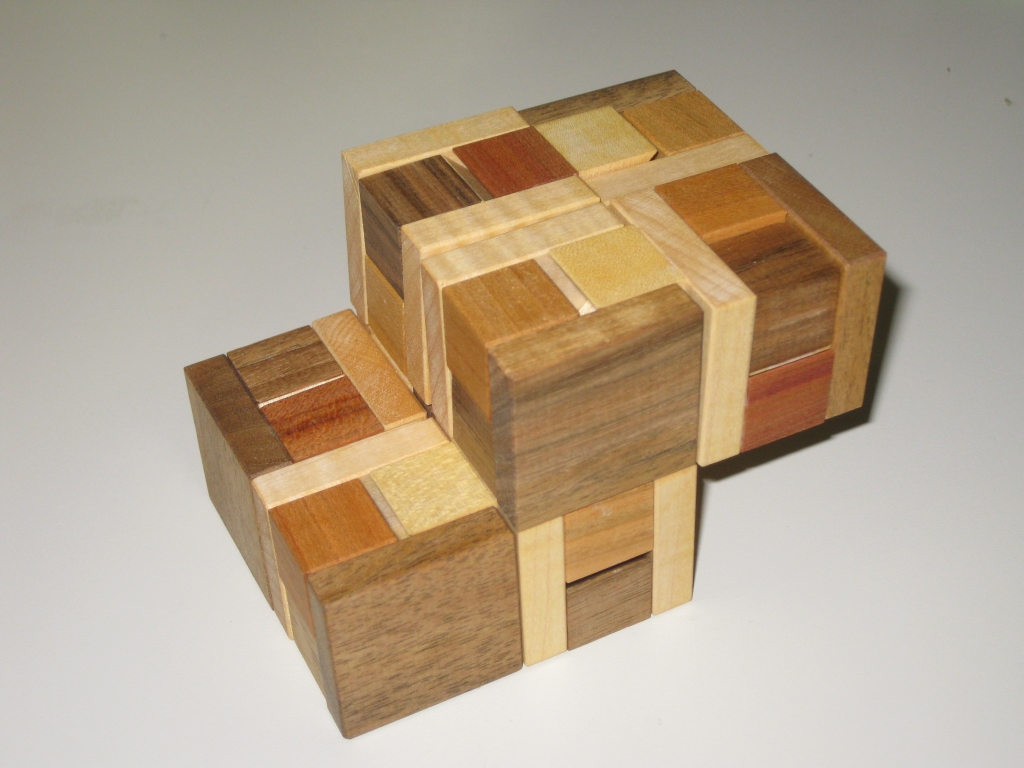
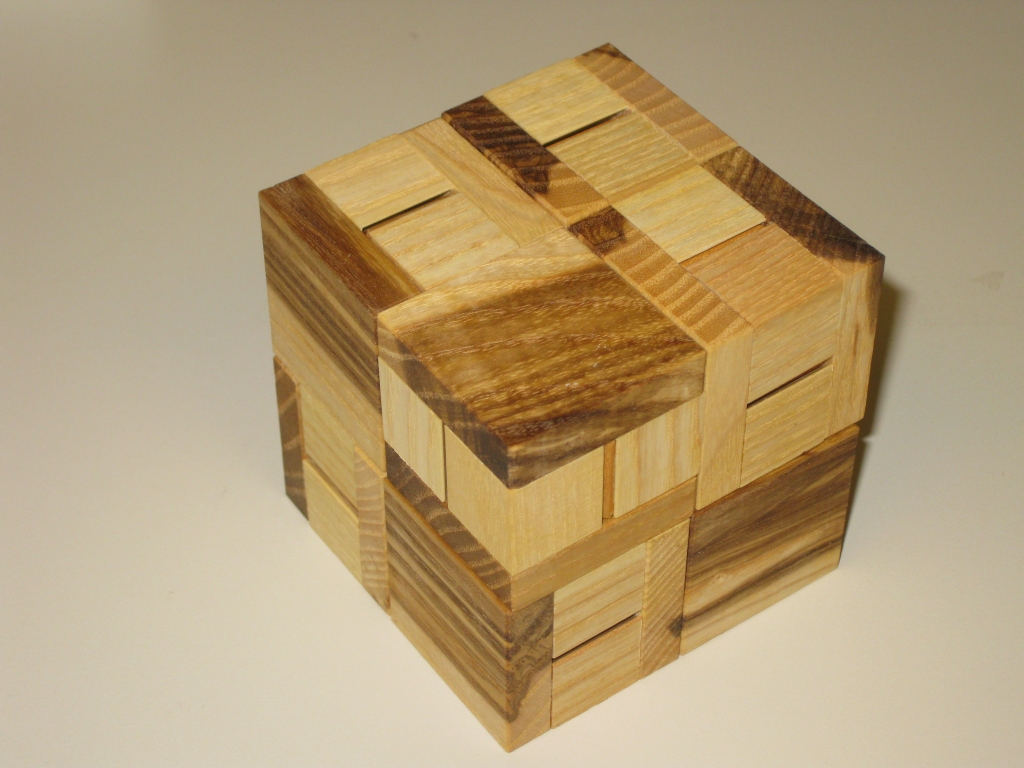
Twisted Half Cube, Super Cube Solution

Twisted Half Cube, Super Cube Solution

Twisted Half Cubes 'Z' Solution

Twisted Half Cubes 'Z' Solution

Vinco sets a number of possible solution shapes of which just a couple are shown above. The solution on the right shows how the pieces support themselves when placed together, so shapes where some pieces do not need to be resting against the desk are possible. I promise that there’s nothing out of view of the camera holding the pieces up.

Diagra

The eight pieces of the Diagra puzzle

The eight pieces of the Diagra puzzle

Similar in design to the Twisted Halfcubes, here the hooks have been replaced by square blocks, meaning that all pieces slide into each other. The difference here to the Twisted puzzle is that coordinate motion solutions are now possible, as the pieces are no longer hooked to one another but slide together. Again, the interesting location of the ‘legs’ makes for some challenging goal shapes and the approach to joining the pieces together is different from the previous puzzle.

I would say that the basic shapes are easier in Diagra, and perhaps this is a more enjoyable set to play with since it’s faster to put the pieces together and take them apart than it is with Twisted Halfcubes. The challenge level does step up a notch when you start looking for the coordinate motion solutions though, so don’t underestimate the challenge from this one.

Diagra Super Cube solution

Diagra Super Cube solution

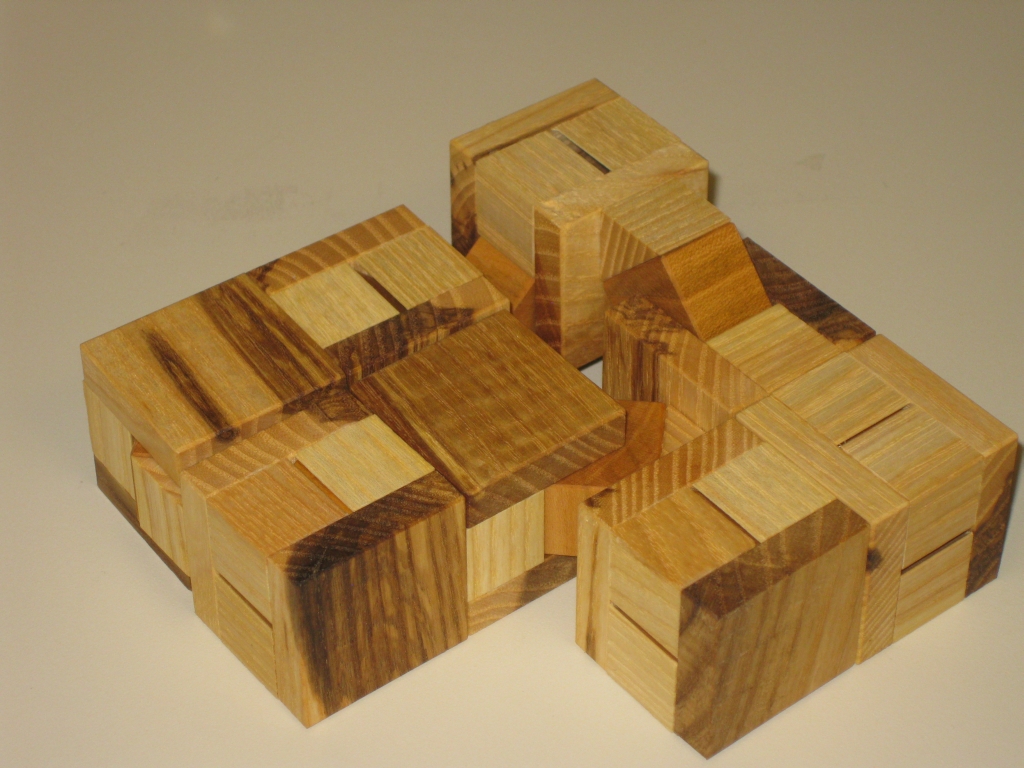
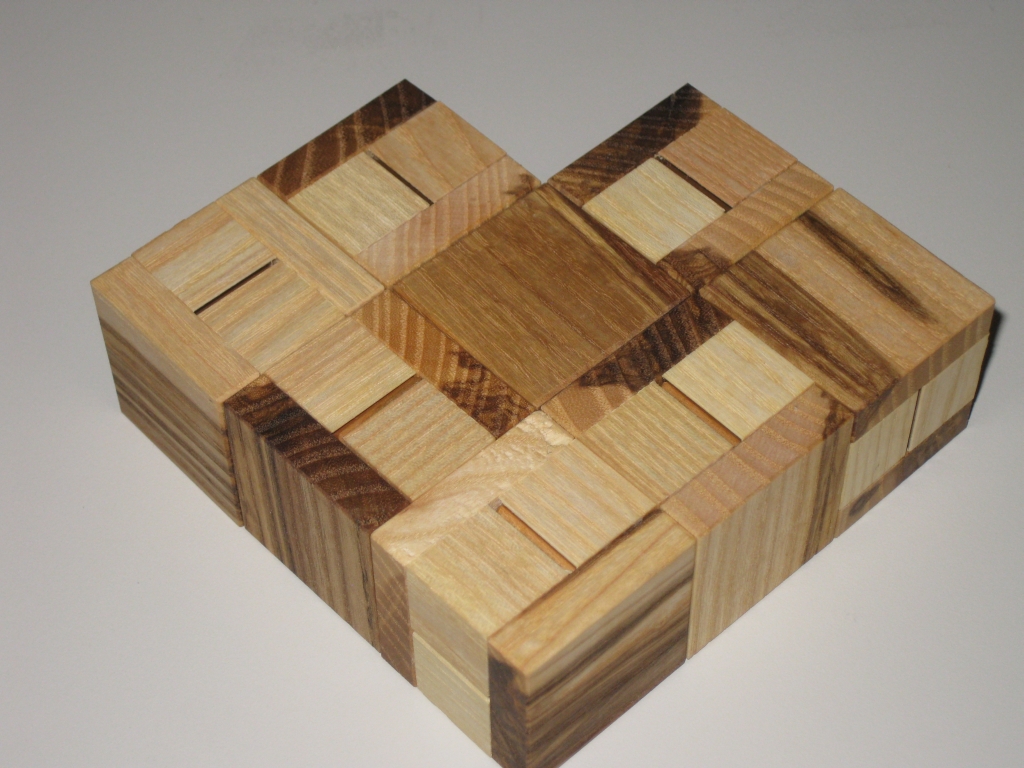
Diagra 'Heart" solution which required coordinate motion

Diagra 'Heart' solution - requires coordinate motion

Coordinate motion solutions in Diagra!

Coordinate motion solutions in Diagra!

As noted in the comments for the solution above on the right, a coordinate motion is required to make this shape. The image on the left shows how the three sub-units join together to make the final shape, and all slide together at the same time, with a satisfyingly smooth movement. Have a look at the very short video below to see this in action.


The beauty of these puzzles are that you’re limited only by your imagination as to the shapes you can create. These make a great set of building blocks, and just playing with connecting them in different orientations is as much fun as trying to create the specific patterns on the short instruction sheet provided. I’ve spent a lot of time doing just this, and as such find it a great stress toy when it’s a rough day at work!

You can order these puzzles directly from Vinco or through Puzzle Master, and I highly recommend any of the Halfcubes series. I will certainly be picking up more of them myself.