Category Archives: Puzzle Reviews

ODD Puzzle

Way back in 2011, when I was at a puzzle party here in the Bay Area, I had a play with a clever little puzzle, by Iwahiro called the ODD Puzzle. A simple three-piece packing puzzle, that was anything but simple. It’s taken me three years, but I now have a copy of my own …. and I had to make it myself!

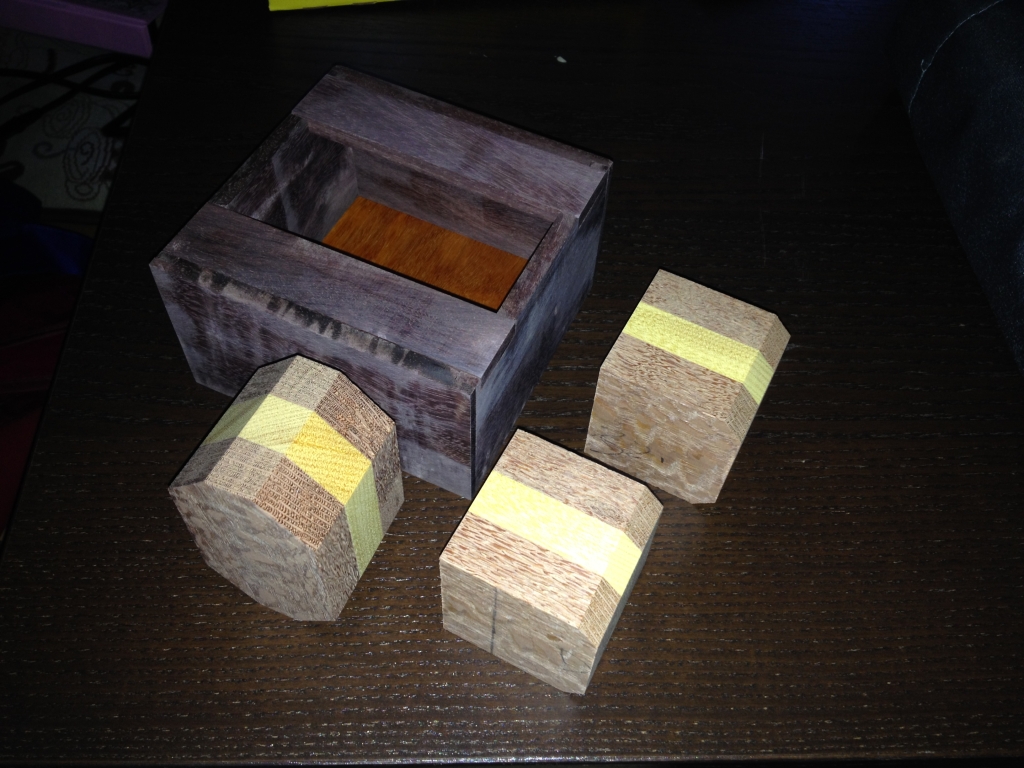
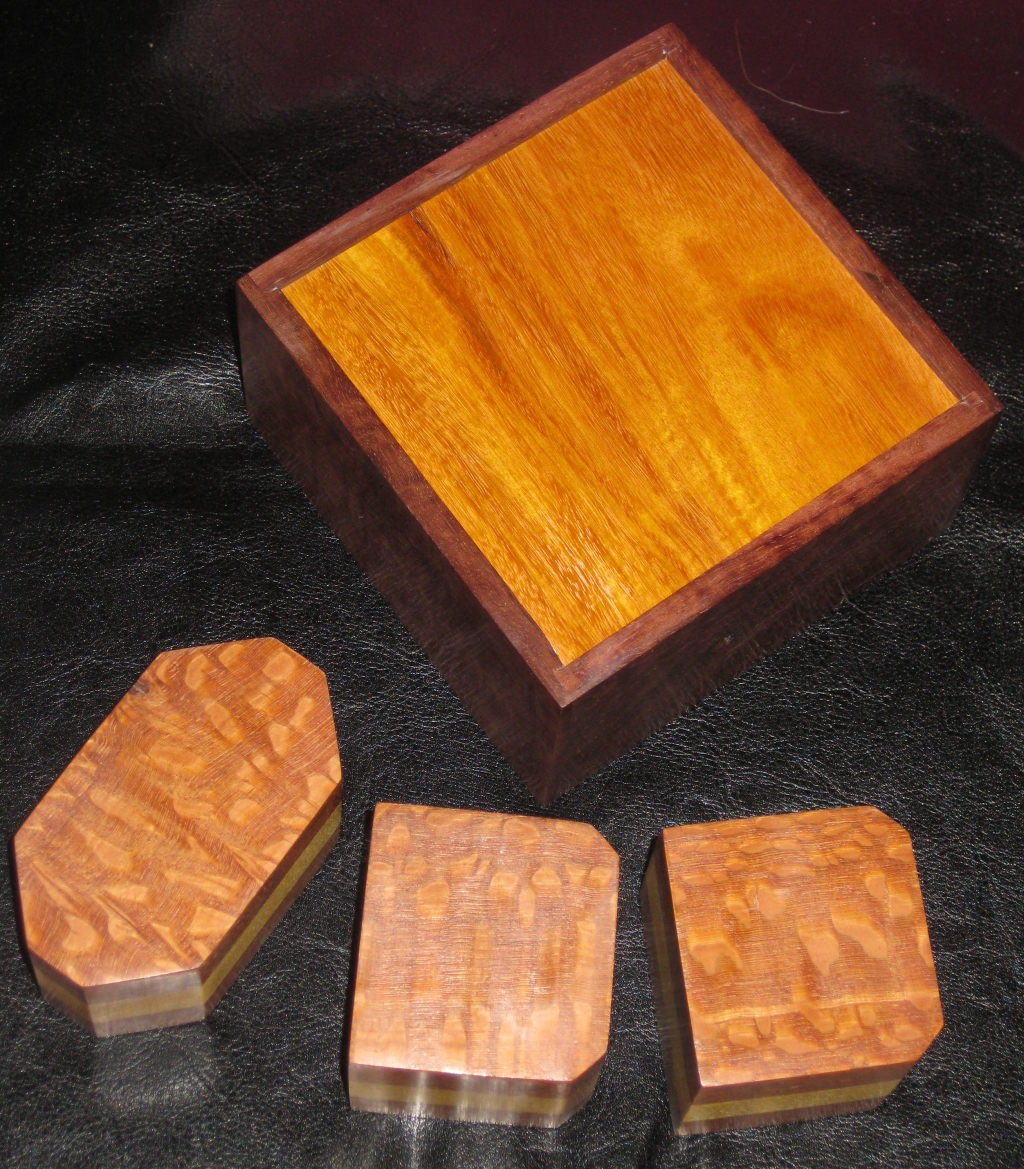
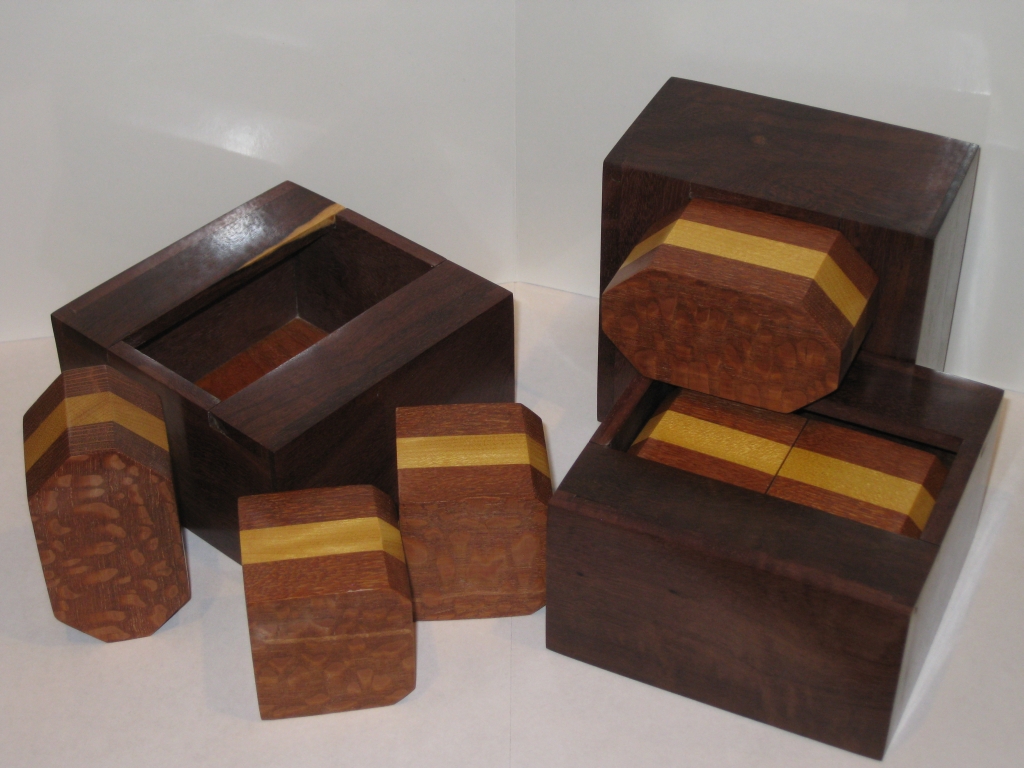
Odd Puzzle by Hirokazu Iwasawa (a.k.a. Iwahiro), made by TheJuggler

Odd Puzzle by Hirokazu Iwasawa (a.k.a. Iwahiro), made by TheJuggler

Back when I first saw the puzzle, the only copy available was a version by Philos. It was made from Beech and measured 4.7″ x 4.7″ x 3″. The fairly plain appearance hid a superb puzzle, that was the grand prize winner at IPP28. Now it’s mostly sold out everywhere you look, and no real indication of when or if it will be available again. The only place I’ve been able to find it is at Puzzle Sport in Germany.

I played around with the copy at Stan’s and really liked the puzzle. It was clever and really needed you to spend time playing with the pieces in the box to understand just how they interacted with each other, and what movements are possible. I was unfortunate that the puzzle was sitting in its solved state when I picked it up, and it was more of a challenge to remove the pieces for me. If I’d not seen the solution I think I would have required a lot more time to understand how it would be possible to get the pieces in there. I had mostly forgotten about this puzzle which if I’m honest is rather a shame.

The Facebook picture that started all this.

The facebook picture that started all this.

Fast forward three years, and I spotted a Craftsman copy of the puzzle made by Iwahiro on one of my friend’s Facebook pages as his profile picture. (ed: There’s a funny story there, but I’ll come back to that.) Seeing that picture spurred me into hunting for a copy, and having failed, I asked a couple of my puzzle friends if anyone had a copy of the puzzle. Amusingly, the closest (geographically) to me had a copy of the puzzle, and agreed to lend it to me. A couple of days later, we met up and exchanged a few puzzles, had the obligatory play with a few new additions to each of our collections, and he left me with a copy of the ODD Puzzle, as well as a puzzle from his collection where a couple of glue joints had broken, that he asked me to fix for him.

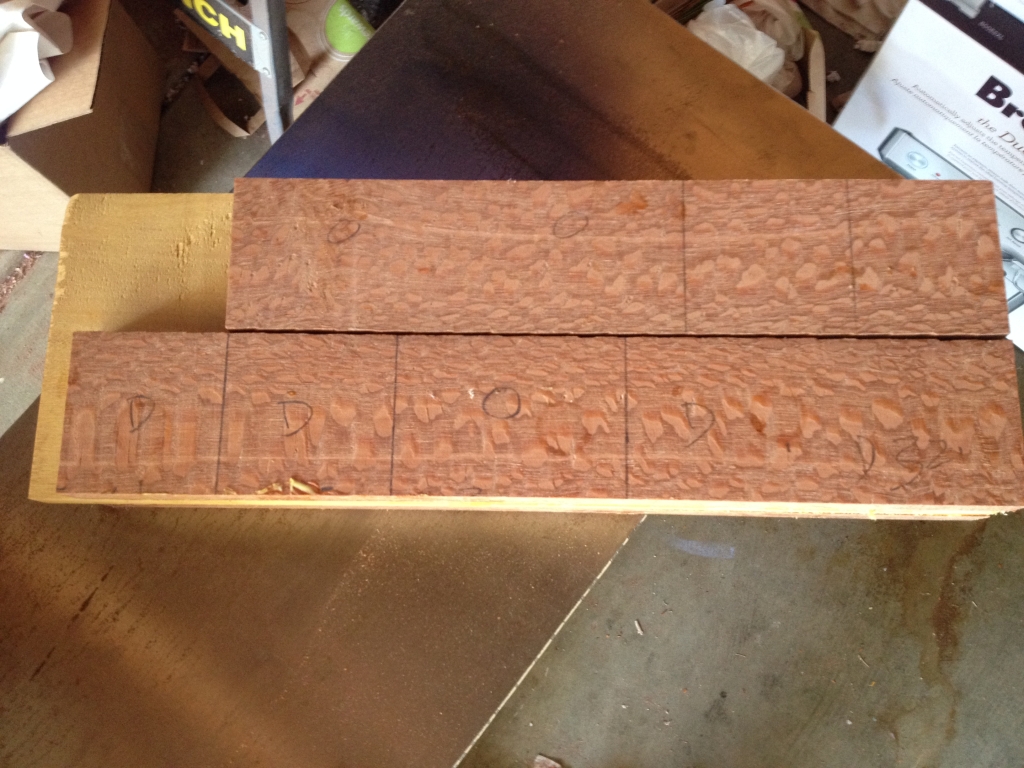
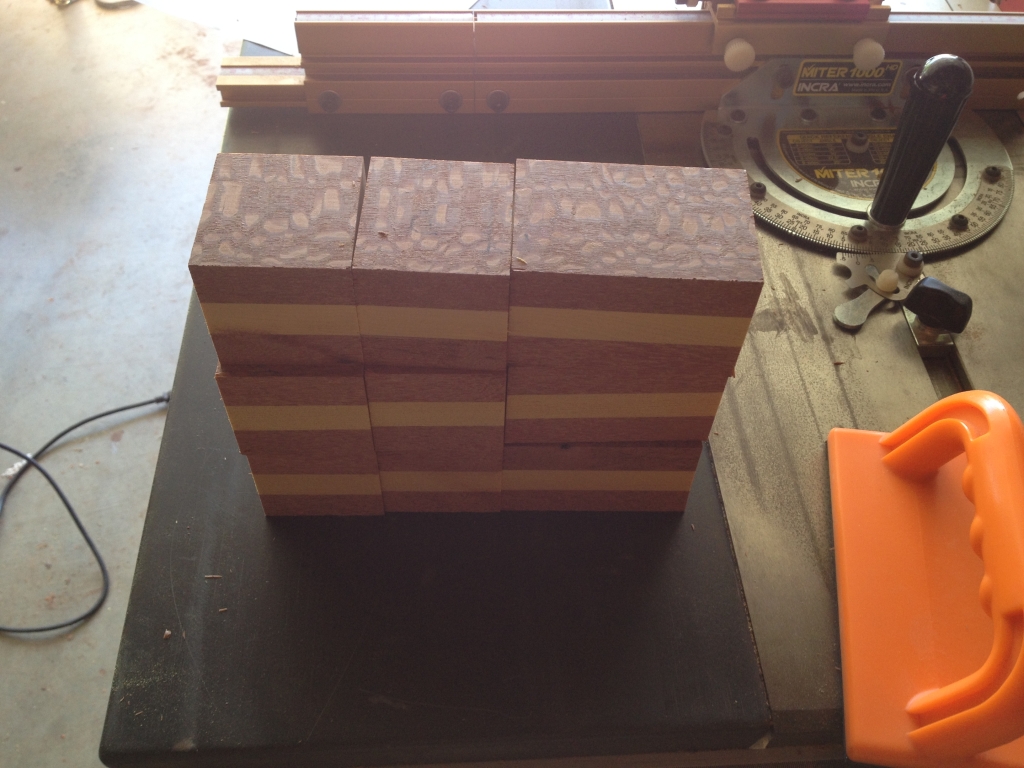
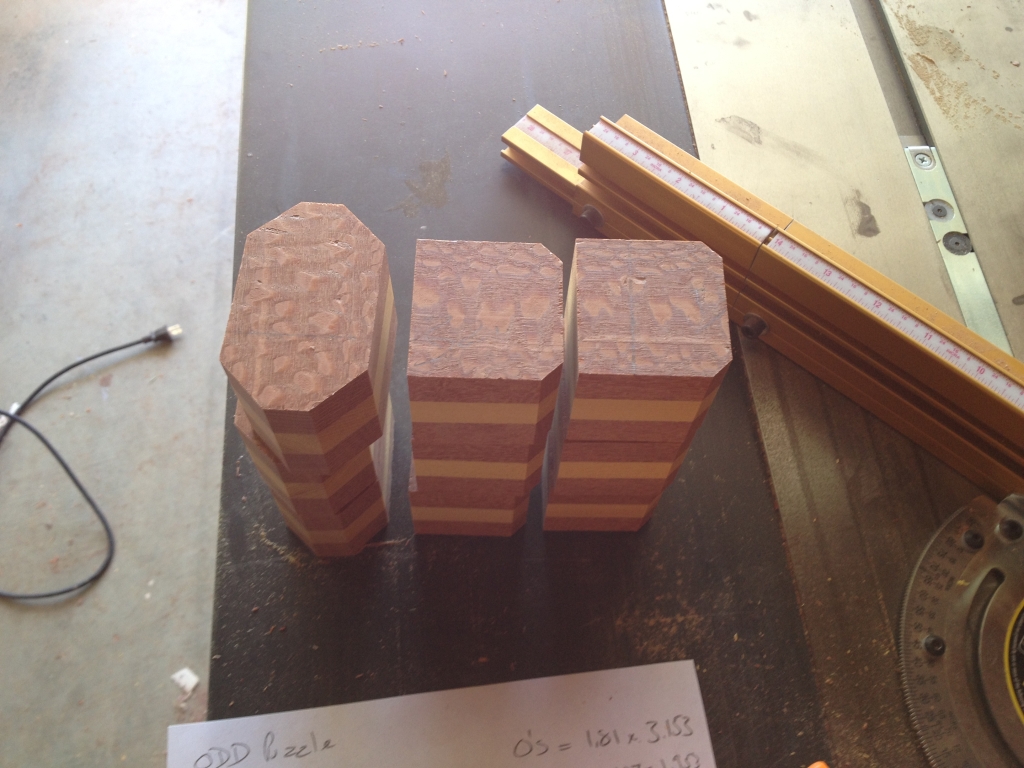
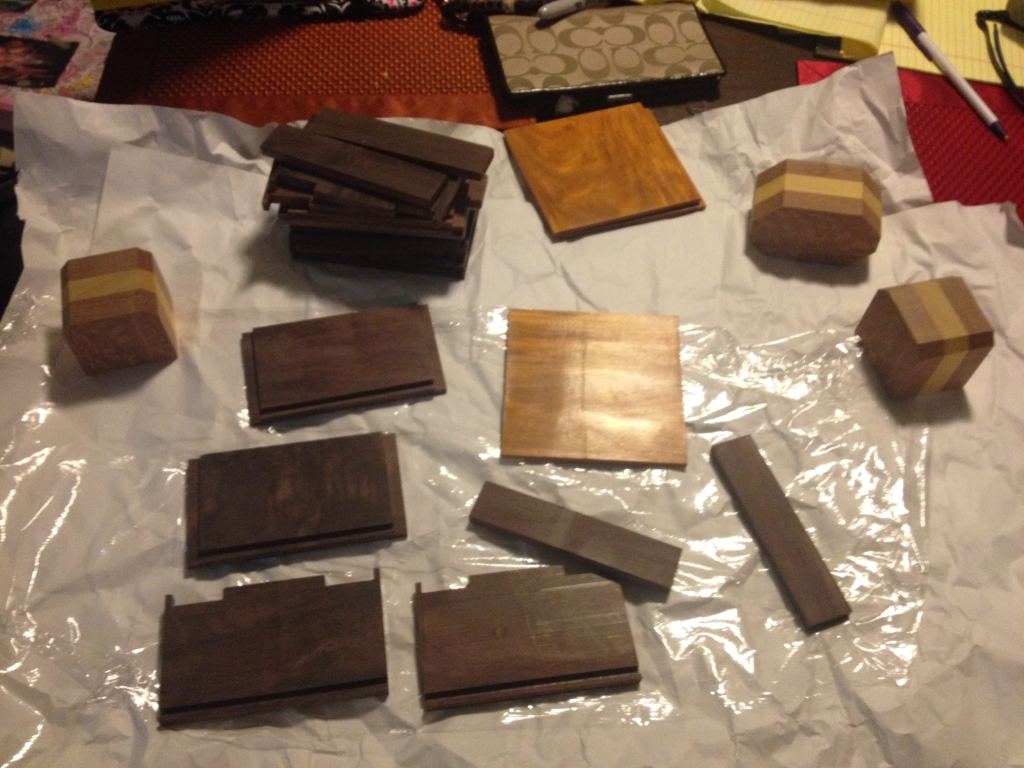
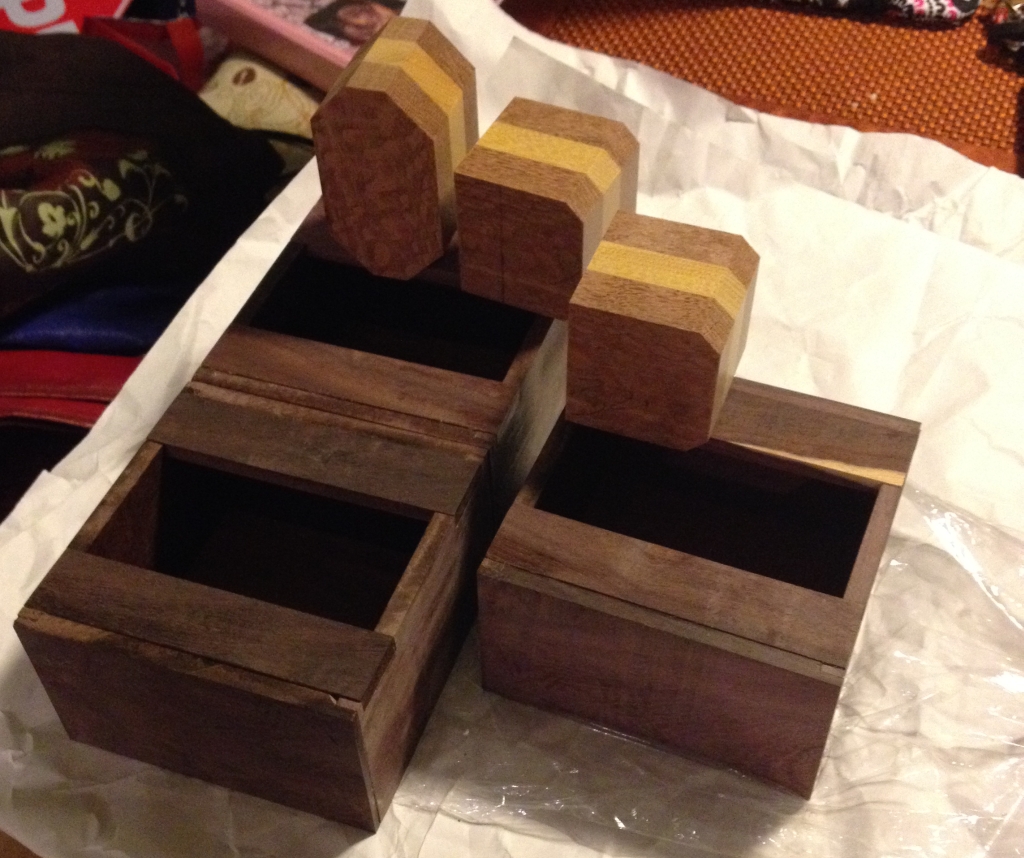
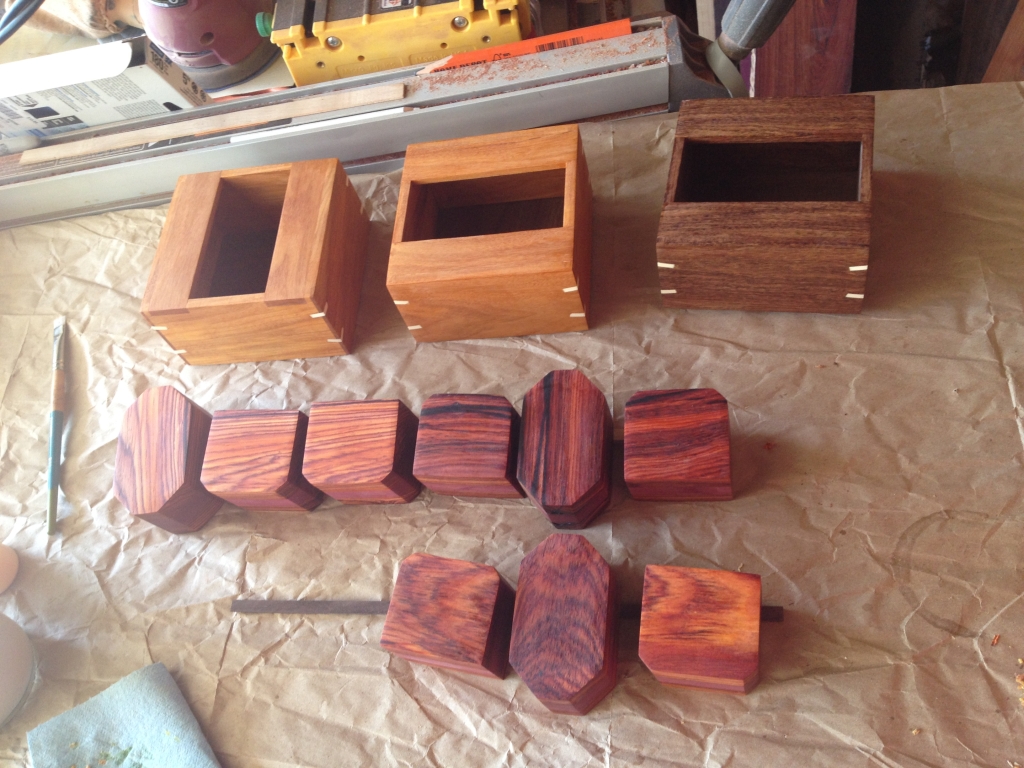
Fairly quickly I took a host of measurements from the reference copy, and set about making a copy of my own. I really liked the look of the craftsman version with the ‘core’ having a different wood to the outer parts of the pieces so looking through my stock, I picked out some Lacewood and Yellowheart to make the pieces. Rather than describe the process in detail, the images below should show the highlights. (As ever, click for larger versions.)

Initial glueup of the pieces

Initial glueup of the pieces

Basic blocks cut

Basic blocks cut


ODD shapes, 'O' still too thick

ODD shapes, ‘O’ still too thick

Boxes cut, and ready for glueup.  Base pre-finished.

Boxes cut, and ready for glueup. Base pre-finished.


Box glued up, unsanded and still no finish yet

Box glued up, unsanded and still no finish yet

Finished!

Finished!


Of course as you can see, when you’re making one, it’s not a lot more work to make two, or three, so I made three copies. When I was posting pictures, on my own Facebook pages during the build, I was contacted about buying copies, so I’m glad I made extra. One interesting build fact is that I pre-finished the bases before I glued up the boxes. The reason being that I was going to be unable to finish the inside of the base once the box was glued together. One benefit to pre-finishing is that the glue won’t stick to the finish, so the base will be truly floating. I also pre-finished the inside walls of the box before I glued on the strips that create the gap. Again, I wasn’t going to be able to get a brush inside the box to finish it to the level I wanted, so I finished it first, leaving clear areas where I was gluing up the pieces so that the glue would stick.

Iwahiro's version, next to my copy

Iwahiro’s version, next to my copy

As a quick comparison, the pieces for both copies are identical in size, and can be interchanged between the boxes. In Iwahiro’s version he has mitred joints in the box with slip feathers for strength. I used a shoulder joint on my box and didn’t add splines (a.k.a. slip feathers). I did however change the way the top of the box is made, extending my slats all the way through the sides, making that joint stronger, unlike Iwahiro’s version where the slats are entirely inside the box. There’s not real difference, just a choice I made.

A look at the bottom of the puzzle made from Chakte Viga

A look at the bottom of the puzzle made from Chakte Viga

My the boxes in my copies are made from Katalox with a Chakte Viga base. I think the contrast between the dark, almost black sides with the bright orange base looks great, but then I wouldn’t have done it if I hadn’t.

This was the first time I’d used the Beall Wood Buff system since I bought it. Fellow puzzle maker John Devost uses it on most of the puzzles he makes, and having used it now, I can see why. The finish achieved is incredible. It’s a high gloss shine, which really makes the wood look great, and gives it an amazingly smooth feel. It also means that the pieces in the ODD puzzle slide against each other with virtually no friction. That means that the slick plastic sheet added in the bottom of Iwahiro’s version isn’t needed in the copies I made.

One of my friends commented that the only thing missing from my copy was the slip feathers on Iwahiro’s box. I joked that I’d considered adding Holly slip feathers, but in the end didn’t do so. (Now I didn’t mention at the time that I didn’t have a jig built that would allow me to create slip feathers in a box) All I can say to that now is …

Different wood choices, and slip feathers added

Different wood choices, and slip feathers added

They’re not quite finished yet, (and I’ll update this when they are) but I’ve added the slip feathers, purely for the aesthetic of them, and rather than have them flat, I put them at an angle just to add detail.

I mentioned earlier that there was a funny story related to me making the puzzles. As I mentioned, I was prompted to make these having seen the picture on a friend’s Facebook. After posting pictures of the copy I’d made, the friend who had the picture sent me a message asking if I could send him measurements of the puzzle, so he could make his own. He didn’t have a copy, and seeing me making my copies kicked him into deciding he should make his own copy, since he’d been meaning to do it for a while. So, I was prompted into making a copy having seen his photo, which prompted him … Well it amused me at least!
Penta Beams

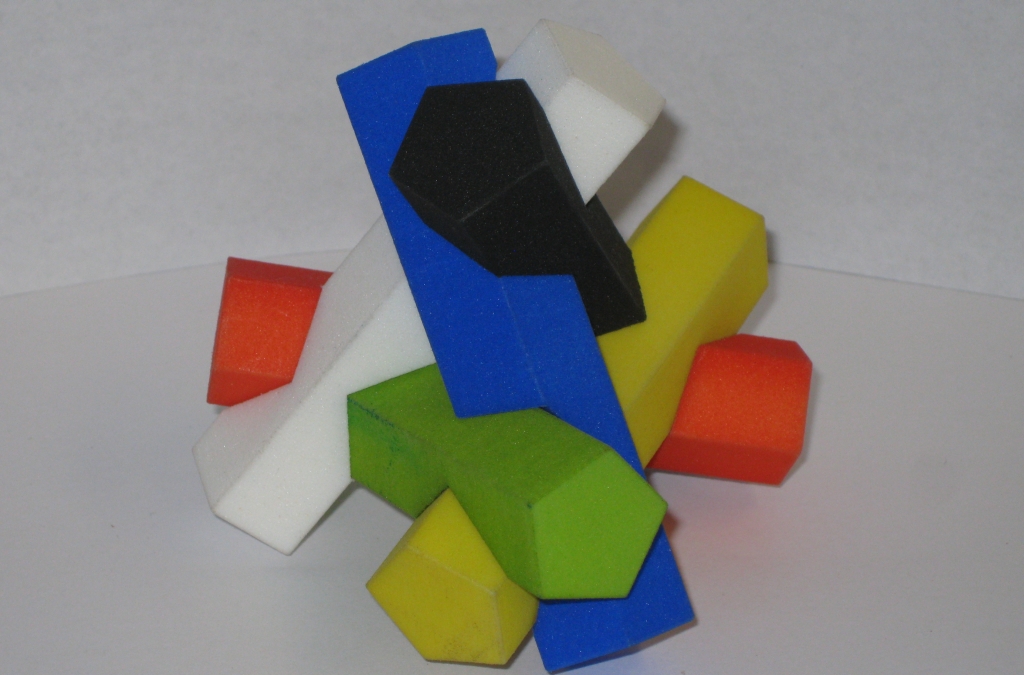
Oskar van Deventer has been at it again, and this is the latest (well latest published as far as I know) design from the incredible puzzle generating mind of the Dutchman. This time it’s an intersection of six pentagonal sticks to form a pyramidal shape. The goal is to take the sticks apart, and put them back together again.

Penta Beams by Oskar

Penta Beams by Oskar

3D printed by Shapeways, the pieces are dyed into six bright colours (plus black and white) and have a solid feel to them. the trapped powder inside each stick really adds weight and a feeling of quality that can sometimes be lacking in Shapeways printed materials. The puzzle measures approximately 3.5″ tall once assembled, with each stick being 3.5″ long with a 7/8″ cross-section.

The sticks just keep on holding.

The sticks just keep on holding.

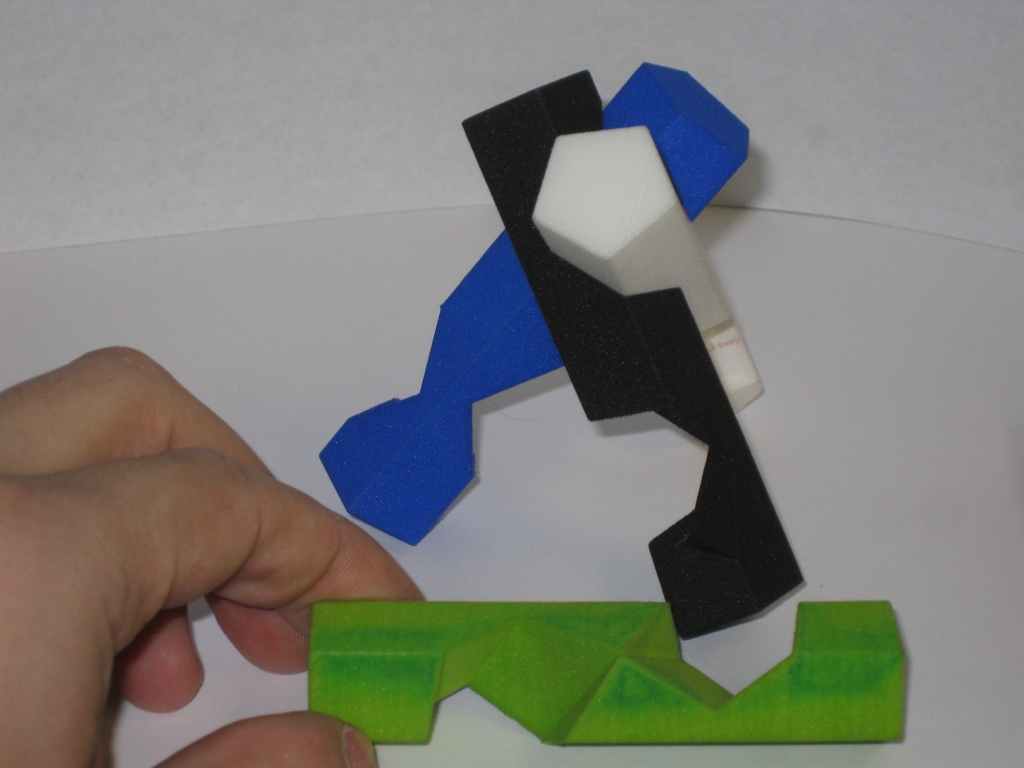
The fit is perfect, and each of the sticks holds the others at the right angles all the way until the last two pieces. That certainly makes this a much more enjoyable puzzle to play with, as you don’t feel like you’re fighting your own fingers and wrestling with a dexterity challenge.

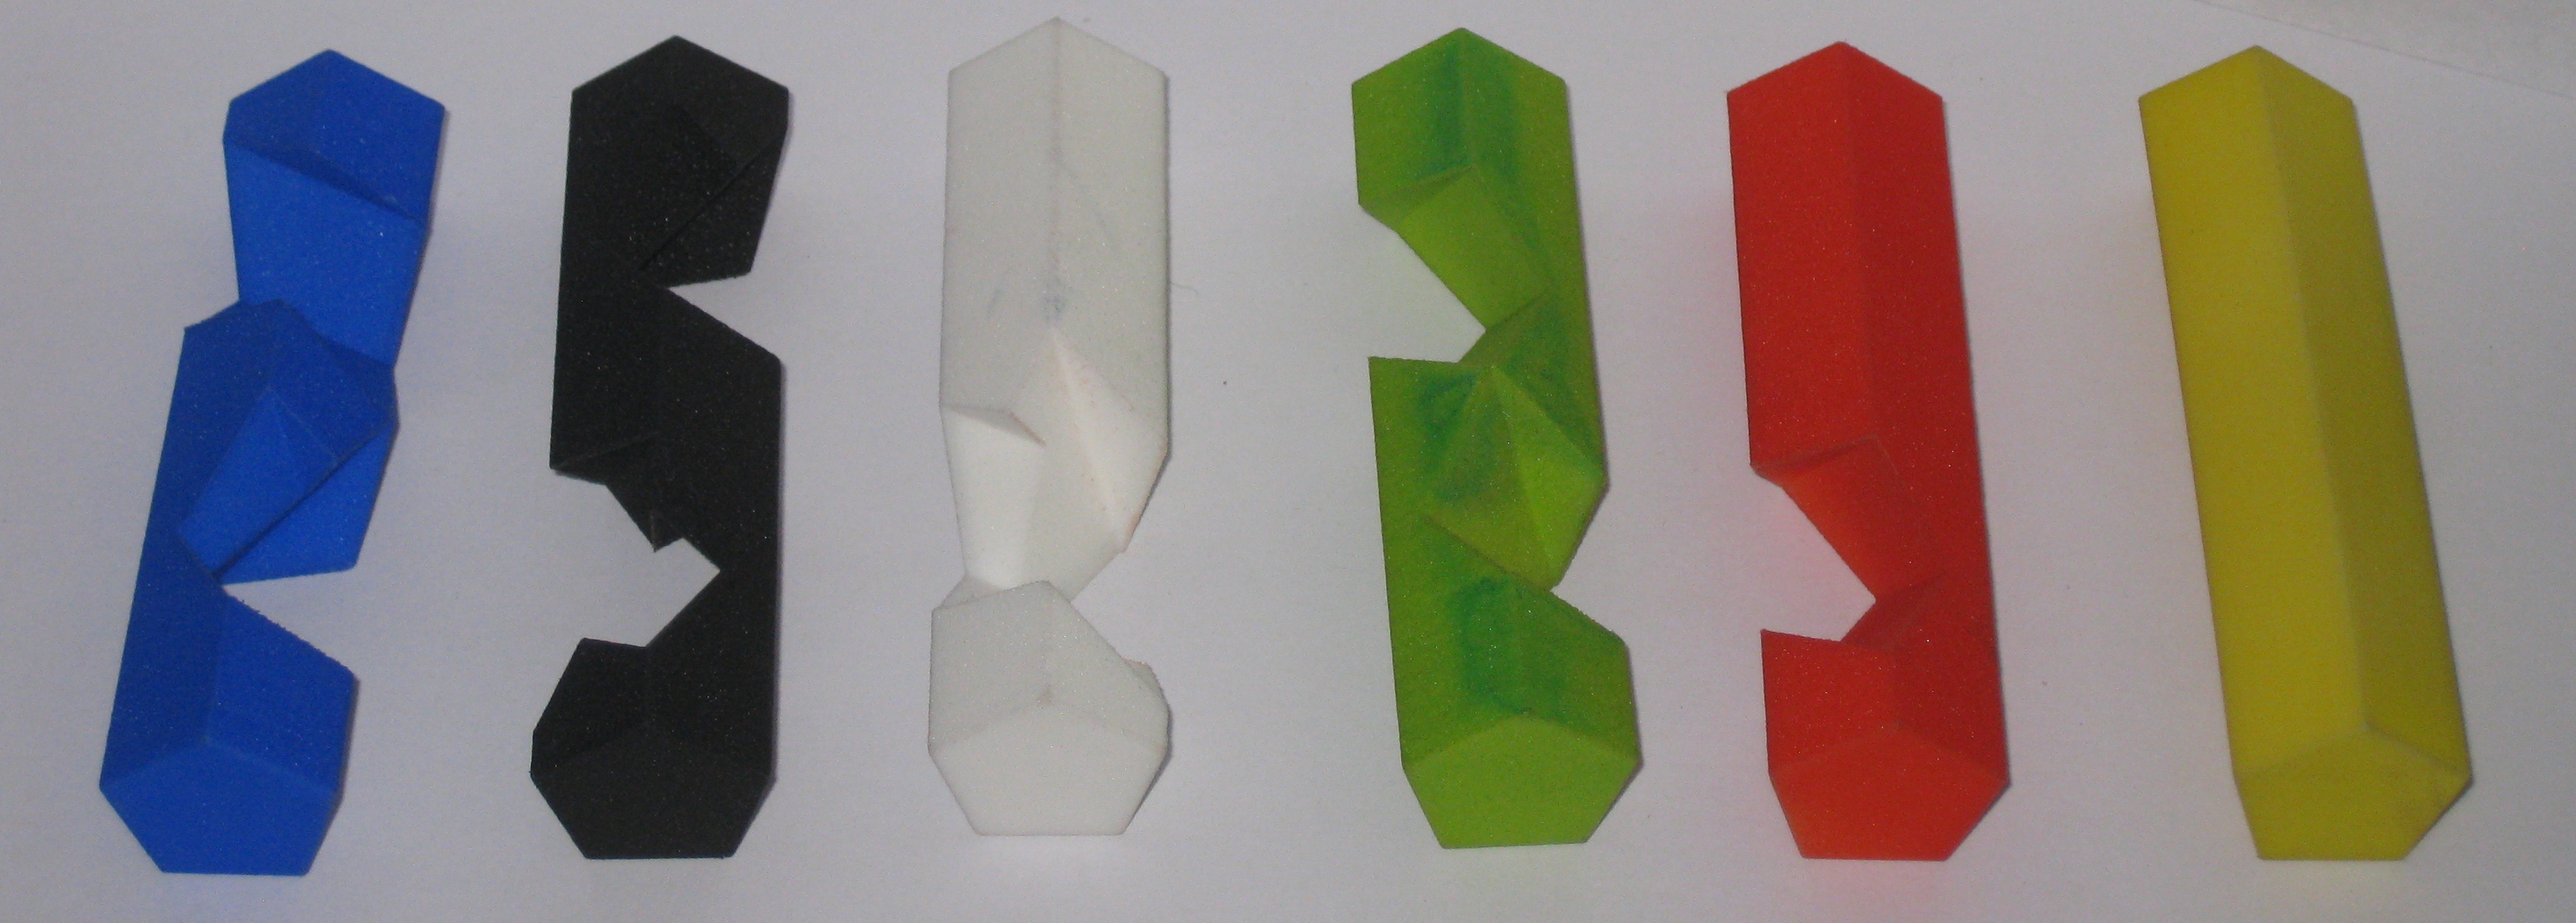
Six pentagonal pieces

Six pentagonal pieces

There’s one key piece, followed by five notched sticks which must be removed in sequence to take the puzzle apart. While it’s not trivial after the pieces are mixed up, I’d say that this is certainly an approachable puzzle for most people. Having taken it apart, and mixed the pieces, then left them alone for a while, I was able to put it back together in around 20 minutes. Now, I’m no expert in this style of assembly puzzle, but it was both fun and a good level of challenge for me.

Penta Beams is available from Oskar’s Shapeways shop if you’d like a copy of your own.

Cast O’Gear

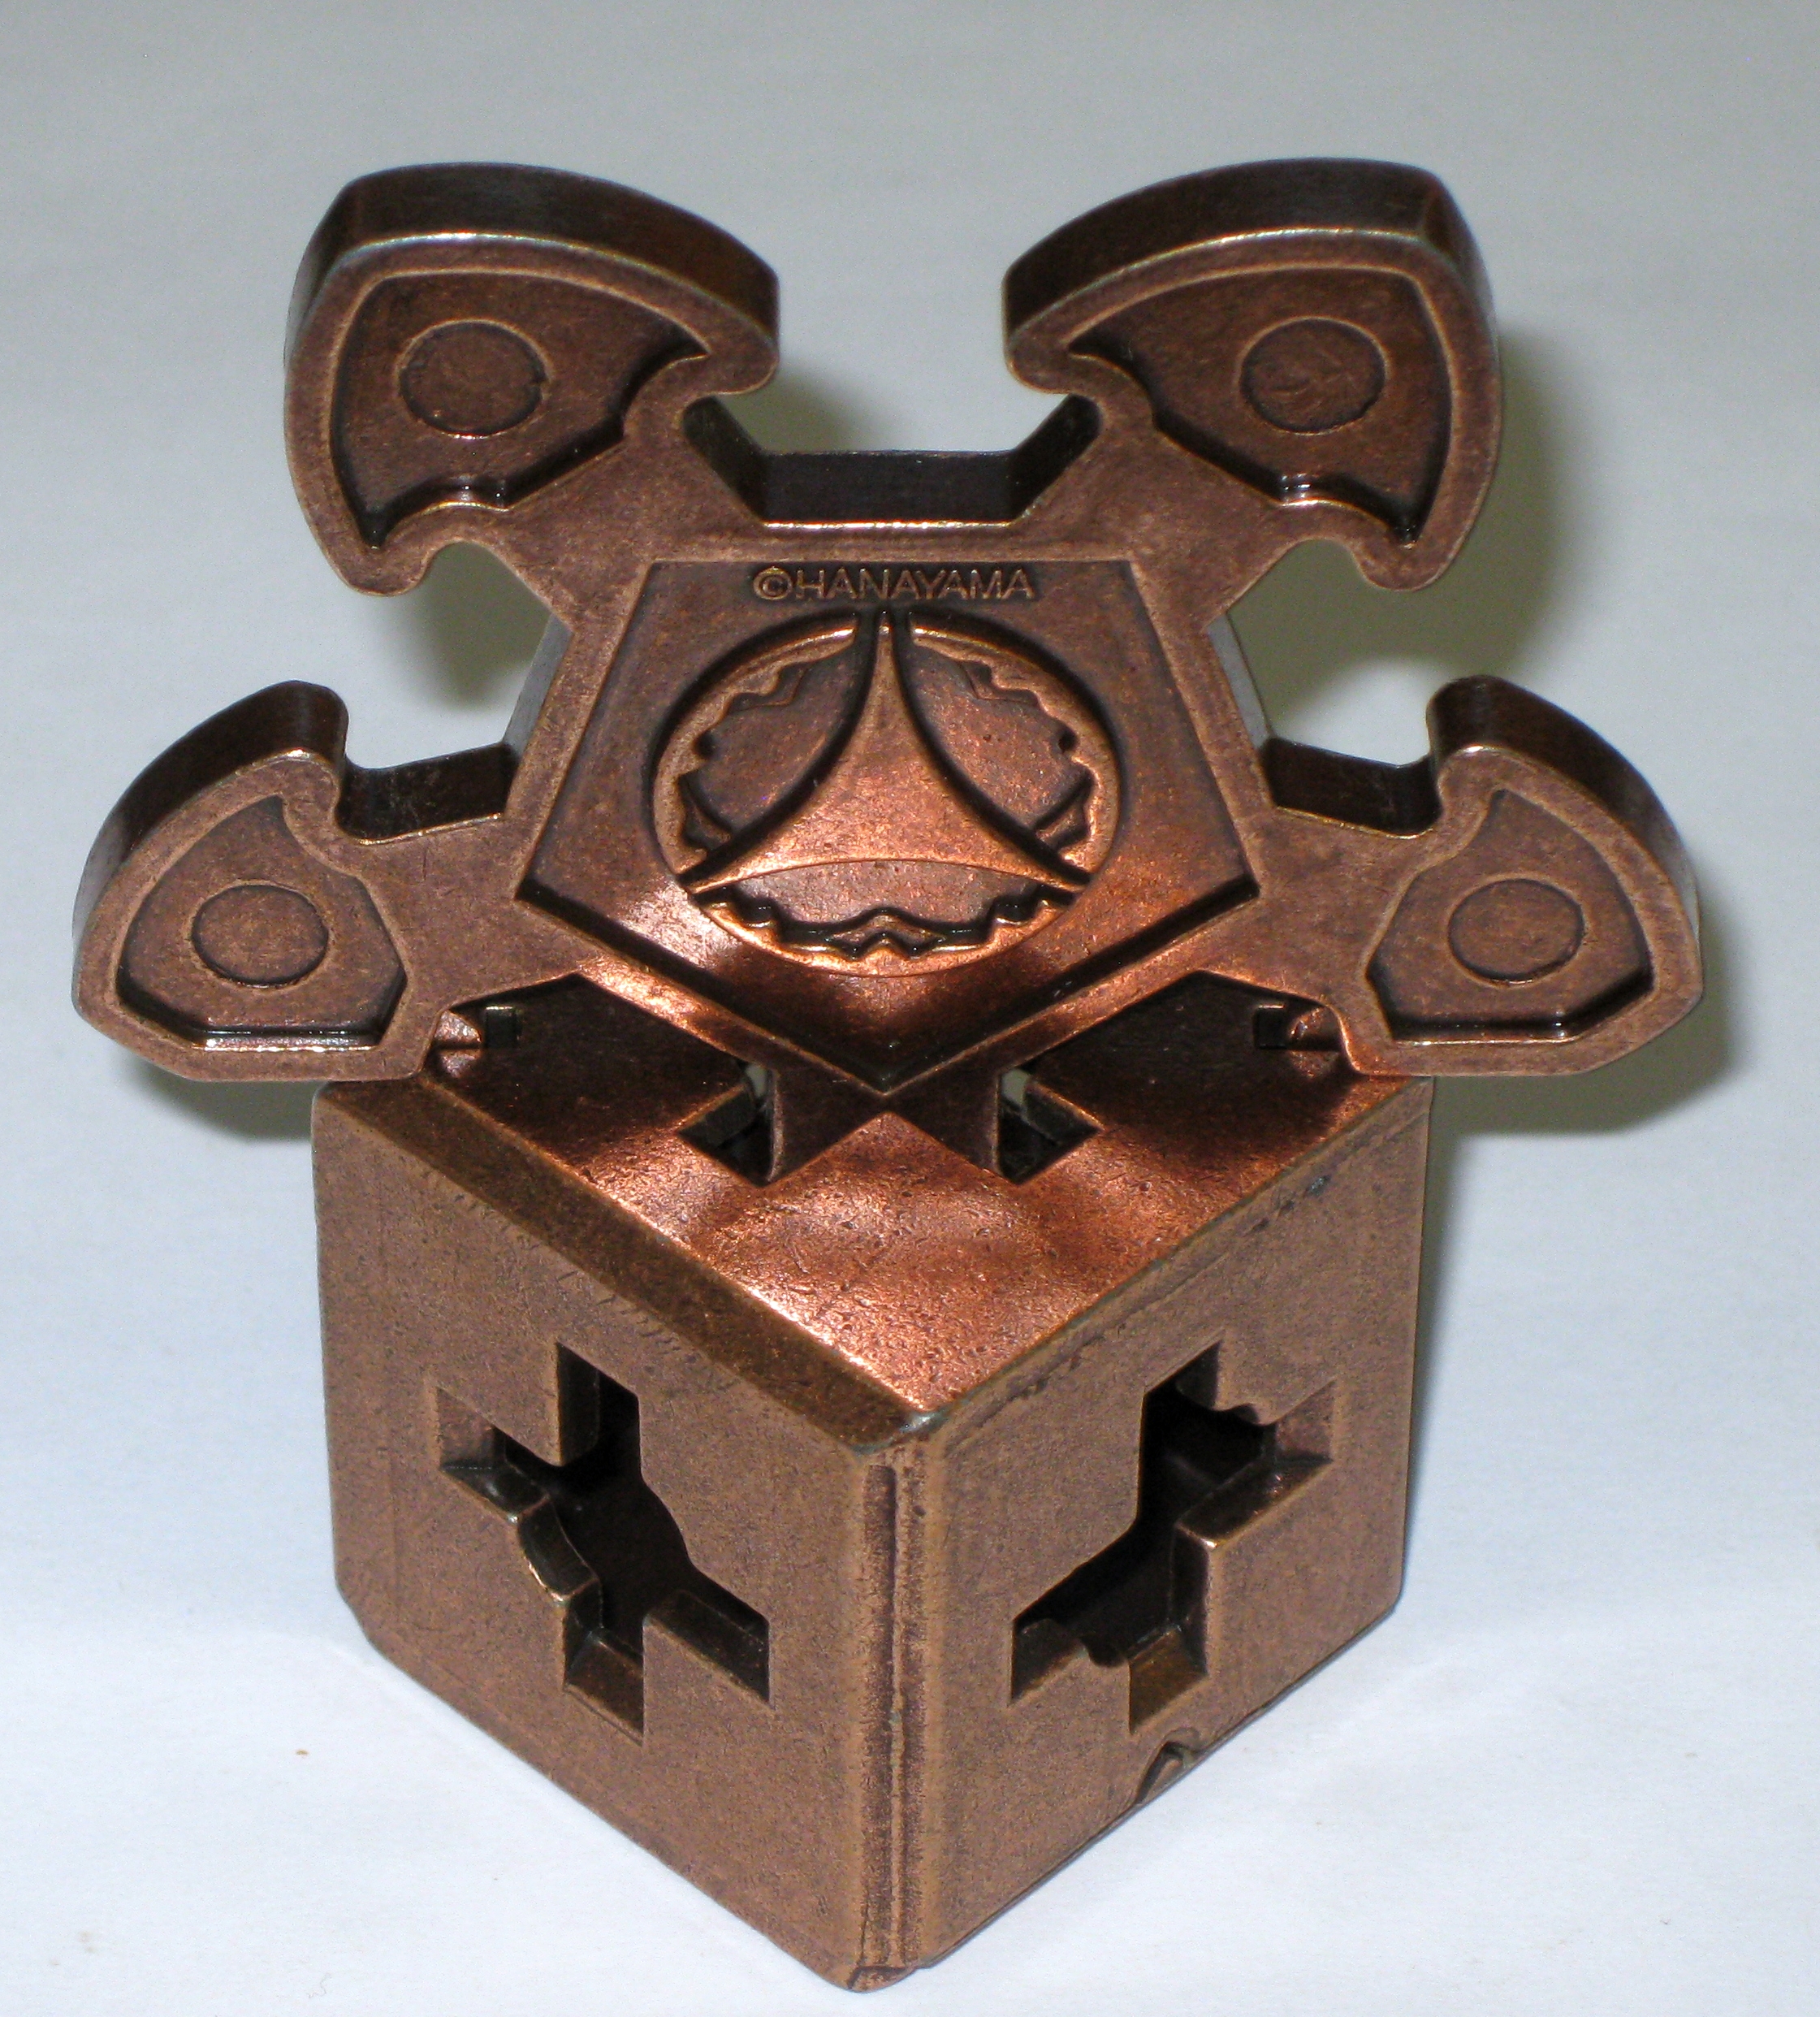
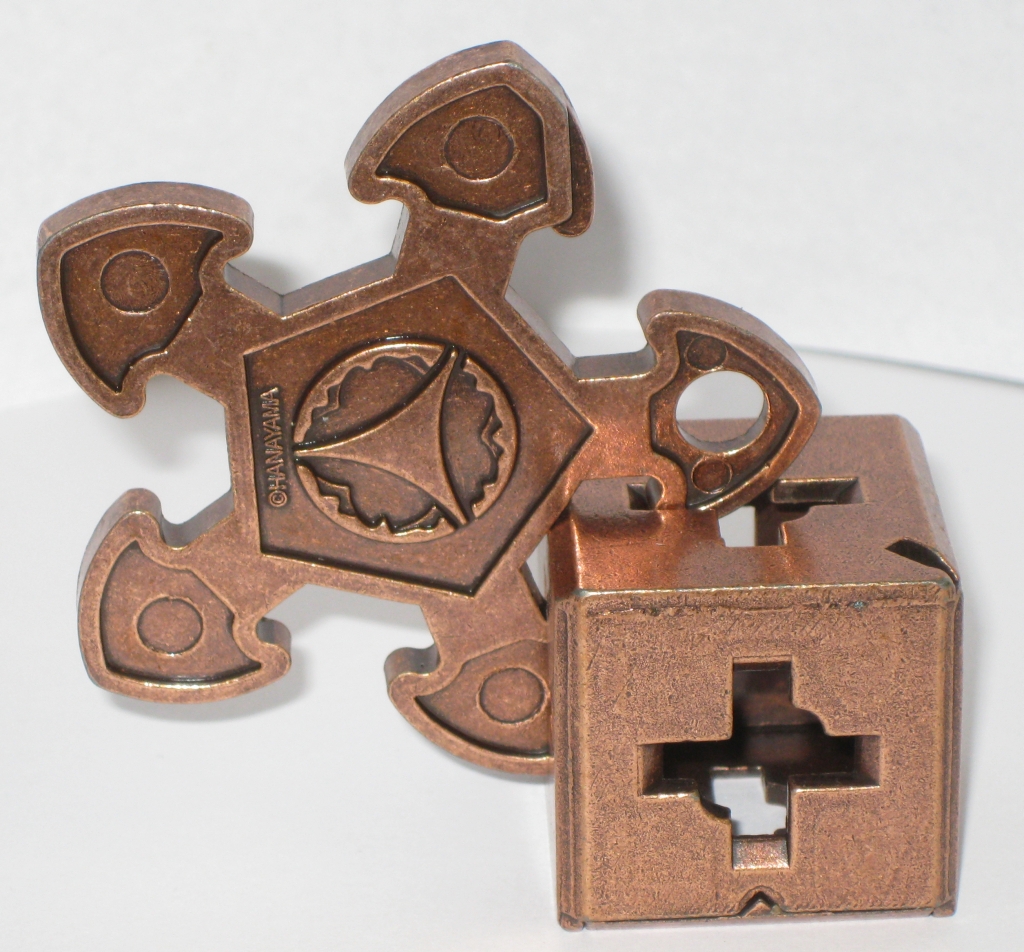
It’s been a while since I reviewed any of the Hanayama puzzles, and I have quite a few to get through, including a few of the newer puzzles. The Cast O’Gear though is one from my early puzzling that I remember solving having been given a copy by my Dad. Designed by Oskar van Deventer, and originally named Sunflower, this was entered into the IPP Design competition back in 2001 where it received an honorable mention. In 2002, Hanayama produced this version under the name Cast O’Gear.

Cast O'Gear in the starting position

Cast O’Gear in the starting position

The antiqued Bronze look of the puzzle seems to have people divided about its appearance. I personally like it. It’s a fairly average size for a Hanayama puzzle, measuring in at 3″ at its widest, by 3.5″ tall and 1.5″ deep it’s a solid puzzle although not too heavy for its size. The goal is to separate the two pieces by following the step maze to the exit.

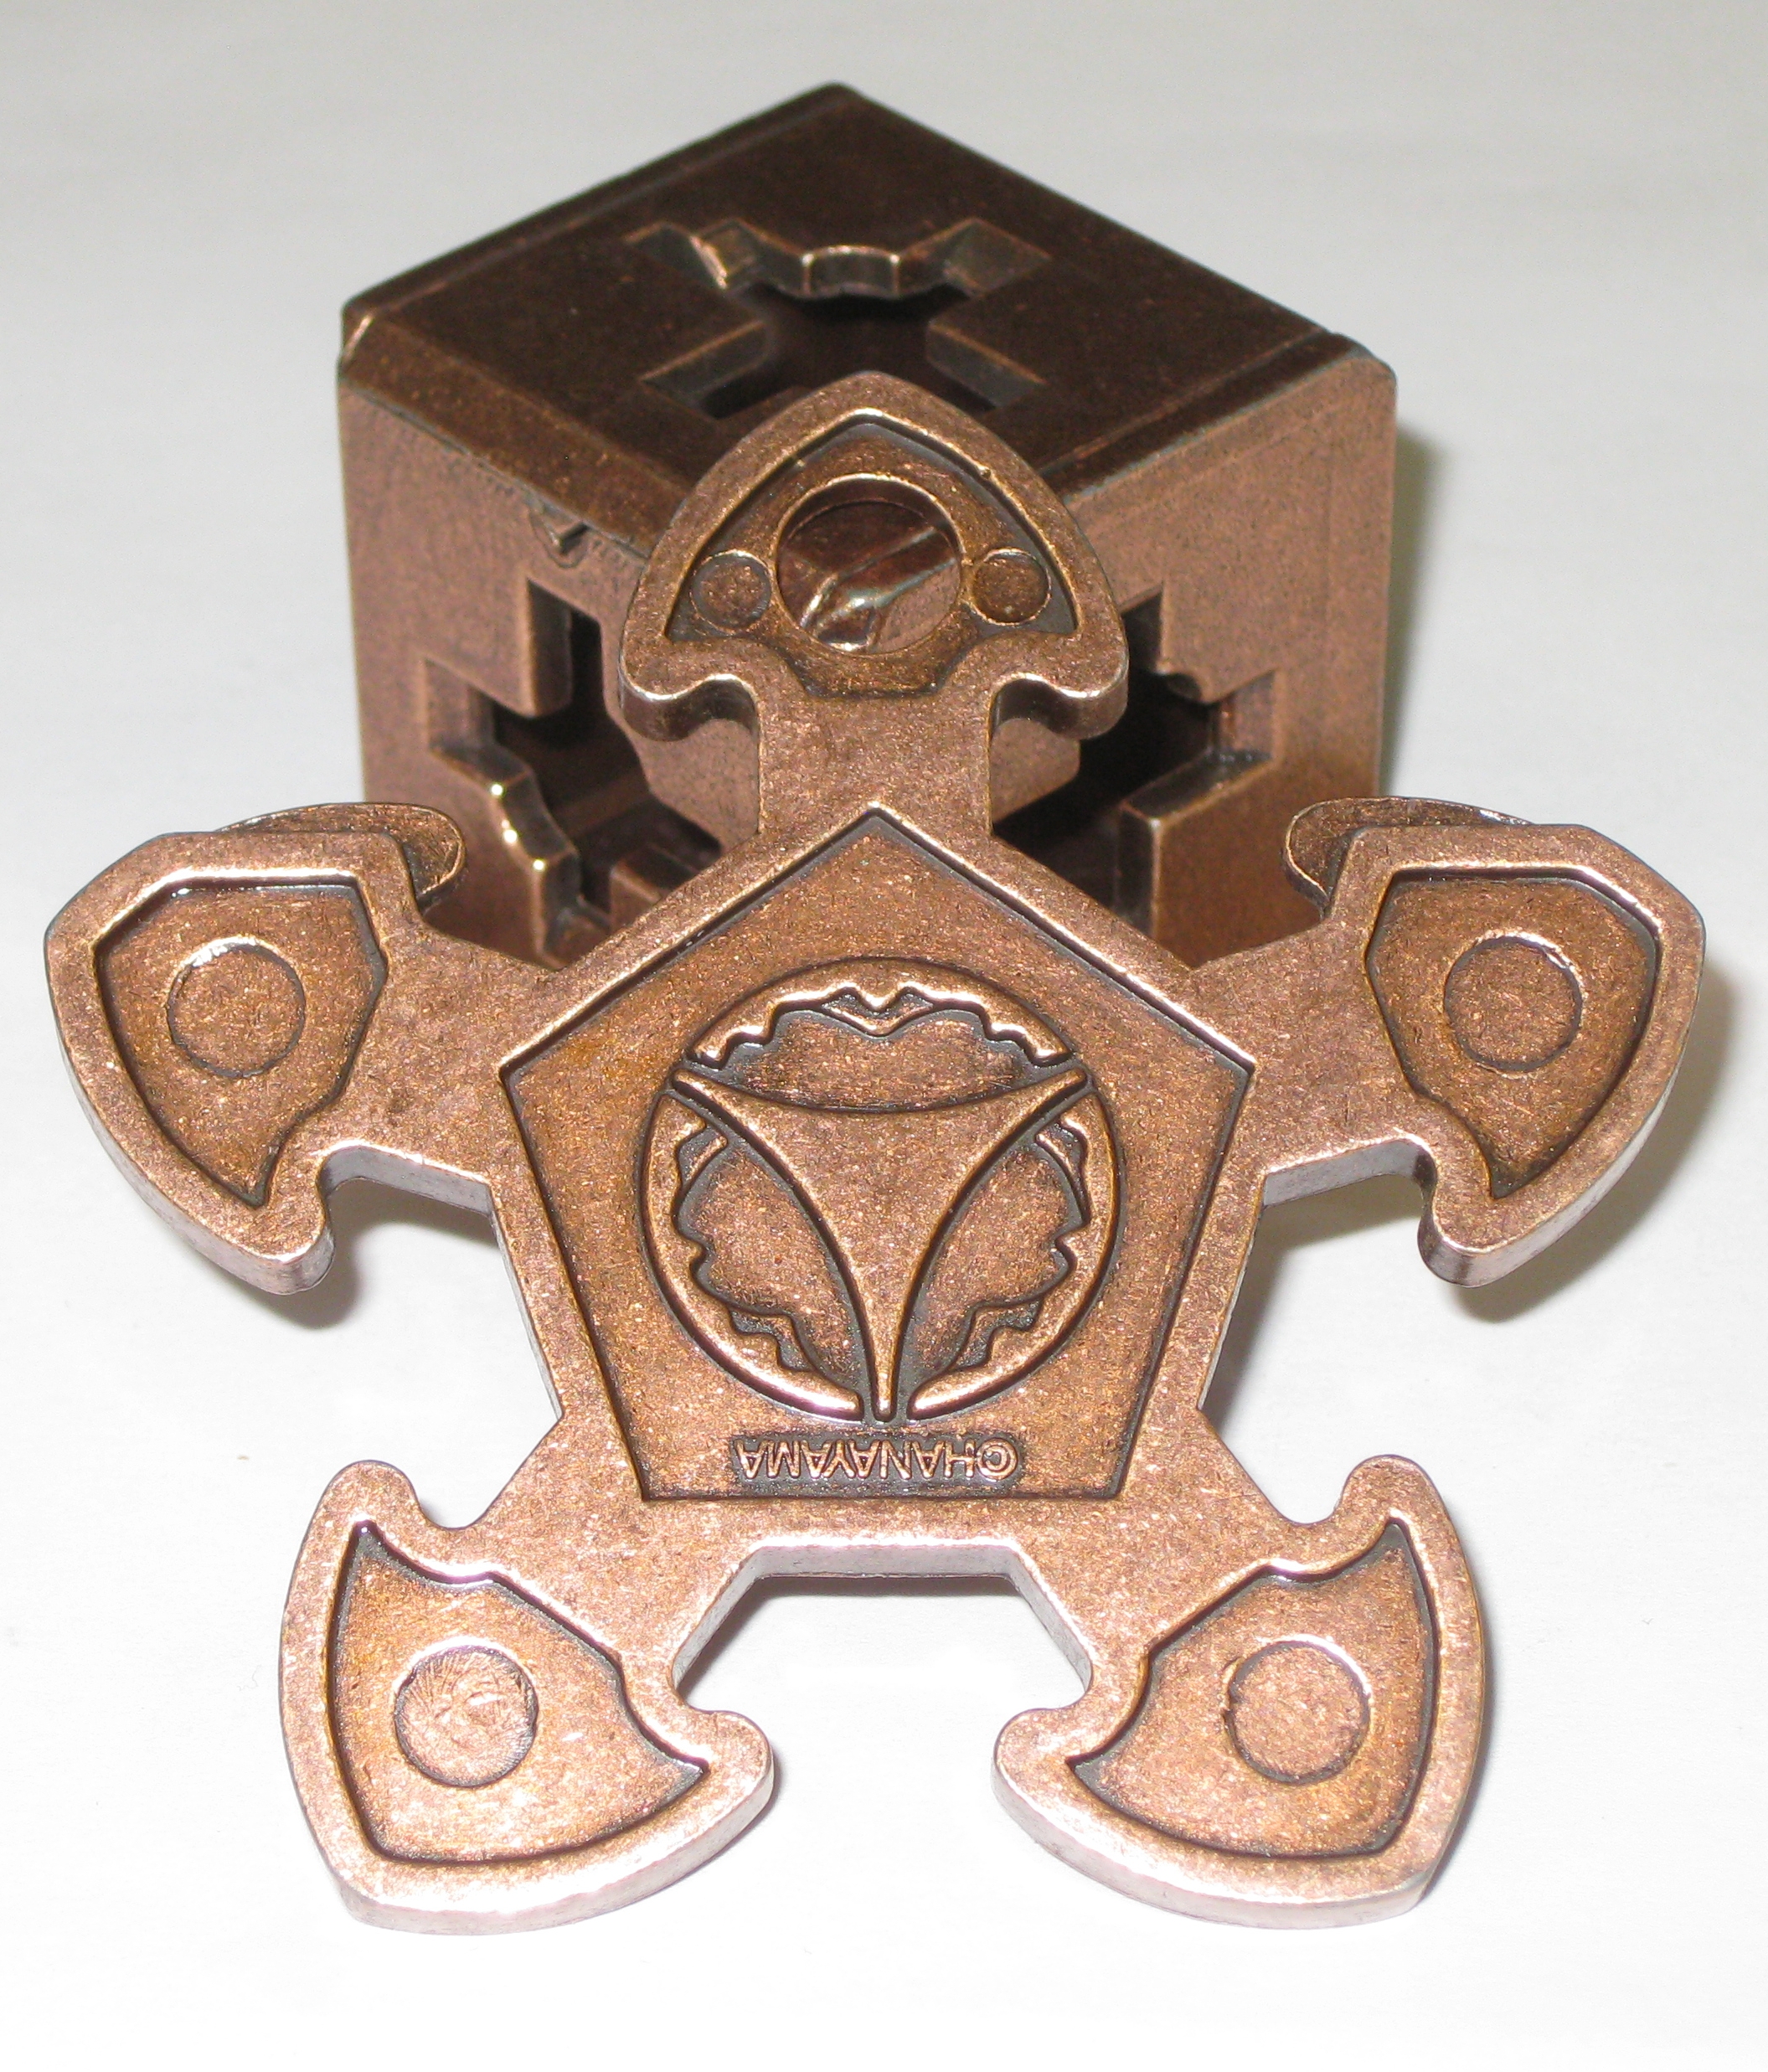
In its starting position above, there are a number of key features that help with solving the puzzle. The small triangle on one face gives both direction and orientation information about the cube. and the indents on the ‘gear’ allow for orientation of the gear relative to the faces of the cube. One additional piece of information not visible in the photograph, is the arm which is inside the cube has a hole in it, giving the ability to create a visual reference for each arm.

The exit to the puzzle is on the opposite face of the cube, and the cutaway on one of the arms can pass through a corresponding groove in the face of the cube, when it has been aligned correctly. There are 120 possible states that the puzzle can be in based on which arm is inside the cube, the orientation of the gear, and which of the six faces the gear arm is inside. To make things a little harder, it’s not possible to transition from all faces to all other faces. The cube is designed with a number of beveled edges to allow the gear to rotate, as well as a couple of sharp edges which prevent the gear from rotating. So often you think you’re on the way to the exit, and find the path blocked by a sharp corner.

Each face also has a curved cutout in the central cross, which allows the gear piece to be rotated by 90 degrees. You can only move in one particular orientation though, governed by where the cutout is, so again you find that you may want to rotate the gear in one direction, however find that path blocked.

Moving the gear around the cube

Moving the gear around the cube

With some logical thinking and planning, this shouldn’t be too tough a puzzle, however it’s easy enough to get lost and go round in circles, trying, and re-trying the same paths, and making little progress. It had been a long number of years since I had solved this puzzle last, and it was certainly no walk in the park. I spent a good half hour just fiddling before realising why certain moves were blocked (must have been having a slow day) and then setting about to find the correct path to the exit. By checking the orientation that the gear needed to be in to allow it to be removed from the cube, then working back through the possible rotations and moves between faces, the path was easy enough to navigate, despite needing some paper and pencil to plot the moves in reverse then execute them.

Solved, with the gear removed.

Solved, with the gear removed.

There are a minimum of 16 moves needed from the starting position to separate the two pieces (if my counting is correct), however as with any maze, you may end up taking far more moves by the time you take into account the dead ends and back tracking that is likely to end up in the solution path.

There are lots of puzzle shops where you can buy your own copy, and it’s available on Puzzle Master as you might expect. If you don’t have a copy, I highly recommend it, as it’s a great fiddle toy, that you can spend a lot of time just moving the gear around the cube, and not really trying to solve the puzzle.

Peppermint

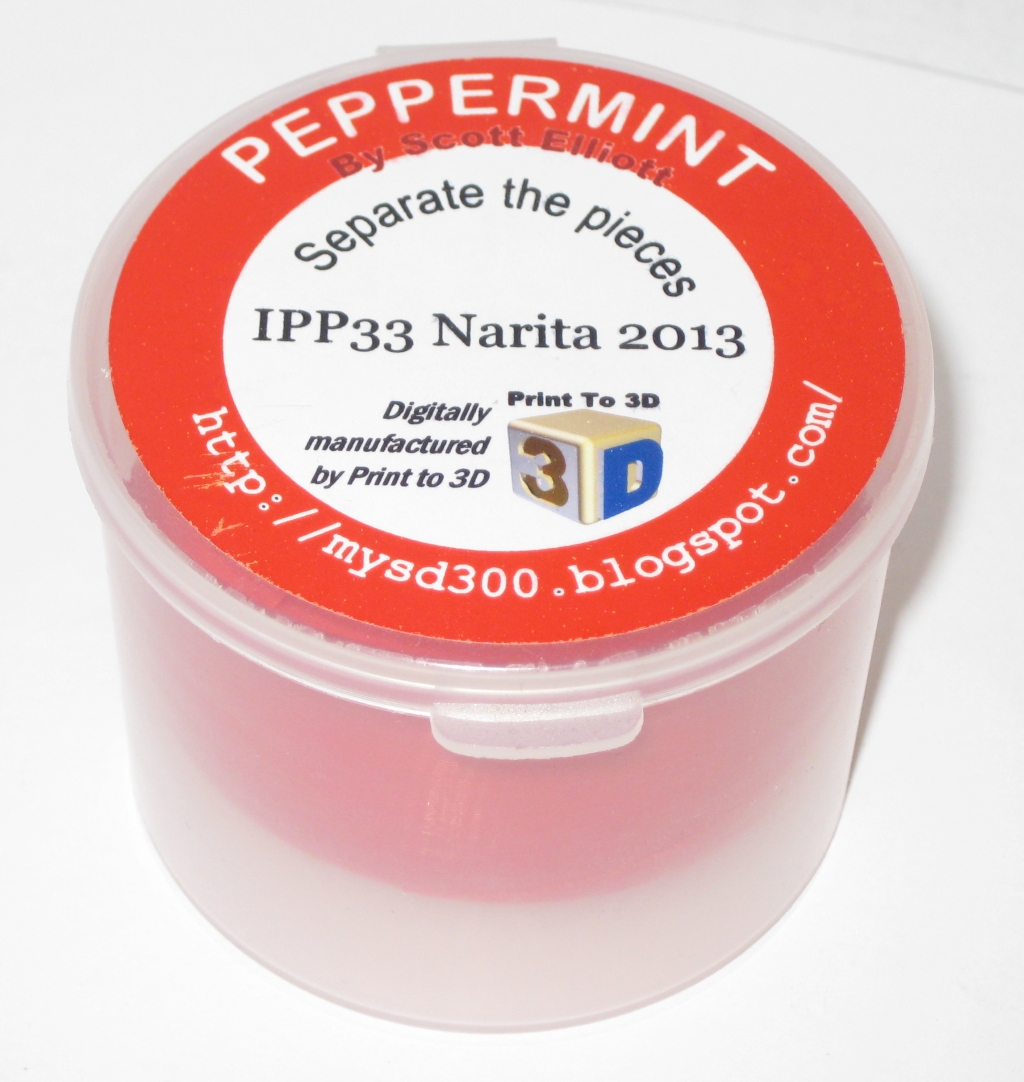
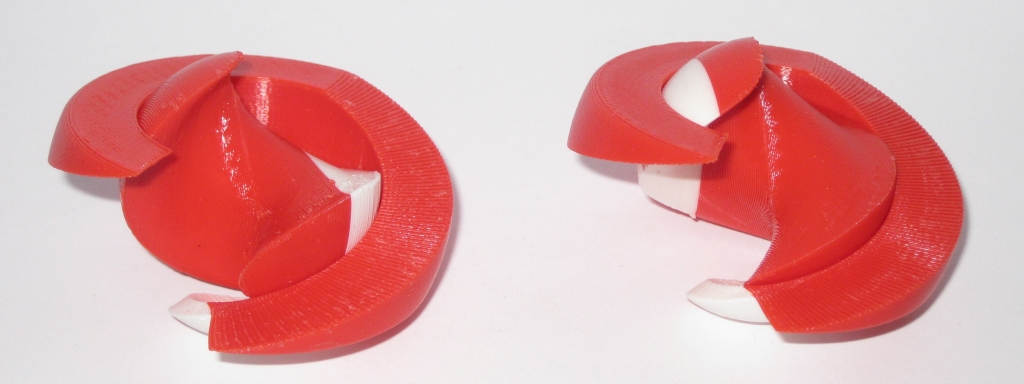
I wasn’t able to attend the IPP in Japan last year however given that I was getting married, I had a great excuse, and I’m not complaining about my choice of location. It did mean however that I missed out on a number of new puzzles from the IPP. Fortunately, I have a few friends who did go, and I was able to borrow some of the Japan Puzzles. Peppermint is a 3D printed puzzle designed by Scott Elliot for the Puzzle Exchange, and was digitally manufactured in colorful ABS by Bradley Rigdon at PrintTo3D according to Scott.

Peppermint.  An exchange puzzle from Scott Elliot.

Peppermint. An exchange puzzle from Scott Elliot.

You can read all about the design process for the puzzle over on Scott’s blog here if you’re interested. I certainly recommend it as it really shows the work that goes into refining a puzzle design. The finished puzzle measures 2.25″ x 1.75″, and seems like a fairly large puzzle in your hands.

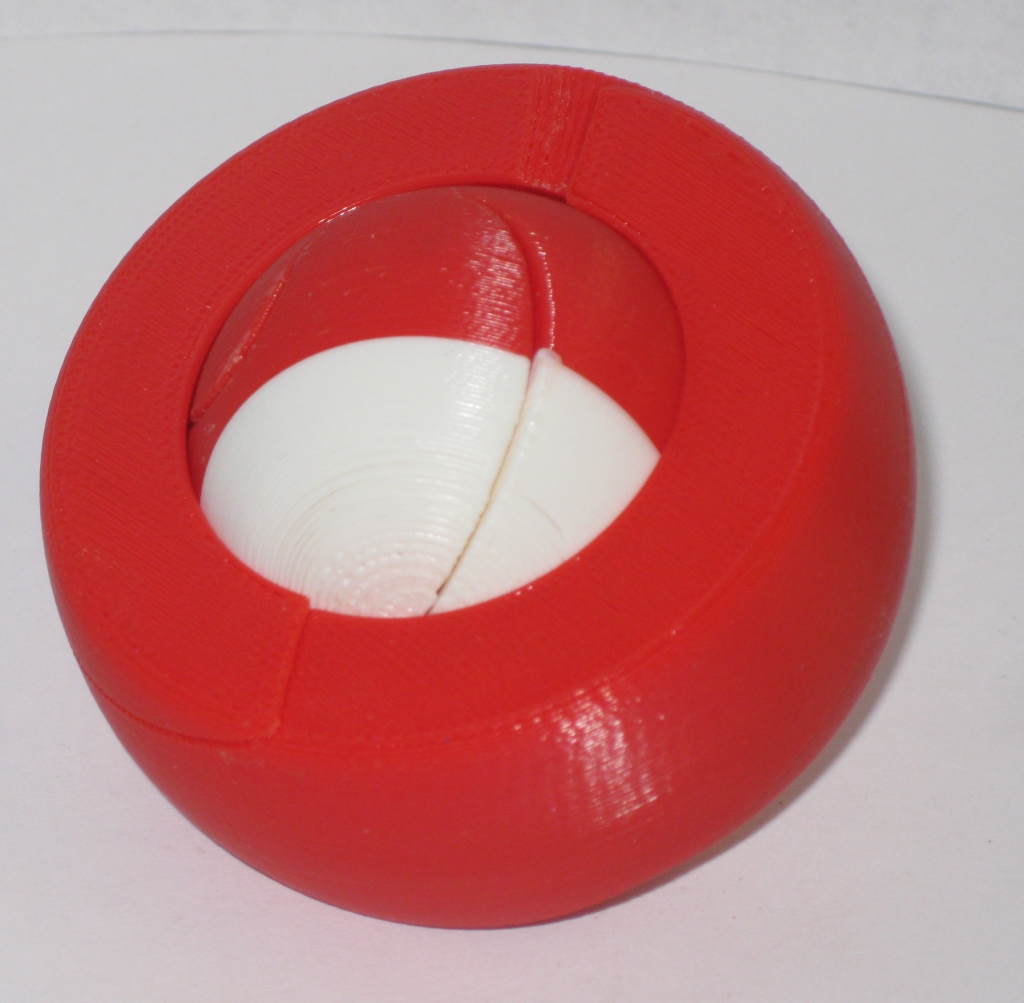
Peppermint.  Unboxed.

Peppermint. Unboxed.

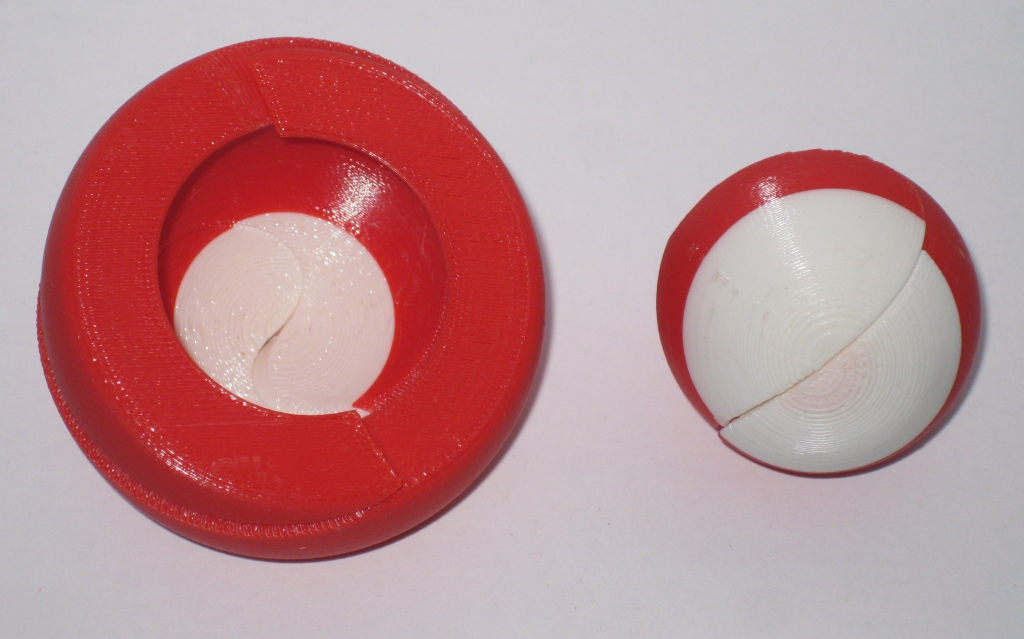
The puzzle consists of four pieces, which combine together into two linked sub assemblies. The outer shell doesn’t move, while the sphere in the centre is free to rotate around. If you’re familiar with the Cast Marble from Hanayama, then you’ll have a fair idea of what’s going on here. The difference is that you can only see the sphere from one side of the puzzle. On the other side is a closed dome that hides the sphere away.

Peppermint.  Taking the pieces apart

Peppermint. Taking the pieces apart.

Once you’ve found the right alignment of all the pieces, it will rotate apart smoothly, before coming apart into four separate pieces. Putting it back together is a simple case of reversing the process. there is a little bit of thought required to align the pieces correctly, but nothing that will stump you for long.

Peppermint.  Showing off the sub assemblies.

Peppermint. Showing off the sub assemblies.

Overall it’s a fun puzzle and it looks great in the vibrant colours of the ABS plastic. I’m seeing more and more puzzles being produced by 3D printers, and the quality is really impressive. For rapid prototyping, and the ability to play with designs just hours after they are conceived is incredible. I don’t see it replacing the feel and look of natural wood, but I can’t deny that it’s an amazing technology.

2 Halves Cage 4 A

Well that’s a bit of a mouthful isn’t it! 2 Halves is a burr puzzle designed by Gregory Benedetti, with my copy being made by the very talented Maurice Vigouroux. Back in November 2013, this came up for sale on Puzzle Paradise with a couple of options for woods used. Seeing the Ebony cage and Bloodwood pieces, I didn’t hesitate, and bought it there and then. I certainly wasn’t disappointed.

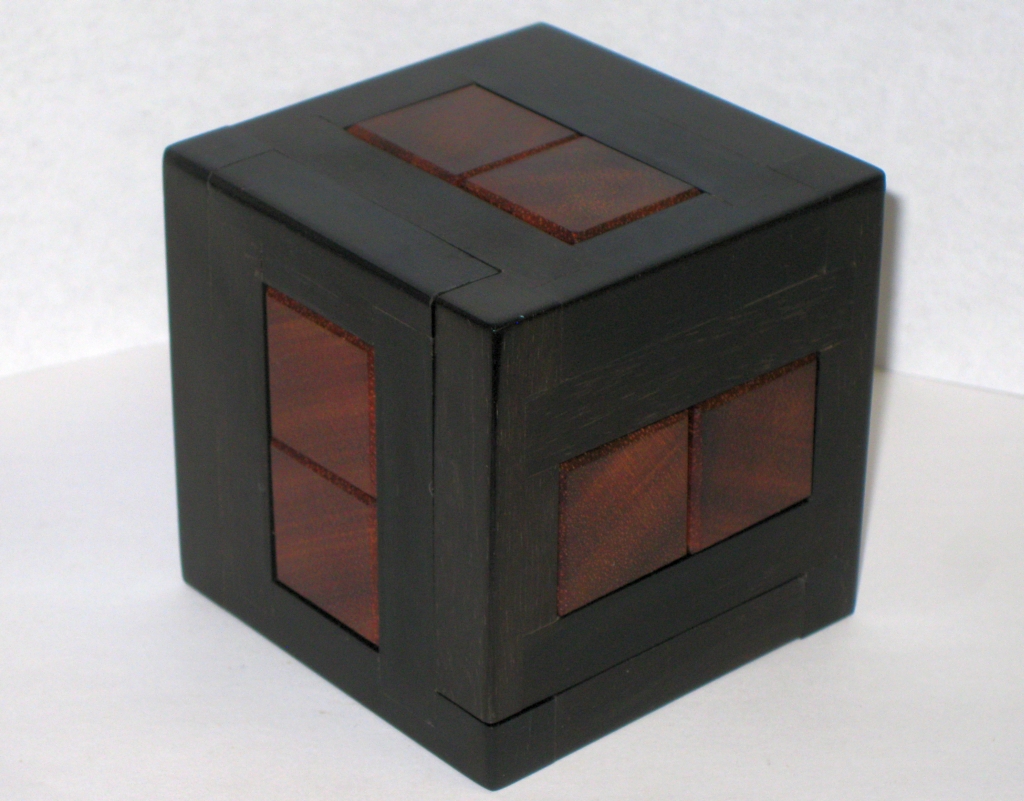
2 Halves Caged 4 A by Gregory Benedetti

2 Halves Caged 4 A by Gregory Benedetti

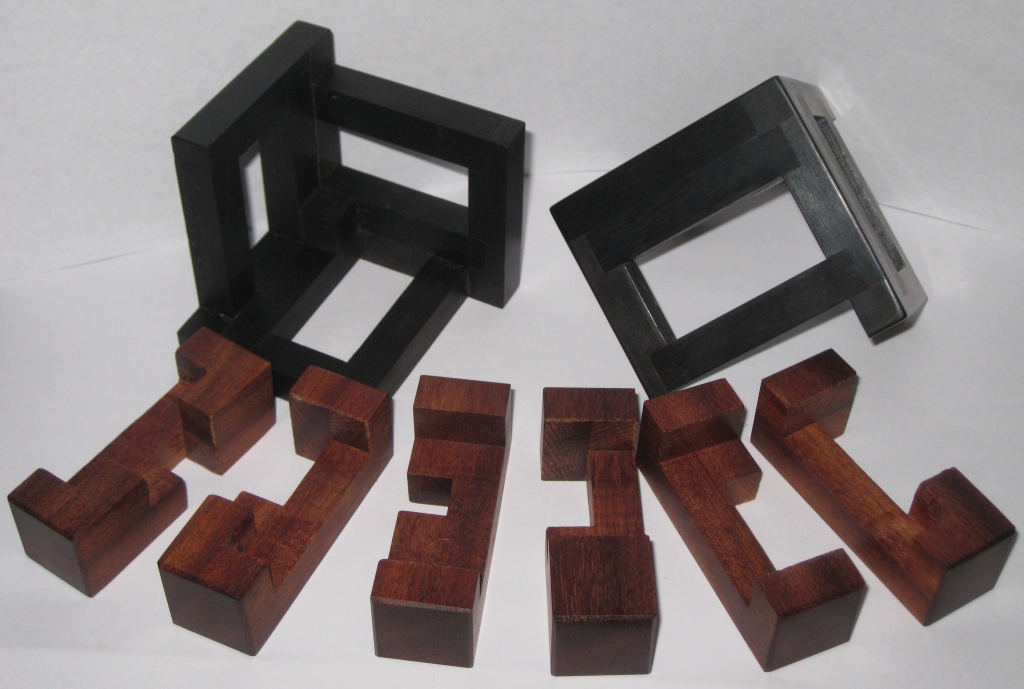
Despite not being particularly good with Burr puzzles, this doesn’t look like a burr, and the jet black Ebony surrounding the deep red of the Bloodwood makes it look imposing. That’s probably a good thing, as this is not a simple puzzle. It’s not a small puzzle either. Each cubie is 7/16″, making it 3″ x 3″ x 3″ overall, meaning that Maurice was working with 1″ thick stock to make the burr pieces. It’s a great size and manipulating the pieces inside the frame is easy given the size of the pieces. It’s heavy too. Ebony is a very dense heavy wood, so this puzzle has a really solid heft to it. The fit and finish are excellent with the Ebony being polished to a reflective shine. The pieces all slide past each other perfectly, and the tolerances are spot on.

The first night I spent around 40 minutes playing around with the puzzle and managed to create some space in the cage to move the burr pieces around a little, but I hit a dead-end and couldn’t see a way to progress further. There seemed to be a huge amount of space in the puzzle, but the cage was still firmly held in place, and the was no way I was sliding any of the burr pieces out of the cage.

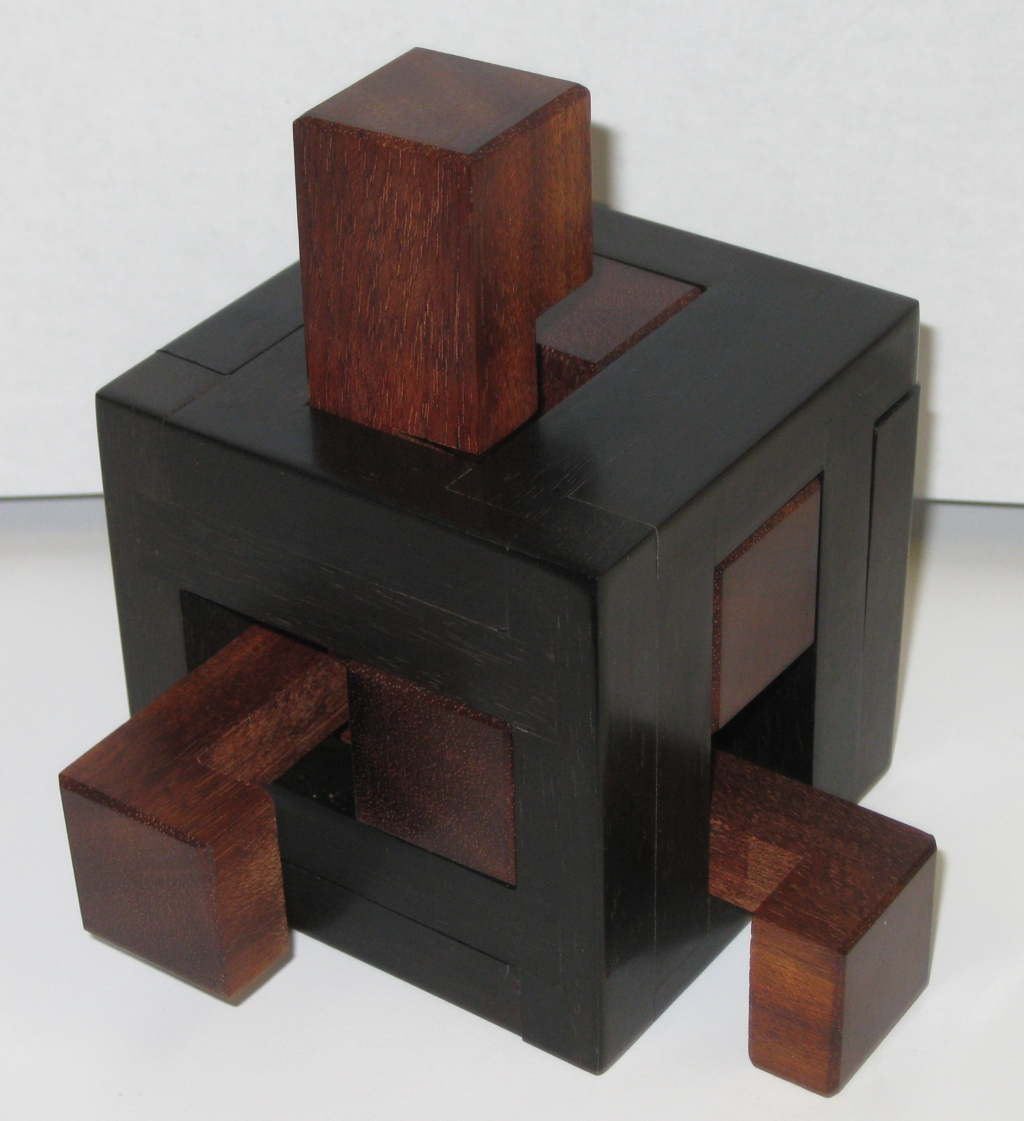
Partially solved with pieces sticking out like a Hedgehog

Partially solved with pieces sticking out like a Hedgehog

This carried on for a few days where I’d spend 20 minutes or so each night trying to make progress and really getting nowhere. As often happens, things got busy, and the puzzle was left on a shelf for a while with pieces sticking out of the sides, looking a little like a hedgehog. Recently I had a little free time, and picked this up again, since it was sitting looking at me and I felt bad that I’d not finished it.

After about an hour, I finally managed to shuffle the burr pieces into the right locations to be able to remove one half of the cage! Progress. It was quite the achievement to have made it this far, and spurred on by my success, I carried on to remove the rest of the pieces. I thought I was past the difficult part and the remainder was going to be easy. After all, I now had a lot of space, and removing the remaining pieces should be easy!

Isn’t it great when you’re totally wrong. The puzzle is a level 17.14.9.5.3 puzzle. So removing the first half of the cage, I’d only finished the first 17 steps. I had another 14 to remove the first burr piece, and then another 9 to remove the second. This is one tough puzzle. I spent another 15 minutes figuring out how to move the pieces around and take that first burr piece out of the remaining cage half, but I finally got there. Let’s just say I didn’t do it in just 14 moves!

Six burr pieces, plus the two cage halves

Six burr pieces, plus the two cage halves

As far as value for money goes, this has been a great puzzle. I’ve had a lot of puzzling time out of it, and I have to admit that I really enjoyed it. This is a little worrying for me, as I’ve never really found much fun in playing with Burr’s. Maybe I’ve found something else that I do enjoy after all.

The 2 Halves is certainly a different style of Burr, with the cage interacting with the burr pieces in such a way that it really adds an extra challenge. The cage itself blocks your view of the voids in the burr, making it much more difficult to see how to progress, and it also adds some structure, keeping the pieces in the right locations without needing an extra hand to prevent them from falling or rotating into a position which makes it difficult to move the next piece.

Now, I freely admit that I’m not good enough with burr’s to be able to re-assemble this one on my own. It was enough of a challenge to just take it apart. Not to mention that I didn’t pay any attention to how the pieces came out, or the order, so I didn’t even have a reference to how to put them back.

There’s only one possible assembly out of 1,844 possible orientations of the pieces in the final shape, so it could take a very long time to put this back together with trial and error. I know when I’m beaten, and turned to the trusty Burr Tools to help. Even there it took me three attempts to get the pieces entered correctly for Burr Tools to be able to solve the puzzle. I have no idea how Gregory designed this, but I have to take my hat off to him. It’s a great design, and I can’t recommend it enough, even if you’re like me, and are not a fan of Burr’s normally.

Lunatic 3D Hidden Mazes

Way back in June 2012 when I was browsing the puzzles over at Cleverwood, I came across a puzzle called The Lunatic. At the time I was spending a lot of time with hidden maze puzzles, and this appealed to me, so I bought one. Turns out this was one of the original mazes made by Marcus Allred, who popped up on Kickstarter a little while later. I backed his first venture there too!

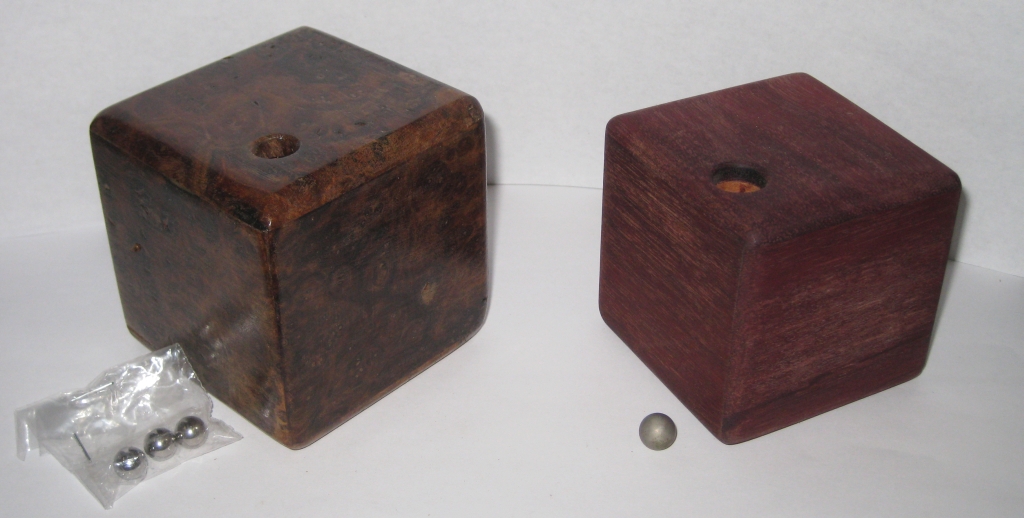
The original Lunatic (right) and the newer version (left)

The original Lunatic (right) and the newer version (left)

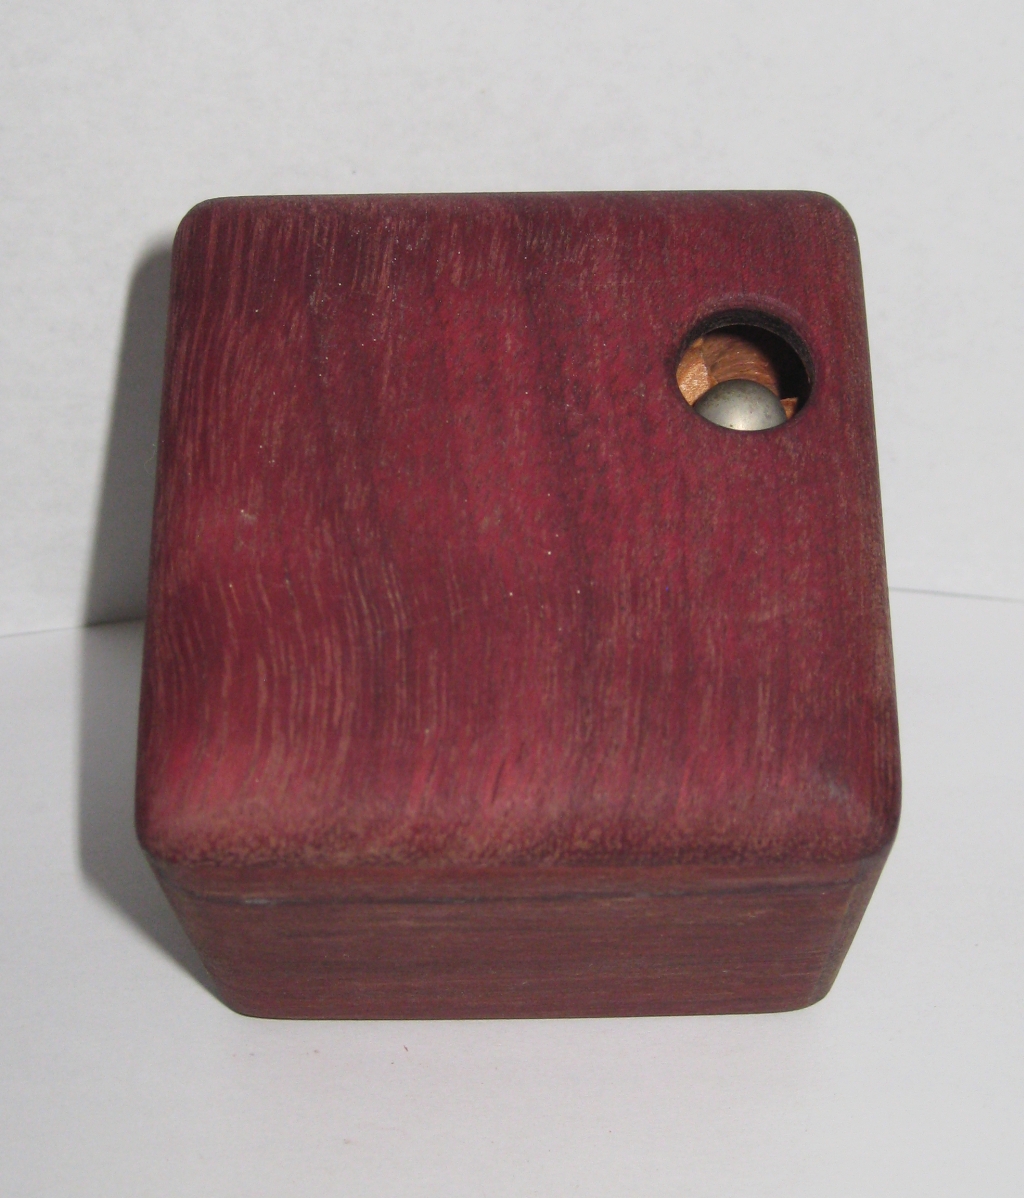
The original puzzle, made with a Purpleheart exterior is a little over 2.5″ x 2.5″ x 2.5″, and comes with a single steel ball which you drop into one of the holes, then navigate through a blind maze, before the ball pops out the hole on the other side. It’s not terribly difficult, and I’d even go so far as to say it’s trivial. There’s no dead ends or chances for the ball to get stuck, you can put the ball in one side, and rock the cube back and forth, and the ball will pop out. The challenge is really to understand the maze, and get the ball out in as few movements as possible. Doing that makes it a little more challenging, and more interesting as a puzzle.

The original Lunatic in Purpleheart

The original Lunatic in Purpleheart

At one point Marcus popped up on one of the puzzle forums I frequent, and we started talking about the puzzle. Apparently he finished the puzzle using Orange Oil, which helps bring out the colour of the Purpleheart. I certainly didn’t know that, and I know a few other puzzle builders were interested in that process. It’s looking a little dry these days, and I may have to refinish the puzzle to bring back its original luster.

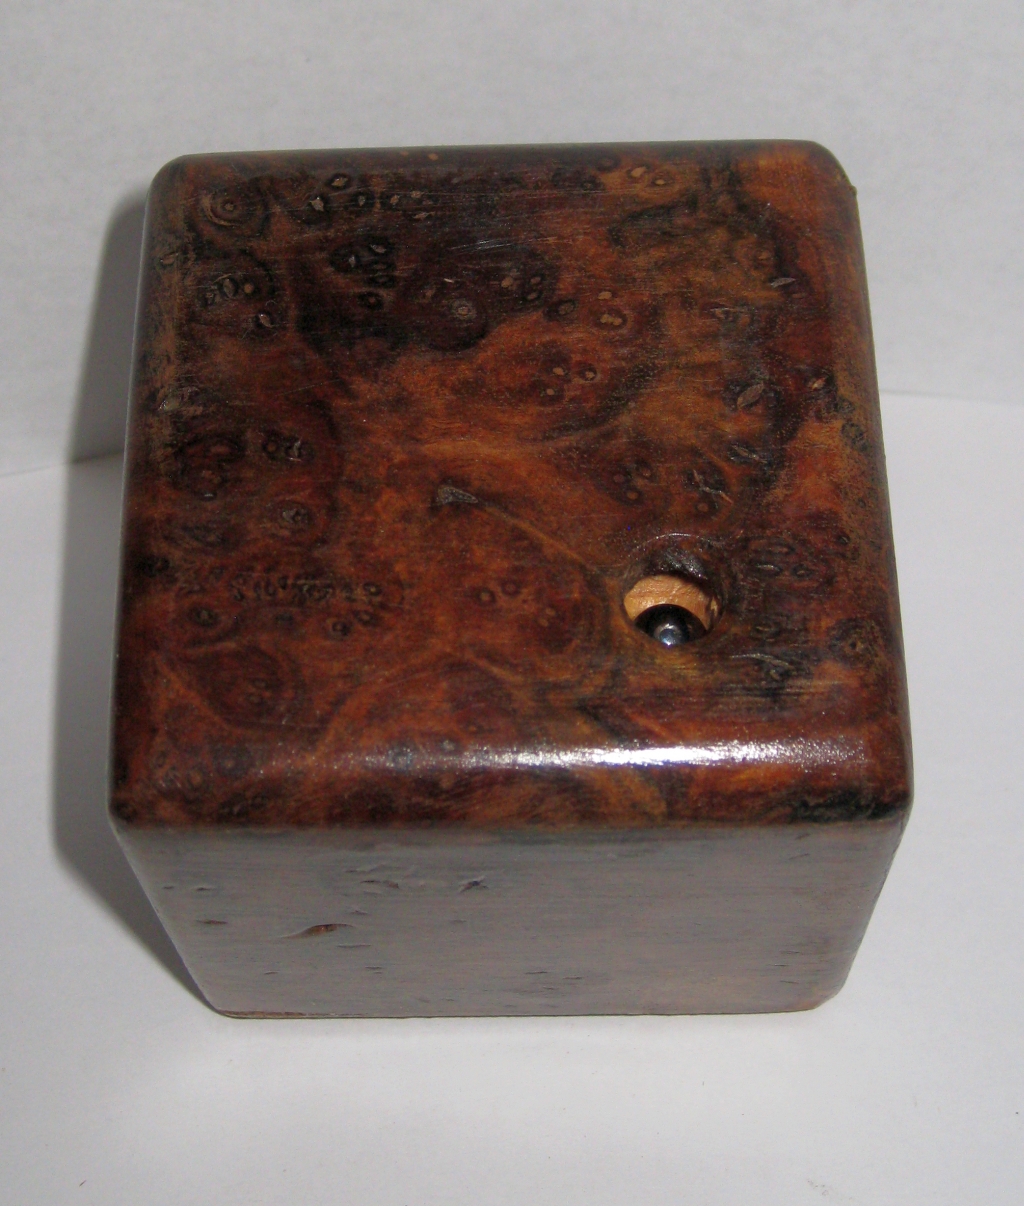
The result of the Kickstarter, made from Walnut Burl

The result of the Kickstarter, made from Walnut Burl

The Maze above is the result of that first Kickstarter project, a larger, 3″ maze with a Walnut Burl exterior. Marcus has certainly refined the process from that first cube, with the entry holes to the maze being both smaller and better defined. The visibility of the internal maze which is made from a much less exotic wood is minimal, and overall it looks like a more polished puzzle.

The difficulty is much the same as the original, and won’t provide much of a challenge, unless you follow my suggestion to map the internal maze, and then navigate it in as few movements as possible. Still that’s not the real attraction of the work Marcus is doing.

He’s finding some of the most beautiful burl woods out there, and working them expertly into beautiful works of art that are also puzzles. Some of his more recent work includes using the burl itself to create the maze, and then encasing it in a clear shell. Adding two balls to the puzzle of different colours and then creating challenges to swap the locations of the balls and so forth. The challenge to work with burls like this without having the wood shatter or chip is no easy task, and Marcus has refined his techniques to produce excellent results.

His latest Kickstarter offering up some of the new designs has just been successfully funded, and I look forward to seeing what he does next. Might be time for me to pick up one of his newer puzzles, and see how far he’s come.

Marcus now has a new website, so head over there if you’d like to pick up one of his puzzles. If you’re looking for something which will stand out on the puzzle shelves, this may well fit the bill.