My Second IPP in 2012

We’ve made it into 2013, and I find myself wondering where the year went. Seems like I achieved a lot when I look back on it, and even though I didn’t write about as many puzzles as I may have wanted to it seems like I got though a fair few. My collection continued to grow, thanks to some great designers and craftsmen out there, and I was invited to my first International Puzzle Party.

I met many of the people I’ve spoken to over the internet and made many new friends while I was there. One of those was Dor Tietz, who I was introduced to on the first night when a group of us went out for dinner. As we talked, I mentioned that I’d been to Israel a few times and given my day job, I’d probably be back again. He told me to let him know if I was going to be in Israel at any point as he’d organise a get together. So when I was traveling in October, I sent Dor an email, and he arranged my Second IPP for 2012. The Israel Puzzle Party! Before I leave 2012 behind I really need to write about this IPP as it was a very special meeting for me, and I had a lot of fun. It would be a shame not to write about it.


Dor very kindly picked me up from the Office at the end of my work day, and we drove the twenty minutes back to his house. While on the way Dor’s phone rings and there’s a short conversation partly in Hebrew and partly in English, as Dor confirms that we’re on our way.

Getting off the phone, Dor tells me that the call was from Dan Feldman who was on his way. Dor had arranged for a small, select group of local puzzlers to come along while I was ‘in town’, and had hand picked people to join us. Quite an honor, and as Dor pointed out, made sure that it wouldn’t be overwhelming for me.

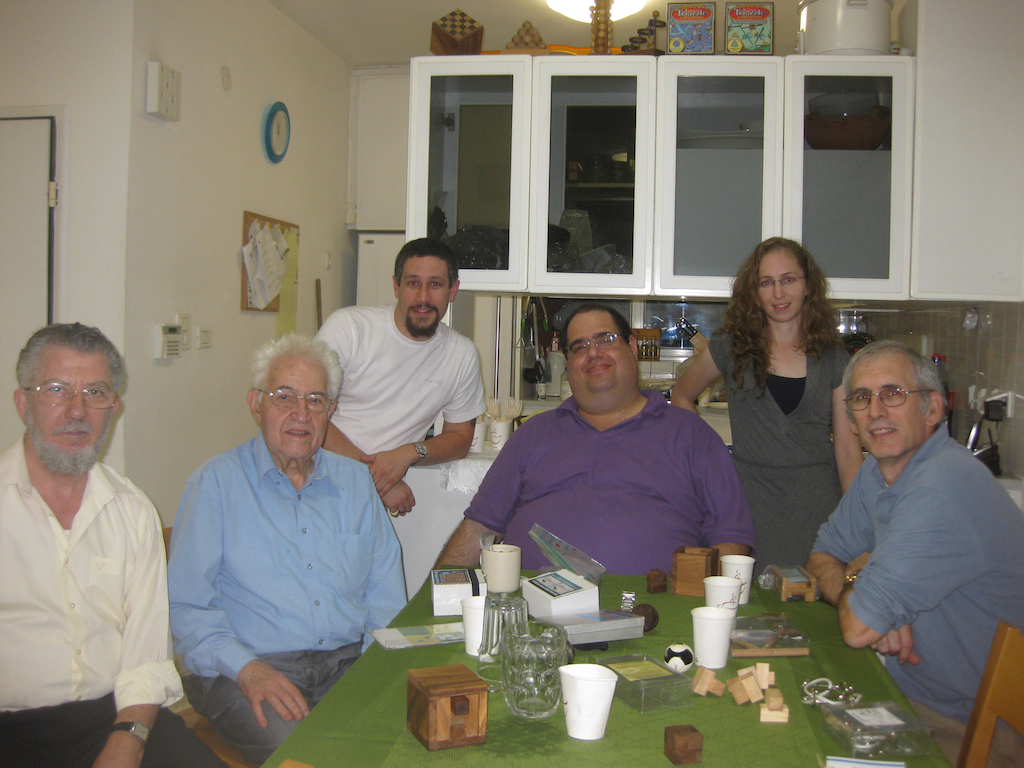
Dan Feldman, Abraham Jacob, Me, Dor Tietz, Yael Meron, David Goodman

Dan Feldman, Abraham Jacob, Me, Dor Tietz, Yael Meron, David Goodman

The small group included Dor, Yael Meron, Dan Feldman, David Goodman, and Abraham Jacob. Dor and I arrived a little ahead of the rest of the group, so I was given the tour of Dor’s collection. Sadly I didn’t take photos, but it’s fair to say he has a great collection. Various Hanayama’s and Puzzle boxes are on shelves in the living room, and there’s a dedicated puzzle room with one wall filled with bookcases of puzzle books and several cabinets with drawers filled with puzzles, all organised by type.

I didn’t have much time to rummage, as the rest of the guests started arriving, so I was introduced to the rest of the Israel team. Having met Yael on the first night at IPP, it was good to see her again and be able to catch up. Not to mention that another familiar face always makes things easier. Although I didn’t realise it initially, I’d also met Abraham before as well.

When I was helping out in the Puzzle Exchange at IPP, I had spoken with Abraham as Diniar and I exchanged with him. His wire puzzle ‘Encircling the “X”‘ looked very interesting, and his explanation of how it was made really intrigued me, however I didn’t manage to pick up a copy at IPP, and given that I had no money with me still don’t have a copy … I’ll remedy that the next time we meet!

David Goodman is a puzzle collector and designer who I’d not met before. He designs some great ‘simple’ puzzles. You know the sort that you look at and wonder where the challenge could be, and then spend weeks trying to figure out. I’ll get back to that though!

Finally we have Dan Feldman, the designer of the DanLock. Having seen my review of the Danlock, Dor thought it would be good for me to meet Dan, and be able to chat with him. As it turns out Dan reads my blog, and had read my review, so it turned out that I wasn’t the only one who had questions!

Given that I didn’t know whether I’d be able to meet up with Dor given my work schedules, I didn’t bring any of my work with me except a copy of Stewart Coffin’s Cube-16 that I’d made a small batch of thanks to a recommendation from John Devost. I gave that as a host gift to Dor. Everyone else had also brought puzzles with them so there was plenty to talk about and play with.

As we sat around Dor’s table and talked people delved into bags and boxes they’d brought with them, and started handing me puzzles to play with as we talked. It seemed that my ability to solve (or not solve) a puzzle just let to more and more challenging puzzles being presented. And by that you should read simpler puzzles being presented. Seems that not only twisty puzzles can stump me, but those with just a couple of pieces too.

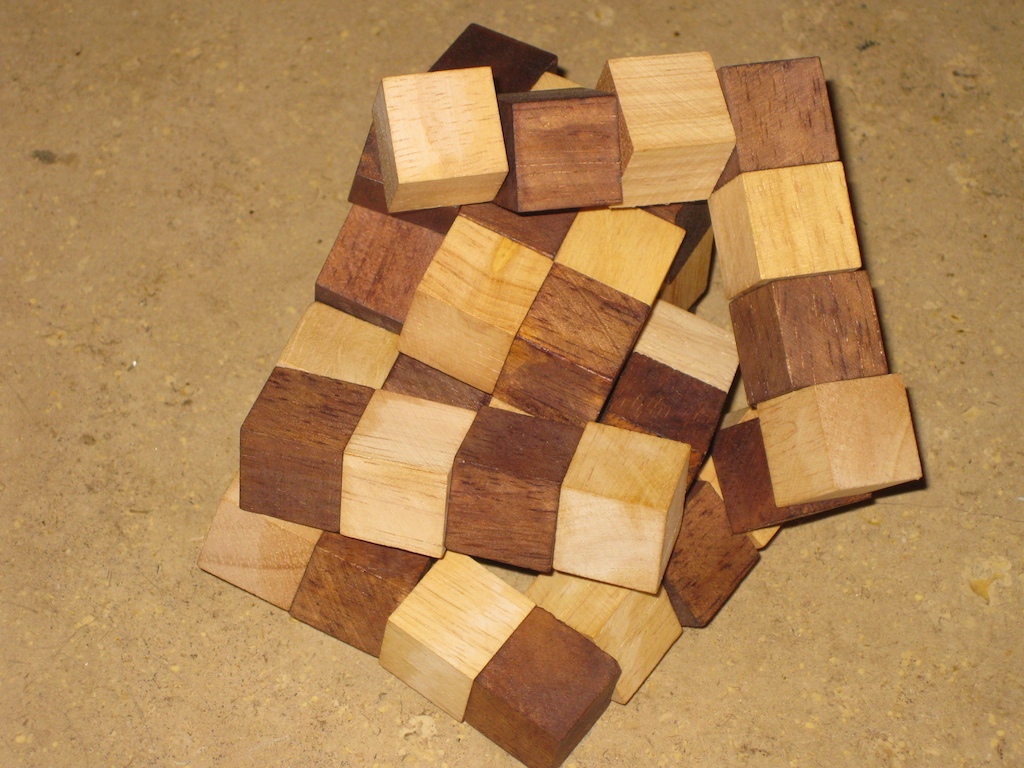
Double Loop, unsolved

Double Loop, unsolved

Double Loop Solved

Double Loop Solved

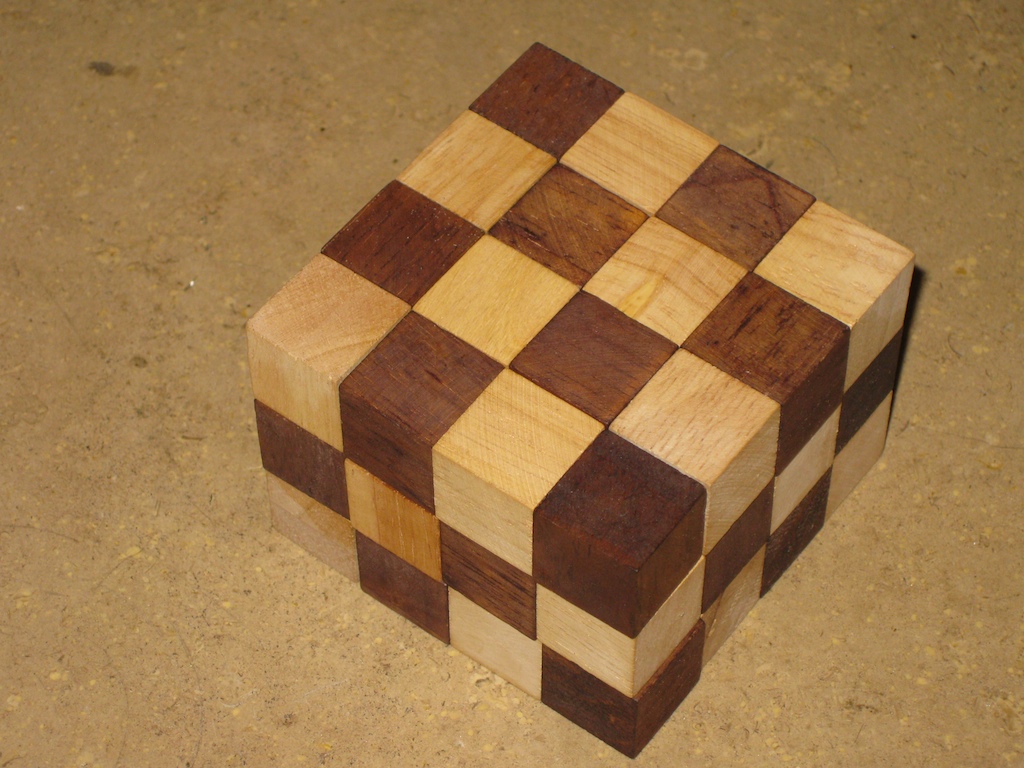
Dor asked me whether I’d managed to get a copy of his IPP31 exchange puzzle “Double Loop” which I hadn’t. He promptly unboxed a copy, and made sure it was in the unsolved state by scrambling it for me. His theory is that if you get it solved you’ll probably never play with it, so this means that I would at least be able to enjoy playing with it once. The puzzle is an extension of the well known “Snake Cube”, but as the name suggests, rather than just one string of linked cubes, the Double Loop has two interlinked loops, making solving a lot more challenging and adding a whole other level to the puzzle. As you can see Dor, I did manage to solve it, and had fun playing!

9 Parts

9 Parts

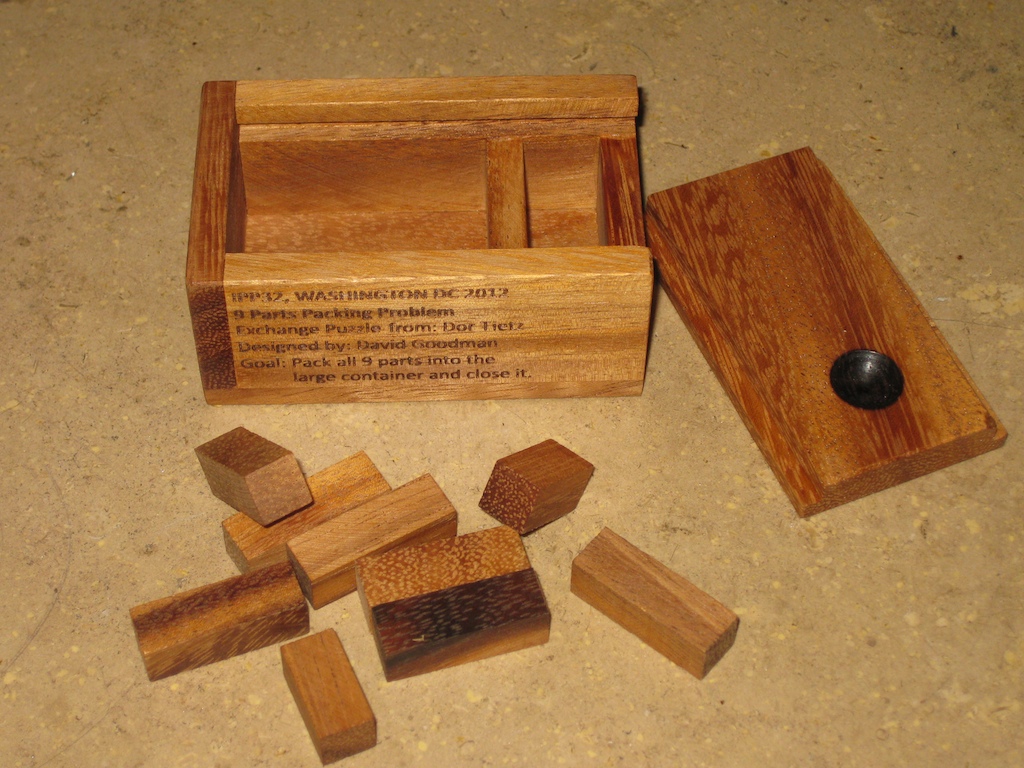
He also gave me a copy of his IPP32 Exchange the “9 parts packing problem” as well. This one is designed by David, so it was great to be able to meet the designer. The challenge here is simple. Just pack all nine parts into the large container, and shut the lid. What could be difficult about that? Well it’s another challenging little packing puzzle, that kept me busy for a few hours. I’m getting a lot better with packing puzzles, but I’m still not quick with them!

Damn Saddam!

Damn Saddam!

Damn Saddam's face

Damn Saddam’s face

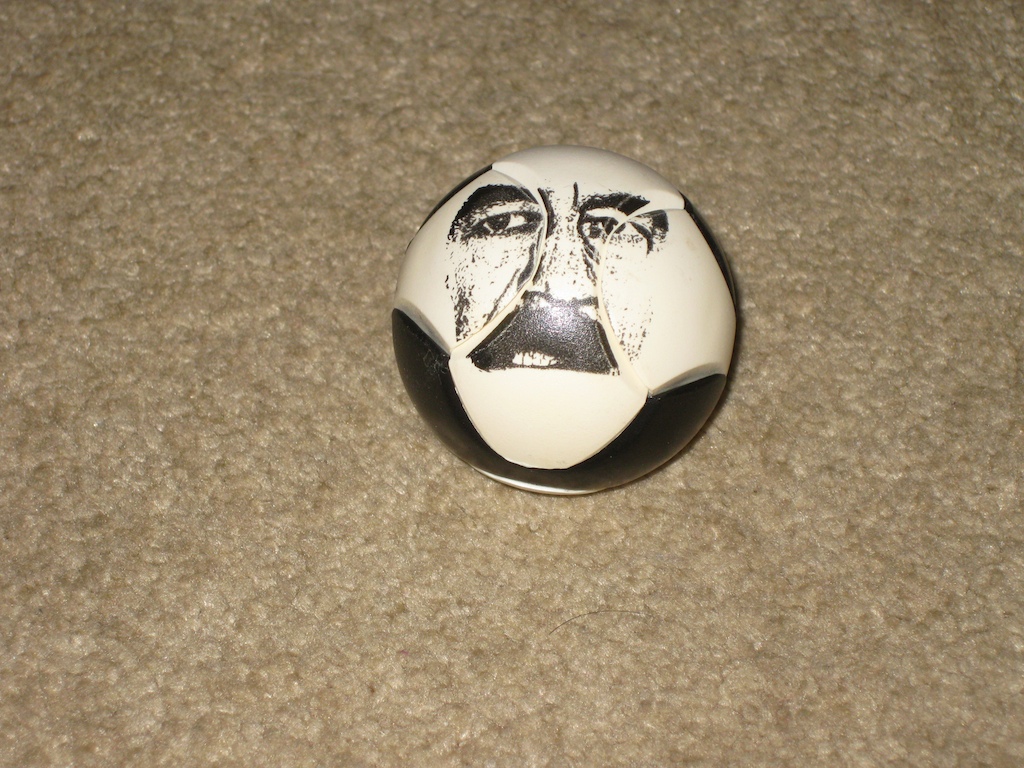
Shortly after arriving, David went into one of the boxes he had with him and puzzled out a copy of “Damn Sadam”. This six piece puzzle is ‘taken apart’ by throwing it on the floor. A fair bit of force is required, and I wasn’t sure whether he was joking when he told me to throw it, so I handed it back to him and watched as he took three attempts throwing it harder each time before the pieces flew apart. Of course when they did, they were handed back to me to put back together. Fortunately I had seen a similar puzzle before and was able to put it back together pretty quickly. This ended up being a gift from David, so went into the pile of puzzles I was accumulating to take home with me.

Triangular Pyramid pieces

Triangular Pyramid pieces

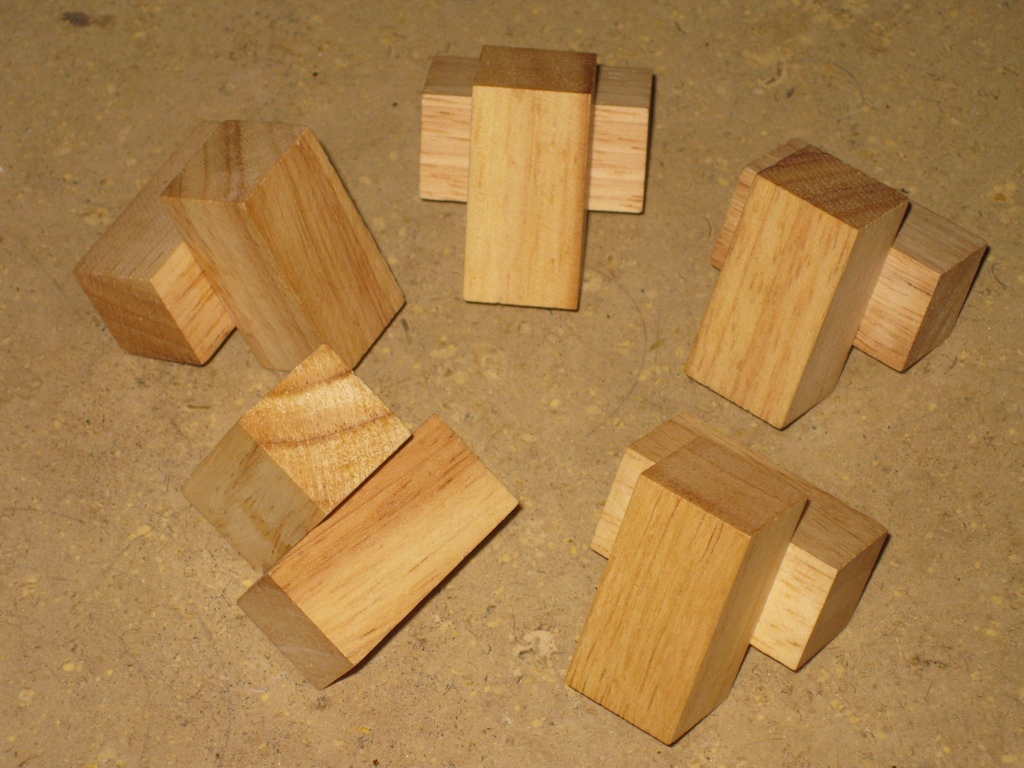
David then handed me a copy of “Triangular Pyramid” which was a previous exchange from David at IPP. It turns out that when David gave the puzzle to Dan, he found something of a useless machine when it was in its solved state, so that became a second challenge for the puzzle. Once you’ve combined the puzzle into its pyramid shape, you can move pieces in and out in a piston like motion which will continue indefinitely, making for a great distraction. I wasn’t able to solve it while I was sitting at the table, and although David offered to show me the solution I declined as I prefer to be able to work these things out myself. Besides with only 5 pieces it seemed so simple! David gave me the copy I’d been playing with so that I could finish solving it. I have to say it’s a great puzzle, for such simple pieces, and I highly recommend it. If you’re thinking about making your own puzzles, this would be a good one to try given it’s simplicity, and the challenging solution.

Ring a Nail

Ring a Nail

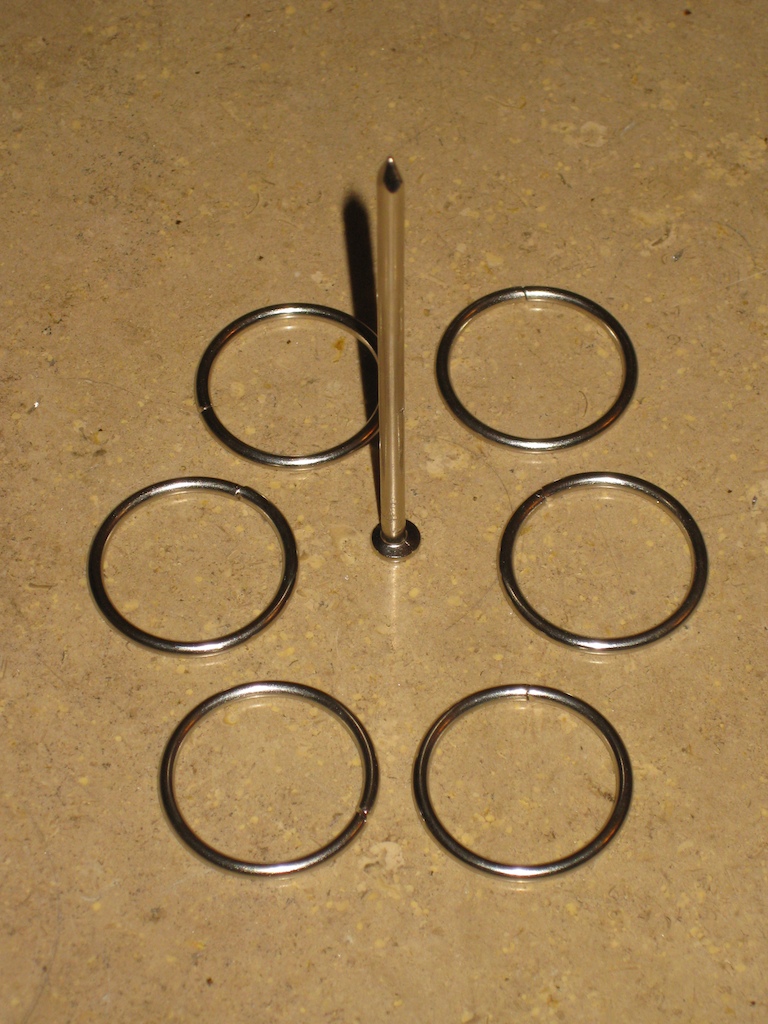
Another simple yet challenging puzzle David gave me was his “Ring a Nail” puzzle. Similar to the Nine Nails puzzle, this takes a slightly different approach, with a similar goal. The idea being to balance the five rings on the point of the nail. Yet another puzzle which seems so simple but really makes you think.

While sitting talking Dan asks me what I thought about the Danlock, given that he had read my review. It was very interesting talking to him about the puzzle and how it’s made. Dan explained a number of the possible ideas he had for the lock, including another mechanism which would prevent the broken key from turning in the lock if the lock was not oriented in a certain direction. Seems like the puzzle could have been a lot more devious, given all the ideas floating around in Dan’s head. His view is that the puzzle should be challenging, but not so difficult that you can’t see a way to proceed, or that you need to do something where there would be no reason for that action, such as hitting or tapping the puzzle. Another idea such as requiring to tap the puzzle to release an internal lock as an example, which Dan felt didn’t belong in the puzzle.

For anyone wondering why Dan doesn’t make more of the lock more frequently, given its success and high demand, the reason is quite simple. Dan doesn’t have his own workshop, so has to sub-contract various parts of the process. Getting someone to take on the small numbers he creates is a real problem, and often he finds that someone who he used in the past is no longer in business to help again.

It was fantastic to meet Dan in person, and to be able to spend time talking to him and getting to understand the designs he’s come up with was a fantastic opportunity.

J-Cubes Sheets

J-Cubes Sheets

Folding the J-Cubes

Folding the J-Cubes

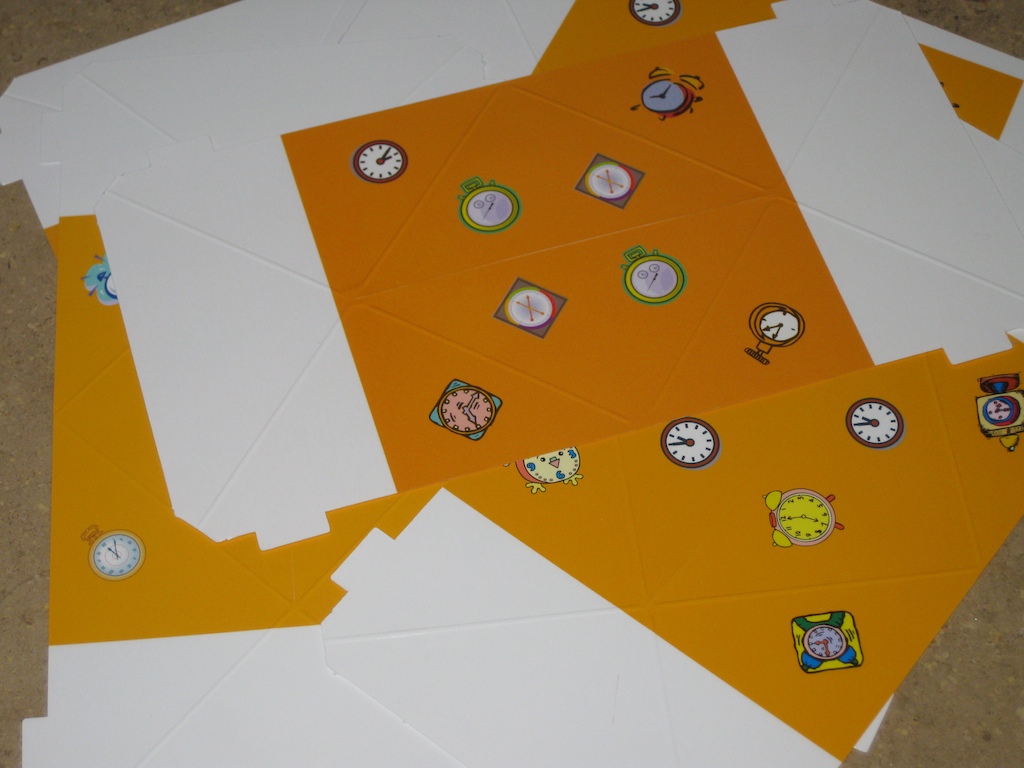
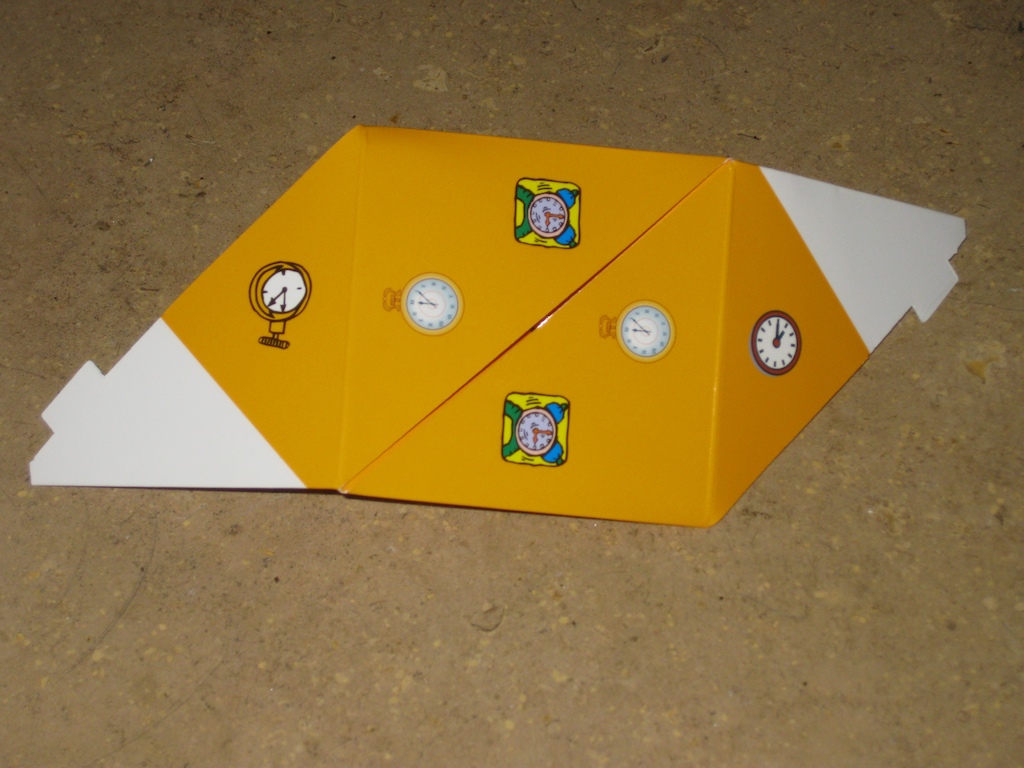
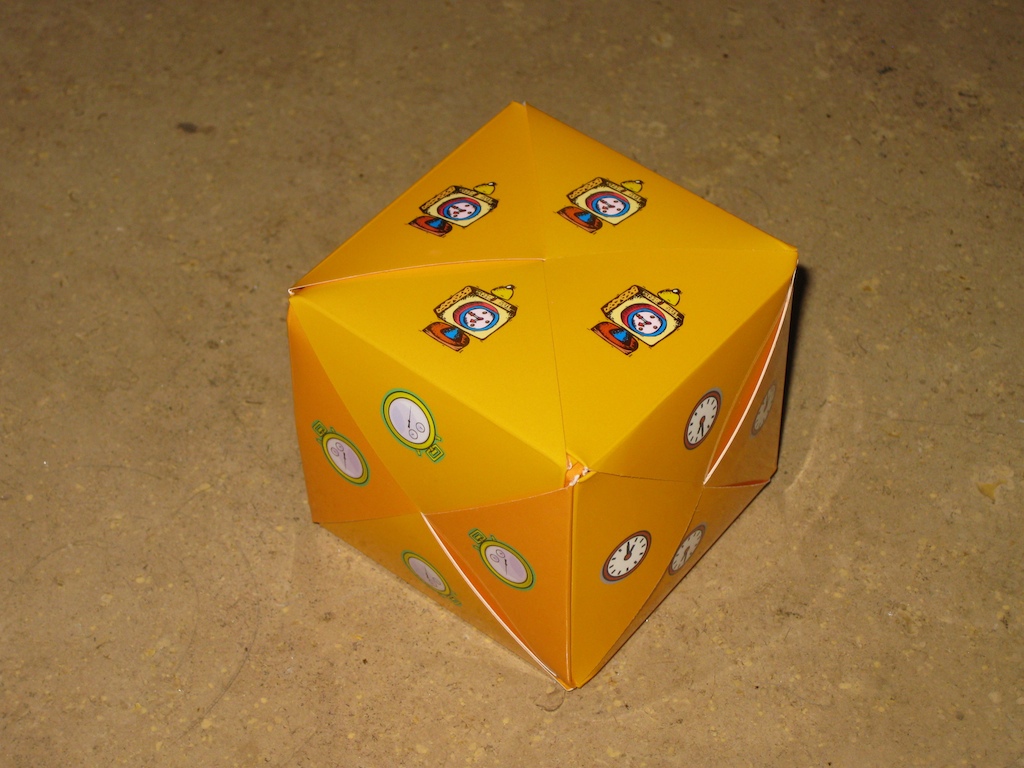
Not to be outdone, Abraham had a few of his puzzles with him, including a very interesting paper puzzle from a previous IPP Exchange called J-Cubes. The puzzle consists of a number of laminated sheets with a number of images on them. The goal being to fold these into cubes, made from several of the pieces joined together, and meet a couple of challenges based on the images on the faces of the cubes. This is made harder by their being a number of different ways to fold the sheets, and joining them into cubes isn’t trivial either. Now given that I have found a love for impossible folded objects, this puzzle is right up my street. For something which seems so simple, it may have been passed up by many puzzlers. I have to say though, having played with them myself, if you have a set of these, do yourself a favor and go find them and play with them. They offer a good amount of puzzling, and will certainly make you think. the first challenge to get all the faces with the same image is not too tough, but the second challenge to make sure all the images are in the same orientation and you only use 6 out of the 7 sheets, finding the ‘odd one out’.

J-Cubes, cubed

J-Cubes, cubed

Abraham asked me to play with the J-Cubes and let him know what I thought of them as he felt many puzzlers may have overlooked them given that they are ‘just a paper puzzle’. Well I can happily say I have played with them, and I think they’re well worth the hours I spent fiddling with them. They’re well thought out and certainly have a lot of puzzling in them. If you’d like a set, let me know and I’ll pass on Abraham’s details as I’m sure he’d be delighted to send you some.

Trio F&L

Trio F&L

Quartet F&L

Quartet F&L

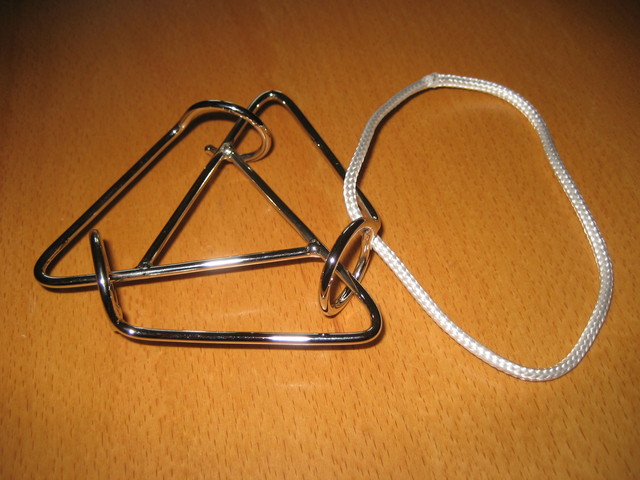
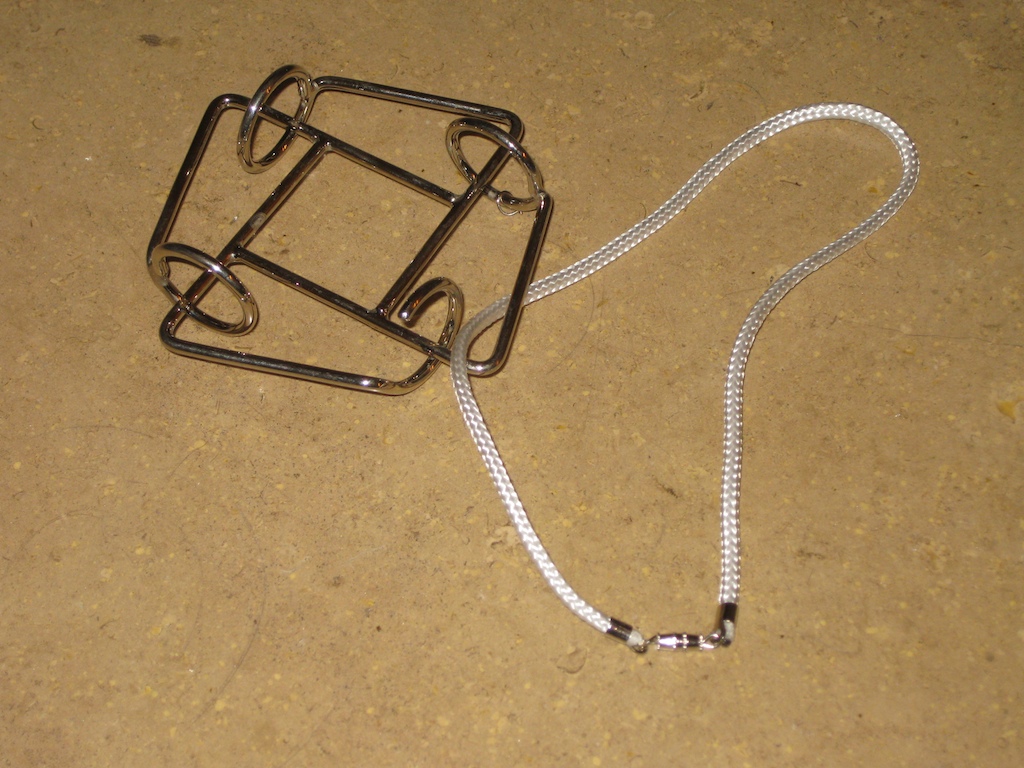
As well as the J-Cubes, he had a number of his wire and string puzzles with him. Initially I was handed a copy of Trio F+L Puzzle (left above) which was fairly straight forward and I solved in under a minute. With my confidence restored, he handed me Quartet F&L Puzzle (above right) which is much more challenging, and I manged to do little more than tie it in a knot. That said, it’s not a problem with one of Abraham’s puzzles as the string can be split and rejoined thanks to his thoughtfully placed clasp.

In a bizarre coincidence, as we were leaving Abraham commented that it had been his birthday two days prior. That’s also my birthday. Turns out it really is a small world. Ok, so Abraham has a few years experience on me but it was fun to find that we shared out birthdays.

Stick Up!

Stick Up!

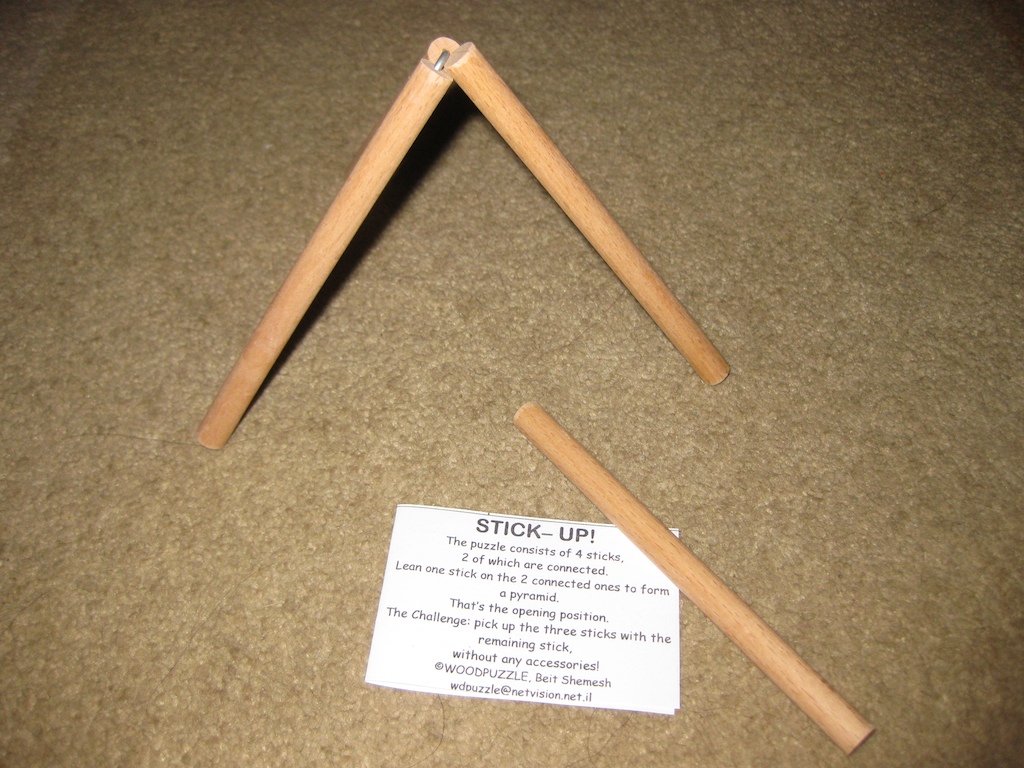
One of the puzzles I was handed by Dor on the night was this incredibly simple looking ‘pub game’ puzzle. The idea being to use one of the long sticks to create a tripod with the v shaped stick, and then use the second long stick to pick up the tripod from the table. Sounds simple right? Well I spent 40 minutes just looking at the puzzle. This did amuse Dor as I didn’t attempt to pick them up since I felt it should be possible to solve the puzzle by thinking about it, which is exactly what I did. Everyone decided that I would solve it in 5 minutes when I didn’t have four sets of eyes watching me. I wasn’t that quick I’m sorry to say, but I did solve it since Dor told me to take that away too so I could solve it. It may have taken me 2 months thinking about how to solve it, but I did solve it on my first attempt. Have a think and see if you can figure it out … or make yourself a copy and try it. Let me know how you get on as I’d love to know.

Trapped Penny

Trapped Penny

Coin Balance

Coin Balance

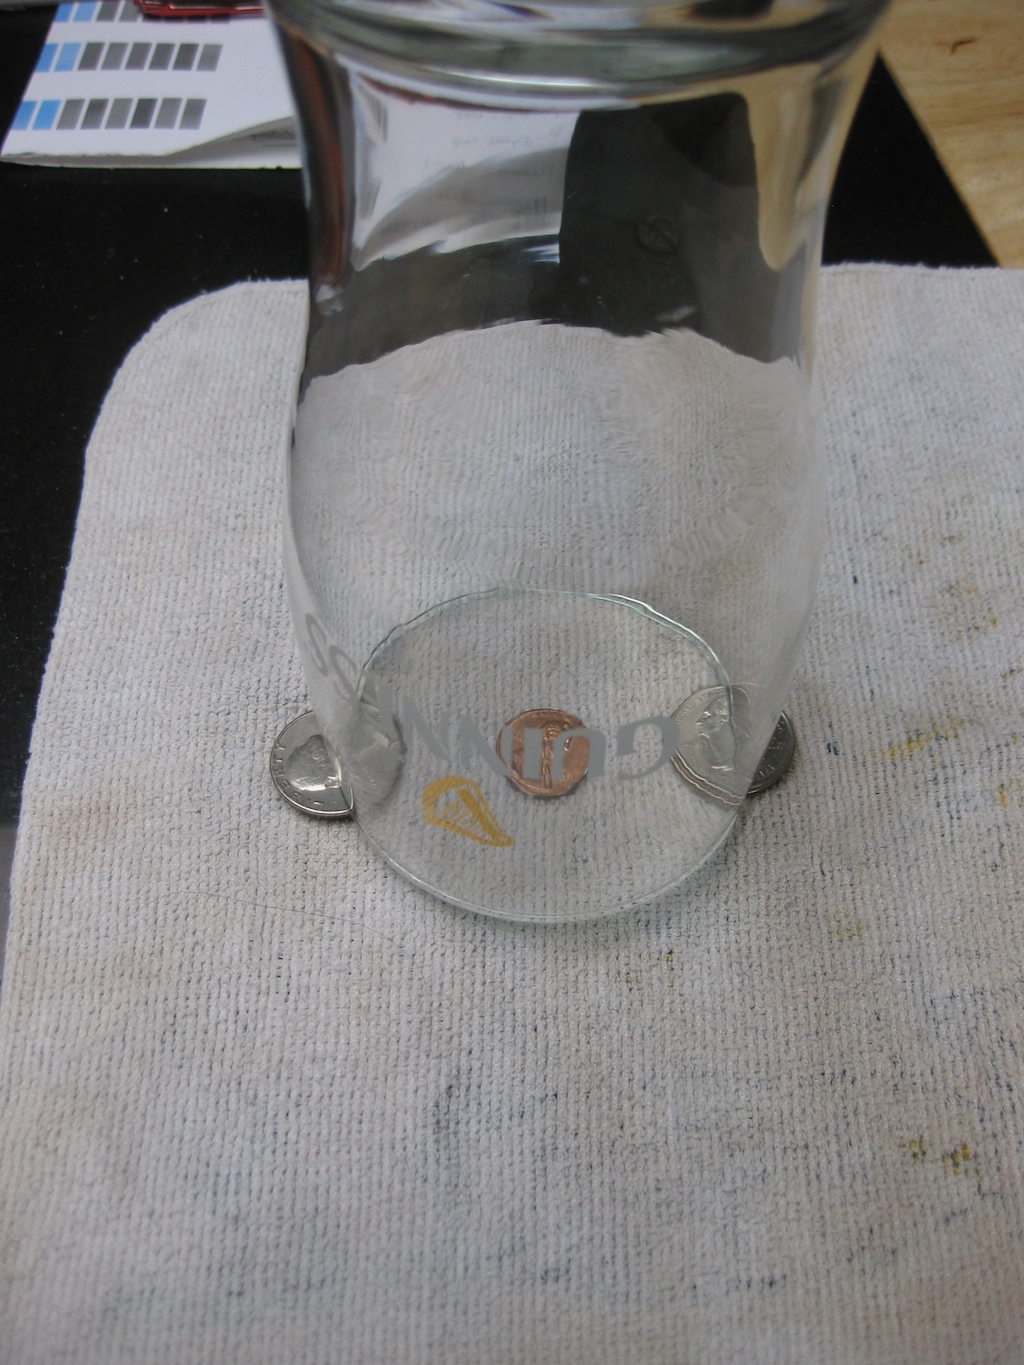
Strange as it was this reminded me of a couple of ‘pub puzzles’ which I’d not shown anyone in over 20 years. I promptly set them up to give David and Abraham a shot at solving them, which turned out to be a great idea. I never really thought about it but these puzzles are so simple, but may have been lost to many for a long time. Seems like I need to try to bring them back to people if I can.

The first is the coin under the glass (left). The idea is to get the coin out from under the glass without touching the glass or the coins it is resting on. (You’ll need to set this up on a tablecloth). Do you know how to do it?

The second is to balance the coin on the brim of the glass, and get the coin over the glass (right). You can’t touch the glass or the coin. The coin should not end up on the side of the glass nearest you, or inside the glass. (Try doing this in the pub with a half full pint!)

All in all I had a great night with the Israel puzzlers, and have to say a huge Thank You to Dor for arranging everything. There was a lot more that we talked about over the night, and a good few more puzzles played with too, but I think I’ve covered enough for this trip. I’ll be sure to let Dor know the next time I’m traveling.
Revomaze Sleeve Project

This entry is part 9 of 11 in the series Revomaze

As many of you know, I’ve owned and solved all of the Revomaze Series One puzzles released, including the Gold puzzle, which I’ll write about soon. For a long time on the Revomaze Forums, a clear sleeve which would allow you to see the maze as you solved it has been talked about and many people have asked for one. Well having added the lathe to my list of tools, I thought I’d have a shot at making one.

Since getting the lathe, I’ve made a few pens, some bowls, all just learning how to use the tools, and get the shapes I want made. I mostly work with wood, as that’s where my real love is, however I have played with a few acrylics as well. I find the acrylic to be a pain to work with, since it tends to create thin streamers of plastic which just wrap around whatever you’re working on, and obscures your view of the work. Still, there’s no way I could make a clear sleeve from wood.

Clear sleeve starting point.  A 2

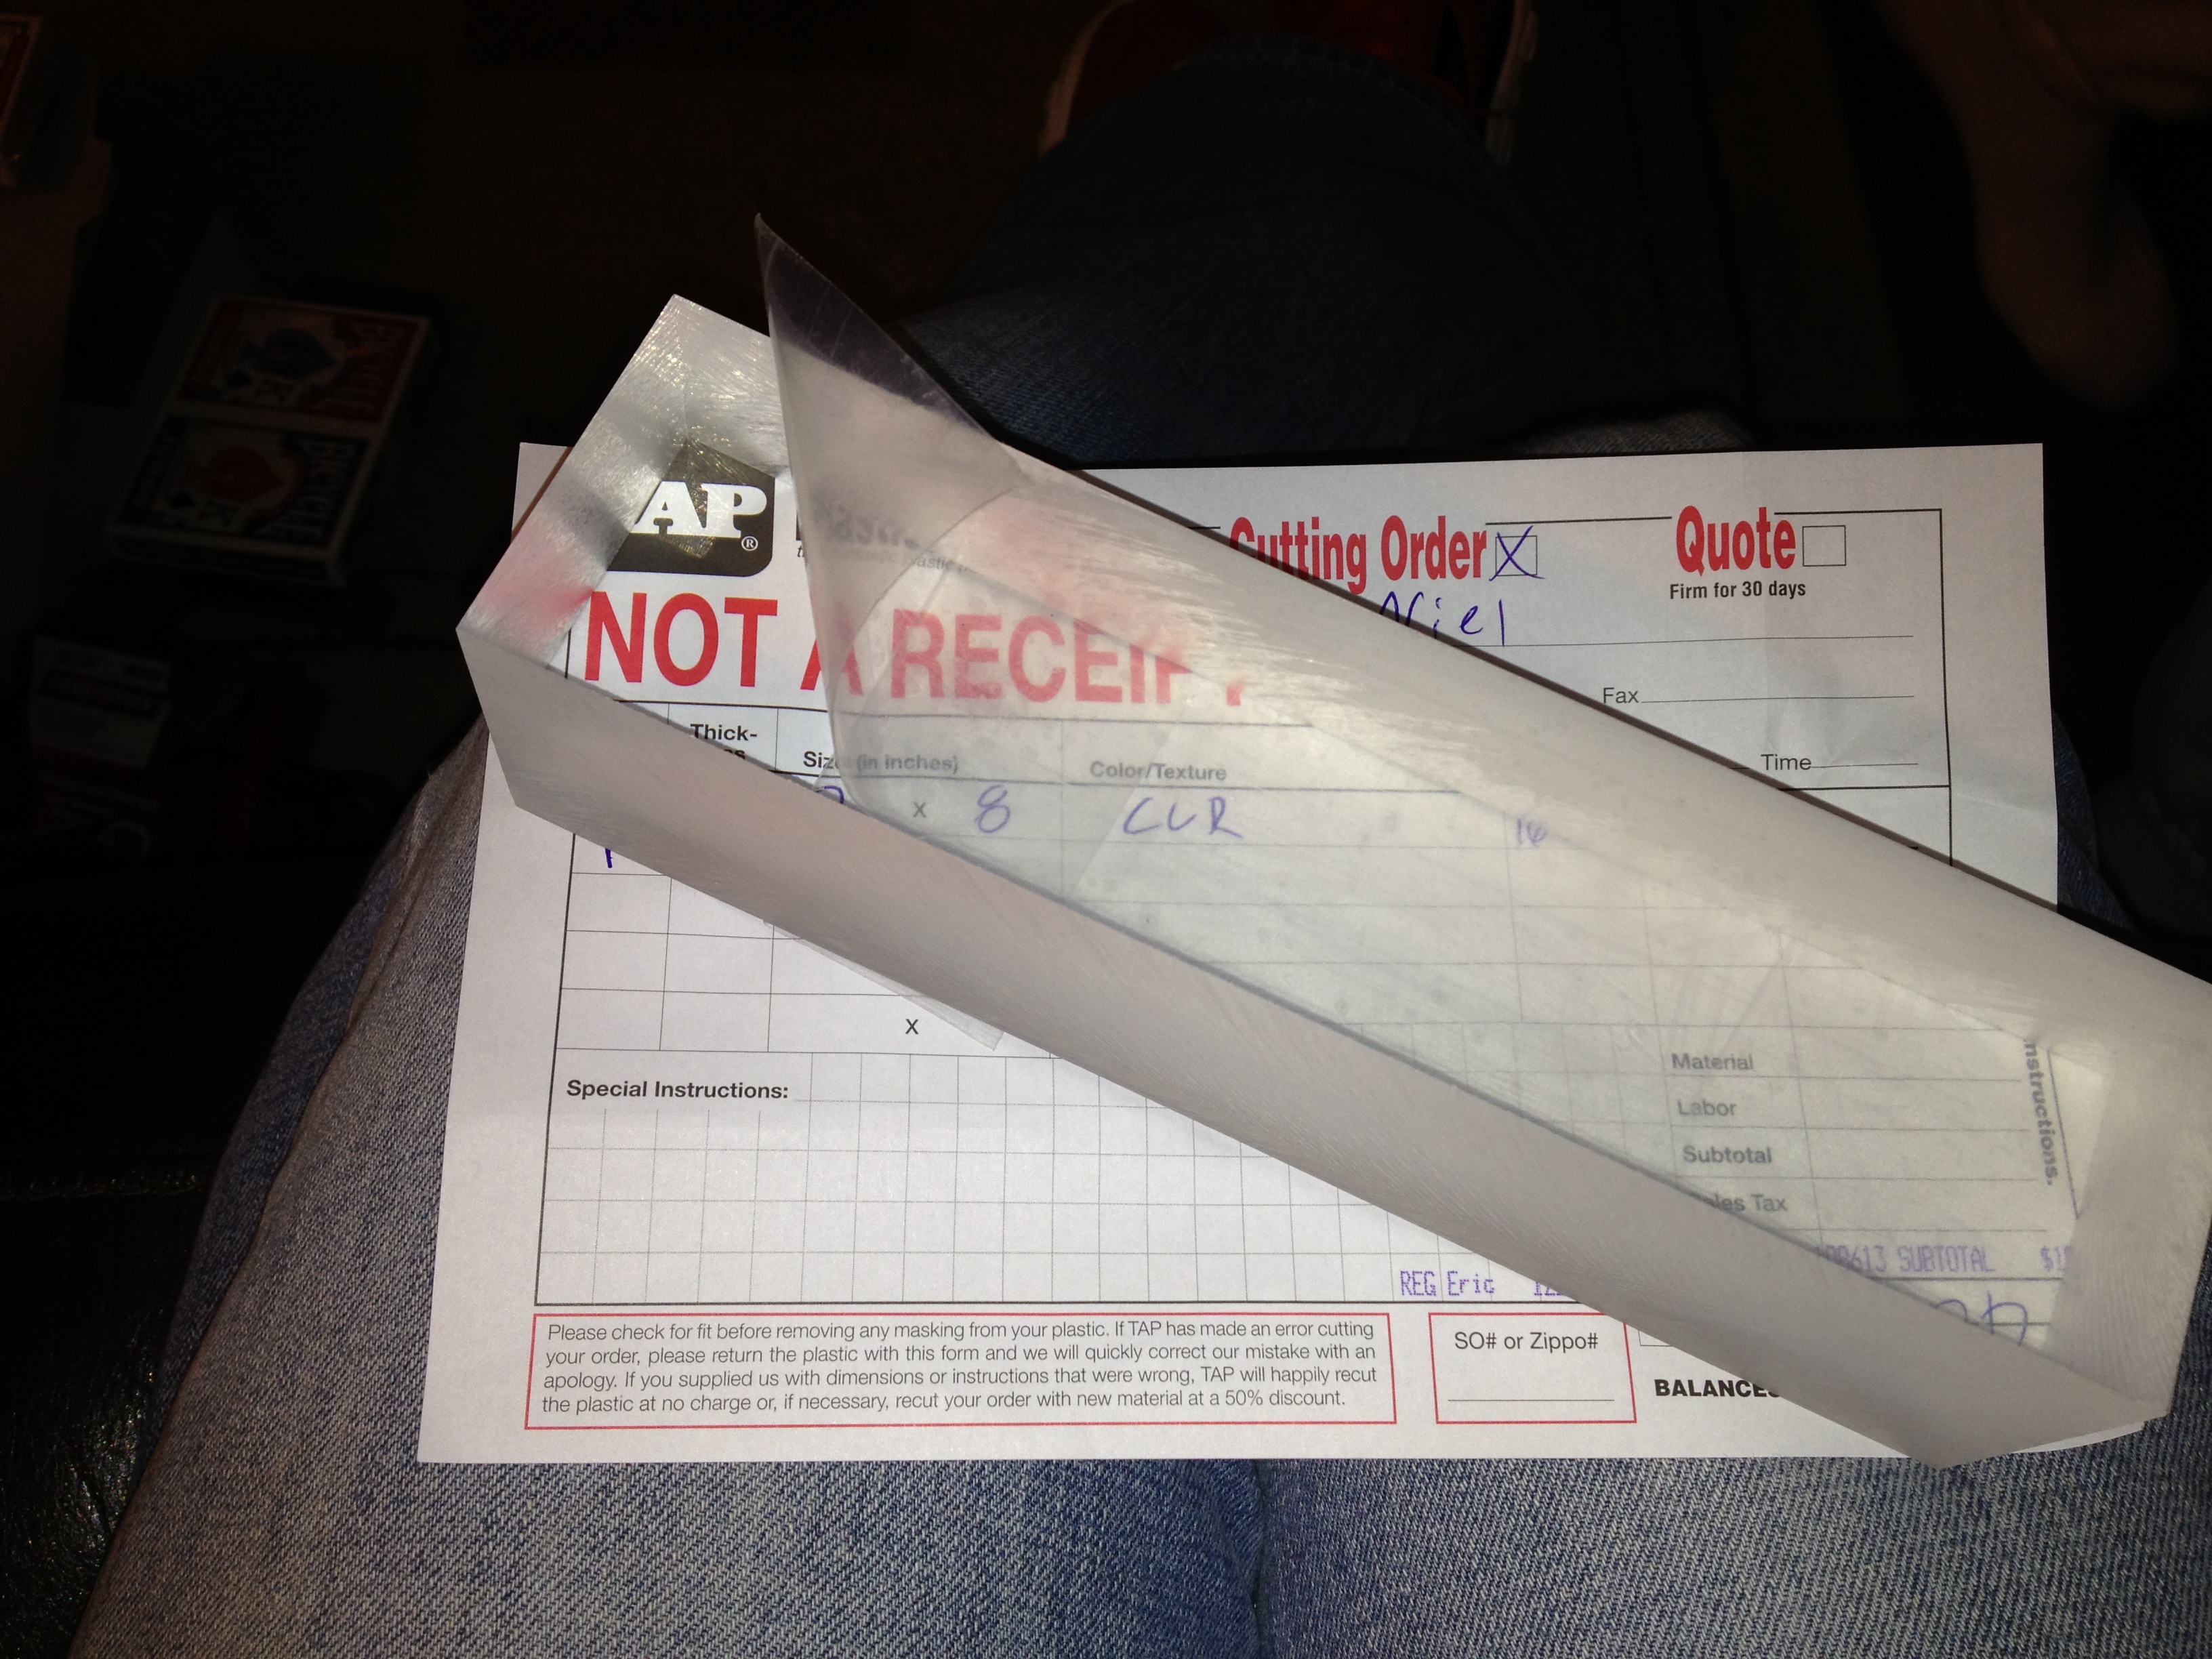
Clear sleeve starting point. A 2″x2″x8″ block of Acrylic.

It all starts with a block of clear acrylic. This piece is 2″x2″x8″, which will be enough to make two sleeves. I got it from Tap Plastics here in the bay area. They’ll custom cut sheets while you wait, and their prices are pretty good. I’m no expert with the plastics, but I can certainly recommend them.

The block turned to a cylinder.

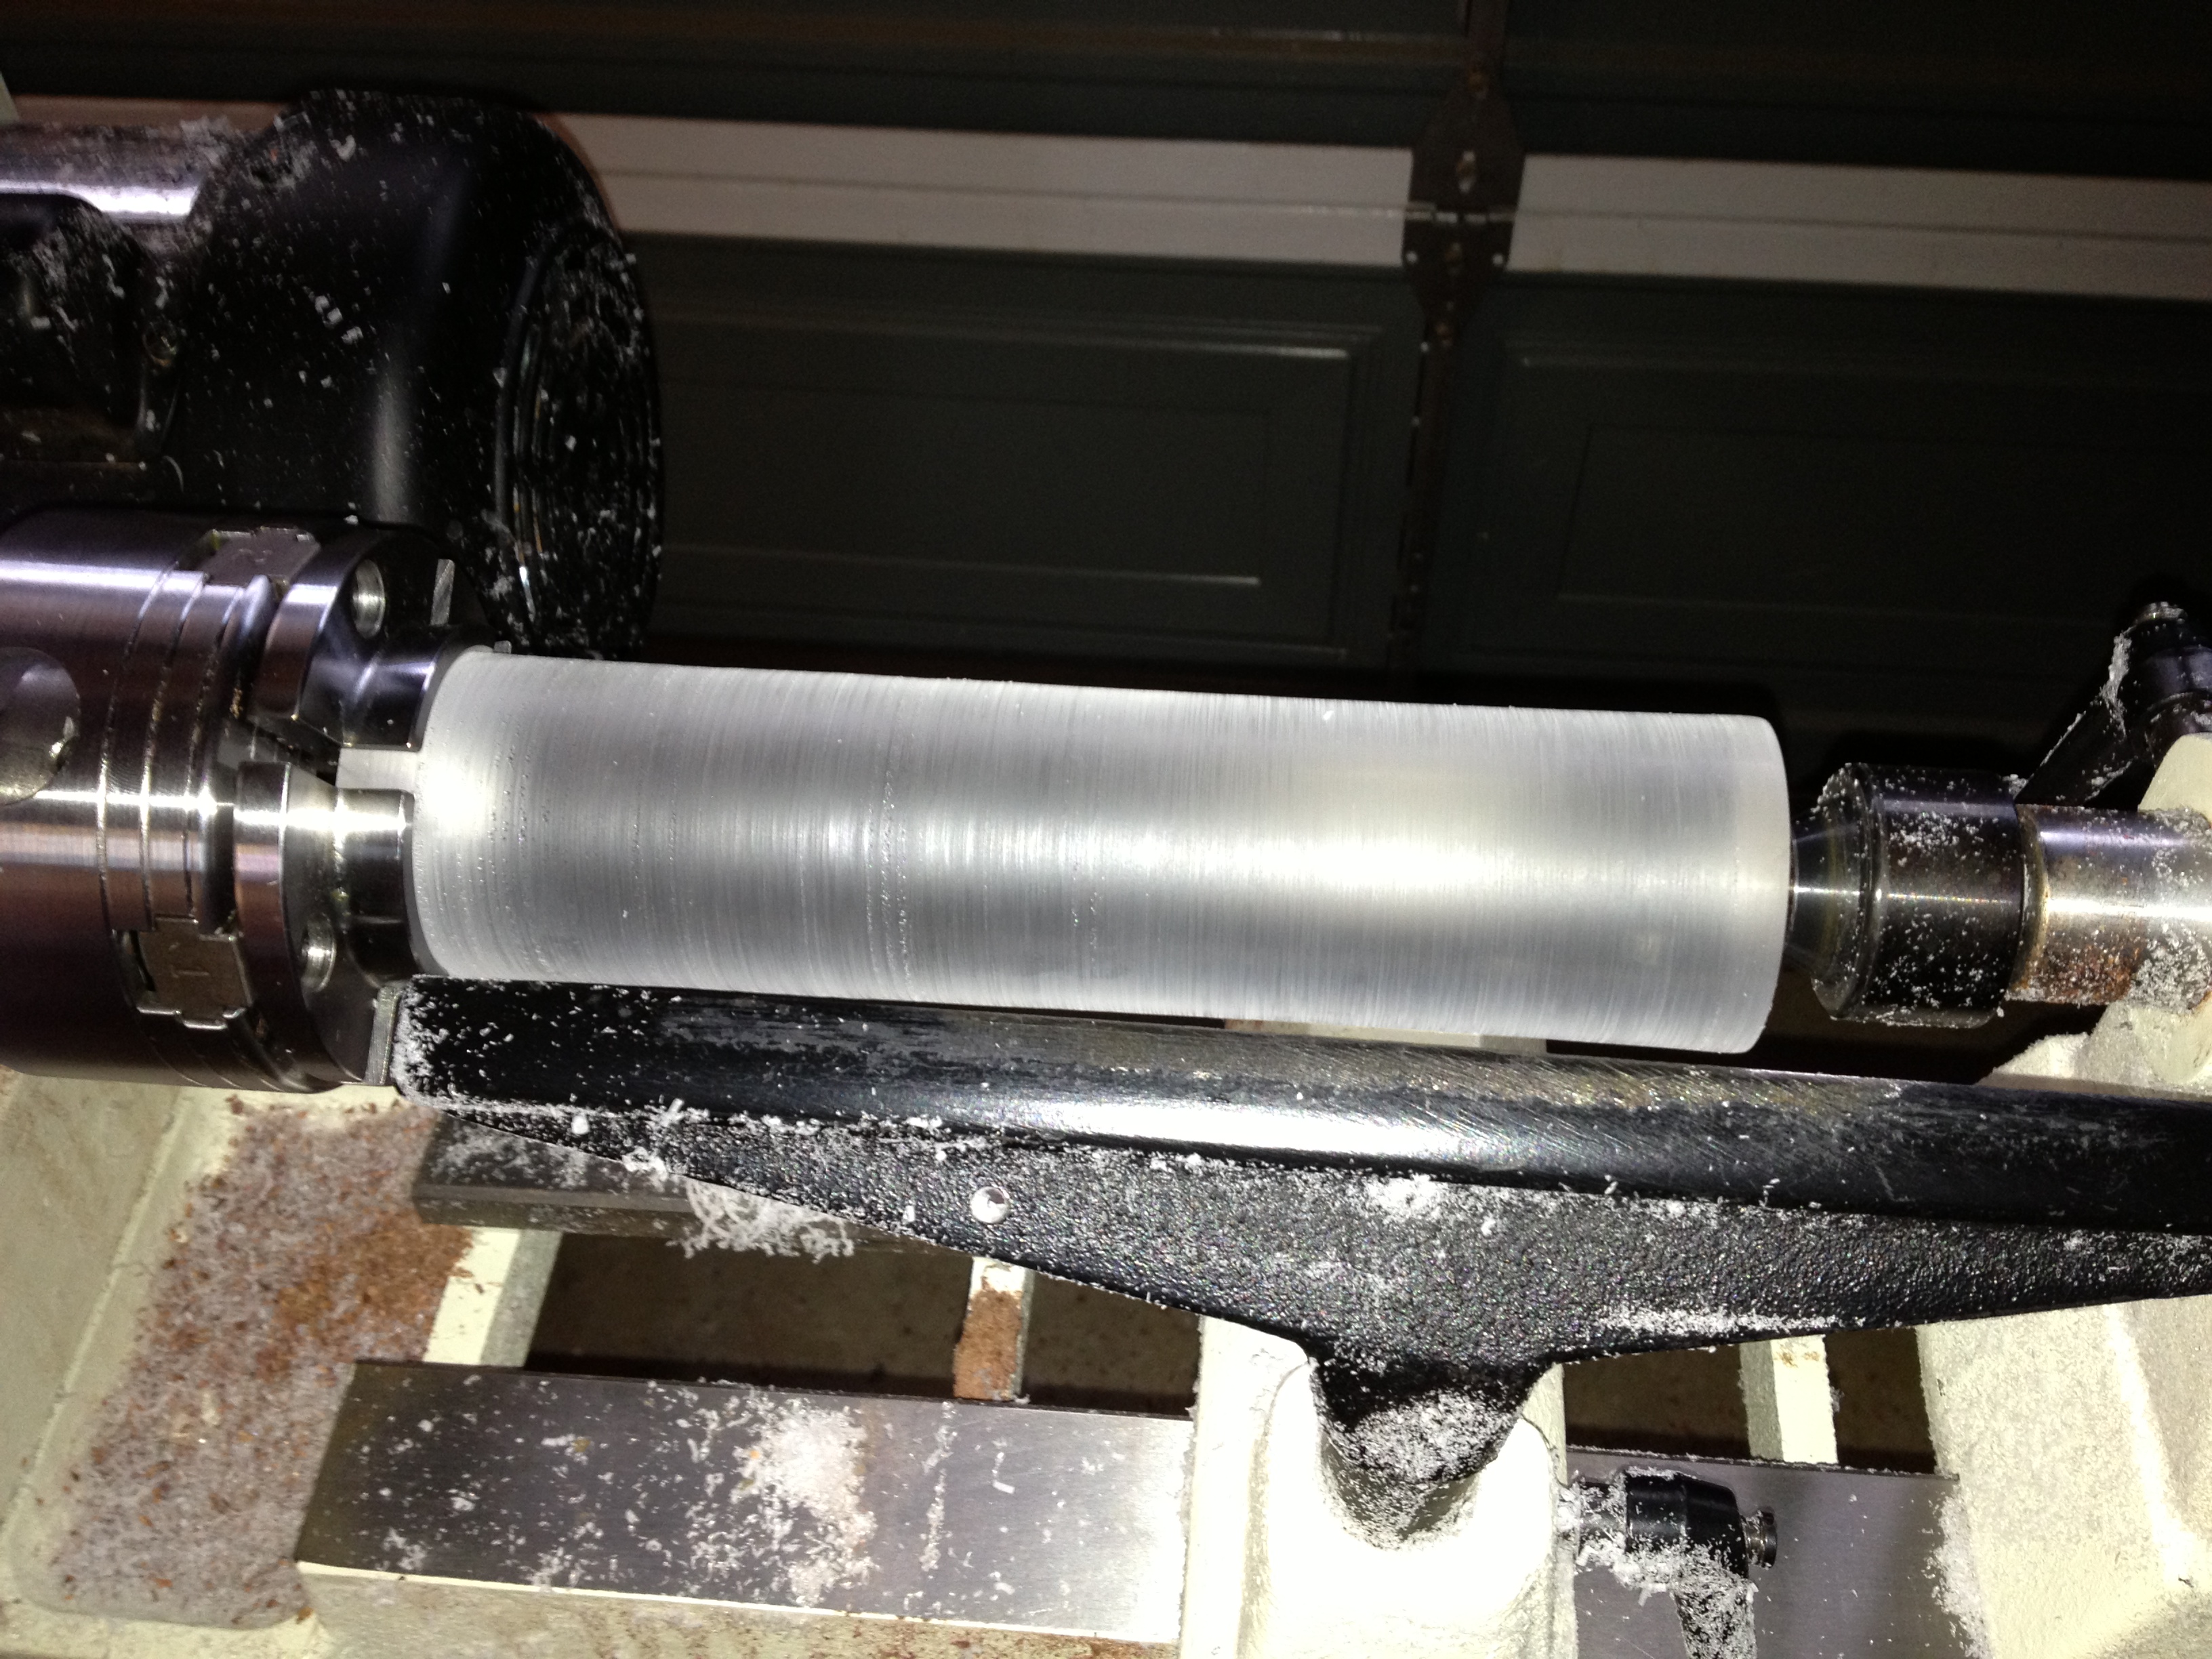
The block turned to a cylinder.

First up, I need to take this perfectly clear block, and make a complete mess of it; otherwise known as turning it round. Doing that removes the beautiful clear finish, and turns the whole thing a rather cloudy opaque grey colour. When I’m working with Acrylics, I need to wear my respirator, as the smell created when working it tends to give me a headache. Not bad practice anyway, but something I have found I have to do. As it turns out, I’m also somewhat allergic to the material too. When I’d finished turning the block into a cylinder, and brushed all the tiny shavings off my arms, I found that I’d reacted rather badly to it. Time for a shower and some anti-histamine!

The initial shape of the sleeve

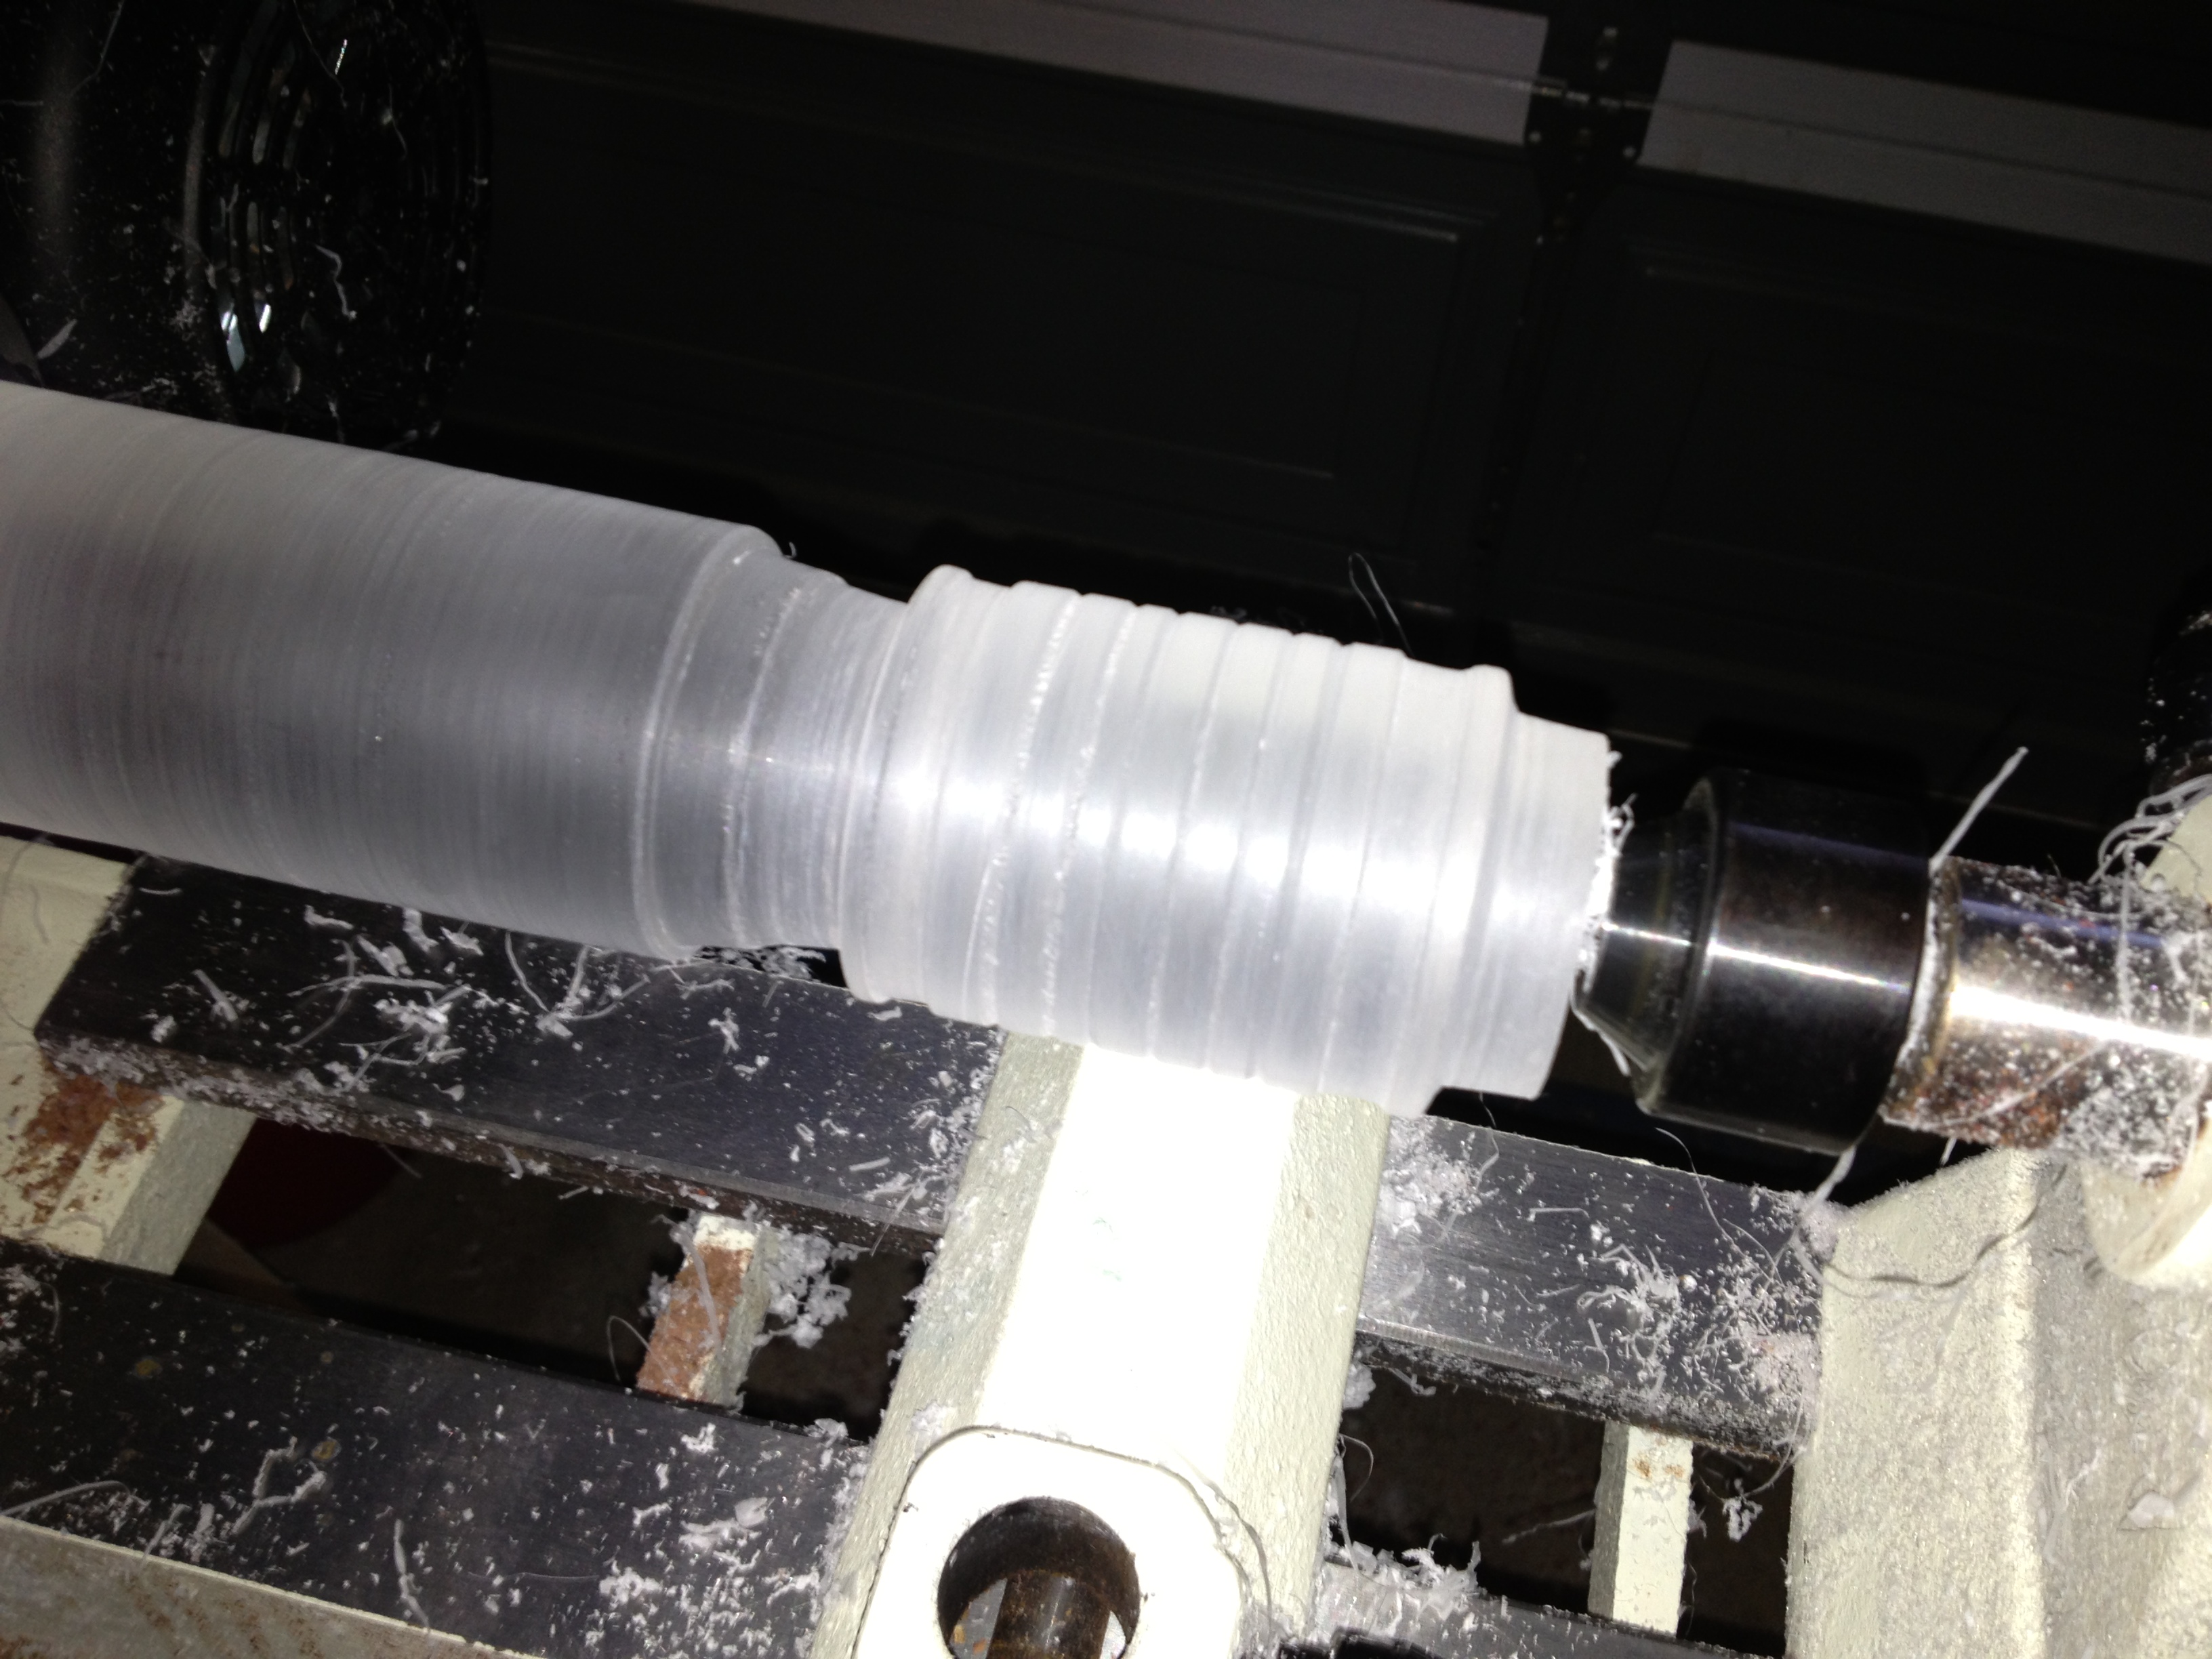
The initial shape of the sleeve

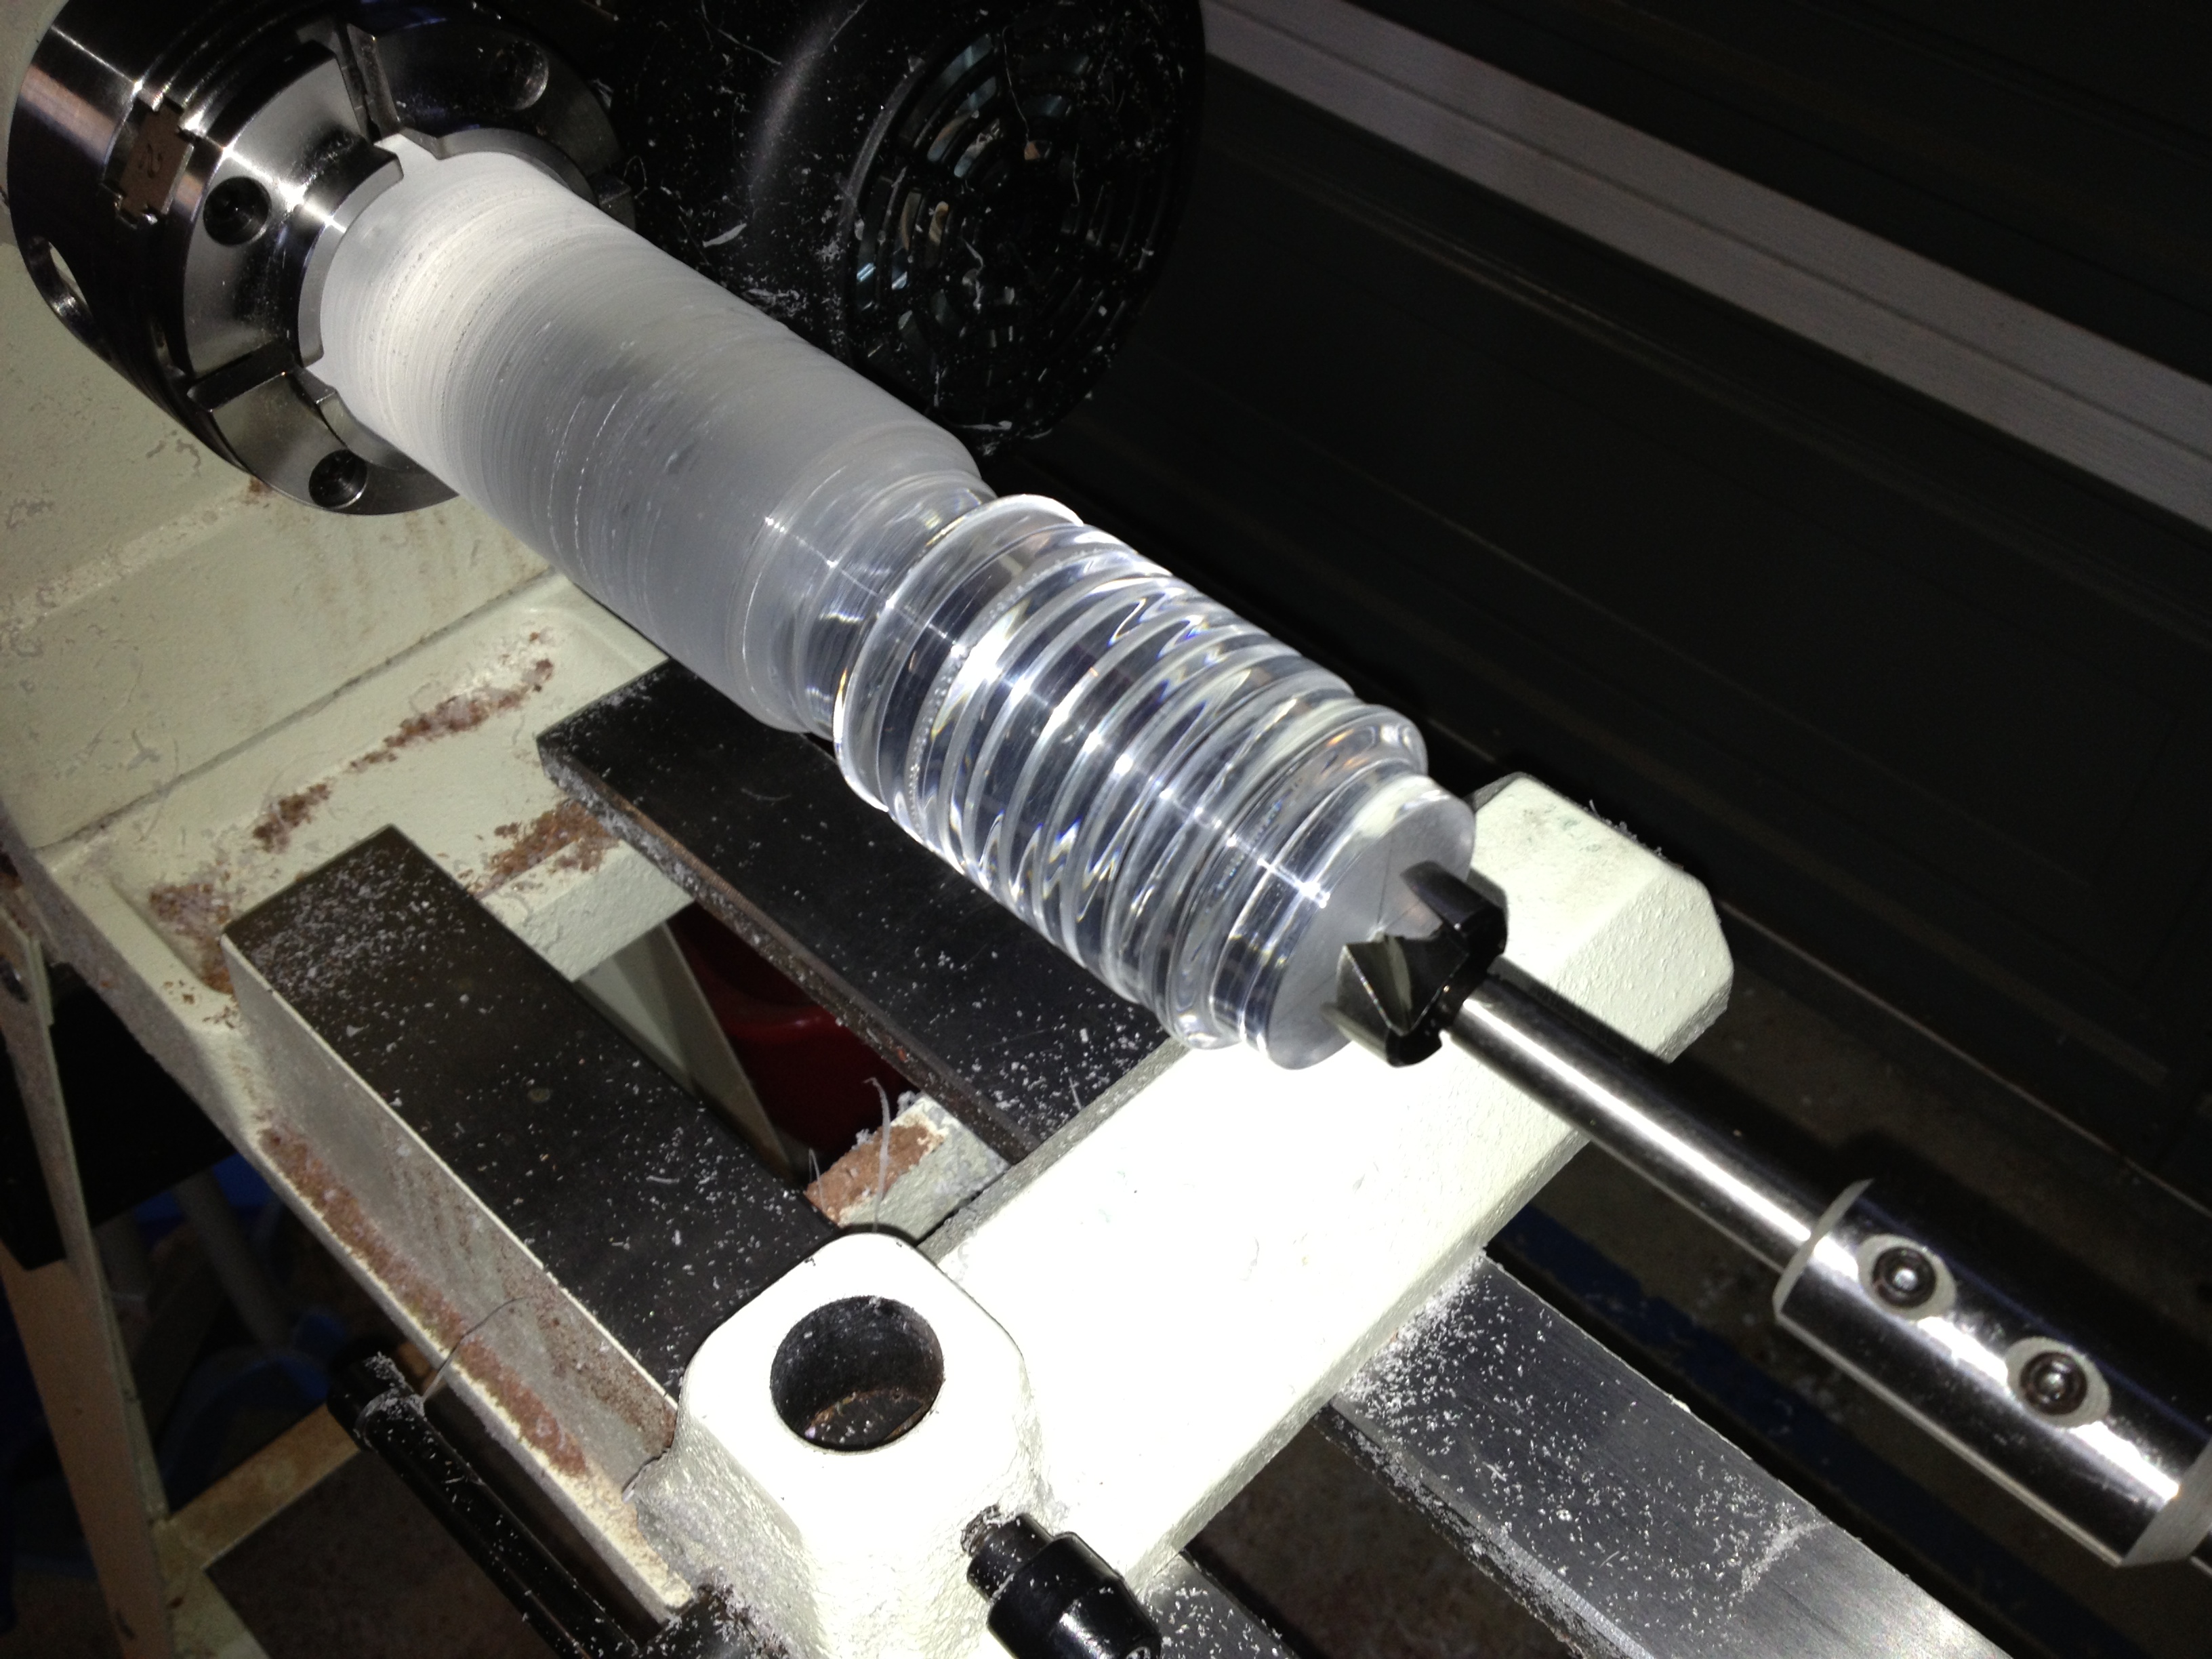
Having cleaned up, and put on long sleeves, I came back and shaped the outer surface of what would become the sleeve. Using the sleeve from my bronze maze as a template I matched the dimensions as closely as possible, including the ridges along the main body of the sleeve, and of course, making sure that the length was exact, since the intent is to make a fully functioning sleeve.

At this point, I’ve kept the sleeve attached to the main piece of perspex as I still need to drill out the central hole where the shaft will be. Before I go and drill that out though, I want to get the clear finish back so that I can see what I’m doing when drilling things.

Outer surface sanded to 12000 grit.

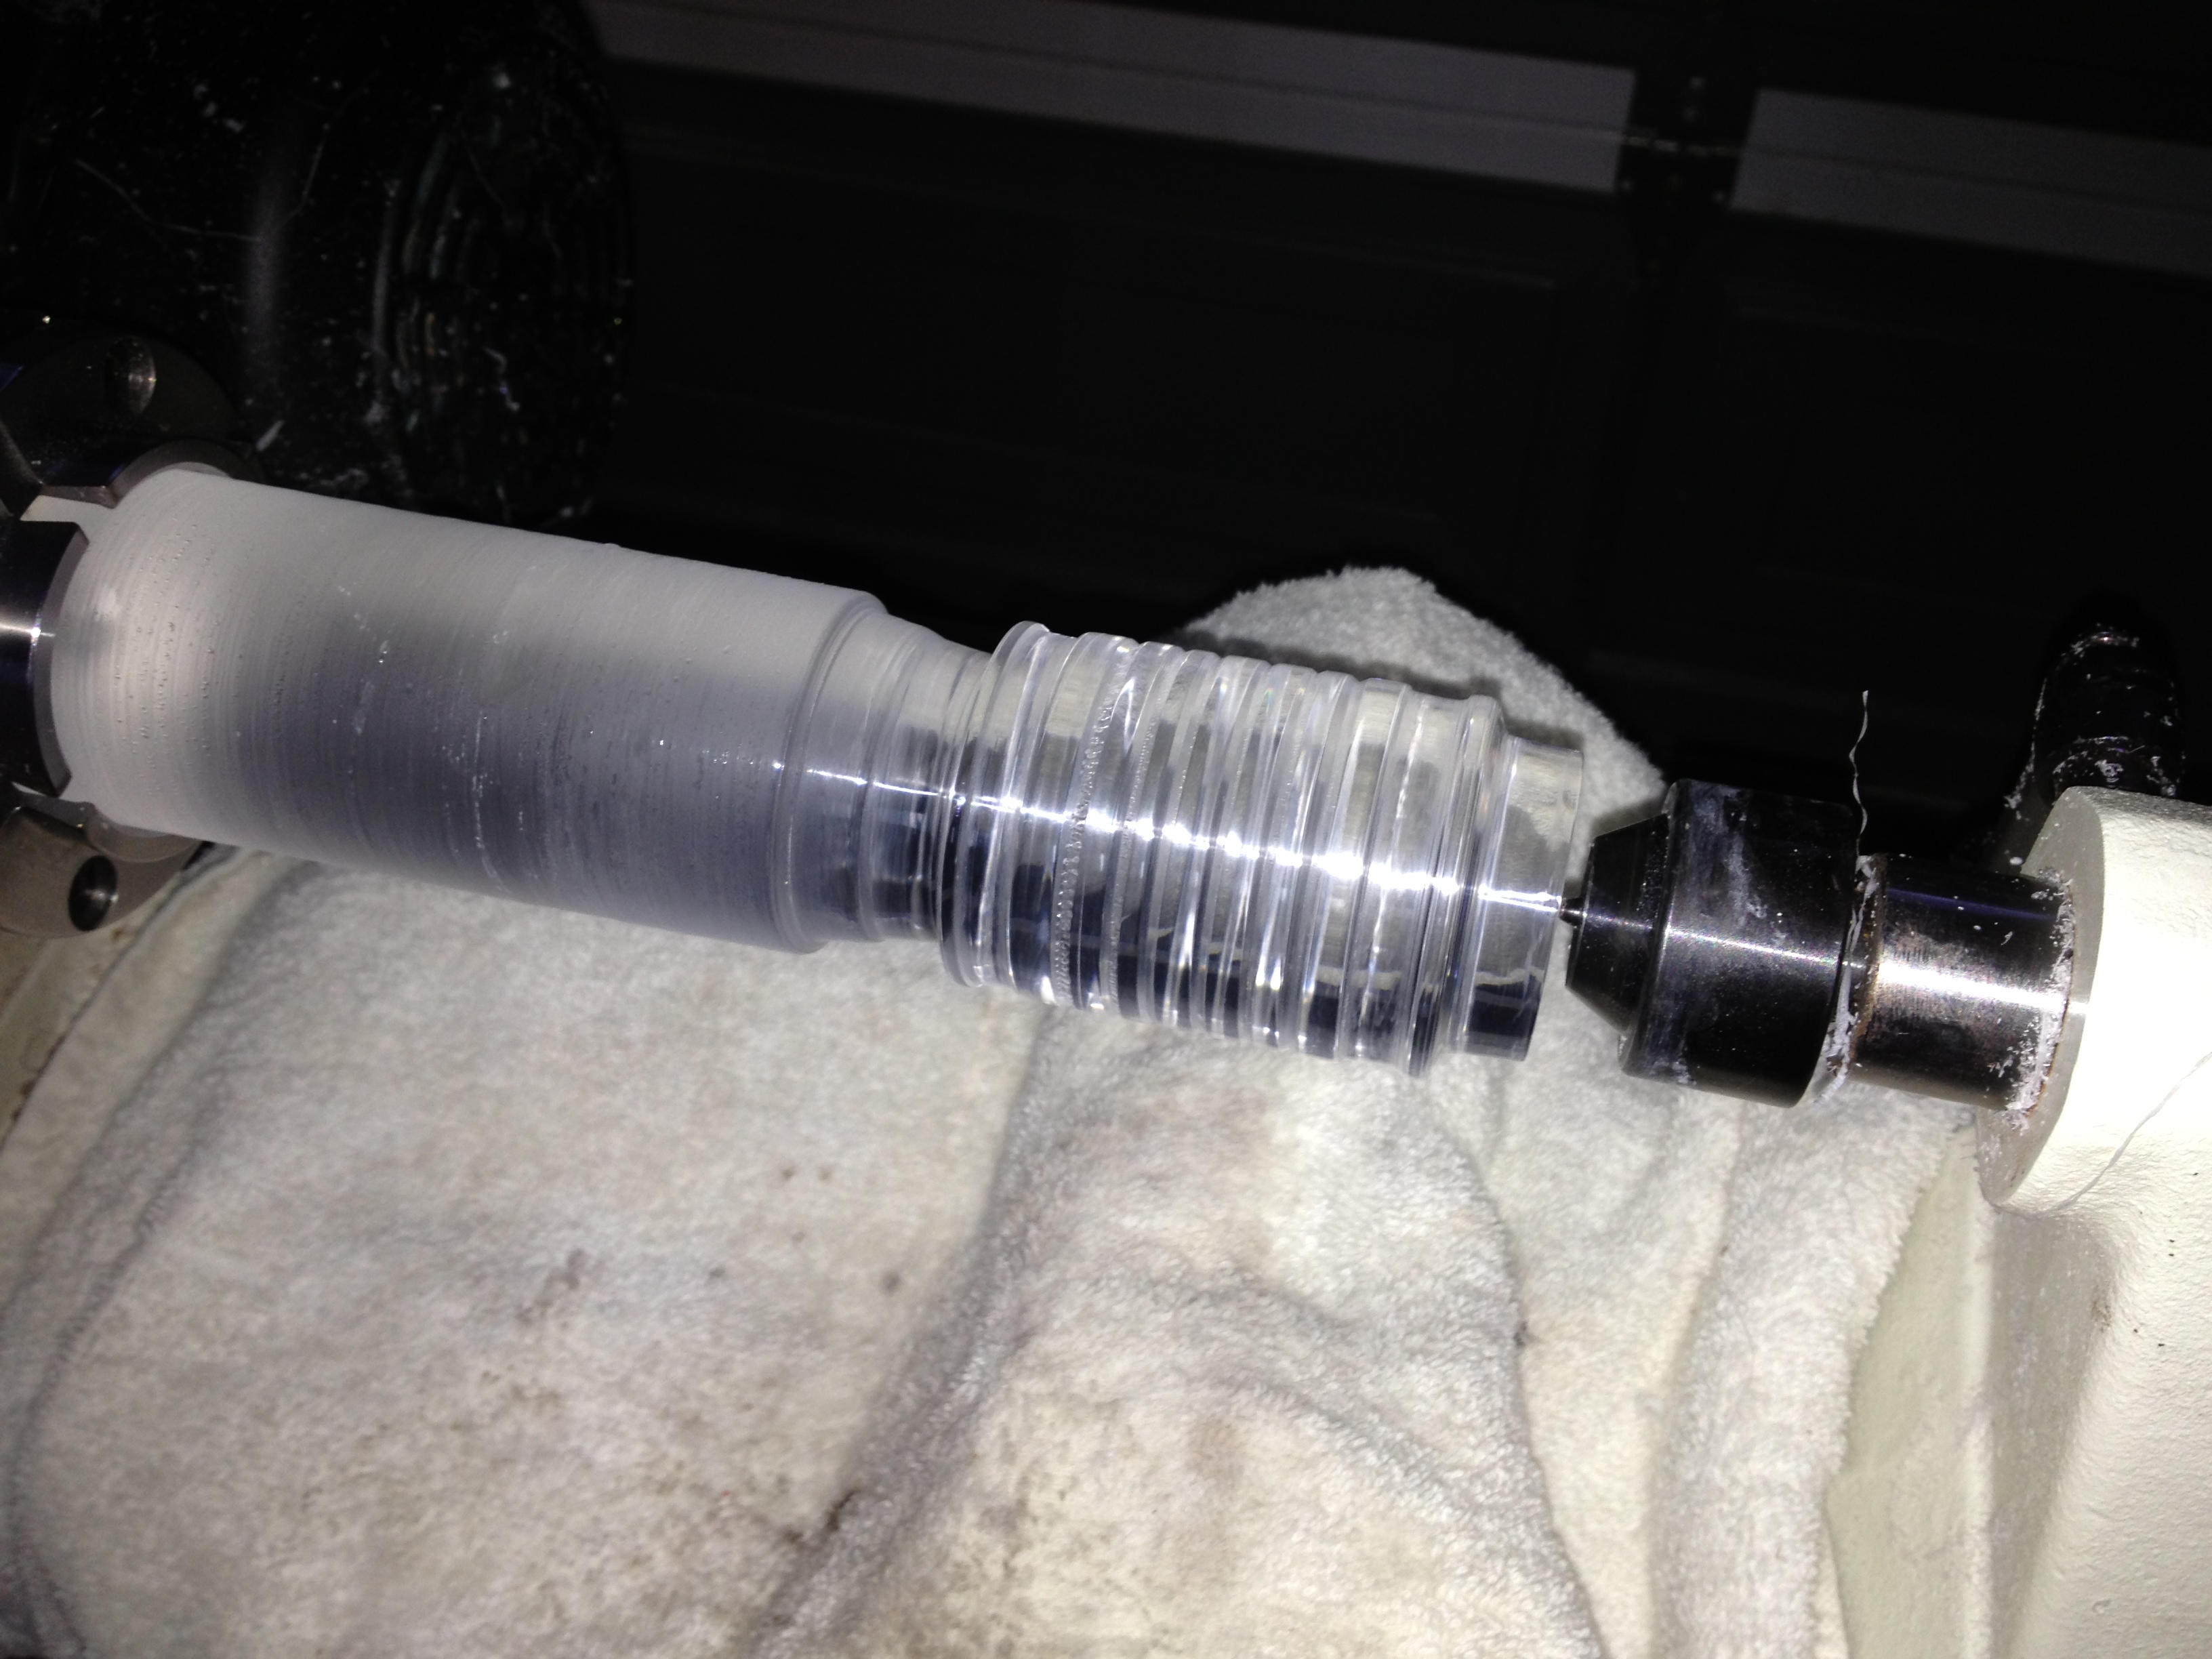
Outer surface sanded to 12000 grit.

After around half an hour of work, I end up with the finish above. This is wet sanded all the way up to 12000 grit to give a finish close to how the block arrived.

Ready to start drilling

Ready to start drilling

With that done, and the cylinder being transparent again it’s time to change our the tail stock on the lathe for a 15/16″ forstner bit to drill out the hole in the sleeve. Given the length of the hole I was drilling, the drill bit alone wasn’t going to be long enough to make the cut. I had bought a bit extender so that I’d be able to drill the length I needed.

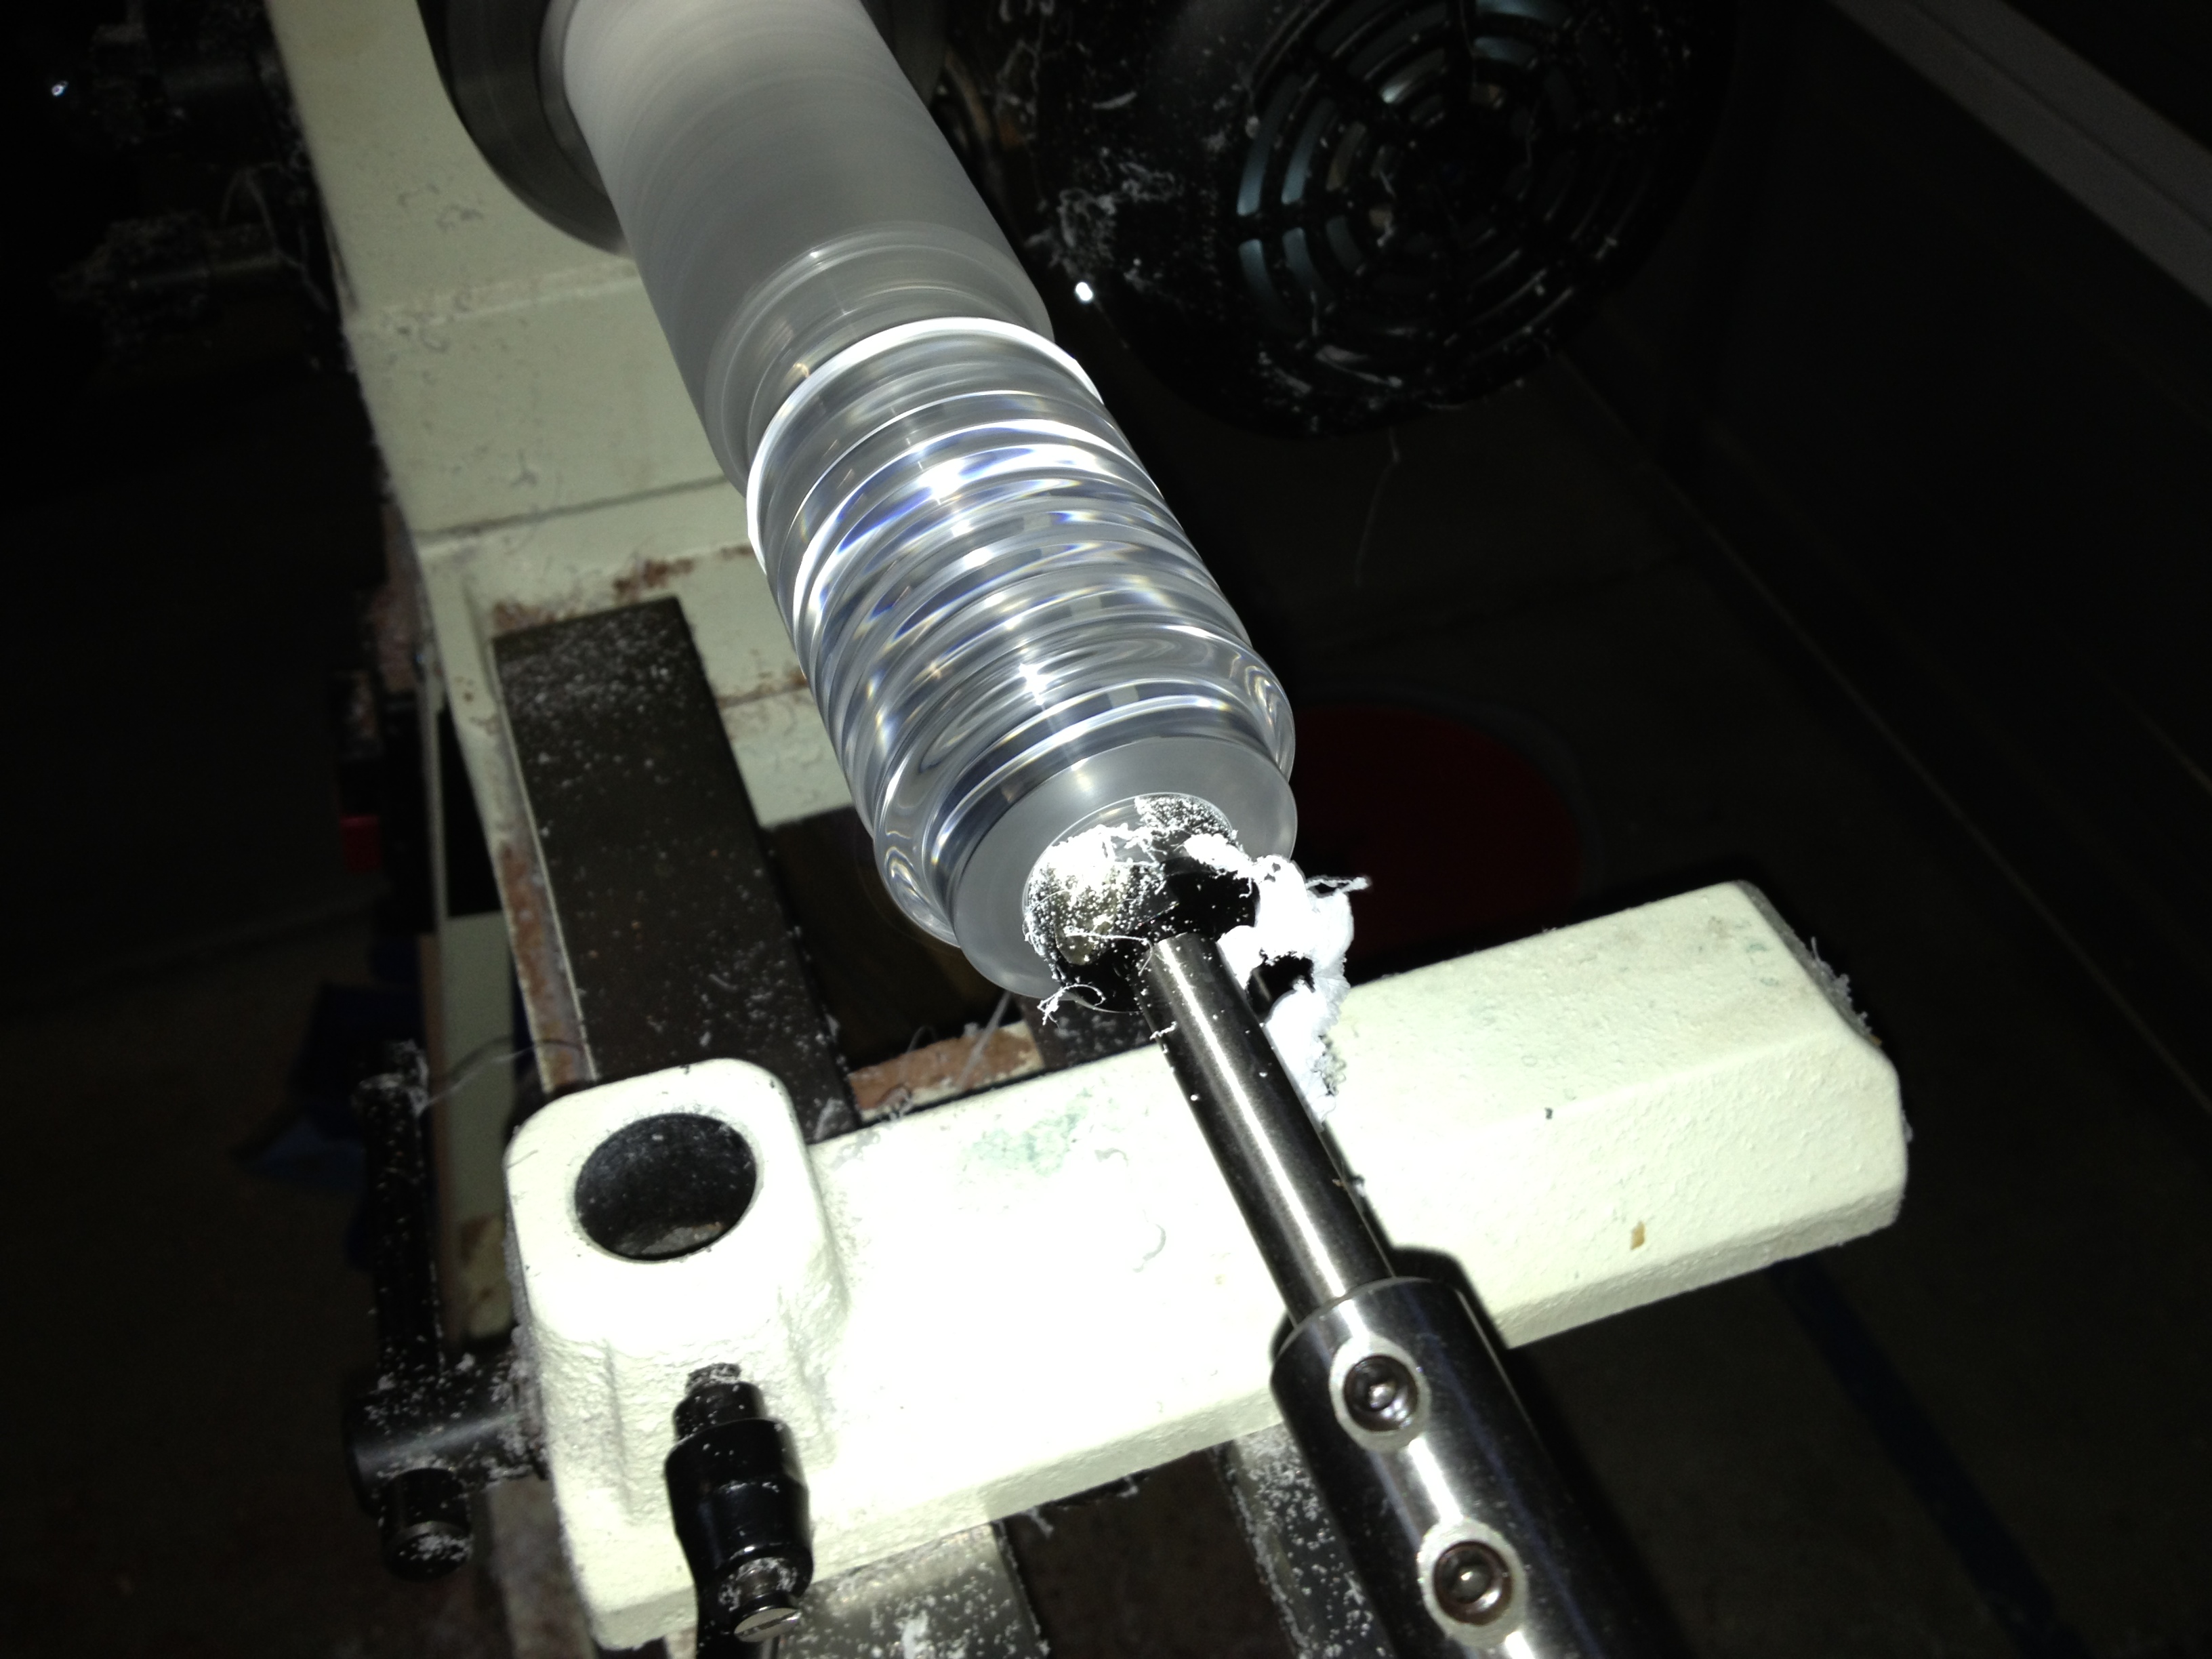
Starting to drill

Starting to drill

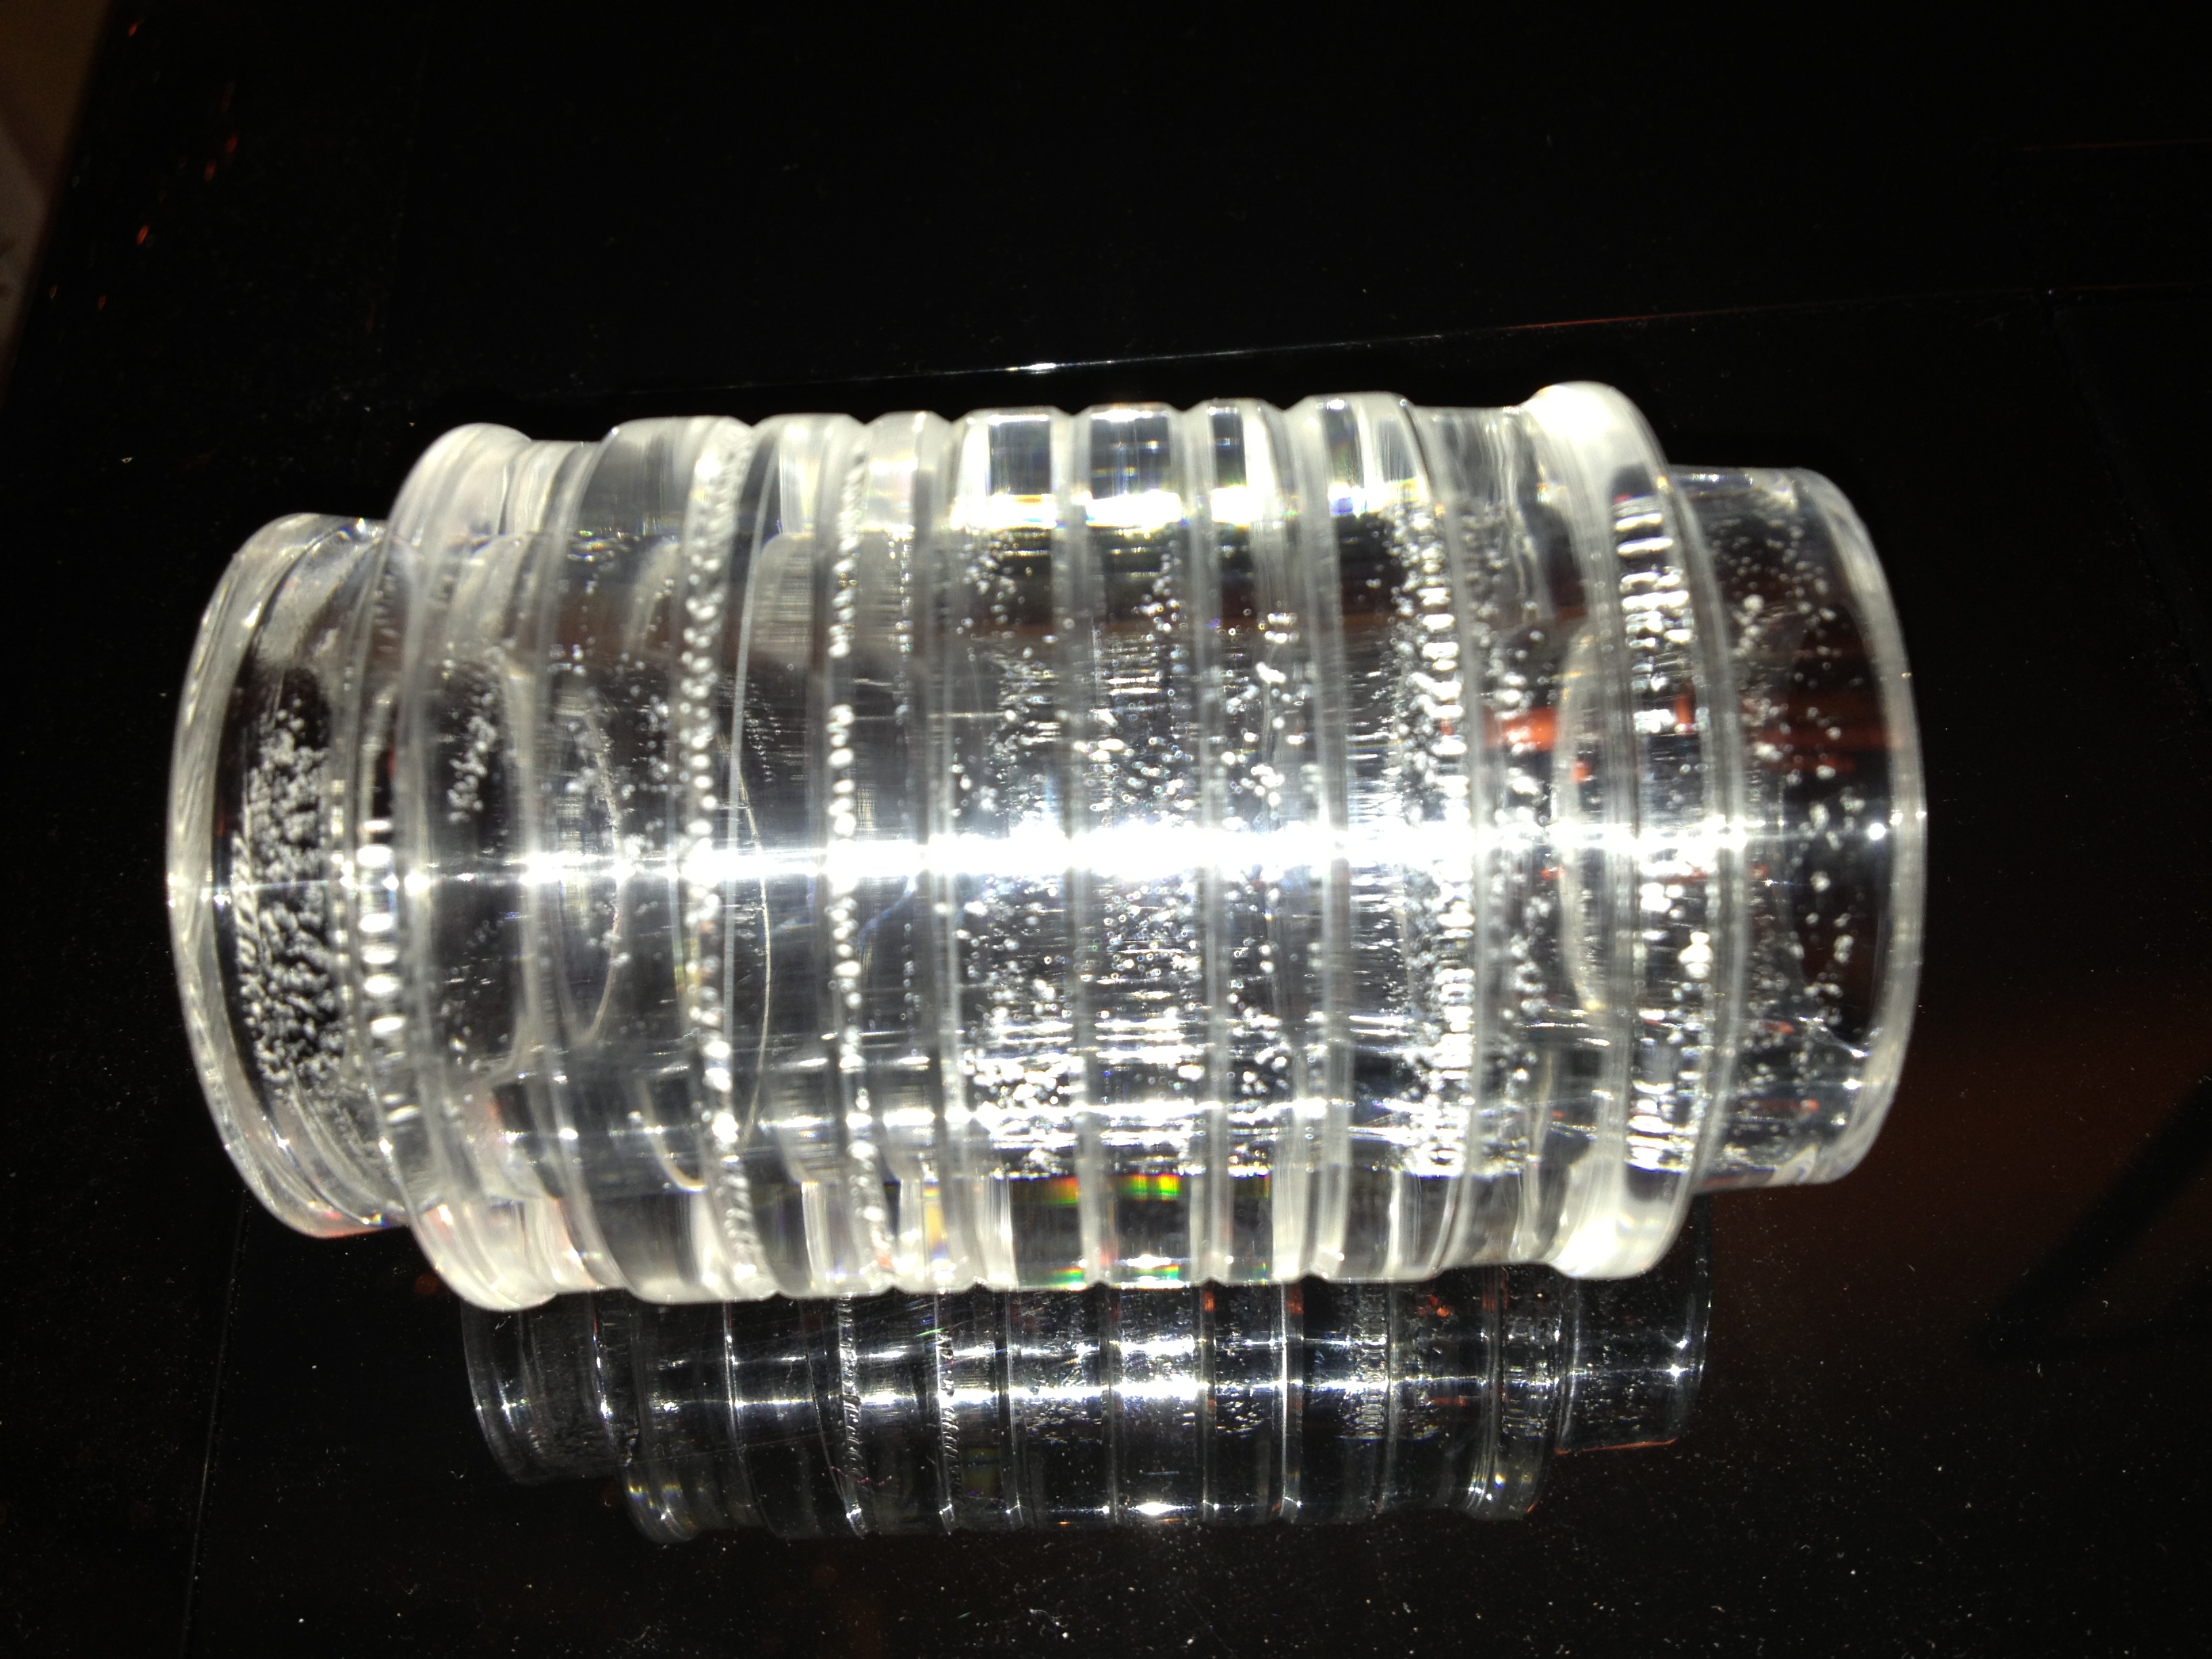
Ribbons of acrylic as the drill bit cores the sleeve

Ribbons of acrylic as the drill bit cores the sleeve

As you can see, with a sharp bit, the cut creates long streamers at the beginning of the cut, but before long, the heat almost melts the acrylic, and you have to be careful to eject the shavings before they solidify behind the head of the drill bit, and make it impossible to remove the drill bit.

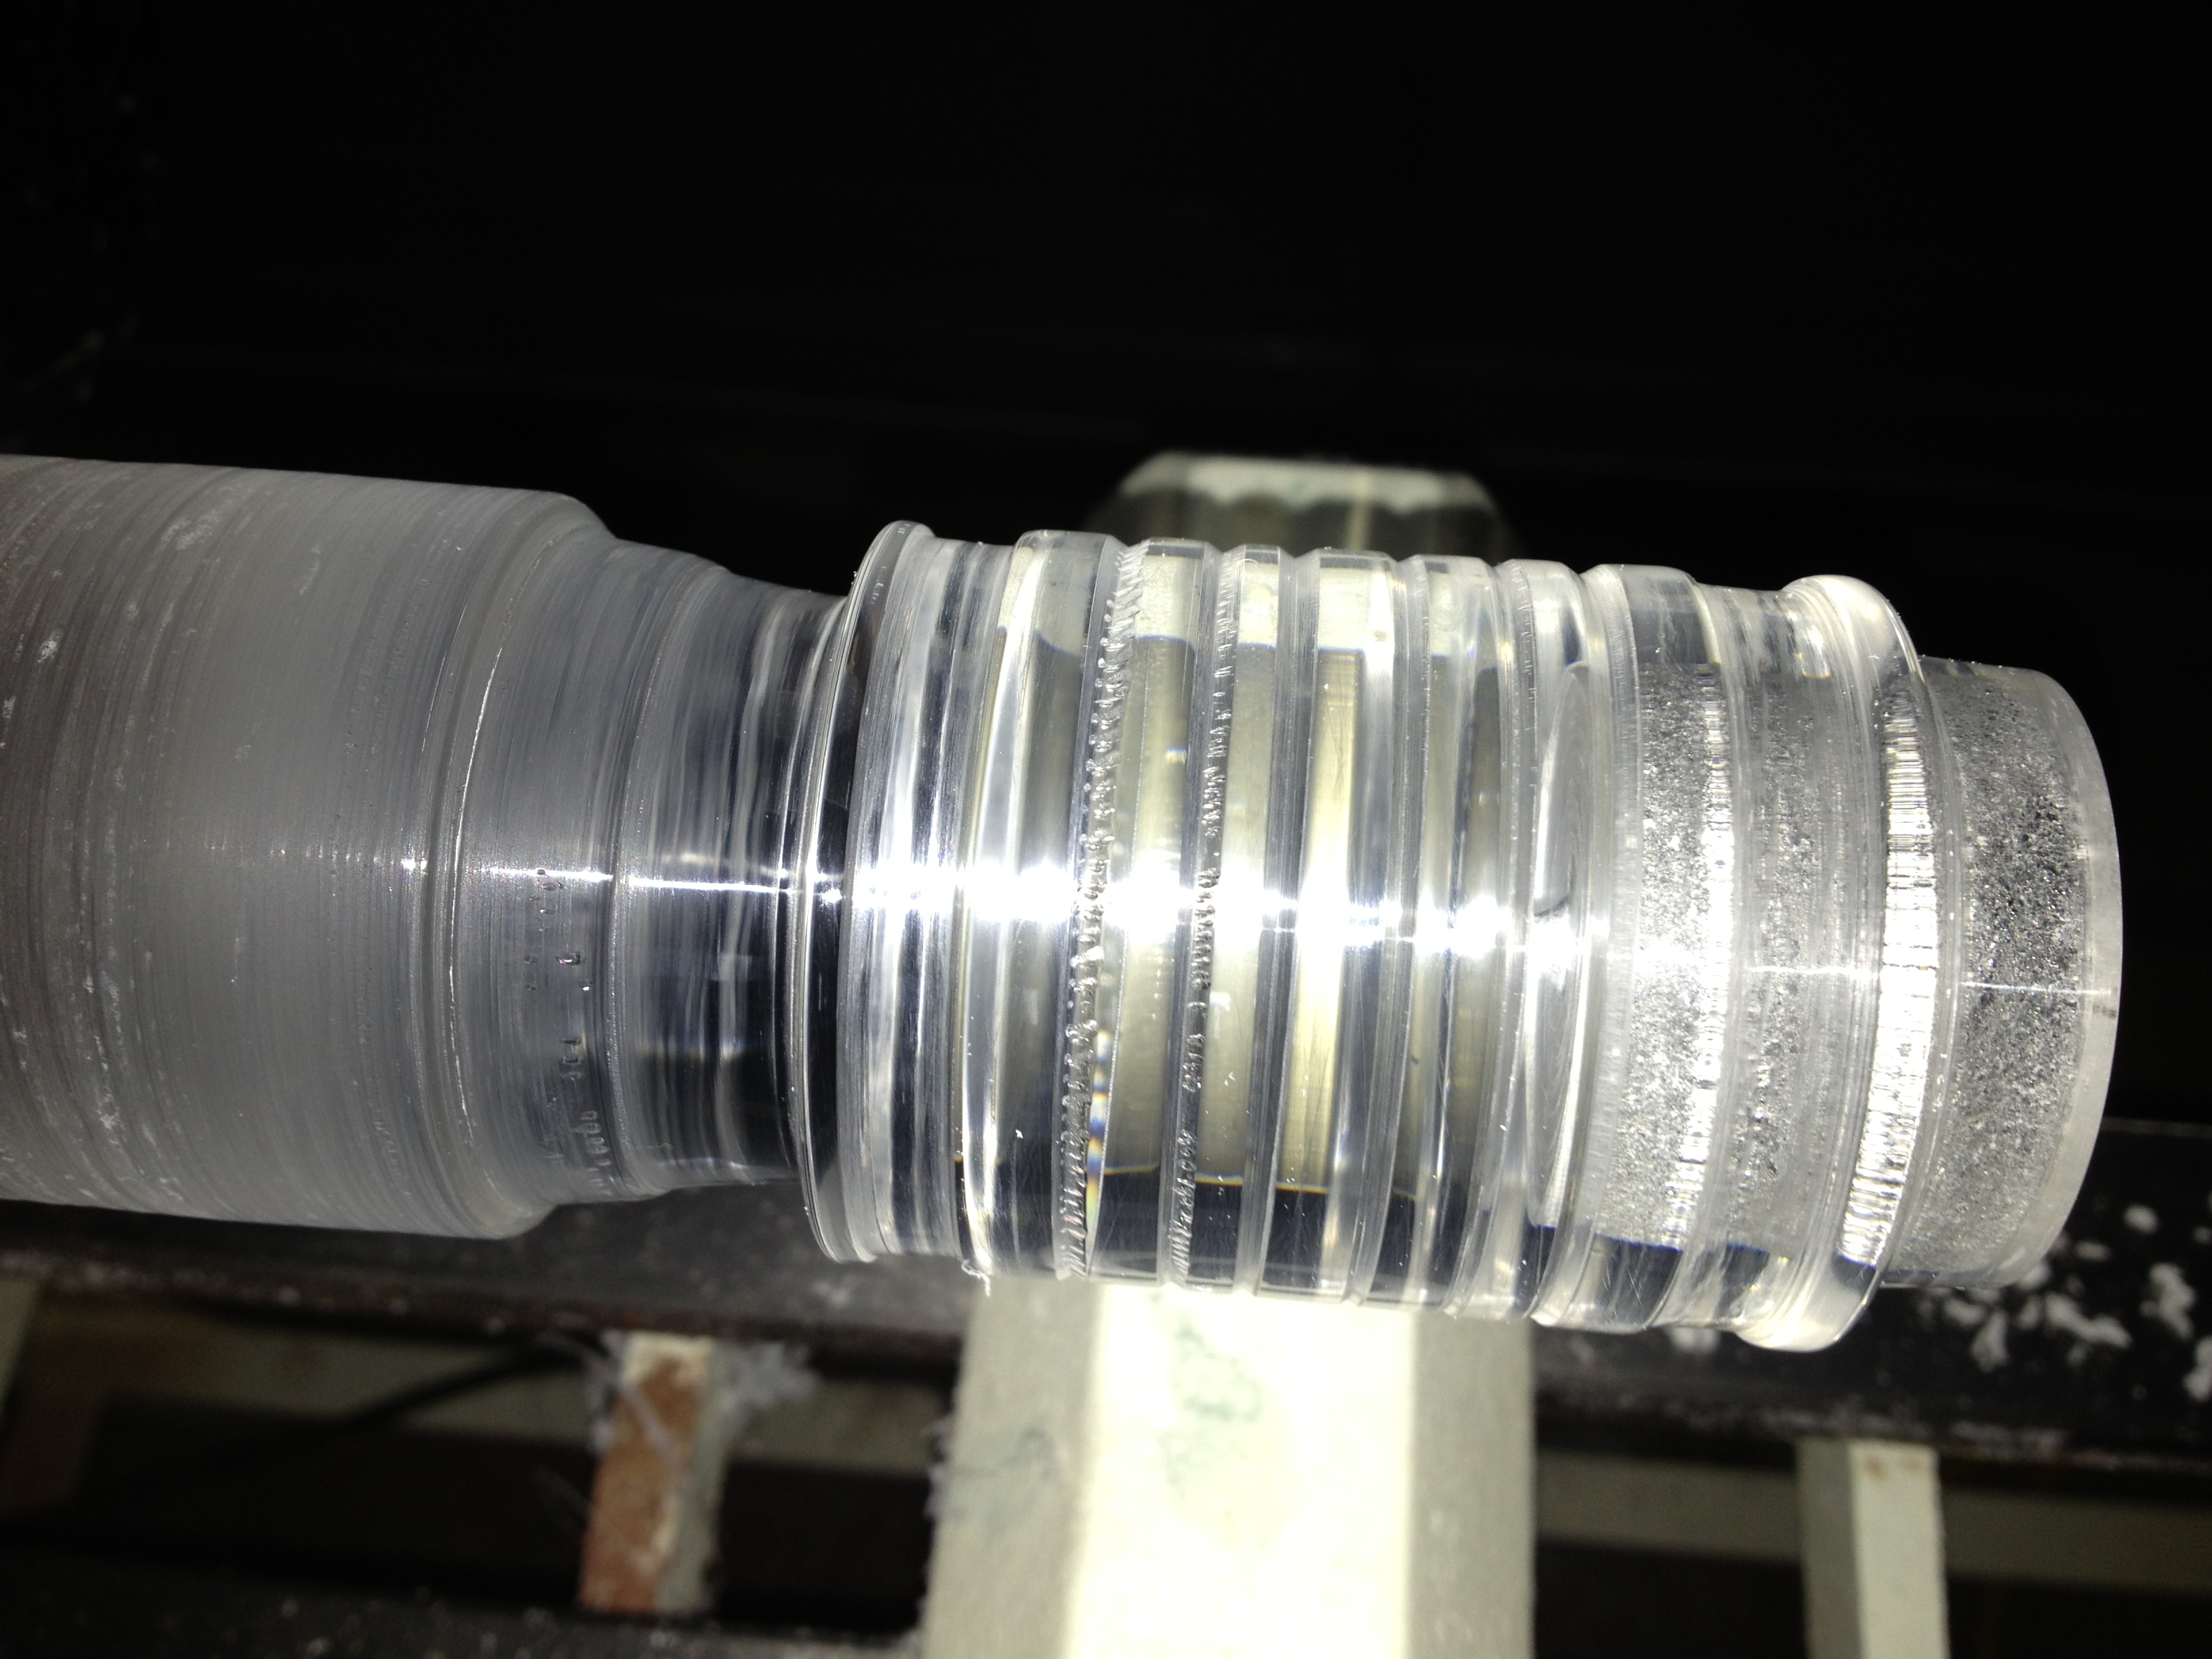
'Bubbles' on the inside as the drill cuts

‘Bubbles’ on the inside as the drill cuts

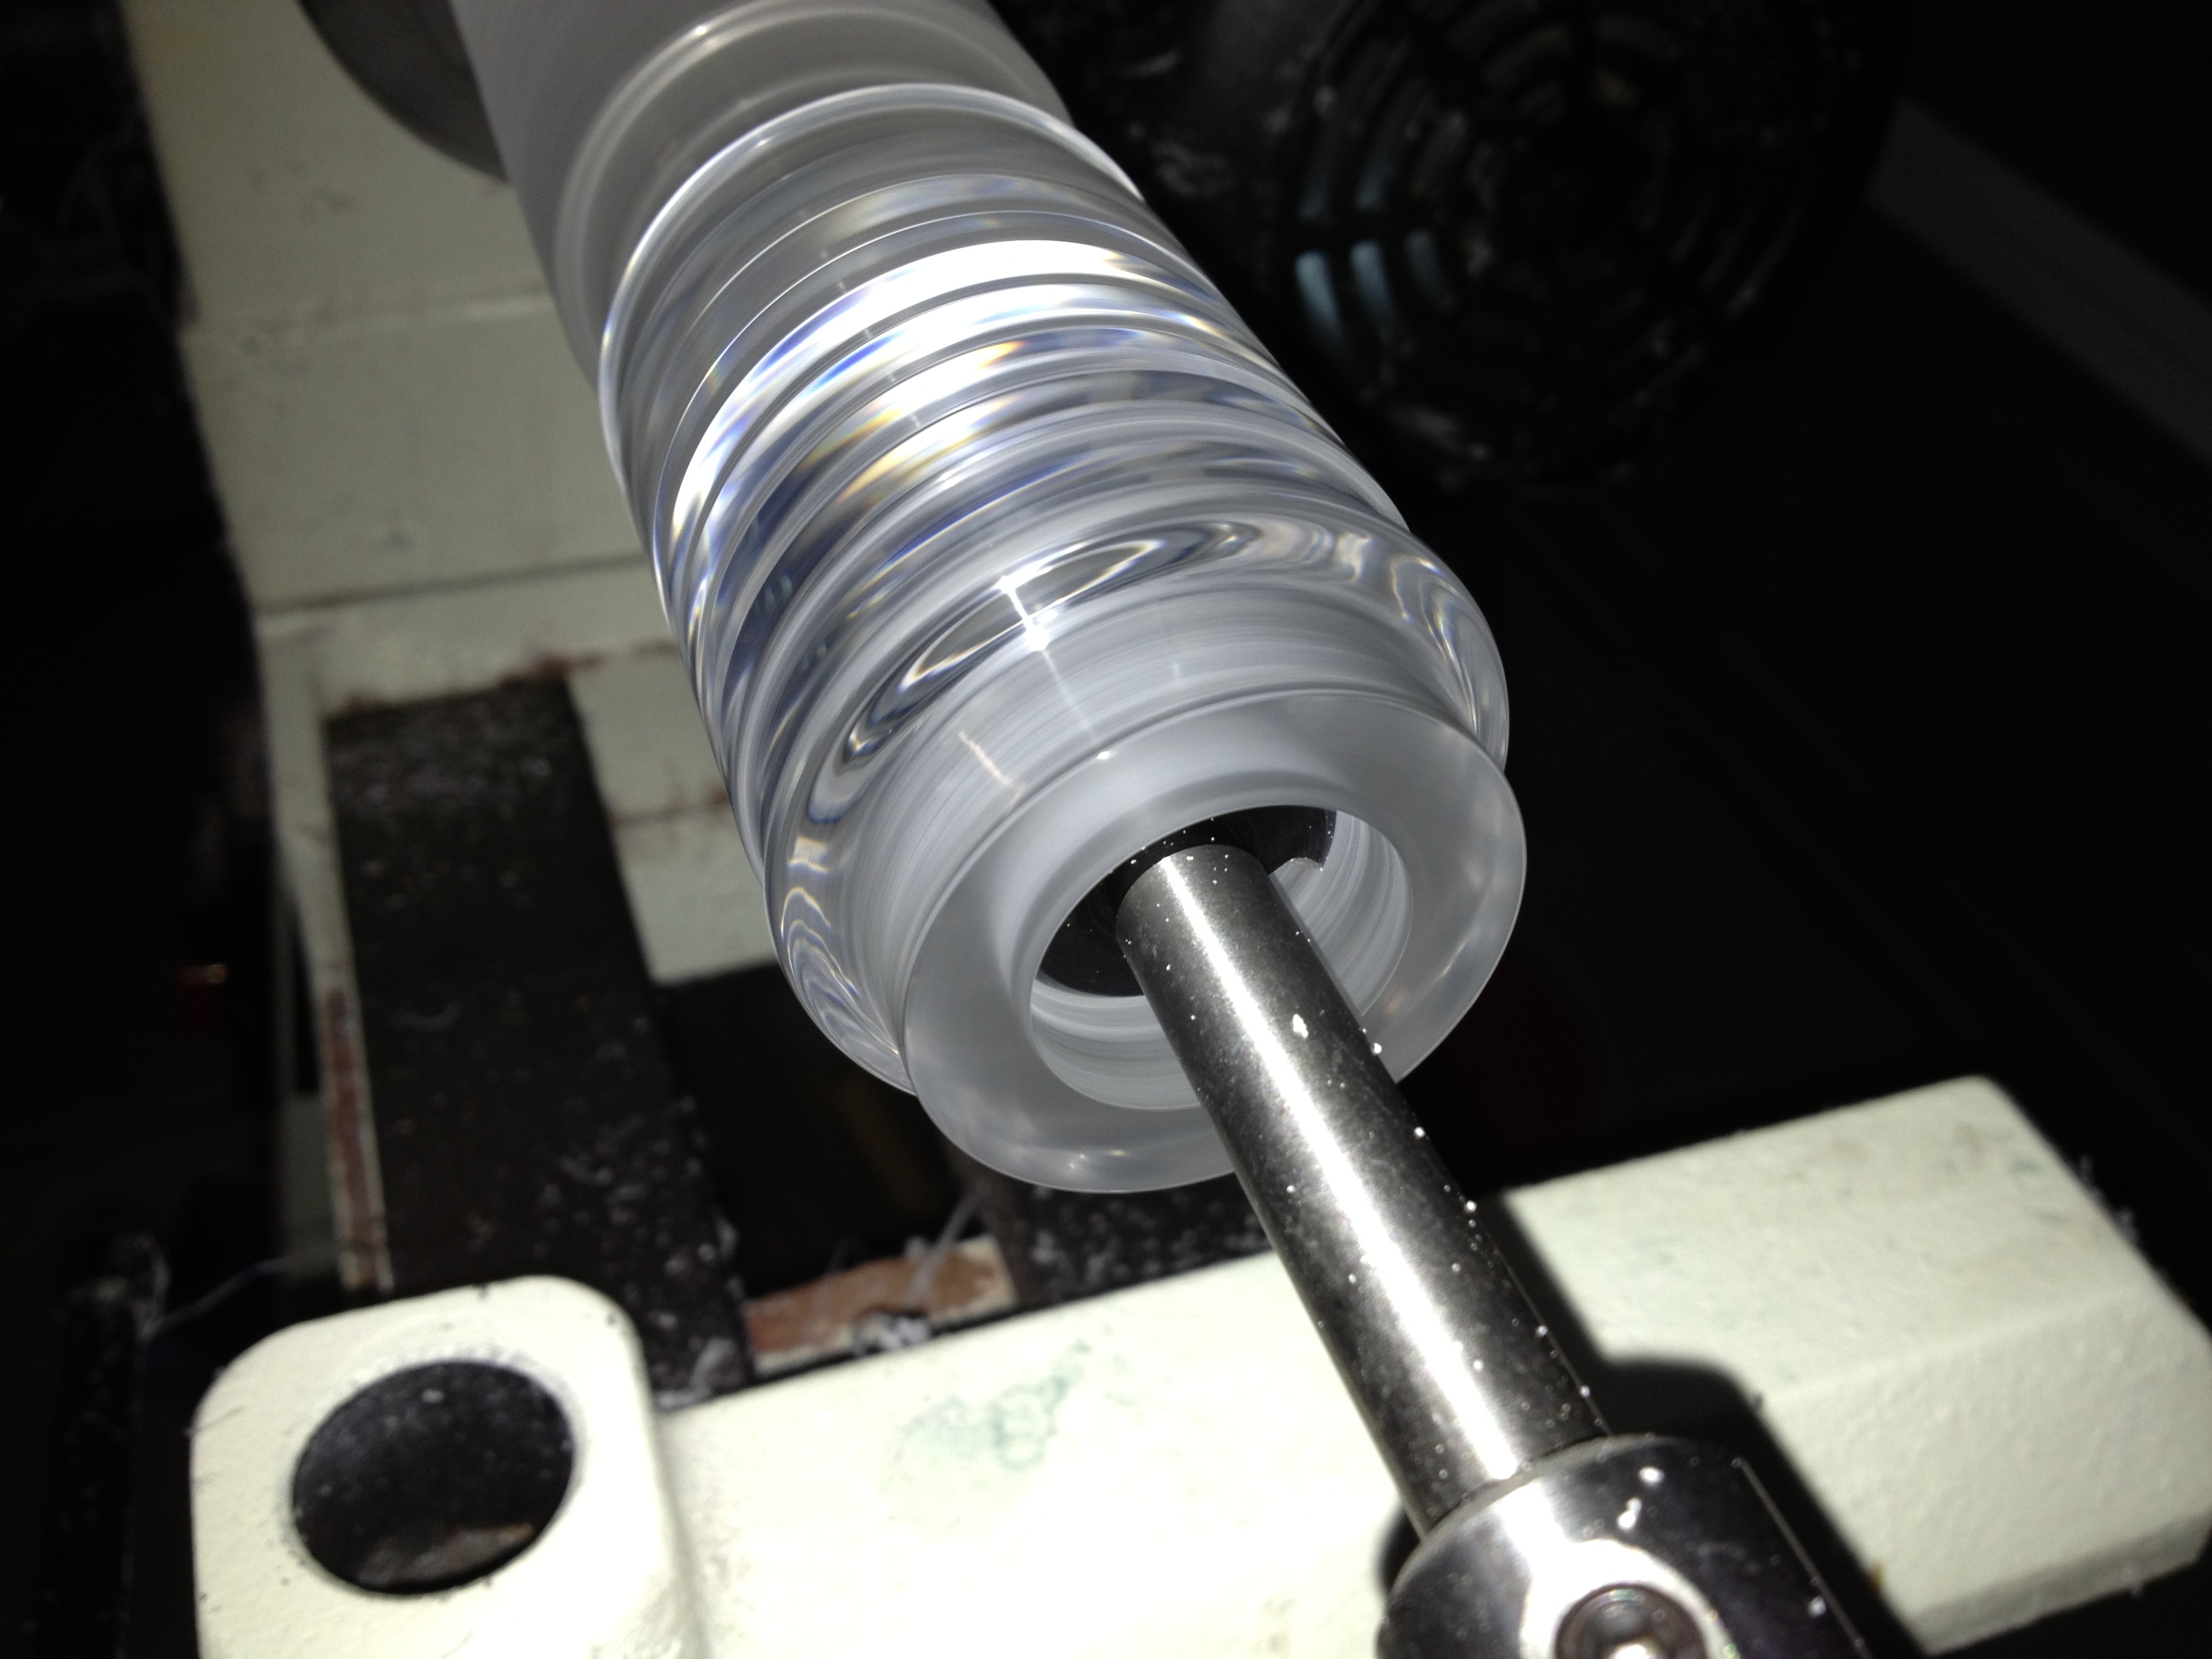
The internal reflections are stunning

The internal reflections are stunning

Even though the drill leaves a rough surface on the inside of the sleeve, given the work sanding it earlier, it looks really good. Once the entire core is drilled out, it will be sanded up to 12000 grit the same as the outside, before being polished to a high shine.

The Finished Sleeve

The Finished Sleeve

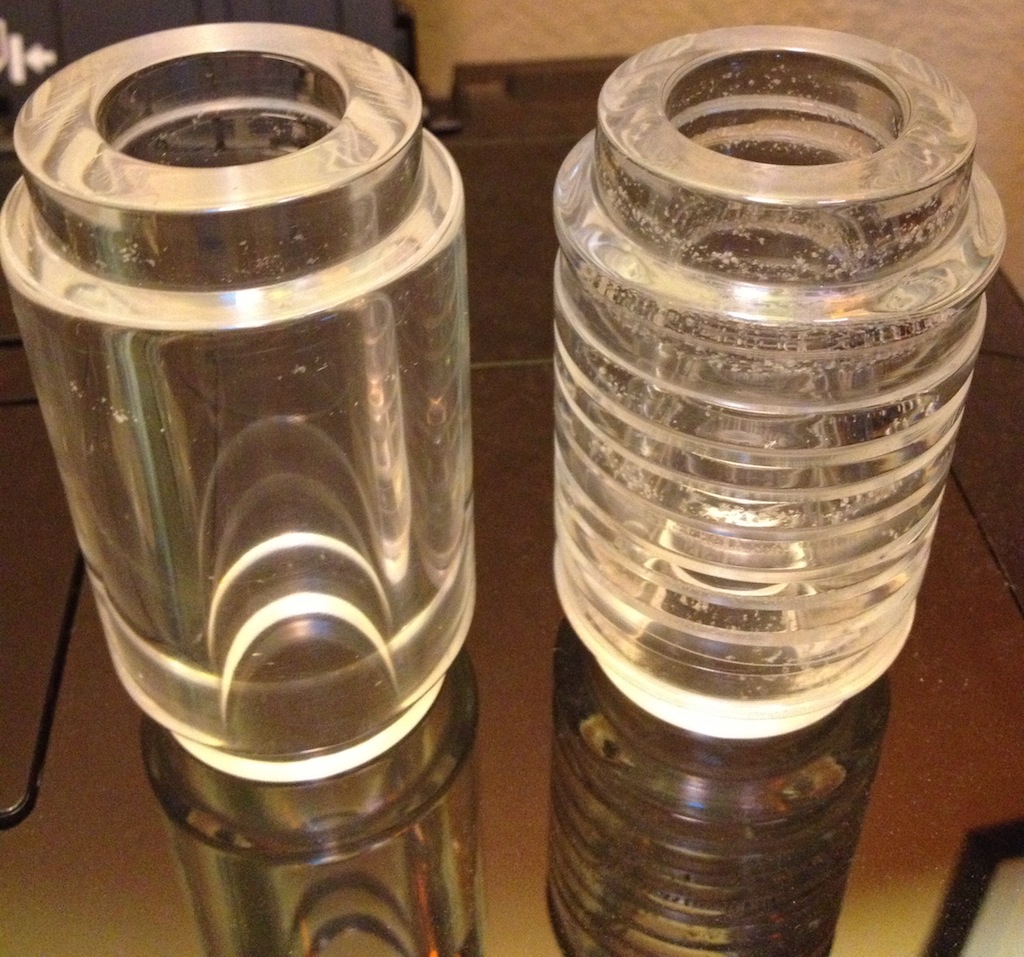
Having completed the drilling of the core, I parted off the sleeve, and finished sanding the ends to get the same finish as the rest of the sleeve, things are just about ready. Some plastic polish is applied, and then a coat of Ren Wax to really finish the shine. As you can see, the inner core isn’t perfect, but with more sanding I could get things back to a perfect finish. In fact I’ve gone back and made a second sleeve without the ridges which is far clearer than this sleeve.

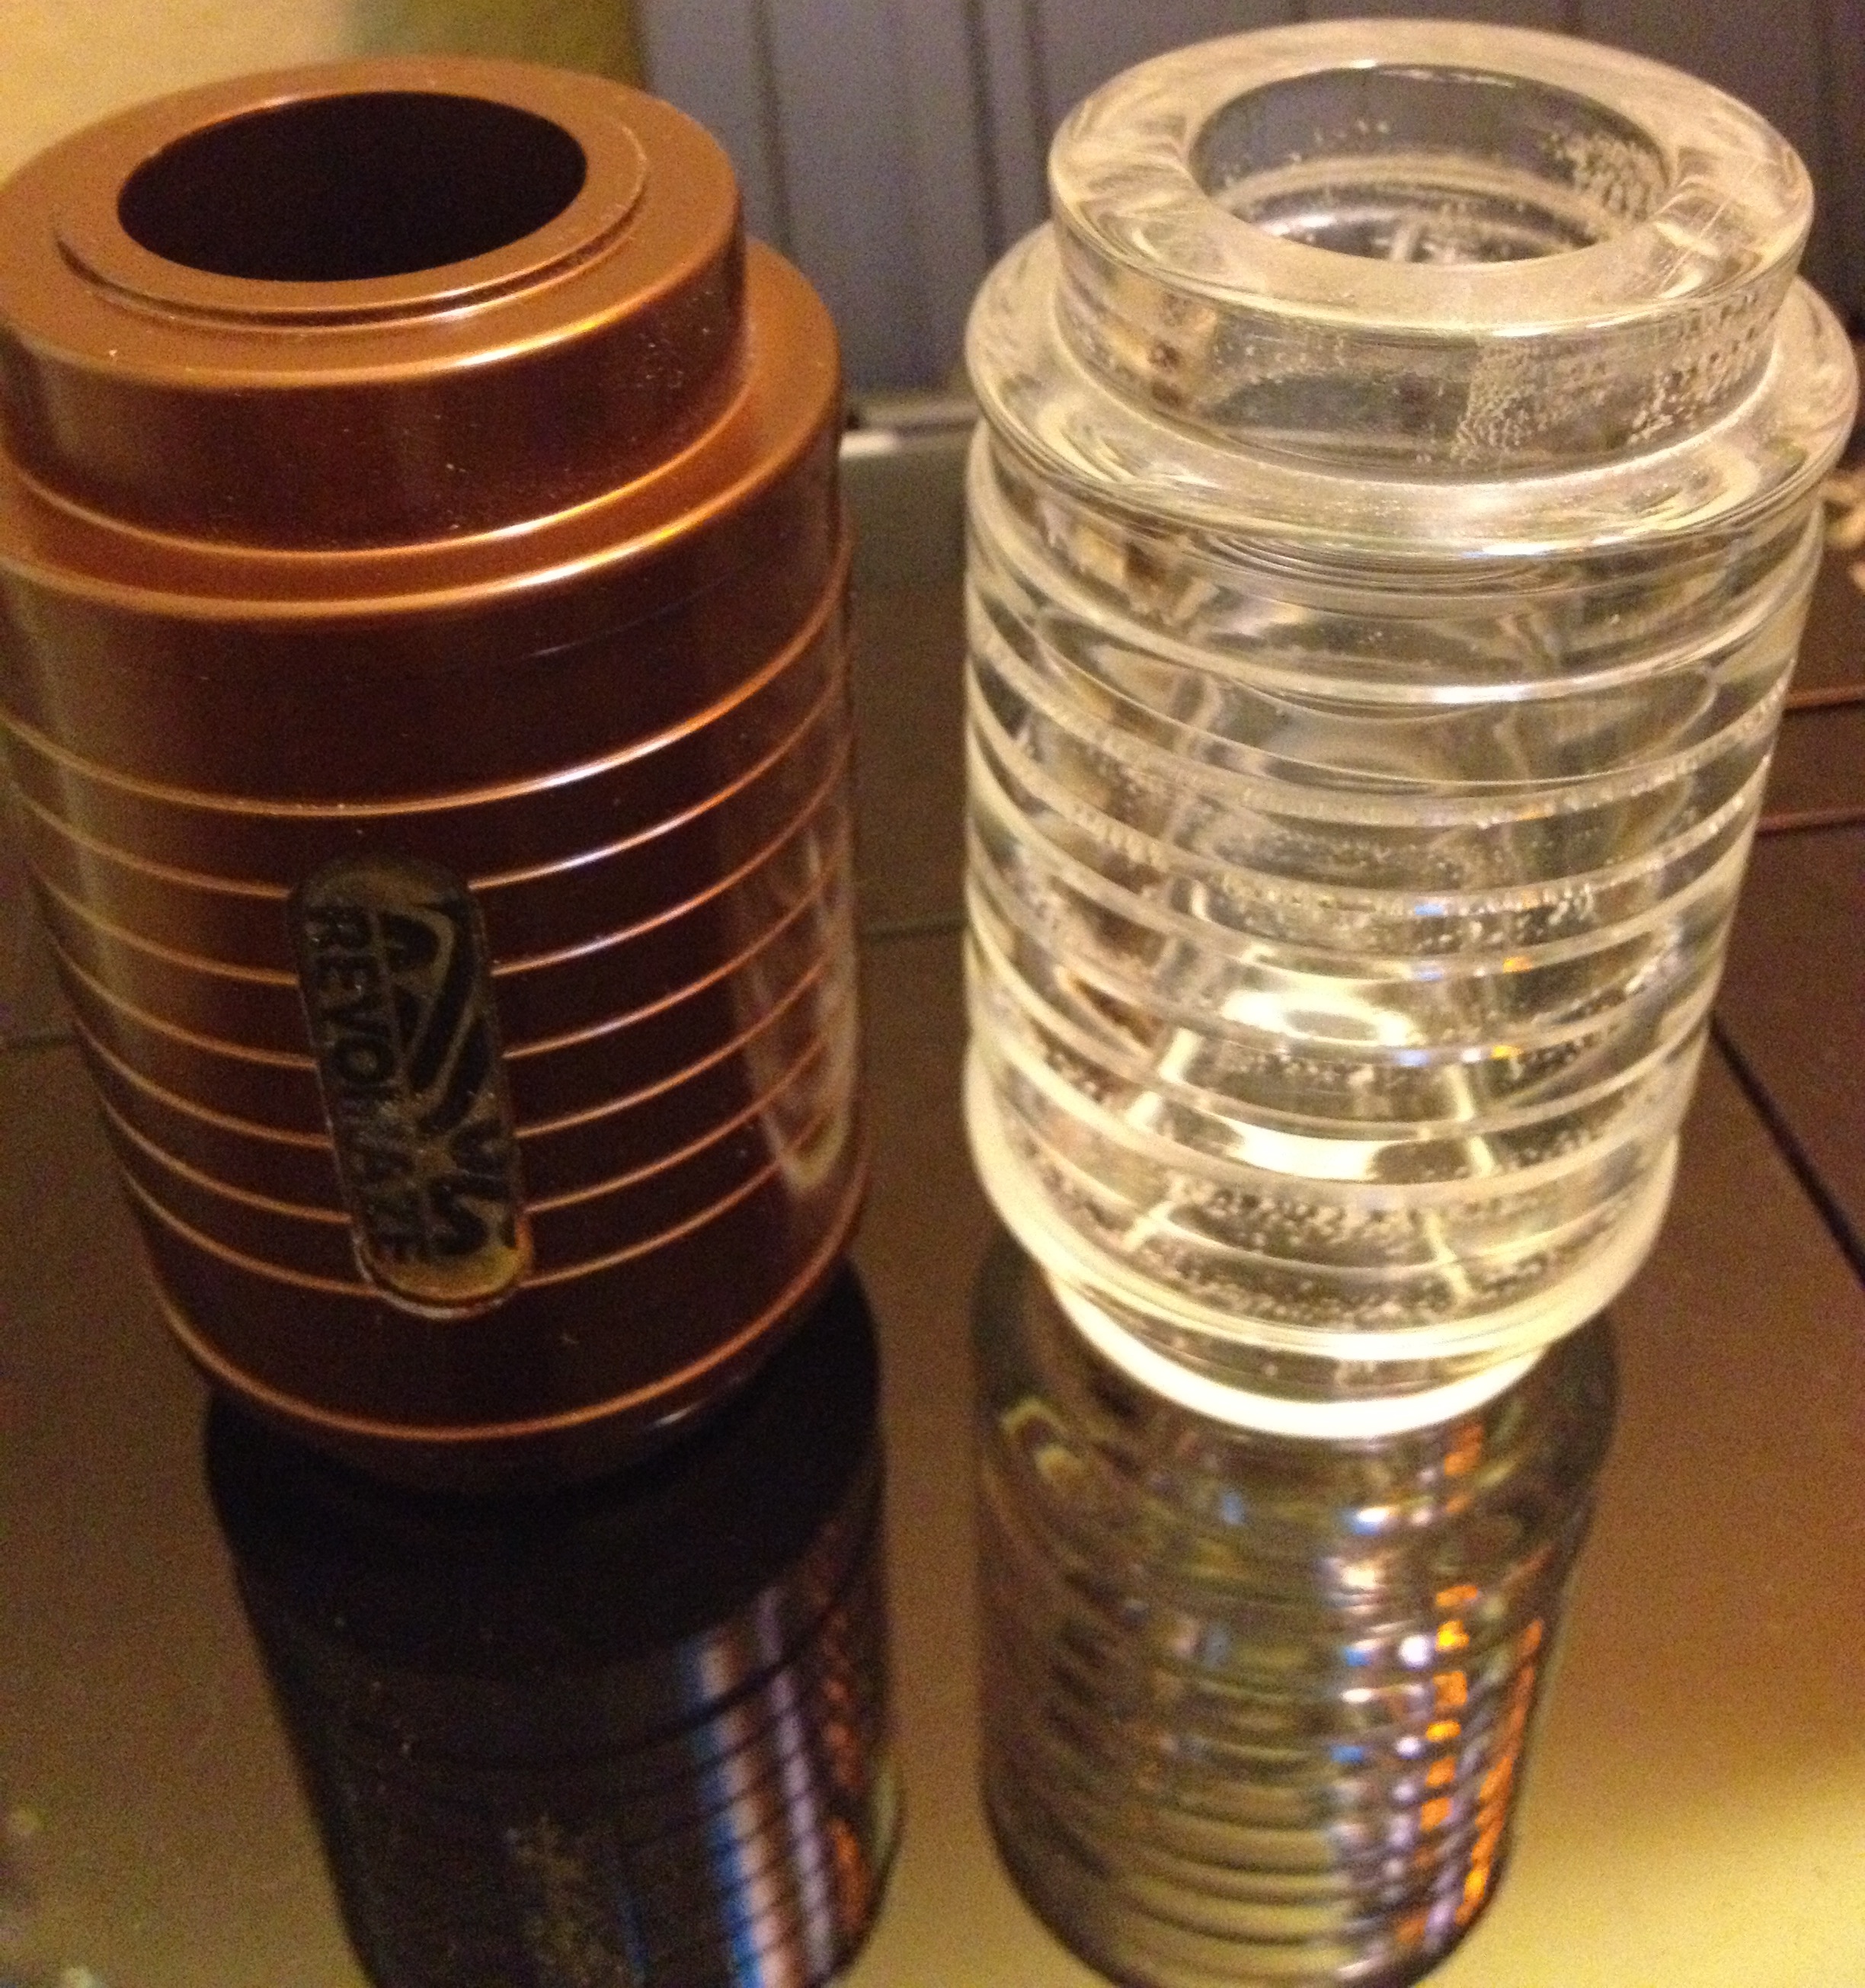
A comparison with the original sleeve

A comparison with the original sleeve

Both clear versions side by side.

Both clear versions side by side.


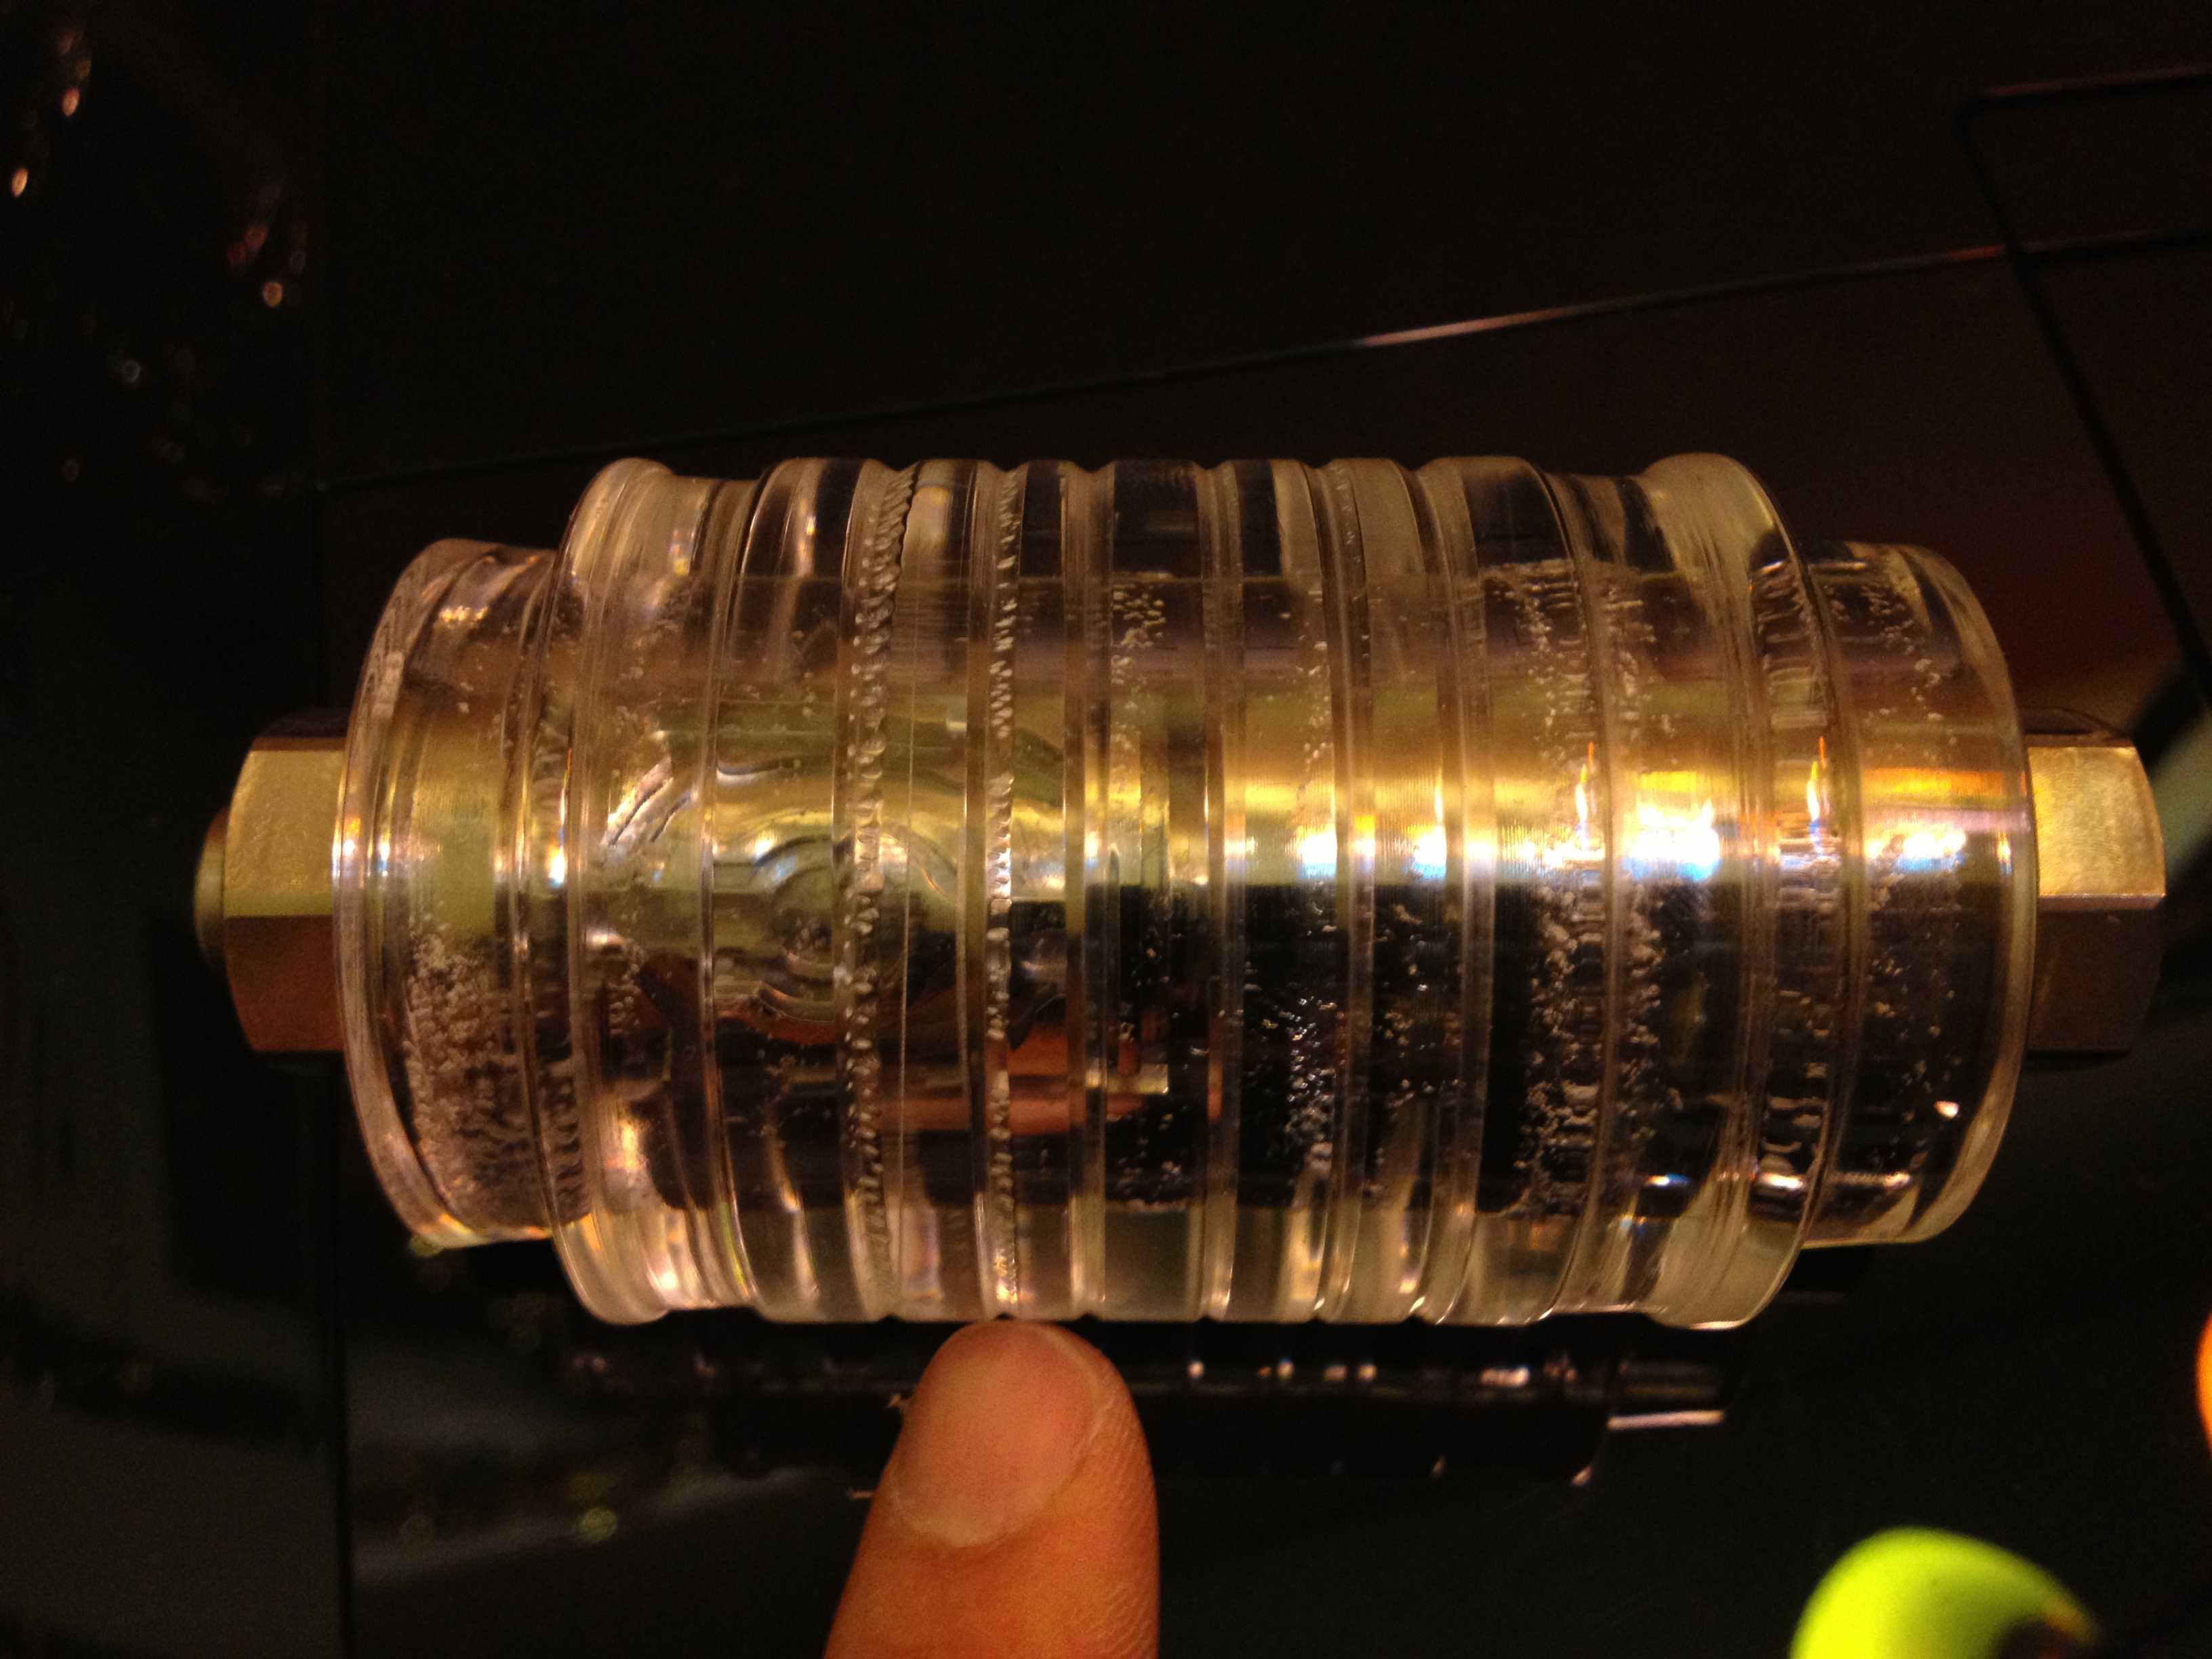
So the real test is left. Can you see the core? Well the answer is a resounding yes. The core is easily visible in the sleeve, and everything fits perfectly. I’m pretty happy with the results.

The Sleeve with a maze in it

The Sleeve with a maze in it

Stickman Constellation Puzzlechest

Merry Christmas, and Happy Holidays to all my readers. I have a very special post today from Stickman himself. I’m very proud to be able to bring you the Constellation Puzzlechest.

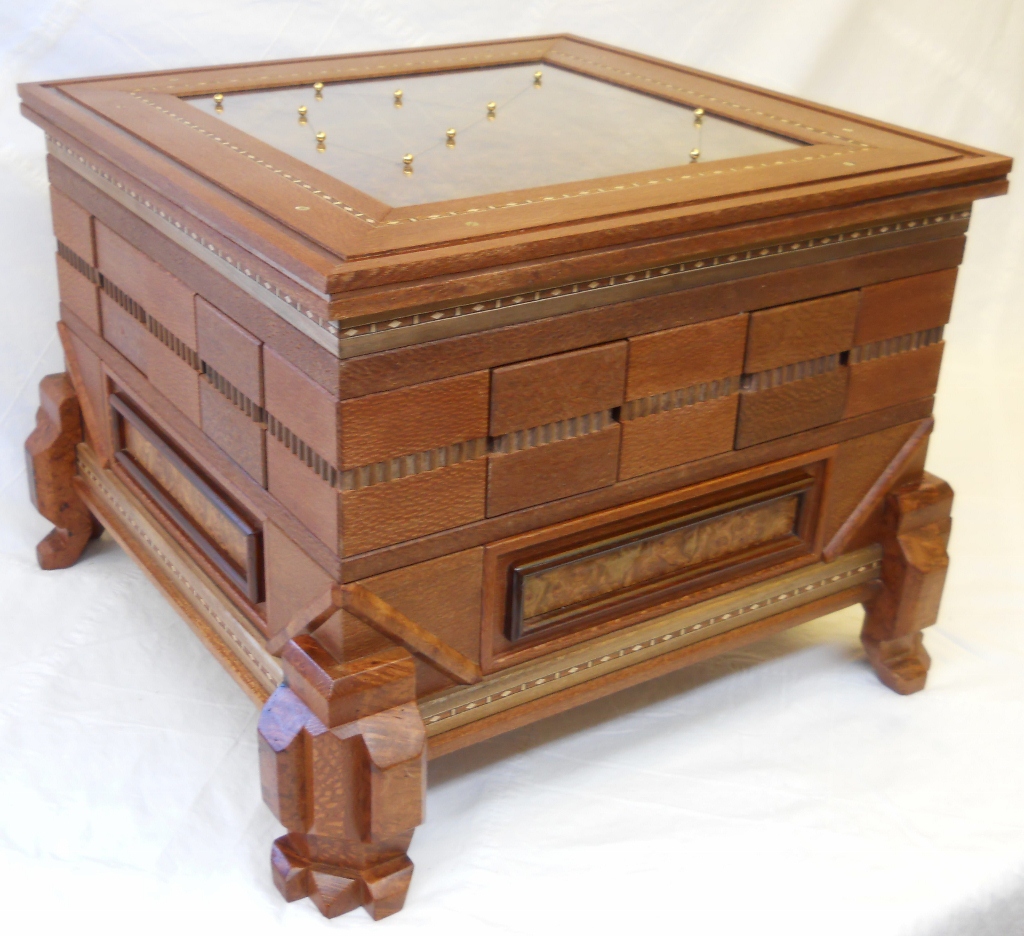
Stickman Constellation Puzzlechest

Stickman Constellation Puzzlechest

This beautiful chest is his latest creation, and is a one-off commissioned piece. The rest of the post comes directly from Stickman. There are various photos throughout and a video at the bottom of the page, all supplied by Stickman. I hope you enjoy this sneak peak.


The Stickman Constellation Puzzlechest is an intricate mechanical puzzle commissioned to Robert Yarger. Crafted from Leopardwood, Walnut and Amboyna, it measures a whopping 2 feet square and weighs over 65 lbs. (NOTE: If you are the person who commissioned this chest, you may not want to review the video at the bottom of the page. While it does not reveal any details of the solution, you might not want to see the position of mechanical parts.)

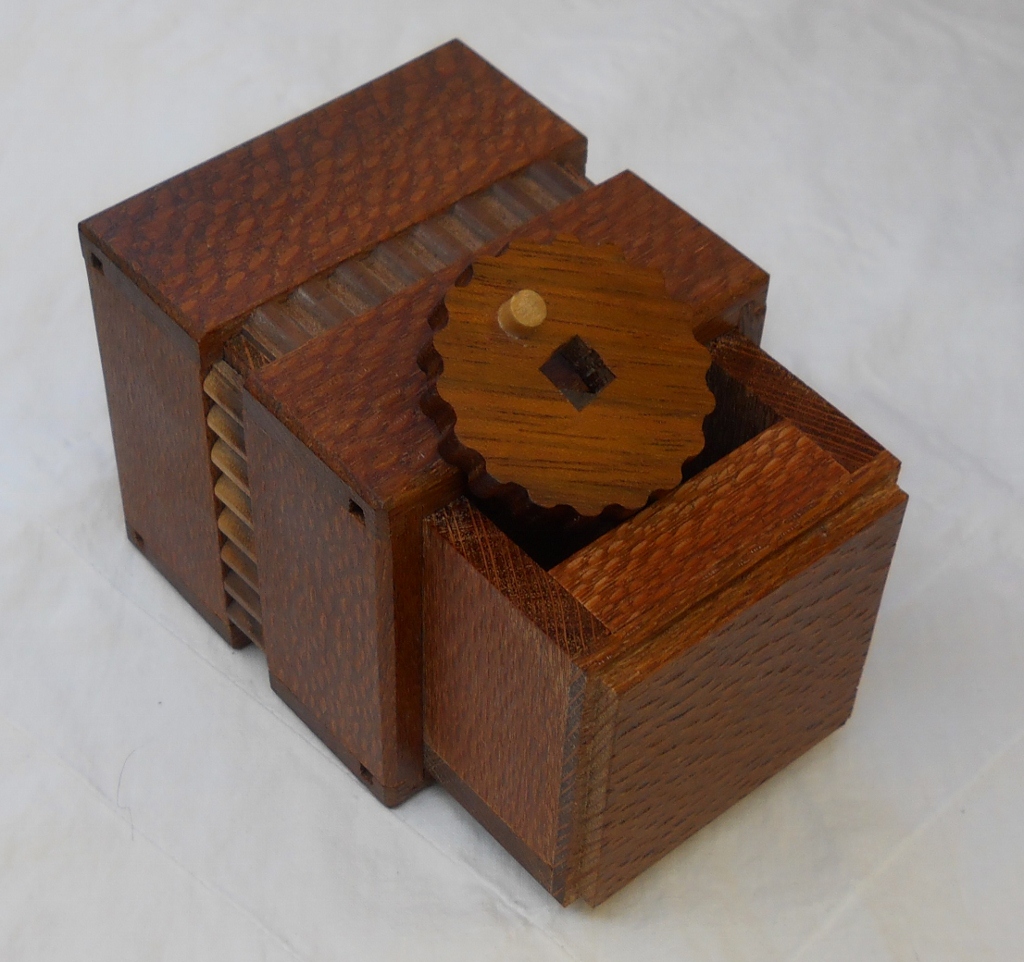
A simple drawer from the puzzlechest

A simple drawer from the puzzlechest

The chest houses a total of 16 small puzzleboxes, each of which may appear identical, but are unique in their solution. Inside each of these is a single mechanical part. It requires logical deduction to determine just where each of these must be placed in order to make the chest’s mechanism operate.

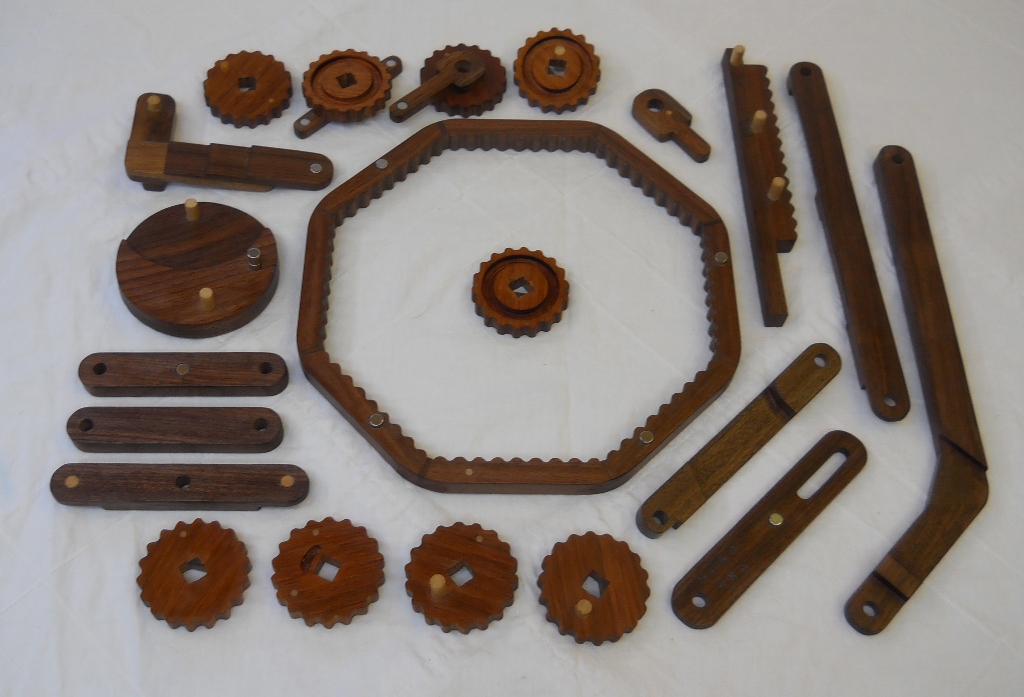
Stickman Constellation Puzzlechest mechanism parts.

Stickman Constellation Puzzlechest mechanism parts.

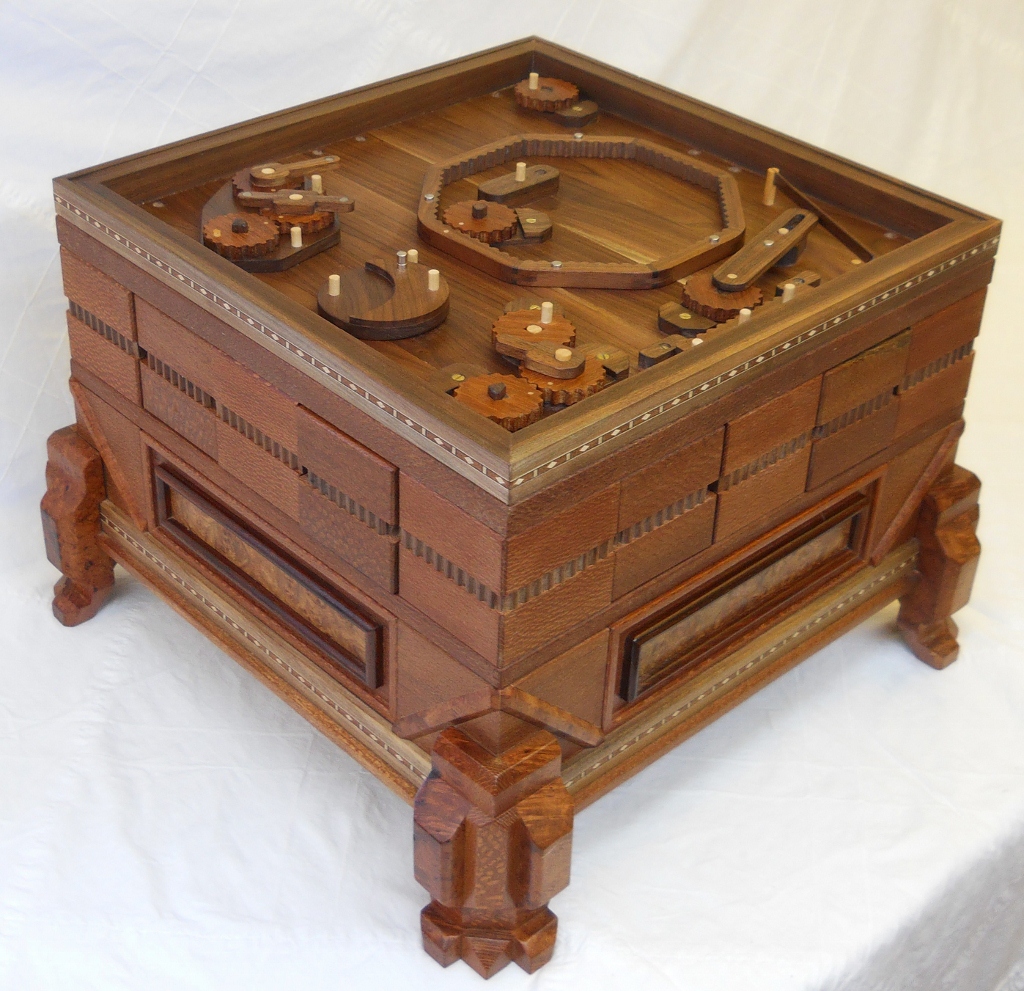
Stickman Constellation Puzzlechest with its lid off

Stickman Constellation Puzzlechest with its lid off


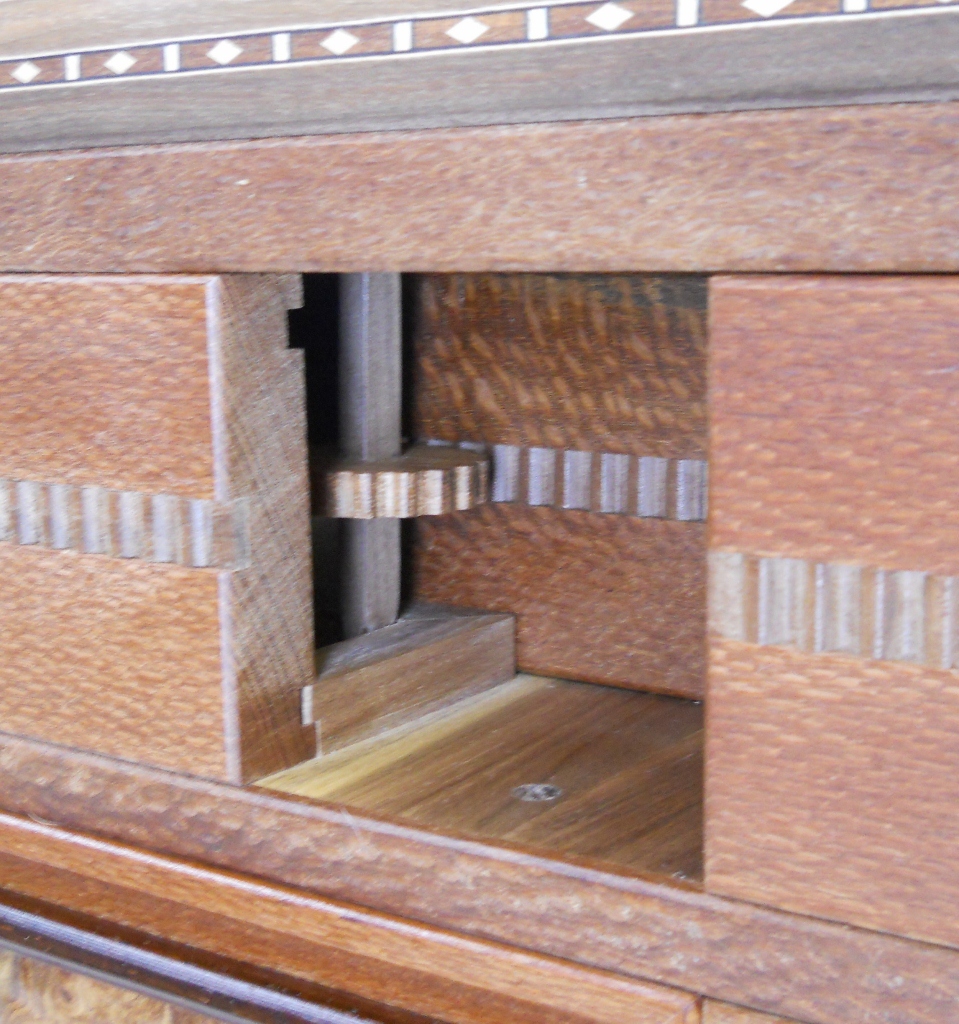
Once completed, this mechanism will operate by pushing drawers into the chest. Decorative inlays on their sides engage and rotate internal wooden gears, and pushing in one drawer will cause another one to come out of some other side (and not always the side you expect). The sequence in which puzzleboxes are pushed into different openings is key to manipulating the mechanism properly.

Constant Gear Mesh with the internal mechanism.

Constant Gear Mesh with the internal mechanism.

The patterns of celestial constellations are etched on both sides of the chest’s lid. Place gold magnetic spheres (representing stars) on the lid and magnets embedded in the mechanics below move and rotate them until they line up with these etched celestial patterns. This is not as easy as it seems though, as the operation of some components influenced output of others. Once this is accomplished, one of the two hidden drawers of this chest will open. Flipping over the lid to solve the puzzle for a second constellation will unlock another secret drawer.

Radbox

I have been a fan of Jean Claude Constantin’s work for a while. Many of his designs are laser cut pieces which press together making for some very characteristic ‘Constantin’ looking designs and almost all of his puzzles have some unique and interesting mechanic that makes them worth owning. Radbox is another design which is a classic laser cut puzzle box design with some striking features which makes it really stand out. I got my copy from Puzzle Master.

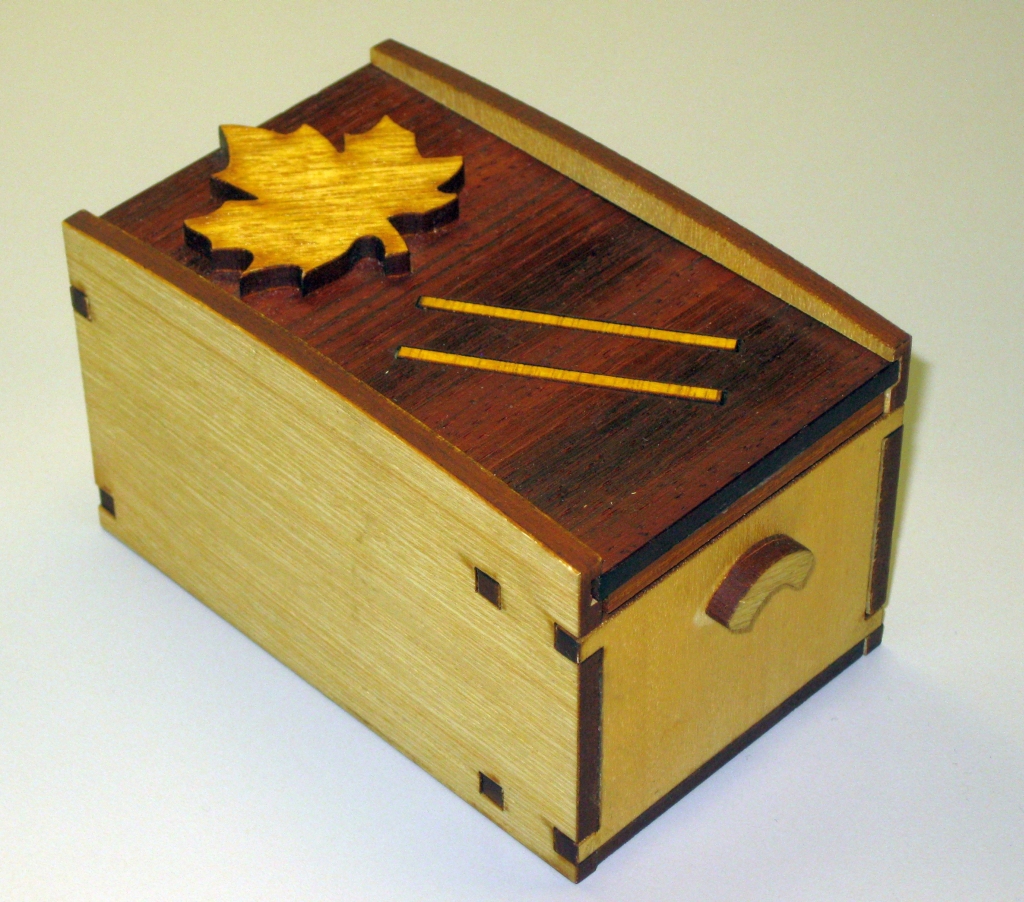
Radbox by Jean Claude Constantin

Radbox by Jean Claude Constantin

As you can see from the image above, the design is quite striking. The Maple panels, Paduak top with Maple leaf and banded Maple insets really looks good. If you have any misconceptions that laser cut puzzles are ‘cheap’ or somehow ‘low quality’ then this box is a good example to prove that as a false statement. There are a lot of really nice design choices such as the gentle curve on the top of the side panels and the curved handles on the sides which don’t change the mechanism of the puzzle, but really help to finish the puzzle. At 4.5″ x 2.75″ x 2.5″, the box is a good size, and has very little reduction in inner dimensions so you’ll be able to store something around the size of two packs of playing cards inside.
Examining the box you’ll quickly see that at one end there is a peg attached to the sliding lid, and at the other you can see something curved at the other end, which all together stops the lid moving more than a new millimeters. Shaking the box, there’s a slight rattling, and spinning or blowing on it doesn’t seem to do much to move the lid any further. Some careful examination will lead to some discoveries about how the locking mechanism works, before making you realise that you may not have fully understood what’s going on as the box remains resolutely shut.

The Radbox opened.

The Radbox opened.

The mechanism is simple yet clever and once you understand how it works, you can open the box repeatedly and fairly quickly. Although it is similar to mechanisms I’ve seen in other boxes, it does take the idea one step further making it worth a look. Overall a fun box, and great value if you can get your hands on one.

Mirrorkal – “You and Mona Lisa”

Several months back, I received a copy of “You and Mona Lisa”, a Mirrorkal puzzle, designed by Ivan Moskovich and produced by Recent Toys. So why has it taken me so long to write about it? Well truth be told it’s taken me this long to solve it!

Mirrorkal - "You and Mona Lisa" Solved

Mirrorkal – “You and Mona Lisa” Solved

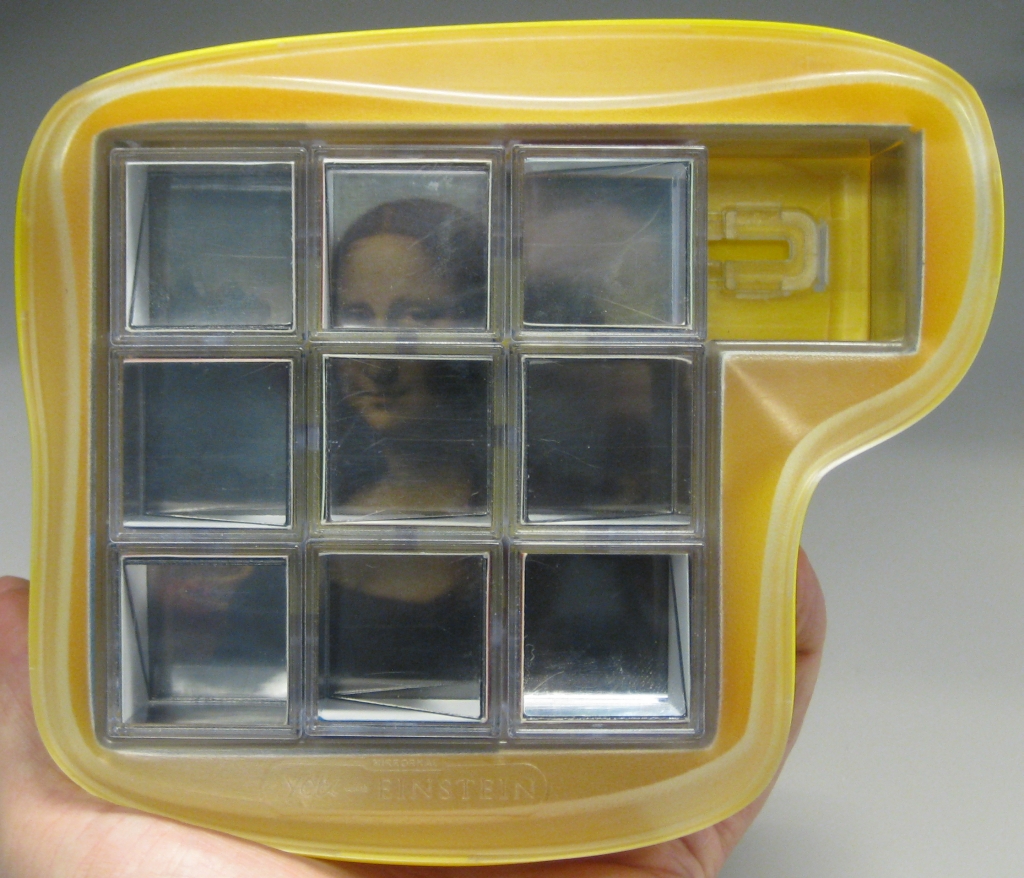
The puzzle is an interesting variation on the 15 puzzle, with this version having 9 tiles, plus the space needed to move the tiles which is conveniently placed off to the side of the puzzle. What makes the puzzle unique and quite so challenging is that the image you see when looking at the puzzle is being reflected by an angled mirror from an adjacent piece. The goal, as with any other 15 puzzle is to scramble the tiles, and then restore the original order so you can see the picture of the Mona Lisa.

Mirrorkal Escher

Mirrorkal Escher

The earlier version of the Mirrorkal Puzzle was a removable block version where the nine puzzle pieces were stored in a frame. In that version you are able to remove the cubes and inspect each side, allowing you to match the correct side with the corresponding mirror to make up the solution. With the sliding tile version, things are much more challenging. Since the cubes can’t be removed, you will have to either position the side of the cube you want to see with the empty space adjacent to it, or place it in the centre and surround it with mirrors pointing at the cube, to allow all sides to be seen. Having done this you’ll need to remember what picture is where, and then position each tile in the correct location to make the final image. Oh and if that’s not enough of a challenge, remember that since you’re dealing with mirrors, the images are upside down on the sides of the cubes!
If you’d like more information on the Mirrorkal Escher, Brian and Gabriel have both written about it.

Mona Lisa Scrambled

Mona Lisa Scrambled

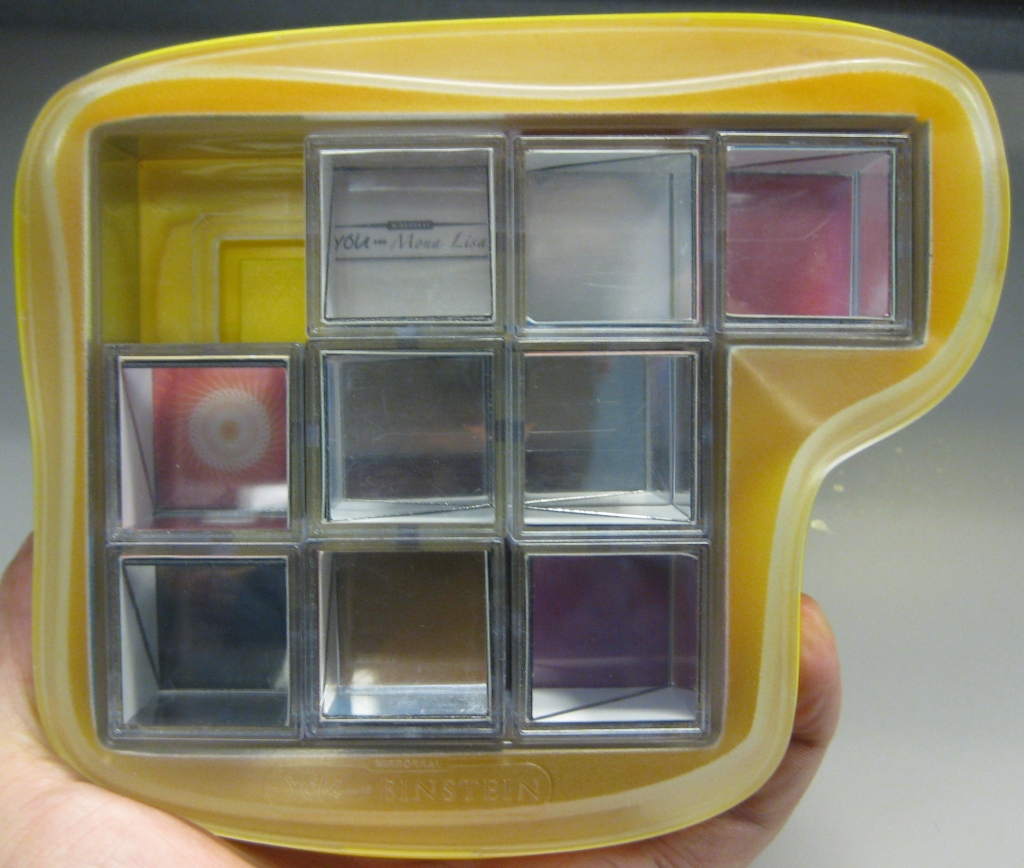
As you can see, once the puzzle pieces are scrambled, in most cases they no longer show parts of the Mona Lisa image, making the challenge even more difficult. Something else which you need to take into account is that there may be more that one cube with the same a part of the final image on it, so not only do you need to find the parts of the image, and place them in the correct spot to be reflected by the adjacent mirror, but the piece you’ve identified may not even be the correct one. This happened to me where I was trying to place the last two cubes, and they were swapped from where they needed to be. It turned out that I needed the other piece with the same angled mirror, which I’d already placed in the opposite corner.

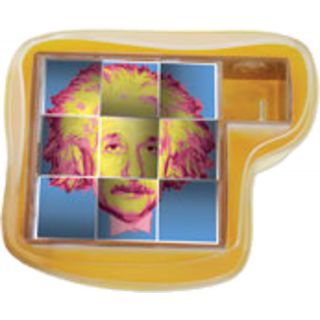
Mirrorkal - "You and Einstein"

Mirrorkal – “You and Einstein”

As an interesting note, the 15 style version of the puzzle originally used an image of Einstein, but was later changed to the Mona Lisa. The workings of the puzzle is still the same, just the images which were swapped. In fact if you look at the frame of the puzzle, it still reads “You and Einstein”. Puzzle Master still has copies of the puzzle with the original Einstein image if you’d like that version.

Whether you’re looking for the slightly harder challenge of the sliding tile version or a simpler puzzle with the framed cubes, both versions of the puzzle are well worth picking up and I can highly recommend them. These would make great stocking fillers, although you may need fairly big stockings!

For some more thoughts on the Mirrorkal – “You and Mona Lisa” puzzle, Gabriel’s Review has some more thoughts.

Note: Sorry about the poor images in the review. Given the mirrors in the puzzle, it’s not easy to photograph.

Cerebral Rings

The Cerebral Rings puzzle is an interesting plastic puzzle produced by Magnif. My copy came to me from Puzzle Master in the last shipment of puzzles I had arrive from them. This was a puzzle I was interested to play with as it seemed rather different than many I’d played with recently, and I hoped would be a nice change of pace.

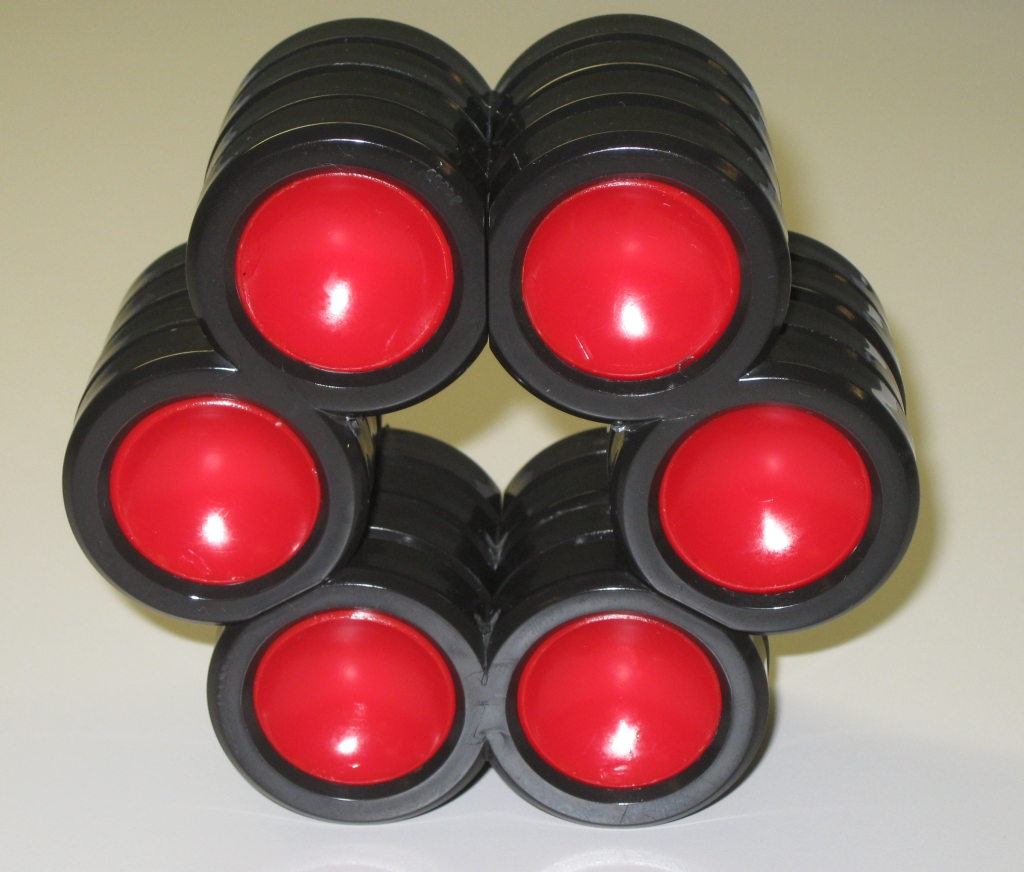
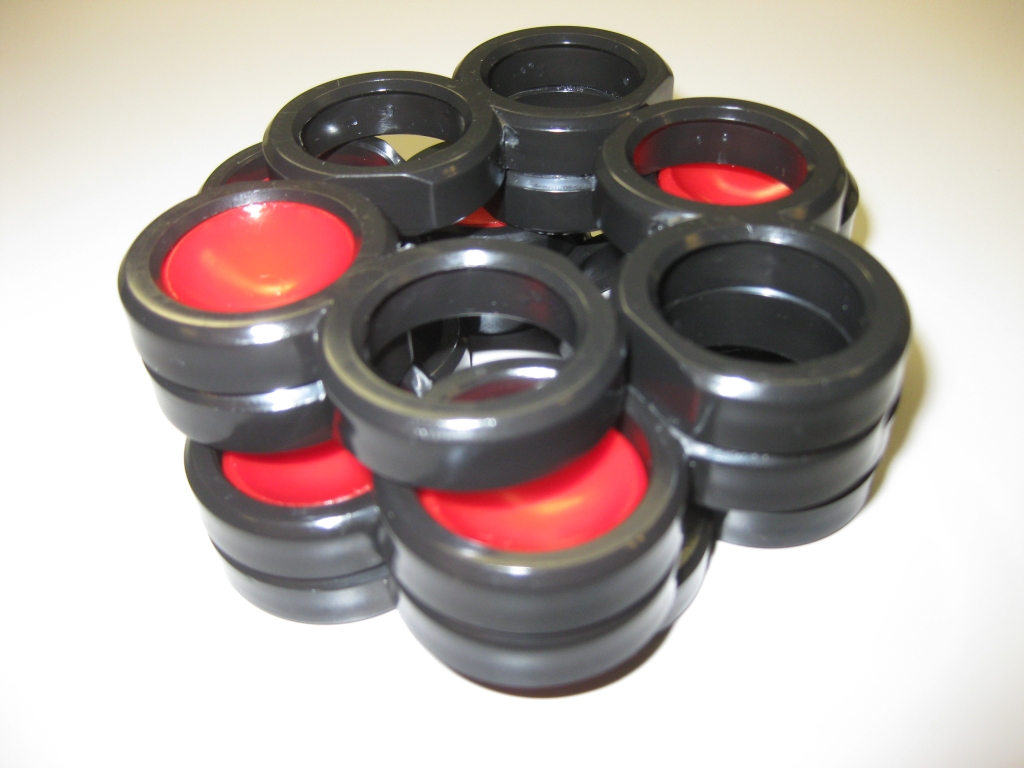
The Cerebral Rings in their starting position

The Cerebral Rings in their starting position

The goal of the puzzle is to move the red plungers inside the circular shafts to positions where it will allow the black rings to slide apart in a coordinate motion, separating the three parts which make up the rings. Measuring 4″ wide x 1.75″ high the puzzle is a good size and the plastics used have been well finished to give a really glossy appearance as you can see in the photographs. All the edges are nicely chamfered and the curves used in the plungers mean that they are comfortable to press when you’re playing with the puzzle. The fit of the pieces is good, making it difficult to see the seams where the three frame sections join.

One downside which I have to mention about this puzzle is that the inside of the tubes have been coated fairly heavily with a lubricant. Clearly the idea was to make the pieces move easily inside the tubes. Unfortunately, at least on my copy the amount of grease used was excessive, and then you push the red plungers inside the tubes, your fingers end up covered in grease, making for a fairly unpleasant experience when playing with the puzzle. The first thing I did when I opened the puzzle was to take a rag and clean out all that grease. Sadly even with all the grease in there to start with I found there were times when the plungers would get stuck in the tubes and require significant force to move them past the obstacle which they were stuck on, allowing full travel through the tube.

From the Manif website, the puzzle comes with the following description: “Fabled to have been found among the effects of the renowned astronomer Johannes Kepler, was an early version of the Cerebral Rings. This challenging puzzle baffles astronomers, astrologers and mathematicians alike. It was said that Kepler’s students had to master the expanding layers of the Cerebral Rings and the red plungers within, solving the puzzle in order to progress to apprenticeship. There are hundreds of possible combinations and only 8 solutions.

Personally I think Kepler would be turning in his grave at the idea that the puzzle was used as part of an apprenticeship, as the puzzle really isn’t that challenging, however it makes for a good story! It is true that depending on how you count a move, there may be hundreds of combinations, and only eight solutions, but sadly once you’ve found one, there’s really no need to find any others, as there’s not enough of a difference to make it worthwhile. That said there are some nice elegant symmetrical solutions if you care to look for them.

The Rings sliding apart

The Rings sliding apart

Note: The image above does not show a solution. Ed

As you can see once you’ve found the correct combination, the rings slide apart passing each other in a coordinate motion which means that they do indeed expand as they come apart. The fit of the pieces is very good here, so starting the motion can be quite a challenge. Finding the correct spot to push on the pieces so that they glide past each other is not obvious, and as with many puzzles, placing your fingers so that you’re not blocking the motion can be tricky.

Puzzle Master rates the puzzle as level 8/10 (Demanding) and Manif rates it 2/4. I have to say I think it’s closer to the lower end of the scale but could certainly provide a good challenge if you’re not paying attention. I enjoyed playing with the puzzle even if it did take a very short time for me top solve it the first time, somewhere under 5 minutes. It was a good change of pace to the other puzzles I’ve been playing with recently and would make a good Christmas present for the younger puzzler.

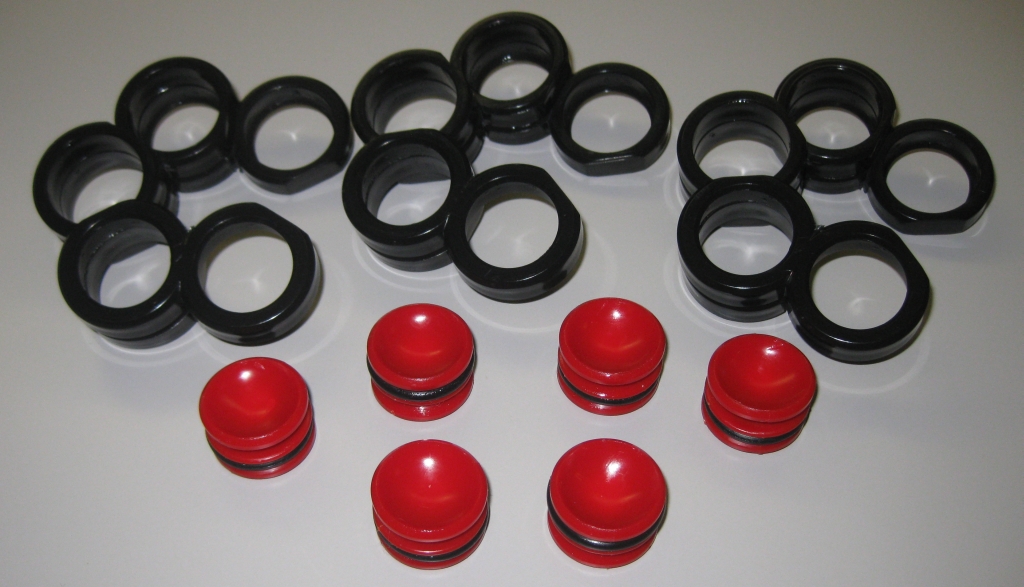
The Cerebral Rings pieces once solved

The Cerebral Rings pieces once solved

Once you’ve solved the puzzle everything comes apart, leaving you with the six plungers, and three black ring sections. The rings are all identical so re-assembly is fairly simple. Overall a fun distraction even though it’s not an overly challenging puzzle. It is well made, and the contrasting colours will make it stand out on the puzzle shelf. Definitely one that people will pick up and have a fiddle with.