Firewood

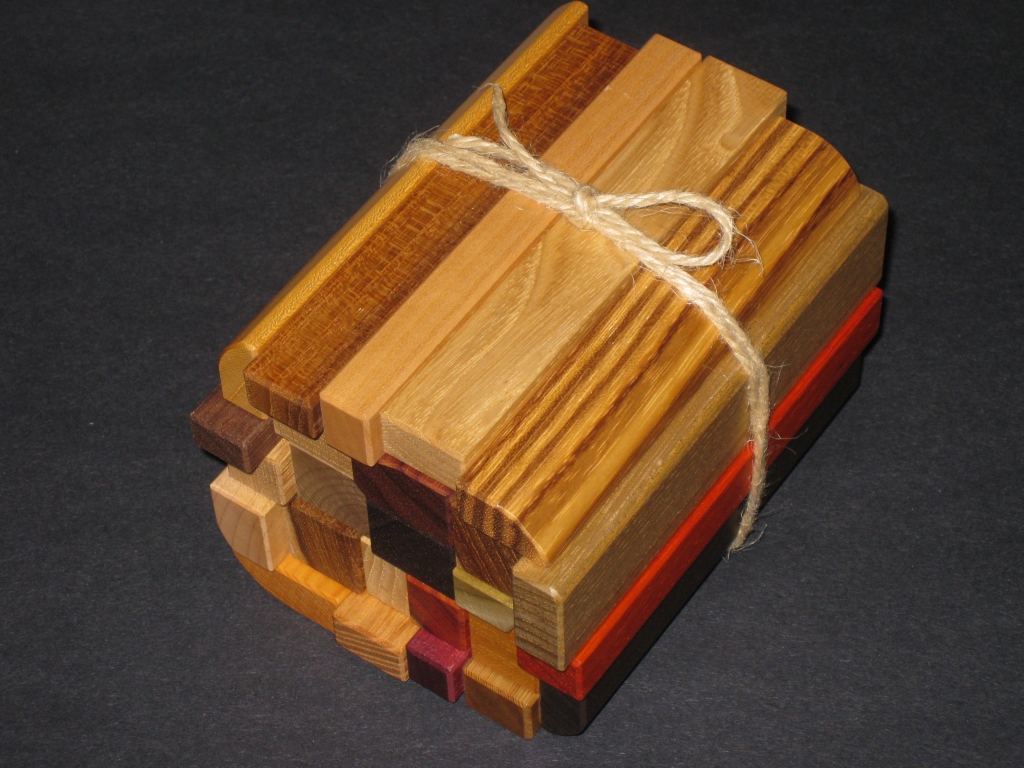
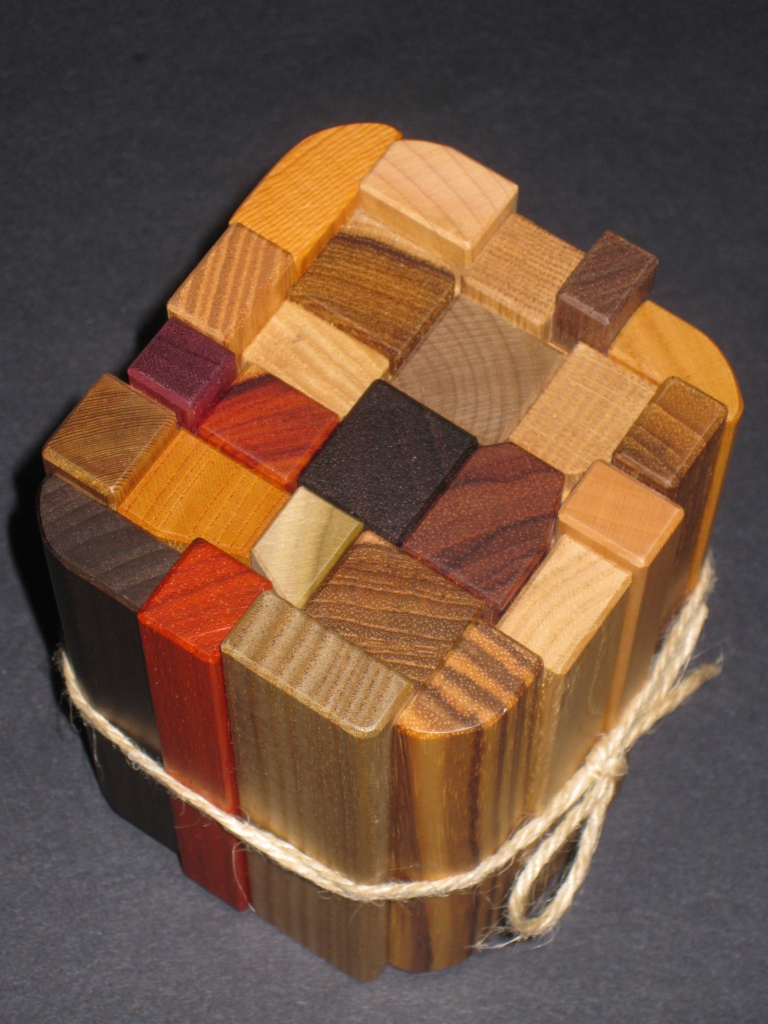
Firewood by Hiroshi Iwahara is another beautiful looking puzzle box available from the Karakuri Creation group. Living up to its name, this pile of sticks made from a number of exotic woods really does look like a bundle of firewood, wrapped with string ready to be sold.

Firewood

Firewood

The puzzle was designed for an exhibition with a “forest” theme. Created in April 2011 this is the newest box from Iwahara(at the time of writing), and is a really cute box. It’s not the largest puzzle box out there, but is still a pretty good size at 5″x 4″x3.75″. Sitting in your hand, the puzzle feels good, the rounding of each firewood log makes it very tactile, and you find yourself turning it round and round. Now this may be because you can’t find out how to open it, as none of the logs in the centre of the puzzle seem to move and the outer logs are all glued together.

With over 10 hardwoods used in the puzzle, there’s a great array of colours and textures, making this a real feast for the eyes. I know that at the very least there’s Katsura, Oak, Rosewood, Zebrawood, Purpleheart, Bloodwood, Bubinga, Cherry, Black Ebony (big guess on the ebony) and Maple in there, based on my limited ability to identify woods from visual inspection. (Note: I may be entirely wrong, as there’s no conformation from the Karakuri group on this, so it’s all a guess)

Firewood

Firewood

I spent around 10 minutes poking and prodding the logs on this box before I found the trick, and the drawer popped open rather satisfyingly. It’s not the most challenging puzzle box out there, but it does exude a charm which is hard to pass up. The ‘lock’ really is incredibly simple, and it makes me smile each time I close it, with the drawer pulling itself back into place, then pop it back out with the trick. Very simple, but hugely satisfying.

Accidents Happen

Since I’ve started creating puzzles in wood, I’ve been learning quickly and starting to produce some puzzles that I’m very proud of. Over the weekend I started putting together a run of puzzles for a craft fair that is coming up, with the hope of selling a few puzzles there.

I had a batch of sticks cut and spent Saturday morning gluing up pieces. It’s amazing just how quickly you use up the sticks you have cut so after about an hour I went to cut some more sticks. I started rough cutting some sticks from the redwood planks I have and was getting on great.

If you’re a nervous reader, I’d stop reading now…

I was getting to the end of the batch, and it seems I was a little careless. When moving a piece of waste wood from the table, I got my thumb a little too close to the blade. The result, lots of blood and a good chunk taken out of my thumb.

I spent the next few hours in the emergency room where the surgeon operated on my thumb. So I now have 2 pins in my thumb and it’s going to be a bit shorter than it was. I’m lucky, the saw took a clean cut through my finger, clean through the bone, but didn’t sever the top of my finger and didn’t hit the joint. So I have full feeling, and full motion.

It’s a harsh lesson, that it only takes a second for things to go wrong. I’m going to be just fine (although in a lot of pain just now) and I’ll have a nasty scar to remind me to watch where I put my fingers.

I’ll be back to making puzzles in no time, but for now things have to heal and I need to take stock.

Warning: table saws are dangerous. Handle with care!

Cast Nutcase

This entry is part 5 of 8 in the series Hanayama Cast Puzzles

Cast Nutcase is another puzzle in the Cast series from Hanayama designed by Oskar van Deventer. Measuring in at 1.25″ diameter, by just under 2″ long, the goal is to remove the small nut encased inside the hollow part of the puzzle by taking the two halves of the puzzle apart. Thanks to Puzzle Master for sending me this puzzle to review.

There is a second goal to the puzzle, but I’ll talk about that later …
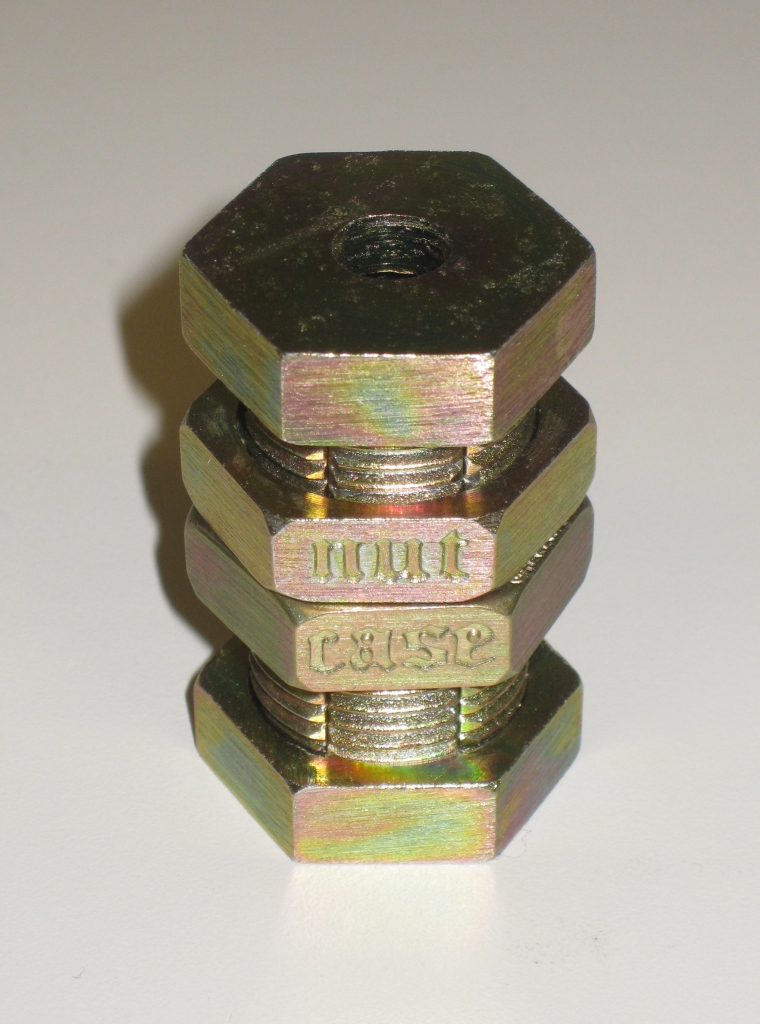

Cast Nutcase in the starting position

Cast Nutcase in the starting position

As you’d expect, the puzzle comes in the standard Hanayama black and gold packaging, with the puzzle held in shrink wrapped plastic to keep it in place. The puzzle consists of 5 pieces, including the small bolt that can be seen through holes in the ends of the puzzle. The two bolts threaded onto the centre of the puzzle will spin up and down the threads and each has ‘Cast’ and ‘Nut’ engraved into opposite sides of the bolt. The familiar Hanayama logo is also engraved into the edge of the bolt.
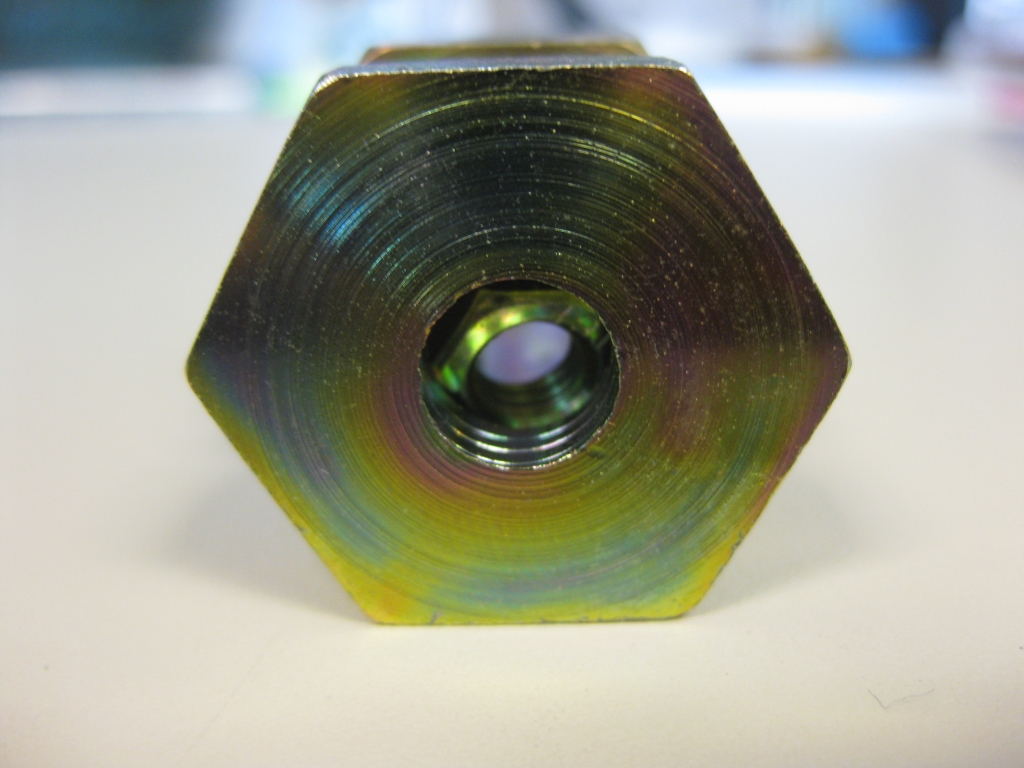
Closeup showing the small nut trapped inside
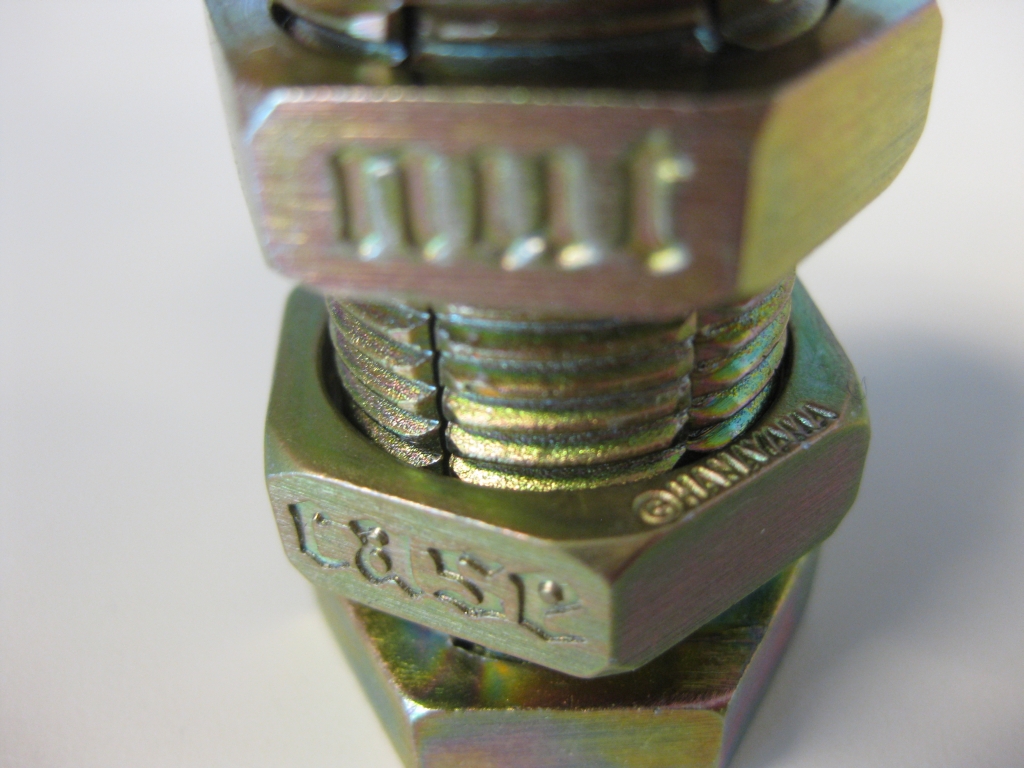
Closeup showing the small nut trapped inside

Closeup of the engraving on the nuts

Closeup of the engraving on the nuts

The look of this puzzle is interesting as a galvanised, bronzed bolt, with some interesting patina patterning on various surfaces. It may not be the prettiest of the Hanayama puzzles, but it’s by no means ugly either. Looking at the puzzle, it seems impossible, as the two nuts in the centre of the puzzle are threaded onto a seemingly full thread which extends from one end of the puzzle to the other. The only clue as to what is going on is that the thread is not made from a single piece of metal, and it split into sections. Pulling on each end of the puzzle will show that the sections are alternately connected to either end of the puzzle, so there is some hope that the parts will separate.

Rated as 6/6 by Hanayama and 10/10 – Mind Boggling by Puzzle Master. I have to agree with this rating. It’s a tough puzzle and will certainly test you whether you’re a seasoned puzzler or not. It took me around an hour to open this one, and even then I think I may have been a little lucky. I could certainly see it taking a lot longer to open this puzzle. You should be able to figure this one out by looking closely at how things are put together, and from that work out what’s going on, but there could be a lot of trial and error before you get it opened. If you get really stuck, there’s a solution here. For me, this puzzle is a little like picking a lock, and feeling your way around what’s happening with little changes to the parts of the puzzle as you go.
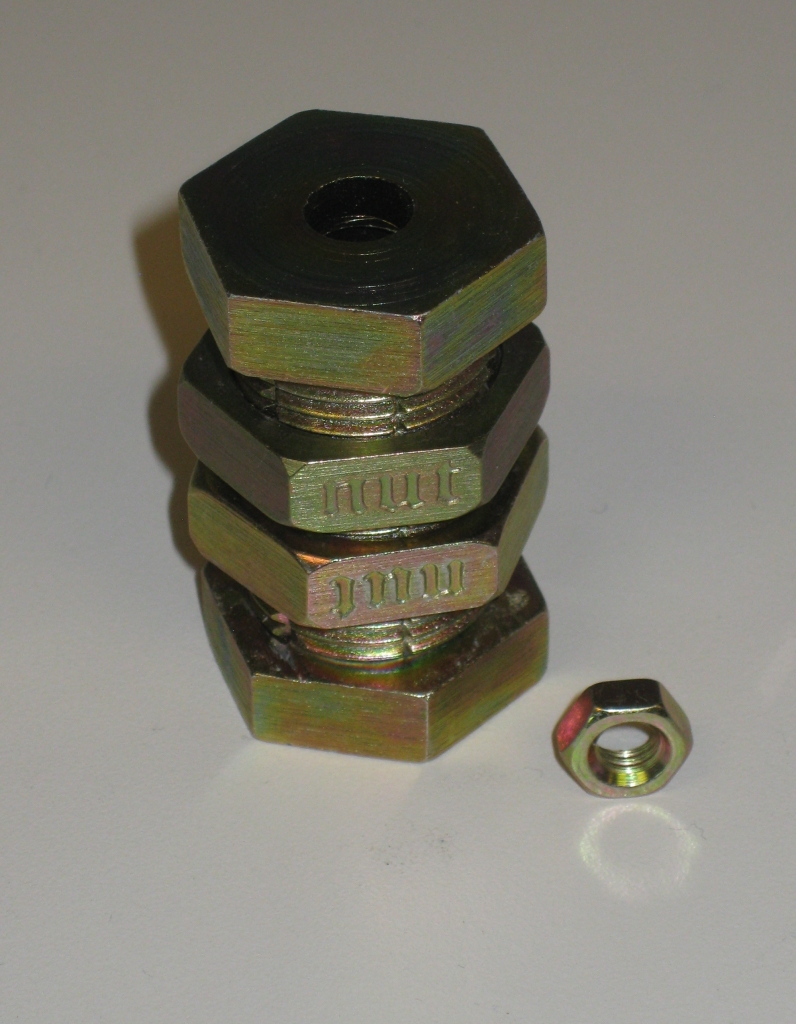
The small nut free from it's "Nut Case"

The small nut free from it's "Nut Case"

My biggest problem with this puzzle is that the nuts don’t turn smoothly on the threads if there’s any misalignment at all. Given the way that the puzzle opens, and the design on the nuts, this is inherent in the design, and I don’t think there’s much that can be done to avoid it. Sadly, I feel that the sticking of the nuts as you turn them does detract from the overall experience, and I had several times where one of the bolts would lock up, and significant banging of the puzzle on my desk was required to get things moving again. Given that very precise alignment of the various parts is required to solve the puzzle, the stickyness does make things less enjoyable. Having solved this a number of times, keeping the threads aligned by pushing together on each end of the puzzle with one hand while turning the bolts helps however that is only useful for the first half of the solution. If things get misaligned, then it’s tough to get it back in sync.

Overall this is a challenging puzzle, but I fell there’s a little too much guess work and hidden trickery to make this a stand out puzzle. If you want a real challenge, then pick this one up, but if you’re just looking for a fun puzzle, I’d say it’s best to pass this one by.

The Case Nut Puzzle

Now, remember way back at the start, I said there was a second goal …
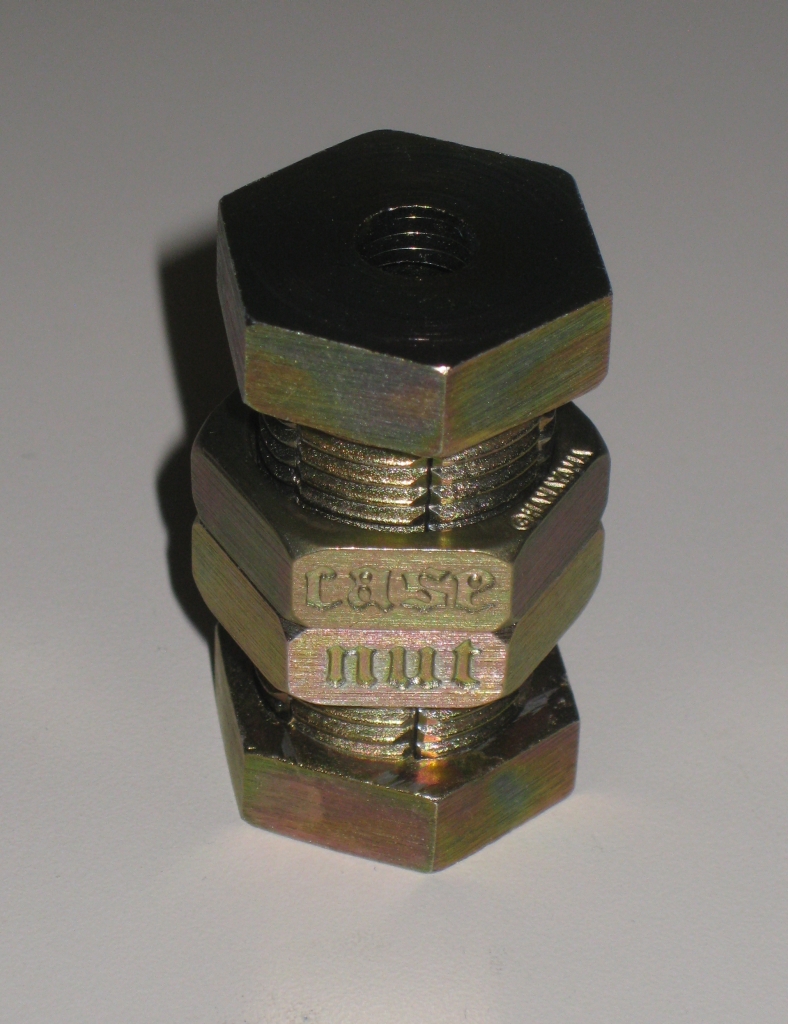
The second goal for the puzzle, just to prove it's possible

The second goal for the puzzle, just to prove it's possible

If you think that the first goal is tough enough, then I’d say stay away from the second. Once you’ve solved it a few times, and you know what’s going on, give this a shot.

Warning: this is a lot tougher!

The nuts on the puzzle are designed to go on in one orientation, so that when closed they spell “Nut Case”. But it is possible to reverse the orientation so that they spell “Case Nut”. The photo above proves that it’s possible. Now I will say, make sure you understand how to open it normally before doing this, as all the little markers you’ve used to solve the puzzle in its first configuration will be of no use to you! When putting the puzzle into this second configuration, things are much tougher, so don’t say I didn’t warn you. I think this puzzle may just go up to 11!
Involute – Finishing a Puzzle

Recently I wrote about my first attempt at building a puzzle in wood, from scratch. You can read about that here.

At the end of that post, I had a working puzzle, that I was very proud of, but it still wasn’t finished. By that I mean that it was finished to the point it worked as a puzzle, but there was no finish on the wood. So I set about resolving that and with advice from a few fellow puzzle makers, here’s the result of that process.

Involute - Lacquered and unfinished side by side

Involute - Lacquered and unfinished side by side

First up was to sand the outside of the puzzle, so it is ready for the eventual finish, and to break all the edges of the puzzle. Working my way through the grits, I sanded at 120, 150, 180 and 220 grit. Straight off the saw, the edges are all very sharp, and it’s not the nicest thing to hold. By passing the edges over some 220 grit sand paper, it takes that sharp edge off, and makes the puzzle much more appealing in your hands.

Next thing to do was to apply a coat of lacquer to the puzzle pieces. This does a couple of things. It brings out the grain in the wood and gives some sort of protection to the wood from our greasy fingers. Going with some recommendations, I used 1 part satin lacquer, 2 parts lacquer thinner to apply a very thin coat. Leaving the pieces for 10 minutes after applying then rubbing off any excess with a soft clean rag.

The results are pretty obvious when you look at the two puzzles side by side. Given how much time I spent getting the tolerances right, you’ll be pleased to know that the lacquer really doesn’t add any thickness to the pieces given how thinly the lacquer mix is applied. It’s pretty much flush with the surface, so no real issues that I can tell, and my puzzle making friends seem to concur.

After that it’s time to apply a couple of coats of wax to the pieces. This helps to make sure that things slide nicely. I had a liquid wax recommended to me, as it’s much easier to brush a liquid into a corner than it is to use a wax paste and a rag. If you’re interested, I’m using Watco Satin Finishing Wax.

Finished involute, the Ren wax just adds that extra polish

Finished involute, the Ren wax just adds that extra polish

Finally I use some Renaissance Wax to buff and polish the outside faces. It’s not cheap stuff, but it is effective. You really don’t need much which is probably just as well. This really brings out the wood, and gives a good protective layer to the outside of the puzzle. If it’s good enough for the British Museum, its got to be good enough for my puzzles!

If you’re wondering, the first fully completed puzzle is now in the collection of a good friend. I’m waiting for him to open the puzzle to let me know what he thinks of it!

Chiyo-Musubi

“When we tie up a belt or paper tape well, a knot that is called “Chiyo-Musubi” is completed. In Japan, it is said to be a lucky knot.”

Chiyo Musubi

Chiyo Musubi

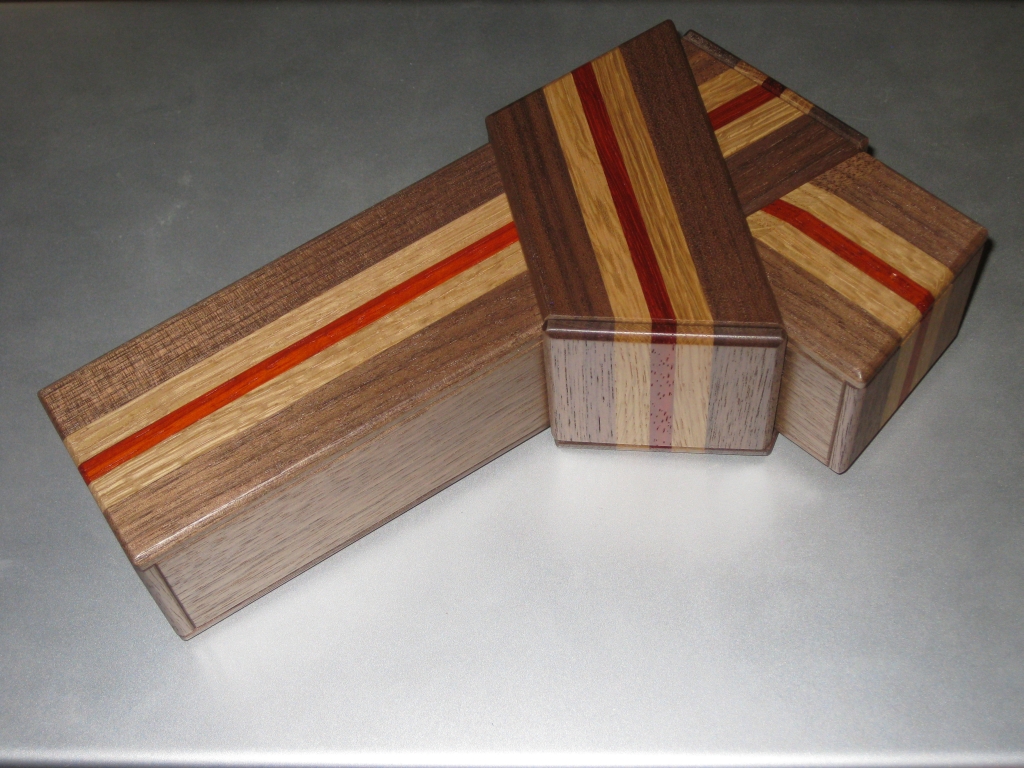
This fine looking box from Hiroshi Iwahara of the Karakuri Creation group is a sliding puzzle box with two hidden compartments requiring 19 moves to open both. The interesting point about this puzzle box is that the slides which conceal both hidden spaces cross one another, so the resulting mechanism is much harder to produce than a standard box. Iwahara notes that the shape of this particular knot is a Pentagon, but it is also possible to produce a Heptagon. He’s not planning to make a Heptagon version as a puzzle box though.

Created back in April this year, and measuring 9.5″ x 5″ x 2.75″ approximately, this is a big puzzle box, and it feels really solid when you’re solving it. I don’t exactly have small hands, and this box feels big to me when I’m working on it. I didn’t do too well on my wood identification in the video, as the only thing I got right was the Walnut! So to correct that, the box is made from Walnut, Oak and Angsana, giving it the striking appearance. To look at it, you really can get the feeling that someone has taken a plank of wood and knotted it like a belt.

I borrowed this puzzle box from Derek Bosch (yes he has a good collection and has been very kind to lend me chunks of it at a time), so I’m not sure if it’s just his copy or not, but the panels are fairly loose, to the point that when solving it, some of the panels would slide back to where I’d moved them from as I turned the box over in my hands. While it doesn’t take away from the box, it can make it a challenge to open, as you have to be careful that panels don’t slide around on their own as you move the box. Not realising that a panel slid back after you moved it preventing further progress can be a pain.

This is a really nice puzzle, and I have to admire the design, especially the ability to have pieces passing over and under each other to make a very slick puzzle. If I’m honest, it’s not my favorite puzzle from Iwahara, but it’s by no means a bad puzzle! It took around 10 minutes to open the box and find both hidden compartments the first time. Having gone back to it later, I can see that this could take much longer as the order you open the compartments does seem to come into play, so I may have been lucky the first time and opened them in the correct order.

Overall, a very nice puzzle and one which would certainly stand out next to other puzzle boxes, both for its size and striking contrast of woods.

Cast Violon

This entry is part 4 of 8 in the series Hanayama Cast Puzzles

Cast Violon is yet another superb puzzle from the Hanayama Cast Series. This puzzle was originally created by Joseph L. Litle in 1965, the Cast version was adapted by Nob Yoshigahara. Puzzle Master kindly sent me this puzzle to review.

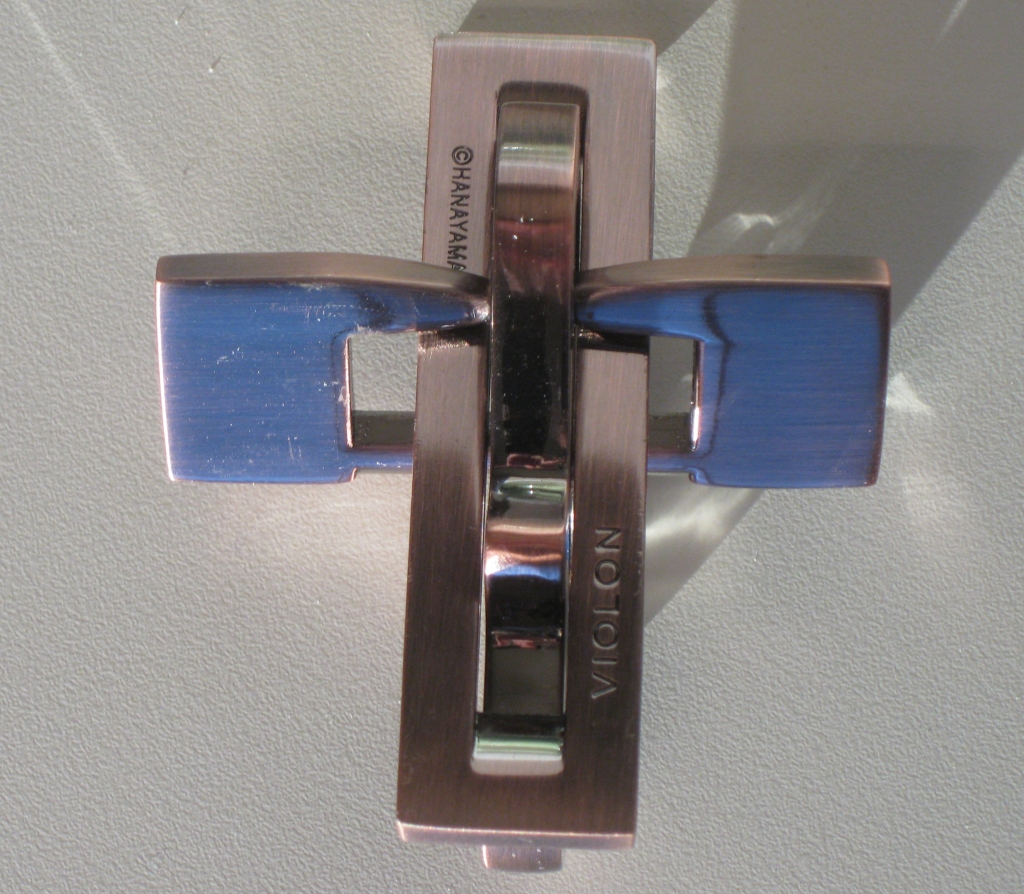
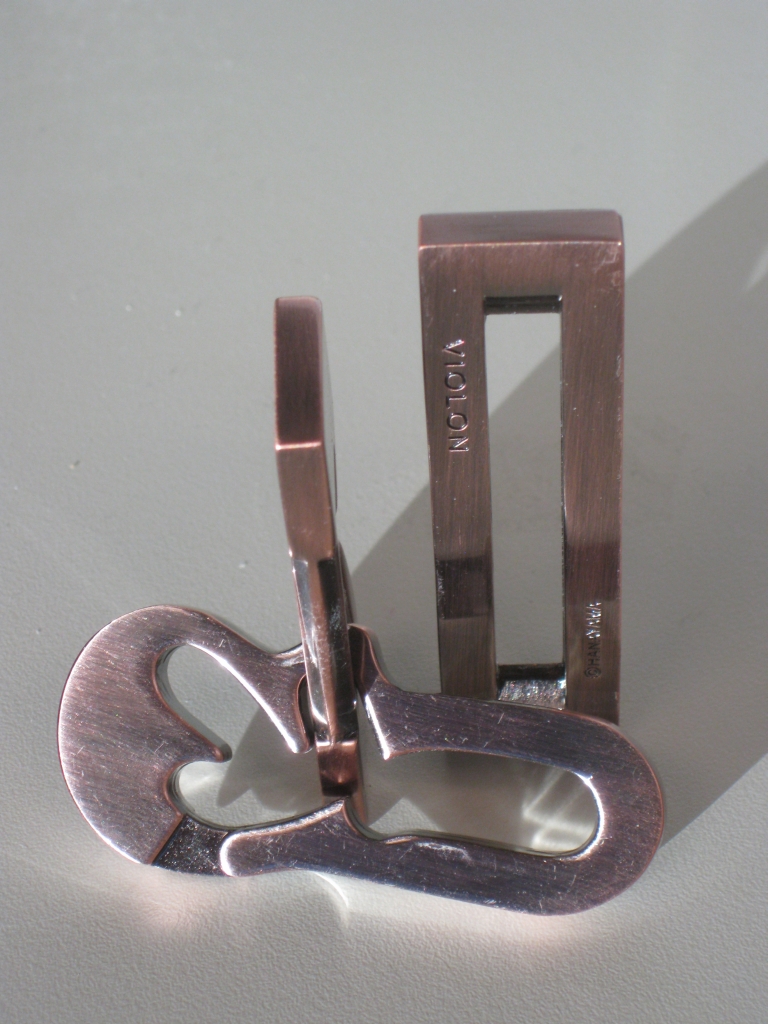
Cast Violon in the starting state.

Cast Violon in the starting state.

Nob had this to say about the puzzle.

“Patented in America in 1965, this puzzle was originally created by Joseph L. Litle. The idea to make this puzzle came to me after playing with a wooden copy built for me by my close, but now deceased friend, Tadao Muroi. The proportions have been changed considerably from the original plan in this new version. With this puzzle being styled after a violin and its strings, the word here is…’string’.

-NOB 2003-“

From the top, it’s difficult to see the violin shape which gave the puzzle its name, however this side view shows things much more clearly.

Side view with the puzzle solved

Side view with the puzzle solved

I really love the aged bronzed look of this puzzle. It suits the style perfectly, and as is normal with the Cast series, it’s a heavy puzzle in your hands. The pieces are all solid and well made, so there’s no fear of anything breaking or bending as you play with the puzzle. It also seems to have a clear coating over the finish to protect it, which seems to be important as I’ll mention later.

The body of the violin creates a maze of sorts which the broken loop runs around. The aim of the puzzle being to remove the rectangular piece with the Hanayama logo and puzzle name from the rest of the puzzle. The thinner section in the violin allows the broken loop to either be fully inside the violin or to run around the outside and it should come as no surprise that a combination of both states is required to solve the puzzle.

Have a look at my video review to see the puzzle close up and get an idea for how the puzzle moves.

At first look, the exit point isn’t entirely obvious, however with a little amount of playing it should become clear where you need to take the ‘string’ off. Puzzle master rates this as a level 6 – tricky (scale of 5-10), and Hanayama rates it as a 2 (scale of 1-6). I think it’s a fair estimate of the difficulty. I was able to solve this in around 5 minutes, and was able to return the puzzle to its starting state in just a few more.

The alignment of the pieces when taking the puzzle apart and putting it back together is crucial. If you’re off by a fraction, getting the pieces apart or back together becomes virtually impossible. Having said that, I’ve seen the pieces some apart in a number of different ways and I’m not quite sure how I managed all of them as the pieces don’t seem to go back the same was I watched them come apart! Get everything just right though, and the pieces slide together seamlessly.

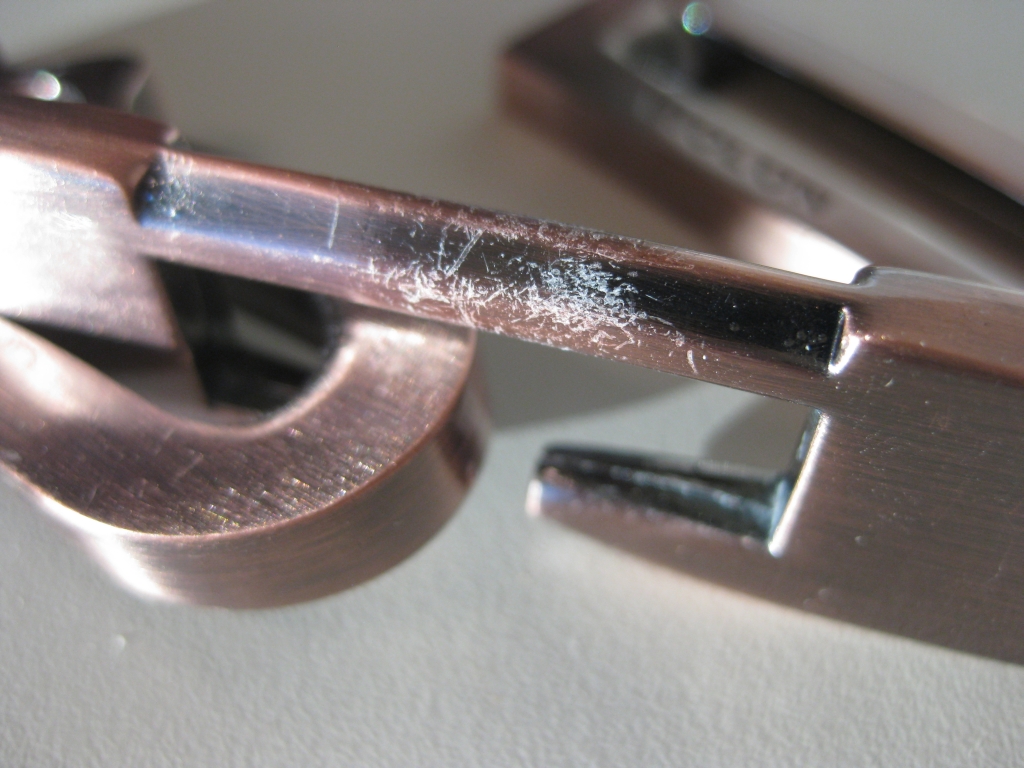
The scratches that have appeared on my puzzle.

The scratches that have appeared on my puzzle.

My only small gripe with the puzzle is that on my copy, the finish has started to become scratched, showing bare metal underneath. From a distance, you’d never know, and it is minor, however it’s not something I expected from a Hanayama puzzle. I think the clear coating that I mentioned earlier just didn’t make it onto the section of the puzzle, as there’s no issues anywhere else!

Overall, this is a nice puzzle. Not tot challenging, and will be able to be solved in a reasonable time by most people who pick it up. If you’re still struggling, you can download the solution here. You can’t really go wrong with a Hanayama cast puzzle, and this is no different.