Popplock T6

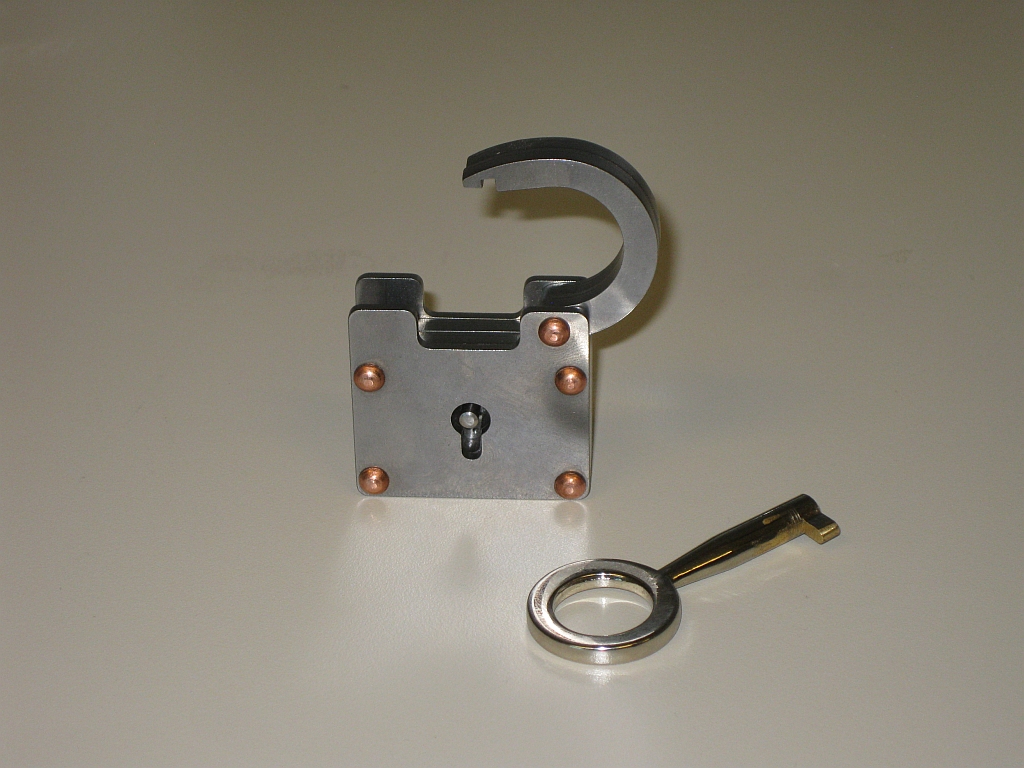
The Popplock T6 is the latest trick lock to be made by Ranier Popp. This review is a little special as it’s the first video puzzle review I’ve done. Things are a little rough round the edges, and if you like it, then I’ll do more, and hopefully they’ll get better over time.

Despite what I say in the video, the rivets are copper, not brass. Sorry.

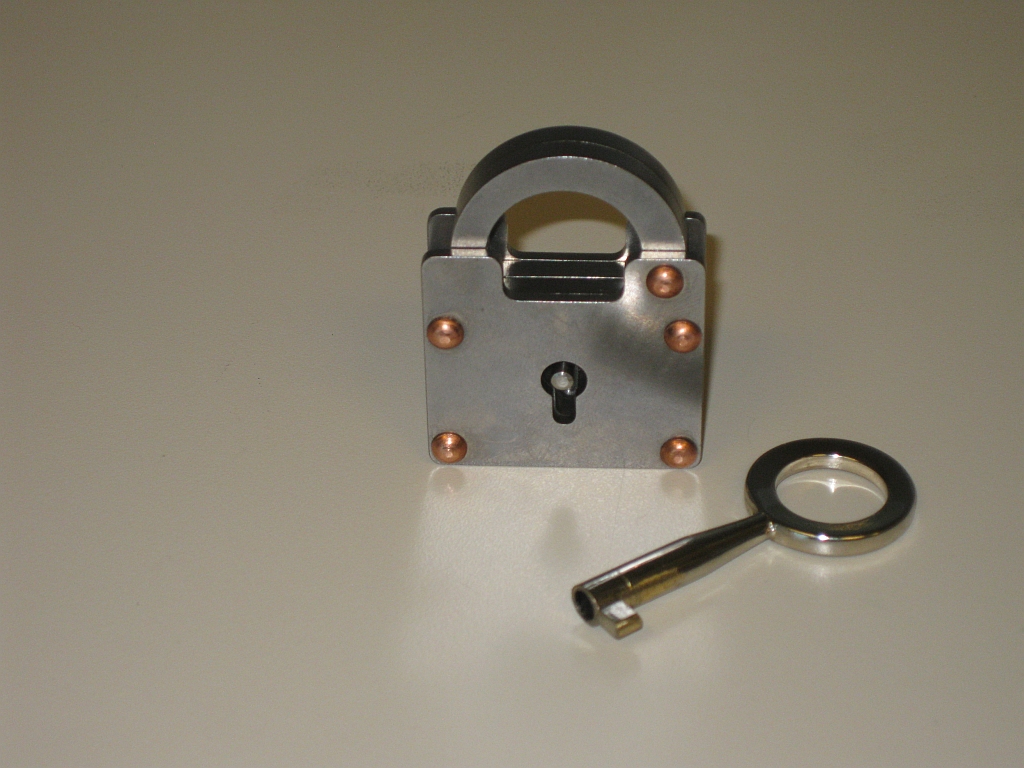
The T6 is 1.5″ square and comes in two different versions. A copper riveted version, and an aluminium riveted version. The mechanism for both is the same, and it’s only the external appearance which differs. Personally, I really liked the copper look so decided to get this version for my collection. An interesting note is that the direction the hasp opens is mirrored between the two versions. You can see the differences on Ranier’s site here. I bought mine through Wil Strijbos, and jumped on the chance when he mentioned he had some available. They are also available currently from Puzzle Master.

Popplock T6 front

Popplock T6

The lock is constructed from stainless steel and as a result is fairly heavy, and very solidly built. There’s no worry about damaging this lock if it’s dropped, or passed around for people to play with. The key supplied looks to be brass (some of the silver plating on mine has rubbed off) so you know they key is solid too, and no chance of it breaking, unlike some early Popplocks where the keys weren’t so robust. As you’d expect all the tools you need to open the lock are included, no paper clips or acetylene torches required.

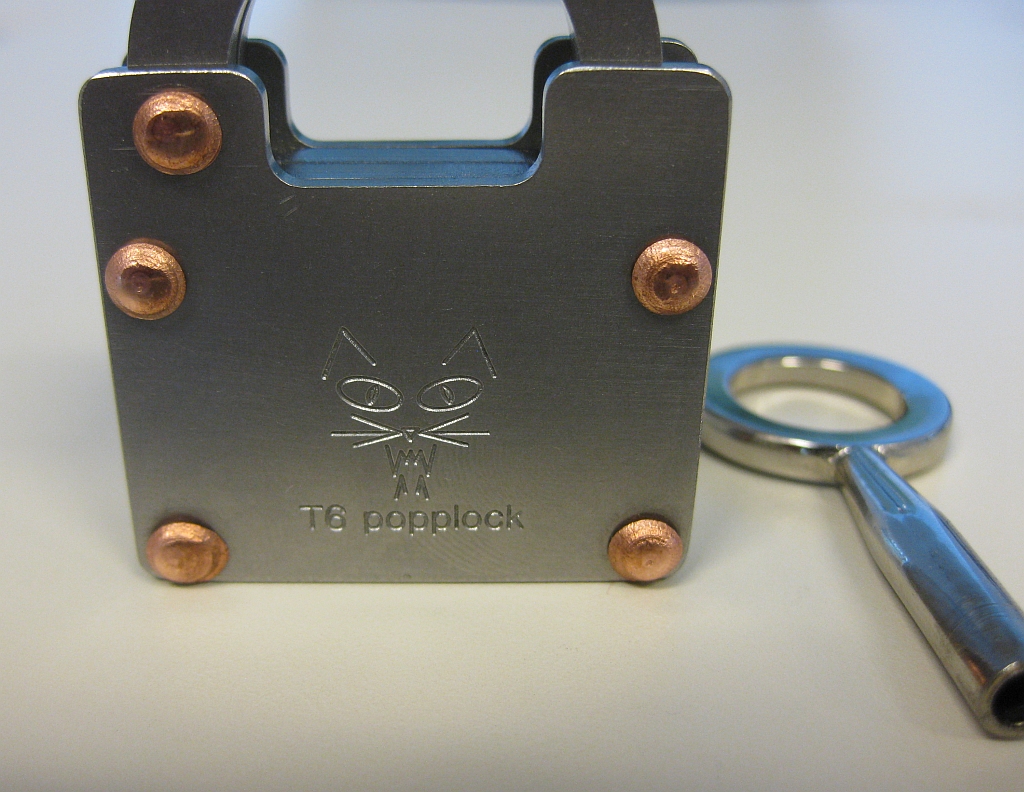
Popplock logo on the back

Popplock logo on the back

The back of the lock sports the familiar feline Popplock logo engraved into the lock, and the copper rivets mirror those on the front.

I freely admit that I’m no expert on solving trick locks. This is the first Popplock I own, and only the second trick lock in my collection. I took a fairly systematic approach to the puzzle, poking and prodding the rivets and anything which may not be as it appeared before putting the key in the lock and turning it. The movement of the key in the lock is very smooth, and there’s no real feedback turning the key in either direction. Not to mention that turning the key in either direction doesn’t open the lock! I can tell you’re surprised by this news.

Fairly quickly I noticed that there are two levels the key can be inserted at, and two ‘discs’ inside the lock which the key turns. The key can only be removed when the top disc is back to its starting position, but the bottom disk can be left at any point. Turning the key you notice a small notch in the upper disk. Surely that is important. Investigating further I found a similar notch in the lower disk and also a dot on the disk. With these reference points, I started to get a feel for what was required to open the lock, but I still had no idea how to execute it.

The opened lock

The opened lock

It took around two hours and a lot of trial and error to figure out how to open the lock, and all I can say is that it’s a clever yet simple mechanism. The mechanism is very cleverly disguised and really requires you to examine everything and assume nothing. As Ranier Popp states on his website, it’s not easy to solve. I highly recommend this puzzle, and if you’re new to trick locks, or to the Popplock series, this is a great puzzle lock to own. I may have to hunt down the rest of the series now!

Internal Combustion

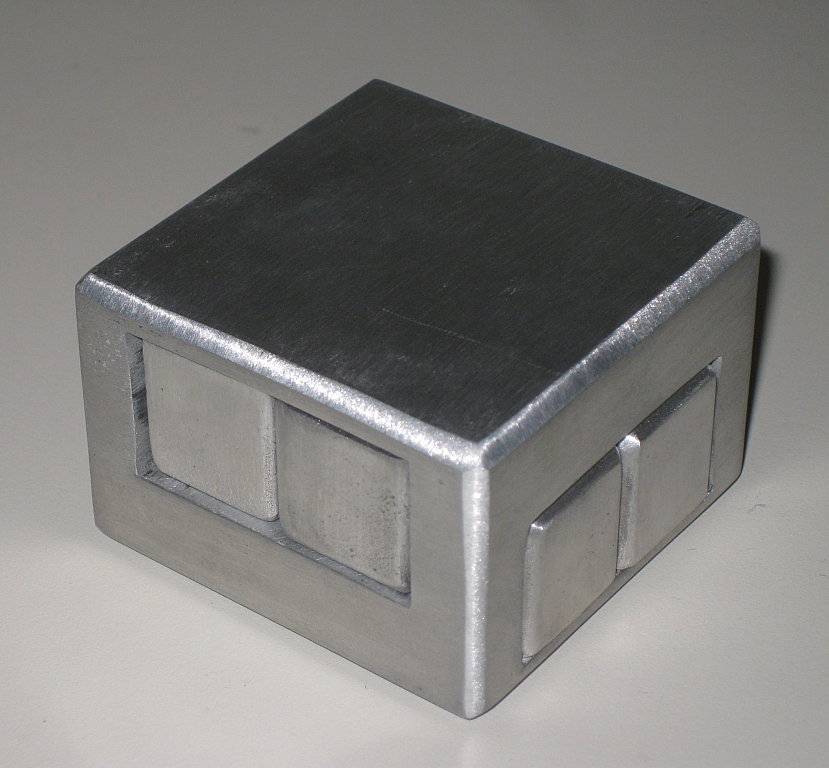
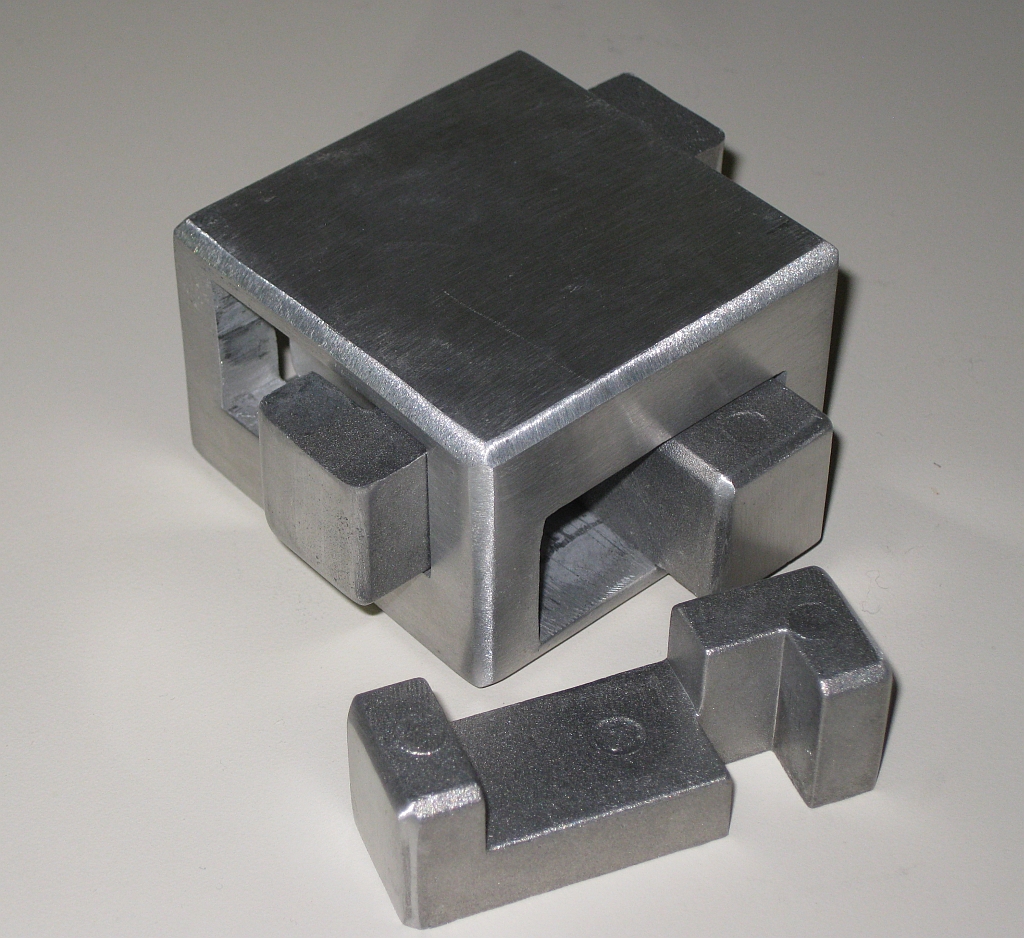
Internal combustion is a nice framed burr puzzle available in a number of formats. This version, available from Puzzle Master is made from a block of aluminuim. Other versions are available, and I have seen copies of the puzzle made in wood. The object is to remove the four ‘pistons’ from the frame. Thanks Puzzle Master for sending me this puzzle to review.

Internal Combustion

Internal Combustion

At 2 1/3″ square by 1 1/3″ high, this is a pretty solid little puzzle. Given that the version I have is made from aluminium, it’s a heavy little puzzle, and really feels good when you’re solving it. I was pleasantly surprised when I started playing with this puzzle that the fit of the pieces was fairly good. I had expected it to be a lot less precise as a mass manufactured puzzle, however that wasn’t the case at all. The movement of each of the internal pieces is smooth and makes the puzzle easy to work with and fun to solve.

Internal Combustion

Internal Combustion

As the name suggests, the movement of the pieces when you’re solving the puzzle is much like that of an engine. Each of the pieces is required to move back and forth much like the pistons of an engine to free each other piece, and eventually remove the first piece, then each of the other pieces in turn. I really like the movement when solving, it has a rhythm to it that you can’t help but enjoy.

It took around 20 minutes to solve the puzzle, then return it to its starting state. Puzzle Master rates it as Level 8/10 – Demanding, which is a fair rating. It’s certainly tougher to put back together than to take apart, especially if you leave the pieces jumbled for a while before going back to re-assemble it.

Overall, this is a good puzzle, and I’d recommend picking up a copy for your collection. See what Oli had to say about it here, and Jerry’s thoughts here

Cast Coil

This entry is part 2 of 8 in the series Hanayama Cast Puzzles

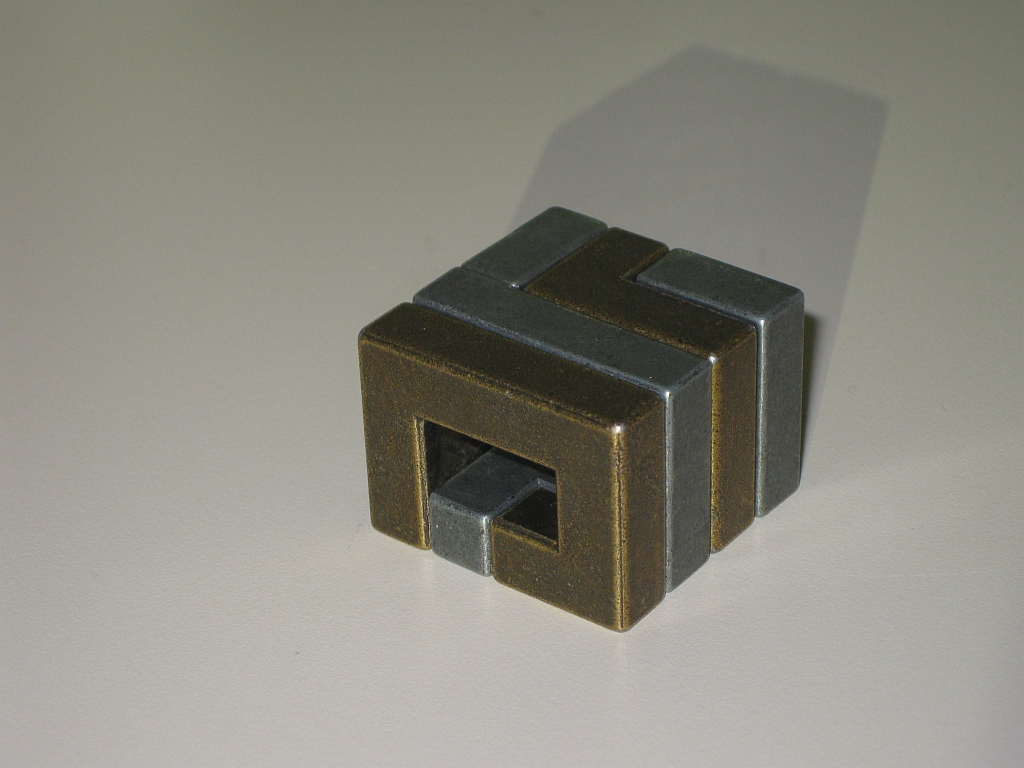
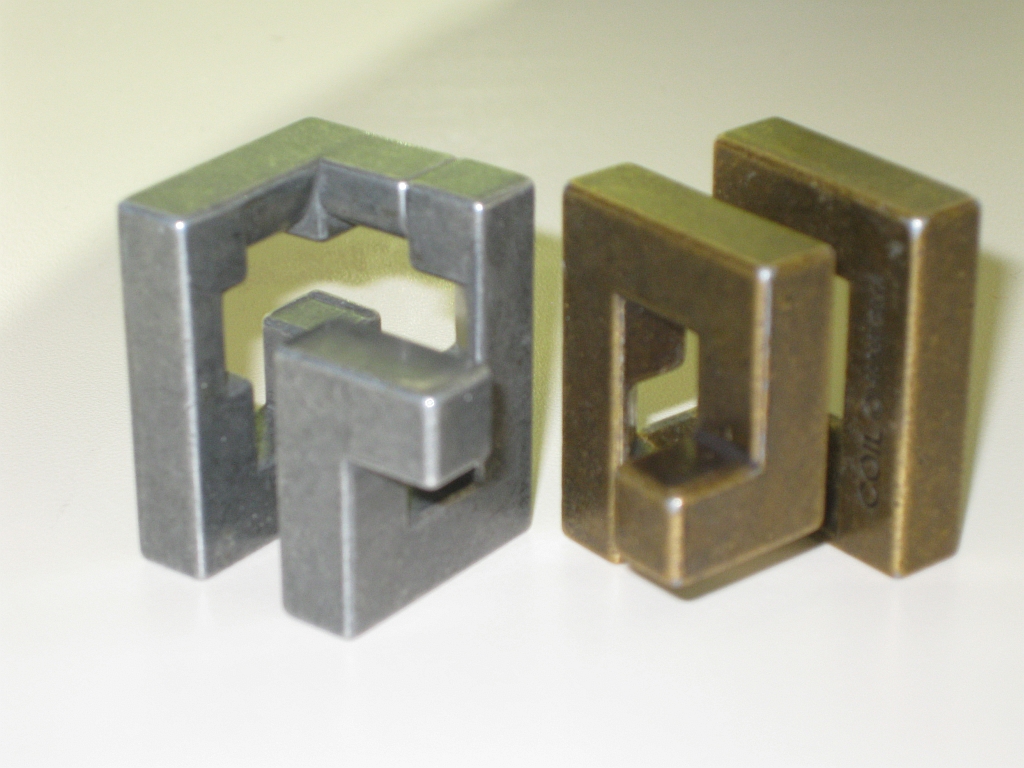
Cast Coil is the newest of the Hanayama cast series of puzzles, and was designed by Edi Nagata of Japan. Thanks to Puzzle Master for sending me this puzzle to review. The objective of the puzzle is to separate the two pieces of the puzzle by sliding and rotating the pieces around each other.

Cast Coil

Cast Coil

At 1 1/3 inches x 1 inch, this is a compact little puzzle, which carries a good weight to it. The Silver and Gold pieces provide a good contrast and make the coil design stand out. There seems to be a rather divided opinion on the look of this puzzle. The aged appearance of the metals used gives it a rough and pitted feel, that many puzzlers don’t seem too happy with. Personally, I think it looks great. I really like the aged appearance and think it suits the puzzle. To see what others are saying, read Kevin’s review here and Brian’s review here.

When I first tried to solve this puzzle, the pieces were a VERY tight fit, to the point that quite a lot of force was required to separate the pieces for the first move. That does seem like a temporary issue however as the more the puzzle is played with, the easier the pieces move. Now that I have solved the puzzle many times over, there is a slight gap between the pieces which was not there initially. The first move is still a little stiff, however that helps to keep the puzzle in the starting state, so isn’t entirely a bad thing.

Cast Coil pieces

Cast Coil pieces

The two very similarly shaped pieces have a number of notches cut out at strategic points on the inside of the puzzle to allow the square pieces to pass each other. The only real differences between the pieces are the locations of these cut away sections, so keeping track of them can be a little challenging. Initially it took me around 20 minutes to solve this puzzle, as there are a number of dead ends on the path towards the solution. There is one move which still catches me out, and even though I now know the sequence of moves, I somehow manage to get stuck at the same point fairly frequently.

Given that most of the moves in this puzzle are rotational moves rather than linear moves, it adds a unique element to the puzzle. The number of possible moves are limited thanks to the shape of the pieces, but rather than making things easier it seems to make things harder as you find yourself wanting to rotate the pieces and being blocked. In all you need around 7 distinct moves to separate the pieces, so once you know the path to take, it can be opened very quickly.

I really enjoyed this puzzle, and think it provides just the right level of challenge. Hanayama rates this as a level 3/5 puzzle, and Puzzle Master 7/10 – Challenging, which I have to agree with. I’d highly recommend picking this puzzle up as it’s a clever design and a fun puzzle.

New Puzzle Designs

While I’ve not had any time to get back to my workshop in the garage and spend time finishing off my current puzzle build, the Matrioshka (read part 1 and part 2) I have been busy. I’ve had a number of puzzle designs floating around in my head, and in the odd spare minute here and there I’ve been sketching things down and trying to make some progress. You’d be amazed how many ideas float through your head at 2am when you’re wide awake.

Since a good friend poked me in the direction of creating my own puzzles, I have had a myriad of ideas floating around in my head, each one probably more crazy than the last. The problem is that having an idea in my head doesn’t really do anyone any good. It was time to try to get a few things down on paper and see if there was some merit to any of them.

As you know from early posts here, my first puzzle design was cube based, and it created a nice puzzle in my opinion. (More info on that coming soon!) But I wanted something a little more interesting. I have been reading a lot about puzzle design, and Stewart Coffin’s work is an excellent learning resource. He challenges you to take what he has done, and learn from it. He doesn’t give the solutions to the puzzles he’s designed, far from it, he challenges the reader to find them himself. Having picked up a copy of one of his books from Amazon, and it was clear that in the world of polyhedral dissections, there is a lot more scope if you move beyond the cube.
Rough Sketches of a new puzzle design

Rough Sketches of a new puzzle design

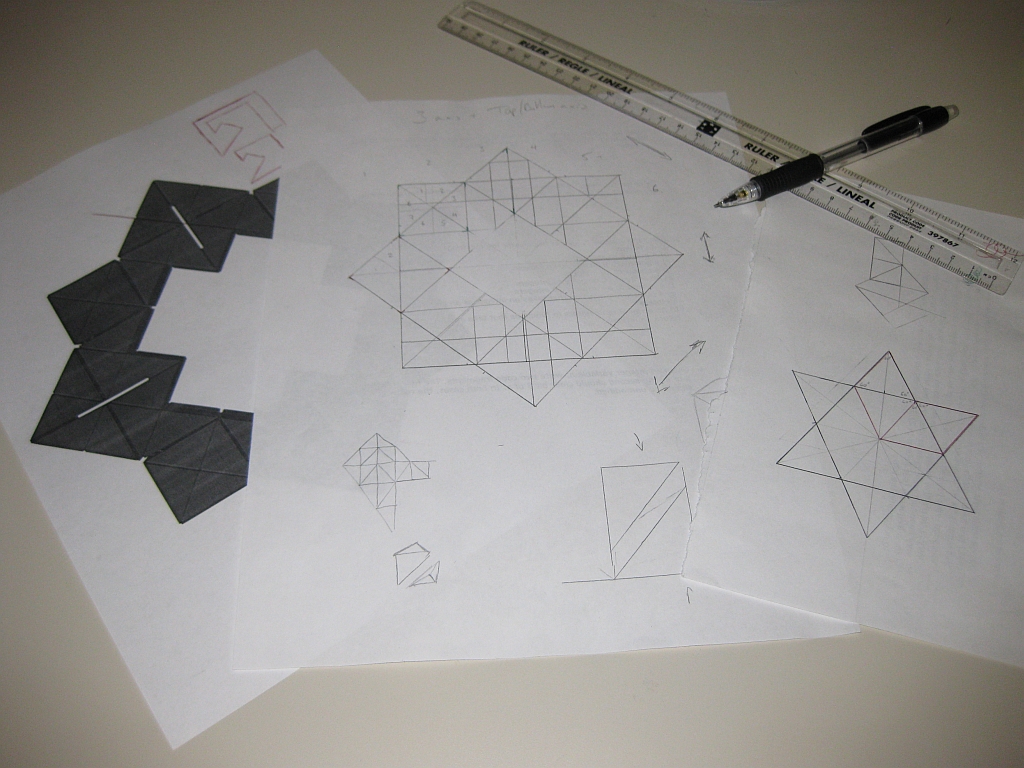
I don’t want to make a copy of any of STC’s designs but I did want to see whether I could create a novel dissection. My starting point was a star, as in the sketches above. My idea was to create an extruded six pointed star with an interesting interlocking set of pieces. I played for a while with this idea, but realised that the dissection would lead to some very interesting cuts to create the pieces needed, and I abandoned that for a simpler 8 pointed star, where all the angles are 45 degrees. Ok, so simpler may be relative, however I did find it easier to work with!

The sketch in the middle is a rough of the dissection, where the puzzle is 6 units wide by two units high. With those base dimensions, I had enough freedom to create an interesting assembly, without it being too complex to create. Remember I am doing this by hand, not using a computer to help!

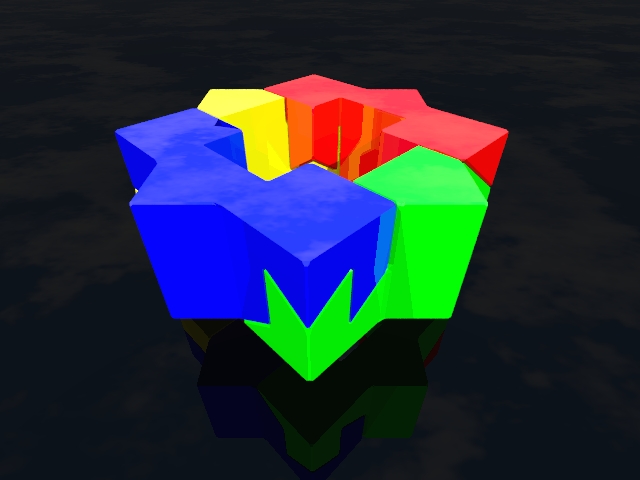
My first challenge was to visualise how you could dissect the shape. The nice part about working with the 8 pointed star is that each of the points is a cube, and cubic dissections are fairly straight forward. Using this as a starting point, I looked at creating 4 pieces which I could create some sort of locking structure around.

The first version was fairly simple, and went part way to what I wanted. I had created a two pieces which would join together such that movement in two of three dimensions was restricted. Creating a set of two such pieces created the first version of the puzzle.
Basic Star Puzzle Solved
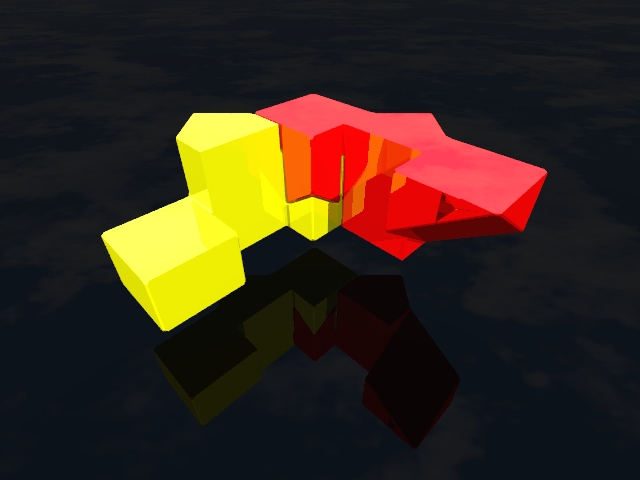
Basic Star Puzzle Solved

Two joined pieces of the puzzle

Two joined pieces of the puzzle

You should be able to see from the image on the right, that there is nothing to stop the two halves from sliding apart, so really this isn’t a great puzzle. The reason I show it, is that it may give you an idea of the stages I went through in creating the puzzle, and if you’re thinking about creating your own puzzles, then hopefully it will be of use to you too.

The next stage of evolution of the puzzle is to create a version where once assembled, the four pieces don’t just slide apart on their own. Some sort of manipulation is required by the solver. The added benefit to this is that it’s now more challenging to solve. To do that I started to look at ways to create a joint between the two halves I’d created. I was looking for something like a dovetail joint, and if you look at the sketches at the top of this post, my version of that is in red pen on the top of the left hand sheet.

Creating the two halves of this joint, I created a way for the two sub assemblies to be slid together to create the final shape.
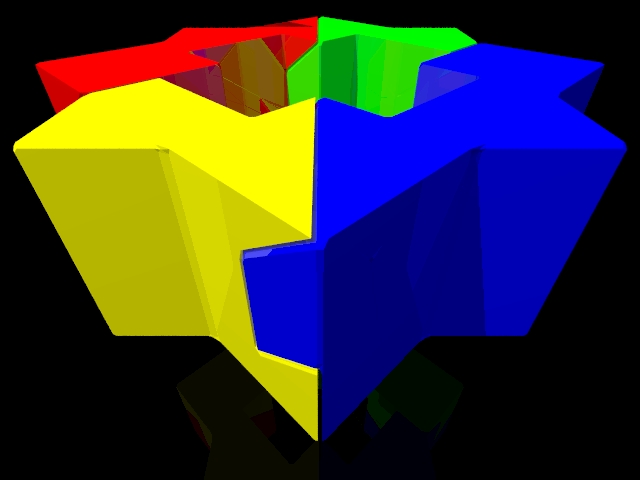
Sliding Star V2

Sliding Star V2

So you may be asking why I’ve labelled this “Sliding Star V2”. The answer is quite simple. It’s the second version of the puzzle. Once I had created the basic pieces on paper, I turned to Burr Tools to model them on the computer, for two reasons which I’ll get to …

Many people turn to Burr Tools to find how to put their puzzle back together, or to create new puzzle pieces. The program has many many uses, and I’m no expert, but I am learning and getting much better the more I use it. I didn’t need to use the tool to find out how to assemble the puzzle, as I already had worked out on paper that it did. What I really wanted was to verify the assembly, and check how many assemblies existed with my pieces, and also because I wanted a model file that I could export for 3D printing!

Coming back to the reason for V2, when I originally designed the dovetail ends, I envisioned the puzzle as being two halves that slid together along the yellow blue axis in my rendering. What Burr Tools showed was that one of the pieces could slide diagonally out of the assembly, and in fact didn’t lock the puzzle together as I had drawn.

Here the power of the tool allowed me to see something I hadn’t seen on paper, and allowed me to rework the pieces to prevent the unintended movement. Burr tools also confirmed only one solution for the V1. For the V2, when I had redrawn things, and re-entered them into the tool, I was surprised to find 2 assemblies! So my small change allows two pieces to be swapped, and still assemble the puzzle. All very interesting, and very unexpected.

With the puzzle pieces confirmed as being possible within the constraints of Burr Tools, I set about exporting the pieces, so that I could have them 3D printed. This is a very quick way to prototype puzzles, which is far more powerful that pen and paper, or even computer modelling. Seeing a puzzle in real life, and playing with the pieces can give you much more feedback that looking at it in two dimensions.

Now I’ll be honest here, Burr Tools isn’t the most intuitive for exporting files, but with a lot of patience, and some guidance from Derek Bosch, I was able to export the pieces in a format which would work for sending to Shapeways. (Which I have done, and I’m waiting for the results!)

Now here’s the really interesting thing about the export from Burr Tools. If you export from the Solution tab, the stl files are created with location information. Which means that when you export them, they are in the position and orientation of the solved puzzle. So it means importing them into you 3D package of choice, you can render the solved puzzle, without painstakingly moving the pieces by hand. As a bonus side effect, it also shows you the tolerances between pieces, which is ideal for knowing how well things will fit when printed by Shapeways! If you’re wondering, yes this is how I created the images of the puzzle above in PovRay.

Once I receive the printed parts from Shapeways, I’ll update as to how things turned out.

With version two created, I turned my attention to the original goal of the project which was a co-ordinate motion version of the puzzle, using the same shape, but modified pieces to make a far more challenging puzzle to assemble. I’ll give more info on that in the next post about my puzzle making progress.

Finally, I mentioned a few posts back that I had a big project I was working on. Well I’m still working on it, but no more details yet. It is still at the pen and paper stage, and there’s a lot of work to tweak the designs before I take that further… Watch this space!
Bolted Closed

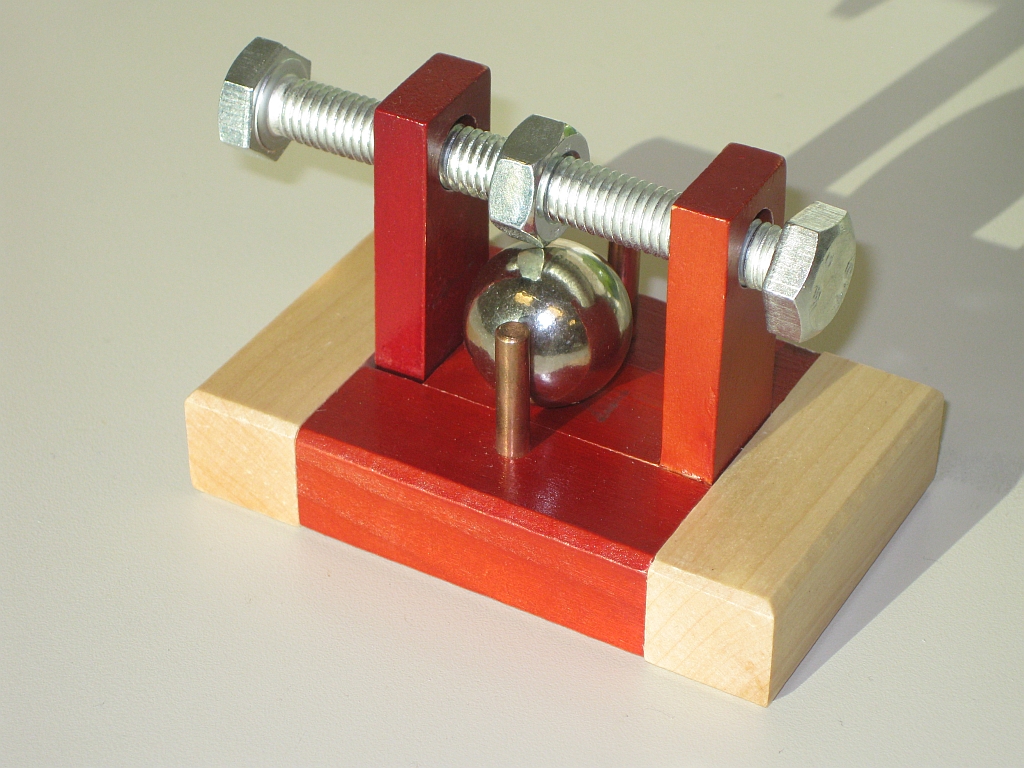
Bolted Closed is a take apart puzzle from Bits and Pieces, which I came across on the Puzzle Master website and really liked the look of. The contrasting woods, and use of different metals makes this puzzle really stand out. Thanks to Puzzle Master for sending it to me to review.

Bolted Closed by Bits and Pieces

Bolted Closed by Bits and Pieces

The object of the puzzle is to remove the large ball bearing from its prison between the brass rods, wooden supports and the nut and bolts. The choice to stain the wood in the centre portion into a bright red helps to make this puzzle stand out and really makes you want to pick it up. When you do, you realise it’s a fairly heavy puzzle thanks to that ball bearing which is rolling around much more freely than photographs made me think it would.

The puzzle comes very simply packaged in a white cardboard box with the name of the puzzle (listed on the box as Brass Bolt), and some warnings about not swallowing the small parts. Safety information over, I opened the box and removed the puzzle, to have the ball bearing fall out, hit the floor and roll under my sofa. Not exactly the sort of challenge I was hoping for. The main reason the puzzle arrived in the already solved state is I think mainly down to the packaging of the puzzle. With no support or padding it’s all to easy for the mechanism to become free during shipping.

Recovering the ball from under the sofa, I put things back together, opened it a couple of times and thought it was almost a trivial mechanism, with no real puzzle element at all. Rather disappointed, I reset the puzzle, and put it on one of my puzzle shelves thinking it was a pretty poor puzzle. Coming back to it some months later to write the review I was able to solve the puzzle as it was intended, and it has gone up slightly in my estimation. I really shouldn’t have judged it based on what may have been a fluke when I unboxed it.

In coming back to the puzzle and trying to solve it fresh, I found that it didn’t open as easily as it had originally. As it turns out, when I closed the puzzle initially, I had only partially done so. The motions of putting it on the shelf and the taking it back down to photograph, had fully reset the puzzle, making it a slightly better challenge. Puzzle Master ranks this as a Level 8 – Demanding (out of 10) puzzle. I don’t think I’d rank it quite as high, possibly a 7.

The mechanism itself if fairly simple, and most people should be able to open it with a bit of time spent on it. The ball rolling around helps to disguise any mechanism at play so it would be easy to miss the first move to removing the ball as a result. Rule 11 as it is fondly known does play a part, but unlike some other puzzles, the amount of force required is small, and there’s no worry about hurting yourself here, unless you get your fingers stuck between the ball and the brass rods.

My biggest issue with this puzzle really comes down to how well it’s made. Ok, it’s not an expensive puzzle, and it does look great. Many other cheaper puzzles look cheap and this doesn’t suffer that fate. If you look closely though, the fit and finish isn’t all that high which lets the puzzle down slightly, but has to be expected given the price range.

The gap between the support post for the bolts and the base is large enough that you can easily see the mechanism keeping it closed, and on my version the two bolts are actually bent into a slight curve. The result being that getting things lined up to remove the ball have to be spot on or the ball will remain just trapped. I can’t tell if this is by design, or not but I have to think it’s unintentional. By the time you can get the ball close to being removed, the hard work is done, and the very slight bend seems incongruent with the solution.

For a beginner, this is a good puzzle. The ability to get a hint as to the mechanism will keep newer puzzlers interested and it does look good. I’d have to say, give this one a chance, and you may just enjoy the puzzle. If you’re really stuck, the solution is included, but I’d leave that in the box until you’ve at least had a play.

Blog Updates

After the long weekend here in the USA, it seems I didn’t do much puzzling (or any to be fair), but I did start sketching out some designs for a new puzzle box that I’d like to make. Don’t get too excited, it’s unlikely to see the light of day any time soon as it’s a big project, and will take me a long time to realise. If it does happen though, I hope it will be something rather special.

I put in a shapeways order over the weekend, for the first prototype of a 3D printed version of my Cube puzzle. This version is a little expensive still as I have kept the internal pieces with a solid wall, so it looks as close to the Lego version as possible. If it works out then I’ll consider making one with mesh internal pieces to reduce the cost significantly so it could be purchased if you wanted one. At some point when I finish the Matrioshka that I’m trying to build, I’ll make the cube in wood, but looks like that will have to wait till the end of the summer before I can even start on that project. Too many things to do, and not enough free time!

As far as the blog goes, thanks for all the feedback you’ve given me. It’s appreciated, and it is good to hear from everyone. Today I upgraded to the newest version of WordPress, and I hope that will clear up some of the Errors that I know one or two people have reported seeing. I’ve never reproduced them myself and can’t narrow it down to a problem at the server side, but I know it’s an issue. If you’ve been affected then I’m sorry, and all I can suggest is to try another browser (Firefox seems to be the one with the issue).

I’ve added a new feature to allow you to rate the reviews, and would love to know what you think of that. Also if there’s anything else you’d like to see added to the site, or even if you have puzzles you’d like me to review, then let me know and I’ll see what I can do!