Peppermint

I wasn’t able to attend the IPP in Japan last year however given that I was getting married, I had a great excuse, and I’m not complaining about my choice of location. It did mean however that I missed out on a number of new puzzles from the IPP. Fortunately, I have a few friends who did go, and I was able to borrow some of the Japan Puzzles. Peppermint is a 3D printed puzzle designed by Scott Elliot for the Puzzle Exchange, and was digitally manufactured in colorful ABS by Bradley Rigdon at PrintTo3D according to Scott.

Peppermint.  An exchange puzzle from Scott Elliot.

Peppermint. An exchange puzzle from Scott Elliot.

You can read all about the design process for the puzzle over on Scott’s blog here if you’re interested. I certainly recommend it as it really shows the work that goes into refining a puzzle design. The finished puzzle measures 2.25″ x 1.75″, and seems like a fairly large puzzle in your hands.

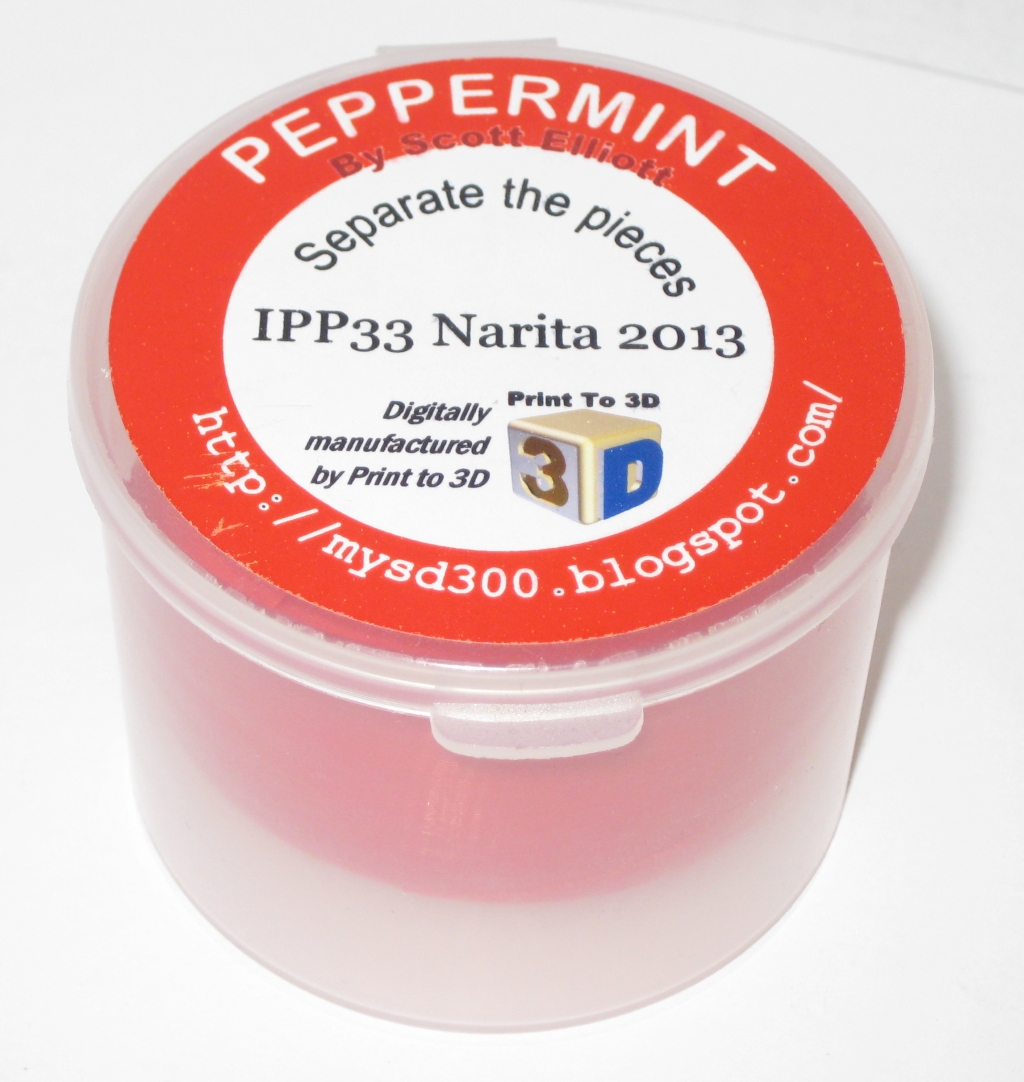
Peppermint.  Unboxed.

Peppermint. Unboxed.

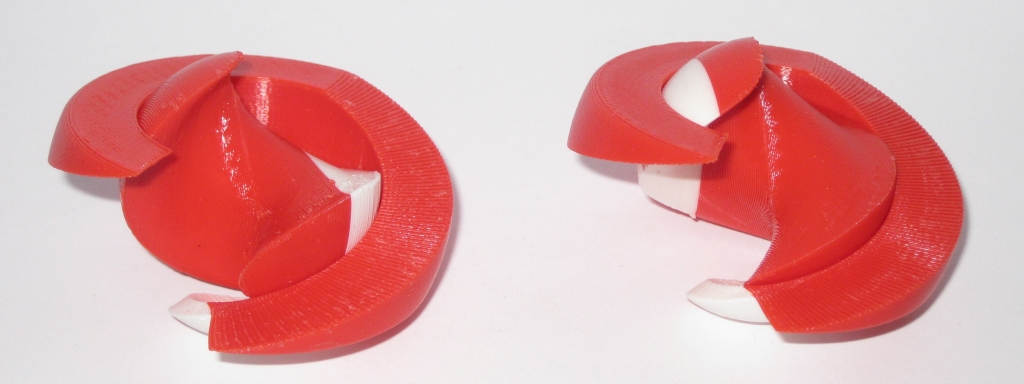
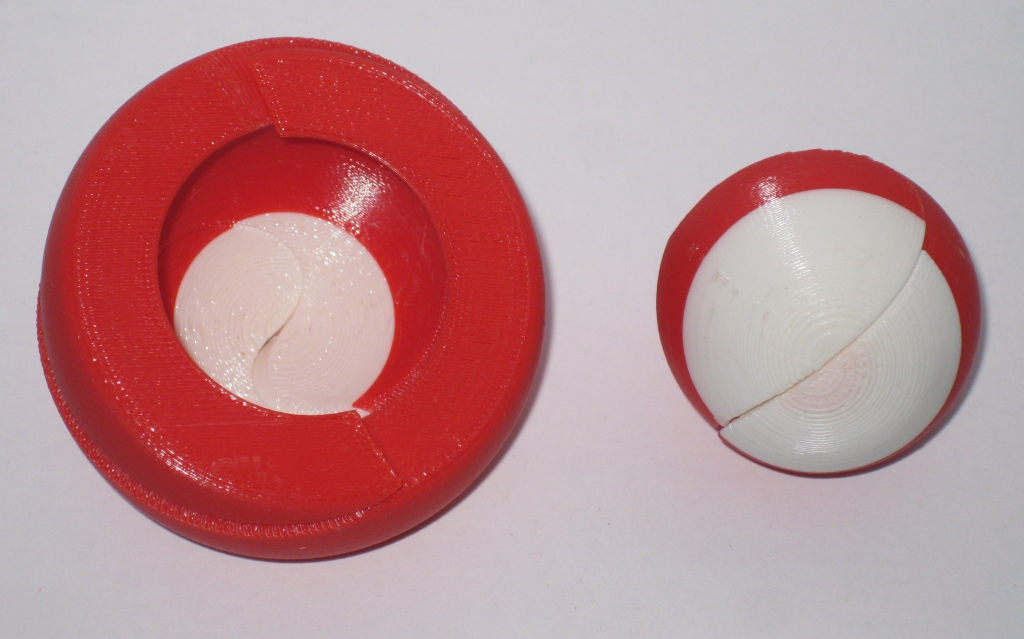
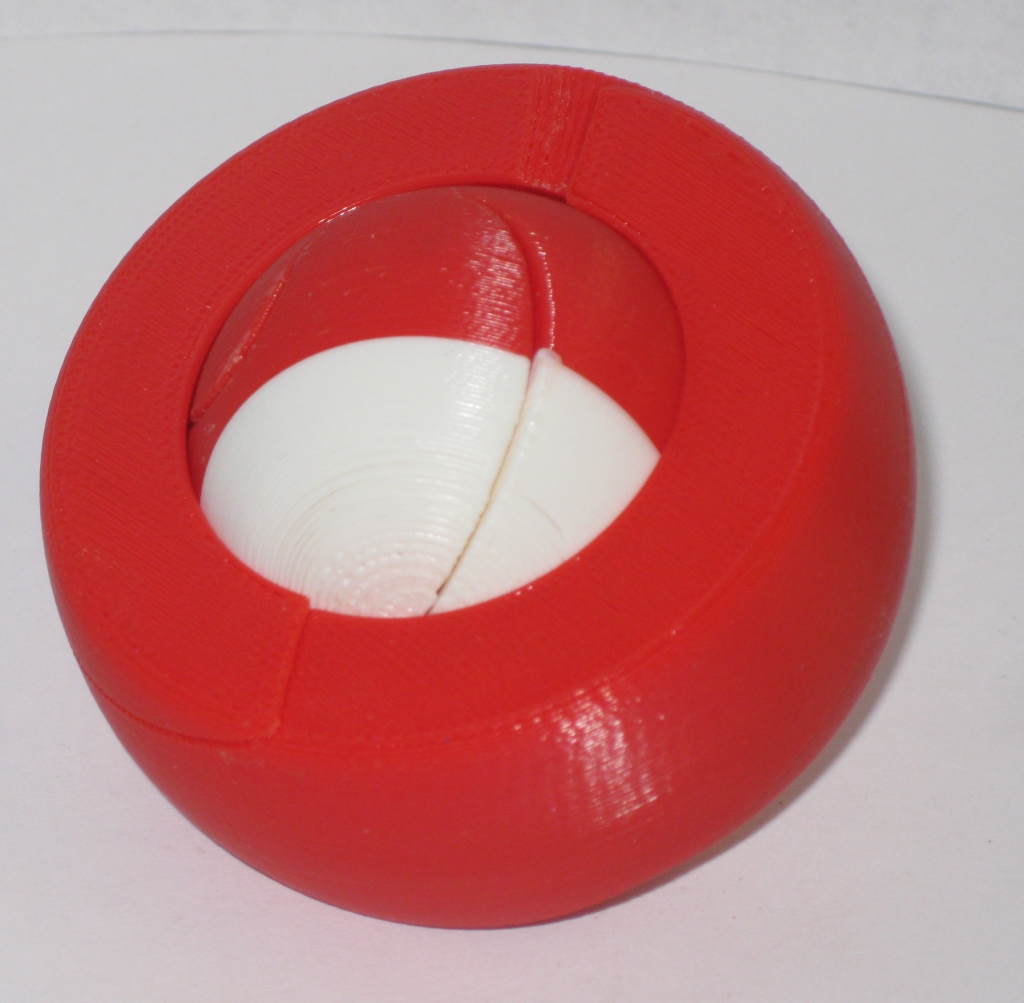
The puzzle consists of four pieces, which combine together into two linked sub assemblies. The outer shell doesn’t move, while the sphere in the centre is free to rotate around. If you’re familiar with the Cast Marble from Hanayama, then you’ll have a fair idea of what’s going on here. The difference is that you can only see the sphere from one side of the puzzle. On the other side is a closed dome that hides the sphere away.

Peppermint.  Taking the pieces apart

Peppermint. Taking the pieces apart.

Once you’ve found the right alignment of all the pieces, it will rotate apart smoothly, before coming apart into four separate pieces. Putting it back together is a simple case of reversing the process. there is a little bit of thought required to align the pieces correctly, but nothing that will stump you for long.

Peppermint.  Showing off the sub assemblies.

Peppermint. Showing off the sub assemblies.

Overall it’s a fun puzzle and it looks great in the vibrant colours of the ABS plastic. I’m seeing more and more puzzles being produced by 3D printers, and the quality is really impressive. For rapid prototyping, and the ability to play with designs just hours after they are conceived is incredible. I don’t see it replacing the feel and look of natural wood, but I can’t deny that it’s an amazing technology.

2 Halves Cage 4 A

Well that’s a bit of a mouthful isn’t it! 2 Halves is a burr puzzle designed by Gregory Benedetti, with my copy being made by the very talented Maurice Vigouroux. Back in November 2013, this came up for sale on Puzzle Paradise with a couple of options for woods used. Seeing the Ebony cage and Bloodwood pieces, I didn’t hesitate, and bought it there and then. I certainly wasn’t disappointed.
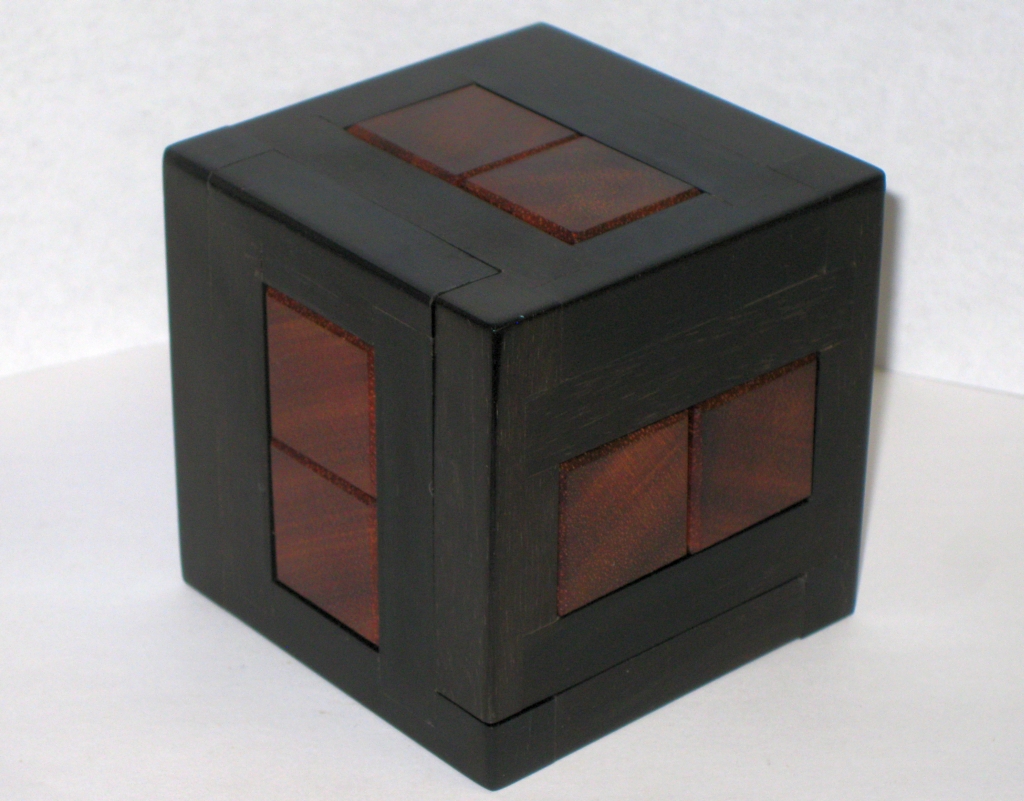
2 Halves Caged 4 A by Gregory Benedetti

2 Halves Caged 4 A by Gregory Benedetti

Despite not being particularly good with Burr puzzles, this doesn’t look like a burr, and the jet black Ebony surrounding the deep red of the Bloodwood makes it look imposing. That’s probably a good thing, as this is not a simple puzzle. It’s not a small puzzle either. Each cubie is 7/16″, making it 3″ x 3″ x 3″ overall, meaning that Maurice was working with 1″ thick stock to make the burr pieces. It’s a great size and manipulating the pieces inside the frame is easy given the size of the pieces. It’s heavy too. Ebony is a very dense heavy wood, so this puzzle has a really solid heft to it. The fit and finish are excellent with the Ebony being polished to a reflective shine. The pieces all slide past each other perfectly, and the tolerances are spot on.

The first night I spent around 40 minutes playing around with the puzzle and managed to create some space in the cage to move the burr pieces around a little, but I hit a dead-end and couldn’t see a way to progress further. There seemed to be a huge amount of space in the puzzle, but the cage was still firmly held in place, and the was no way I was sliding any of the burr pieces out of the cage.
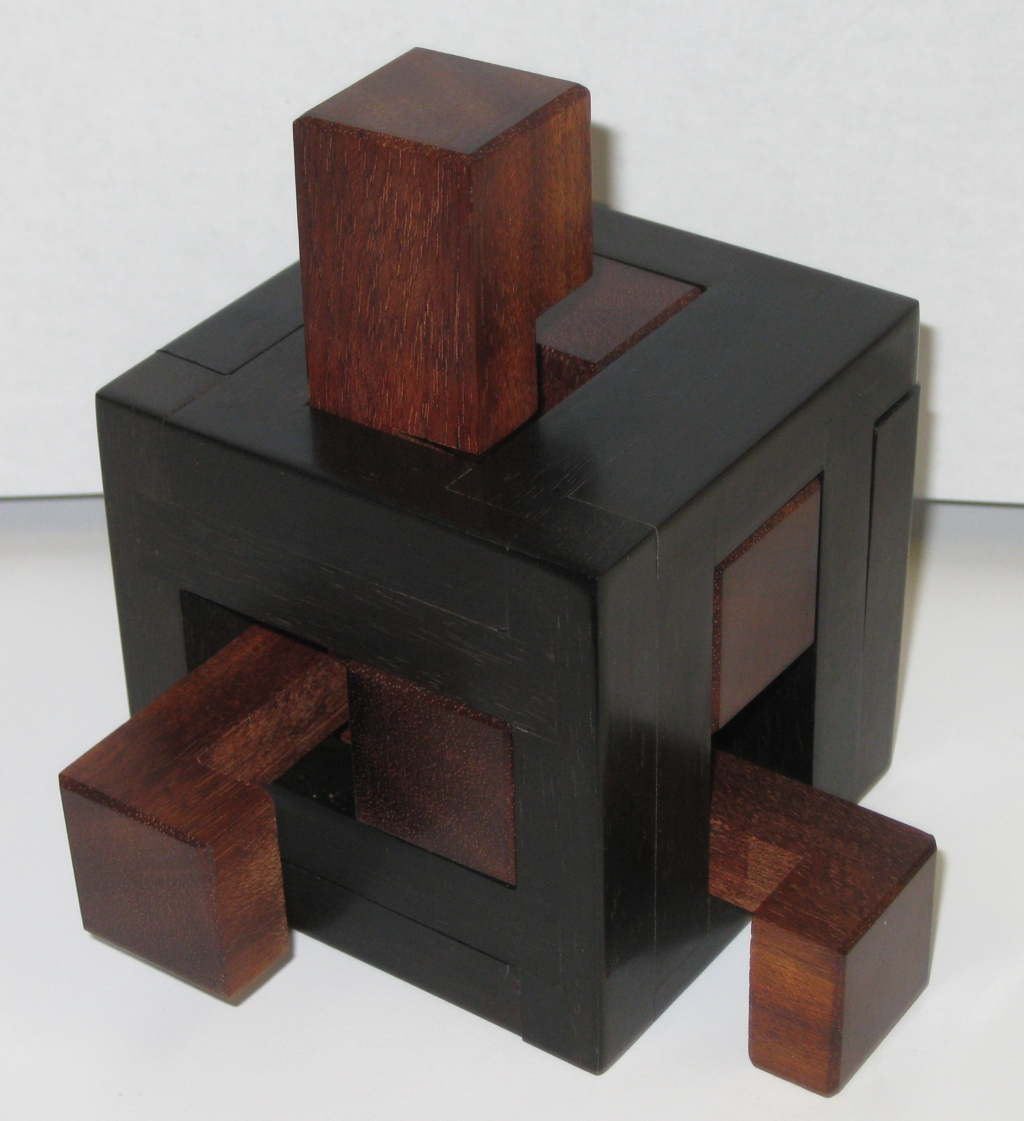
Partially solved with pieces sticking out like a Hedgehog

Partially solved with pieces sticking out like a Hedgehog

This carried on for a few days where I’d spend 20 minutes or so each night trying to make progress and really getting nowhere. As often happens, things got busy, and the puzzle was left on a shelf for a while with pieces sticking out of the sides, looking a little like a hedgehog. Recently I had a little free time, and picked this up again, since it was sitting looking at me and I felt bad that I’d not finished it.

After about an hour, I finally managed to shuffle the burr pieces into the right locations to be able to remove one half of the cage! Progress. It was quite the achievement to have made it this far, and spurred on by my success, I carried on to remove the rest of the pieces. I thought I was past the difficult part and the remainder was going to be easy. After all, I now had a lot of space, and removing the remaining pieces should be easy!

Isn’t it great when you’re totally wrong. The puzzle is a level 17.14.9.5.3 puzzle. So removing the first half of the cage, I’d only finished the first 17 steps. I had another 14 to remove the first burr piece, and then another 9 to remove the second. This is one tough puzzle. I spent another 15 minutes figuring out how to move the pieces around and take that first burr piece out of the remaining cage half, but I finally got there. Let’s just say I didn’t do it in just 14 moves!
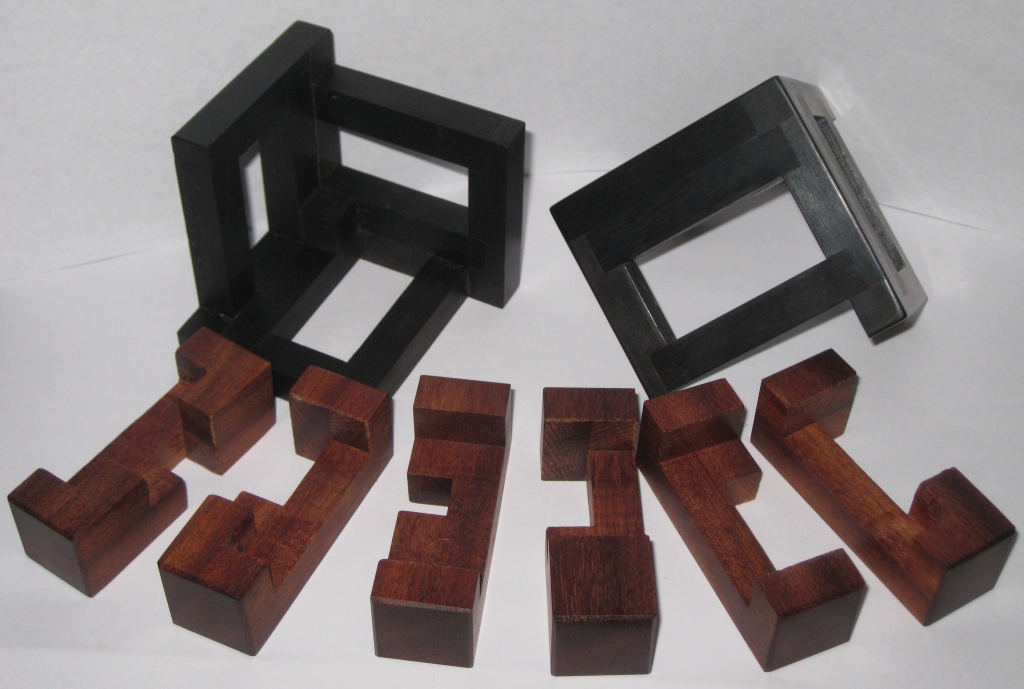
Six burr pieces, plus the two cage halves

Six burr pieces, plus the two cage halves

As far as value for money goes, this has been a great puzzle. I’ve had a lot of puzzling time out of it, and I have to admit that I really enjoyed it. This is a little worrying for me, as I’ve never really found much fun in playing with Burr’s. Maybe I’ve found something else that I do enjoy after all.

The 2 Halves is certainly a different style of Burr, with the cage interacting with the burr pieces in such a way that it really adds an extra challenge. The cage itself blocks your view of the voids in the burr, making it much more difficult to see how to progress, and it also adds some structure, keeping the pieces in the right locations without needing an extra hand to prevent them from falling or rotating into a position which makes it difficult to move the next piece.

Now, I freely admit that I’m not good enough with burr’s to be able to re-assemble this one on my own. It was enough of a challenge to just take it apart. Not to mention that I didn’t pay any attention to how the pieces came out, or the order, so I didn’t even have a reference to how to put them back.

There’s only one possible assembly out of 1,844 possible orientations of the pieces in the final shape, so it could take a very long time to put this back together with trial and error. I know when I’m beaten, and turned to the trusty Burr Tools to help. Even there it took me three attempts to get the pieces entered correctly for Burr Tools to be able to solve the puzzle. I have no idea how Gregory designed this, but I have to take my hat off to him. It’s a great design, and I can’t recommend it enough, even if you’re like me, and are not a fan of Burr’s normally.
Lunatic 3D Hidden Mazes

Way back in June 2012 when I was browsing the puzzles over at Cleverwood, I came across a puzzle called The Lunatic. At the time I was spending a lot of time with hidden maze puzzles, and this appealed to me, so I bought one. Turns out this was one of the original mazes made by Marcus Allred, who popped up on Kickstarter a little while later. I backed his first venture there too!

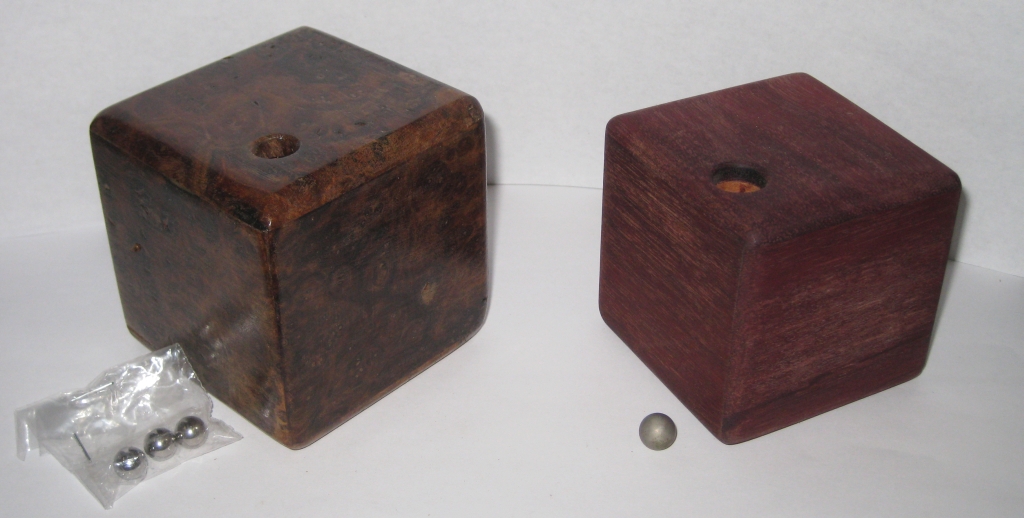
The original Lunatic (right) and the newer version (left)

The original Lunatic (right) and the newer version (left)

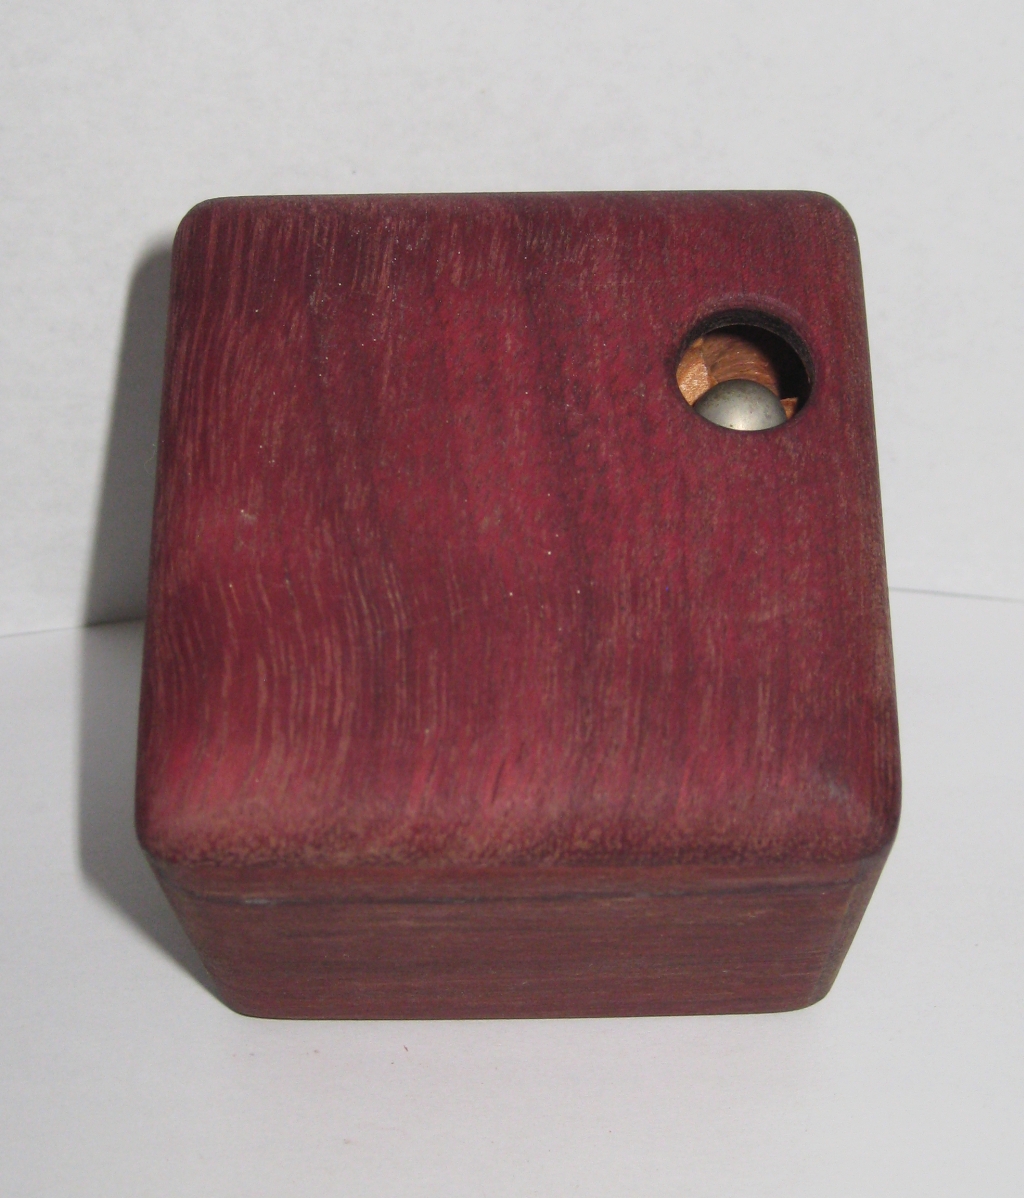
The original puzzle, made with a Purpleheart exterior is a little over 2.5″ x 2.5″ x 2.5″, and comes with a single steel ball which you drop into one of the holes, then navigate through a blind maze, before the ball pops out the hole on the other side. It’s not terribly difficult, and I’d even go so far as to say it’s trivial. There’s no dead ends or chances for the ball to get stuck, you can put the ball in one side, and rock the cube back and forth, and the ball will pop out. The challenge is really to understand the maze, and get the ball out in as few movements as possible. Doing that makes it a little more challenging, and more interesting as a puzzle.

The original Lunatic in Purpleheart

The original Lunatic in Purpleheart

At one point Marcus popped up on one of the puzzle forums I frequent, and we started talking about the puzzle. Apparently he finished the puzzle using Orange Oil, which helps bring out the colour of the Purpleheart. I certainly didn’t know that, and I know a few other puzzle builders were interested in that process. It’s looking a little dry these days, and I may have to refinish the puzzle to bring back its original luster.

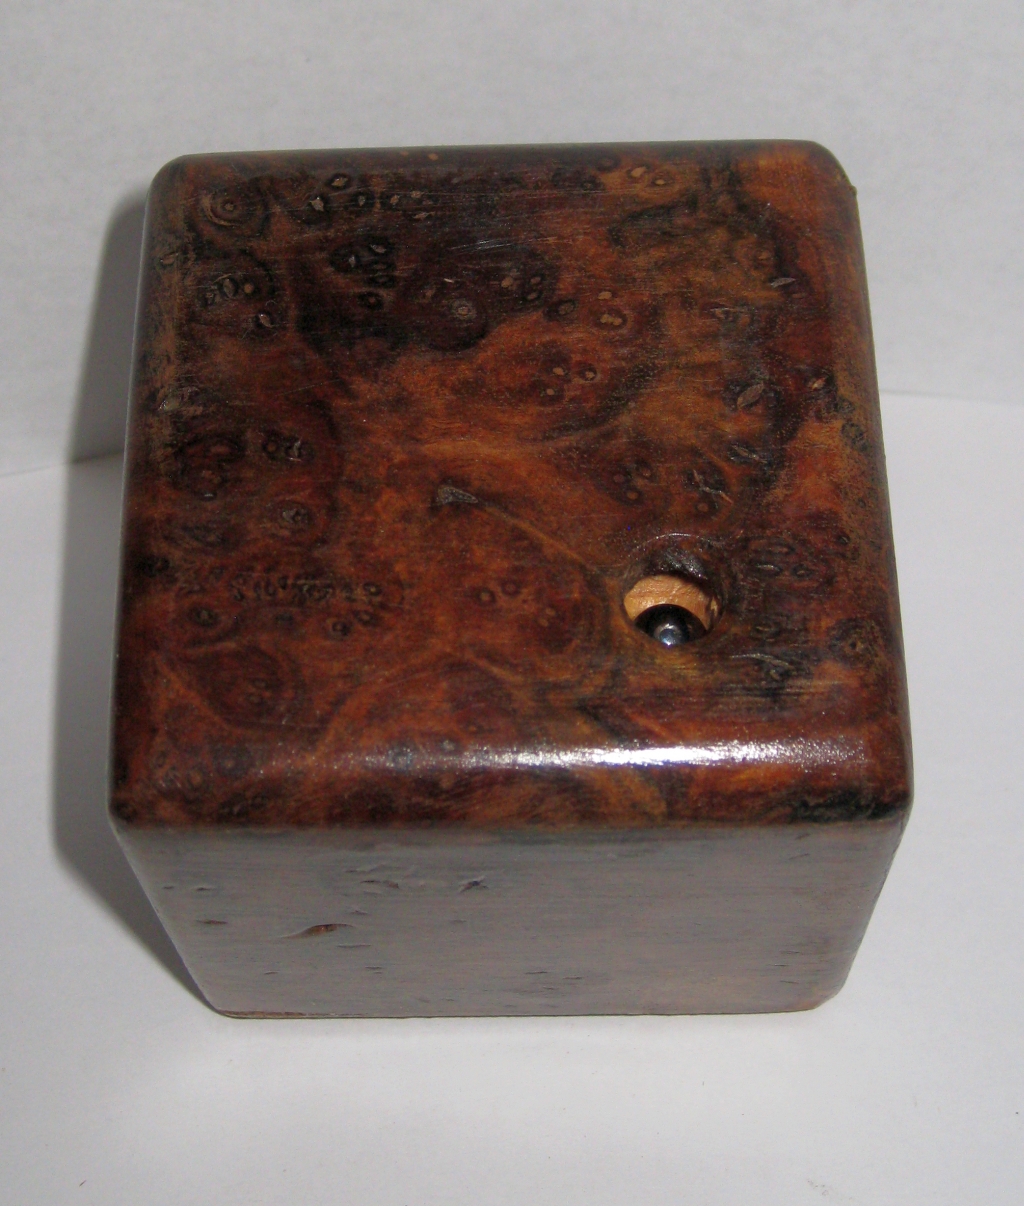
The result of the Kickstarter, made from Walnut Burl

The result of the Kickstarter, made from Walnut Burl

The Maze above is the result of that first Kickstarter project, a larger, 3″ maze with a Walnut Burl exterior. Marcus has certainly refined the process from that first cube, with the entry holes to the maze being both smaller and better defined. The visibility of the internal maze which is made from a much less exotic wood is minimal, and overall it looks like a more polished puzzle.

The difficulty is much the same as the original, and won’t provide much of a challenge, unless you follow my suggestion to map the internal maze, and then navigate it in as few movements as possible. Still that’s not the real attraction of the work Marcus is doing.

He’s finding some of the most beautiful burl woods out there, and working them expertly into beautiful works of art that are also puzzles. Some of his more recent work includes using the burl itself to create the maze, and then encasing it in a clear shell. Adding two balls to the puzzle of different colours and then creating challenges to swap the locations of the balls and so forth. The challenge to work with burls like this without having the wood shatter or chip is no easy task, and Marcus has refined his techniques to produce excellent results.

His latest Kickstarter offering up some of the new designs has just been successfully funded, and I look forward to seeing what he does next. Might be time for me to pick up one of his newer puzzles, and see how far he’s come.

Marcus now has a new website, so head over there if you’d like to pick up one of his puzzles. If you’re looking for something which will stand out on the puzzle shelves, this may well fit the bill.

Six Piece Cube & Little Slide Plank by Gregory Benedetti

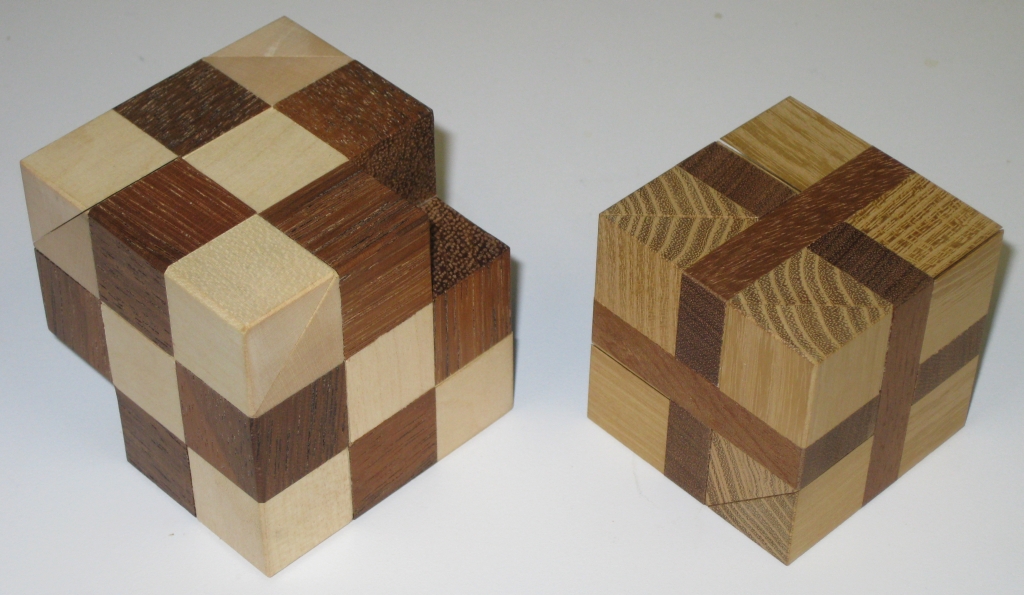
When it comes to co-ordinate motion puzzles, the master is generally regarded as Vinco, however Gregory Benedetti has been doing a lot of work in creating clever dissections which require co-ordinate motion. I was lucky enough to pick up a couple of his puzzles last year from Bernhard over at Puzzlewood. Seems that I’ve had them long enough that I should really write about them!

Two Co-ordinate motion puzzles from Gregory Benedetti

Two Co-ordinate motion puzzles from Gregory Benedetti

Gregory himself admits that he was influenced by Vinco, and his work on co-ordinate motion puzzles, which gave him the push to try to create some co-ordinate motion puzzles himself. There’s a great interview by fellow blogger Saul on his blog Seeking Ariadnes Thread with Gregory if you’d like to read about Gregory’s thoughts. It’s a great read and I highly recommend it.


Little Slide Plank

Little Slide Plank by Gregory Benedetti

Little Slide Plank by Gregory Benedetti

The first, and smaller of the two puzzles is “Little Slide Plank” which is about as minimal as you can get from a co-ordinate motion puzzle. This three piece, 2×2 cube with one small void in the centre is a pretty elegant puzzle. It’s only 2″ cubed, made with a contrasting wood for the planks. If I were to guess, I’d say Ash for the main pieces, and Mahogany for the planks.

Little Slide Plank opening

Little Slide Plank opening

While many people shy away from co-ordinate motion puzzles due to the challenge of reassembling them, this is great for any level of puzzler. The unique dissection leaves you with some very interestingly shaped pieces, and while it’s not difficult to take apart or re-assemble, it has that fiddle factor that makes a great puzzle. You just want to pick it up and play with it.

Little Slide Plank pieces

Little Slide Plank pieces

The pieces themselves are interesting, and all unique making this a very pleasing design. As I mentioned, it’s not difficult to find the correct orientation to put the pieces back together, and unlike many co-ordinate motion puzzles, you don’t need a third (or fourth) hand to get it together, nor the dexterity and precise positioning that is needed from some other puzzles in this category. Overall, I highly recommend it


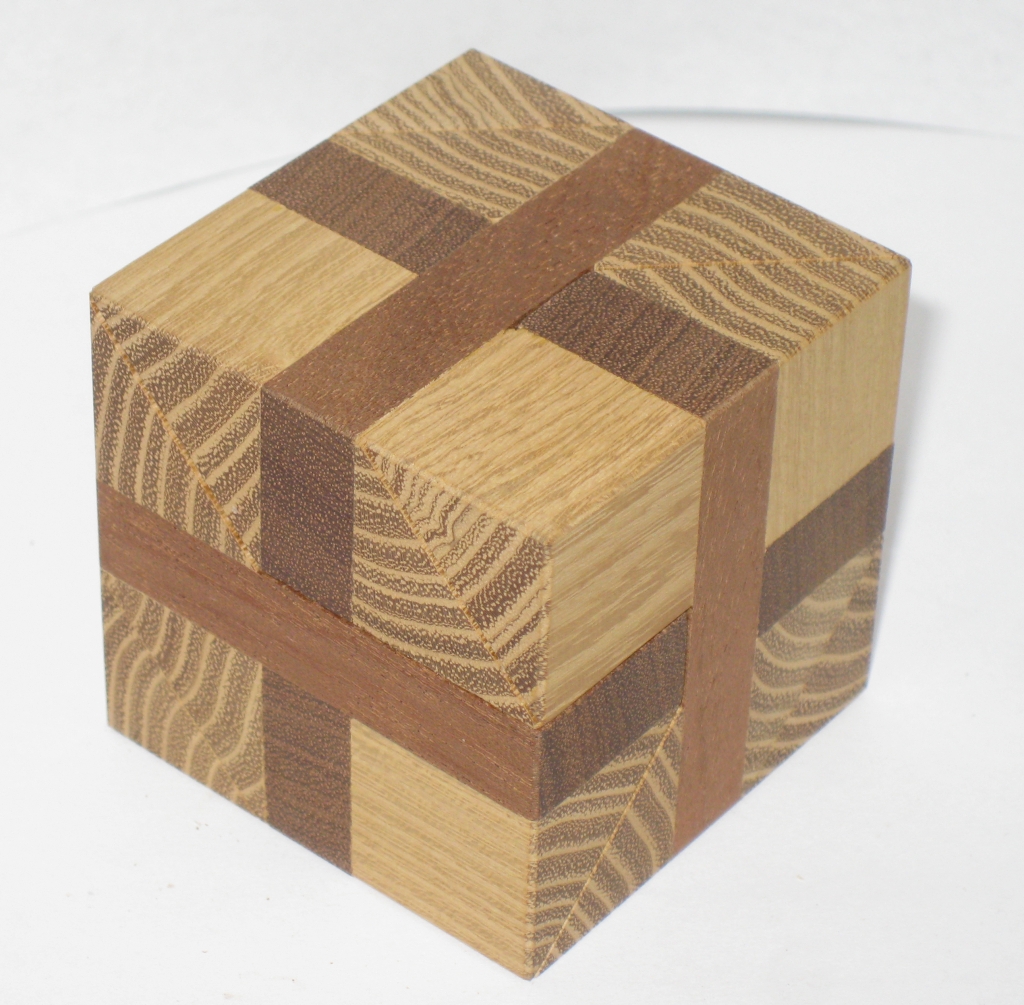
6 Piece Cube

6 Piece Cube from Gregory Benedetti

6 Piece Cube from Gregory Benedetti

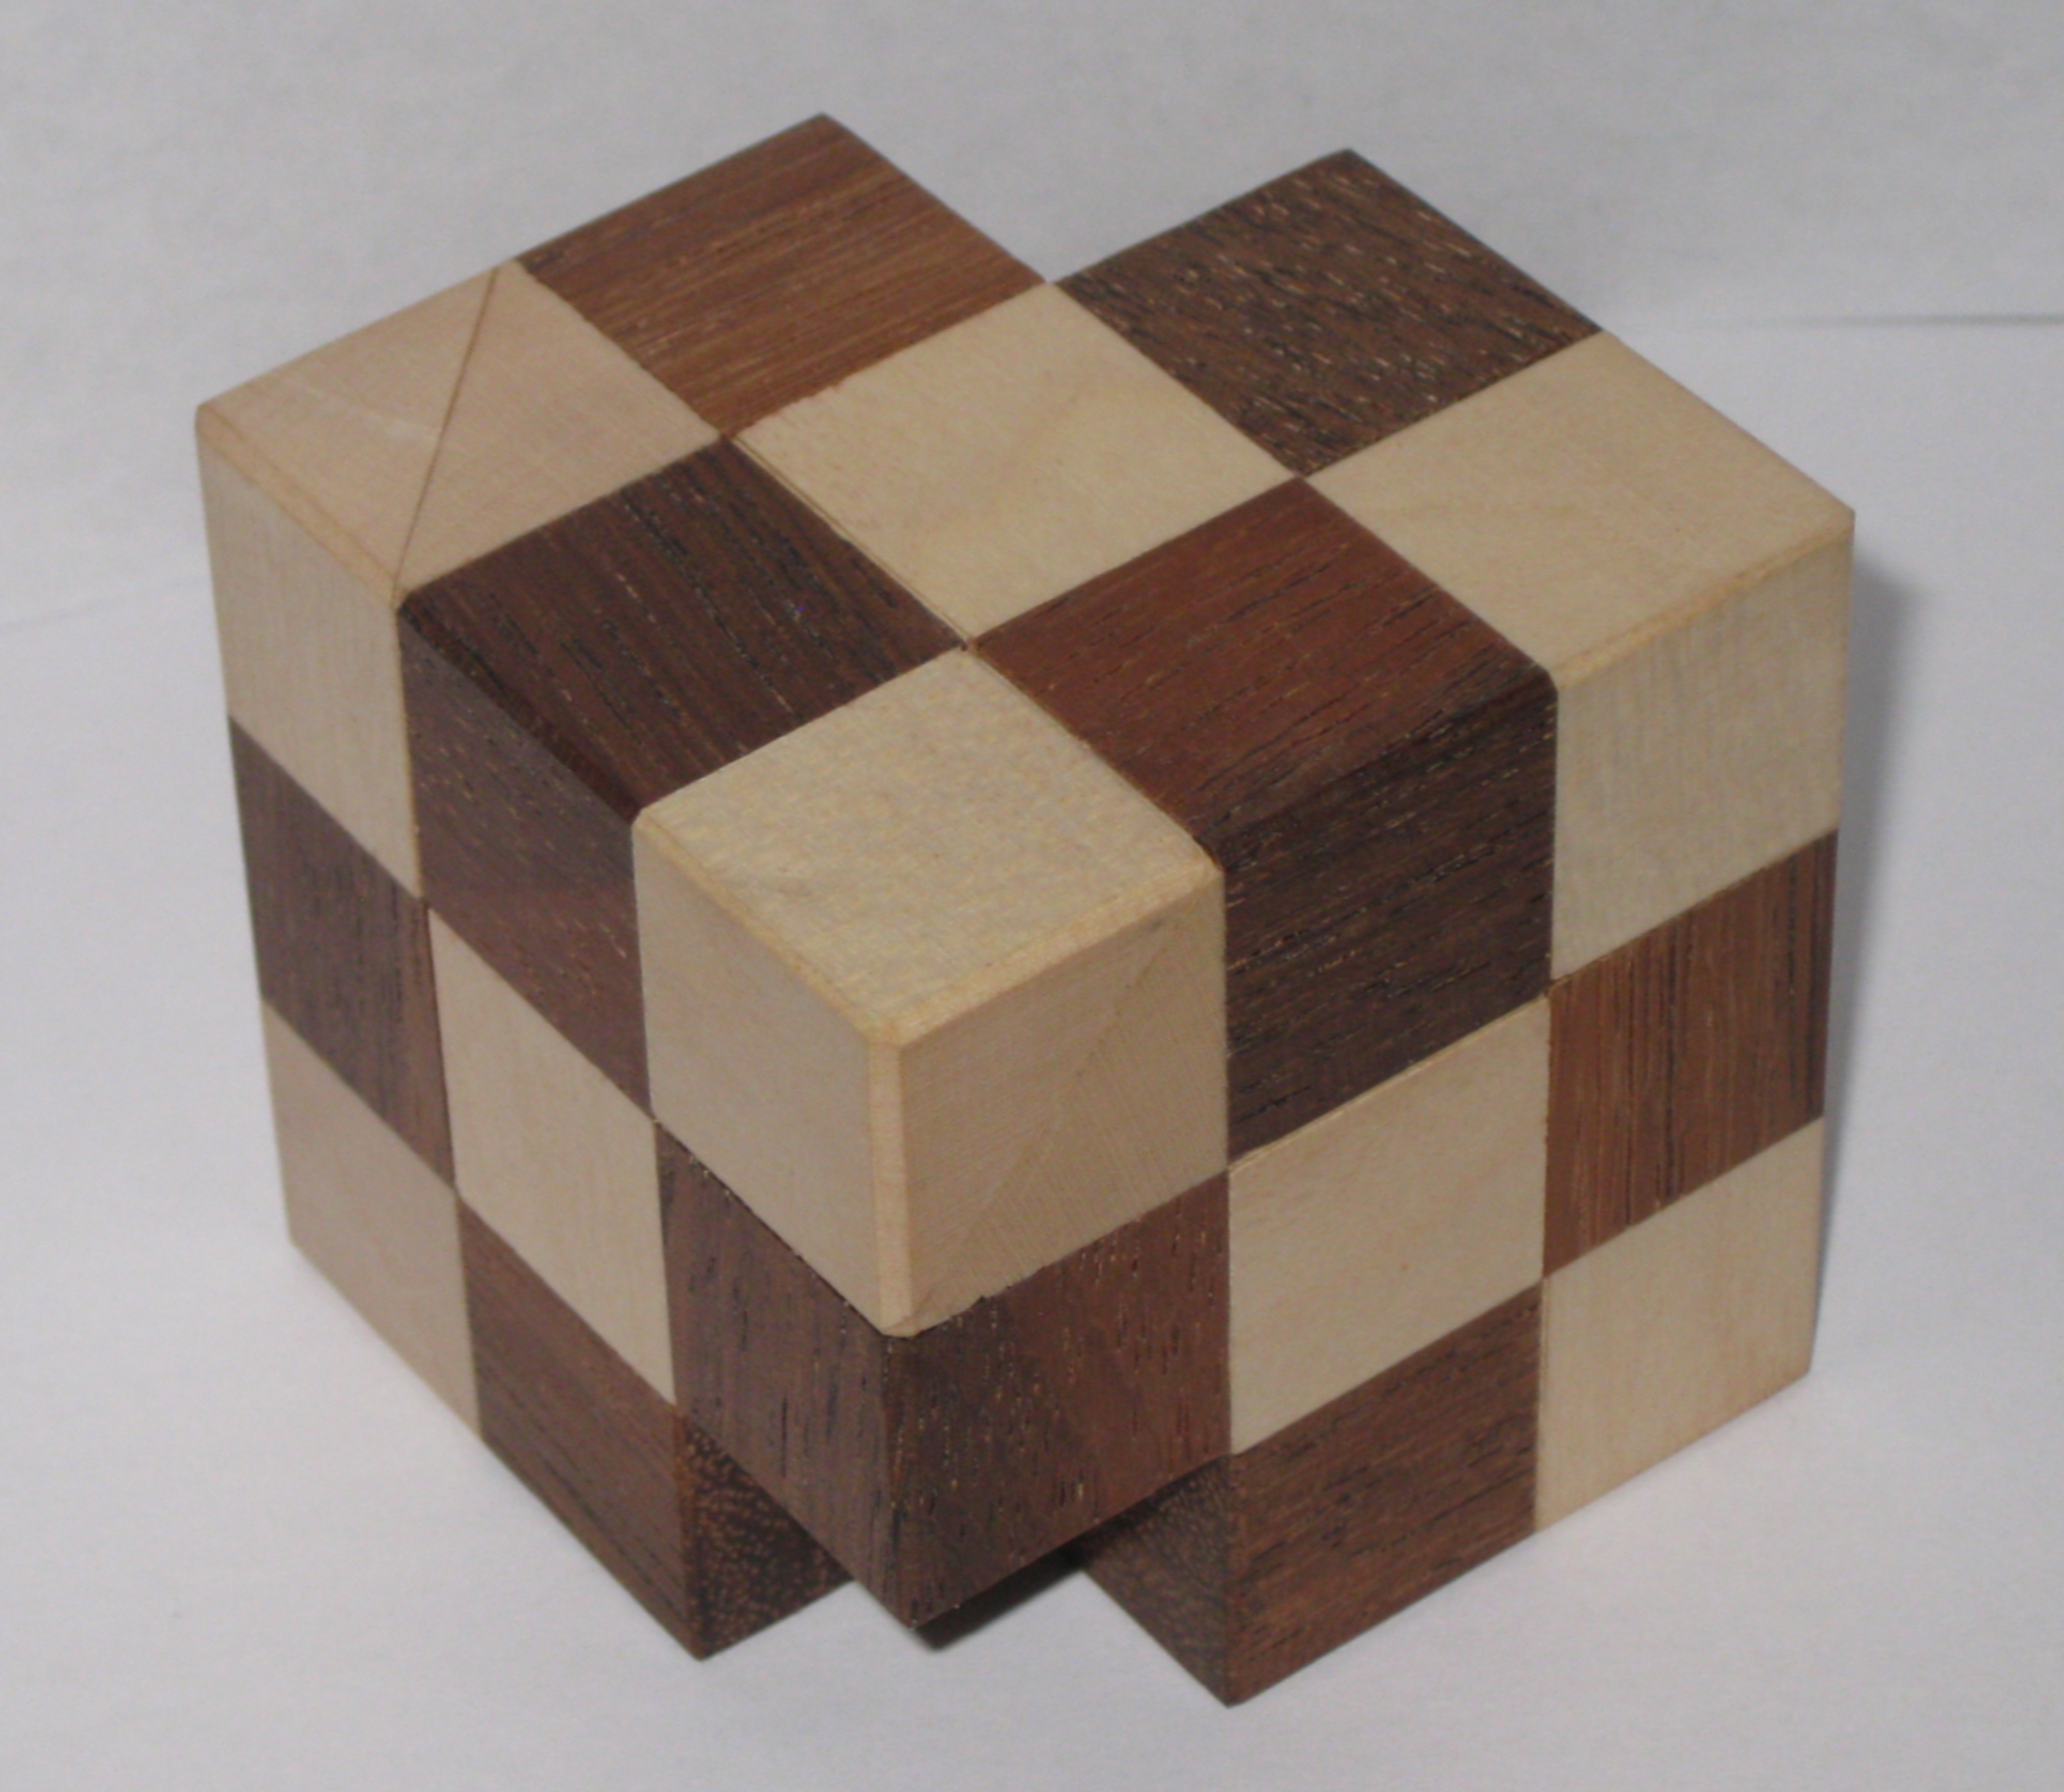
The other design from Gregory is his “6 Piece Cube”. Interestingly, this cube is missing a couple of cubies, meaning it’s not really a cube, but I’ll not fault the design name based on that. Those missing cubies are very useful! This is the slightly larger of the two puzzles, at just under 2.5″ cubed made from walnut and Maple, the contrast of the checkerboard appearance is a good look.

Being a six piece puzzle, the difficulty in this one does go up a notch. Finding the correct grip on the puzzle to allow the pieces to start sliding past each other can be challenging until you know how to hold the puzzle, as often you’ll find a finger is blocking the motion you need. Remember I said those missing cubies were useful?

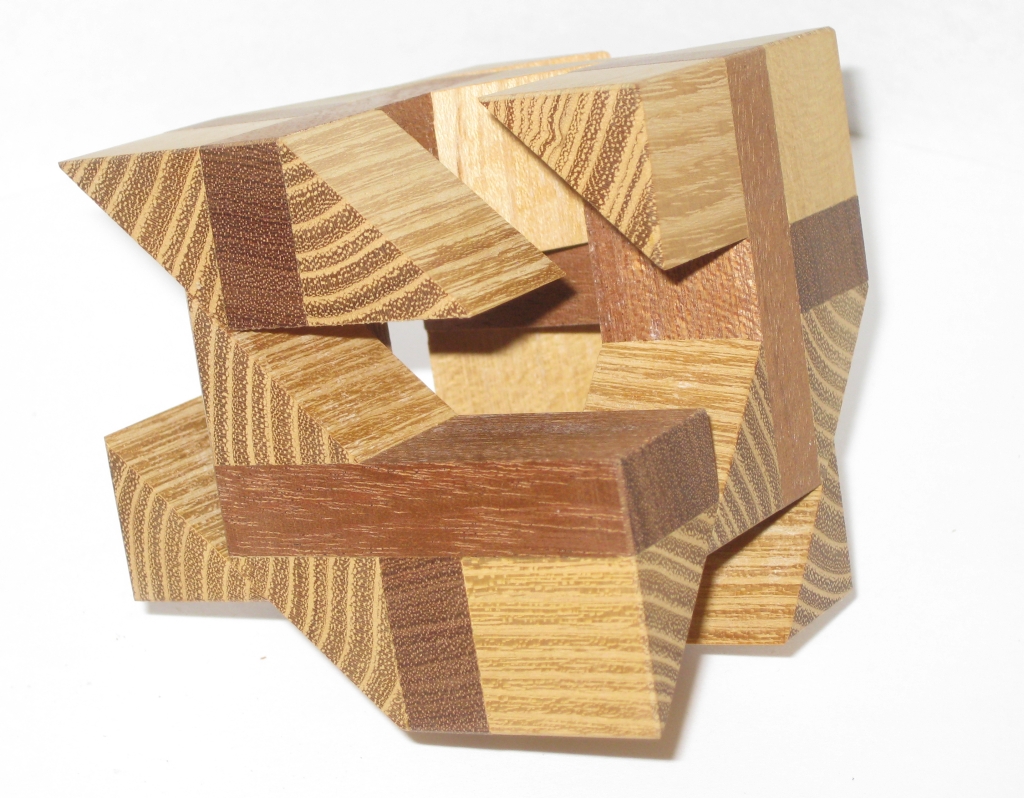
6 Piece Cube opening

6 Piece Cube opening

Once you find the correct axis, the pieces will side past each other, creating some interesting triangular geometry in the voids between pieces. As with any other co-ordinate motion, the puzzle expands in size, right up tot the point where it falls apart in your lap. My copy is very well made, with excellent tolerances. The puzzle is tight as it expands, allowing the pieces to hold onto each other until the very last fibers before they crumble into a pile of six pieces.

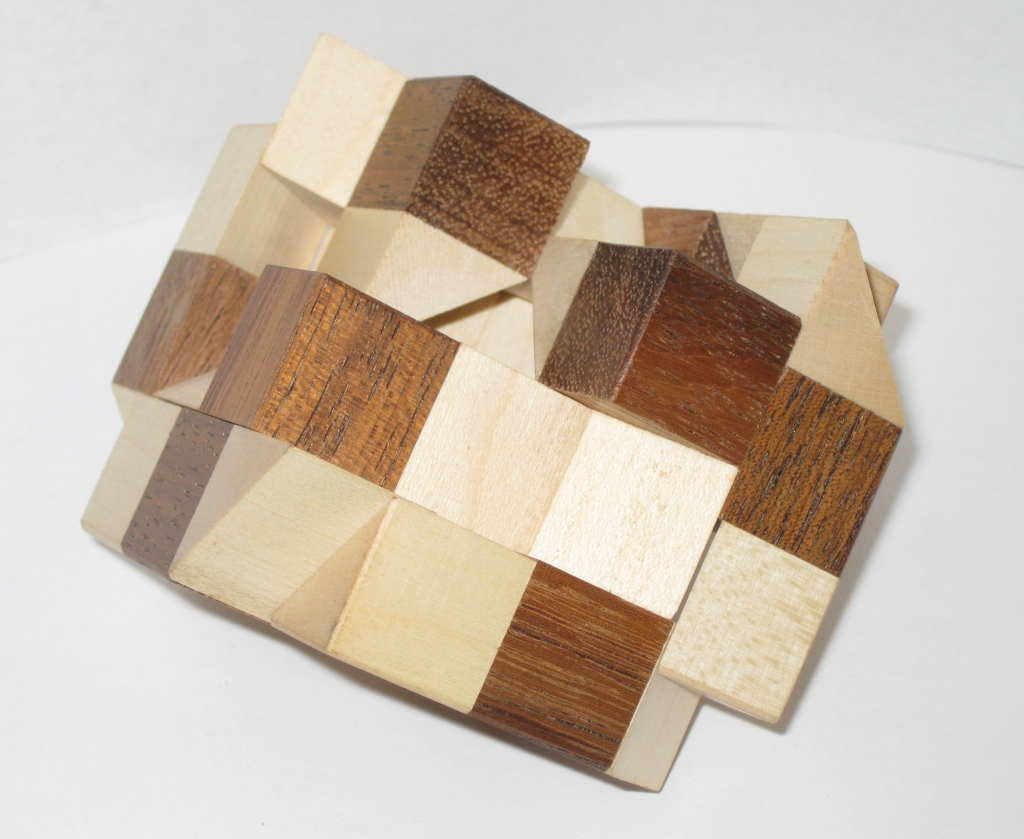
6 Piece Cube pieces

6 Piece Cube pieces

The pieces in this puzzle are made from two sets of congruent pieces. It’s not too hard to see how the pieces go back together, however with six pieces, it takes a little longer than it does with the first puzzle. Then the real challenge starts. Once you have found the correct orientation, getting all the pieces back together is far more challenging. The puzzle needs to be expanded to near collapse to allow a piece to be inserted, and the easiest way I found was to add one piece at a time … so I had to do this more than once, and try not to mishandle a piece and put myself right back to the start of the assembly.

It’s a much more challenging puzzle, but has a great motion as it comes apart, and is achievable by most people. An experienced puzzler should have no problems, and will enjoy the interesting geometry in the puzzle. I do hope Gregory continues his exploration of the co-ordinate motions, as these two puzzles are a great start!

Magic Billet Box

Back in October last year, I came across a kickstarter project for Krusen CNC offering up some interesting new options on the Magic Billet Box that Oli Reviewed years ago. I’d been on the lookout for one of these, however any time I went to the shop, they were unavailable. This seemed like a good way to finally get one of these boxes.

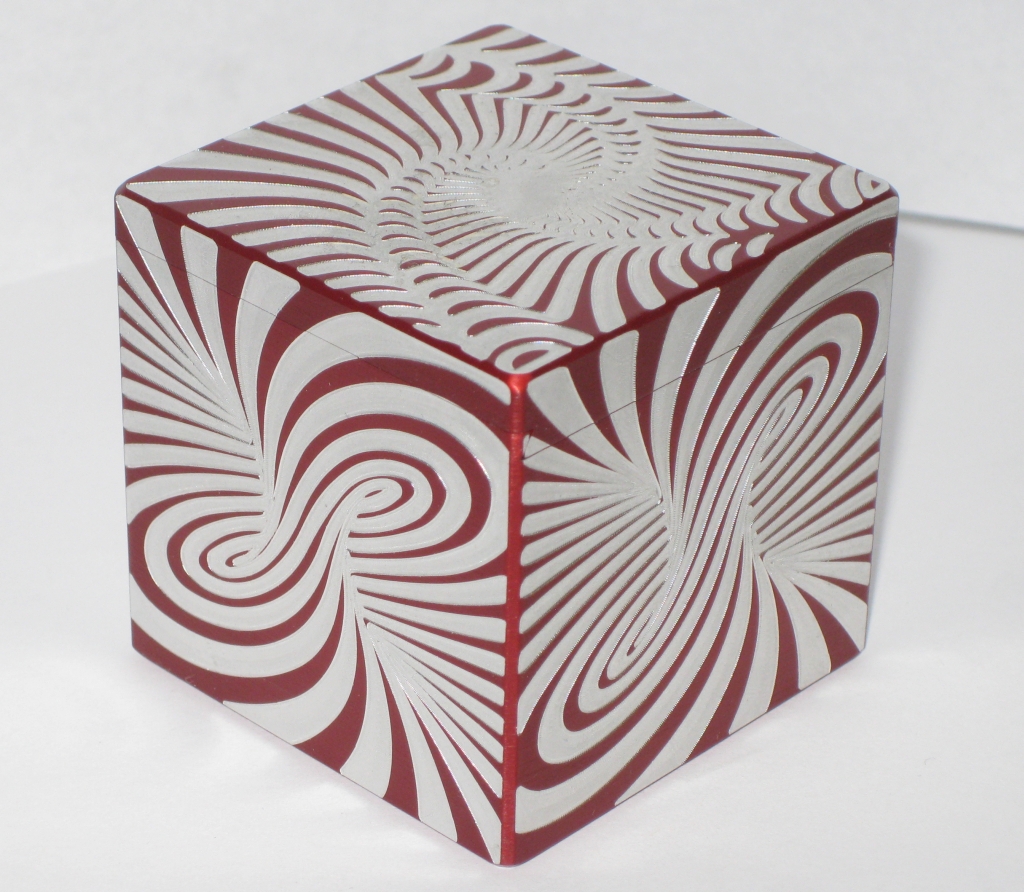
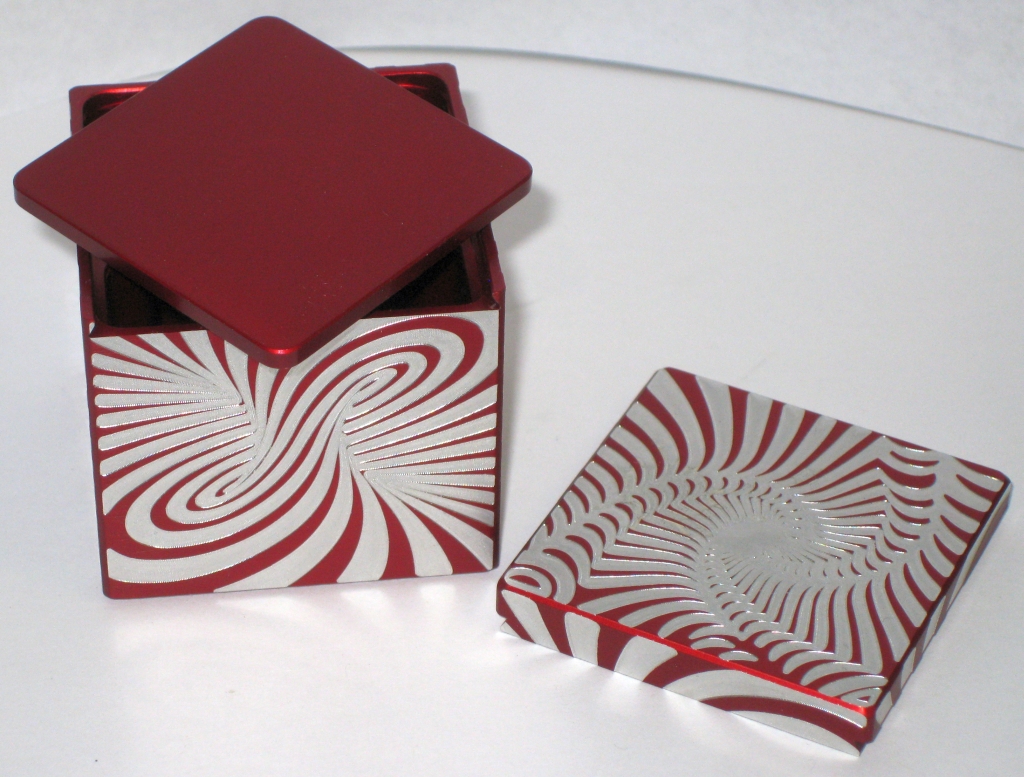
The Magic Billet Box in Red anodized aluminium.

The Magic Billet Box in Red anodized aluminium.

The kickstarter was offering some new options for the anodisation of the aluminium, as well as some new external patterns for the boxes. Sadly the kickstarter didn’t reach its goal and was unsuccessful. That said, an offer was made for anyone who had backed the project to get a box of their choosing at the price they had backed the campaign. Seemed like a win-win. So in November, I received the box above with the “Vortex” pattern.

At 2″ cubed, and having a fair heft to it, this is a solid little puzzle box. Being made from 7072 Aluminium, otherwise known as “Aircraft grade”, it’s a very stable metal and is great for machining. Although it’s not easy to see, there’s a perfect sliding dovetail that form the ‘lid’ of the puzzle, which thanks to a big magnet has a reassuring snap when it’s slid on or off.

Unlike Oli’s copy which is in black anodized aluminium, the sliding lid is a little easier to see on my copy. The black hides the seam making it near invisible, where the red makes it stand out a little more. It’s not an issue, and certainly doesn’t affect the puzzle, but it is worth noting.

Even the internal space in the box is a good size, having 1.75″ x 1.75″ x 1.5″ of usable space inside. Great for storing mints on my desk. And because it’s aluminium and not wood, there’s no fear of whatever you put inside it staining the box, or becoming contaminated. A truly useful puzzle box.

The Magic Billet Box but it's not open

The Magic Billet Box but it’s not open.

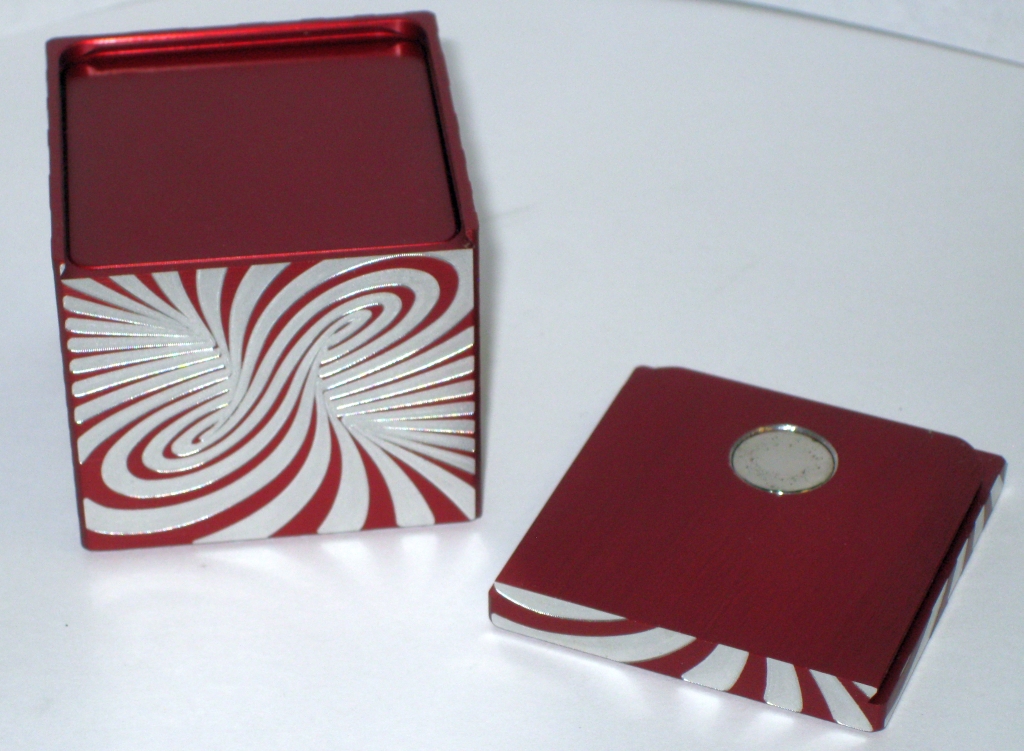
Sliding the lid off doesn’t get you into the hidden space though. Wouldn’t be much of a puzzle if that was the case. Instead you’re greeted with another lid, recessed into the box, and no apparent way to take it off. The big magnet on the sliding lid may be a hint though.

In the style of box I ordered, simply placing the lid onto the box doesn’t open the inner lid, although there is a box offered where the opening mechanism is this simple. For me there’s a little extra work required. And if you try to solve this box with it sitting on the table, you’ll never open it!

The Magic Billet Box opened.

The Magic Billet Box opened.

Most of you will have figured out how this works, but I’ll not give away it’s secrets. Instead, I suggest you go get one of these great little boxes. They’re well machined, and the tolerances are spot on to make this a solid box that will last many years, and take a lot of abuse.

Trapped Coin by Bill Sheckels

Quite some time back, I reviewed the Caged Coin puzzle by Bill Sheckels. Not long after I reviewed it Bill got in touch to say he had a few other new puzzles that were going to be added to his Etsy shop soon, and asked if I’d be interested in any of them. They looked interesting, so of course I said yes.

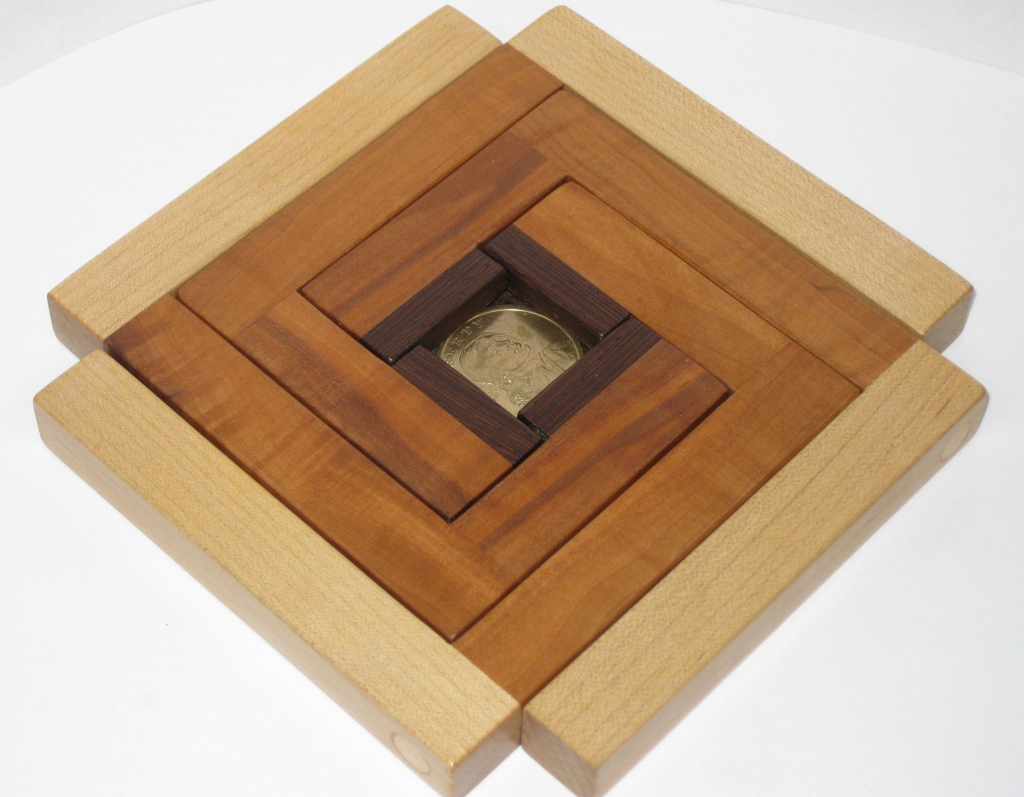
Trapped Coin by Bill Sheckels

Trapped Coin by Bill Sheckels

As you can see it’s a good looking puzzle. Four identical pieces hold a coin trapped in the centre. At just over 5″ wide x 1/2″ thick, it’s a big puzzle. and bill has re-inforced the corner joints with dowel rod to ensure that they’re not going to break with you play with the puzzle. Trapped in the centre is an American one dollar coin, making this the second puzzle in my collection to have a dollar coin as it’s prize. I believe the woods used are Maple, Mahogany and Wenge, but that’s just a guess on my part. I don’t have a record of the woods used. (or even the true name of the puzzle!)

When you pick the puzzle up, there’s enough flex in the pieces to make you think that there may be a way to manipulate the cage so that it will pop apart, releasing the coin. I certainly don’t recommend this, as it’s not the solution, and will likely damage your puzzle. There’s a much more elegant solution.

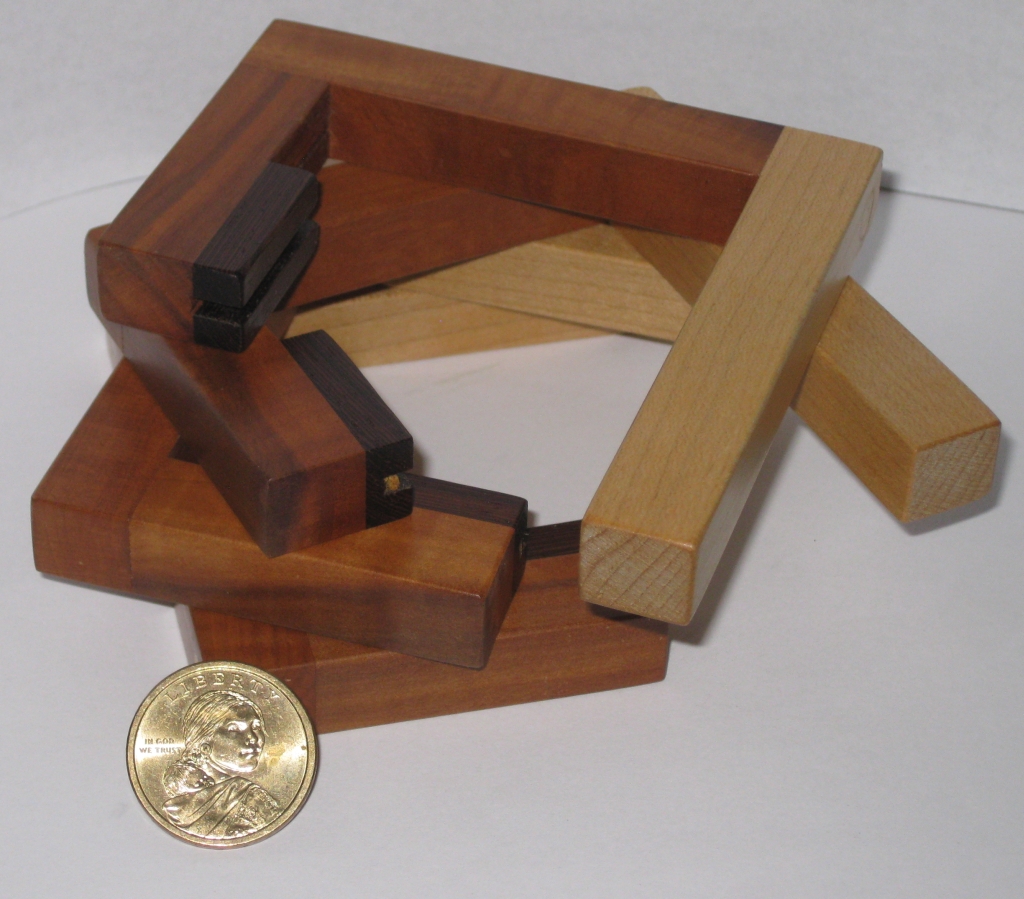
Trapped Coin opened

Trapped Coin opened

The solution is pretty simple, and I doubt it will take many people long to solve it, but it’s a nice object that has that look of impossibility about it that tends to draw people in. Great as a gift, and a fun puzzle to have sitting around.