Tag Archives: Metal

Angel Box

Wil Strijbos is a well-known name in the puzzle world, with his metal puzzles being beautifully made, and highly sought after. Not only does he design and sell his own puzzles, but he seems to be able to find rare puzzles which other people, myself included, seem near impossible to find. I have no idea how he comes across some of the items, but all you need to do is to ask. When Wil announced his latest sequential discovery puzzle “The Angel Box” with a fairly long story about its creation, it sounded pretty interesting, and given enough time, one found its way to me.

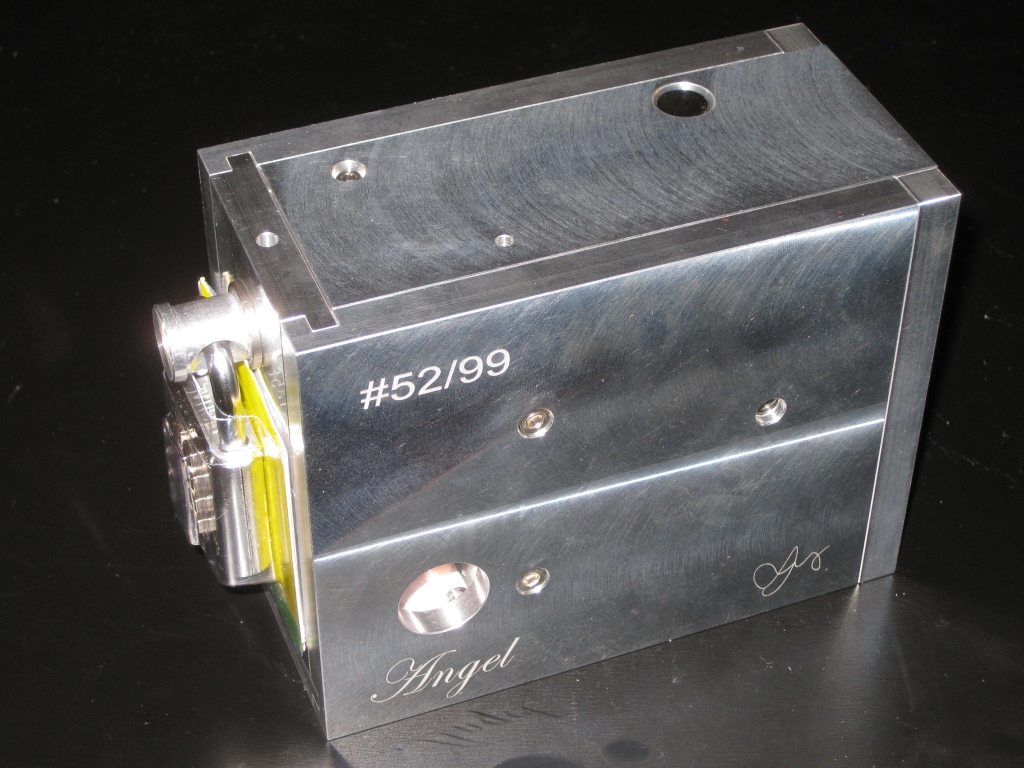
The Angel Box from Wil Strijbos

The Angel Box from Wil Strijbos

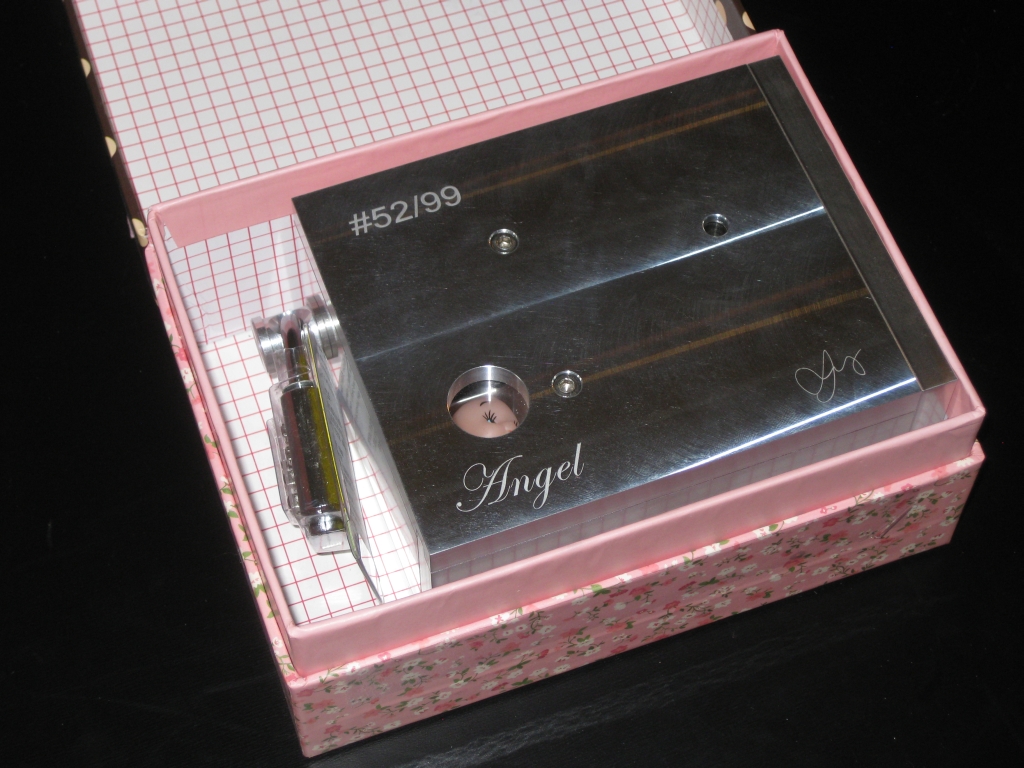
If you’ve ordered a puzzle from Wil in the past, you’ll know immediately when it arrives, as the package is always completely covered in a layer of brown packing tape. After that, there’s various quantities of bubble wrap and newspaper to keep the puzzle safe. The Angel Box takes the packing one step further, and you’ll find the puzzle itself wrapped in the very attractive birthday gift style box, complete with bow and gift tag.

An early birthday present

An early birthday present

Look what's inside

Look what’s inside

As you’ve probably realised already, this is a big puzzle. At 6.25″ x 4.33″ x 2.75″ and weighing in at a whopping 1.9Kg it’s fair to call this heavy metal. Made from some pretty serious aluminium, while the puzzle isn’t a solid block, it is solid. I certainly recommend puzzling with this one at the table. Not just due to the potential damage you could do from dropping the puzzle, but also due to the tools that you’ll start accumulating as you work through the puzzle. The small peep-hole in the side gives a hint of the goal, to remove the Angel from the box.

Your first challenge is the padlock on the front of the box, and as you’d expect from a puzzle, the small metal tag held in the shackle doesn’t contain the code you need to open the lock. That would be far too simple, and if you’ve read any of my other reviews of Wil’s puzzles, you’ll know that opening a puzzle for the first time tends not to be simple! At least the plate gives you the clue that the code is 4 digits which should make life a little easier for you.

Before too long, you should have the padlock removed, and be able to make some progress, although it may not seem helpful at first. At this stage, there’s not a lot of options to progress, and as with any good sequential discovery puzzle, you’ll quickly find a few tools, which in theory should be useful. Finding out what to do with the tools you’ve found is all part of the fun, and take heed from Wil’s own guidelines, that the padlock is not needed to solve the puzzle. Don’t be tempted to use parts of it in the solution. He gets very upset if you use the padlock as a tool!

Looking around the puzzle, you’ll find a number of small holes scattered about, and figuring out how to use the tools you have, and the correct sequence to use what you’ll find as you explore is the key to progress. There’s a great sense of achievement as you discover how the mechanism interacts, and finally make the next step toward progress in solving the puzzle. That’s lock #2 down.

That done, another tool will almost magically appear, and allow some fairly obvious progress toward opening the box. Lock #3 passed. Then things get interesting, and this is where I lost one of my tools. There’s a little flaw in the design of the puzzle, which allows you to lose the tool you need, and potentially prevent part of the mechanism from working correctly. To my mind, it would be a fairly simple issue to fix, but for now, a little care is needed not to lose a key tool. With this part of the puzzle carefully navigated, you’ll have lock #4 solved, and the goal should be in sight.

The Angel in the centre of the box is within grasp, but there’s a final lock, a cage, keeping her locked away. It shouldn’t take you long to get past this final lock and release the Angel. Lock #5 solved.

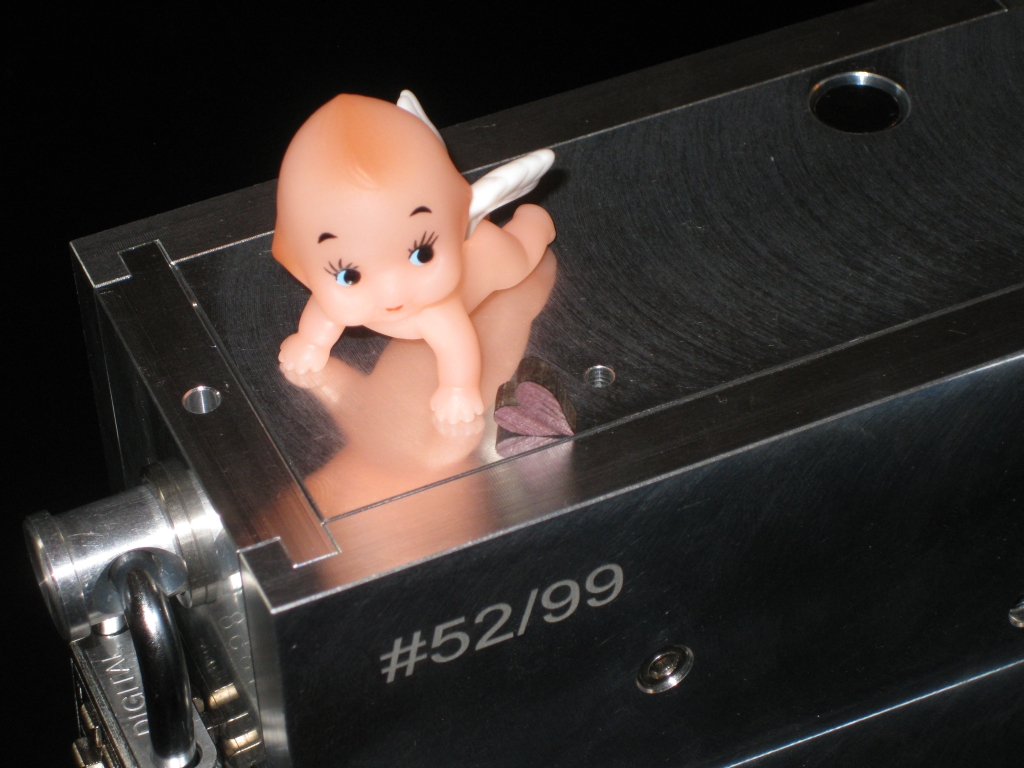
The Angel and her heart

The Angel and her heart

With the Angel free, you’re not quite done. Freeing her heart is the last piece of the puzzle. A small note located with her will leave you with a final set of instructions… but I’ll leave it for you to decide whether to call the number or not. Perhaps Google it first!

Overall The Angel Box is a nice puzzle. Far simpler than I had thought it was going to be, and it took me far less time to solve than I had perhaps hoped for a puzzle at this price. Start to finish I had the puzzle open in 10 minutes so it’s certainly not a puzzle which will have you stuck for weeks. That said, my solve time may not be representative of the mileage others have had. Now my challenge is whether to display her inside her birthday box, or as the attractive aluminium puzzle that she is outside the box.

Revomaze R2 – Mercury

This entry is part 10 of 11 in the series Revomaze

If you’ve read my posts on the Revomaze puzzles, you’ll know the first generation of puzzles ended with the release and solving of the Gold Puzzle. There are a few special editions out there, but for me solving the Gold, was the end of the journey on the R1 puzzles. Chris Pitt, has come out with an entirely new design of puzzle, a second generation of Revomaze puzzles, the R2’s. The first in the series is Mercury.

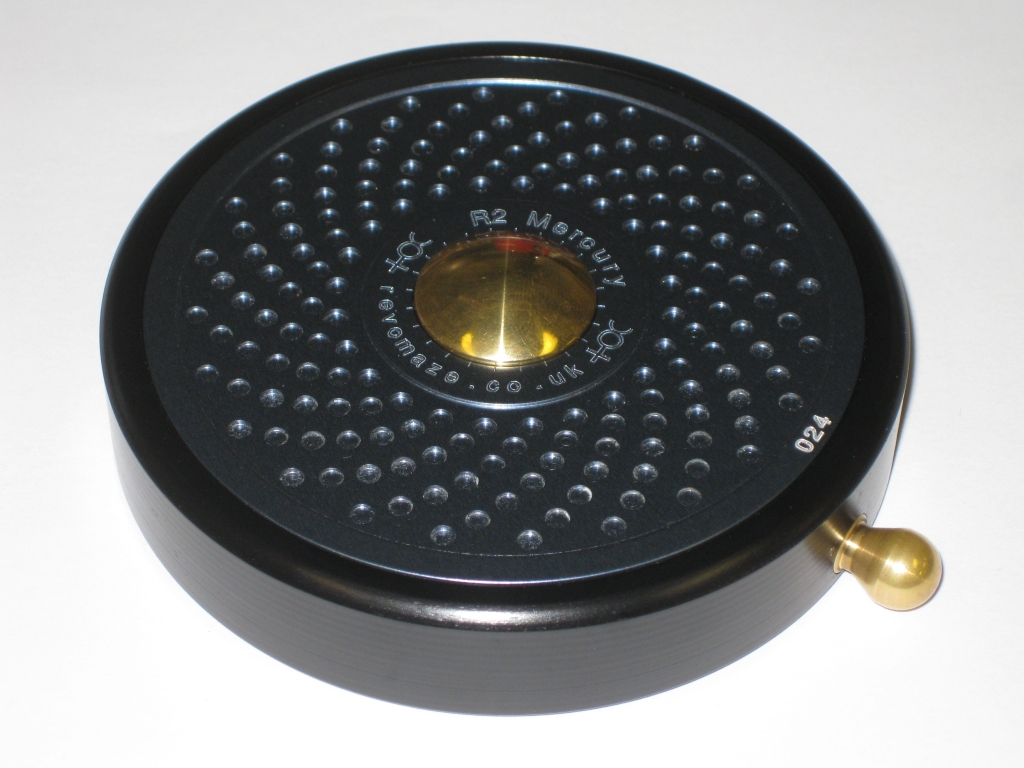
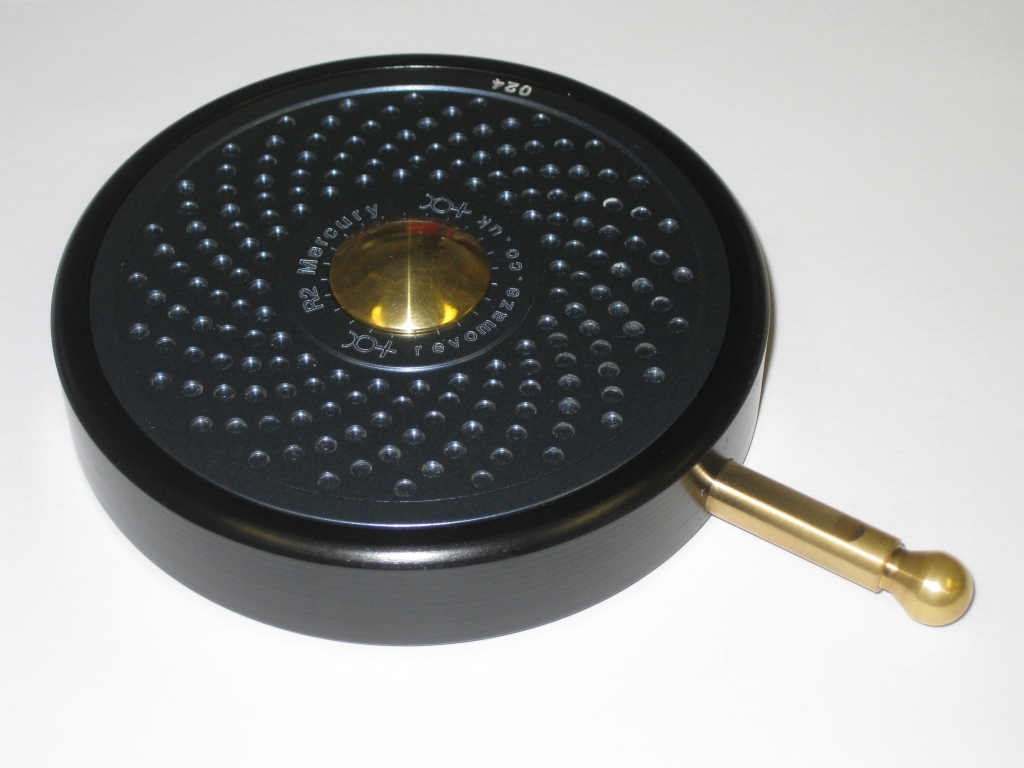
Revomaze R2 - Mercury

Revomaze R2 – Mercury

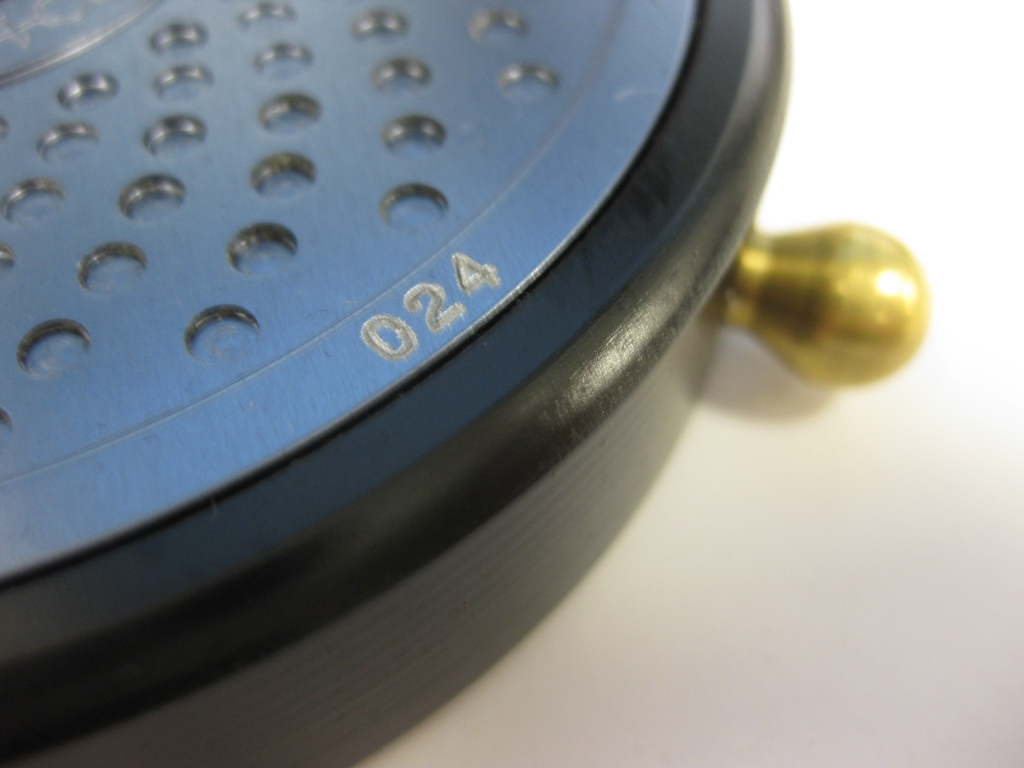
This second series is based on the planets in the solar system, and the closest to the Sun, Mercury, is the first to be released. The series has had a difficult birth, with the company trying to raise funds to buy CNC machines to bring all the production in-house, and move away from the reliance on engineering companies to produce the limited run puzzles they wanted. To that end, “Voyager Status” was created. This was an up front payment to guarantee the price of each puzzle in the series (up to 10 puzzles) for early adopters. For that you’d receive a limited edition coin (stored inside the puzzle of course), your puzzle would be part of the initial limited edition run of 100 puzzles and would be engraved with a serial number to set it apart from other general release puzzles to be released later.

So back on the 12th March 2013, I sent Revomaze £50 of my hard-earned cash, and sealed myself a place on the voyage to the R2. At some point over the course of the next 8 months there were a few changes to what Voyager status meant, and a decision was made at Revo HQ to limit the R2 run to only the 100 puzzles from the Voyager sign-up. The result of this decision is that the puzzles would only be made to meet the Voyager demand (100 max) and no more would be produced or sold until the Voyager members have ALL of their puzzles from the entire series. So at this point, if you missed out on Voyager status, expect it to be 3 years before you get your hands on a Mercury, or any other puzzle in the series. Note that this assumes a release schedule of 3 puzzles per year.

Not long after the Voyager announcements, the option was given to the first 20 people who wanted to pay for the puzzle to receive the puzzle ahead of the main batch, and be part of a ‘Beta Trial’ to allow Chris to sort any issues, and make sure the puzzle worked perfectly. Since I’m always happy to help bringing a new puzzle to life, I agreed to be one of the first batch. On the 1st May 2013, I paid for my puzzle, and began the wait for the R2.

Mercury #24

Mercury #24

Background covered, I should probably start talking about the puzzle, as I’m sure that’s why you’re here. I received my puzzle on the 14th February 2014 and eagerly opened the package when I got home from work, to start playing with the new puzzle. My plan was to take it to the California Puzzle Party on the 15th, and let people play with it there. In fact Chris had express shipped the puzzle to me to ensure that I had it for the Puzzle Party. (Note: He’d done the same for a puzzler on the East coast, and also to some of the puzzlers in the Midlands) Before taking it to the party though I wanted to have some time to play and understand the puzzle. Foolishly, I’d hoped that I could open it before the party. I spent 2-3 hours with it on the 14th trying to understand what was going on, and start mapping out the paths inside the new maze. Most of that was just spent getting used to how different this puzzle is to the original series. It’s a completely different animal that needs a very different touch to be able to solve it. And yes, I did take my wife out for dinner that night… I’m a romantic at heart.

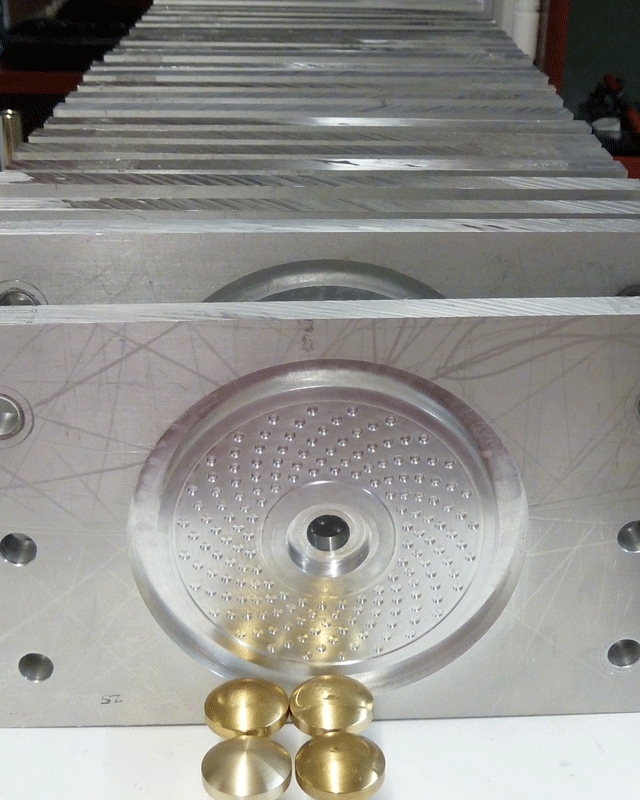
The raw maze before it's finished

The raw maze before it’s finished

The puzzle itself is made from a couple of solid blocks of aluminium and measures 4-1/8″ in diameter by 1″ tall. Including the knob for the draw bar the puzzle is 4-5/8″ and weighs in at 800g. Now I’ll be honest, despite being heavier than the original R1’s, the puzzle feels lighter. Perhaps just the weight being spread over a larger diameter helps.

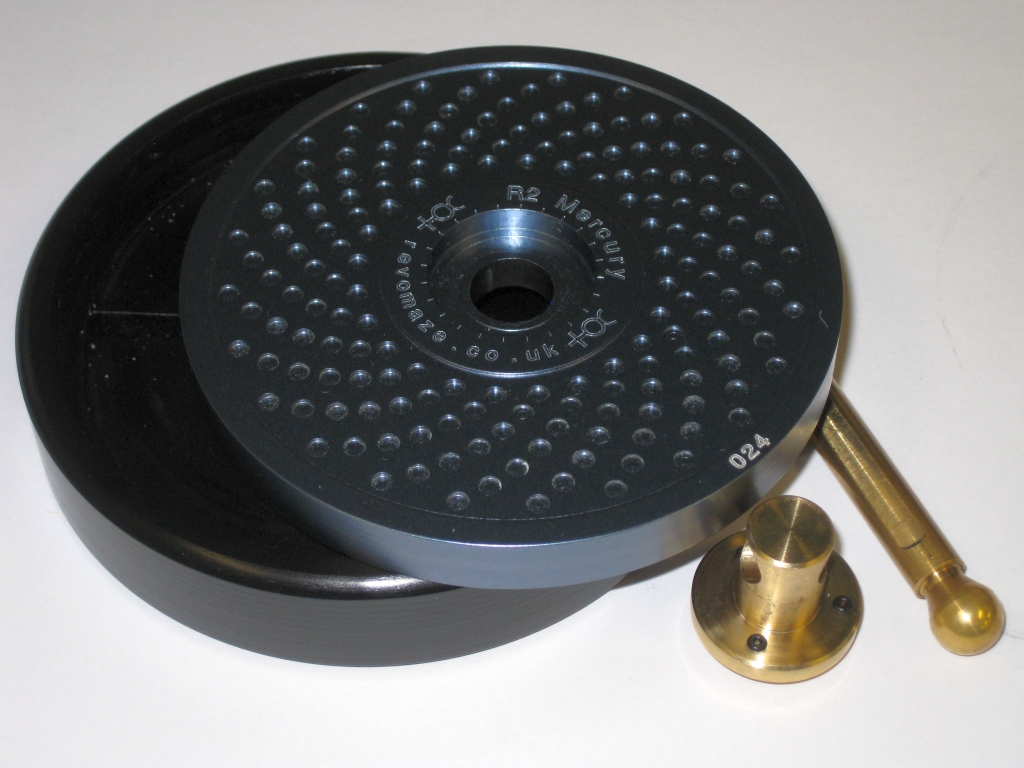
Unlike the R1 where the pin was in the sleeve, and the maze on the central core (or draw bar if you like) requiring you to twist, push and pull the core to navigate the maze, the R2 is a little different. The pin is attached to the draw bar, and the maze is etched onto the titanium coloured disk which rotates inside the black outer case. To navigate the maze you need to both push and pull the draw bar while simultaneously rotating the disk. This requires a lot more coordination than the original maze, and is a very different experience. Any skills you may have learned from solving an R1, will be of little use to you here.

Despite my best efforts and a very crude map, I certainly didn’t solve Mercury before the Saturday puzzle party. One issue which did arise as I played with it was that the silky smooth rotation that the puzzle exhibited on the Friday night, wasn’t quite as smooth by the time I arrived at the puzzle party. I wish I’d realised before going as the puzzle was mostly unusable given the amount of friction between the maze plate and the case. We required two hands on the disk to turn it in any direction, and really any chance of playing with the puzzle or solving it were gone.

Talking with Chris, he suggested WD-40 would help. Skeptical as I was, I took the can of WD-40 to the puzzle, giving it a good coating, and spin it did. The friction issues were completely resolved, and it moved better than it had when it arrived. Over the course of the next week, I didn’t have a great deal of time to spend with the puzzle, but I dabbled on and off mapping as I could and trying to understand what I was ‘seeing’.

Mercury during solving

Mercury during solving

Mapping the R2 is a completely different challenge to an R1. With the R1, you can think of unrolling the maze to a flat plane (since effectively that’s what it is – wrapped onto a cylinder) but the R2 is already flat, and is circular. Some Polar graph paper may be useful here. Fortunately, the centre of the disk has 24 notches, and the dimples on the outer rim match to 15 degree increments. Handy for reference! I started out with regular graph paper making a very crude attempt with a compass. Let’s just say it wasn’t elegant, but it worked. A couple of people pointed me to that wonderful invention – the Internet – to download some polar paper, and I transferred things to there.

One thing you’ll find in Mercury is that it’s full of curves. Actually it’s full of circles! Chris claims that the design of the maze is meant to represent the cratered appearance of the planet itself, and I guess I can see that. As I mapped, I found that there was a chunk of the map which I couldn’t get to , just a little clockwise of the serial number, and part around 10pm. Now knowing that nothing would be wasted in here, I knew that’s where I had to get to, but finding how was proving challenging. The other very concerning aspect I discovered was a trail leading through ~25% of the maze, where everything I had was trap. This was starting to look a lot like a Green. And I hate Green.

After a good few hours trying to find how to get to these new areas, find it I did, and my fears were confirmed. The puzzle becomes a serious dexterity challenge, needing the lightest of touches, and an excellent map. To get there, is a challenging section that I am sure will cause a lot of frustration (it did for me), assuming you can find it. The entrance is very challenging to find, and needs some very careful exploration of the maze.

Given that I have one of the first copies, there’s a few issues in the puzzle which Chris is already solving, as quickly as they are identified.

  • The Spring is a little light, meaning that it’s possible (and even easy) to hug the walls a little tight, and as a result get to parts of the maze through a route which was not intended. That’s fixed with a stronger spring in the draw bar.
  • There is a slight amount of play in the draw bar, meaning that it can rotate a fraction while you’re solving. It’s not a problem that affects the maze, and it certainly won’t help you, but that will be tightened up in the later releases.
  • The last and biggest issue with the early release is that the pin has a fairly rounded profile as you’ll see in the photo below. That means that in some areas where there are ledges in the puzzle, the pin won’t stay on the ledge, without applying some pressure to the wall. That’s being fixed with a different profile for the pin head.

As a result of these issues, a number of people have managed to open the maze very quickly having taken a path which was not intended. I didn’t find these shorter paths, and completed the maze as intended. The benefit of having produced this short run is that Chris is learning how the puzzle is used by someone who doesn’t know what’s going on inside, and by the time these get into general production for the remaining 80 in the run, they will all be perfect. It was a very sensible decision by Chris, and one which I hope he is aware was the best way to launch a new design, and make sure it’s exactly the way he intended.

Mercury #24 - Open

Mercury #24 – Open

From start to finish it took me around 8.5 hours to open the Mercury, and I’ll be honest, it’s a challenging puzzle, not for the faint of heart. It’s difficult from start to finish, and darn right evil from 50% through to the end. I’d even go so far as to say that the very last few millimeters of the puzzle are Satan incarnate. This is perhaps one of the most challenging static puzzle that Chris has released to date, and to my mind is far too challenging for the first puzzle in the series. Yes, you can argue that it took me less than 10 hours to open it, so it can’t be that difficult, considering how long it took me to open Silver from the R1 series, however I go back and re-solve Bronze and Silver. I never go back to Green, and I’m unlikely to want to ever go back and re-solve Mercury.


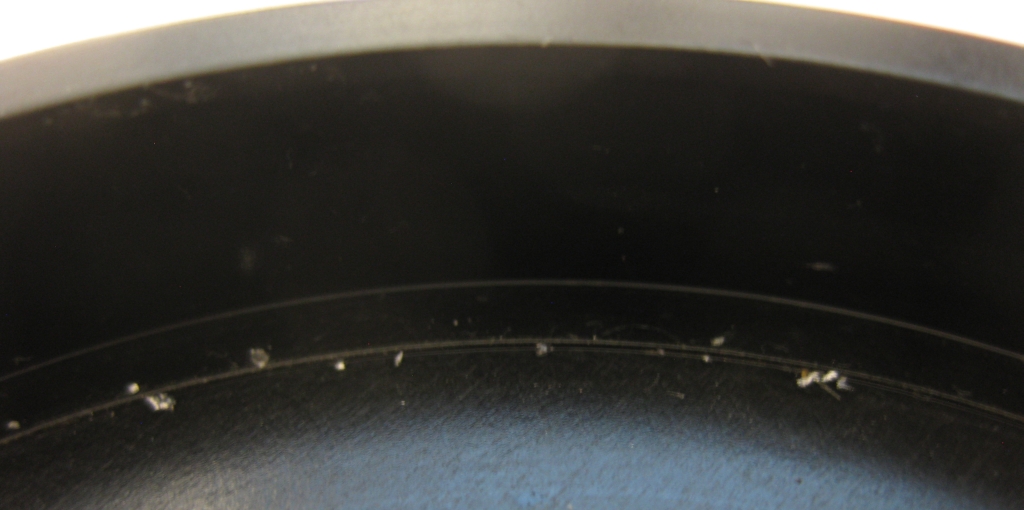
As a small aside, when the puzzle was opened, I found some small flakes of metal sitting in the case of the puzzle. Presumably from the grinding as a result of the friction between the two large plates of aluminium. It doesn’t affect the puzzle, and I certainly don’t see any damage to the maze, but clearly there is some wear as a result of using the puzzle.

Metal shavings in the case

Metal shavings in the case

Lee Valley Trick Bolts

One puzzle type I’ve not written about until now are Trick Bolts. These seemingly innocuous items look just like a screw with a bolt threaded onto it. Of course when you pick it up and try to remove the bolt you’ll find it rather more stubborn than you’d think.

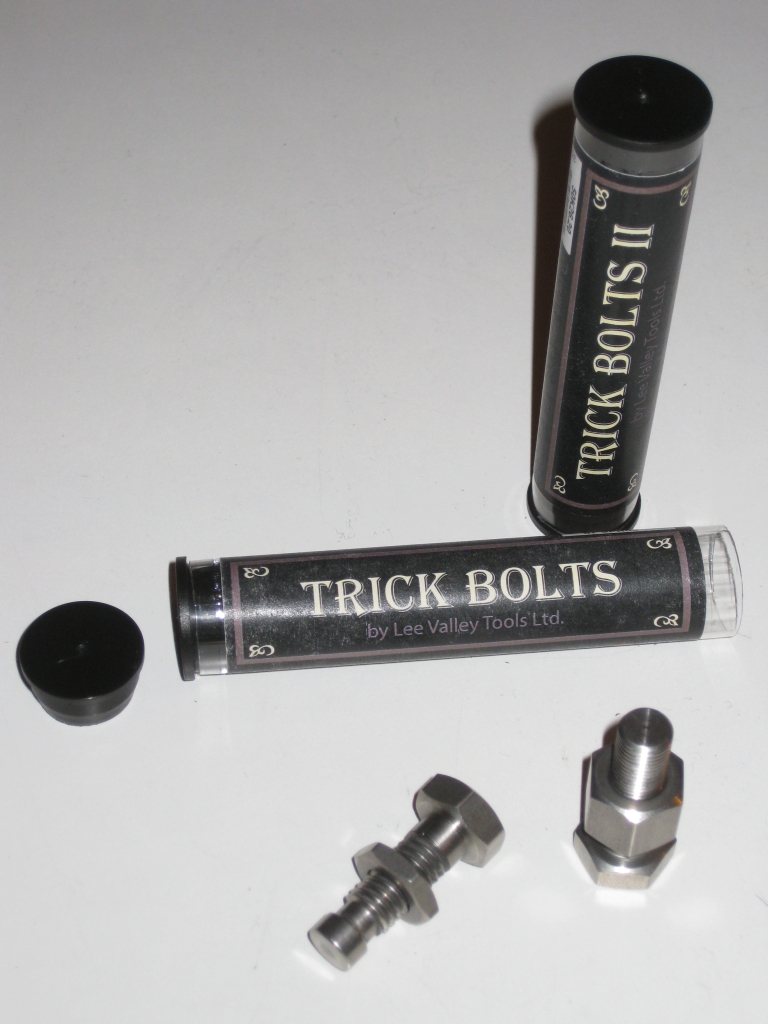
Trick bolts by Lee Valley

Trick bolts by Lee Valley

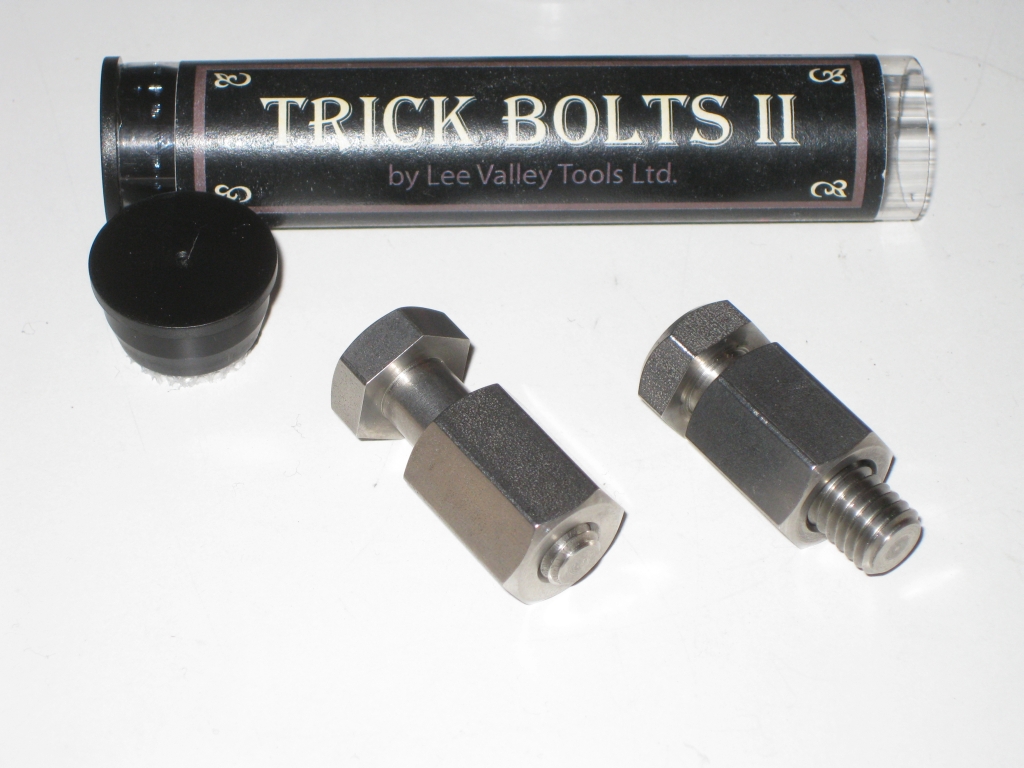
Lee Valley, who are well known for their woodworking tools also has a small number of puzzles they sell as gifts. They recently released their second set of trick bolts and with a few of my puzzling friends talking about them, I decided it was time to add a few bolts to my collection. Head over to Lee Valley to pick up your own copies. All the bolts are made in their own metal shop and measure 1.5″. These are probably the smallest of the trick bolts I’ve seen, however the quality is excellent, and they’re not expensive either.

Trick bolts by Lee Valley

Trick bolts by Lee Valley

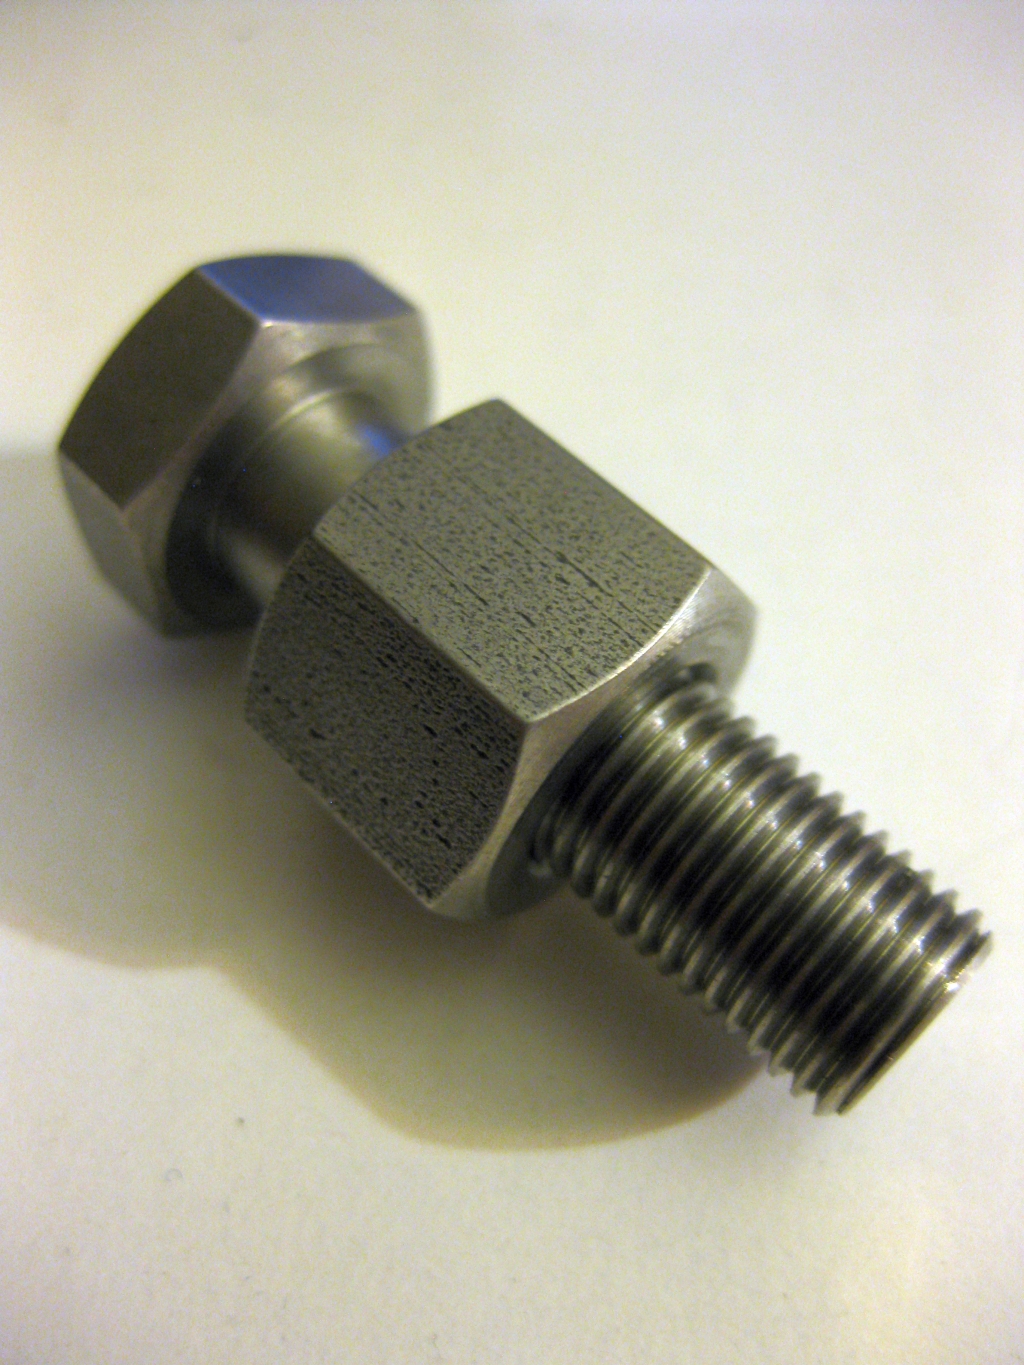
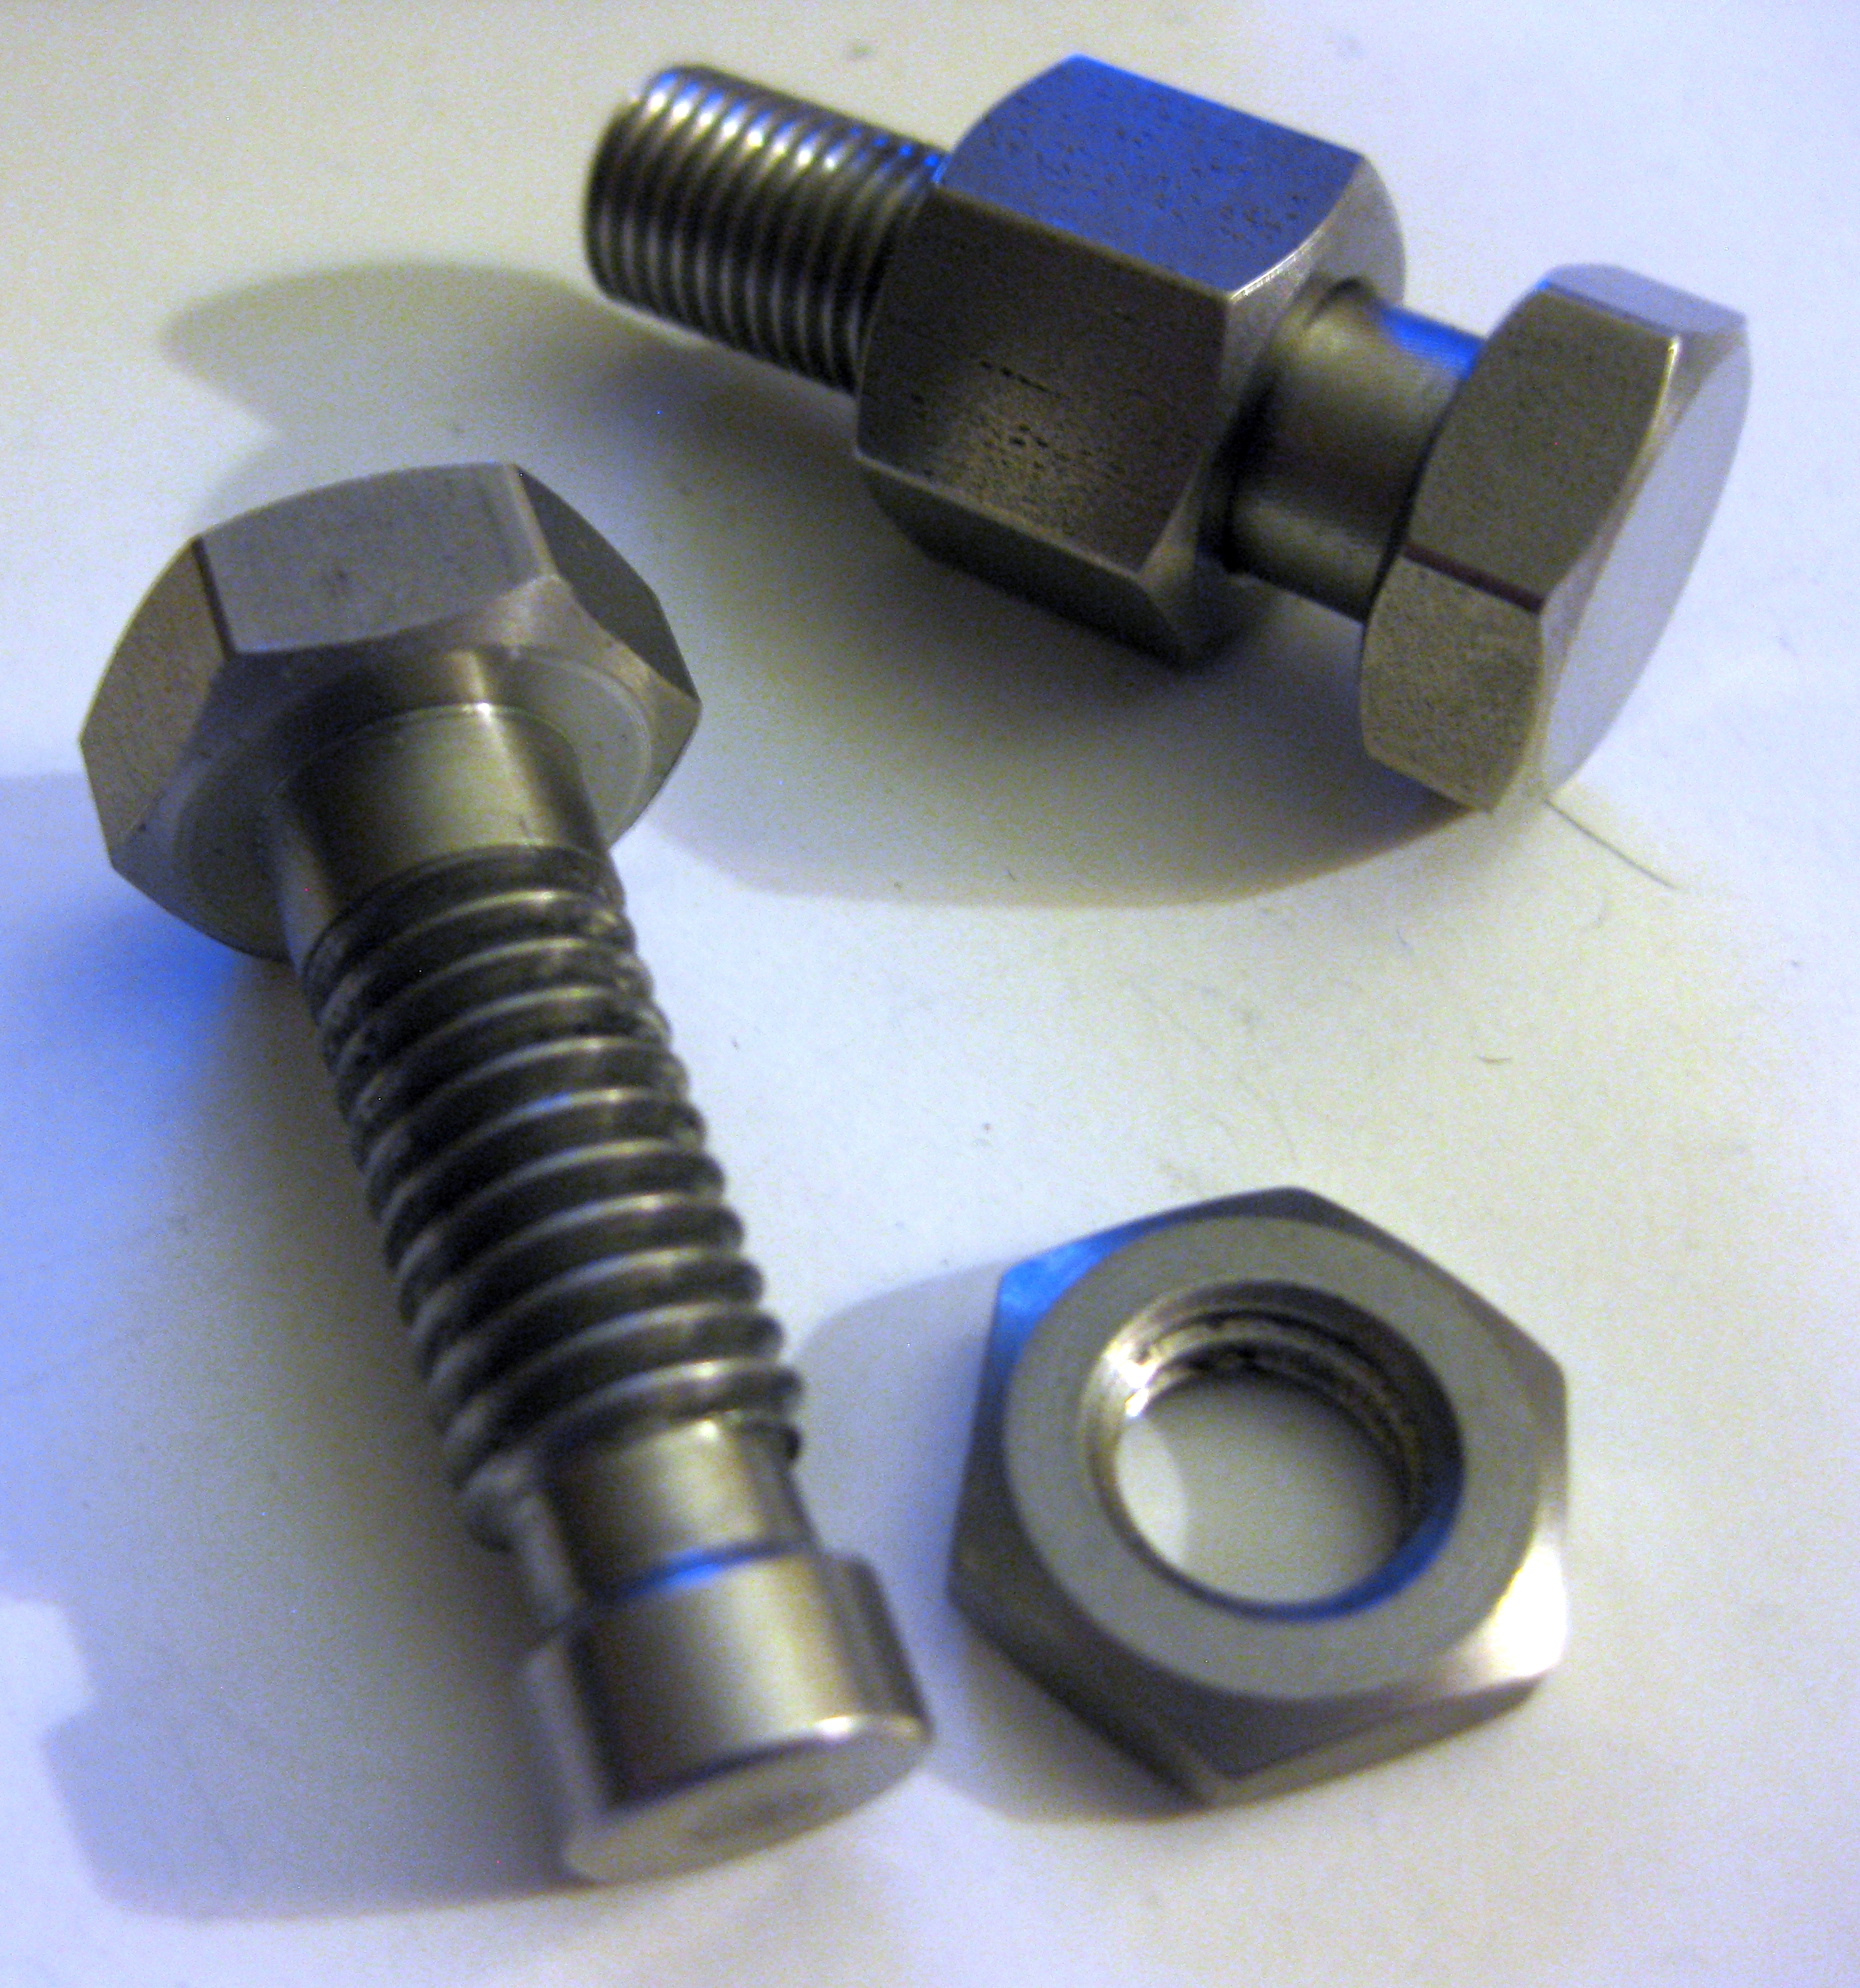
In the first set, the two bolts are fairly straight forward. The large nut on this one conceals it’s trick, and while this is a well known puzzle which you could make yourself, this is a very well made copy. If you have any bolts in your collection, I’d hazard a guess that you have one with this mechanism already.

Trick bolts by Lee Valley

Trick bolts by Lee Valley

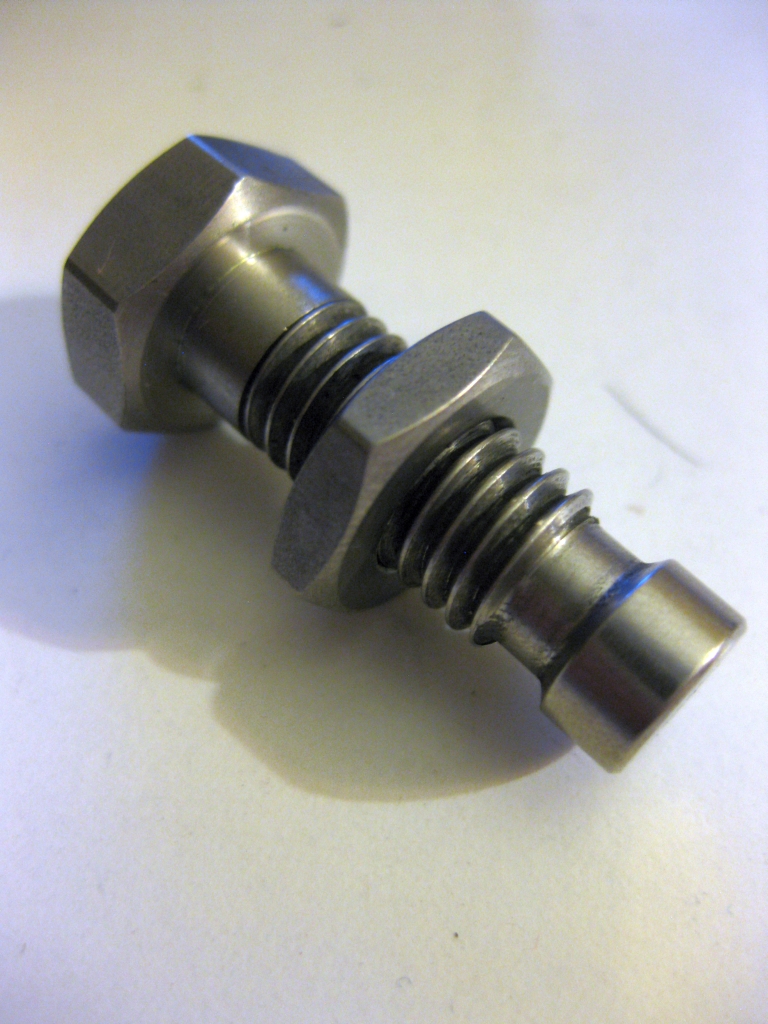
The second of the two bolts with the much thinner nut is able to travel the length of the screw, and will spin freely in the gap at the bottom. At first look it doesn’t seem like there’s a way to remove the nut. This puzzle has another classic trick which Lee Valley have executed perfectly.

Trick bolts by Lee Valley

Trick bolts by Lee Valley

While neither of the bolts took me long to solve, they are well made, and are a great piece to hand to friends and introduce them to puzzles.

Trick bolts by Lee Valley

Trick bolts by Lee Valley

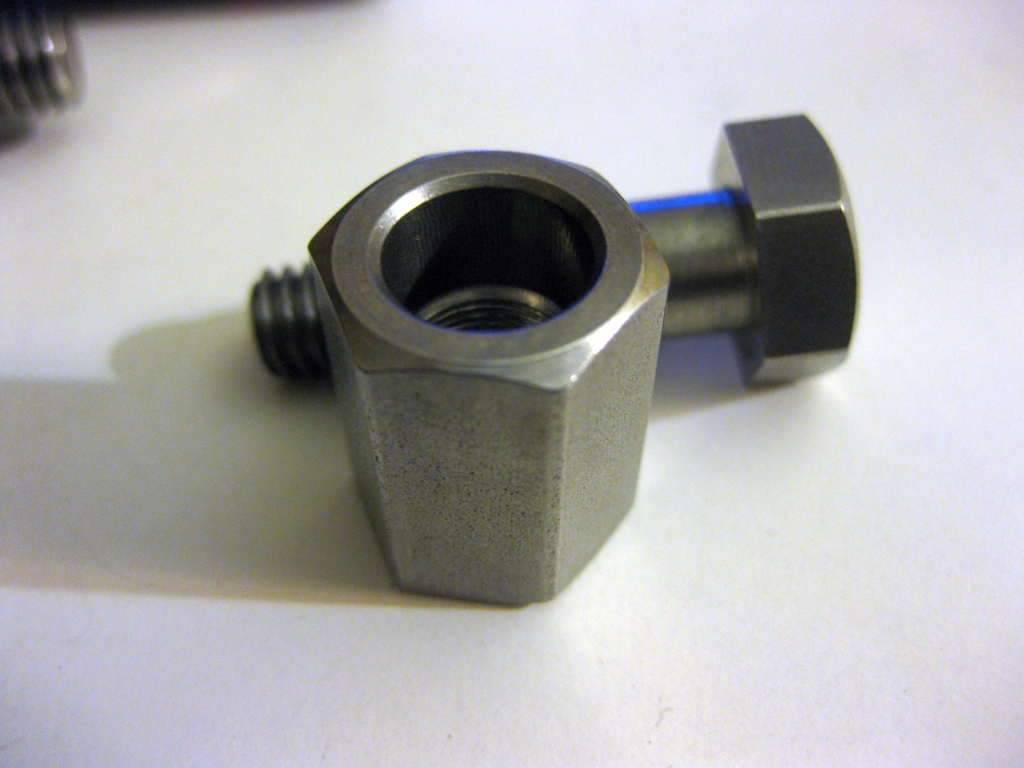
The second set of bolts both look identical, however have very different mechanisms. I’ve not seen these tricks used elsewhere and while neither slowed me down much, they were new and interesting mechanisms.

Trick bolts by Lee Valley

Trick bolts by Lee Valley

While I can’t show the mechanisms of either of these without giving too much away, both of the bolts require multiple movements to remove the nut, and are well worth the investment. They may all be small, and could easily be hidden in a collection, but I wouldn’t overlook any of these.

Marcel Gillen’s Little Rolling Pin

This entry is part 3 of 3 in the series Marcel Gillen Hidden Mazes

In the final review in my series on Marcel Gillen’s hidden maze puzzles, I turn my attention to the small Rolling Pin. All of these puzzles are from pre-1994, and yet are still functioning perfectly, with no real signs of wear on the mazes. I’ve felt rather privileged to be able to spend time playing with these puzzles, understanding and unlocking their secrets, and have to say a huge thanks to Nick for having been able to borrow these from his collection.

Marcel Gillen Hidden Maze Puzzles

Marcel Gillen Hidden Maze Puzzles

By now the goal of the puzzle should be obvious. Remove the handle from the sleeve which forms the body of the rolling pin. There’s a hidden maze carved into the handle, and a sprung pin in the sleeve which you use to navigate the maze. All sounds simple, yet I found this the most challenging of the three puzzles, all thanks to a very clever feature that Marcel added to this puzzle; one which I’ve not come across before in this type of puzzle.

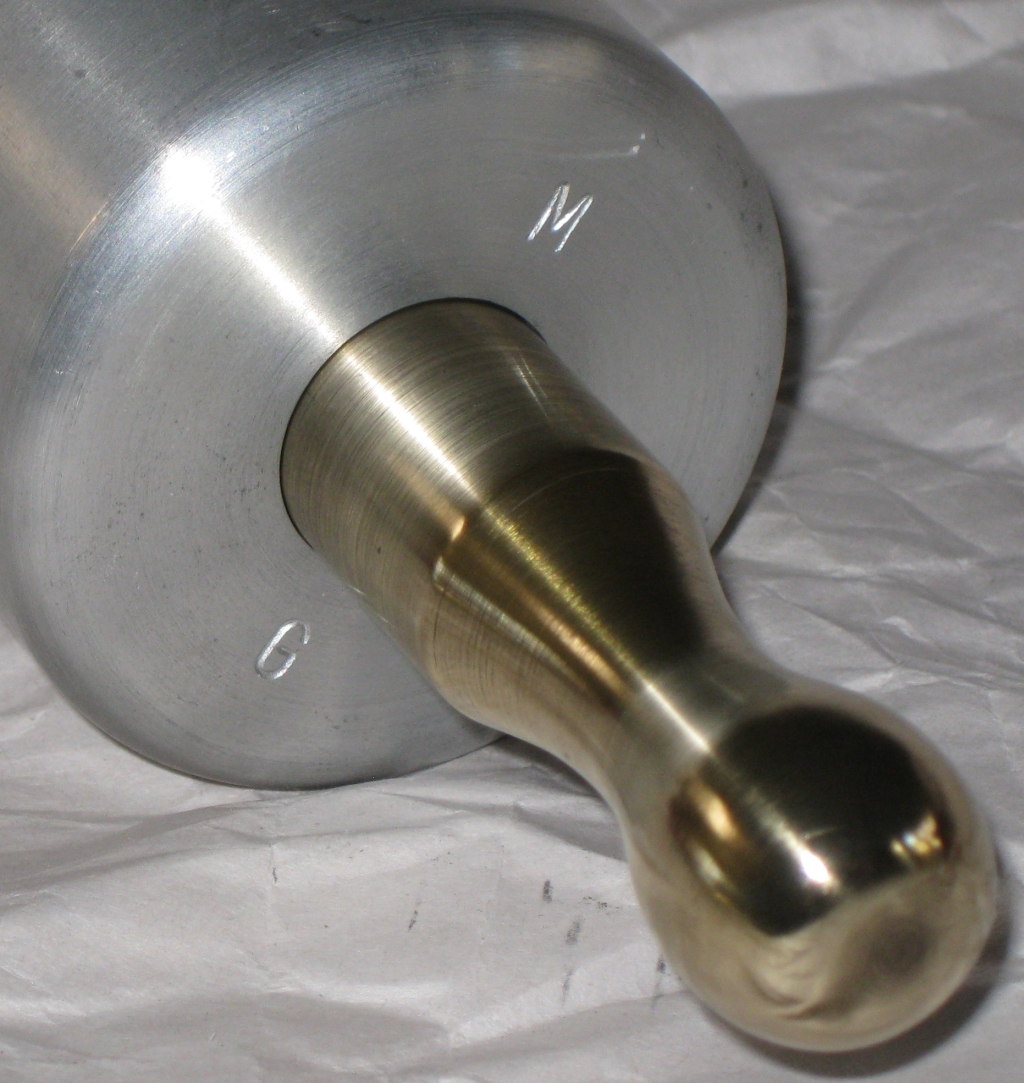
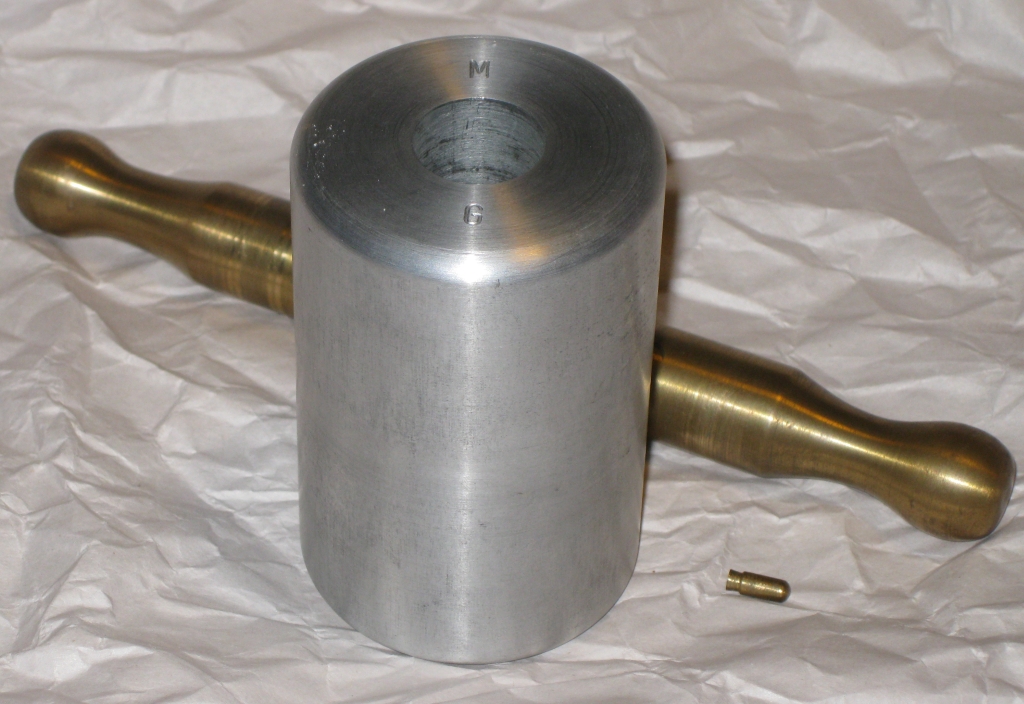
As you can see, the puzzle this time is made up of a brass handle, with an aluminium sleeve. Being significantly smaller than its big brother the rolling pin measures in at 7″ long, 2.75″ diameter around the sleeve, and 1.25″ around the handle. Weighing in at 930g it sits right in the middle of the three puzzles, although not by much compared to the bolt. The end of the sleeve is marked with Marcel’s signature ‘M G’.

Marcel Gillen's Signature

Marcel Gillen’s Signature

When I started trying to solve this puzzle, I spent a lot of time going back and forth in the reset line making, quite honestly, no progress. As I’ve noted in the previous reviews, the puzzles are fairly straight forward to map as you can use the trap to map where the maze is; given that in all of these puzzles the pin rides atop the maze, and there are no walls to guide the pin. This proved only partially useful, as I was unable to find any way to get onto the maze.

Despite knowing better, I continued to repeat the same moves back and forth hoping for a different result, and at no point in my exploration did I find the ramp to enter the maze. Given my experience with this style of puzzle, I assumed that there was a gravity pin, or some other feature which was blocking the path to the ramp. (Ed: I should know better by now that to assume.) Trying different orientations of the puzzle didn’t help. For a short time I toyed with the thought that the puzzle may be broken. Given the craftsmanship of Marcel, this seemed unlikely, so the only option left was that I was missing something.

Small Rolling Pin Solved

Small Rolling Pin Solved

And of course I was. The trick Marcel used is so simple, yet so well ‘hidden’ that I completely missed it for far longer than I should have. Once I had found the entry to the maze, navigating it was reasonably straight forward, until I found something new, which I hadn’t been able to map previously. I have to commend Marcel on the design here. It’s a very simple idea, but works incredibly well.

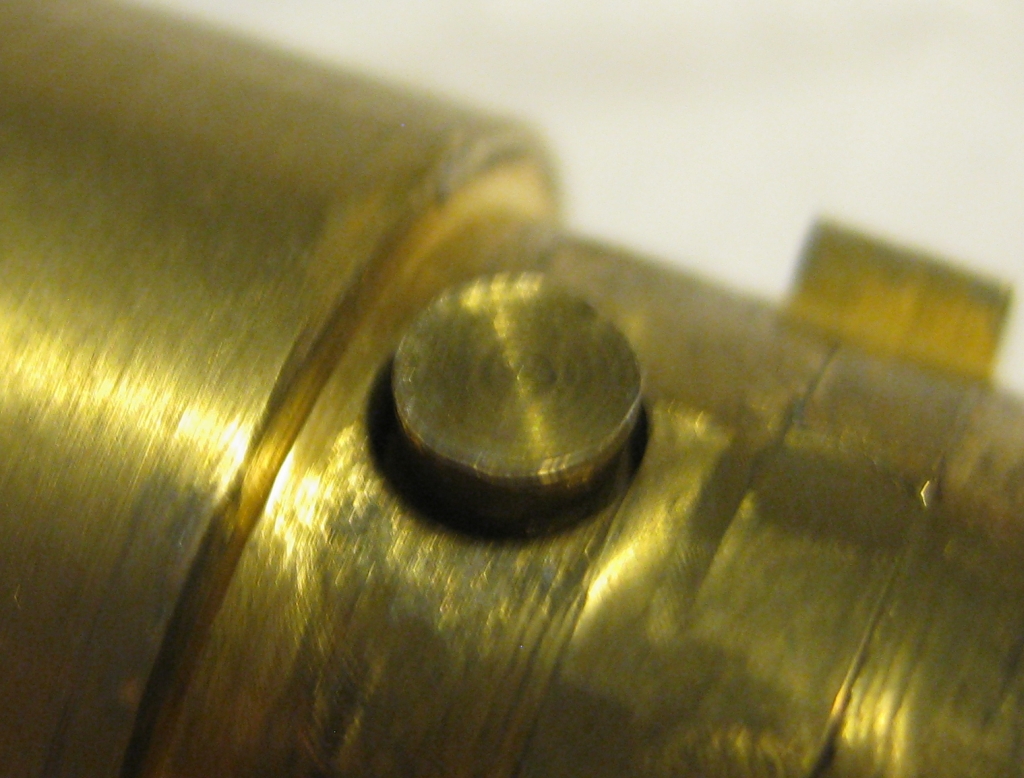
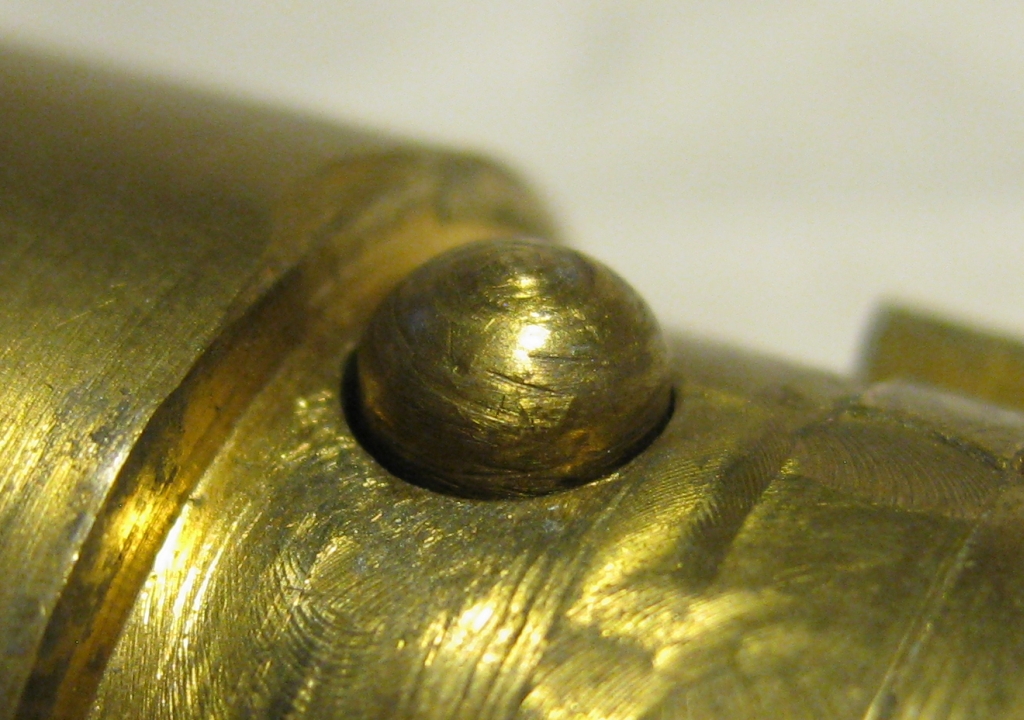
Once you get to this new hidden section of the maze, you’ll be able to extend the handle further than was possible previously, and like the larger rolling pin, you’ll find a brass pin that can be removed. Unlike it’s larger brother, the pin this time has a flat end, and a rounded end, which is the key to taking the handle out of the sleeve.

The secret to the way out

The secret to the way out

The secret to the way out flipped over

The secret to the way out flipped over


When I finished solving the puzzle, and removed the core, the top of the maze was covered in a thin silver film. It seems like the issue I was having with the larger maze was also present in the smaller version. Although I didn’t end up with silver hands when solving it, the friction between the sleeve and core was causing the same effect on the surface of the maze.

The maze looking a little grey

The maze looking a little grey

I think this is my favorite of the three puzzles because of the unique feature used to enter the maze. There’s nothing overly complicated in there, but it is well executed, and requires the solver to not assume how the puzzle works. There’s a few puzzle designs out there which could learn a lot from the relative simplicity of these puzzles. Harder is not always better, and as is proven with these puzzles, added complexity isn’t needed. The more complex the mechanism, the more things can go wrong with it. Each of these puzzles still works every bit as well as it did when they were made, and I am sure will continue to do so for the next 20 years.

The amount of enjoyment I had from solving these puzzles is hard to measure, however the ‘aha’ moment in each of them is unquestionable, and each puts a smile on my face having solved them. If you get the chance to play with any of these, take it. You’ll not be disappointed.

Marcel Gillen’s Bolt #6

This entry is part 2 of 3 in the series Marcel Gillen Hidden Mazes

After reviewing the first of Marcel Gillen’s hidden maze puzzles the rolling pin, this post will focus on one of his ‘bolt’ puzzles. I was lucky enough to be loaned #6 in the series.

Marcel Gillen Hidden Maze Puzzles

Marcel Gillen Hidden Maze Puzzles

The bolt is in the front right in the photo above. It certainly doesn’t look like a traditional bolt puzzle such as those from Lee Valley or Wil Strijbos. The goal of the puzzle is certainly the same though; remove the ring, or nut from the bolt.

Given that this is the first of Gillen’s bolt puzzles I’ve played with, I may have made things artificially more challenging, as this is the sixth puzzle in a series of at least 7 bolts. Each one increases in difficulty from the previous one so starting toward the end of the series may not have been the best plan.

Created from solid brass, measuring 4.5″ tall with a ring diameter of 1.75″ the bolt is a heavy puzzle weighing in at 777g. As I’m starting to learn from Marcel’s work, the puzzle is incredibly well made, and will take quite a bit of abuse from the solver, not that I recommend you abuse your puzzles. Despite how rare these puzzles are, it really is the sort of puzzle that you can hand round without fear of it being damaged.

Having said that, I have to admit that I spent an embarrassingly long time trying to solve this puzzle. I managed to understand the basics of what was going on in the puzzle, and you’ve probably guessed already that there’s some sort of hidden maze in the puzzle. I’d managed to ‘map’ the maze however there was an element in the puzzle which was preventing me from solving it, and I was too concerned about breaking the puzzle to try what I thought was needed. As a collector, I’m always concerned when solving a puzzle, especially one which is not mine, about doing something which might damage the puzzle. There are designers out there who use this knowledge against puzzlers, however Marcel is not one of those designers.

The problem I had is that the puzzle has a number of gravity pins which limit the movement of the ring. I found that it was possible to disengage the pins by holding the puzzle in a certain orientation, however I couldn’t solve the puzzle from that orientation. There is more than one gravity pin in there, and they interfere at different points as you move the puzzle. The obvious way to remove this obstacle is something I had avoided due to the large mass of the brass, and my fear that I would break something. As it turns out I really shouldn’t have been worried about that.

Marcel Gillen Bolt #6 Solved

Marcel Gillen Bolt #6 Solved

Having taken care of the gravity pins which were frustrating me no end, solving the rest of the puzzle was fairly quick, and took no more than around 10 minutes. The one comment I will make is that the puzzle needs a very specific orientation to solve it, which adds to the challenge. Understanding how the puzzle works, I can now repeatably solve it in under 30 seconds, and it’s a very satisfying puzzle to solve.

Marcel Gillen Bolt #6 Ring view

Marcel Gillen Bolt #6 Ring view

Having removed the ring, you can see what’s going on in there. The top two protrusions are a couple of the gravity pins which are present, and the protrusion on the left is a sprung pin which is used to navigate the maze which is etched into the bolt. The other element in there is a sprung ball bearing which just keeps a constant pressure against the bolt, and makes the movement of the puzzle much smoother.

I’m very happy to have had the chance to play with this puzzle, and will certainly be keeping my eyes open for any of these which become available for sale. They’re so well made, and such a fun puzzle to solve, that I’d love to add them to my collection.

Marcel Gillen’s Rolling Pin

This entry is part 1 of 3 in the series Marcel Gillen Hidden Mazes

Happy New Year to all my readers. Here’s wishing all of you a great year in 2014. I hope it’s a puzzling one, for all the right reasons. This year, I kick off the reviews with a set of rather special puzzles from Marcel Gillen. Over the next few posts, I’ll review some of Marcel’s hidden maze puzzles.
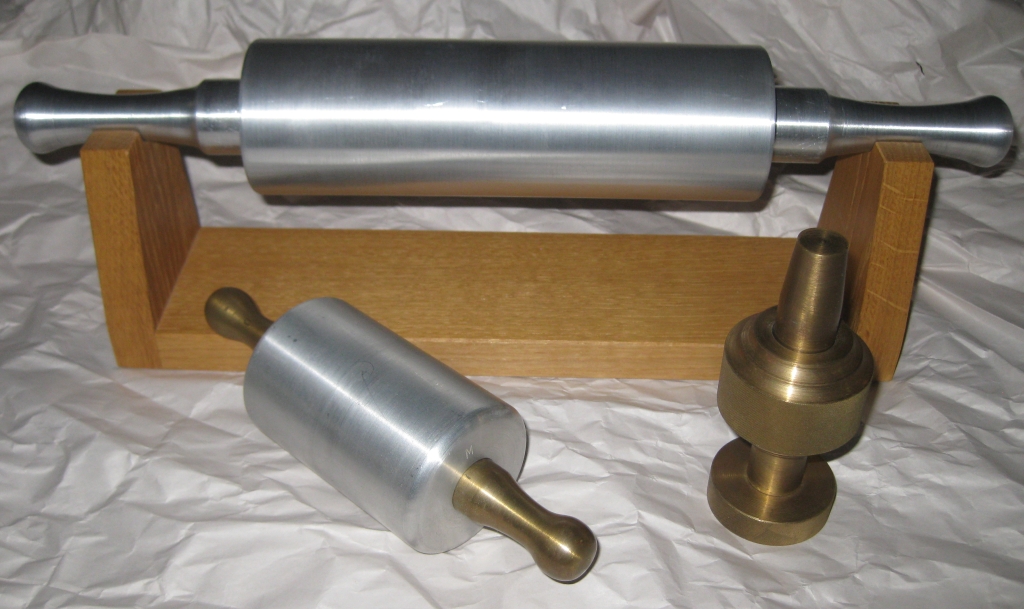
Marcel Gillen Hidden Maze Puzzles

Marcel Gillen Hidden Maze Puzzles

I’m very lucky to have been able to borrow these puzzles from a good friend who knows that I’ve solved all of the Revomaze puzzles, and suggested that I should play with the puzzles pictured above. He really wanted my thoughts on Marcel’s puzzles, given that they predate the Revomaze by quite some time, and have very similar puzzling aspects.

This review will focus on the large rolling pin, sitting on the stand in the photo above. This is probably one of the heaviest puzzles I’ve played with. If you think the Revomaze is heavy, weighing in at ~600g, this is in the ultra heavyweight class. The Puzzle is solid Aluminium, and weighs in at a whopping 1714g, yes it’s nearly three times heavier than a revo! One thing that I really had to get used to was working with the weight of this puzzle. It’s not easy to spend a lot of time working on something quite this heavy.
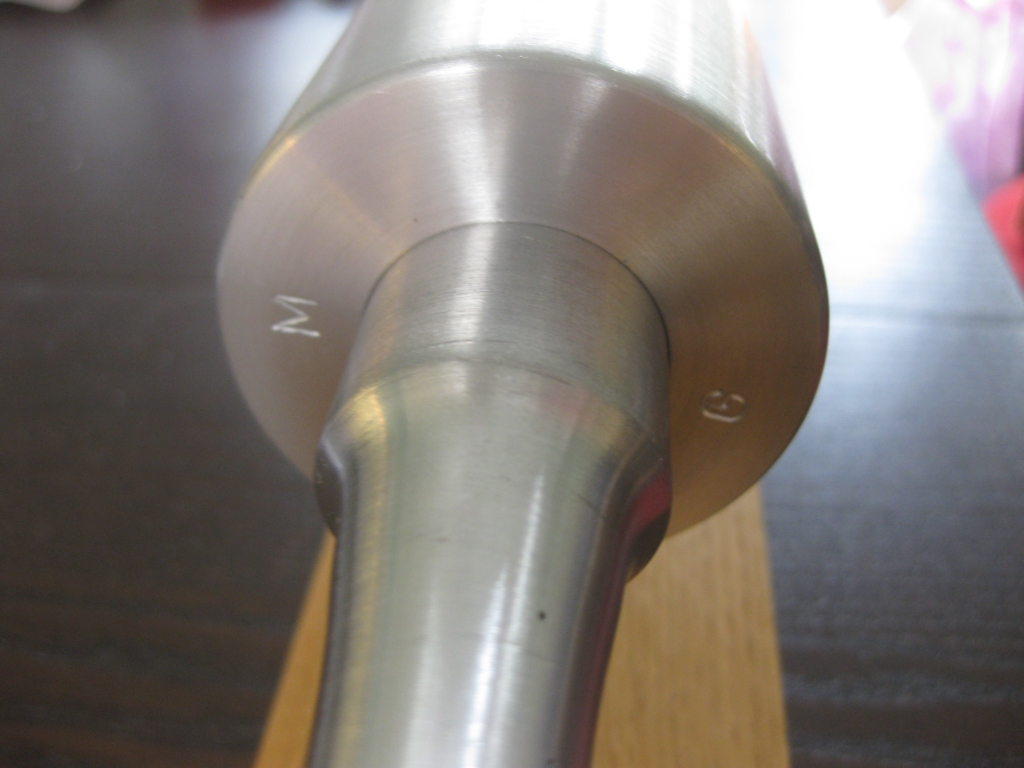
Marcel's signature initials on the end of the sleeve

Marcel’s signature initials on the end of the sleeve

End to end, the puzzle measures 15″, with the main body of the pin being 7.5″ long. The body of the puzzle is 2.25″ in diameter, and the handle is 1.25″ in diameter. On one end of the body Marcel’s signature initials can been seen on either side of the handle. As you might expect, they will serve some purpose as a reference when solving the puzzle.

I first wrote about this puzzle back in June 2012 after attending a local California Puzzle Party where I didn’t manage to solve it, but did make what I thought was pretty good progress. To my knowledge the puzzle hadn’t been opened by its owner, however at one point it was sent back to Marcel as it had a problem and needed to be fixed. When it came back, the solution to the maze was marked on one end of the handle. Seems like Marcel needed a little help opening it. Even with those helpful markings, it still hadn’t been opened. One of the requests I was given when I borrowed the puzzle was to clean off the black marker which showed the solution, so before I started playing with it again, that’s exactly what I did. After all, what’s the point in the puzzle if you already have the solution!

Taking on the challenge of opening this beast, I set about understanding what was going on. If you’ve read my comments about the puzzle previously, you’ll know that there’s a hidden maze which is etched into the handle of the puzzle. There’s a sprung pin on the inside of the sleeve which is used to traverse the maze. (Sound familiar to anyone?) As you start the puzzle, you can feel the tension as the pin rides up onto the top of the maze, and for anyone who is familiar with the Revomaze puzzles, that familiar click is present when you take a wrong turn and drop off the maze.

Unlike the Revomaze, there’s no quick reset back to the start in this puzzle, and when you make a mistake, you’ll have to navigate the traps all the way back to the start of the puzzle to try again. While other maze puzzles have walls which you can rest the pin against, there’s no such feature here. This is a one way trip riding on top of the walls. Think of it as one long bridge with no walls.

I should probably note that mapping the puzzle is a lot simpler than other hidden maze puzzles I’ve played with since you can use the traps to map the maze. By falling off, then carefully mapping the traps, you can figure out what’s left. With a single way back to the start, it’s much harder to map using such a method, so I do believe that this is much simpler to solve for anyone familiar with mapping techniques used for hidden maze puzzles.

After around an hour of figuring out and mapping the path, falling off many times along the way, I reached the end of the maze.

Having solved the maze once, this is the reward

Having solved the maze once, this is the reward

At least I assumed I had reached the end, as I was able to see the brass circle in the photo above. At this point I was a little disappointed that I was unable to remove the handle from its sleeve, to be able to see the maze, but was pretty happy that I’d made it to the end. Investigating a little more, I found that the circle was in fact a brass rod which came out of its hole…
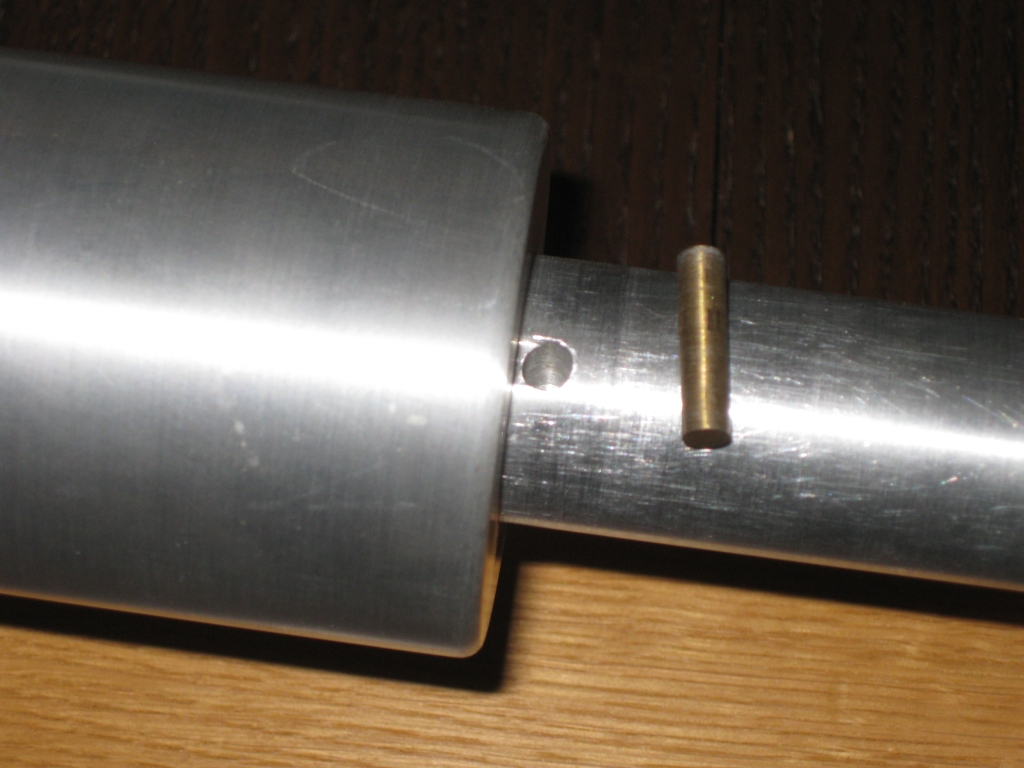
The Brass rod as a prize for solving the maze once

The Brass rod as a prize for solving the maze once

The question now is what to do with that rod. My first thought was that if I removed it, then returned the puzzle back to its starting position, perhaps it would allow the pin to drop into the hole I’d left by removing the rod, and let me remove the maze that way. Given that Marcel is an expert designer, I assumed that he wasn’t going to let me remove something from the puzzle which would lead to it ending up broken, I set the pin aside, and returned the puzzle back to its starting position, hoping that it would now allow me to remove the maze. I was wrong, but I was in for a surprise.

When I got back to the start, the core traveled a little further back that it had been able to previously, and exposed a new hole at the other end of the puzzle. It was just the right size to accept the brass rod, so that’s exactly where I put it. Of course now I need to solve the puzzle again! So back to the start, I go ahead and solve the puzzle again. This time it takes me a much more respectable 15 minutes to get back to the end, but I still can’t remove the handle.

After engaging the old grey matter, I realise what is going on. The brass rod is creating a bridge at the end of the puzzle allowing the pin to cross over what would otherwise be a trap, and lets me remove the handle. It took me a good few attempts to get this to work properly, but fortunately Marcel hasn’t been too nasty, and has provided a ramp in the last trap of the puzzle allowing me to take as many attempts as I need to find and cross my new bridge.
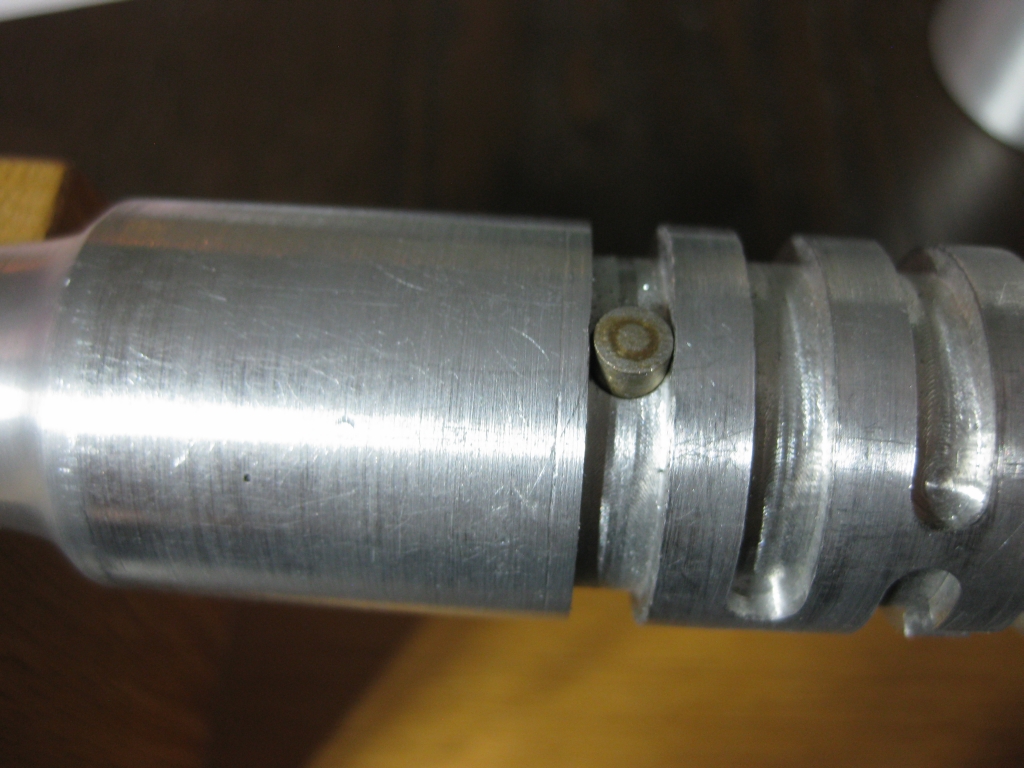
Rolling Pin maze exit

Rolling Pin maze exit

Having finally removed the handle, you can see exactly what the brass rod was doing, creating a narrow bridge, at the same height as the main maze, allowing the pin to remain compressed and move onto the outer side of the handle, freeing the maze to be seen in all its glory.
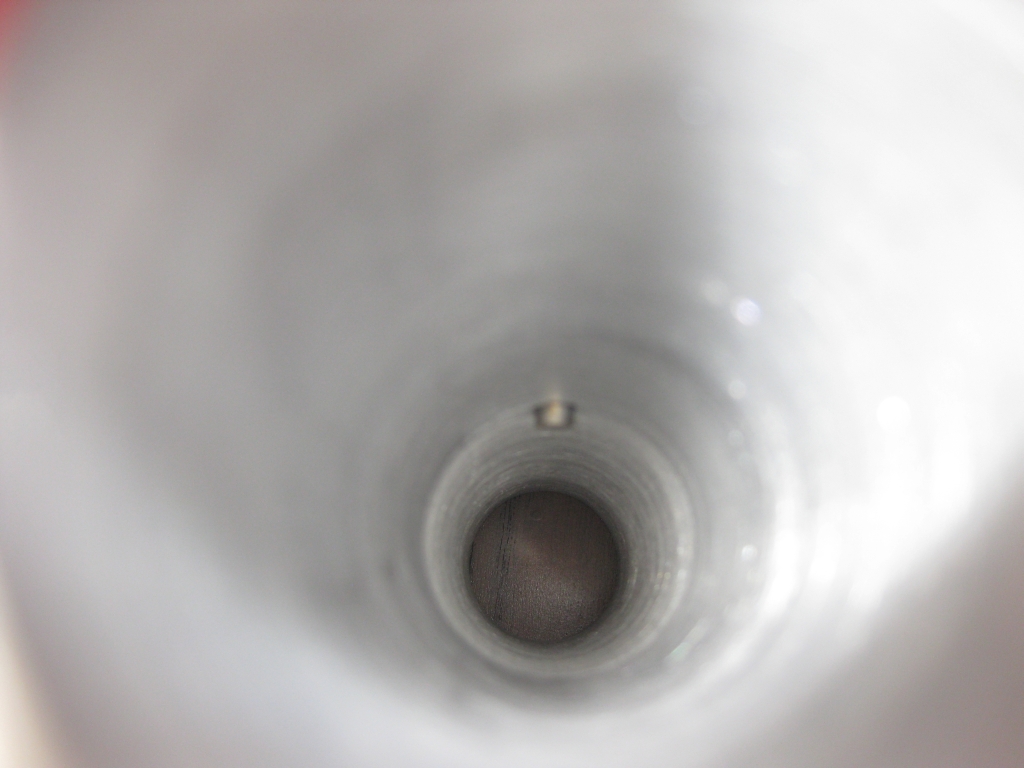
The pin used no navigate the maze inside the sleeve

The pin used no navigate the maze inside the sleeve

Looking down the inside of the sleeve you can see the maze pin in the middle of the sleeve. It’s a sprung pin, fixed inside the sleeve and isn’t removable. Probably a good thing as it’s a fairly small part and would be easily lost. (I managed to drop the brass rod at one point, and watched it roll under the table I was sitting at. It’s big enough that I found it easily, but being non-magnetic, it could have been a problem!)
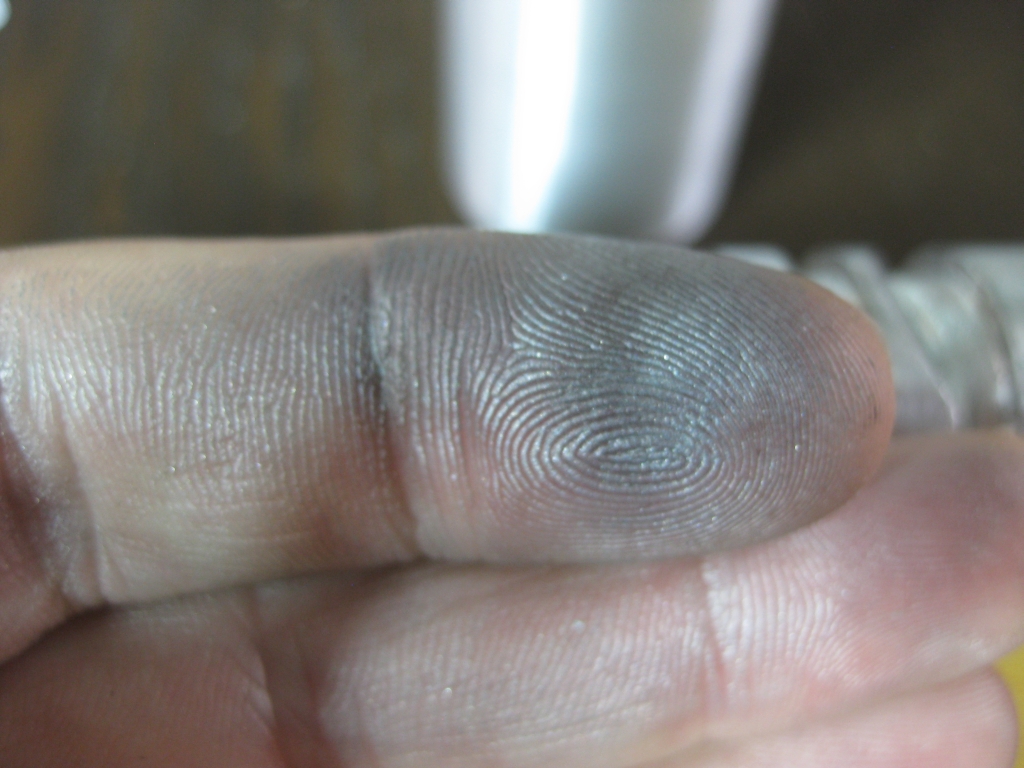
My fingers after solving

My fingers after solving

Given that the puzzle is raw aluminium, it had a rather interesting side effect, in that it left my fingers rather silver. Exactly the same thing happened when I played with it at the Puzzle party so I was expecting it this time. I’m not entirely sure whether there’s just some aluminium dust on the puzzle as a result of the pin rubbing against the surface, or whether the natural oils in my skin react with the aluminium. Regardless, I needed to wash my hands, and took the opportunity to clean the entire puzzle at the same time. (Ed: Don’t worry, no water was used in the cleaning of this puzzle.)
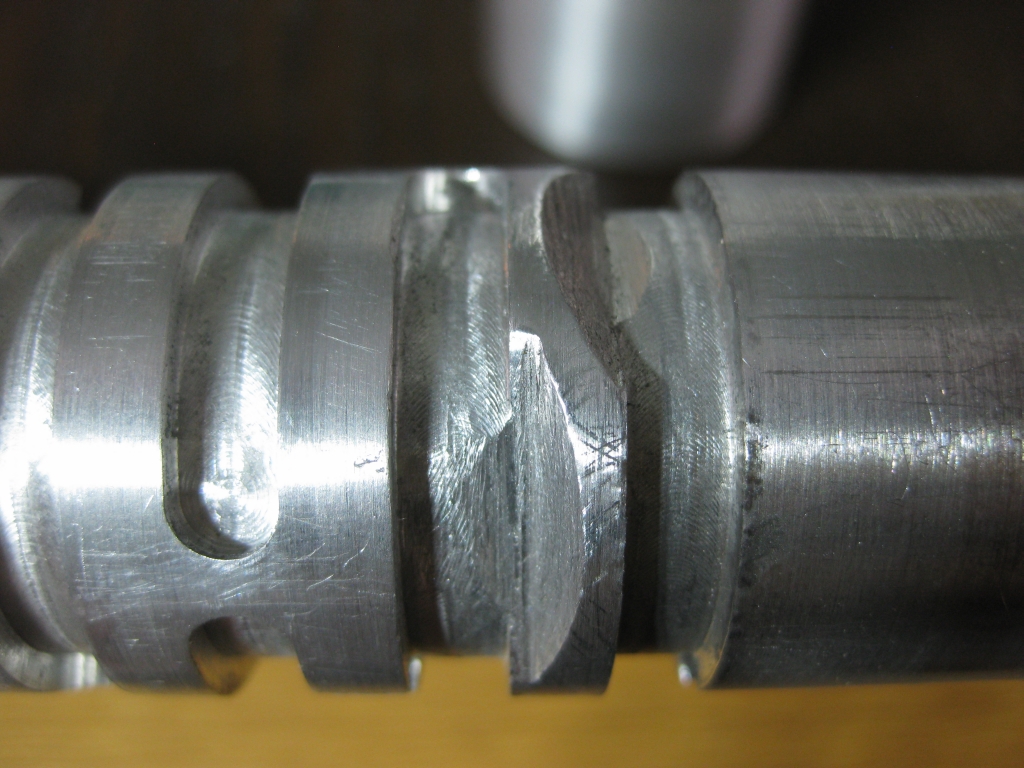
Rolling Pin ramps

Rolling Pin ramps

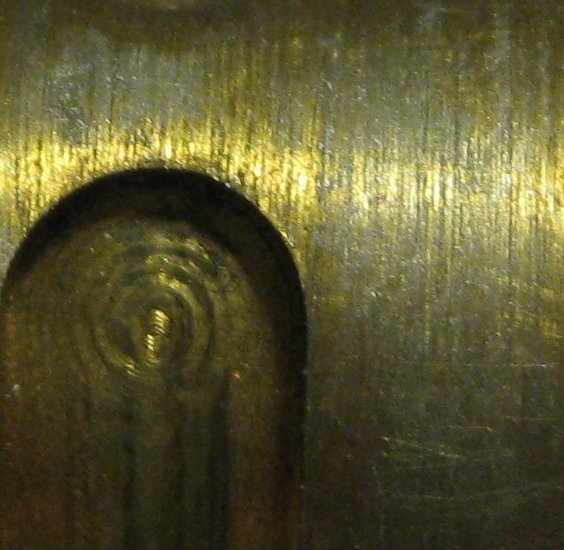
Having a close look at the maze, you can see the ramps which are etched into the walls of the maze to allow the pin to move from the traps back up onto the level of the maze. Pictured above are the two ramps at the start of the puzzle. One from the start point to enter the maze, and one from the end of the traps back to the start of the puzzle. While I’m not going to show the entire maze here, the small section you can see shows how the puzzle works. The Pin rides on the higher area of the puzzle, and the lower cut-out sections are the traps. This is where you end up when to take a wrong turn. As you can see, the puzzle is incredibly well made, and it has stood up very well to many years of use.

Overall this is a great puzzle, with many similarities to the Revomaze puzzles. Perhaps this is closest to the Green Revomaze puzzle if I were to draw a comparison, however this puzzle does pre-date Revomaze by many years and includes the feature that the maze must be solved not once, but twice in order to truly say that the puzzle is solved and remove the core. No chance of getting lucky in opening this puzzle!

What I found to be even more impressive is how you reset the puzzle for the next person. To reset the puzzle, simply take the brass rod, and return it to the deep hole at the start of the maze, then slide the handle back into the sleeve. The maze pin simply rides onto the handle, then drops back into the maze. Navigating back to the start takes a few seconds, and the puzzle is ready to be solved again. Very clever, and so simple.

I had a lot of fun playing with the rolling pin. There’s no gimmicks here, and the clever mechanism which allows the maze to be removed is very well executed and adds an extra challenge to the puzzle that I found to be very rewarding, especially after understanding what was required.

I’ll review the other two puzzles soon, so stay tuned for more of the Marcel Gillen Puzzles.