Tag Archives: Metal

Cast Spiral

This entry is part 6 of 8 in the series Hanayama Cast Puzzles

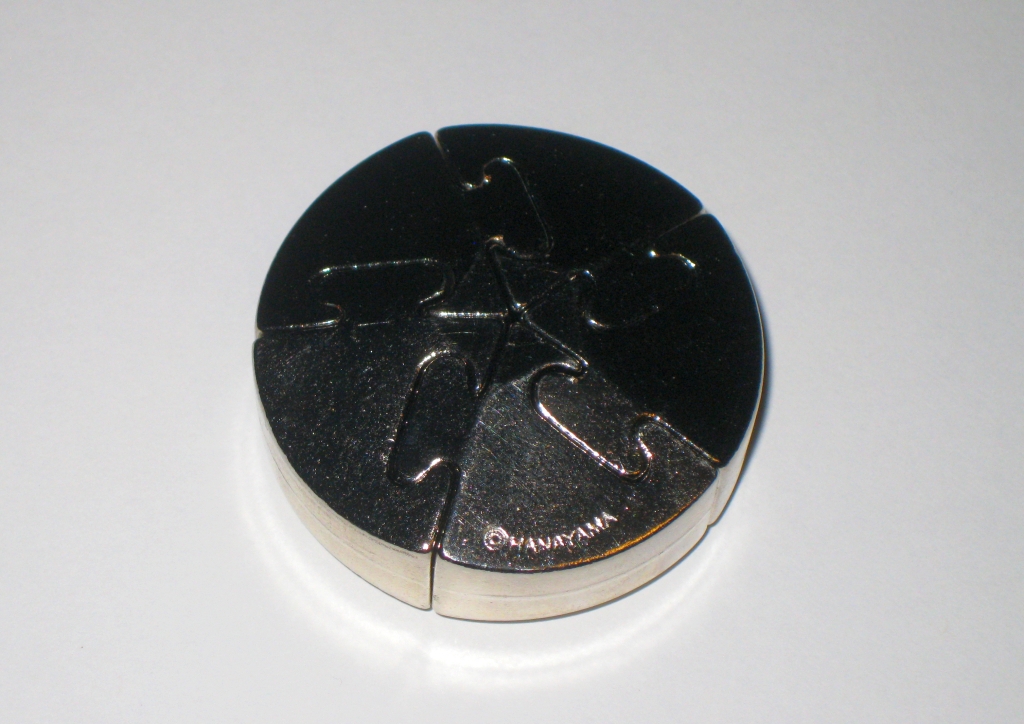
Cast Spiral is another puzzle from the Hanayama Cast series, this one designed by Kennet Walker. This puzzle is similar to a number of ‘Jigsaw’ puzzles where a small number of apparently identical pieces are linked in a seemingly endless spiral, the goal being to separate the pieces then put them back together. Cast Spiral takes the idea one step further and rather than a 4 piece puzzle, this is a five piece version. Puzzle Master kindly sent me this copy to review. Thanks Puzzle Master!

Cast Spiral

Cast Spiral

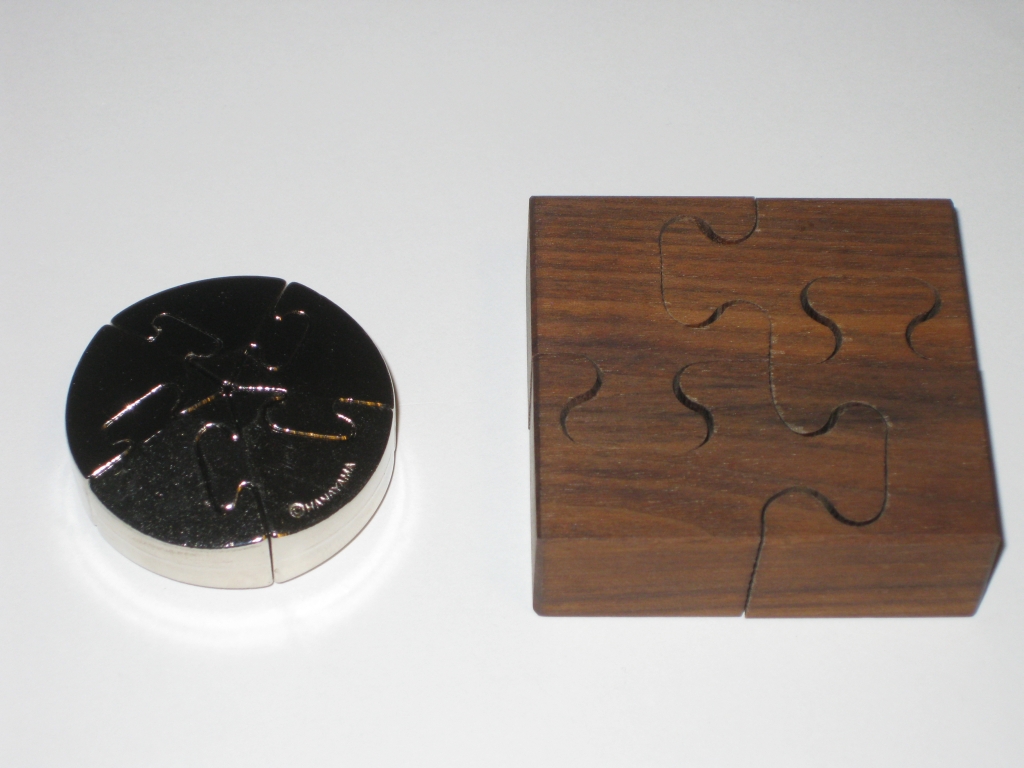
I have a couple of different versions of this style of puzzle, and the wooden version below called Wooden Spiral can be purchased from Puzzle Master. Think Fun also produce a version in plastic called the a-ha! 4 Piece Jigsaw . Both of these puzzles work on the same principle and if you have solved either, then you’ll have a good idea of how to approach the Cast Spiral.

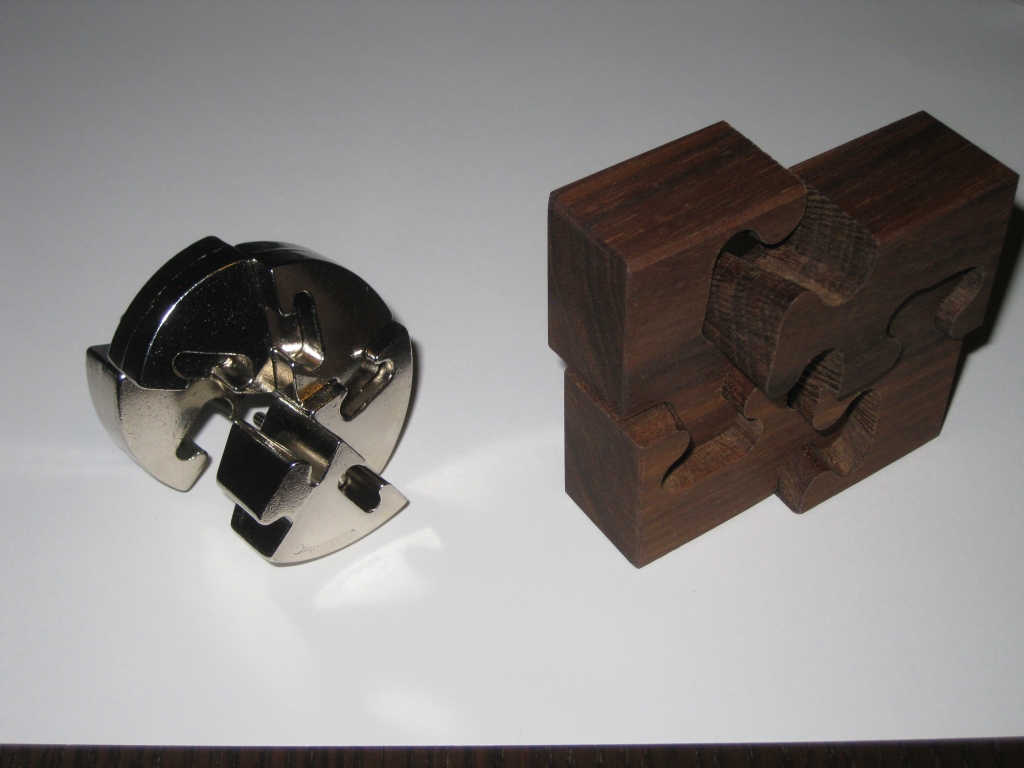
Cast Spiral and Wooden Spiral side by side.

Cast Spiral and Wooden Spiral side by side.

Cast Spiral is a nice progression in this style of puzzle. It’s a heavy puzzle, and being made from solid metal, you can be quite confident passing this to any of your friends to have a bash at solving it. (Note: No hitting or dropping of the puzzle is required to solve it.) The finish on the surface is plain, but well finished, and bears the Hanayama logo. Given that this is an older puzzle in the Cast series, originally released in 2003, the name of the puzzle isn’t on there, unlike most of the newer releases. The shape of the puzzle itself is also interesting. rather than going for a plain cylinder, the pieces taper from the centre to the outside, with a slightly flattened spot in the middle, making for a rather pleasing shape, that leaves the puzzle looking as though it’s floating above the table.

Side view of Cast Spiral and Wooden Spiral showing the spiral nature of the pieces.

Side view of Cast Spiral and Wooden Spiral showing the spiral nature of the pieces.

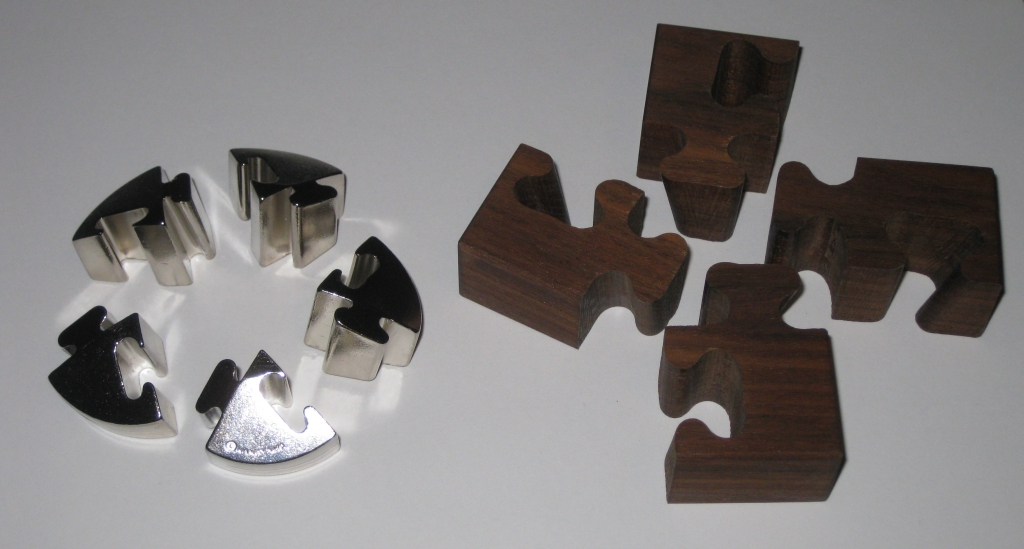
As you can see from the side, it looks as though there’s no way to separate the five pieces of the puzzle, however as I mentioned earlier, the solution to this puzzle has its roots in the jigsaw style puzzles I’ve already mentioned. Unlike the wooden or plastic four piece versions, the pieces of Cast Spiral are not all identical. So just picking it up and using the trick you already know isn’t going to work. You’re going to have to find out how to implement the trick, which adds a little extra challenge if you’re familiar with this style of puzzle.

Identical pieces?

Identical pieces?

Hanayama rates this as a Level 5/6 puzzle, and Puzzle Master a Level 9/10 – Grueling. I think it’s fair to say this is a tough puzzle, however it’s perhaps only a 4 in Hanayama’s scale given that there’s a number of tougher puzzles been released since this one. It’s nice that even if you know the solution to one of the four piece puzzles, that it’s not going to instantly work on the Spiral, so it may catch a few people out. If you’ve not come across one of these before, then it’s a tough puzzle, but a fairly enjoyable one at that. If you’re really stuck then you’ll find a solution here.

Like the other Cast puzzles I’ve already reviewed, I highly recommend adding this to your collection. It’s a really solid puzzle, with a nice twist in the solution. None of the cast series are overly expensive so really there’s no reason not to own one!

To see what everyone else is saying about these puzzles (yes, seems everyone else has reviewed this before me), have a read of the reviews by Allard, Brian, Jerry, Kevin and Oli.
Cast Nutcase

This entry is part 5 of 8 in the series Hanayama Cast Puzzles

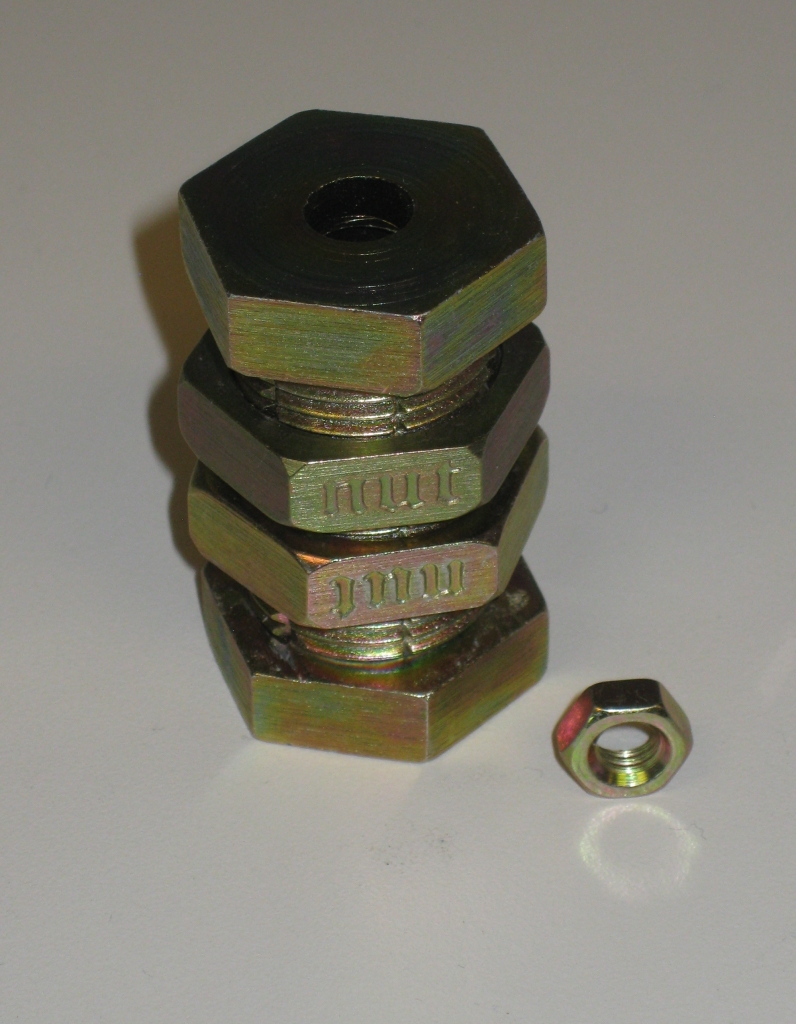
Cast Nutcase is another puzzle in the Cast series from Hanayama designed by Oskar van Deventer. Measuring in at 1.25″ diameter, by just under 2″ long, the goal is to remove the small nut encased inside the hollow part of the puzzle by taking the two halves of the puzzle apart. Thanks to Puzzle Master for sending me this puzzle to review.

There is a second goal to the puzzle, but I’ll talk about that later …


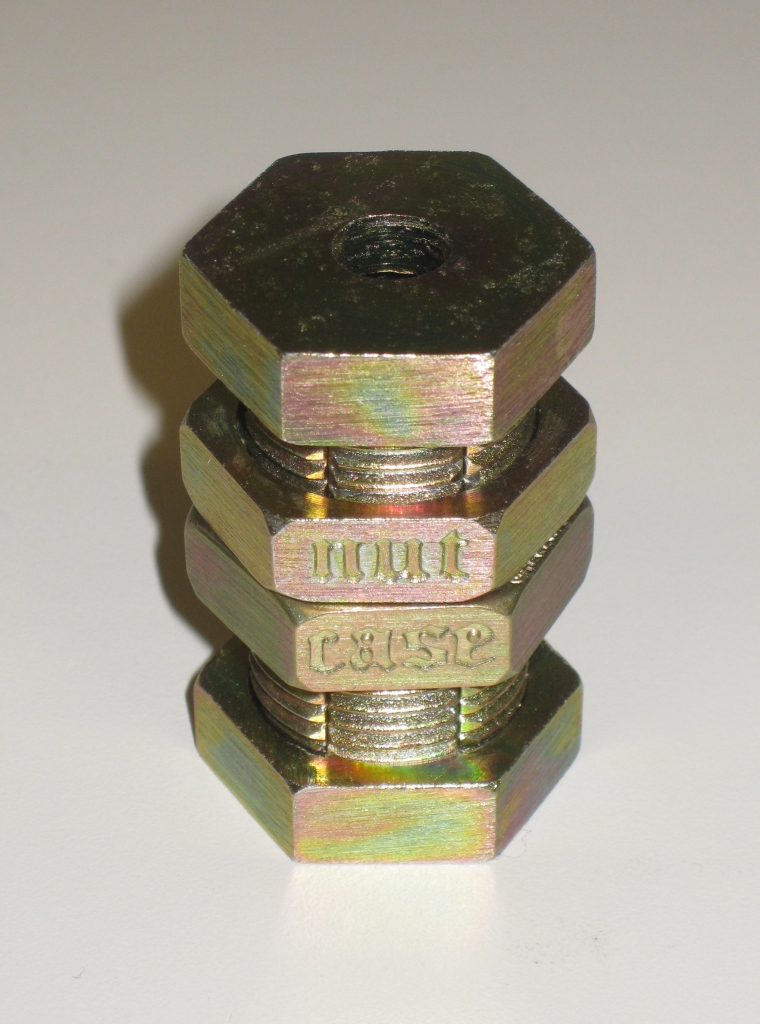
Cast Nutcase in the starting position

Cast Nutcase in the starting position

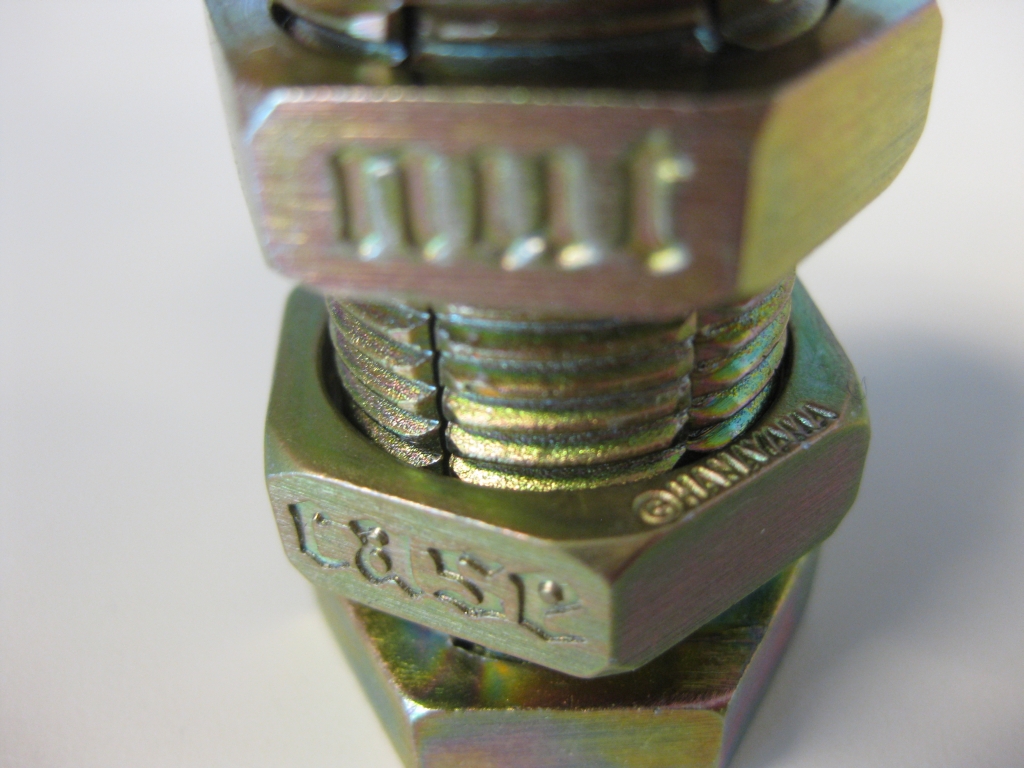
As you’d expect, the puzzle comes in the standard Hanayama black and gold packaging, with the puzzle held in shrink wrapped plastic to keep it in place. The puzzle consists of 5 pieces, including the small bolt that can be seen through holes in the ends of the puzzle. The two bolts threaded onto the centre of the puzzle will spin up and down the threads and each has ‘Cast’ and ‘Nut’ engraved into opposite sides of the bolt. The familiar Hanayama logo is also engraved into the edge of the bolt.

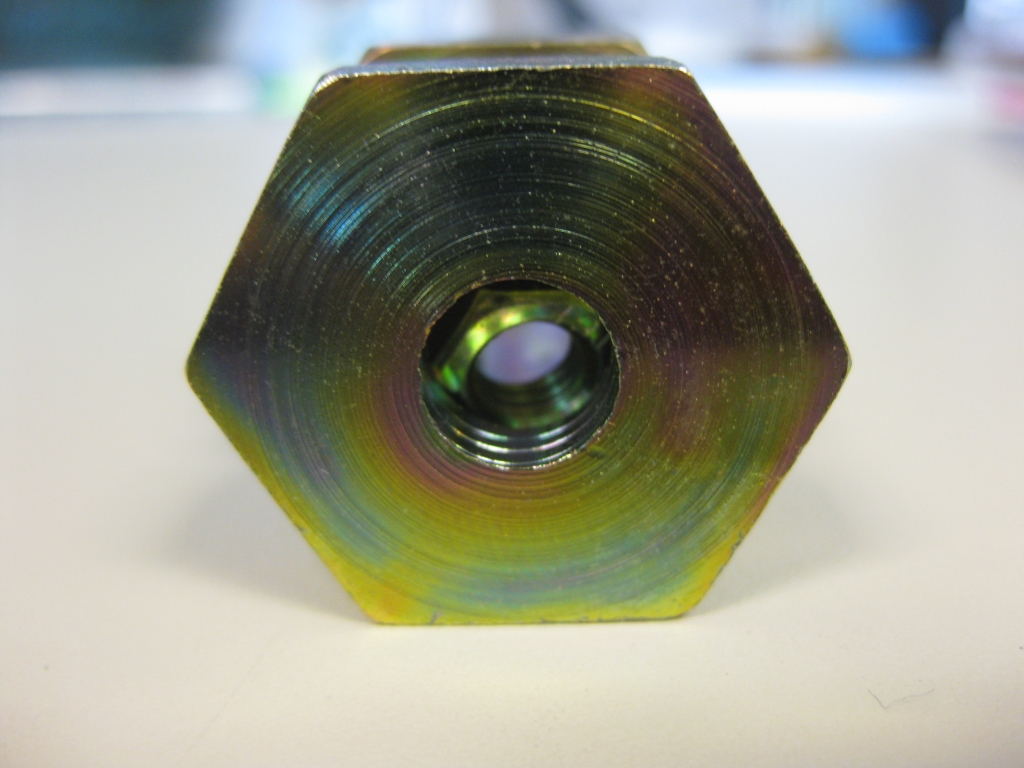
Closeup showing the small nut trapped inside

Closeup showing the small nut trapped inside

Closeup of the engraving on the nuts

Closeup of the engraving on the nuts

The look of this puzzle is interesting as a galvanised, bronzed bolt, with some interesting patina patterning on various surfaces. It may not be the prettiest of the Hanayama puzzles, but it’s by no means ugly either. Looking at the puzzle, it seems impossible, as the two nuts in the centre of the puzzle are threaded onto a seemingly full thread which extends from one end of the puzzle to the other. The only clue as to what is going on is that the thread is not made from a single piece of metal, and it split into sections. Pulling on each end of the puzzle will show that the sections are alternately connected to either end of the puzzle, so there is some hope that the parts will separate.

Rated as 6/6 by Hanayama and 10/10 – Mind Boggling by Puzzle Master. I have to agree with this rating. It’s a tough puzzle and will certainly test you whether you’re a seasoned puzzler or not. It took me around an hour to open this one, and even then I think I may have been a little lucky. I could certainly see it taking a lot longer to open this puzzle. You should be able to figure this one out by looking closely at how things are put together, and from that work out what’s going on, but there could be a lot of trial and error before you get it opened. If you get really stuck, there’s a solution here. For me, this puzzle is a little like picking a lock, and feeling your way around what’s happening with little changes to the parts of the puzzle as you go.

The small nut free from it's "Nut Case"

The small nut free from it's "Nut Case"

My biggest problem with this puzzle is that the nuts don’t turn smoothly on the threads if there’s any misalignment at all. Given the way that the puzzle opens, and the design on the nuts, this is inherent in the design, and I don’t think there’s much that can be done to avoid it. Sadly, I feel that the sticking of the nuts as you turn them does detract from the overall experience, and I had several times where one of the bolts would lock up, and significant banging of the puzzle on my desk was required to get things moving again. Given that very precise alignment of the various parts is required to solve the puzzle, the stickyness does make things less enjoyable. Having solved this a number of times, keeping the threads aligned by pushing together on each end of the puzzle with one hand while turning the bolts helps however that is only useful for the first half of the solution. If things get misaligned, then it’s tough to get it back in sync.

Overall this is a challenging puzzle, but I fell there’s a little too much guess work and hidden trickery to make this a stand out puzzle. If you want a real challenge, then pick this one up, but if you’re just looking for a fun puzzle, I’d say it’s best to pass this one by.

The Case Nut Puzzle

Now, remember way back at the start, I said there was a second goal …

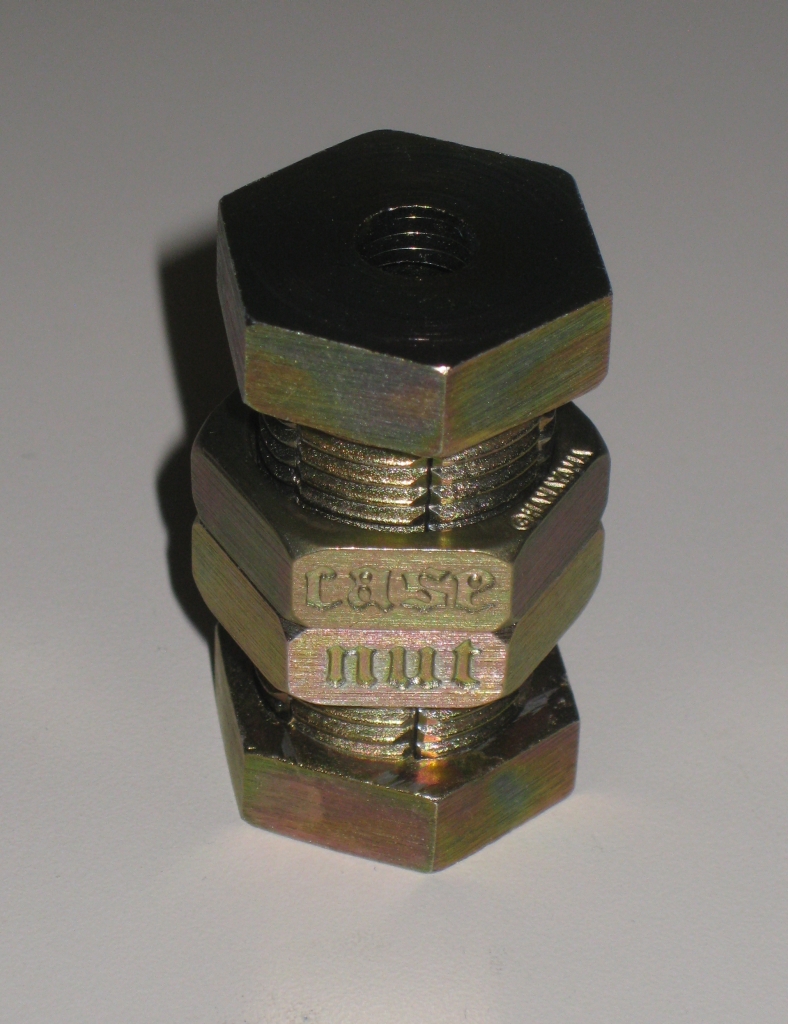
The second goal for the puzzle, just to prove it's possible

The second goal for the puzzle, just to prove it's possible

If you think that the first goal is tough enough, then I’d say stay away from the second. Once you’ve solved it a few times, and you know what’s going on, give this a shot.

Warning: this is a lot tougher!

The nuts on the puzzle are designed to go on in one orientation, so that when closed they spell “Nut Case”. But it is possible to reverse the orientation so that they spell “Case Nut”. The photo above proves that it’s possible. Now I will say, make sure you understand how to open it normally before doing this, as all the little markers you’ve used to solve the puzzle in its first configuration will be of no use to you! When putting the puzzle into this second configuration, things are much tougher, so don’t say I didn’t warn you. I think this puzzle may just go up to 11!

Cast Violon

This entry is part 4 of 8 in the series Hanayama Cast Puzzles

Cast Violon is yet another superb puzzle from the Hanayama Cast Series. This puzzle was originally created by Joseph L. Litle in 1965, the Cast version was adapted by Nob Yoshigahara. Puzzle Master kindly sent me this puzzle to review.

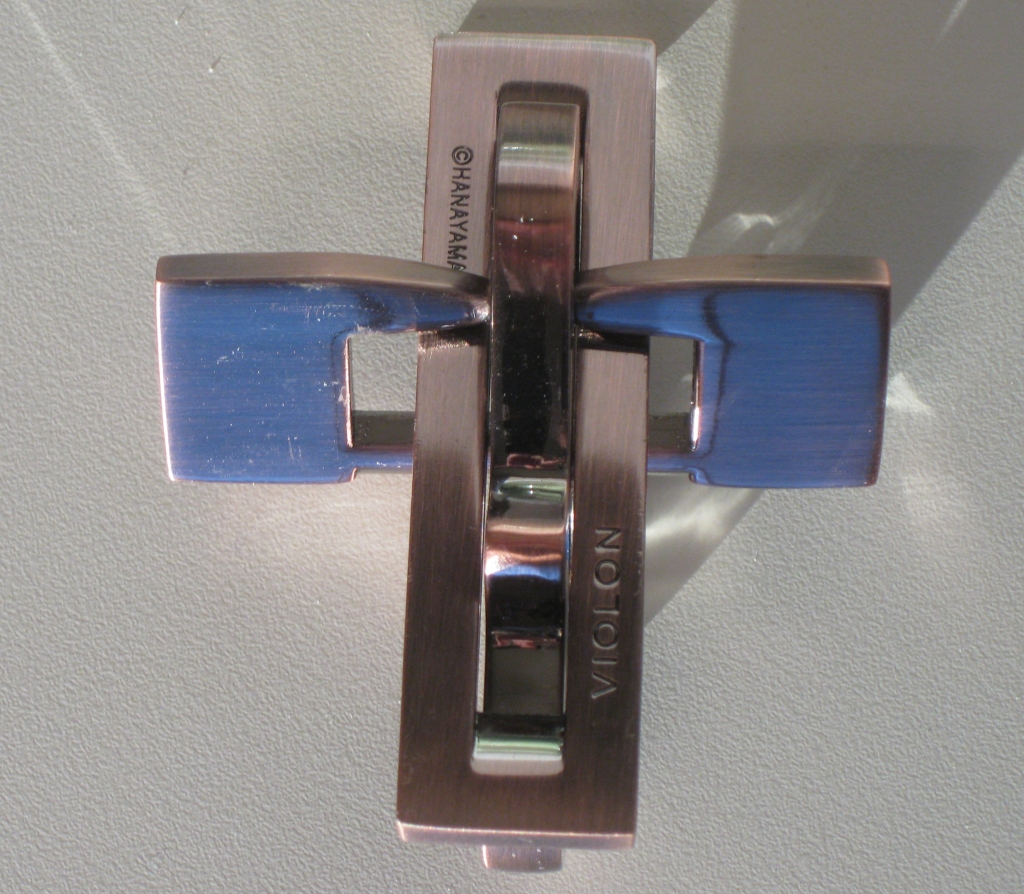
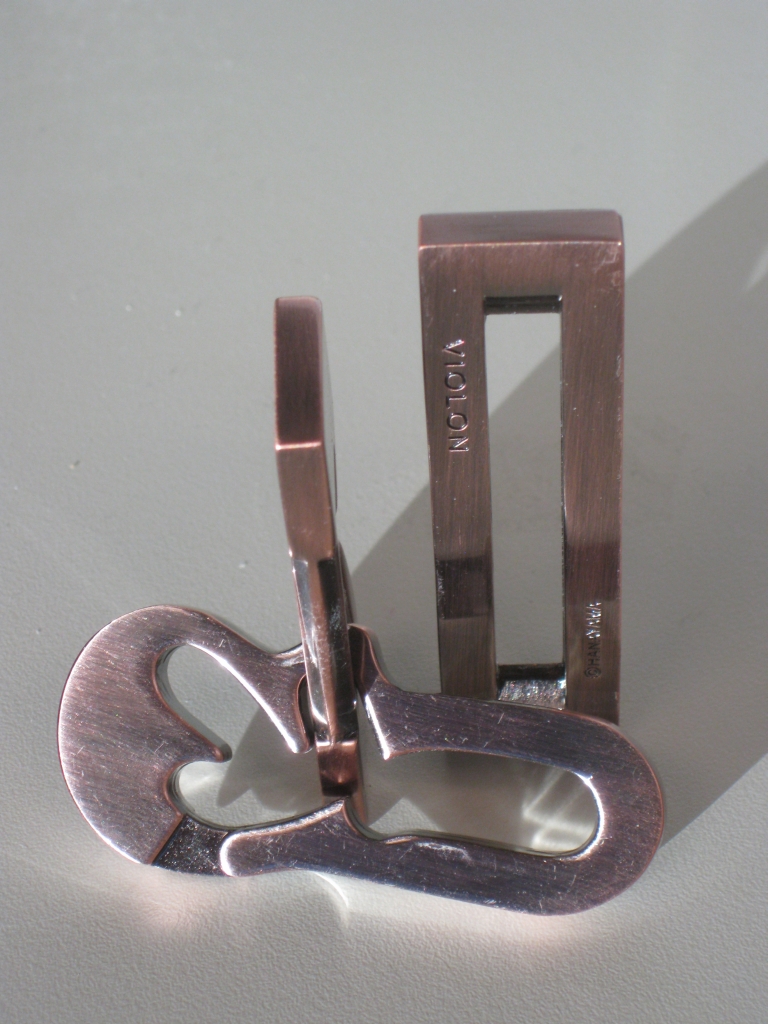
Cast Violon in the starting state.

Cast Violon in the starting state.

Nob had this to say about the puzzle.

“Patented in America in 1965, this puzzle was originally created by Joseph L. Litle. The idea to make this puzzle came to me after playing with a wooden copy built for me by my close, but now deceased friend, Tadao Muroi. The proportions have been changed considerably from the original plan in this new version. With this puzzle being styled after a violin and its strings, the word here is…’string’.

-NOB 2003-“

From the top, it’s difficult to see the violin shape which gave the puzzle its name, however this side view shows things much more clearly.

Side view with the puzzle solved

Side view with the puzzle solved

I really love the aged bronzed look of this puzzle. It suits the style perfectly, and as is normal with the Cast series, it’s a heavy puzzle in your hands. The pieces are all solid and well made, so there’s no fear of anything breaking or bending as you play with the puzzle. It also seems to have a clear coating over the finish to protect it, which seems to be important as I’ll mention later.

The body of the violin creates a maze of sorts which the broken loop runs around. The aim of the puzzle being to remove the rectangular piece with the Hanayama logo and puzzle name from the rest of the puzzle. The thinner section in the violin allows the broken loop to either be fully inside the violin or to run around the outside and it should come as no surprise that a combination of both states is required to solve the puzzle.

Have a look at my video review to see the puzzle close up and get an idea for how the puzzle moves.

At first look, the exit point isn’t entirely obvious, however with a little amount of playing it should become clear where you need to take the ‘string’ off. Puzzle master rates this as a level 6 – tricky (scale of 5-10), and Hanayama rates it as a 2 (scale of 1-6). I think it’s a fair estimate of the difficulty. I was able to solve this in around 5 minutes, and was able to return the puzzle to its starting state in just a few more.

The alignment of the pieces when taking the puzzle apart and putting it back together is crucial. If you’re off by a fraction, getting the pieces apart or back together becomes virtually impossible. Having said that, I’ve seen the pieces some apart in a number of different ways and I’m not quite sure how I managed all of them as the pieces don’t seem to go back the same was I watched them come apart! Get everything just right though, and the pieces slide together seamlessly.

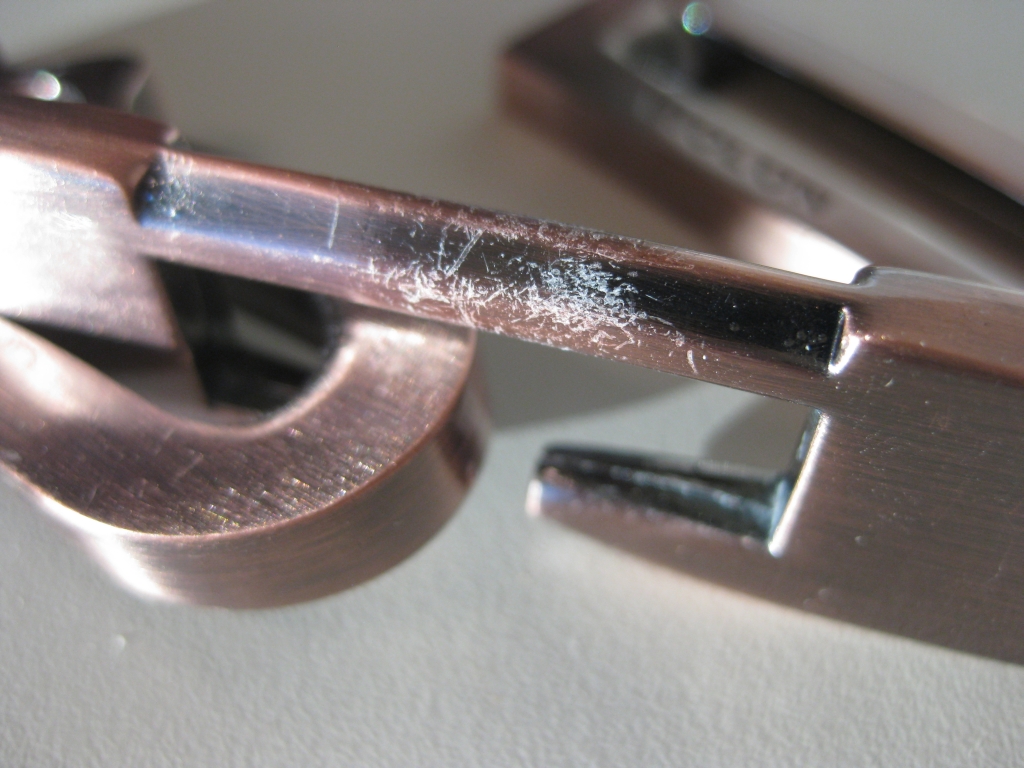
The scratches that have appeared on my puzzle.

The scratches that have appeared on my puzzle.

My only small gripe with the puzzle is that on my copy, the finish has started to become scratched, showing bare metal underneath. From a distance, you’d never know, and it is minor, however it’s not something I expected from a Hanayama puzzle. I think the clear coating that I mentioned earlier just didn’t make it onto the section of the puzzle, as there’s no issues anywhere else!

Overall, this is a nice puzzle. Not tot challenging, and will be able to be solved in a reasonable time by most people who pick it up. If you’re still struggling, you can download the solution here. You can’t really go wrong with a Hanayama cast puzzle, and this is no different.

The Yot

… not a UFO

The Yot (or perhaps it’s toY backwards?) from Hi-Q Products is a puzzle which has intrigued me for quite some time now, but I’ve seemed to always have another puzzle that I wanted turn up and mean that I put off getting one. Well that’s no longer the case, as my recent shipment from Puzzle Master included one of these fine puzzles.


Note: Video now available in 720p HD.

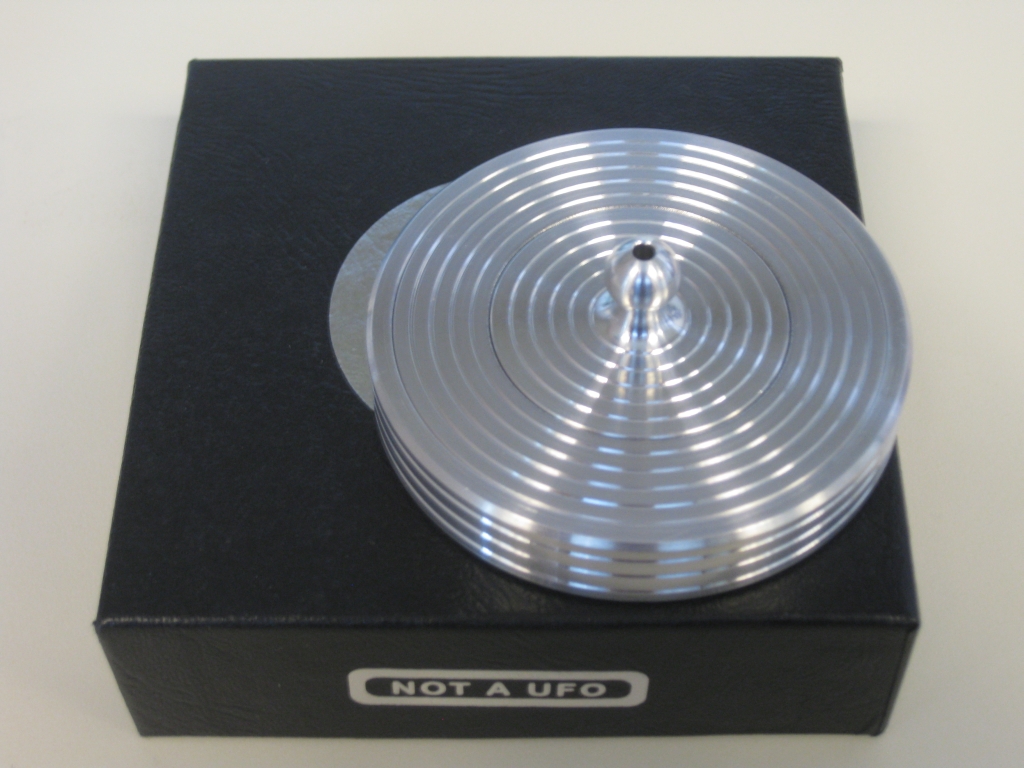
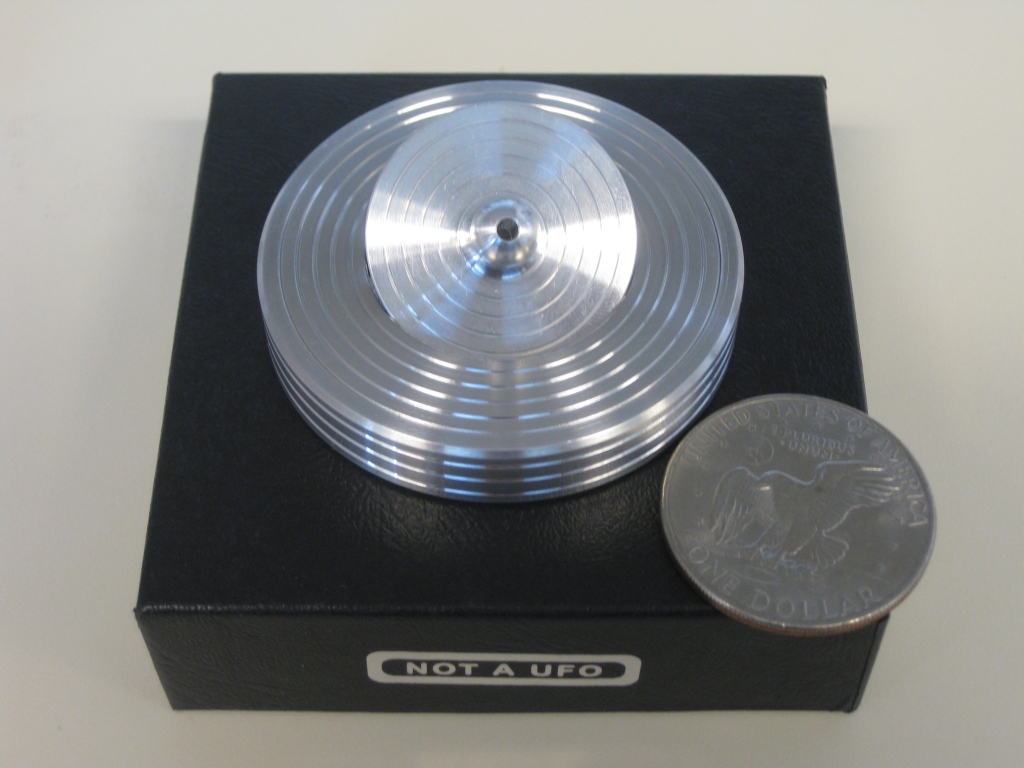
The Yot is a great looking puzzle, carved from a block of aluminium and measuring 2.75″ in diameter with a silver dollar trapped inside. My Silver Dollar is from 1972 so is a little older than I am. As a non American, I wasn’t in the USA when these coins were in regular circulation, so it’s nice to have one, and what better way to keep it than inside a puzzle? The Yot has a really good weight in your hand and the little handle on the top is well shaped giving a very tactile feel to it. There is a hole in that nub in the top of the puzzle, which may lead you to thinking it’s part of the solution. If anything I think it’s there to prevent a vacuum from forming between the lid and the coin, but may help to disguise the real solution.

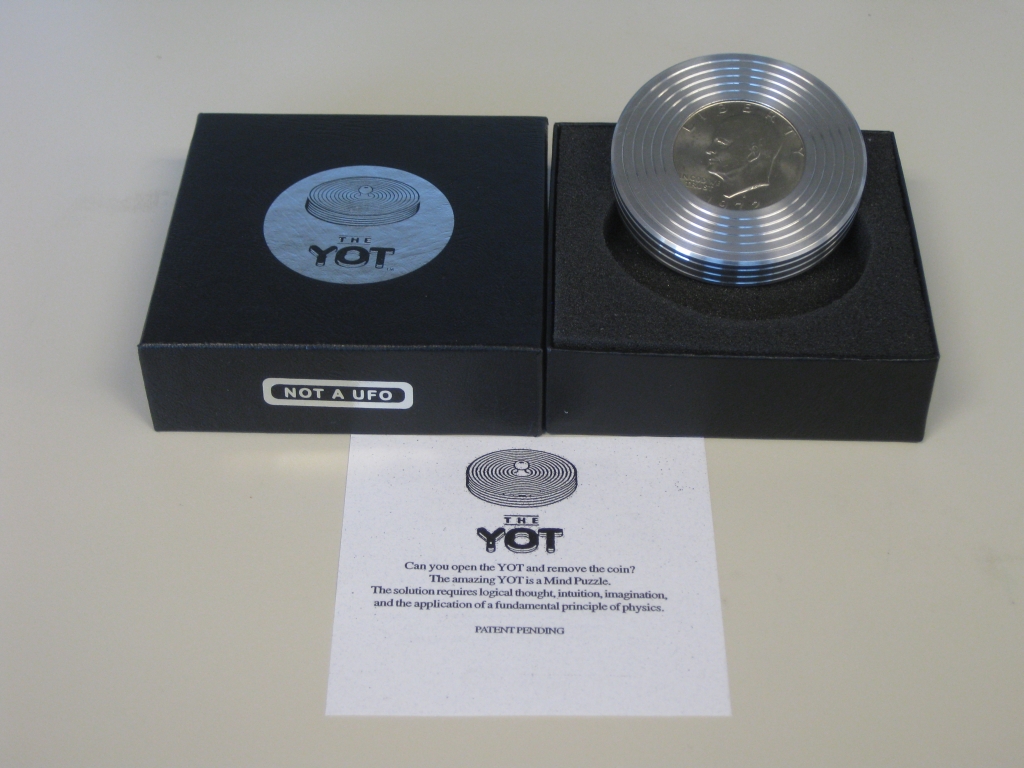
The Yot in its box

The Yot in its box

The top of the Yot

The top of the Yot

The puzzle itself isn’t terribly difficult to open, and I opened it within a few seconds of taking it out of the box for the first time. The solution is fairly common to a number of puzzles, and really given the shape is one of only a few possibilities that could be hidden in such a small puzzle. Now if you’re reading this, you’re probably thinking, why would I spend nearly $40 on a puzzle that I’ll open so quickly? Well first off, it’s a very high quality puzzle that is well made, and very precisely machined, so from that aspect, it’s worth the price tag. Perhaps the real reason is that given how well made the puzzle is; the simple mechanism, works repeatedly without fail. Even the box it comes in, while simple, is still well finished and adds to the quality feel you get from the puzzle. The only caveat to that is the badly over photocopied piece of paper in the top of the box giving you info about the puzzle.

The Yot opened, and no this picture won't help you solve it.

The Yot opened, and no this picture won't help you solve it.

The real fun with the Yot is being able to open it in front of one of your friends, showing them that all you need to do is lift the top straight off, then closing the puzzle and handing it to them, and watch them struggle to open it. It does take a little practice to be able to perform the trick that is required to opening it without your audience seeing what you have done, but once you can, the look on their faces is priceless. Even better, you can hand them it in the solved state, so they can take the top off, and almost invariably, they open it, re-close it then turn it over with a smile of their face, then fail to re-open it when they turn it back around, which just leaves them more puzzled than they were to start with.

As a nice touch, it’s possible to remove the coin from the Yot, and close it back up. Now the base of the removable top is visible, however the mechanism and any clue as to how the puzzle works is still hidden, so you could even pass it out like this to show that there’s nothing tricky about the coin. A nice touch and a good piece of design to boot.

The Yot is also available in a collectors edition from yot.com directly where the body is 18k gold, and has an antique silver dollar trapped inside. While it’s a lot more expensive than the basic version, it’s a nice touch and if you’re a collector it may be worth looking at. I’ll be honest, without the puzzle being a little more challenging I doubt I’d consider getting the collectors version, but if you’ve won the lottery, then why not. Editors note: Given the price of gold today, and the solid silver dollar contained within, this may even be an investment.

The Yot II has a different solution to the original, so I may have to pick one up and see how much different it is. It’s in a larger package, so clearly there’s more room in there for an additional mechanism.

If you need a few hints as to how to open the puzzle, then you can go to the Yot’s website, and they have a few clues there. It’s not a full solution, but really you shouldn’t need it.

There are a number of other puzzlers out there have already reviewed the Yot, so have a look at Brian’s review or Oli’s. Jerry also has written about the Yot and the Yot II, so there’s no shortage of thoughts on this puzzle.

Overall, I’d say if you’re an experienced puzzler, you’re not going to have a problem in opening this very quickly, but opening the puzzle in front of someone then watching their face as they fail to open it by doing “the same thing you just did” is priceless. A fun puzzle, a great coffee table item, plus a nice way to store your silver dollar. If you don’t have one, it’s a nice addition to a collection, and would make a very nice gift.

Puzzle Master Trick Locks 1-5

I recently borrowed a set of five Puzzle Master Trick Locks from fellow puzzler Brian Pletcher, through the Puzzle Library run at Renegade Puzzlers. Brian has already reviewed the locks, so check his series of reviews here. Jeff Chiou had the locks before me so I met him over lunch to talk about puzzles and for him to pass on the locks to me, since we work fairly close to one another. Read his thoughts on his blog here

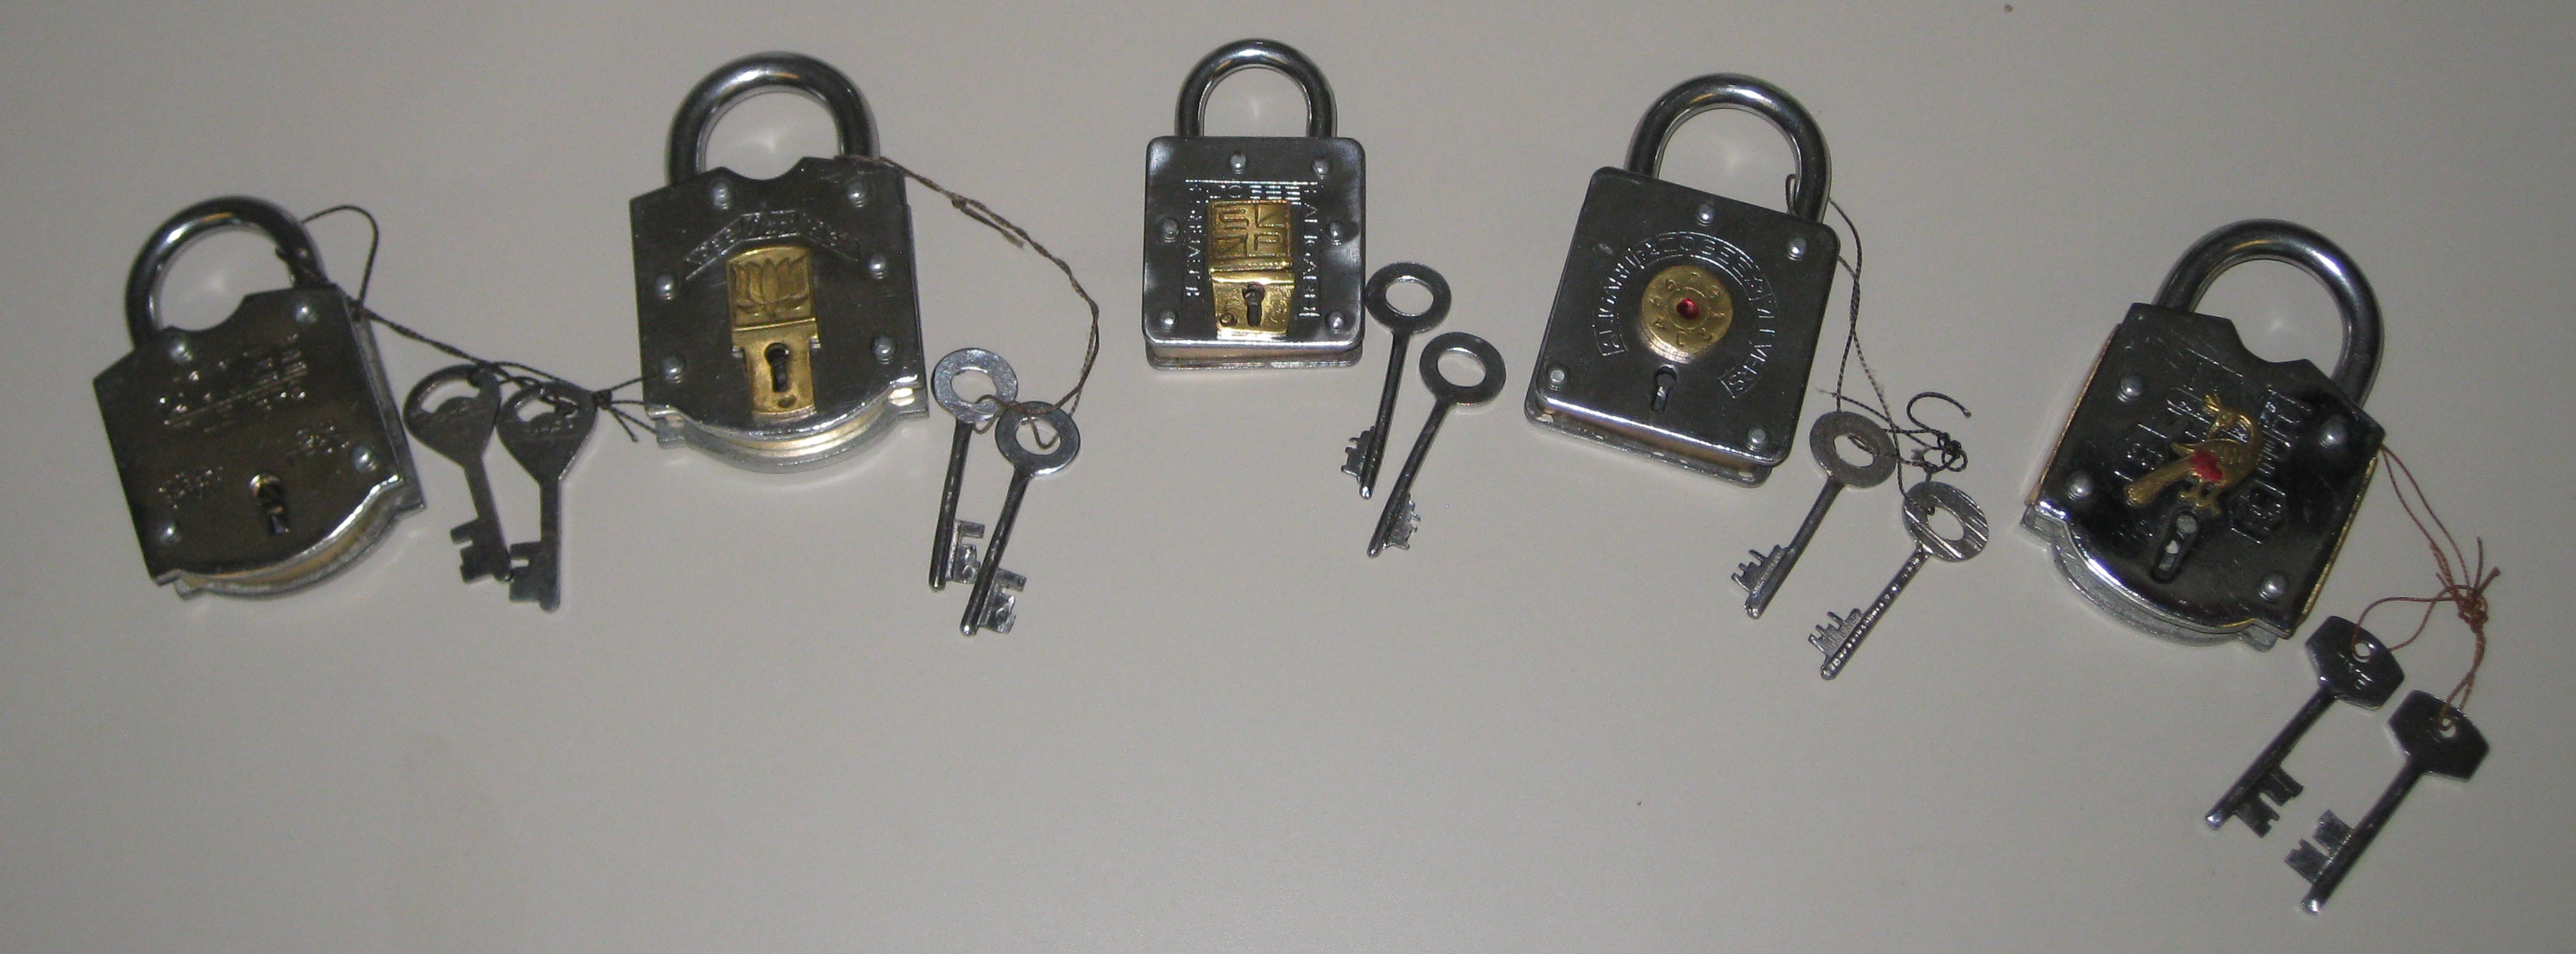
All 5 Puzzle Locks

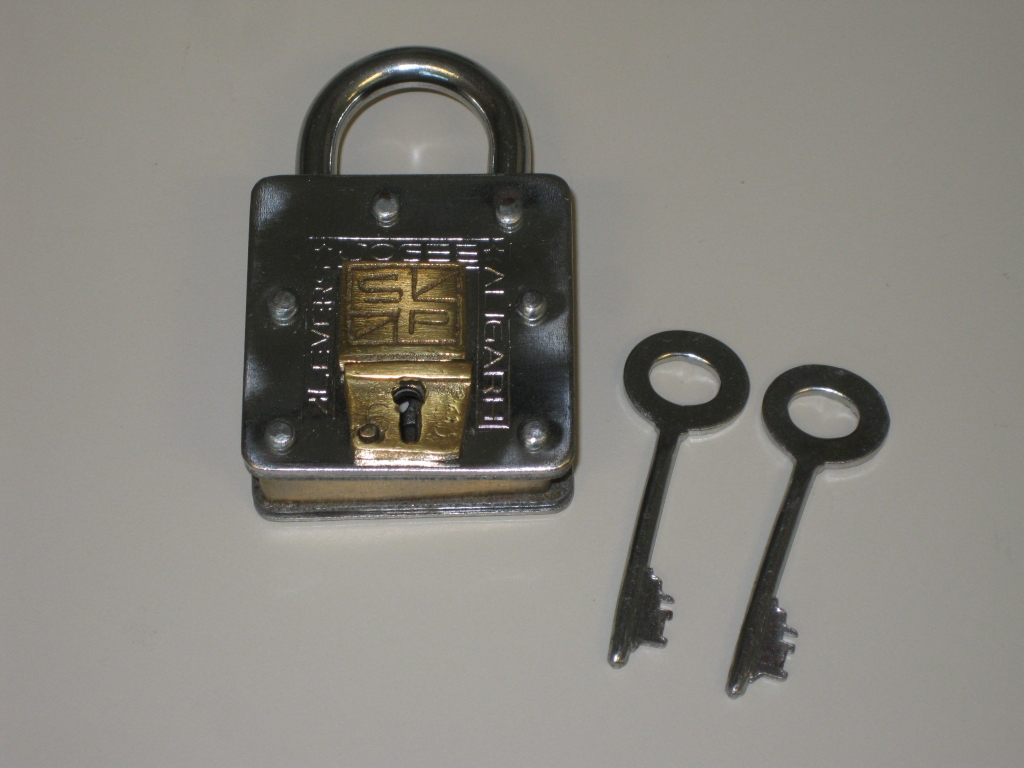
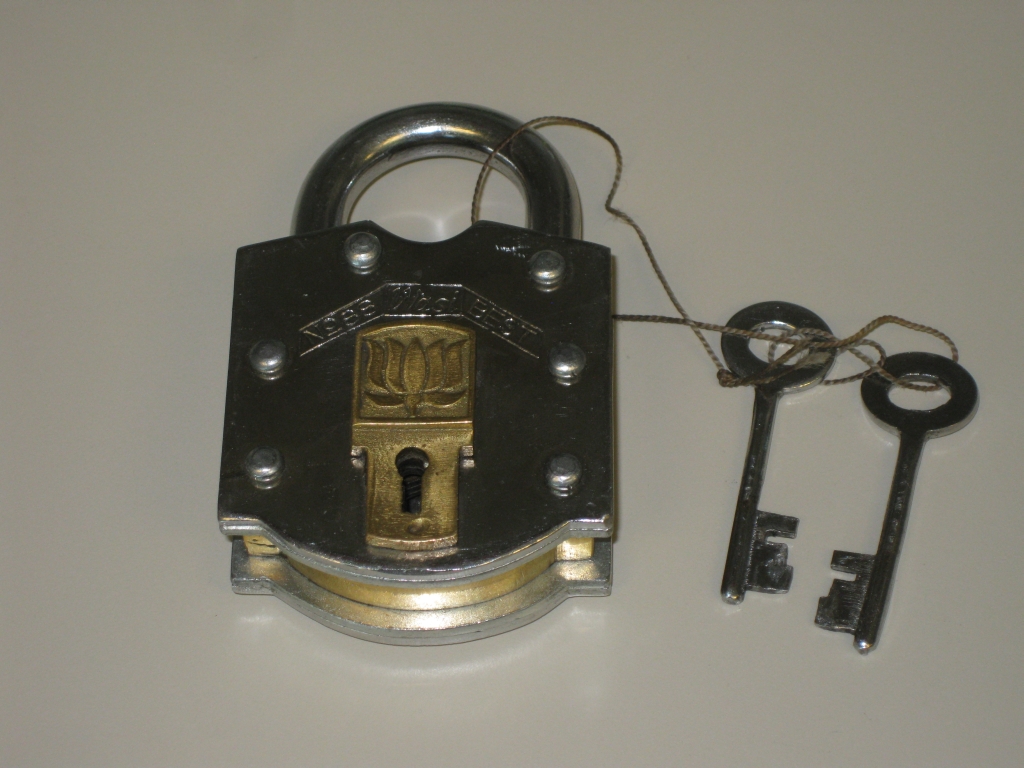
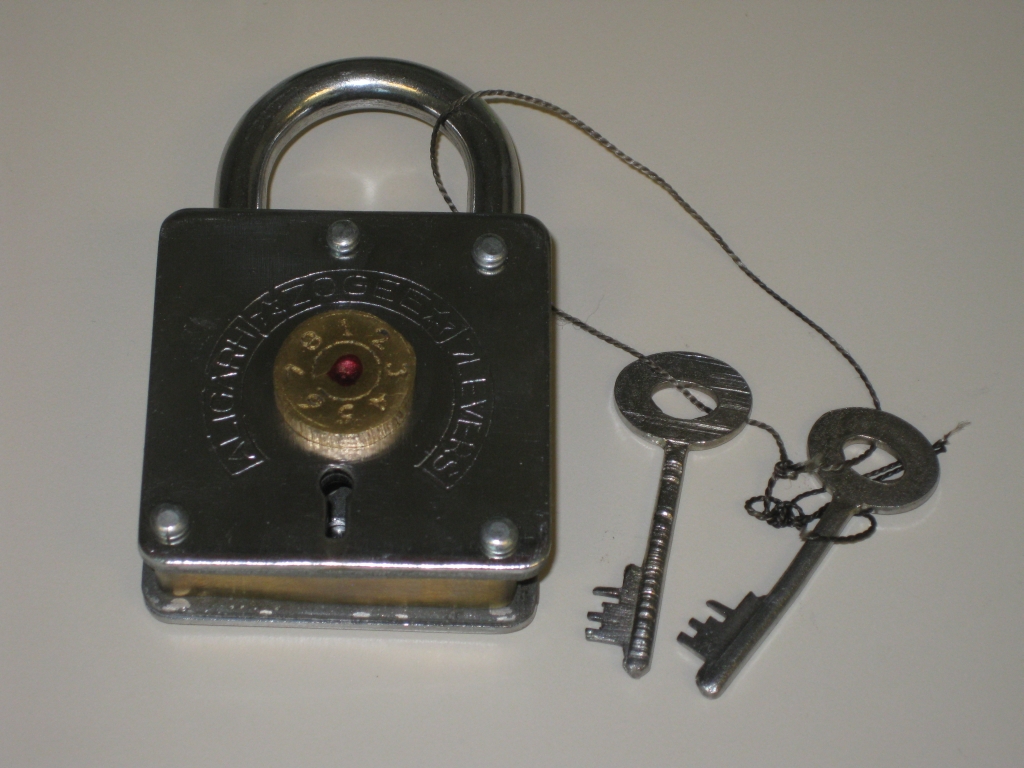
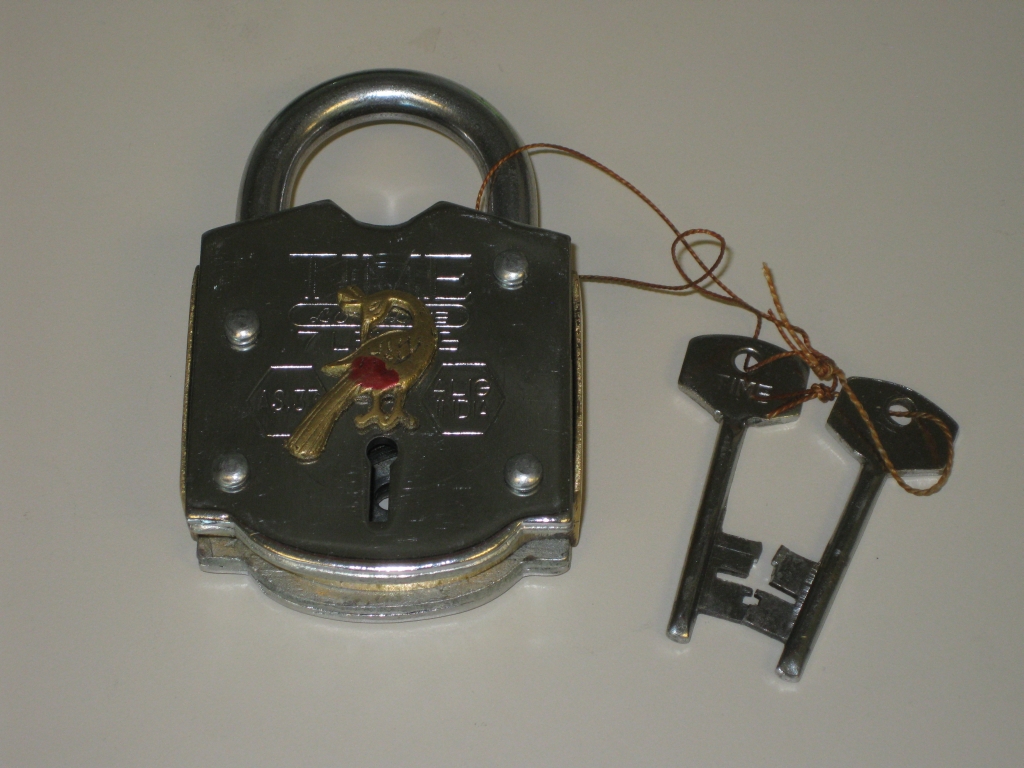
All 5 Puzzle Locks, from left to right - 1, 3, 2, 4, 5.

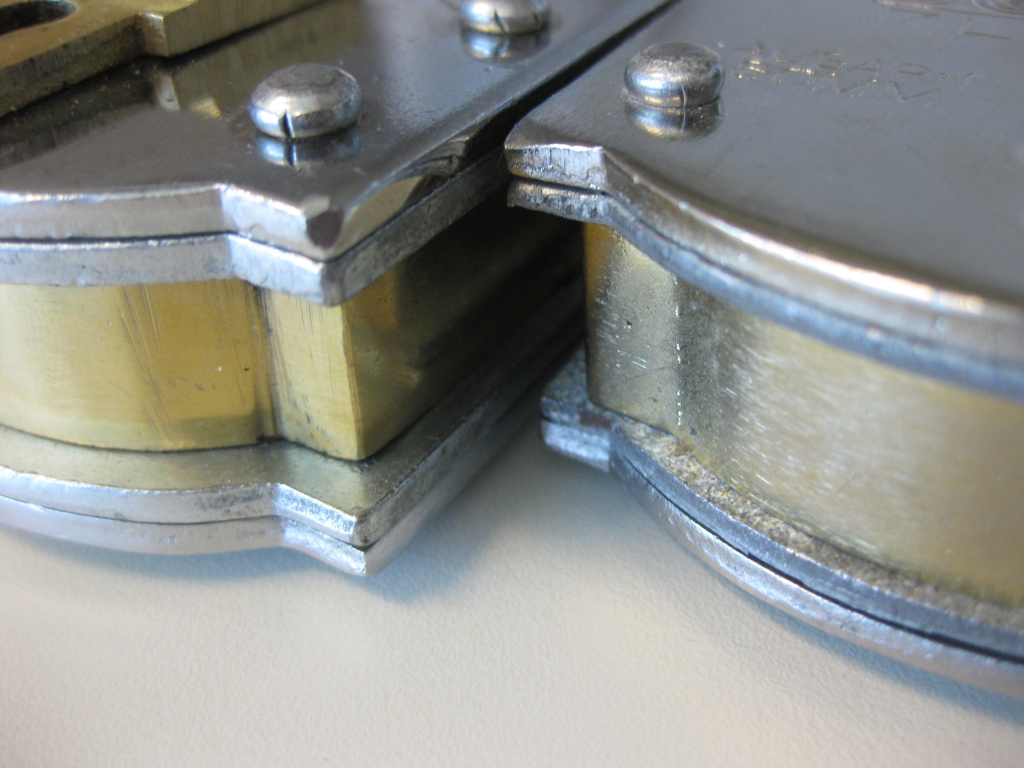
Edge Closeup

Edge Closeup

The first thing to note with all of these locks is that they are all solid. They’re constructed from double thick steel plate and brass riveted into stacks as you can see on the right. That gives them a very solid feel, and significant weight to each lock. One thing to note from that however is that it doesn’t mean that these are high quality locks. The fit and finish is rough giving the locks a ‘well used’ feel to them. The keys for the locks seem flimsy by comparison to the build of the locks themselves. Priced between $20 and $30 per lock these aren’t the cheapest puzzles out there, but they are on the low end of the scale when it comes to puzzle locks. That is somewhat reflected in the level of difficulty of the puzzle, as I’d classify all of these as easy. I’m not a trick lock expert, however I opened all of these very quickly. The locks come from India, and to my knowledge, Puzzle Master is the only place to buy them currently.

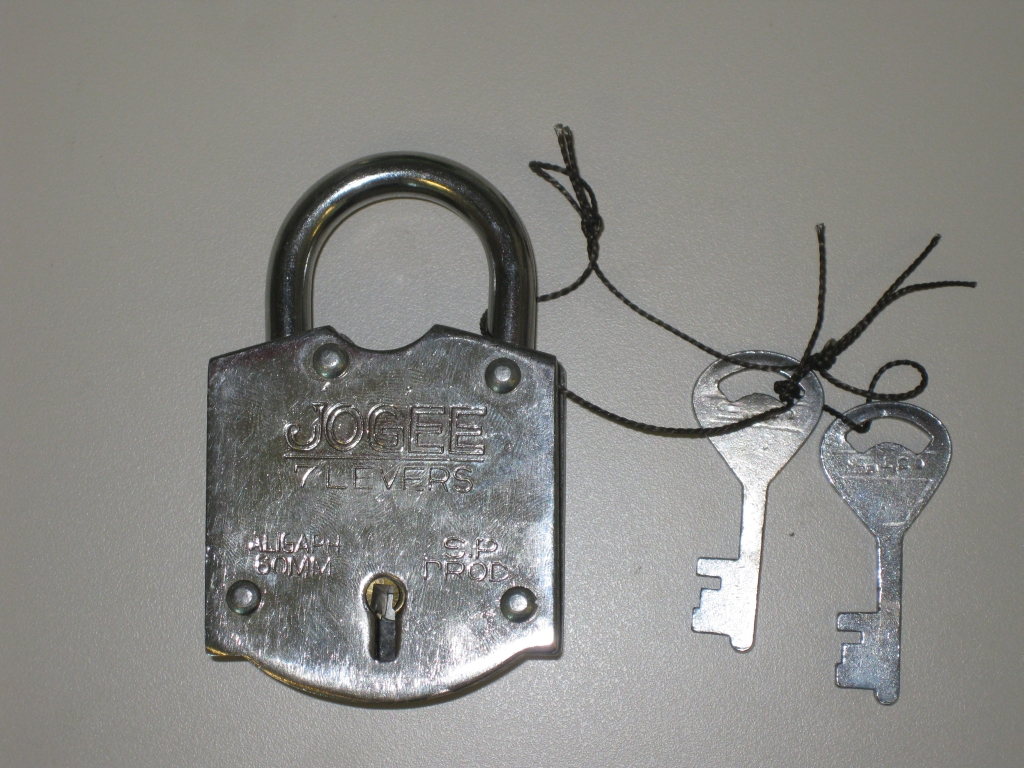
Trick Lock #1

Trick Lock 1

Trick Lock 1

The first of the trick locks is the most traditional looking lock of the set. From the front, there’s nothing unusual, however inserting the key and turning in any direction isn’t going to get you far. The secret to this lock isn’t well hidden, and really is my one big problem with this lock. Had the secret been hidden better, this would have been a far better puzzle lock.

Trick Lock #2

Trick Lock 2

Trick Lock 2

The second lock in the series is both the smallest and lightest of the locks. Inserting the key into the lock you’ll find that it doesn’t even turn so clearly that’s not the solution. This has a novel mechanism which may catch some people out as it’s not entirely obvious. The fit of the mechanism lets it down slightly , but also helps to throw you off the scent as things which really shouldn’t move, do. The back of this lock gives the puzzler a hint as to its solution, however the mark on the back is subtle, and may be easily missed as a manufacturing defect. Given it’s location I’m inclined to believe it was a hint rather than a flaw.

Trick Lock #3

Trick Lock 3

Trick Lock 3

The third lock in the series is a fun lock. The mechanism isn’t obvious, and is possibly the best hidden of the series. I have to agree with Brian’s review that it is entirely possible to open this lock without knowing how you did so, and given that, not reset it back to it’s locked state. The stylised front adds a nice feature and is probably my favorite aesthetically in the series. Again, it’s not a difficult puzzle, and the solution isn’t obvious so this may keep some people guessing.

Trick Lock #4

Trick Lock 4

Trick Lock 4

Number four is an interesting lock, with a combination dial on the front face. Again, the back of the lock will come in handy when trying to solve this lock, as there’s a handy clue stamped into the back for you if you’re paying attention. The dial itself is fairly roughly cut and etched with the numbers 1-8, plus a red splodge of ink in the centre. I don’t much care for the red ink, as it really doesn’t add anything, and isn’t particularly well applied. The dial on this particular lock is incredibly stiff, but it is possible to rotate it 360 degrees. It’s easier to stop at 8 and reverse your direction rather than trying to keep going however, so I’d recommend that approach. This is very similar to #2 in the series in terms of opening the lock, but the mechanism is different enough to be worth opening even after solving the earlier lock.

Trick Lock #5

Trick Lock 5

Trick Lock 5

The final lock in the series is the heftiest lock in the set, and the central core of this one looks to be hewn from a solid block of brass, unlike the other locks, which use thinner plate bent to shape. The bird on the front has again been splashed with some badly applied red ink, which really does nothing for the look of the puzzle. This time there’s no obvious hints on the back of the puzzle, so you’re on your own with this one. It’s not the most difficult of locks, but could keep you busy for some time trying to understand how the mechanism works. Even though you can see clearly into the guts of this lock, you’ll not find any clues there either. This is probably my favorite, as it’s the most challenging lock in the series.

Cast Rattle

This entry is part 3 of 8 in the series Hanayama Cast Puzzles

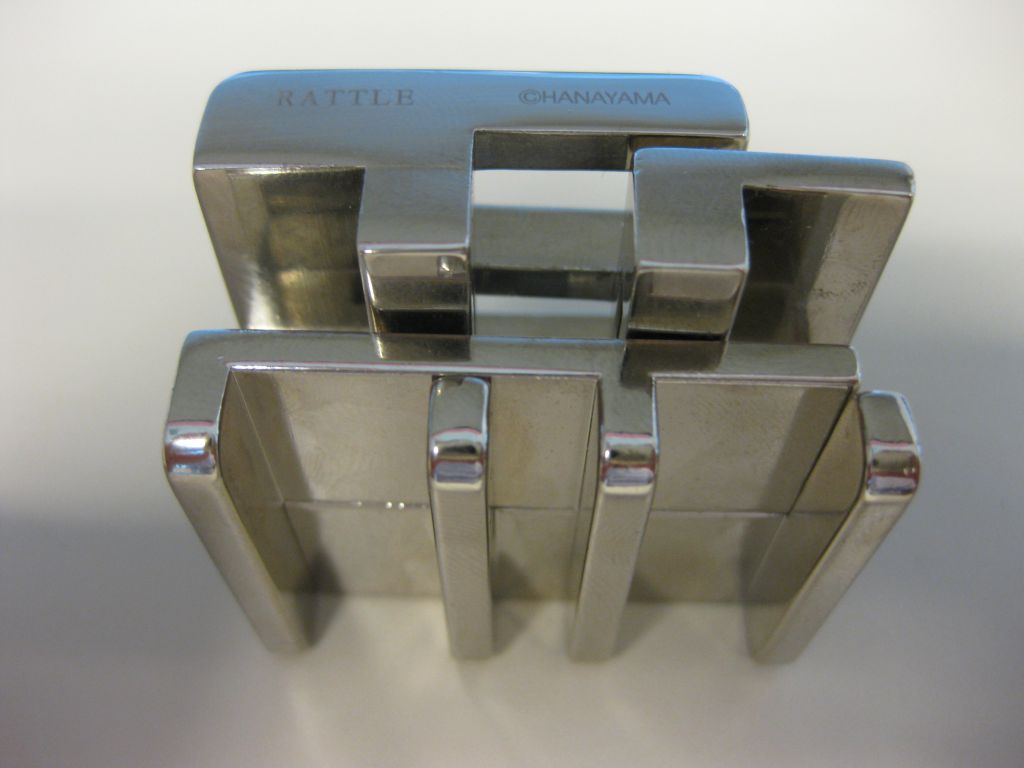
Cast Rattle is another excellent puzzle from the Hanayama Cast series of puzzles. This particular puzzle is designed by Bram Cohen. The highly chromed, clinking puzzle challenges you to separate the four joined pieces, then put them back together, before you drive your significant other insane from the rattling. Thanks to Puzzle Master for sending me this puzzle to review.


Cast Rattle by Hanayama

Cast Rattle by Hanayama

As other people have already commented in their reviews, this puzzle really lives up to its name. The four identical pieces rattle and clink with each and every touch of the puzzle, and most attempts to silence it will prove to be futile. The chromed finish is very slick, and there is very little friction between the pieces to keep them in any particular spot. Have a look at Kevin’s review and Brian’s review to see what they had to say about this puzzle.

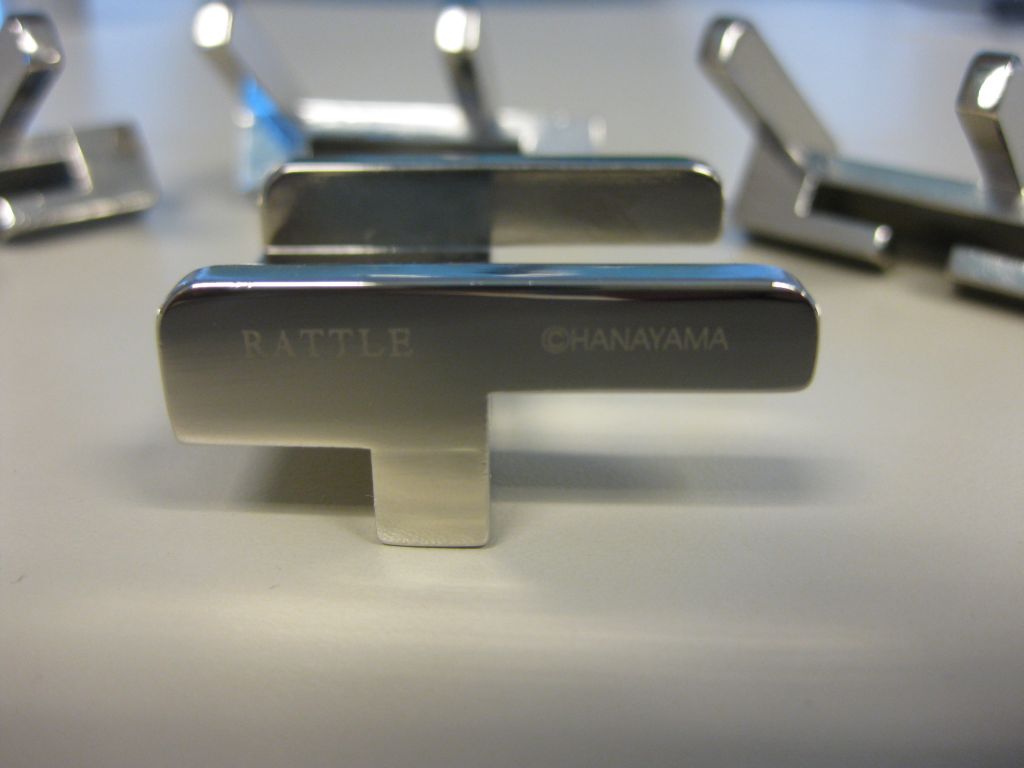
If you’re familiar with the cast series, then it will come as no surprise to find that the name of the puzzle, and Hanayama’s name are laser etched onto one of the pieces. This puzzle is no exception and lives up to the high quality that we are familiar with from the Hanayama series. It’s a solid puzzle with a good weight and excellent fit and finish. Despite its small price tag, this is a high quality puzzle.

Cast Rattle closeup

Cast Rattle closeup

At its smallest, the puzzle is around 1.5″ square x 1″ high. The pieces fit very loosely together which adds to its tendency to rattle, but there’s really no unnecessary movement here. Moving the pieces around in relation to one another, you can see everything, making this another ‘perfect’ puzzle.

You may not realise it, but this puzzle is actually a burr puzzle. Don’t let that put you off though. I know that many people are not a fan of burrs but this is a great puzzle and you’d be missing out if you passed it by. The loose connection of the pieces, and the ability to see all parts of the puzzle make this a rather unique burr. Nothing hidden from you and yet something keeps the pieces locked together.

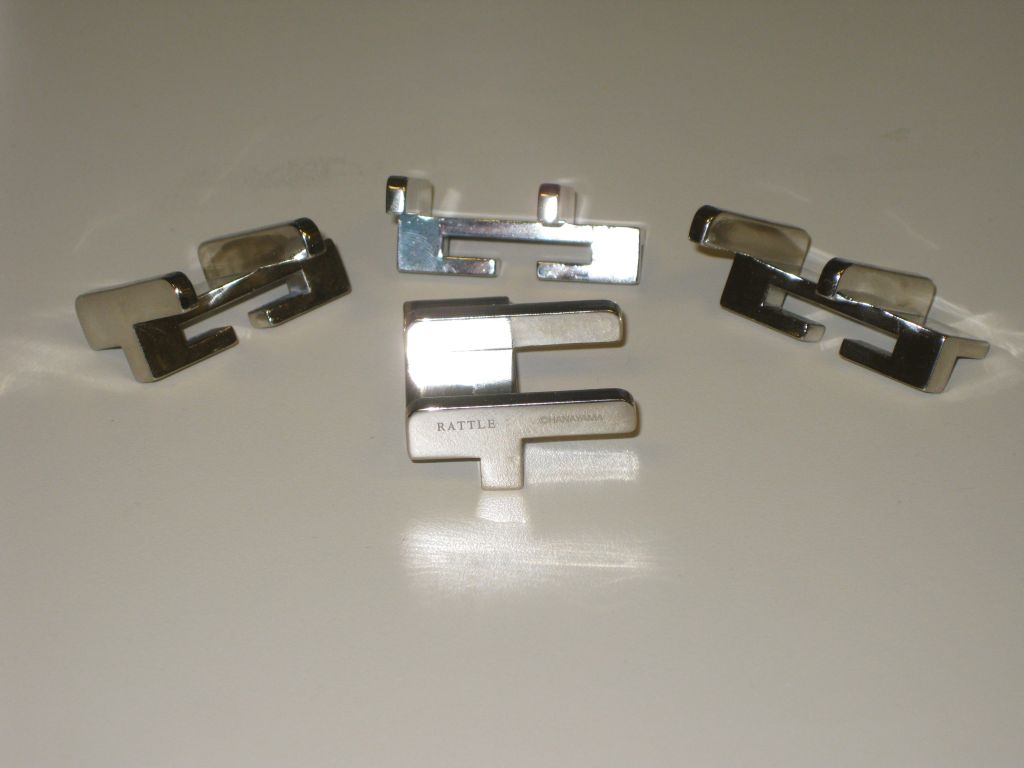
With nothing hidden, it should be easy to see how it should open, right? And this is where the frustration sets in. Idly fiddling with the puzzle in your hands is unlikely to see you opening it any time soon. Tugging and pulling wildly at the pieces in the hope they will pop apart also won’t yield particularly impressive results. A more structured approach (and a level surface) help in solving this one. You can see from looking at the pieces and how they connect that all you need to do is line the pieces up, and they should fall apart. The beauty is that the pieces are so accurately made, that the alignment has to be spot on for that to happen.

Cast Rattle pieces

Cast Rattle pieces

I’ve given this puzzle to a few different people to try to solve, and most have managed. The interesting thing is that each person approaches the puzzle differently, and as such I’ve witnessed a couple of solutions. The most Neanderthal solution involved holding two pieces and shaking until things fell apart, to the other end of the scale where carefully aligning pieces on a desk and gently repositioning with a pencil until the top two could lift off. Interestingly both were successful!

After I solved this for the first time, and could look closely at the pieces when I was re-assembling the puzzle, I noticed something very interesting. That led to what I consider to be a very elegant solution. Taking a couple of tooth picks and carefully placing them between the pieces, you can precisely align them, and separate the pieces with minimal effort. I wonder if this was intentional when the puzzle was designed or just luck!

The effect of such a precise construction, and low friction surface is that even when you’re putting the pieces back together, almost as soon as the pieces touch, they will move out of alignment locking themselves together again.

Hanayama rates the puzzle as a level 4/6 and Puzzle Master a level 8/10 – Demanding. I have to say that these are spot on. It’s a challenging puzzle and could keep you rattling away for hours if you don’t look carefully at the pieces and their interaction. Even after solving it, and knowing what you have to do, this still provides a challenge every time you come back to it. I highly recommend Cast Rattle for all ages and level of puzzle solving, although I’d suggest not handing it to the baby!