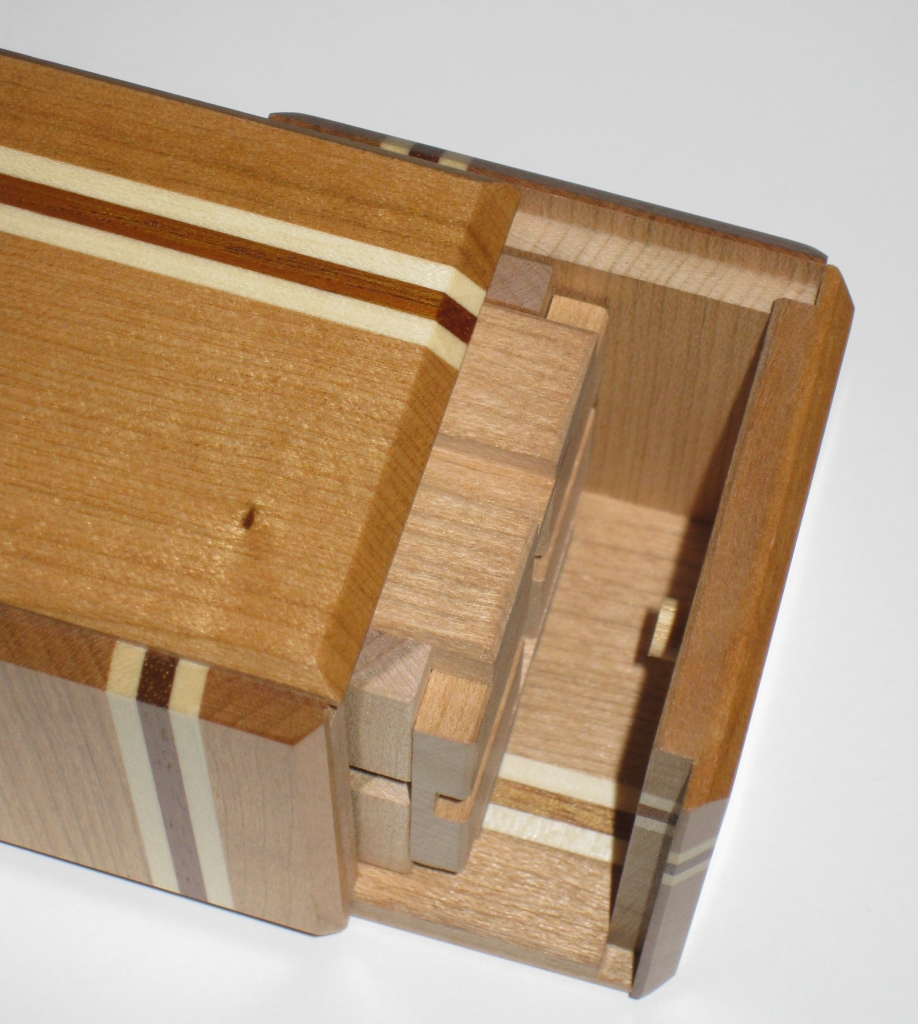
Tag Archives: Puzzle Box

Karakuri Work Kit – Kakukaku box

As a member of the Karakuri Group, when I renewed my membership at the start of the year I decided to pick up a few of the DIY kits that they offer. After my experience with Bruce Vinney’s designs I was interested to see what Karakuri Group had created, and also to better understand the mechanisms used, which is one of the goals Karakuri set when making the kits.

When I mentioned that I had the kits on one of the puzzle forums, there were requests to show how to build them, so much like I did with the previous kits I built, I decided to show the build process in full. Watch the video below to see the build, and watch the kit come to life. In the video I’ll cover all the tools I use and this isn’t time lapse so you can see everything in real time. I’ll be doing videos for all the kits shown in the video, so check back for more soon.

As promised in the video, you’ll find the instructions below, with my guide to building the box. Be aware that this is in no way a translation of the instructions!

General Kit Comments

The Karakuri group offer a reasonable number of DIY puzzle boxes which they refer to as “Work Kits”. Each of the kits consist of a number of pre-cut plywood pieces, some decorative pieces (like the beautifully made acorn on the Acorn Box), and any hardware needed for the mechanism, if it’s not just a straight forward sliding panel or suchlike. The kits are all perfectly cut, and of the kits I own there have been no issues with the fit or finish on any of the pieces.

Something which is worth noting about the kits is the price. They all come in at around the $25 USD mark, so in terms of affordability, these are really affordable boxes. The quality of the cuts on the pieces is excellent and the fit is as good as you will find with anything from the Karakuri group, so I’d say from that side of things, they’re great value.

One thing to note is that the build instructions for the kits are in Japanese language only. Don’t be put off by that however as with a little thought, and some careful study of the diagrams, you’ll build the kits just fine. Failing that, have a look at my Build Instructions section below, where I have detailed the steps (in English) to build the kit.

Kakukaku Kit Review

The first of the kits I built was (as you already know from the title of this post) the Kakukaku Box. I picked this one for no other reason than liking the look of the box. Interestingly it was the last of the four that I picked, and really the only reason was that I had set a budget and this fit within that budget after having picked the three others I wanted.

The completed top and bottom of the box

The completed top and bottom of the box

As you can see from the picture above, the box itself is fairly simple. The ply is visible on the top of the box, but personally I don’t think that’s an issue. If you don’t like having the ply exposed, you could glue some veneer onto the top panel just to make it neater. The laser cut tree certainly adds to the look of the box, and is also a clue as to the solution.

Building the kit was fairly simple. The diagrams on the build instructions are very clear, and there’s nothing complicated to this kit, so I didn’t have any issues building it. The video is real time, so it took about 15 minutes to put together, and would probably be quicker if you’re not recording a video and talking through everything you’re doing!

As far as the puzzle box itself is concerned, I’ll be honest that I was a little disappointed with the box. I have two reasons for this, and at first they seem contradictory, but bear with me.

The locking mechanism is both too difficult to open, and too easy to open at the same time. If you attempt to open the box using the ‘solution’ provided, it can be very difficult to move the two parts of the box in the right way to get them to open. The fit is pretty good, and as such the movements need to be made very precisely to get the box open. Sadly, there is a much simpler way to open the box. If you hold the top of the box, and shake it, the bottom falls out on its own, making it far too easy!

As a kit I certainly enjoyed building it, and you will understand the mechanism once you’ve built the box, so it certainly meets the expectations that the Karakuri group set out to achieve. If you’re thinking of buying one (or more) of these kits, I’d say that there are better boxes in terms of the end puzzle that you could get, but if you just want to add them all, then go get it!

Build Instructions

In this section I will try to give my guide to building this kit. Please note that this is in no way a translation of the Karakuri Group’s instructions, but my own instructions based on having built the kit. If you have issues following my instructions, feel free to get in touch and I’ll help you if I can, and update things below to clear up any confusion.

Build instructions - Click image for full size

Build instructions - Click image for full size

The instructions below match to the numbers on the diagram above.

Tools Needed

Before starting, you’ll need a couple of tools.

  • Wood Glue / Elmers hobby Glue
  • Pencil
  • Ruler (or some measuring device)
  • Tape – I recommend blue painters tape
  • Glue Brush (optional)
  • Engineers Square (optional)

      Step 1 – The Locking mechanism

      First up, sort the parts from the kit into the same order as shown in the top diagram. If you feel like you need to then you can mark the piece numbers in pencil on the inside of each piece. The way the pieces are laid out in the diagram shows the inside, with the exception of piece ‘B’, which will be inside the box and unlikely to be seen so even if you don’t remove the pencil mark, probably not an issue. In my opinion, the pieces are pretty clear so you should need to label them.

      Take Piece ‘A’ and lay it as shown in the diagram. The sides with the notches cut out should be at the top and right of the piece as you look at it.

      Take Piece ‘B’ and glue it into the centre of piece ‘A’. The piece fits snugly between the wooden blocks that surround the piece, so no adjustment or fine placement is required. Make sure that the lip on piece ‘B’ is on the left and top as you look at the piece. This can be confirmed by the angled corners as seen in the diagram.

      Leave the top for around 10 minutes for the glue to dry (note if the glue you are using takes longer to dry, then follow the manufacturers recommendations).

      Step 2 – Top Decoration

      Once the top of the box is dry from step 1, flip the piece over so that the cut away sections are now on the top and left of the piece as you look at it.

      Using a ruler, mark the centre of the piece, making note of the cutout which will not be seen once the box is complete.

      With the centre identified, glue the tree piece to the centre as seen in the diagram.

      Step 3 – Inner Box

      Take the parts labelled ‘E’ in the diagram. The flat square is the base of the inner box. There are two sides with notches cut in each end, and two with no notches cut.

      Place the base in the centre and then around that the two pieces with notches in the ends above and below it, then the two without notches at either side as seen in the diagram on the right.

      You will notice that there is a grove running through the with of all of these pieces. The base will go into one of these slots, and the other is part of the locking mechanism.

      Put glue into the notches on either end of the top and bottom pieces and using a brush, spread the glue evenly into these notches. Bring all four sides together around the base as seen in the lower left diagram.

      Once all four pieces have been brought snugly together, tape the corners and check that the corners are square using an engineers square. Note: This check is not really needed as the pieces are designed to give a good square corner.

      Note: You can put tape on the corners before adding the glue. This can make the job of taping the corners easier rather than trying to get tape around the corners after they are in place.

      Leave the inner box to dry.

      Step 4 – Outer Box

      Take the top which was completed in step 2, and place it as seen in the diagram, where the cut-out sections are at the top and right of the piece as you look at it.

      Taking pieces Labelled C-1, C-2, D-1, D-2, place these around the top as seen in the diagram.

      Pieces D-2 and C-2 have a piece of wood inside the groove which ensures the pieces are correctly located in relation to the locking mechanism, and the centre of the box.

      Pieces C-1 and D-1 have no insert in the groove, and will slide freely along the length of the top.

      Apply glue into the notches on either end of pieces D-1 and D-2 and using a brush, spread the glue evenly into these notches.

      Bring all four pieces together around the top as seen in the diagram on the right, starting with pieces D-2 and C-2 which will ensure that the pieces are correctly centred.

      Once all four pieces are in place, tape the corners together and allow the top to dry. You can check the top for squareness before it is dry however as with the inner box, the pieces are designed to give a good square corner even without this check.

      Note: As before putting tape on the piece before gluing can make this easier

      Step 5 – Opening and Closing the box

      To Close the Box, place the outer box onto the Inner box and move the top Right and Up as per the green arrow in the diagram. The box is now locked.

      Top Open the box, move the outer box Down and Left as per the blue arrow in the diagram, then lift the top of the bottom. The box is now open.
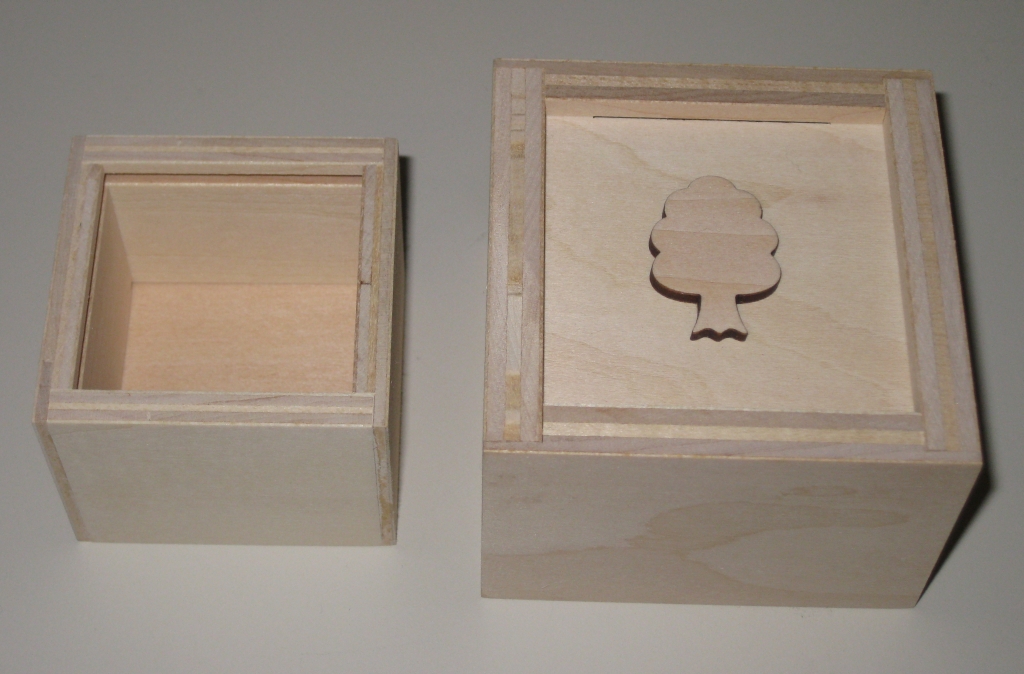
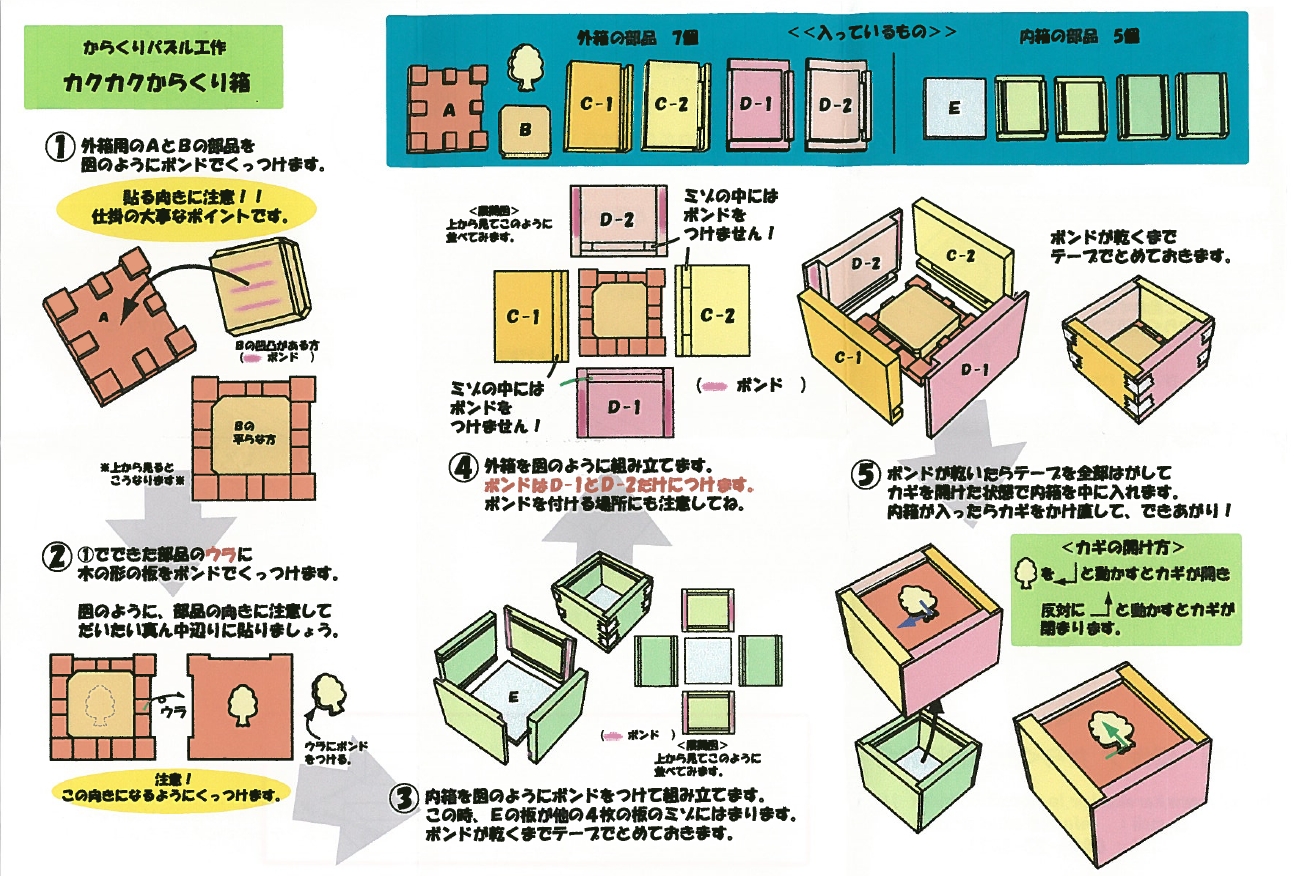
Havanas #1 & #2 – Chris and Heather

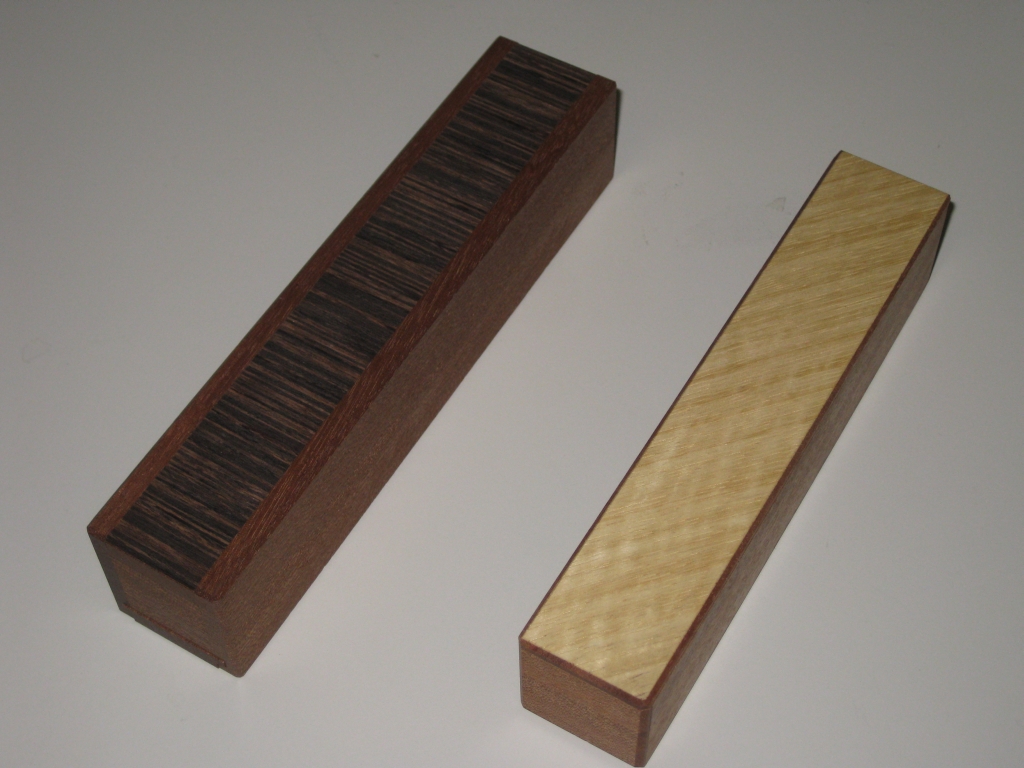
Eric Fuller recently started producing a series of Cigar Puzzle boxes, in honor of his local cigar bar Havana Deluxe. I have been lucky enough to get my hands on the first two puzzles in the series, the ‘Chris’, named after the doorman, and the ‘Heather’ named after one of the part-timers behind the bar.

Chris on the left, and Heather on the right

Chris on the left, and Heather on the right

As you can see both boxes look stunning, and as other people who have these have commented, the photo’s don’t really do the boxes justice. I’ve tried to get as close to the actual colour of the box as possible with the photographs, but I still think the actual box is better looking. (Sorry)

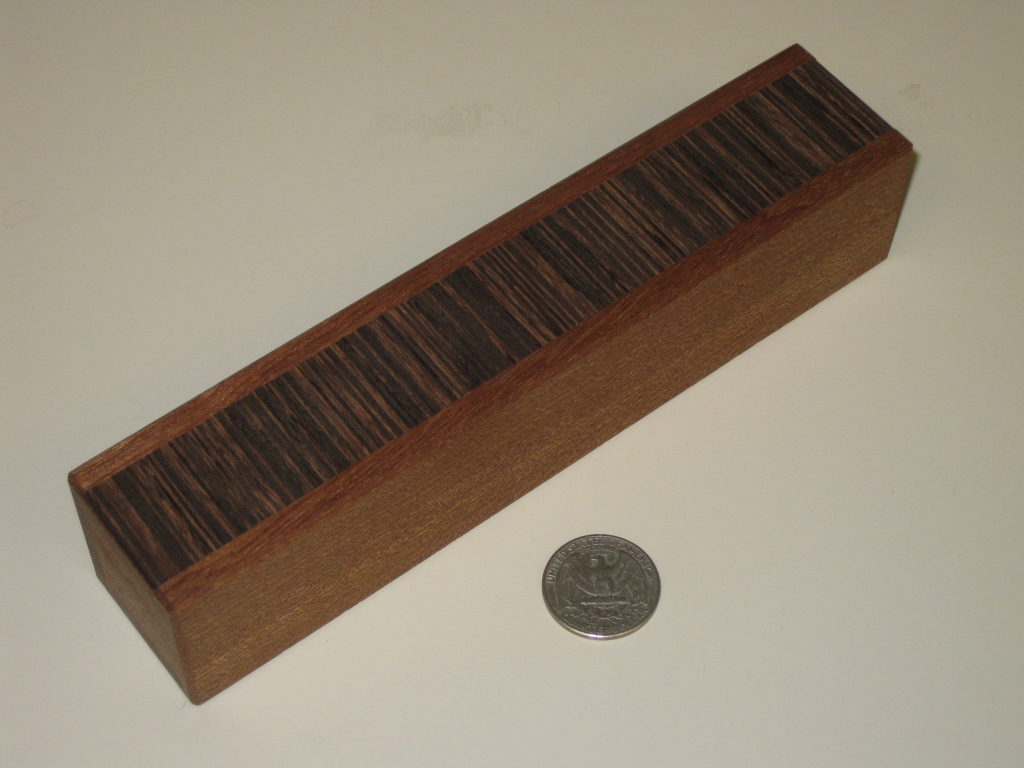
Havanas #1 -The Chris

Havanas #1 - The Chris

Havanas #1 - The Chris

Eric has this to say about Chris:

“One of my favorite activities is to have a big, stinky cigar after a long day in the shop…generally enjoyed at my local cigar bar, Havana Deluxe. I’ve been wanting to make a puzzle box that will hold a cigar for some time now. A while back I was talking to the owner about it and we decided that I would make not just one cigar box, but a series of them! Each box will named after one of the people working there. And thus was born the Havana’s Puzzle Box series. This is the first box in the series…Havana’s Box #1 – “The Chris”…named after the doorman.

The designs will start off fairly easy in difficulty, and get harder over the course of the series. This first box is therefore not super complicated, but it does have a nice “twist” to it as well as a sophisticated and compact locking mechanism concealed inside. The entire lockworks are contained in the endblocks, measuring 1″x1″x.45 inch. This makes the box nice and compact.”

Chris is crafted from Quatersawn Sapele, and if you know anything about wood, it is most stable dimensionally when cut quartersawn. The top and bottom use cross grain Wenge veneer (have a look at my recent table project to see the face grain) to really make the box pop. The stunning contrast in the striped grain is really beautiful and Eric has used it to full effect in this box.

Don’t be put off by this being veneer rather than solid wood. To have tried to create the top and bottom from crossgrain Wenge there would have been no strength to the box, and it would have snapped as soon as you looked at it, so this was a great choice.

The box measures 7.25″ x 1.5″ x 1.5″ so holds the cigar comfortably, and in fact has a fair bit of spare space inside to hold a larger specimen. Only 40 were made and each is signed and dated as is Eric’s usual custom.

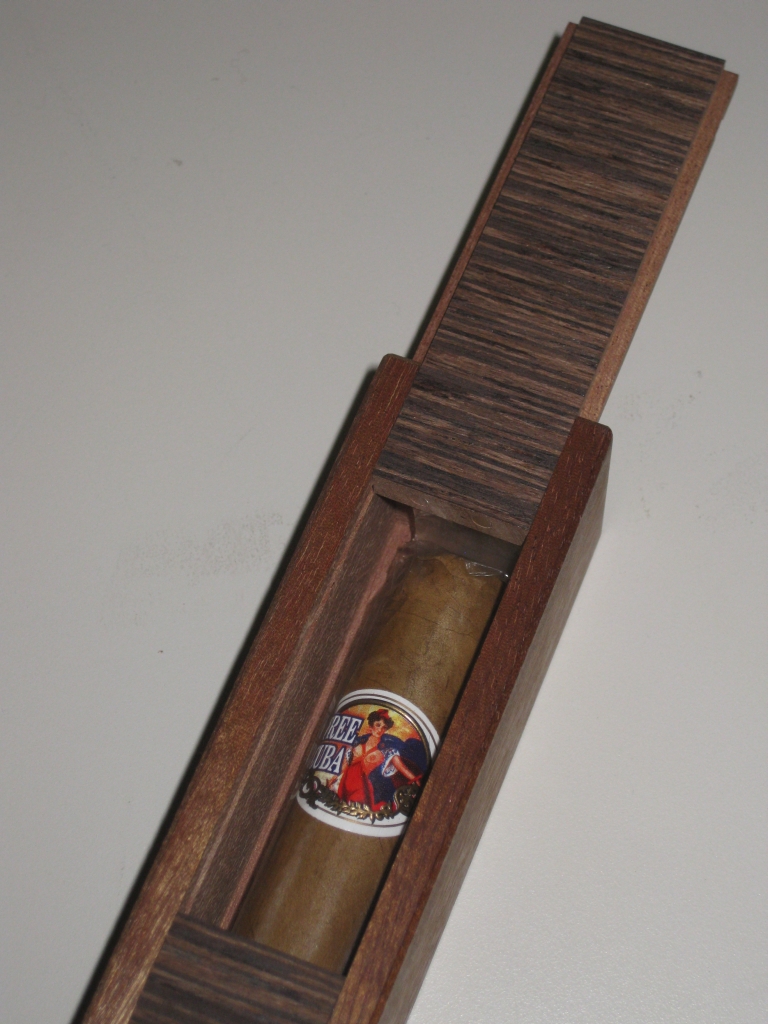
Having waffled for long enough about the wood, and the reason behind the box, what is it like as a puzzle I hear you shout… Well, I really like it. At first, nothing seems to move much and as you turn it around in your hands, you’ll find a small amount of movement, but not enough to be apparently useful.

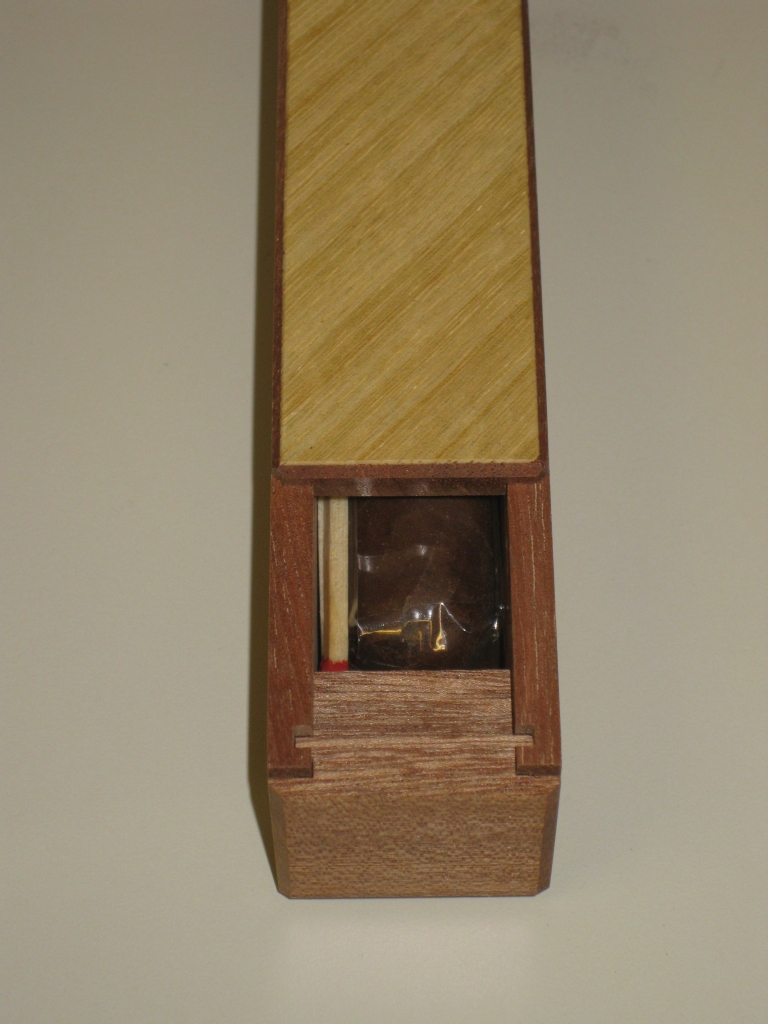
A glimpse, but not enough to remove the prize

A glimpse, but not enough to remove the prize

With some more fiddling, the box starts to tease you with a glimpse of the cigar contained within, but you’re not getting it out without snapping it, so more work is required. Before too much longer you should be able to fully open the box, and remove the cigar undamaged.

The Cigar free from the box

The Cigar free from the box

As the first in the series, Chris isn’t too difficult to open as Eric himself commented, and is really here to give a feel for what’s coming. I took around 10 minutes to open the box for the first time, but now that I understand the mechanism, I can open it in a few seconds. I love the mechanism, and even though it’s entirely hidden from view once the box is open, you should be able to figure out what’s going on inside those end panels. This is a great start to the series!

Have a look at what the rest of my puzzle friends are saying about Chris… Allard, Brian and Rox’s thoughts.

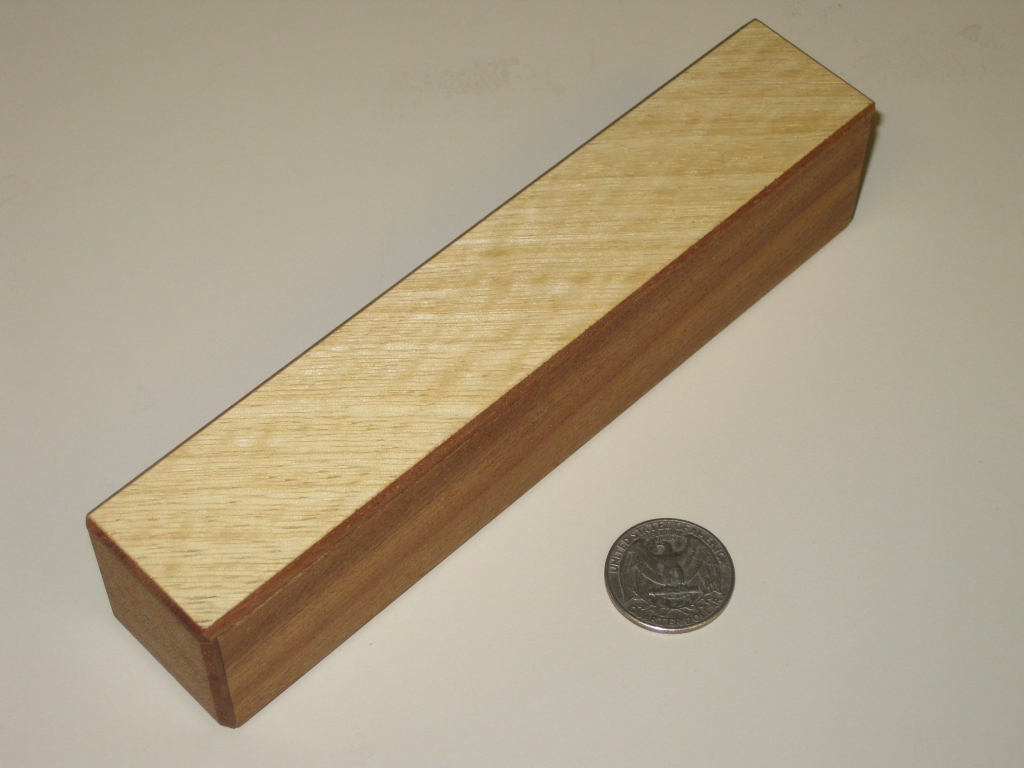
Havanas #2 -The Heather

Havanas #2 - The Heather

Havanas #2 - The Heather

Eric has this to say about Heather:

“The second in the Havanas Box series is named the “Heather”, after the one of the friendly part-timers behind the bar. It’s a step up in difficulty from the first box…easy enough to get started but then a few moves in you hit a wall. The solution is fairly unique and I think it will be a lot of fun to discover. Tough to say much more about it without giving a lot away…all I can say is pay attention and the solution will match your observations.”

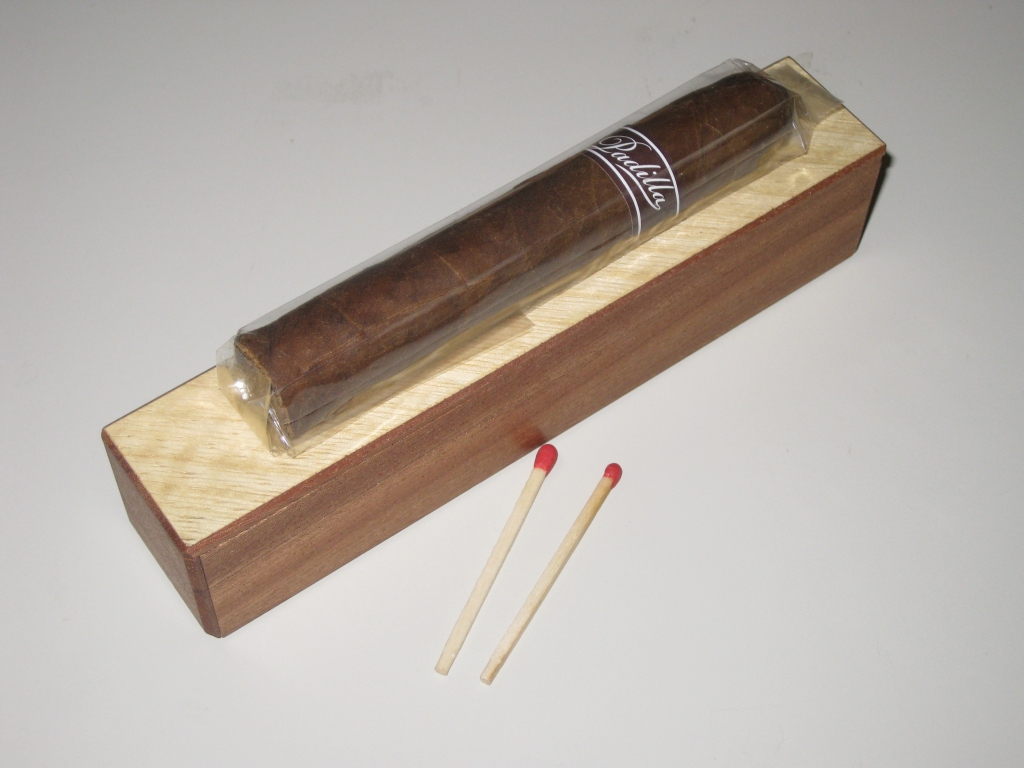
This time, there were two options offered. The one I have is made from Quartersawn Sapele and has a Quilted Primavera veneer to the top. The quilting which looks like waves in the wood is easiest to see in the first picture in this post. The other option was with a Bleached Lacewood veneer on the top, however those sold out very quickly. There are still two of the Primavera boxes left if you’re quick on Cubic Dissection (and I’d highly recommend these so don’t miss out!). 45 were made in total, and they’re all signed and dated.

Measuring 6.5″ x 1.3″ x 1.5″, Heather is more petite than the doorman Chris (which is probably a good thing), and is certainly a more snug fit for the cigar contained within than Chris was.

Hitting a dead end

Hitting a dead end

As Eric mentioned, fairly quick progress is made for at least the first few moves, then you seem to end up stuck with only the tip of the cigar visible, and the handy matches that Eric has put in the box for you to light your cigar if you manage to get it out!

The Cigar free from the box

The Cigar free from the box

The mechanism is certainly unique, and Eric has disguised the next steps beautifully. I’ll not say anything more about how to proceed as I really don’t want to give anything away, but I really like what Eric has done with the puzzle, and think it’s a fun progression from Chris. You’ll certainly need to look closely, and think about what you could possibly do to successfully open this box!

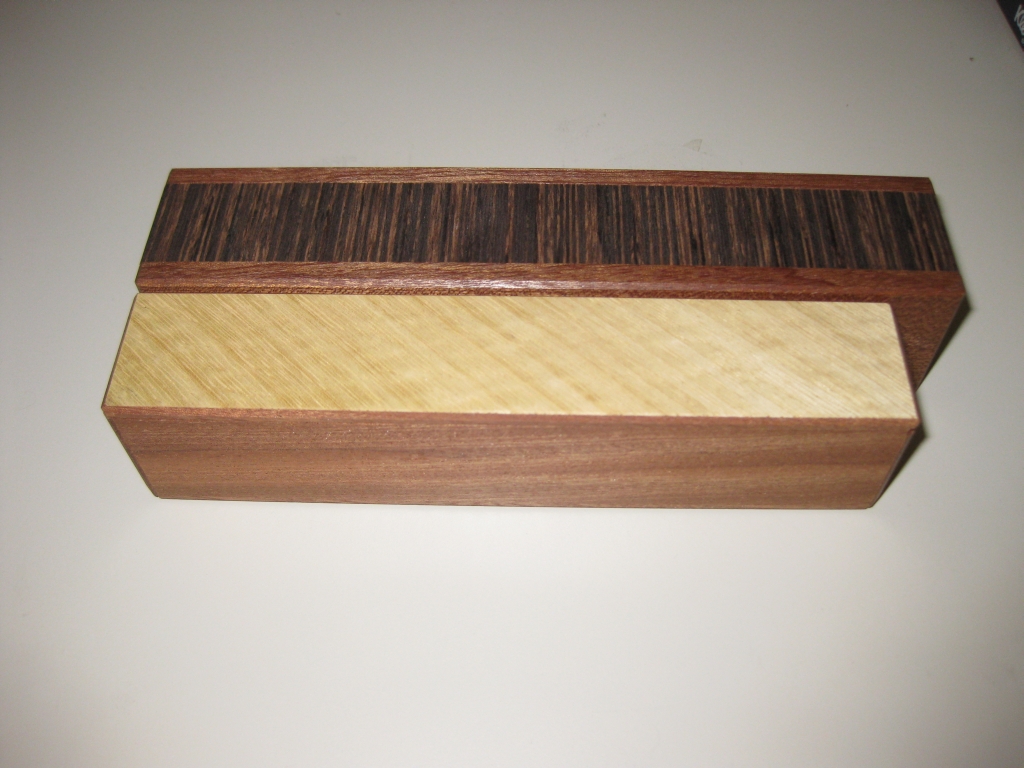
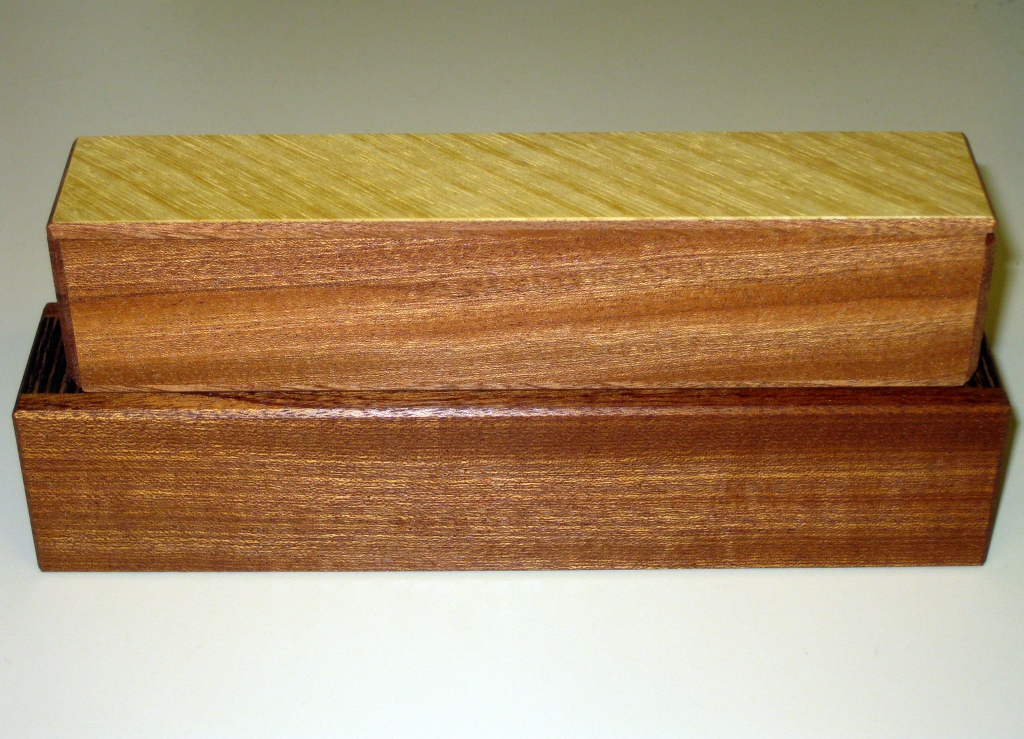
Just to give a quick comparison between the boxes, here’s a couple of shots showing the difference in sizes between them.

Size comparison between Chris and Heather

Size comparison between Chris and Heather

Size comparison between Chris and Heather

Size comparison between Chris and Heather


These are great puzzles, and I’m looking forward to the rest of the puzzles in the series. Keep up the great work Eric, can’t wait to see what you do next.

The Granny’s Tea Box

Towards the end of 2011, Kelly Snache; Snake, started producing a series of puzzle boxes designed around old wooden tea boxes. “The Granny’s Tea Box” is the second puzzle in the series. Sadly I didn’t manage to get one of the first boxes, but seeing this come up, I was fortunate enough to be able to get one. At the time of writing, there are still a couple available on puzzleparadise.ca so if you’re quick, you may still be able to pick one up.

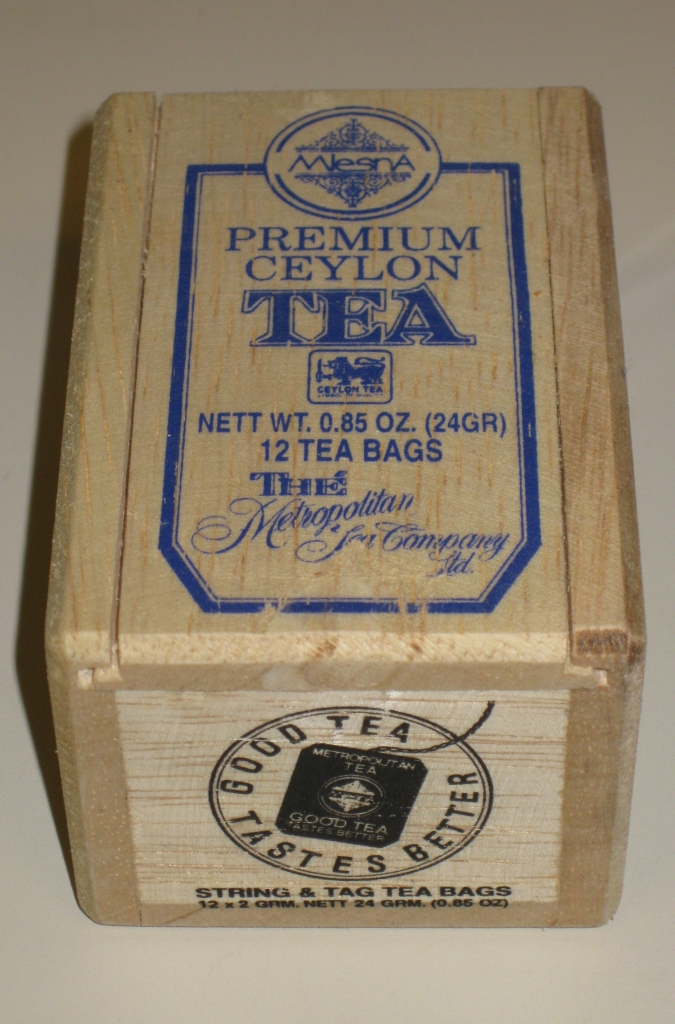
The Granny's Tea Box side view

The Granny's Tea Box side view

As I mentioned when I reviewed Snake’s Goliath puzzle box, Kelly works almost entirely with reclaimed wood, so taking existing wooden boxes and retro fitting puzzle mechanisms to the boxes is something of a passion of his. And I have to say, he’s very good at it.

The Tea box itself exudes charm, as it still has all the original printing from when it was used to store Ceylon tea (and I’m rather partial to a cup of Ceylon), and all the imperfections in the box really add to its character.

The Granny's Tea Box end view

The Granny's Tea Box end view

The first thing that strikes you about the box is the weight. The wood of the original box is incredibly light, probably some sort of balsa wood, and Kelly has done nothing to make it any heavier.

There’s only one part of the box that moves which is the original sliding lid. At first it won’t move far at all, and there is nothing else external that will help you. Snake has named this “The Pendulum Box” and that’s the only hint you get. Before too long, you should be able to get the lid to start sliding, and you’re instantly shown the mechanism that was preventing the lid from moving to start with.

After that though, there’s still more to do, the box isn’t open yet. With some more investigation, you’ll find the way to open the rest of the way, and if you’re anything like me, it will make you smile. The mechanism is simple, but clever enough to slow you down.

The Granny's Tea Box signature

The Granny's Tea Box signature

Snake has signed the bottom of the box, and numbered the puzzle in the run. Given that this is the second in the series, it’s marked as #2. I have box #21 out of 24.

From what I gather, this is an easier puzzle than the first box, but I still found it to be a fun puzzle, even if it was quick to solve, and not overly challenging. Snake’s ability to take old boxes and convert them into puzzles really adds new life to old boxes, and is a great way to reuse boxes that may otherwise be gathering dust. If you’d like to make some of your own, Kelly sells the plans on his new website woodlockplans.com.

Goliath

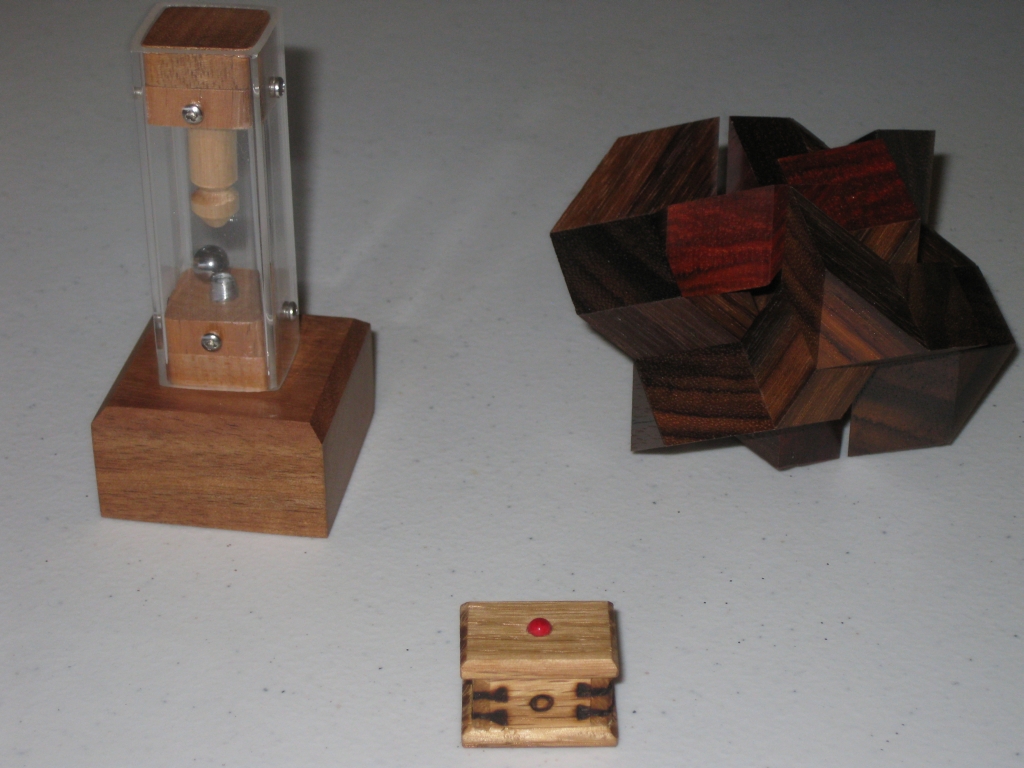
Despite what its name may suggest Goliath, is not a large puzzle. In fact it’s the smallest puzzle box I have in my collection. Made by Kelly Snache, or Snake as he’s known, this diminutive puzzle box really is a lot more fun than its size might lead you to believe.

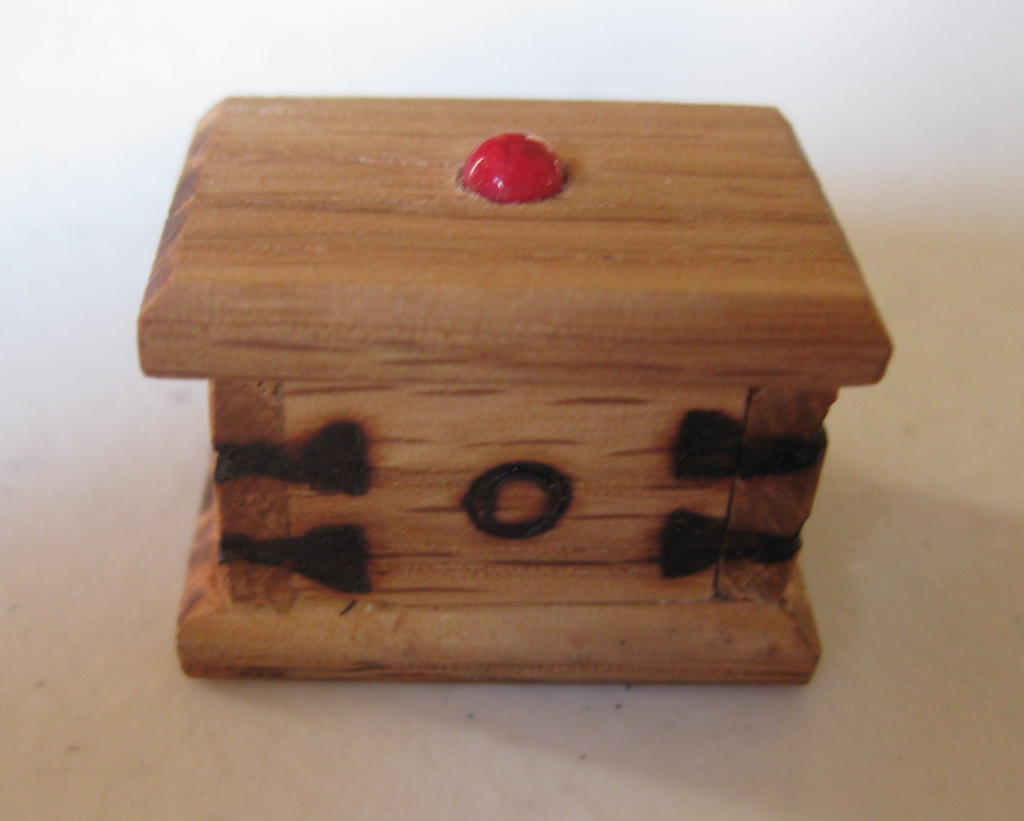
The Front of Goliath

The Front of Goliath

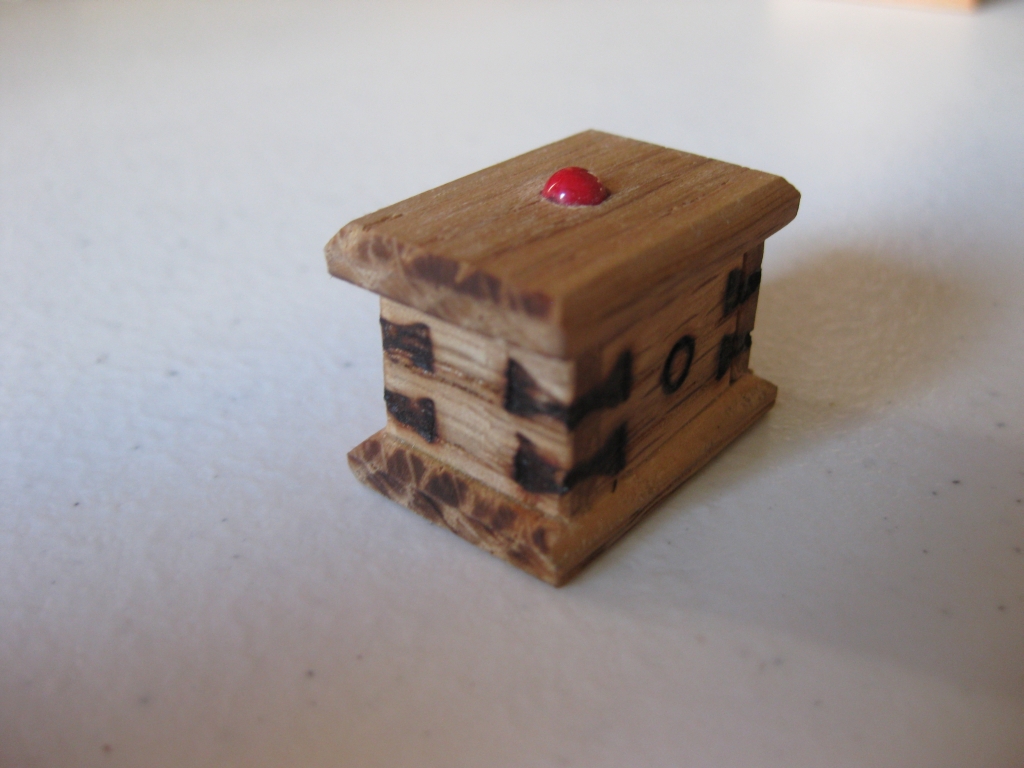
A view from the corner

A view from the corner


So the picture on its own shows that there’s a lot of detail in this box, despite it being less than an inch long, and half an inch wide. The Jewel on the top helps to hide the true scale, and the hand burned brackets on the corners add a fun touch to a tiny puzzle. Even the beveled edges on the puzzle give it character and detail, that is hard to believe on a fully working puzzle box at this scale.

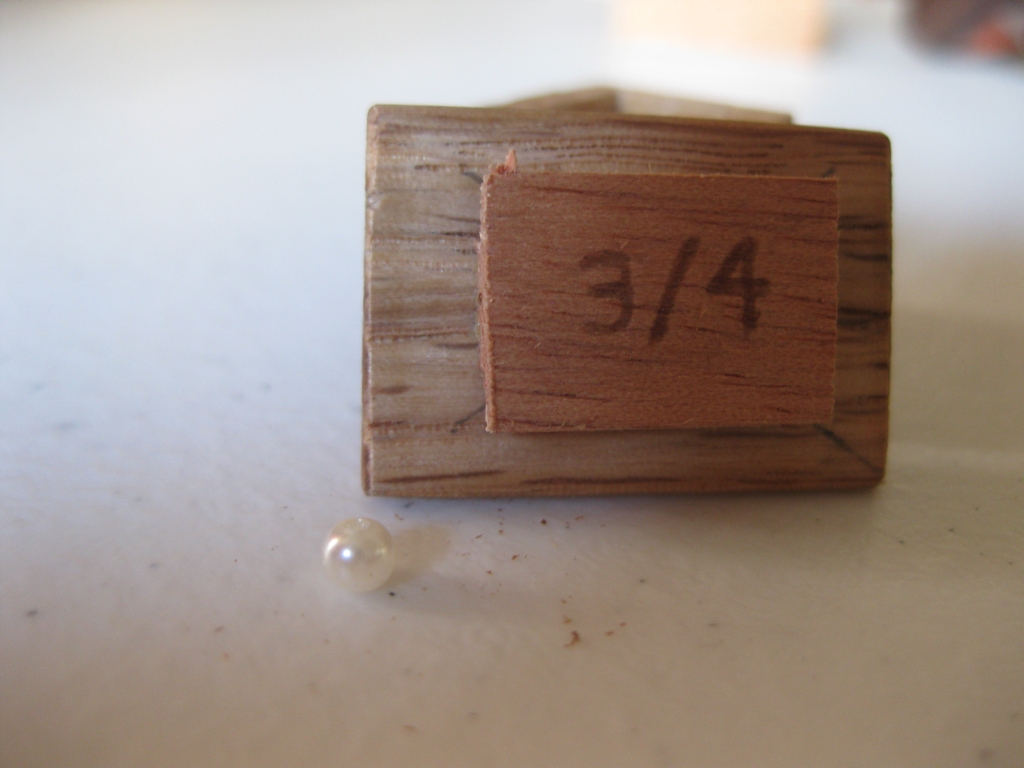
While it didn’t take me very long to open the box, it is a true puzzle box. There’s two moves required to open it, and there’s a properly sliding lid to the puzzle. Not only that but there’s also a treasure hidden inside the box. It’s unlikely that you can use it for storing anything given how small it is, but it’s a great touch that Snake has thought to put something inside for you. I should note that the first time I opened the box, I nearly lost this little treasure and had to scramble around the floor to find it!

The tiny treasure hidden within

The tiny treasure hidden within

For those who are not familiar with Snake’s work, he only uses recycled woods or boxes to make his puzzles. As with his recent Cigar puzzle boxes, he took old cigar boxes, and retrofitted puzzle locks to them. This is a great idea, and gives all of his work a unique feel. Goliath is little different made entirely from the scraps of wood lying around his shop! Only four of these boxes were made, and I have number 3.

Some idea of scale

Some idea of scale

To give an idea of scale I’ve taken the picture above with Mr Puzzle’s Houdini’s Torture Cell which I recently reviewed and Scott Peterson’s Rosebud. I wasn’t kidding when I said this box was small. This little puzzle sits pride of place next to my Stickman #2. Now there’s a real David and Goliath matchup!

There be Dragons – Dragon Wing

Dragon Wing – Karakuri Christmas present from Shiro Tajima

This years Christmas present from Shiro Tajima is exactly what many of us were hoping for. For the last few years, Tajima has been making boxes with a theme of the Zodiac animal for the following year. Last year, we were treated to the Magic Hat, which was a rabbit stuck in a hat, and before that we had “The Tiger of Carboholic”, so many of us were hopeful for a dragon design this year, and we weren’t disappointed!

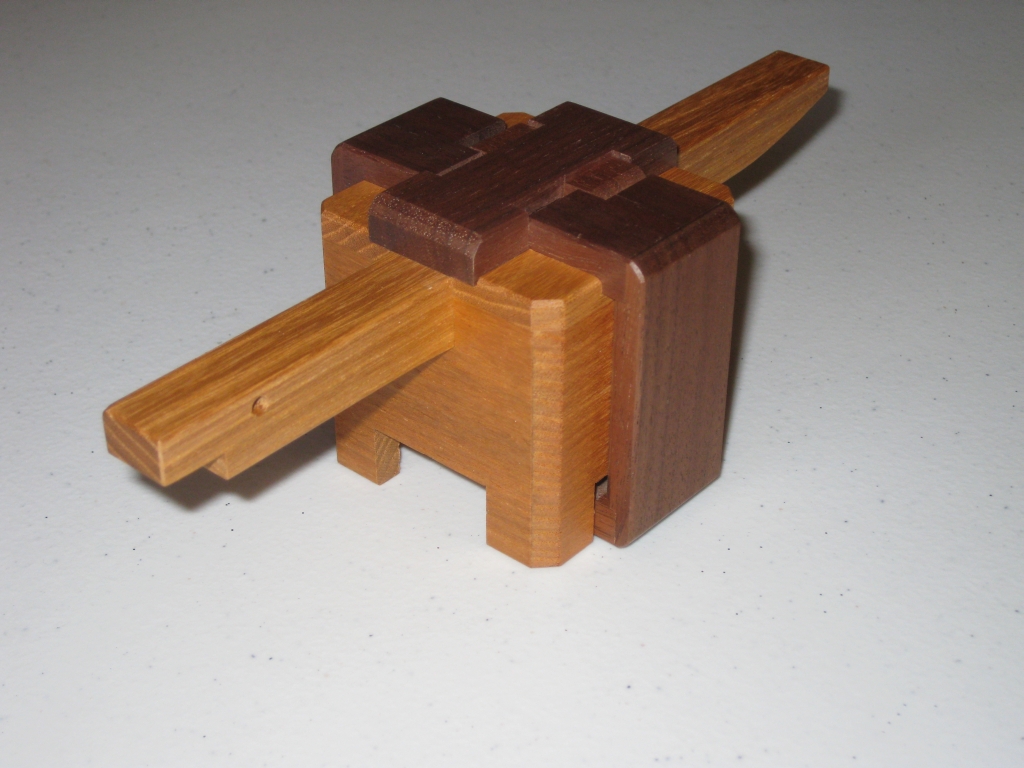
The dragon with his wings closed

The dragon with his wings closed

When I opened the box from the Karakuri Group, it wasn’t clear exactly what I was looking at. My first impression was that the puzzle this year was some sort of irregular burr puzzle, and it wasn’t until I took the puzzle out of the box, and the bag it was wrapped in that I could see we did in fact have a dragon on our hands.

Initially, the wings of the dragon are wrapped around the sides and base of the box, giving him a very streamlined appearance, and hiding his true appearance. It didn’t take too long to find out that there was a little movement in the box, and I soon had the wings opened, and was able to see the box in all its glory.

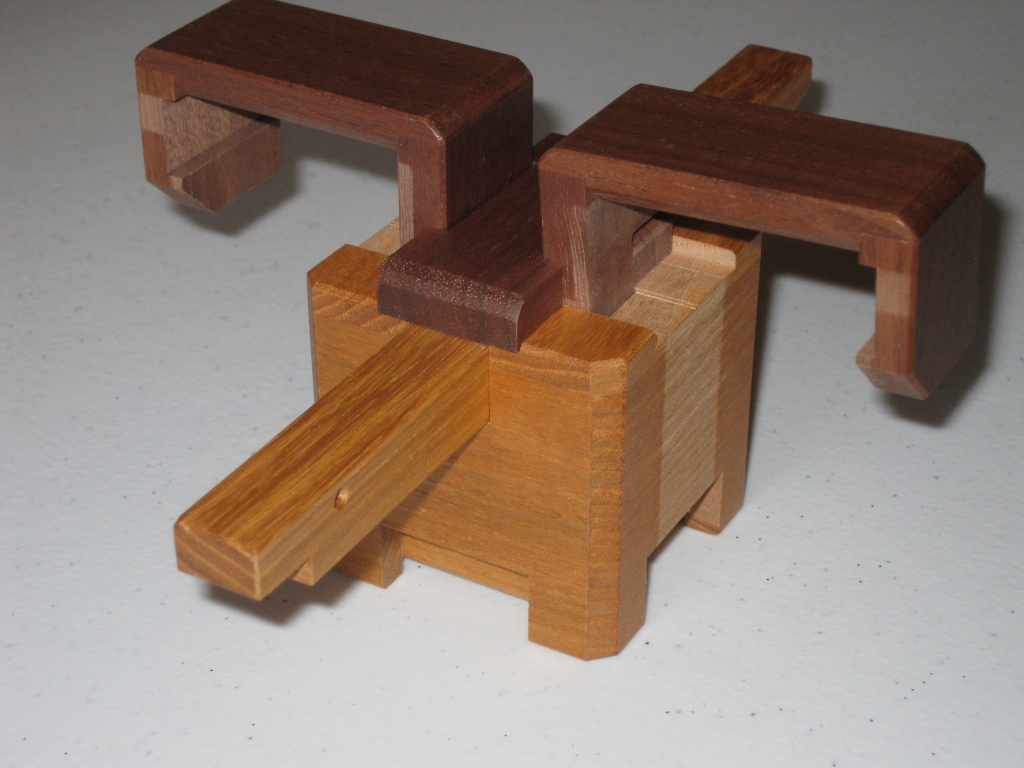
The dragon with his wings open

The dragon with his wings open

Even with the wings open, this box isn’t giving up its secrets easily. Playing around with the wings open I soon found that there was more that could move than just the base and the wings. Having said that, there was still no clues as to how this box would open. The base of the box is sprung, so I started investigating there to see what could possibly open. Initially I was thinking along the lines of the Karakuri small box series which I reviewed a while back.

Without giving away any of the puzzles secrets, I’d almost consider this as a new puzzle in the Small Box series. It’s a nice little puzzle and the mechanism is both simple and different enough from the other small boxes, that it is a stand alone box. I really love the look of the dragon. It’s simple, yet you can easily tell what it’s supposed to be.

My one small issue with the box is that having opened it, the base doesn’t quite go back in as far as it did before I opened it, so the wings when closed are a little tight. I don’t think it’s a huge issue, but it is worth noting.

As the only box I received this year, I’m really pleased to have selected Tajima as my designer. It’s a great puzzle, and I’m happy to have added it to my collection.

Flemin’

This entry is part 2 of 6 in the series IPP 31

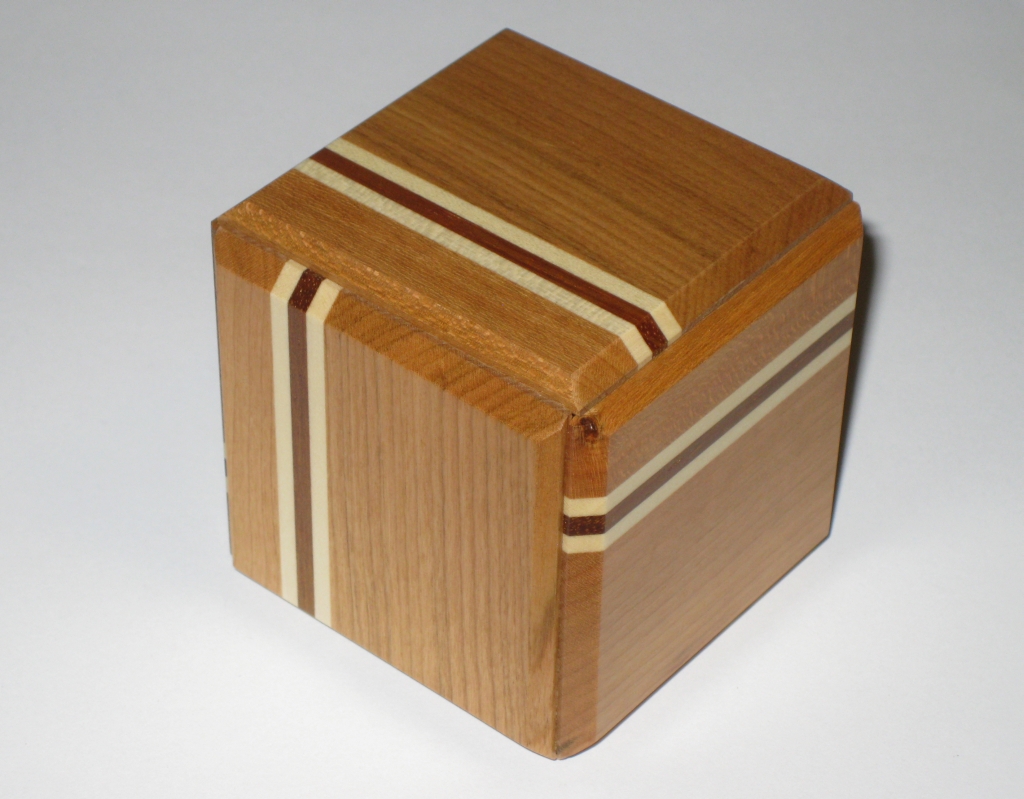
Flemin’ is an interesting puzzle from Shiro Tajima from the Karakuri Creation group. This fairly plain looking Cherry box with an inlay detail apparently conceals a hidden compartment in its centre, however it’s not easy to find!

Flemin'

Flemin'

As I mentioned the goal of the puzzle is to open the shell and find the secret compartment. Opening the shell isn’t too hard. The outer panels are attached to the inner cube using short dowels which run in grooves in the outside of the inner cube. The way the panels of the inner cube are glued together prevent the outer panels from being removed, and keep the solver going round in circles. Confused? The picture below should help.

Showing how the pegs interact with the inner cube

Showing how the pegs interact with the inner cube

Made from Cherry, Rengas and Mizuki, this take apart puzzle while fairly plain (compared to some boxes we’ve seen from Shiro Tajima) still has a striking appearance to its outer casing. Created back in June 2010, this box has been around for a while now, but the internal mechanism was slightly redesigned and entered in the IPP 31 design competition in Berlin.

I’ve spent quite a lot of time on this box, which was kindly loaned to me by Derek Bosch, and (like Derek) have singularly failed to find the internal compartment. I spoke with a couple of fellow puzzlers about this puzzle, and eventually, talking with Jim Strayer, he pointed me towards the correct technique to open the inner box. It was Jim who mentioned while I was talking to him that the mechanism had been redesigned, and that he can easily open his copy, but was only able to open the IPP copy once.

Our thoughts seem to come down to the mechanism on this copy being locked solid as a result of expansion of the wood. Sadly, it is a potential problem with wooden puzzles, and it seems that the mechanism on this box is rather sensitive to wood movement. Given that I have the puzzle on loan, I certainly didn’t want to force anything and possibly break a puzzle (and my thumb being slightly out of action doesn’t help). Jim did mention that to open the internal compartment the mechanism needs to move very precisely, and I was concerned about damaging what sounds like a delicate internal movement.

So for now, this one remains unsolved. I can say that having spent possibly an hour and a half working on this one (most of that before my accident), that nothing I had tried would have led me to opening it, so it is a challenging box even when you understand its mechanism.

Given the comments of other puzzlers who’ve struggled to open this one, and the possible problems with wood expansion, I’m not sure whether to recommend this box or not. I really like the concept behind the mechanism, and I’m sure if it works, it is both simple, unexpected and very clever. It is a challenging puzzle, so if you’re looking for a puzzle box that is a little unusual, and will not work the way you expect then it’s a great buy. On the other hand, if you get one where the mechanism is stuck, this will frustrate you no end.