Tag Archives: Wood

Involute – Finishing a Puzzle

Recently I wrote about my first attempt at building a puzzle in wood, from scratch. You can read about that here.

At the end of that post, I had a working puzzle, that I was very proud of, but it still wasn’t finished. By that I mean that it was finished to the point it worked as a puzzle, but there was no finish on the wood. So I set about resolving that and with advice from a few fellow puzzle makers, here’s the result of that process.

Involute - Lacquered and unfinished side by side

Involute - Lacquered and unfinished side by side

First up was to sand the outside of the puzzle, so it is ready for the eventual finish, and to break all the edges of the puzzle. Working my way through the grits, I sanded at 120, 150, 180 and 220 grit. Straight off the saw, the edges are all very sharp, and it’s not the nicest thing to hold. By passing the edges over some 220 grit sand paper, it takes that sharp edge off, and makes the puzzle much more appealing in your hands.

Next thing to do was to apply a coat of lacquer to the puzzle pieces. This does a couple of things. It brings out the grain in the wood and gives some sort of protection to the wood from our greasy fingers. Going with some recommendations, I used 1 part satin lacquer, 2 parts lacquer thinner to apply a very thin coat. Leaving the pieces for 10 minutes after applying then rubbing off any excess with a soft clean rag.

The results are pretty obvious when you look at the two puzzles side by side. Given how much time I spent getting the tolerances right, you’ll be pleased to know that the lacquer really doesn’t add any thickness to the pieces given how thinly the lacquer mix is applied. It’s pretty much flush with the surface, so no real issues that I can tell, and my puzzle making friends seem to concur.

After that it’s time to apply a couple of coats of wax to the pieces. This helps to make sure that things slide nicely. I had a liquid wax recommended to me, as it’s much easier to brush a liquid into a corner than it is to use a wax paste and a rag. If you’re interested, I’m using Watco Satin Finishing Wax.

Finished involute, the Ren wax just adds that extra polish

Finished involute, the Ren wax just adds that extra polish

Finally I use some Renaissance Wax to buff and polish the outside faces. It’s not cheap stuff, but it is effective. You really don’t need much which is probably just as well. This really brings out the wood, and gives a good protective layer to the outside of the puzzle. If it’s good enough for the British Museum, its got to be good enough for my puzzles!

If you’re wondering, the first fully completed puzzle is now in the collection of a good friend. I’m waiting for him to open the puzzle to let me know what he thinks of it!

Chiyo-Musubi

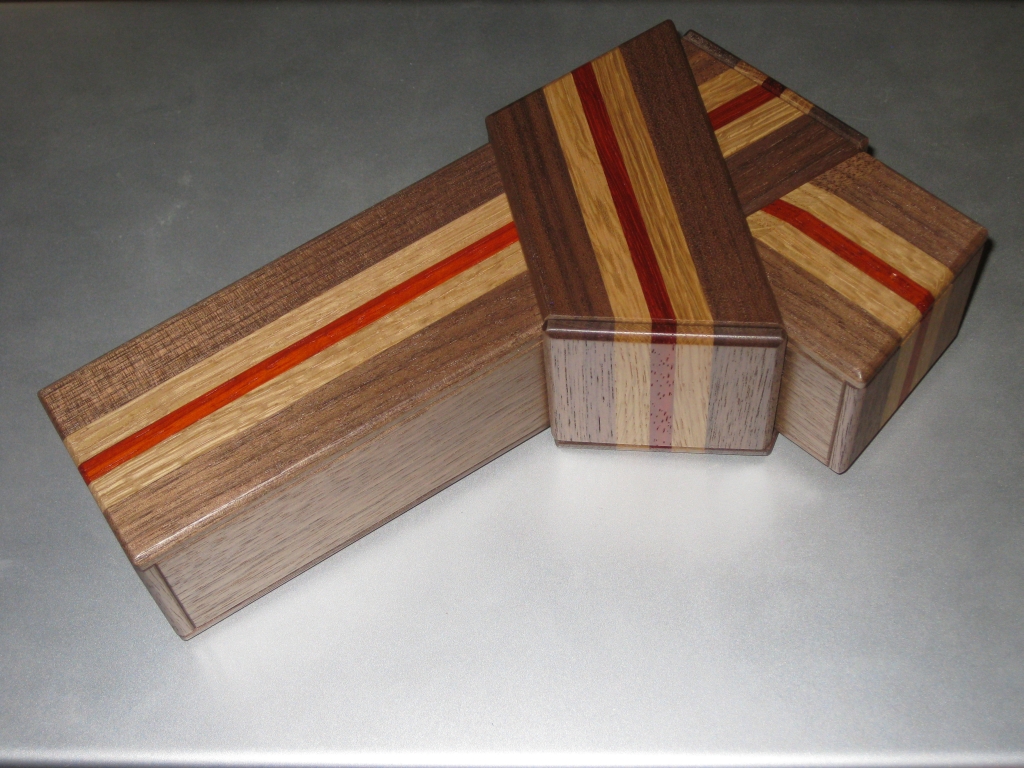
“When we tie up a belt or paper tape well, a knot that is called “Chiyo-Musubi” is completed. In Japan, it is said to be a lucky knot.”

Chiyo Musubi

Chiyo Musubi

This fine looking box from Hiroshi Iwahara of the Karakuri Creation group is a sliding puzzle box with two hidden compartments requiring 19 moves to open both. The interesting point about this puzzle box is that the slides which conceal both hidden spaces cross one another, so the resulting mechanism is much harder to produce than a standard box. Iwahara notes that the shape of this particular knot is a Pentagon, but it is also possible to produce a Heptagon. He’s not planning to make a Heptagon version as a puzzle box though.

Created back in April this year, and measuring 9.5″ x 5″ x 2.75″ approximately, this is a big puzzle box, and it feels really solid when you’re solving it. I don’t exactly have small hands, and this box feels big to me when I’m working on it. I didn’t do too well on my wood identification in the video, as the only thing I got right was the Walnut! So to correct that, the box is made from Walnut, Oak and Angsana, giving it the striking appearance. To look at it, you really can get the feeling that someone has taken a plank of wood and knotted it like a belt.

I borrowed this puzzle box from Derek Bosch (yes he has a good collection and has been very kind to lend me chunks of it at a time), so I’m not sure if it’s just his copy or not, but the panels are fairly loose, to the point that when solving it, some of the panels would slide back to where I’d moved them from as I turned the box over in my hands. While it doesn’t take away from the box, it can make it a challenge to open, as you have to be careful that panels don’t slide around on their own as you move the box. Not realising that a panel slid back after you moved it preventing further progress can be a pain.

This is a really nice puzzle, and I have to admire the design, especially the ability to have pieces passing over and under each other to make a very slick puzzle. If I’m honest, it’s not my favorite puzzle from Iwahara, but it’s by no means a bad puzzle! It took around 10 minutes to open the box and find both hidden compartments the first time. Having gone back to it later, I can see that this could take much longer as the order you open the compartments does seem to come into play, so I may have been lucky the first time and opened them in the correct order.

Overall, a very nice puzzle and one which would certainly stand out next to other puzzle boxes, both for its size and striking contrast of woods.

Hadrian’s Box

a DIY Puzzle Box

Some time back, I purchased a couple of DIY puzzle boxes from BH Pen & Laser Crafts which are kits based on Bruce Viney’s designs.

Bruce makes a large number of puzzle box designs, and supplies plans for you to cut your own pieces. He uses an interesting measuring system based on the thickness of the wood, so you can use any stock you have as long as you mark everything up based on thickness.

Rather than cutting all the pieces myself, I purchased the pre-cut kits to make my life easier. I didn’t really feel like spending days cutting all the parts myself, not to mention that some of the pieces are pretty small, making for some challenging cuts.

The video shows the full process from start to finish, using time-lapse. Overall, it took around 2.5 hours actually working on the kit. Including time for the glue to dry, it was around 5 hours.

Overall, it’s a good kit, despite the small issue I had. Since I’ll be receiving some replacement parts to fix that issue, I really can’t complain. If you’re thinking about getting one of these, I highly recommend the kit as it’s both well made, and Bruce’s instructions are pretty easy to follow. There’s minimal sanding needed, so pretty much anyone should be able to build on of these, and get pretty good results at the end.

Tier Box by Eric Fuller

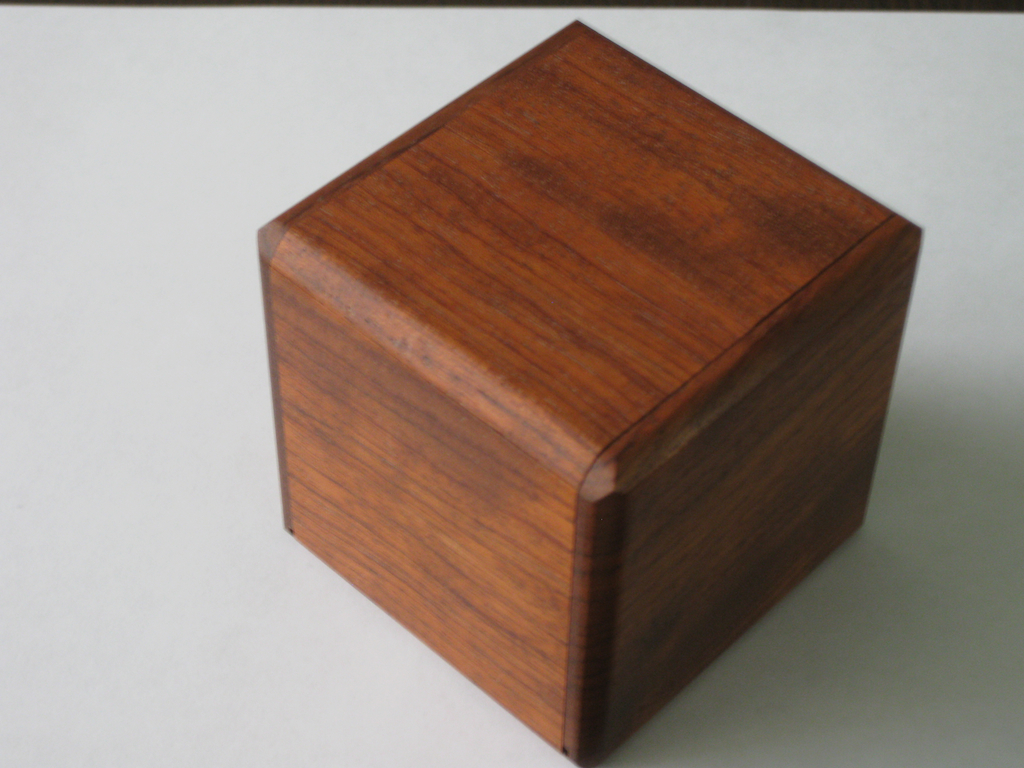
Tier Box is a Japanese style sliding panel puzzle box with a few unique touches, designed and made by Eric Fuller back in September 2009. The 18th marks its two year birthday, so I though it appropriate to add this review today.

The box measures 3.2″ cubed and is made from Quartersawn Bubinga for the outer panels, and Quartersawn Paduak for the internal panels. Along with that there’s a few magnets and some metal pins thrown in for good measure. 14 moves are required to open the box to reveal the space inside, and the same again to close it. Despite opening it fairly quickly, I must confess, it took me many more than 14 moves to close this one back up!

Eric has this to say about the box:

I am very happy with the results of this, my latest puzzle box. The design originates from a sketch I made in Chicago sometime during IPP23. It combines several ideas I have been wanting to implement in a sliding panel puzzle box. The solution requires 14 moves, but those moves are anything but straightforward and are at times downright devious. I had the pleasure of watching many puzzlers attempt to solve it during the course of IPP29, so I can say that difficulty wise it’s a nice 15 minute solve for most puzzlers, with several ah-ha’s to spice things up. Fully understanding the interactions between all the panels will likely take quite a bit longer.

Tier Box in its closed state

Tier Box in its closed state

There were only 34 copies of the box made, so I have to once again thank Derek for lending me his copy to puzzle over. It’s a fun box, and very solidly built. As Eric notes himself, fully understanding the interactions of all the panels certainly does take some time. I was able to open the box without too much trouble, finding it a fairly simple progression from one step to the next. Closing however was not the same story. I probably spent around 5 minutes opening the box, and well over 20 closing it again. At one point I thought I was going to have to give it back to Derek open as it didn’t look like I could figure out how to close it!

So from that experience it’s a challenging little box. The panels interact in interesting ways with each other, and the only way to truly say you’ve solved it is in understanding all the interactions. Despite the pins being around 1/16″, they really do get in the way!

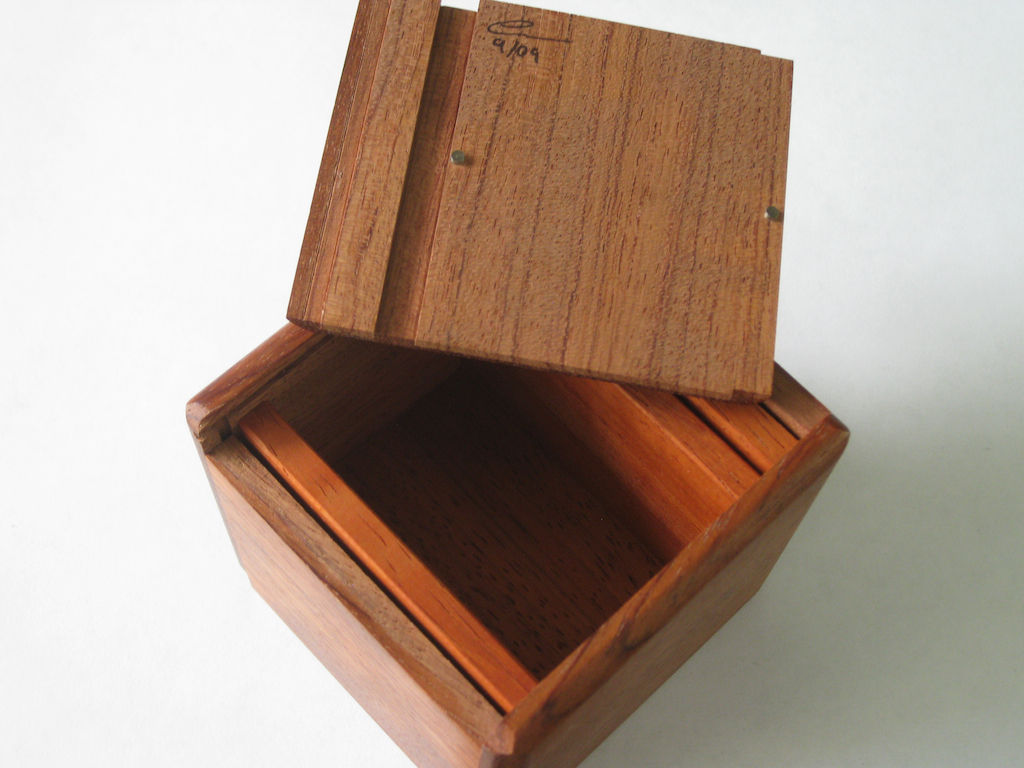
Tier Box opened, showing the bright Paduak insides

Tier Box opened, showing the bright Paduak insides

One of the beautiful things about the choice of wood here is that the internals of the box being made from Paduak, are protected from UV, so have retained their beautiful Orange/Red colour which will normally fade to a dark brown if exposed to the sun. It’s a nice touch to have this colour screaming at you when working on the box.

My only criticism with the mechanism is that the thin sliding panels used in the internals of the box are fairly tight. While this is normally a good thing in a puzzle box, meaning the panels don’t rattle around of their own accord, I found that this worked against me when trying to close the box, as my fingers couldn’t push one of the internal panels far enough to slide it to where it needed to be through the small gap left when the outer panels were positioned in the correct locations. In the end, I had to get a small tool to help.

Overall, a superb box, that adds a few surprises to a standard sliding box, and creates a satisfying puzzle.

Coffin Involute

My first home built Puzzle

After the successes with creating both Square Sticks and Cubes, I had to go do something with them; and see if I could create a puzzle. I decided to make some of Stewart Coffin’s designs, and having been in touch with him, he very graciously gave me permission to try to recreate any of his designs, and encouraged me to do so. With that endorsement, I was off and running. Well, almost!

I had to work out which puzzle I was going to create. There’s so many to choose from that it’s not an easy decision. In the end, I decided to create something that I didn’t already own, so I’d be adding to my collection if it turned out to be any good. So I settled on a copy of STC #214, the Involute puzzle. The Involute is the third in a series of puzzles from Stewart Coffin, each an improvement over the predecessor.
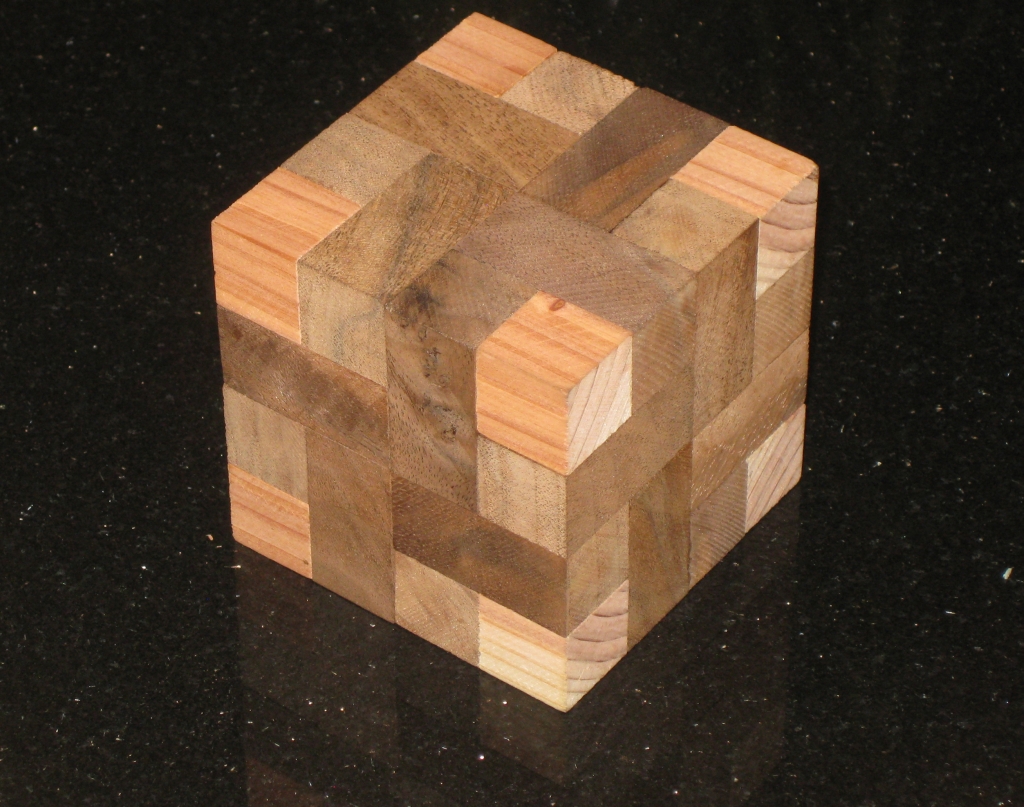
My first attempt - Involute by Stewart Coffin

My first attempt - Involute by Stewart Coffin

The first was Convolution, a 4×4 interlocking cube which requires a rotation in the solution. Due to the rotation, some material needs to be removed from one of the cubes in the solution (if you have a tight fit) to allow the rotation to happen. You can read my review here. Stewart Coffin notes that given the rotation, and the nature of cubes (which don’t like to be rotated when hard against one another), that this design could be improved. In his book “The Puzzling World of Polyhedral Dissections”, he leaves it to the reader to see if they can find a solution to this problem.

At the same time, Stewart Coffin had already solved the problem, and created STC #198, Involution. Again a 4×4 cube with a rotation required in the solution, but this time because of the design of the dissection, no material needs to be removed from the pieces to allow the rotation. I’ll not give away how this is done, as it would spoil the puzzle, but I will say it’s a simple and clever solution! I was able to play with one of Scott Peterson’s copies that he had made on my recent visit to see Scott, so I can say I’ve solved both the Convolution and Involution puzzles at this point.

The third in the series is STC #214, Involute. This is the final puzzle in the series, and is again an improvement over the Involution and Convolution. Again there is a rotation required in the puzzle, and again, no material needs to be removed for the rotation to take place. There’s an extra trick in this puzzle, that I’ll get to in a bit which makes it just that bit more devious.

All three puzzles in the series look identical from the outside, each having the same cross pattern on all six faces, so without knowing which puzzle you have in your hand, it could easily be any one of the three. Have I mentioned that this Coffin is a devious bloke?

Thanks to Allard and Kevin who both reviewed their copies of the Involute puzzle, I was able to model the pieces in burr tools, and from that create myself a parts list and a gluing diagram to be able to build the puzzle.
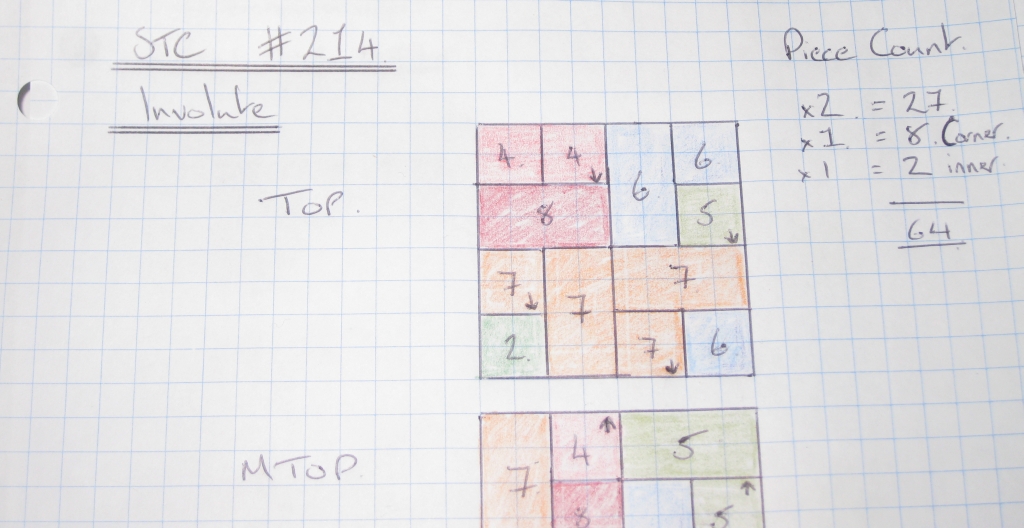
My piece and gluing diagrams for the Involute.

My piece and gluing diagrams for the Involute.

Given that it took several hours to create the diagrams, including the time to create the model in burr tools and so on, I’m not going to give you the whole thing. Not to mention it would spoil how to solve the puzzle (or would it – I’ll come back to that thought). But the image above gives you an idea of what I created.
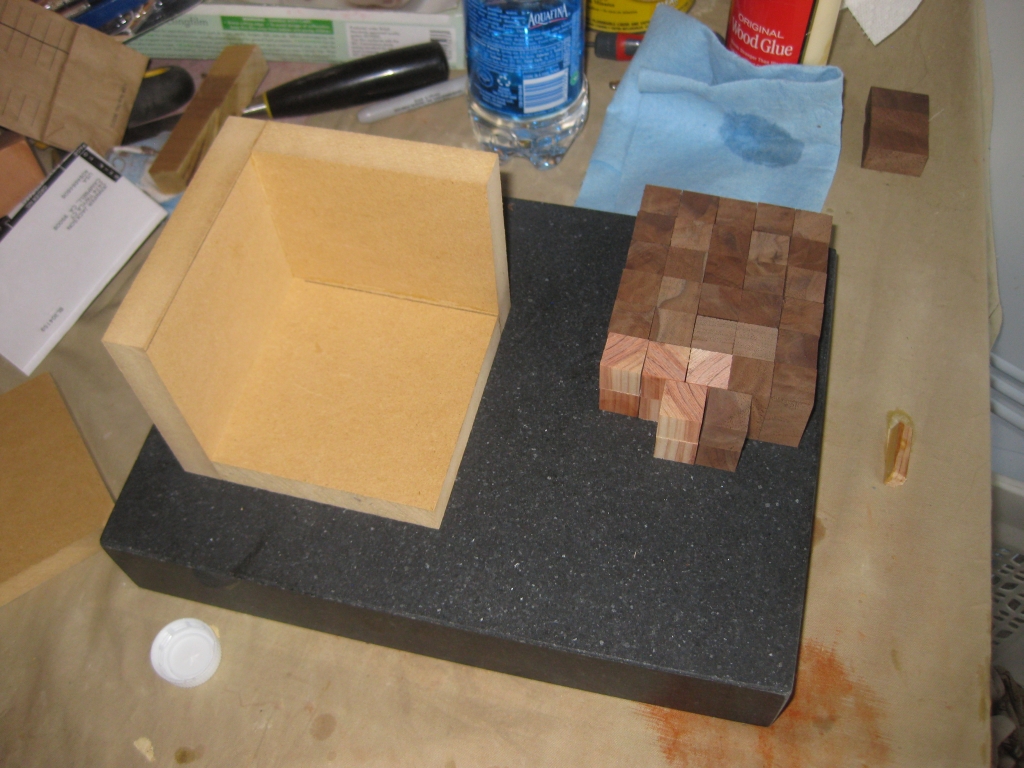
All the pieces needed to build the Involute

All the pieces needed to build the Involute

With the design in hand, I went off to the saw, and using the crosscut sled and my stops, I cut all the necessary cubes to make the puzzle. There’s quite an array of pieces there when you see them all sitting together. Also in the picture is one jig I hadn’t talked about previously. This is my cube gluing jig. It’s not overly complicated, just three pieces of MDF cut and glued together to hold a 4×4 cube cut to my 3/4″ stick size which has all edges at 90 degrees, and has been waxed to prevent any glue from sticking to it. I also have three ‘end panels’ which will distribute the clamping pressure evenly across all the blocks so as not to twist the blocks while the glue dries.

At this point I made something of a realisation. Sitting looking at this array of blocks, and my gluing diagram, gluing up one of these puzzles is hugely complicated. You’re working in three dimensions gluing any number of pieces together, all of which needs to be accurate, and with no glue squeeze-out. If you thought Ikea furniture plans were Convoluted, then this is much more challenging!
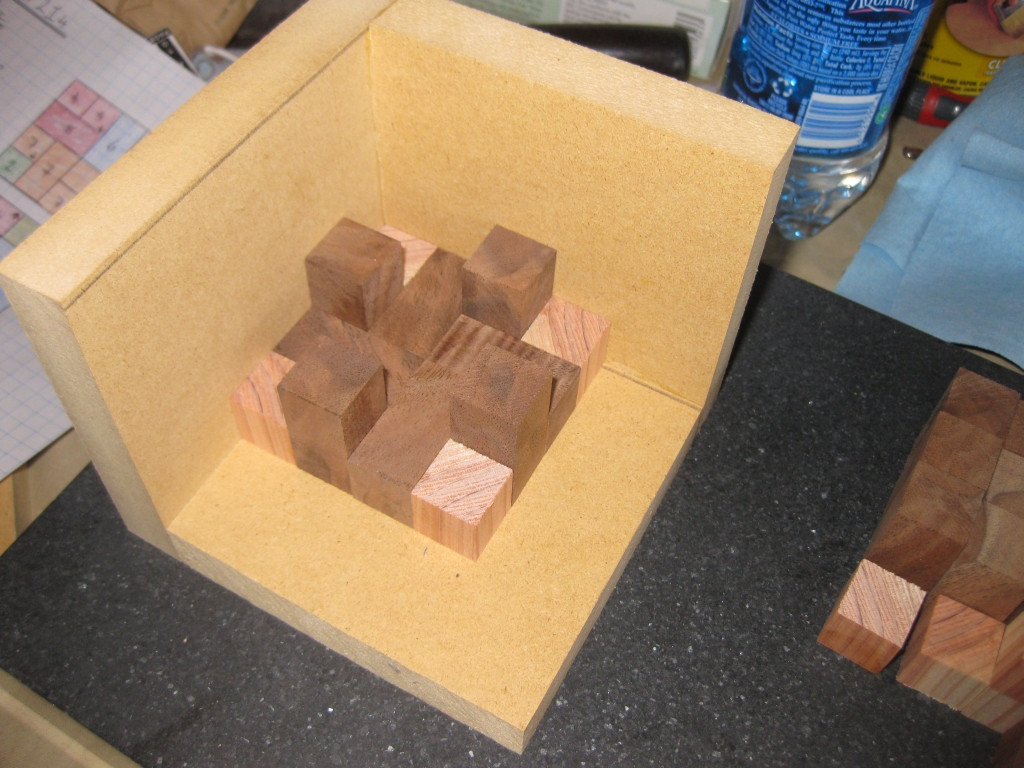
Dry fit in the gluing jig  - bottom layer.
Dry fit in the gluing jig - bottom layer.

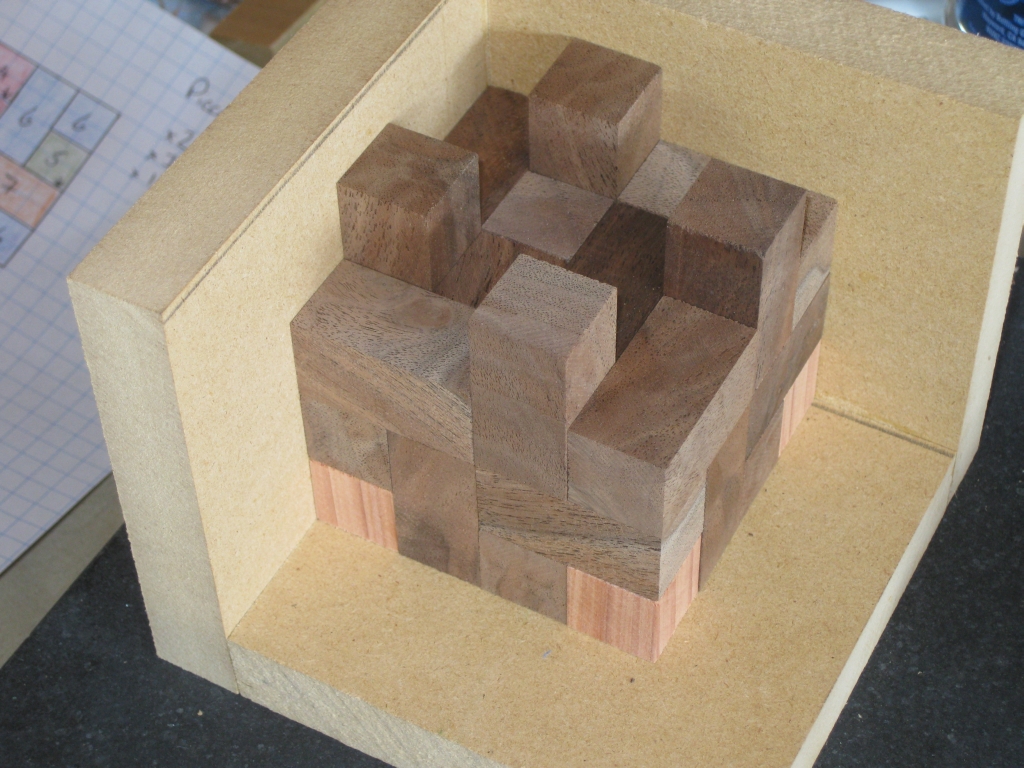
Dry fit in the gluing jig - three layers.
Dry fit in the gluing jig - three layers.

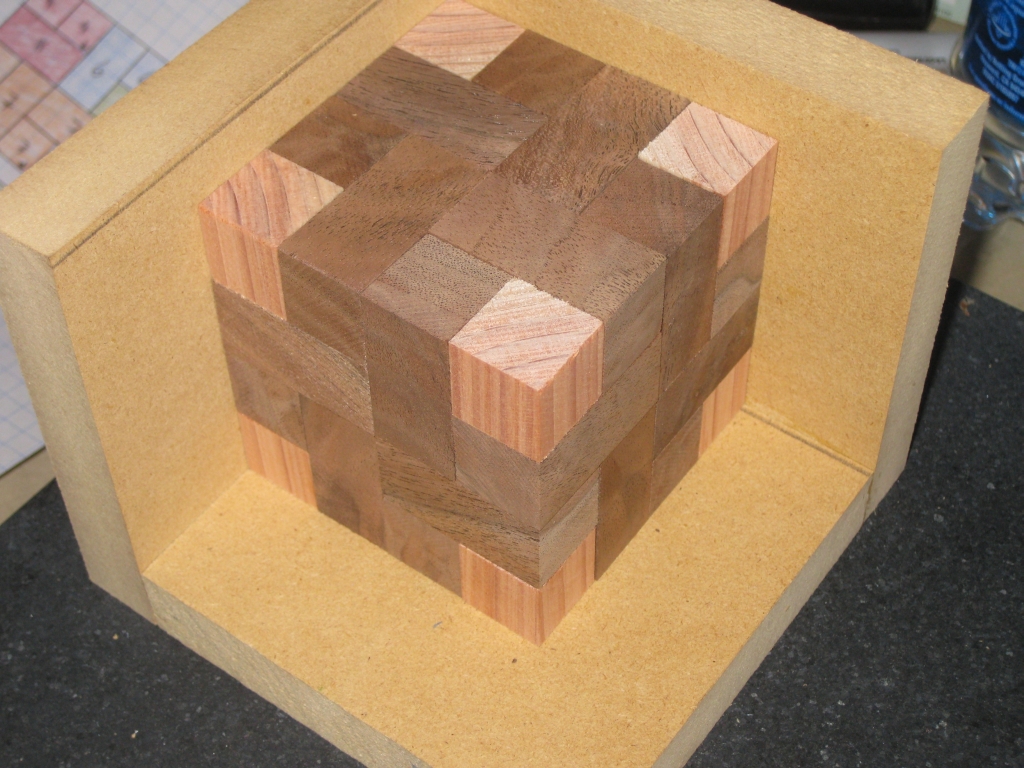
Dry fit in the gluing jig - full puzzle.
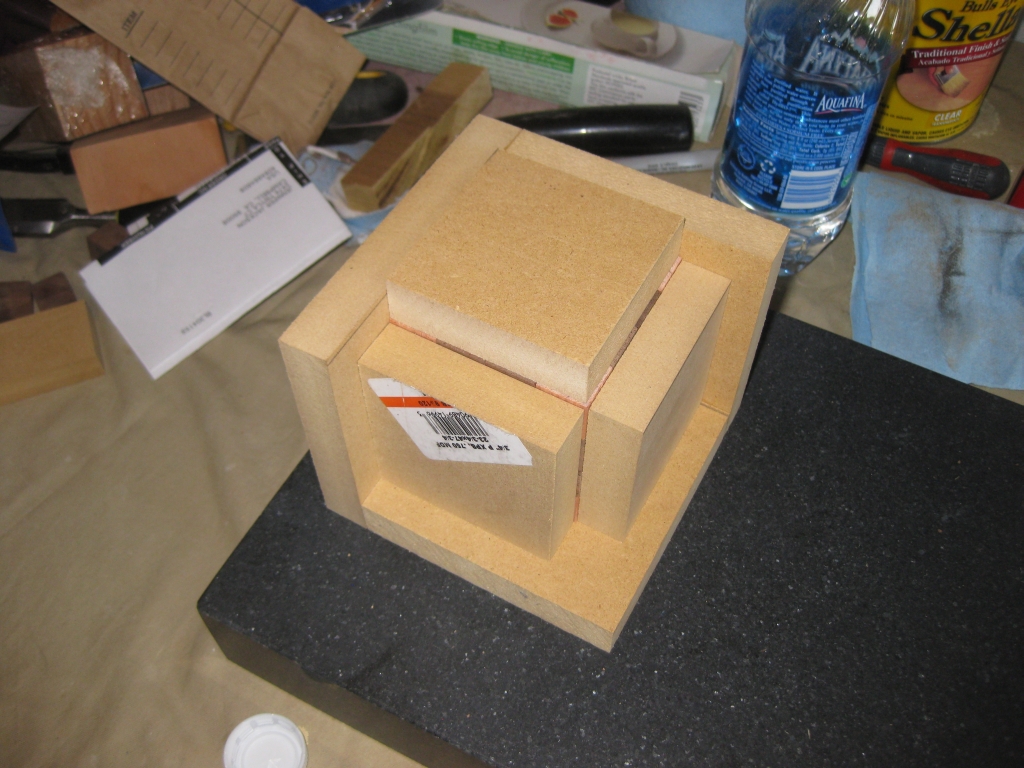
Dry fit in the gluing jig - full puzzle.

Dry fit in the gluing jig with clamp blocks.

Dry fit in the gluing jig with clamp blocks.

Next up I placed all the pieces into the gluing jig, to match my plans. This serves a couple of purposes. Initially, it shows me how good the fit is, and also verified that my plans were correct (at least in as much that I had the correct number of pieces). The other benefit to the dry fit is that it allows me to select which pieces I want to put where in the puzzle. Looking at the grain in the wood, I can select the ‘nicest’ grain to be on the outside of the puzzle, or look at creating grain patterns by selecting pieces carefully from the pile. Given that this was a first ever attempt, I wasn’t too concerned with the grain pattern, but I didn’t entirely ignore it either.

Since this was the first glueup I’d be doing, I decided to go with gluing up two layers at a time. This meant that I didn’t have to work quite as quickly to get the clamps on the jig to ensure that tight fit I was going for. Fortunately, the way the pieces go together, there is a flat surface after every second layer, which was ideal as a stopping point. I also have a smaller glue bottle, where I’ve decanted some of the glue from my big bottle. This small bottle has a fine nose, and is much easier to work with that the full sized bottle. Given the small amount of glue I’d need for each piece, this is the only way to work.
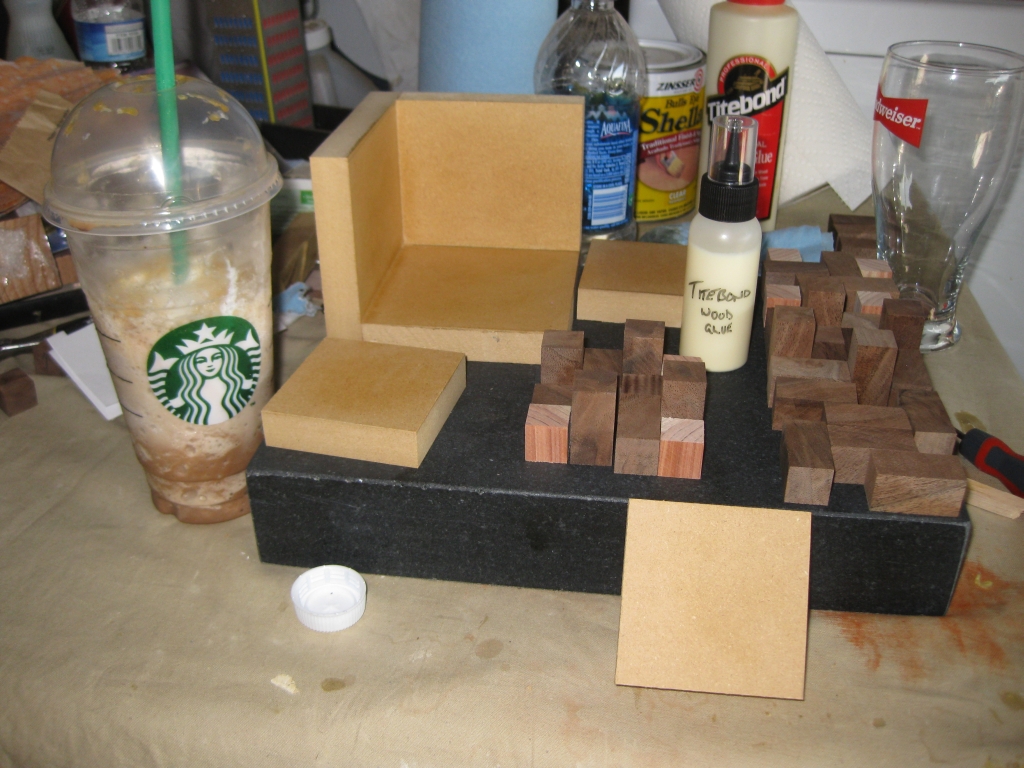
Involute in layers ready for the glueup

Involute in layers ready for the glueup

With all the pieces separated into layers, I was as ready as I was ever going to be to start putting this together into a puzzle. Fingers crossed!
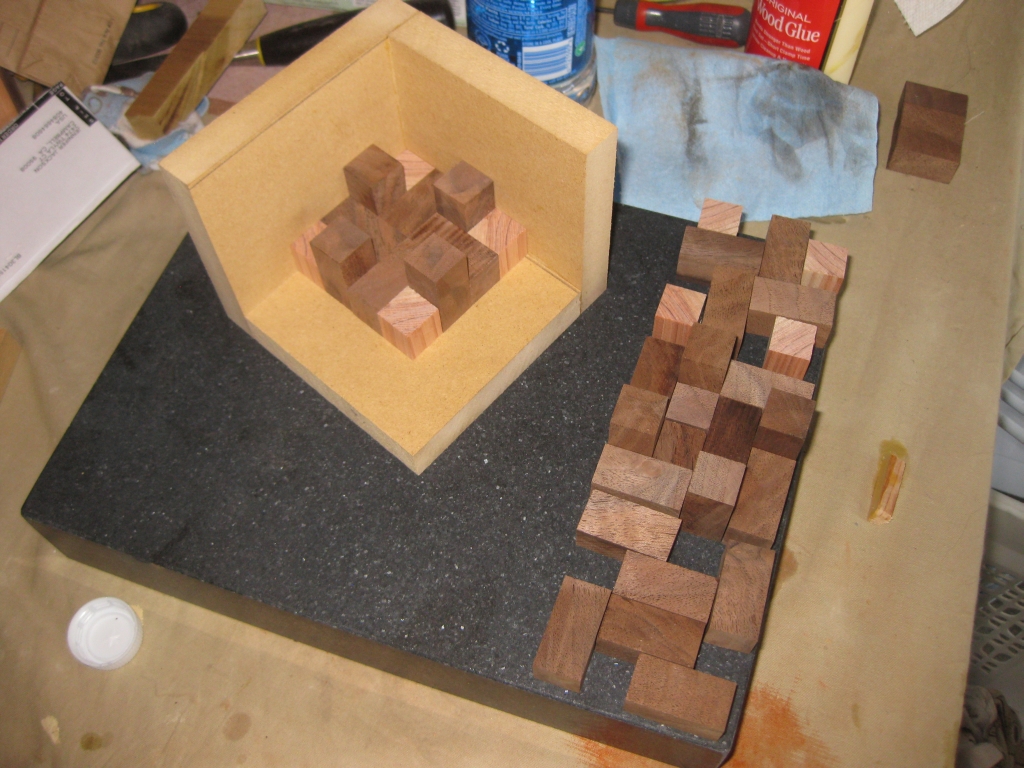
First layer glued in place.
First layer glued in place.

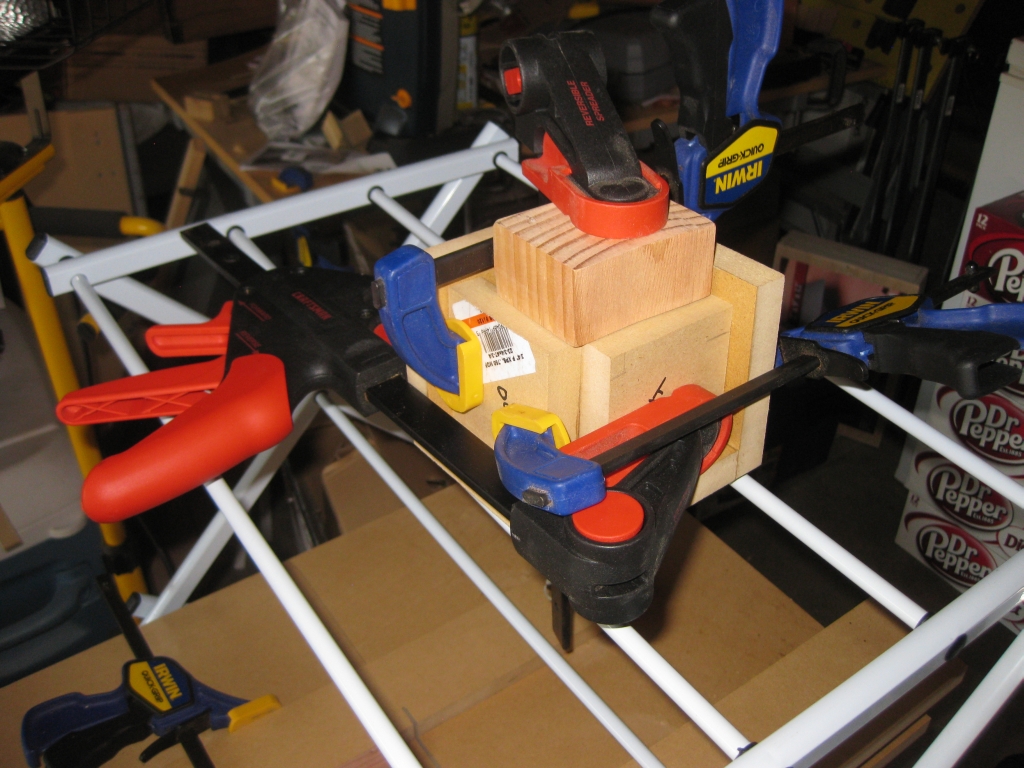
Two layers glued up and clamped.

Two layers glued up and clamped.

Working reasonably quickly, I glued up the first two layers, and thanks to tips from Scott Peterson, I managed to do so with little to no glue squeeze-out. That’s pretty important since any glue squeeze-out will glue blocks together that shouldn’t be, making the puzzle unsolvable. You’ll notice the fairly large block of wood on the top of the gluing jig in the photo on the right. That’s because I only have two layers build at this point, so the puzzle is half way inside the side plates. I needed to add some height to be able to clamp the puzzle effectively.
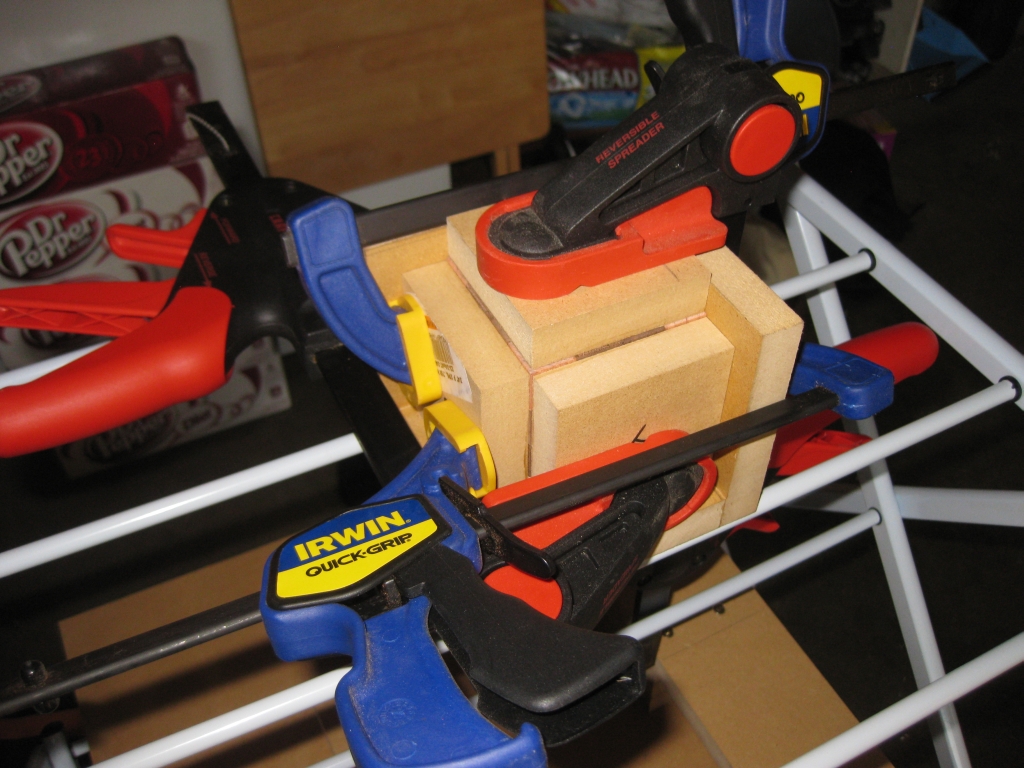
Glueup completed, clamped and waiting nervously.

Glueup completed, clamped and waiting nervously.

After the glue had set, I came back and added the remaining two layers, building on the two I already had. This time, you can see that the puzzle fills all the space, and there are no extra spacers required. I then had to wait a few hours for the glue to dry properly before I could take the clamps off, and see whether I had created a puzzle or a paperweight.

They may have a been a few of the longest hours I have experienced in a long time. My fiancée was about ready to kill me, as I wanted to go take the clamps off and see what I had, she kept telling me to leave it alone. I was like a kid on Christmas morning waiting to see what presents I had. I could barely sit still! When things had been left for long enough, I was finally allowed to go take the clamps off and see what I had.

I should note at this point, that I have never solved an Involute puzzle prior to making this one. Given that rotations are required in the solution, Burr Tools can show that there is a solution, but it can’t animate the assembly for you (or in my case the dissassembly), so I have no idea how to take the puzzle apart. I’m now in new territory, and given that I don’t know how to take things apart, or whether the pieces are glued together correctly, and not glued to one another I know this is going to be interesting!

Since I know where the key piece is, I can remove that fairly easily, but then spend the next ten minutes pushing and pulling on various pieces hoping that something else will move in the puzzle. I can see that there is movement in the pieces, so at least it’s not all glued together, but I am having real problems in finding the second move. The pictures that follow were taken by my fiancée, so are unedited as I make progress. That grin on my face is real!
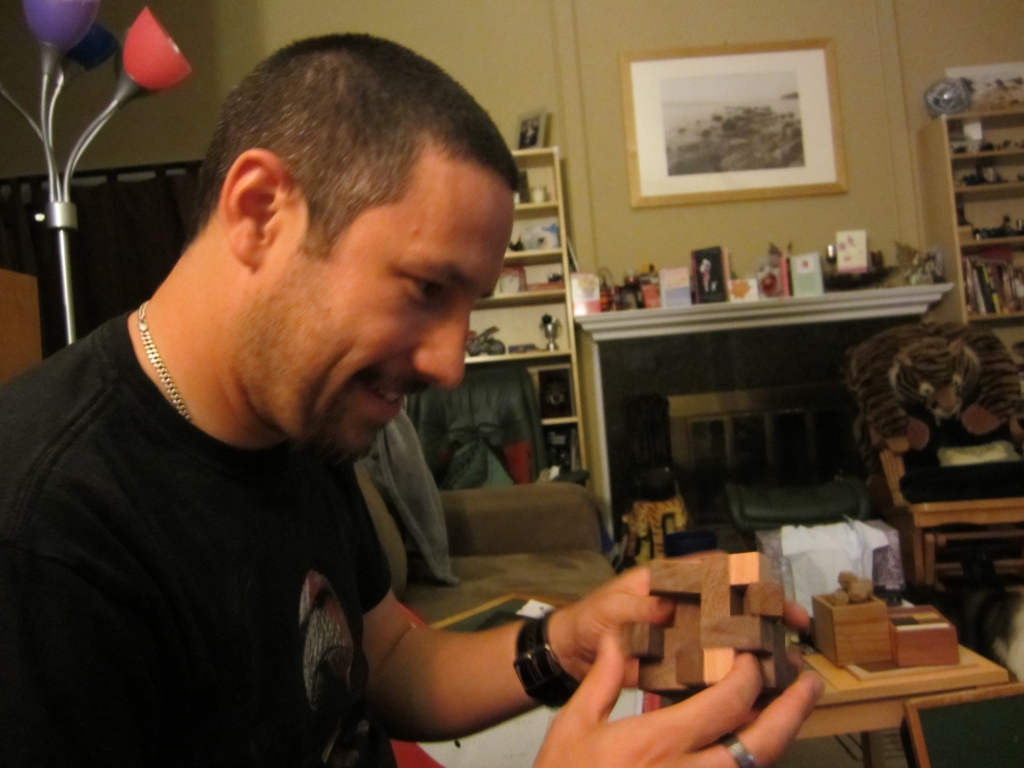
The moment where I figure out move 2.
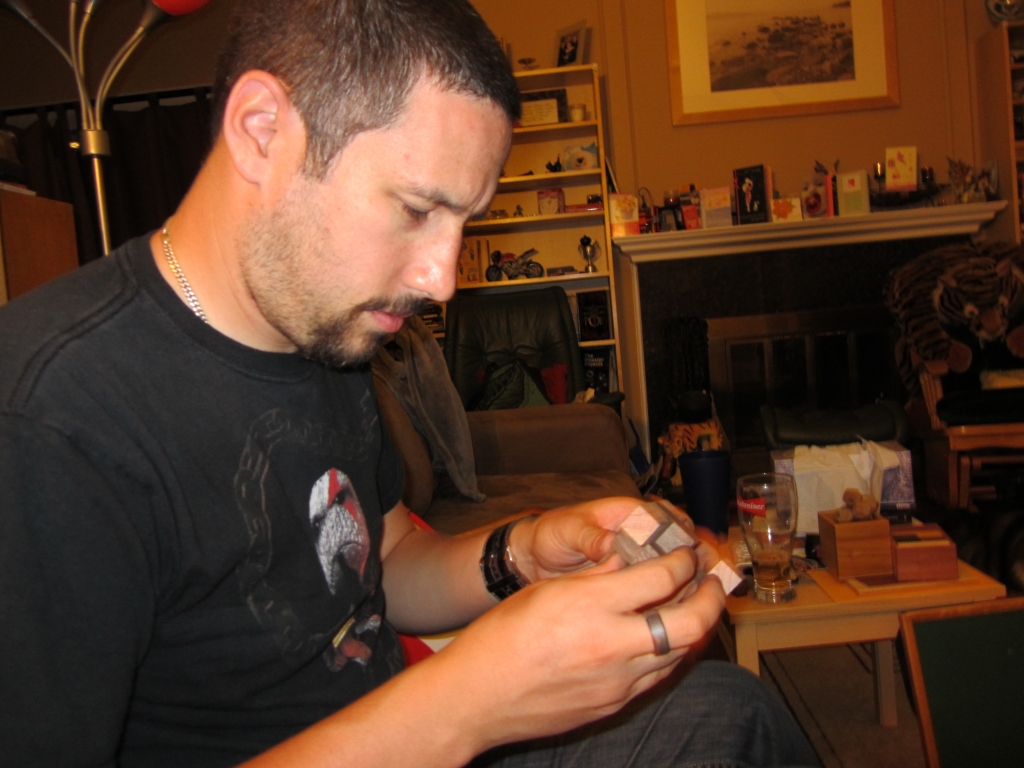
The moment where I figure out move 2.

Now what?
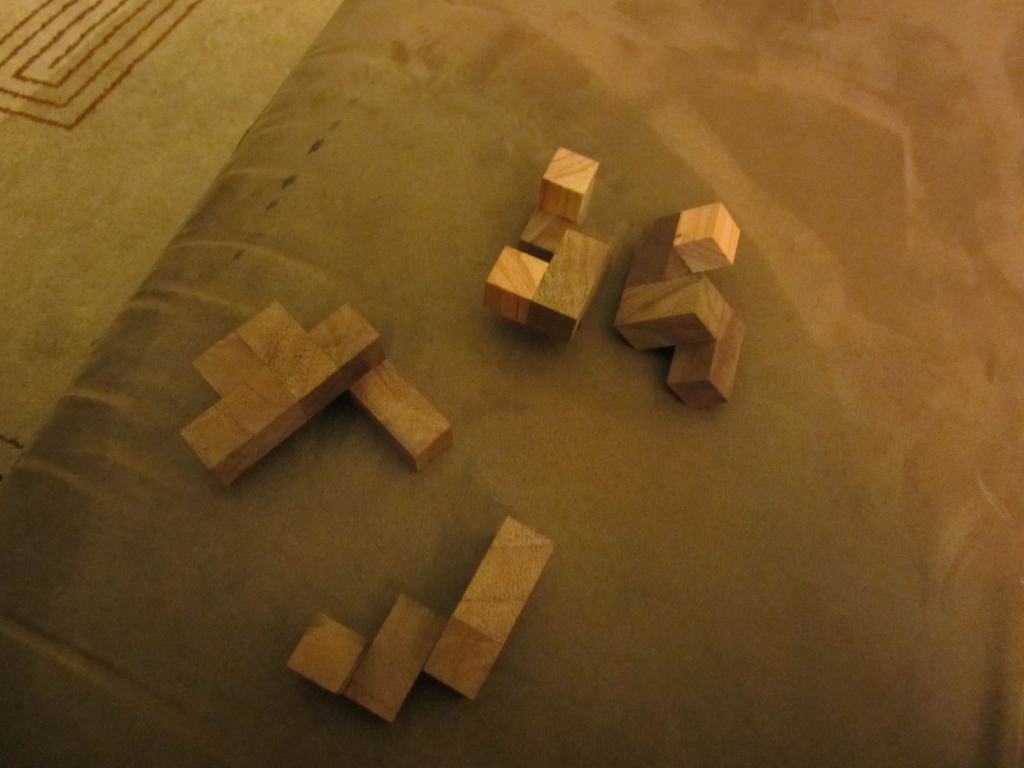
Now what?

Seeing the individual pieces of the Involute for the first time.

Seeing the individual pieces of the Involute for the first time.

As I mentioned, I’ve never solved the Involute before, so I had no idea how the puzzle was supposed to come apart. The key piece in the puzzle is really well hidden, and without knowing where it was I would have struggled to start, especially not knowing if the puzzle was entirely glued together at this stage. The second move is also very clever. One thing that Stewart Coffin regularly has in his designs is pieces which are created so that the average person will hold the puzzle in such a way that you will be holding the piece you need to move, effectively pushing the puzzle closed and preventing it from being opened. The Involute is no different, and has this very same trick to allow move two. The look on my face when what looked like half of the puzzle slid to the side perfectly must have been quite the picture. I think for me not only was I solving a puzzle for the first time, which always brings a smile to my face, but also it was a puzzle I had built, and seeing it work the way it is supposed to is an ever bigger achievement.

I took the puzzle fully apart, and was left with the eight individual pieces sitting on my sofa, with a huge grin on my face. I then realised that I had absolutely no idea how to put the whole thing back together! In my excitement of taking the puzzle apart, I wasn’t paying any attention to how the pieces were coming apart! I then spent the next 15 minutes with my gluing diagram trying to put the puzzle back together. Remember I mentioned that having the full diagram may not help that much! I did get there, and the smile on my face seeing the puzzle back together was truly from ear to ear.

Closeup of the fit between pieces

Closeup of the fit between pieces

The rotation in the puzzle works perfectly, and I haven’t removed any material from the rotational piece to make that move easier. The fit of the pieces is superb. It’s difficult to tell individual pieces apart as you can see from the closeup above. This makes finding how the pieces come apart even more difficult that if the pieces fitted loosely together as there is no movement between the pieces. In case you’re wondering, that tiny gap that looks like there’s a chunk taken out of one of the pieces isn’t tear-out as a result of a poor cut, but was some natural holes in the walnut. It’s also worth noting here that there is no sanding done on any of the pieces, these are all straight off the saw. Many people in the puzzle community have noted that sanding reduces the accuracy of the pieces, and that a good clean cut can have every bit as good a finish as a sanded piece, perhaps better, since sanding is effectively scratching the surface.
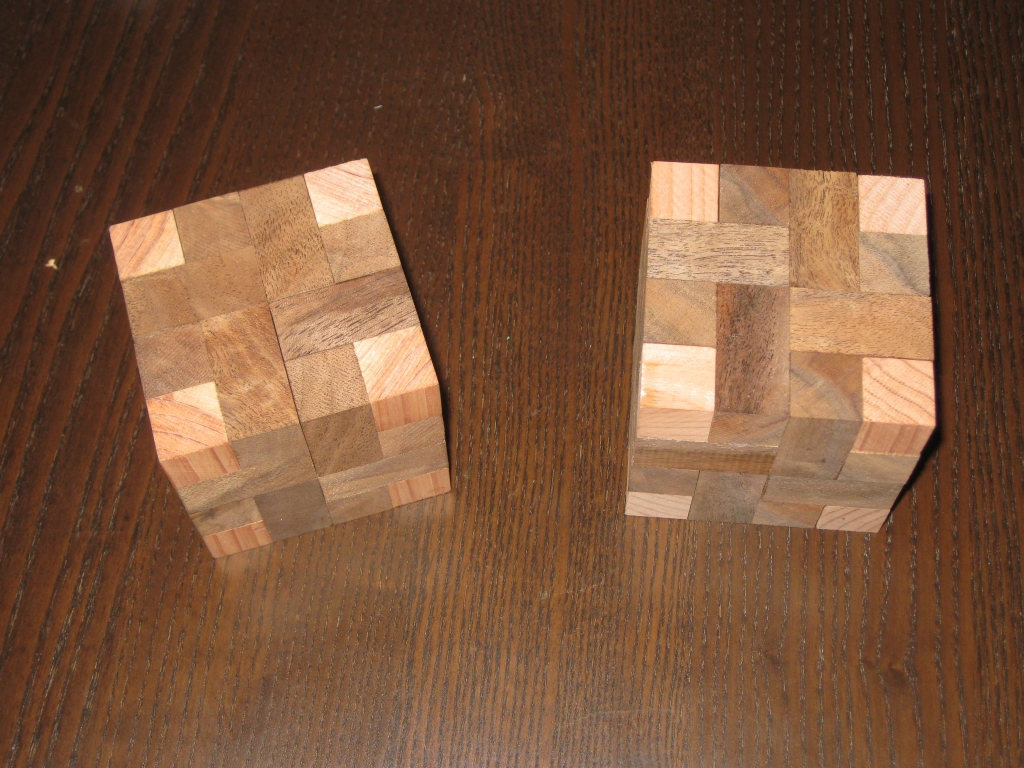
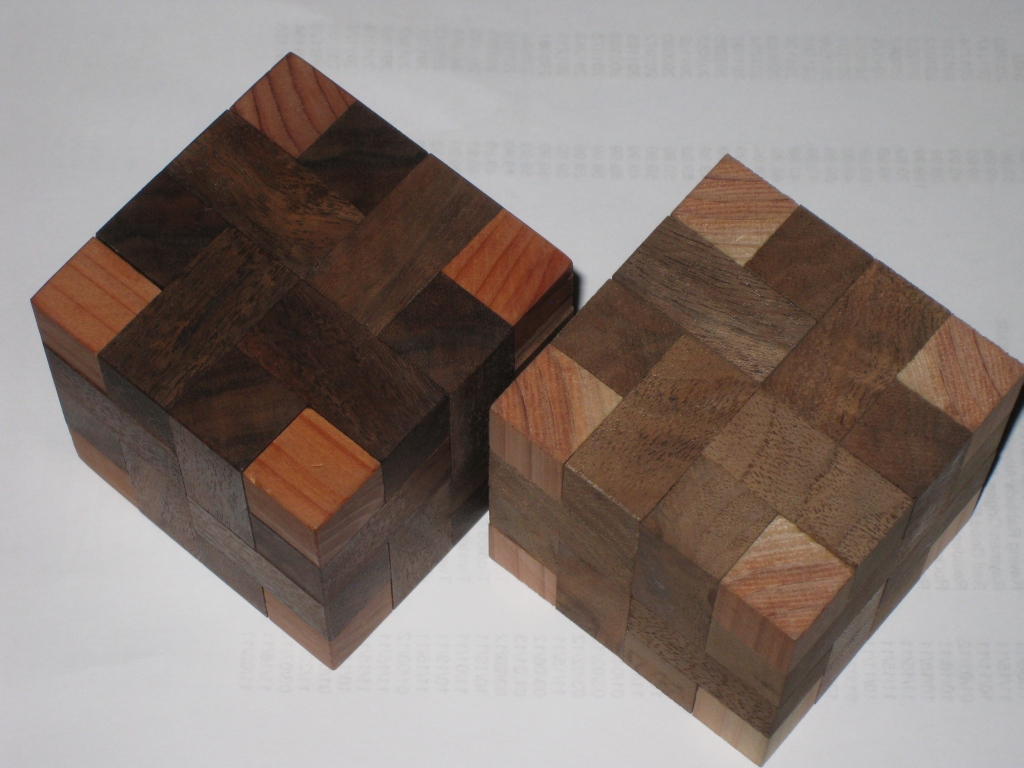
Yes, I made a second to prove it wasn't a fluke!

Yes, I made a second to prove it wasn't a fluke!

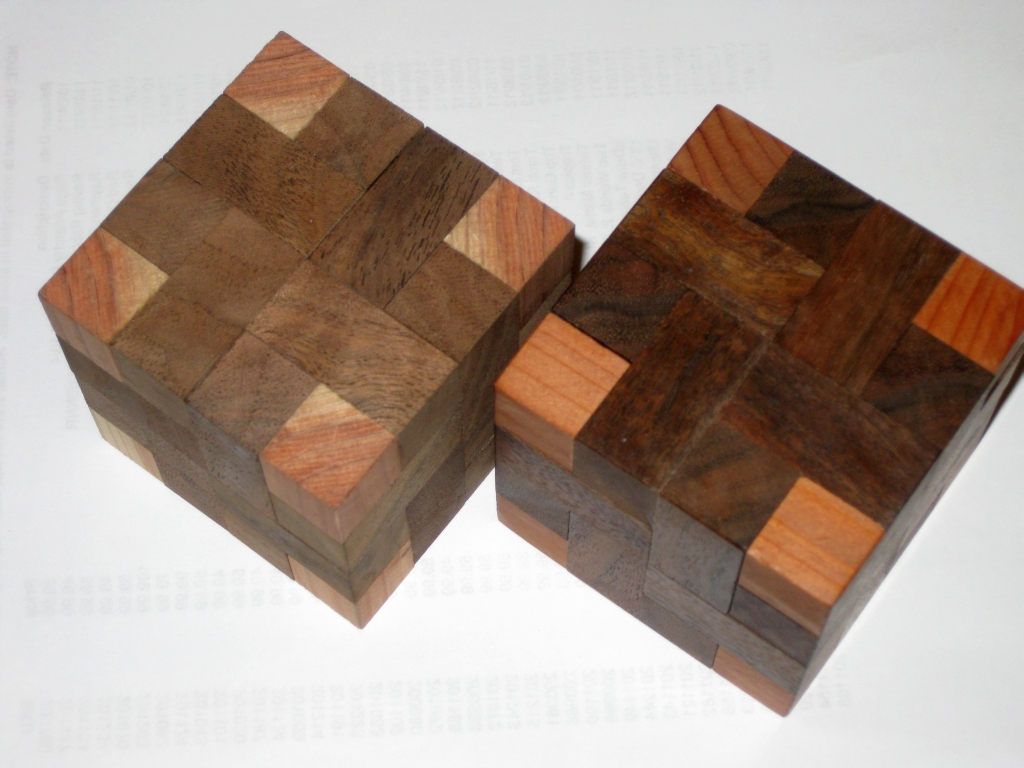
To prove that it wasn’t just a fluke and this was a one-off, I went off and created a second copy of the Involute. So what you’re seeing here isn’t some clever photography, but the two copies side by side.
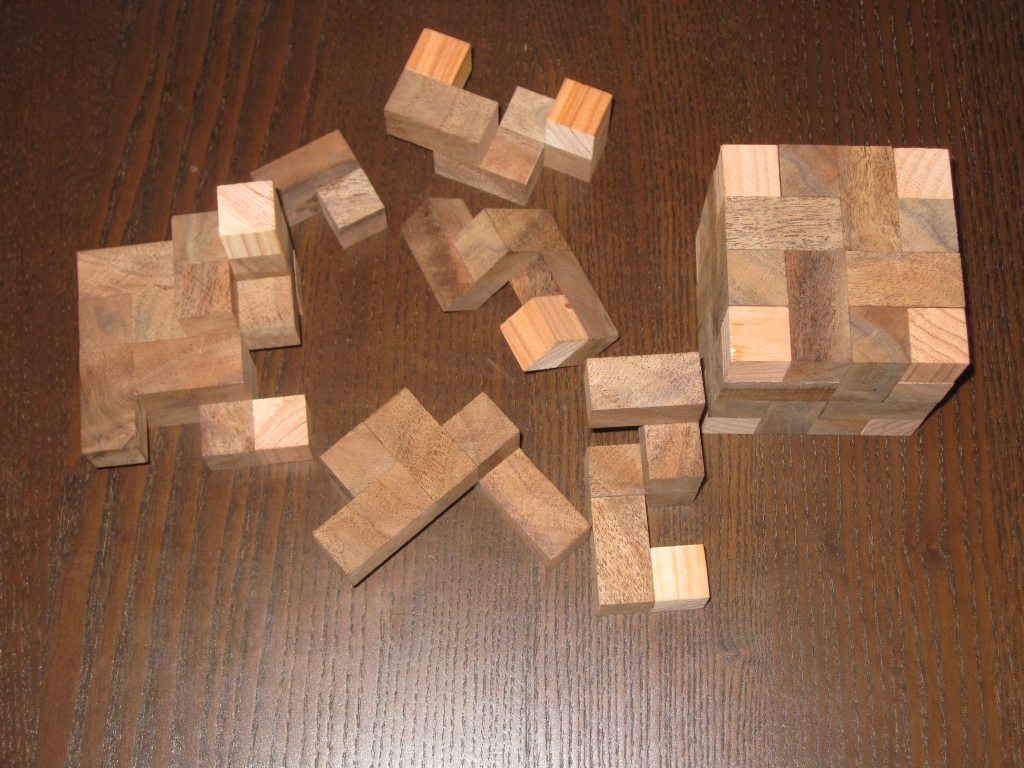
Taking one of the cubes apart

Taking one of the cubes apart

And just to show that it works, there’s a partially assembled version next to the fully solved cube.

I was really happy with the results. Over the weekend I produced two copies of the involute puzzle, and both have a very snug fit, and I’d be happy to add these to my collection. In case you’re wondering, they’re made from walnut with redwood corners. And not to sound like an American advert trying to get you to place an order for something you didn’t want …

But that’s not all!

There’s another of Stewart Coffin’s designs that I’ve wanted to play with for a while. That’s his “Half Hour Puzzle”, STC #29. So I drew up the diagram for that, and made one of those too! The brilliant thing about the half hour puzzle is that even though Stewart coffin designed it to only have the cube solution, there are hundreds of possible solution shapes that can be made with the pieces. I’ve created a burr tools file with many of the solution shapes, so if you’re interested in a copy of the file, just let me know.
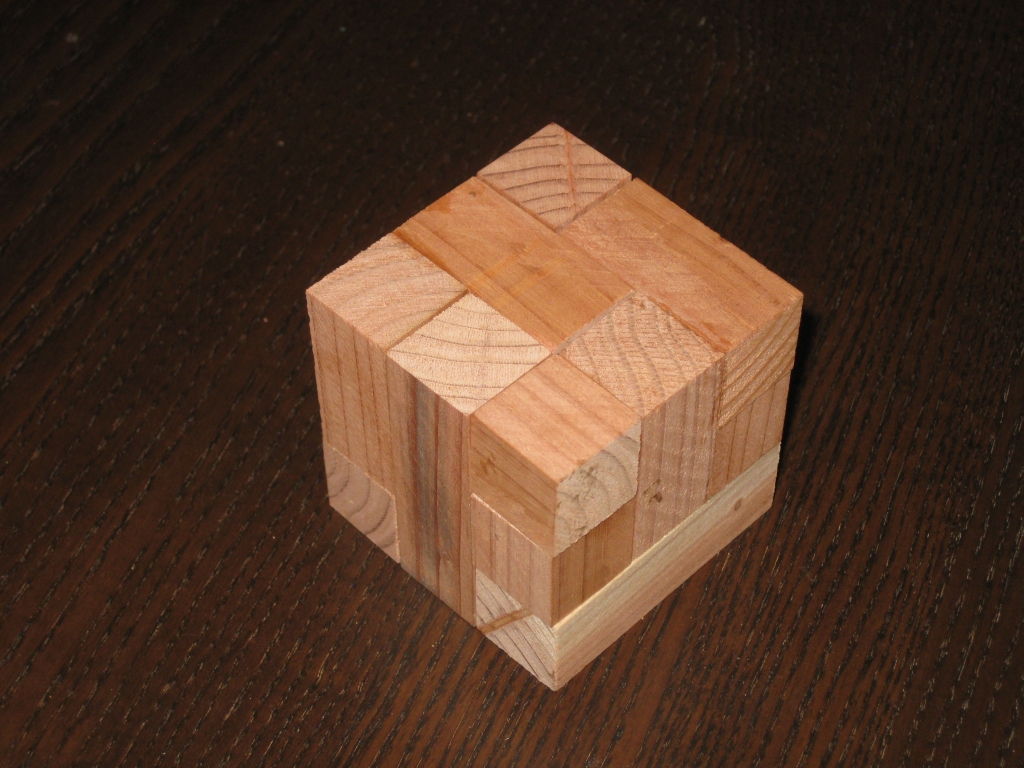
STC #29 - Half Hour Puzzle
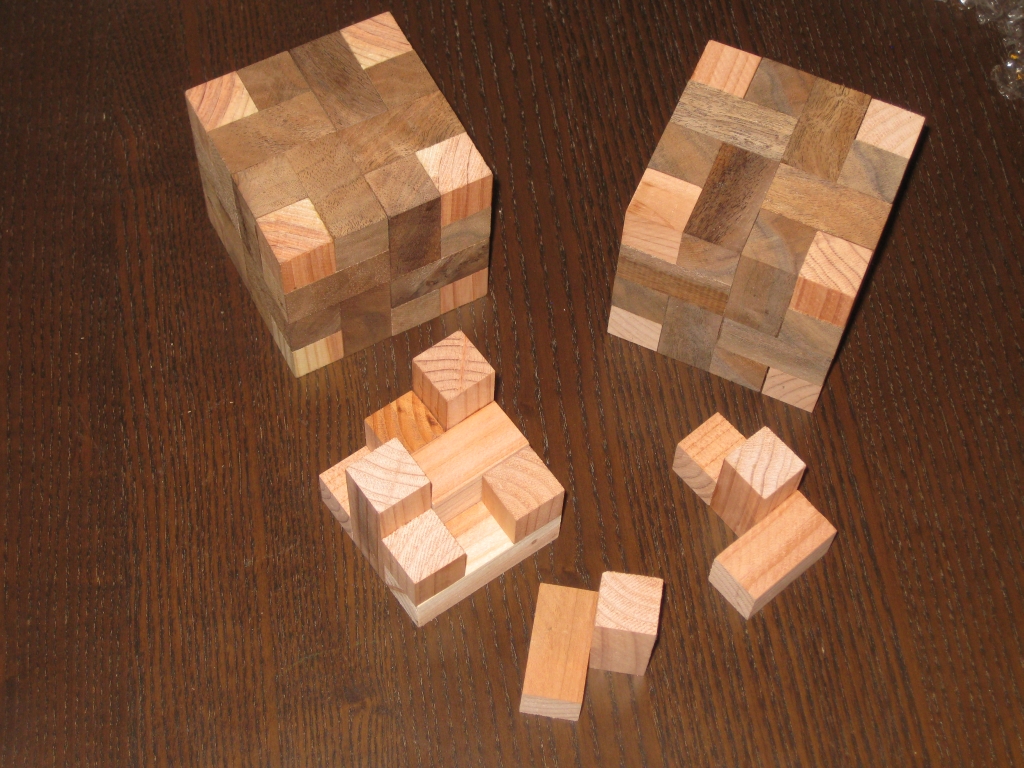
STC #29 - Half Hour Puzzle

Three Coffin's

Three Coffin's

So there you have it. Three puzzles in one weekend, all which I am very proud of, and is the start of hopefully great things. As Allard has put it, “One day there’ll be a couple of us around who can say that we had one of the very puzzles created by someone the whole puzzling community now knows as the Juggler-guy! :-)” Maybe … one day.
From Square Sticks to Cubes

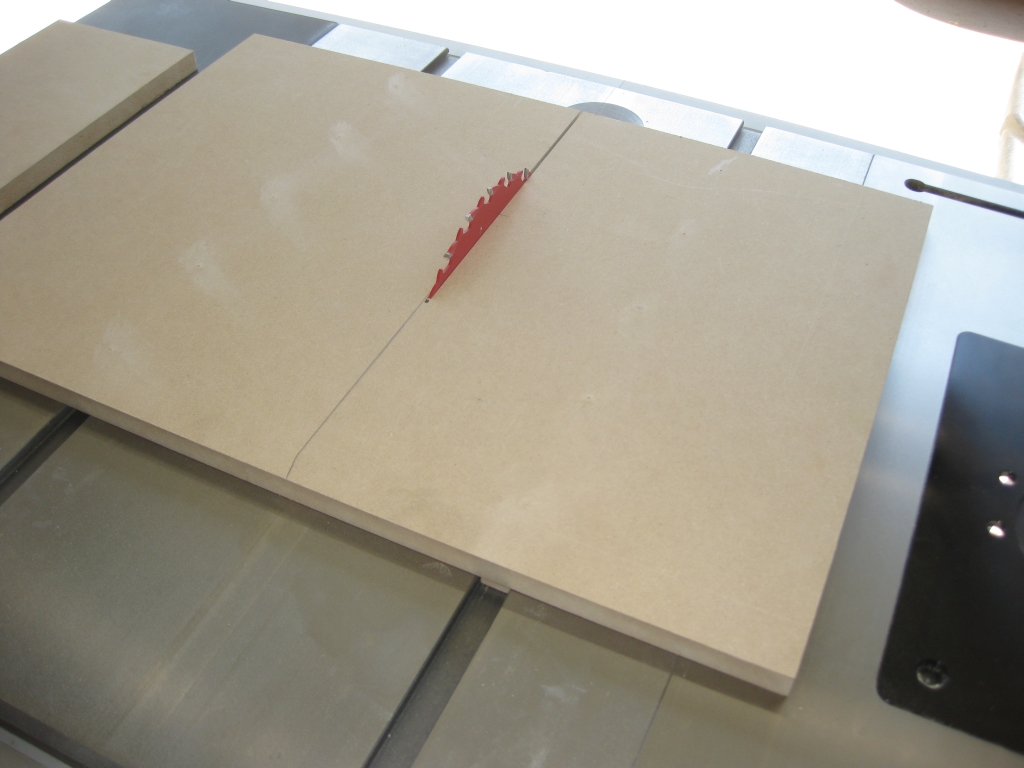
I recently wrote about the first of my puzzle making jigs to create square sticks as the first stage in creating the building blocks of many puzzles. With that jig successfully completed, and working pretty well, I had to move to the next stage and create some cubes. I said in the Square stick post that I’d tell you about it soon. Well, soon is now, and it’s time to make a crosscut sled!

The starting point for a crosscut sled

The starting point for a crosscut sled

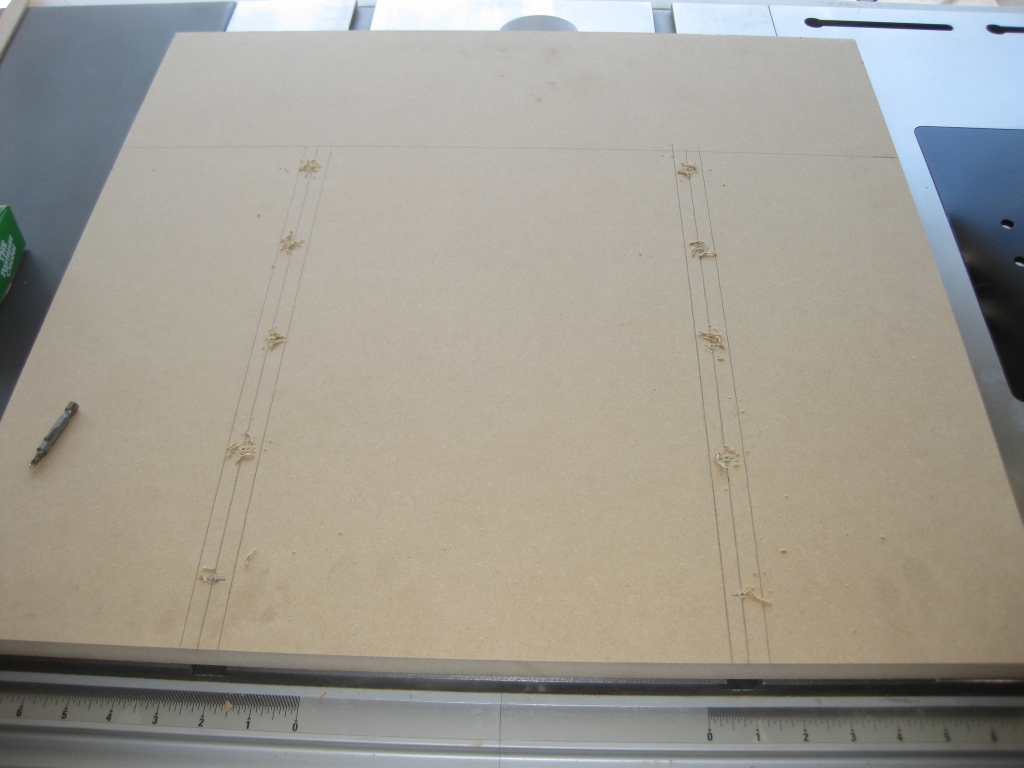
For this jig, I needed a larger platform than the square stick jig, and as such I was going to be using both miter slots on the table saw. I cut myself a slab of MDF and marked it up for adding runners. I don’t have enough of the fancy metal miter bar that I used for the last jig, so I made my own. Starting with a strip of wood rough cut to the correct size for my miter slot, I sneaked up on the correct width by taking thousands of an inch off at a time until I had a snug fit. It didn’t take as long as I thought it might, and I think I now have an even better runner than the metal versions I used on the first jig.

My intention was to drill and counter sink holes in the top of the sled and screw straight into the runners below. Sadly that didn’t quite work out as planned as I didn’t have screws which would fit. What I had was either too short or too long so I had to go to Plan B. I decided to screw through from the runner side into the base. As it turns out, it wasn’t too much of a change and in the end achieved the same end result.

Runners mounted and a slot cut

Runners mounted and a slot cut

With the runners mounted, I flipped the jig over and tested the fit in the miter slots with the blade below the table. I had a couple of spots which were binding slightly, so I lightly sanded the offending areas until I had a tight but smooth fit with no wobble in the jig. For anyone wondering, the way I found out where the runners were binding was to run a sharpie along the length of the runner sides, then move the jig in the slots. When you take the jig back out, where the sharpie has been rubbed away is where you need to remove a small amount of material. Simple yet effective!

With the sled moving smoothly, I raised the blade up, and cut myself a slot part way through the sled. That slot will help aligning the crosscut fence as I need it to be perfectly square to the blade. Without having the blade through the sled that would be almost impossible.

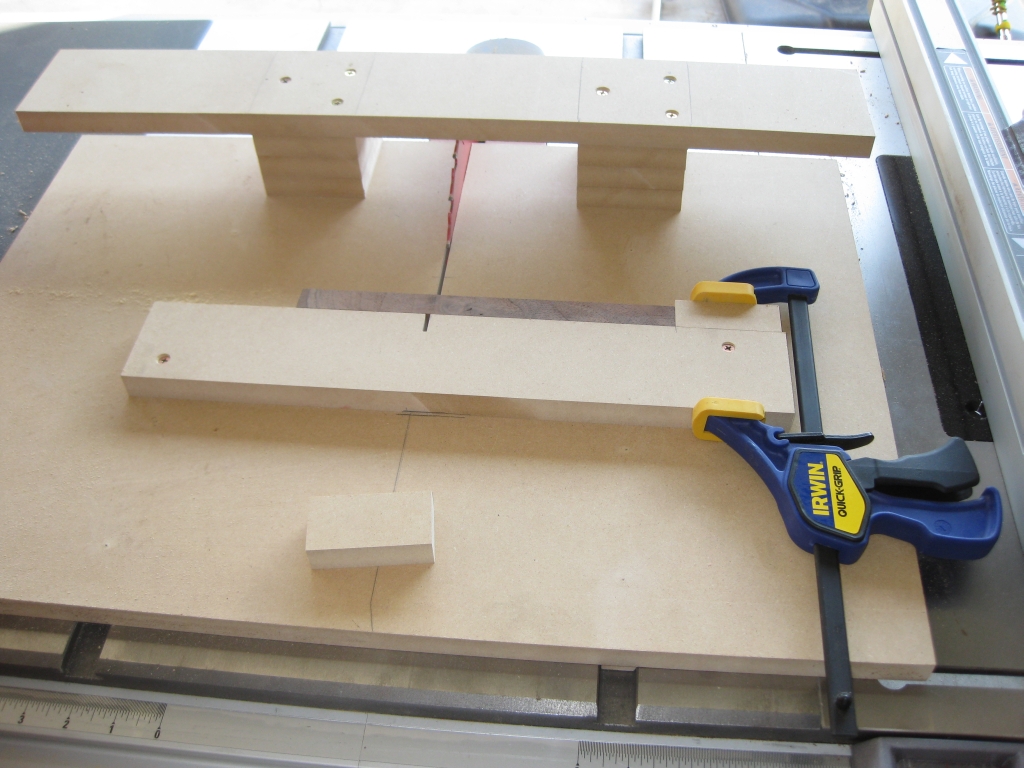
Some reinforcement across the back of the sled.

Some reinforcement across the back of the sled.

Given the slot I’ve just created, I now have a potential weak point in the sled where it could flex, and degrade the cut. Despite how it may look in the photograph, I wasn’t trying to create a wing to add down-force to the sled.

Each of the three spacers on either side is screwed to the piece below with three screws, and gives enough clearance that with the blade raised to the point that the blade stiffeners are just below the base of the jig, it doesn’t cut into the cross bar. The cross bar keeps either side of the sled stable and prevents any twisting or warping of the sled. Yet again simple but effective. (I’m liking the fact that I can keep things simple. Less chance of things going wrong!)

A beautiful Dragonfly that stopped to see what I was doing

A beautiful Dragonfly that stopped to see what I was doing

Given that it was getting on for around 5 hours that I’d been working on the saw and building the jigs by this point, I took a break, stretched out my legs and back and relaxed for ten minutes. While I was doing that, I spotted a dragonfly floating around the garden. Standing watching him for a few minutes, he landed on the radio antenna for our car. Given that I still had the camera in my pocket from taking pictures of what I was doing, I grabbed it, as he posed for me! Looking at the pictures later, there really came out well, so I thought I’d share…

Anyway, back to the jig …

Adding the fence and a stop

Adding the fence and a stop

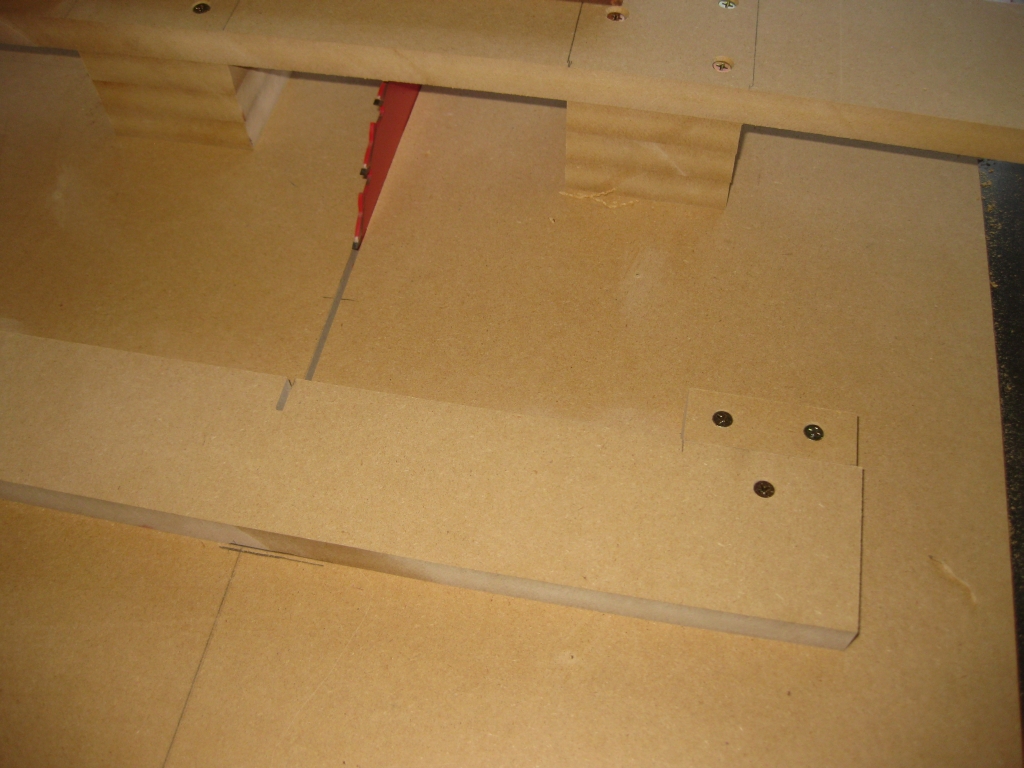
With the back reinforced, I had to add the fence to the sled. The important thing here is that it is at exactly 90 degrees to the saw blade. If it’s off, then the cut will not be square, which isn’t going to make for a good cube. Using the best square I have, I sat one edge against the blade, and the other against the fence board I’d cut. Keeping both edges in firm contact, I drilled one screw hole, counter sank and then screwed the fence to the sled at one corner. With one corner in place, I double and triple checked the fence was square, on both sides of the blade (using two squares). That may be a little overkill, since the blade shouldn’t be different on either side, but I figured it couldn’t hurt!

Everything checked, I pre-drilled and screwed the other side of the fence to the sled, and checked again for squareness. With everything looking good, it was time to add the stop. Now this was something that I’d been puzzling over for a good few days at this point, and hadn’t really figured out how I was going to perfectly measure the offset so that I ended up with good low tolerance cubes. As is ever the case, the answer came to me when I least expected it, in the shower in the morning before heading to work.

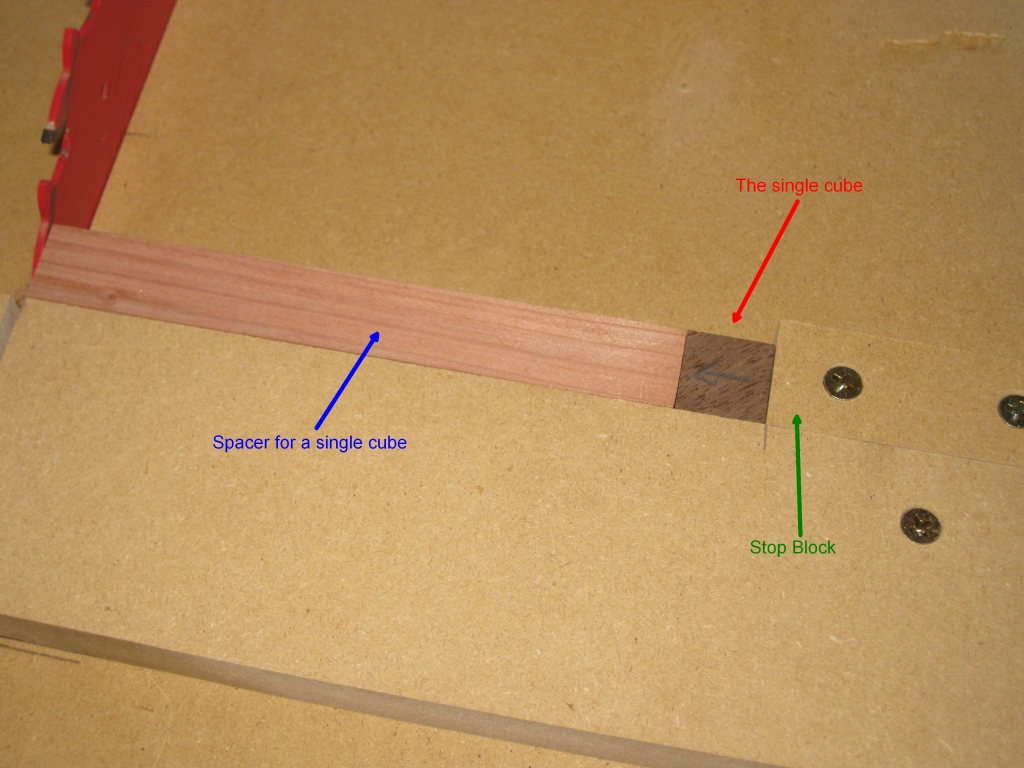
The answer. Make sure that the stop is far enough from the blade to make the biggest cut you’ll need, plus a bit. The reason … Well if you properly size a piece you want to cut (and I’ll get to that) then you can use that piece against the stop, then cut a ‘spacer’ by placing it against the fence, and the piece you want to cut, then cut that piece. You get a perfect spacer, and no complicated measuring required. (Other than the piece you want to end up with). Yes, I know that’s all very confusing, but I’ll annotate the pics below and it will make more sense!

Clamp removed now that the stop is screwed in place

Clamp removed now that the stop is screwed in place

Having screwed the stop in place I could remove the clamp. The stop is placed 6″ from the blade. I’m unlikely to ever cut a stick that needs to be 6″, unless perhaps I’m making 18 piece burrs, so this is lots of space to create whatever sized stick I need.


Creating the spacer for a single cube

Creating the spacer for a single cube

If you click on the image on the left, you’ll see I’ve annotated it to make my previous explanation simpler to understand. The single cube in walnut was created by shaving a few thousands at a time from the edge of the block and measuring after each pass until it matched the dimension of the square stick. In some regards, that is probably the most time consuming part of the process, as if you take off too much, then it’s a case of starting again.

With the first cube created by hand, it can be placed against the stop, then a long stick placed against it to create the spacer. In the diagram, you’ll see I created mine from some of the redwood sticks I’d cut when I was testing the square stick jig.

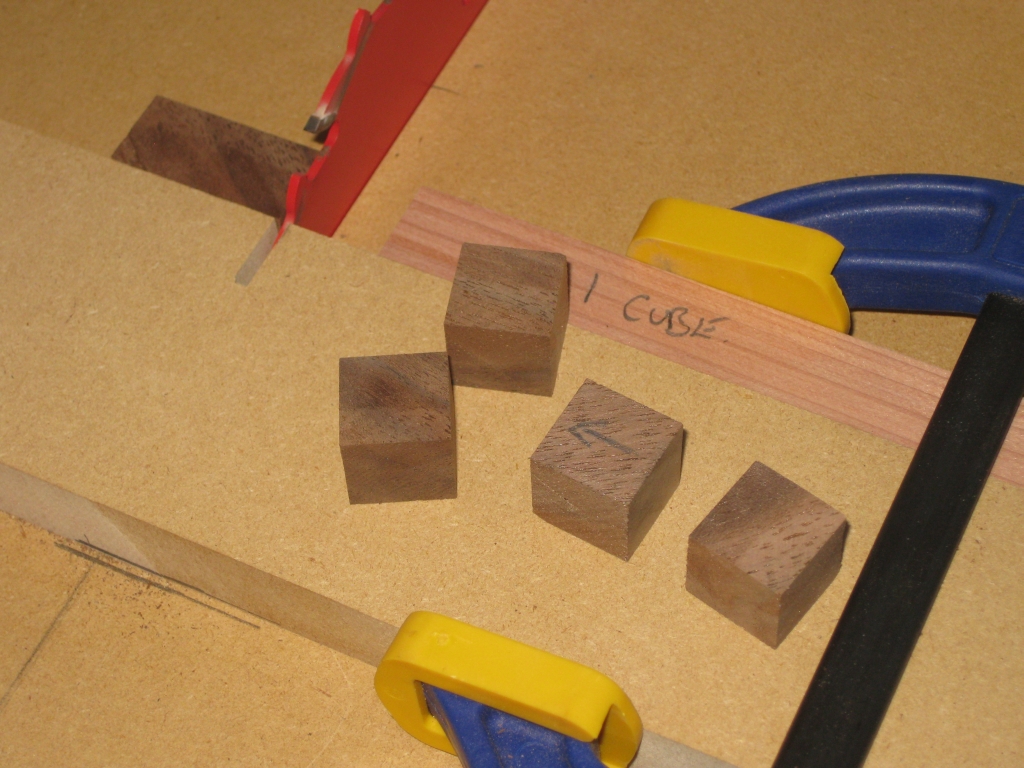
Batching out some cubes

Batching out some cubes

Now it’s a simple task of swapping the order of the pieces so that the spacer is against the stop, and batching out some cubes. I’ve used a clamp to keep the spacer in place, both against the fence, and hard up against the stop to make sure that it doesn’t move between cuts. It’s also important after each cut to clear out any dust that gets between the block and the fence as this will affect the accuracy of the cut. It is possible to adjust the spacer by adding feeler gauges between the stop and the spacer and before each run of cubes, I’ll need to check the sizes to make sure everything is within an acceptable tolerance.

Running through a few cubes, each cube came out almost perfectly. The worst cube had a tolerance of 0.001″ from the size of the square sticks. I can’t really complain when the cuts are that close. It’s going to be pretty good for any initial puzzles I make.

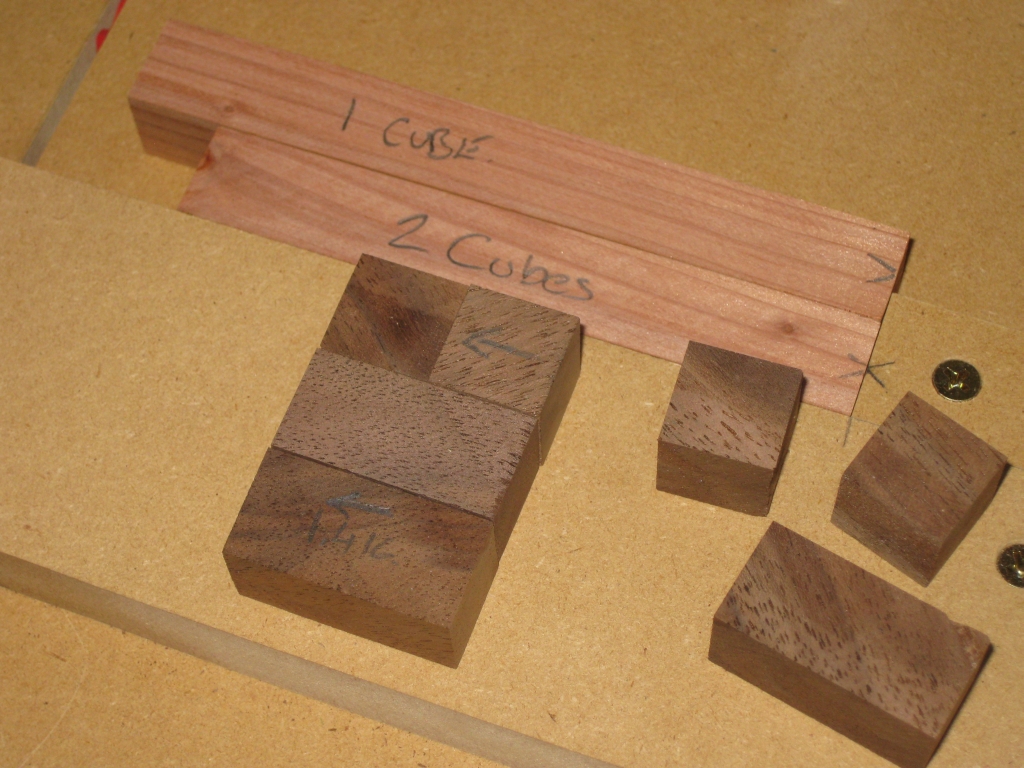
Making double size cubes

Making double size cubes

Now with a few cubes cut, I measured them, and selecting two that were exactly cubic, I placed them together and verified that the length was exactly double that of a single cube. Repeating the process I had used for the first cube, I cut a ‘two cube spacer’. This spacer will let me make double sized cubes, perfect for making any of Stewart Coffin’s Convolution/Involution/Involute puzzles.

Let the fun commence!