Tag Archives: Wood

Magic Dice

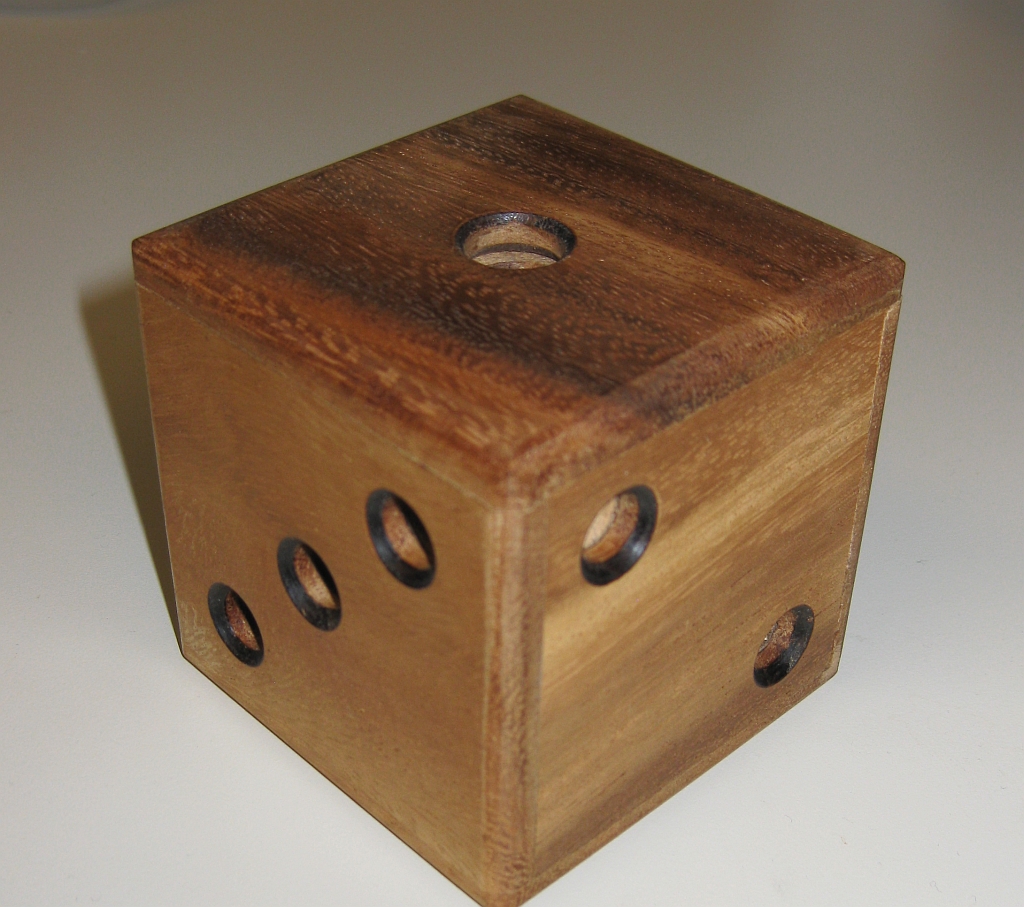
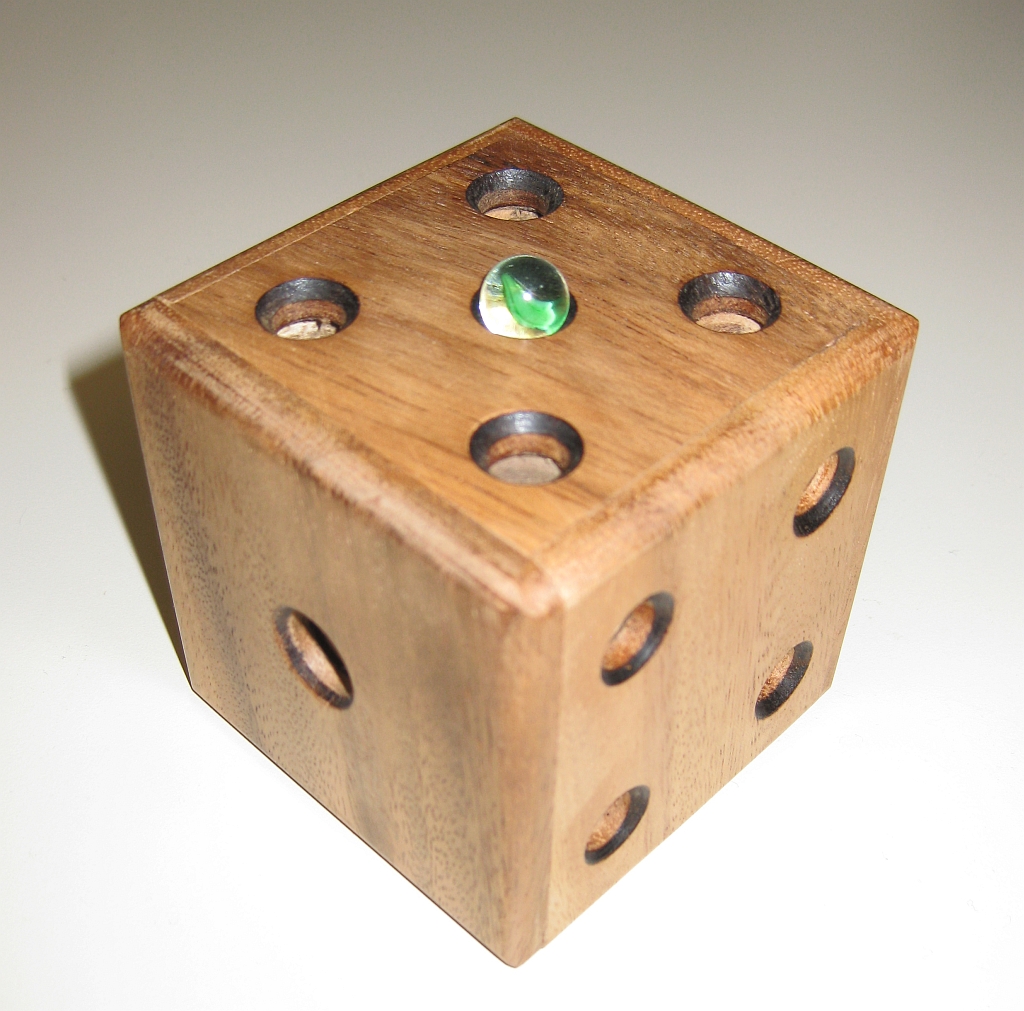
Magic dice is another Puzzle Master designed and built wooden puzzle, where the object is to remove a small marble from the inside of the dice. Thanks Puzzle Master for sending me this puzzle to review.

Magic Dice by Puzzle Master

Magic Dice by Puzzle Master

The 2 4/5 inch cube is made from Rubberwood, and has countersunk holes on each side corresponding to the faces of a dice. As far as the magic part of the name goes, I have no idea where that came from. Inside the cube, a small marble is trapped, and runs along tunnels, forming a sort of simple maze. By looking through the holes in the sides, and tilting and turning the puzzle, you can navigate the marble through the maze until it can be removed through the side with the single hole, which is slightly larger than the others on the cube. The outer cube is well finished, and looks great. The inner ‘maze’ is a lot rougher, and the finish of the wood isn’t as high as on the outside.

Getting the marble to that side is a reasonable challenge. There are no internal stops on most sides of the cube, so it’s easy to have the marble run from one side of the cube to the other, without pausing anywhere in the middle. A gentle hand, and the occasional ‘hop’ is required to coax the marble to where you need it. There is an added challenge by not being able to see through the puzzle on all sides. Given that the holes represent a dice, there is no visibility in the centre of the puzzle on the #4 side for example.

Magic Dice Solved

The Marble removed from the puzzle

Puzzle Master rates this is a level 5 puzzle (easy) and I’d agree. It’s not a tough puzzle, but can be a little frustrating as you watch the marble speed past where you wanted it to stop. I took around five minutes to remove the marble, and I suspect most people would be the same. Overall a fun puzzle, just don’t expect it to keep you entertained for hours.

Building a Matrioshka (Part 2)

This entry is part 2 of 3 in the series Building a MaTRIOshka

At the end of the first post on my Matrioshka build, I’d finished gluing up the ‘ends’ as I think of them for each of the puzzle pieces. I still hadn’t cut out the centre sections (or as I’m referring to them, the bridges) that join the two ends of each puzzle piece together, and I still had a lot of sanding to do so that the pieces were all the same size. In this second part, I go through that process, and get closer to the finished puzzle.

On a side note, I originally referred to this project as a MaTRIOshka, however what I’m actually building is a single layer of Vin&Co’s puzzle. Stewart Coffin originally referred to this assembly in “The Puzzling World of Polyhedral Dissections”, which I have been reading recently as the Expanding Box puzzle. There Mr. Coffin refers to this as a curiosity more than a puzzle, but I’m going to continue on none the less with this build. It is helping me learn about puzzle creation and improve my skills, although I dare say that as with most puzzle creators early works, this will be less than impressive. The bottom line is that it is still a nice co-ordinate motion puzzle.

With 12 ‘ends’ all glued together, I had quite a task to remove all the excess glue from the pieces, and sand them all down to a nice smooth finish. I had deliberately left the pieces slightly larger than they would be for the final glue-up, so that I had some room for cutting errors and the like. This is fairly standard, as it’s easier to correct for problems with your saw being slightly off, or gluing issues when you have a little extra material to work with.
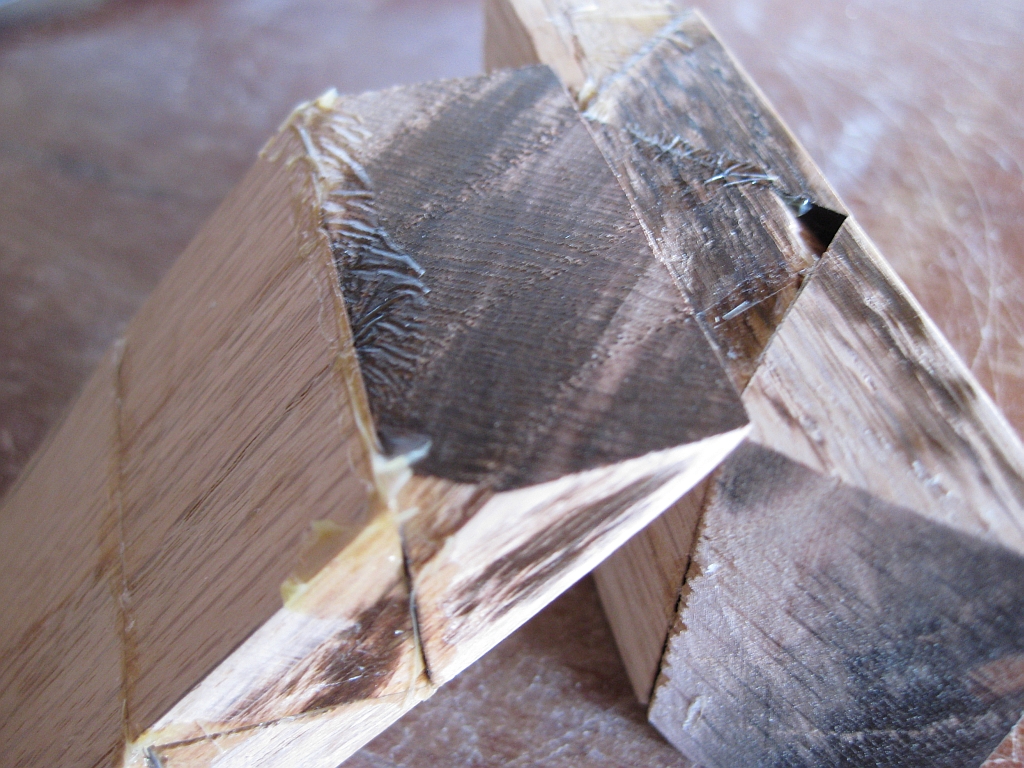
Puzzle Pieces before sanding

Puzzle Pieces before sanding - not pretty!

As you can see from one of the pieces, things weren’t exactly pretty at this stage. Yes I could probably have allowed the glue to set for about 30 minutes, and then scraped off the excess, but I let things sit overnight without touching them, so I may have created more work for myself here that I needed to. You’ll also note that there are apparent gaps between the individual pieces. As I mentioned, this is a learning experience, and I expected that I would have a problem like this! (Oh, and the large lump of tearout on one of the pieces is pretty obvious too.)

If you’re wondering about the interesting pattern in the dry glue, this is because I’m using plastic wrap to prevent glue getting onto my clamps. It’s effective at keeping the glue where it needs to be, but until I build some gluing jigs, I’m left with this sort of mess.

After a lot of sanding, and some time measuring each piece against a ‘perfect’ reference piece, I was left with 12 identical pieces. The puzzle has six sides, which are all identical, so this would be the basis of the finished pieces. (ok, so I only photographed 10 pieces. The other two were on my workbench.)
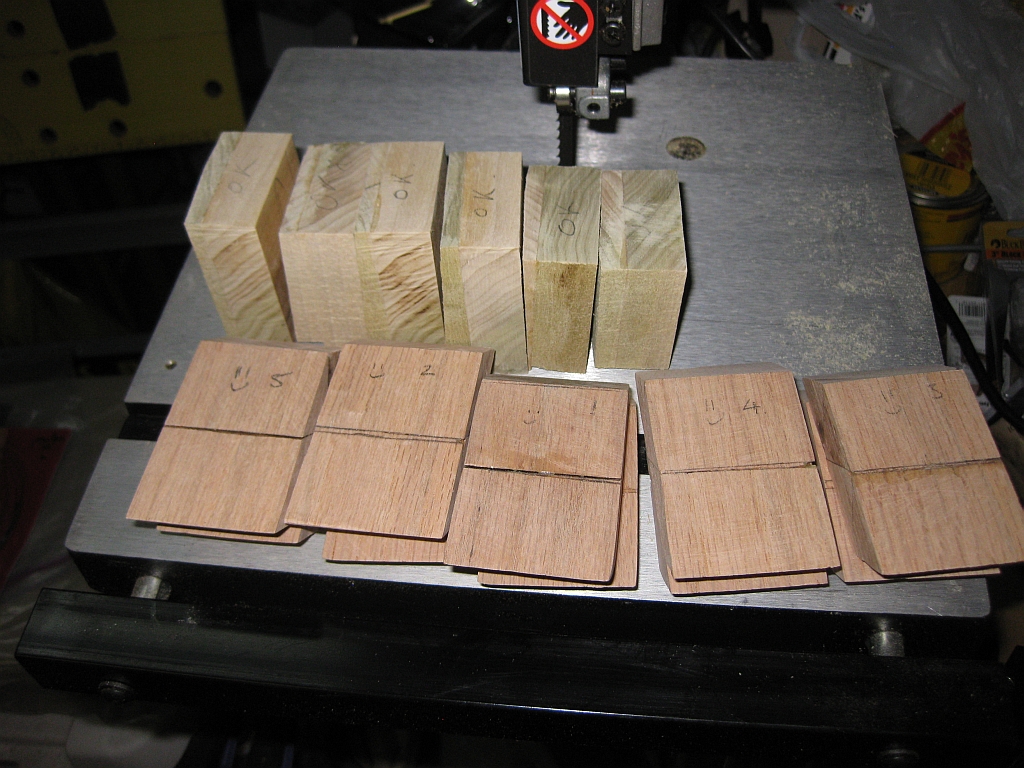
Sanded End Pieces

Sanded End Pieces

As yet I still hadn’t cut any wood for the join between each end of the piece. I’ll be honest here, I still hadn’t entirely figured out how these should be cut, the angles required on the cut etc.
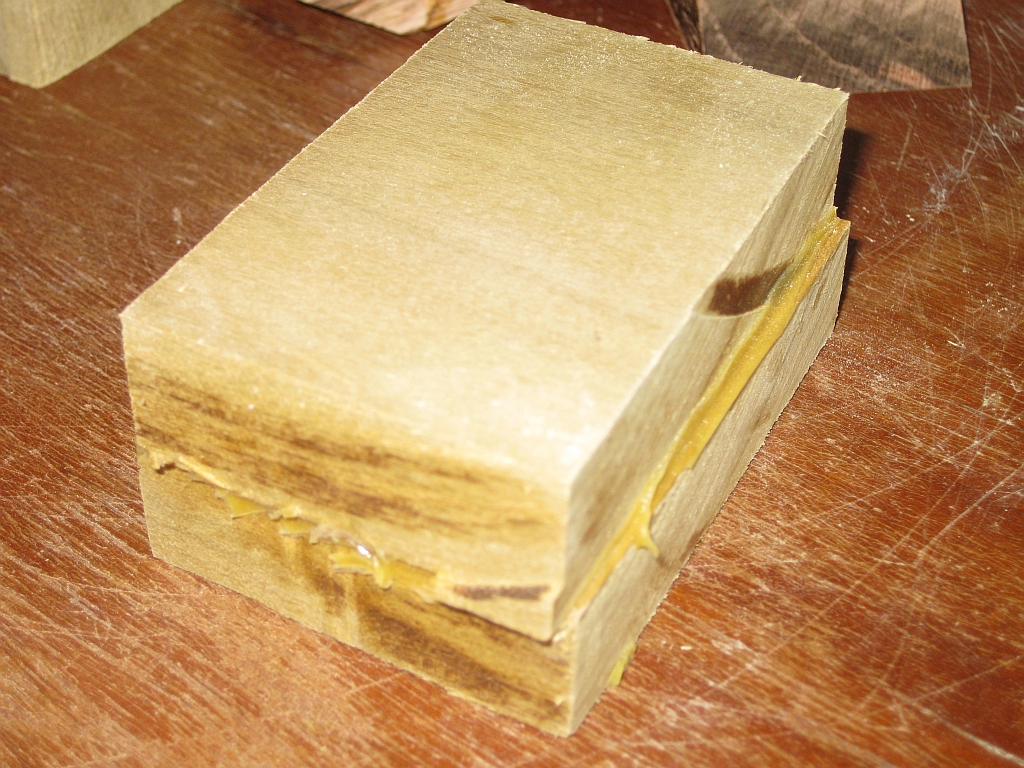
Some stock laminated together to give the thickness I needed

Some stock laminated together to give the thickness I needed

All I could tell from the pictures I was working from was the length of the piece, and that the base touched one side of the end and the top of the triangle touched the other side. Note: I had not started reading Stewart Coffin’s book at this point which told you exactly how to make this! (Thanks Stewart) With that information on hand, I decided the best thing to do was to just go for it. I cut six rectangular blocks which were a match for the dimensions of the end of my end piece, marked the mid point on the end, and took to the band saw. (These rough cut pieces are what you see in the image above. Note that they were only true on one side, as I was cutting to a point on the other so I didn’t care!)
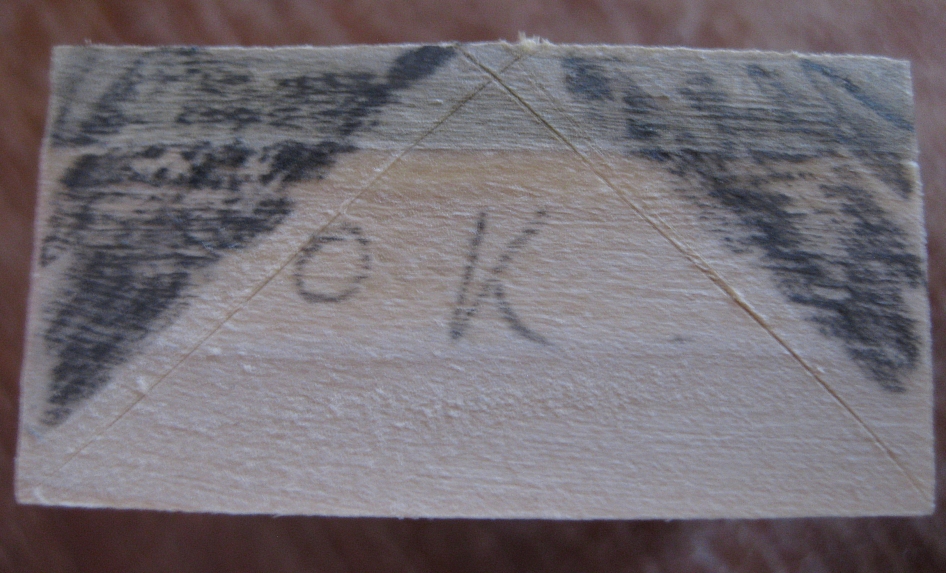
The rectangular stock marked up for cutting to make the bridge

The rectangular stock marked up for cutting to make the bridge

As I have learned, I cut close to my lines, but didn’t go over, to allow me to sand the pieces to the perfect size. You may notice from the image, that my lines are not in pencil Given the accuracy of the cuts I wanted, I used a hobby knife to make the lines. This gives a much more accurate line than pencil, since the edge is much thinner, and also helps to prevent tearout by severing the ends of the fibres if you’re working across the grain. Yes, these marks are in end grain so it’s not helping me here, but I though it worth mentioning.

Note: If you’ve not figured it out already, all the images I upload are at least twice the size you see here. Click the image to see the full size version, and to browse all images for this blog entry.

The result was six identical pieces which would form the bridge between each end of each puzzle piece. So far, so good. Now the interesting thing I found out taking this approach, and working purely from pictures, is that the piece required for the bridge is a standard triangular cross-section, the same as the rest of the pieces in the puzzle. The only difference is that the bridge is slightly taller than the end pieces. Going back to Coffin’s book, this is exactly what he shows, so this was confirmation that I had this right.
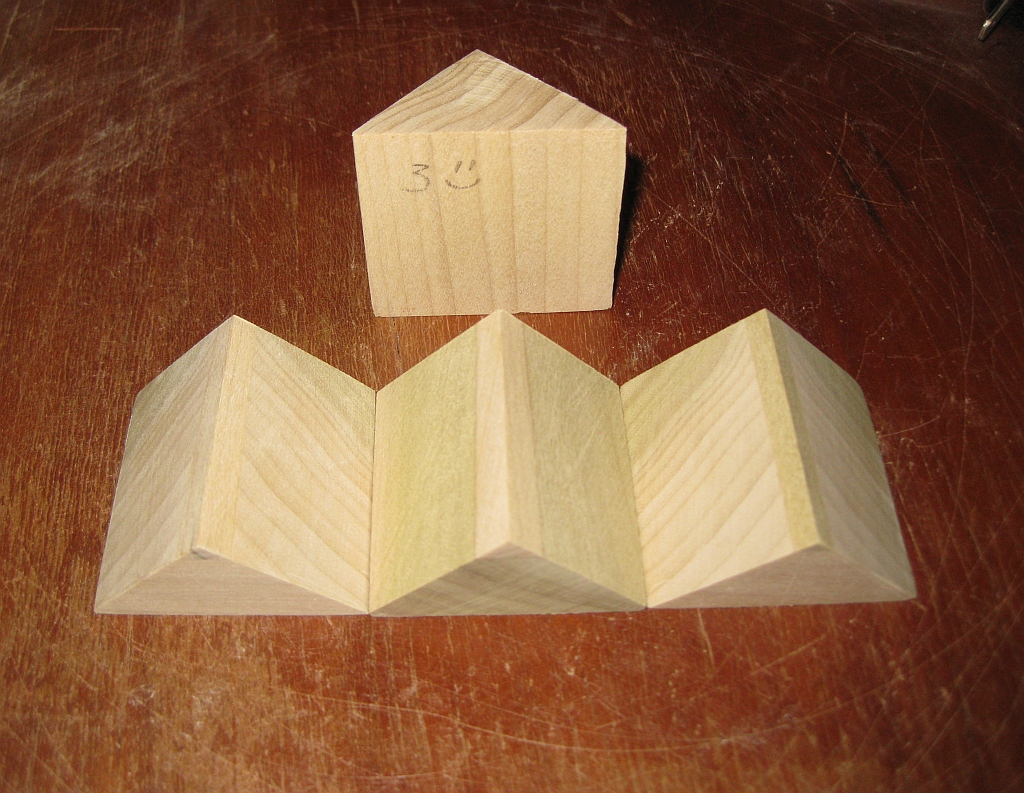
The Bridge pieces ready for assembly

The Bridge pieces ready for assembly

In the next part, I’ll look at tackling the problem of gluing up the final pieces and seeing if this thing actually works. On a side note, I have my copy of Vinco’s Matrioshka now, and the puzzle I’m building is large enough that the Matrioshka will fit inside it. So does this mean I’m actually building a Quadrioshka?
Convolution

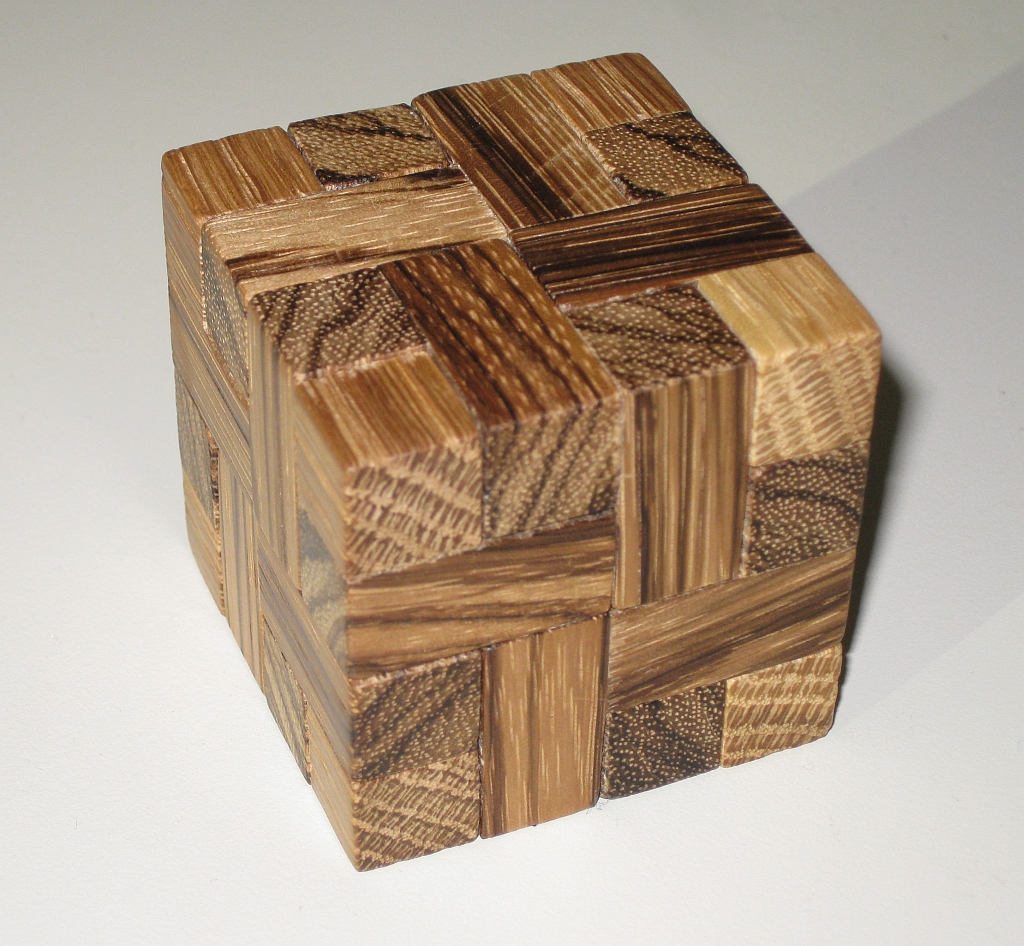
Convolution is another Stewart Coffin design, and is numbered 30 in his numbering Scheme. Originally produced in 1980 the seven dissimilar pieces can be assembled in one way, and one way only to give a 4x4x4 cube with a symmetrical pattern on all faces.

Convolution designed by Stewart Coffin made by Brian Menold

Convolution designed by Stewart Coffin made by Brian Menold

This version was made by Brian Menold over at Wood Wonders and is made entirely of Zebra Wood. The puzzle is a nice size at 1 7/8″ and the choice of Zebra Wood really helps to show off the symmetry on each side. This is a very nicely made puzzle, at a very good price.

You may remember from my post about the MMMM’s puzzle that I received from Brian when ordering the convolution that there were some issues in Brian’s view when I was ordering. Brian normally makes the Convolution in either Oak or Poplar, and the puzzle is slightly larger. When I contacted Brian about buying a copy of Convolution from him, he got in touch to say he had a few copies in rarer hardwoods which were slightly smaller but the same price if I was interested. I thought this was a great offer, and took him up on it.

After a little back and forth conversation via email, we settled on the Zebra Wood version, however there were a few hiccups along the way which led to Brian sending me the MMMM’s free. Originally when he told me about the puzzles he had, he’d looked at his Involution puzzles, as they are so similar, so it turned out he didn’t have the wood combination he thought he had. He really didn’t have to, and to my mind there were no issues at all. Just goes to show that Brian’s a really decent guy and I highly recommend both his work and him as a person to buy from.

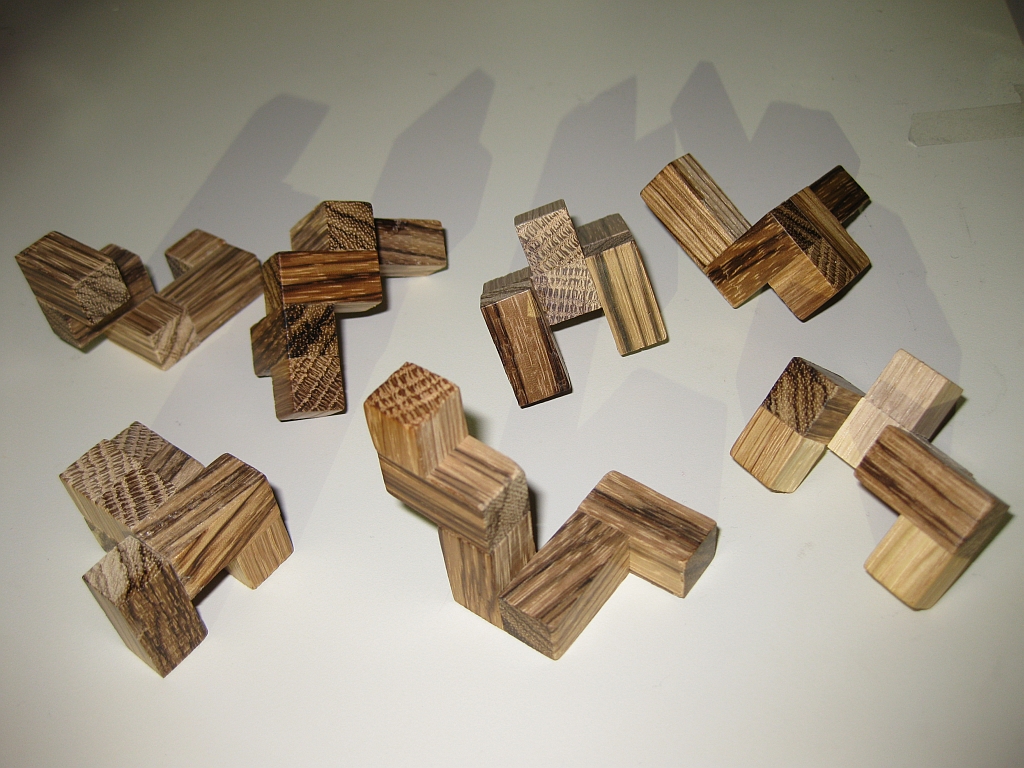
The seven pieces of Convolution

The seven pieces of Convolution

Getting back to the puzzle itself, this is a classic Coffin reproduction, and is well made. The pieces have a tight fit, and are simply finished with a wax, so there are no stains or other products to tarnish this beautiful wood being used. The puzzle itself creates an interlocking cube so unlike many other cubic dissections, this one doesn’t need a box to hold the pieces, and isn’t going to fall apart if someone bumps into it.

The fact that the pieces are interlocking also adds to the complexity of solving the puzzle. There is only one assembly, and the symmetrical pattern on each side does help with the assembly to some extent. This would be a tough puzzle if it was sent unassembled, and looking at a picture of the assembled cube isn’t going to give a clue as to where certain pieces should be. This is a great design, and while it may not stand out on the puzzle shelf amongst other flashier puzzles, this is one that you really want to pick up and solve.

Deja Vu

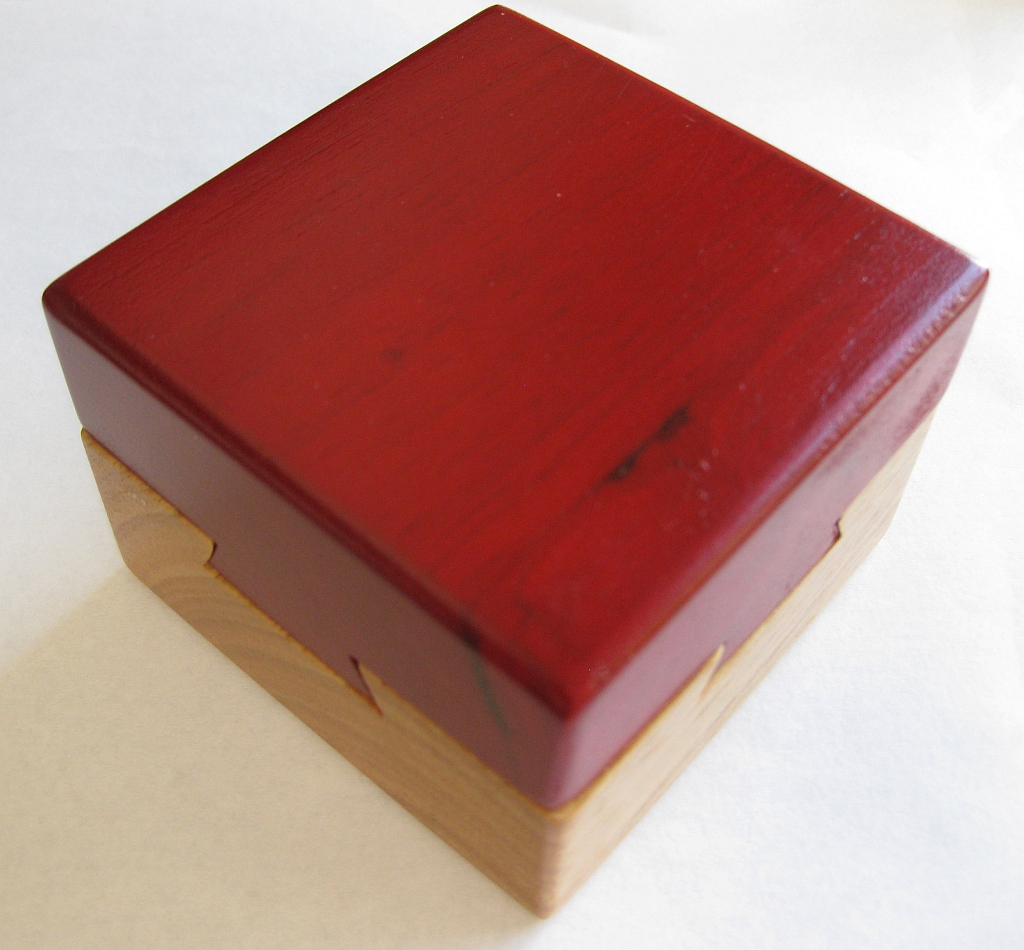
Deja Vu is a trick dovetail box produced by Puzzle Master. Thanks Puzzle Master for sending me this box to review. The object is simply to open the box. It looks simple until you point out to the potential opener, that there is a dovetail on all four sides, which in the normal world would hold the lid and base quite firmly in place.

Deja Vu

Deja Vu trick Dovetail box from Puzzle Master

This is a really striking box to look at, and the staining of one half as a bright red wood really helps to make the detail in the dovetails stand out. The box itself is made from two solid pieces of wood, and there is a small circular hollow in the centre of the red half which could be used to store a small item. Most puzzlers will probably end up with at least one trick dovetail puzzle in their collection, the real beauty is finding one with a really tight fit so as not to give away its secrets.

Puzzle Master offers this box for $11.95 Canadian dollars, so it’s not an expensive puzzle at all, and that does show in its build quality. Given the price you shouldn’t be expecting a hand fitted dovetail with perfect mating between the two parts.

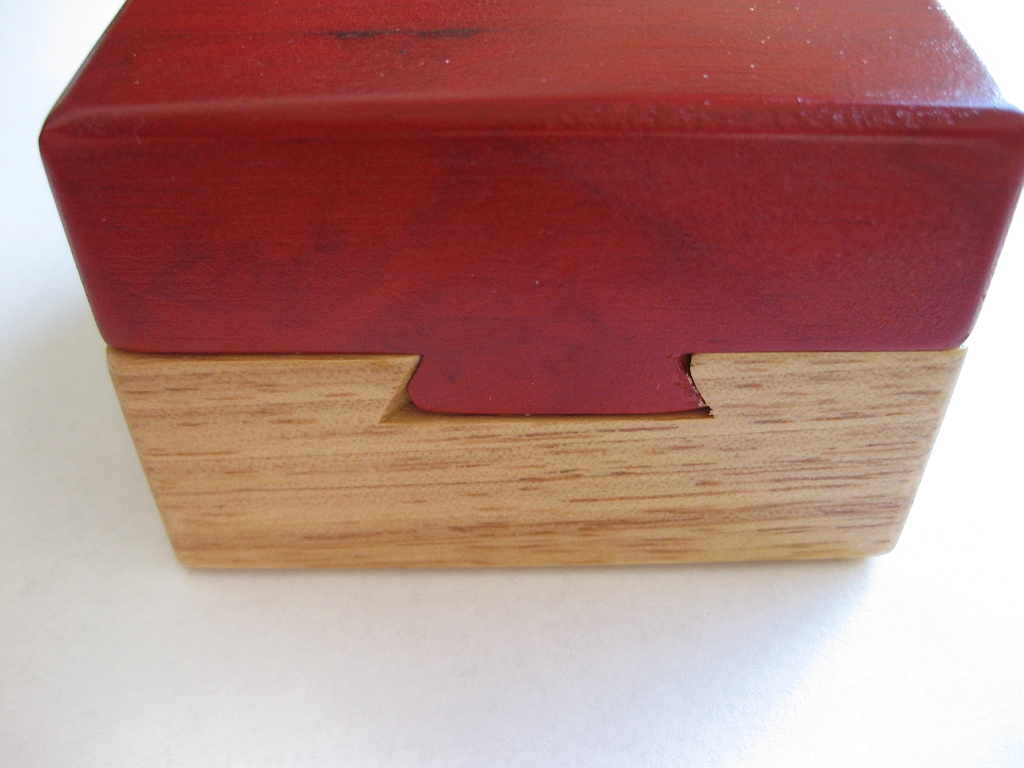
The fit between the two halves of the dovetail is quite loose. As such you can lift the two halves away from each other, and see the locking mechanism in one corner, keeping the box closed. Also as you can see from the close-up picture, there is rounding on the edges of the dovetail, which is a shame as it lets you see how the box opens too.

Deja Vu closeup

A Closeup of the dovetail joint on the Deja Vu puzzle

The locking mechanism itself uses a round ball bearing which also allows for a certain amount of play in the mechanism. One problem I found is that having handed the box to a few people to play with, they would start to slide the two halves apart, and hit the curve of the ball bearing with the slot in the box that the bearing sits in. This has started to round the outside edge of the slot the bearing moves in as the wood is much softer than the bearing. I don’t think it will get to the point where the puzzle will be able to be opened without first releasing the lock, but the amount of play will increase over time. This could easily be fixed by replacing the ball bearing with a metal cylinder which would behave the same way, but would prevent the rounding as the top of the box would not be able to lift on the ball.

The lock in the box is magnetic, and when closed, it holds the box nicely in place, To re-close it, lining up the two halves and then reversing the opening process is required. I’ve found holding the two halves in place correctly is a little challenging as they have a tendency to move as you try to re-lock the box, or at least they do the way I am holding the box. It’s a minor concern as the real challenge is opening the box not closing it.

I do like this box, and it provides a simple challenge to hand to friends, or to leave sitting on a shelf as its striking appearance will have someone itching to pick it up. It’s worth picking up a copy as there are few dovetail boxes available for the general public, and this is a nice box for the money.

MMMM’s

I recently came across Wood Wonders, run by Brian Menold. Brian makes wooden puzzles in small numbers, and has several beautiful looking puzzles for sale online. I was ordering a copy of Stewart Coffin’s Convolution from Brian, and Brian felt that given a few minor things that happened when ordering that he was going to send me a free puzzle as a way of saying sorry for any confusion.

MMMM's designed by Hirokazu Iwasawa

MMMM's designed by Hirokazu Iwasawa, made by Brian Menold

I should point out that from my point, there were no issues at all, Brian was an absolute gentleman, and was very quick in getting back to me not only with some other options for the puzzle I was buying, but with lots of great feedback.

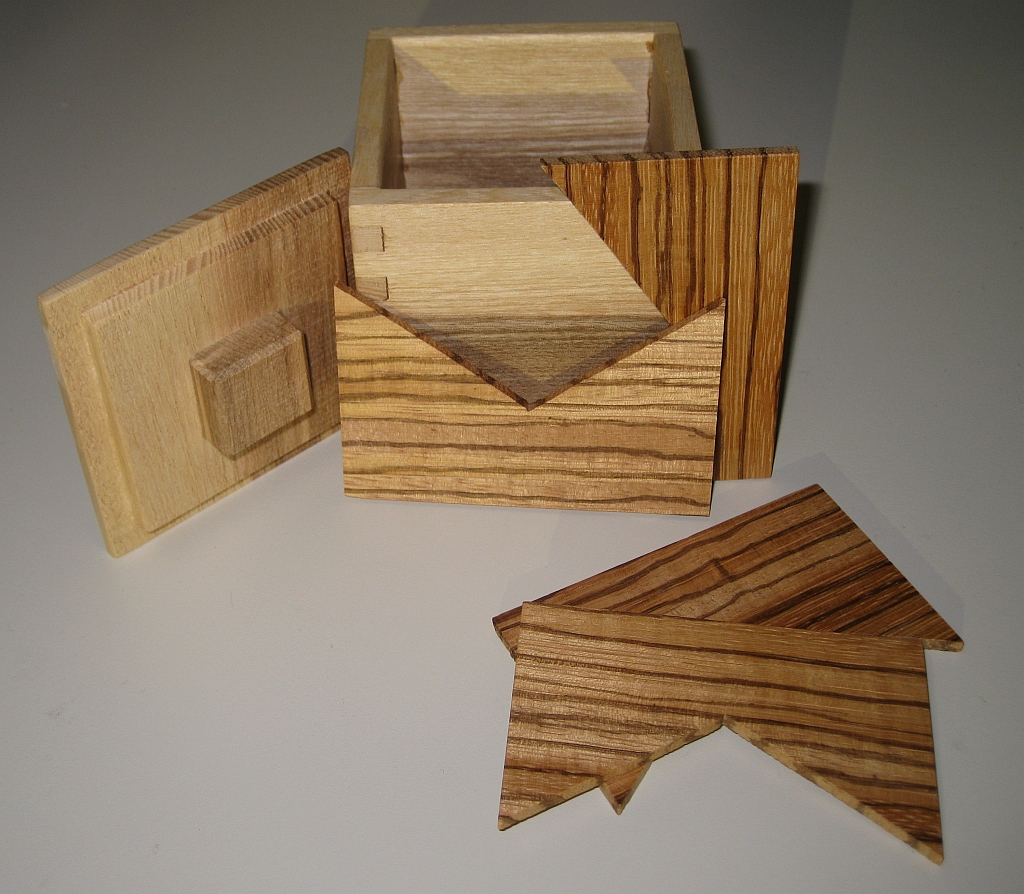
The puzzle Brian sent on was MMMM’s designed by Hirokazu Iwasawa. The idea for this puzzle is simple enough. Place the four identical ‘M’ shaped pieces into the box, and close the lid. The lid is designed so that it fits snugly onto the box, and contains an inset block which fills some space inside the top of the box. Brian’s version of this puzzle is beautifully made with a snugly fitting box, and the four M’s made from Zebra Wood.

Your first thought is that this shouldn’t be possible. The pieces are both longer than the box is wide, and tall so it doesn’t look good for a simple solution. The height of the pieces is almost exactly the width of the internal dimension of the box, so it’s a snug fit, and not a lot of room free, or so it appears. There’s a good few ways in which you can put all four pieces into the box, but only one way in which the lid will sit closed on top of the box.

You require a little bit of out of the box thinking on this puzzle, but it does provide a nice challenge, and I have found it very satisfying to open the box, and tip the pieces into an unsuspecting person’s hands then ask them to put the pieces back in. Doing this adds the extra challenge that they know the pieces were in there to start with, so it has to be possible, but doesn’t let them see the solution by opening the box themselves. Maybe there is a cruel streak in me somewhere?

Everyone I’ve given this to has really enjoyed the puzzle, and Brian’s version is very well made. Thanks for sending me this puzzle Brian. I really appreciate it, and it is a very welcome addition to my collection. Look out for my review of Brian’s Convolution soon. I highly recommend you browse Wood Wonders, there are some beautiful puzzles there, and Brian’s craftsmanship is excellent.

Pagoda Puzzle boxes

After the most recent Puzzle Paradise auction had finished, I was in the site looking at the details for the Stickman #2 that I’d won, and a few items which hadn’t sold popped up again. Two of them were Matt Dawsons’ Improved Pagoda Puzzle Box, and Pagoda Puzzle Box #3.

My fiancĂ©e saw these, and really like the look of them. Then asked me to get them. Both. After I’d picked myself up from the floor, I did just that!

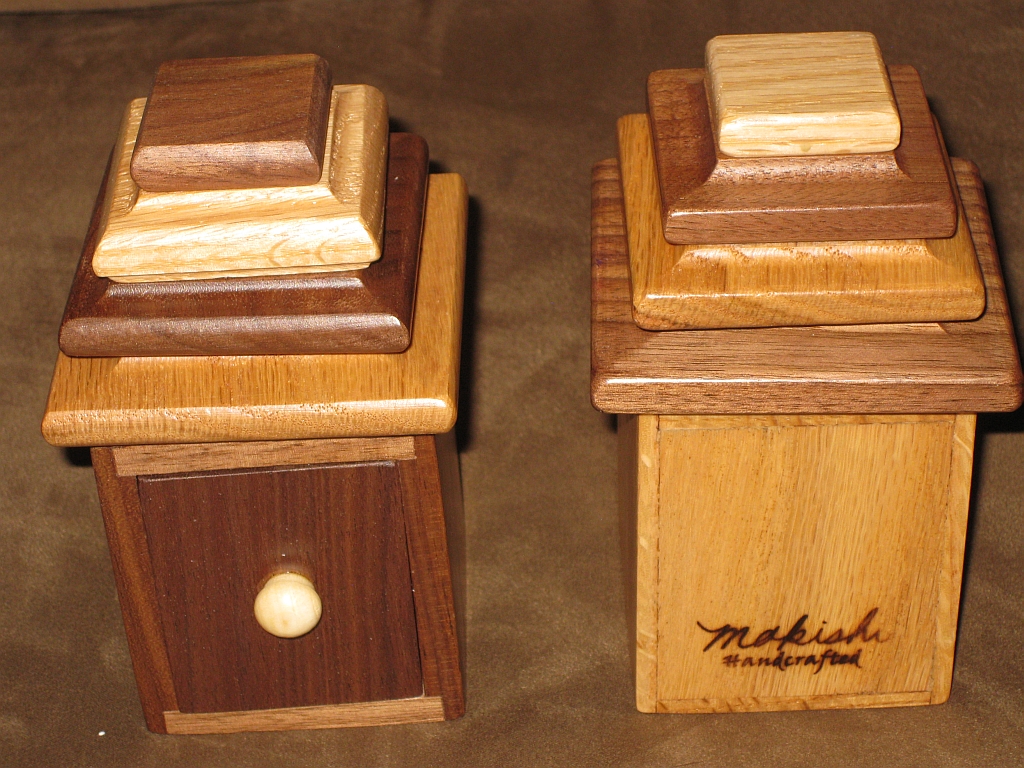
Pagoda puzzle boxes showing Makishi's Signature

Pagoda puzzle boxes showing Makishi's Signature

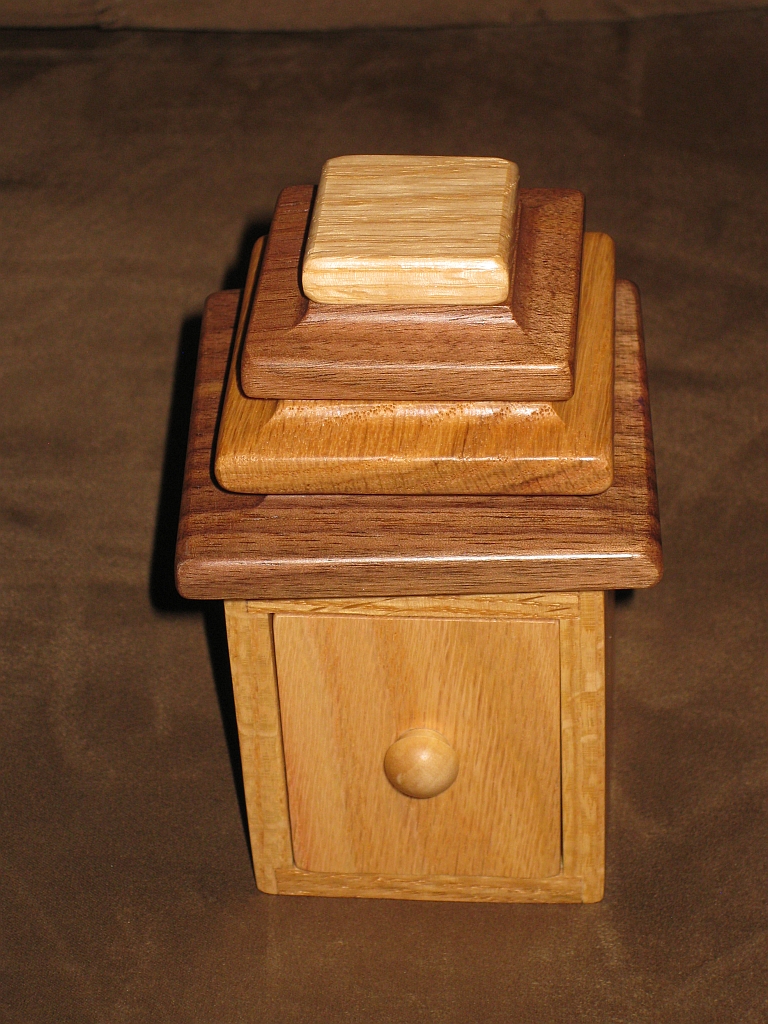
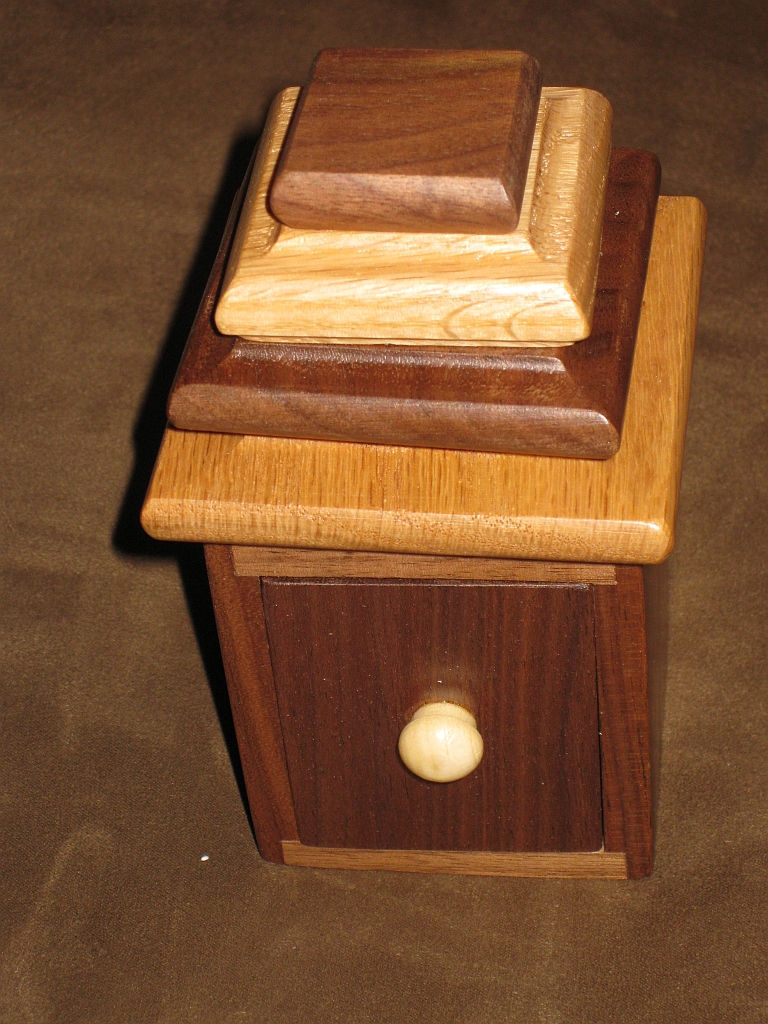
Both boxes are designed by Matt, and built by Makishi. Makishi has signed the back of both boxes as can be seen on the shot of the back of the Improved Pagoda. Each box is limited to 40, and are beautifully made. Makishi has done an excellent job on these, and they look like a matched pair. The object on both boxes is to open the drawer that can be seen a the front of the puzzle. The boxes are made from Red Oak, Walnut and Maple, giving the boxes their striking appearance. The boxes both measure 5.3125 inches high, by 3 inches square.

Improved Pagoda Puzzle Box by Matthew Dawson and Makishi

Improved Pagoda Puzzle Box by Matthew Dawson and Makishi

The Improved Pagoda Puzzle box is an improved design from the one submitted to the IPP 29, hence its name. The box is a sequential move puzzle box, requiring 13 moves to open. You open it by raising and lowering the topmost section of the pagoda by spinning the lower two sections. The design is quite clever and is executed in such a way that it’s quite easy to get turned around and close the box again rather than open it. It took about 15 minutes for me to open this one, as the last couple of moves eluded me. This is where keeping track of what you did is really essential, otherwise, you’ll go backwards rather than forwards. After opening the box I spotted a smiley face drawn on both the inside of the box and the drawer, which can be fully removed from the pagoda. I have to assume that these are marks Makishi added to keep the drawers and boxes together while making them. It’s a nice little touch and I’m quite glad he didn’t remove them. I’ve already found myself doing exactly the same thing when working on my own puzzle designs!

Pagoda Puzzle Box #3 by Matthew Dawson and Makishi

Pagoda Puzzle Box #3 by Matthew Dawson and Makishi

The Pagoda Puzzle Box #3 which uses the Walnut as the main wood for the body is a slightly more challenging puzzle, requiring 25 moves to open it. The same basic rules apply for this box, with a few additional steps added to make things just that bit more challenging. This is a really nice puzzle, and I do like the extra complexity added. For myself this is a better challenge than the Improved Pagoda, however the Improved Pagoda is less frustrating for newer puzzles, or non-puzzlers. (We bought the Improved Pagoda for my son who has shown an interest in puzzling having watched me, so it’s simpler opening allows him to find the solution without getting annoyed).

If you’re a serious puzzler, I’d recommend the 25 move box over the simpler 13 move box, but as a pair, these look great together!

You may still be able to get these from Puzzle Paradise currently, or get in touch with Matt Dawson.