A little while back I wrote about the process of turning a clear sleeve for the Revomaze puzzles, however I hadn’t really completed the project at that time. I didn’t have springs, and I was still trying to figure out how to put a spring in there so that I could complete the project and have a fully working sleeve. I’ve now finished the process, found springs, a way to put them in the sleeve, and have a set of fully working sleeves. Read on to find out the end of the story…
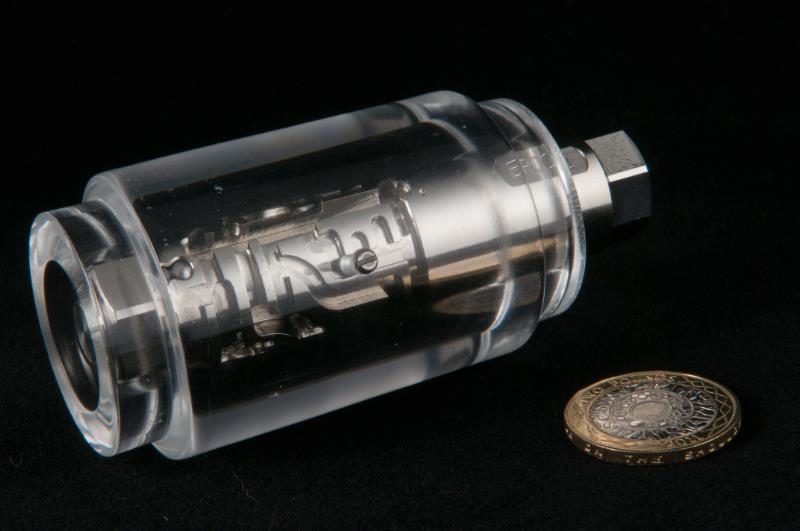
Thanks to Allard for the excellent image above. For more of his thoughts and a clear perspective, go have a look at his blog.
Before going off and making many more of the sleeves, I had to make sure that it was possible to make it into a working puzzle. That meant I had to solve the issue of the spring. From the Revomaze website, there is a pin and spring kit listed in case you managed to lose the set from your puzzle. Sadly they were showing out of stock and to be fair, it was a fairly expensive route to take, given that I only needed the spring. I decided to contact Chris Pitt, to see if he could help, or at least help out with dimensions of the spring and also how deep the spring hole is drilled into the sleeve. Sadly I never did receive a response back from Chris, so I had to look at alternate avenues.
Fortunately, a good friend had a spare spring or two and offered to measure it for me so that I could try to find a replacement. He even went so far as to measure the length compressed, and of course managed to have the tiny thing launch itself from the calipers and get lost in the carpet.
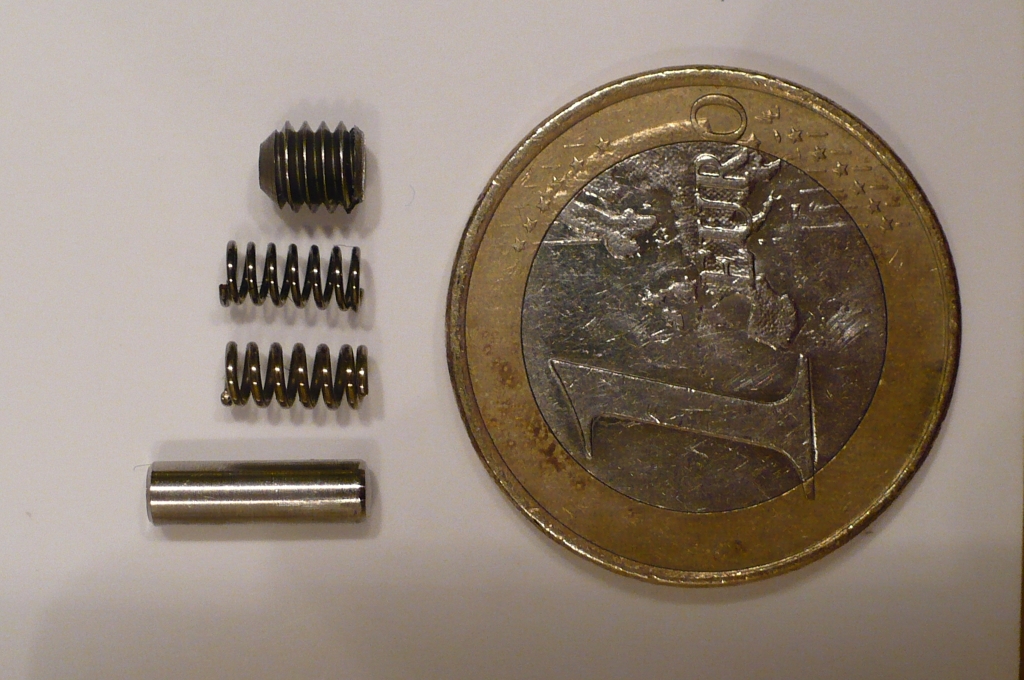
It turns out that the spring measurements are: Outer diameter 2.90mm, Length 5.98mm and Compressed length 3.9mm. It really is tiny, and therein lies a problem. It’s a completely custom size. I spent a lot of time hunting online spring makers to get an exact match (and that’s without knowing the compression load) and just couldn’t find one. I did finally get something that’s very close and decided to settle on it, but even then it wasn’t cheap. To buy just one of these is $7 each! The price drops as you order in bulk, but still not a cheap part.
As you can see from the photo above, the spring I found is slightly thinner in terms of the wire thickness, but pretty close in the other dimensions. The 1 euro coin should give you a feel for just how small these are.
A week later the spring arrived, and I was a step closer to a working maze. I still had the issue to work out the drill depth for the spring/pin hole. While I had been waiting there was some talk on the Revomaze forums about how to do this, and Thayneq suggested having the pin/spring being removable. Well I went off and experimented with a tap to be able to thread the outer sleeve, and put a screw plug in there. Turns out that a 6-32 tap is too small for the pin, and a 8-32 is too large. In the end though this worked to my advantage. The pin itself is 2.90mm wide, so I was able to drill a hole all the way through one side of the sleeve for the pin, then drill 3.7mm using the larger drill bit to take an 8-32 thread and plug.
This actually solves three problems. Obviously the pin is now removable, so if anything goes wrong when you’re solving a maze, just remove the pin. Secondly, I’ve not had to drill all the way through the sleeve from the other side and then plug the hole. This is the way the official sleeves are made, and the plugged hole is then covered with the Revomaze sticker. As you know I’m not affiliated with Revomaze in any way, and don’t have stickers, so the ‘plug’ was just going to be an eyesore. I’m also pretty sure that I don’t have a long enough drill bit to get all the way through either, so that was a nice bonus. Finally, the screw plug allows the tension of the spring to be adjusted so that the movement in the maze ‘feels right’.
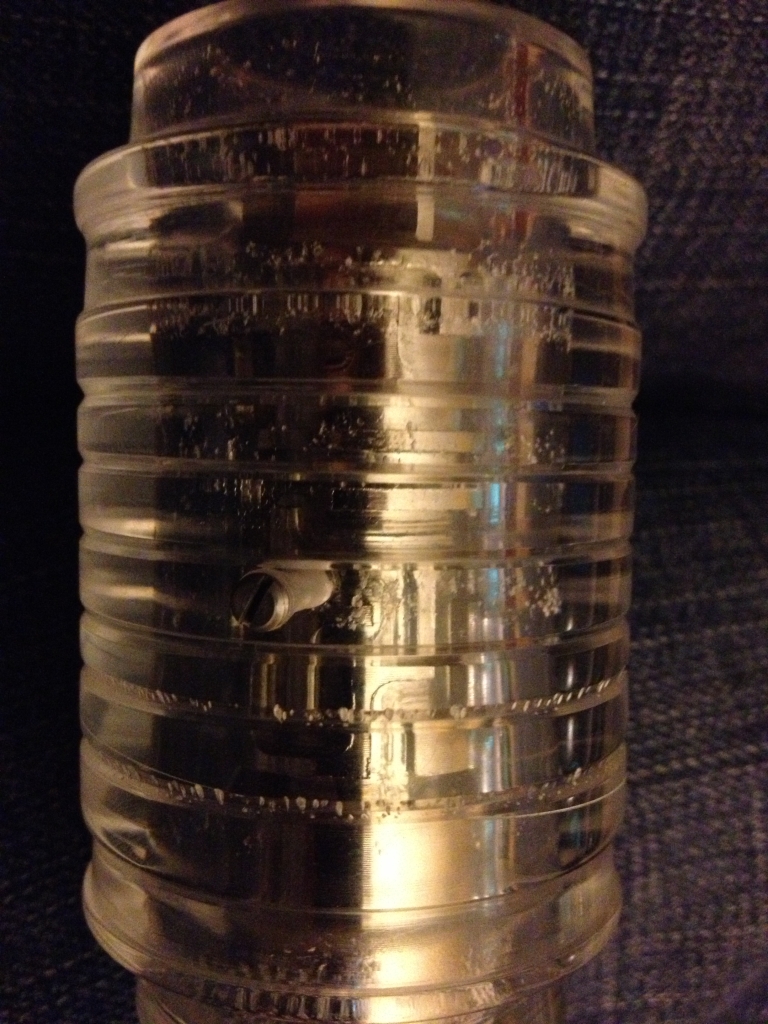
Note: The Image below is deliberately dark to ensure that no solution details for the maze are given away.
With all the pieces in place, I had to take the plunge and try it on one of my test sleeves. I put the ridged sleeve I had in the vice, carefully drilled it, and then re-drilled for the plug. Taking the pin from my blue maze, popping that in the hole, followed by the spring and then the plug I was able to check the compression of the spring, and compare that to the depth the pin sat on the official sleeve. After some fine adjustment of the screw until I was happy, I took the pin back out; assembled the blue core and inserted it into the sleeve.
Having now sent a few of these out, my friend with the spare spring has tried both the official spring, and the one I found, and prefers mine because the spring compresses a little more meaning that the plug can be screwed in a little further. He’s also done some other testing, but I’ll come back to that later.
After a little jiggle the pin dropped into the hole, and I was able to turn the maze and reset it. That familiar click left me with a huge grin on my face, and of course this time I could see exactly what had happened. The question now was whether the maze was solvable!
Very cautiously, I started to navigate the maze. Of course I’m now holding the puzzle ‘upside down’ and looking at the pin rather than the sticker. Despite working with the ridged sleeve, and there being a fair bit of distortion along the length of the maze, the section under the pin is perfectly visible, and it’s easy to navigate. At the first trap, I fall off, and hear that familiar click. Somehow it seems even more satisfying being able to see the pin fall off! After a couple of tries, I make it through the maze, past the tricky section with ease, and the pin easily drops back into the core, and I can remove it from the sleeve. IT WORKS!
As with anything in science, doing it once isn’t good enough, it has to be repeatable, so after picking the pins up from the floor (Ed: You’d think with the number of these I’ve solved I’d not drop the pins by now) I re-assembled the core and put it back in again. Playing around I tried moving to various parts in the maze, and dropping into a reset and restarting; each time grinning because I was controlling the click. Having navigated to the end again, I tried to remove the pin, and found it didn’t want to come out. Puzzled I tried the usual tapping and jiggling, but it wasn’t dropping. Of course I could see the pin and couldn’t work out what was stopping it. No worry though I unscrewed the plug, and removed the pin that way …
… Then realised what an idiot I’d been. Rather than turning the puzzle ‘upside down’ so that the pin fell into the core, I’d been trying to get it to drop into the sleeve hole. Just shows how being able to see what you’re doing doesn’t always help!
So with the proof of concept working, I took a quick video to show the operation and sent that to a couple of close friends. Now I had to start making these as the requests were coming in pretty quickly!
Something which had bothered be about the initial two sleeves I’d made was the ‘bubbles’ which are visible on the inside of the sleeve. This occurs due to the high temperature created by the friction when drilling out the core, but I wanted to try to reduce that and get as close to a clear, unobstructed sleeve as I could. With a little bit of work, and some liquid cooling for the drill bit I think you’ll agree I succeeded, and the sleeves are now much clearer. Just look at that shot at the top of this post from Allard. His images really show off how clear the sleeve is, and I have a good few more from him that I just can’t show as they give huge hints to the solution of the revomaze shown.
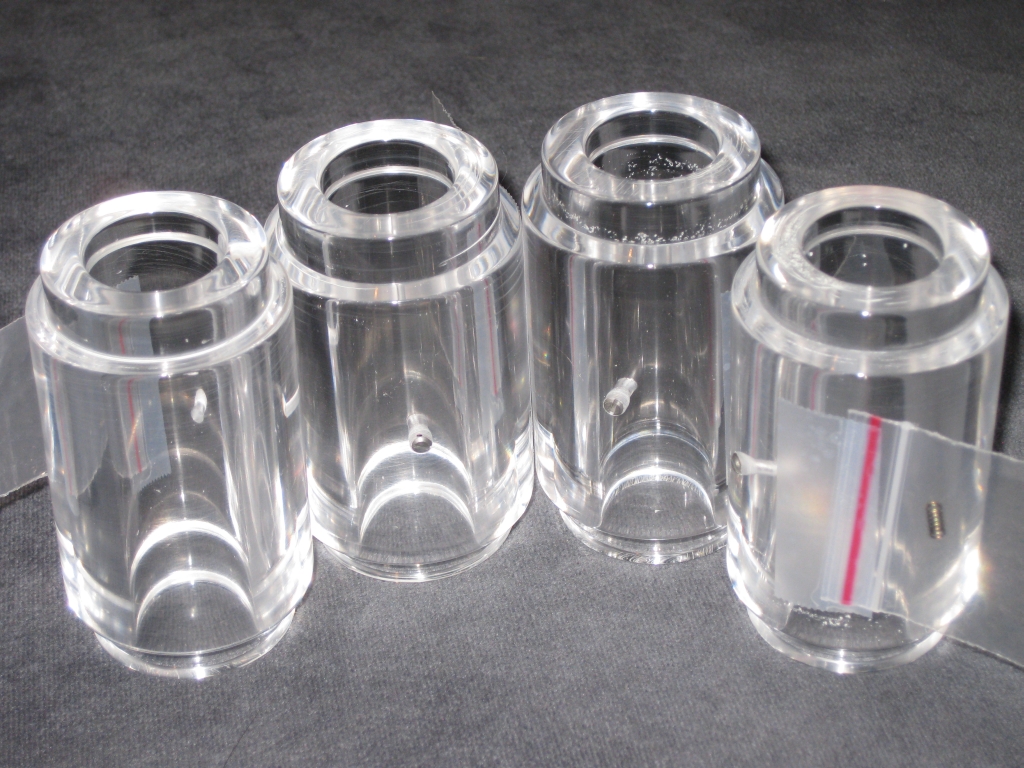
As you can see, production is now underway. Given that these are all hand turned, and finished, it still takes a good few hours per sleeve, but from the feedback I’ve had from the people who have one, they’re pretty happy, and that makes me pretty happy too.
One thing to point out is that the tolerances on my core are slightly larger than those from the official source. Nothing in the Revomaze design is standard sizes. The core is custom, the sleeve is custom, the spring is custom, the pin is custom, and as such you can’t buy tools which match the dimensions. As such I have had to make things as close as possible, but close is not exact. Having played with some of the mazes, Silver, Lime and Handmade as specific examples, there are elements in these mazes which do not work exactly as expected due to the larger gaps in the internal sleeve dimension. It is possible to solve these mazes, but some extra care is required, and some parts of the solution become trickier than with the official sleeve. I do know that Blue, Green, Bronze, Black, Orange, Gold, Red all work with no issues and really look quite stunning when displayed in these sleeves.
There is one further extension that I am looking at. I had a request for transparent colour matched sleeves for each maze. That requires custom casting of coloured acrylic, so for now it’s further away from reality. I do have paint based pens which are designed for working on acrylic and may add colour bands to the sleeves so you can see which maze is in a sleeve from a distance, but that’s still to come.
Hope you’ve enjoyed the look at the project, and keep an eye out for a time lapse video of the process coming soon…


“Pretty happy” would be a massive understatement, Neil! AWESOME work – well done! (and Thanks again for making our wishes come true!) – allard
Thank you Neil! I feel very privelidged to be in the first group to receive one! It works a dream! Hopefully I will finally have the courage to reassemble my silver now!
Kevin
Puzzlemad
Don’t you intend to make some more?…That would be nice 😉
By the way are they enough resistant to bear the friction with the pin, the bear the movement and above all to be the weight of the big metal rid where the maze is?
I don’t plan on making more of these as they were very time consuming, and I’m not a huge fan of working with acrylic. They certainly have no issues with the friction from the pin and the sleeves are more than strong enough for the metal cores.