I’ve been slowly adding to my collection of trick locks over the last few years, and first saw the Transparent Lock by Gary Foshee a couple of years back, but sadly missed out back then as they sold incredibly quickly. I was lucky enough to be able to borrow one, and solve it, and at that point I kicked myself for not being quicker off the mark in trying to get one.
When I heard from Gary himself that Wil Strijbos had some with him at IPP 35 for sale, I was pretty quick in finding Wil and asking if I could please lighten his luggage and take one off his hands.
Transparent Lock by Gary Foshee
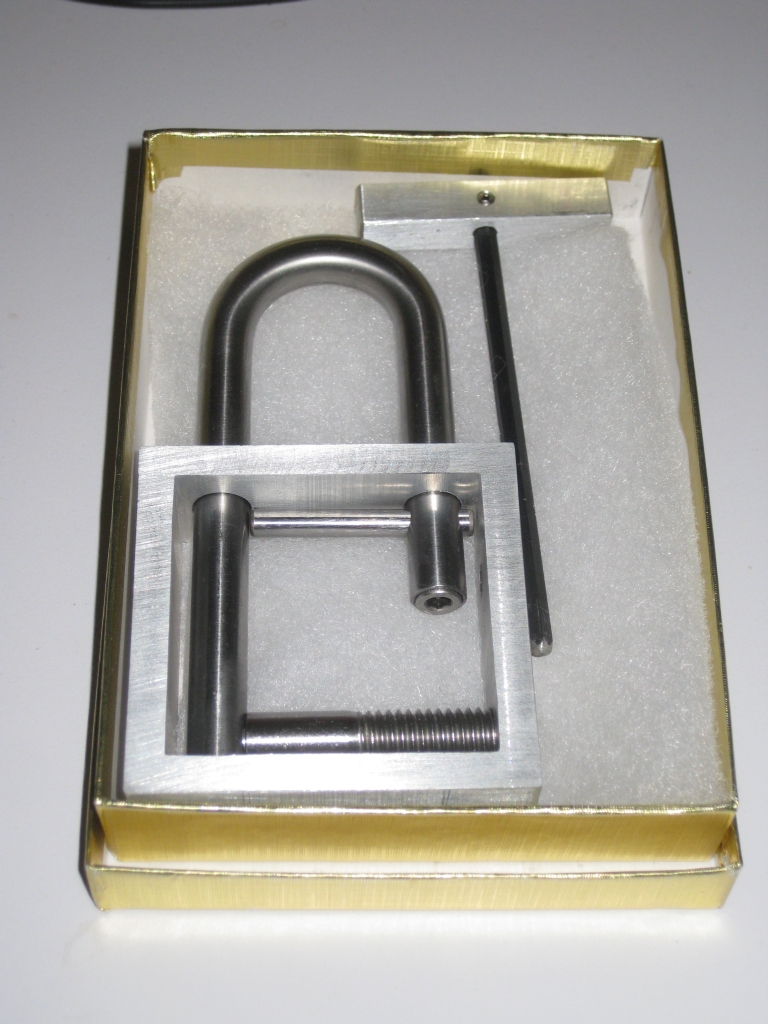
Transparent Lock boxed with Gary’s Signature
The puzzle looks exactly as you’d expect for a transparent lock (or as it’s also known, the Open Lock). It looks pretty simple, with a square frame, a shackle, and a few bits and pieces attached to the frame. You also get a handy hex wrench with a handle, which given that it comes with the puzzle, we can safely assume is not considered an external tool.
The puzzle comes in a fairly plain gold box, and as you can see, mine is the 2015 version of the puzzle. It’s the same as the older version, so no need to try to hunt one of these down if you have the first release version. In the bottom corner is Gary’s little cartoon signature, which looks uncannily like the man himself.
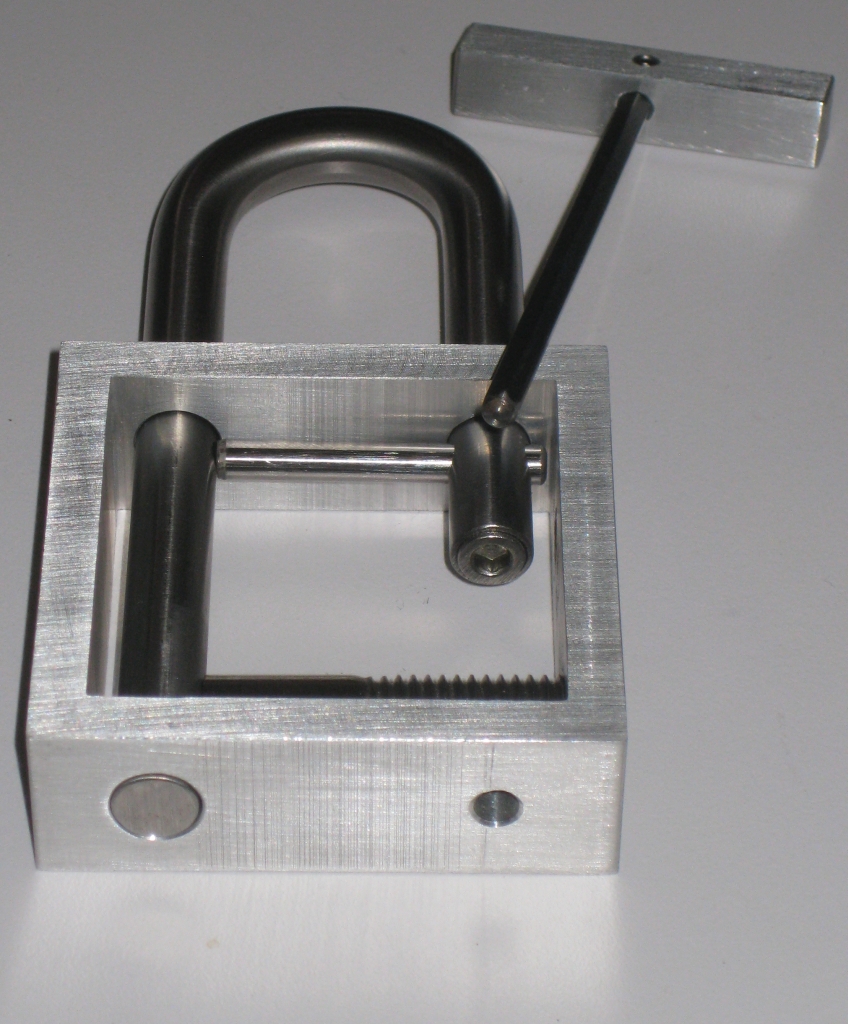
Made almost entirely from aluminium the puzzle has a fairly rough look to the body and the hex handle, showing lots of tool marks, while the rest of the puzzle has a polished and clean finish. It’s a little disappointing, given the quality of some of the aluminium puzzles out there, and some of Gary’s other work I’ve seen. With a little polish I’m sure the frame could be cleaned up, so it’s really a small nit, but given the price of the lock, you do expect a certain level of finish.
Measuring in at 2.5″ x 4.5″ x 0.8″ it’s about a standard size for a lock, and it has a good solid feel to it. I doubt that you’d damage much other than your toes if you dropped it. Given how solid it is, it’s easily a puzzle that you can pass round and let people play with, and there’s really not much they can do wrong.
These are fairly limited in production because Gary has to make the shackles himself, and having talked to him about them, they’re a real pain to make. Apparently they’re cold forged and the process is pretty difficult to get the results he needs. Let’s just say that he’s not the biggest fan of making these!
Could this be useful?
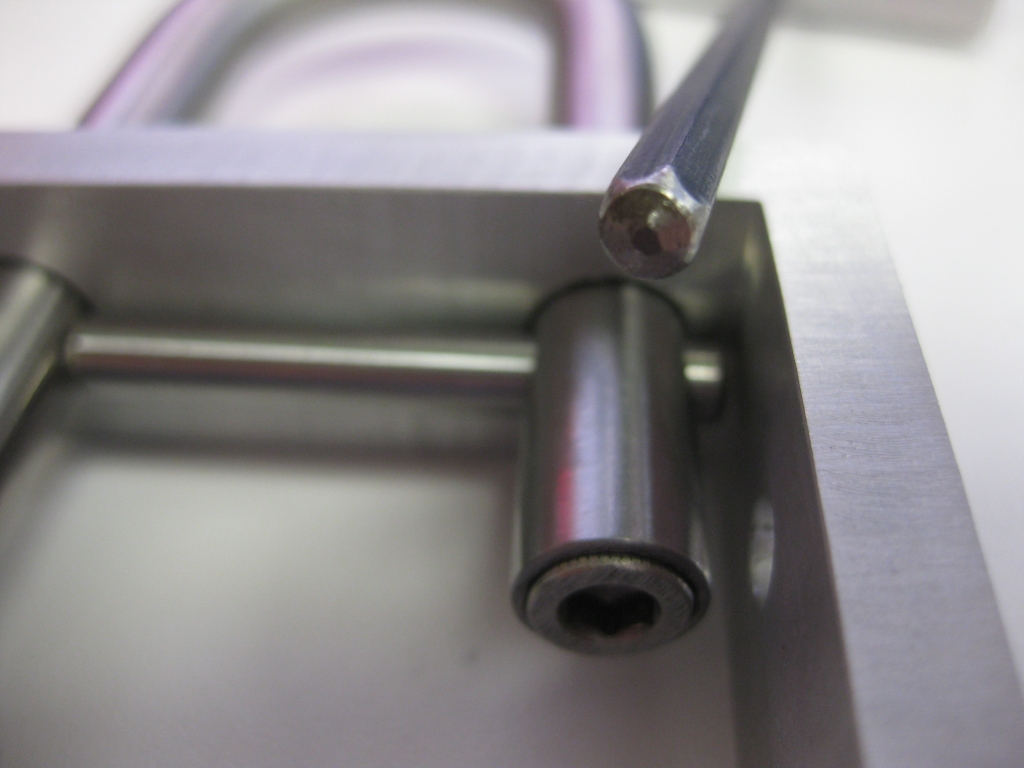
Looking over the puzzle, there’s a couple of fairly obvious things to try, like the screw thread at the bottom of the lock. You will also notice the hex head inside the shackle, and you’ll probably make the obvious leap that it’s useful, and that you should probably do something with it. Unfortunately, it’s not going to be quite that easy to open the shackle, and if we’re honest you wouldn’t want it to be that easy.
Gary helpfully rounded the ends
At this point, you’re probably yelling at the screen “Use the hex tool”, and you’d think that would be useful. Unfortunately, Gary has very helpfully rounded over the ends of the hex tool, making it entirely useless. Of course there are things that you’ll find useful, and the puzzle has much more hidden around it than you’d think at first. There’s a reasonable sequence of steps to discover various tools and useful bits that will get the puzzle open.
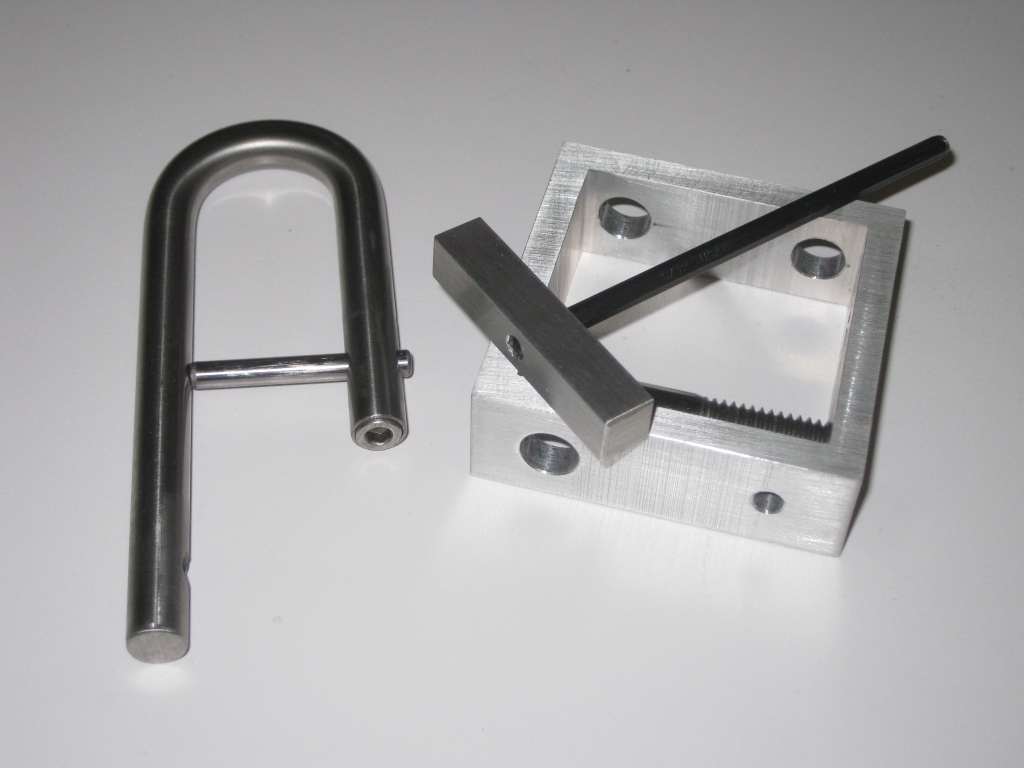
Once you remove the shackle from the frame, you can entirely disassemble the puzzle and leave yourself with an array of parts on the table. I think this is one of the reasons I like the puzzle as much as I do, since it really lives up to its name. Once open it really is transparent.
Finally open
While it’s not a difficult puzzle, and took only a few minutes for me to open the first time I played with one, it is well made, and it’s a fun puzzle. If you’re looking for a challenge on the order of a Popplock, then you’ll want to look elsewhere as I feel you will probably be disappointed.
Having been trying to get one of these for a while, and missing them at auction I’m happy to have picked one of these up. It’s a great addition to my collection, and one of Gary’s puzzles I’m very happy to have. Allard was able to get his hands on one of the original run, so head over here to read Allard’s thoughts.
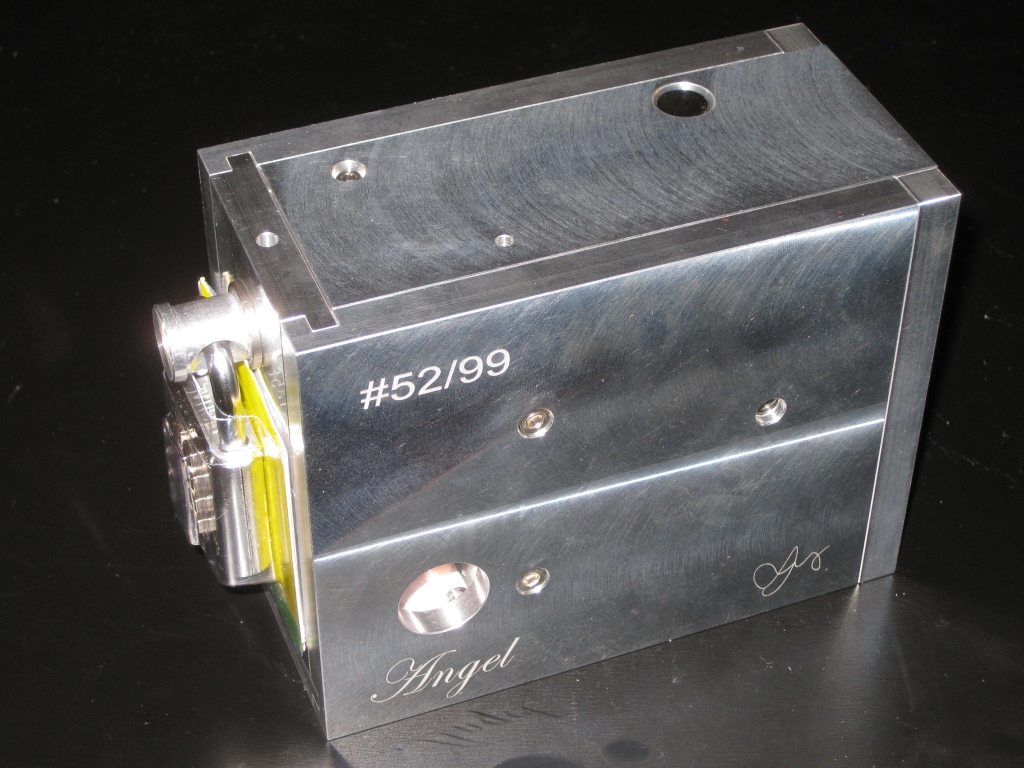
Wil Strijbos is a well-known name in the puzzle world, with his metal puzzles being beautifully made, and highly sought after. Not only does he design and sell his own puzzles, but he seems to be able to find rare puzzles which other people, myself included, seem near impossible to find. I have no idea how he comes across some of the items, but all you need to do is to ask. When Wil announced his latest sequential discovery puzzle “The Angel Box” with a fairly long story about its creation, it sounded pretty interesting, and given enough time, one found its way to me.
The Angel Box from Wil Strijbos
If you’ve ordered a puzzle from Wil in the past, you’ll know immediately when it arrives, as the package is always completely covered in a layer of brown packing tape. After that, there’s various quantities of bubble wrap and newspaper to keep the puzzle safe. The Angel Box takes the packing one step further, and you’ll find the puzzle itself wrapped in the very attractive birthday gift style box, complete with bow and gift tag.
An early birthday present
Look what’s inside
As you’ve probably realised already, this is a big puzzle. At 6.25″ x 4.33″ x 2.75″ and weighing in at a whopping 1.9Kg it’s fair to call this heavy metal. Made from some pretty serious aluminium, while the puzzle isn’t a solid block, it is solid. I certainly recommend puzzling with this one at the table. Not just due to the potential damage you could do from dropping the puzzle, but also due to the tools that you’ll start accumulating as you work through the puzzle. The small peep-hole in the side gives a hint of the goal, to remove the Angel from the box.
Your first challenge is the padlock on the front of the box, and as you’d expect from a puzzle, the small metal tag held in the shackle doesn’t contain the code you need to open the lock. That would be far too simple, and if you’ve read any of my other reviews of Wil’s puzzles, you’ll know that opening a puzzle for the first time tends not to be simple! At least the plate gives you the clue that the code is 4 digits which should make life a little easier for you.
Before too long, you should have the padlock removed, and be able to make some progress, although it may not seem helpful at first. At this stage, there’s not a lot of options to progress, and as with any good sequential discovery puzzle, you’ll quickly find a few tools, which in theory should be useful. Finding out what to do with the tools you’ve found is all part of the fun, and take heed from Wil’s own guidelines, that the padlock is not needed to solve the puzzle. Don’t be tempted to use parts of it in the solution. He gets very upset if you use the padlock as a tool!
Looking around the puzzle, you’ll find a number of small holes scattered about, and figuring out how to use the tools you have, and the correct sequence to use what you’ll find as you explore is the key to progress. There’s a great sense of achievement as you discover how the mechanism interacts, and finally make the next step toward progress in solving the puzzle. That’s lock #2 down.
That done, another tool will almost magically appear, and allow some fairly obvious progress toward opening the box. Lock #3 passed. Then things get interesting, and this is where I lost one of my tools. There’s a little flaw in the design of the puzzle, which allows you to lose the tool you need, and potentially prevent part of the mechanism from working correctly. To my mind, it would be a fairly simple issue to fix, but for now, a little care is needed not to lose a key tool. With this part of the puzzle carefully navigated, you’ll have lock #4 solved, and the goal should be in sight.
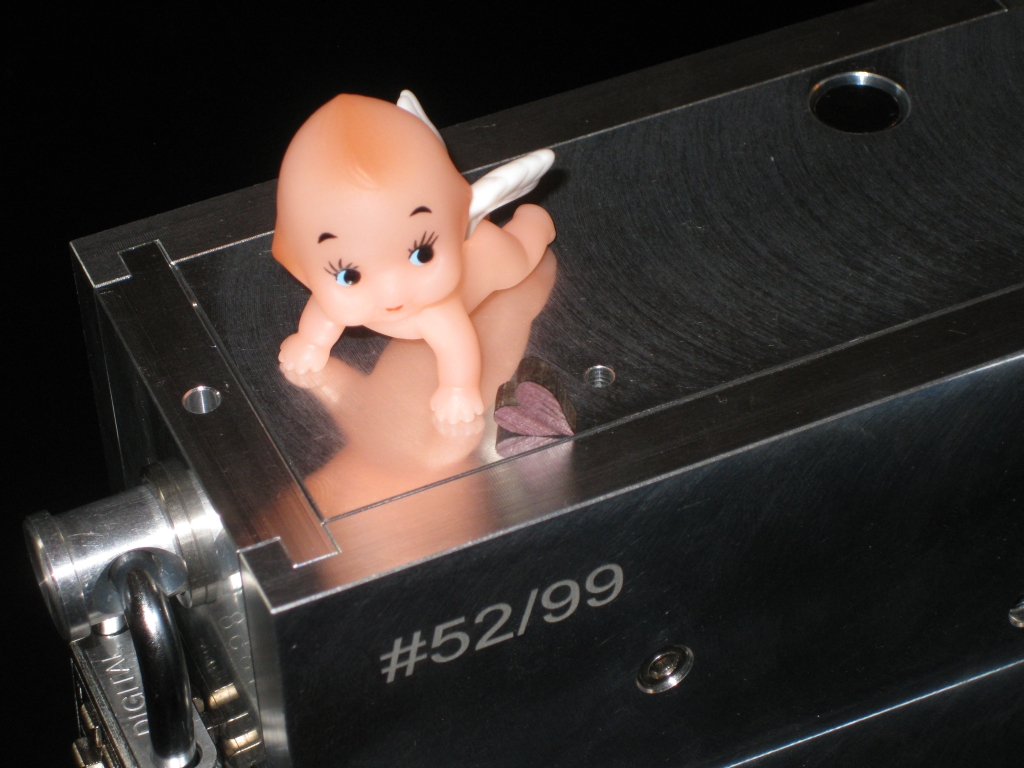
The Angel in the centre of the box is within grasp, but there’s a final lock, a cage, keeping her locked away. It shouldn’t take you long to get past this final lock and release the Angel. Lock #5 solved.
The Angel and her heart
With the Angel free, you’re not quite done. Freeing her heart is the last piece of the puzzle. A small note located with her will leave you with a final set of instructions… but I’ll leave it for you to decide whether to call the number or not. Perhaps Google it first!
Overall The Angel Box is a nice puzzle. Far simpler than I had thought it was going to be, and it took me far less time to solve than I had perhaps hoped for a puzzle at this price. Start to finish I had the puzzle open in 10 minutes so it’s certainly not a puzzle which will have you stuck for weeks. That said, my solve time may not be representative of the mileage others have had. Now my challenge is whether to display her inside her birthday box, or as the attractive aluminium puzzle that she is outside the box.
Back at IPP 32 in DC, I had the pleasure of playing with a puzzle box from the incredibly talented Michail Toulouzas. I was fortunate, and opened the puzzle in a few minutes, so feeling quite smug, went to close the box to leave for the next puzzler only to find that the door wouldn’t shut. I realised at that point that I wanted one of these.
The Vault
Returning back from IPP, I wrote to Mike, and kindly asked that if he made any more if he’s consider making one for me. I was pleasantly surprised when he wrote back telling me that in fact he was making some, and he’d added me to the list!
Around a year went by and in various conversations with Mike, he assured me (and a few other puzzlers) that he’d not forgotten about us, and was still working on the puzzles. IPP was coming round again, and he had puzzles to make for Japan, so he’d delayed ‘The Vault’ a little while he worked on those. Now just before I’m due to get married, I get an email from Mike saying the puzzle was finished and on its way to me! Arriving just a day or two before my big day, it was a great wedding present.
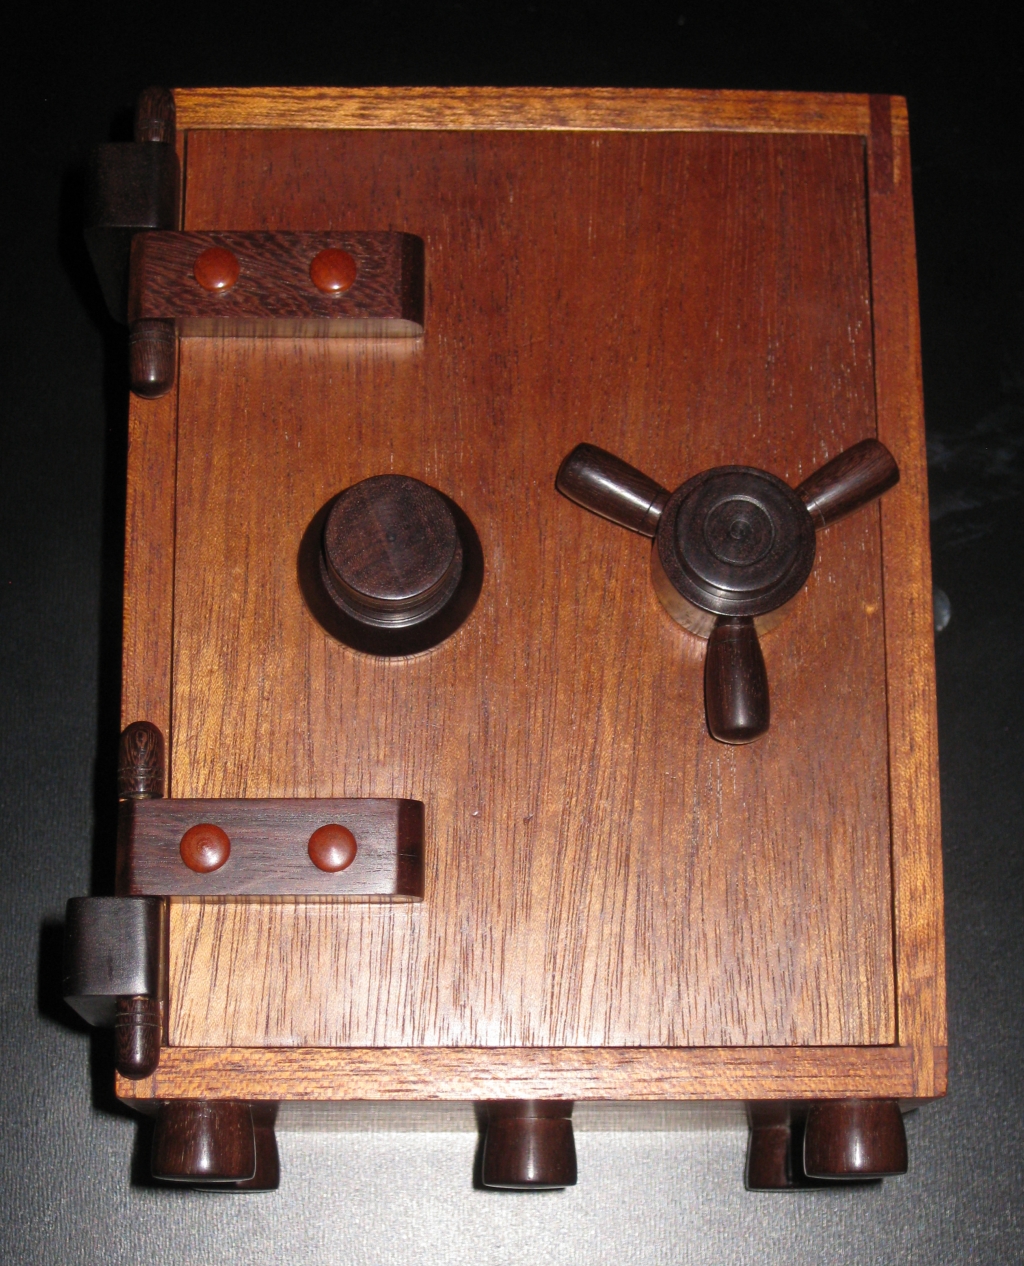
Front view of the Vault.
The puzzle itself is 8″ x 5″ x 4.3″ and is made from Ebony, Mahogany and Chakte Viga. Mike’s attention to detail is nothing short of breathtaking, and everything down to the rivets in the hinges is beautifully finished. It’s instantly recognisable as an old fashioned safe, and it feels as sturdy and solid as you’d expect and old time safe to be. Details such as the turned feet, and combination lock handle have been lovingly crafted to really make you feel like you’re cracking a safe as you open it.
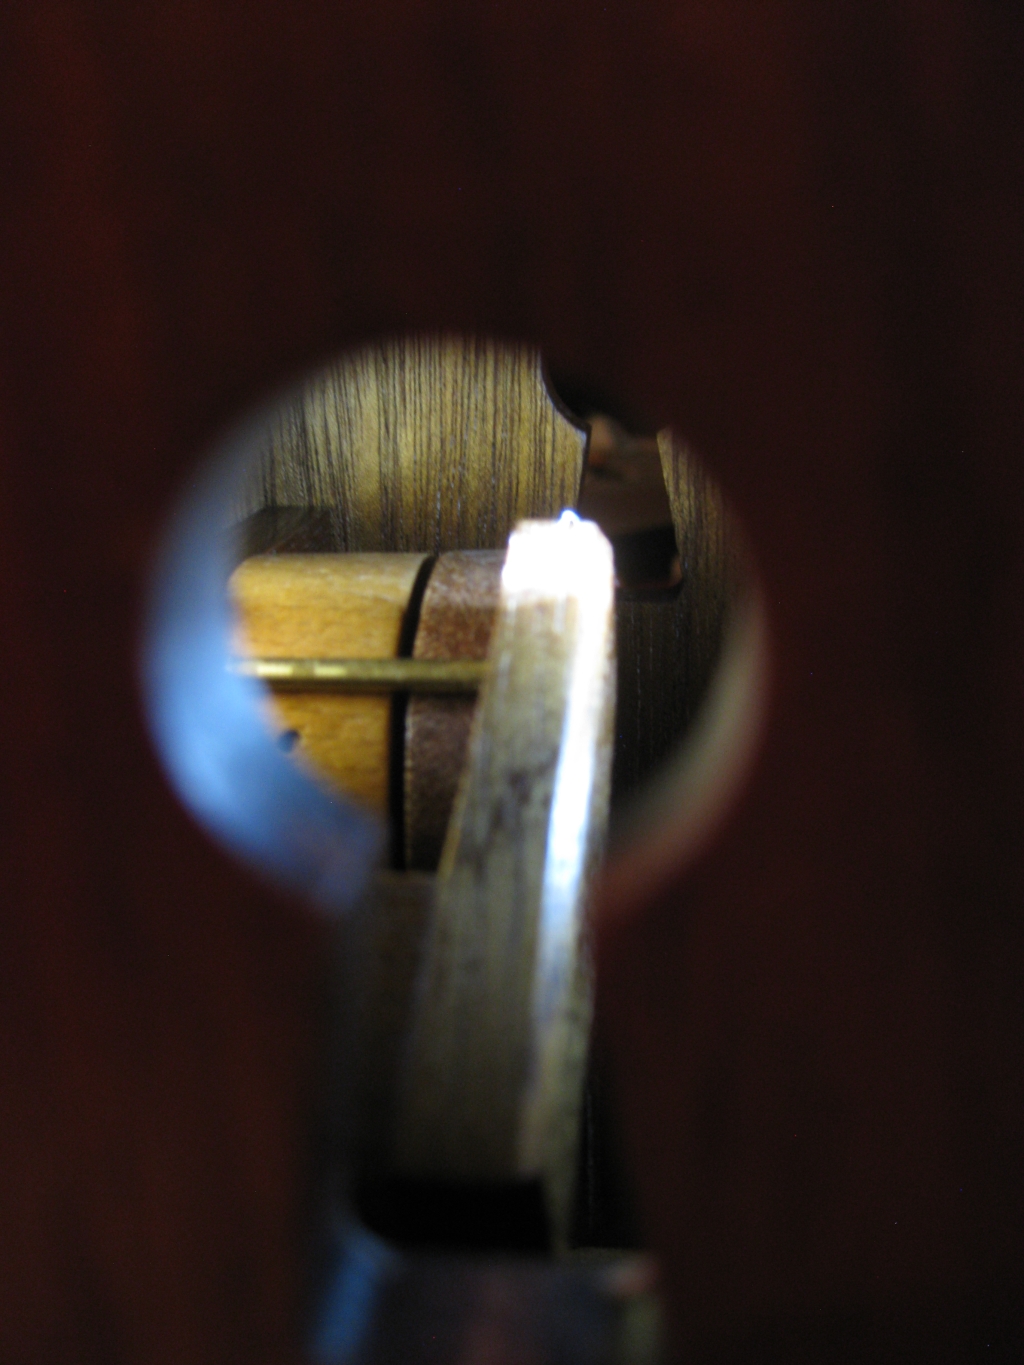
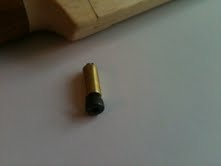
There is one other piece to the puzzle and that takes the form of a torch. It’s sized perfectly to fit into one of those keyhole slots in the side of the puzzle, leaving your hands free to play with the knobs on the front, and able to peer into the inner workings thanks to the light provided.
Peering into the inside
After an initial inspection there’s only the two knobs on the front which will do anything, and you can see quickly from peering inside what they do. The handle on the right is attached to a brass rod which will hopefully open the door, and the tumbler on the right rotates something inside. Turning that knob will reveal something useful, but that alone isn’t enough to open the door. Something more is needed and it takes a little bit of experimentation to figure out how to control what’s happening on the inside from the knobs on the outside. That done, you’ll get a satisfying clunk, and the door will swing open.
That reveals a key inside the puzzle, as well as exposing the inner workings and Mike’s signature. Given that you didn’t need a key to open the puzzle, what possible use could you have for one now that it is open? The key is held on the back wall of the vault and can be lifted out of its slot and inspected. Seems fairly straight forward, but no use is apparent. Putting it back, you can try to shut the door, but soon find out it’s not going to be that easy. Resetting the puzzle is every bit as much of a puzzle as opening it was. And that’s a good thing!
Without giving too much away, that key is very useful, but as you’ll soon learn there’s no way you’re fast enough to close that door before whatever is keeping it from closing resets itself, and any other attempt would leave you with the key not back in its original spot, neatly stowed on the back wall. There’s another simple but well executed trick needed, and it’s going to take some thinking outside of the box to solve it.
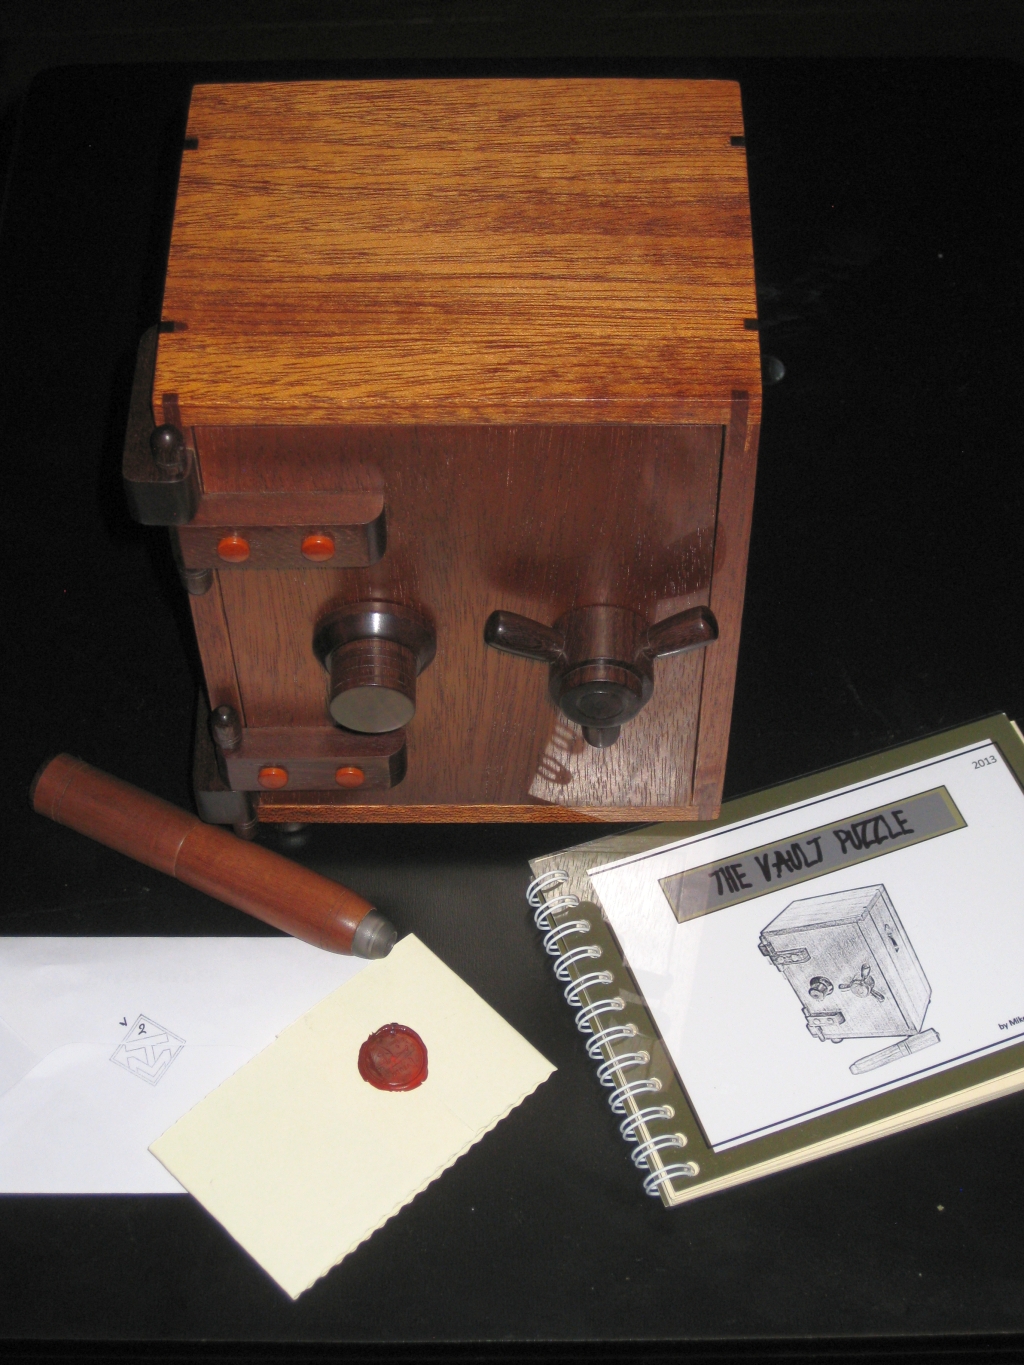
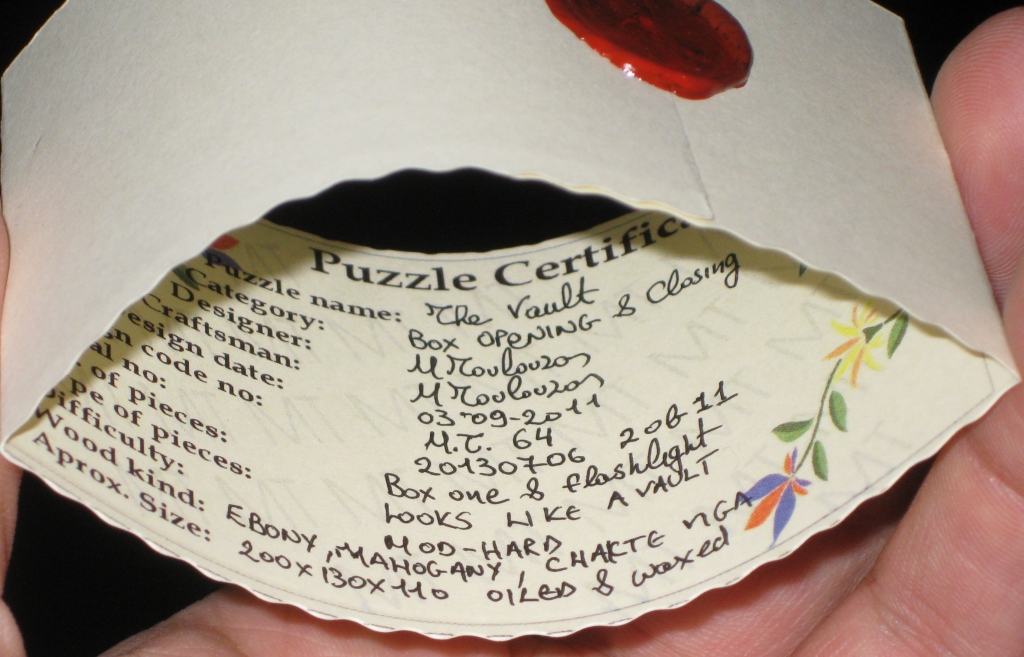
Puzzle Certificate
As you saw from the first image of the puzzle, it comes with a hefty puzzle book, describing the puzzle, and of course the solution should you need it. The other item in that first picture is the small card which has been sealed with a wax crest. That’s the Puzzle Certificate, and is a beautiful touch that really finishes the whole experience. Hand written in Mike’s flowing cursive it’s a great little touch.
Overall I loved this puzzle, and I’m pretty happy to have one in my collection. With only 16 made, 4 in 2012 and 12 in 2013, with the last being a unique selection of woods, and was auctioned in Puzzle Paradise. There’s also one special edition which mike made, #10 which will have a special locking mechanism, and be sent to the James Dalgety Puzzle museum. So if you happen to be there, look this one up!
If you want to see more of this puzzle, have a look at my video review below.
One of the puzzles I really liked the look of while taking part in the IPP32 Puzzle Exchange was Mr Puzzle’s Washington Monument. Brian’s description of the puzzle when he presented it, plus the really high quality and great look of the puzzle meant this was one that I went looking for on the day of the Puzzle Party, and was lucky enough to get one (amongst a number of other puzzles from Brian’s table that day!)
The Washington Monument by Mr Puzzle
It’s a good looking puzzle which sits at 5″ tall and the base is 2.5″ x 2.5″ which makes for a good sized puzzle. The puzzle is a very close replica of the Washington monument, right down to the lightning rod in the top of the tower, and the flags surrounding the base. Made from Queensland Silver Ash for the monument and a Western Australian Jarrah base there’s a good contrast between the woods, and it makes for a striking puzzle. Brian has also used this in the description of the puzzle which reads:
Washington Monument description card
“There’s Red, While & Blue on the flags. There’s the White monument on a Red base. Can you find the other Blue?
If you keep searching you’ll find it inside the puzzle.
And we’re not referring to the use of “blue” language or going “blue” in the face (excuse our Aussie slang) with frustration.
The object of the puzzle is to unlock and open it, find the blue, close and relock it. You’ll have solved the puzzle when you can complete these two stages.
All the tools you’ll require to do the puzzle are given with the puzzle.
The puzzle we’ve presented is a representation of the Washington Monument, right down to the lightening rod in the top, which can come out, so be careful not to lose it. You’ll more than likely need it to complete the puzzle.”
The monument spins freely 360 degrees on its base and you can hear a number of things moving inside the puzzle. Removing the flags, and looking into the drilled holes, you can see some metal pegs as you turn the monument, so it gives you an idea of what’s going on in there, but not how you’d solve it. In order to have solved it correctly, there’s two extra pieces of information that Brian gave you when the puzzle was exchanged (and now appear on his website):
“First stage:
Lock all gravity pins inside the round base of the obelisk so they do not move.
This will allow you to remove the obelisk from the base.
If you open the puzzle by chance then the gravity pins will still move freely; this is not the intended solution. The first stage is not completed until the gravity pins are locked inside the round base.
Second stage:
Unlock the gravity pins so they flow freely again. This allows you to lock the obelisk back in the square base.
You could find that relocking the puzzle might be more challenging than unlocking it was.”
So when I first opened the puzzle, I’d not completed this first stage correctly. The pins were still lose, and I had ‘got lucky’ in terms of opening the puzzle. Being able to see the insides actually didn’t help that much to be able to understand what I should have done, however I’d already figured out that there was something hiding inside the monument that I hadn’t used so far, and clearly that was key. After another 10 minutes or so playing with the puzzle and applying some physics (no I didn’t blow on it or spin it!) I had found out how the puzzle should be solved, and was left with the challenge of locking the puzzle back up again.
The mechanism is very clever and makes for a fun puzzle. I’m not sure how many people will solve it ‘correctly’ first time, but it certainly is a great mechanism, and very well executed. The puzzle received the 3rd Prize for the themed puzzle at IPP32, and it’s deserving of that recognition, both for its iconic look and for being a genuinely good puzzle. I’d recommend getting a copy of this while there are still some available!
I’ll be reviewing the other puzzles I picked up from Brian soon, as well as many more of the IPP puzzles, so keep an eye out for those soon.
The Opening Bat by Mr Puzzle is a pretty serious sequential discovery puzzle which was ten years in the making. When the puzzle was first released in 2010 I looked longingly at it, but had to resist the urge to buy one as I couldn’t justify it at the time. A year later, and Brian still had a few copies available. Well the money was burning a hole in my pocket, and even though I’m not a huge cricket fan (despite playing in my youth) I’d heard a lot of good things about the puzzle, so took the plunge and ordered a copy.
The Opening Bat by Mr Puzzle
A few weeks later, the puzzle arrived very carefully wrapped and I excitedly opened the box to find the bat, and wickets securely stowed along with a couple of other puzzles I’d ordered at the same time. To give you an idea of scale and the look and feel of the puzzle, I’ve put together the video below. Read on for my full thoughts, and a rather scary moment when I was solving the puzzle for the first time.
As you can see from the video, the puzzle is not small. The Bat measures 13.75″ x 2.3″ x 1.3″, the Oval is 7.25″ x 5″ and the wickets stand 7.9″ tall. Limited to just 50 copies, there’s not too many of these around, so I’m pleased to have been able to get one. Brian tries to use local Australian woods wherever possible, and The Opening Bat is no exception. Normally cricket bats are made from willow, as it stands up well to the impacts from the hard cricket ball. Unfortunately it’s not a great wood for making puzzles from. Brian uses Queensland Silver Ash for the blade of the bat in the puzzle. The handle is Tasmanian Blackwood and the Oval, Wickets and Bails are all Papua New Guinean Ebony. Overall it’s a stunning looking puzzle, and given it’s size certainly has a presence on my puzzle shelves. (Not to mention that I had to re-arrange the shelves somewhat to accommodate its height!) There is a small brass pin embedded in the base of the oval which matches with a similar hole in the bottom of the bat, which allows the bat to sit as though it is resting against the wickets. It’s a nice touch and makes for a great display piece.
Sir Donald Bradman coin crowns the handle
The final goal of the puzzle is to remove the Sir Donald Bradman coin from the top of the handle. There’s no chance of prising the coin out of its current spot, and certainly not without damaging the handle, so I’ll save you the trouble of thinking like that and tell you to forget that idea now. Besides, if you could get to the end of the puzzle without taking the journey then you’d really be missing out.
The coin itself is really the inspiration for the puzzle and according to Brian, the first ideas for the puzzle came around when the coin was released in 2001. From that point, it seems like Brian’s mind went into overdrive and he continued to add elements to the puzzle. Now some people may disagree given the difficulty, but I for one am pretty happy with all the work Brian put into the puzzle. The size and shape of the bat has given Brian a lot of space to work with, and he’s crammed a lot of steps into that space. The puzzle consists of three main puzzle locks, which must be solved to release the coin at the top of the handle. However there are many more steps along the way to find all the tools required to open each lock. In Brian’s own words, “As far as sequential discovery puzzles go this one’s on steroids!”
When it came to solving the puzzle, I’ll admit it took around two months for me to solve the puzzle with probably around 5-6 hours of time actually spent working on the puzzle. Why so long? Well sadly work had been hectic and I simply didn’t have the time to sit and play with puzzles. As a result there were long periods where the puzzle and the tools I’d found sat on a table taunting me with my lack of progress.
The first lock defeated
Nothing in the puzzle is quite what it seems. Brian has managed to conceal tools in every possible part of the puzzle, and some very close attention is required to be able to find everything you need. I was fairly lucky and found the first hidden tool fairly quickly, which also revealed the Baggy Green Cap. Another ten minutes or so, and I’d successfully navigated the first lock, and removed the bottom of the bat.
With the first piece of the bat removed, it can be set aside. There’s nothing else useful in there. What you’re presented with now is the head of two hex bolts and the lock from the first stage, neatly hiding in holes drilled into the main section of the bat. Now being a good puzzler, I know that external tools are not required, so I didn’t go hunting in my tool box for a way to remove those bolts. Instead, more investigation of the puzzle is required. As it happens, I was remarkably lucky, and stumbled upon the tool I needed by pure luck.
I was sitting with the pieces of the puzzle on my table, and happened to have a folding knife sitting on the table. At one point I must have nudged one of the pieces, and it rolled across the table, un-noticed by me. After a while fiddling, I looked across and found that the piece was stuck to the blade of the knife!
Well Brian mentioned that there were lots of magnets used in the puzzle, and it seems I’d found one! As it happens this piece if the puzzle is so well disguised, I have no idea how long it would have taken me to find this tool had it not been for that piece of luck. I have to commend Brian here, as the grain matching, and fit of the particular piece is incredible!
So with a new tool found, I quickly removed the rods on either side of the second section of the bat, before hitting another dead end. I had no idea how to remove the central rod, but there is a small clue as to what you might need to help with that process. It took probably another half an hour, or more for me to find the well disguised tool needed and be able to remove the third rod. At this point I’ve now managed to discover the three extra wickets needed to play Cricket, but I’m still no closer to opening that second lock!
From here I sent several hours trying to combine the various tools I’d found up to this point, along with a torch to try to see to the bottom of those long holes in an attempt to open the second lock. I lost count of the number of combinations of things I’d tried, and none of them seemed to help. In a fit of desperation, I placed a particular tool I’d found into the hole, thread first, and then used a different tool to reach to the bottom of the hole, and turn it. Now, that was a pretty bad idea, as the first tool ended up stuck and I was pretty sure at this point that I’d gone wrong.
I sent an email to Brian who helped me confirm exactly what I’d done then gave me a few suggestions as to how to fix the problem, and the assurance that regardless of what I’d done, in the worst case, I could send it back to him and he’d fix it. Now I appreciate that I’ve been remarkably vague here, but I’m trying not to give anything away. As it happens Brian’s suggestion worked, and I was back in business. If you want to see what I did, then click here. And if you have this puzzle yourself, don’t drop anything down the holes that you can’t reach to pull back out! as it turns out, I’m not the only person to have put something into the puzzle that wasn’t intended… at least I used something that came with the puzzle.
The second lock defeated
So with my panic over, I was back on track to solve the puzzle, however I still hadn’t opened the second lock. Fortunately, it didn’t take too much more time to be able to remove the final piece holding that dovetail joint in place and I had the second lock open!
All that remained now was the handle of the bat, and the third lock. Now I already knew that the puzzle here was the same as the one contained in “Houdini’s Torture Cell” as Brian had noted that the reason he made the Torture cell was so that more people could have access to this little puzzle, however that didn’t make solving it any easier. Unlike the Torture Cell where you can see what’s going on, here everything is blind. That said, you can figure out what’s going on fairly easily, and with a little luck, you’ll have that coin rising out of the handle fairly quickly.
The puzzle fully solved
True to Brian’s word, when you open the last lock, not only is the coin removed, but you’ll find you have a second set of wickets (brass rods), the cricket ball (silver ball bearing) and at this point, you should be good for that game of cricket to win back the Urn containing the ashes, which is also there.
For the observant amongst the readers, you’ll notice that I’m not really showing many of the tools in the pictures, and that is entirely deliberate. I don’t want to give anything away, that might spoil the discovery should you get a chance to play with this puzzle yourself. I’ve also been very careful not to give any clues when it comes to how things are hidden in the puzzle. Really a huge part of this puzzle is the journey of discovery as you find each element, and I’d hate to spoil that. It’s too good a puzzle to ruin it for you.
Overall, I really enjoyed the puzzle, and highly recommend it should you get the chance to own one, or if someone is willing to let you play with their copy, don’t pass on the opportunity. Brian has done a great job and there’s clearly a lot of time and care went into the puzzle. Hat’s off to you sir, it’s a great puzzle!
Allard and Brian have also reviewed the puzzle on their blogs, so if you want another opinion, then go read what they have to say.
So at the end of the last post, I had been playing with Marcel Gillen’s Rolling Pin puzzles, and ended up with very silver hands thanks to the aluminium dust. That really was the end of the day though and I have missed out a big chunk in the middle, so time to back track a little and fill in the blanks.
Alan Boardman with a cigar box containing one of every puzzle he makes
Alan’s Business Card
I had the pleasure to meet Alan Boardman for the first time, and was able to see some of his work up close. Often with photographs of puzzles, it’s hard to tell the size of them, but with Alan, Scale is everything. He considers himself a microxylometagrobologist. Yes, he makes tiny puzzles. The remarkable thing is that these puzzles, most less than an inch in size, and many less than a quarter inch in size are made with regular woodworking tools, with a level of precision which needs to be seen to be believed. Even his business card needs to be seen to be believed. A beautiful slice of 2ply Birdseye Maple!
As I mentioned in the first part of the puzzle party writeup, Nick Baxter went through a guided solve of the IPP 17 Host gift made by Gary Foshee. I took photos throughout the solve, and will do a writeup here. Warning, there may be a number of images here showing parts of the sequential discovery where clues as to how to solve the puzzle may be seen. I feel that given how limited this puzzle is, that few people will be able to see or solve this puzzle, and as such I fell less concerned about showing steps of the solution. However if you don’t want to see anything, then don’t click the link below.


