Category Archives: Puzzle Creation

Really Bent Board Burr

It’s been a while since I’ve sat down and shown the process of making a puzzle, mainly because I’ve been busy in the shop working on making puzzles, and haven’t had time to write, however the Really Bent Board Burr by Derek Bosch is one that is worth writing about.

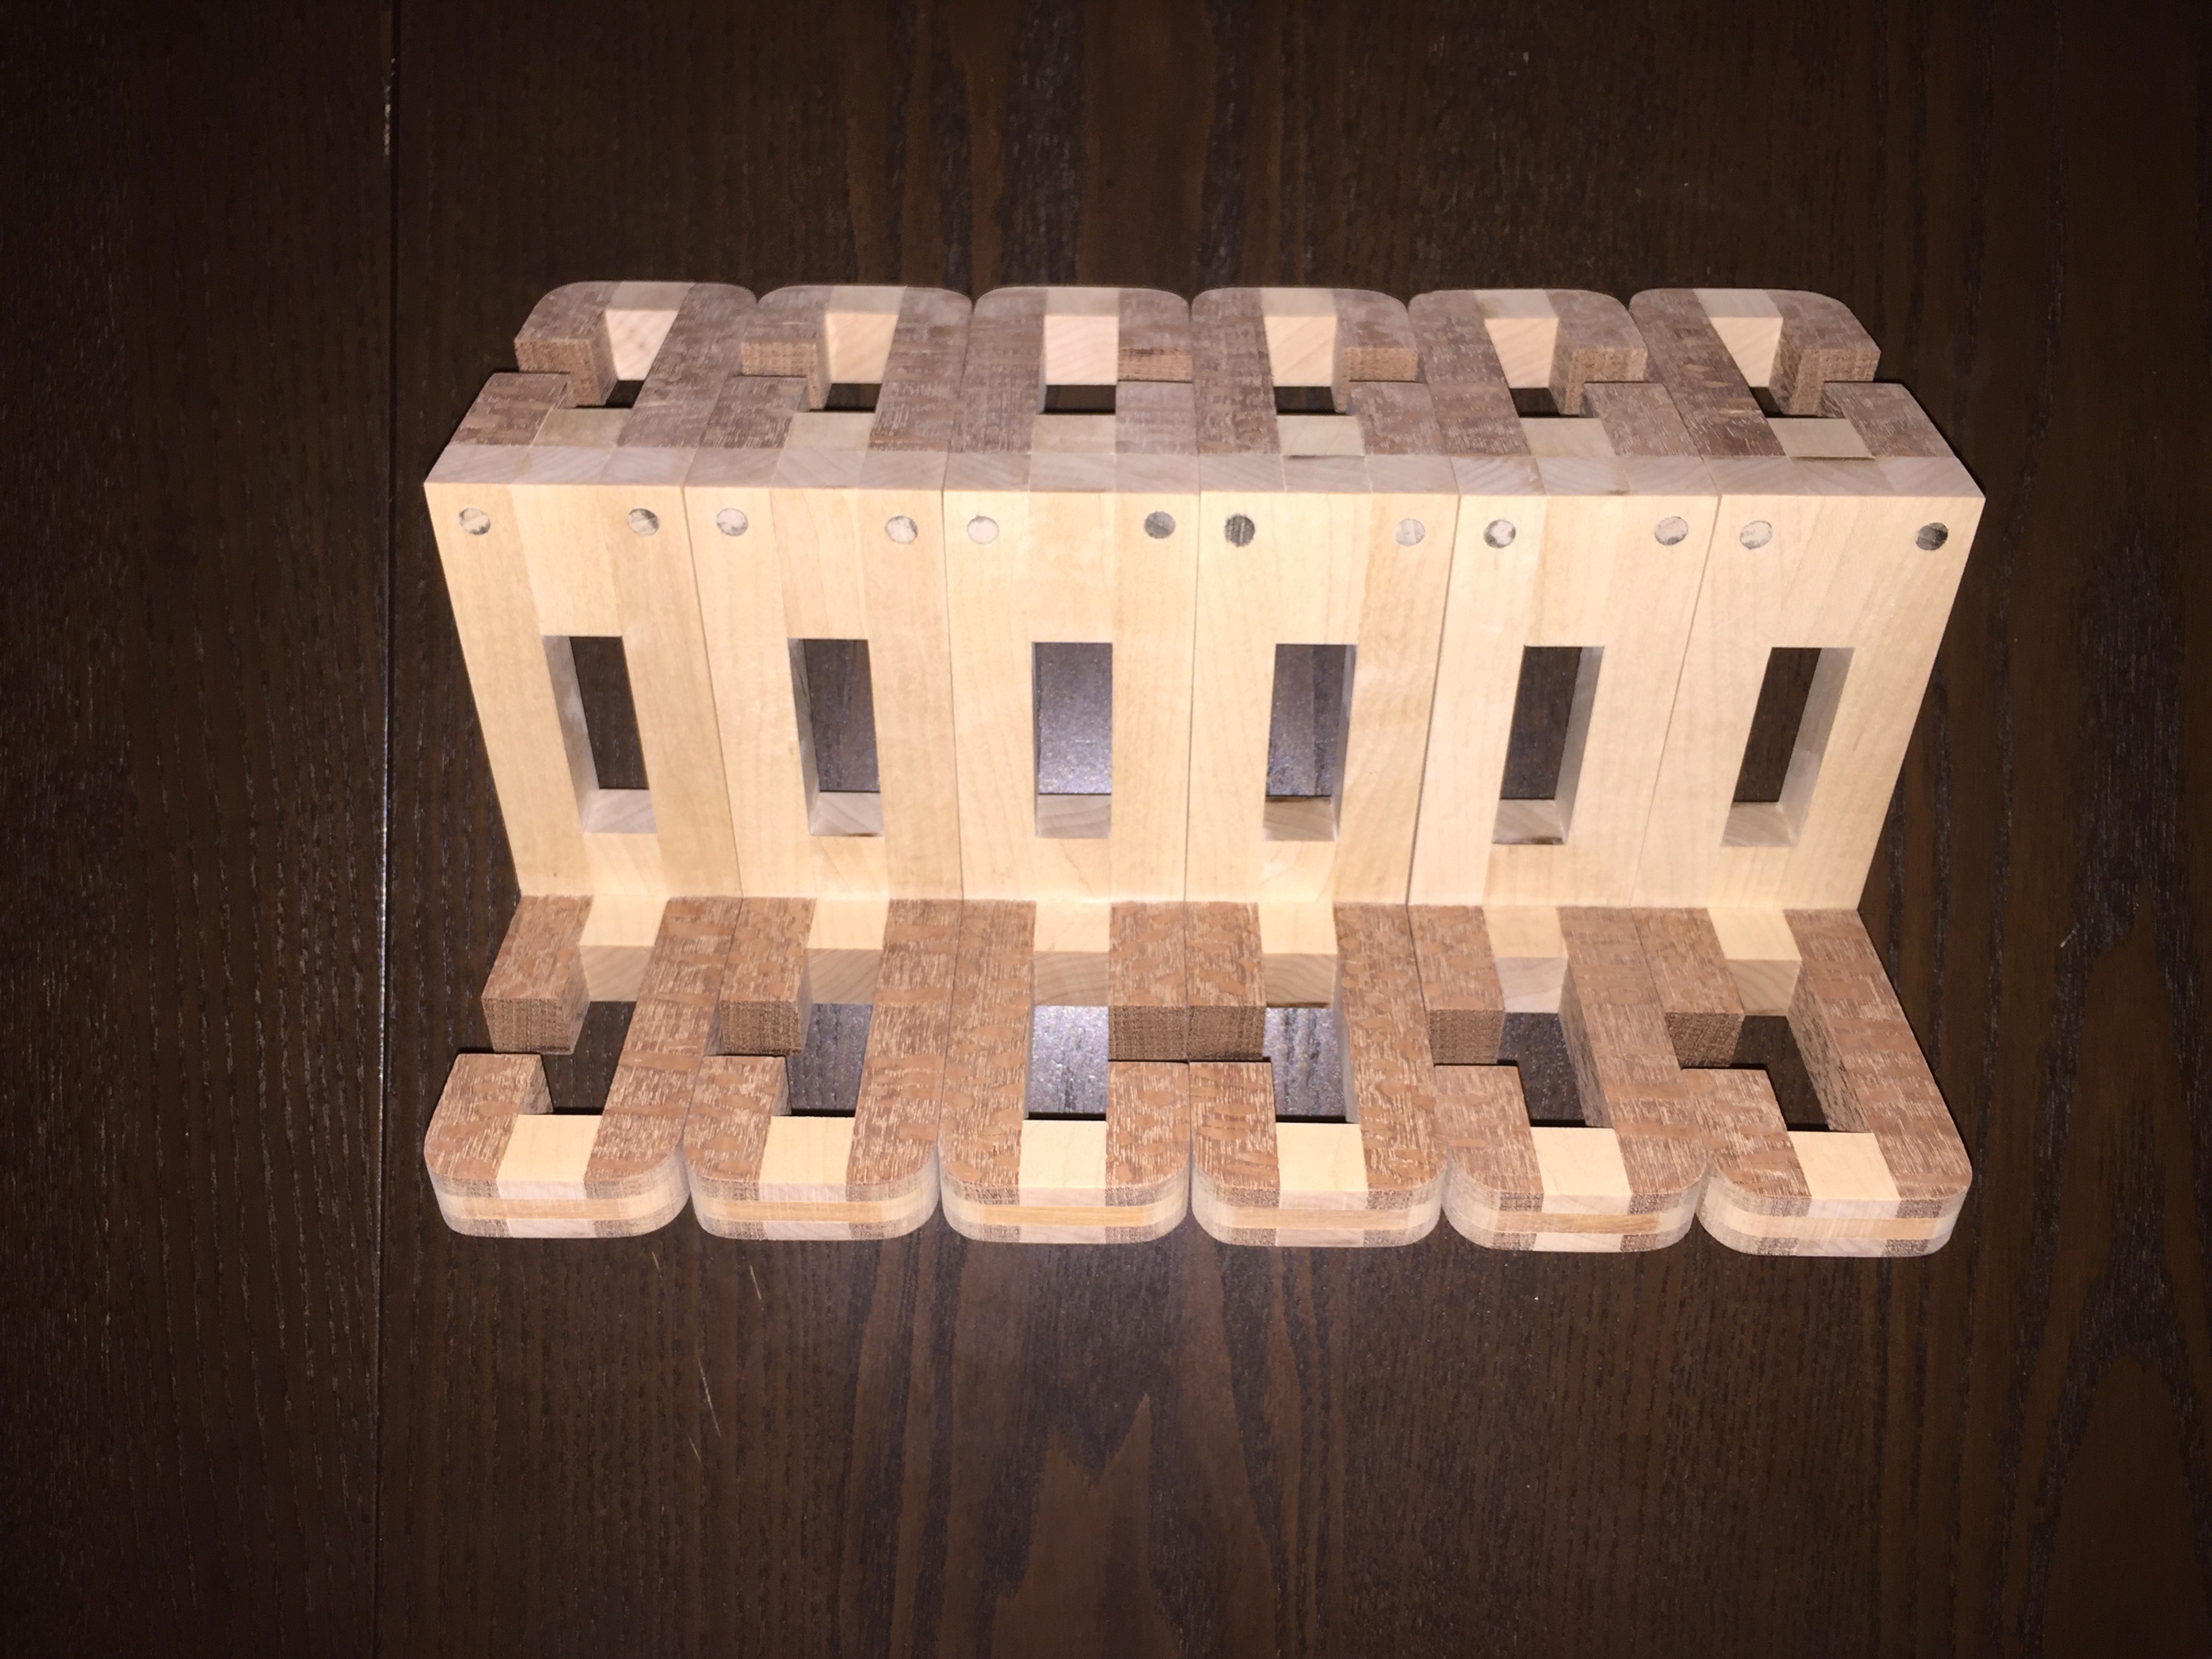
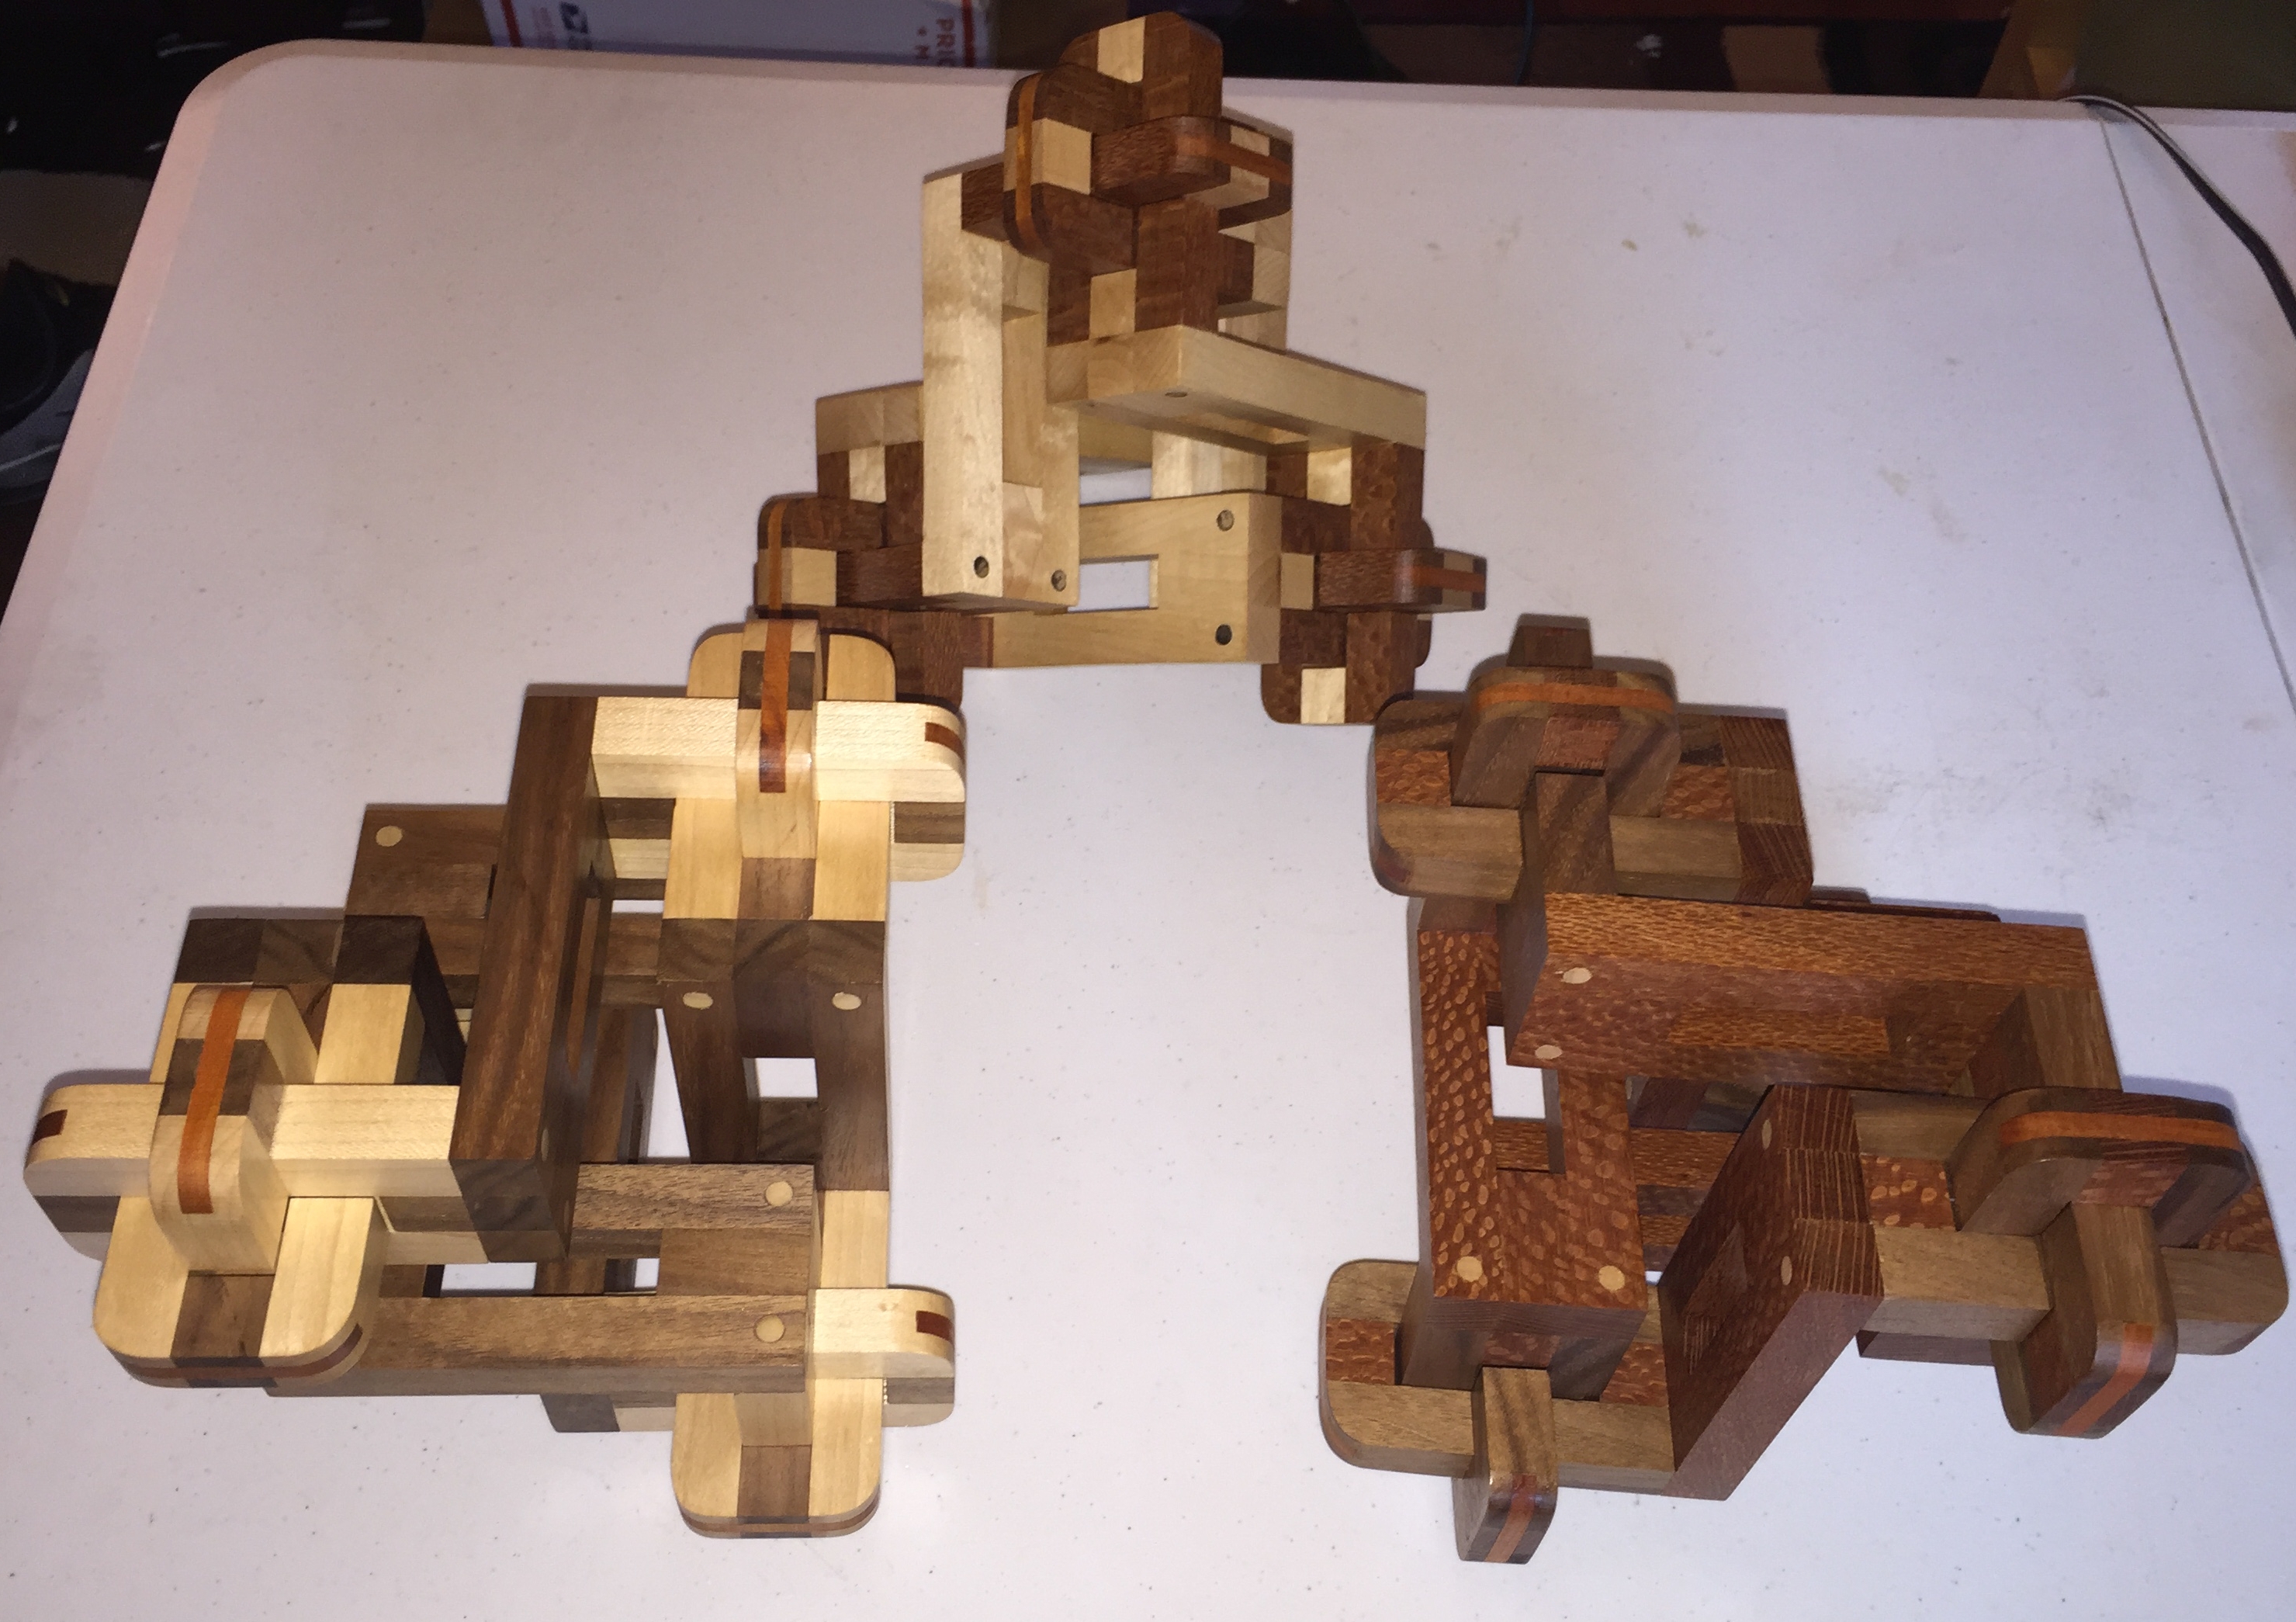
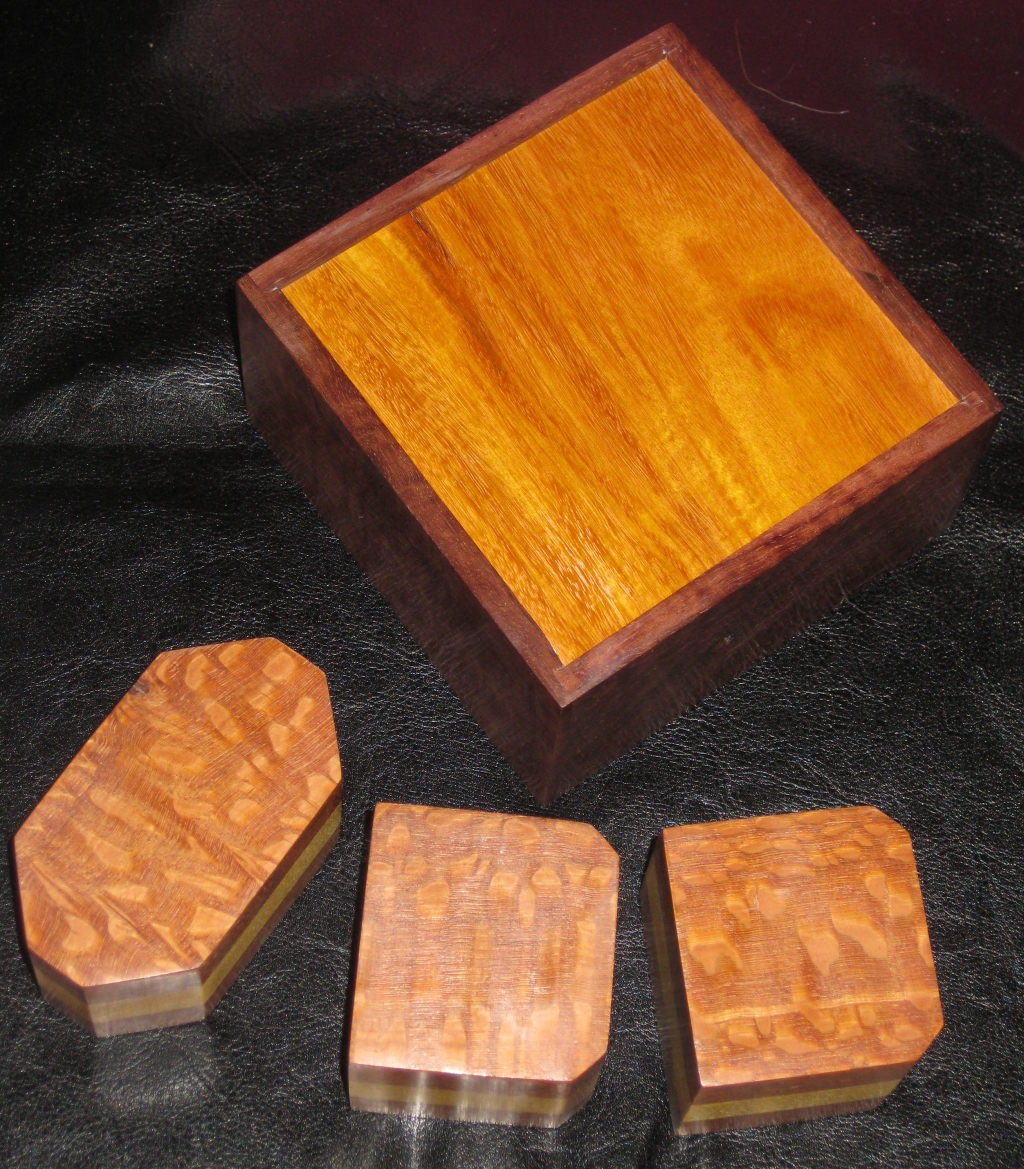
The Final puzzle

The Final puzzle

I’ve never owned a copy of this puzzle, and it has always intrigued me. I’ve talked about making copies for long enough, and now I finally have, so here’s a little bit of insight to the puzzle, and the process of creating it. The puzzle was originally produced by Tom Lensch back in 2007 and the craftsmanship as you’d expect was superb. Hopefully I’m able to do it justice, but I’ll let you be the judge of that.

An alternate angle

An alternate angle

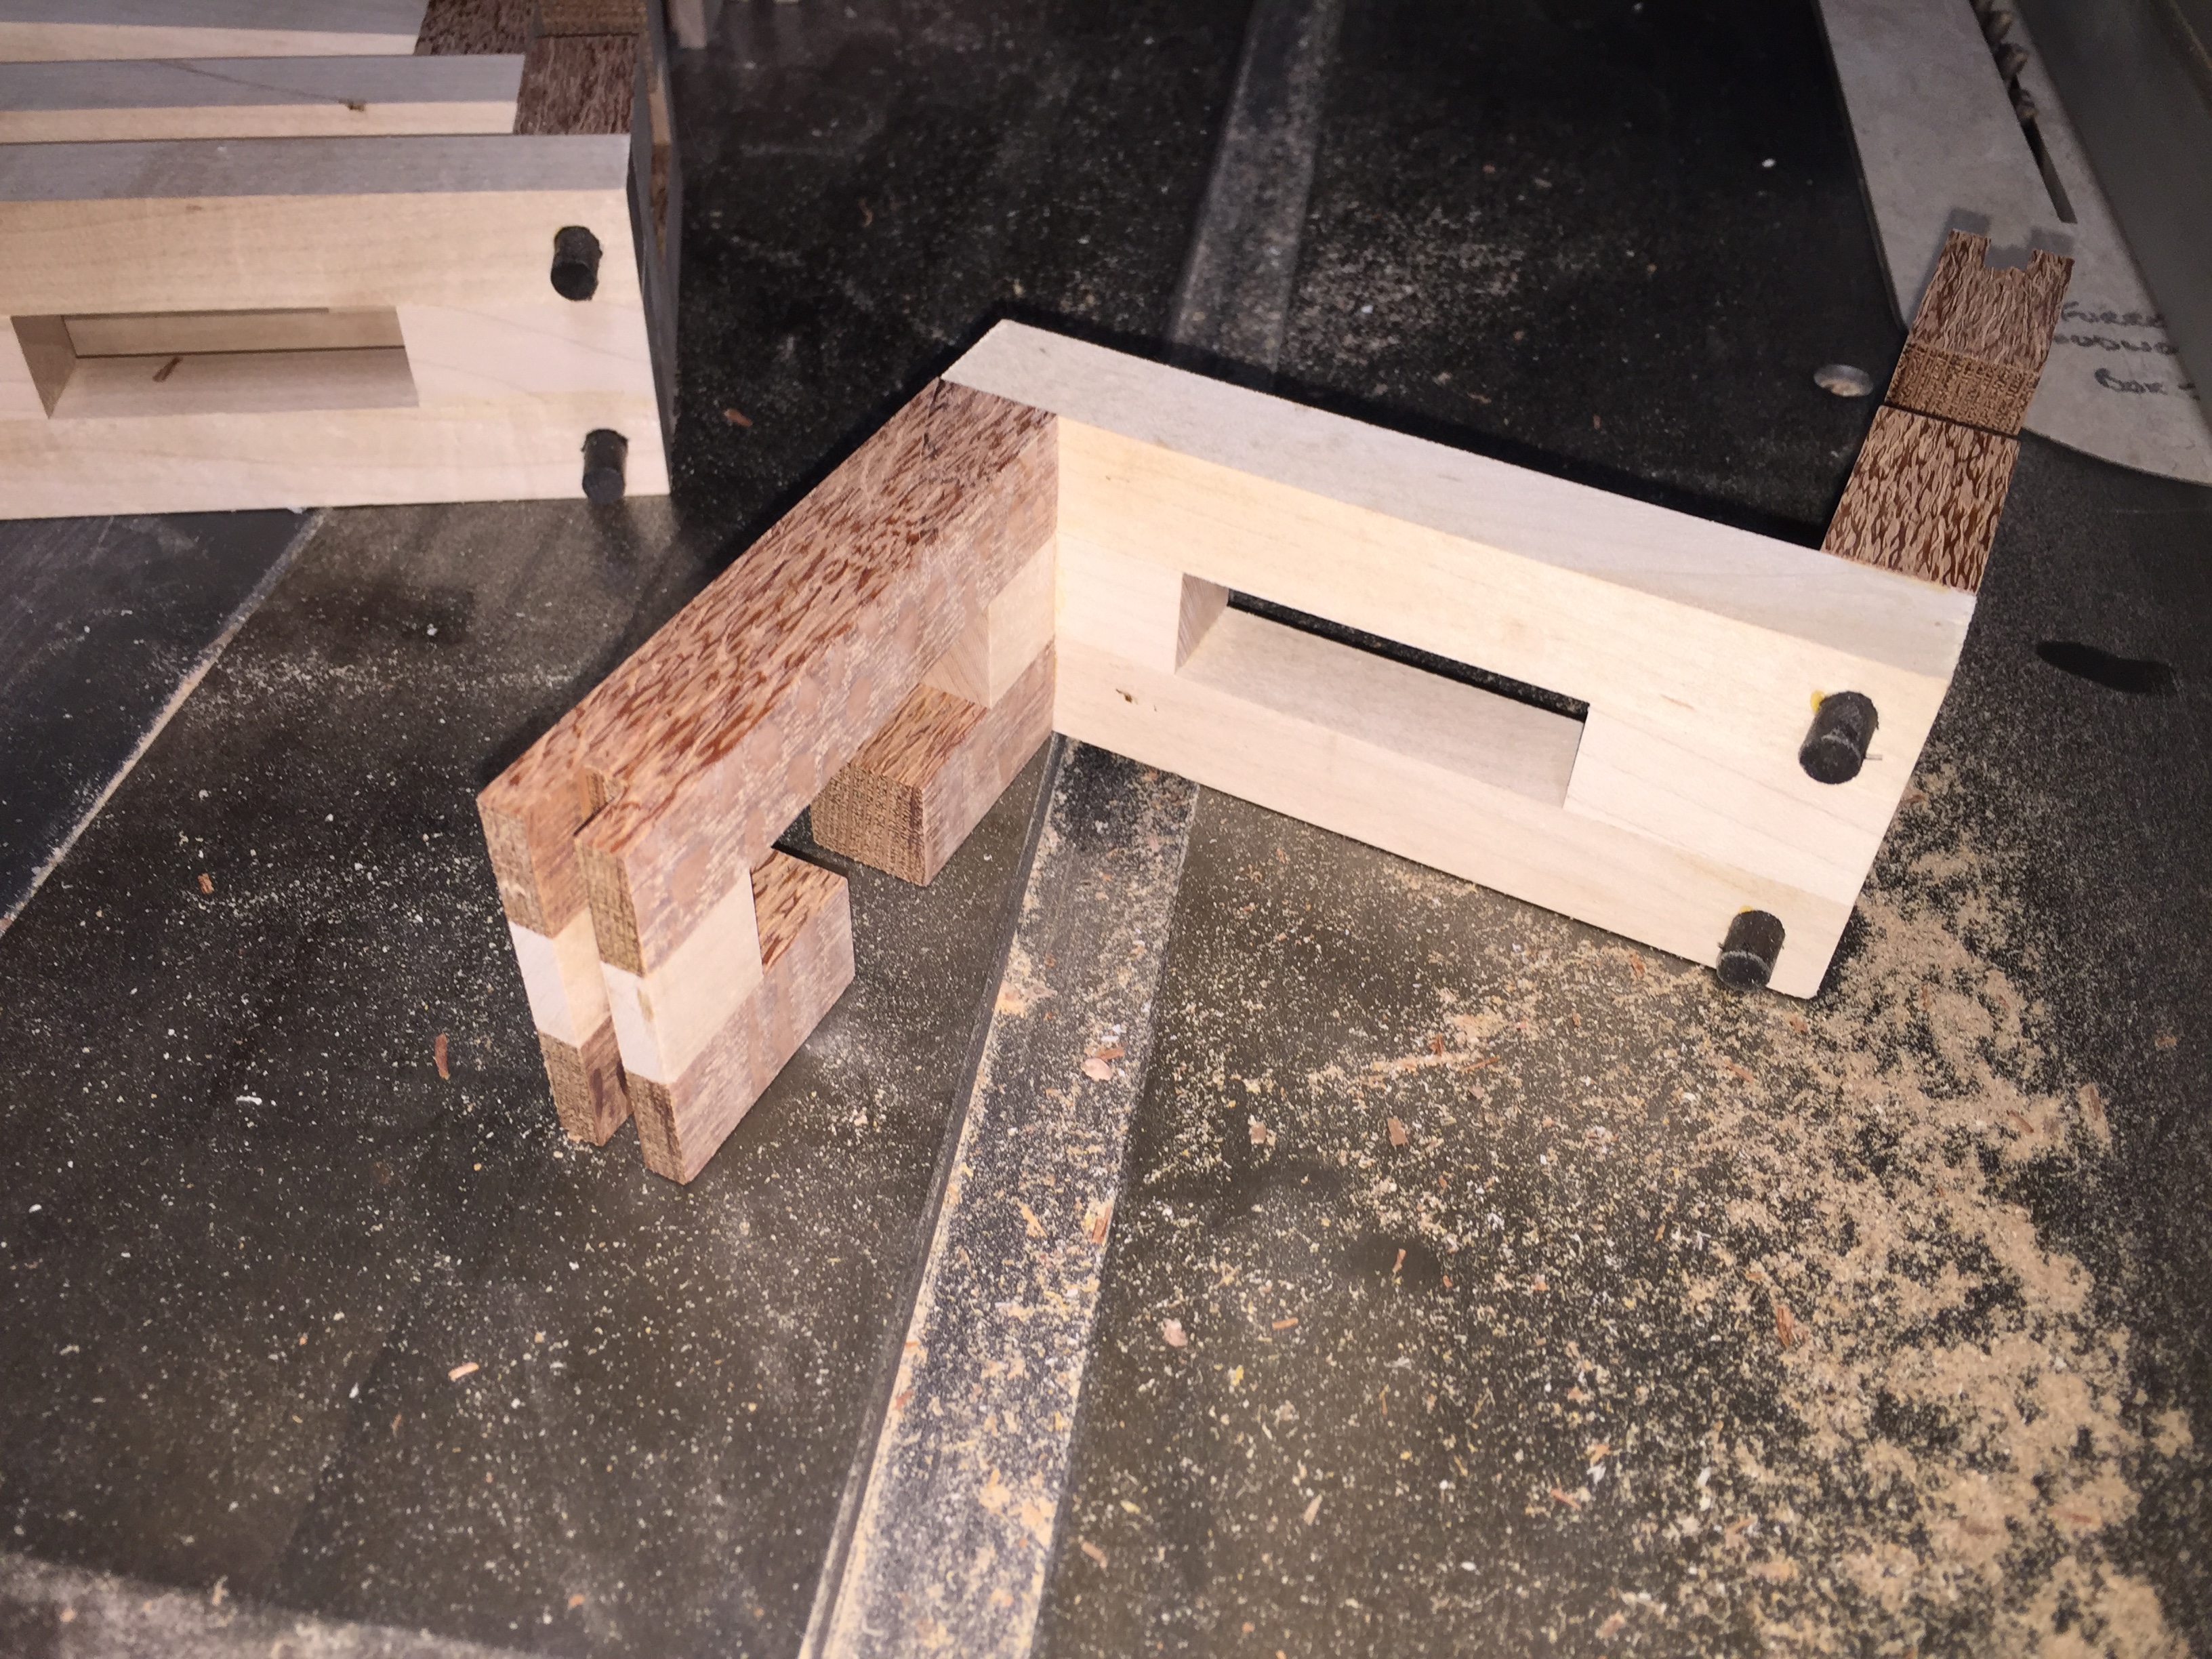
Before I get into the details of making this puzzle, here’s a few interesting things about the puzzle. It’s hard to tell from the assembled puzzle, but this is a 6 piece puzzle, with three different types of pieces used in the construction. Each piece forms a ‘Z’ shape with two ‘C’ pieces attached to a central ‘O’ piece. The puzzle itself has two different solutions using the same 6 pieces. An easy and a hard solution. The easy solution is a level 10.6.1.4 while the hard is a staggering 20.2.10. In all honesty calling the easy solution easy is a joke. This is a really tough puzzle both to assemble and dis-assemble, however the final shape is well worth the time to solve. (And no, I’m not smart enough to assemble it without help!)

All six pieces that make up the RBBB

All six pieces that make up the RBBB

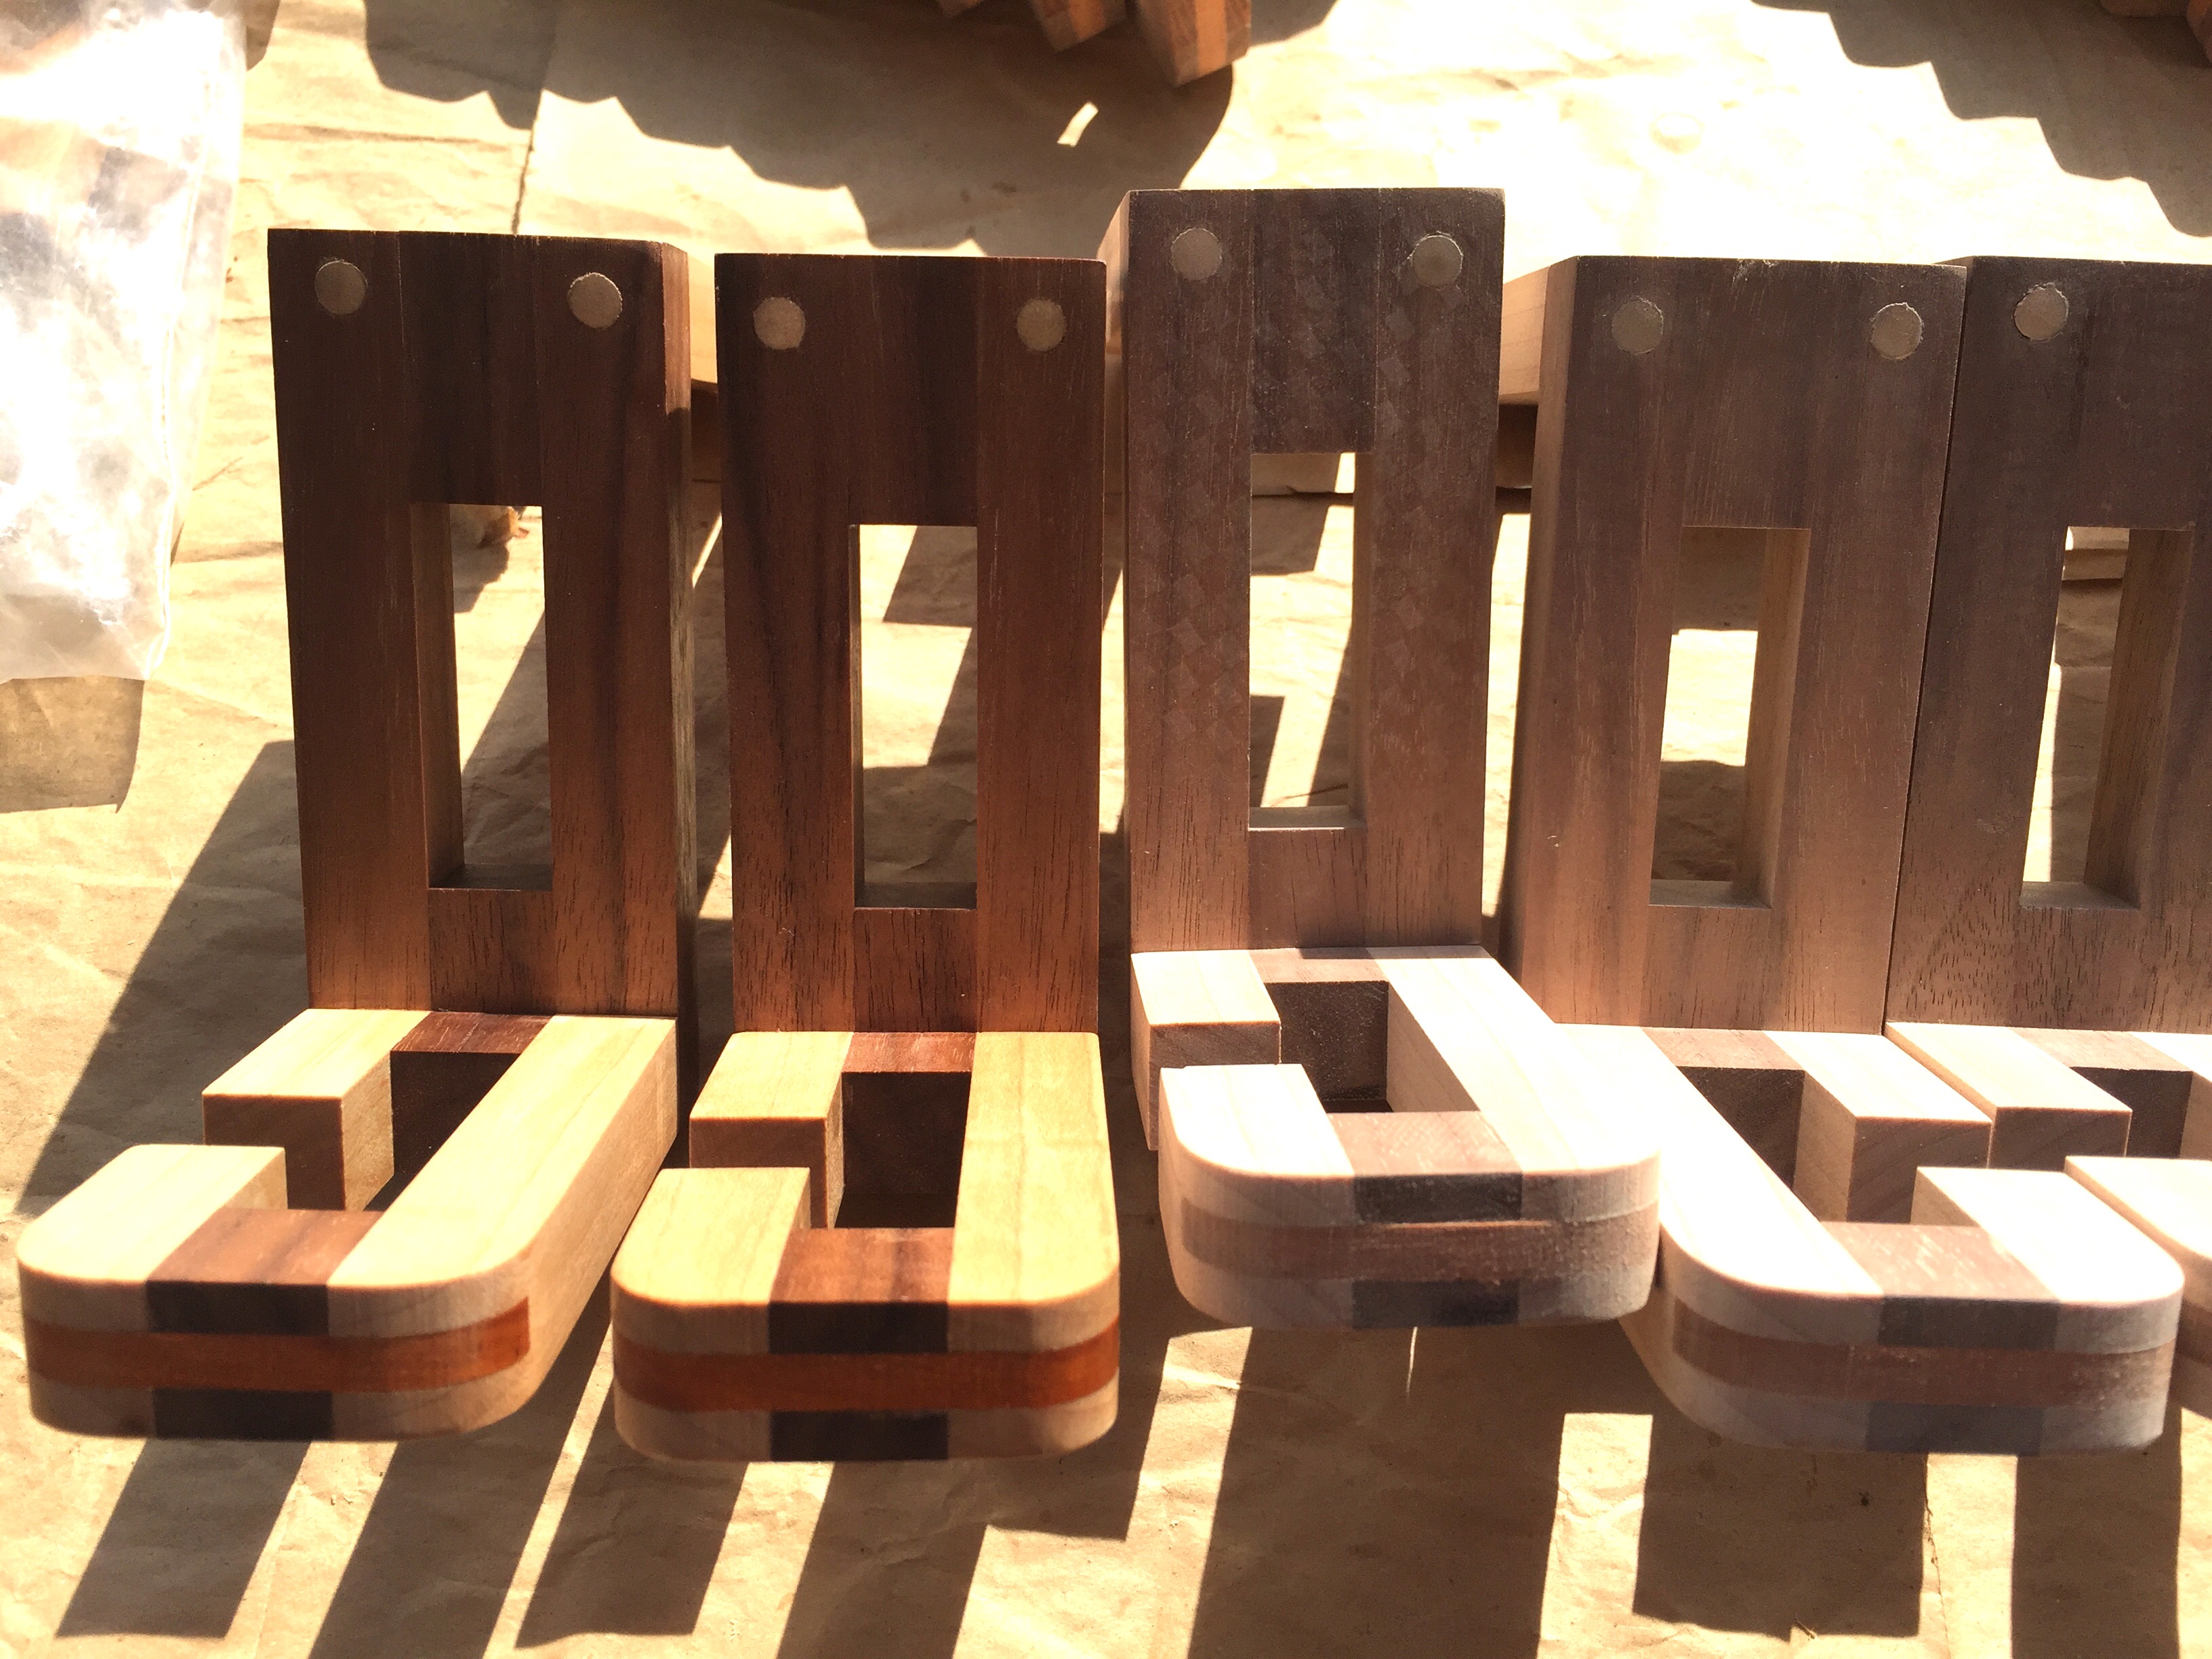
The pieces form a set where three of the Z’s have the C’s attached with the opening facing in opposite directions, two with the opening in the same direction, and the final is a mirror image of the second piece type. Given the length of the C’s and the minimal gluing surface to the central structure, the joints need to be reinforced to prevent them from breaking. Equally, the end of the C’s need to be reinforced to prevent them breaking too. All told there’s a lot of work to producing such a puzzle, however the end result is in my opinion worth the extra effort.

Starting with square sticks

Starting with square sticks

The start of any such puzzle is with the preparation of the stock. Square sticks need to be accurately milled from the boards giving straight, consistent sticks as a starting point. For this run of puzzles, I had a selection of Maple, Walnut and Lacewood to work with. Fortunately all the stock I had was 8/4, meaning that I could create sticks that were over 1/2″ in diameter, resulting in a very pleasing and not small final puzzle. Overall, each puzzle requires 12 feet of wood to make, and 2 feet of dowel to pin the pieces ensuring they are strong enough. That’s a lot of wood!

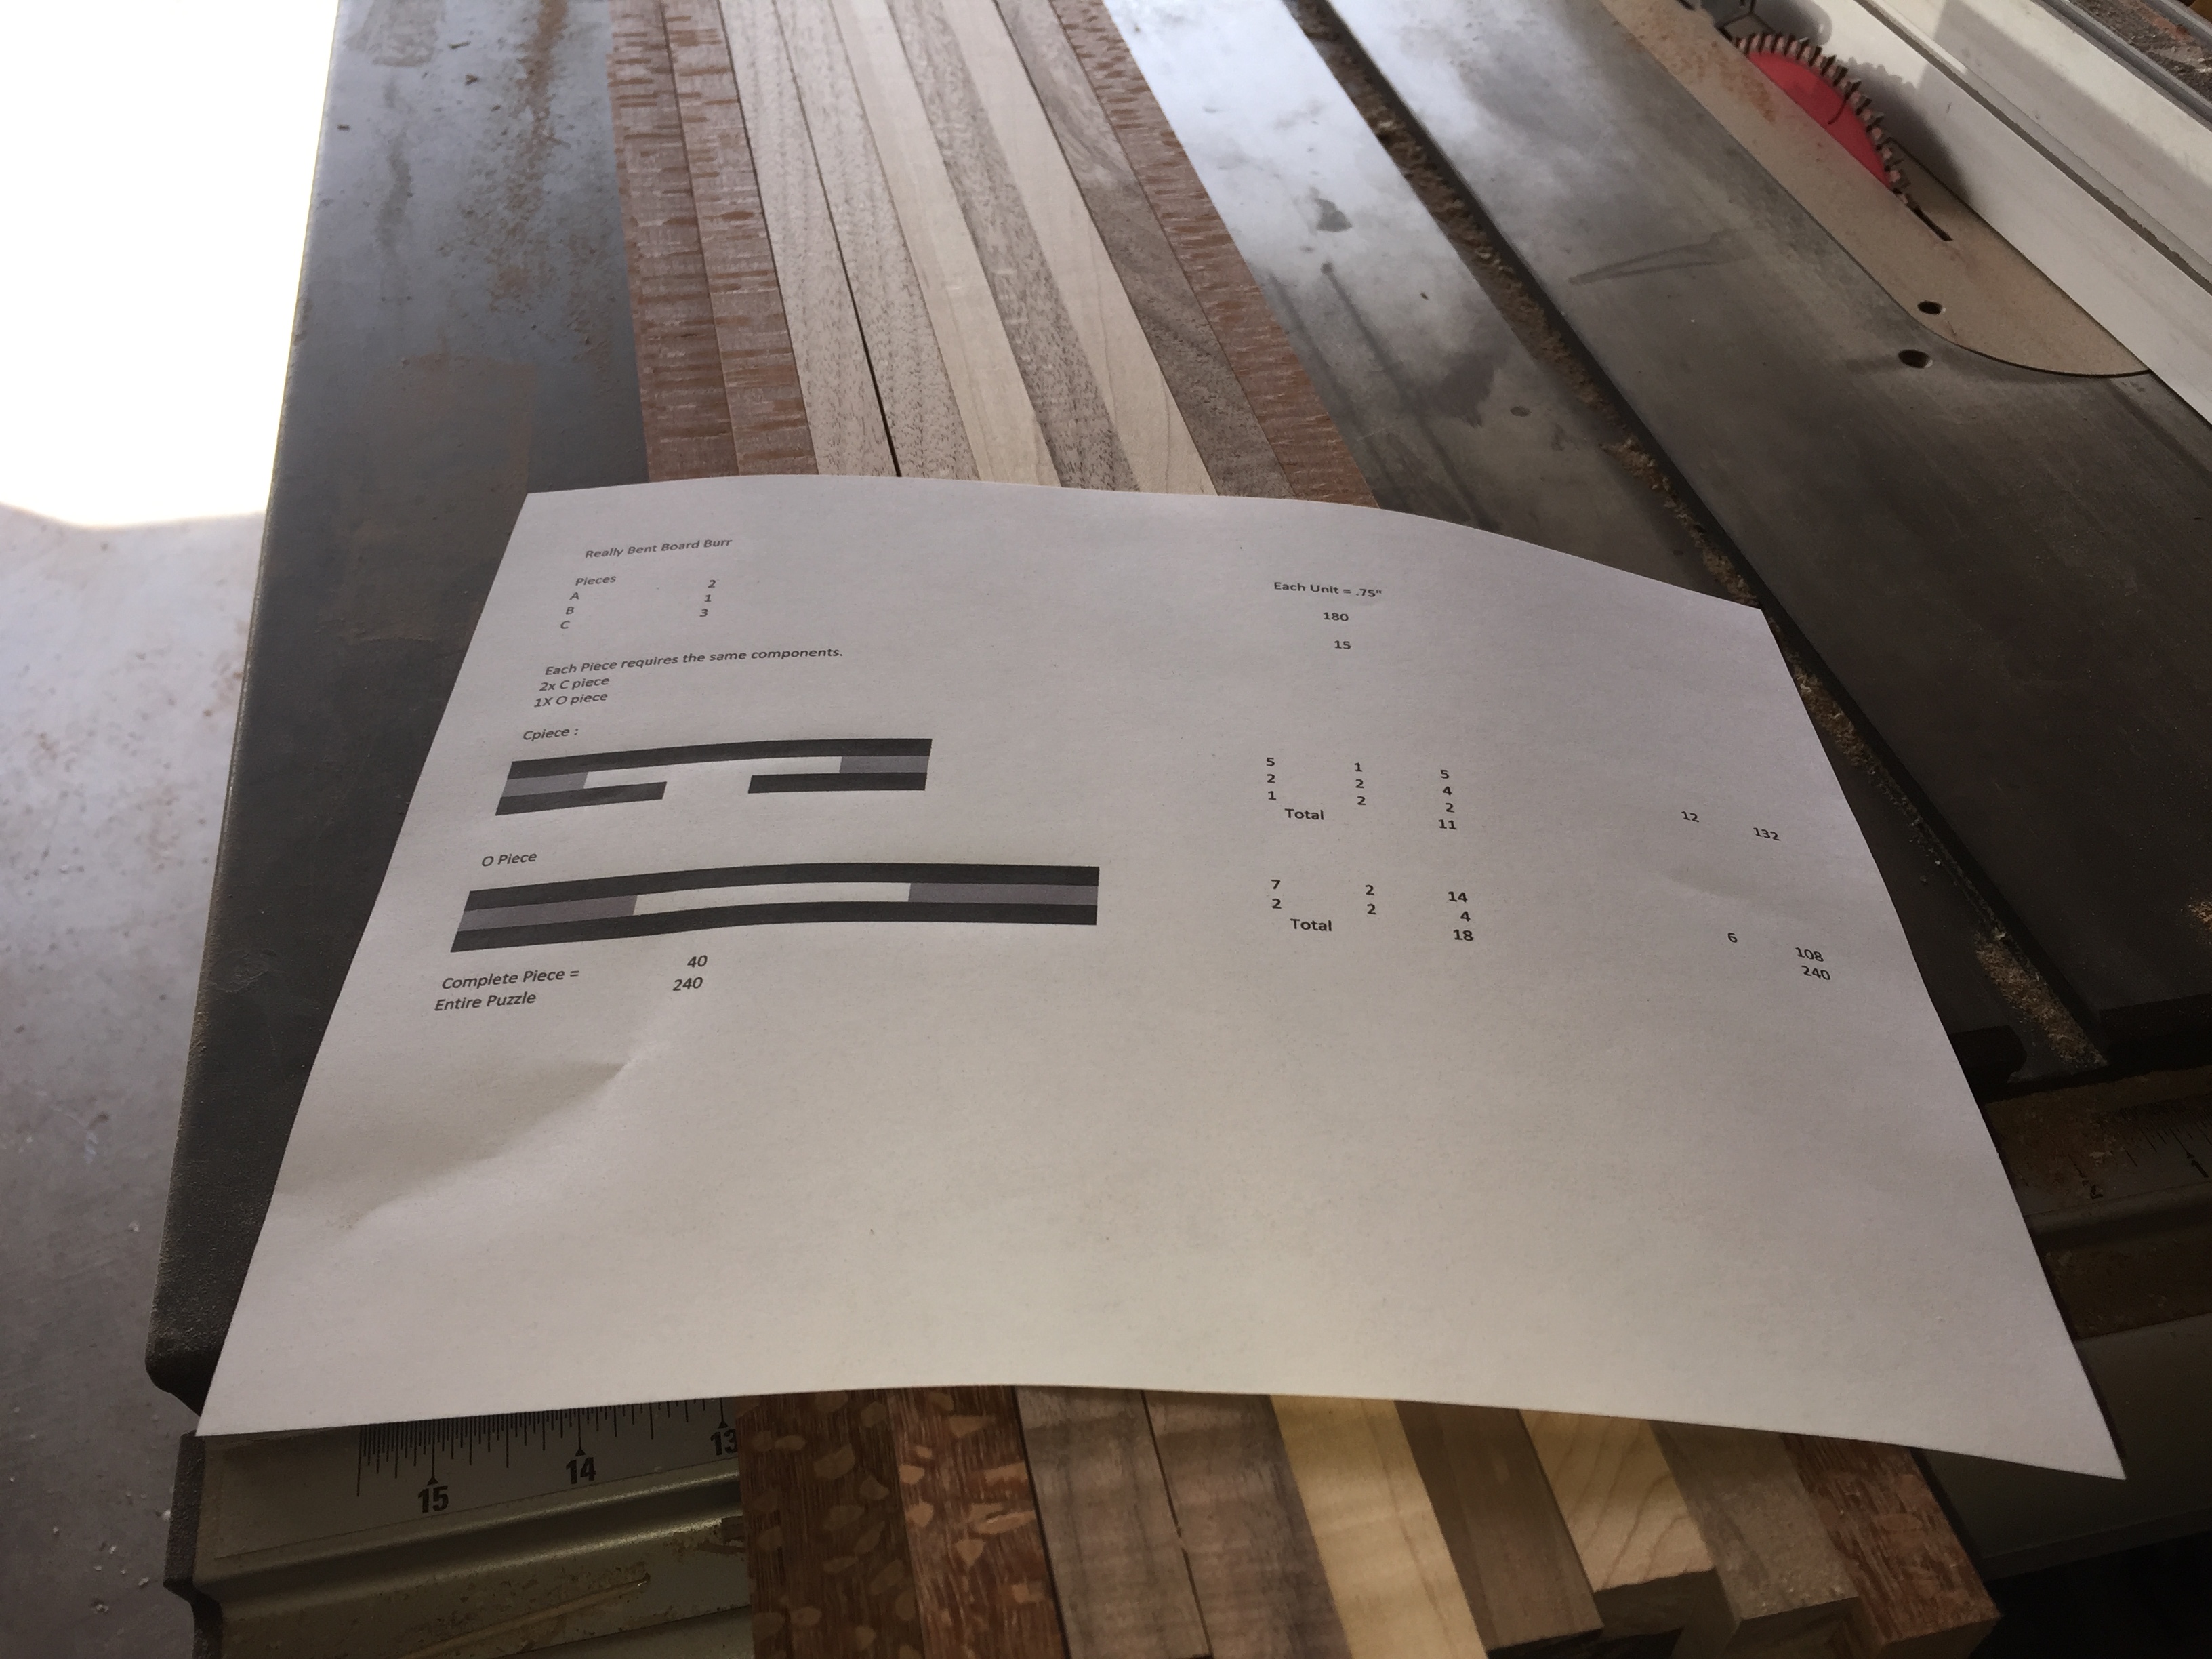
You can see my cheat sheet in the image above, where I mapped out the pieces and produced a cut list for the individual sticks needed to create the final puzzle. The colouring on the pieces on my cheat sheet is partly to make seeing each piece easier, but it also helps with the wood selected for each piece, resulting in a pretty interesting final puzzle piece.

The size of each of the pieces is determined from the width of the square stock. That sets the size of a single cube, and from there the units required are 1×1, 1×2, 1×5 and 1×7. I made a set of these pieces, which are easily created my combining the smaller units, all cut from the stock I’m using to ensure their size is accurate. You can see them in one of the photos below, sitting on my saw.

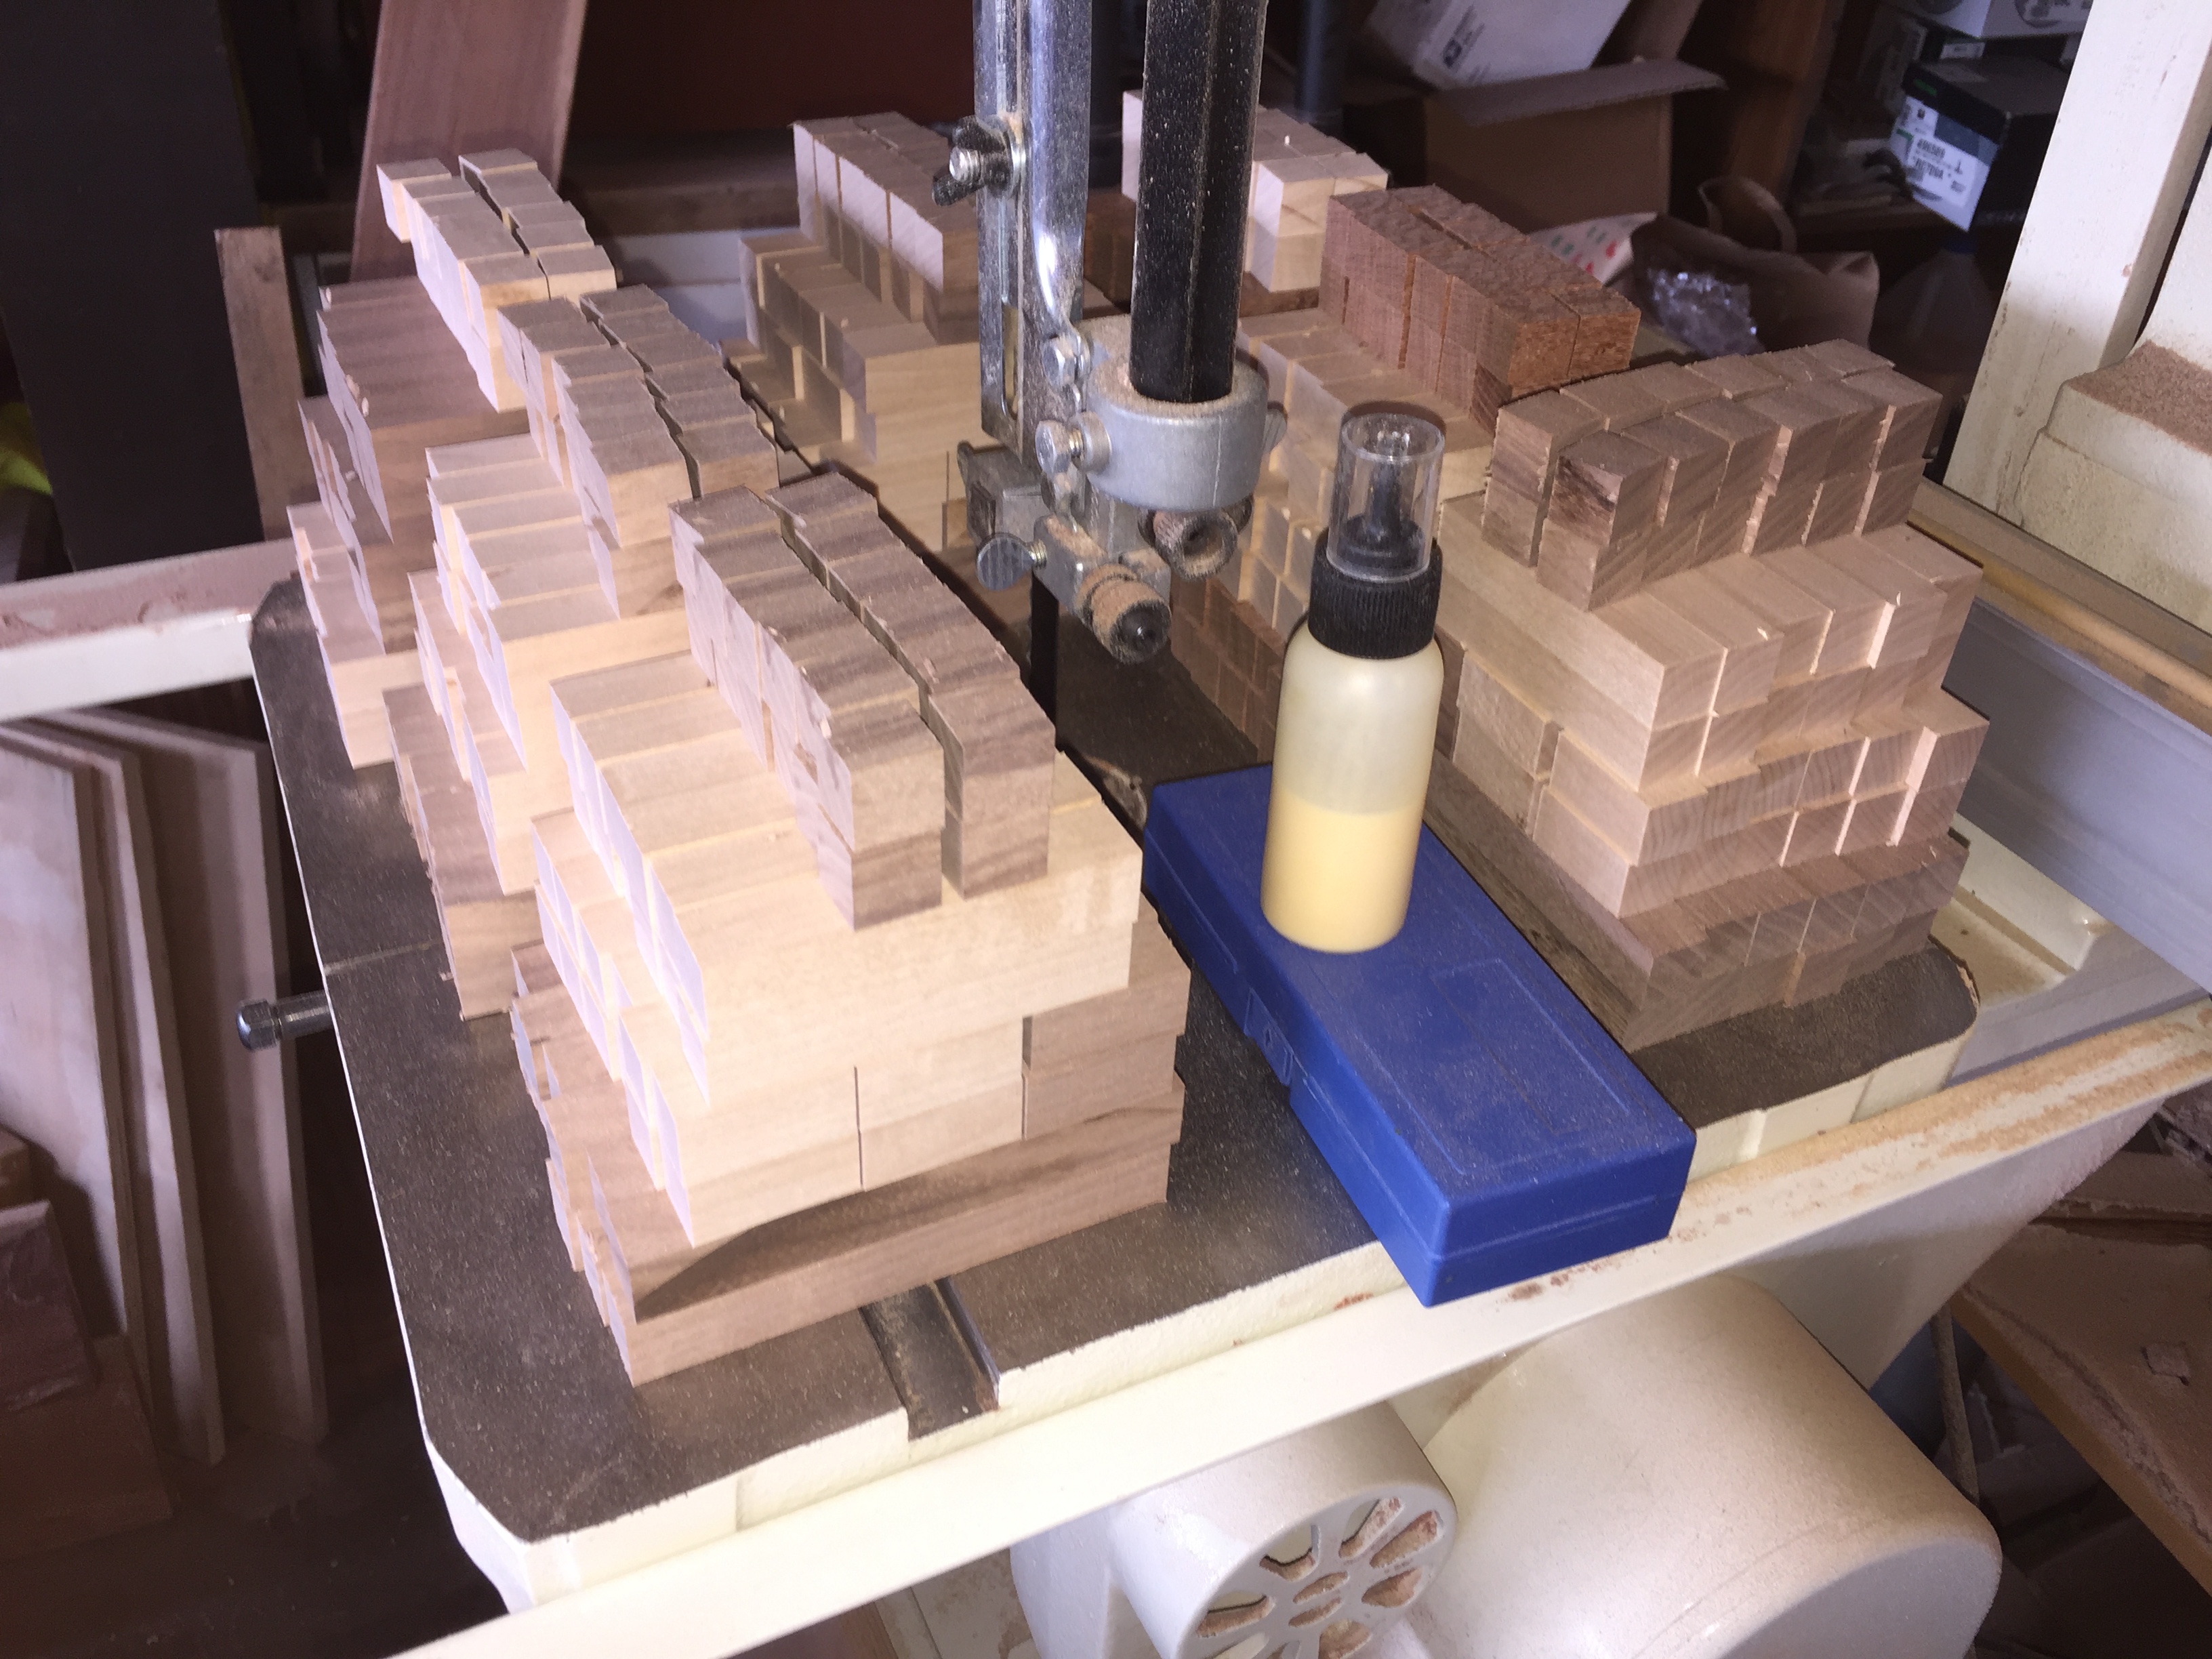
Stacks of pieces.  Each stack is one puzzle

Stacks of pieces. Each stack is one puzzle

The square sticks are cut to the correct lengths for each puzzle in batches, and then stacked to create the pieces for each puzzle. In total, I cut enough pieces for 10 copies of the puzzle to be made. As I’ve mentioned before, once the jigs are setup to make the cuts required, the effort to create 10 copies is not significantly more than to create one, so it just makes sense to make multiple copies. I’m sure there are people out there who will be interested in a copy.

Making the C's

Making the C’s

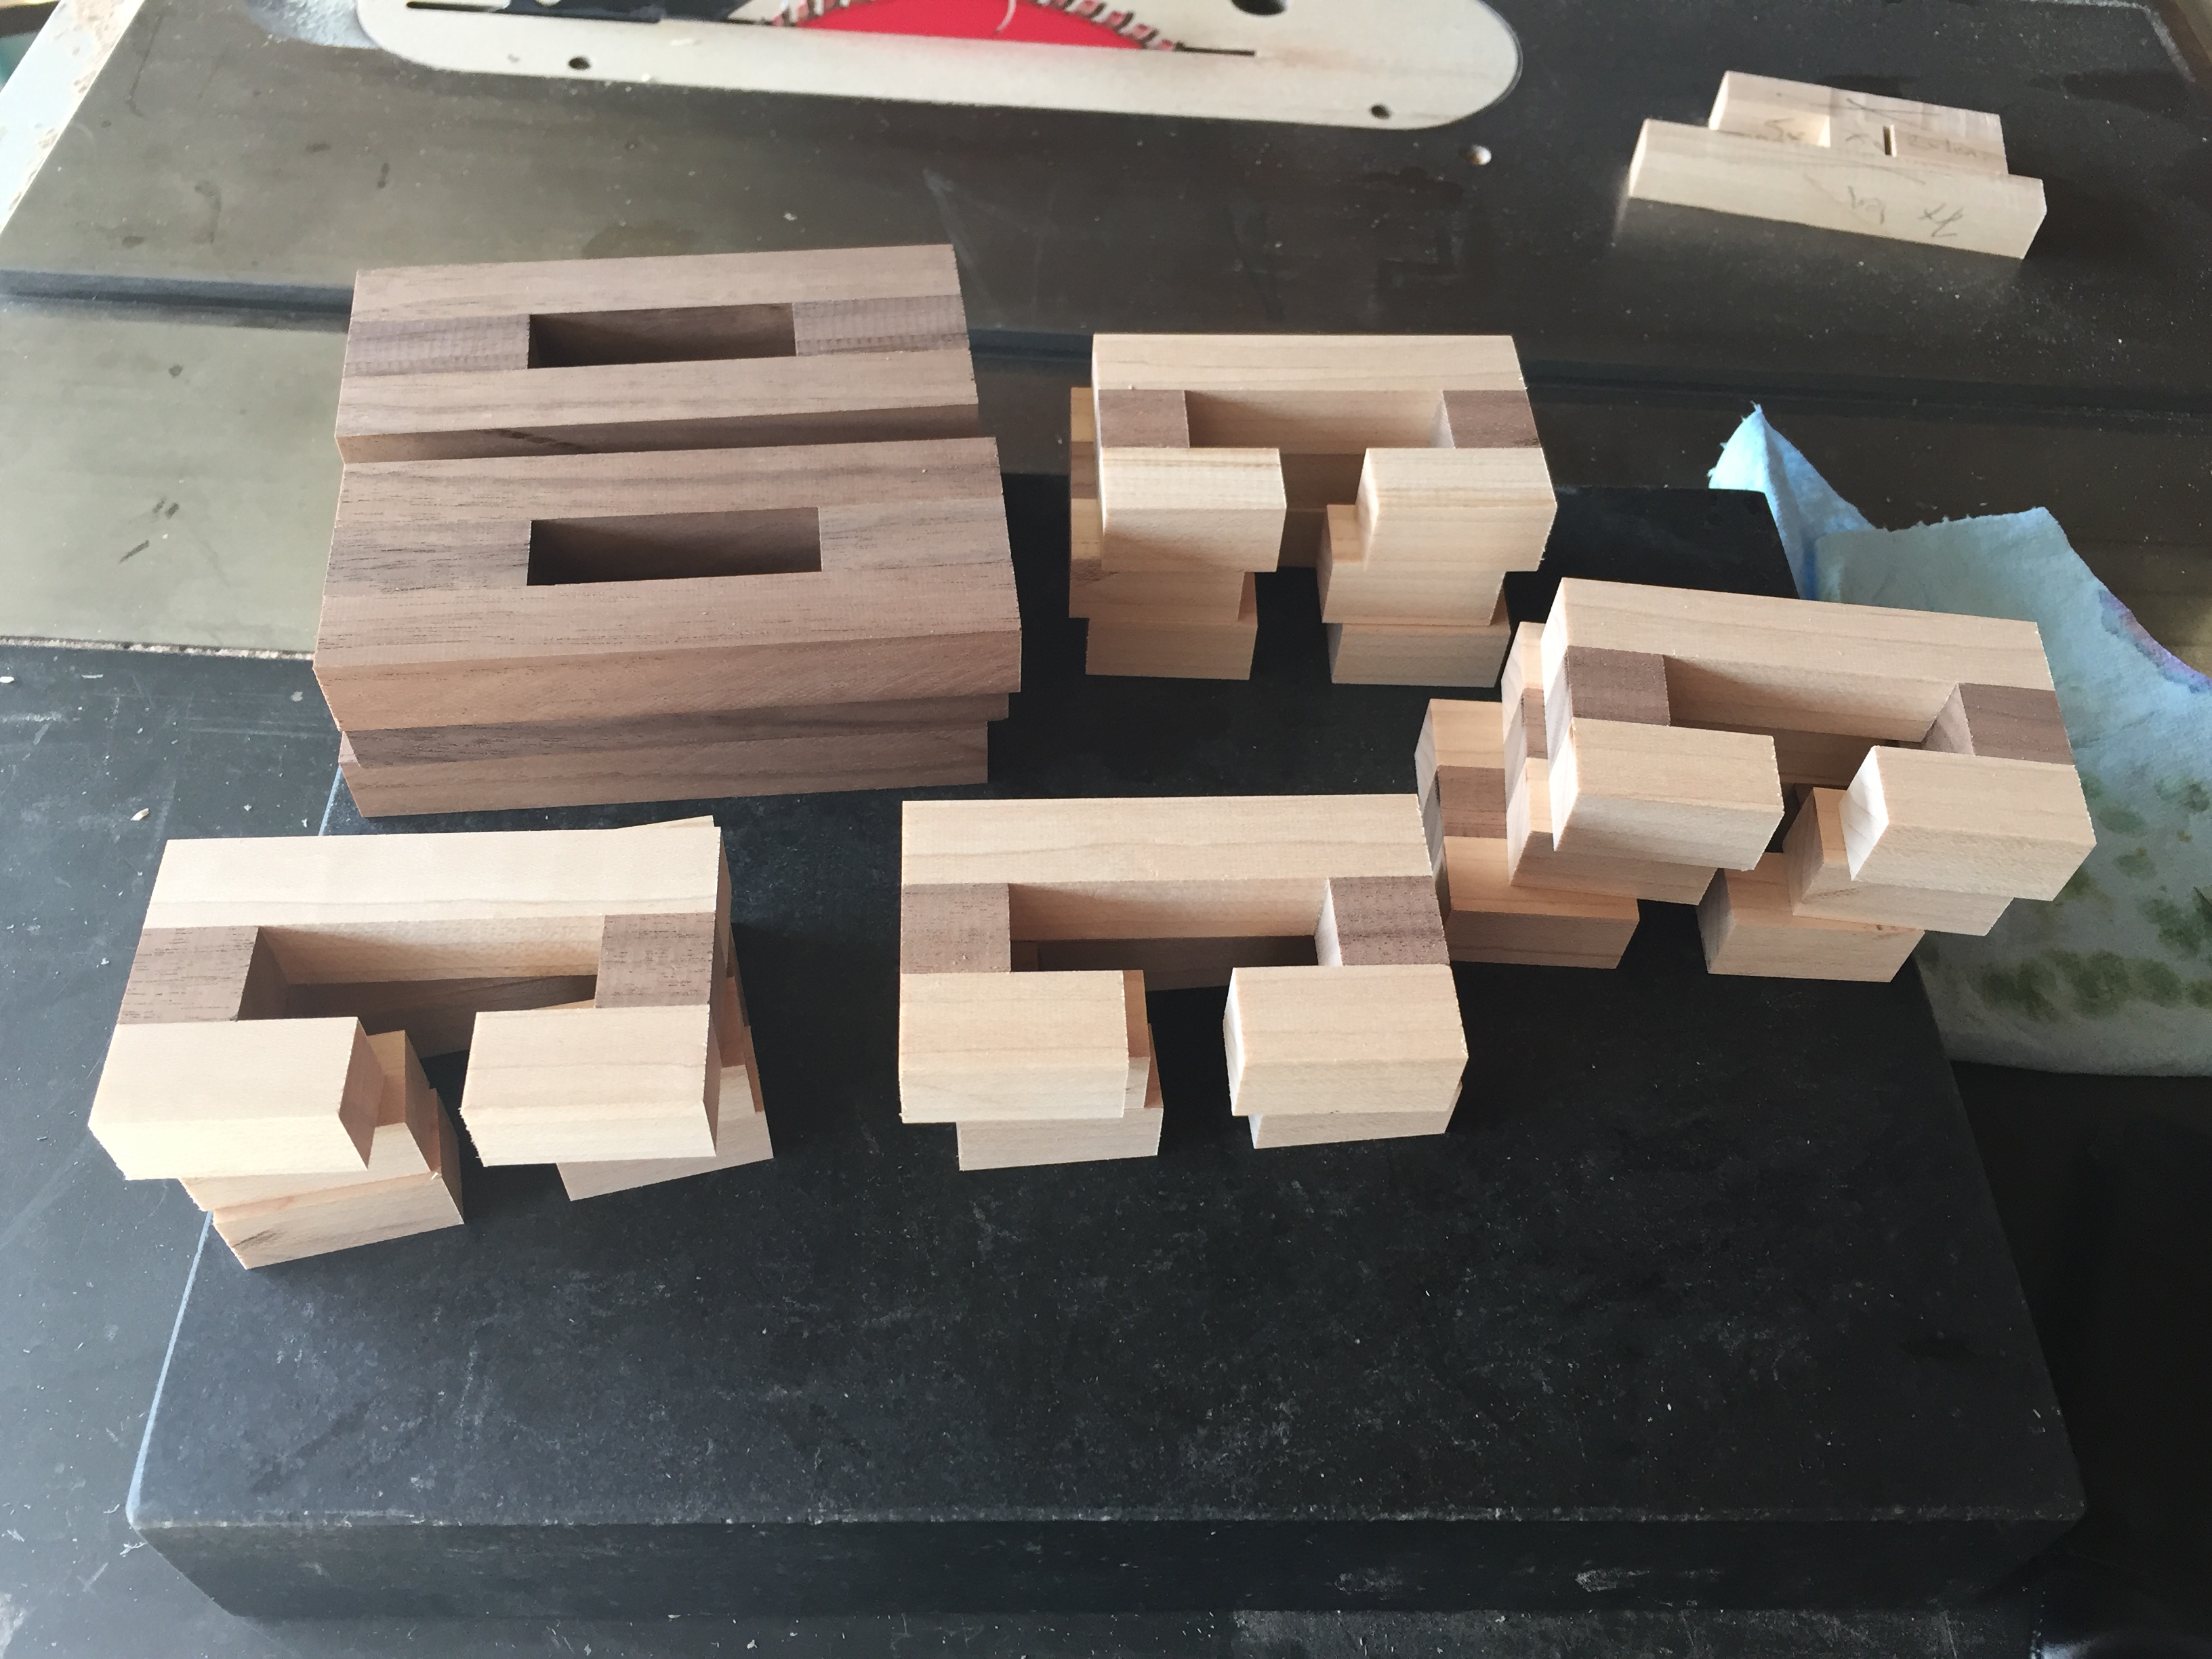
C's and O's

C’s and O’s

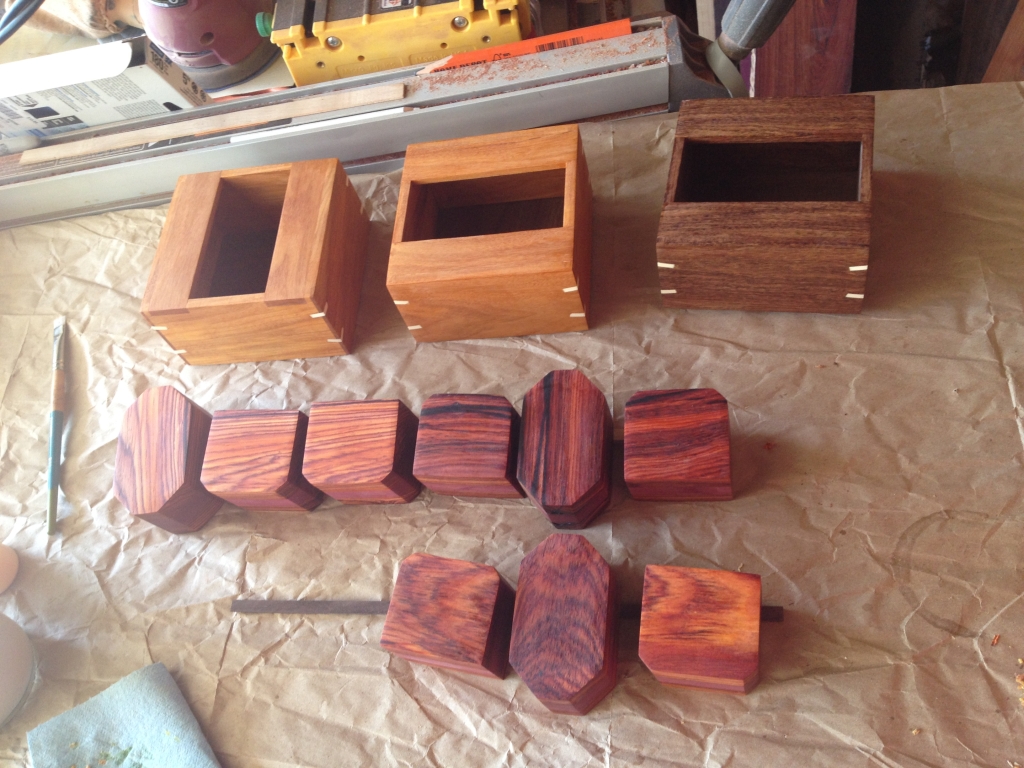
From each pile of sticks, the individual components of each individual puzzle piece are created. Since each piece consists of two C’s and an O, those can be created en-mass, and then assembled into the correct puzzle piece.

Dowels glued in place and slot cut for the spline

Dowels glued in place and slot cut for the spline

Splines glued in place

Splines glued in place

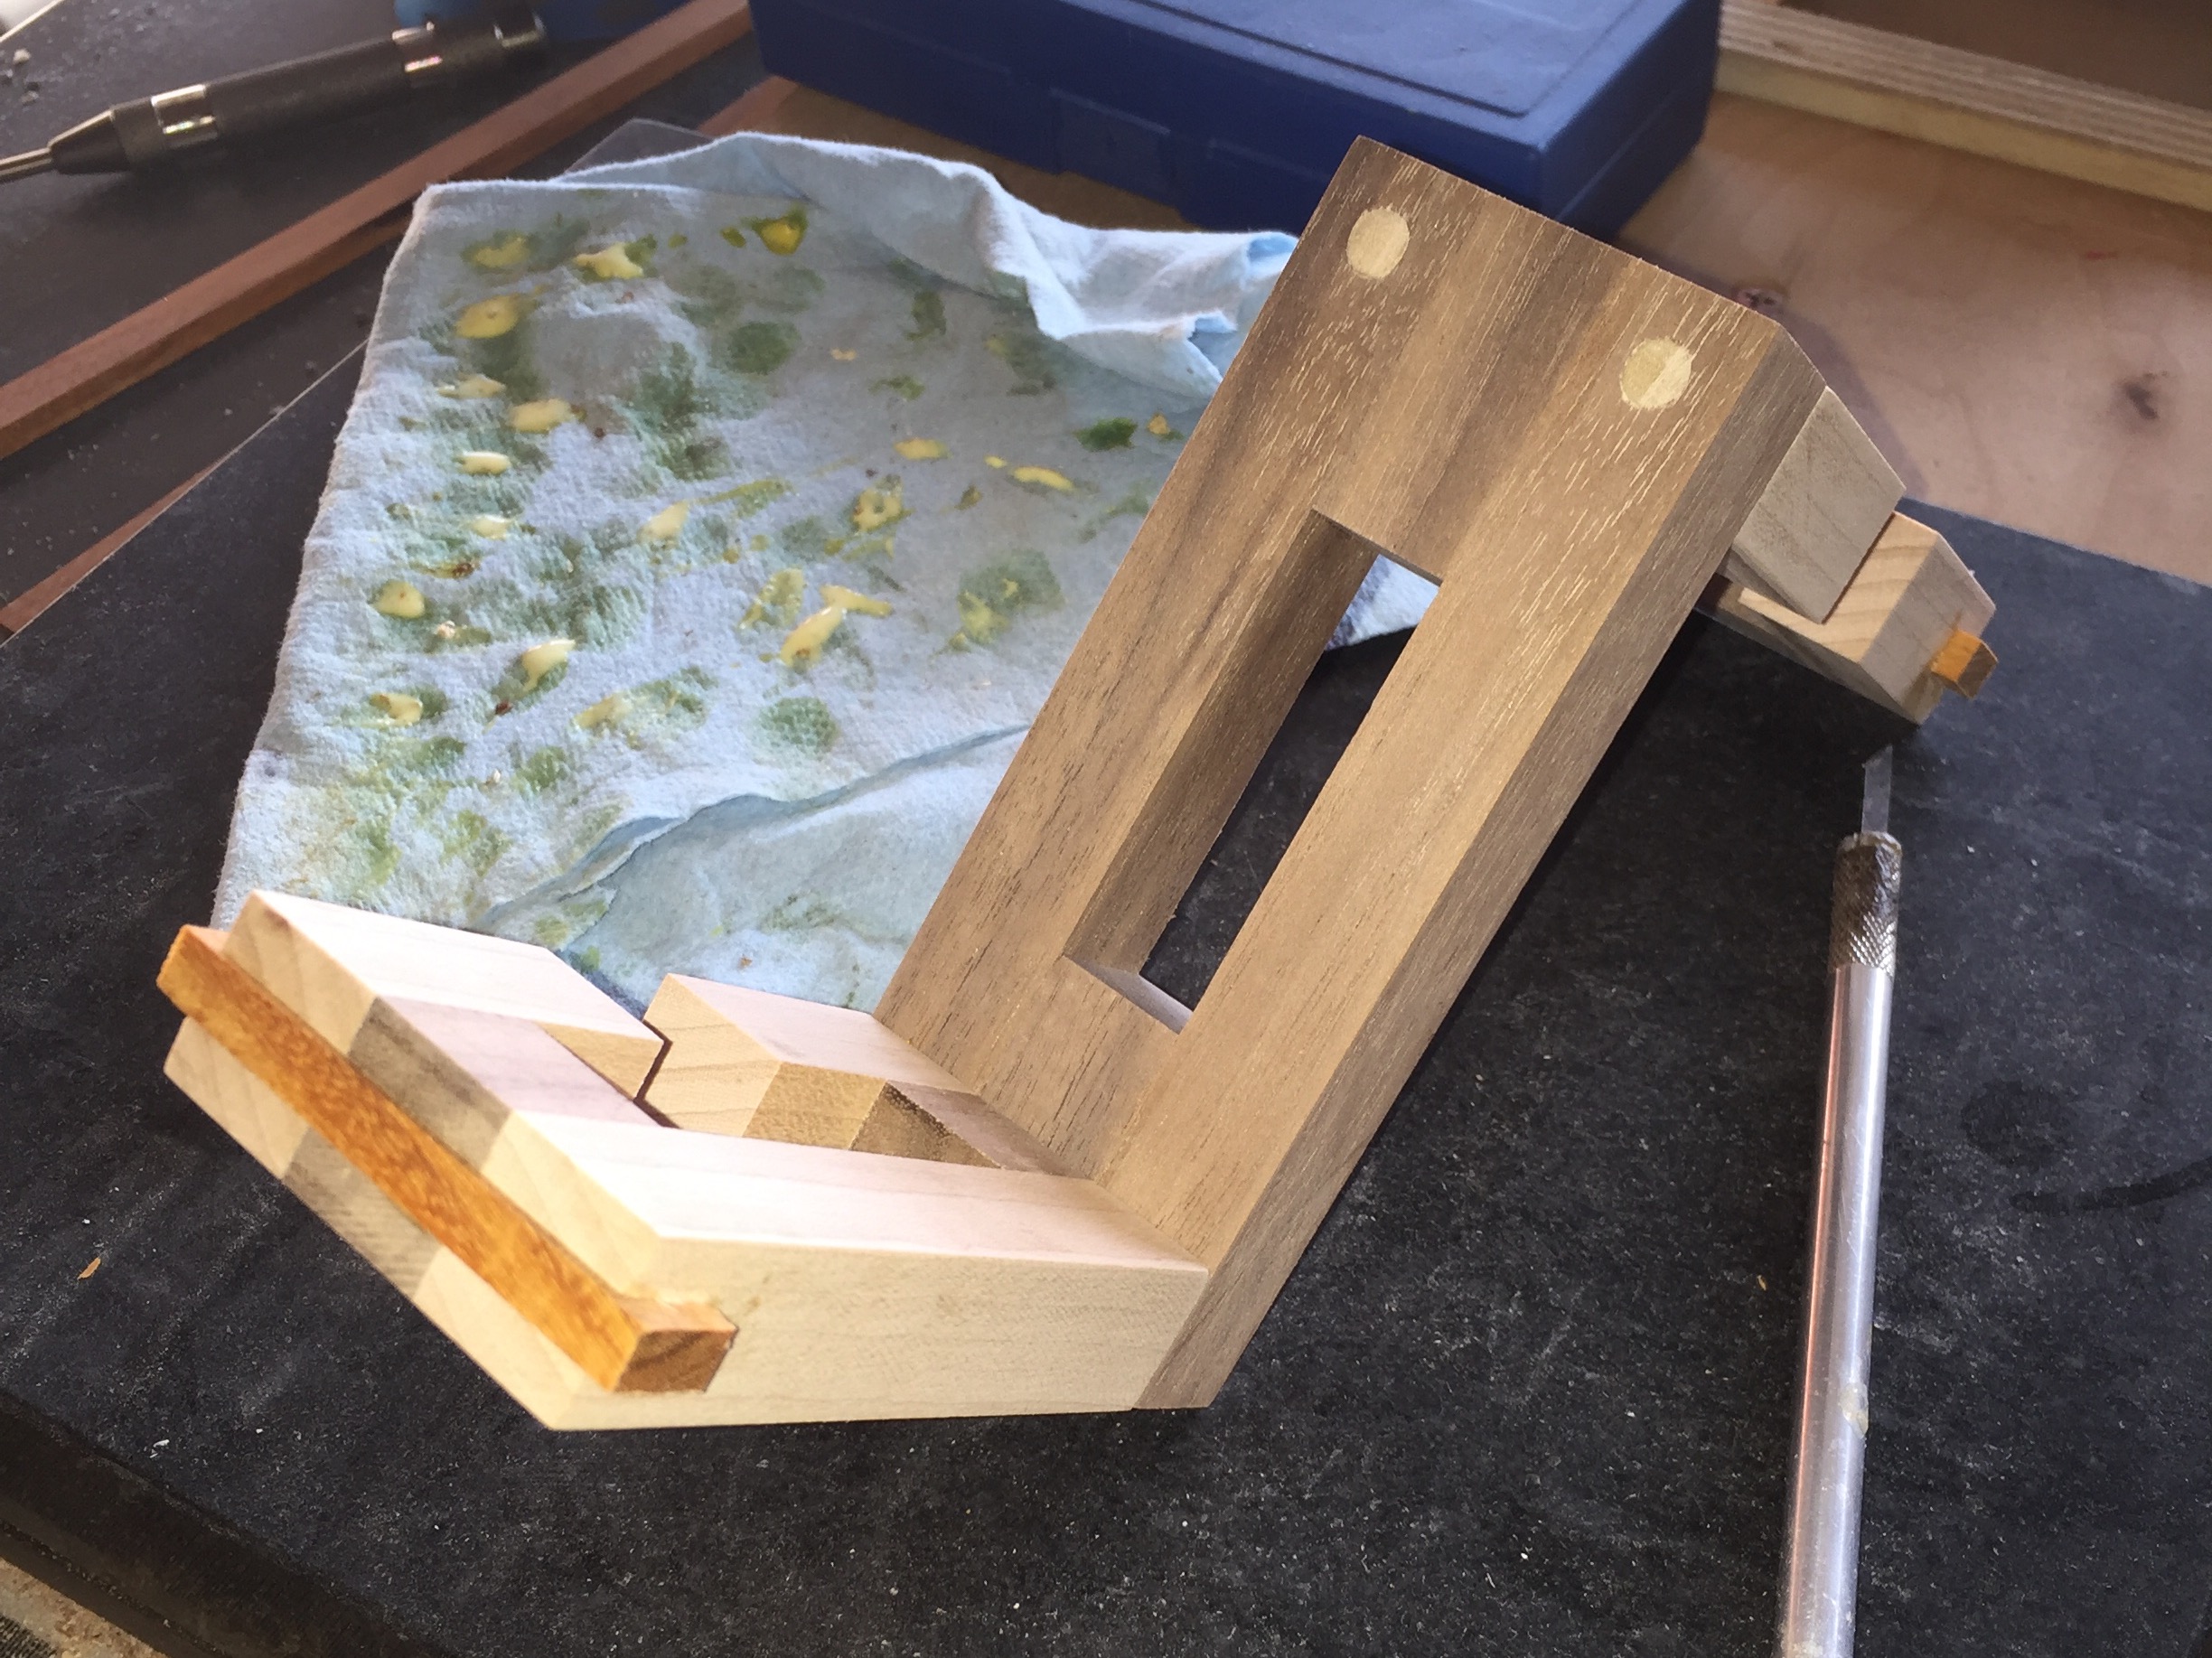
After the individual components are completed, they are glued together to form the final puzzle pieces, and then holes are drilled through the O’s to allow dowels to be glued into place, forming a much stronger joint between the components and helping to ensure that significant force would be needed to break the pieces. At the same time, the pieces are run across the table saw to add a flat bottomed groove in the ends of the pieces to allow a spline to be added. That spline will reinforce the ends of the C’s again helping to ensure that the pieces will not break when the solver is playing with the puzzle. These ends are very weak without some additional support since there is very little gluing surface, but lots of force available given the length of the pieces.

Once the glue has dried, the dowels are trimmed with a special saw which does not mark the surface the blade rests against, and the ends of the c-pieces are rounded to both clean up the spline, and add a visual element to the puzzle pieces in the assembled state. The other advantage to doing this is that is hides any tearout that was created from cutting the groove in the ends of the pieces. Normally I will back-up the cut with another piece of wood against the back of the piece where the blade will exit. This prevents the wood fibers which are unsupported otherwise from being ripped away from the piece, however with this type of cut that is very difficult, and taping the joint is only partially successful. So from my perspective as a craftsman, this rounding is both useful and pleasing to the final puzzle piece.

Applying finish really brings out the beauty of the wood

Applying finish really brings out the beauty of the wood

At this point, the puzzle can be tested to ensure that all the pieces fit together. Unlike many other puzzles I’ve made there’s no way to test the puzzle sooner. That means that I could have spent 10 hours making the pieces, and have nothing but scrap to show for it. Unfortunately, the pieces are so long that without all the dowels and splines, they are not strong enough to be put together into the final puzzle meaning that it’s an all or nothing build. Fortunately with the experience I have gained over the last few years, the puzzles went together without issue. Only minor sanding was required in a couple of places on one of the puzzles to ensure a good fit.

With the pieces tested and fitting together, they can be final sanded up to 600 grit to ensure a smooth and tactile surface, then finish can be applied to bring out the beauty of the wood. My go-to finish for puzzles is still a thinned lacquer then the Beall Triple Buff system to really make the pieces shine.

Just a few finished puzzles

Just a few finished puzzles

That’s about all there is to it. Each puzzle takes around 15 hours to make from start to finish, and I’m now very happy to have one of these excellent puzzles in my collection. They are a lot of work to make, and I’ll be honest, as happy as I am to have one in my collection now, I’ll not be making more of these any time soon! Hopefully the write-up was interesting, and hopefully I’ll be back to writing more soon.

Ring & String, or perhaps “Something memorable from IPP”?

Hi all, it’s been a good few weeks since I sat down and wrote anything, but then after a fantastic three and a half weeks touring the UK, catching up with friends and family; a wonderful long weekend with the MPP crowd soaking up the fantastic hospitality of the amazingly humble and welcoming Walker household; a week of IPP and many puzzle friends old and new, all mixed in with my one year delayed Honeymoon, it’s good to be back, and probably about time I put a pen to paper, or finger to keyboard.

There’s a good few puzzle bloggers out there who are writing about IPP, and all the fabulous conversations and events that took place over the week, so I’m not going to give you my account of what happened. But I do suggest you go read Allard’s Assessment, Rox’s Ramblings, and Jerry’s Journey. They’re all well worth reading, and will give you a good feeling for what a fantastic time was had by all. I’ve said it before and I’ll no doubt say it again, the people in the puzzle community are an amazing group, and I’m proud and humbled to know each and every one of you, and to be able to call so many friends. Thank you.

I will give one special mention to Allard and his wife Gillian (as well as their two dogs, Ben and Jerry) for welcoming my wife and I into their home, putting us up for 4 days, feeding us, making us so welcome and at home, and not accepting a single penny in thanks. You truly are great friends, and I can’t wait to return the favour at some point. Fortunately no harm came of the dogs who decided to eat some of my green packing peanuts while we were all out. The only casualty with Allard’s lap when one of them decided to throw up on him. (Sorry!)

Anyway, I do want to mention one great experience from my IPP. While there Dr Colin Wright was wandering around talking to people and showing us some interesting little tricks. Colin is a Juggler, magician and specialises in Communication. I spent quite a bit of time talking to him, given that I juggle, have done my share of magic over the years, and with all this writing that I do, I have to accept that I have something to do with communication as well. (Ed: So hurry up and get to the point!)

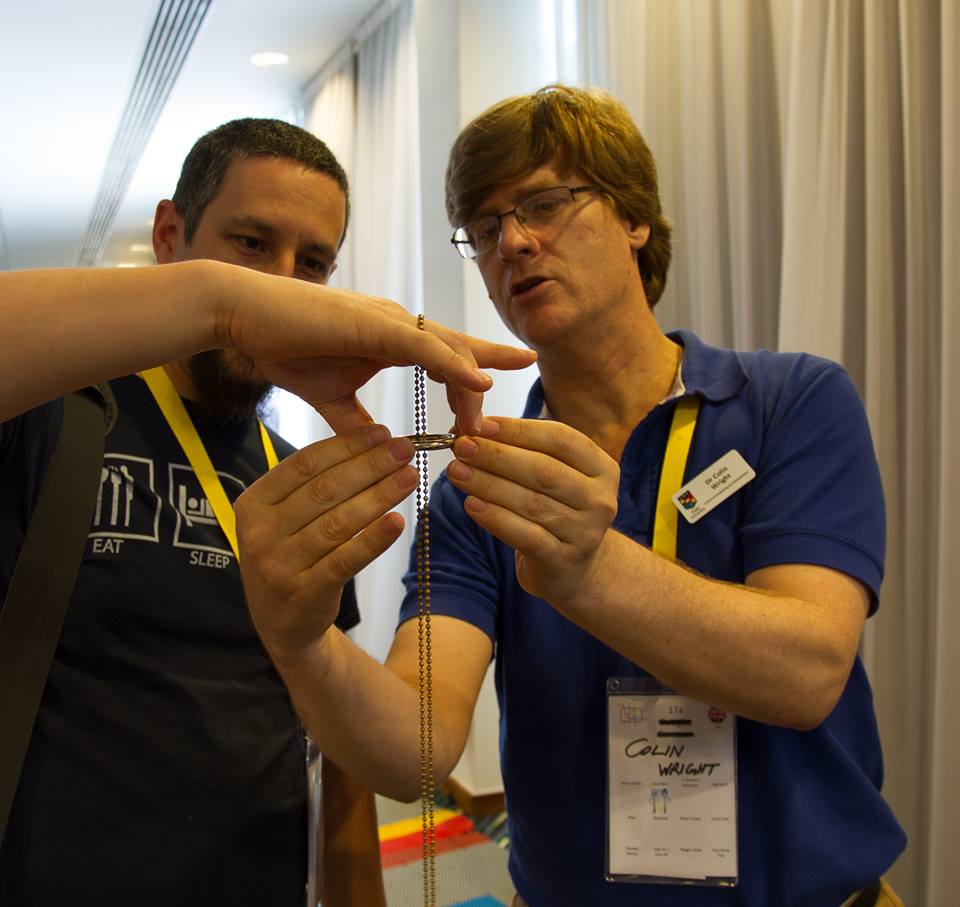
Colin was wandering around with a length of chain around his neck, attached to it there was a steel ring. At one point as I was wandering around talking to the myriad of puzzlers Colin had a group around him, and he was doing something interesting with said ring and “string”.

“Now, hold it like this ….”

As you can see, being the curious chap that I am, I wandered over and listened in to what he was saying. Before I knew it, he’s turned to me, and I have the apparatus around my hand, and with a huge grin have been shown how the magic happens, and have now done it for myself. Yes, I really did have a huge grin on my face, as Colin explained what was happening, and that he had analyzed the behaviour to work out exactly how things worked, and perfected the one-handed technique. A few other people commented that they’d seen it before, and even done this before but using other grips, two hands or even a table. (Ed: But what was it … get to the point already!)

Well when I got back from IPP, I went to the local hardware store, picked up a couple of rings, some chain and made my own copy, and one for my son. I knew he would like it, and for a couple of dollars, it’s a great toy to have. Anyway, the picture above surfaced on Facebook, and I was tagged. A few comments from confused readers later, and I find myself making a video showing what we were doing. (Ed: But you’ve still not told us what that was.)

Rather that try to explain, I’ll just leave you with the video below. I am fortunate enough to have a high-speed camera now, so I took some footage at high speed showing what happens, and put that in the video. I don’t show how to do this, but it’s fantastic to see what’s happening.

Now, I took this to work with me to show a couple of my colleagues as I knew they would appreciate it. What happened though was entirely unexpected. Rather than asking how to do it, I was relieved of the pieces, and the team started trying to work out how to do it themselves. (I’m and engineer, and this has become a problem to be solved). For me this was fantastic. I’ve now seen about 4 different ways that can reproduce the result, none as elegant as what Colin showed me, and none that are nearly as reliable.

So here’s a challenge. Go get yourself a solid ring, a length of chain and try this for yourself. I’d love to see how you get on in the comments!

Until next time, when I’ll be back to puzzles, enjoy the video.

Reproducing a puzzle

It’s been a little while since I sat down and wrote anything, and it’s not for lack of puzzles to write about, but really because I’ve been so busy in my own shop making puzzles. With IPP looming, I had set myself some lofty goals of designing and producing my first exchange puzzle. That in itself was a lot of work, but I didn’t stop there. I went on to make copies of Iwahiro’s ODD Puzzle, then a small run of puzzles to give away to new IPP attendees, and then I took on my most ambitious project to date. I remade a Stickman box.

The finished box

The finished box

If you’re a regular reader, you’ll remember that some time back I won a Stickman Domino Box at auction, which needed a little work to turn it into a fully working Domino Box. Having made the Dominoes, and learned a lot about the box along the way, I had the insane idea that I should make a few copies of the box for other puzzlers. There were only 25 originals made by the Stickman Puzzle Box Company, and it’s such a fun design, it really should be played with by more puzzlers. So with insanity on my shoulder, and time slipping away beneath me, I embarked on the most challenging project to date.
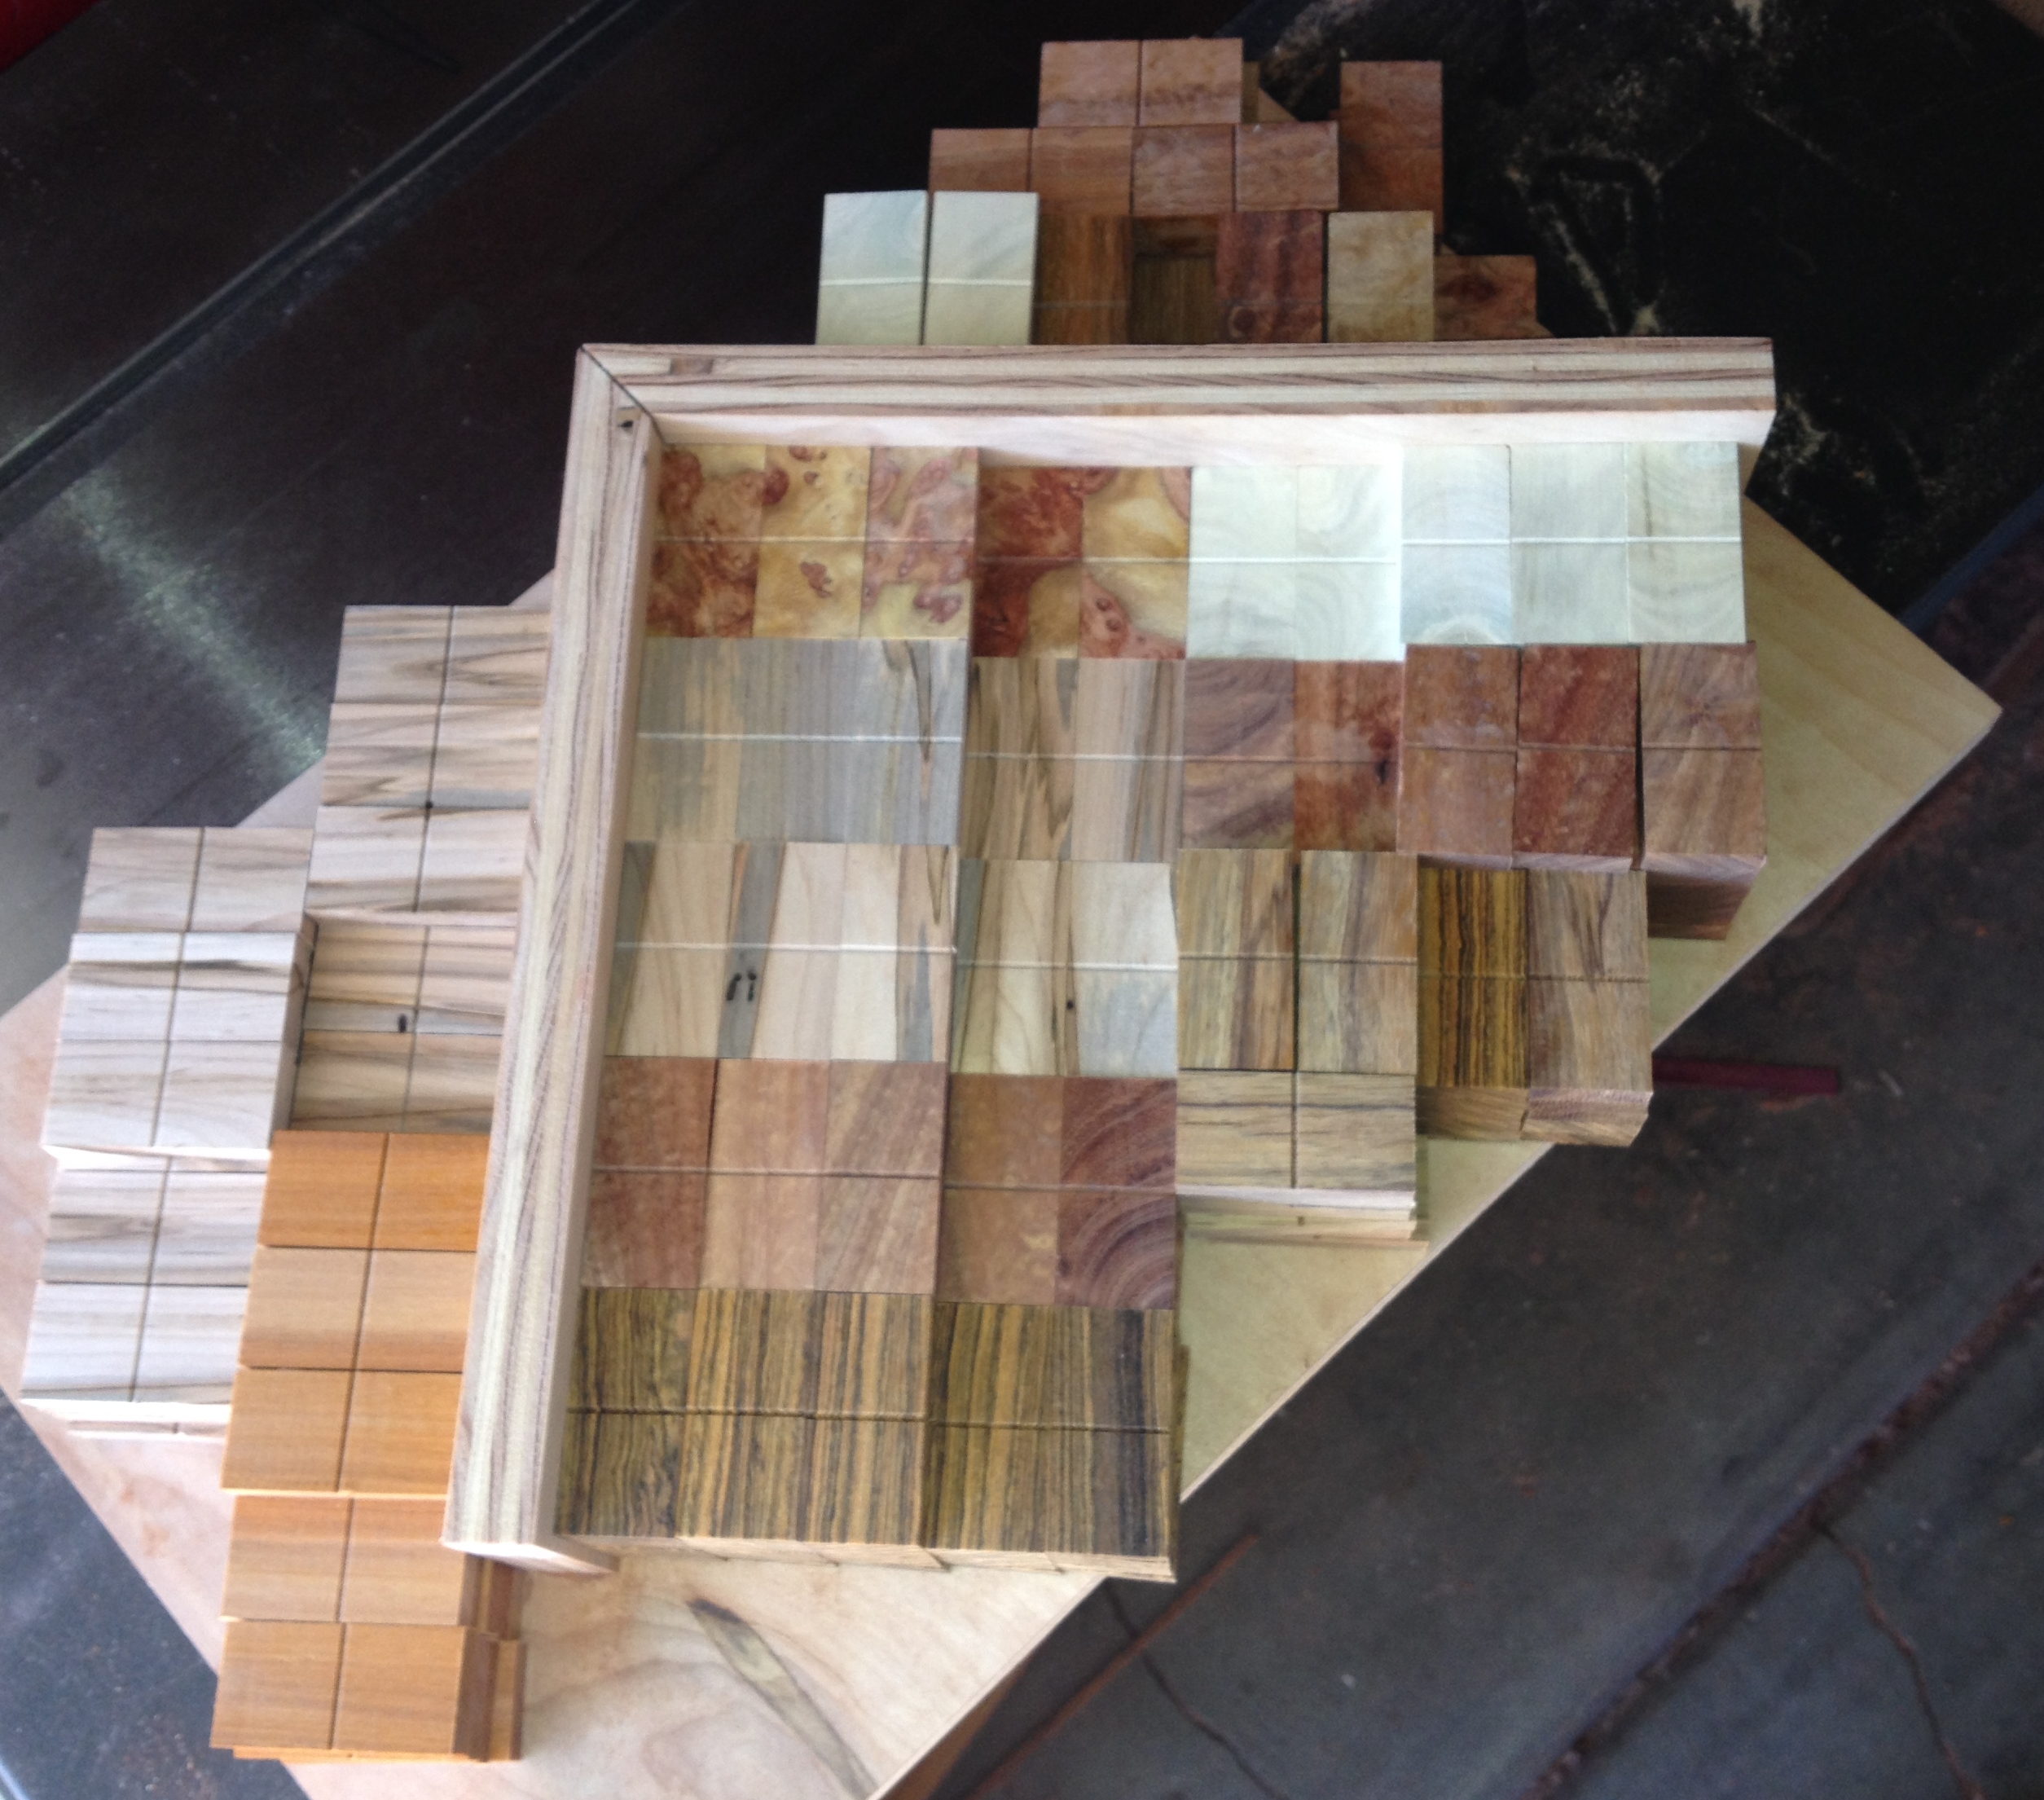
A new batch of Dominoes

A new batch of Dominoes

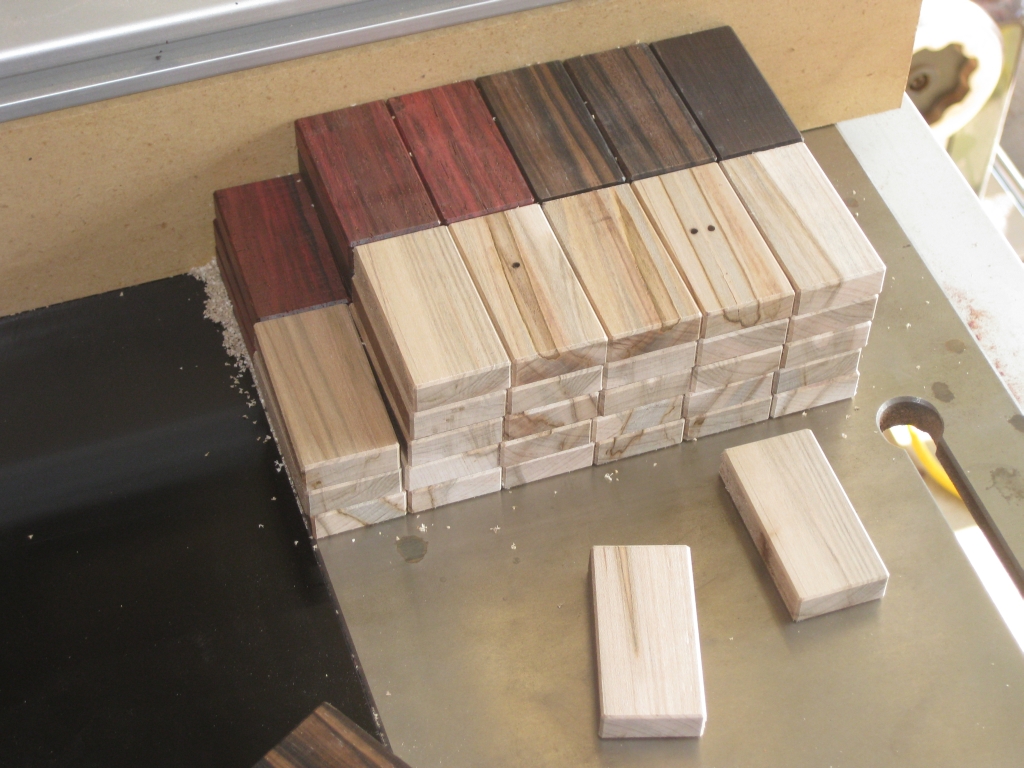
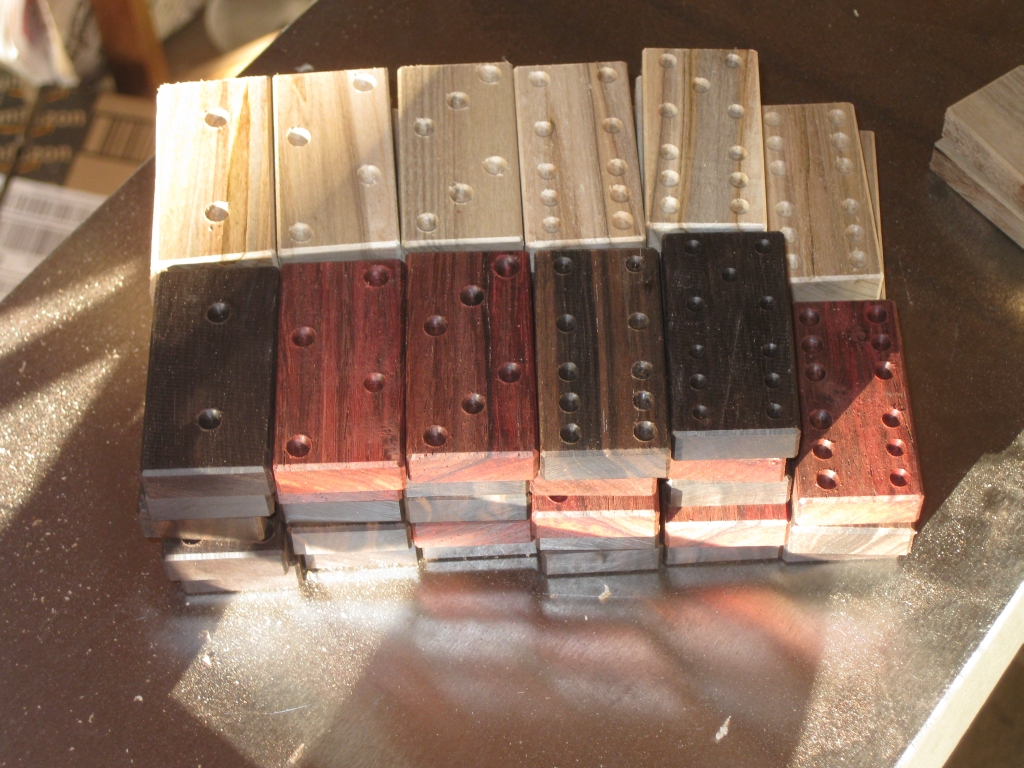
First off, I needed a new set of dominoes, so looking around the growing stockpile of exotic woods that I’ve purchased, I selected a number of boards, and set about the same process as before, and made a bunch of dominoes. I’ll not go into the details, as I’ve covered them elsewhere, but in total I made up 11 sets of dominoes.
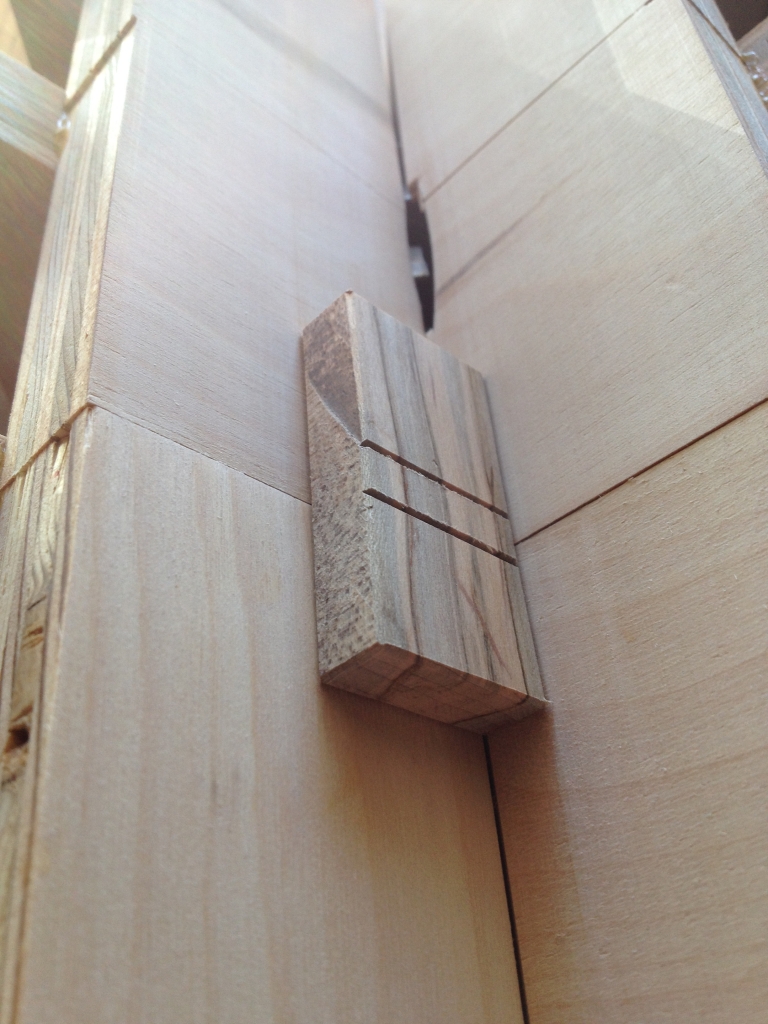

Puzzle Piece Bevel Jig

Puzzle Piece Bevel Jig

The last time I’d made the dominoes, I created the bevel on each edge using the router table, with a 45 degree bit. In fact that’s how I’ve done all the bevels for every project so far. I’ve never been too happy with that as a process though. The pieces I tend to work with are a little small, and with a high speed rotating blade, it wouldn’t take much for a piece to slip, and things to go wrong quickly. So taking some advice from fellow puzzle maker Eric Fuller, I created a new jig. As you can see, it’s a 45 degree cradle, where the saw blade pokes out through the centre. This allows me to run the piece to be beveled over the blade pretty quickly, and the amount of the blade sticking out is so small, that it’s almost impossible to stick a finger in the blade. Safety first!
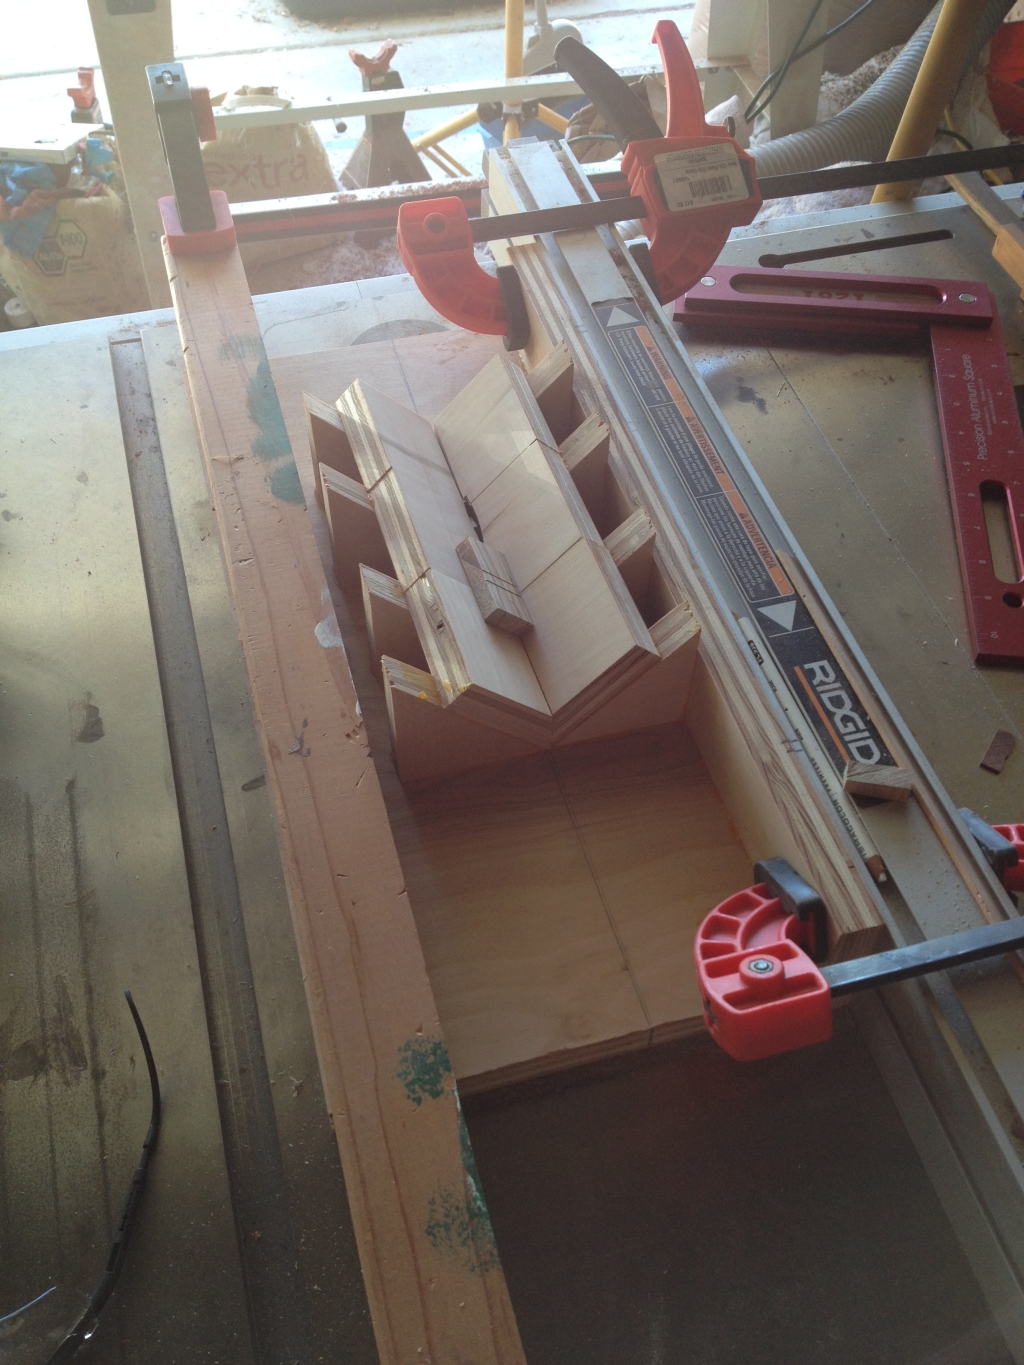
A wider shot of the beveling jig

A wider shot of the beveling jig

As you can see from the wider shot, the jig is clamped to my fence, and also clamped to the table, so it won’t move anywhere, making this a pretty safe jig. It’s also fast. Since I don’t need to put a push block onto the piece, and then guide it over the spinning router bit, the whole thing takes much less time.
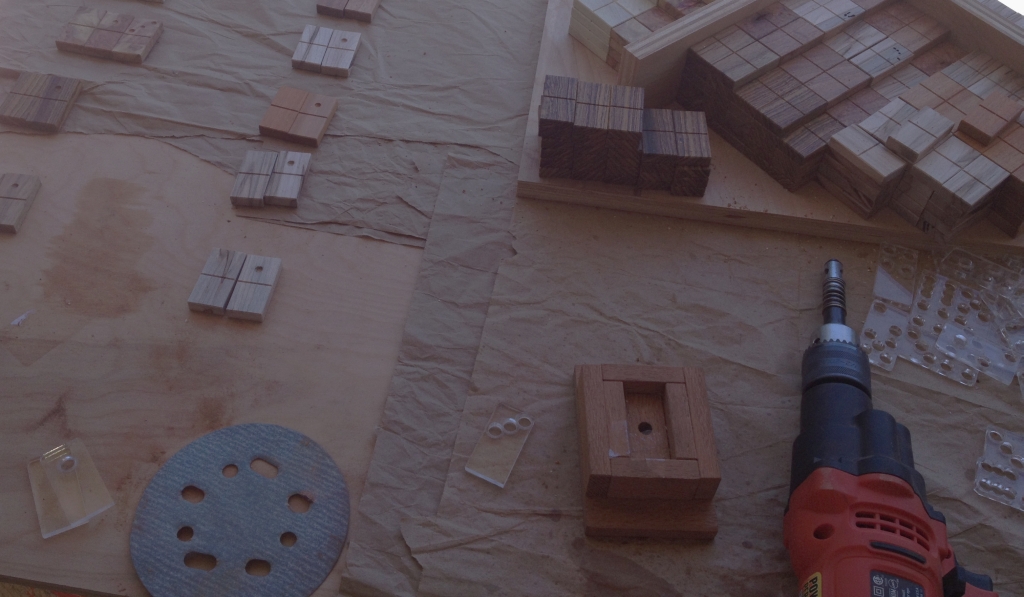

Drilling Domino pips

Drilling Domino pips

Much like the last time I made dominoes, I had the jig and templates to cut the dots or ‘pips’ for the dominoes. With 11 sets, or 308 dominoes, or 1848 pips depending on how you want to look at it, there was a lot more work this time round. I’d learned from the last attempt when I ended up with blisters from where the drill rubbed against my fingers, and taped up my fingers at the appropriate points to save any further blistering. Sadly, not everything went to plan.
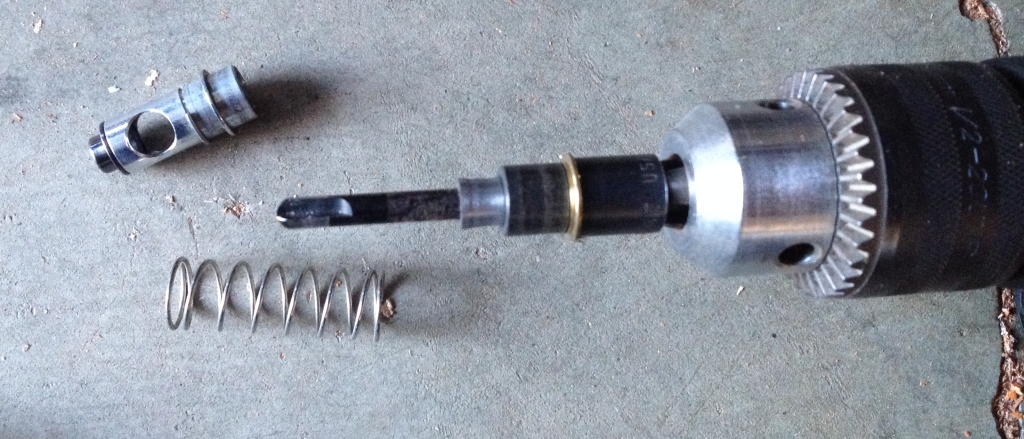
Disaster

Disaster

Around ¾ of the way through the process I hit a snag. My template drill bit exploded! The bit works by having a collar which is held onto the main body with an angled internal neck. So the collar can’t come past that neck as it increases in diameter. The spring pushes it back to the point where the drill bit is covered, and when you push won inside the template the bit is exposed, allowing it to create a pip. Well it seems that since this drill bit made all the original sets of dominoes, it was just rather worn out, and the neck had work to the point where it no longer held the collar in place. With this, it was impossible to finish the dominoes, and I had to scramble to fins a replacement. Fortunately, Rockler sells the kits, and replacement bits … so by mid week I had a replacement and could finish the pips. Dominoes complete, it was time to turn my attention to the puzzle carcass.
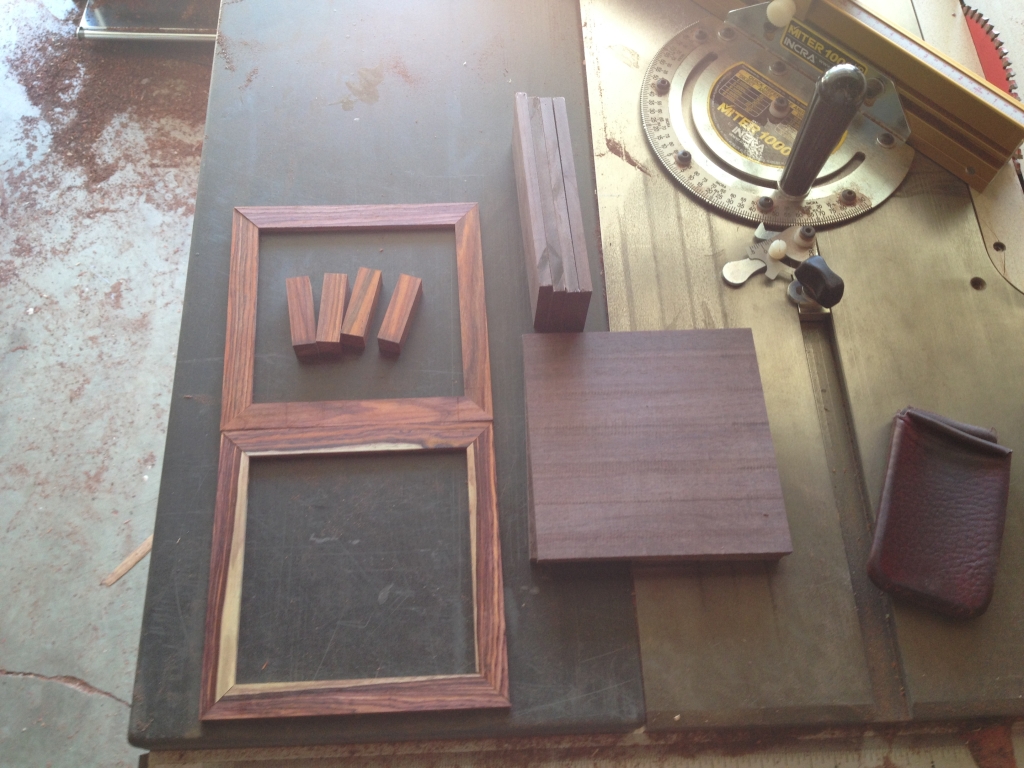
Basic pieces for the carcass

Basic pieces for the carcass

Before starting on making the boxes, I’d been studying the design of the joinery, and how the box had been made for weeks. I’ll freely admit that I really didn’t understand why Stickman had done things the way he had, but I had a good idea of what I was doing, and having taken lots of measurements, I proceeded to start making sawdust. Having surfaced and thicknessed the boards, I cut the basic side panels, the top and bottom, as well as the corner posts, and top/bottom frames. The wood choice was Katalox for the body and Cocobolo for the frame. The Katalox will darken over time to a dark black almost ebony like colour, but starts off as a warm rich chocolate brown. The contrast with the Cocobolo should be quite striking.
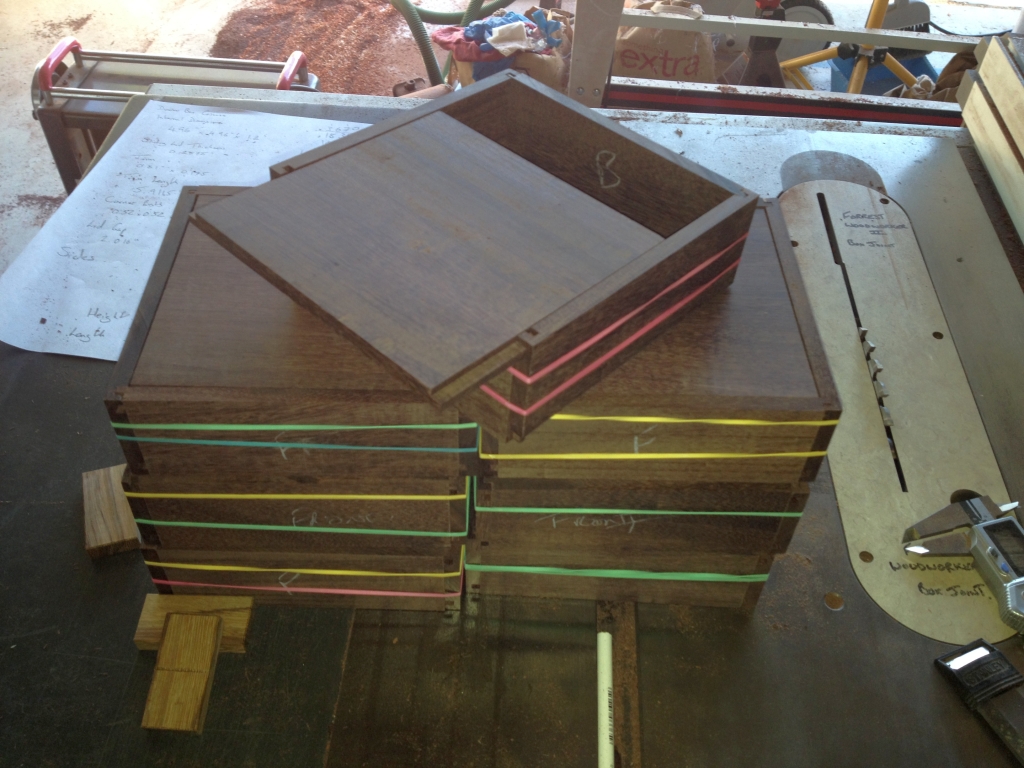
Initial test fit with rubber bands to hold things together

Initial test fit with rubber bands to hold things together

After an afternoon’s work, I had all the various grooves cut to both support the panels, and allow the top and front to slide respectively when the box is opened. At this point, I came in from the shop, and announced to my wife that Stickman is a genius. Having not truly understood why the box was created the way it is, and the reasons behind design choices, previously, I now fully understood why each piece existed, and exactly how it interacted. Not only is the construction a work of art, it also requires the minimal number of cuts, and pieces to make everything work perfectly. There is an elegance to the design that I hadn’t appreciated. Having spoken with Stickman about it, he agreed. It’s only once you’ve tried to repair someone else’s work, or remake it, that you truly appreciate the process they went through to make the final design. And yes, I’m lucky to be able to talk to the original designer, and get his input and feedback as I worked through this project!
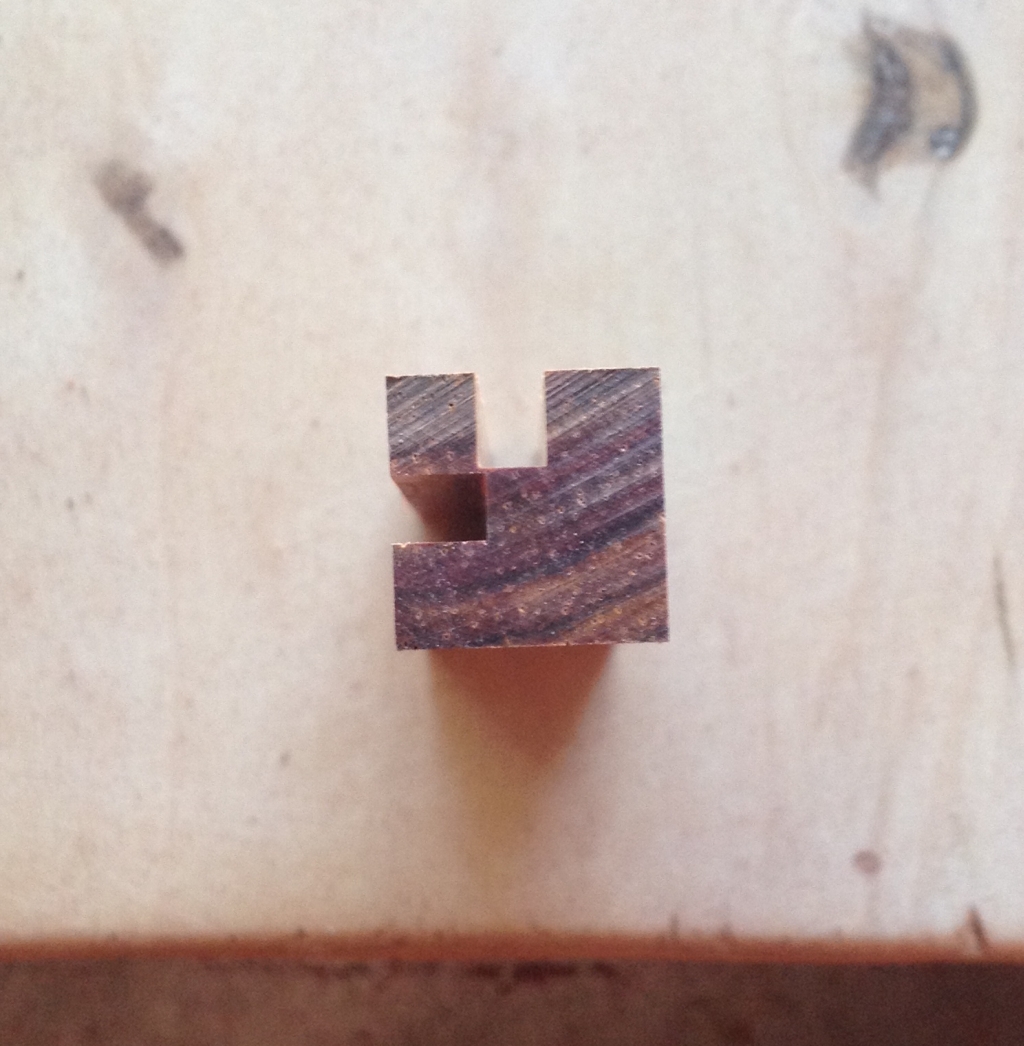
Yes, that piece is still attached

Yes, that piece is still attached

With the main body cut and fitting perfectly, I turned my attention to the ‘decorative’ elements of the puzzle, namely the corner pillars. I’d cut the pieces to the right dimensions but needed to cut out the centre to create corner sections. My first pass on the saw left a rather fun little piece, but after a small adjustment, things were spot on. The joy of working with jigs is that you can make a small adjustment, re-cut, adjust until you’re good, then just cut lots of exact replicas of a piece quickly and accurately.
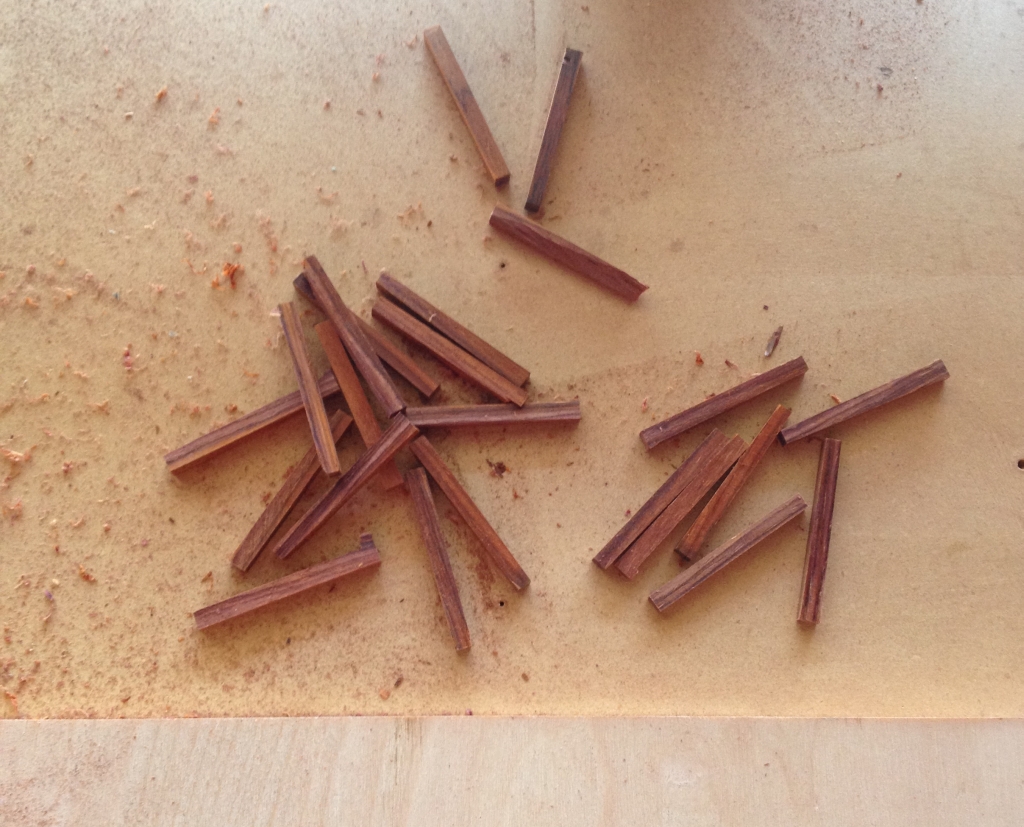

Cocobolo matchsticks

Cocobolo matchsticks

When cutting the corners, I was left with a lot of cocobolo matchsticks. As with any exotics in the shop, these all end up in a scrap bin, and will eventually be used for something else. Nothing gets wasted!
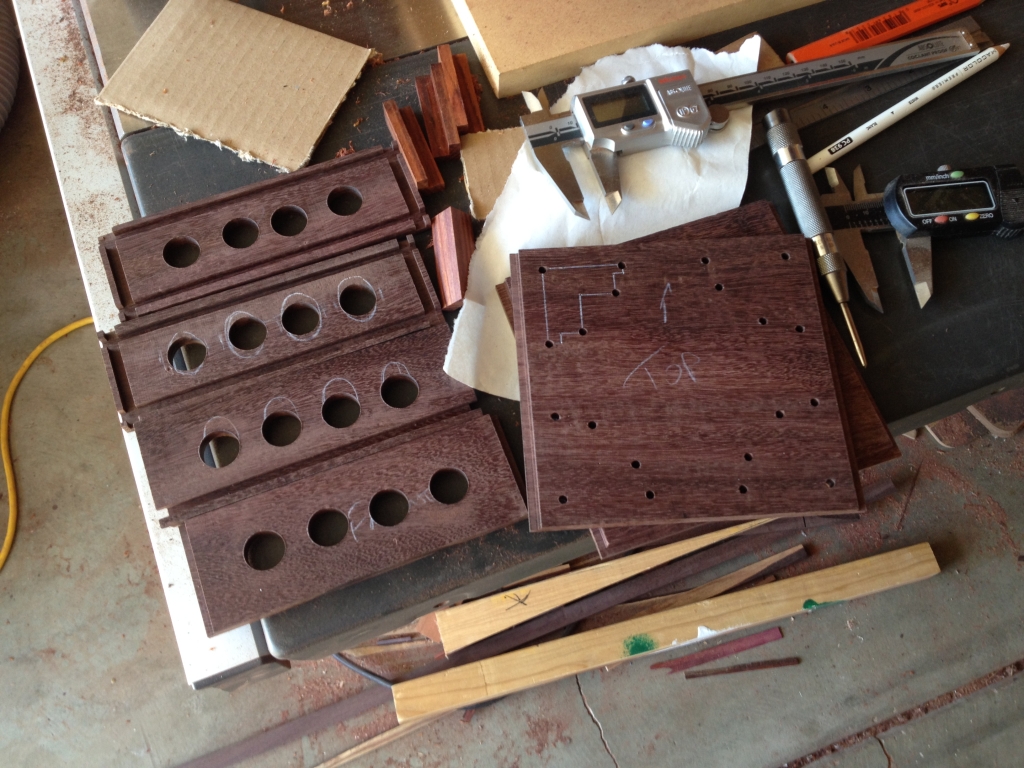

Initial circular holes in the side plates

Initial circular holes in the side plates

The original puzzle is peppered with holes and gaps. They’re not just because Stickman wanted to make the puzzle lighter (although in my case, working with Katalox which is a dense, heavy wood it’s not a bad thing) but they’re integral to solving the puzzle. You need to be able to see what’s going on inside, and be able to poke your fingers through the sides to manipulate the dominoes. Stickman did all this work on a CNC machine, where effectively, he clamped the wood down, and let a computer controlling a router bit do all the hard work. I don’t have a CNC machine, but I did need to replicate all the holes, and they had to be pretty close to the originals since larger holes would let dominoes escape.

To create the ovals in the sides, I started at the drill press with a Forstner bit and drilled the centres out. I had planned to then take the pieces to the scroll saw, and carefully cut out the ovals. Having tried this, on the first piece, I was entirely unimpressed with the result, and decided not to proceed with that method. Instead I went back to the drill press, and drilled an additional hole either side of the initial central hole, creating something close to an oval. Then I spent several hours with a Dremel to clean up the inside of the hole, and make the ovals smooth and consistent over all the panels. It might seem like a lot of work, but in the end it was a lot less work than my original idea would have been!

Time for a game of \

Time for a game of “Join the Dots”

While I was drilling ‘ovals’ for the side plates, I also drilled a lot of small holes in the top and bottom to allow me to create the stepped holes I needed. There’s no clever way for me to do this without the CNC machines, and I had to do this by hand. Drilling holes at the corners allowed me to insert the blade of the scroll saw, and cutout the holes I needed. By having a hole at each corner, I can easily turn the blade, and get square corners. Before I could start working at the scroll saw though, I needed to have a template to follow, so after a game of “Join the Dots” I had reference lines I could follow.
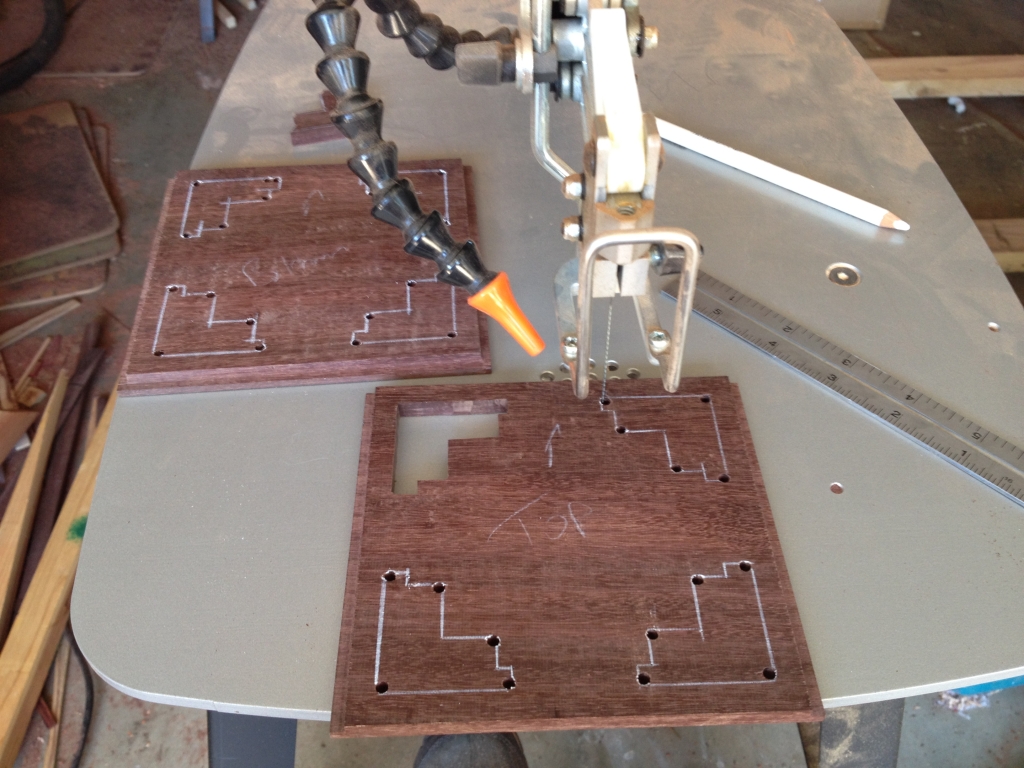
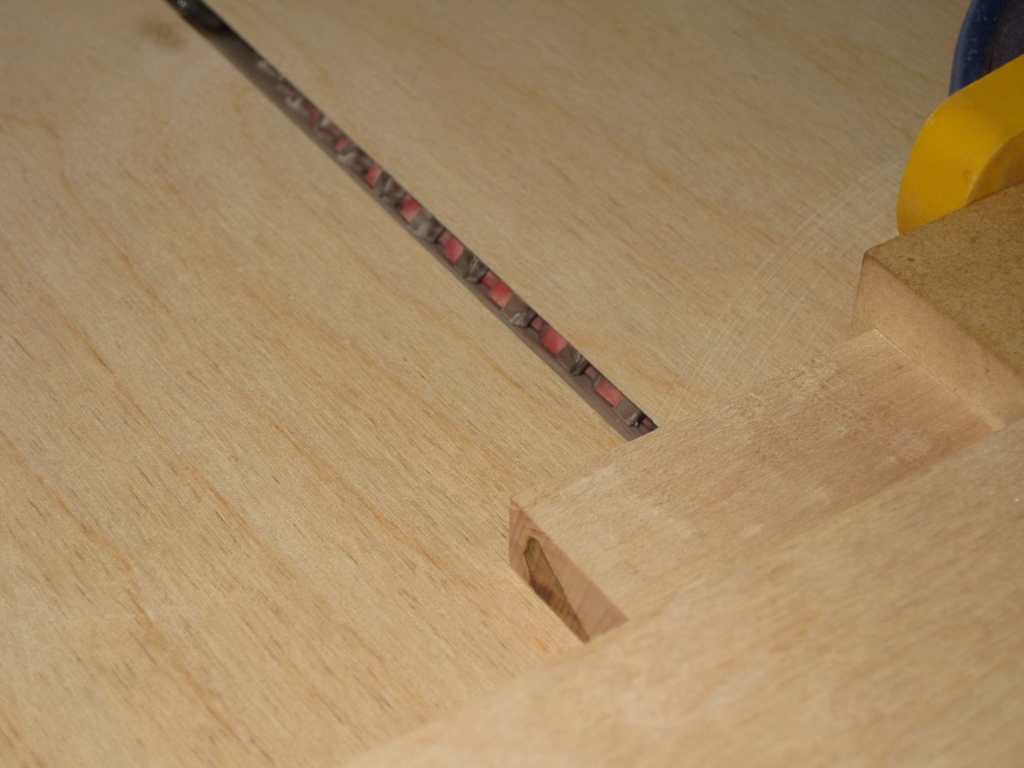
Inserting the blade through the holes

Inserting the blade through the holes

This shows how the blade is inserted into the middle of the piece, and lets me cut out the hole without having to cut through the sides of the board. It might seem obvious, but there are very few tools in the shop that allow you to make such a cut, and the Scroll Saw is the only one that is close to safe, and accurate enough. The blade I was using cuts a saw kerf that is just 0.01″ thick and leaves a very smooth finish, meaning that there was little additional work after cutting. Of course, I still had to take my time, and each plate took around 45 minutes to cut.
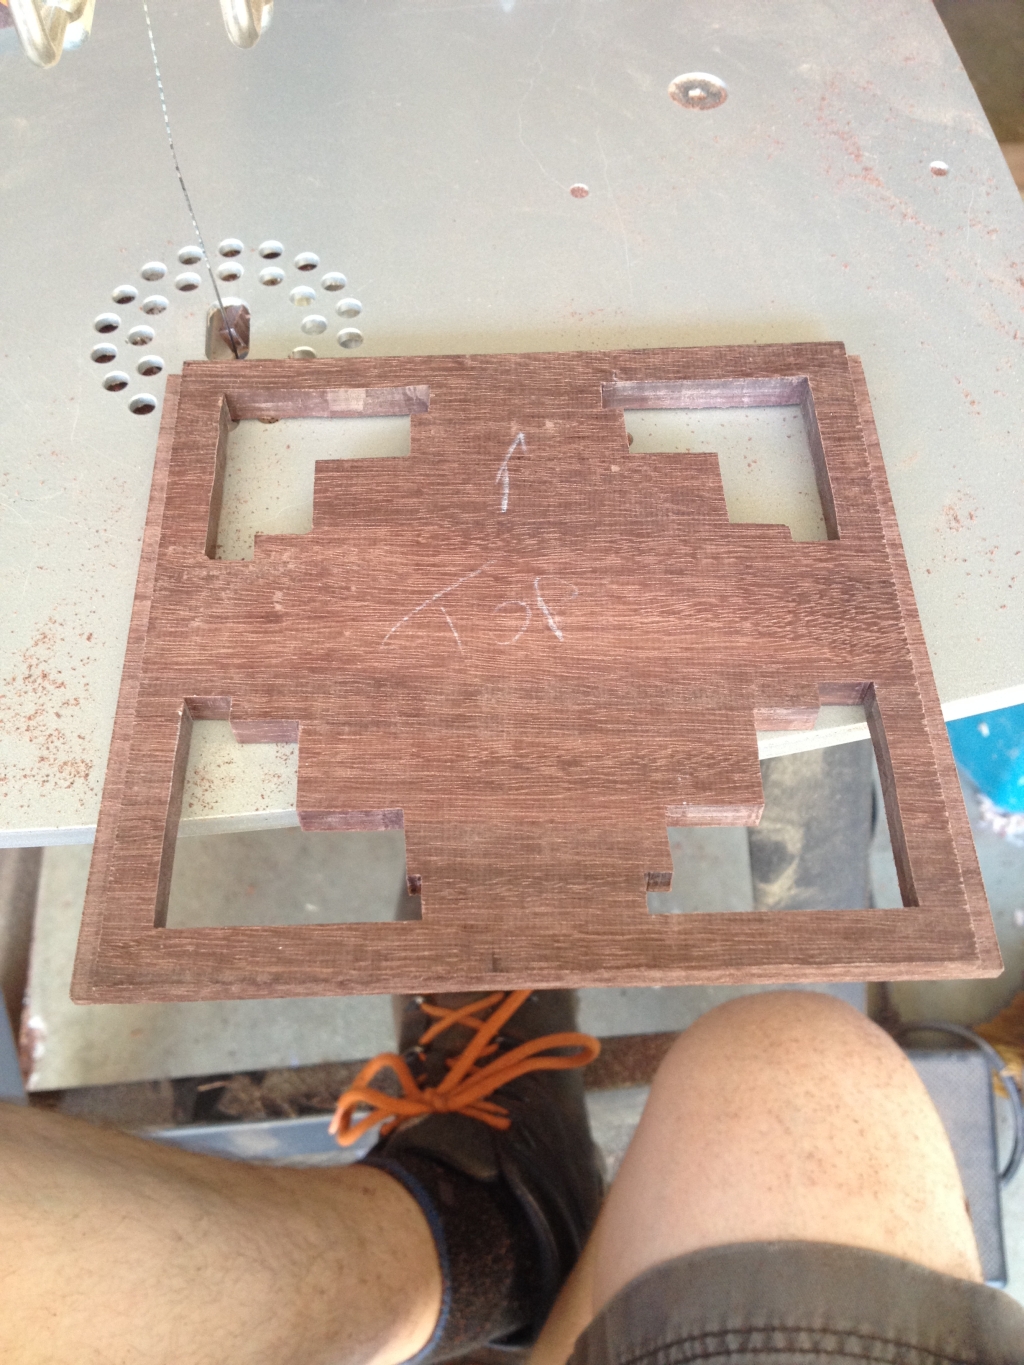
Forgive my Scottish knees

Forgive my Scottish knees

With one panel fully cut, there were only 13 more to cut. Over the course of the next couple of days, I slowly worked my way through them (and a good number of fresh blades … Katalox is dense and dulls blades quickly) before sticking some sand paper to a lollypop stick, and sanding the edges of the holes to soften them, making the piece much nicer to hold.
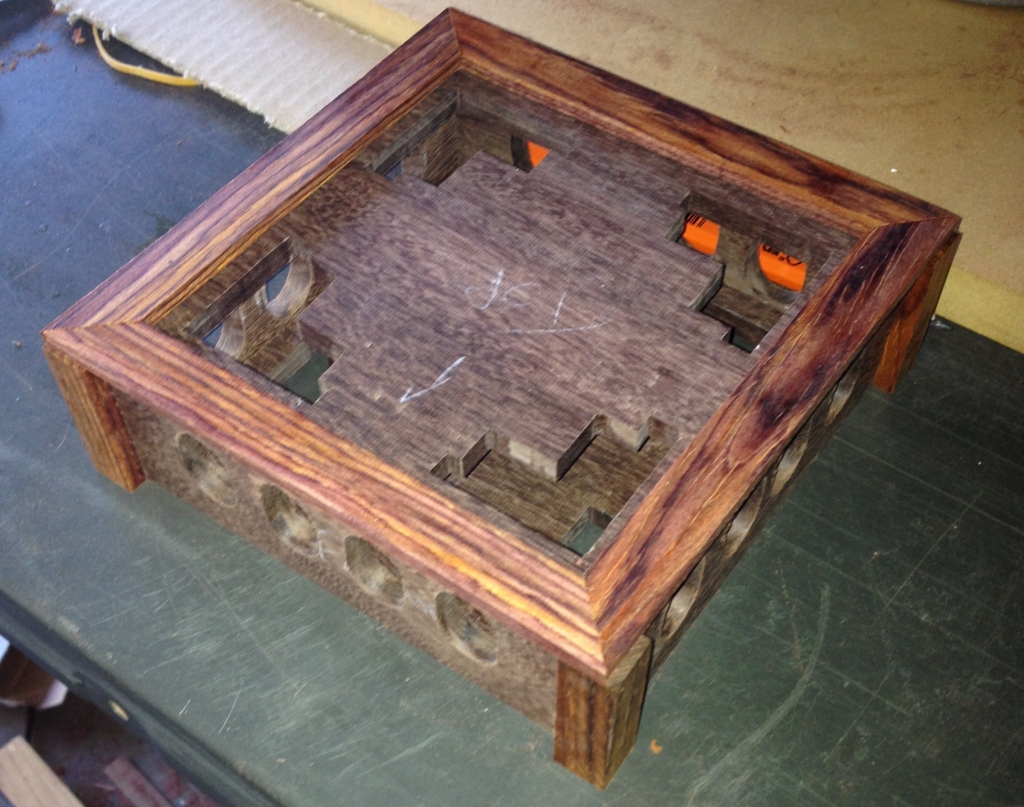

My first dry fit

My first dry fit

With all the components cut, I could put the pieces together for the first time, and get a feeling for how the final puzzle would look. There was still a lot of work to be done before I could start gluing up the pieces, but this gave me a good feeling for the fit and the look of the finished puzzle.
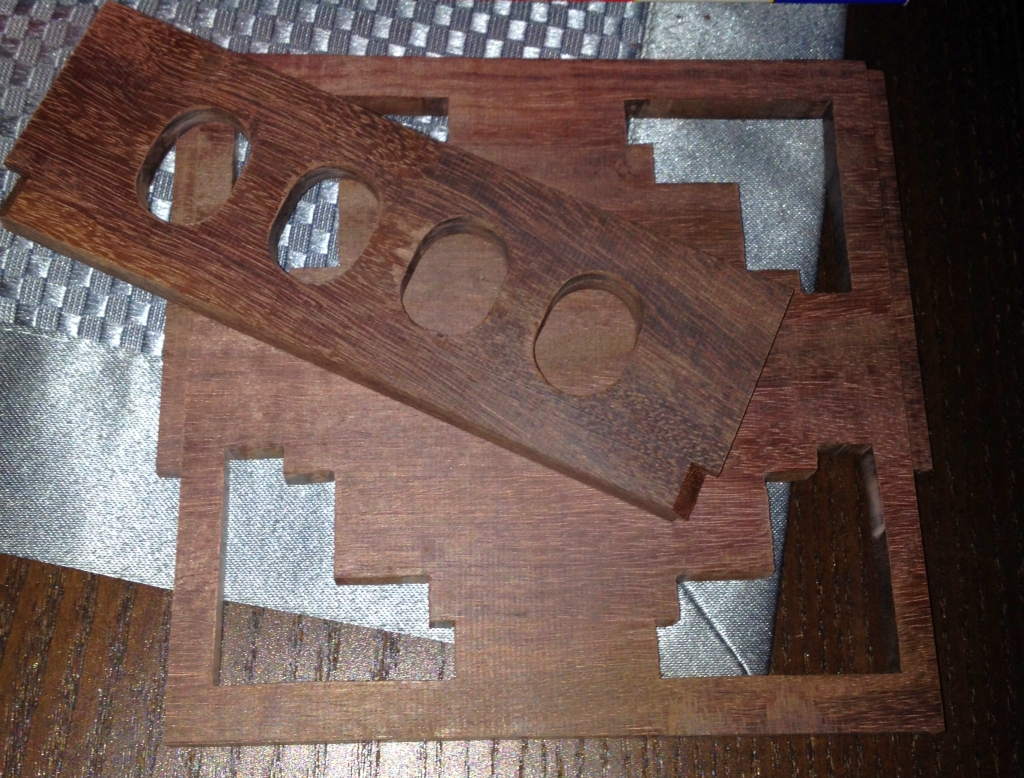

Pre-finished front and top panels

Pre-finished front and top panels

Given that I would have to glue the puzzle together with the front and top panel in place, I went ahead and pre-finished those pieces. Once they were in place and the corner posts were added, there would be no way to remove them or access the insides to be able to apply finish. The other benefit to pre-finishing the pieces is that the lacquer and wax would help prevent the glue sticking to them, so if there was any glue squeeze-out, it wouldn’t lock the puzzle solid. After all the work to get to this stage, that’s the last thing I wanted!


Piles of puzzle box pieces

Piles of puzzle box pieces

With the boxes mostly taken care of, the dominoes made, there is one additional element needed. There are five additional pieces in various shapes that go into the box to make things more troublesome for the solver. I decided to make these from Redheart and Purpleheart. Each piece is a solid section of wood, and I cut the notches out of the piece. This gives me a nice continuous grain, and a stronger piece. Not to mention that there’s less work for me to cut out a piece than having to cut twice as many pieces, and then re-glue them later. As with the dominoes, these pieces are passed over the bevel jig, to soften the edges, however there is a small problem. Given the internal edges it’s not possible to get the blade into them. This meant that each internal bevel is cut by hand with a chisel. So lots of extra work from my side, but I end up with a clean consistent bevel around the pieces.
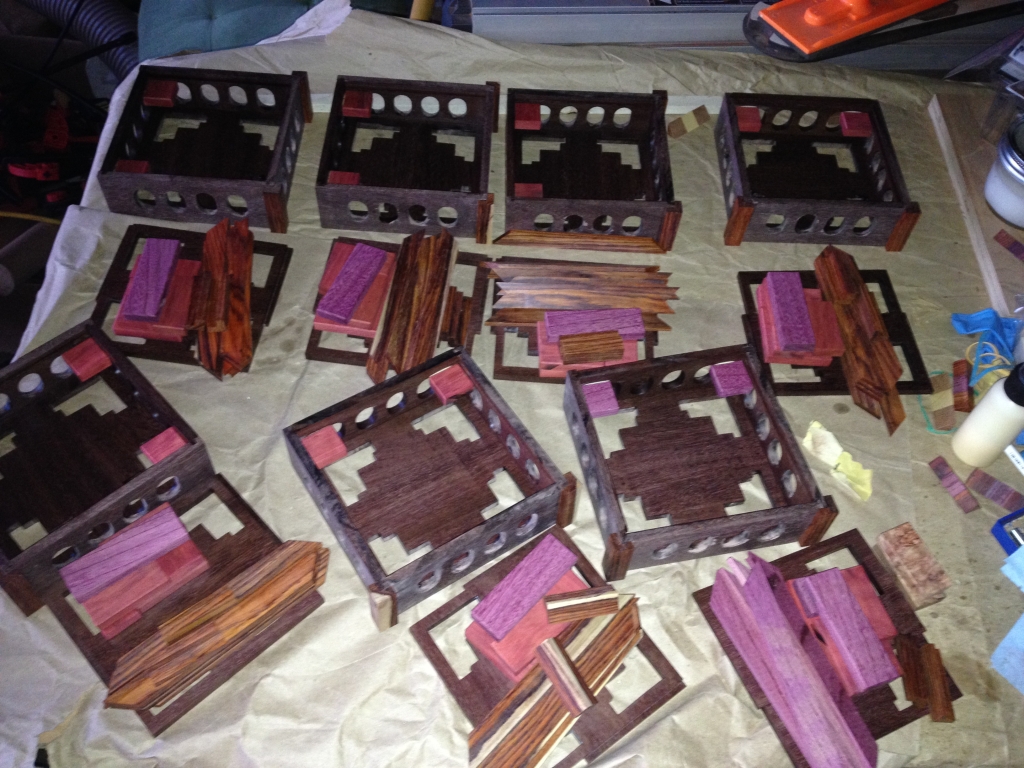

Internal blocks glued in place, ready for the final glueup.

Internal blocks glued in place, ready for the final glueup.

On the front panel, there are two blocks which are glued to the inside which are the final part of the locking mechanism. A gap needs to be freed below these blocks to allow the front panel to slide, and then the top to slide. Each piece needs to be added at the right time, or you end up being unable to glue the piece in place, and end up with firewood rather than a puzzle.

By this point it seemed like I’d spent weeks and still had nothing more than a pile of pieces to show for my work. The glueup for the box is rather complicated. Unlike most other projects I’d tackled, the box can’t be glued up, then assembled. The glueup is the assembly. The way things work is that the front panel, and top panel both have ‘wings’ which travel in the grooves of the side panels. In each panel, a section of the wings are removed to allow them to pass the pillars on the corners and the trim on the bottom. So when I mentioned earlier that Stickman is a genius, this is why. Those pieces which look like trim and decoration are actually integral parts of the mechanism. What is means is that for the glueup, the top and front are inserted, then the pillars are glued in place. This prevents the top panel from being removed again, so I had to make sure that everything was in the right place.
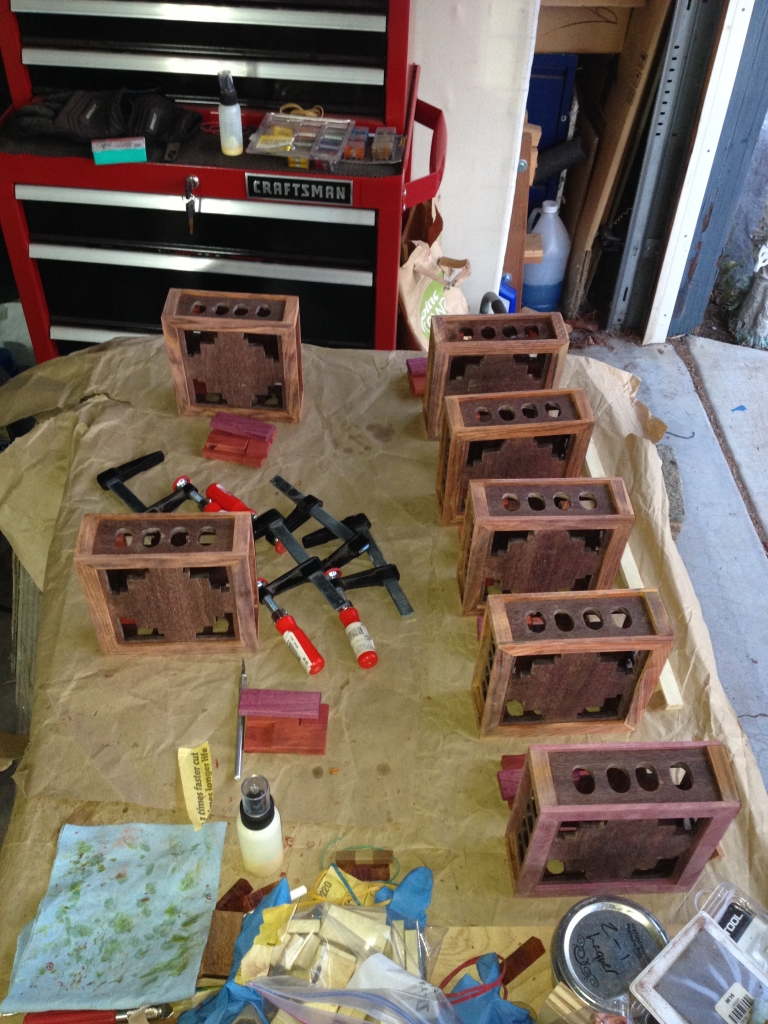
Seven Domino Boxes Standing in a row

Seven Domino Boxes Standing in a row

So with the blocks in place, the pillars glued on, and a check that everything still moved, I could glue the top and bottom frames in place, finishing the glueup, and being the moment of truth as to whether I had a puzzle box reproduction, or some very expensive (and frustrating) firewood.

While the glue on the frames was drying, I clamped several boxes together back to back and clamped them together. This meant that each box was providing a gluing jig for the one next to it, giving me good clamping pressure across the entire joint, and ensuring that all the boxes were identical.

This is probably the most challenging assembly I’ve attempted, and I’m pleased to say that it all went very well. I’ve clearly learned a lot over the last couple of years, and having three times as many clamps today as I had when I started certainly doesn’t hurt. It really is true, you never can have enough clamps!
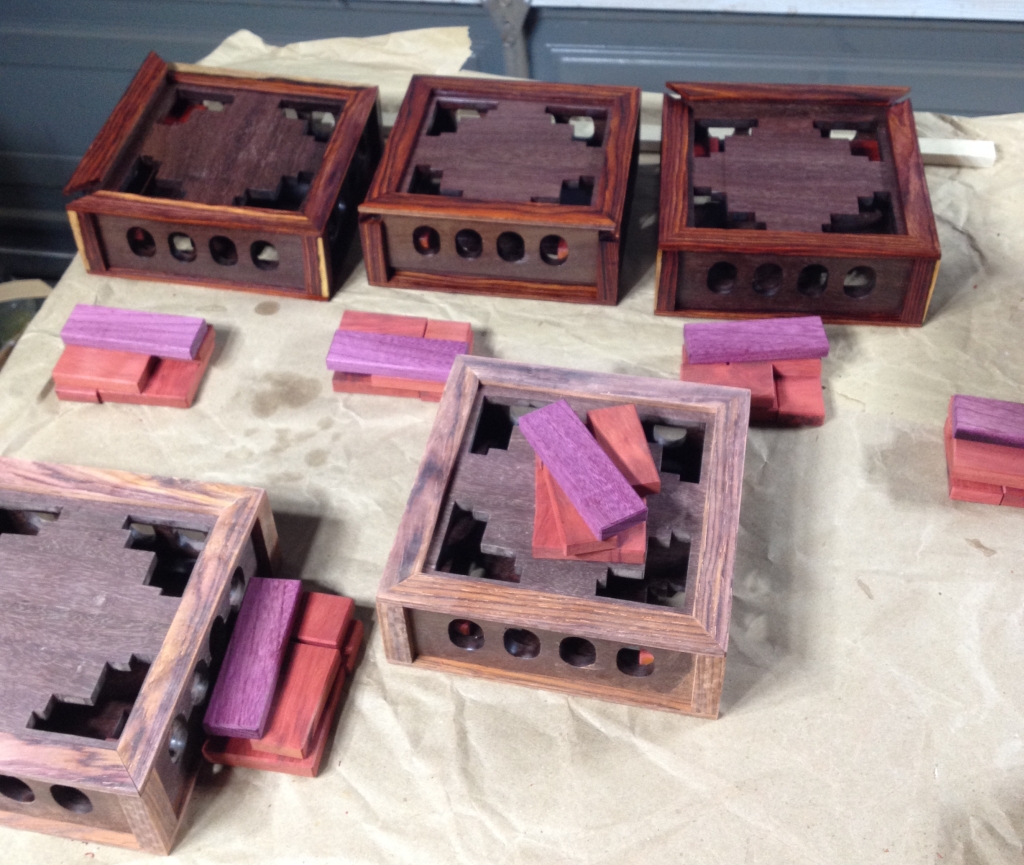

The difference is marked after applying lacquer

The difference is marked after applying lacquer

The following night, once the glue was dry, I could finally test the mechanism on each box, and confirm that it worked as intended. You have no idea how much of a relief it was that each box slid smoothly and opened as expected… until the last box. The lid didn’t come out past the front pillars! Fortunately, I have some sharp chisels, and I took a few thousands off the top of each of the front pillars, and the lid slid past. The amount I had to remove was so small, it’s unlikely that even I could find the box I had to shave, but it was enough to stop things working. Fortunately, it wasn’t a difficult fix.

The last steps were to finish the puzzles. As you can see the boxes at the back where the first coat of lacquer has been applied really show the true colours of the wood, unlike the boxes at the front which look drab and liefeless without the finish.
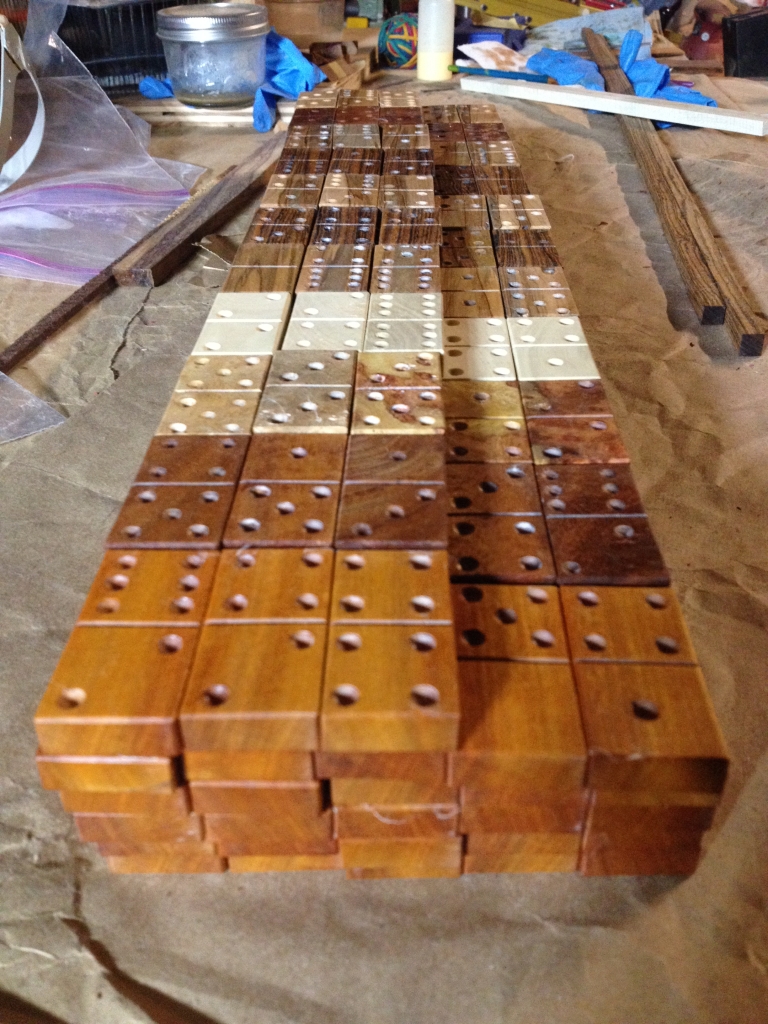
Sets of dominoes all finished

Sets of dominoes all finished

The final steps are to triple buff the puzzles and dominoes, to really make them shine.

Stickman was kind enough to send me the original files for the puzzle booklet, so with a couple of updates, I have been able to create a new booklet which matches the reproduced puzzles. (Ed: Have I mentioned before how nice a guy he is?)

Stickboy

Stickboy

While I was working on the puzzle, I was posting images of the work in progress. Seems that a few of my puzzling friends have suggested that I could be “Stickboy”. I might have taken that idea and run with it. Stickman seemed to like the idea, and agreed to let me use the moniker and a modified version of his logo. I also took his own logo, and created a much higher resolution version for use on Stickman’s next project. After all, I was cleaning things up for my own use. Seemed silly not to let Stickman benefit from my work.
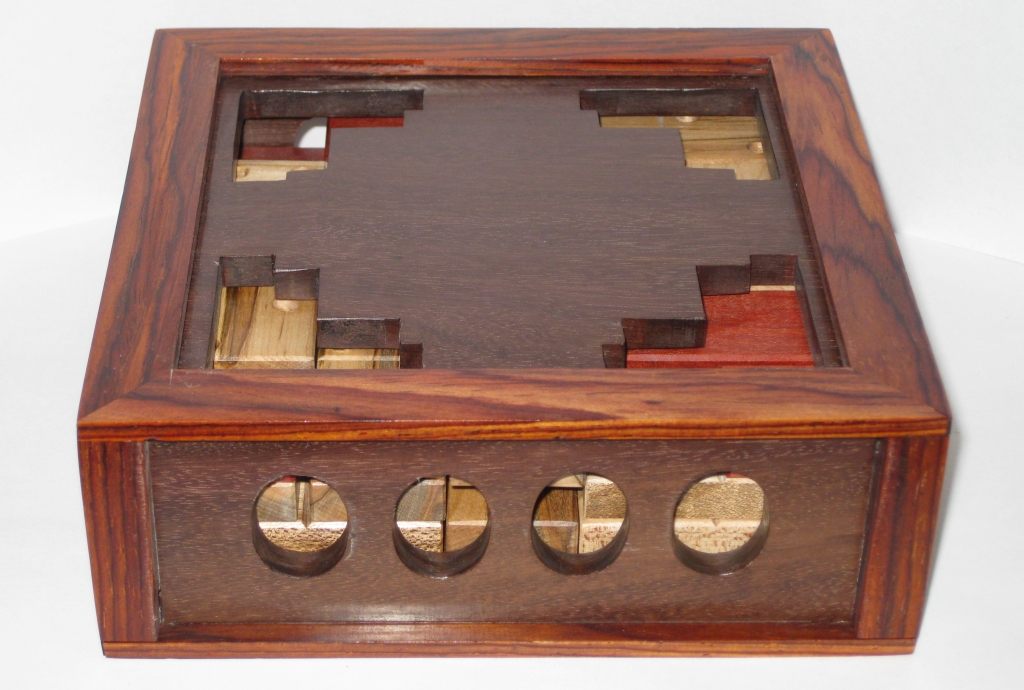

The finished box

The finished box

After that, it’s a simple case of putting the dominoes inside the carcass, mixing things up and passing them to a new owner. It’s been an interesting project, and one I’m glad that I tackled. The question is which box do I tackle next?
ODD Puzzle

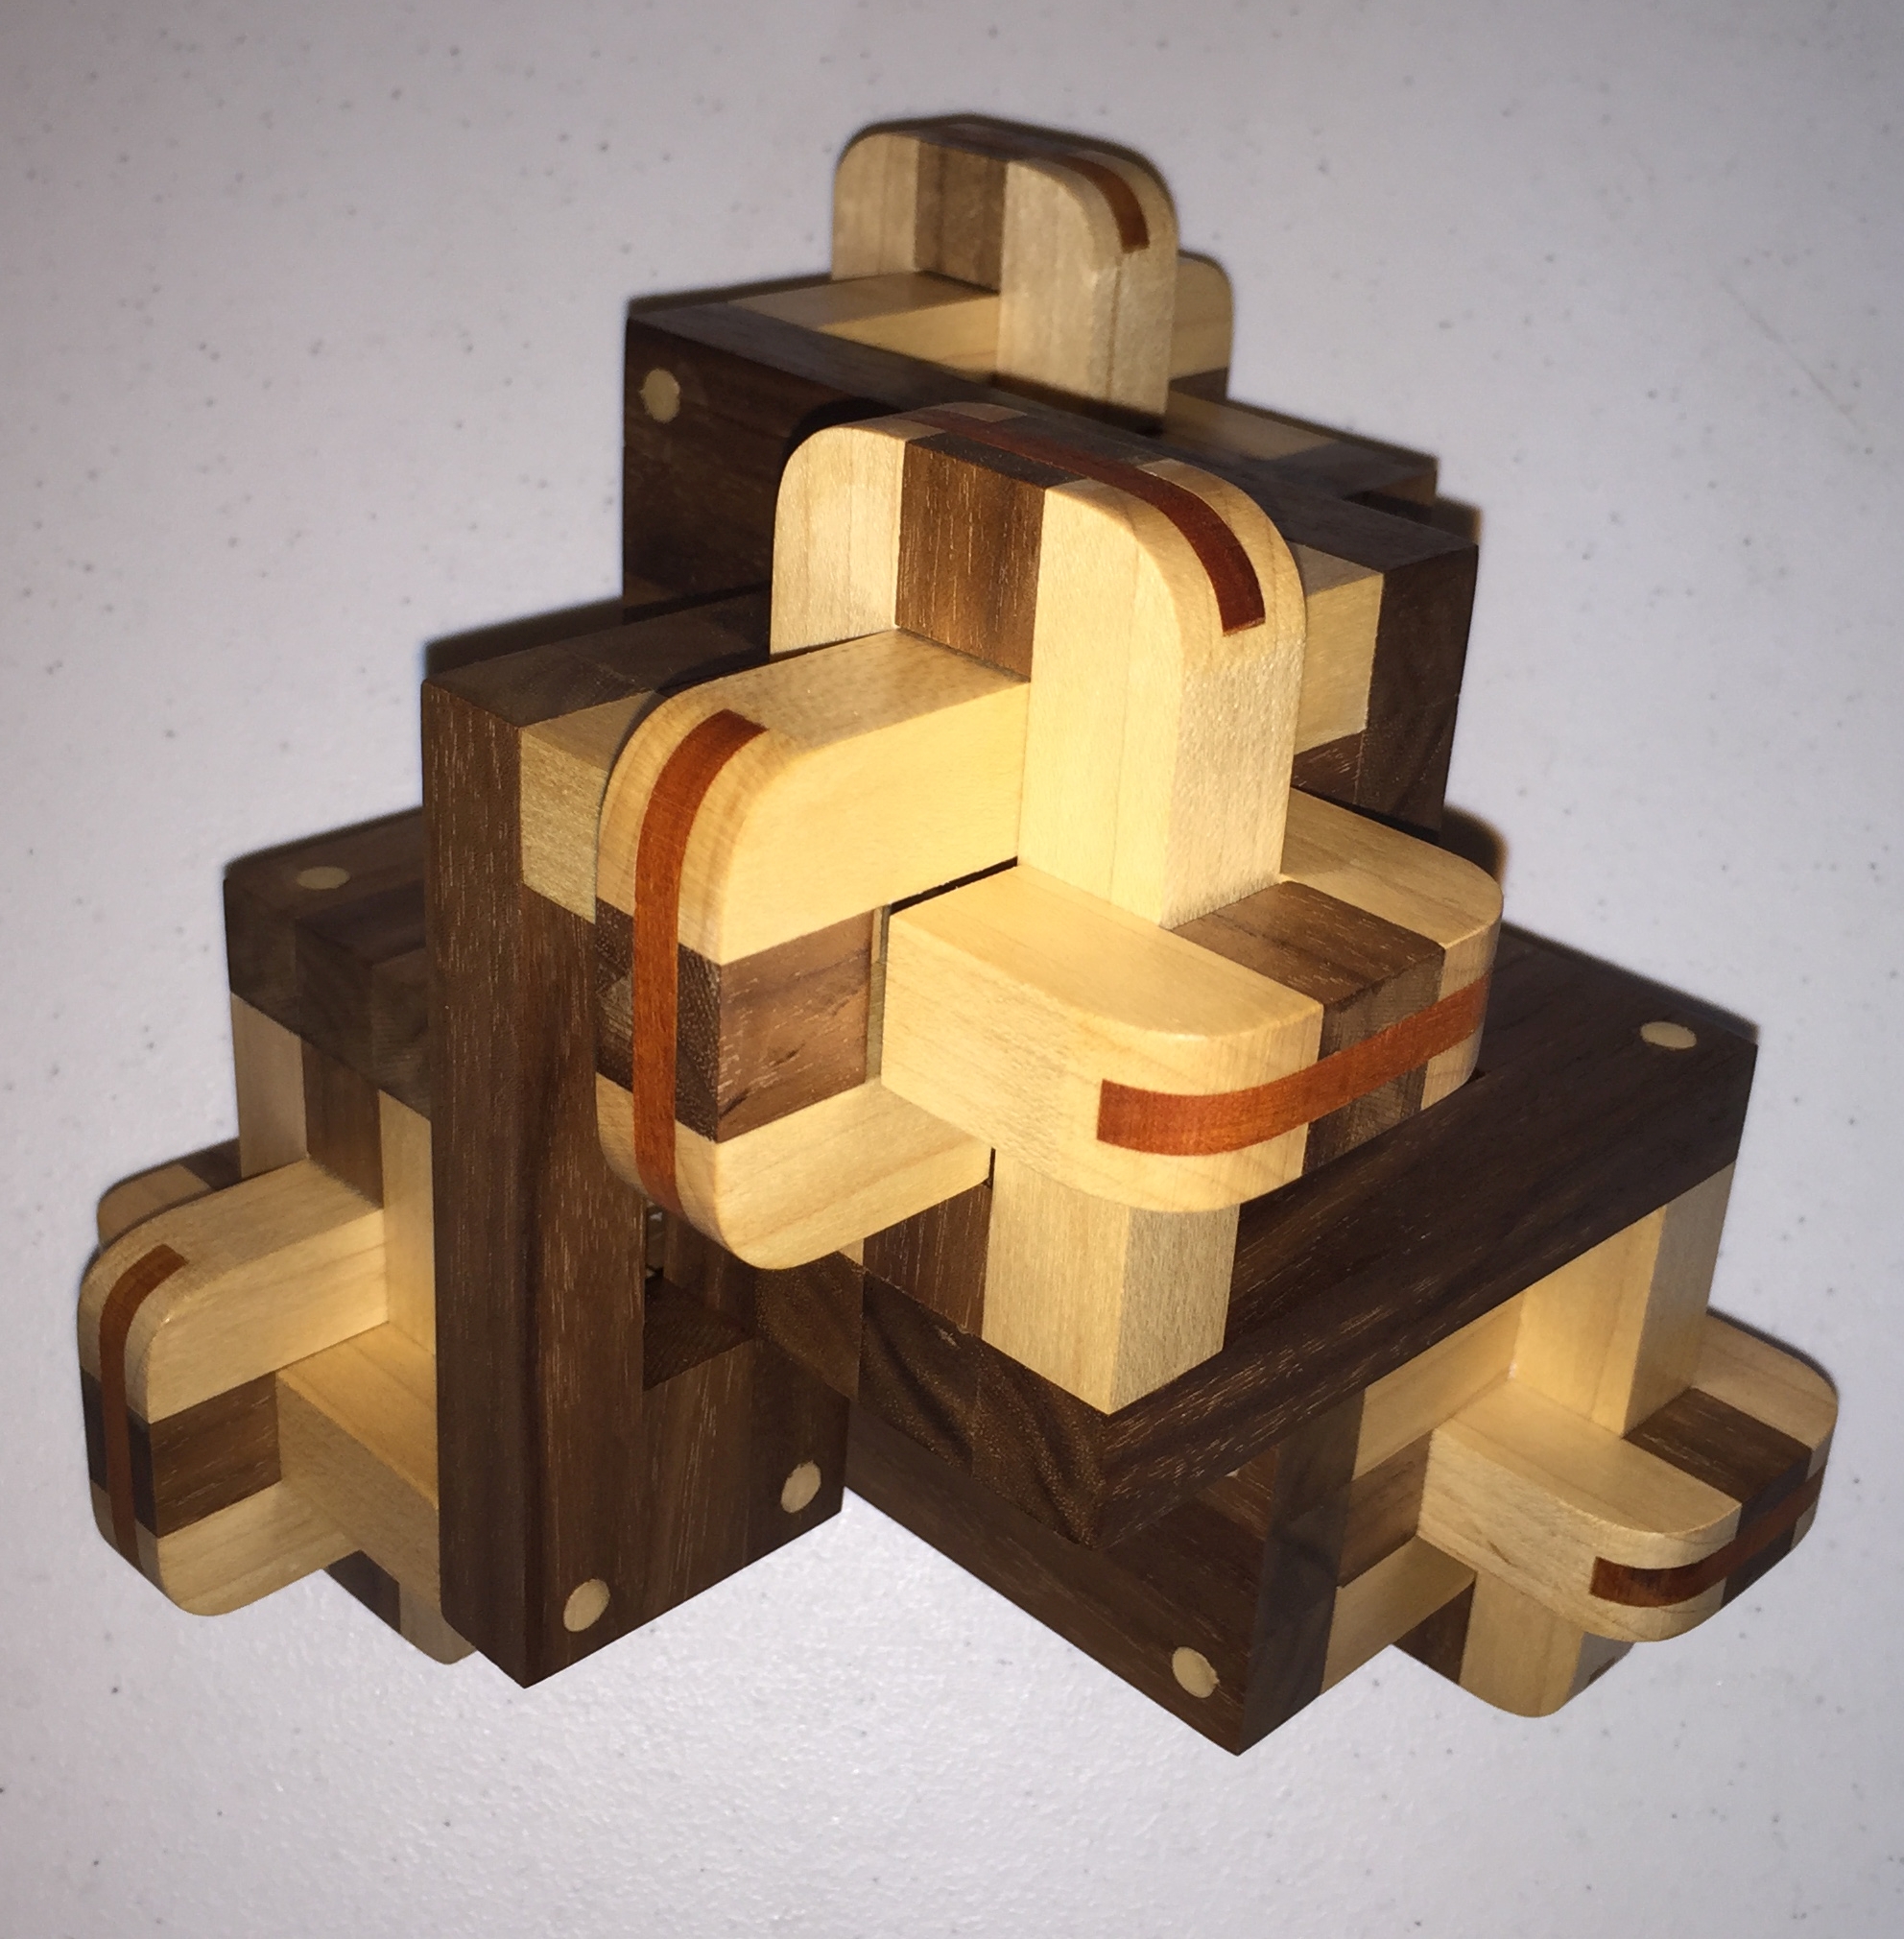
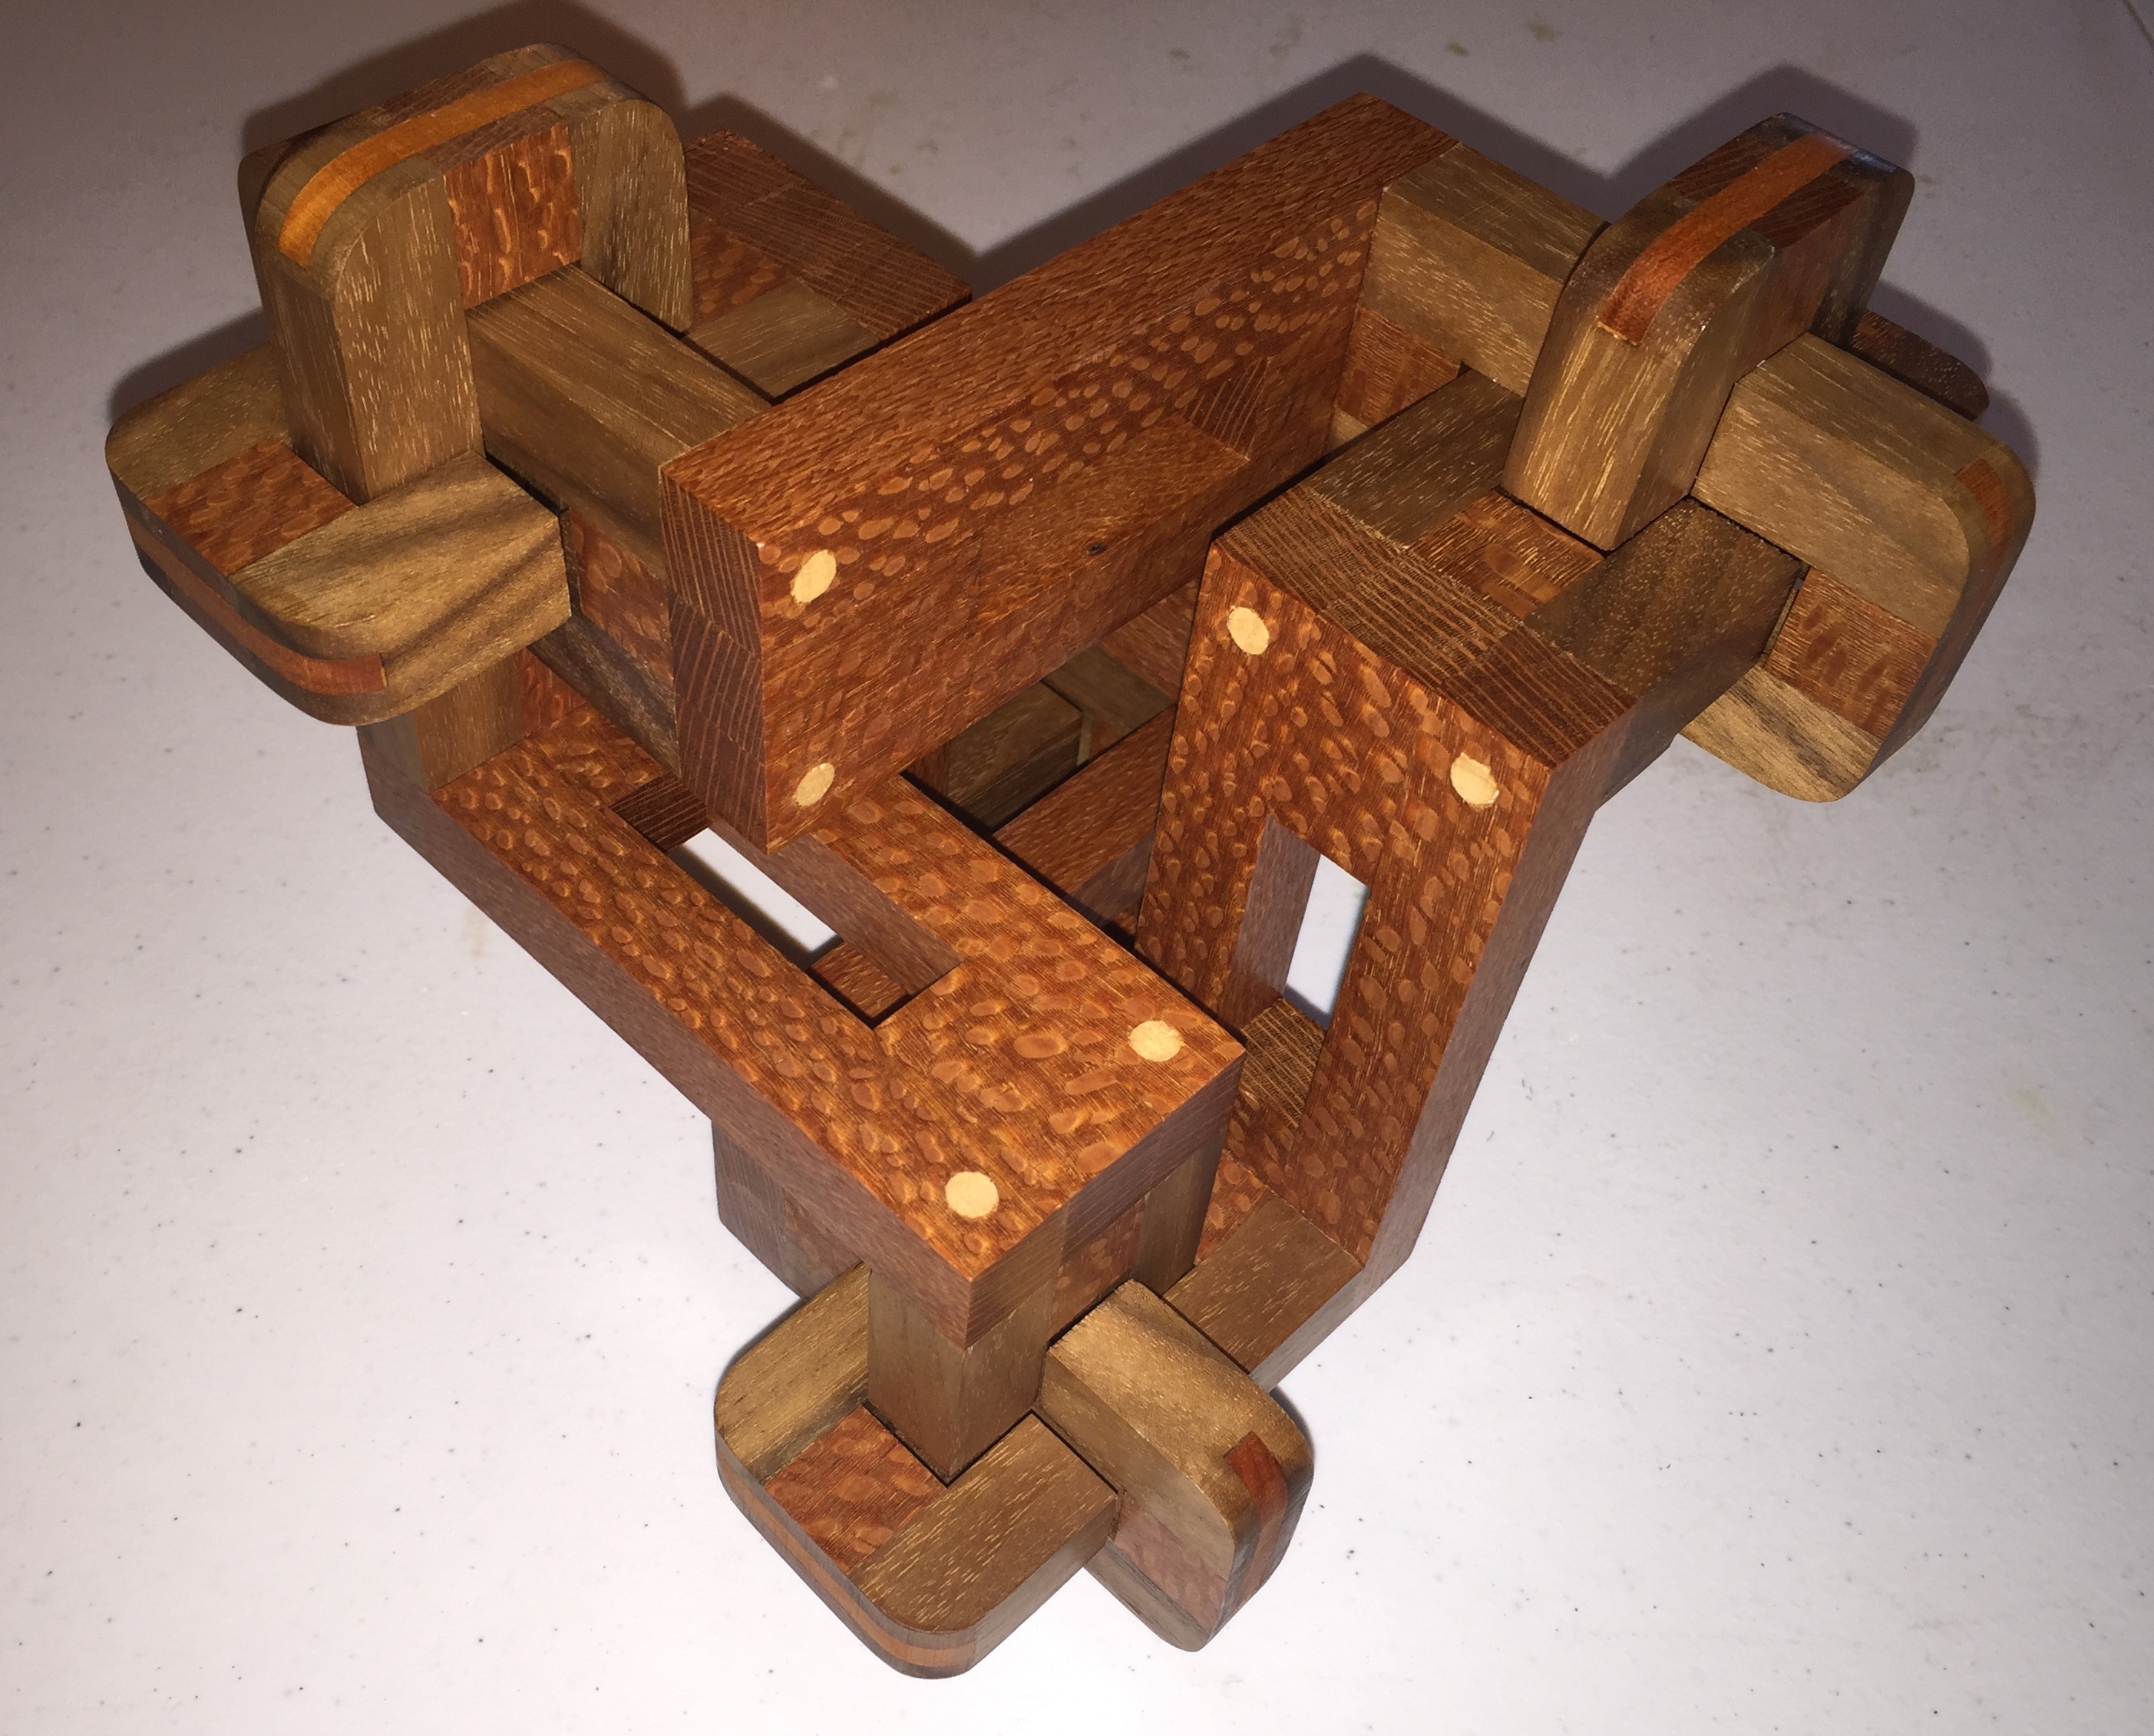
Way back in 2011, when I was at a puzzle party here in the Bay Area, I had a play with a clever little puzzle, by Iwahiro called the ODD Puzzle. A simple three-piece packing puzzle, that was anything but simple. It’s taken me three years, but I now have a copy of my own …. and I had to make it myself!

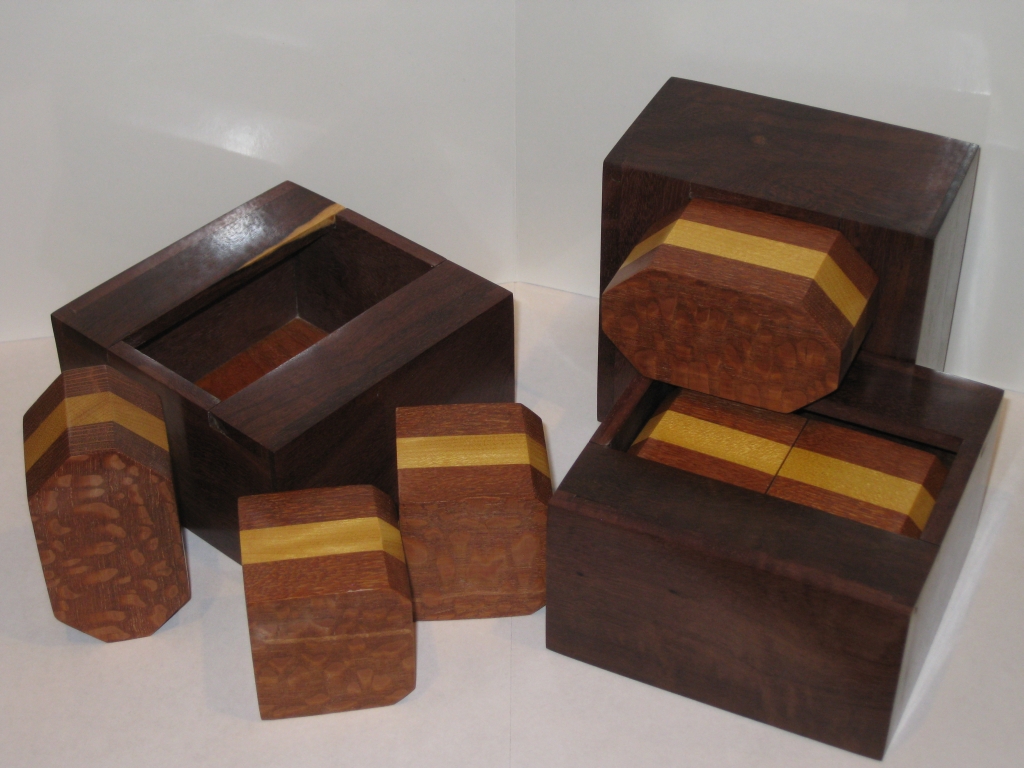
Odd Puzzle by Hirokazu Iwasawa (a.k.a. Iwahiro), made by TheJuggler

Odd Puzzle by Hirokazu Iwasawa (a.k.a. Iwahiro), made by TheJuggler

Back when I first saw the puzzle, the only copy available was a version by Philos. It was made from Beech and measured 4.7″ x 4.7″ x 3″. The fairly plain appearance hid a superb puzzle, that was the grand prize winner at IPP28. Now it’s mostly sold out everywhere you look, and no real indication of when or if it will be available again. The only place I’ve been able to find it is at Puzzle Sport in Germany.

I played around with the copy at Stan’s and really liked the puzzle. It was clever and really needed you to spend time playing with the pieces in the box to understand just how they interacted with each other, and what movements are possible. I was unfortunate that the puzzle was sitting in its solved state when I picked it up, and it was more of a challenge to remove the pieces for me. If I’d not seen the solution I think I would have required a lot more time to understand how it would be possible to get the pieces in there. I had mostly forgotten about this puzzle which if I’m honest is rather a shame.

The Facebook picture that started all this.

The facebook picture that started all this.

Fast forward three years, and I spotted a Craftsman copy of the puzzle made by Iwahiro on one of my friend’s Facebook pages as his profile picture. (ed: There’s a funny story there, but I’ll come back to that.) Seeing that picture spurred me into hunting for a copy, and having failed, I asked a couple of my puzzle friends if anyone had a copy of the puzzle. Amusingly, the closest (geographically) to me had a copy of the puzzle, and agreed to lend it to me. A couple of days later, we met up and exchanged a few puzzles, had the obligatory play with a few new additions to each of our collections, and he left me with a copy of the ODD Puzzle, as well as a puzzle from his collection where a couple of glue joints had broken, that he asked me to fix for him.

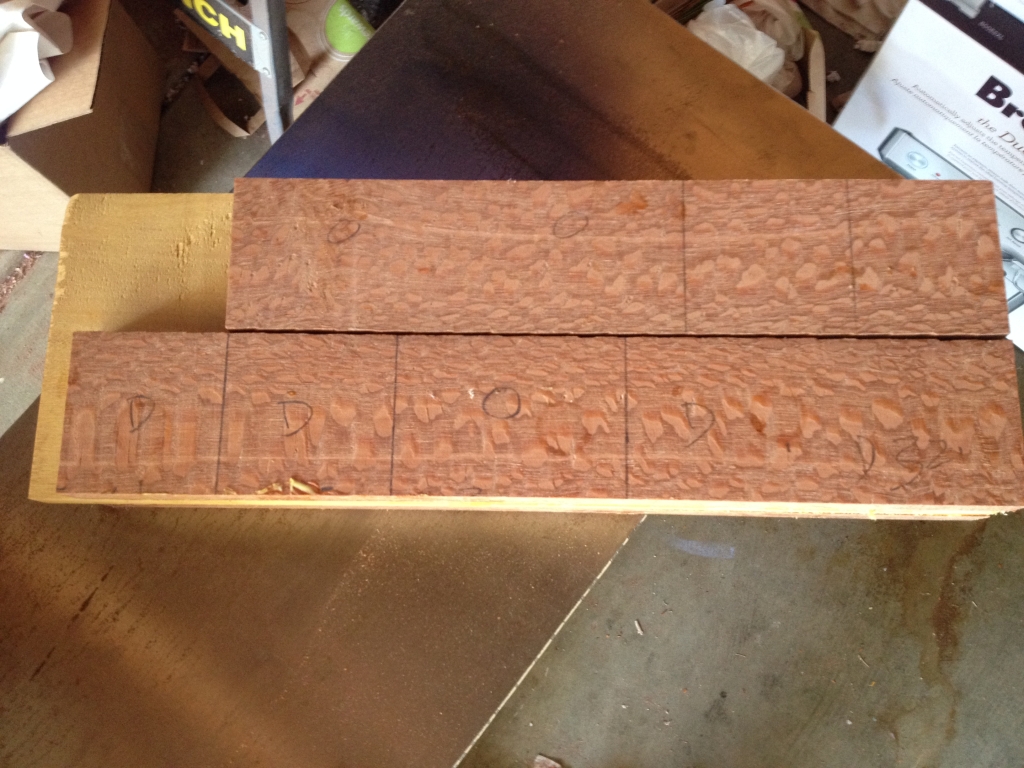
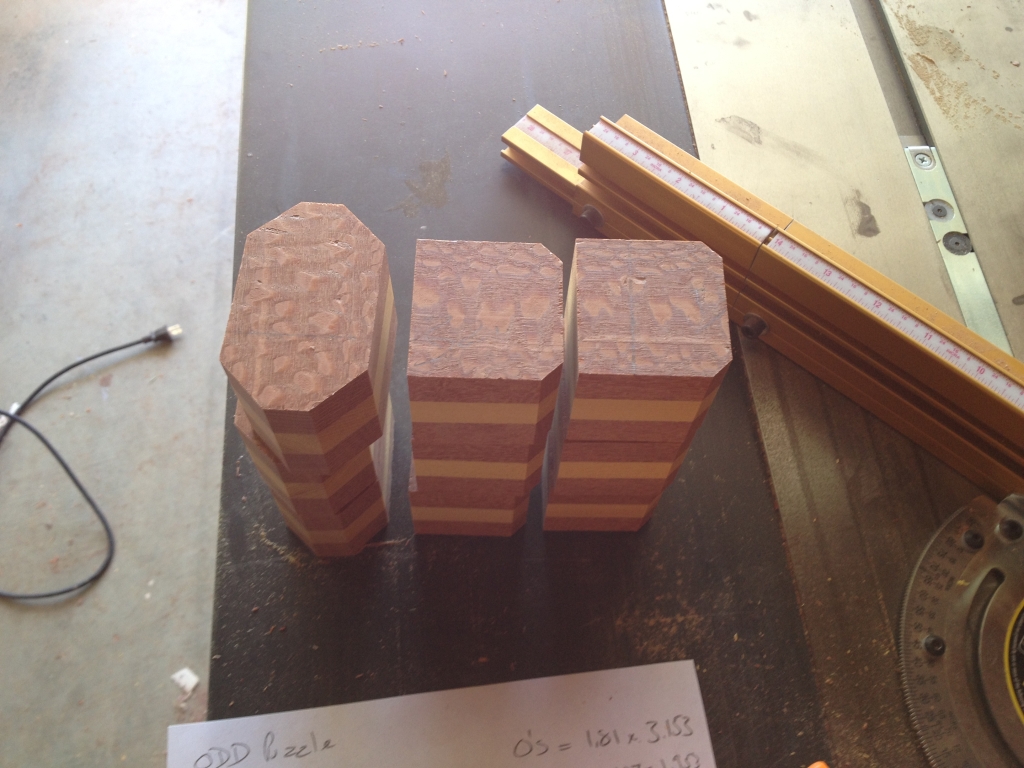
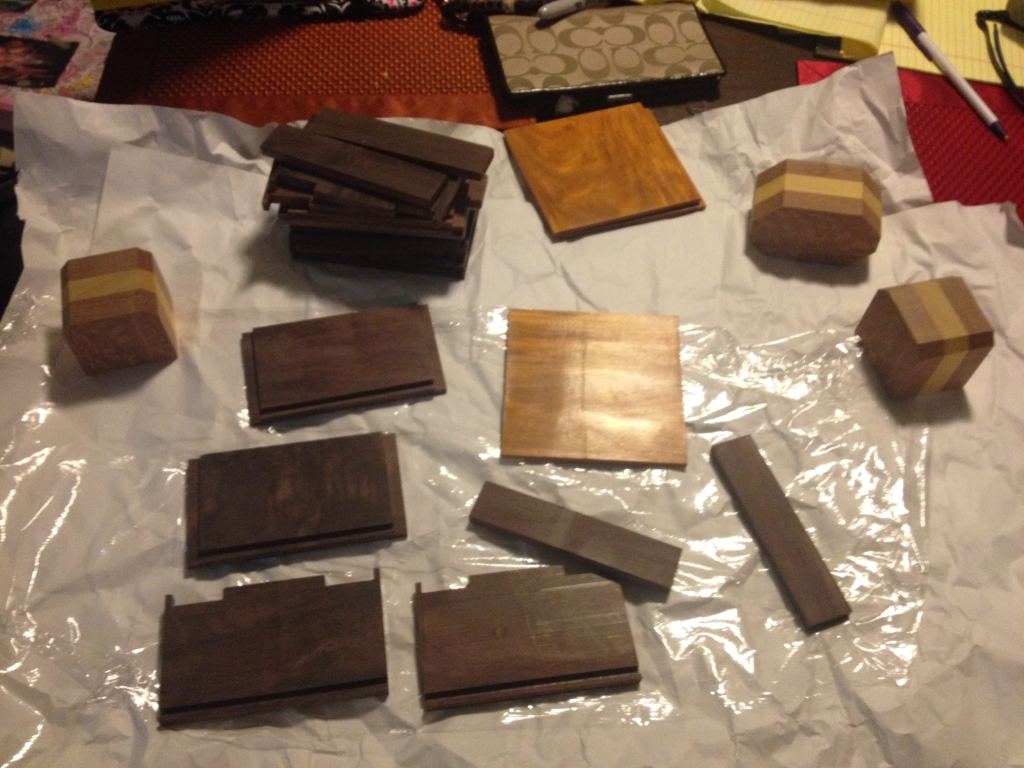
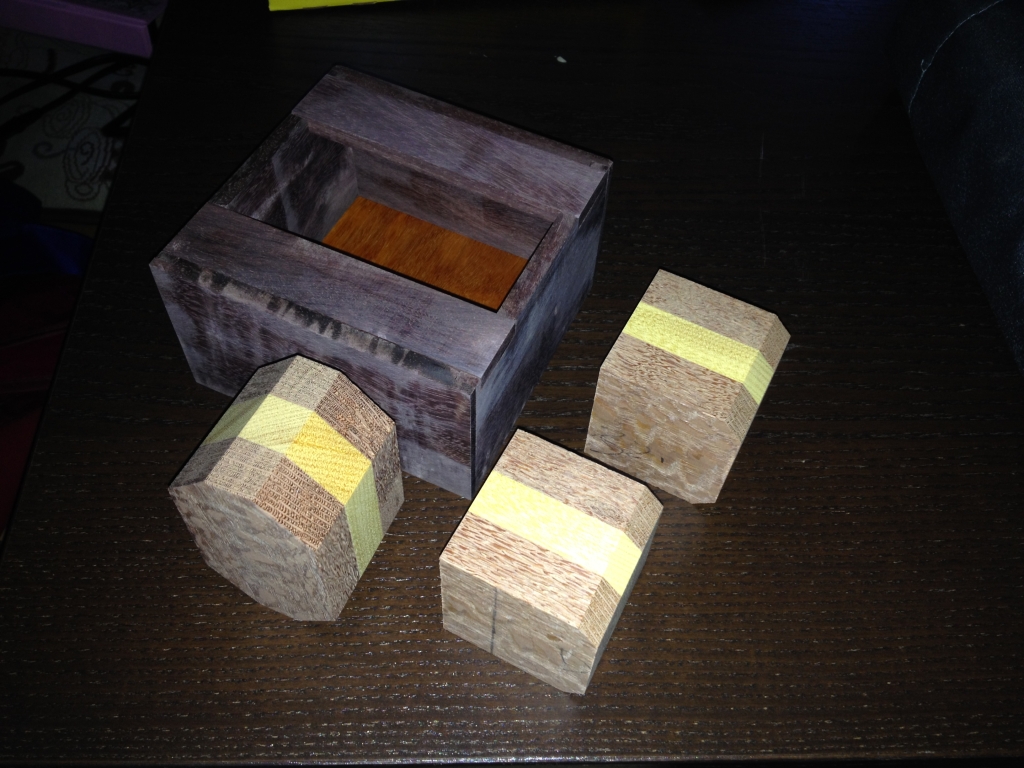
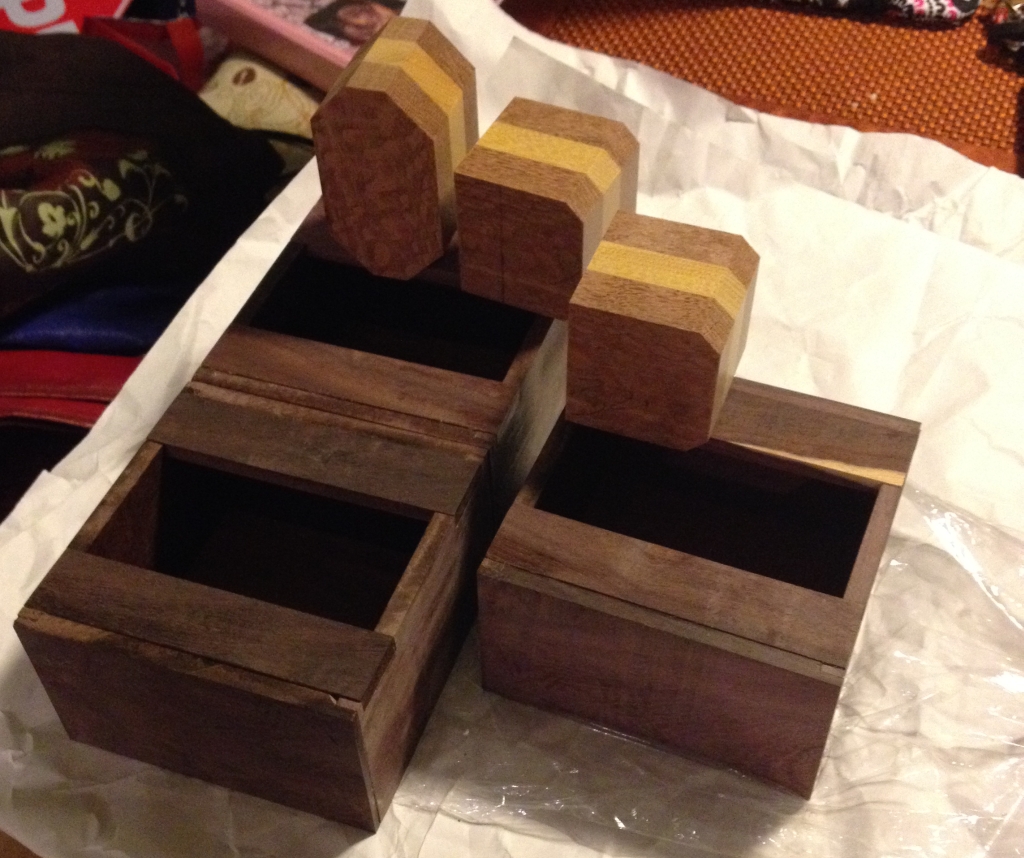
Fairly quickly I took a host of measurements from the reference copy, and set about making a copy of my own. I really liked the look of the craftsman version with the ‘core’ having a different wood to the outer parts of the pieces so looking through my stock, I picked out some Lacewood and Yellowheart to make the pieces. Rather than describe the process in detail, the images below should show the highlights. (As ever, click for larger versions.)

Initial glueup of the pieces

Initial glueup of the pieces

Basic blocks cut

Basic blocks cut


ODD shapes, 'O' still too thick

ODD shapes, ‘O’ still too thick

Boxes cut, and ready for glueup.  Base pre-finished.

Boxes cut, and ready for glueup. Base pre-finished.


Box glued up, unsanded and still no finish yet

Box glued up, unsanded and still no finish yet

Finished!

Finished!


Of course as you can see, when you’re making one, it’s not a lot more work to make two, or three, so I made three copies. When I was posting pictures, on my own Facebook pages during the build, I was contacted about buying copies, so I’m glad I made extra. One interesting build fact is that I pre-finished the bases before I glued up the boxes. The reason being that I was going to be unable to finish the inside of the base once the box was glued together. One benefit to pre-finishing is that the glue won’t stick to the finish, so the base will be truly floating. I also pre-finished the inside walls of the box before I glued on the strips that create the gap. Again, I wasn’t going to be able to get a brush inside the box to finish it to the level I wanted, so I finished it first, leaving clear areas where I was gluing up the pieces so that the glue would stick.

Iwahiro's version, next to my copy

Iwahiro’s version, next to my copy

As a quick comparison, the pieces for both copies are identical in size, and can be interchanged between the boxes. In Iwahiro’s version he has mitred joints in the box with slip feathers for strength. I used a shoulder joint on my box and didn’t add splines (a.k.a. slip feathers). I did however change the way the top of the box is made, extending my slats all the way through the sides, making that joint stronger, unlike Iwahiro’s version where the slats are entirely inside the box. There’s not real difference, just a choice I made.

A look at the bottom of the puzzle made from Chakte Viga

A look at the bottom of the puzzle made from Chakte Viga

My the boxes in my copies are made from Katalox with a Chakte Viga base. I think the contrast between the dark, almost black sides with the bright orange base looks great, but then I wouldn’t have done it if I hadn’t.

This was the first time I’d used the Beall Wood Buff system since I bought it. Fellow puzzle maker John Devost uses it on most of the puzzles he makes, and having used it now, I can see why. The finish achieved is incredible. It’s a high gloss shine, which really makes the wood look great, and gives it an amazingly smooth feel. It also means that the pieces in the ODD puzzle slide against each other with virtually no friction. That means that the slick plastic sheet added in the bottom of Iwahiro’s version isn’t needed in the copies I made.

One of my friends commented that the only thing missing from my copy was the slip feathers on Iwahiro’s box. I joked that I’d considered adding Holly slip feathers, but in the end didn’t do so. (Now I didn’t mention at the time that I didn’t have a jig built that would allow me to create slip feathers in a box) All I can say to that now is …

Different wood choices, and slip feathers added

Different wood choices, and slip feathers added

They’re not quite finished yet, (and I’ll update this when they are) but I’ve added the slip feathers, purely for the aesthetic of them, and rather than have them flat, I put them at an angle just to add detail.

I mentioned earlier that there was a funny story related to me making the puzzles. As I mentioned, I was prompted to make these having seen the picture on a friend’s Facebook. After posting pictures of the copy I’d made, the friend who had the picture sent me a message asking if I could send him measurements of the puzzle, so he could make his own. He didn’t have a copy, and seeing me making my copies kicked him into deciding he should make his own copy, since he’d been meaning to do it for a while. So, I was prompted into making a copy having seen his photo, which prompted him … Well it amused me at least!

Stickman #16 – Domino Box

In my last post, I started creating the dominoes to complete the copy of Stickman #16, the Domino Box I had recently acquired. In this post, I’ll finish making the dominoes and review this very tricky Stickman Puzzle Box.

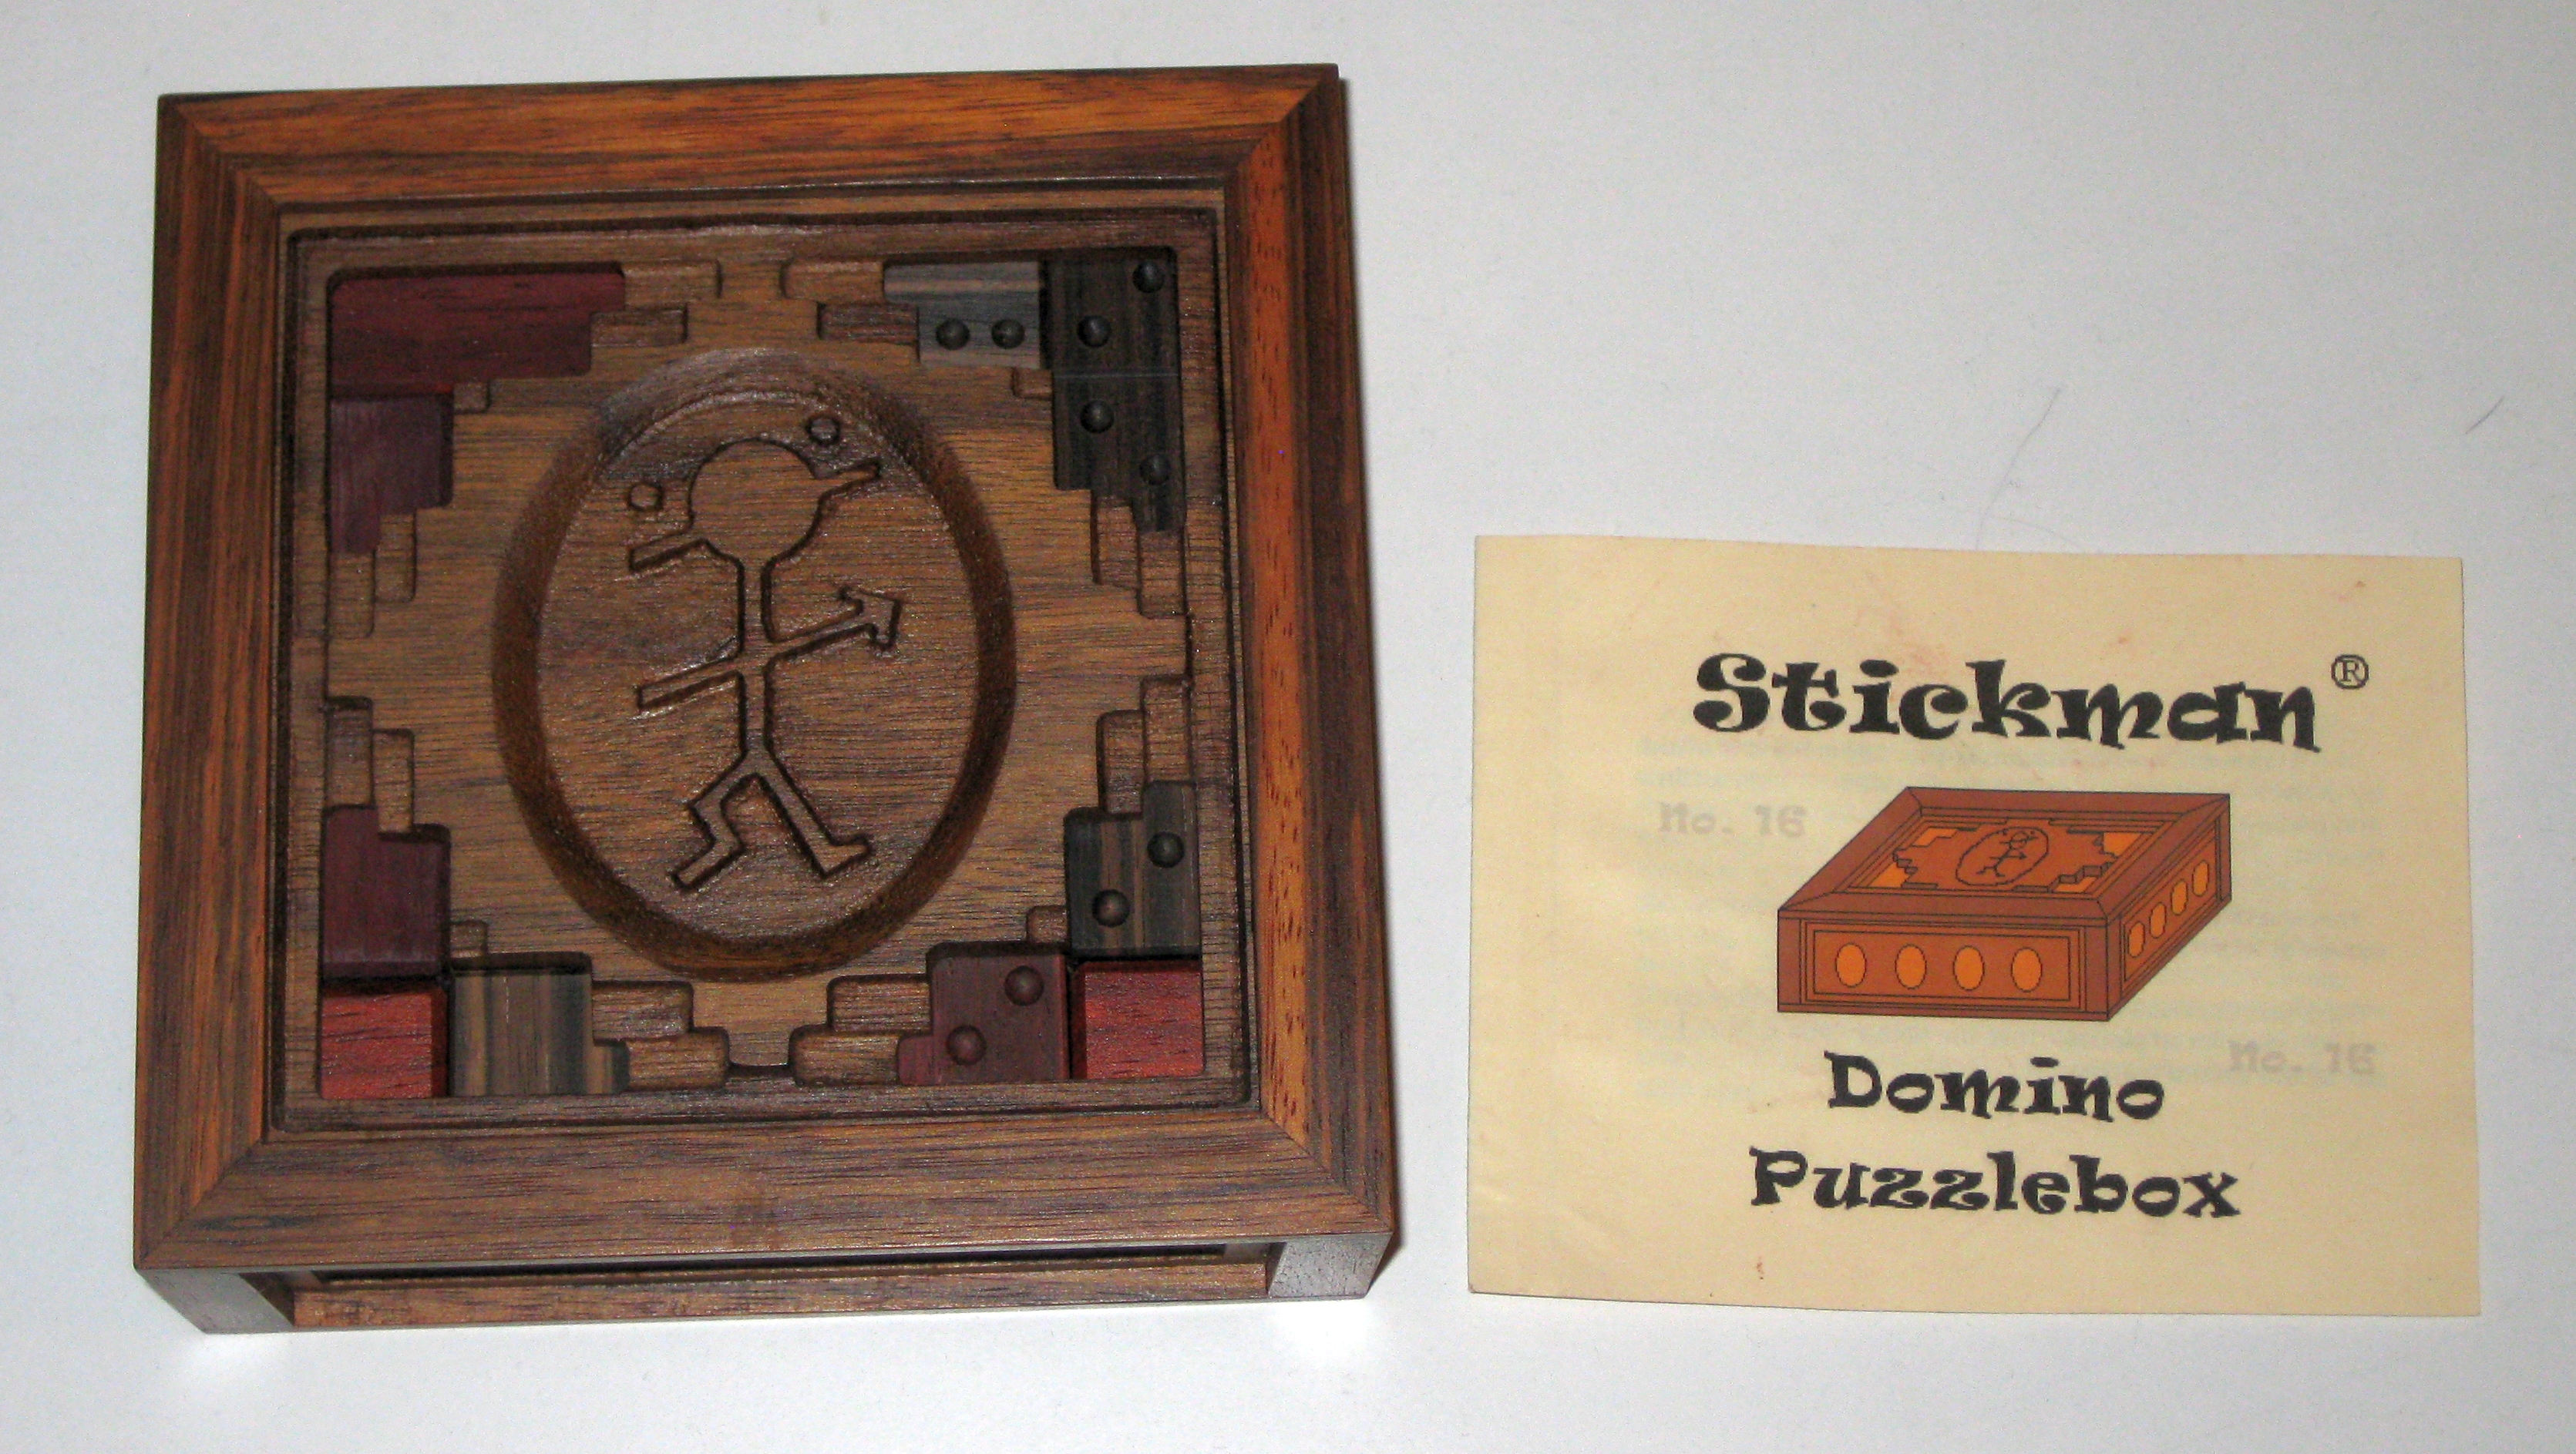
Stickman #16 - The Domino Box

Stickman #16 – The Domino Box

Once the box is filled with dominoes, plus a couple of additional pieces that Stickman created to fill the space, the previous solver can shuffle the dominoes, effectively creating the starting point for the next solver. But before I get to the review itself, I still have to finish making the dominoes. If you’re only interested in the review, then jump here.

The Jig to cut the centre line in the domino

The Jig to cut the centre line in the domino

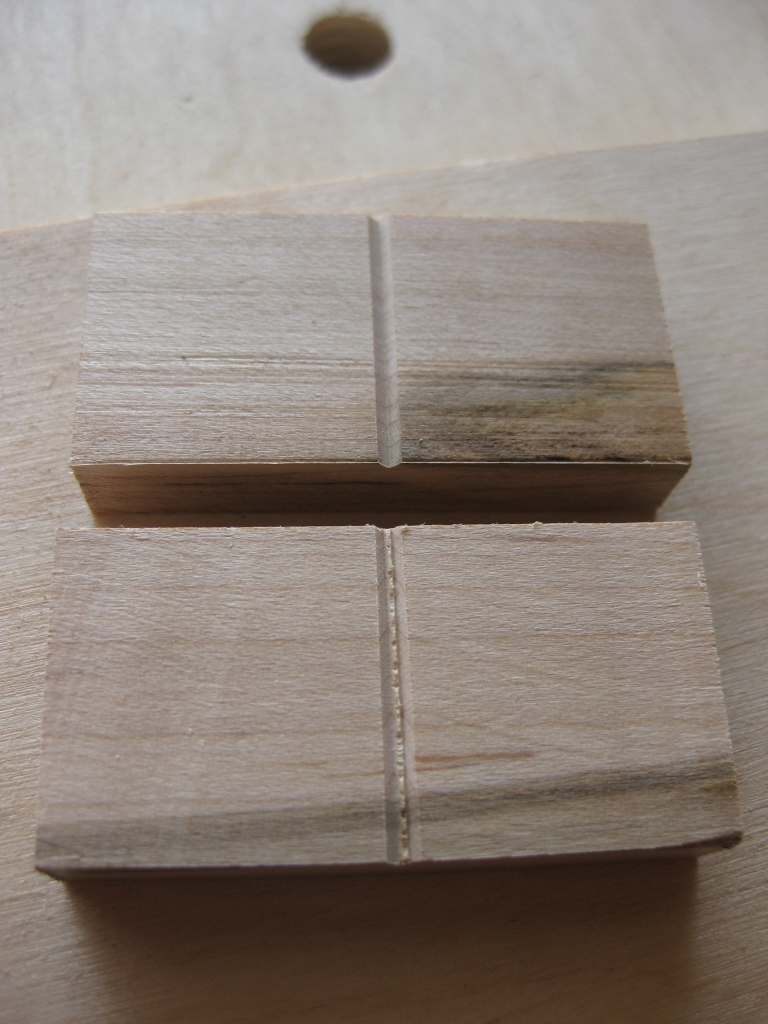
I spent most of my Sunday morning putting together a new jig just to put the centre line in the dominoes. As you probably remember from the last post, I finished up having cut the spots, but still had the challenge of creating that centre line split that all dominoes have. I needed to be able to do this quickly and accurately, and also had to take into account that tearout was possible when cutting across the grain of the wood. Had I been sensible, I’d have cut the centre line before creating the bevel, making tearout a much lesser issue, since the bevel would cleanup any possible tearout.

Given that I didn’t do that (live and learn!) I had to create a crosscut sled, with the blade angled at 45 degrees to the table. This allowed me to cut using the corner of the blade, and create the desired effect. Although it may look like the blade is inside the jig in the picture above, it’s actually 1/64″ above the plane of the jig. Just enough to cut the shallow groove I need.

Adjusting the stop to get a perfect cut

Adjusting the stop to get a perfect cut

The first attempt, I had my stop block slightly off, so the cut was fractionally too wide and left a hill in the centre of the domino. A quick adjustment of the stop block, and the test domino looked good. The benefit of having the stop and this jig is that the cuts are repeatable, and very quick to make. It takes less than 10 seconds per domino.

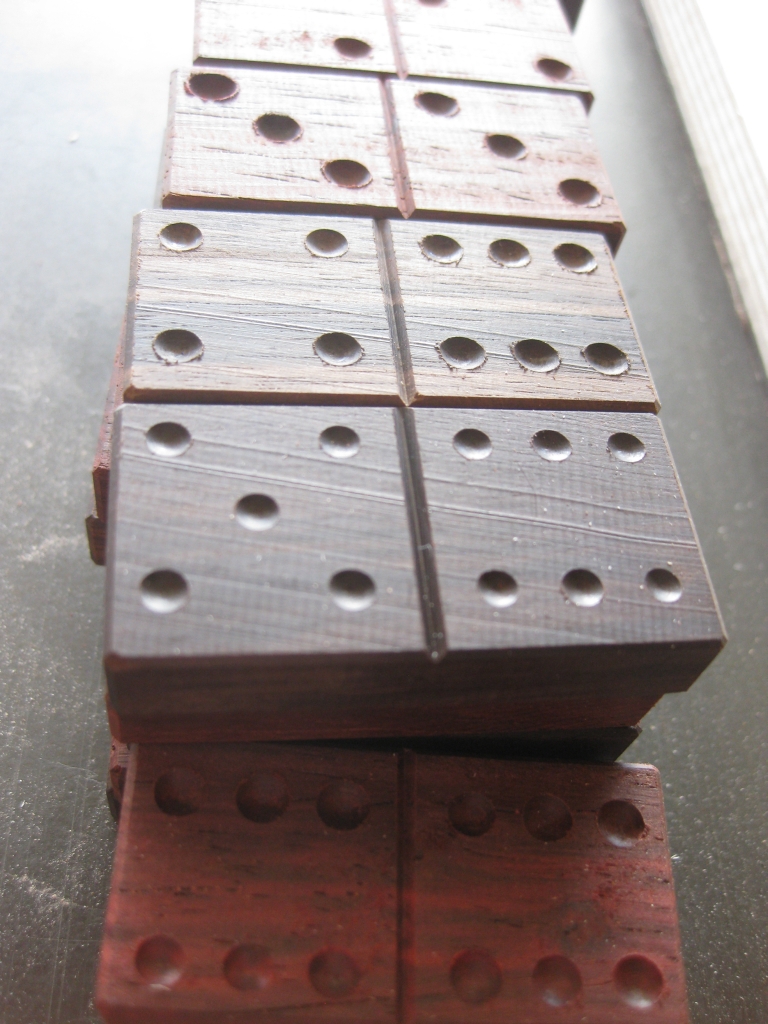
The finished Ebony Dominoes

The finished Ebony Dominoes

Half an hour later, I had two full sets of dominoes finished. Now of course there’s some final sanding and finish to be applied, but the dominoes themselves are complete, and could be used in the puzzle at this point. It took two days over two weekends to make the two sets of dominoes and was time well spent in my mind. There’s another Stickman puzzle (two in fact) which are now complete and will hopefully allow these excellent puzzles to be enjoyed by many more people.

Stickman #16 - The Domino Box, complete and ready to puzzle

Stickman #16 – The Domino Box, complete and ready to puzzle

So with all the work I put in to completing this puzzle, was it worth it, and is the puzzle any good?
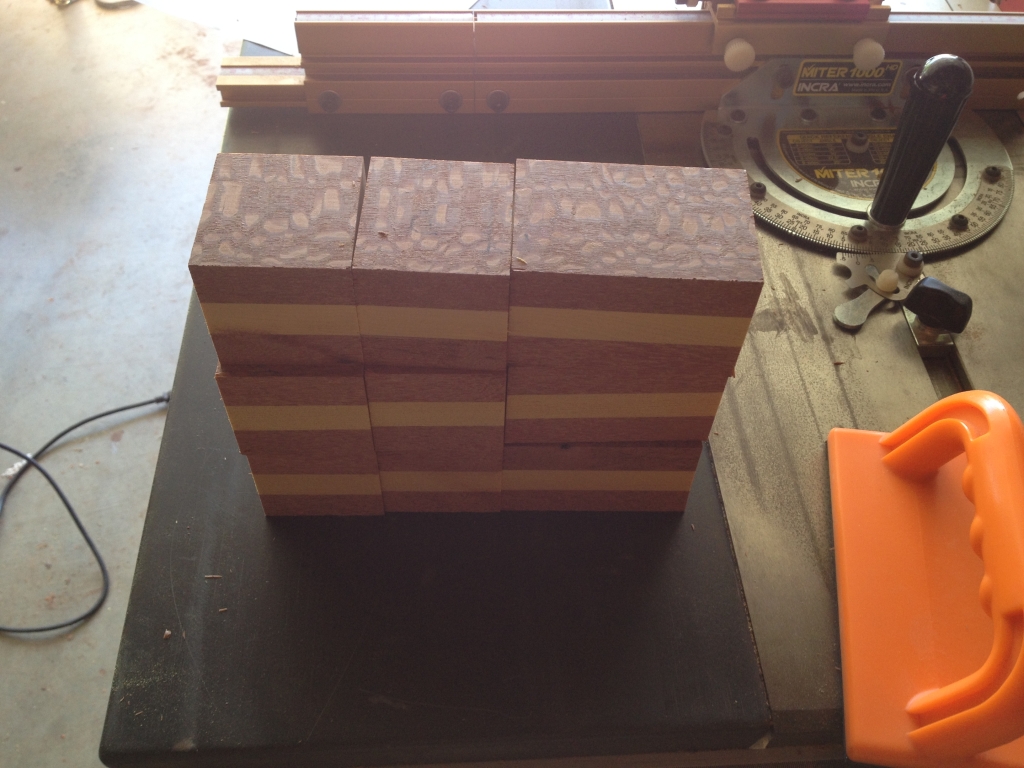
The puzzle measures 6″ x 6″ x 2″, and has enough space to store a regular set of 6 spot dominoes (that’s 28 if you weren’t sure), as well as a few additional shapes just to make things interesting. Made from Walnut and Monticello it’s a sturdy box, which with all the ornate work on the top and bottom makes it a great looking puzzle.

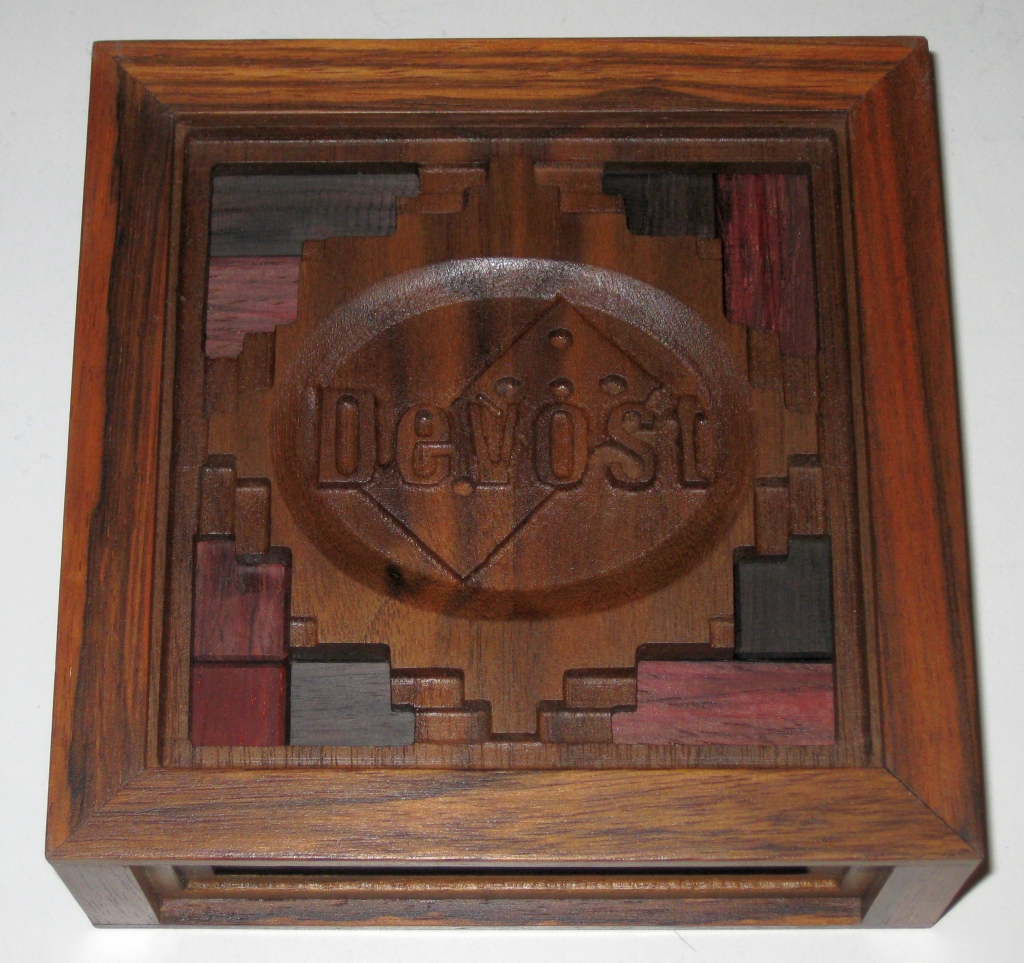
The Base of the box

The Base of the box

With the Stickman logo on the top, the Domino and Devost on the bottom to signify that the dominoes were made by John Devost, this stands out on the puzzle shelves. Of course in my case, the dominoes were made by me, and this is the only set of dominoes in the run of boxes to be made from Ebony. I was very lucky to get the Ebony blocks from John through Stickman, so this is the wood which was intended to be with this box. I’m incredibly happy that some of the Ebony has the amazing red tint to it. Sadly, over time this will oxidse into the dark rich black that is normally associated with Ebony, but for now I’m going to enjoy this wonderful hue.

I think this probably qualifies as one of the simplest mechanisms in a Stickman Puzzle that I’ve come across. If we break it down to the bare minimum, it’s a box, with a sliding lid, and two blocks glued to the inside. Don’t read that the wrong way, the craftsmanship in this puzzle is everything you’d expect from a master craftsman like Stickman, and given the CNC work, it’s one of the more ornate puzzles he’s produced.

It’s up to the puzzler to insert the dominoes into the box, in any orientation he desires along with the additional pieces, close the lid, and then shift a few of the dominoes around to lock the puzzle. The challenge is then to return the dominoes to their original position which leaves a small gap at each corner on the front of the puzzle, allowing it to be opened.

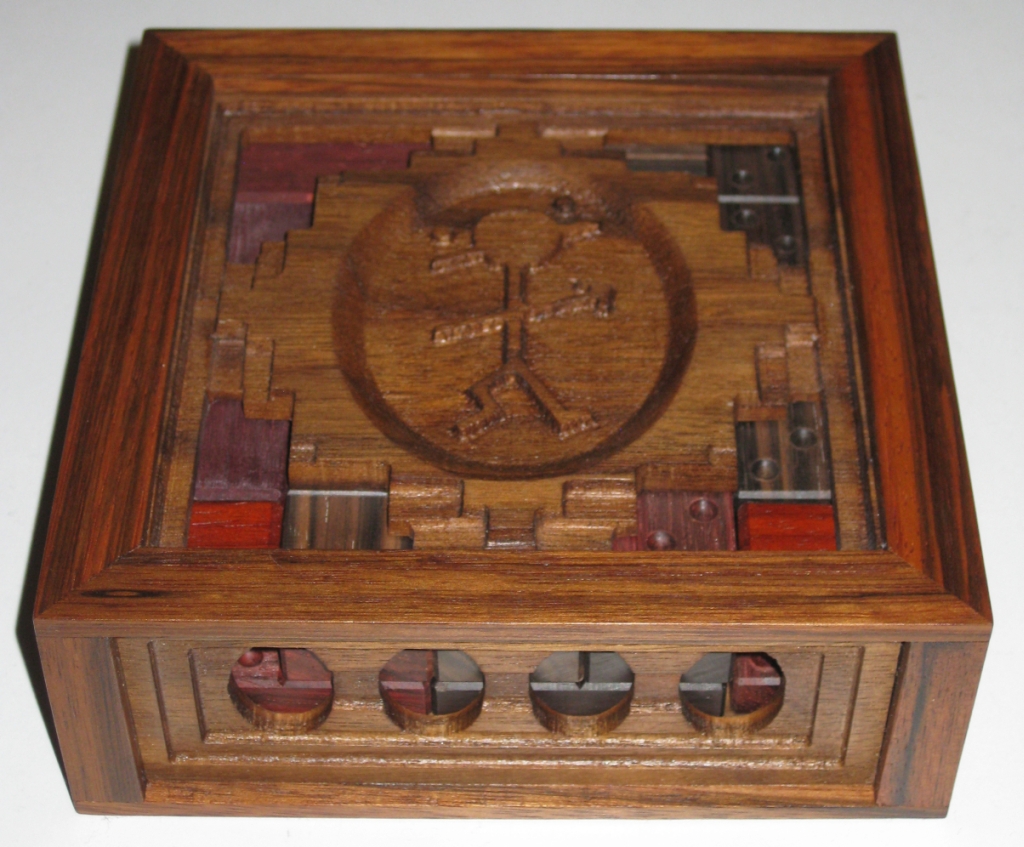
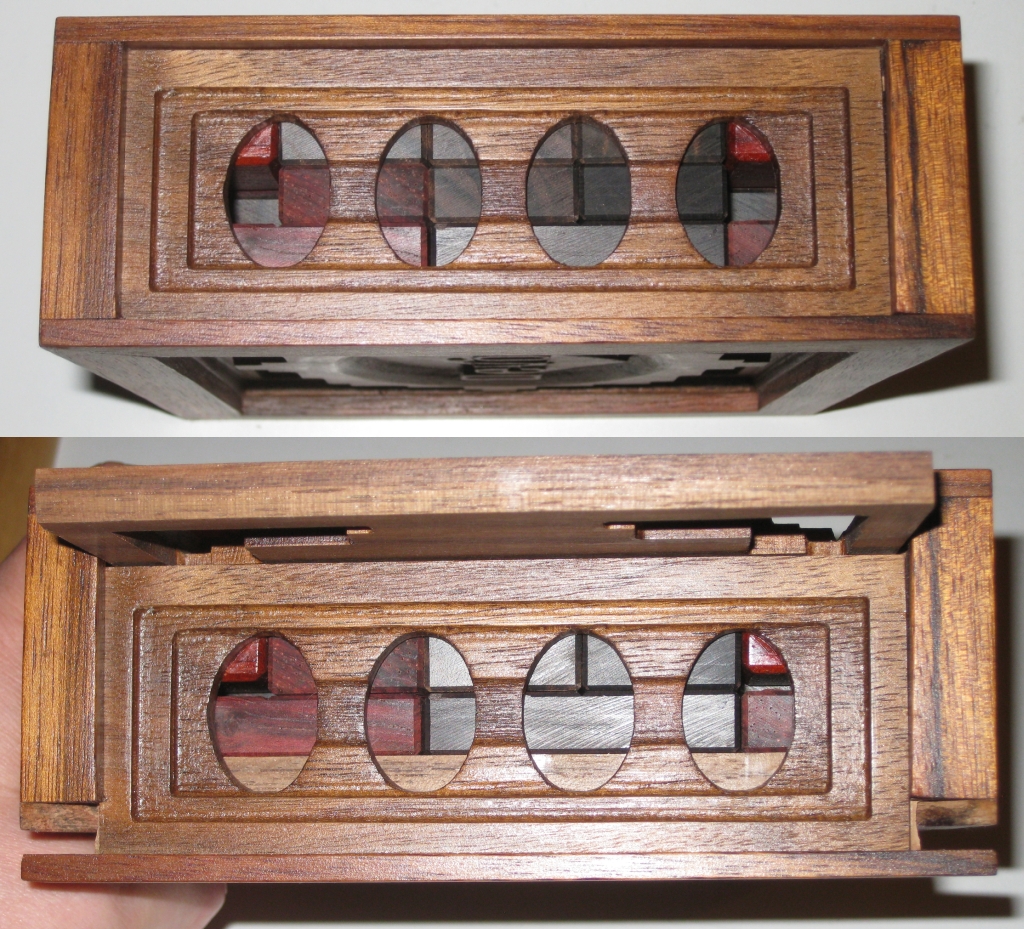
Front of the box showing the solved state, and the open mechanism

Front of the box showing the solved state, and the open mechanism

The Upper image shows the gaps which have to be created. Looking through the two outer holes in the box, there’s a gap in the middle layer of tiles. The top two reddish bricks at the top are the two which are glued to the frame and make the locking mechanism. Once those spaces are clear, the front can be slid down, allowing the top to slide part way out, allowing access to the dominoes.

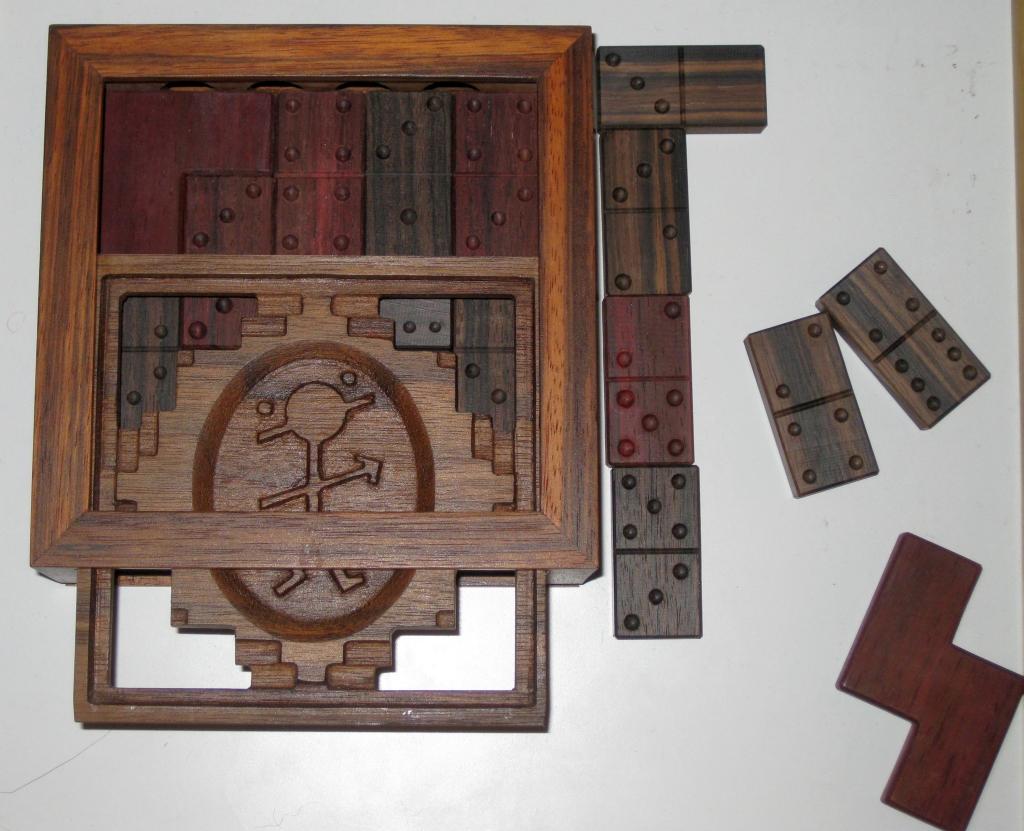
The opened box, allowing access to the dominoes

The opened box, allowing access to the dominoes

In terms of the difficulty, this is a very challenging puzzle. Those holes which are all around the box look huge until you try to move a domino inside the box, and realise that the gaps are not as large or as helpful as you might like. I found myself often tapping the side of the box against my palm to cause a domino to slide where I needed it. Moving dominoes between layers is especially tricky, and it’s not had to create a state inside the box that will take a lot of time to solve. Even Stickman himself admits that he found himself locked out of the box for hours.

The opened box, allowing access to the dominoes

The opened box, allowing access to the dominoes

I really like this puzzle box, and it doesn’t hurt that once you solve it, you can go ahead and make use of the dominoes inside. I’m very pleased to have been able to turn this into a working puzzle and I hope this will give more puzzle enthusiasts a chance to play with another Stickman design.

Bringing another puzzle into the world

Every now and then an opportunity arises to take a puzzle in potentia, finish it, and bring another puzzle into the world. I recently had that opportunity with one of Stickman’s puzzles. At a recent auction, I was bidding on a copy of Stickman’s Domino Box, and given that I’m friends with the man himself, I was talking to him about it. He happened to mention that he had a carcass of the puzzle that just needed the dominoes made for it. He even had the blocks of Ebony to make them.

The Domino Box was a joint venture between Stickman and John Devost. Stickman made the housing for the dominoes, and the extra ‘bits’ that for the mechanism of the puzzle, and John Devost made all the sets of Dominoes.

Turns out neither he nor John Devost had the time, or motivation to make the dominoes, so Robert offered me the chance to take that copy instead of the one I had won at auction. I’ll not go into the details, but both myself, and the person I was bidding against got a great deal on the puzzle, so it was a win-win situation.

The Stickman Domino Box 'kit'

The Stickman Domino Box ‘kit’

What arrived from Stickman was everything needed to make the puzzle functional. As you can see in the photo above, I received four blocks of Ebony, the carcass for the puzzle, a bag of domino templates, the special drill bit to cut the spots, and a jig to help in cutting the spots. There were also some original dominoes cut by John Devost for sizing, the interesting shaped pieces which are part of the mechanism, and the original puzzle booklet. It’s quite the collection of pieces, however it was going to need some work to make it into a Stickman.

Originally, this was to be a special edition, with the Ebony Dominoes however as often happens with a run of puzzles, toward the end the last couple never quite get completed. Having everything I needed, and not having the drain of completing 25 copies of a puzzle, the motivation was there to make up the dominoes. This post will show you the process of making up the set of dominoes to turn this into a functional puzzle, and add a unique copy of the Domino Box to my collection.

Not long after I received the kit, I heard from another puzzling friend, over in the land of Oz who had heard through the puzzle grapevine that I had all the necessary ‘bits’ to make up a set of dominoes. He asked if it would be possible to create a set for him while I was making my own as he also had a carcass that needed the dominoes. Making two sets, isn’t a lot more work than making one, so of course I agreed.

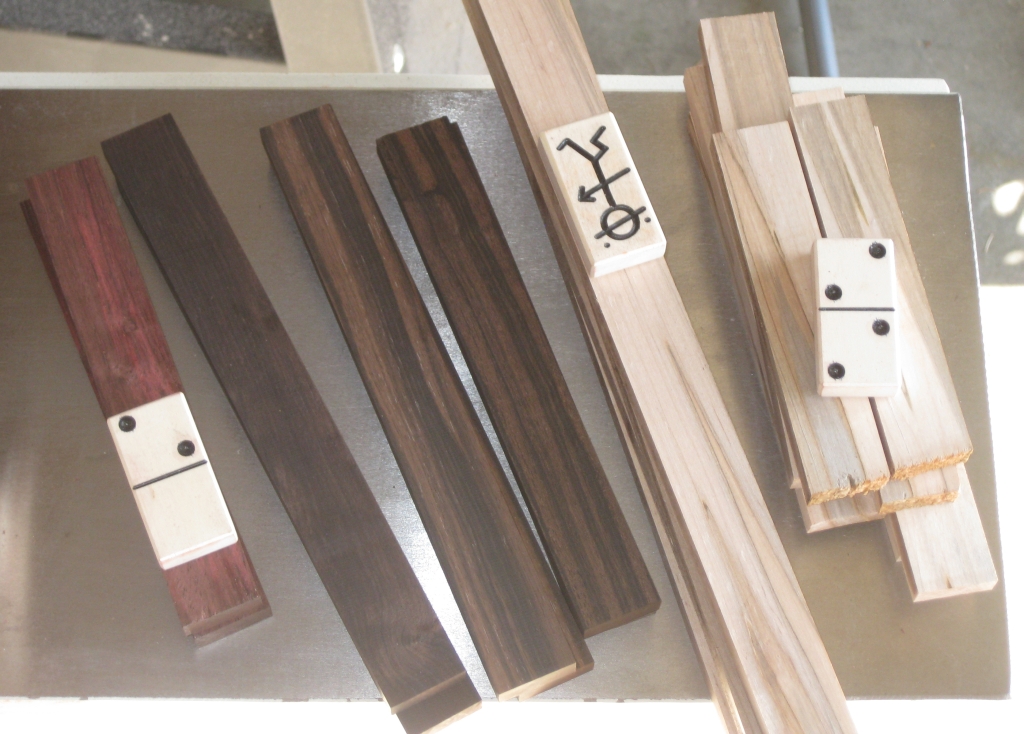
From the Ebony blocks, I had to figure out how to get the 28 domino blanks I needed from the blocks. Unlike the second set where I had a full eight foot board to work with, here I had just enough to make the dominoes. (Ed: I didn’t realise just how close it was until much later)

Some fairly deep checking

Some fairly deep checking

I also had to be very careful when cutting the blocks to size, as there was some significant checking running through the entire block in two out of the four wood blanks, which would ruin a domino if the checking came through the piece. Fortunately, the block was thick enough that I could cut it and avoid the checking, to get just enough stock.

The Stock milled to thickness

The Stock milled to thickness

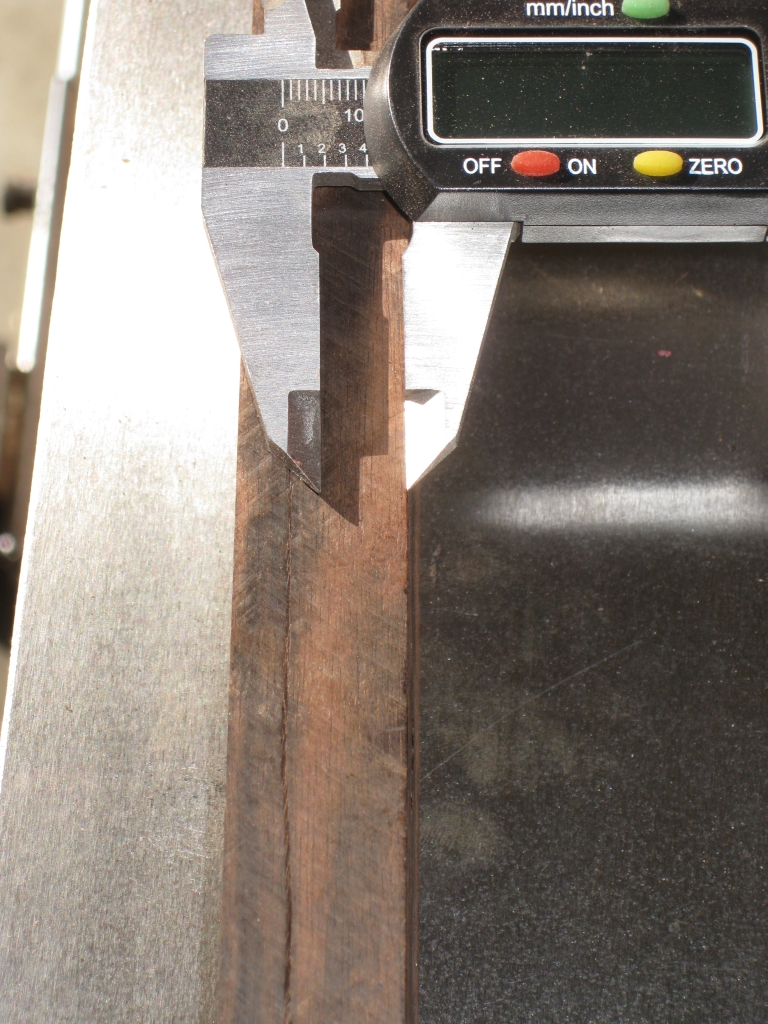
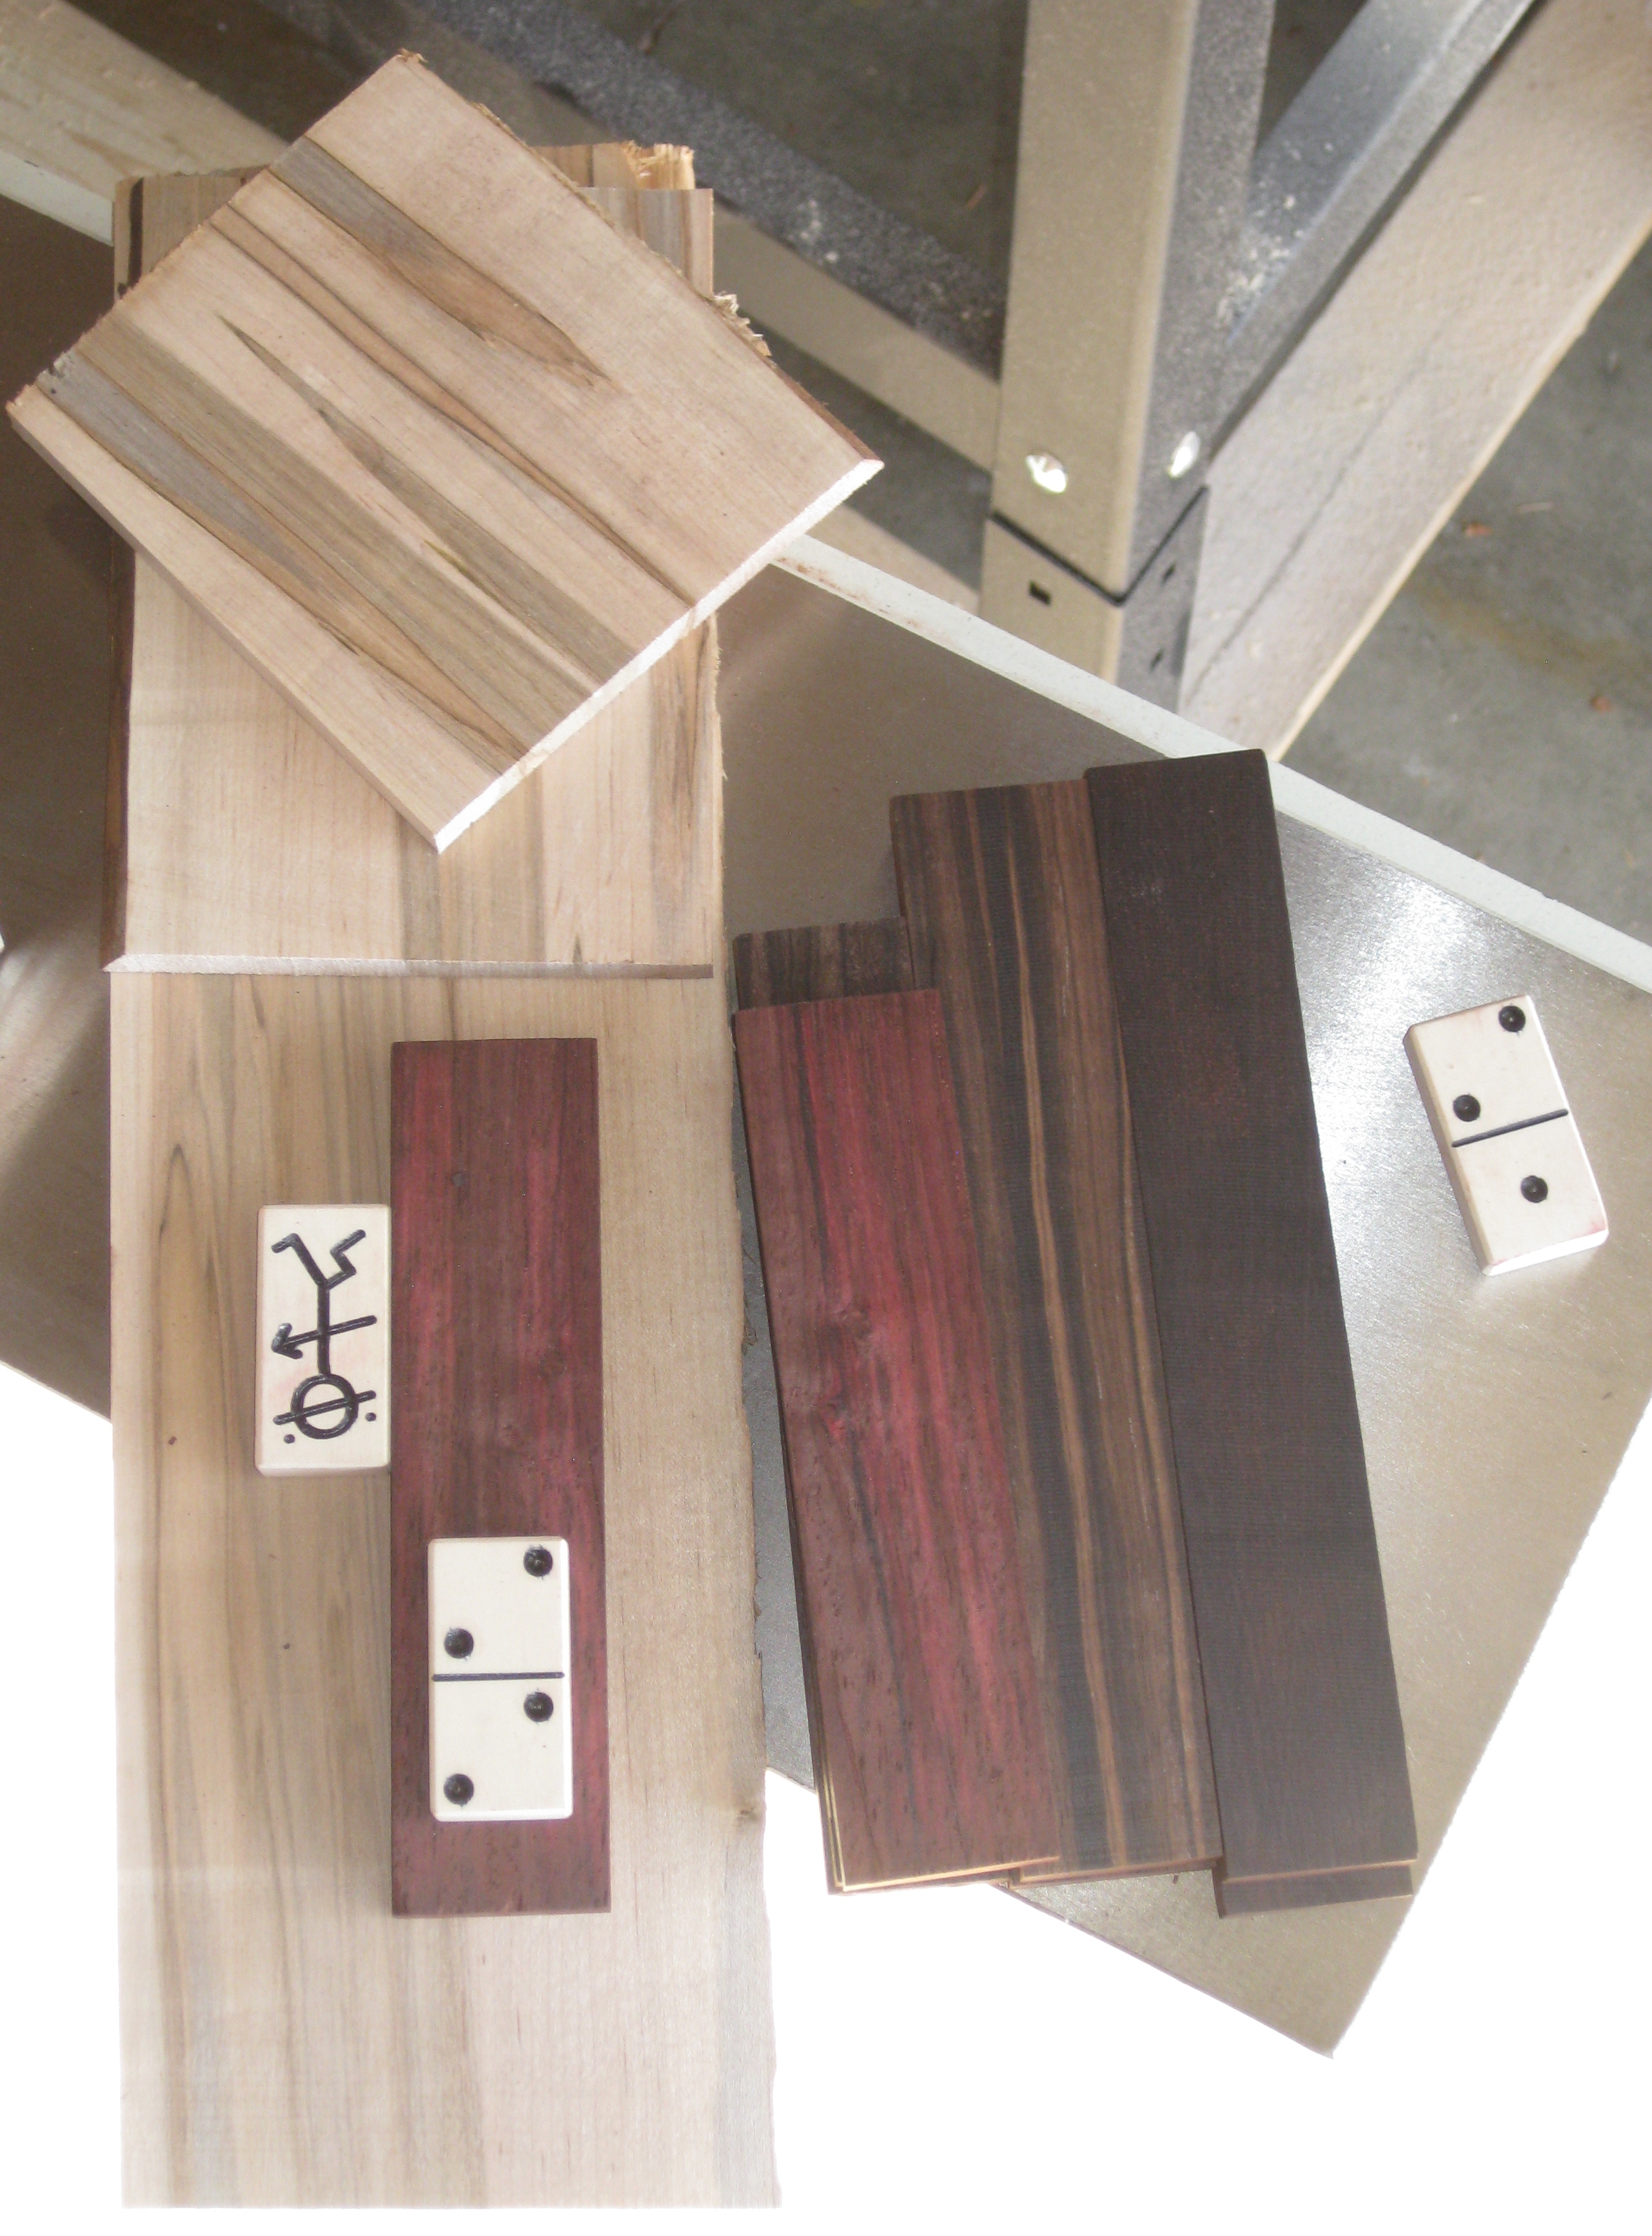
With the stock milled to the correct thickness (10mm) for the dominoes I had a set of boards, which as you can see are wider than needed for the final domino blanks. The lighter stock is Ambrosia Maple. I had picked up a beautiful board at a recent trip to the lumber store, and despite not knowing what I’d use it for at the time, I couldn’t pass up such a stunning board. When I was asked to make the second set of Dominoes, this seemed like the perfect use for some of that board.

Cut to width, ready to create domino blanks

Cut to width, ready to create domino blanks

Having used the original dominoes Stickman had provided, I cut the long strips of wood to the correct width, ready for making into the domino blanks.

Setting the jig to cut dominoes to length

Setting the jig to cut dominoes to length

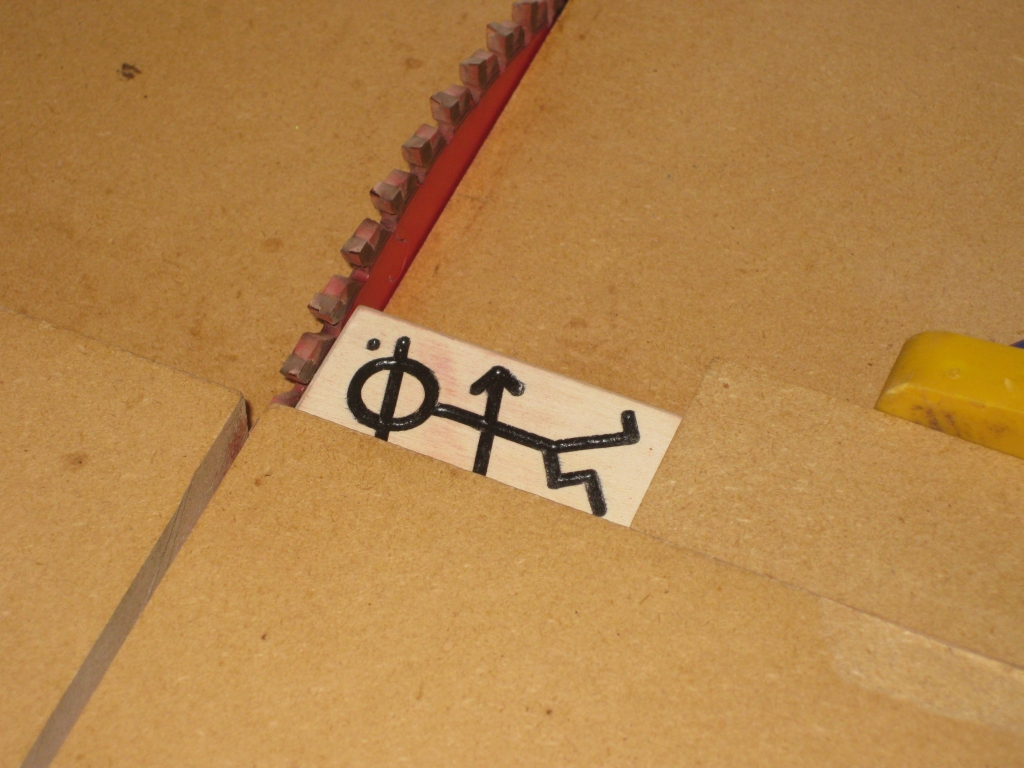
With my crosscut sled, I took the original domino and used that to set my stop block to allow me to quickly and accurately cut the blanks to length.

Sticks cut to perfect length

Sticks cut to perfect length

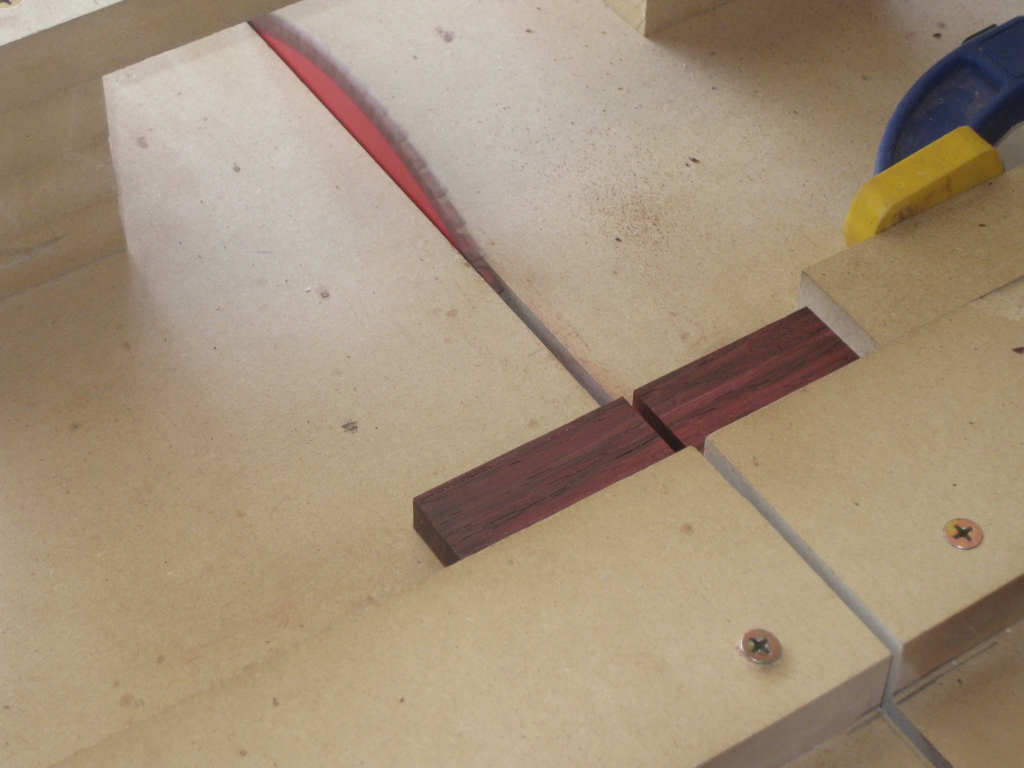
Each long stick has its end trimmed on the sled to make sure that it is absolutely 90 degrees to the long edge, and makes sure it will be parallel to the other end when cut to size. After that, it’s a simple process of placing the stick against the stop block, and pushing the sled across the blade. Each domino blank is perfectly sized, with very little work needed.

Two full sets of domino blanks cut

Two fulls sets of domino blanks cut

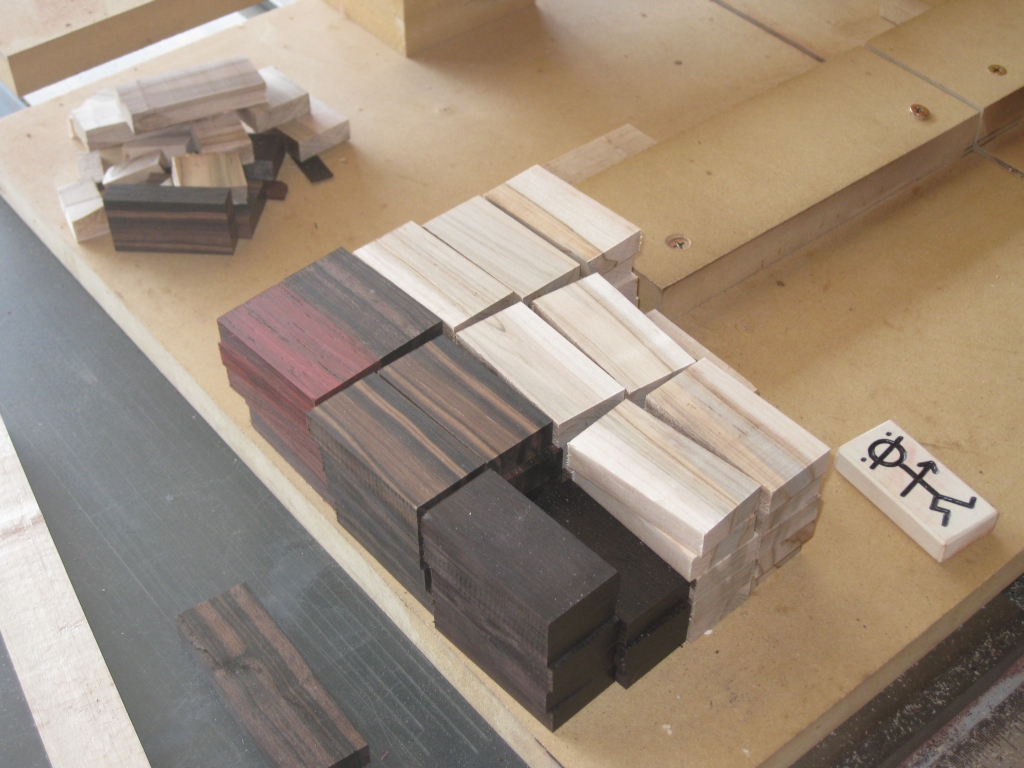
Before long I had a couple of stacks of domino blanks. There was enough wood to get exactly 28 blanks from the Ebony. I had a little more of the maple stock, so I cut a number of spare dominoes just so that I had extras to test out each additional step in the process. After all, I had no room to screw up with the Ebony stock.

In the back left of the image are all the offcuts from the stock. I’ll certainly not be throwing all that Ebony away. I’m sure it will make its way into another project at some point.

All the blanks chamfered, ready for their spots

All the blanks chamfered, ready for their spots

Leaving the blanks with their sharp edges after cutting on the saw means they’re not particularly nice to handle. The sharp edges, especially on the Ebony which takes such a good edge mean that the pieces are not particularly tactile, and need a little softening. Putting a small chamfer on the edges takes the harshness from the pieces. Initially I was planning to put a roundover on the pieces, however the roundover bit I have didn’t give me a pleasing result, so I decided against it. The benefit of having the spare dominoes meant I could experiment without worrying about something not working.

28 templates including the double blank

28 templates including the double blank

With the chamfers finished, it was time to make these domino blanks into dominoes. The bag of spot cutting templates I received contained all 28 blanks needed, including a double zero tile. I assume that whichever company was making the templates had issues that someone out there forgot to make a double blank, so they had to include it. I took the time to separate the templates into their groups, just to make sure I had everything I needed before starting.

Ready to cut test spots

Ready to cut test spots

First attempt at cutting spots

First attempt at cutting spots

Using one of the spare domino blanks I’d cut earlier, I tested the template and spot cutting drill bit to see how they worked together, and get a feeling for how to cut the spots. I added a couple of shims to make sure the blank was positioned correctly under the drill bit template. The drill bit itself is rather clever. There’s a collar on the end of the bit, which drops into the hole in the template, and when you push the drill down, the rounded cutting head protrudes below the template to make the cut. The jig holds both the domino and the template in the same fixed location allowing for consistent spot placement, and no chance of spots becoming oval shaped.

The results look good, time to cut them for real

The results look good, time to cut them for real

The end result is well placed, consistently positioned spots which are all the same depth, with virtually no thought or skill required from the operator. I’ll count that as a good thing, as it would be all to easy to ruin hours of work without the template and special bit.

Two full sets cut, but not finished yet

Two full sets cut, but not finished yet

After a couple of hours work with the drill, I had 56 dominoes cut. The two full sets look great, but sadly I’m not finished yet. The central divider needs to be added to each domino, and I need to make a new crosscut sled where the blade is at 45 degrees to the table in order to add that detail. I then also have the difficult choice of whether to ink the spots or not. As you can see from the original dominoes I have, the spots are accented by adding the black ink to really make them stand out. Before I make a final decision I’ll test out a couple of options and see what works best.

The observant among you may have been wondering why some of the Ebony dominoes are red. When I started working the Ebony blocks, one of them had the red tint to the wood. Personally I love the red tint, and wish I had more of this wood. It will eventually oxidize back to the dark black that you can see from the outside of the original block, but I’m going to enjoy the red tint while I can!

In the next post, I’ll finish up the dominoes before putting them into the puzzle, and enjoy solving it for the first time.