Category Archives: Random Musings

Time for something different

Some time back, Jen asked me to make a few pieces of furniture for her. Now I’ve been pretty busy with work, and making the puzzles, so I’ve not really been able to do much for her, but since it was something of an unwritten agreement when I started buying all the tools it was about time to start paying up. If you’re only interested in puzzles, then skip this one, but if you want to see a little more on the woodworking I’m doing then keep reading.

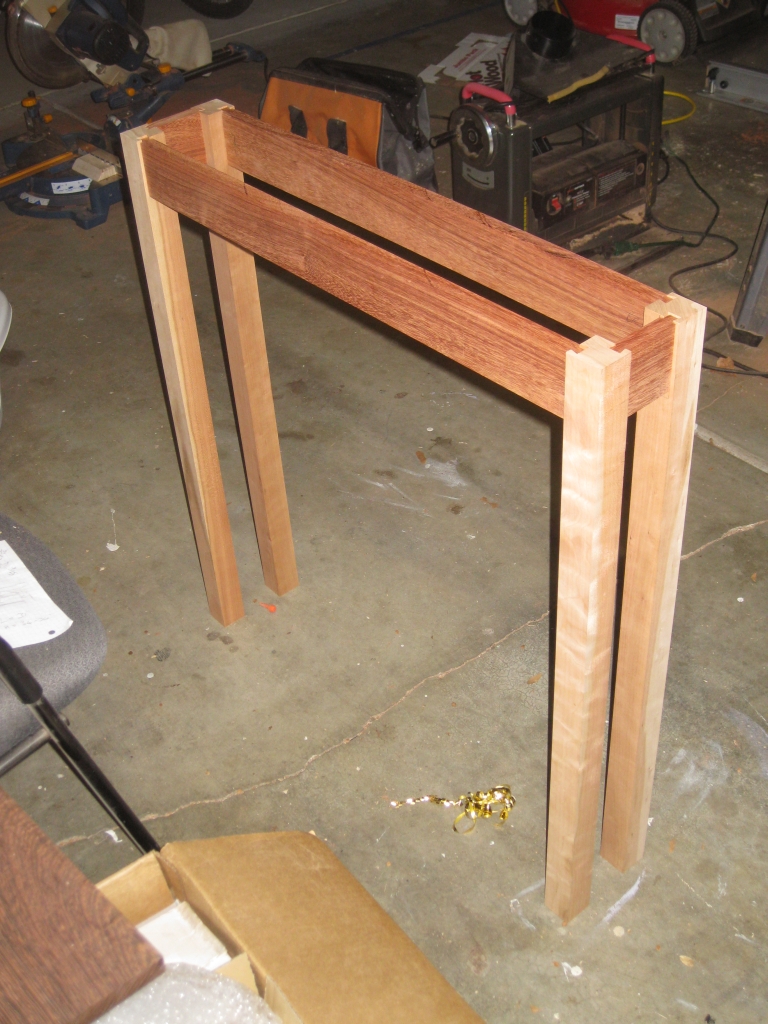
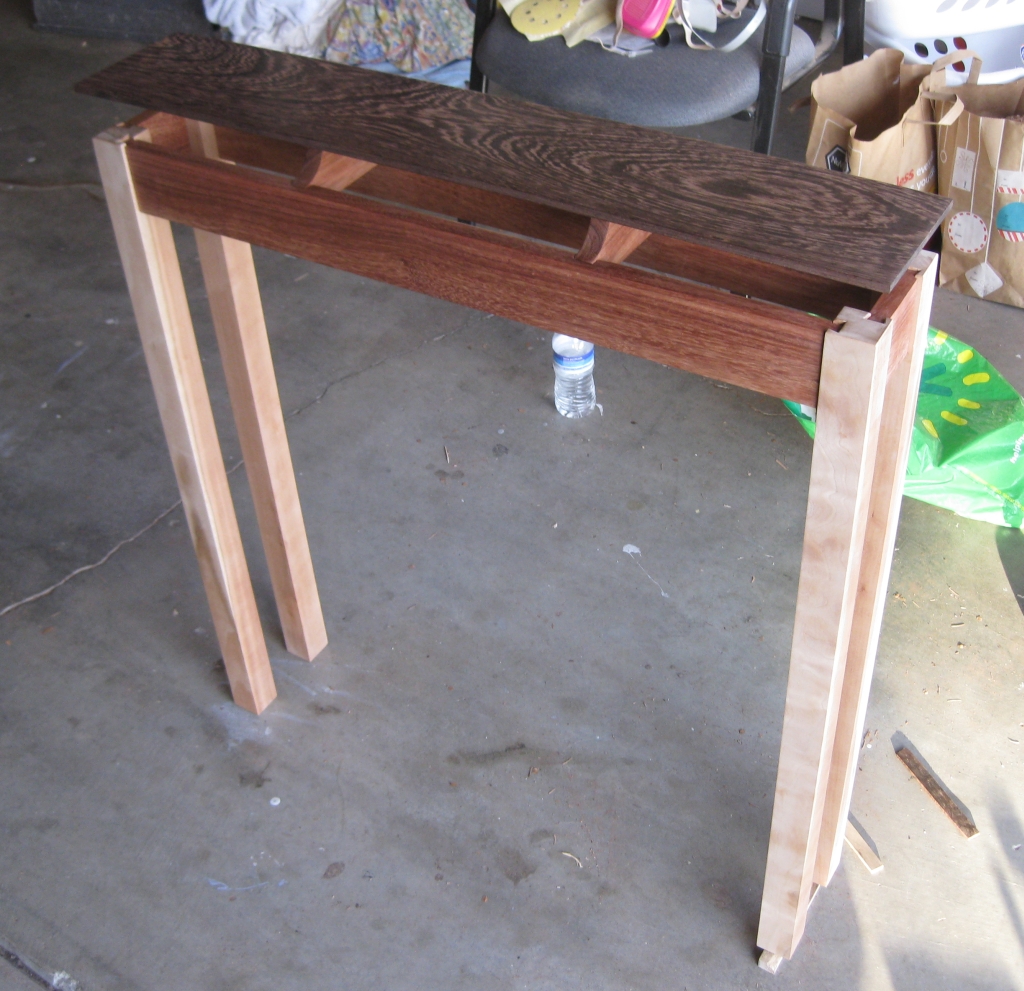
Completed Table

Completed Table

The first project that I’ve tackled is the narrow table above which Jen wanted for putting keys and other stuff on just inside the door to the house. It needs to be thin as it has to hide behind the door when it’s opened so really a custom piece was the only way to go. I left choice of woods up to Jen as it was her table, I was merely making it. We settled on Cherry for the legs (one of which when we finished it we found out is actually highly figured quilted Cherry!), Grenadillo for the frame and Wenge for the table top.

I’m going to use this post to work thought the build process and design decisions I made when building the table, as I have learned a lot from the project, and even though it’s not puzzle related, it will certainly help me in puzzle making going forward. Hopefully you find the journey interesting.

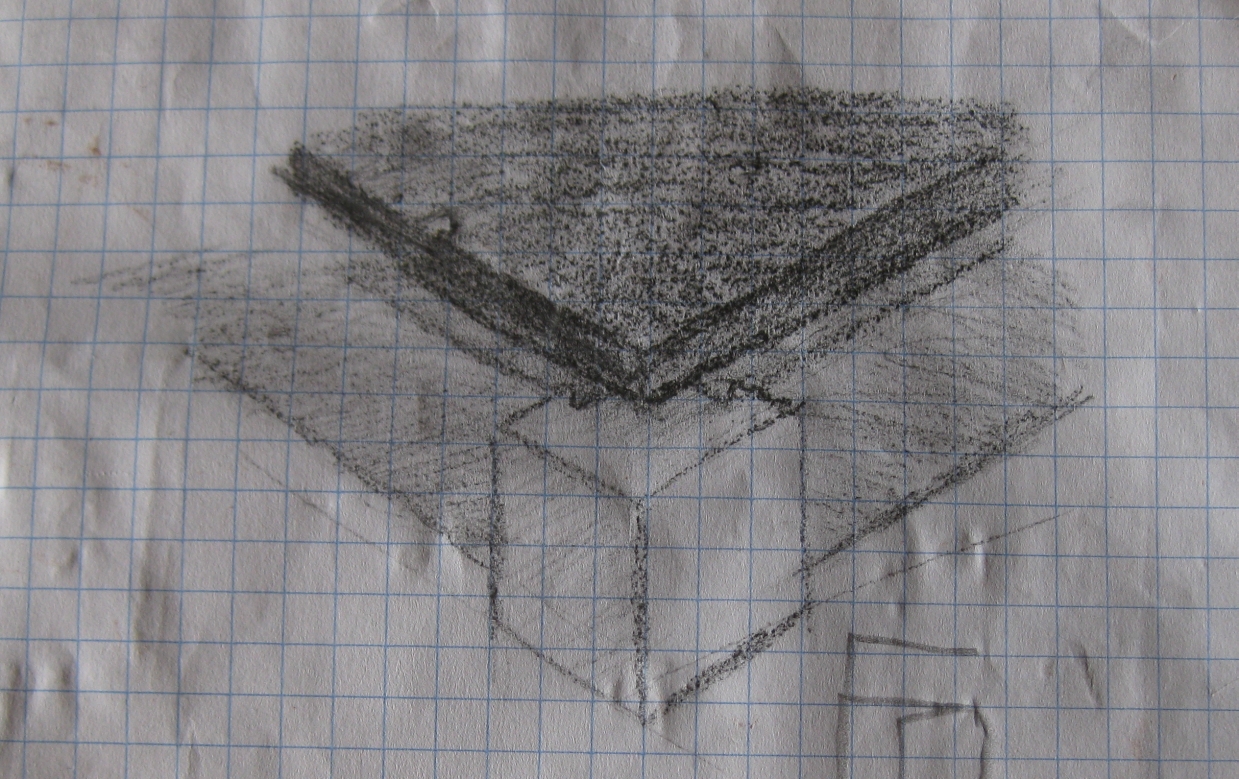
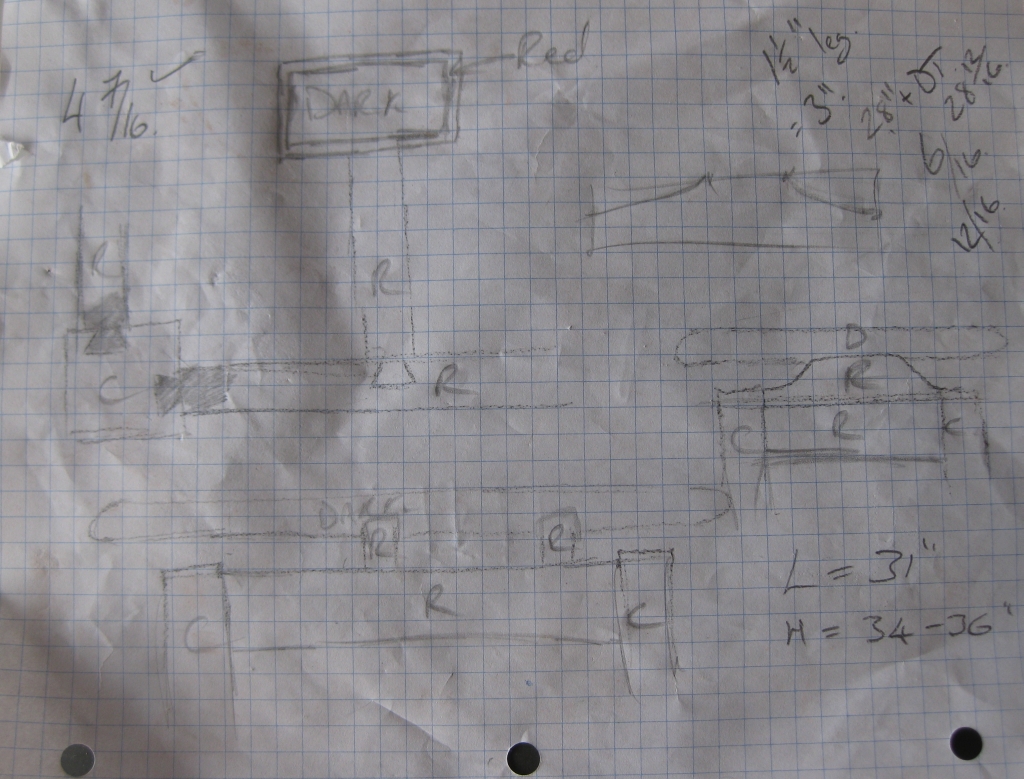
Plans

Plans

More plans

More plans


When I started the project, there were a number of things I wanted to try to accomplish. Initially I wanted to push myself in terms of the woodworking, and not necessarily play it safe. Now by that I mean not just sticking to things I’ve done before, really trying to use this to step out of my current comfort zone. I decided that I wanted to create a table with a floating top, and as such the joints into the legs were going to be stopped dovetail joints since they would be visible in the finished table, and become a feature. I appreciate that I was asking a lot of myself, having never attempted any joinery before and jumping straight to a dovetail may seem crazy, however I was fairly confident that I could do it so why aim low?

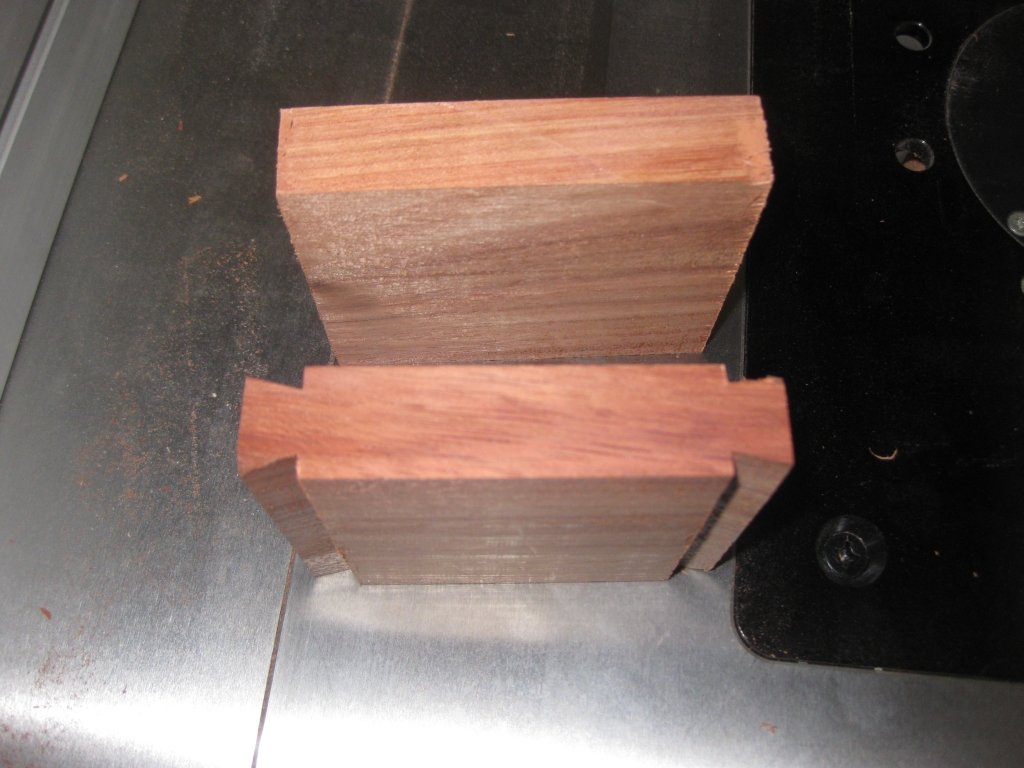
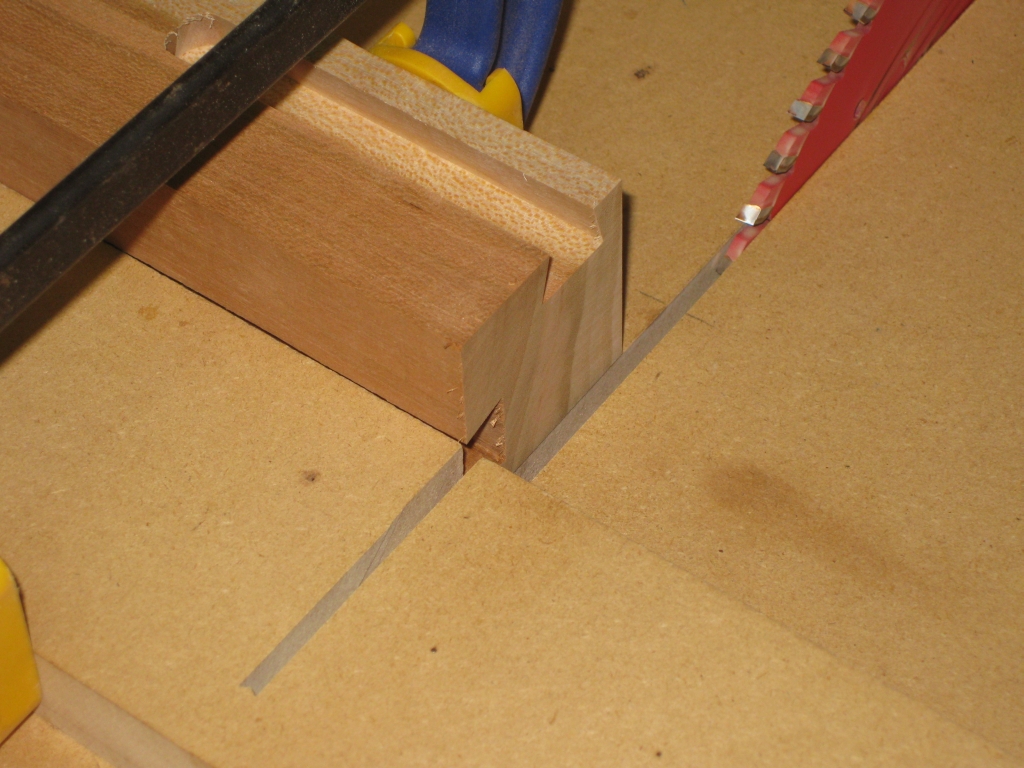
With all the dimensions written down, I started off by cutting the pieces for the frame of the table. I even remembered to take into account the size of the dovetail, so I didn’t end up cutting the sides too short. Starting off with some scrap pieces of wood, I setup the dovetail bit and made both sides of a joint to see what problems I was going to encounter and how close I could get the fit (which turns out to be so close I needed a mallet to separate the two pieces). The biggest issue was putting the dovetail into the ends of the long boards. Supporting them wasn’t easy, but given that I have a friend visiting, he was able to help out.

The end piece for the frame.  One with the dovetail cut, the other without.

The end piece for the frame. One with the dovetail cut, the other without.

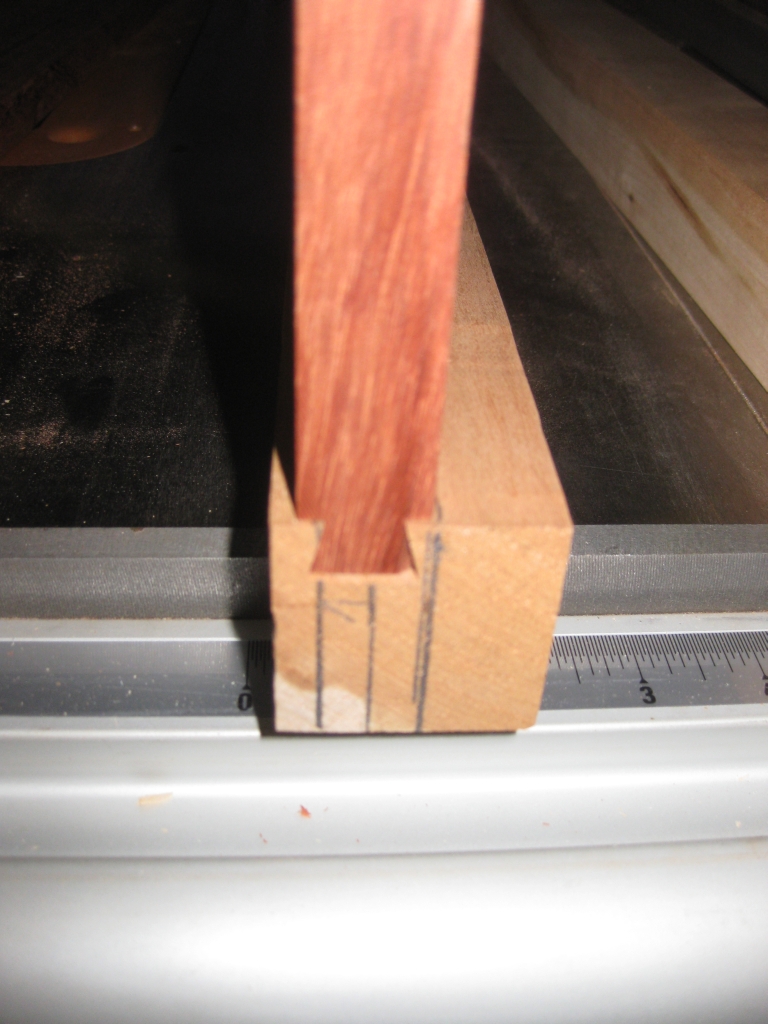
All of the male dovetails on the frame were cut at the same time, so the bit was setup once and there were no issues in getting the dovetails the same size. After that I moved on to setting up for the female size of the dovetail on each of the legs. Two female dovetails need to be cut into each of the legs, and they need to be the same distance from the outside edge on each leg to make the table look right when finished. Given that the setup for each dovetail in the leg is different I cut one dovetail in each leg before coming back and resetting the spacing for the second.

The first completed dovetail

The first completed dovetail

This was the first joint completed. As you can see, I’d marked the top of the leg with the centre of the dovetail, and the width of the dovetail to help with setting up the cut. The width of the joint is wider than the width of the bit I’m using, so that allowed me to creep up on the perfect fit. The joint is tight, and requires some persuasion to come out but there’s enough room to account for the swelling of the wood when I add the glue to the joint.

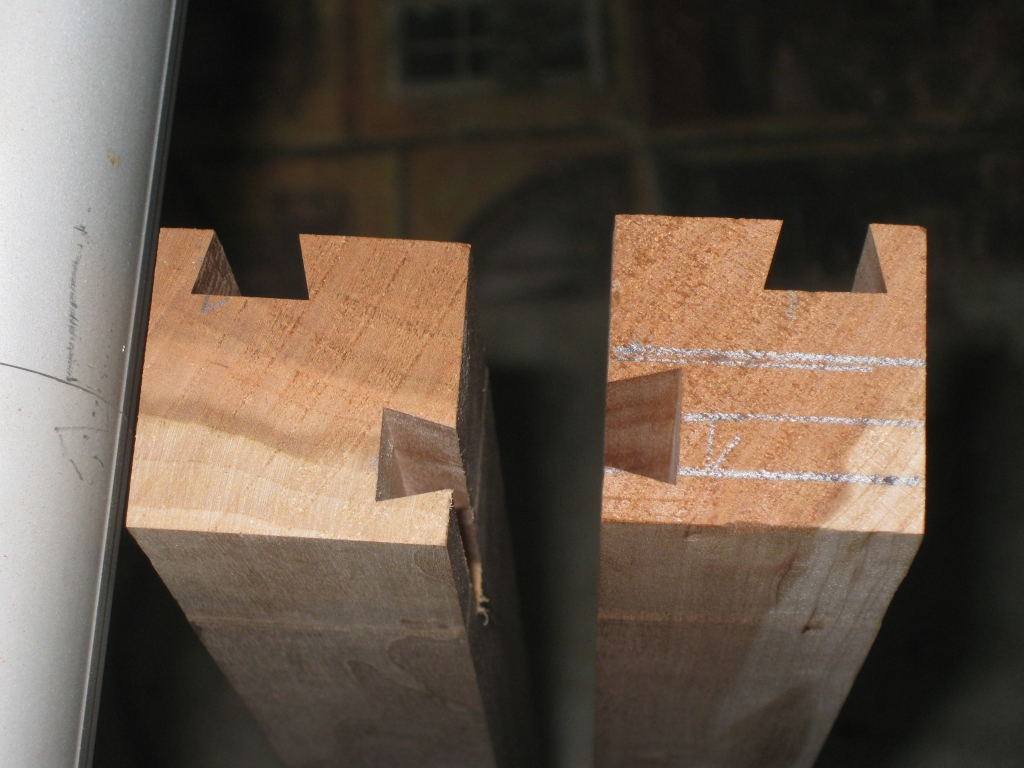
Comparison between final dovetails, and the first pass

Comparison between final dovetails, and the first pass

As you can see from the photo above, there is quite a difference in width between the first pass in the joint, and the final dovetail. You’ll also note that only the first cut was marked up. After that, the fence was set to allow the rest to be cut knowing that they were an exact duplicate of the first. When it came to ensuring that the adjoining dovetail was spaced exactly, I started the first cut closer to the centre of the final joint, and then crept back to the correct starting point by measuring the gap between the front of the leg and the top of the joint with my digital calipers, until they were exactly the same width (the gap on the bottom in the photo above).

Trimming the top of the table legs.

Trimming the top of the table legs.

With all the dovetails cut, I trimmed up the top of the legs, so that I knew everything was square, and that the depth of the dovetail was where I wanted it. As you’ll have noticed, the male dovetail is slightly inset in the female groove, and this was by design. I wanted to have the dovetail really stand out, rather than being flush with the top I wanted to have it inset slightly. I’m sure other people would disprove of this choice, but I like the effect.

First dry fit of the frame

First dry fit of the frame

With all of the joinery cut for the main frame of the table, I put it all together on a dry fit. This allows me to test the fit without gluing things together, and see that everything is square and sitting the way I want it. At this point, I still have to add the supports for the table top to make it float, but I was happy that everything went together the way I had planned, it was square, and it was looking good!

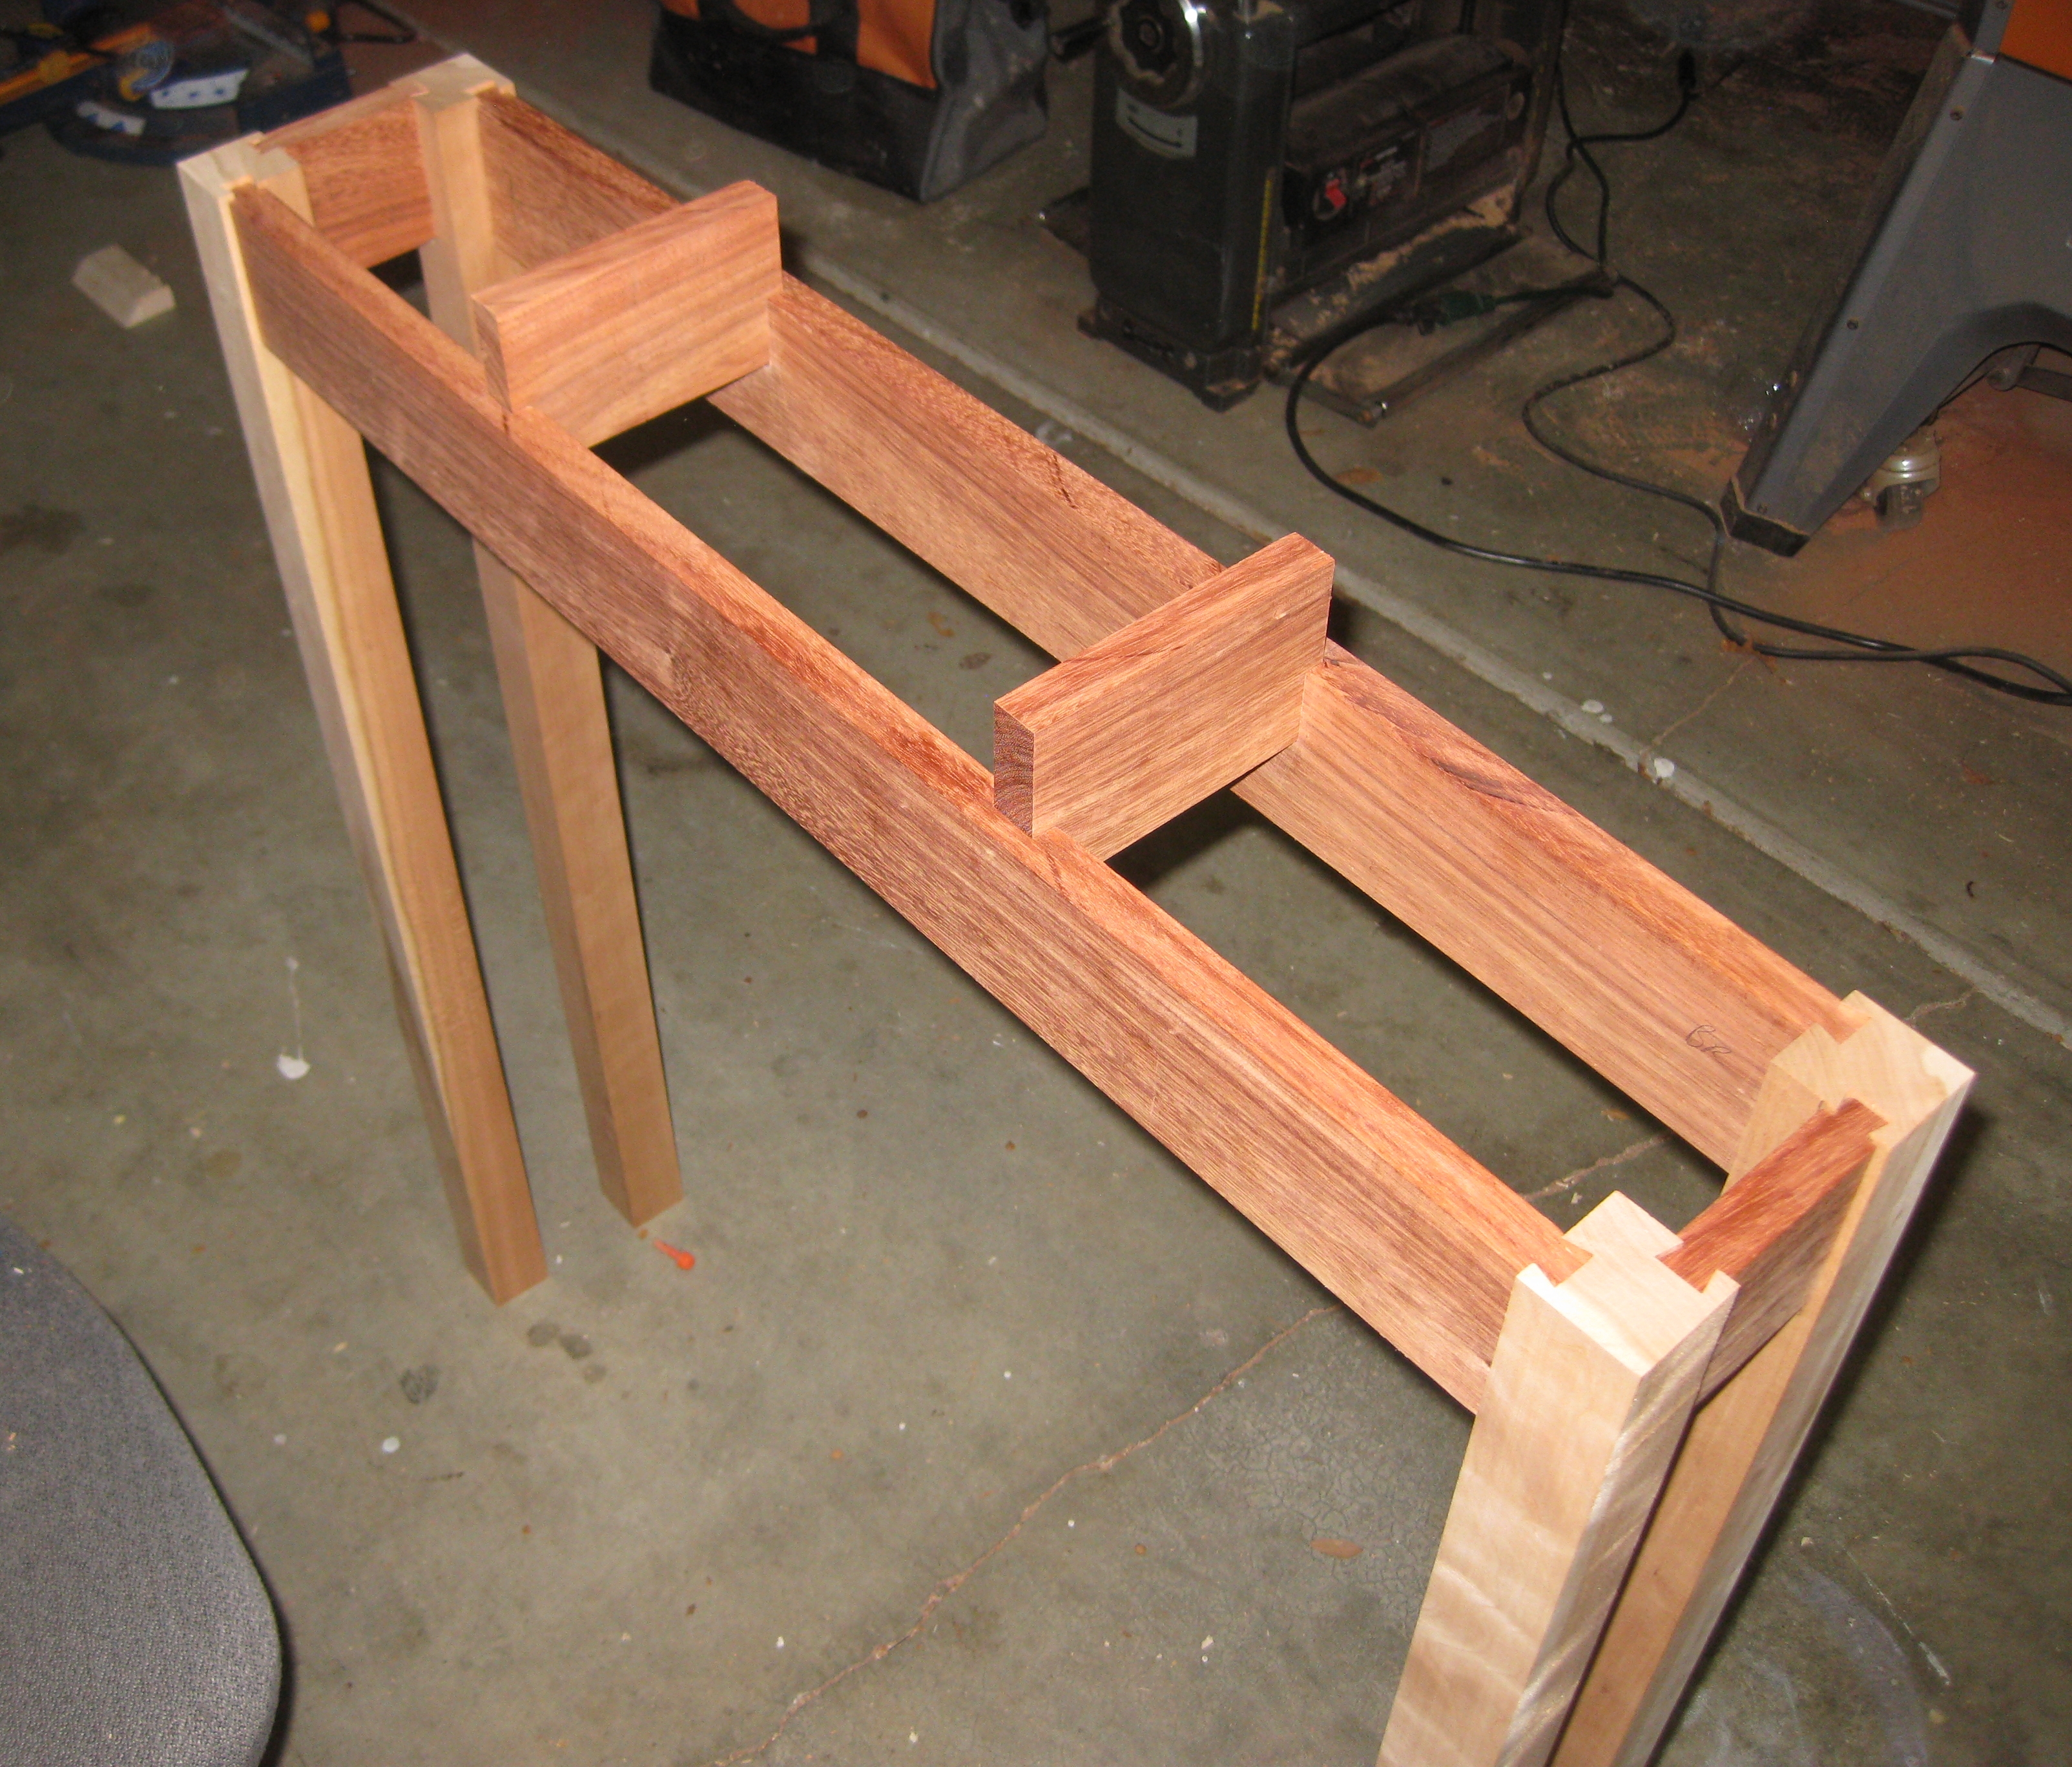
Second dry fit of the frame, with the floats sized and in place.

Second dry fit of the frame, with the floats sized and in place.

Next up was to cut the groove for the supports and also size them to fit correctly. I decided to make life simpler here, and go for a straight stopped dado, rather than a stopped dovetail. After all, the wood is the same so it won’t be a contrast like on the legs, and the entire point is to make the top appear to be floating above the legs, so drawing attention to the supports wasn’t the effect I was going for. The intent is to add a curve to the supports, so they start flush with the frame and curve under the table top. At this point though, I was happy just having the stopped dado cut and the height of the float set.

It seemed like most of the hard work was done now but there was still one last piece which would in my mind make or break the project, and that was getting the table top in place correctly.

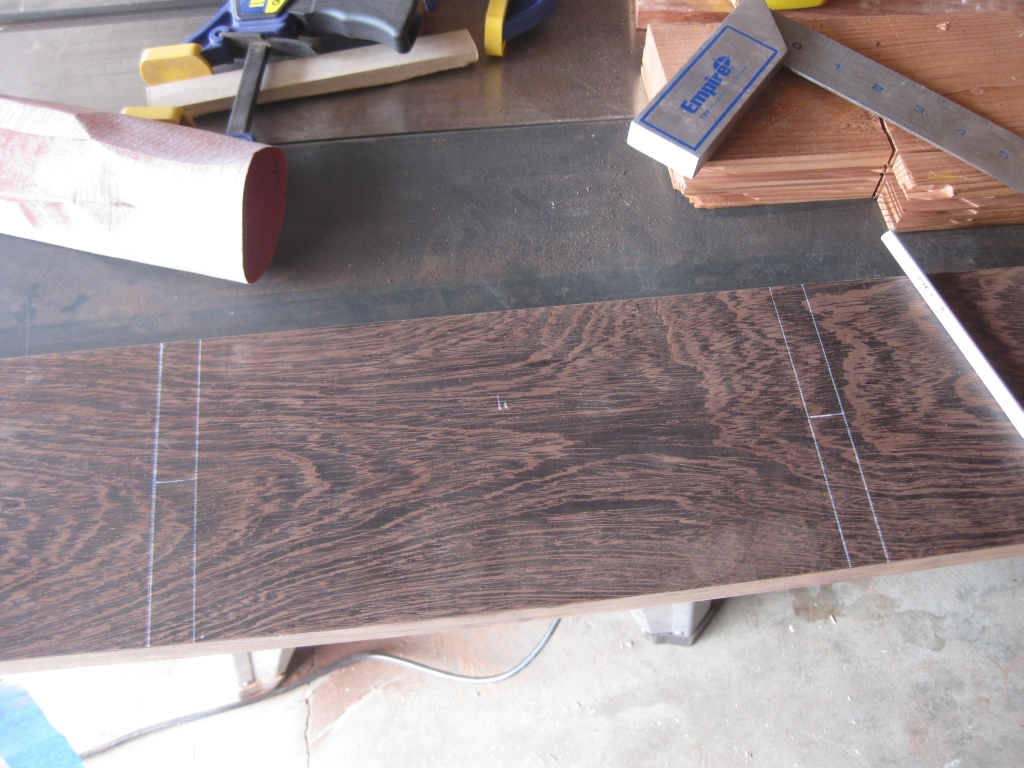
The Table top is 1/4″ longer than the frame at each end, and 1/8″ wider than the frame, front to back, so there is a slight overhang. When marking up the locations for the dado’s that the floats will drop into, I had to take this into account, to ensure that the table top is exactly centred over the frame. Without this, I’d end up with scrap rather than a table top! (And I’ve put a lot of hours into this to end up with scrap).

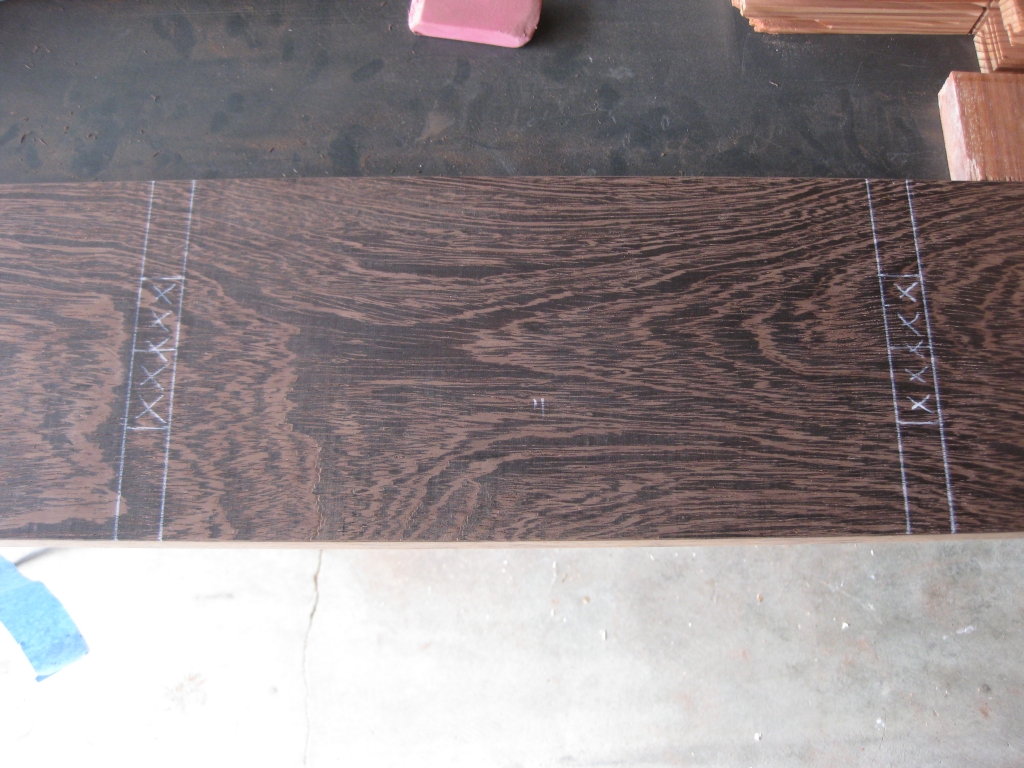
Marking up the table top

Marking up the table top

Marking up the table top

Marking up the table top


I marked up the width of the floats, then marked the centre of the top before marking the area to be removed. Having checked and double checked the markup, it was time to go ahead and remove the material so that I’d have a table top. Part of this project has been trying new things and learning more woodworking techniques, and this was no different.

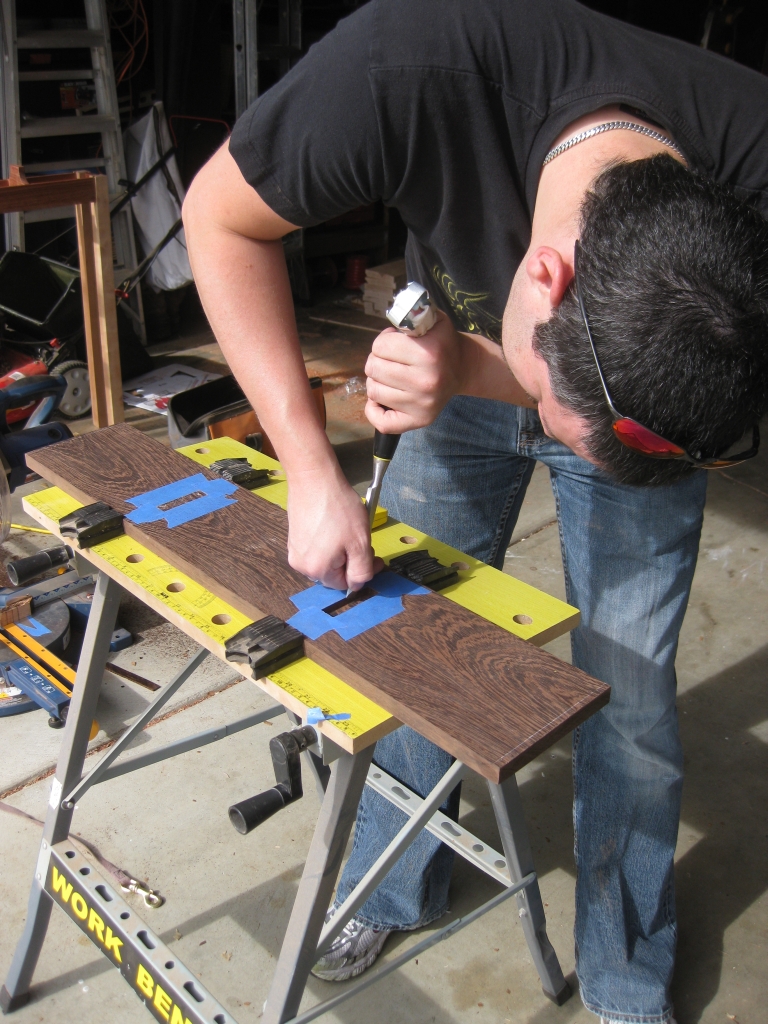
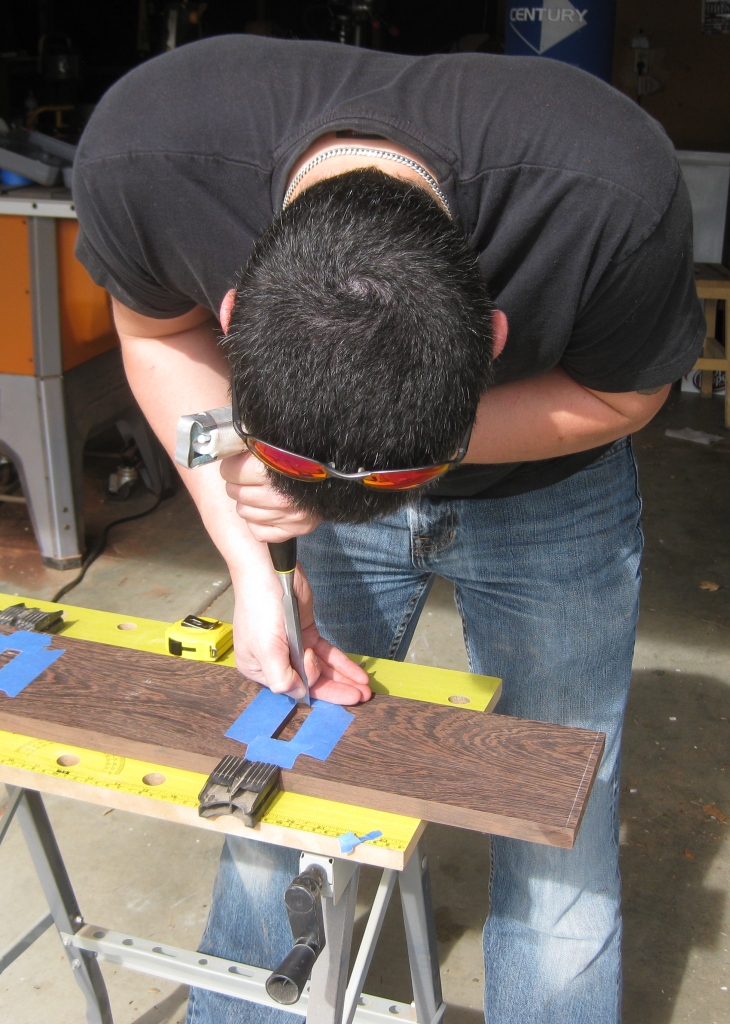
Sometimes hand tools really are the best tool for the job.

Sometimes hand tools really are the best tool for the job.

Yes, I still have the pins!

Yes, I still have the pins!


I decided to do this is a more traditional method, and use a chisel to remove the material. While it may not be the fastest way, it certainly was the safest, and by keeping my chisel sharp cutting through the wood really wasn’t difficult. Not only that, but it gave me a chance to work with some hand tools, and really get a feeling for some ‘serious’ woodworking. (And if it all went wrong, it was under the table where no-one would see it!) By going back to the frame frequently, I could check the fit, and ended up with a very tight fit. Tight enough in fact that I could put the top onto one of the floats, with the entire top hanging over the outside of the frame, with no glue, and it wouldn’t fall off.

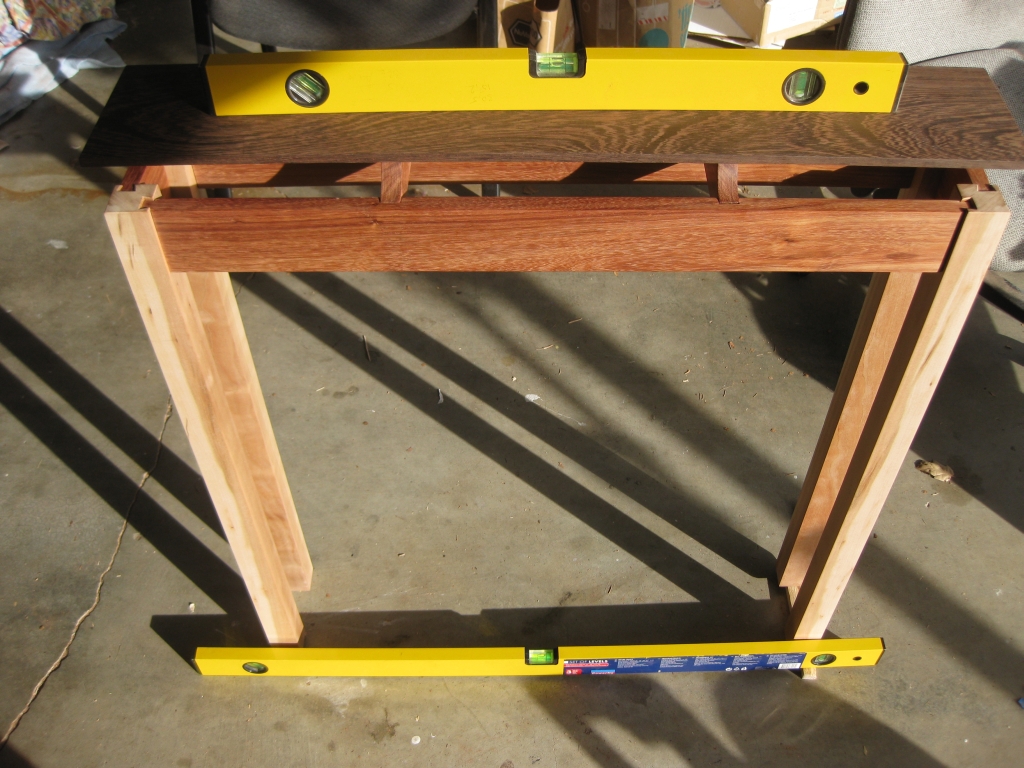
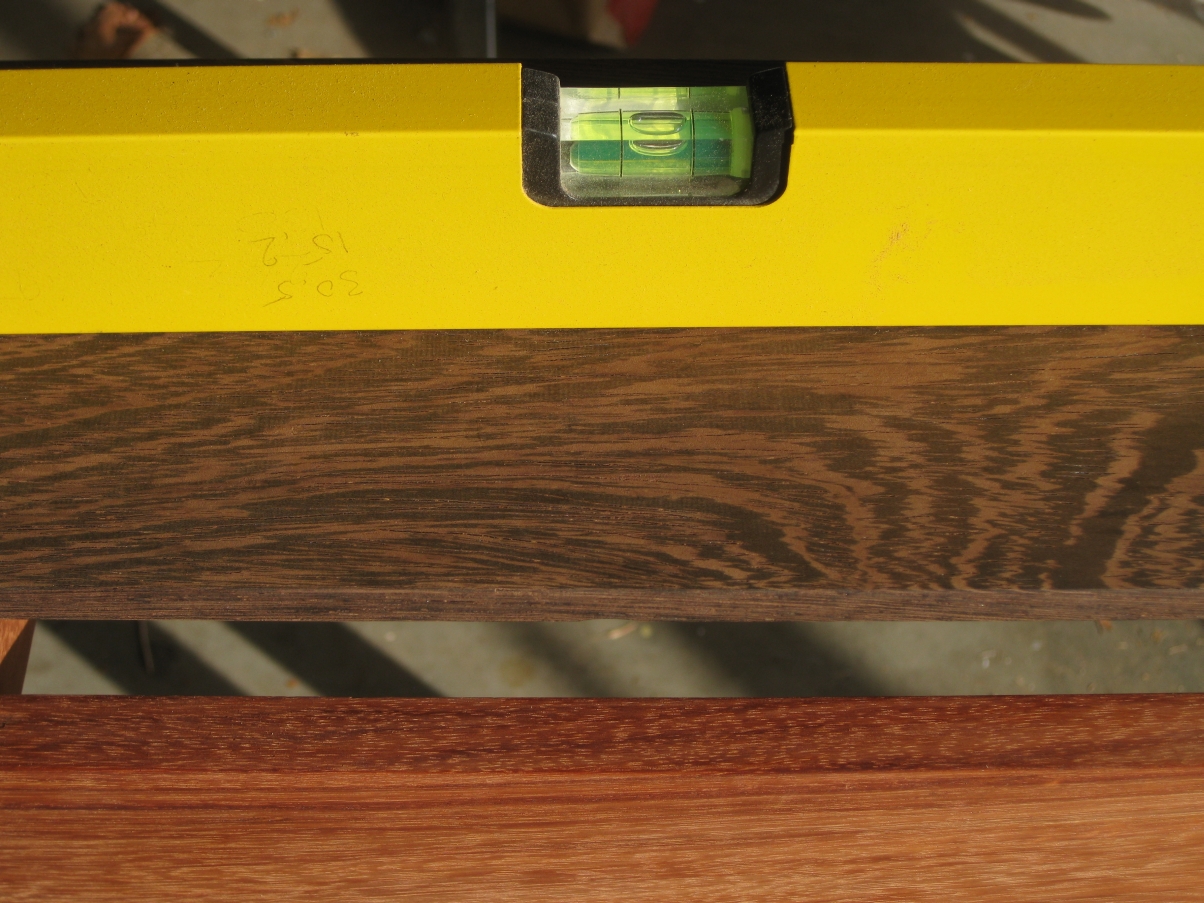
Checking for level

Checking for level

Spot on

Spot on


With the slots cut, I checked that the top was level. Unfortunately, my garage floor isn’t level, so I had to shim one side of the table legs to get it level first.

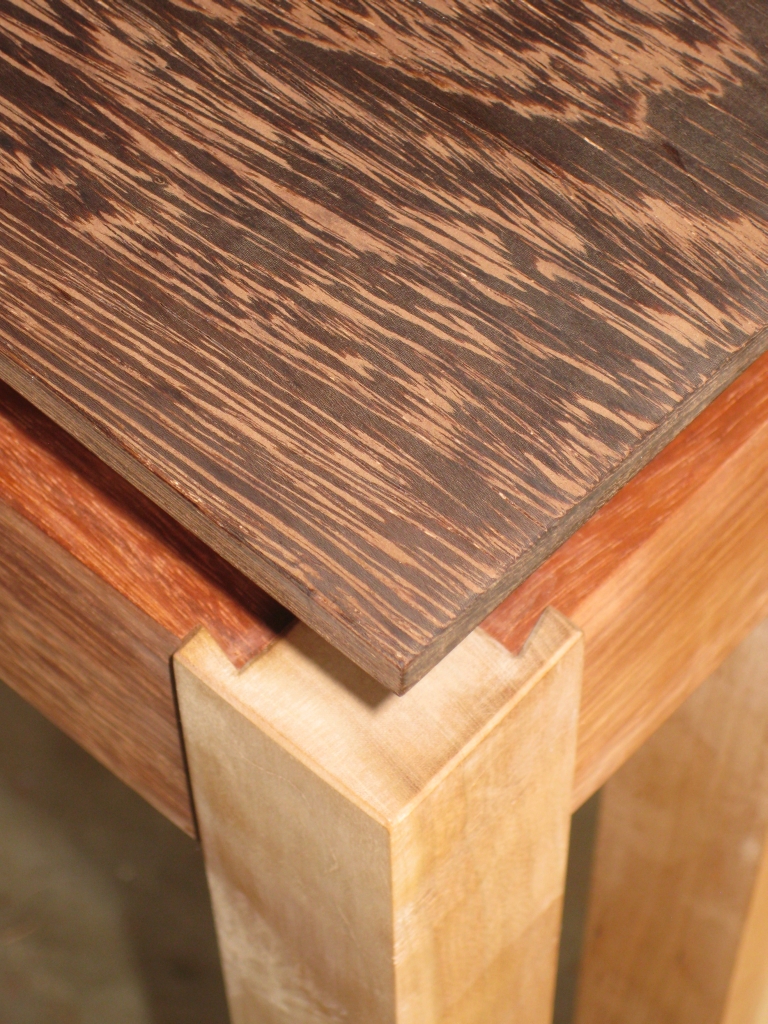
So there you have it, one table, built from a few boards to the finished product. The photos don’t show it, but with the wood polished to 600grit, there is a mirror shine to the faces, even without any finish on them, to the point that you can see your reflection in it. I’ll come back a little later and show you the table once it’s been lacquered, but until then I’ll leave you with a detail shot of the corner with the dovetails. I think it matches the original design drawing. I also added the bevel into the top and bottom of the legs to really finish the table. Clearly it’s the details that make the project.

Corner details

Corner details

I’d also like to say a huge thanks to my friend Callum who’s over from Scotland visiting me at the moment and helped throughout the whole project. I know that without his help much of the work would have been far more difficult.
My Own Shop Tour, and a Happy New Year!

Just a very quick post to wish all of my readers a very Happy New Year, and a prosperous 2012.

I’ve spent the last couple of days tidying up the garage, which is my shop, thanks to the Christmas Present of some plywood from my good lady. So two days of hard work completed, and I now have a workspace I can use. To celebrate, I’ve put together a short video tour. Nothing on the scale of what I did with Scott, but it’s my humble shop, and I’m very happy with what I have been able to produce in it so far.

Watch out for my first puzzle box in the new year, and I’m sure many more things to come.

Thanks for reading, and see you on the flip side!

Neil

Shippers Dilemma

This is to be the first in a series of posts in the run up to Thanksgiving Day here in the US. So what better to be thankful about than new puzzles to play with?

You’ll have to indulge me for a few minutes here, as this set of puzzles comes with a bit of a story. Don’t worry, there’s puzzles in here too! So back in June, my parents came to visit me here in California. It’s the first time they’ve traveled since my dad went through all his Cancer operations, and it was the end of a long road for him. Both he and my mum were in need of the break, and having not seen them other than the quick trips back to Scotland for work, it was the perfect time to catch up. While they were here we had planned a bit of a road trip. None of us (either my parents or my new family) had been to the Grand Canyon or Death Valley, and since it was likely to be the last time my parents would be able to make such a long trip, we took the 2000 mile round trip in an RV.

Entrance to Calico Silver mining town

Entrance to Calico Silver mining town

While we were in Death Valley, we stopped at an old Ghost Town by the name of Calico. This is an old silver mining town which has been restored and has the tourist trap costumed inhabitants wandering around. One of the shops there was a modestly sized Puzzle shop; Calico Woodworks, selling ‘old west’ puzzles, including various disentanglement puzzles, tavern puzzles and wooden puzzles. I must have spent an hour in the shop (much to the dismay of the rest of the family who wanted to see the town) browsing, and talking with the owner, who had a fantastic knowledge of the puzzles she was selling.

Calico Woodworks

Calico Woodworks

As it happens, we struck up quite the little banter, and I have no doubt our discussions helped her sales for the day as the shop was packed when I left. Not long after I walked in, and I was animatedly pointing things out to Jen and my Mum, she hands me a puzzle which she calls the ‘Manhood Puzzle”. Clearly its something she hands to all the men as it comes with a story that if I can’t solve it, she’ll have to change my name to something girly. The puzzle she hands me is a nut and bolt puzzle, which as it happens I’ve seen before. I play along for a minute, and poke and prod at the split washer which is secured in the middle of the screw between the head and a nut which is soldered to the screw, before unscrewing the bottom section and removing the washer.

2 Piece Pyramid Puzzle

2 Piece Pyramid Puzzle

She then picks up a few other puzzles to show me, and entice me into buying. As she’s off finding the puzzles, I spot a two piece pyramid puzzle sitting on the counter, and promptly solve it. (After all it was sitting there un-solved!) She comes back, spots it solved and asks if I did it. “Yes”, I reply. She curses me, then proceeds to tell the story of having received it from Creative Crafthouse, spent days not being able to solve it (having received 1,000 of these), and calls them telling them their puzzle is broken. When they told her how to solve it, I believe a large chunk of pride and humble pie was swallowed!

She picks up a series of three puzzles, which for the Shippers Dilemma series. It turns out these are made by Creative Crafthouse and come both individually and as a nice set of three. As it happens, she didn’t have the first in the set available, but I did end up buying the other two puzzles from here (amongst other things).

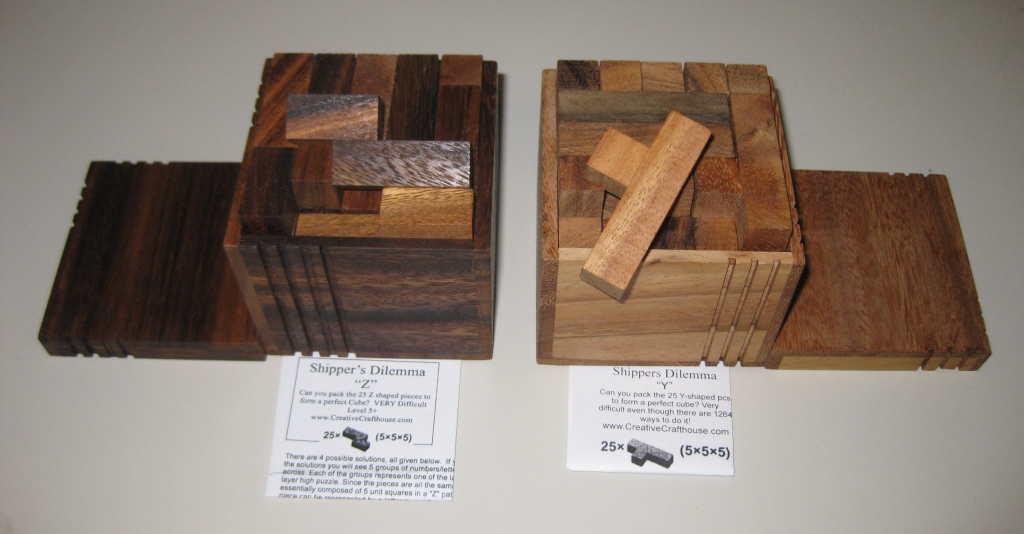
Shippers Dilemma's

Shippers Dilemma's

So now that I’m done with my story, back to the puzzles at hand! The two puzzles I ended up getting are Shippers Dilemma ‘Y, the middle difficulty puzzle, and Shippers Dilemma ‘Z’ the very hard puzzle.

Both puzzles come in their own wooden boxes, which have been routed with a number of grooves to signify the difficulty of the puzzle. It’s a nice touch and means you can easily tell which puzzle you’re picking up without having to leave the lids off! Also, the ‘lid’ is really the base, and the puzzle can be built inside it then the rest of the box slipped on top to put it away (that is if you get it back into a cube)!

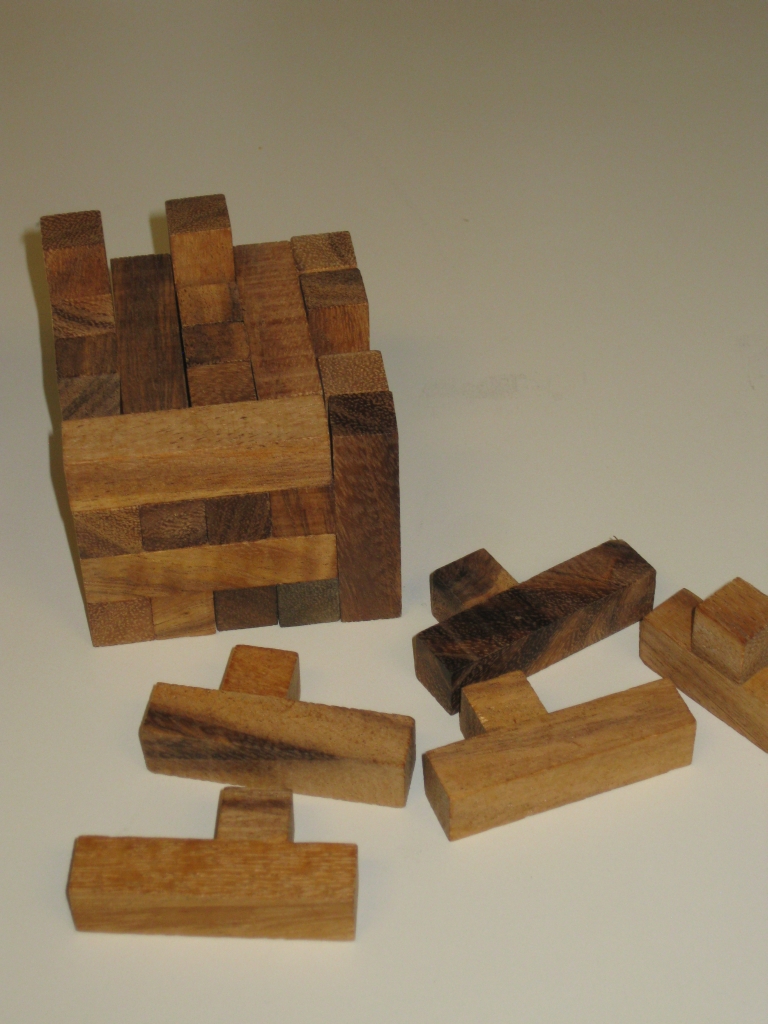
Pieces for Shippers Dilemma 'Y'

Pieces for Shippers Dilemma 'Y'

The first of the two puzzles is made entirely of ‘y’ shaped pieces, 25 to be exact, which have to be placed together to make a 5x5x5 cube. The puzzle was designed by David Klarner and published in the Journal of Recreational Mathematics in 1970, so its not a new puzzle. Originally thought to have just 236 solutions, Burr Tools shows there to be 1264 solutions possible. Never the less, this is still a challenging puzzle, and it’s unlikely you’re going to solve it in 5 minutes. I think I played around for about 30 minutes to get one solution, and was happy enough with that.

There are a number of other shapes that you can make from the pieces, including a 10x5x1 rectangle from 10 pieces, and a 15x4x2 using 24/25. So lots to keep you occupied with this particular puzzle. It does come supplied with a solution sheet showing 4 possible solutions, and the other shapes you can try, so if you’re struggling with the 5x5x5 then one of the others may prove easier!

The pieces of the puzzle themselves are unfinished and fairly rough. While the fit is fairly precise between pieces, there’s evidence of glue on some of the pieces, and not all the small cubes are glued perfectly straight onto the longer ‘base’ section. That said, this isn’t an expensive puzzle, and given that it’s well worth the money.

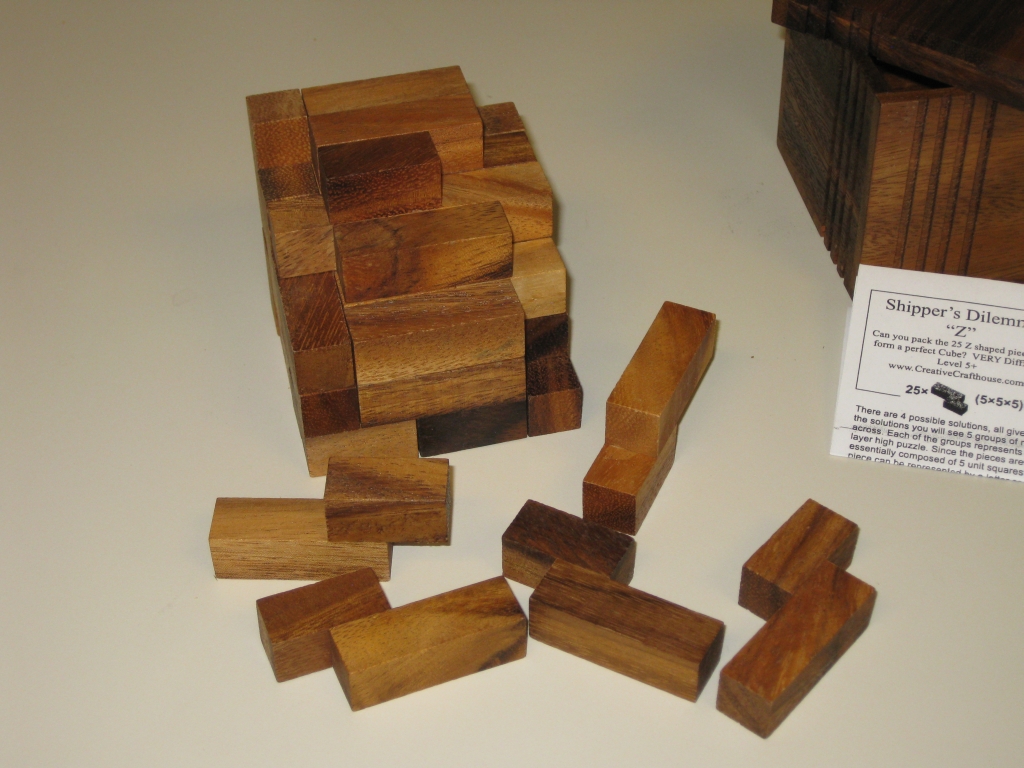
Pieces for Shippers Dilemma 'Z'

Pieces for Shippers Dilemma 'Z'

The second of the two Shippers Dilemma puzzles is ‘Z’. You’ll not be surprised when I tell you that this puzzle is made from 25 ‘Z’ shaped pieces (or N in pentominoes sets) which need to be made into a 5x5x5 cube. Like it’s little brother there are a number of other possible solution shapes using varying numbers of pieces which are listed with the puzzle, so again plenty to keep you occupied. This is listed as a very hard puzzle, and given that there’s only 4 solutions, which are provided, I can see why. Around an hour found me a solution that let me put it back in its box, and I was pretty happy with that. Burr Tools confirms that there’s only 4 solutions.

This puzzle is made from a darker wood, but again, I’m not sure what sort of wood has been used. It’s of a similar quality and price to the previous puzzle, so all in all good value for money and a serious challenge regardless of how many times you solve it!

I may have to puck up the first in the series, as it has a beautiful symmetry to the way the pieces fit inside, which I really liked. That’s one for another day though. Funny that I traveled all the way to Death Valley to pick up my first puzzles from Creative Crafthouse, but I’ve not been disappointed, and will likely buy more from them in the future.

Come back tomorrow to see the other puzzles I picked up while in Death Valley!

Birthday Puzzling

As some of you know, I celebrated my birthday last week, and the day came with some shiny new puzzles and tools thanks to my family.

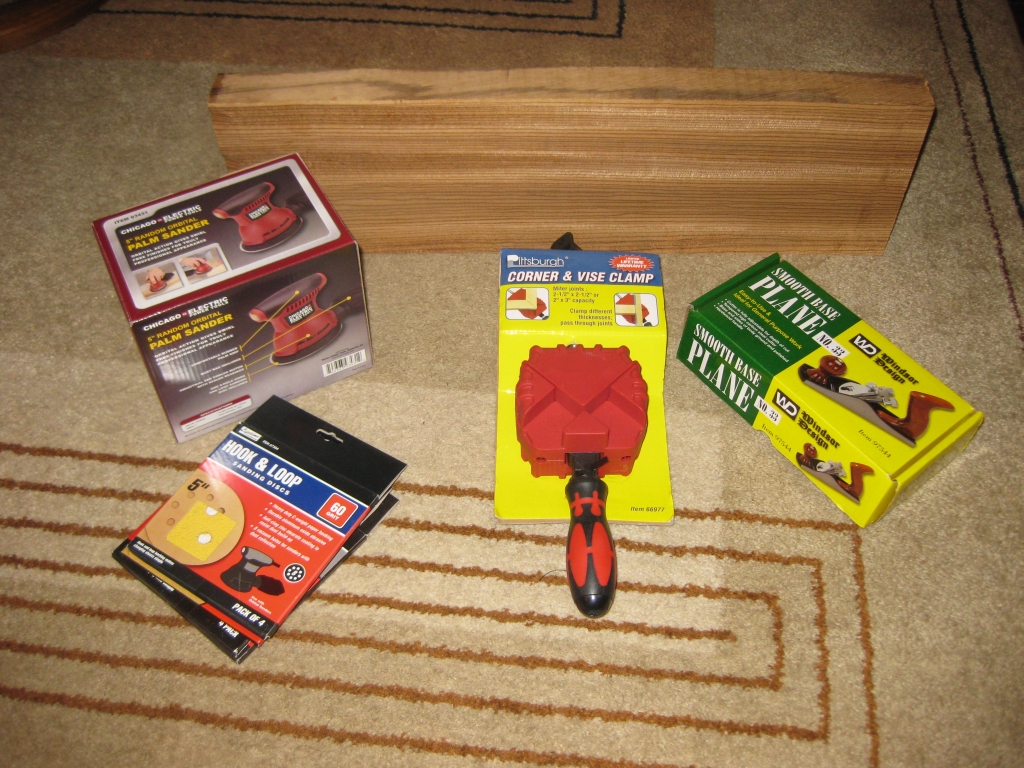
Some Zebra Wood to make puzzles, and a few new tools

Some Zebra Wood to make puzzles, and a few new tools

It seems that my fiancée had been hard at work, talking to a few of my friends and figuring out what and how to get me a few puzzles and tools. Not only was I lucky enough to receive three puzzles from Mr Puzzle, but there were also some tools to help in making more puzzles myself, and three board feet of Zebra Wood to make into puzzles as well.

I have been talking about getting a small random orbit sander for quite a while now. Believe it or not, up to this point, all the sanding that Ive done, regardless of the size of the project has all been done by hand. So to get a nice palm sander plus several different grits of paper was really nice. I have a couple of biggish projects that I’m working on just now, including the charity build of two children’s rocking horses, so that will come in really handy there, as well as finishing the outer surfaces on some of the puzzles I’ve been making.

Also among the tools was a nice hand plane. It’s another tool that I didn’t own and will make a nice addition to my tools. I have a very small plane for fine work, but this will help for some of the bigger projects that I have planned. Finally there’s an interesting corner clamp. I have no doubt this will come in very handy for making boxes for some of the puzzles.

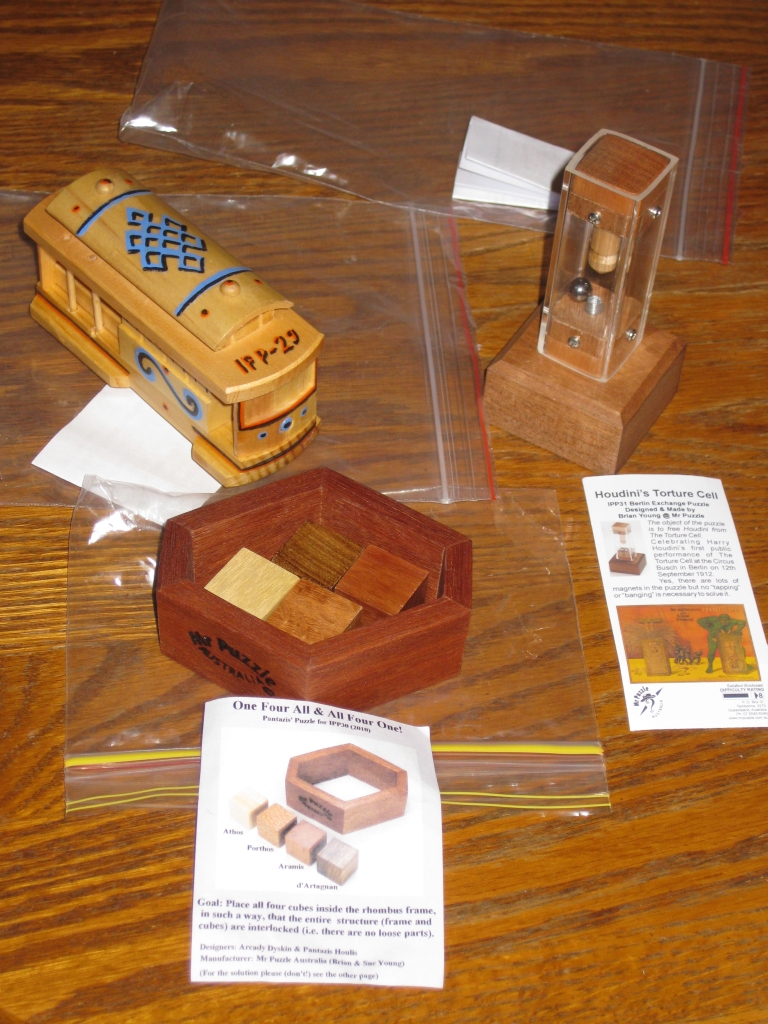
Three puzzles from Mr Puzzle

Three puzzles from Mr Puzzle

From the puzzle side, I had mentioned to my fiancée that I really wanted to have a proper go at Mr. Puzzle’s IPP exchange puzzle from IPP 31 this year, the Houdini’s Torture Cell. Well it seems that when she went looking for it, she decided it wasn’t very expensive, and had a look around some of the other puzzles on the site to pick up a few puzzles for me. In the end she decided on the Cable Car from the San Francisco IPP, and One Four All & All Four One from IPP30 designed by Arcady Dyskin & Pantazis Houlis.

I’ll be writing full reviews of all the puzzles once I’ve had a chance to play with them all so keep an eye out for them soon.

When puzzles start to take over

My puzzle collection has been increasing steadily over the last few years, and as with most collections, they have managed to spread themselves around the house quite impressively. Well over the weekend, my better half decided that she’d had enough and wanted her house back. So what happens… well even with a gammy thumb, we don’t get to sit and relax on our days off so we set to work.

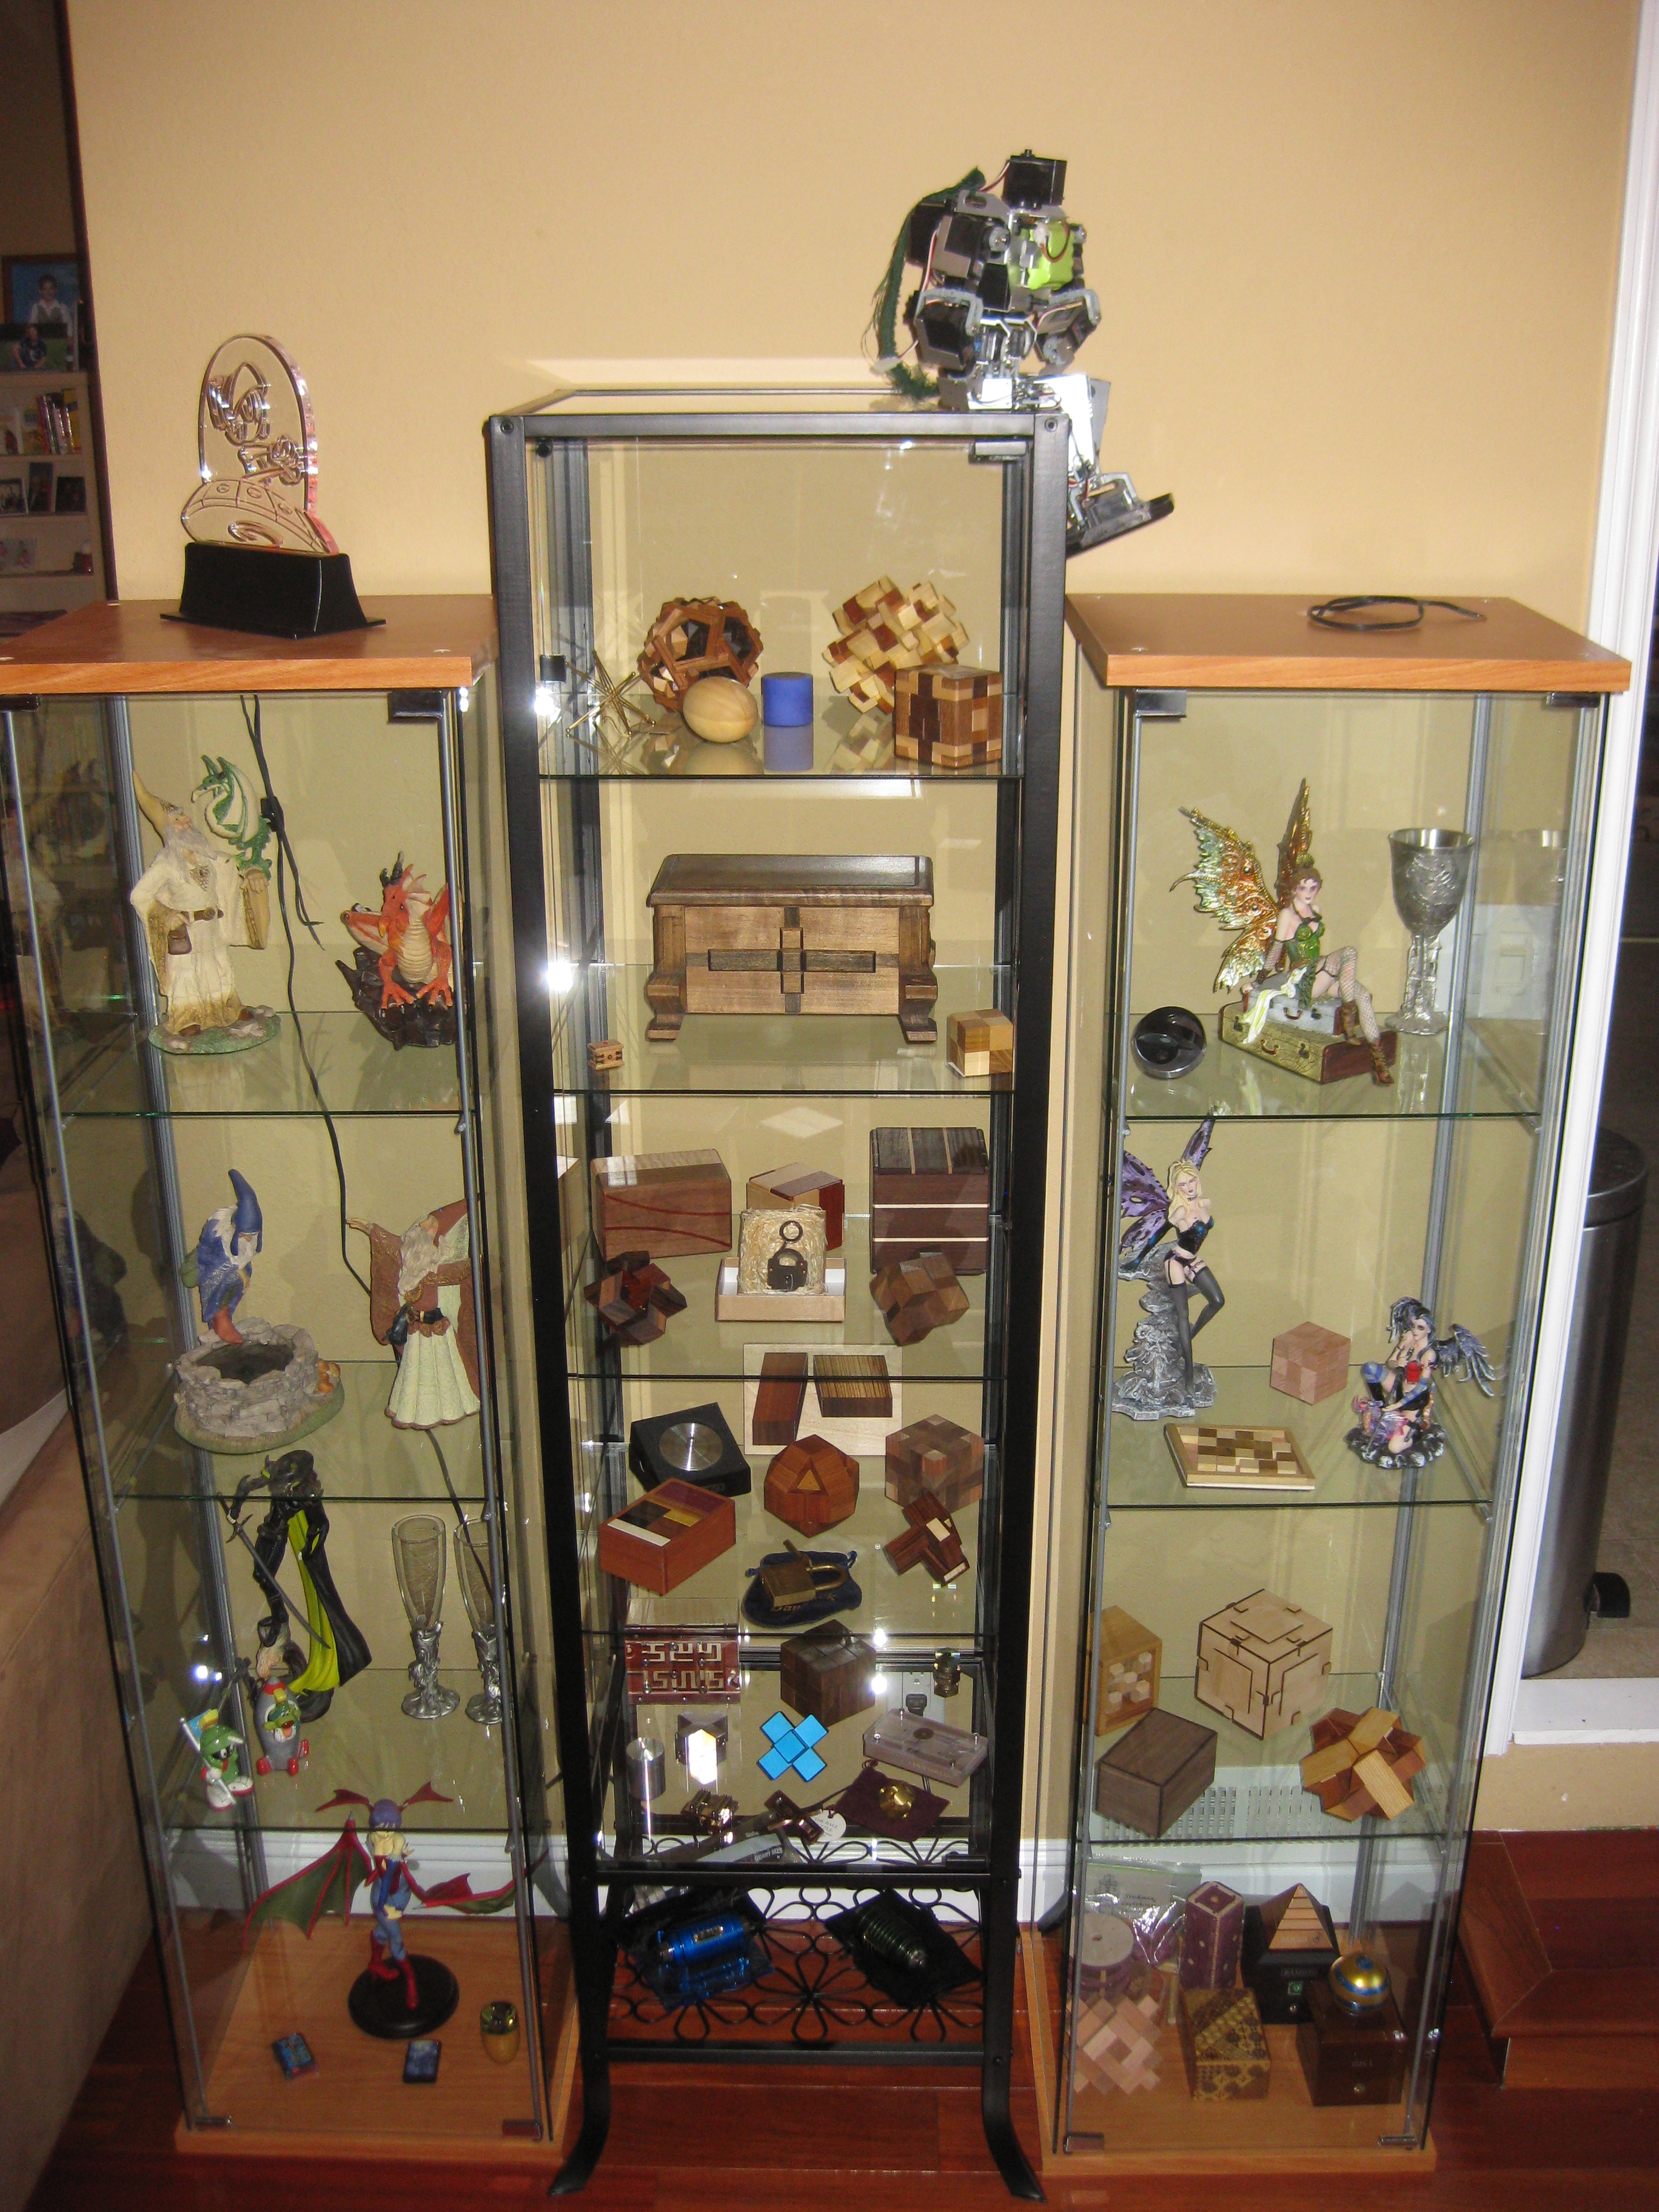
I have had a couple of glass display cabinets which have a few of my statue’s in it but have sadly been hidden at the back of the dining room for too long and needed to be brought out where they can be appreciated. We decided it was time to stop the puzzle collection from spreading all over the house, so a new glass cabinet was purchased, and it was time to re-organise.

Note: All images in this post are very large. Clicking the image will show the full size version so you can see the maximum detail possible.

Puzzle Storage

Puzzle Storage

After around 6 hours on Sunday moving furniture around the dining room, which involved relocating a chunk of my DVD collection, and the Lego collection, and …. ok, you get the idea; the cabinets were freed from their corners and moved into the living room as you can see above. After some Ikea cabinetry, the new glass cabinet was put together and some of the collection relocated to its new home.

The cabinets in the photo are only a small part of the collection, but it does mean that some of the puzzles have at least been brought together and are visible, rather than piled up on top of one another on whatever spare space I could find at the time they arrived.

The figures on the left are mine, and the faeries on the right are my fiancée’s. Sitting on top of the cabinet is one of my other projects. It’s a robot that I’ve been writing code for. There’s a few video’s of it walking here if you’re interested. So far I’ve not connected up the gyro’s so it’s all mechanical balance, and he does pretty well given that.

You might notice a certain Stickman in the bottom of the right hand cabinet. That’s a ‘kit’ that Robert sent me to get working. There was a wee mistake when the threads were being cut so it doesn’t work as intended. I’m currently in the process of reworking it and documenting what’s needed to get it working. I’ll be posting about that in due time, so watch this space.

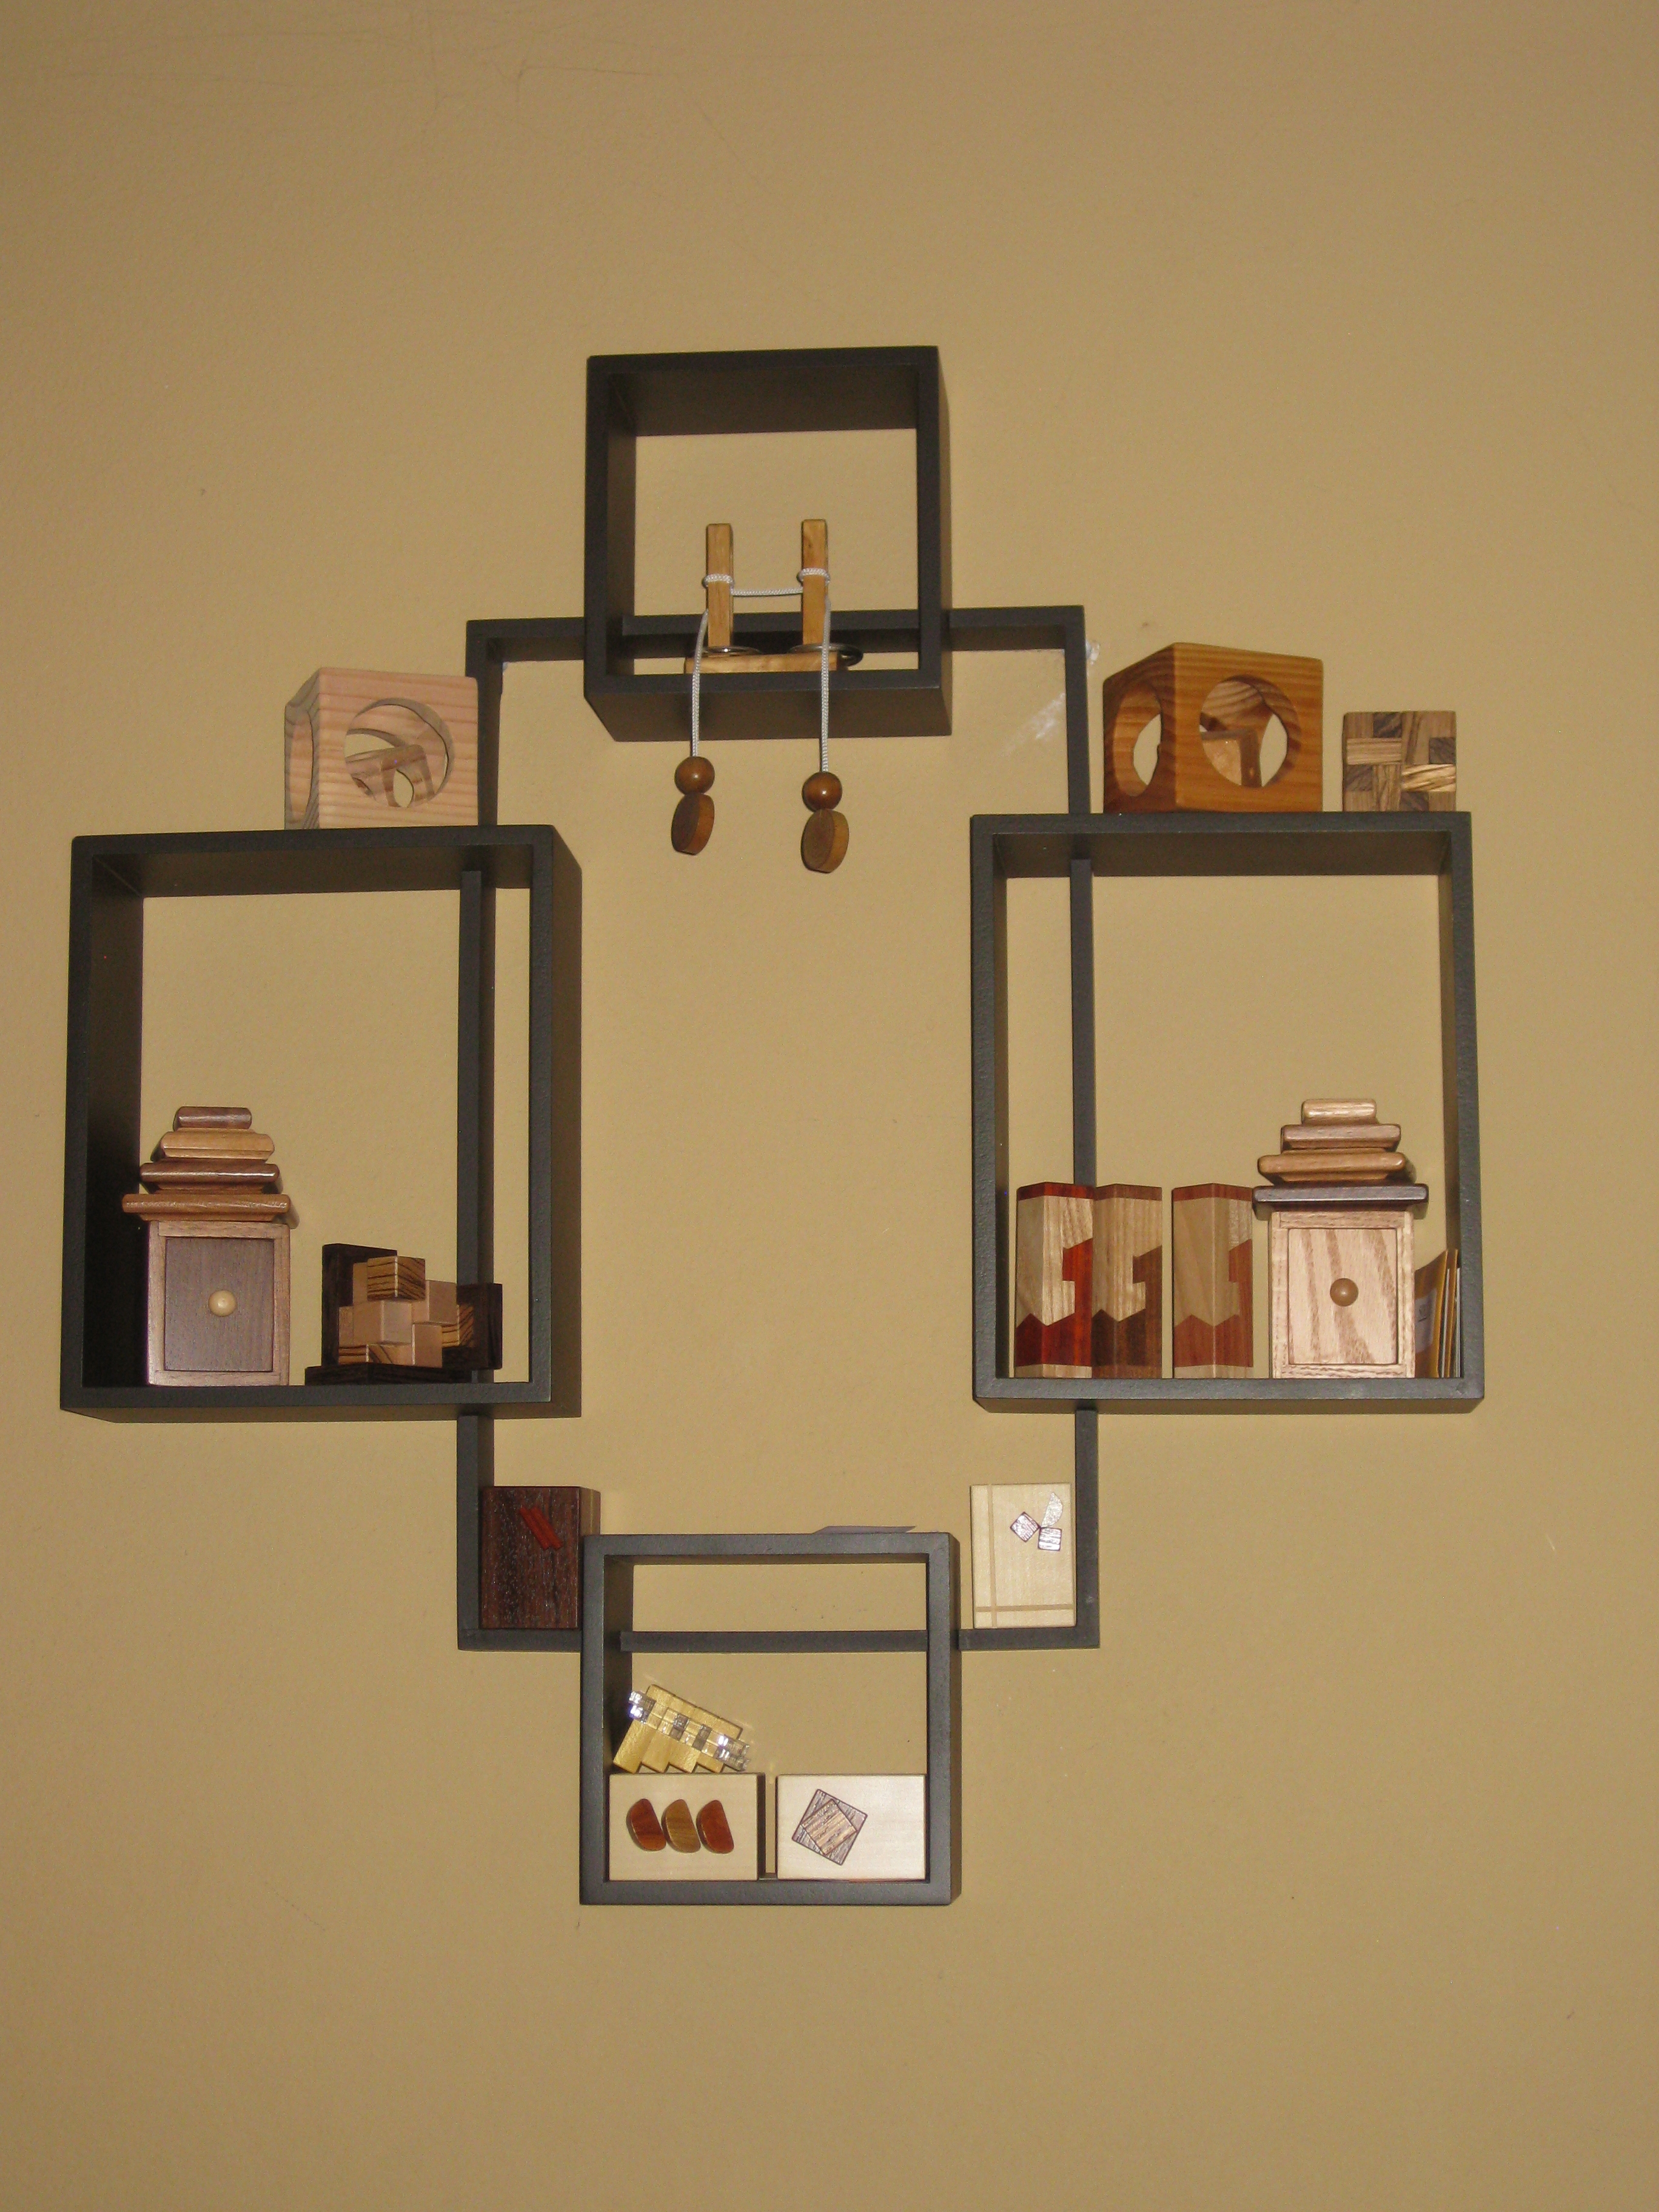
Puzzle Shelves

Puzzle Shelves

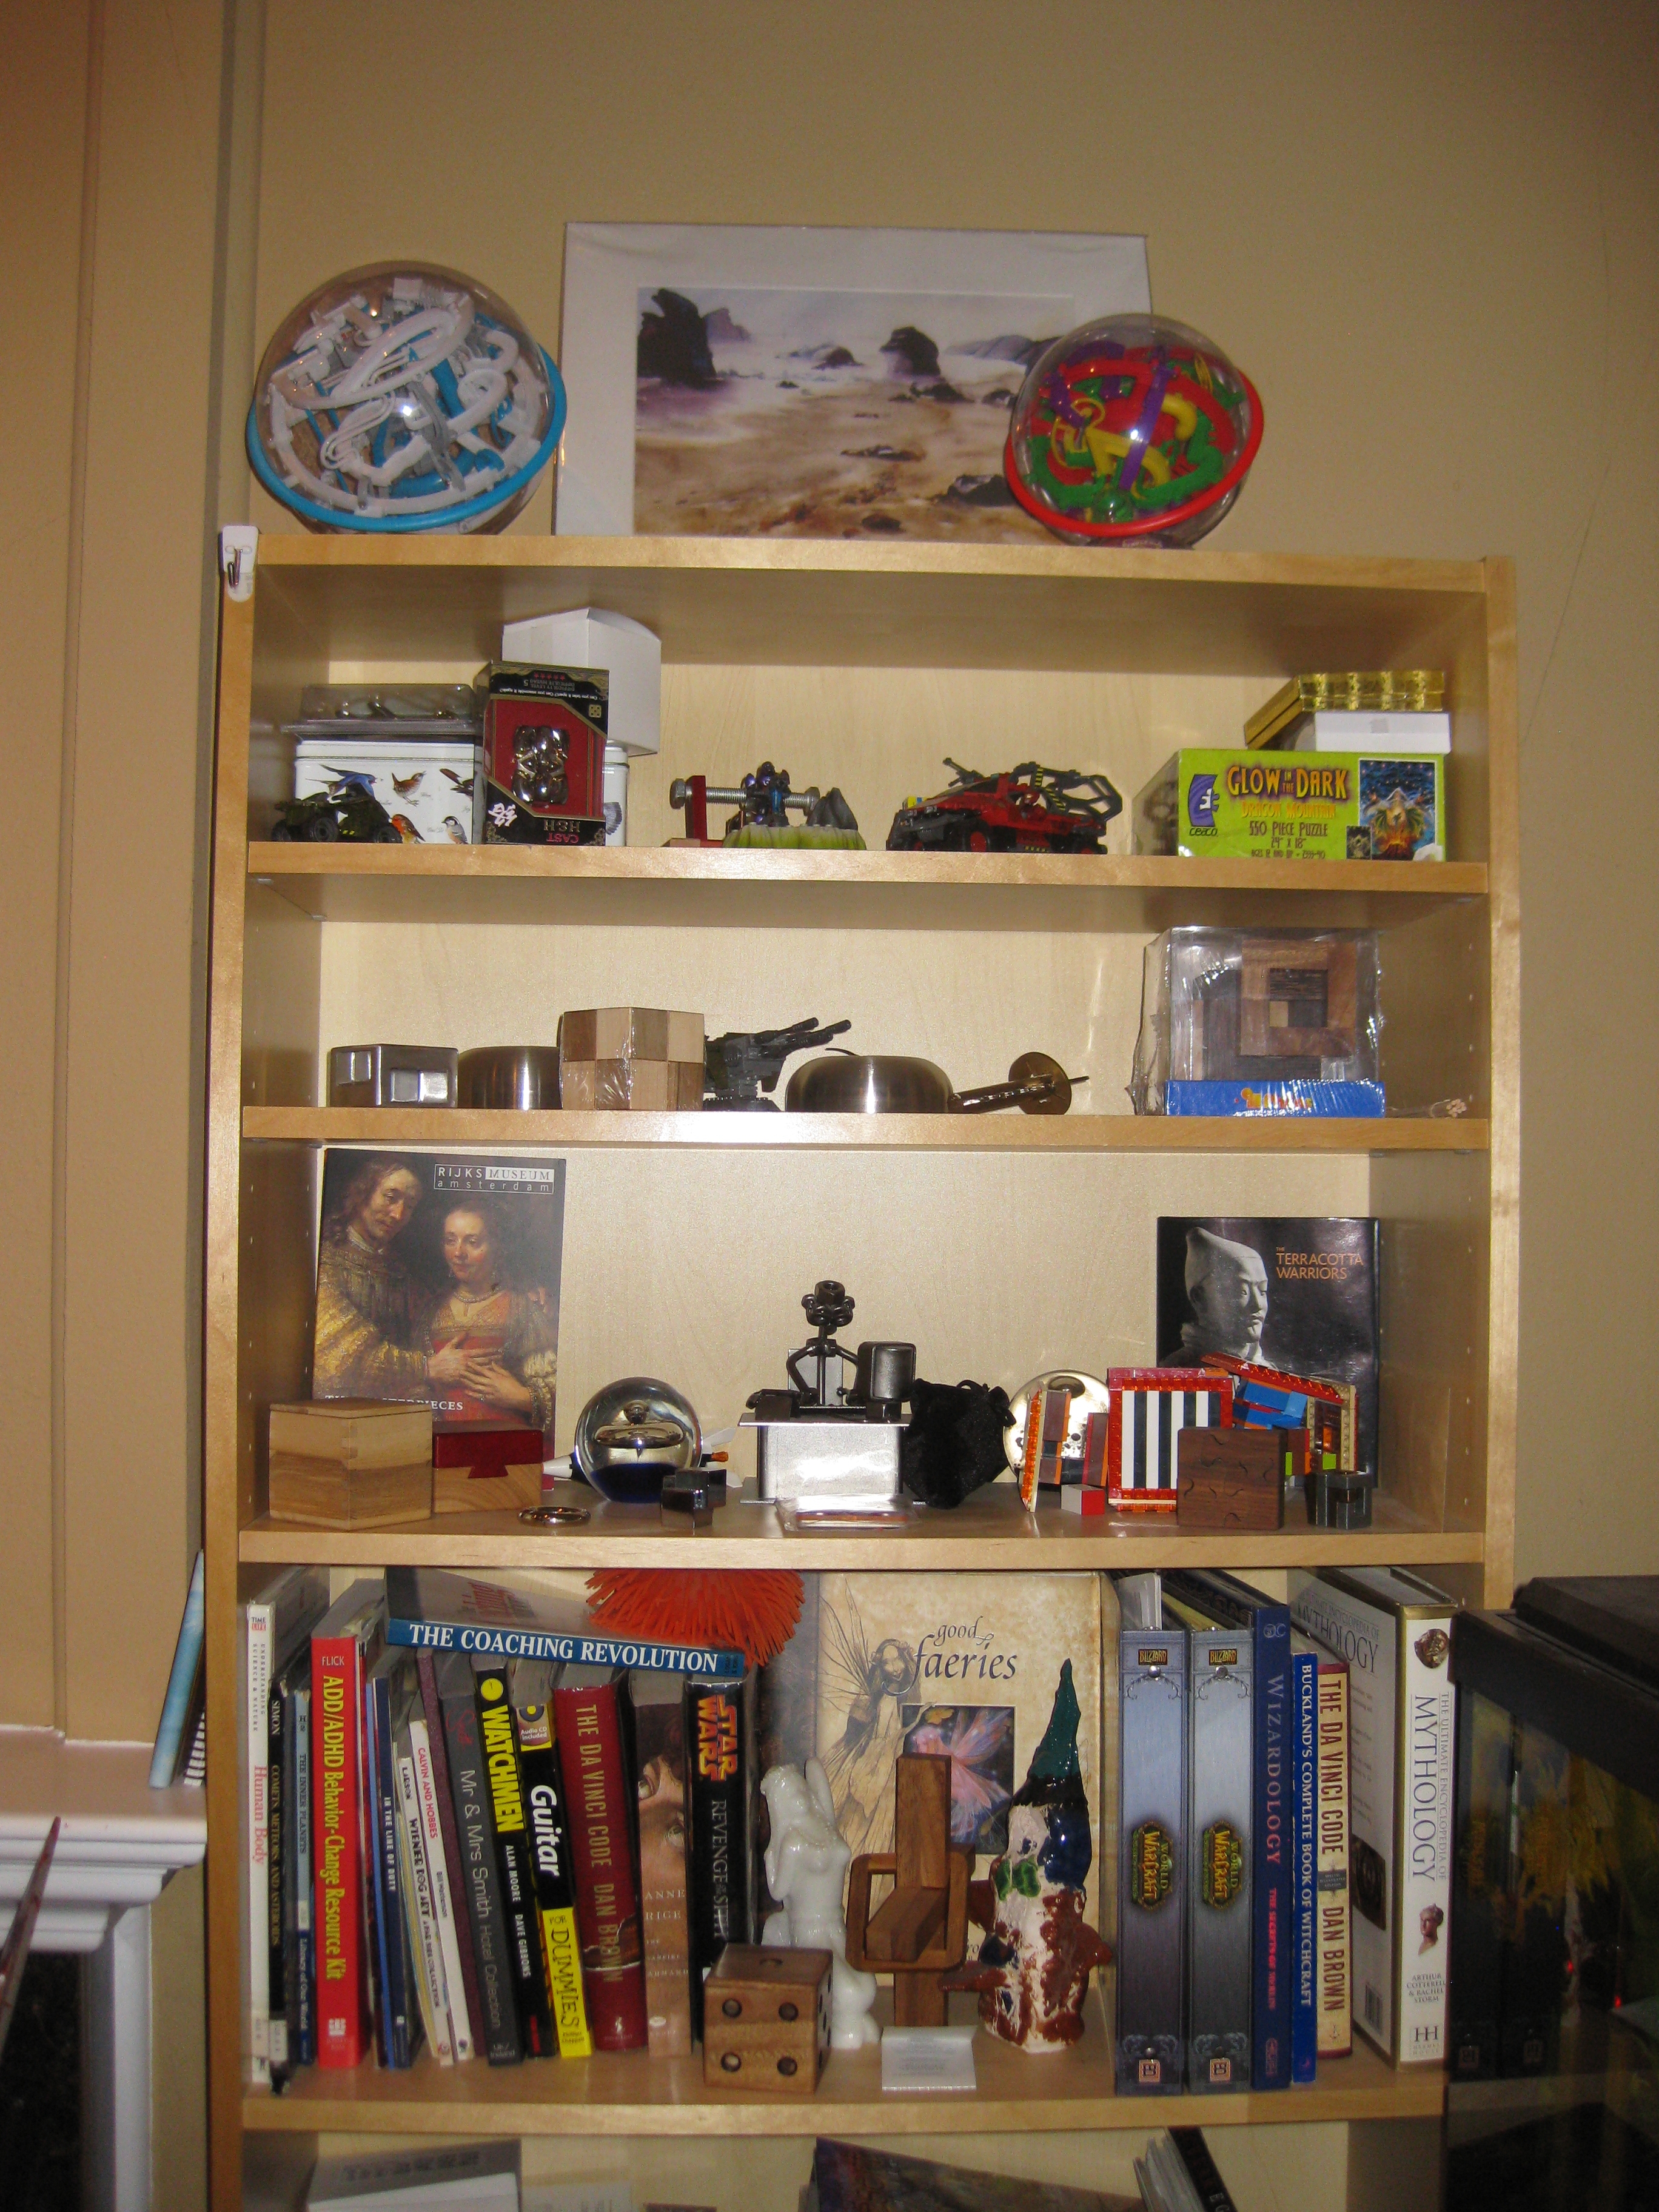
More Puzzle Shelves

More Puzzle Shelves

As I mentioned, the gathering of the puzzles is only a small part of the collection. There’s a few other shelves and spaces on the bookcases that have varying puzzles lying around. Not to mention other boxes with puzzles scattered around the house.

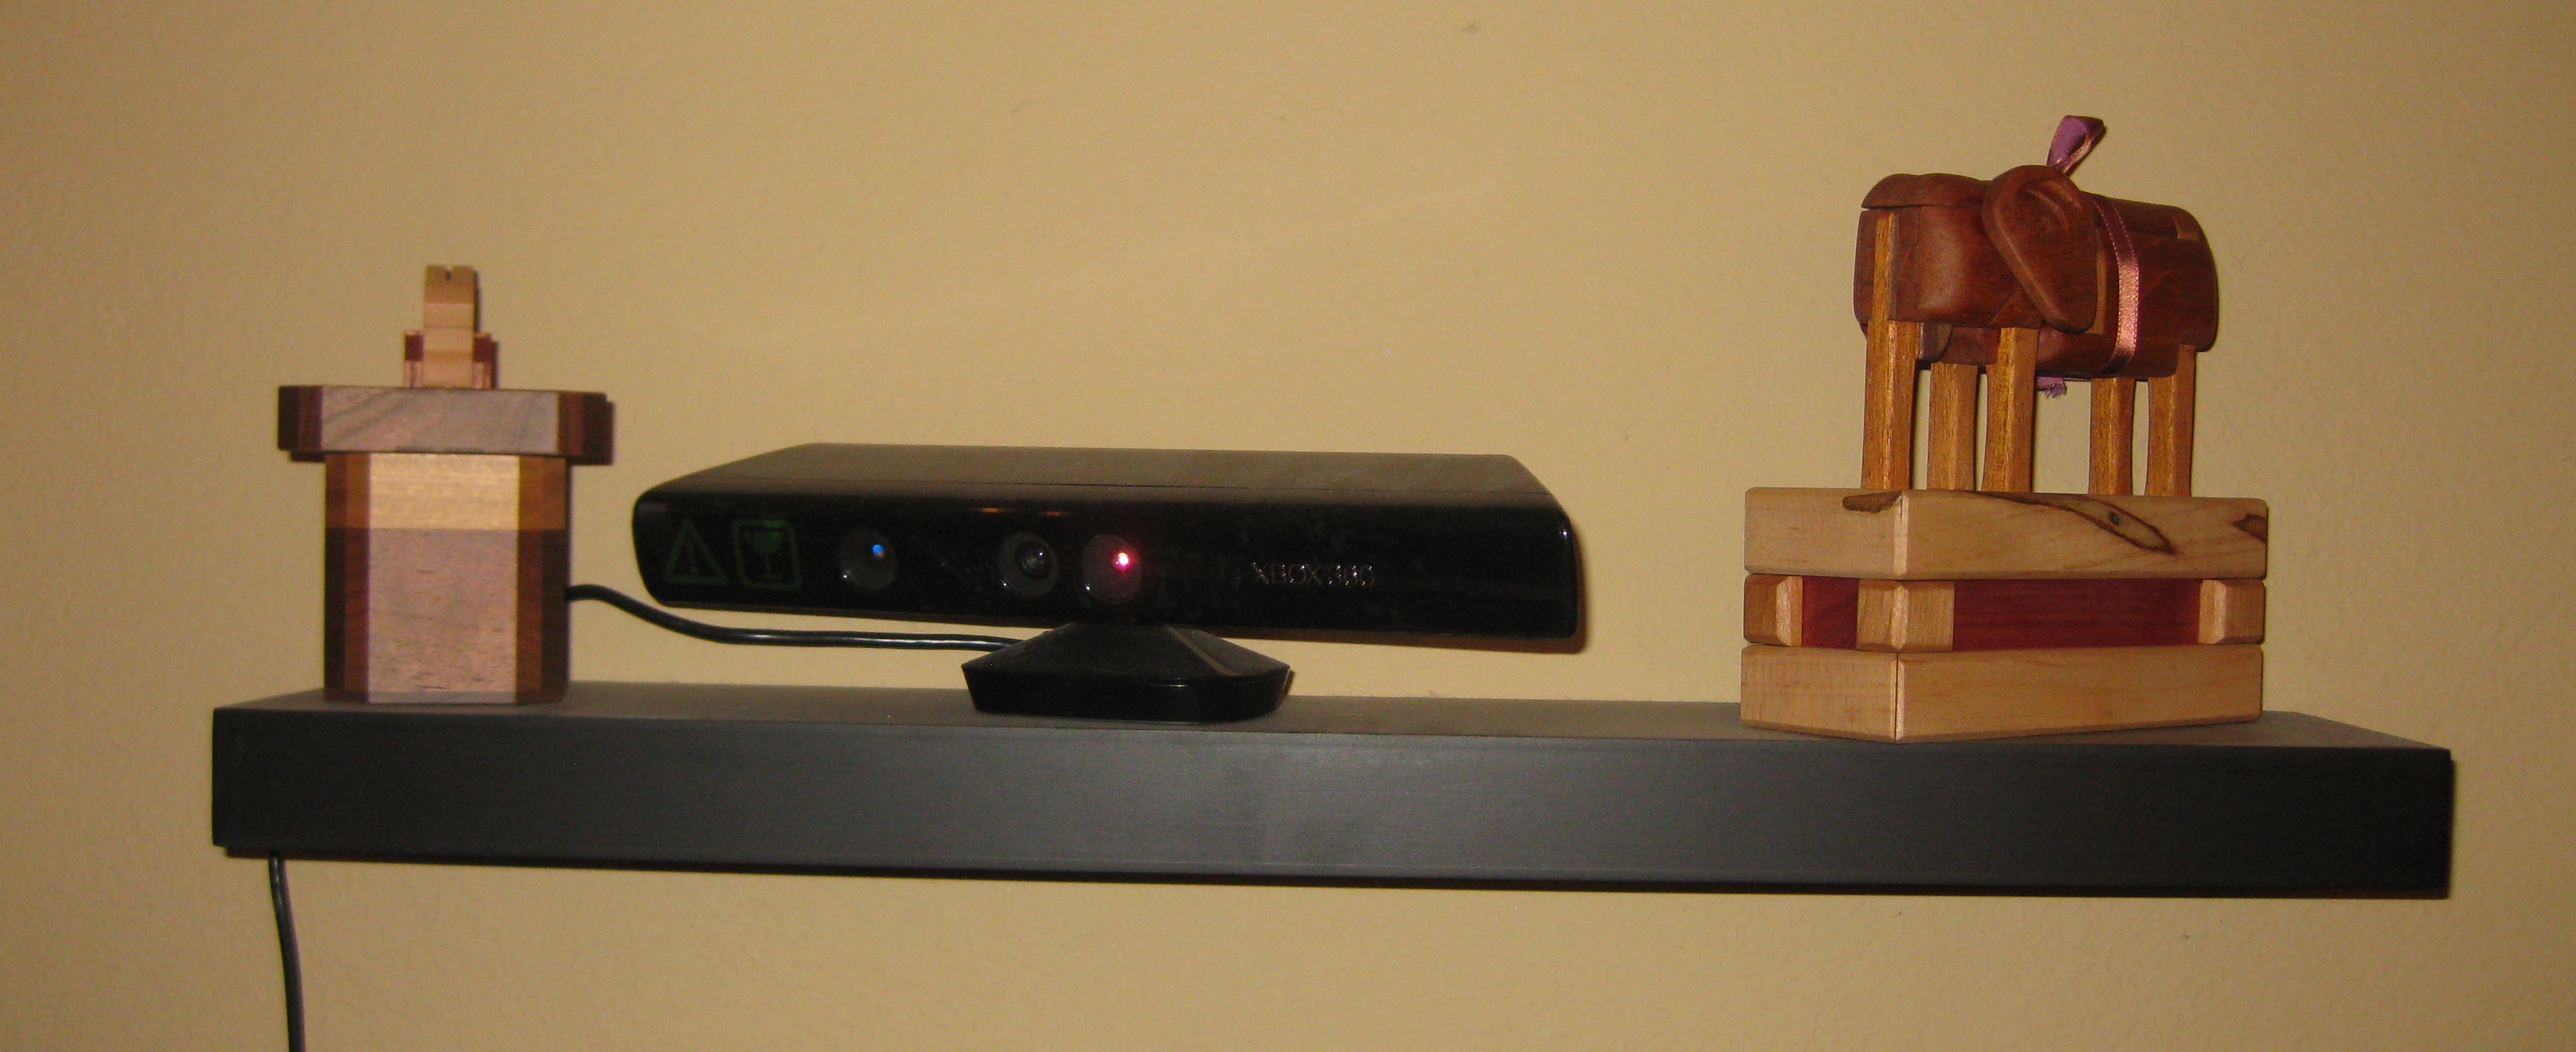
That pesky Elephant ...

That pesky Elephant ...

I’m still not quite sure how that Elephant got up there, but I’m slightly concerned that he’s plotting something with the Rabbit in the Magic Hat. I suppose I was warned by its maker that I shouldn’t feed it after midnight, and that they have been known to be a little rowdy …

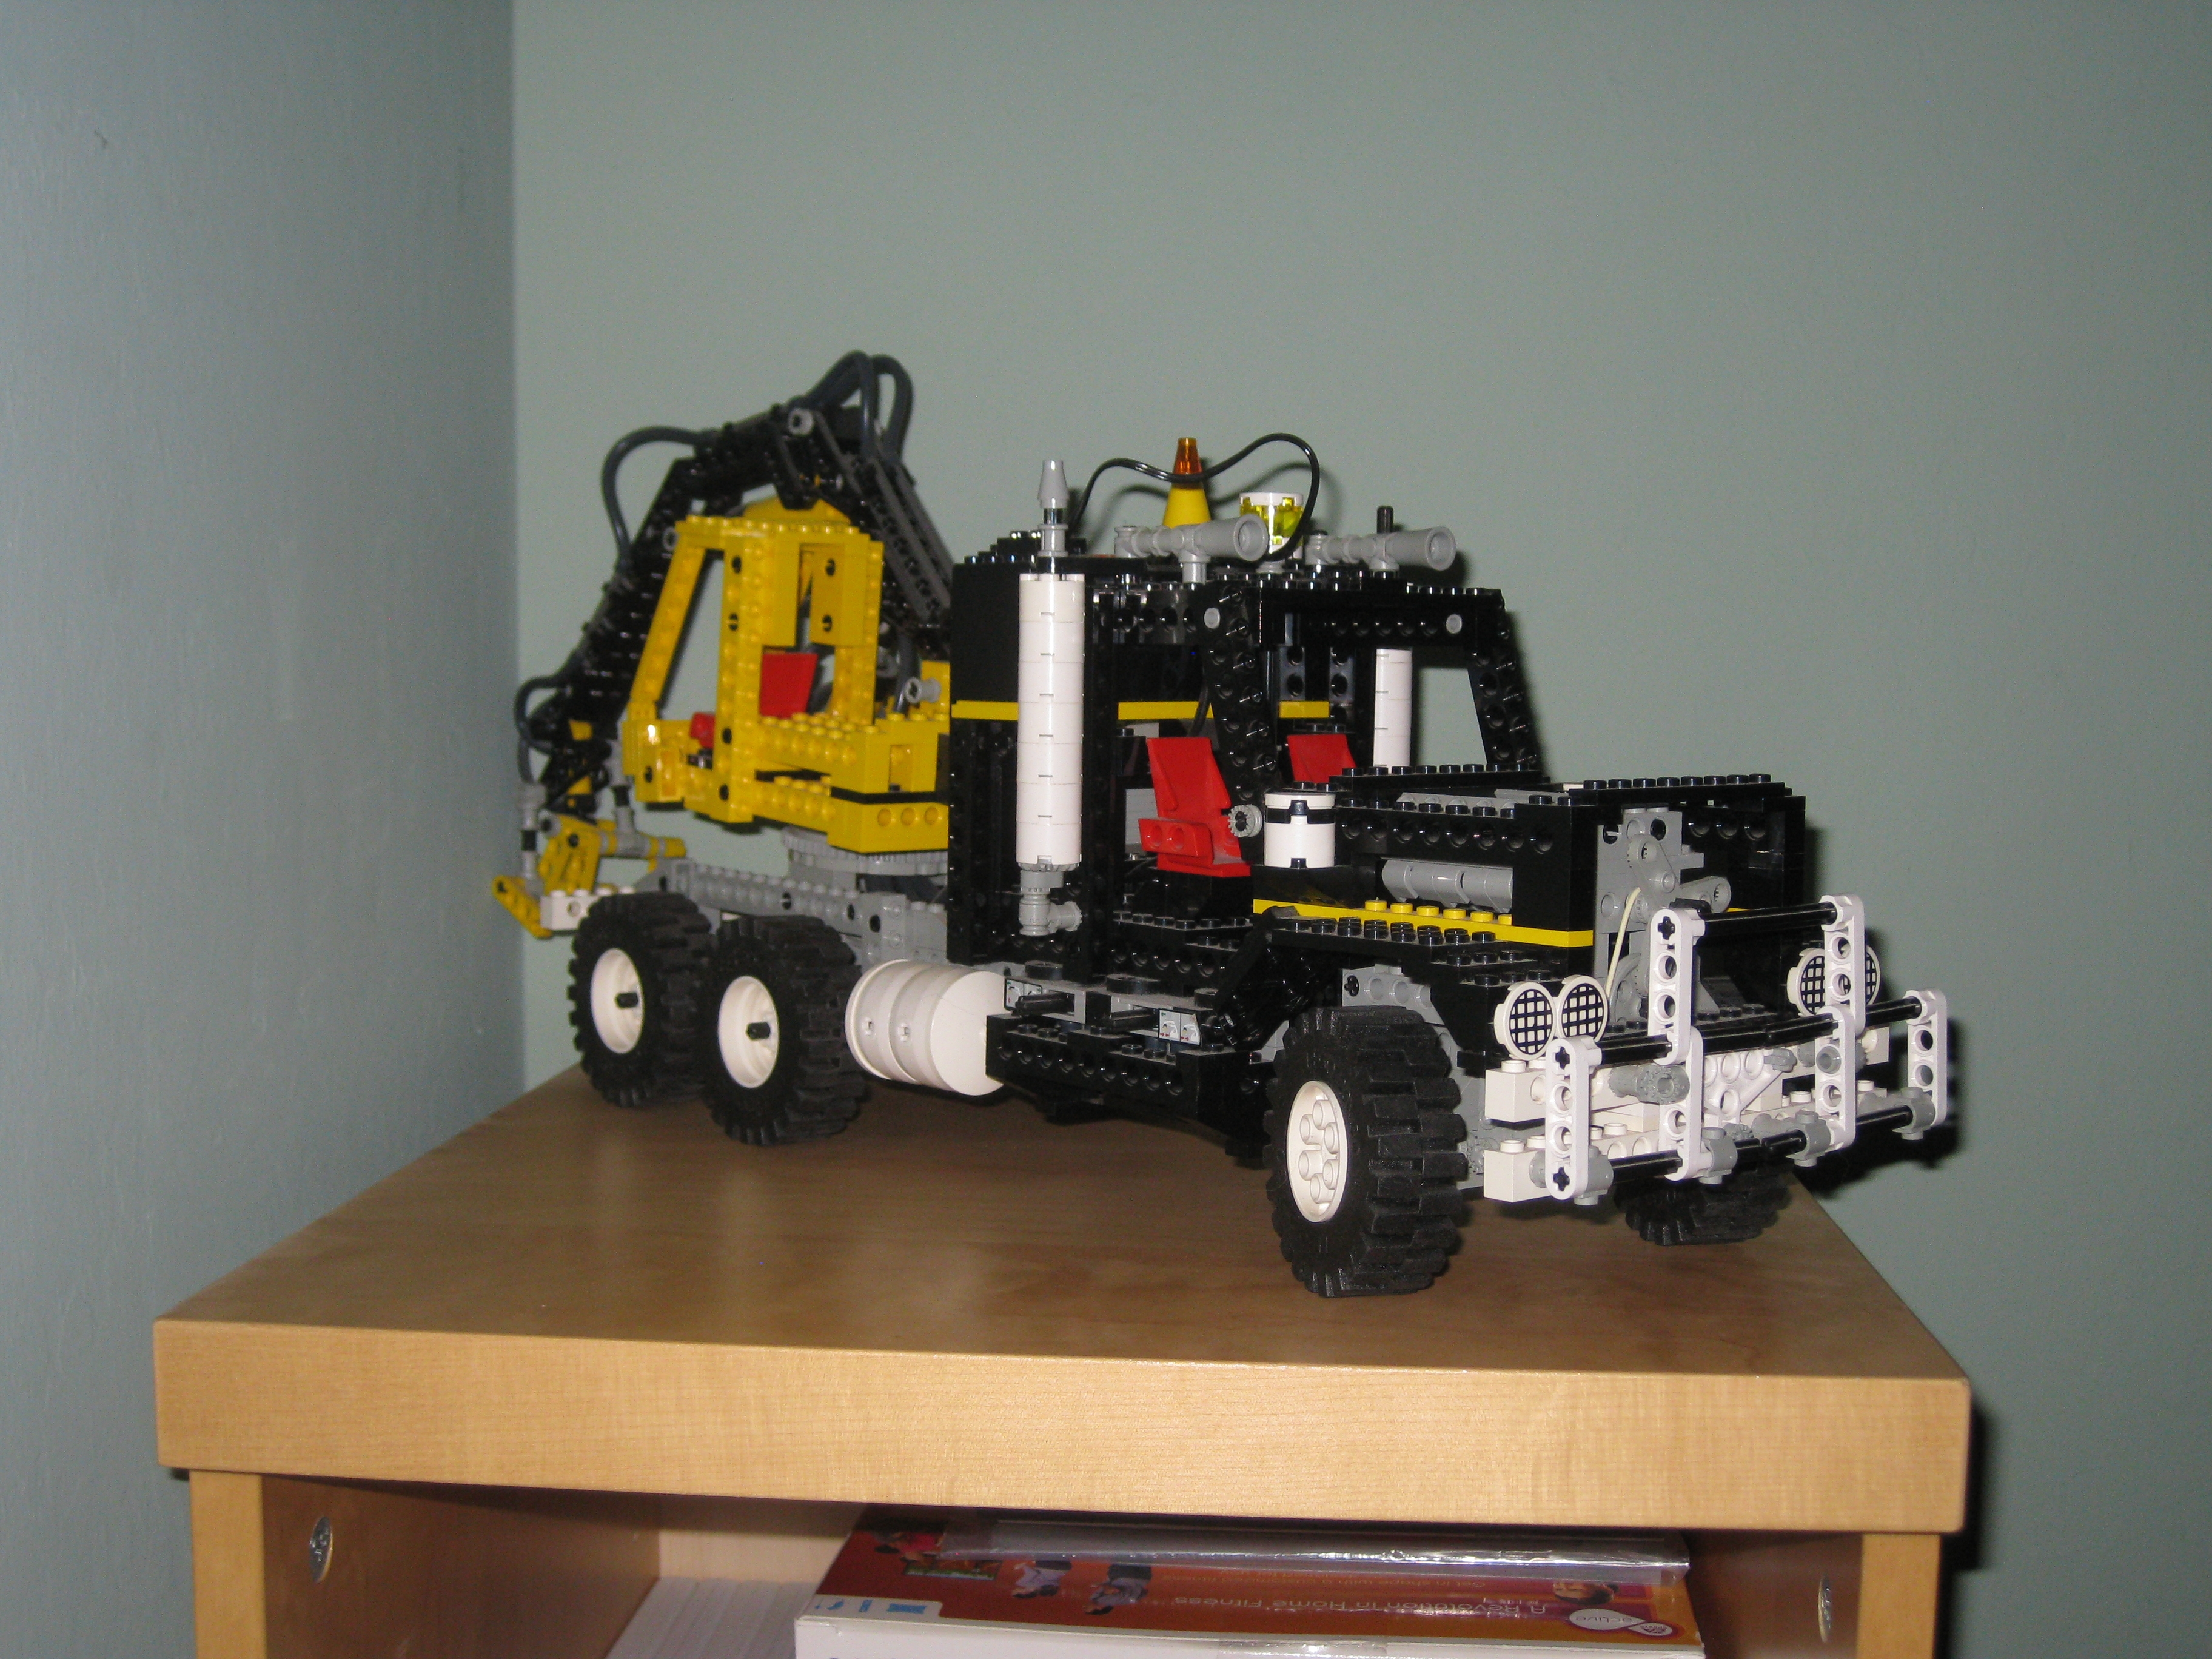
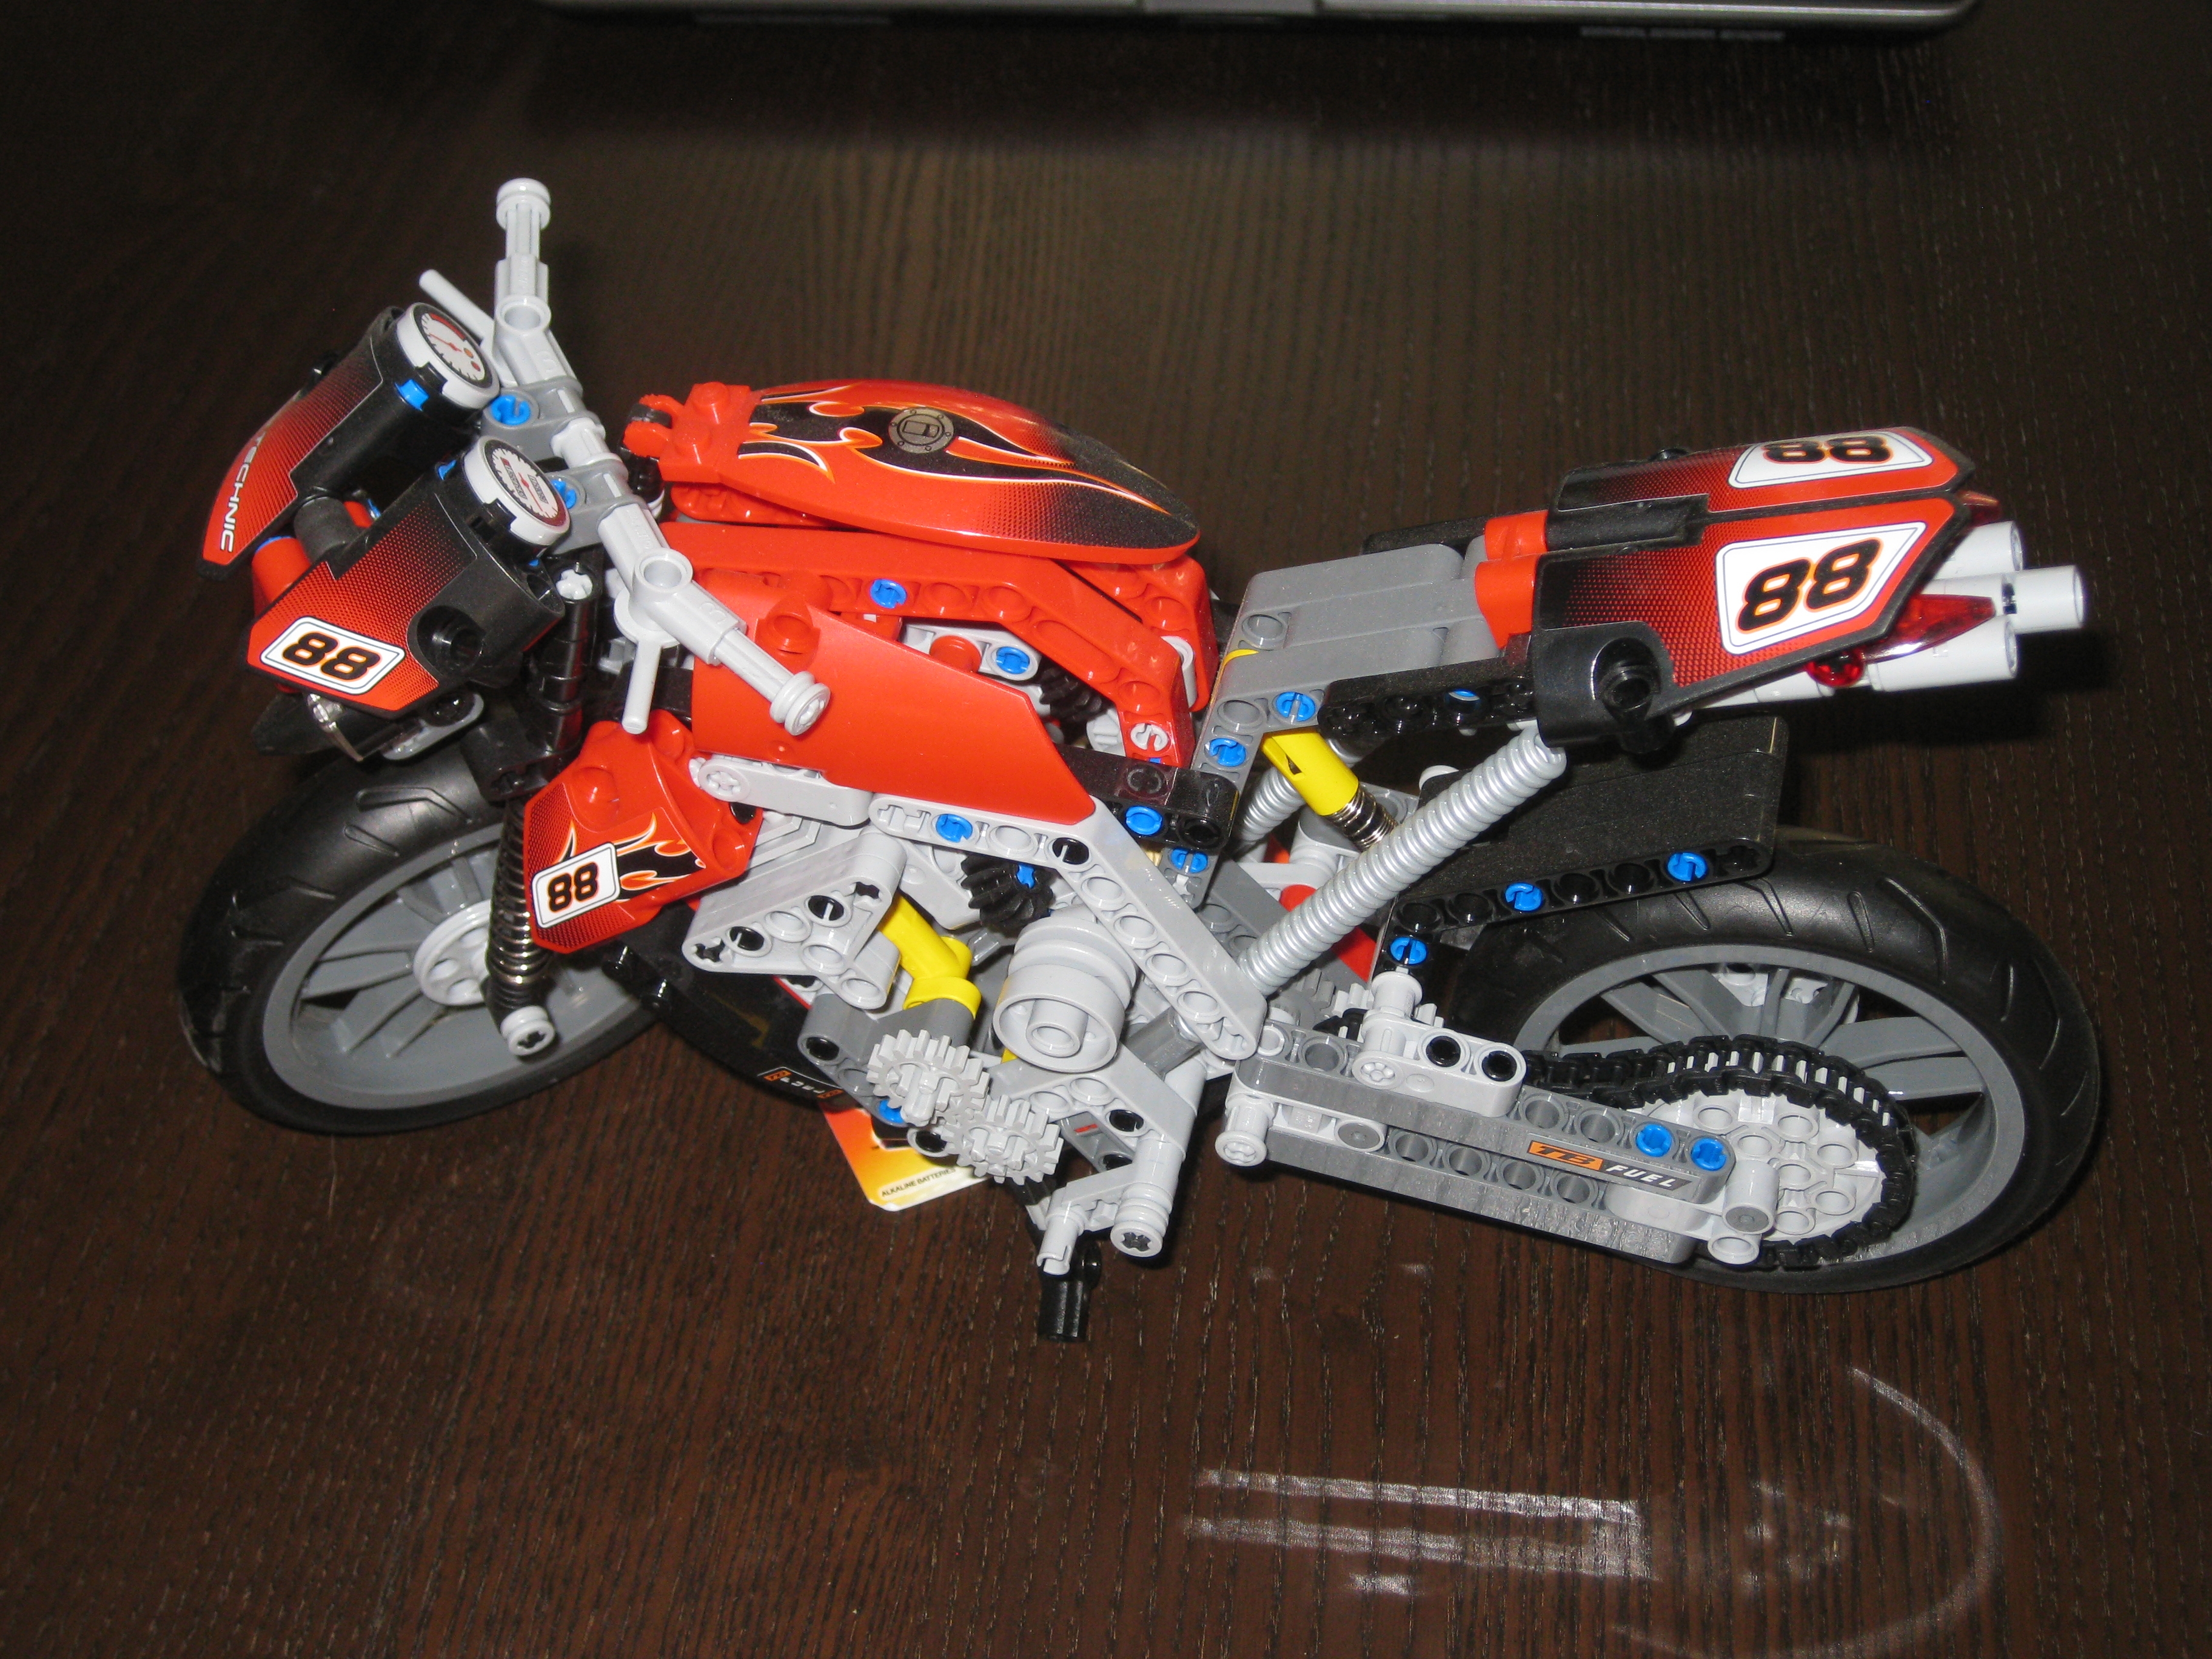
So with the space freed up elsewhere, there’s room now for some of the Lego models I own to get a bit more space, rather than those being crammed into a corner. I have a pretty good number of kits dating back to the 1970’s since I’ve played with and collected Lego since I was a small boy. Given that I’ve had a couple of people ask about some of the models, here’s a quick look at a few that are out and about. There’s probably around 300 kits in boxes in my garage, and varying other models dotted around, but these are probably the bigger pieces that are out and gathering dust.

Lego Models (L->R) – Space Shuttle 8480, Lego Model Team Truck 5580, Backhoe Grader 8862, Blue Fury 5541, Batmobile 7784″ src=”http://thejuggler.net/blog/lego1.jpg” title=”Lego Models (L->R) – Space Shuttle 8480, Lego Model Team Truck 5580, Backhoe Grader 8862, Blue Fury 5541, Batmobile 7784″ width=”525px” /></a>
<div style=Air Tech Claw Rig 8868

Air Tech Claw Rig 8868

Motorbike 8051

Motorbike 8051

Well hope you liked the sneak peek into some of my collection. I’ll be back to the regular reviews soon as my thumb is healing nicely. Going to be a while before things are entirely back to normal, but that’s what happens when thumb meets saw.