Karakuri Work Kit – Kakukaku box

As a member of the Karakuri Group, when I renewed my membership at the start of the year I decided to pick up a few of the DIY kits that they offer. After my experience with Bruce Vinney’s designs I was interested to see what Karakuri Group had created, and also to better understand the mechanisms used, which is one of the goals Karakuri set when making the kits.

When I mentioned that I had the kits on one of the puzzle forums, there were requests to show how to build them, so much like I did with the previous kits I built, I decided to show the build process in full. Watch the video below to see the build, and watch the kit come to life. In the video I’ll cover all the tools I use and this isn’t time lapse so you can see everything in real time. I’ll be doing videos for all the kits shown in the video, so check back for more soon.

As promised in the video, you’ll find the instructions below, with my guide to building the box. Be aware that this is in no way a translation of the instructions!

General Kit Comments

The Karakuri group offer a reasonable number of DIY puzzle boxes which they refer to as “Work Kits”. Each of the kits consist of a number of pre-cut plywood pieces, some decorative pieces (like the beautifully made acorn on the Acorn Box), and any hardware needed for the mechanism, if it’s not just a straight forward sliding panel or suchlike. The kits are all perfectly cut, and of the kits I own there have been no issues with the fit or finish on any of the pieces.

Something which is worth noting about the kits is the price. They all come in at around the $25 USD mark, so in terms of affordability, these are really affordable boxes. The quality of the cuts on the pieces is excellent and the fit is as good as you will find with anything from the Karakuri group, so I’d say from that side of things, they’re great value.

One thing to note is that the build instructions for the kits are in Japanese language only. Don’t be put off by that however as with a little thought, and some careful study of the diagrams, you’ll build the kits just fine. Failing that, have a look at my Build Instructions section below, where I have detailed the steps (in English) to build the kit.

Kakukaku Kit Review

The first of the kits I built was (as you already know from the title of this post) the Kakukaku Box. I picked this one for no other reason than liking the look of the box. Interestingly it was the last of the four that I picked, and really the only reason was that I had set a budget and this fit within that budget after having picked the three others I wanted.

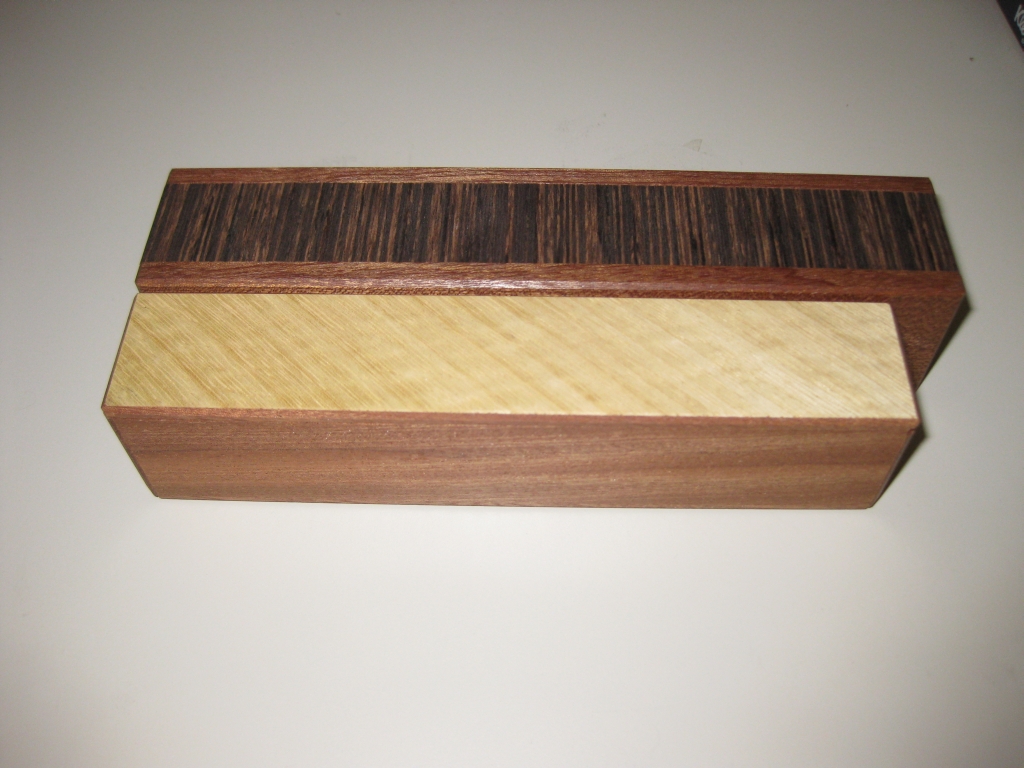
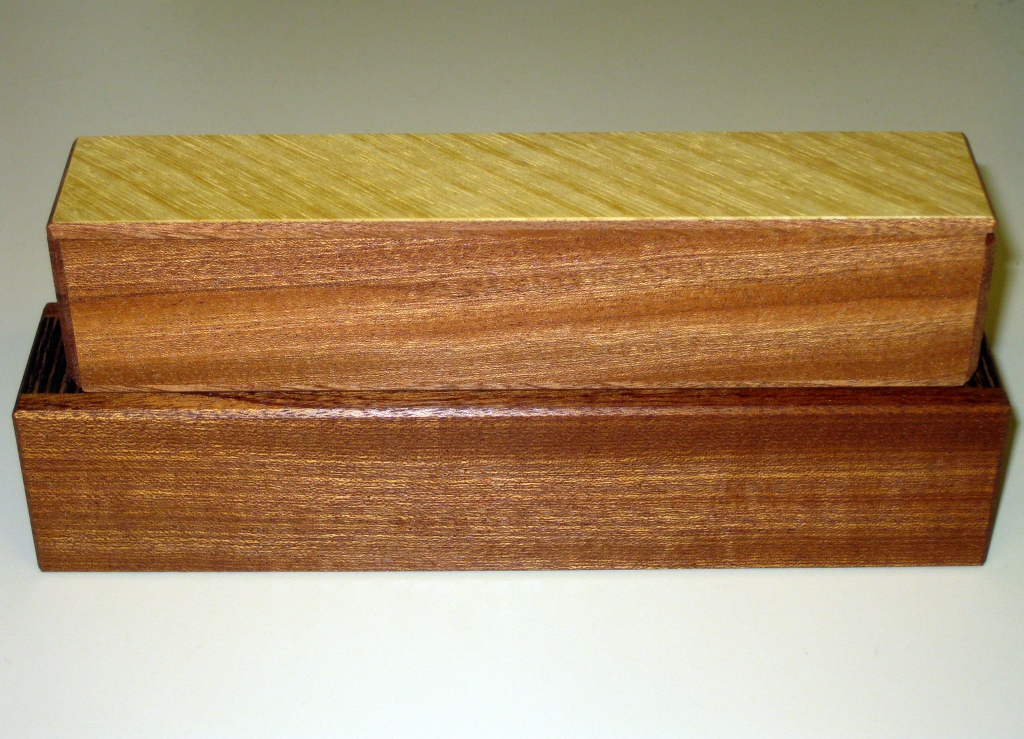
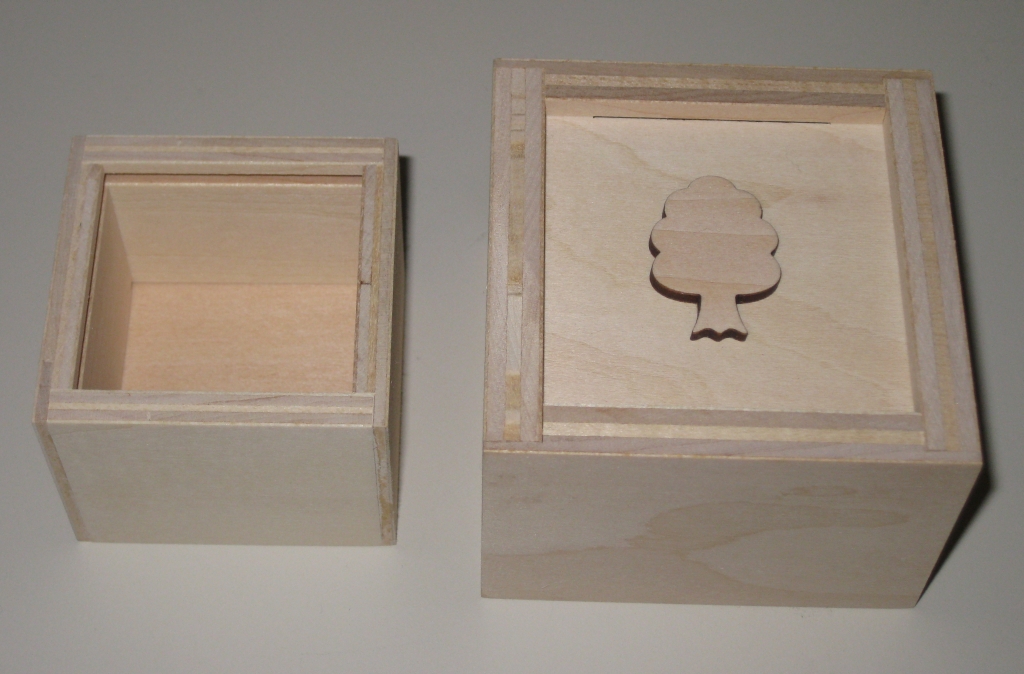
The completed top and bottom of the box

The completed top and bottom of the box

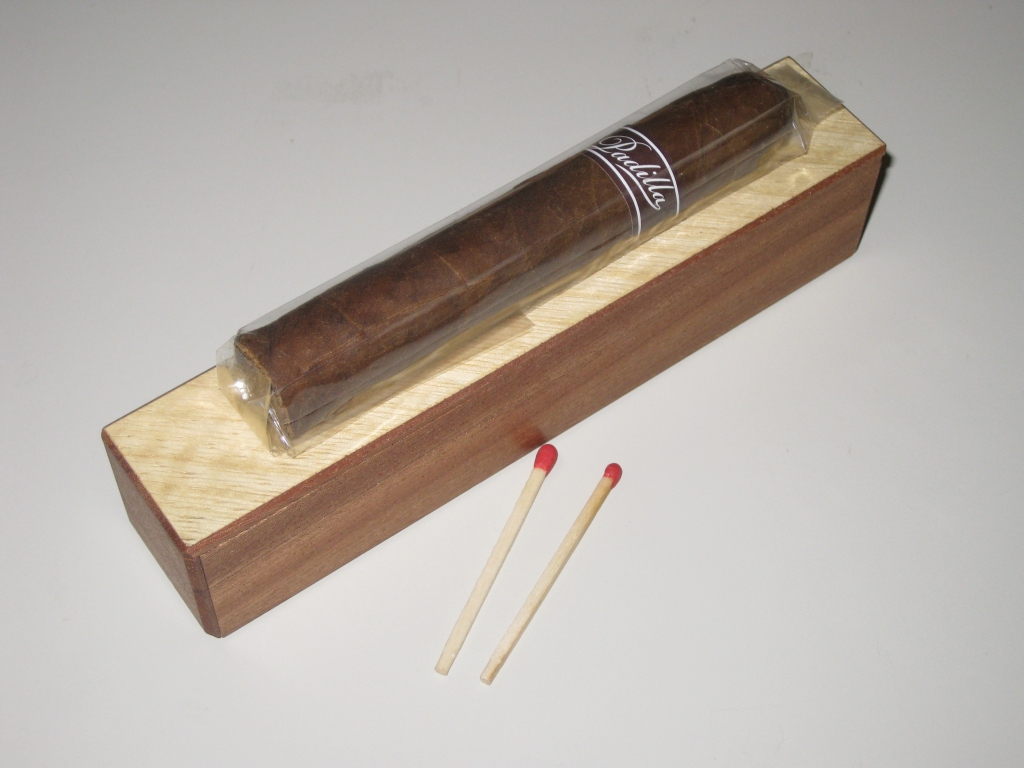
As you can see from the picture above, the box itself is fairly simple. The ply is visible on the top of the box, but personally I don’t think that’s an issue. If you don’t like having the ply exposed, you could glue some veneer onto the top panel just to make it neater. The laser cut tree certainly adds to the look of the box, and is also a clue as to the solution.

Building the kit was fairly simple. The diagrams on the build instructions are very clear, and there’s nothing complicated to this kit, so I didn’t have any issues building it. The video is real time, so it took about 15 minutes to put together, and would probably be quicker if you’re not recording a video and talking through everything you’re doing!

As far as the puzzle box itself is concerned, I’ll be honest that I was a little disappointed with the box. I have two reasons for this, and at first they seem contradictory, but bear with me.

The locking mechanism is both too difficult to open, and too easy to open at the same time. If you attempt to open the box using the ‘solution’ provided, it can be very difficult to move the two parts of the box in the right way to get them to open. The fit is pretty good, and as such the movements need to be made very precisely to get the box open. Sadly, there is a much simpler way to open the box. If you hold the top of the box, and shake it, the bottom falls out on its own, making it far too easy!

As a kit I certainly enjoyed building it, and you will understand the mechanism once you’ve built the box, so it certainly meets the expectations that the Karakuri group set out to achieve. If you’re thinking of buying one (or more) of these kits, I’d say that there are better boxes in terms of the end puzzle that you could get, but if you just want to add them all, then go get it!

Build Instructions

In this section I will try to give my guide to building this kit. Please note that this is in no way a translation of the Karakuri Group’s instructions, but my own instructions based on having built the kit. If you have issues following my instructions, feel free to get in touch and I’ll help you if I can, and update things below to clear up any confusion.

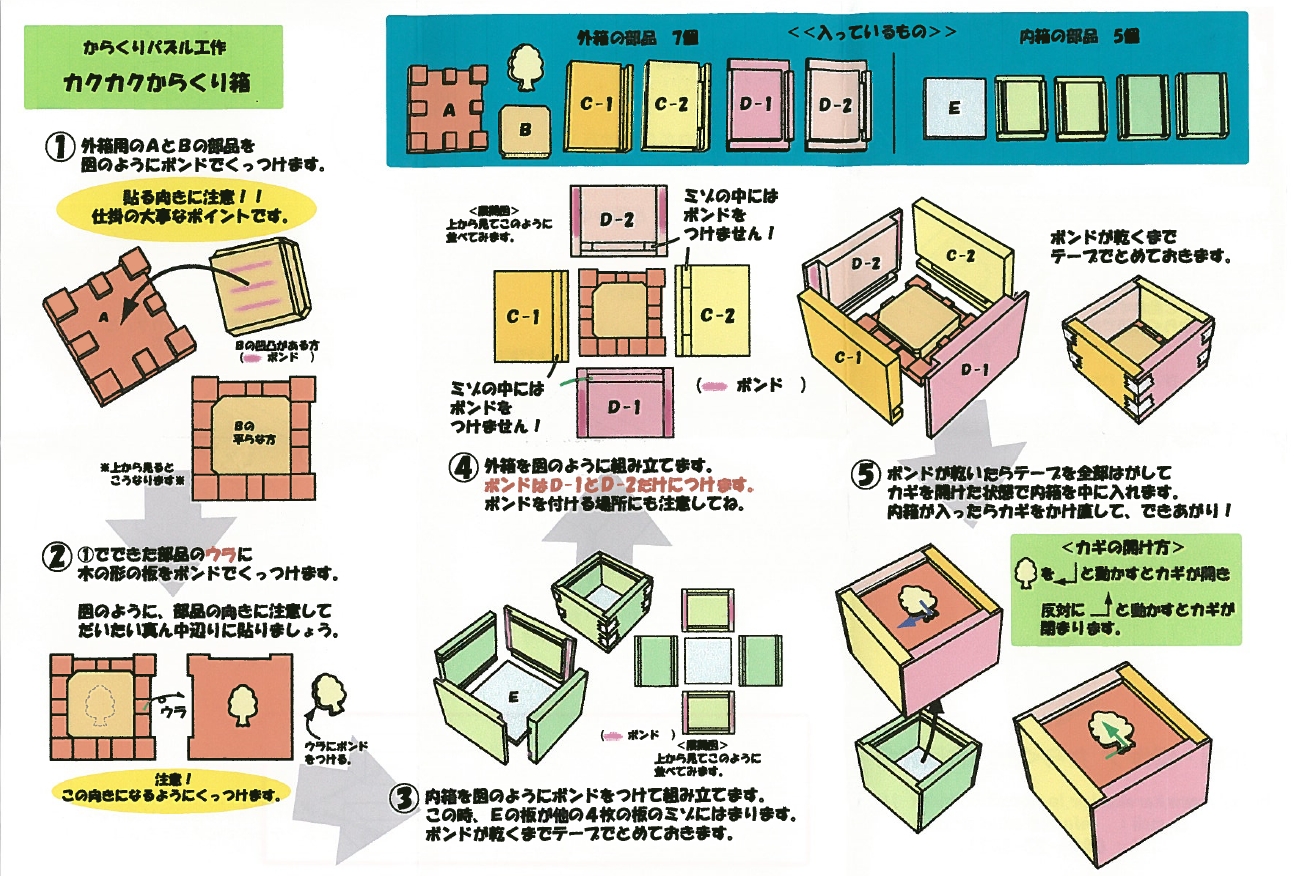
Build instructions - Click image for full size

Build instructions - Click image for full size

The instructions below match to the numbers on the diagram above.

Tools Needed

Before starting, you’ll need a couple of tools.

  • Wood Glue / Elmers hobby Glue
  • Pencil
  • Ruler (or some measuring device)
  • Tape – I recommend blue painters tape
  • Glue Brush (optional)
  • Engineers Square (optional)

      Step 1 – The Locking mechanism

      First up, sort the parts from the kit into the same order as shown in the top diagram. If you feel like you need to then you can mark the piece numbers in pencil on the inside of each piece. The way the pieces are laid out in the diagram shows the inside, with the exception of piece ‘B’, which will be inside the box and unlikely to be seen so even if you don’t remove the pencil mark, probably not an issue. In my opinion, the pieces are pretty clear so you should need to label them.

      Take Piece ‘A’ and lay it as shown in the diagram. The sides with the notches cut out should be at the top and right of the piece as you look at it.

      Take Piece ‘B’ and glue it into the centre of piece ‘A’. The piece fits snugly between the wooden blocks that surround the piece, so no adjustment or fine placement is required. Make sure that the lip on piece ‘B’ is on the left and top as you look at the piece. This can be confirmed by the angled corners as seen in the diagram.

      Leave the top for around 10 minutes for the glue to dry (note if the glue you are using takes longer to dry, then follow the manufacturers recommendations).

      Step 2 – Top Decoration

      Once the top of the box is dry from step 1, flip the piece over so that the cut away sections are now on the top and left of the piece as you look at it.

      Using a ruler, mark the centre of the piece, making note of the cutout which will not be seen once the box is complete.

      With the centre identified, glue the tree piece to the centre as seen in the diagram.

      Step 3 – Inner Box

      Take the parts labelled ‘E’ in the diagram. The flat square is the base of the inner box. There are two sides with notches cut in each end, and two with no notches cut.

      Place the base in the centre and then around that the two pieces with notches in the ends above and below it, then the two without notches at either side as seen in the diagram on the right.

      You will notice that there is a grove running through the with of all of these pieces. The base will go into one of these slots, and the other is part of the locking mechanism.

      Put glue into the notches on either end of the top and bottom pieces and using a brush, spread the glue evenly into these notches. Bring all four sides together around the base as seen in the lower left diagram.

      Once all four pieces have been brought snugly together, tape the corners and check that the corners are square using an engineers square. Note: This check is not really needed as the pieces are designed to give a good square corner.

      Note: You can put tape on the corners before adding the glue. This can make the job of taping the corners easier rather than trying to get tape around the corners after they are in place.

      Leave the inner box to dry.

      Step 4 – Outer Box

      Take the top which was completed in step 2, and place it as seen in the diagram, where the cut-out sections are at the top and right of the piece as you look at it.

      Taking pieces Labelled C-1, C-2, D-1, D-2, place these around the top as seen in the diagram.

      Pieces D-2 and C-2 have a piece of wood inside the groove which ensures the pieces are correctly located in relation to the locking mechanism, and the centre of the box.

      Pieces C-1 and D-1 have no insert in the groove, and will slide freely along the length of the top.

      Apply glue into the notches on either end of pieces D-1 and D-2 and using a brush, spread the glue evenly into these notches.

      Bring all four pieces together around the top as seen in the diagram on the right, starting with pieces D-2 and C-2 which will ensure that the pieces are correctly centred.

      Once all four pieces are in place, tape the corners together and allow the top to dry. You can check the top for squareness before it is dry however as with the inner box, the pieces are designed to give a good square corner even without this check.

      Note: As before putting tape on the piece before gluing can make this easier

      Step 5 – Opening and Closing the box

      To Close the Box, place the outer box onto the Inner box and move the top Right and Up as per the green arrow in the diagram. The box is now locked.

      Top Open the box, move the outer box Down and Left as per the blue arrow in the diagram, then lift the top of the bottom. The box is now open.
Log Jam

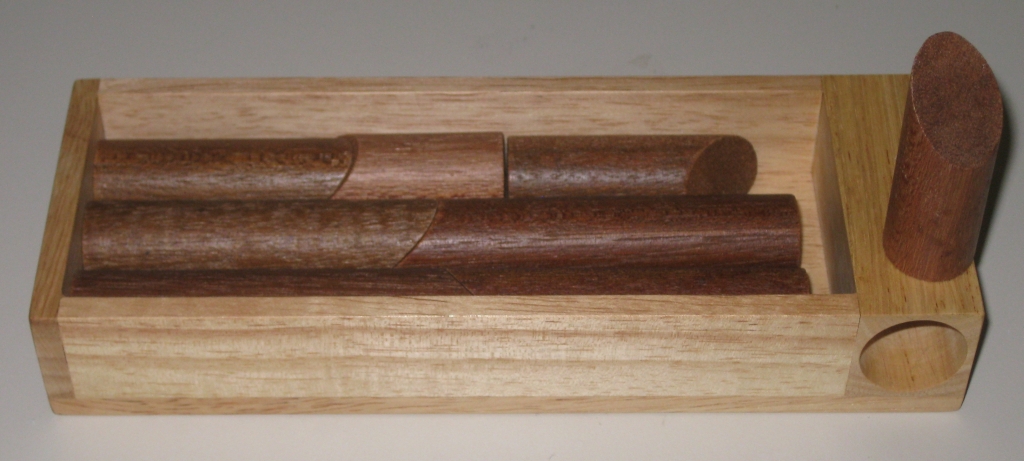
I recently put in an order for a few wooden packing puzzles since I’ve found a liking for them recently, after spending a long time not being very good at them. I made an order with Brilliant Puzzles who have a good selection of wooden puzzles at very affordable prices. The first of those puzzles I’ll be reviewing is Log Jam, or “Log Pack” as it is known on the Brilliant Puzzles site. The puzzle has seven pieces in the tray, and an eighth in the end. The goal of the puzzle it to fit the extra log into the box, in typical packing puzzle style.

Log Jam by Vesa Timonen

Log Jam by Vesa Timonen

Designed by Vesa Timonen, this is a fairly well known puzzle design, and was entered in the IPP 22 design competition where it was known as Lox in Box. I’ve been looking to try it for a while, after reading Brian’s review and having seen various copies of the puzzle in friends collections. The copy from Brilliant Puzzles is not expensive, and as I was ordering something for Jen, I decided to added this to my order. Creative Crafthouse also make a copy of this puzzle.

The puzzle comes sealed in shrink wrapped plastic, with the solution sheet folded and on the bottom of the puzzle. At least you can avoid accidentally seeing the solution. It’s 7.5″ x 2.75″ x 1.25″ and made from two contrasting woods. If I were to guess I’d say the wood used is rubberwood, which seems very common in the cheaper, mass produced puzzles that I have seen recently. Given the price, the quality of the pieces is what you’d expect. This isn’t a high end collectors piece, but a puzzle to be played with.

The fit of the pieces is fair, and the puzzle functions exactly as it should. As nice touch, and something which seems fairly common with this design is that the extra piece has a place in the end of the puzzle for storage so that the puzzle can be kept in its unsolved state without leaving pieces stacked, or losing the piece.

When I had seen this puzzle elsewhere, I’d tried mentally solving it, so before I started I had a few ideas to try. After a few minutes I’d exhausted those, so I had to think a bit. Sorting the pieces, and then looking at what I had let me see a possible pattern, and after another few minutes of playing I had the solution. It’s a very elegant solution, and well worth getting a copy to play with. The design of the pieces and the initial presentation leads you down one avenue of thinking while the actual solution is quite different. It is something that I have noticed with these ‘fit the extra piece in’ style puzzle that the initial presentation is often designed to start you off on the wrong path, and this is no different. Very clever.

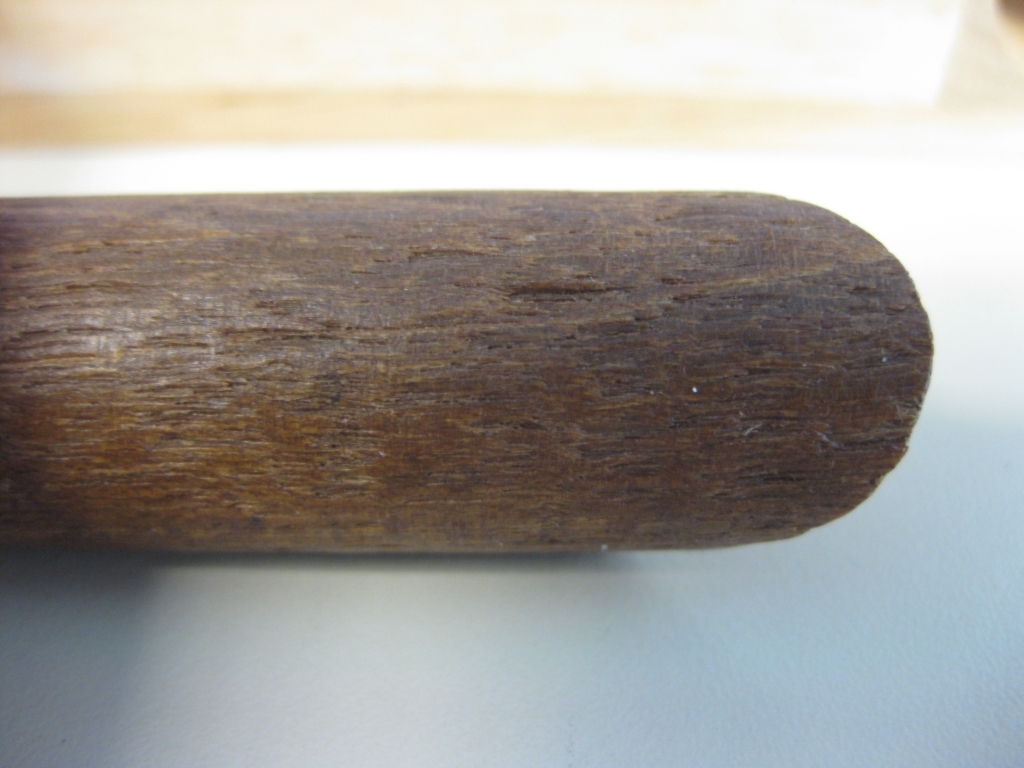
Closeup of one of the pieces

Closeup of one of the pieces

In the solved state, the fit is not as close as I would have expected, and there’s still a degree of wiggle room in the tray. Not enough that there’s a different possible solution, so perhaps it’s just the perfectionist in me looking for more. As you can see from the closeup of one of the logs above, the finish on the pieces is pretty rough, and the tray shows some signs of the fit and finish not being stellar. But as I mentioned earlier, this is a puzzle to be played with, and not a collectors piece, and that is reflected in the price.

For the price, this is a great puzzle, and I’m happy to have had the chance to play with it.

Sun

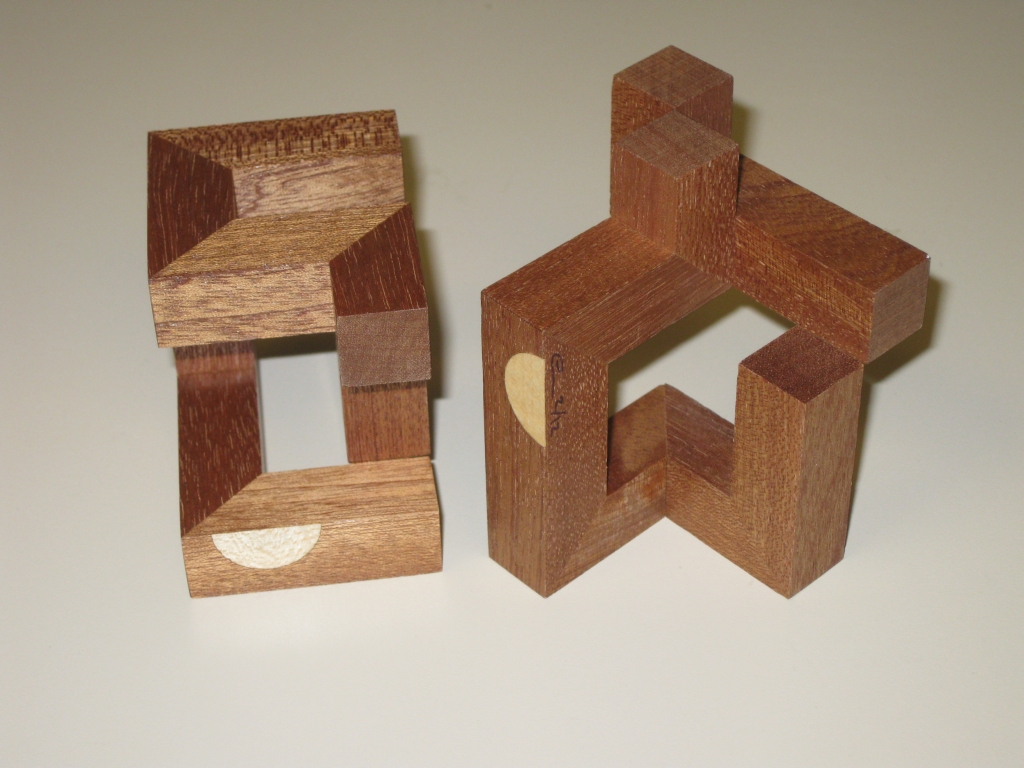
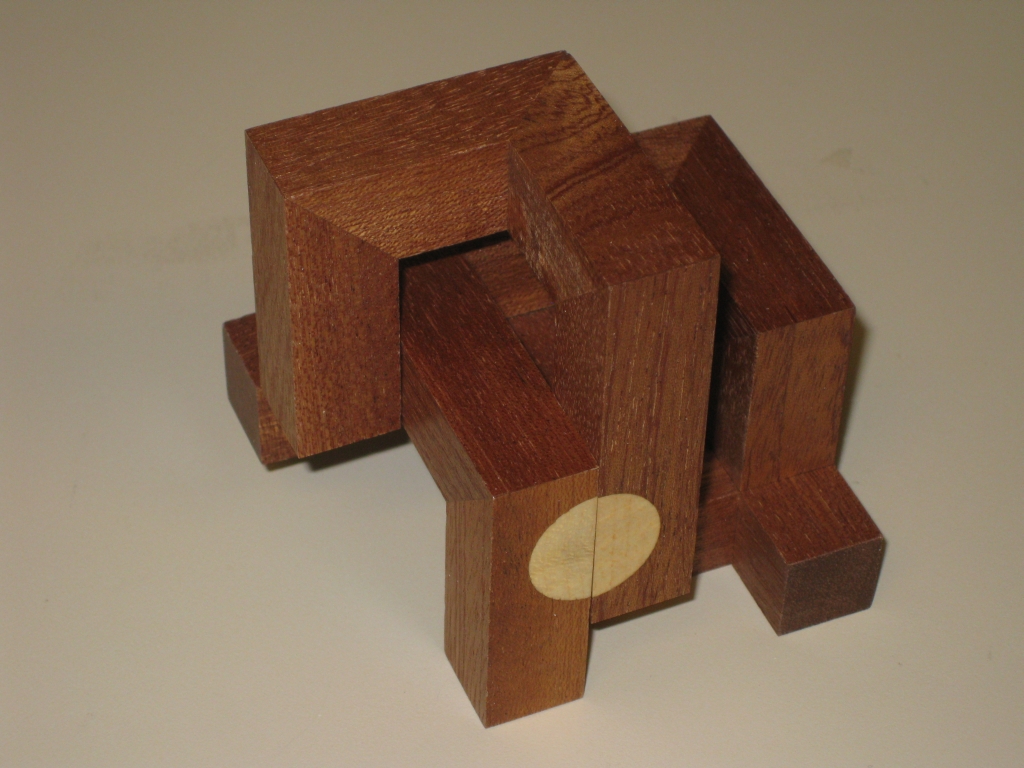
Sun is a very interesting interlocking puzzle designed by Jos Bergmans. Two separate pieces which form almost closed loops require to be connected in such a way that the two semi-circles end up fitting together to form a completed circle, the sun.

The two pieces of the Sun

The two pieces of the Sun

The copy I have is made by Eric fuller and was offered in his most recent set of puzzles at Cubic Dissection. Made from Sapele with a Maple veneer for the sun the puzzle measures 2.6″ x 3″ x 3″ so it’s a good size and the construction is superb. Eric hand glued each joint, including a couple of triple mitre joints using a granite plate and a machinists square to ensure that every joint was at exactly at right angles, and it really shows in the finished puzzle. Attention to detail is superb. Three different wood combinations were available when Eric produced the Sun, including the inverse of my copy, Maple with a Sapele sun, and Walnut with a Maple sun. As always Eric has signed and dated the puzzle. 36 copies were made available.

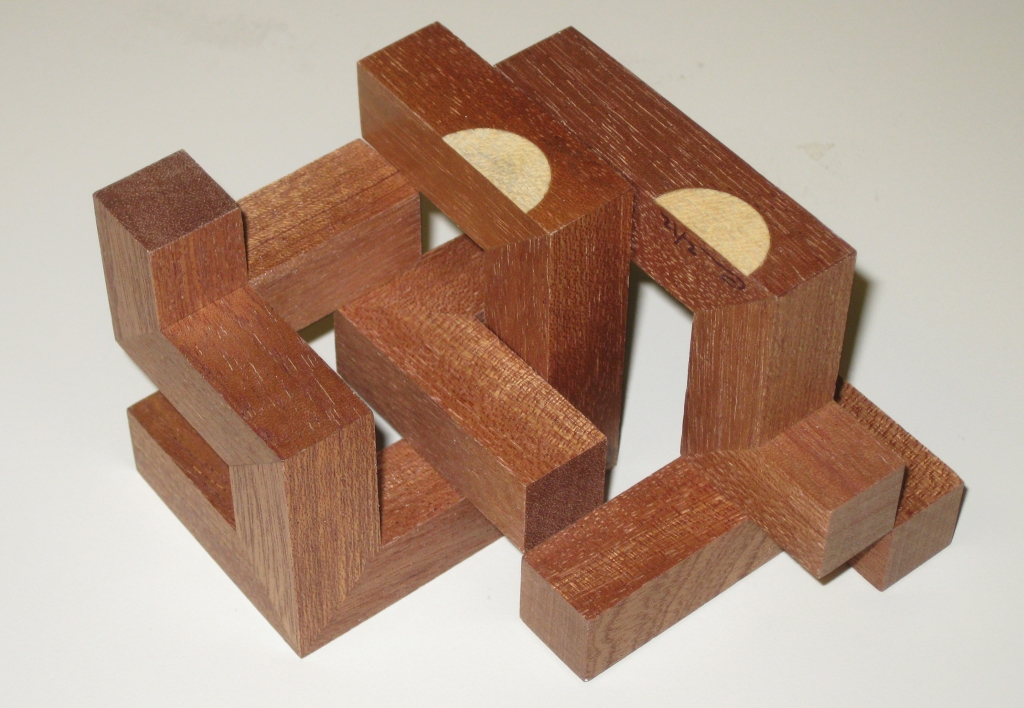
Sun Partially Solved

Sun Partially Solved

The goal of the puzzle is to interleave the two pieces of the puzzle, to create one solid object where the two halves of the sun line up. Looking at the pieces, they initially seem like closed loops so joining them together at all seems impossible. With a little study though, there is one place where the two pieces will allow for an initial move to link them together, and that’s where the fun starts.

Normally with this sort of rectilinear puzzle, some of the pieces have rounded edges, or parts of the edges have been taken away to allow the pieces to move past each other, such as the Cast Coil from Hanayama. This puzzle however has no corners or edges rounded, and all the moves, slides and rotations happen because there’s just enough room for the pieces to move past each other, making this as close to a perfect example of this style of puzzle as is possible.

Sun in its solved state.

Sun in its solved state.

Once you have the two pieces intertwined, there’s a couple of easy rotations, then you find yourself at a dead end. (At least I seem to every time I solve this puzzle!) I’ve solved it a good few times now, and each time I spend several minutes trying to figure out where to go next. There are a good few dead ends in the puzzle, so the challenge is fairly good. I seem to go though the same set of wrong moves at the start each time before finding that magic move and from there the solution seems to just flow, and I have it solved very quickly thereafter. I took around 20 minutes to solve this for the first time, but each time after that it still takes me 10 minutes, so I’d say is has some good replay value.

Taking the two pieces apart seems much easier than putting them together, so I’m glad that Eric shipped the puzzle in its unsolved state. It’s a really fun puzzle, and very well made. I’m happy to have been able to get a copy of this for my collection.

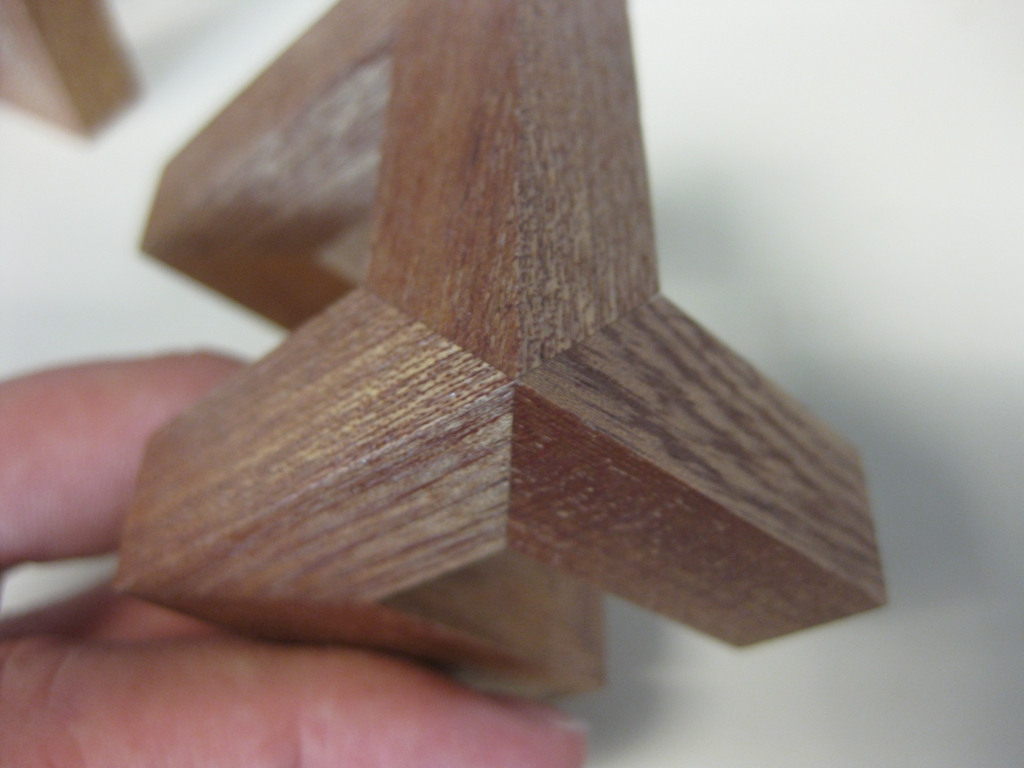
One of the triple mitre joints

One of the triple mitre joints

As I mentioned earlier, the detail and quality of the work in this copy of the puzzle is superb. Just look at the triple mitre joint above, and you’ll see what I’m talking about. Despite Eric commenting that the construction was painstaking, I think he’s right to be very pleased with how these turned out!

Havanas #1 & #2 – Chris and Heather

Eric Fuller recently started producing a series of Cigar Puzzle boxes, in honor of his local cigar bar Havana Deluxe. I have been lucky enough to get my hands on the first two puzzles in the series, the ‘Chris’, named after the doorman, and the ‘Heather’ named after one of the part-timers behind the bar.

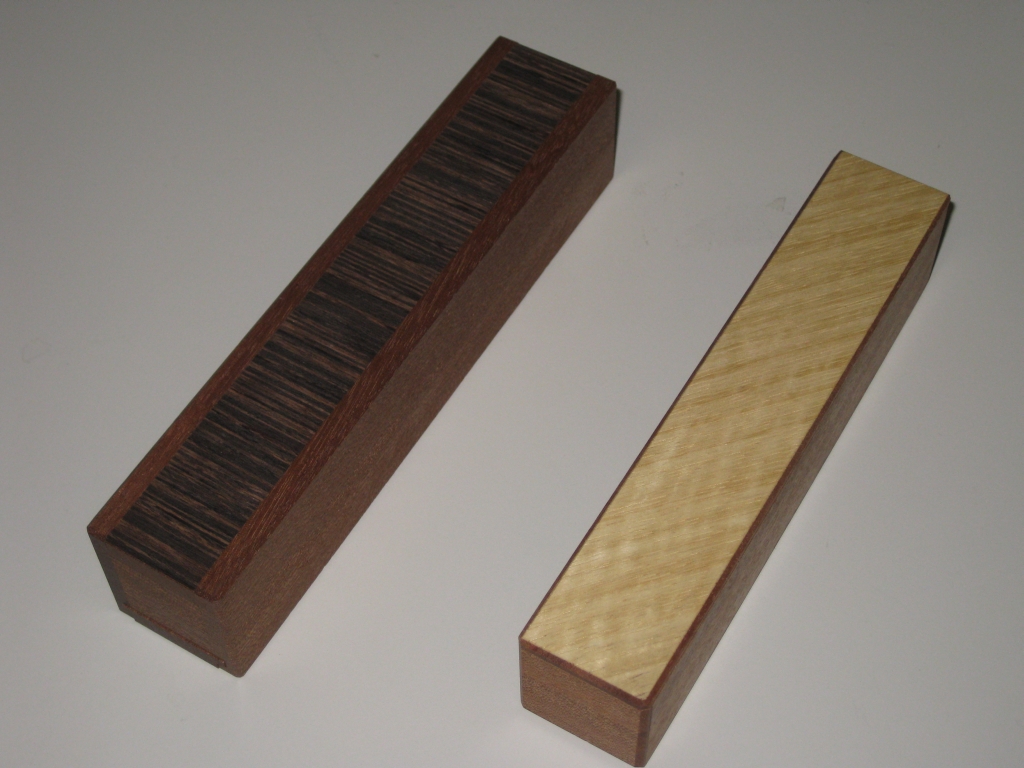
Chris on the left, and Heather on the right

Chris on the left, and Heather on the right

As you can see both boxes look stunning, and as other people who have these have commented, the photo’s don’t really do the boxes justice. I’ve tried to get as close to the actual colour of the box as possible with the photographs, but I still think the actual box is better looking. (Sorry)

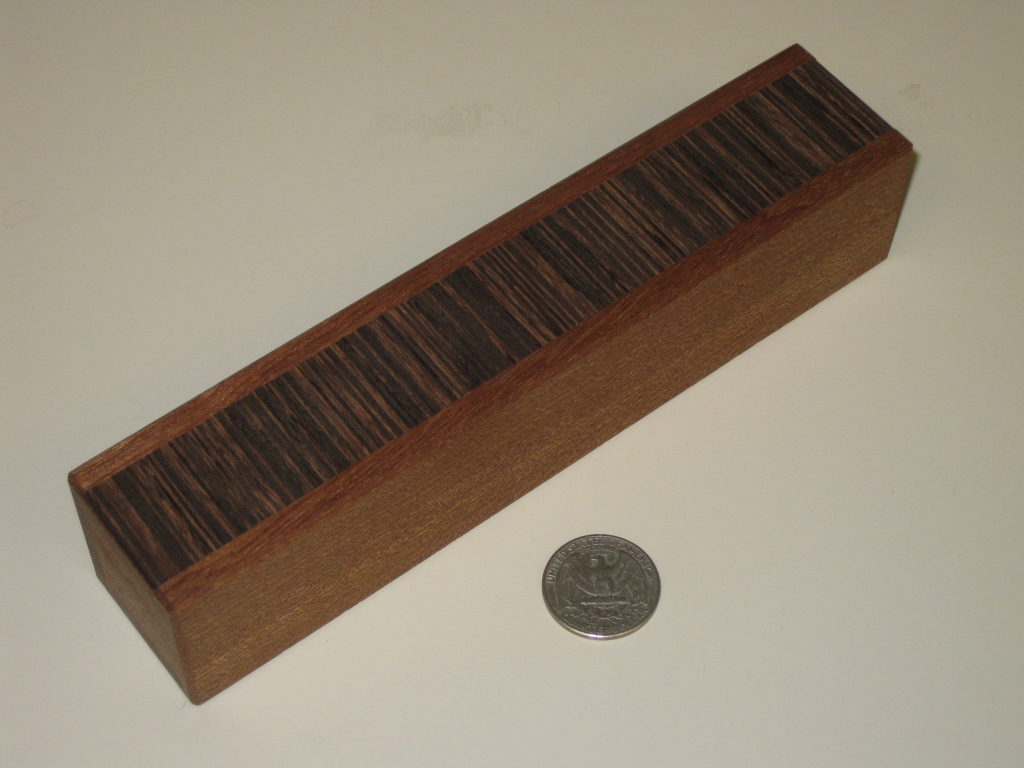
Havanas #1 -The Chris

Havanas #1 - The Chris

Havanas #1 - The Chris

Eric has this to say about Chris:

“One of my favorite activities is to have a big, stinky cigar after a long day in the shop…generally enjoyed at my local cigar bar, Havana Deluxe. I’ve been wanting to make a puzzle box that will hold a cigar for some time now. A while back I was talking to the owner about it and we decided that I would make not just one cigar box, but a series of them! Each box will named after one of the people working there. And thus was born the Havana’s Puzzle Box series. This is the first box in the series…Havana’s Box #1 – “The Chris”…named after the doorman.

The designs will start off fairly easy in difficulty, and get harder over the course of the series. This first box is therefore not super complicated, but it does have a nice “twist” to it as well as a sophisticated and compact locking mechanism concealed inside. The entire lockworks are contained in the endblocks, measuring 1″x1″x.45 inch. This makes the box nice and compact.”

Chris is crafted from Quatersawn Sapele, and if you know anything about wood, it is most stable dimensionally when cut quartersawn. The top and bottom use cross grain Wenge veneer (have a look at my recent table project to see the face grain) to really make the box pop. The stunning contrast in the striped grain is really beautiful and Eric has used it to full effect in this box.

Don’t be put off by this being veneer rather than solid wood. To have tried to create the top and bottom from crossgrain Wenge there would have been no strength to the box, and it would have snapped as soon as you looked at it, so this was a great choice.

The box measures 7.25″ x 1.5″ x 1.5″ so holds the cigar comfortably, and in fact has a fair bit of spare space inside to hold a larger specimen. Only 40 were made and each is signed and dated as is Eric’s usual custom.

Having waffled for long enough about the wood, and the reason behind the box, what is it like as a puzzle I hear you shout… Well, I really like it. At first, nothing seems to move much and as you turn it around in your hands, you’ll find a small amount of movement, but not enough to be apparently useful.

A glimpse, but not enough to remove the prize

A glimpse, but not enough to remove the prize

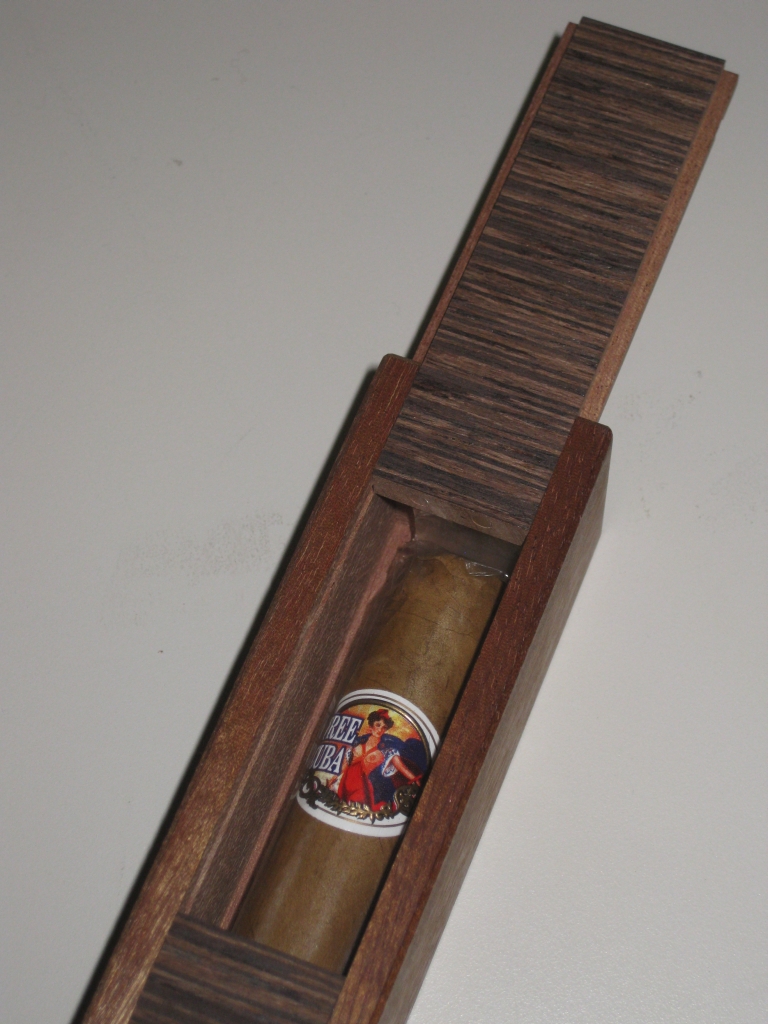
With some more fiddling, the box starts to tease you with a glimpse of the cigar contained within, but you’re not getting it out without snapping it, so more work is required. Before too much longer you should be able to fully open the box, and remove the cigar undamaged.

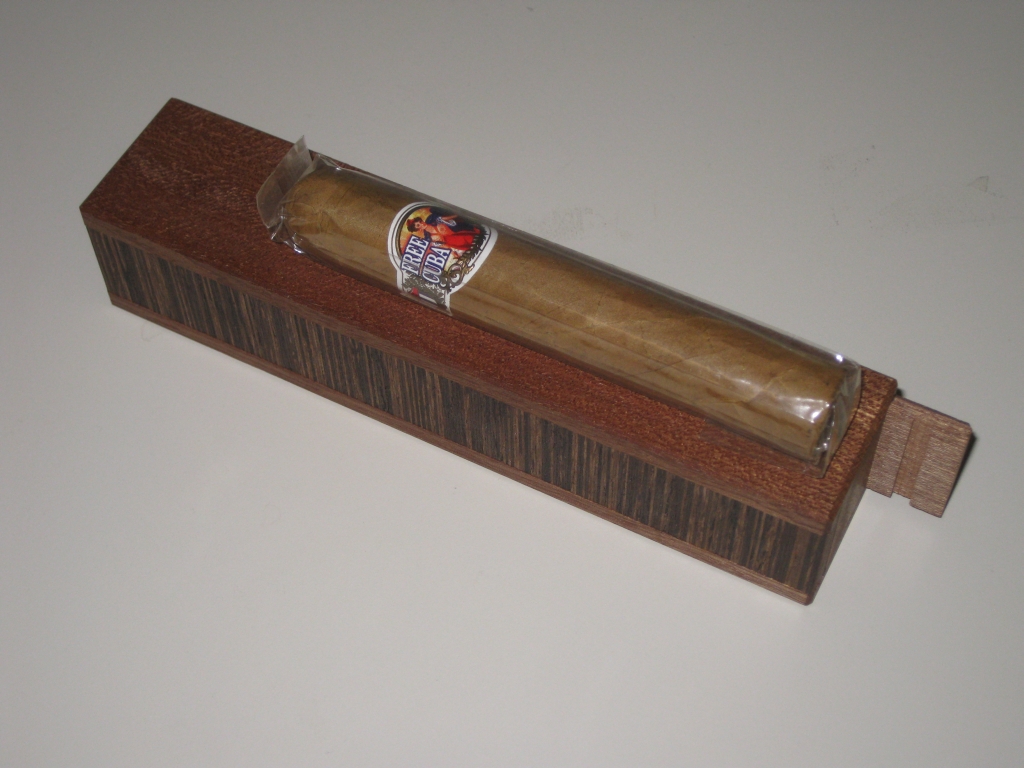
The Cigar free from the box

The Cigar free from the box

As the first in the series, Chris isn’t too difficult to open as Eric himself commented, and is really here to give a feel for what’s coming. I took around 10 minutes to open the box for the first time, but now that I understand the mechanism, I can open it in a few seconds. I love the mechanism, and even though it’s entirely hidden from view once the box is open, you should be able to figure out what’s going on inside those end panels. This is a great start to the series!

Have a look at what the rest of my puzzle friends are saying about Chris… Allard, Brian and Rox’s thoughts.

Havanas #2 -The Heather

Havanas #2 - The Heather

Havanas #2 - The Heather

Eric has this to say about Heather:

“The second in the Havanas Box series is named the “Heather”, after the one of the friendly part-timers behind the bar. It’s a step up in difficulty from the first box…easy enough to get started but then a few moves in you hit a wall. The solution is fairly unique and I think it will be a lot of fun to discover. Tough to say much more about it without giving a lot away…all I can say is pay attention and the solution will match your observations.”

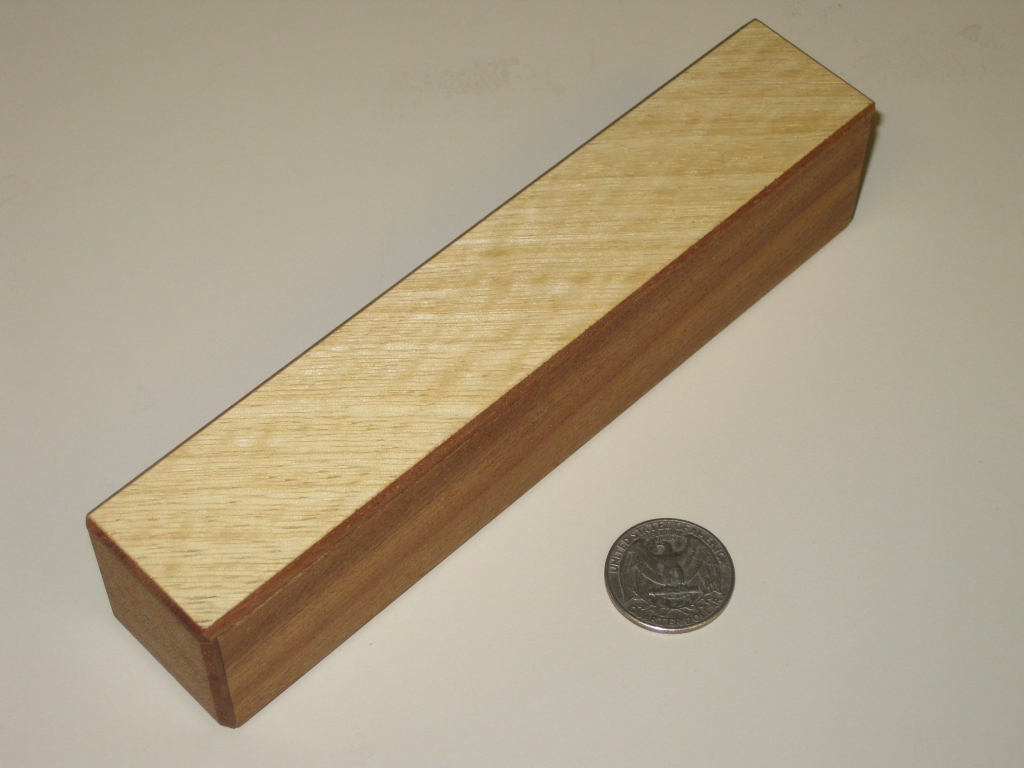
This time, there were two options offered. The one I have is made from Quartersawn Sapele and has a Quilted Primavera veneer to the top. The quilting which looks like waves in the wood is easiest to see in the first picture in this post. The other option was with a Bleached Lacewood veneer on the top, however those sold out very quickly. There are still two of the Primavera boxes left if you’re quick on Cubic Dissection (and I’d highly recommend these so don’t miss out!). 45 were made in total, and they’re all signed and dated.

Measuring 6.5″ x 1.3″ x 1.5″, Heather is more petite than the doorman Chris (which is probably a good thing), and is certainly a more snug fit for the cigar contained within than Chris was.

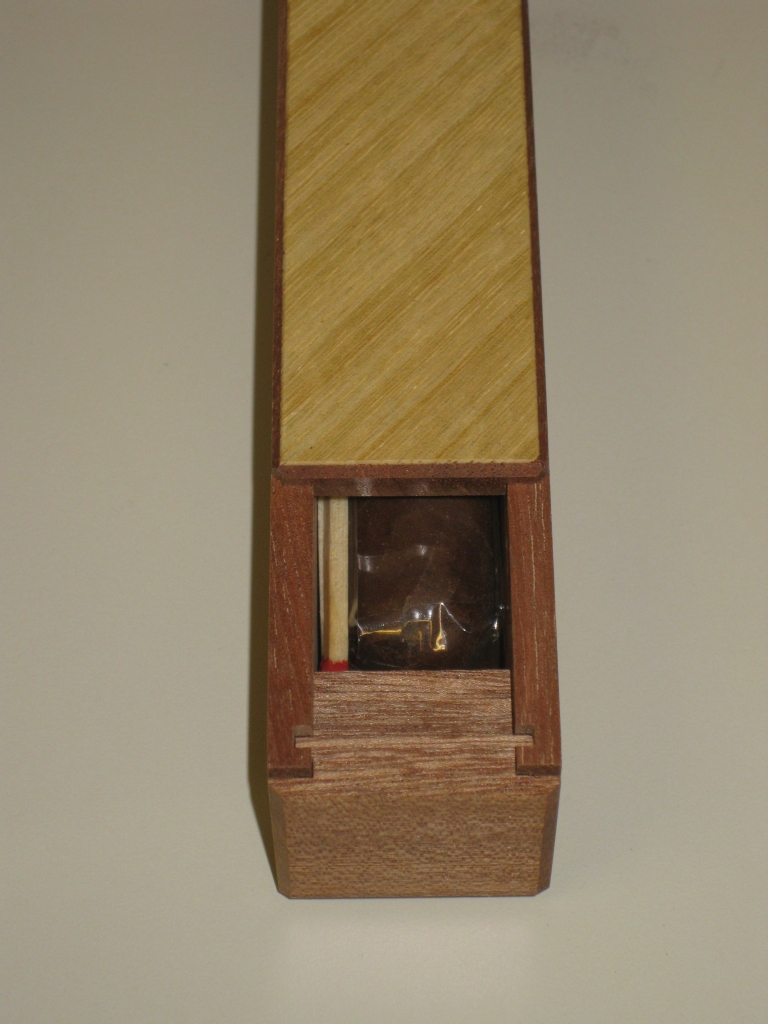
Hitting a dead end

Hitting a dead end

As Eric mentioned, fairly quick progress is made for at least the first few moves, then you seem to end up stuck with only the tip of the cigar visible, and the handy matches that Eric has put in the box for you to light your cigar if you manage to get it out!

The Cigar free from the box

The Cigar free from the box

The mechanism is certainly unique, and Eric has disguised the next steps beautifully. I’ll not say anything more about how to proceed as I really don’t want to give anything away, but I really like what Eric has done with the puzzle, and think it’s a fun progression from Chris. You’ll certainly need to look closely, and think about what you could possibly do to successfully open this box!

Just to give a quick comparison between the boxes, here’s a couple of shots showing the difference in sizes between them.

Size comparison between Chris and Heather

Size comparison between Chris and Heather

Size comparison between Chris and Heather

Size comparison between Chris and Heather


These are great puzzles, and I’m looking forward to the rest of the puzzles in the series. Keep up the great work Eric, can’t wait to see what you do next.

Time for something different

Some time back, Jen asked me to make a few pieces of furniture for her. Now I’ve been pretty busy with work, and making the puzzles, so I’ve not really been able to do much for her, but since it was something of an unwritten agreement when I started buying all the tools it was about time to start paying up. If you’re only interested in puzzles, then skip this one, but if you want to see a little more on the woodworking I’m doing then keep reading.

Completed Table

Completed Table

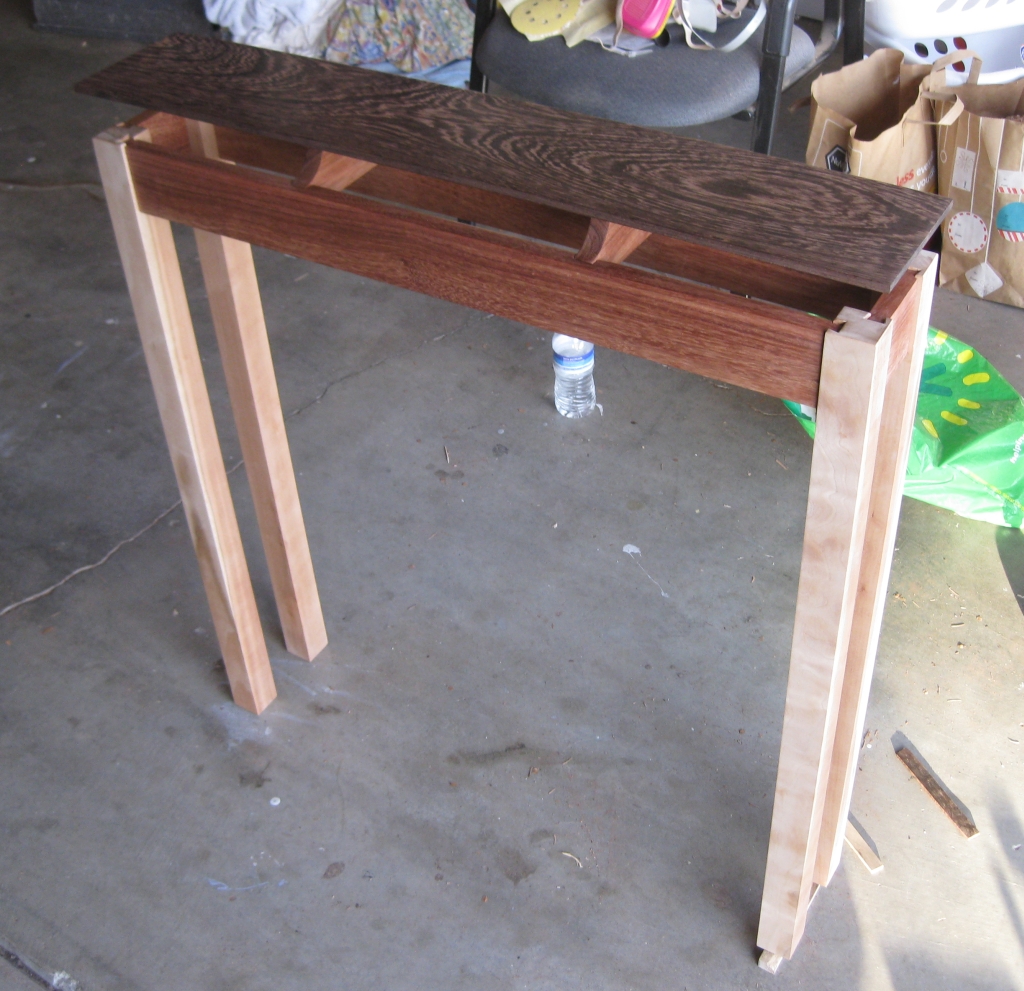
The first project that I’ve tackled is the narrow table above which Jen wanted for putting keys and other stuff on just inside the door to the house. It needs to be thin as it has to hide behind the door when it’s opened so really a custom piece was the only way to go. I left choice of woods up to Jen as it was her table, I was merely making it. We settled on Cherry for the legs (one of which when we finished it we found out is actually highly figured quilted Cherry!), Grenadillo for the frame and Wenge for the table top.

I’m going to use this post to work thought the build process and design decisions I made when building the table, as I have learned a lot from the project, and even though it’s not puzzle related, it will certainly help me in puzzle making going forward. Hopefully you find the journey interesting.

Plans

Plans

More plans

More plans


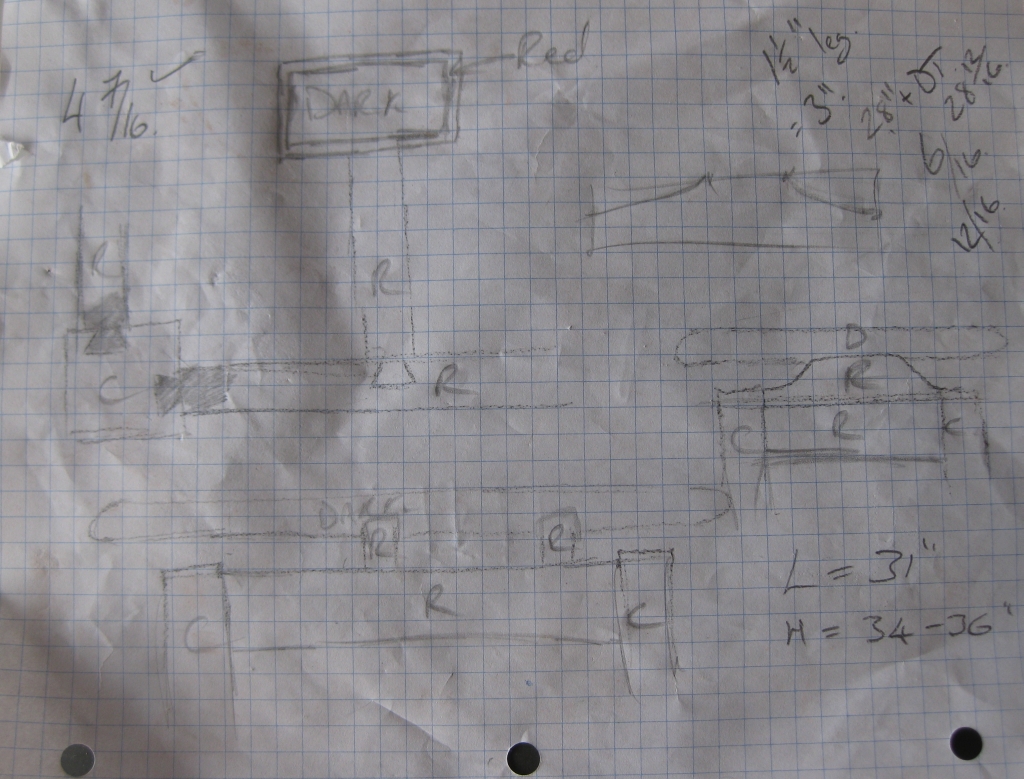
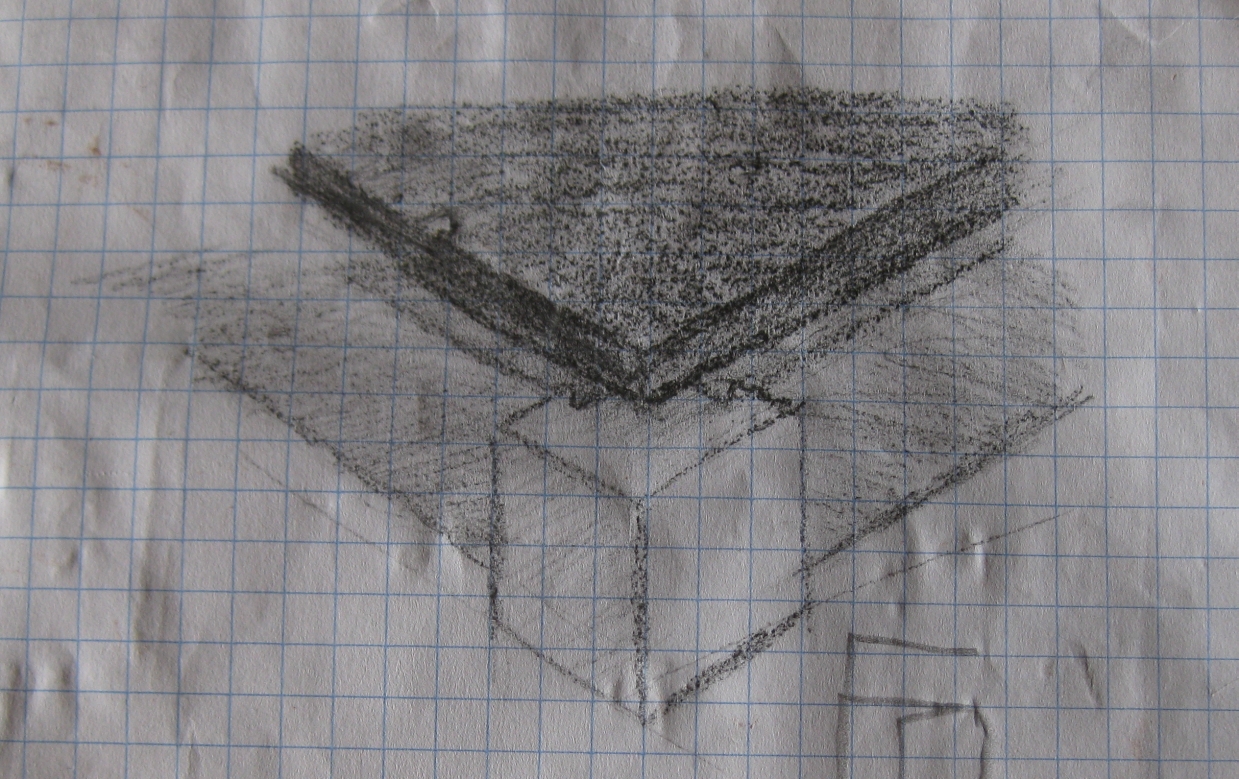
When I started the project, there were a number of things I wanted to try to accomplish. Initially I wanted to push myself in terms of the woodworking, and not necessarily play it safe. Now by that I mean not just sticking to things I’ve done before, really trying to use this to step out of my current comfort zone. I decided that I wanted to create a table with a floating top, and as such the joints into the legs were going to be stopped dovetail joints since they would be visible in the finished table, and become a feature. I appreciate that I was asking a lot of myself, having never attempted any joinery before and jumping straight to a dovetail may seem crazy, however I was fairly confident that I could do it so why aim low?

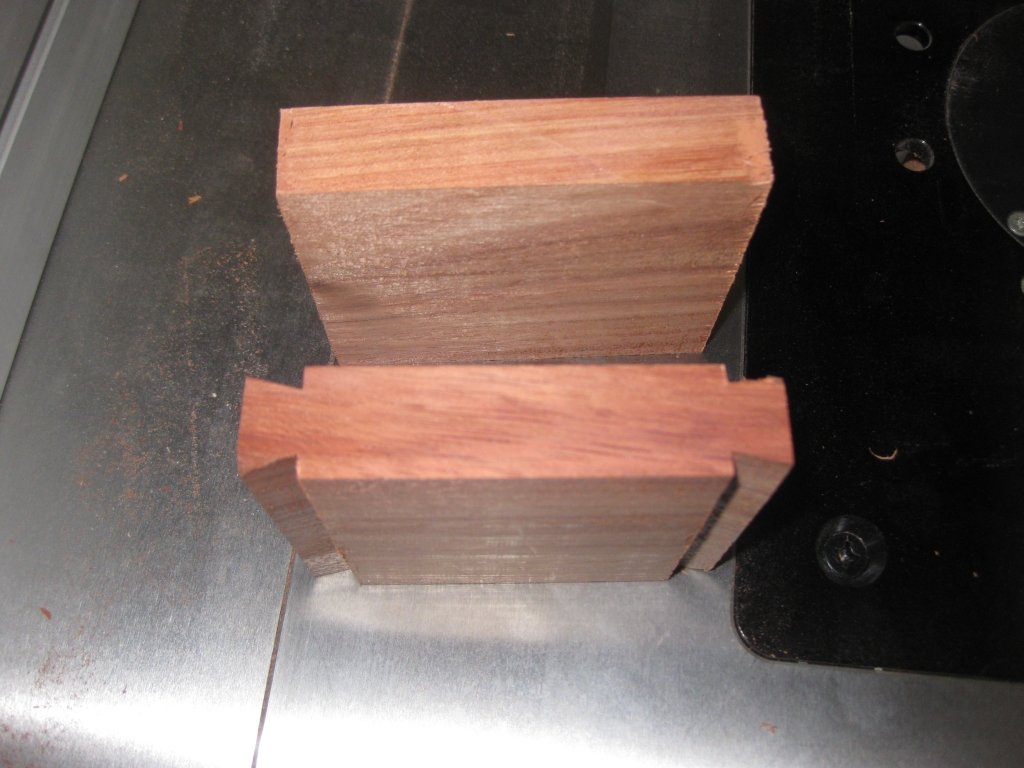
With all the dimensions written down, I started off by cutting the pieces for the frame of the table. I even remembered to take into account the size of the dovetail, so I didn’t end up cutting the sides too short. Starting off with some scrap pieces of wood, I setup the dovetail bit and made both sides of a joint to see what problems I was going to encounter and how close I could get the fit (which turns out to be so close I needed a mallet to separate the two pieces). The biggest issue was putting the dovetail into the ends of the long boards. Supporting them wasn’t easy, but given that I have a friend visiting, he was able to help out.

The end piece for the frame.  One with the dovetail cut, the other without.

The end piece for the frame. One with the dovetail cut, the other without.

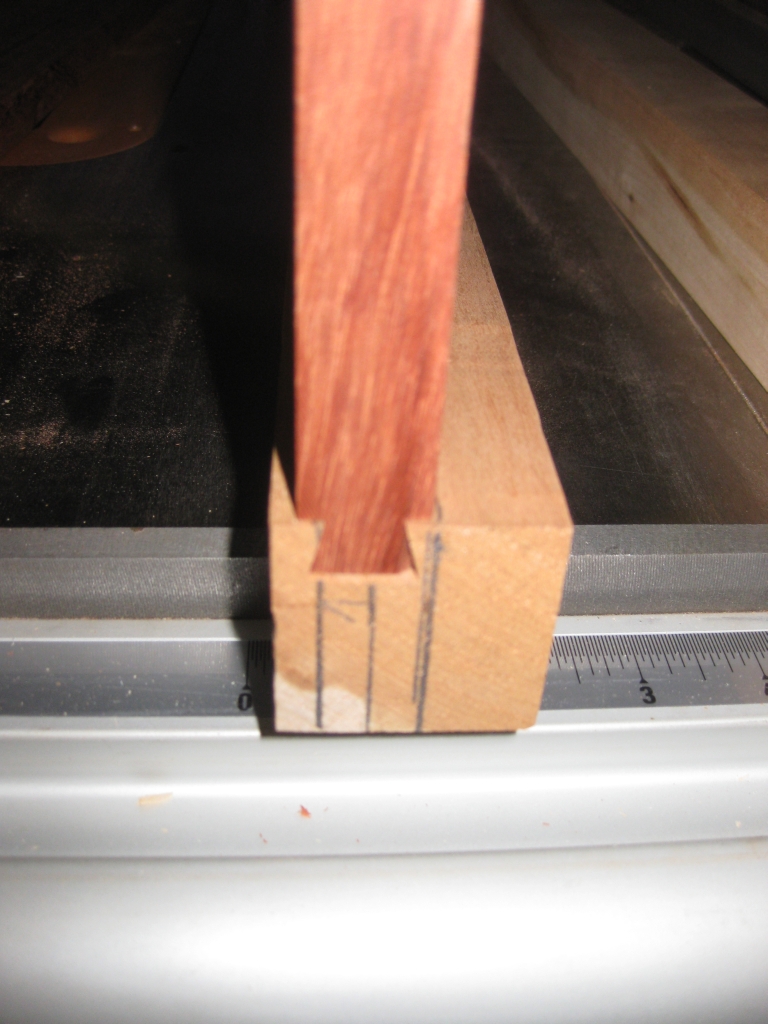
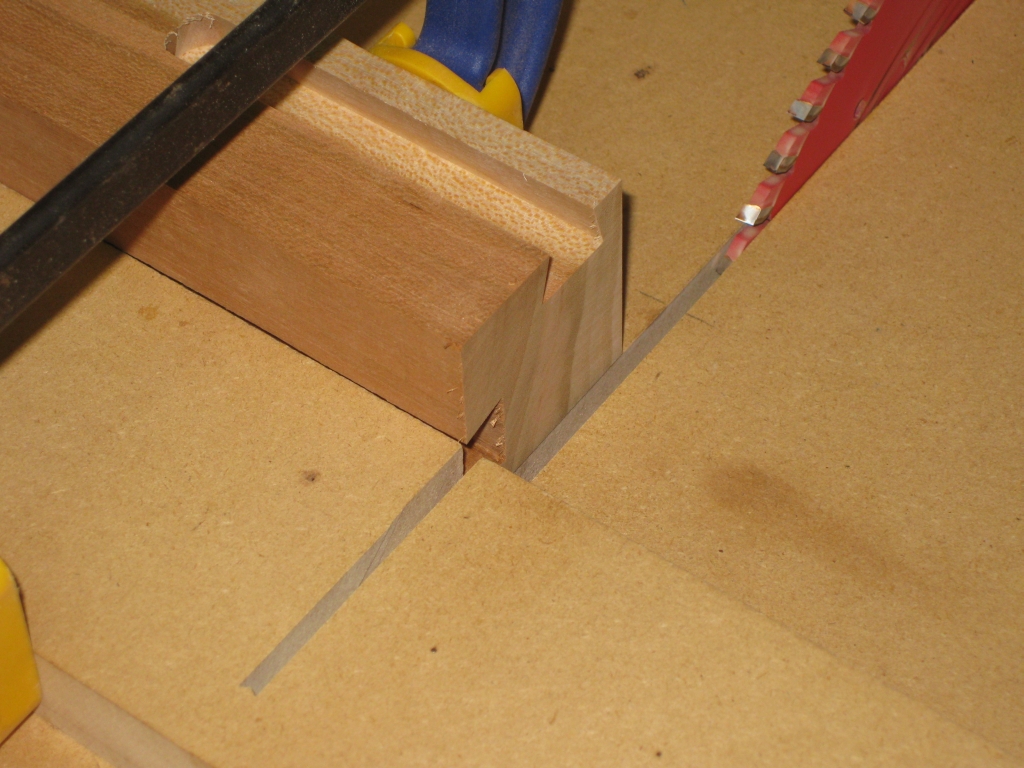
All of the male dovetails on the frame were cut at the same time, so the bit was setup once and there were no issues in getting the dovetails the same size. After that I moved on to setting up for the female size of the dovetail on each of the legs. Two female dovetails need to be cut into each of the legs, and they need to be the same distance from the outside edge on each leg to make the table look right when finished. Given that the setup for each dovetail in the leg is different I cut one dovetail in each leg before coming back and resetting the spacing for the second.

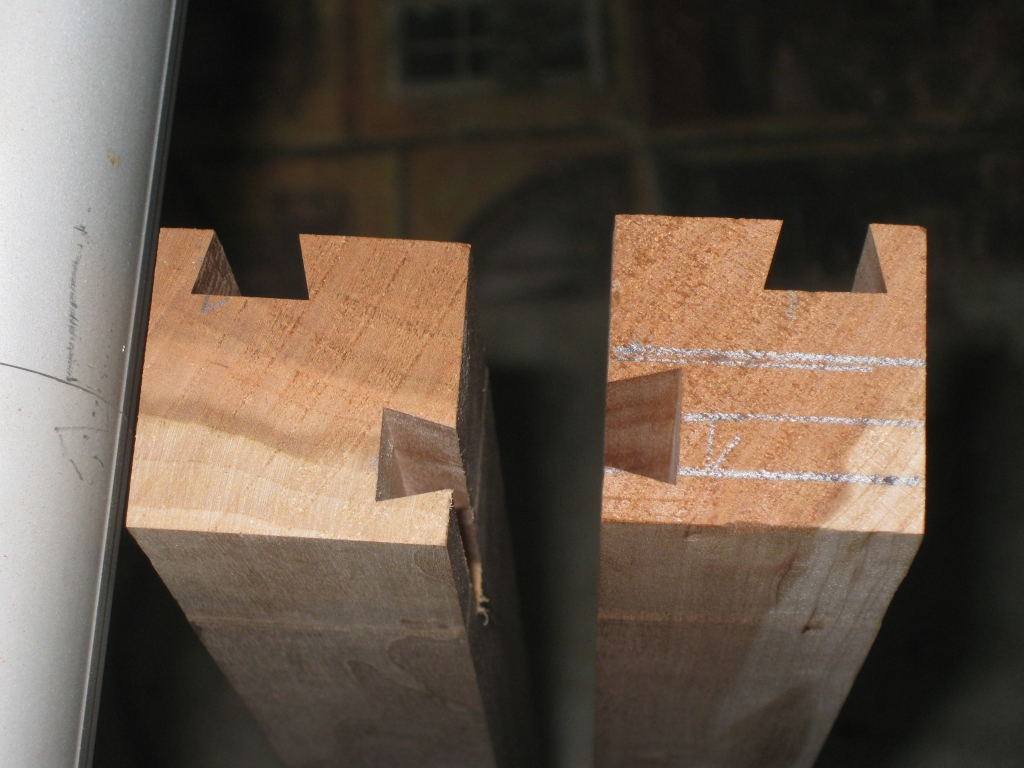
The first completed dovetail

The first completed dovetail

This was the first joint completed. As you can see, I’d marked the top of the leg with the centre of the dovetail, and the width of the dovetail to help with setting up the cut. The width of the joint is wider than the width of the bit I’m using, so that allowed me to creep up on the perfect fit. The joint is tight, and requires some persuasion to come out but there’s enough room to account for the swelling of the wood when I add the glue to the joint.

Comparison between final dovetails, and the first pass

Comparison between final dovetails, and the first pass

As you can see from the photo above, there is quite a difference in width between the first pass in the joint, and the final dovetail. You’ll also note that only the first cut was marked up. After that, the fence was set to allow the rest to be cut knowing that they were an exact duplicate of the first. When it came to ensuring that the adjoining dovetail was spaced exactly, I started the first cut closer to the centre of the final joint, and then crept back to the correct starting point by measuring the gap between the front of the leg and the top of the joint with my digital calipers, until they were exactly the same width (the gap on the bottom in the photo above).

Trimming the top of the table legs.

Trimming the top of the table legs.

With all the dovetails cut, I trimmed up the top of the legs, so that I knew everything was square, and that the depth of the dovetail was where I wanted it. As you’ll have noticed, the male dovetail is slightly inset in the female groove, and this was by design. I wanted to have the dovetail really stand out, rather than being flush with the top I wanted to have it inset slightly. I’m sure other people would disprove of this choice, but I like the effect.

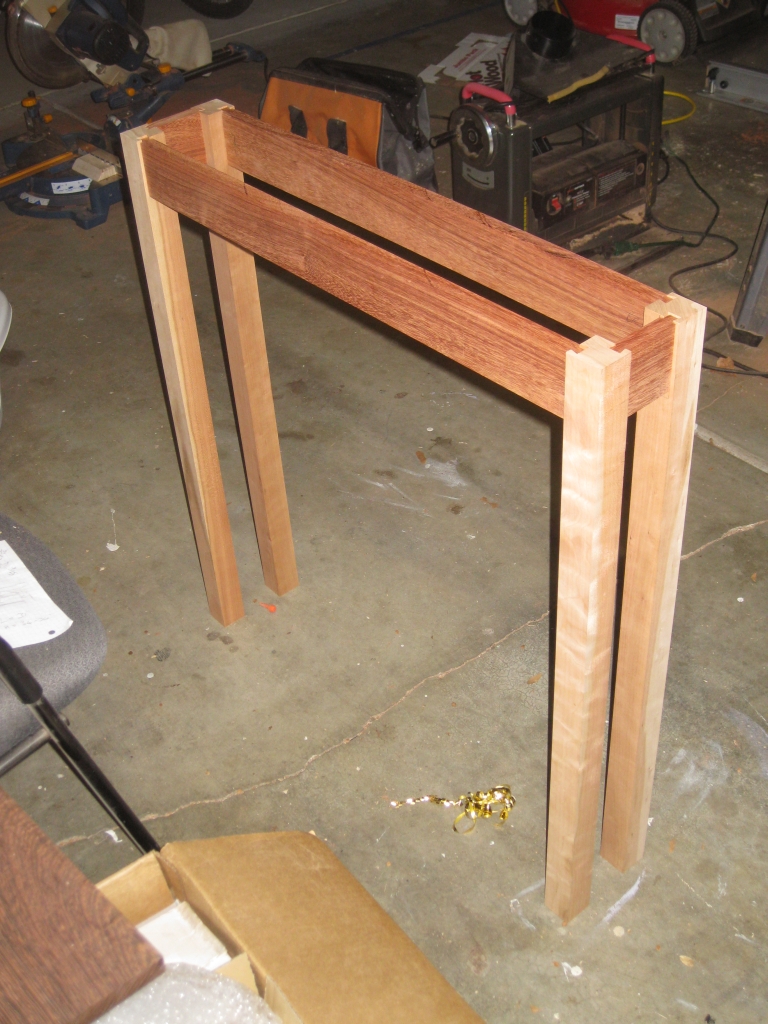
First dry fit of the frame

First dry fit of the frame

With all of the joinery cut for the main frame of the table, I put it all together on a dry fit. This allows me to test the fit without gluing things together, and see that everything is square and sitting the way I want it. At this point, I still have to add the supports for the table top to make it float, but I was happy that everything went together the way I had planned, it was square, and it was looking good!

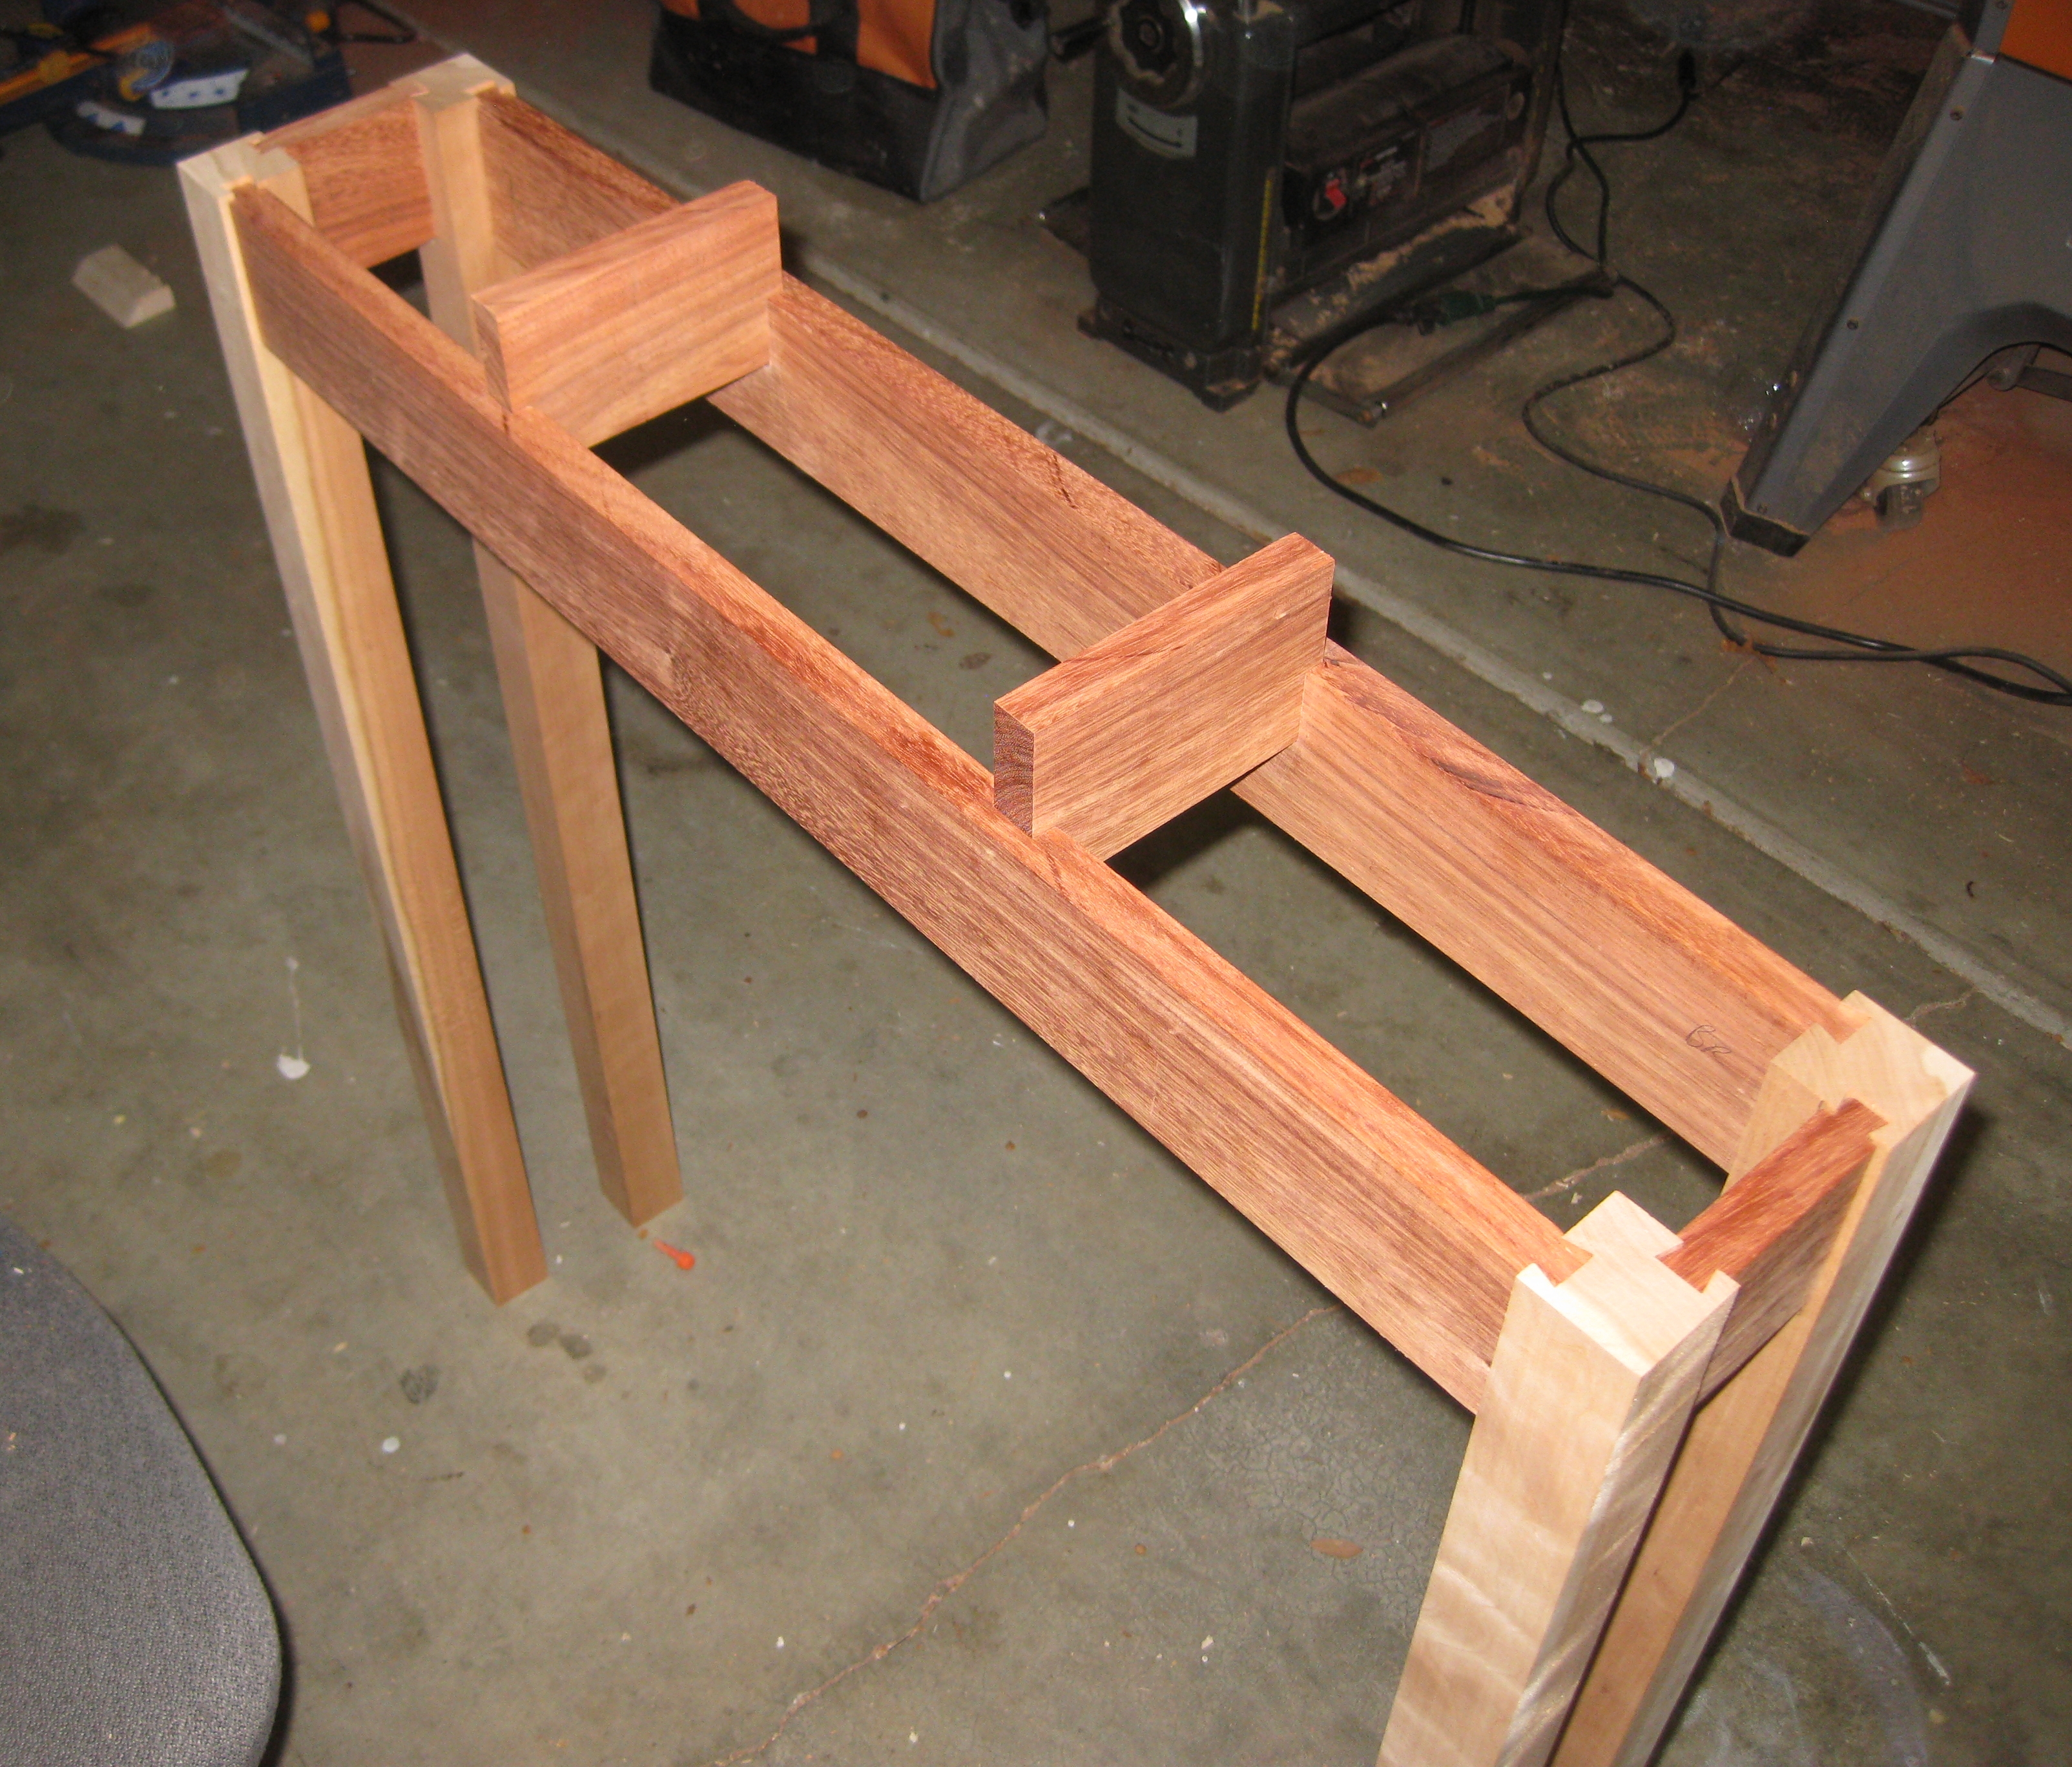
Second dry fit of the frame, with the floats sized and in place.

Second dry fit of the frame, with the floats sized and in place.

Next up was to cut the groove for the supports and also size them to fit correctly. I decided to make life simpler here, and go for a straight stopped dado, rather than a stopped dovetail. After all, the wood is the same so it won’t be a contrast like on the legs, and the entire point is to make the top appear to be floating above the legs, so drawing attention to the supports wasn’t the effect I was going for. The intent is to add a curve to the supports, so they start flush with the frame and curve under the table top. At this point though, I was happy just having the stopped dado cut and the height of the float set.

It seemed like most of the hard work was done now but there was still one last piece which would in my mind make or break the project, and that was getting the table top in place correctly.

The Table top is 1/4″ longer than the frame at each end, and 1/8″ wider than the frame, front to back, so there is a slight overhang. When marking up the locations for the dado’s that the floats will drop into, I had to take this into account, to ensure that the table top is exactly centred over the frame. Without this, I’d end up with scrap rather than a table top! (And I’ve put a lot of hours into this to end up with scrap).

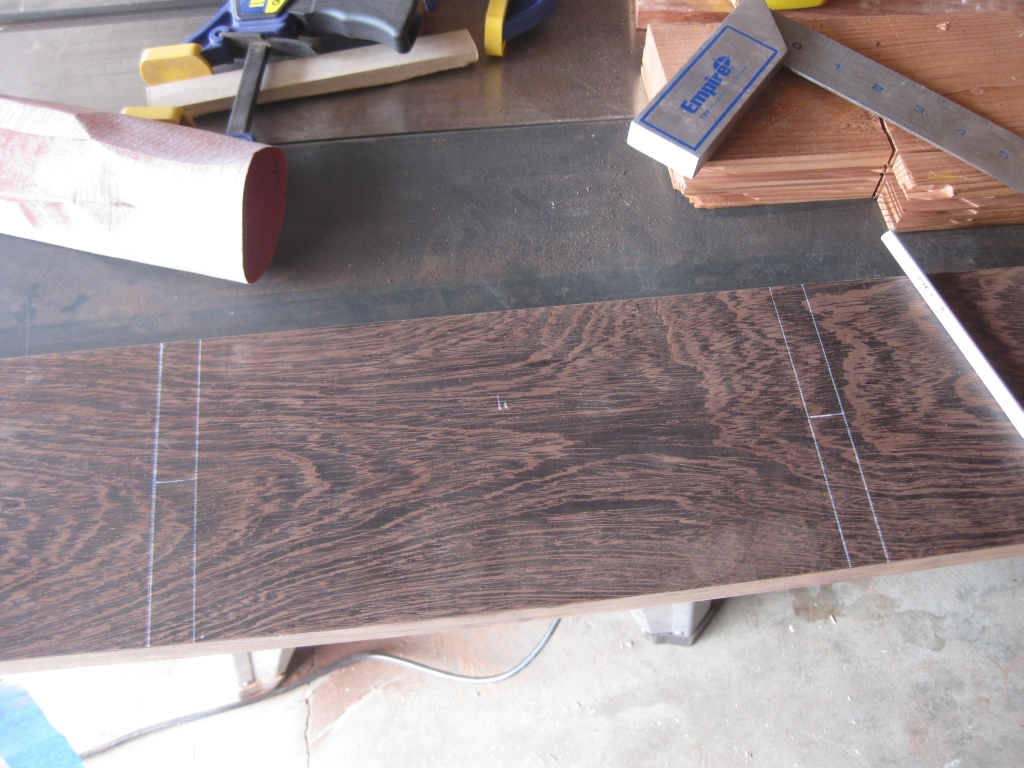
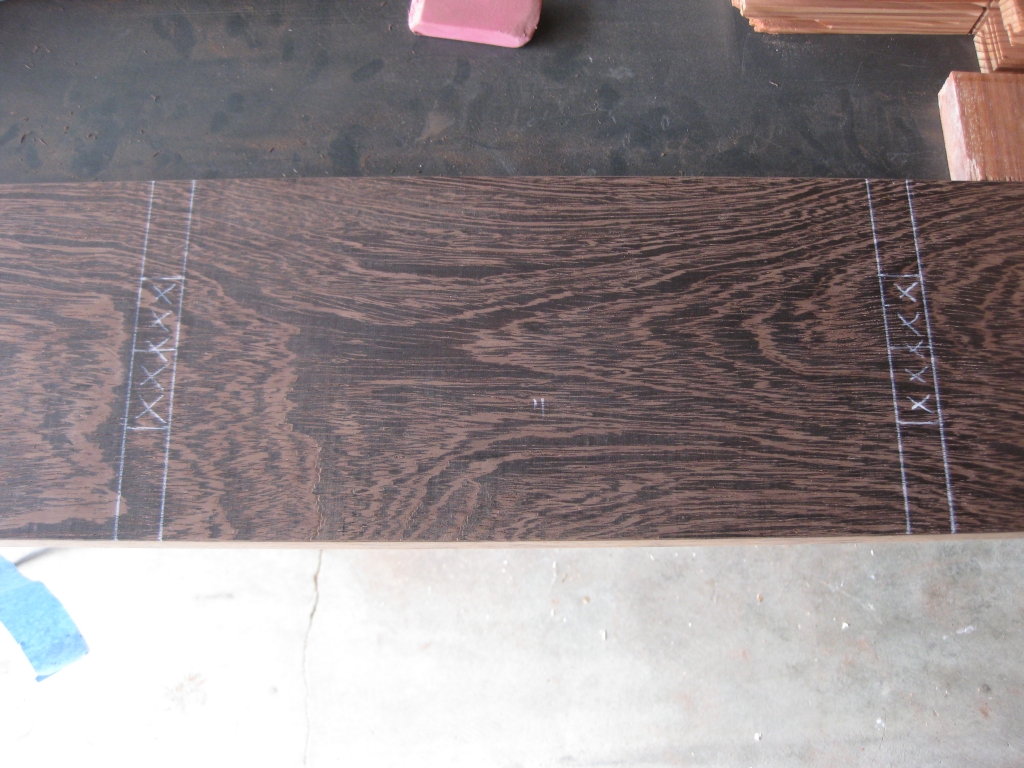
Marking up the table top

Marking up the table top

Marking up the table top

Marking up the table top


I marked up the width of the floats, then marked the centre of the top before marking the area to be removed. Having checked and double checked the markup, it was time to go ahead and remove the material so that I’d have a table top. Part of this project has been trying new things and learning more woodworking techniques, and this was no different.

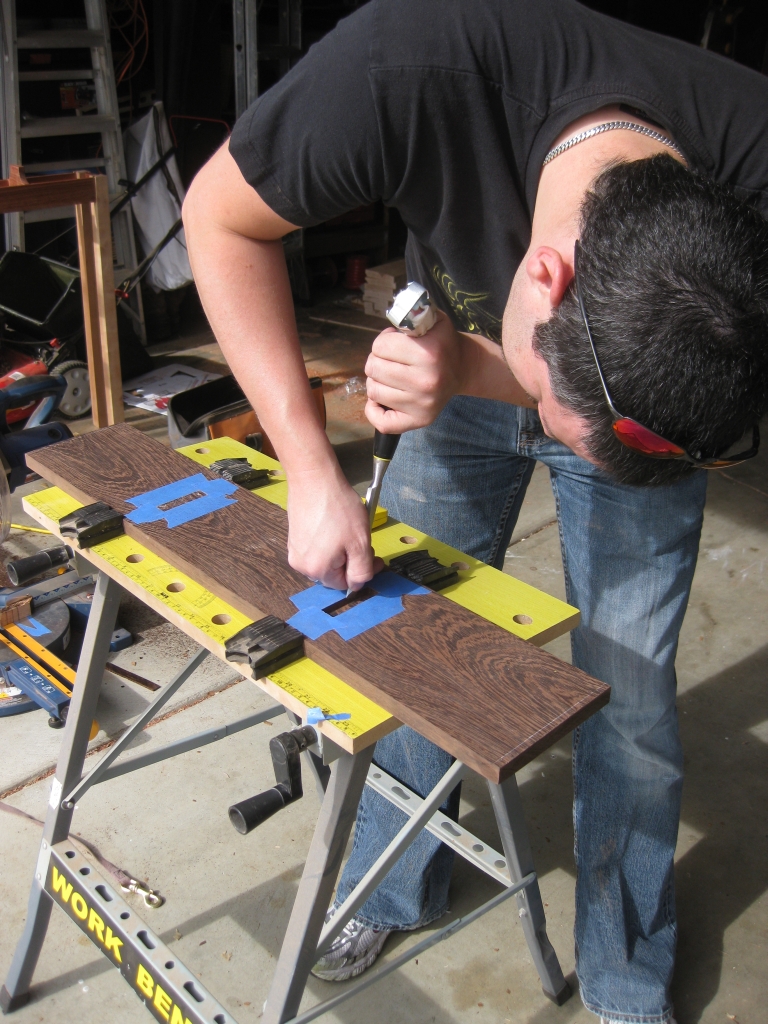
Sometimes hand tools really are the best tool for the job.

Sometimes hand tools really are the best tool for the job.

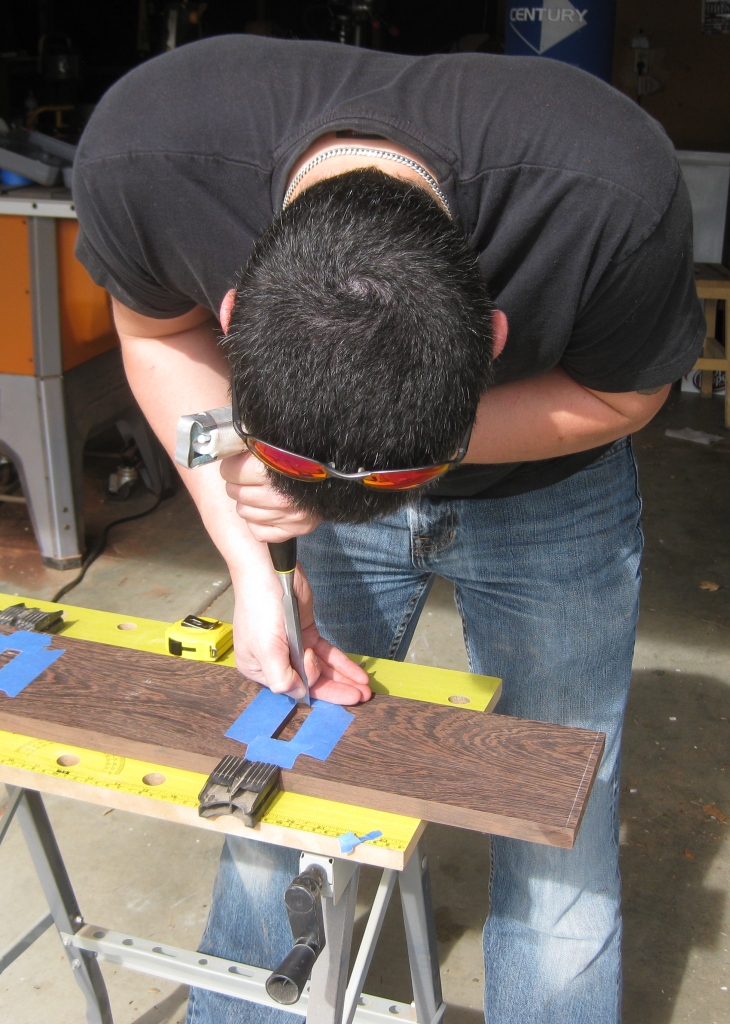
Yes, I still have the pins!

Yes, I still have the pins!


I decided to do this is a more traditional method, and use a chisel to remove the material. While it may not be the fastest way, it certainly was the safest, and by keeping my chisel sharp cutting through the wood really wasn’t difficult. Not only that, but it gave me a chance to work with some hand tools, and really get a feeling for some ‘serious’ woodworking. (And if it all went wrong, it was under the table where no-one would see it!) By going back to the frame frequently, I could check the fit, and ended up with a very tight fit. Tight enough in fact that I could put the top onto one of the floats, with the entire top hanging over the outside of the frame, with no glue, and it wouldn’t fall off.

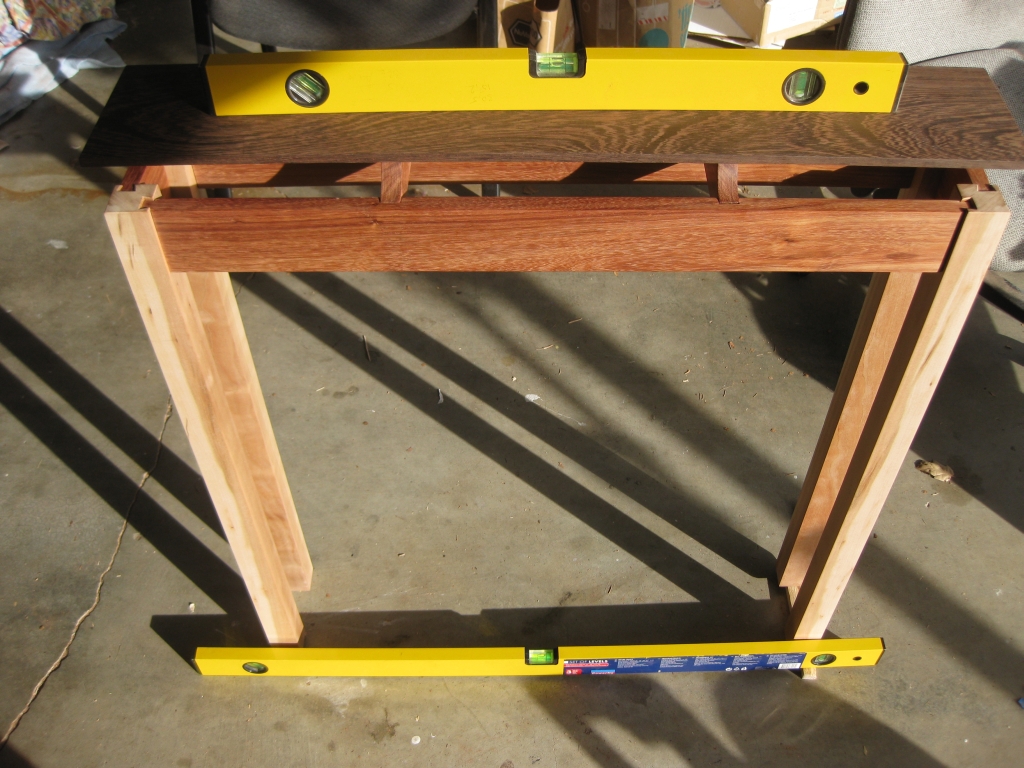
Checking for level

Checking for level

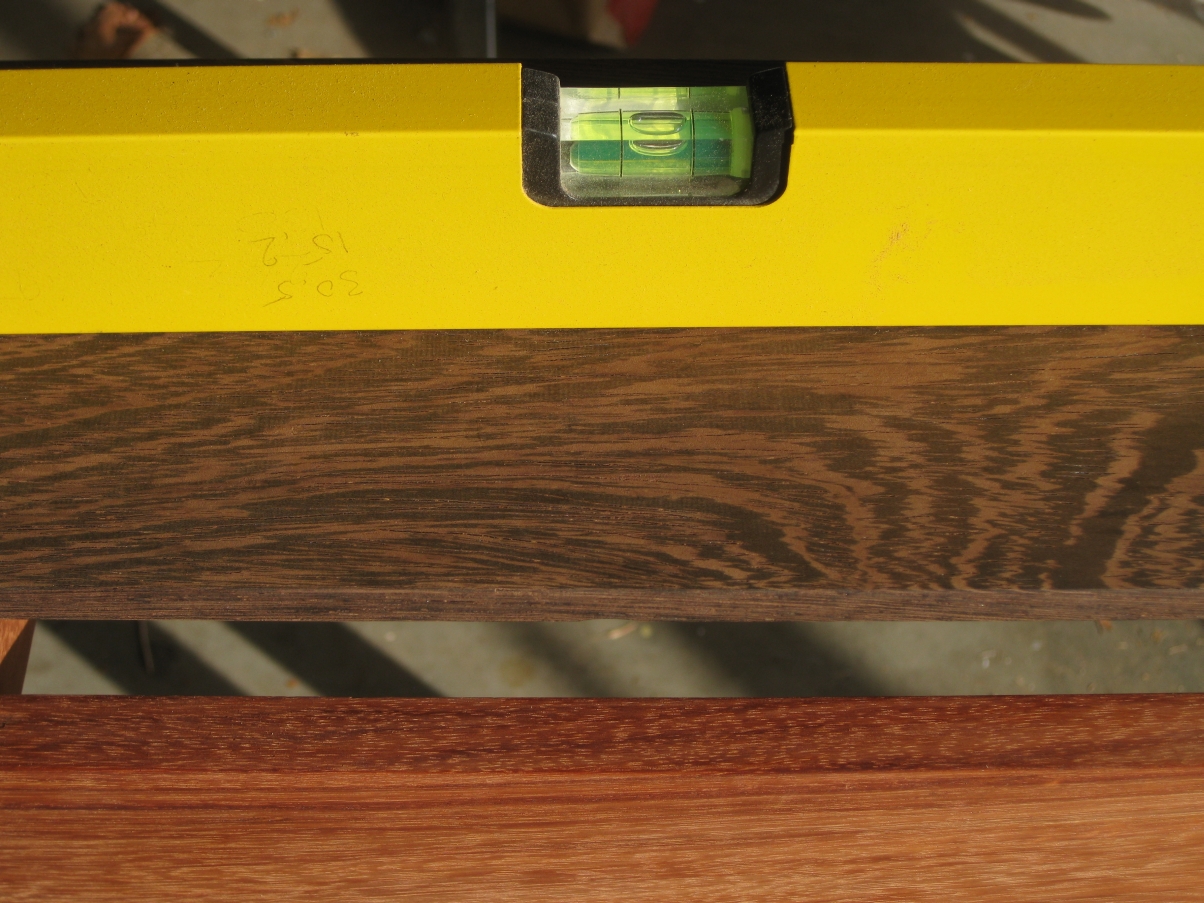
Spot on

Spot on


With the slots cut, I checked that the top was level. Unfortunately, my garage floor isn’t level, so I had to shim one side of the table legs to get it level first.

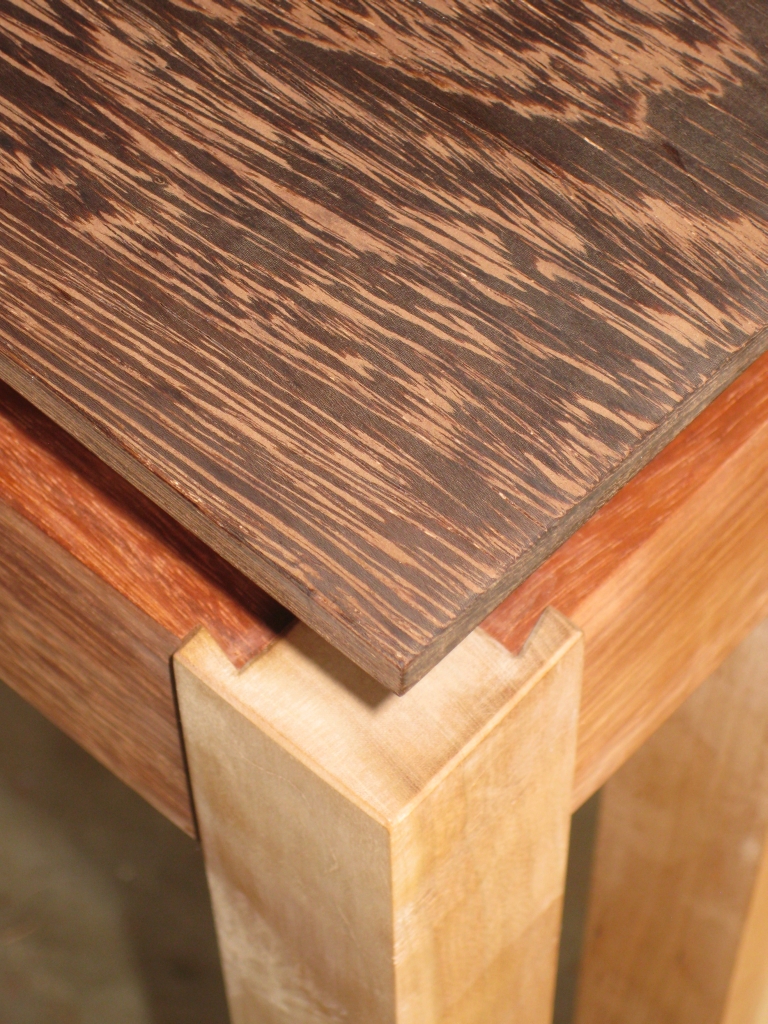
So there you have it, one table, built from a few boards to the finished product. The photos don’t show it, but with the wood polished to 600grit, there is a mirror shine to the faces, even without any finish on them, to the point that you can see your reflection in it. I’ll come back a little later and show you the table once it’s been lacquered, but until then I’ll leave you with a detail shot of the corner with the dovetails. I think it matches the original design drawing. I also added the bevel into the top and bottom of the legs to really finish the table. Clearly it’s the details that make the project.

Corner details

Corner details

I’d also like to say a huge thanks to my friend Callum who’s over from Scotland visiting me at the moment and helped throughout the whole project. I know that without his help much of the work would have been far more difficult.

Four Colour Map Puzzle

A short time before Christmas, Brian reviewed the Four Colour Map Puzzle made by Artifact Puzzles, and given that my other half enjoys her jigsaw puzzles, and I enjoy puzzles in general, I decided to buy a copy for her as a Christmas gift.

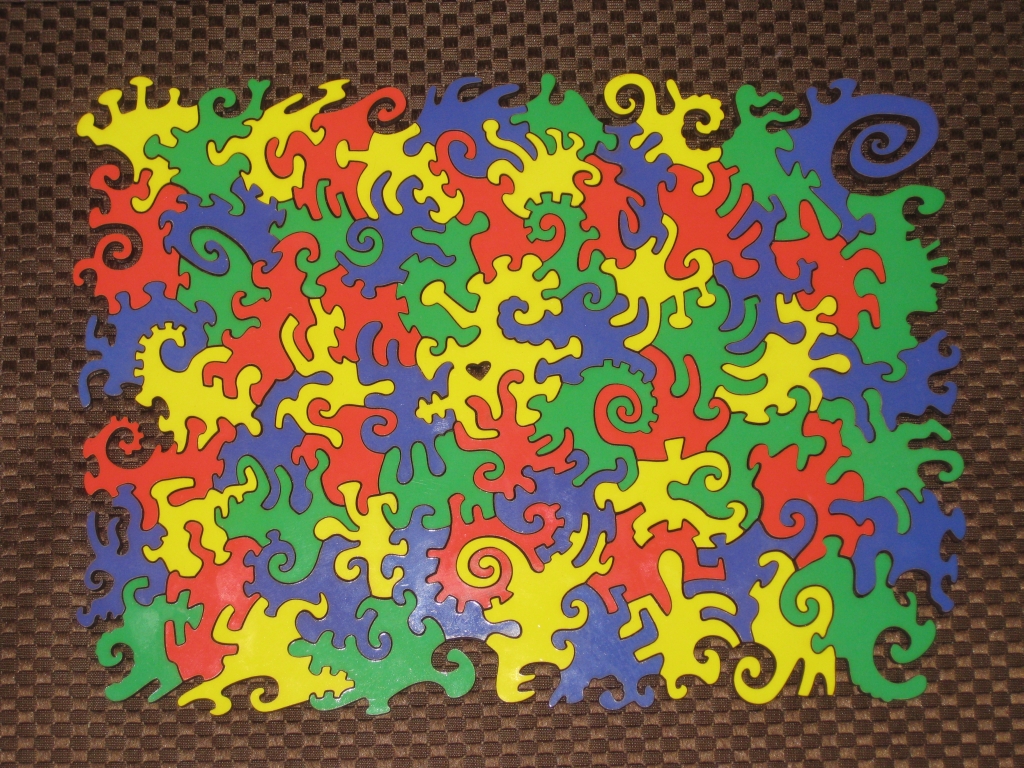
Four Colour Map Puzzle

Four Colour Map Puzzle

This 68 piece puzzle measures 6″ x 8″ and the pieces are laser cut from 1/4″ wood. The pieces are finished with a high gloss lacquer like finish in very bold colours so the puzzle looks great as a finished article. It comes shipped in a small box, with the pieces in a drawstring bag so overall it’s well presented, and there’s no bulky boxes to have to find space for if you decide to take it apart to store it.

When Jen opened the puzzle at Christmas, she was pretty happy, but we took a few days before we actually sat down to try to solve it. When we did, I think between us we spent around 20 minutes before we even found two pieces that would fit together! Now one of the reasons for that is that the shape of the pieces is based on some work by John Stokes III who is a master hand cutter. The pattern is specifically designed to make it difficult to see how pieces go together.

The task is made slightly easier by the fact that it is also representing the mathematical Four Colour theorem. Have a look at the wiki link for more information, but the short version is that no two pieces touching each other can have the same colour. As such you can narrow down the selection of pieces that will connect.

After getting a couple of pieces together, we found ourselves a little stuck, and ended up with several groups of two or three pieces together, but nothing that was making larger blocks. As we progressed, slowly things became easier until after around an hour we had two fairly large pieces that with a little shuffling around the table we found how they combined into one large piece.

I can say that we had a lot of fun putting this together, and the lack of any ‘final image’ actually adds to the fun of the puzzle. I think most people will agree that the finished puzzle as you can see above is really striking. I love the fact that there’s no straight lines in the puzzle giving a very organic look; even the edges maintain the swirls and curves that make this puzzle so unique.

One thing I will note about the puzzle is that the thickness of the pieces are not very uniform. There’s a fairly noticeable variance between pieces which doesn’t detract from the finished puzzle, but does make things a little more difficult when you’re putting the puzzle together.

I’ll admit that I’m not a big jigsaw fan, I tend to find them fairly dull, and if I want a nice piece of artwork, I’d rather just buy the art, however I did enjoy working on this puzzle as it’s more of a challenge than a standard jigsaw, and isn’t too large that I lost interest. Jen and I really enjoyed putting this together, and despite it being quite different to what Jen is used to, she certainly had fun. Given that the puzzle sells for $32 and uses the Amazon shop, you get a great puzzle, and the piece of mind of using Amazon’s shopping cart, which includes the free shipping. It’s a great puzzle, and I don’t think you can go wrong picking one of these up.