Tag Archives: IPP

Lean 2

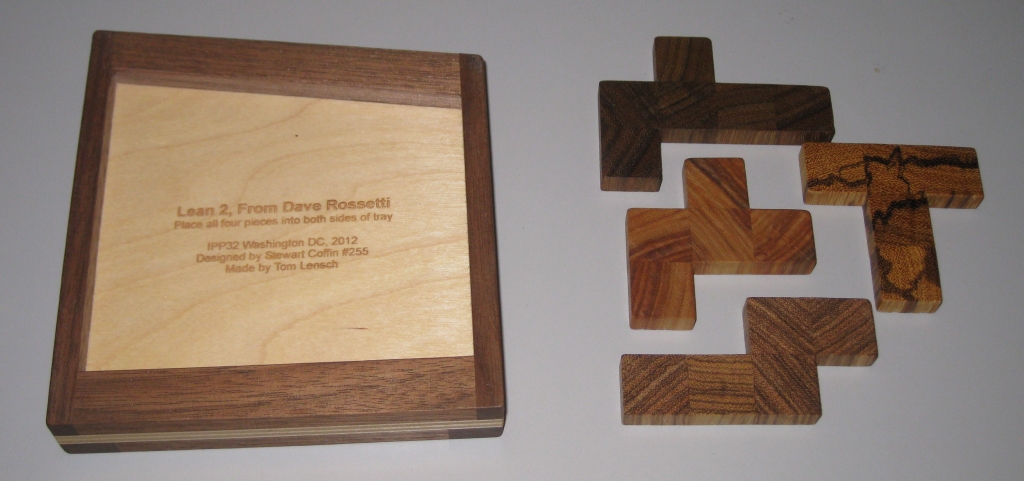
During IPP 32 last year, Dave Rossetti presented another Stewart Coffin tray packing puzzle as his exchange puzzle. Numbered #255 in Stewart’s numbering scheme, this was isn’t made by Stewart himself, but by the woodworking master Tom Lensch. Given that I have a number of puzzles made by Tom, and I thought I was getting better at these packing puzzles, it seemed like a good idea to pick up a copy of this one.

Lean 2 with the four pieces

Lean 2 with the four pieces

As you can see this is another simple four piece packing puzzle. The additional challenge here is that the tray is two sided, meaning twice the puzzling fun … or frustration. Tom has crafted this using four different woods for the pieces, Zebrawood, Marblewood, Canarywood and Bubinga (I’m guessing on the Bubinga) with a Walnut framed tray. Measuring in at 5.5″ x 5″ and nearly 1″ thick, it’s a good puzzle to work on, and not too big that it can’t be slipped into a bag and taken with you.

Given that I picked this up in August, you may ask why it’s taken so long to write about. Well as it happens, I solved the first side fairly quickly. It took me several hours over a month or so as I’d pick it up and fiddle, then put it back down. I was fairly happy with that and feeling quite confident so moved on to the second side, and promptly failed to make much progress.

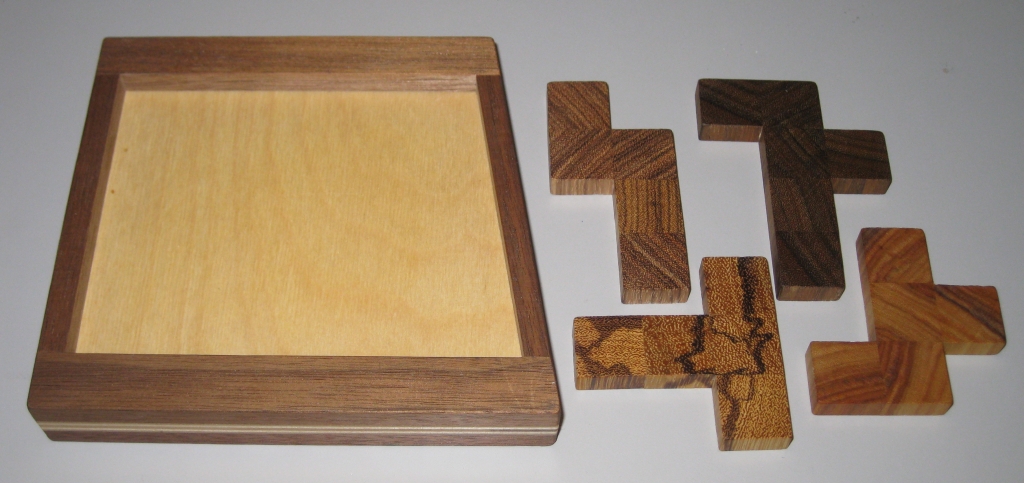
Lean 2's second side with the four pieces

Lean 2’s second side with the four pieces

I was a little disheartened when a good puzzling friend sent out an email asking for people to send him all the solutions they’d found for this puzzle. The suggestion was that there were a couple of false solutions that could be made. Well I got back to it and kept puzzling. After another couple of months, and several emails back and forth with my friend, I’d sent him 4 invalid solutions to the second side, but seemed to be no closer to the actual solution.

After another month of puzzling on this one I have to be honest and let you know I admitted defeat and asked for help. I dropped an email to fellow blogger Allard who had already solved and written about Lean 2 and asked for his help. I wasn’t looking for the solution, I’m not that much of a defeatist, but he kindly took pity on me and sent me a location for one of the pieces. I should note that I’d been sending Allard my ‘solutions’ and none of those I’d found worked on his copy of the puzzle, so he knew that I had given this one a fair shot.

With the hint in hand, I had the second side solved in about 2 minutes. Overall, this is a great puzzle, and kept me busy for many months. If you enjoy packing puzzles, then definitely pick this one up, it’s well worth the money and will keep you busy for quite some time.

Sandfield’s Banded Dovetails

Back in August last year at IPP, I had the pleasure of meeting Robert Sandfield and talking to him about his puzzles, as well as picking up a copy of his Banded Dovetails, and ReBanded Dovetails puzzles.

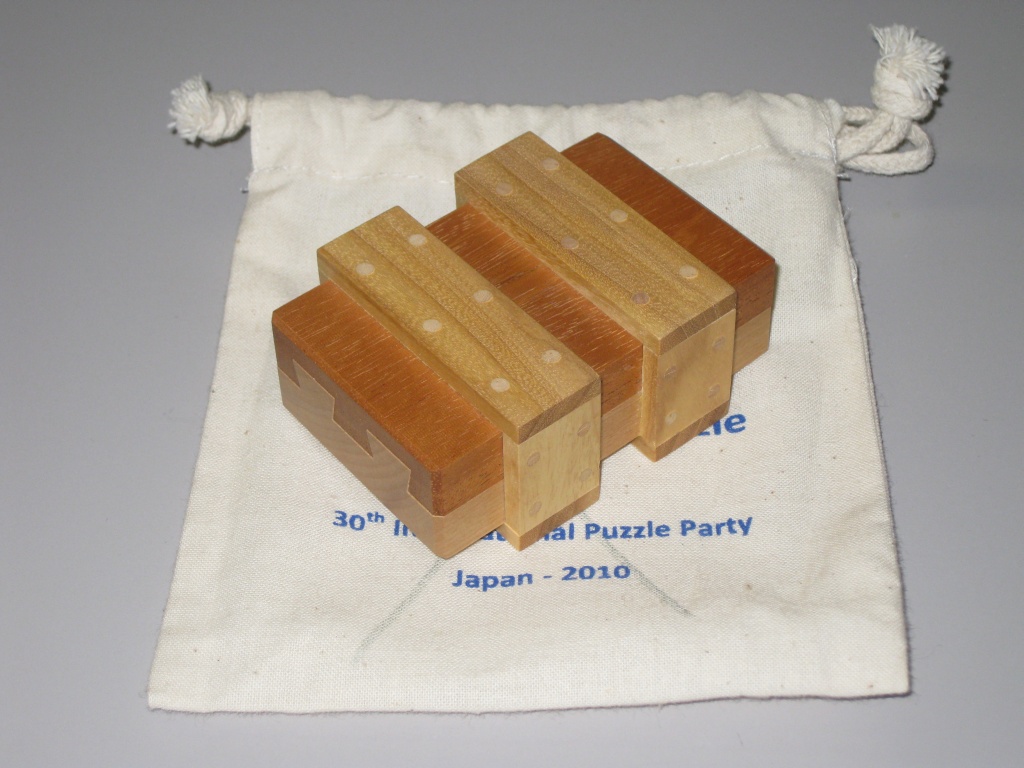
Sandfield's Banded Dovetails or is it the Locked Draw Puzzle?

Sandfield’s Banded Dovetails or is it the Locked Draw Puzzle?

First up is his Banded Dovetail puzzlebox. Designed by Perry McDaniel, and crafted by the very talented Kathleen Malcolmson. Crafted from Mahogany, Alder and Prima Vera, I think you’ll agree that this is a great looking puzzle box. As is the Sandfield brothers trademark, there’s dovetails in there, with what looks like two bands which have been pinned to the outside of the box, creating an impossible joint. Of course, it wouldn’t be much of a puzzle if it were impossible, but the impression is very convincing. The puzzle measures 3.2″ x 2.25″ x 1.5″ so its small however I think the size really adds to the charm of the puzzle.

The goal is simply to open the box, but when is it ever simple when someone hands you something telling you it’s simple? When you pick up the box you’ll quickly find that shaking it will reveal something rattling around in there. Whether that’s useful or not it’s hard to tell, but any clue with a locked box is useful right?

This one took me a good hour or more to figure out. All the things I had thought of were entirely unhelpful and didn’t get me any closer to solving the puzzle. Really the thanks for that go to Kathleen who’s made this so well that there’s no clues at all as to what’s going on. I think it’s made even more impressive when you realise how many moves are required to open the puzzle.

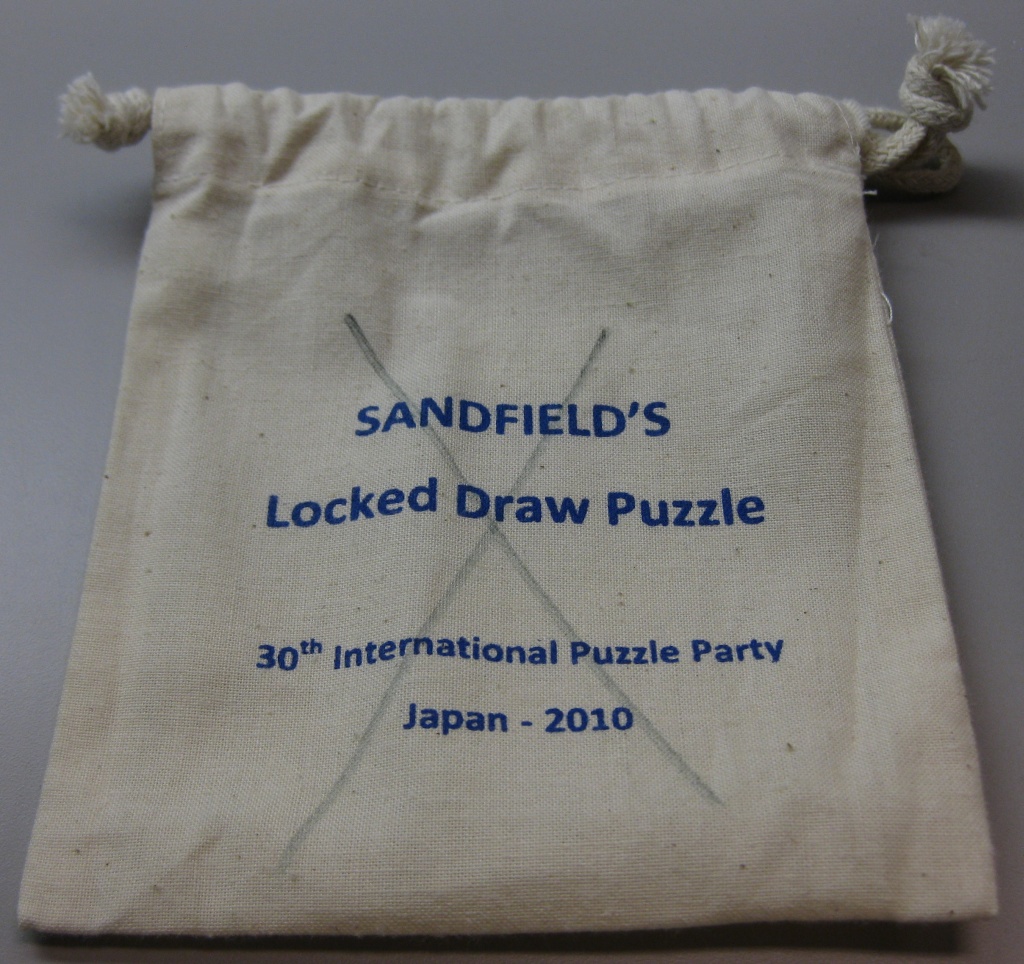
The bag for the Banded Dovetails

The bag for the Banded Dovetails

As well as being a great puzzle, there’s also a bit of a story behind the puzzle too. If you have a look at Brian’s review of the puzzle, you’ll see he lists it as IPP 28 (Prague) from 2008. Allard’s review lists it as IPP 29 (San Francisco) from 2009, and my bag has IPP 30 (Japan) 2010 listed and a different name for the puzzle! So what was really going on? Sadly I can’t tell you, but it was an IPP 29 exchange puzzle. Both Allard’s bag, and my info sheet which came with the puzzle list IPP 29, and have IPP 28 crossed out. Whatever happened, I’m glad that this one made it out as it was worth the wait.

This is a real gem, and if you can get your hands on one, don’t hesitate!


Sandfield's ReBanded Dovetails

Sandfield’s ReBanded Dovetails

During the Exchange, Robert’s puzzle this year was the ReBanded Dovetails. When he exchanged this puzzle box, he mentioned that he’d had Kathleen remake the boxes as apparently some people had managed to open the Banded Dovetail, so this was to resolve that issue. A fun little story, and a nice way to present the new puzzle.

As you can see, the appearance is very similar to the Banded Dovetails puzzle. Made by Kathleen, and designed by both Robert Sandfield and Kathleen Malcolmson you know that there’s going to be something clever going on. This one is made from Baltic Birch plywood, Walnut and Lacewood. Plywood isn’t the sort of material that you’d expect to find in a puzzle box, but given the striking striped appearance and great finish, I really like the look of it. The wonderful snake skin like appearance of the lacewood really sets the box off nicely. Measuring 3.2″ x 2.5″ x 1.5″ it’s slightly larger than the Banded Dovetails, but only slightly. Of course the outer appearance is where any similarity ends.

Again when you pick it up, there’s a rattling from inside, and if you’ve already solved the Banded Dovetails, you might think that this gives you a clue. Well, prepare to be disappointed! Requiring a few more moves than the previous puzzle this one is every but as well crafted. I managed to open this one far faster than the first, taking less than 5 minutes, but I enjoyed it every bit as much.

This is a clever and well made box, with a couple of nice tricks up its sleeve and the mechanism is very well hidden. Hat’s off to Kathleen again there.

Both of these are great puzzles, and I’d say don’t hesitate to add them to your collection if you get a chance.

My Second IPP in 2012

We’ve made it into 2013, and I find myself wondering where the year went. Seems like I achieved a lot when I look back on it, and even though I didn’t write about as many puzzles as I may have wanted to it seems like I got though a fair few. My collection continued to grow, thanks to some great designers and craftsmen out there, and I was invited to my first International Puzzle Party.

I met many of the people I’ve spoken to over the internet and made many new friends while I was there. One of those was Dor Tietz, who I was introduced to on the first night when a group of us went out for dinner. As we talked, I mentioned that I’d been to Israel a few times and given my day job, I’d probably be back again. He told me to let him know if I was going to be in Israel at any point as he’d organise a get together. So when I was traveling in October, I sent Dor an email, and he arranged my Second IPP for 2012. The Israel Puzzle Party! Before I leave 2012 behind I really need to write about this IPP as it was a very special meeting for me, and I had a lot of fun. It would be a shame not to write about it.


Dor very kindly picked me up from the Office at the end of my work day, and we drove the twenty minutes back to his house. While on the way Dor’s phone rings and there’s a short conversation partly in Hebrew and partly in English, as Dor confirms that we’re on our way.

Getting off the phone, Dor tells me that the call was from Dan Feldman who was on his way. Dor had arranged for a small, select group of local puzzlers to come along while I was ‘in town’, and had hand picked people to join us. Quite an honor, and as Dor pointed out, made sure that it wouldn’t be overwhelming for me.
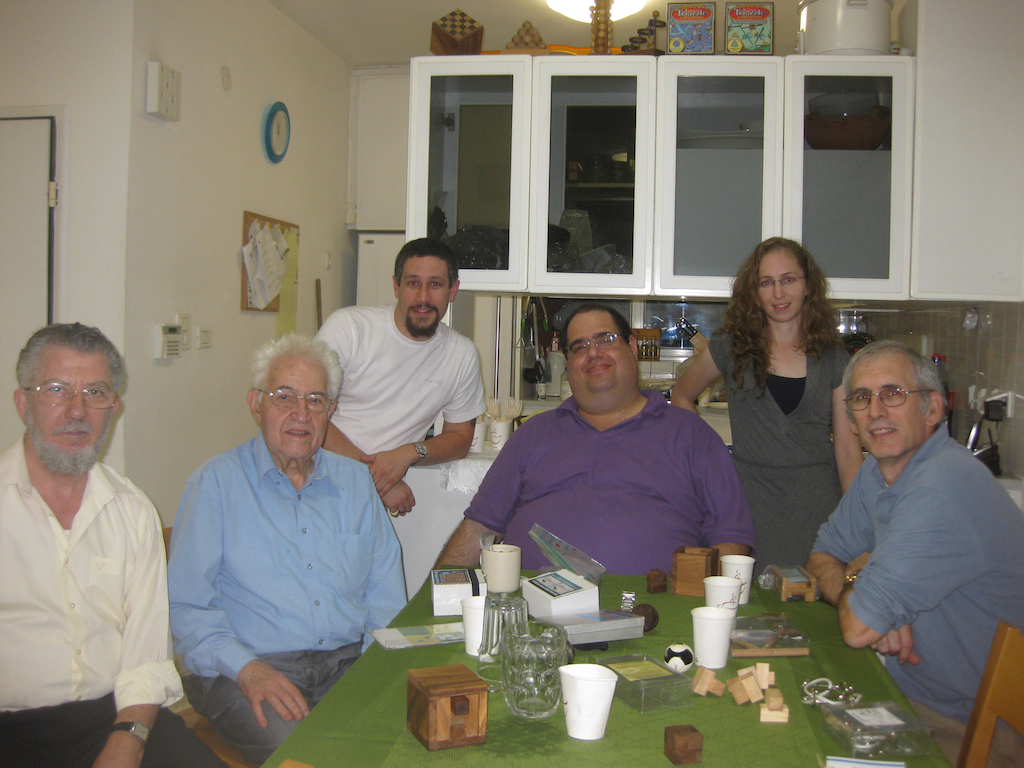
Dan Feldman, Abraham Jacob, Me, Dor Tietz, Yael Meron, David Goodman

Dan Feldman, Abraham Jacob, Me, Dor Tietz, Yael Meron, David Goodman

The small group included Dor, Yael Meron, Dan Feldman, David Goodman, and Abraham Jacob. Dor and I arrived a little ahead of the rest of the group, so I was given the tour of Dor’s collection. Sadly I didn’t take photos, but it’s fair to say he has a great collection. Various Hanayama’s and Puzzle boxes are on shelves in the living room, and there’s a dedicated puzzle room with one wall filled with bookcases of puzzle books and several cabinets with drawers filled with puzzles, all organised by type.

I didn’t have much time to rummage, as the rest of the guests started arriving, so I was introduced to the rest of the Israel team. Having met Yael on the first night at IPP, it was good to see her again and be able to catch up. Not to mention that another familiar face always makes things easier. Although I didn’t realise it initially, I’d also met Abraham before as well.

When I was helping out in the Puzzle Exchange at IPP, I had spoken with Abraham as Diniar and I exchanged with him. His wire puzzle ‘Encircling the “X”‘ looked very interesting, and his explanation of how it was made really intrigued me, however I didn’t manage to pick up a copy at IPP, and given that I had no money with me still don’t have a copy … I’ll remedy that the next time we meet!

David Goodman is a puzzle collector and designer who I’d not met before. He designs some great ‘simple’ puzzles. You know the sort that you look at and wonder where the challenge could be, and then spend weeks trying to figure out. I’ll get back to that though!

Finally we have Dan Feldman, the designer of the DanLock. Having seen my review of the Danlock, Dor thought it would be good for me to meet Dan, and be able to chat with him. As it turns out Dan reads my blog, and had read my review, so it turned out that I wasn’t the only one who had questions!

Given that I didn’t know whether I’d be able to meet up with Dor given my work schedules, I didn’t bring any of my work with me except a copy of Stewart Coffin’s Cube-16 that I’d made a small batch of thanks to a recommendation from John Devost. I gave that as a host gift to Dor. Everyone else had also brought puzzles with them so there was plenty to talk about and play with.

As we sat around Dor’s table and talked people delved into bags and boxes they’d brought with them, and started handing me puzzles to play with as we talked. It seemed that my ability to solve (or not solve) a puzzle just let to more and more challenging puzzles being presented. And by that you should read simpler puzzles being presented. Seems that not only twisty puzzles can stump me, but those with just a couple of pieces too.
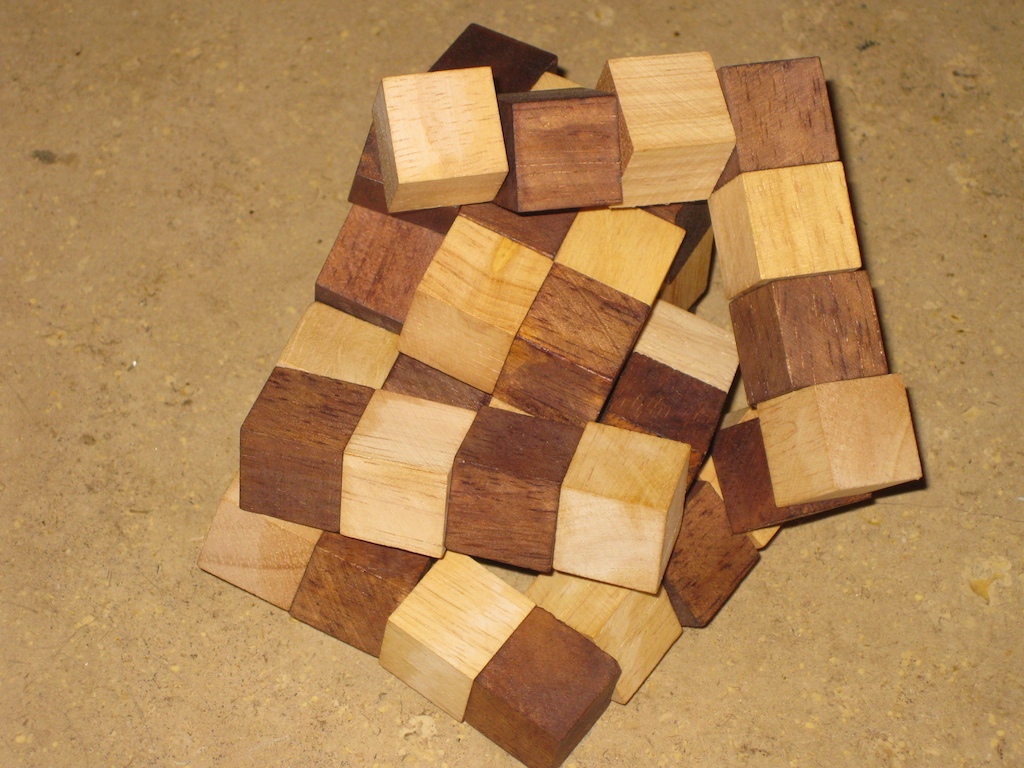
Double Loop, unsolved
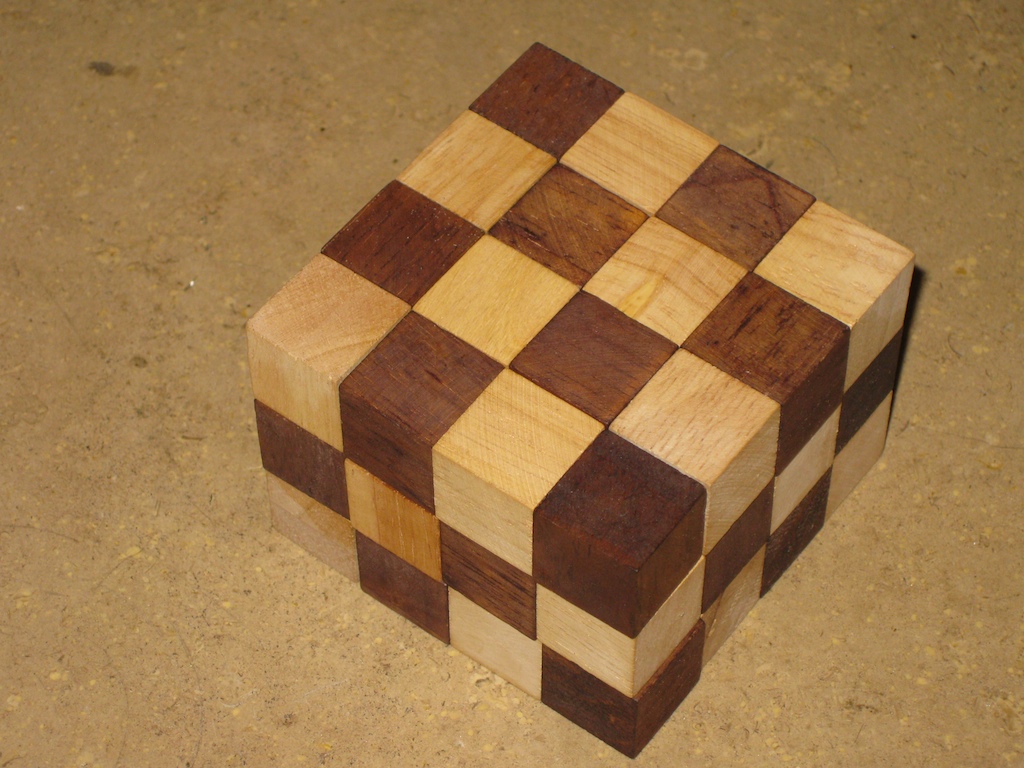
Double Loop, unsolved

Double Loop Solved

Double Loop Solved

Dor asked me whether I’d managed to get a copy of his IPP31 exchange puzzle “Double Loop” which I hadn’t. He promptly unboxed a copy, and made sure it was in the unsolved state by scrambling it for me. His theory is that if you get it solved you’ll probably never play with it, so this means that I would at least be able to enjoy playing with it once. The puzzle is an extension of the well known “Snake Cube”, but as the name suggests, rather than just one string of linked cubes, the Double Loop has two interlinked loops, making solving a lot more challenging and adding a whole other level to the puzzle. As you can see Dor, I did manage to solve it, and had fun playing!
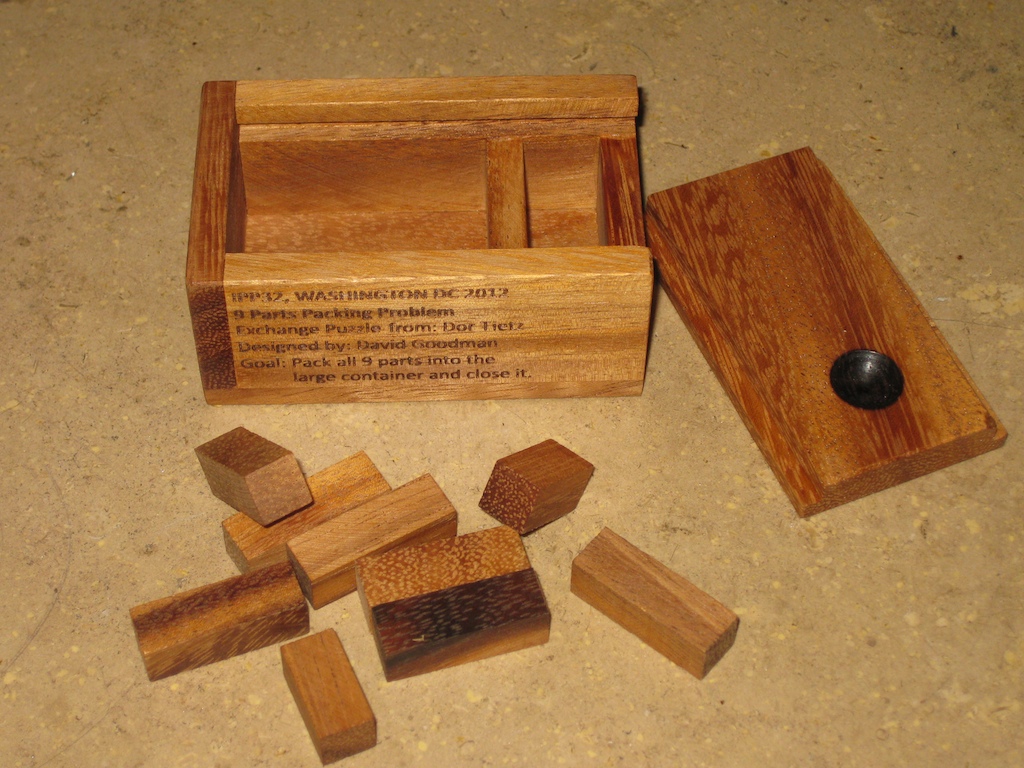
9 Parts

9 Parts

He also gave me a copy of his IPP32 Exchange the “9 parts packing problem” as well. This one is designed by David, so it was great to be able to meet the designer. The challenge here is simple. Just pack all nine parts into the large container, and shut the lid. What could be difficult about that? Well it’s another challenging little packing puzzle, that kept me busy for a few hours. I’m getting a lot better with packing puzzles, but I’m still not quick with them!
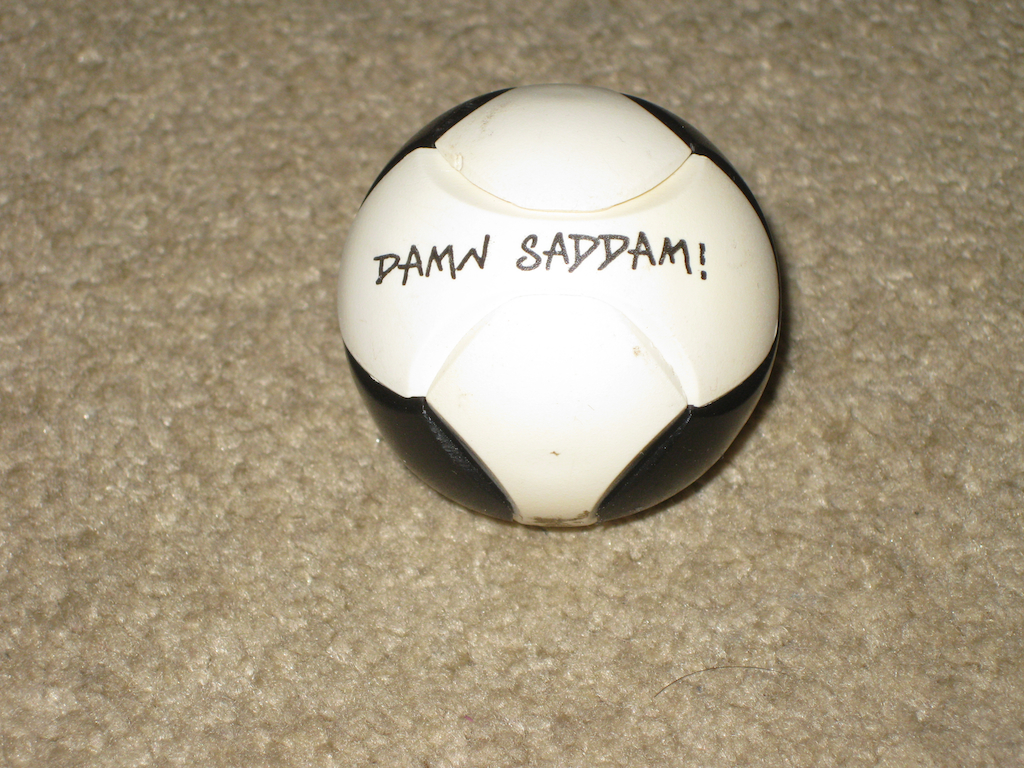
Damn Saddam!
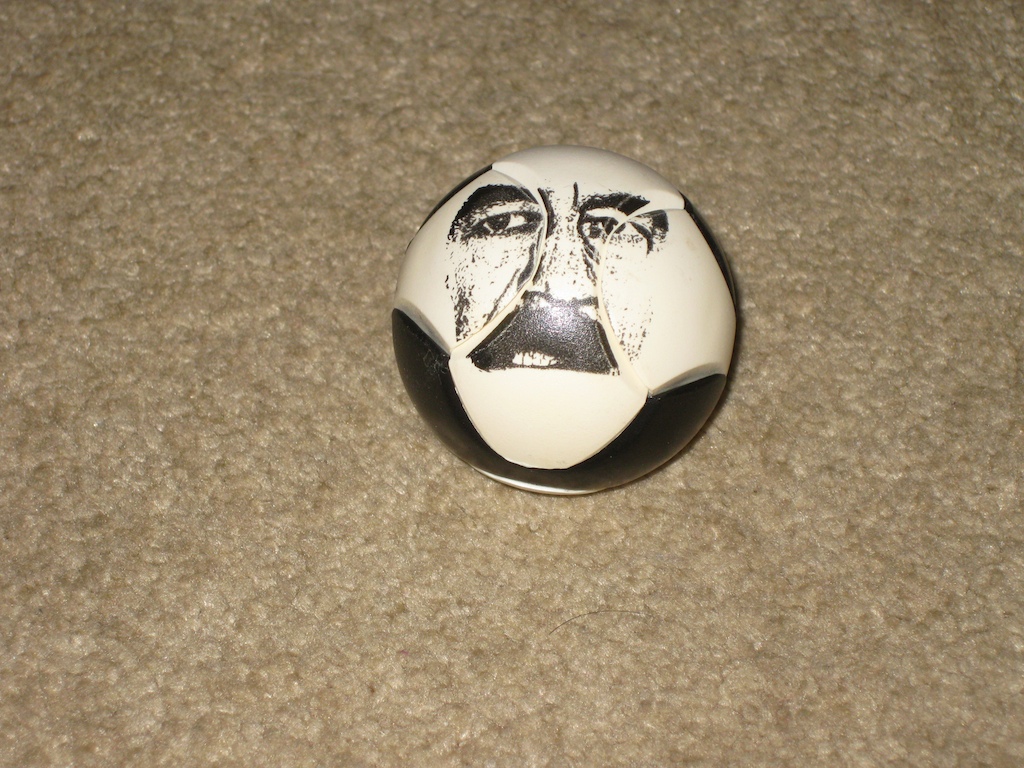
Damn Saddam!

Damn Saddam's face

Damn Saddam’s face

Shortly after arriving, David went into one of the boxes he had with him and puzzled out a copy of “Damn Sadam”. This six piece puzzle is ‘taken apart’ by throwing it on the floor. A fair bit of force is required, and I wasn’t sure whether he was joking when he told me to throw it, so I handed it back to him and watched as he took three attempts throwing it harder each time before the pieces flew apart. Of course when they did, they were handed back to me to put back together. Fortunately I had seen a similar puzzle before and was able to put it back together pretty quickly. This ended up being a gift from David, so went into the pile of puzzles I was accumulating to take home with me.
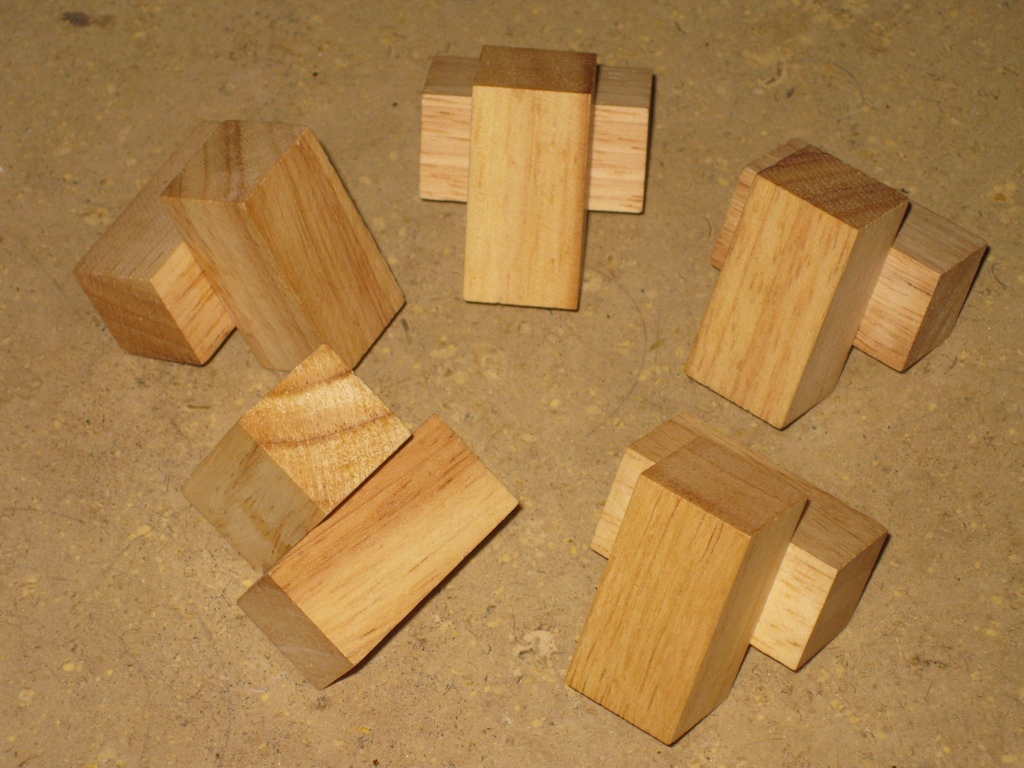
Triangular Pyramid pieces

Triangular Pyramid pieces

David then handed me a copy of “Triangular Pyramid” which was a previous exchange from David at IPP. It turns out that when David gave the puzzle to Dan, he found something of a useless machine when it was in its solved state, so that became a second challenge for the puzzle. Once you’ve combined the puzzle into its pyramid shape, you can move pieces in and out in a piston like motion which will continue indefinitely, making for a great distraction. I wasn’t able to solve it while I was sitting at the table, and although David offered to show me the solution I declined as I prefer to be able to work these things out myself. Besides with only 5 pieces it seemed so simple! David gave me the copy I’d been playing with so that I could finish solving it. I have to say it’s a great puzzle, for such simple pieces, and I highly recommend it. If you’re thinking about making your own puzzles, this would be a good one to try given it’s simplicity, and the challenging solution.
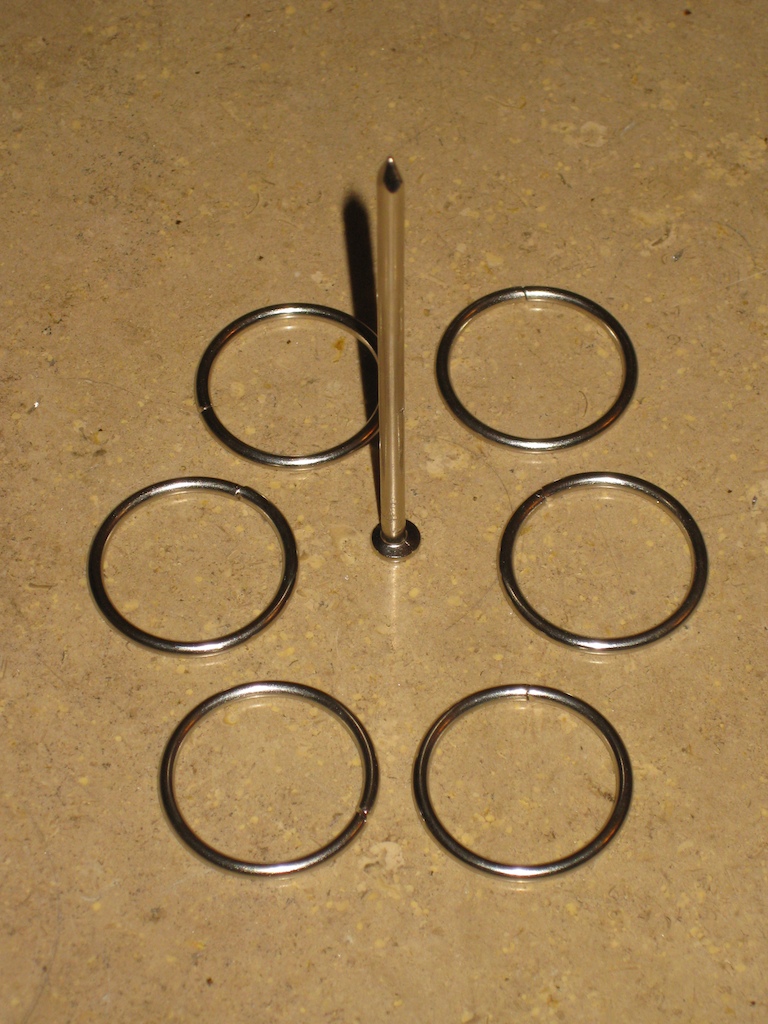
Ring a Nail

Ring a Nail

Another simple yet challenging puzzle David gave me was his “Ring a Nail” puzzle. Similar to the Nine Nails puzzle, this takes a slightly different approach, with a similar goal. The idea being to balance the five rings on the point of the nail. Yet another puzzle which seems so simple but really makes you think.

While sitting talking Dan asks me what I thought about the Danlock, given that he had read my review. It was very interesting talking to him about the puzzle and how it’s made. Dan explained a number of the possible ideas he had for the lock, including another mechanism which would prevent the broken key from turning in the lock if the lock was not oriented in a certain direction. Seems like the puzzle could have been a lot more devious, given all the ideas floating around in Dan’s head. His view is that the puzzle should be challenging, but not so difficult that you can’t see a way to proceed, or that you need to do something where there would be no reason for that action, such as hitting or tapping the puzzle. Another idea such as requiring to tap the puzzle to release an internal lock as an example, which Dan felt didn’t belong in the puzzle.

For anyone wondering why Dan doesn’t make more of the lock more frequently, given its success and high demand, the reason is quite simple. Dan doesn’t have his own workshop, so has to sub-contract various parts of the process. Getting someone to take on the small numbers he creates is a real problem, and often he finds that someone who he used in the past is no longer in business to help again.

It was fantastic to meet Dan in person, and to be able to spend time talking to him and getting to understand the designs he’s come up with was a fantastic opportunity.
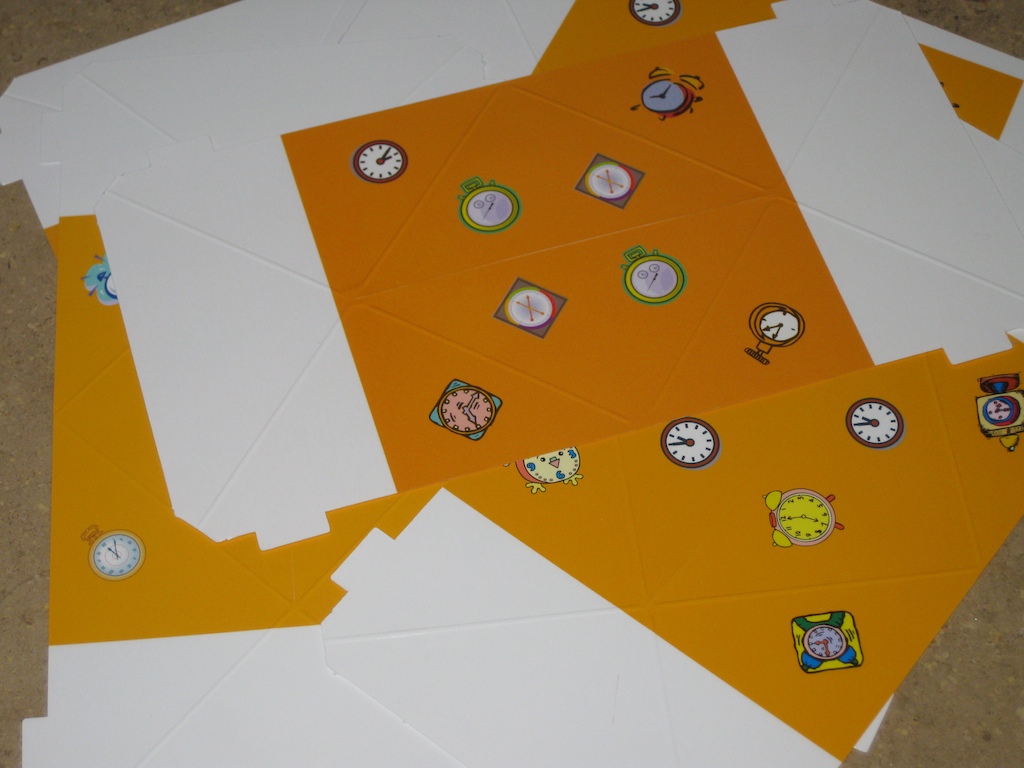
J-Cubes Sheets
J-Cubes Sheets

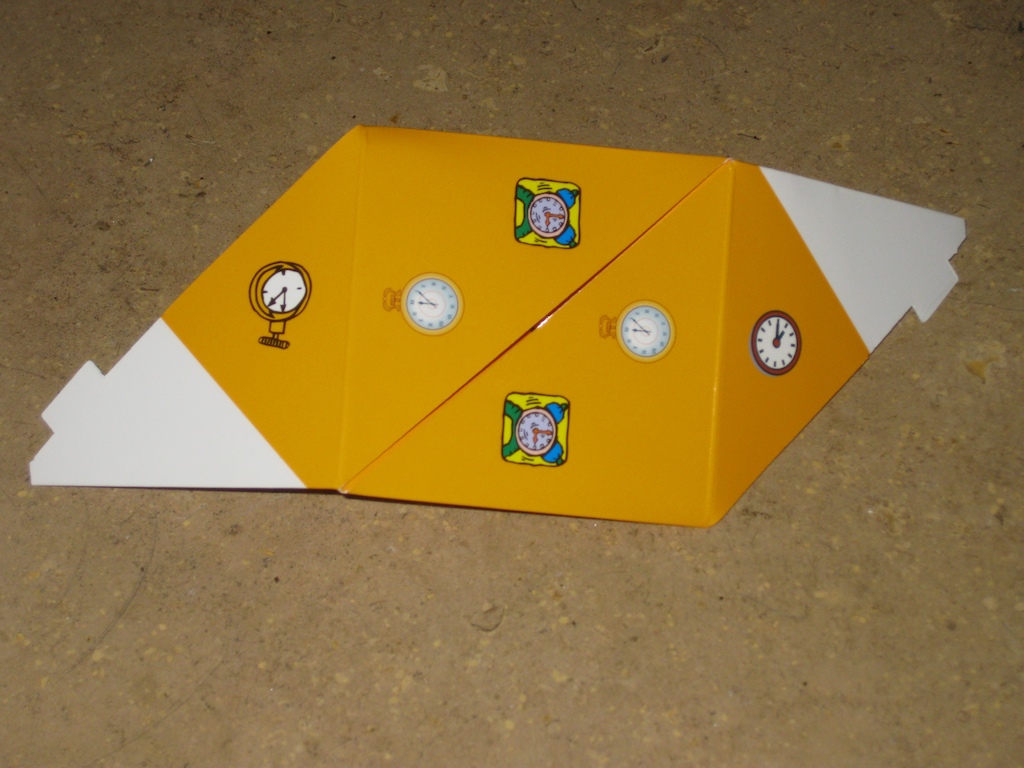
Folding the J-Cubes

Folding the J-Cubes

Not to be outdone, Abraham had a few of his puzzles with him, including a very interesting paper puzzle from a previous IPP Exchange called J-Cubes. The puzzle consists of a number of laminated sheets with a number of images on them. The goal being to fold these into cubes, made from several of the pieces joined together, and meet a couple of challenges based on the images on the faces of the cubes. This is made harder by their being a number of different ways to fold the sheets, and joining them into cubes isn’t trivial either. Now given that I have found a love for impossible folded objects, this puzzle is right up my street. For something which seems so simple, it may have been passed up by many puzzlers. I have to say though, having played with them myself, if you have a set of these, do yourself a favor and go find them and play with them. They offer a good amount of puzzling, and will certainly make you think. the first challenge to get all the faces with the same image is not too tough, but the second challenge to make sure all the images are in the same orientation and you only use 6 out of the 7 sheets, finding the ‘odd one out’.
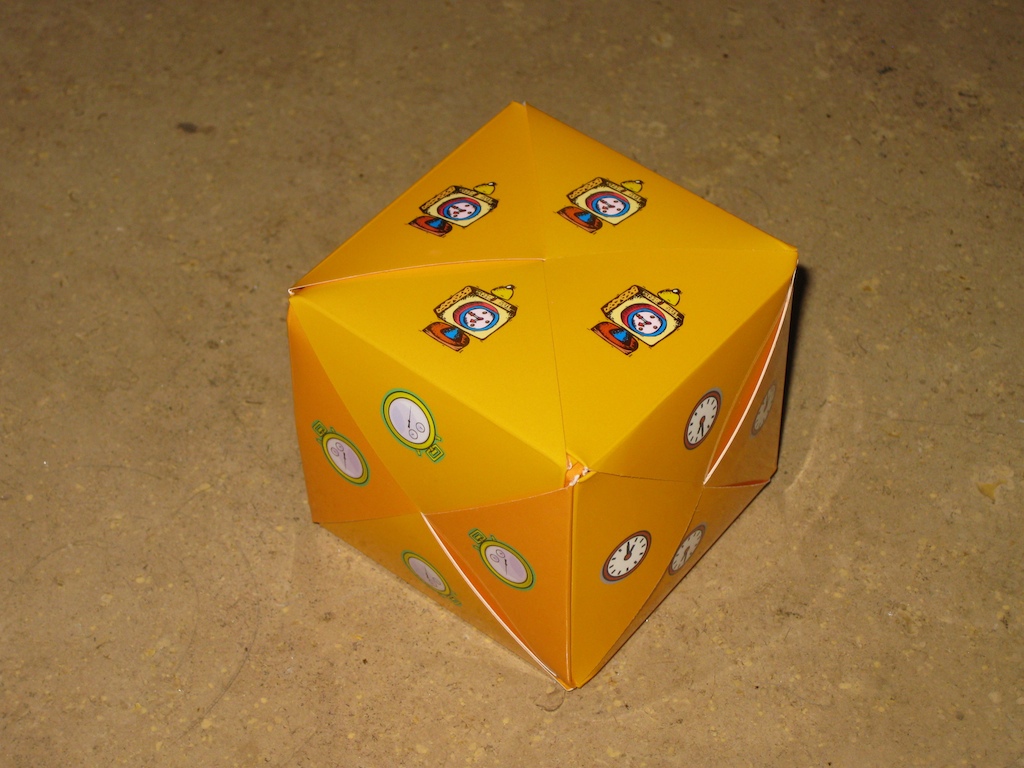
J-Cubes, cubed

J-Cubes, cubed

Abraham asked me to play with the J-Cubes and let him know what I thought of them as he felt many puzzlers may have overlooked them given that they are ‘just a paper puzzle’. Well I can happily say I have played with them, and I think they’re well worth the hours I spent fiddling with them. They’re well thought out and certainly have a lot of puzzling in them. If you’d like a set, let me know and I’ll pass on Abraham’s details as I’m sure he’d be delighted to send you some.
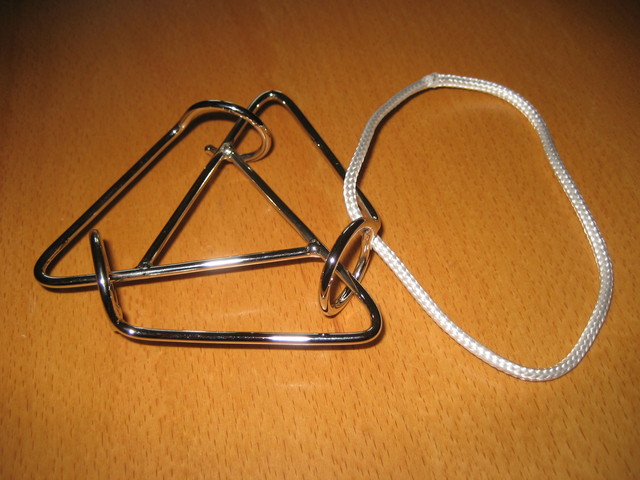
Trio F&L
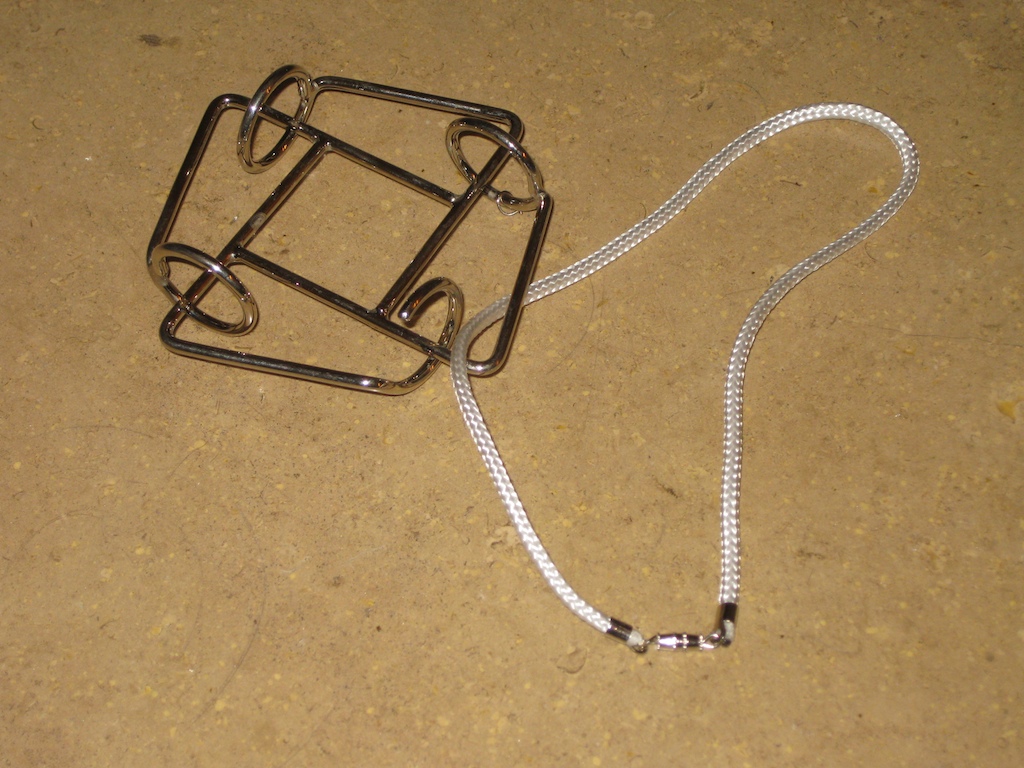
Trio F&L

Quartet F&L

Quartet F&L

As well as the J-Cubes, he had a number of his wire and string puzzles with him. Initially I was handed a copy of Trio F+L Puzzle (left above) which was fairly straight forward and I solved in under a minute. With my confidence restored, he handed me Quartet F&L Puzzle (above right) which is much more challenging, and I manged to do little more than tie it in a knot. That said, it’s not a problem with one of Abraham’s puzzles as the string can be split and rejoined thanks to his thoughtfully placed clasp.

In a bizarre coincidence, as we were leaving Abraham commented that it had been his birthday two days prior. That’s also my birthday. Turns out it really is a small world. Ok, so Abraham has a few years experience on me but it was fun to find that we shared out birthdays.
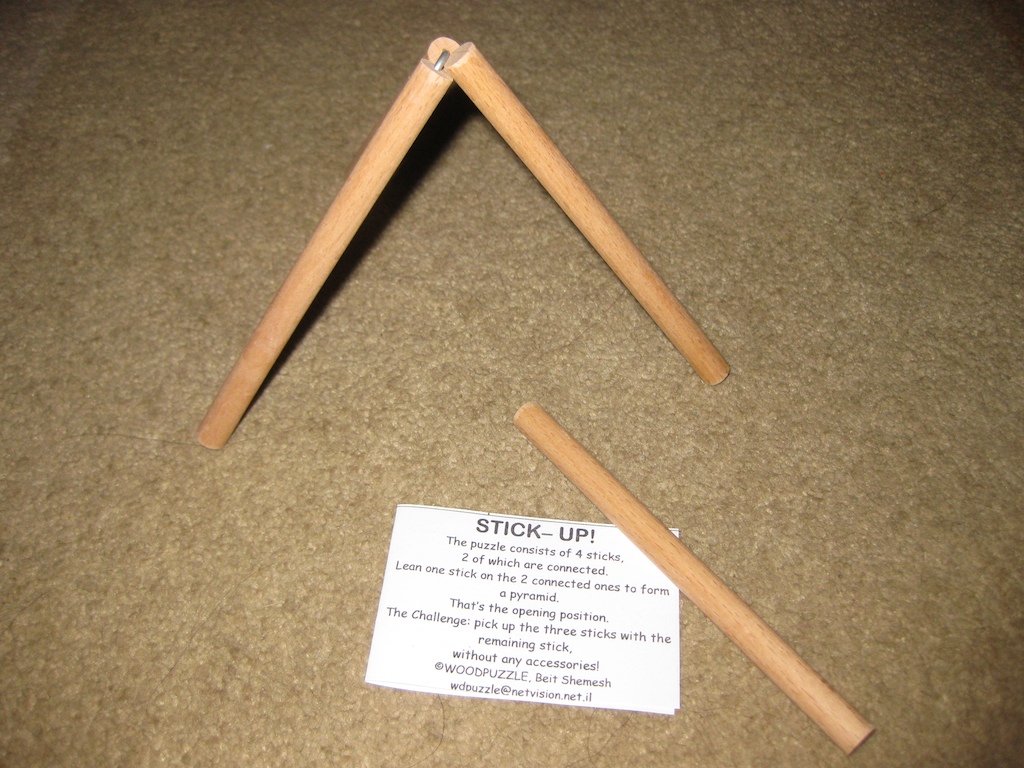
Stick Up!

Stick Up!

One of the puzzles I was handed by Dor on the night was this incredibly simple looking ‘pub game’ puzzle. The idea being to use one of the long sticks to create a tripod with the v shaped stick, and then use the second long stick to pick up the tripod from the table. Sounds simple right? Well I spent 40 minutes just looking at the puzzle. This did amuse Dor as I didn’t attempt to pick them up since I felt it should be possible to solve the puzzle by thinking about it, which is exactly what I did. Everyone decided that I would solve it in 5 minutes when I didn’t have four sets of eyes watching me. I wasn’t that quick I’m sorry to say, but I did solve it since Dor told me to take that away too so I could solve it. It may have taken me 2 months thinking about how to solve it, but I did solve it on my first attempt. Have a think and see if you can figure it out … or make yourself a copy and try it. Let me know how you get on as I’d love to know.
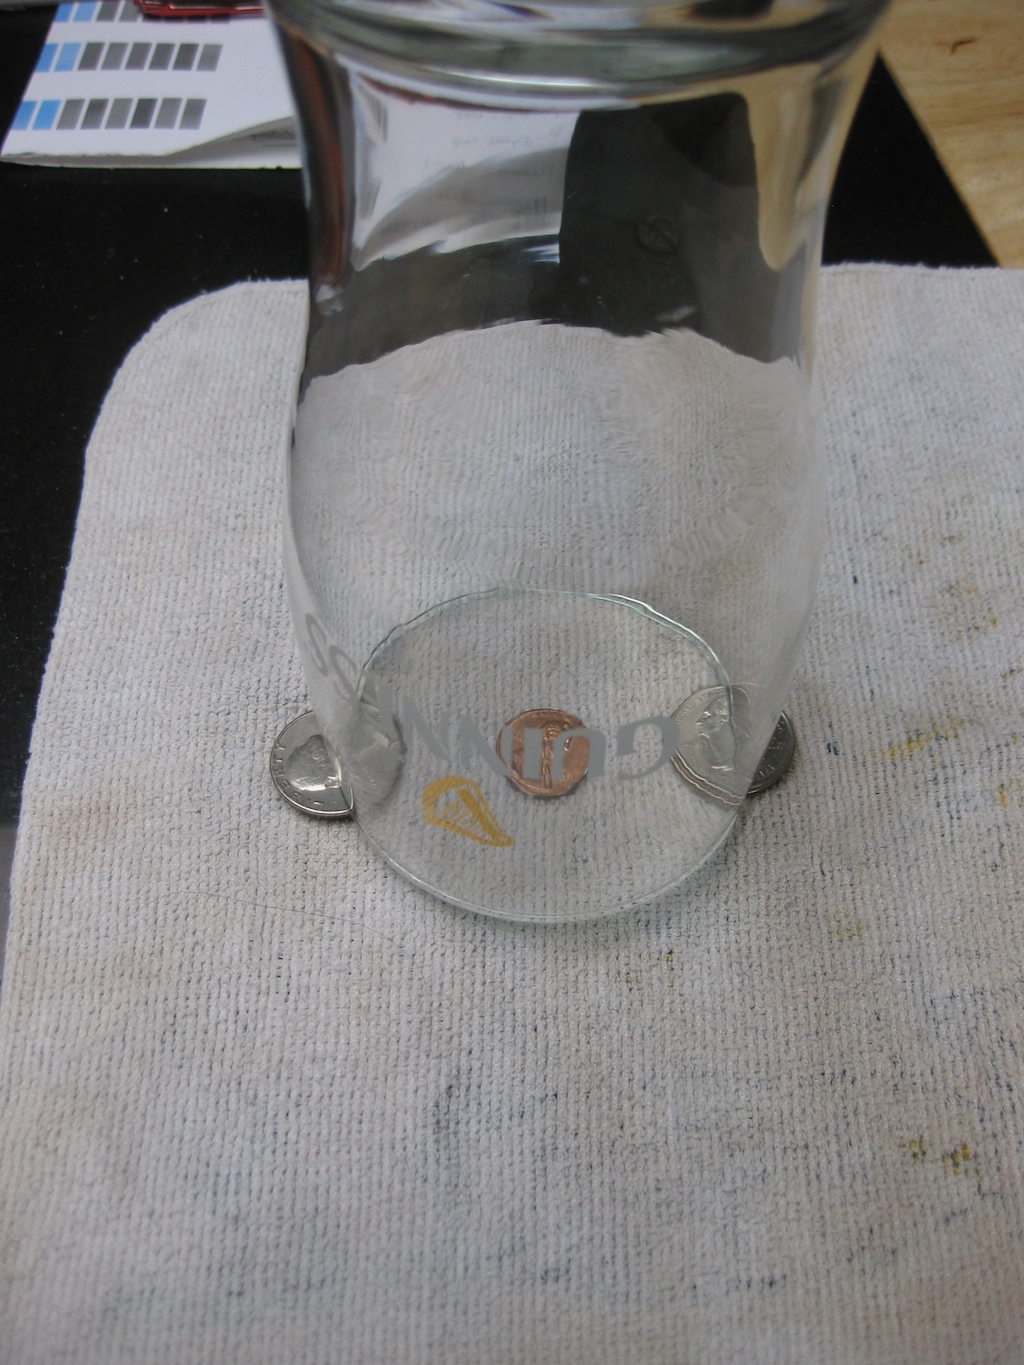
Trapped Penny

Trapped Penny

Coin Balance

Coin Balance

Strange as it was this reminded me of a couple of ‘pub puzzles’ which I’d not shown anyone in over 20 years. I promptly set them up to give David and Abraham a shot at solving them, which turned out to be a great idea. I never really thought about it but these puzzles are so simple, but may have been lost to many for a long time. Seems like I need to try to bring them back to people if I can.

The first is the coin under the glass (left). The idea is to get the coin out from under the glass without touching the glass or the coins it is resting on. (You’ll need to set this up on a tablecloth). Do you know how to do it?

The second is to balance the coin on the brim of the glass, and get the coin over the glass (right). You can’t touch the glass or the coin. The coin should not end up on the side of the glass nearest you, or inside the glass. (Try doing this in the pub with a half full pint!)

All in all I had a great night with the Israel puzzlers, and have to say a huge Thank You to Dor for arranging everything. There was a lot more that we talked about over the night, and a good few more puzzles played with too, but I think I’ve covered enough for this trip. I’ll be sure to let Dor know the next time I’m traveling.
Blind Burr

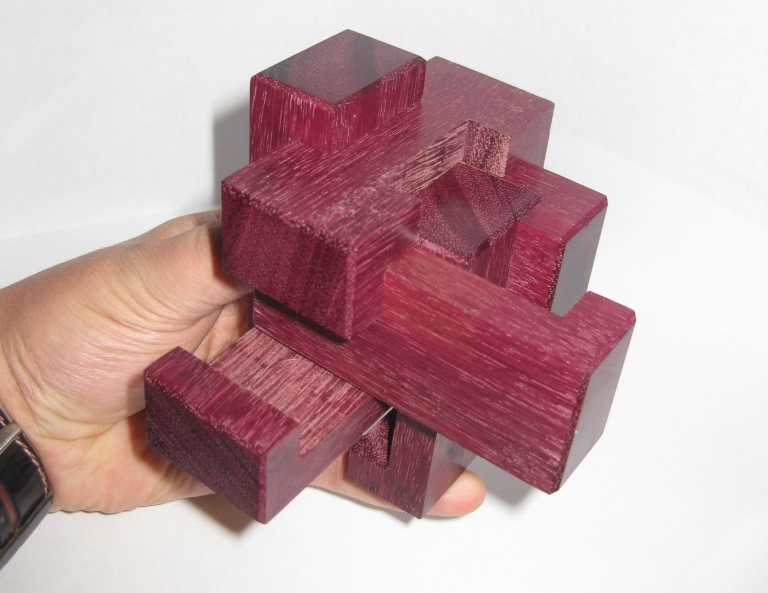
One of the Top 10 Vote Getters at this years IPP design competition was the Blind Burr, designed by Gregory Benedetti and made by Maurice Vigouroux. I had the great pleasure of being able to talk to Gregory about his puzzle designs and certainly enjoyed playing with his entry in the puzzle competition, so when I had the chance to pick one up on the day of the puzzle party, I didn’t hesitate.

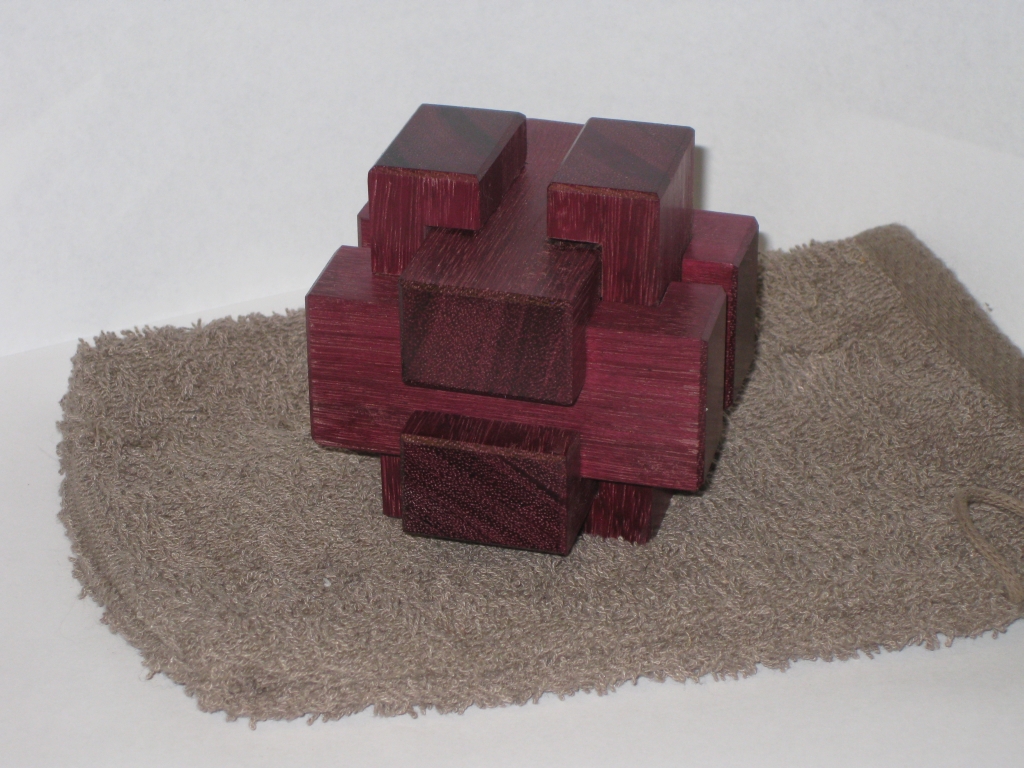
Blind Burr by Gregory Benedetti

Blind Burr by Gregory Benedetti

Made from some beautiful slabs of purple heart, the puzzle measures 3.25″ x 3.25″ x 3.25″. Each piece is cut from a solid chunk of purple heart, measuring a full inch thick, so the pieces are incredibly sturdy and finished to the high standard that is common for work from Maurice Vigouroux. Each of the pieces is polished to a high shine, and the ends of the pieces have been chamfered to really finish the puzzle nicely.

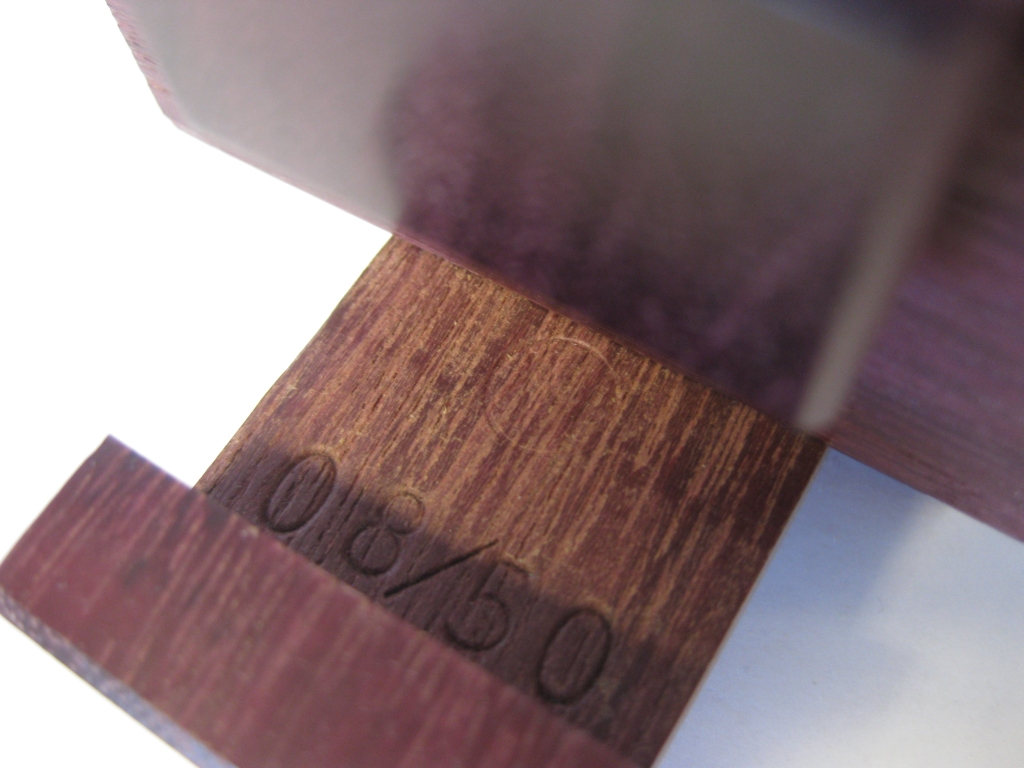
Limited edition number and Maurice's stamp

Limited edition number and Maurice’s stamp

As you can see each puzzle was numbered in a limited edition of 50, and the number is stamped into the wood, along with Maurice’s signature. There was a very interesting discussion on one of the Puzzle Forum’s about what makes a puzzle Limited Edition, which showed that there are many definitions to many different people. It turns out that in this case it’s limited because Maurice agreed to make 50, and no more! The reason why is fairly obvious when you start to play with the puzzle.

I’ve probably mentioned before that I’m not a huge Burr puzzle fan. There’s many other puzzle types out there that I get far more excited about than Burrs. So why did I make sure to get a copy of this one. And why’s it called a Blind Burr …. in my experience pretty much all Burr’s are blind. Well I’m not sure I can answer the second question, but I will answer the first. And the answer is pretty simple, this is no ordinary burr!

Edit: I can’t answer why it’s called the Blind Burr, but Greg did. Check out the comments for the answer!

Lots of movement but little progress

Lots of movement but little progress

Immediately on picking up the puzzle, you find that there are three pieces which are pretty loose, and move a fair distance. Looking at the inner part of the piece which slides out you’ll see it’s completely smooth, so whatever burrs exist, they are only in the top 1/3 of the piece which remains hidden in the centre of the puzzle. Of course all of this movement doesn’t really help much, as there is no movement at all in the remaining three pieces. Strange and definitely not an average burr.

Despite the piece on the right in the image above leaving enough space for the top piece to slide over it, that piece won’t budge. Something in there is keeping it in place and there’s no real hint of movement. Time to go back to the drawing board and figure out what else can move in the puzzle.

After some feeling around, you start to see that there may be another way to make progress, and sure enough that yields a little more movement in one of the pieces, and after that the rest of the puzzle will come apart using coordinate motion. It’s a really beautiful movement if not particularly difficult, and well worth the time to understand.

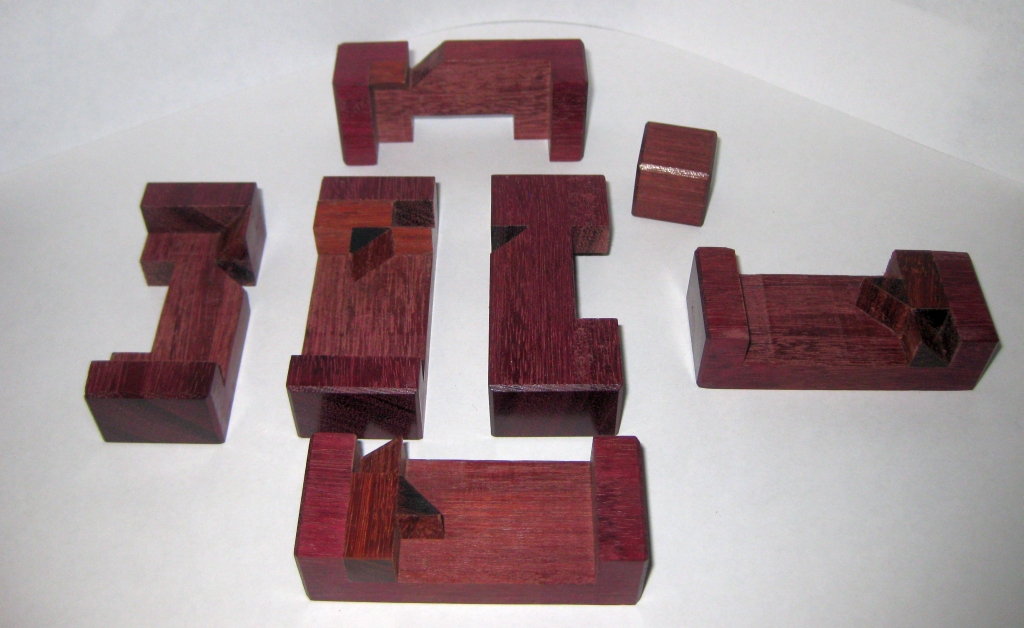
The pieces of the Blind burr (some details hidden)

The pieces of the Blind burr (some details hidden)

I don’t want to give too much away, as the discovery of the puzzle mechanism is a joy but you can see the seven pieces which make up the puzzle, with some familiar 45 degree blocks in there which are used in the coordinate motion. That cube was a bit of a surprise!

Putting the puzzle back together is marginally trickier than taking it apart as some dexterity is required during the assembly, and despite taking it apart and putting it back together a number of times now, I still struggle a little to get the first three pieces aligned correctly.

All in all it’s a great design, and rather deserving of its Top 10 vote. All of these are currently sold, but if you see one come up for sale, grab it. It really is a fun puzzle, and even for a non-Burr fan like me, you’ll enjoy it.

Washington Monument – IPP32 Exchange

One of the puzzles I really liked the look of while taking part in the IPP32 Puzzle Exchange was Mr Puzzle’s Washington Monument. Brian’s description of the puzzle when he presented it, plus the really high quality and great look of the puzzle meant this was one that I went looking for on the day of the Puzzle Party, and was lucky enough to get one (amongst a number of other puzzles from Brian’s table that day!)

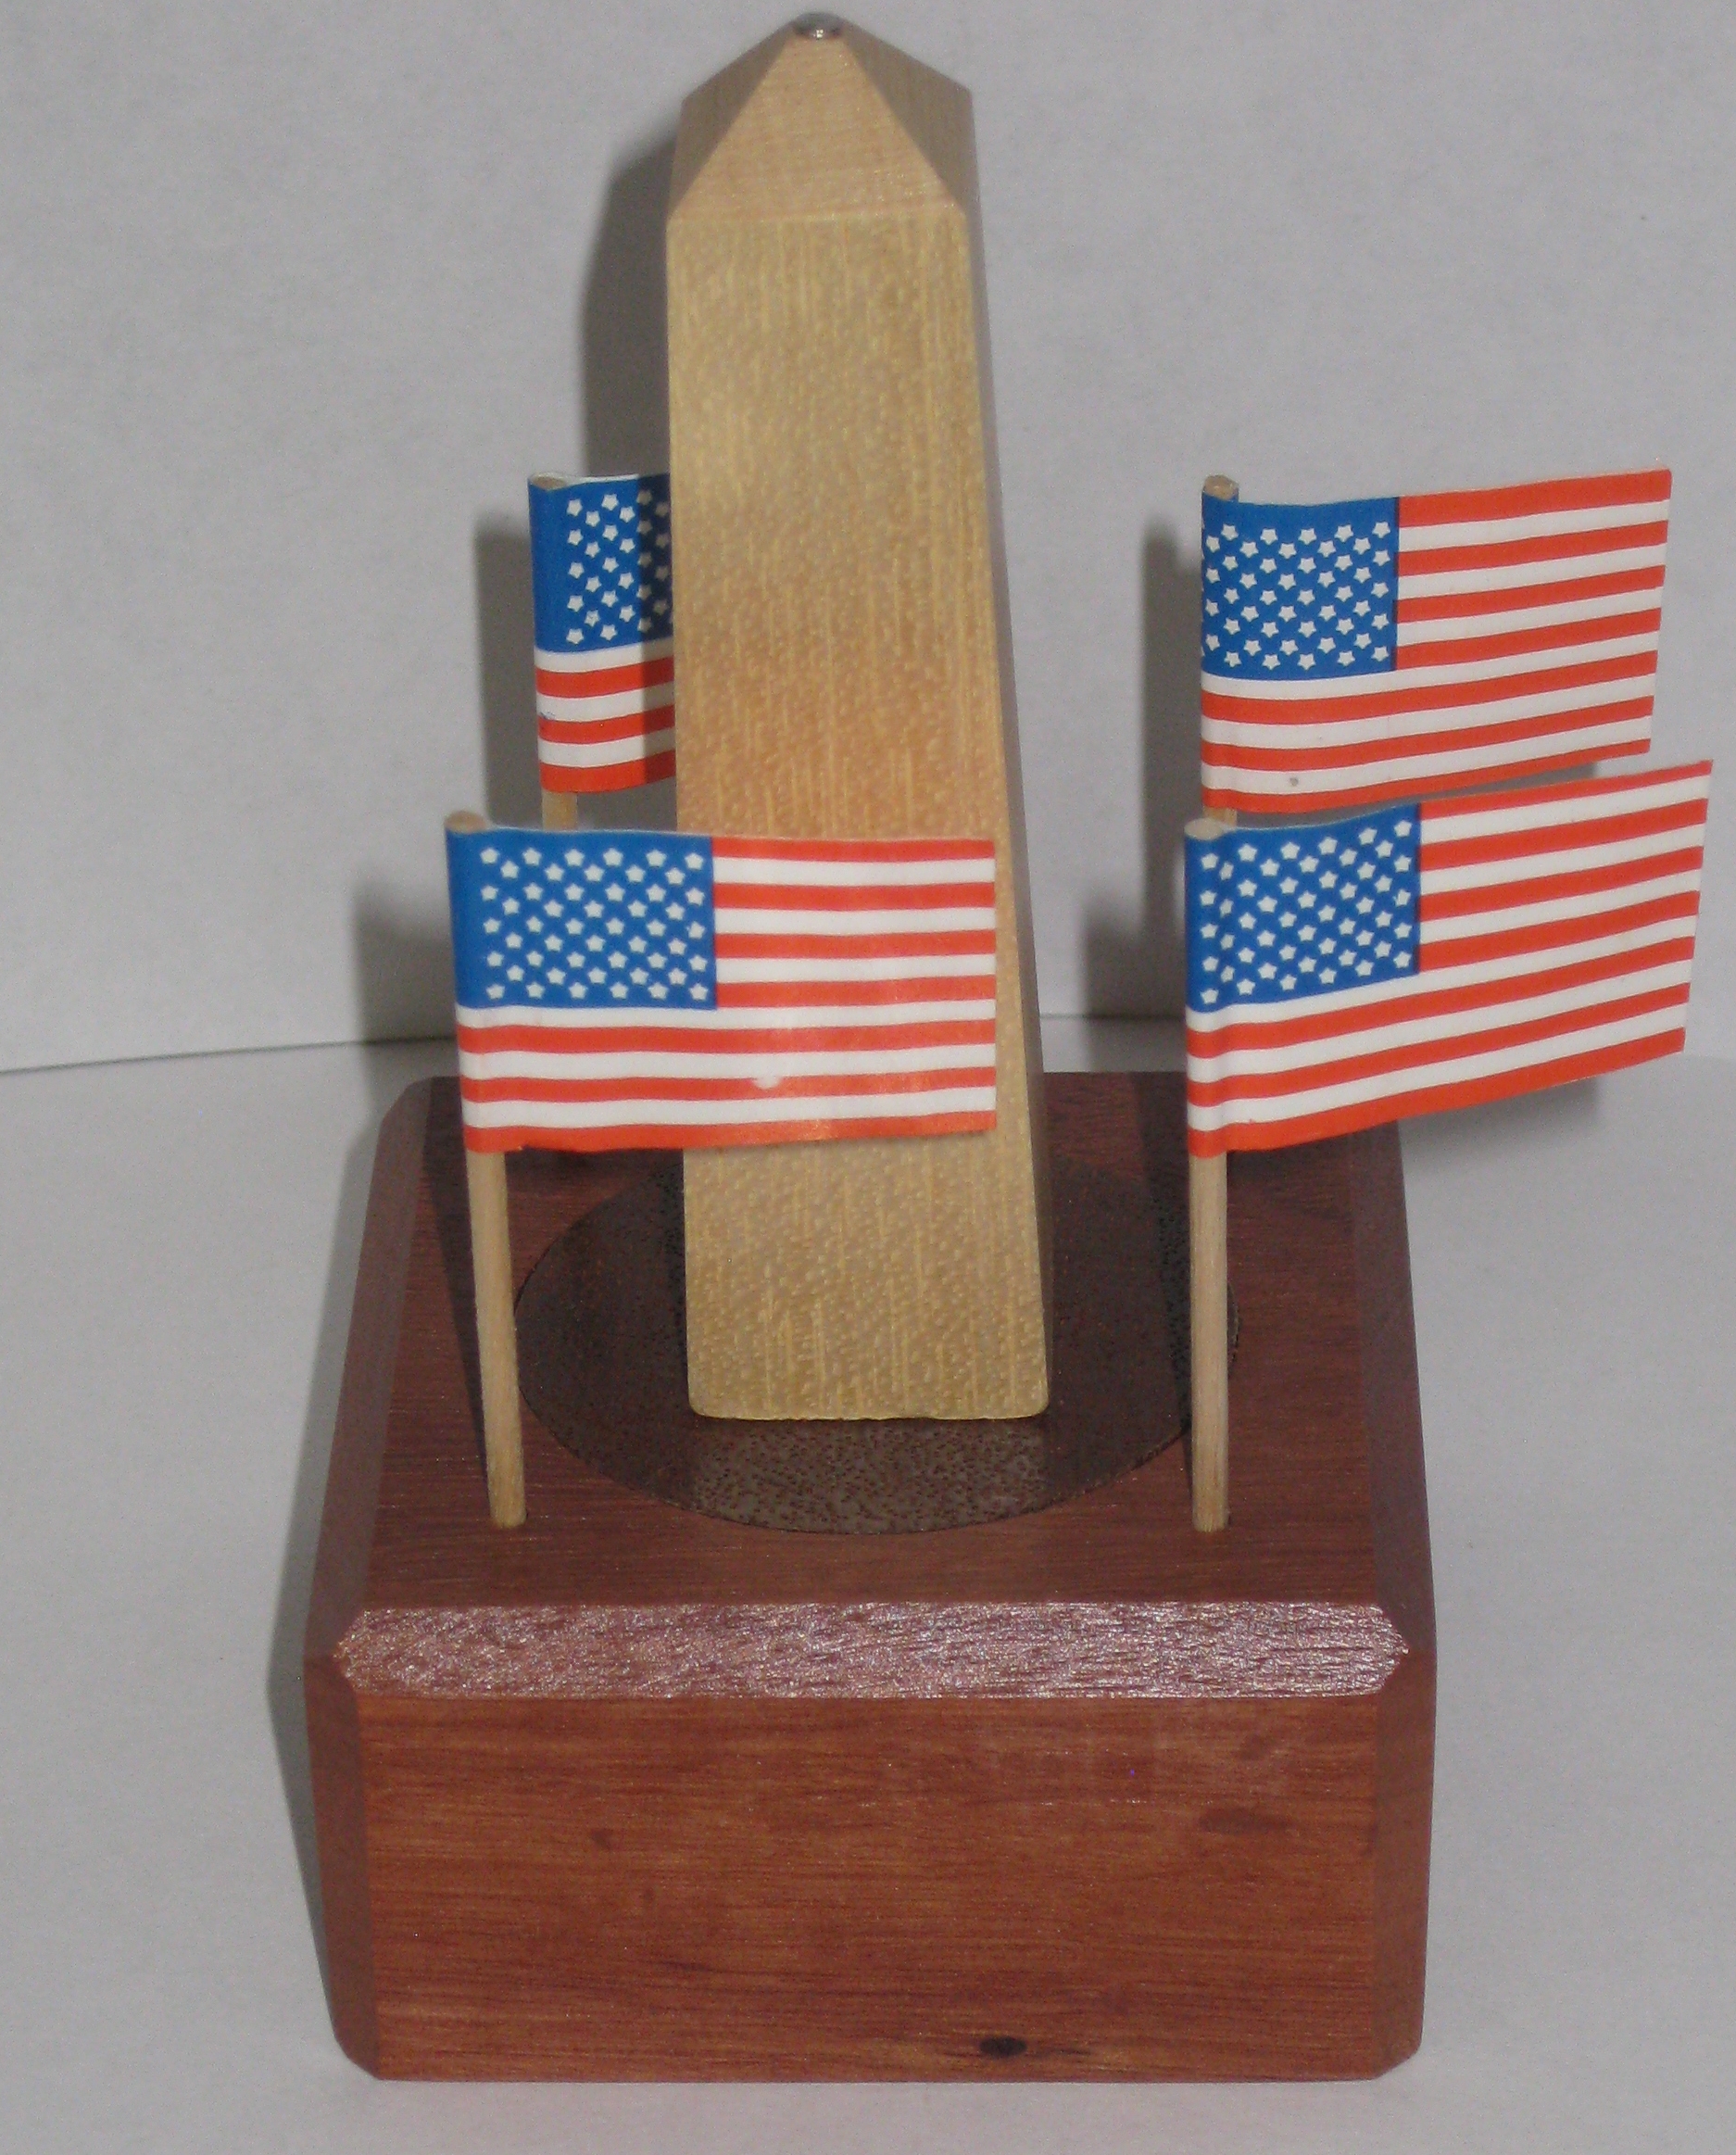
The Washington Monument by Mr Puzzle

The Washington Monument by Mr Puzzle

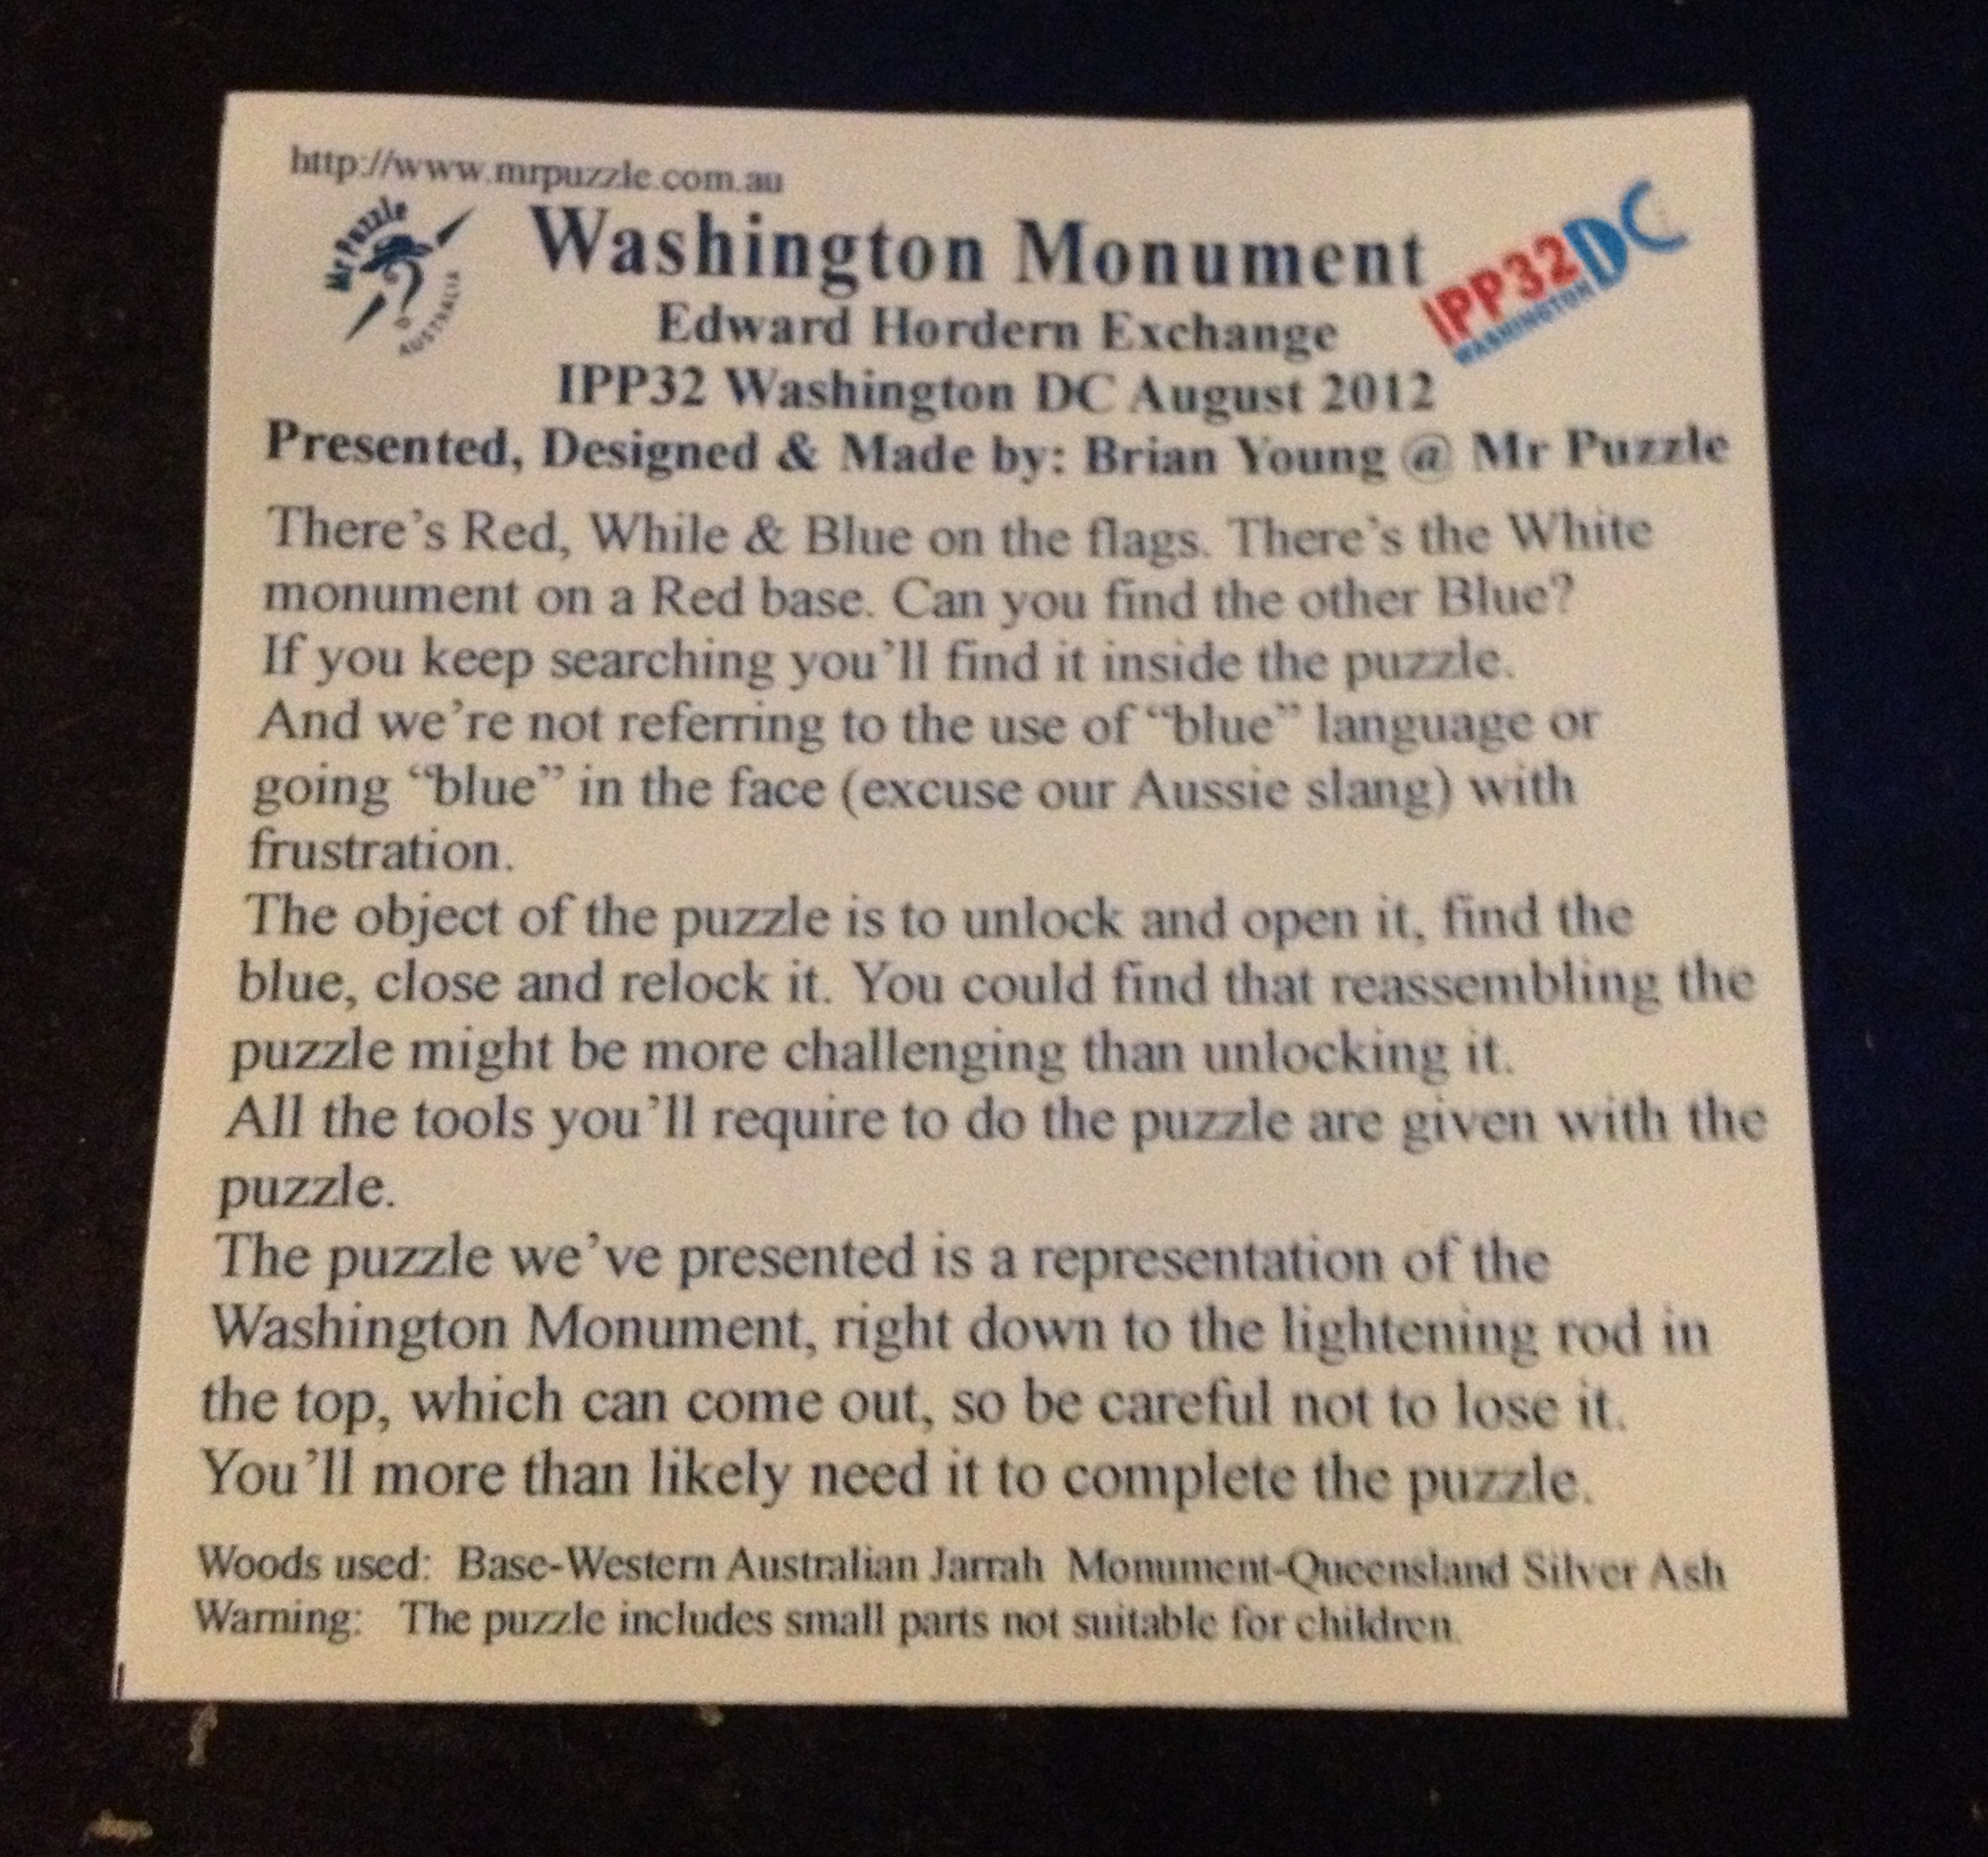
It’s a good looking puzzle which sits at 5″ tall and the base is 2.5″ x 2.5″ which makes for a good sized puzzle. The puzzle is a very close replica of the Washington monument, right down to the lightning rod in the top of the tower, and the flags surrounding the base. Made from Queensland Silver Ash for the monument and a Western Australian Jarrah base there’s a good contrast between the woods, and it makes for a striking puzzle. Brian has also used this in the description of the puzzle which reads:

Washington Monument description card

Washington Monument description card

“There’s Red, While & Blue on the flags. There’s the White monument on a Red base. Can you find the other Blue?
If you keep searching you’ll find it inside the puzzle.
And we’re not referring to the use of “blue” language or going “blue” in the face (excuse our Aussie slang) with frustration.
The object of the puzzle is to unlock and open it, find the blue, close and relock it. You’ll have solved the puzzle when you can complete these two stages.
All the tools you’ll require to do the puzzle are given with the puzzle.
The puzzle we’ve presented is a representation of the Washington Monument, right down to the lightening rod in the top, which can come out, so be careful not to lose it. You’ll more than likely need it to complete the puzzle.”

The monument spins freely 360 degrees on its base and you can hear a number of things moving inside the puzzle. Removing the flags, and looking into the drilled holes, you can see some metal pegs as you turn the monument, so it gives you an idea of what’s going on in there, but not how you’d solve it. In order to have solved it correctly, there’s two extra pieces of information that Brian gave you when the puzzle was exchanged (and now appear on his website):

“First stage:
Lock all gravity pins inside the round base of the obelisk so they do not move.
This will allow you to remove the obelisk from the base.
If you open the puzzle by chance then the gravity pins will still move freely; this is not the intended solution. The first stage is not completed until the gravity pins are locked inside the round base.

Second stage:
Unlock the gravity pins so they flow freely again. This allows you to lock the obelisk back in the square base.
You could find that relocking the puzzle might be more challenging than unlocking it was.”

So when I first opened the puzzle, I’d not completed this first stage correctly. The pins were still lose, and I had ‘got lucky’ in terms of opening the puzzle. Being able to see the insides actually didn’t help that much to be able to understand what I should have done, however I’d already figured out that there was something hiding inside the monument that I hadn’t used so far, and clearly that was key. After another 10 minutes or so playing with the puzzle and applying some physics (no I didn’t blow on it or spin it!) I had found out how the puzzle should be solved, and was left with the challenge of locking the puzzle back up again.

The mechanism is very clever and makes for a fun puzzle. I’m not sure how many people will solve it ‘correctly’ first time, but it certainly is a great mechanism, and very well executed. The puzzle received the 3rd Prize for the themed puzzle at IPP32, and it’s deserving of that recognition, both for its iconic look and for being a genuinely good puzzle. I’d recommend getting a copy of this while there are still some available!

I’ll be reviewing the other puzzles I picked up from Brian soon, as well as many more of the IPP puzzles, so keep an eye out for those soon.

Brass Trasure Chest

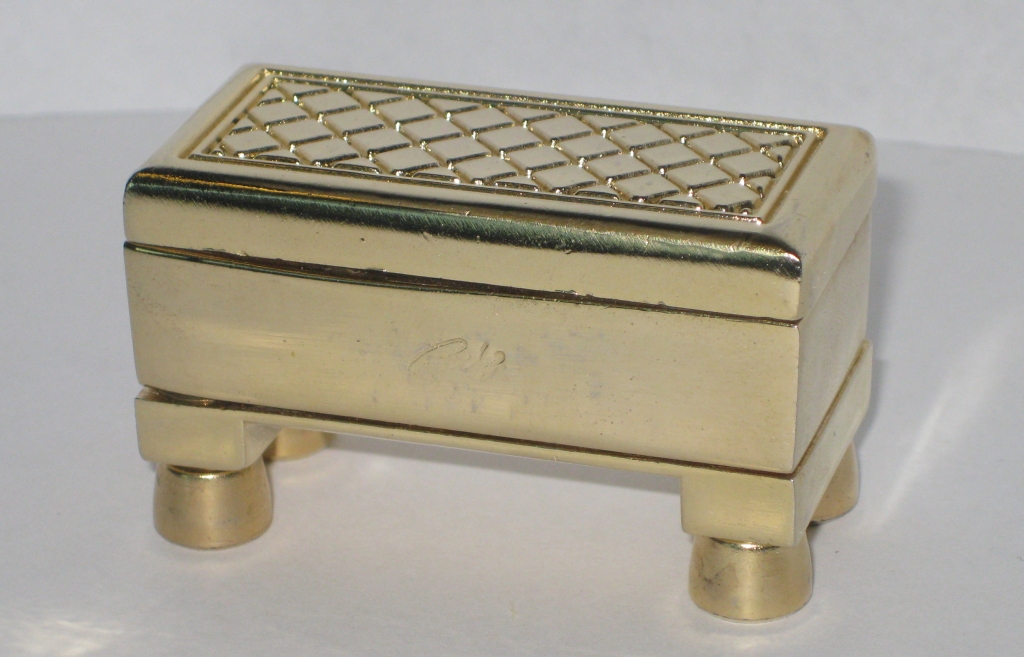
The Brass Treasure Chest is a Rocky Chiaro design, produced by Puzzle Master. As the name suggests, this is a small Brass puzzle which is made to look like a treasure chest, and like many of Rocky’s designs contains a devilish locking mechanism that will keep you puzzling for quite some time.

Brass Treasure Chest by Rocky Chiaro

Brass Treasure Chest by Rocky Chiaro

Having met Rocky Chiaro when I was at IPP, and being able to spend time talking to him at his puzzle table on the day of the Puzzle Party, it was great to see the passion he has for his puzzles, and to see just how happy he was to demonstrate his puzzles, and talk about them in general. Getting insight into why he made a puzzle the way he did, or having him show me a much better way to solve a couple of his bolt puzzles after I bungled my way through the solutions myself was superb. Currently the only one of Rocky’s puzzle design’s I own is the Brass Treasure Chest, and having played with a number of his puzzles now, I will have to remedy that!

The Puzzle itself is quite small, measuring 2 1/8″ x 1″ x 1 1/4″, and has a good weight to it given that it’s made from a big lump of brass. The front of the puzzle has Rocky’s signature scribed into it, and if you’re familiar with trick opening boxes, that can’t just be coincidence, and will surely be useful when you try to solve it. The box is reasonably well made, although there are a few edges on my copy which don’t line up perfectly, and there’s a couple of small gaps in the seams between sections of the puzzle. You’re going to have to look closely to see it, and it doesn’t affect the puzzle at all, so it’s not something that should put you off. And no, it’s not going to help you to solve the puzzle either.

When you first start solving this puzzle, there’s a couple of things you’ll find fairly quickly as the first couple of steps are fairly easy to find and allow the top of the chest to rotate a small amount. After that, you hit a dead end, and that’s where the really tricky part starts. Moving the puzzle around (or shaking it) will let you hear that there’s a couple of loose parts in there rattling around, and figuring out how they move is key to opening the box fully. This is fairly typical of Rocky’s designs so will give you a good idea of whether you’re going to like his style of puzzle boxes.

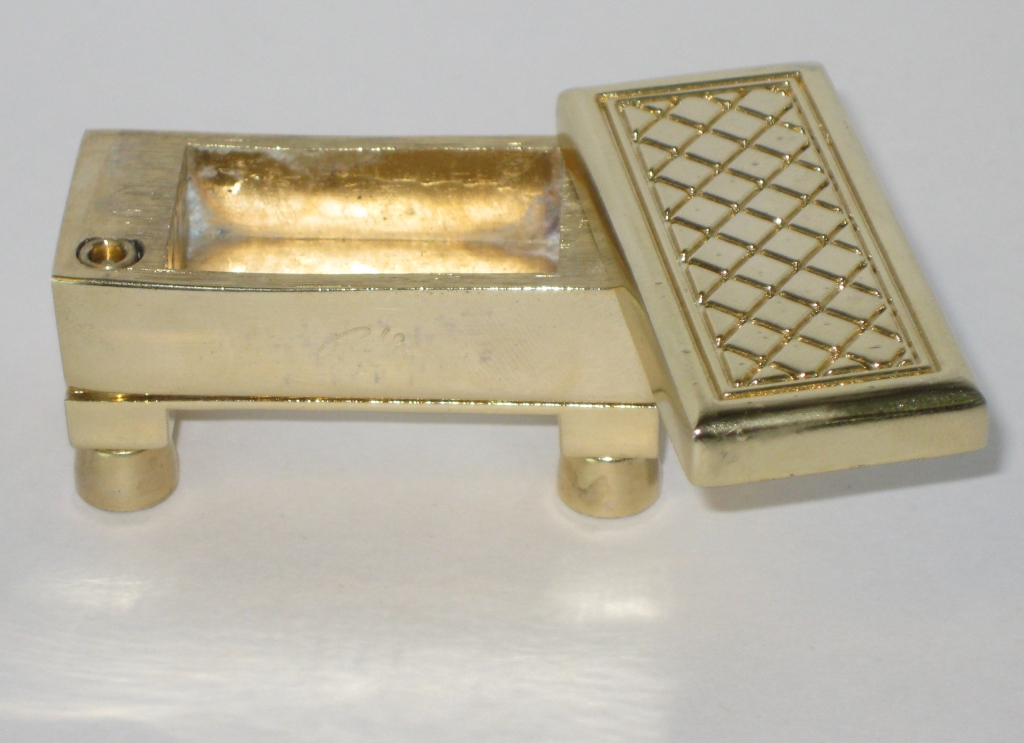
Brass Treasure Chest by Rocky Chiaro opened.

Brass Treasure Chest by Rocky Chiaro opened.

After a lot of what felt like blind stumbling I finally managed to get the box open. I really didn’t understand exactly what I’d done to solve the hidden mechanism, and it took quite a bit of fiddling around with the lid open to understand what I did to allow the lid to swing open freely. It’s a challenging little box, but once you understand the mechanism, it can be opened quickly and repeatedly. The first time took me around 45 minutes over a couple of nights of playing and thinking in-between. No solution is provided with the puzzle, but if you need one, you can find it here.

There’s a small space inside as you can see from the picture which could be used to store a very small item. That said, I’m not sure if anyone would actually store anything inside their puzzle vessels. (I know I don’t)

As an introduction to Rocky’s puzzles the Brass Treasure chest is a very affordable first puzzle, and although the fit and finish isn’t as good as the puzzles that Rocky hand makes, it is a great puzzle for the price. As I mentioned, the mechanism is a classic design so it will give you a good idea of whether you’d enjoy his style of puzzle, before spending a lot more money on a handmade original. Having been fortunate enough to see all of Rocky’s puzzles in person, I can’t praise his work highly enough. Anyone who still makes all his puzzle by hand in brass, with no CNC or computer aids and is able to turn out such high quality puzzles is truly a master craftsman.