Tag Archives: Metal

The Strijbos Metals

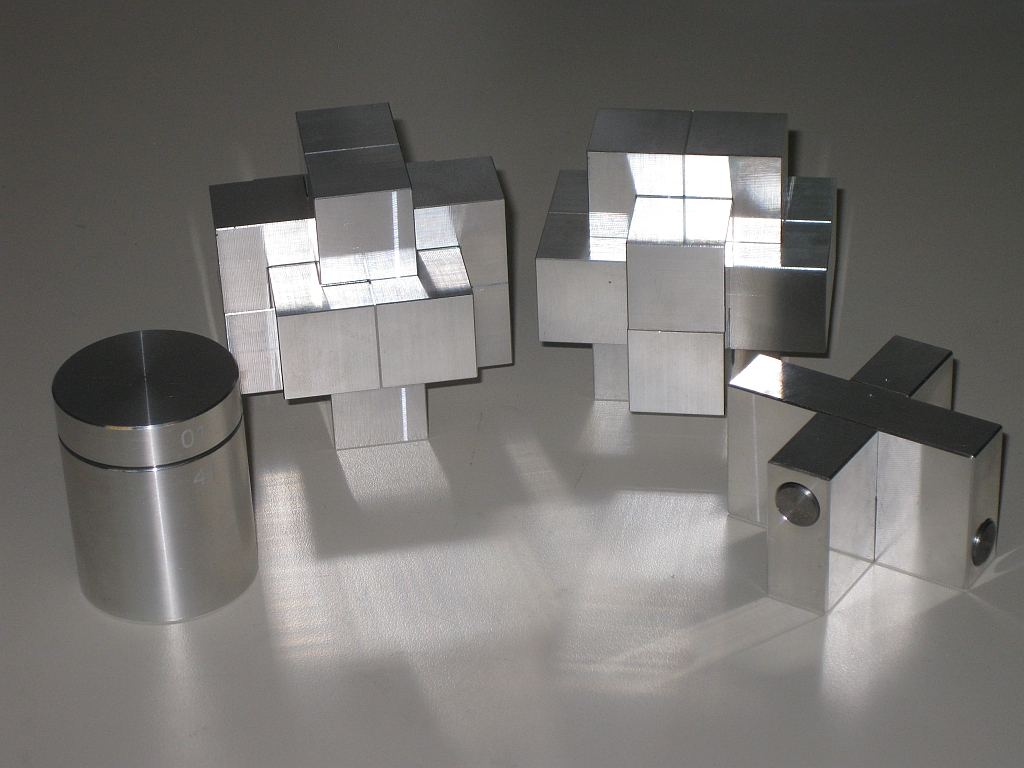
Despite the slightly cryptic title, many puzzlers will already know what I’m talking about. Hailing from the Netherlands, William Strijbos is a name familiar to many puzzlers. His aluminium puzzles are probably his best known, but by no means his only puzzles. Wil also designs bolt puzzles as well as a fair share of coke and whisky bottle puzzles as well.

Wil's Aluminium Puzzles

The collection of Aluminium puzzles from Wil Strijbos

I recently purchased Wil’s Cross puzzle from John Devost through Puzzle Paradise and at the same time had ordered Wil’s Aluminium burrs and his Aluminium Cylinder directly from Wil.

I’ve had the Cross for a few weeks now, but at the weekend, the rest of the items arrived from Wil. As much as Wil knows about designing puzzles, he also has a good supply of packing tape, as there was no box visible on his package, it was so well covered in tape. Guess Wil was expecting rain as this one was watertight!

I’ll be reviewing all of these fairly soon, so keep an eye out for that, but until then, rest assured that these are excellent puzzles, and well worth owning. If you are interested, drop me a message and I can pass on Wil’s details.

If you’re interested, despite the identical external appearance, the Burr on the left is the 10 move burr which is a version of the ‘Piston Puzzle’ by Peter Marineau and the one on the right is a version of ‘Gaby Games’ designed by Phillipe Dubois.

All the puzzles are incredibly high quality, and beautifully made. Well worth having in the collection. While the Burr’s are not new designs, their construction from Aluminium does add to their appeal, and the fit is excellent, making them worthy of note.

Oskar’s Blocks

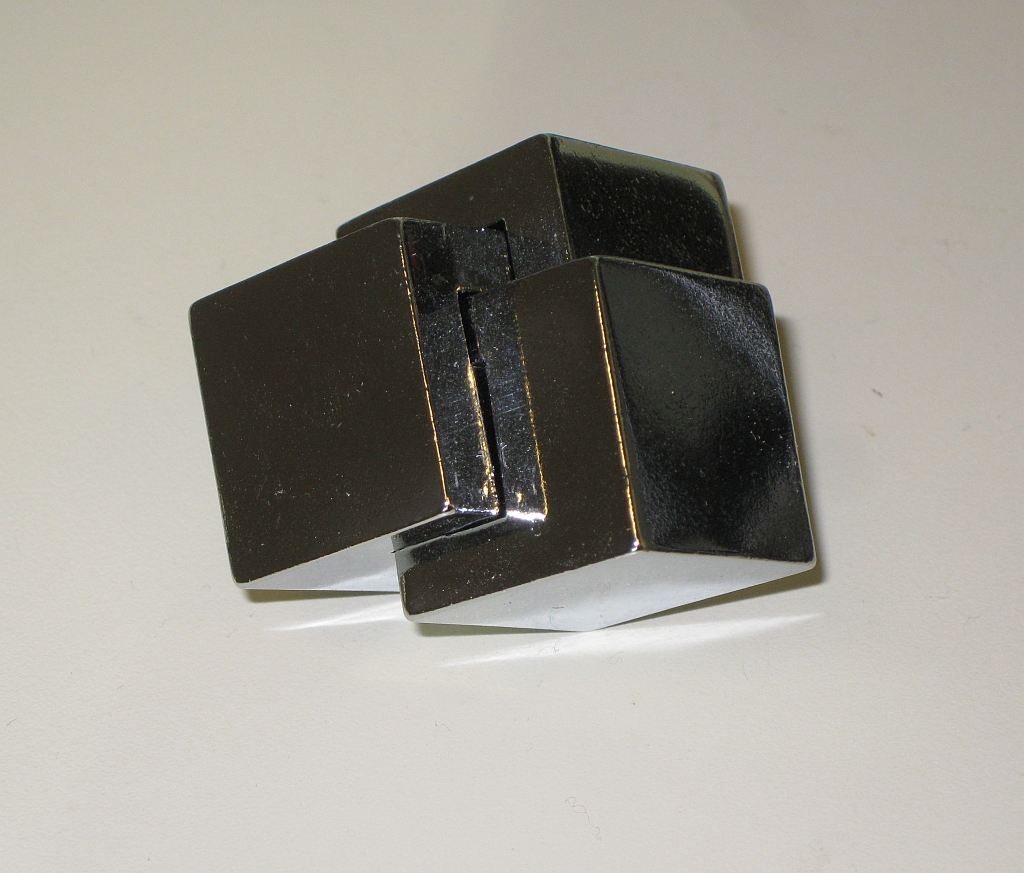
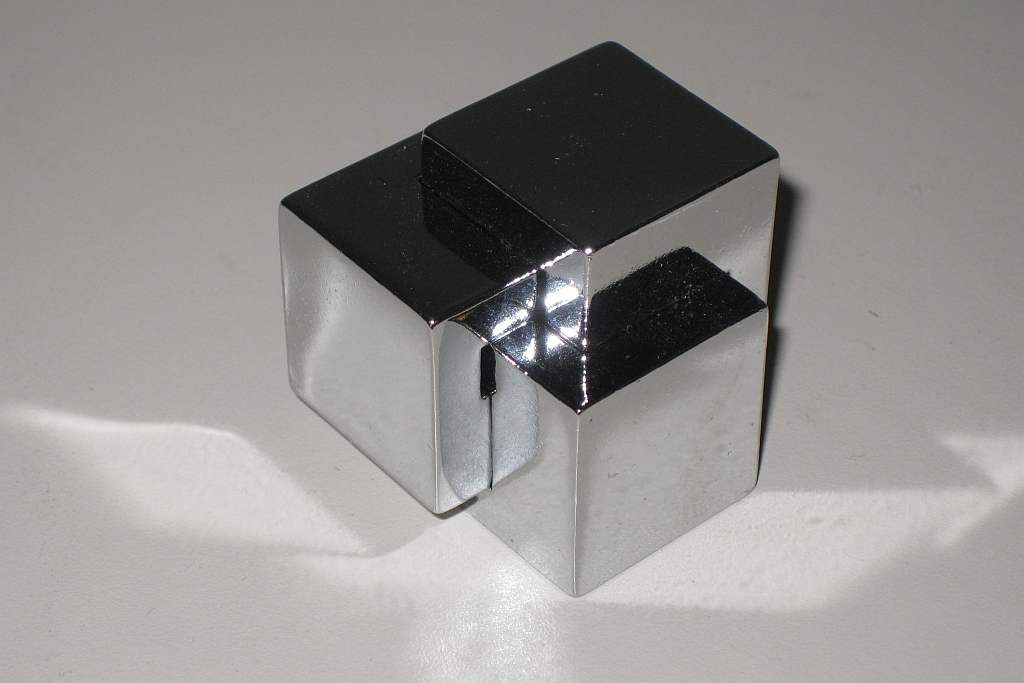
Oskar’s Blocks, also known as Oskar’s Cubes is another design by Oskar Van Deventer, can be found in both wood and metal versions. This version is made by Bits and Pieces from chrome plated metal and is available from Puzzle Master. Thanks to Puzzle Master for sending me this puzzle to review.

Oskar's Blocks

Oskar's Blocks

As you can see, this is a good looking puzzle from the well known and prolific designer Oskar Van Deventer. It’s a fairly small puzzle, with each of the three cubes measuring 15/16″ in size, to give a fully assembled size of just under 1.5″. Given that the puzzle is metal, it has a good weight for its size, and while the pieces aren’t a tight fit, they do hold themselves together well enough to not fall apart when you place it on a single cube.

Oskar's Blocks

Oskar's Blocks

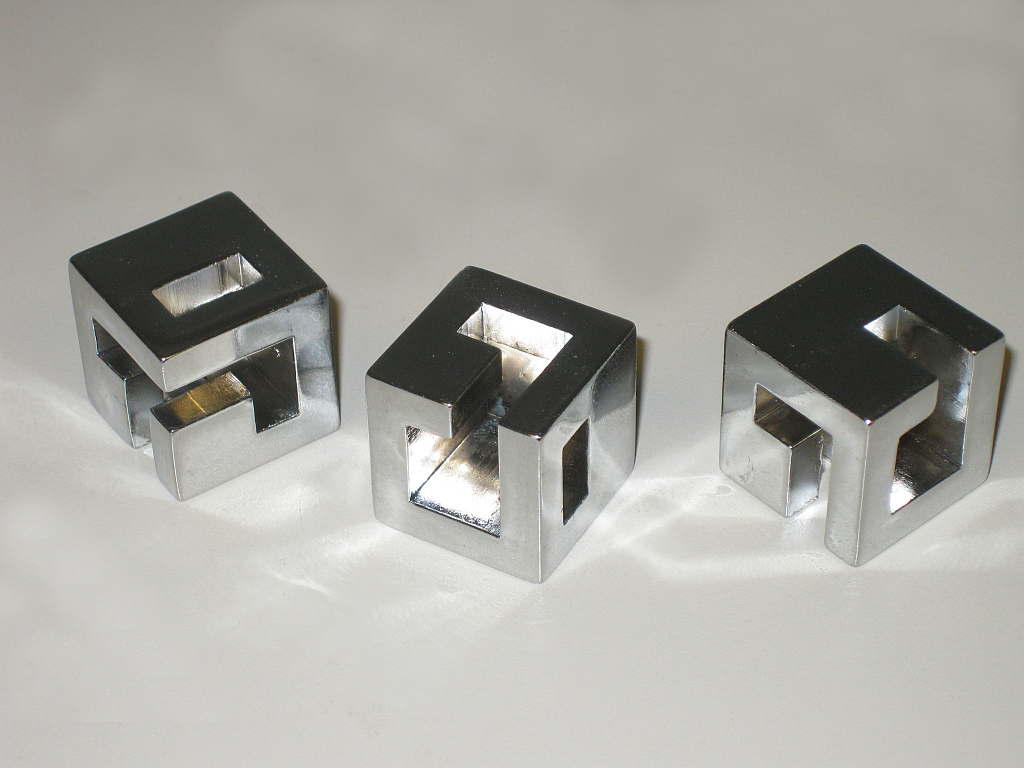
With only three pieces, you might be forgiven for thinking this is an easy puzzle. Puzzle Master ranks it as Level 7 – Challenging (out of 10), and I have to say it’s spot on. This isn’t the most challenging puzzle you’ll come across but take the pieces apart, roll them across the floor, come back in half an hour, and you’ll find it a challenge to put back together unless you’ve memorised the slots on each piece.

Oskar's Blocks Pieces

Oskar's Blocks Pieces

With each of the pieces being dissimilar, it does add to the challenge of this puzzle. Given the number of ways that each of the pieces can interact with each other, getting the first two pieces in place to allow the third to slide in and lock the puzzle together is a good challenge. I spent around 15 minutes after having scrambled the pieces, and left them for a while to put it back together. The more times you solve it, the easier it becomes, but I think that is true of many puzzles out there. The puzzle comes simply packaged from Bits and Pieces in a white cardboard box, with a solution included if you’re really stuck.

Overall, this is an excellent puzzle. It’s well made, solid and nicely finished. With a price tag under $15, this is well worth picking up. Despite being pocket sized, I’d advise against keeping it there given the sharp corners.

Cast Loop

This entry is part 1 of 8 in the series Hanayama Cast Puzzles

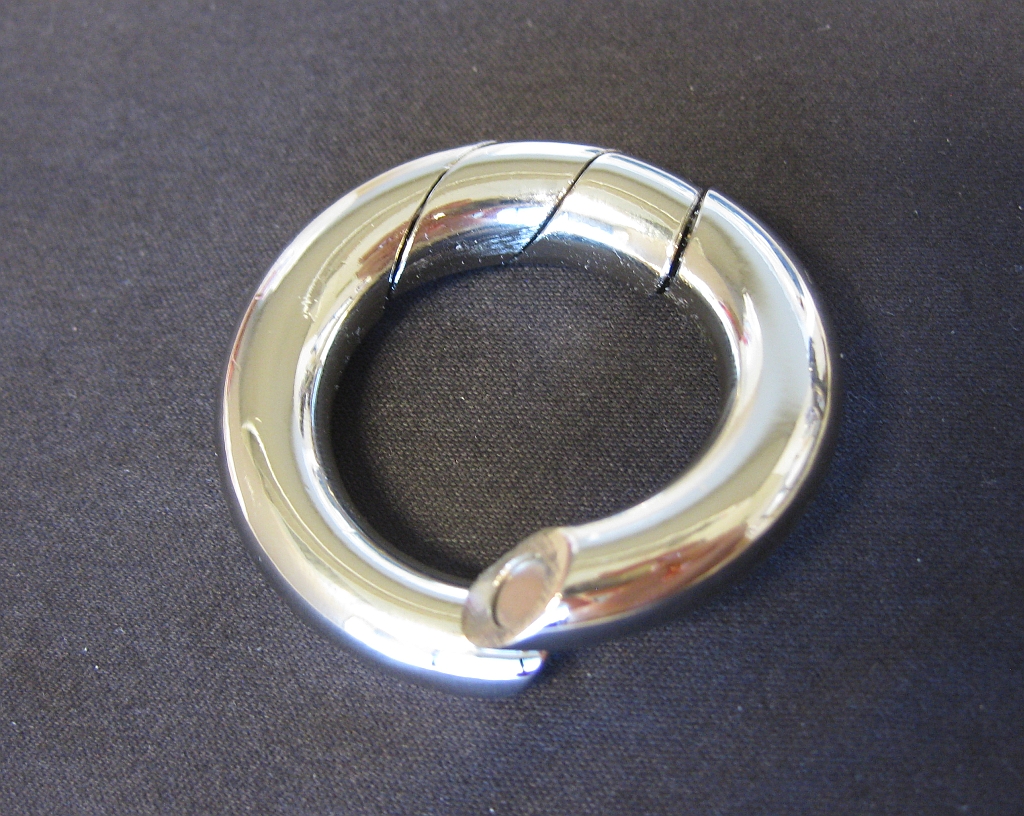
Cast Loop is the second newest puzzle in the Hanayama Cast series of puzzles, designed by Finnish puzzle designer Vesa Timonen based on an original puzzle ring he created for his girlfriend. It is available from Puzzle Master along with many more puzzles from the Hanayama cast series. The object of the puzzle is to create a closed loop. Thanks Puzzle master for sending me this puzzle to review.

Cast Loop

Cast Loop

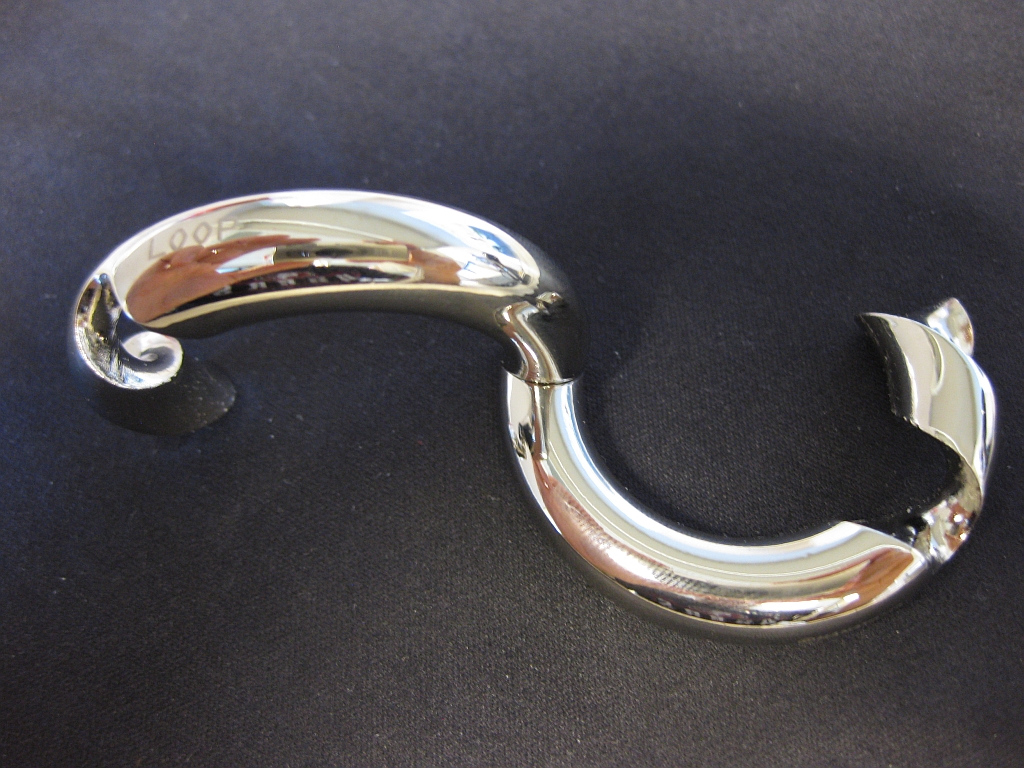
The puzzle is packed in the standard Hanayama black and gold packaging, and is held in the box in the position seen above. By shipping it this way, you’re not given any clues as to how to solve the puzzle, as separating the pieces doesn’t show you how to solve it. If anything it may mislead you, and trick you into not seeing the solution. Quite a clever way to package the puzzle. It also ships with a leather thong, so that once solved, the puzzle can be worn as a necklace. It does hold together well, so this would be a possibility, but we’ll get to that.

This is a great looking puzzle, with the chrome plated finish really making the puzzle stand out. The puzzle is around 2 3/4″ in diameter so sits nicely in your hand, and being a cast puzzle has a solid weight to it. This really feels like a high quality puzzle.

Cast Loop Magnets

Cast Loop Magnets

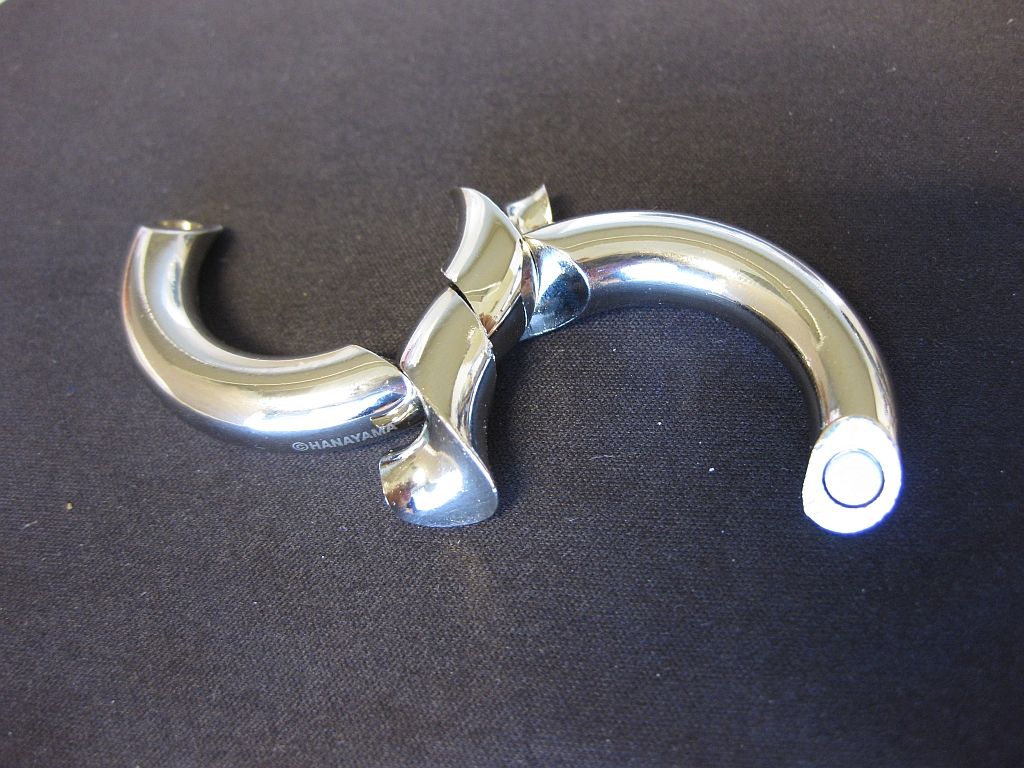
Taking the puzzle apart, you’re left with what looks like two mirror image pieces. The magnets on the angled ends are strong enough to hold the puzzle pieces firmly together, so there’s no worries about the puzzle accidentally coming apart once solved unless you want it to. To that end I think it would be possible to wear the puzzle as jewellery, just don’t expect to see me wearing it any time soon.

Cast Loop Symmetry

Cast Loop Symmetry

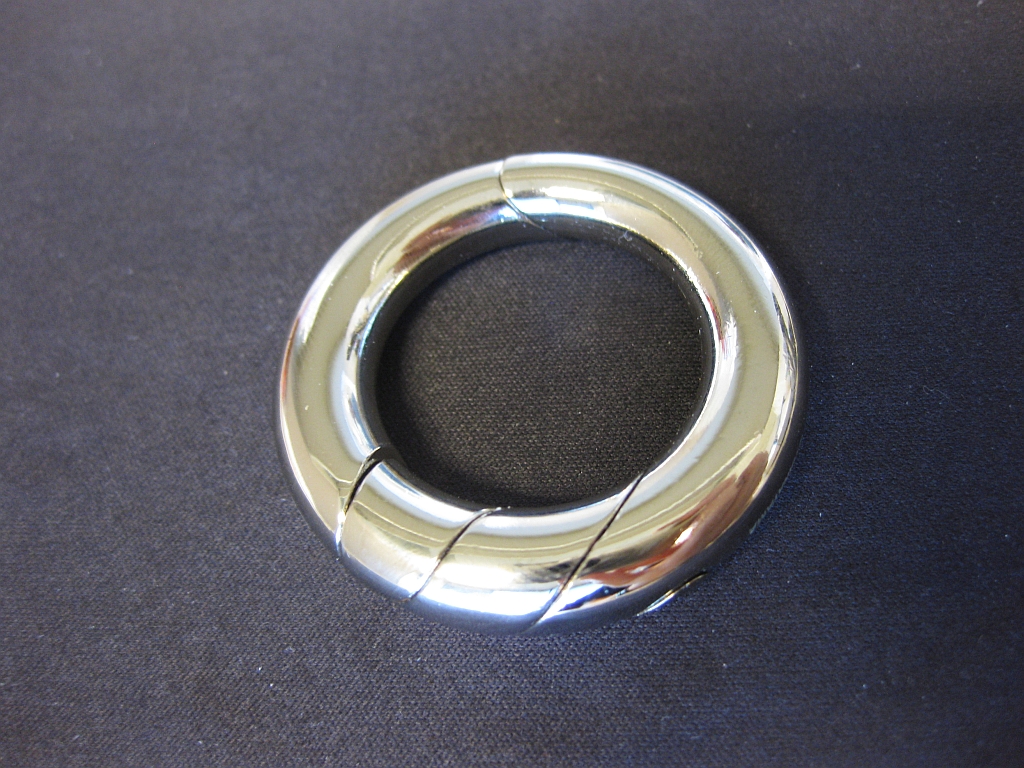
One of the things I love about this puzzle is the symmetry when solving it. Even though there are minimal moves needed, the puzzle looks great throughout. This is listed as an easy puzzle both by Hanayama where it is a 1 on their scale (1-5) and 5 on Puzzle Masters scale (5-10). It is an easy puzzle, but the beauty is that it is designed in such a way that you need to really think about what you’re doing to be able to solve it. The obvious way to combine the pieces won’t get you a solid loop.

Knowing how to solve the puzzle, I found myself idly playing with it, opening and closing the loop without really looking at it. Sitting in long meetings at work, it gave my hands something to do rather than just spinning my pen.

Cast Loop Solved

Cast Loop Solved

This is a stunning puzzle, and is one you really should have in your collection. If you don’t already, then go buy this, you’ll not regret it!

Yin & Yang

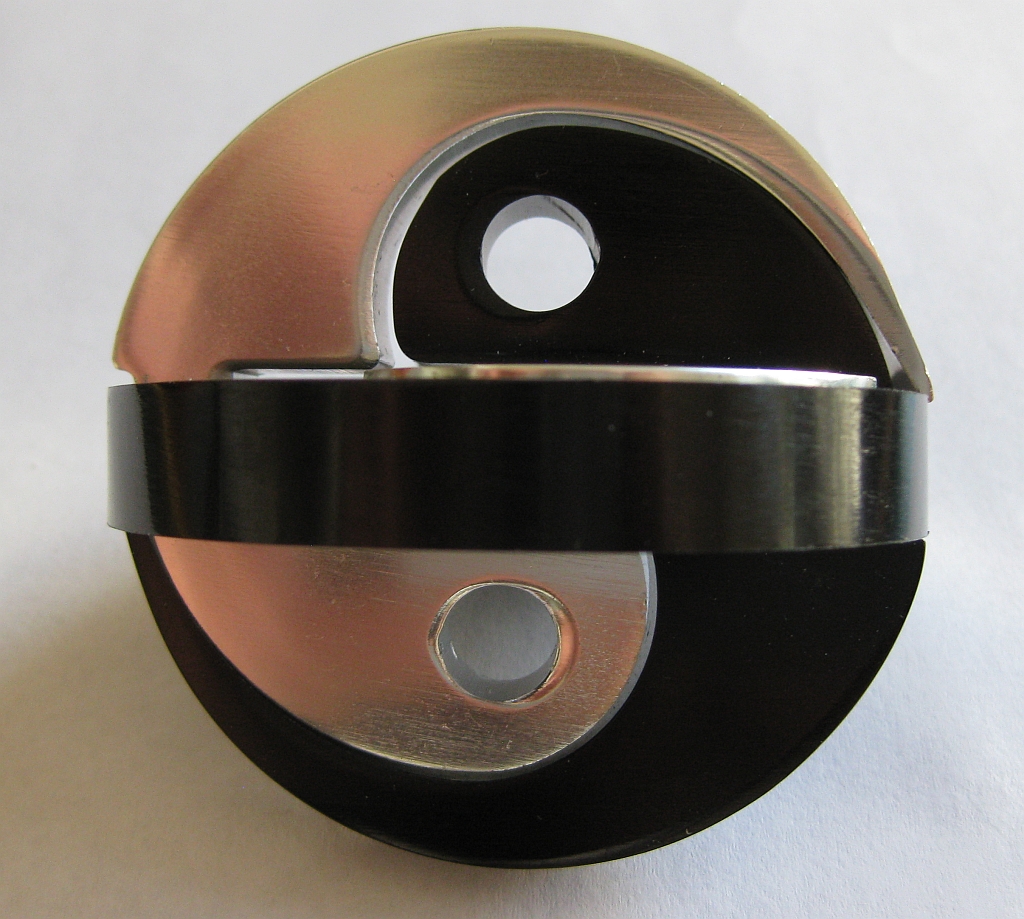
Yin & Yang is another Puzzle Master metal puzzle designed by Doug Engel where the object is to separate and re-assemble the pieces. Thanks Puzzle Master for sending me this puzzle to review.

Yin Yang

Yin Yang

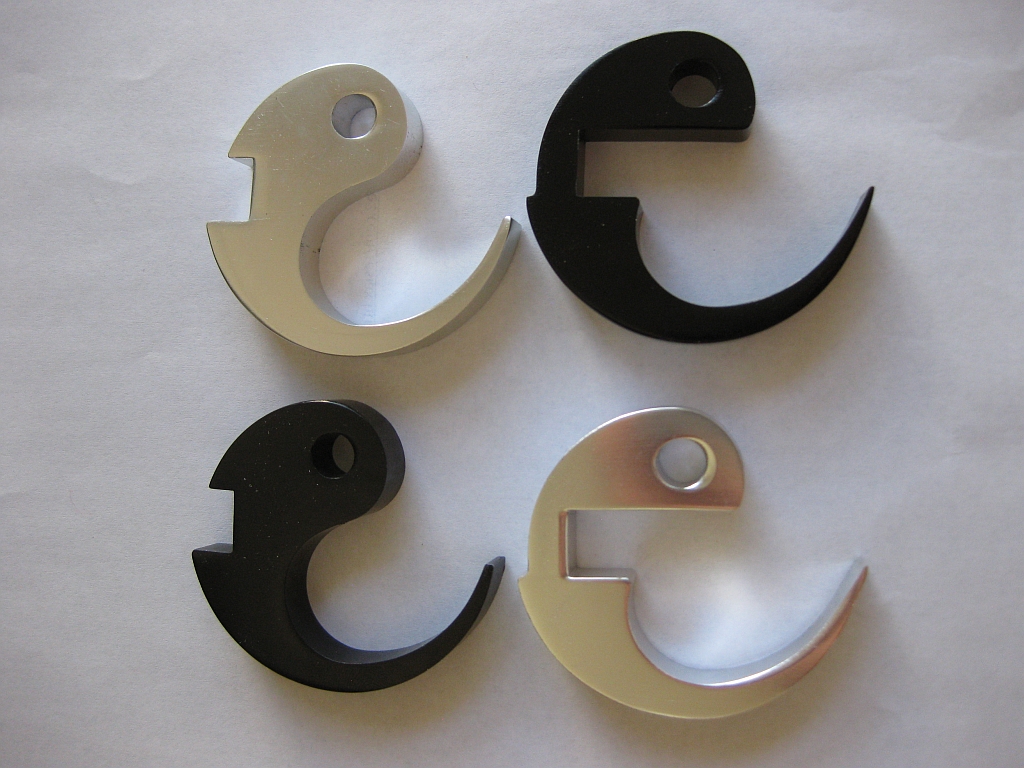
This is a fairly solid metal puzzle, with a reasonable weight to it. The anodised metal parts look great with the contrasting black and silver pieces, cut from solid aluminium. Rated as a Level 5 (Easy) puzzle by Puzzle Master, I have to agree. Taking this puzzle apart isn’t too difficult, and putting it back to its original shape is also fairly simple as long as you work in pairs.

Yin Yang Pieces

Yin Yang Pieces

The two sets of pieces are well made, and although the fit of the assembled puzzle is loose, it does hold itself together fairly well, and looks good sitting on the puzzle shelf.

Handing this puzzle around to a few friends, it’s not caused anyone any issues in being able to solve or re-assemble it, but most people like the look, and are surprised by the weight when they pick it up. This is a nice beginner puzzle, and although there may not be much in the way of re-solving, it will make a nice present for new puzzlers, or for father’s day if you’re still looking for something.

Free The Key

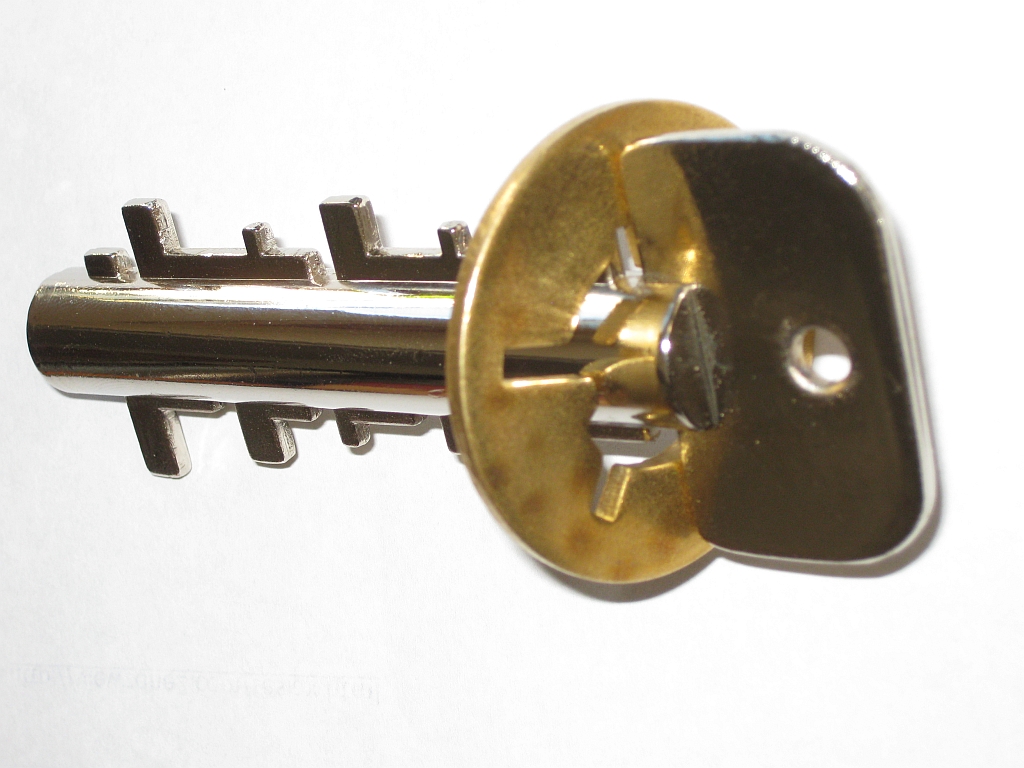
Following on from my recent theme of maze based puzzles, this is a review of Puzzle Master’s metal puzzle, “Free The Key”, designed by Oskar Van Deventer and produced by Puzzle Master themselves. I’d like to thank Puzzle Master for sending me this puzzle to review.

Free The Key

Free The Key by Puzzle Master

At first glance this is a nice looking puzzle, and has a solid feel to it. It’s much larger than I expected, at around 4.5″ long by 2″. The puzzle I received has some discolouration around the gold ring as can been seen in the photographs, which spoils the look slightly when close up, but sitting on the puzzle shelf you’d never know that.

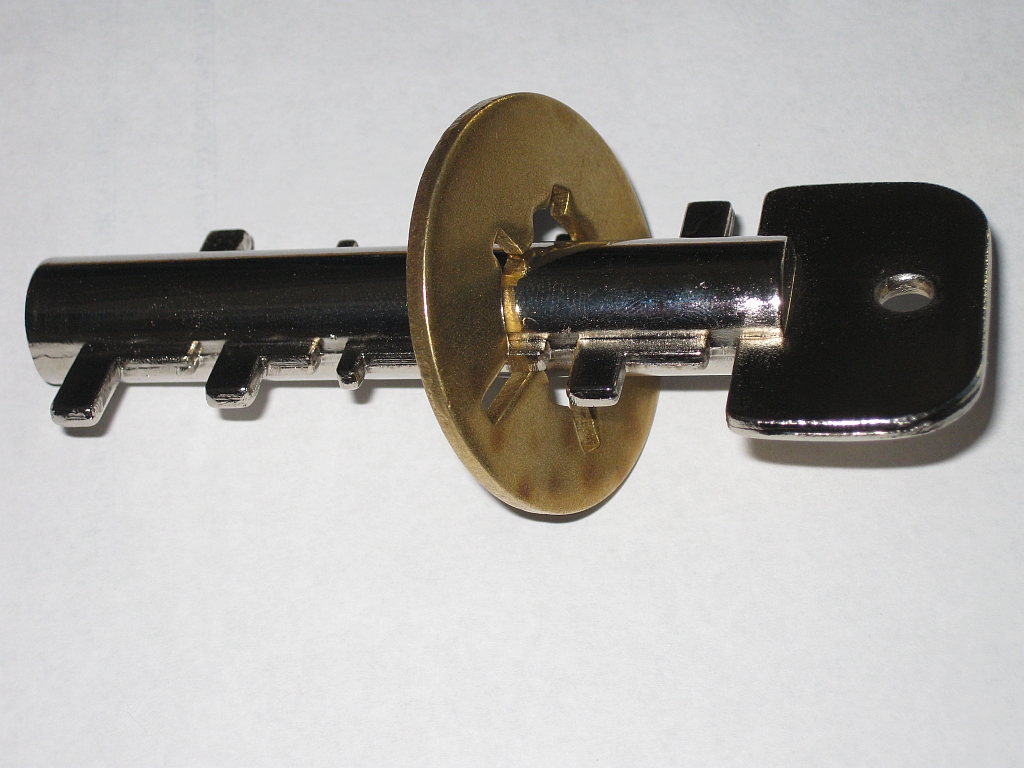
The object is to remove the brass ring from the key, and then return the ring to its starting point. It seems like a simple enough objective, and really is. There are a few dead ends and more than one start point, as with any good puzzle of this type. The arms on either side of the puzzle interact with each other meaning you occasionally have to back track and re-orient the ring to get over the dual obstacles. It does mean that you have to look ahead to see which notches in the ring you’ll need to have lined up before you progress too far down the key.

Where the puzzle is let down slightly is that the fit of the ring on the main shaft of the key is slightly loose. This leads to what I’d consider cheating where you can angle the ring so it is not 90 degrees to the shaft of the key, permitting the spikes on the key through a gap in the ring it was not intended to go through, simplifying the puzzle at points. This aside, it’s a fun puzzle, and is well made for the price.

Free the Key partially open

Free the Key by Puzzle Master partially open

Puzzle Master lists this as a difficulty level 8 puzzle, however I feel that it should be lower, maybe around a 5 or 6. I solved this in under 10 minutes, both removing the ring and returning it to its starting point, and had little trouble in doing so. If you’ve not played with this type of puzzle before, it may provide more of a challenge, but a more experienced puzzler will have little difficulty with this one. If you’re looking for a gift for a younger puzzler, I’d recommend this, and it’s the sort of puzzle you’d have no worries about passing round.

Revomaze Black Extreme

This entry is part 5 of 11 in the series Revomaze

Continuing the Revomaze series, available from Revomaze and also in limited numbers from PuzzleMaster.
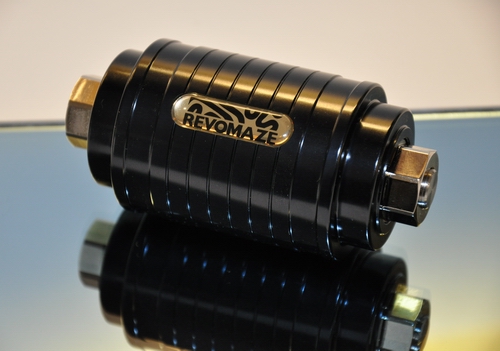
The Black Revomaze

The Black Revomaze Puzzle

I’ve already covered the basic puzzle in my earlier reviews of the Series I puzzles, so for general information on the Revomaze puzzles, I’d suggest reading that post here.

The Black Revomaze, available in both Plastic and originally Metal (although only 20 metal puzzles were produced and are very rarely available for sale from their current owners) was the first Revomaze which was not part of the main series of puzzles, incorporating Blue, Green, Bronze, Silver and Gold. When the engineering company was working with Chris Pitt on the puzzles, they produced the Black as a way to show Chris what they were capable of, and, so the story goes as a challenge to Chris to open a puzzle that he didn’t know the route through maze. Chris like the design they created so much that he added it to the line of puzzles to be produced and sold. The reason why, I’ll explain later.

Similar to the Blue and Green puzzles, the Black is a static maze, however it is much closer to Bronze in execution as the orthogonal lines from the Blue and Green seem to be non-existent leaving only curves and sharp corners. This makes for a very interesting challenge, as some of the sharp turns create very thin ledges to be navigated, increasing the chances of clicking into the ever-present trap lines. The curves also add a challenge to mapping as anyone who has tried to map the Bronze will know already.

The real beauty of the Black is the reveal you get either when mapping the puzzle (if your map is accurate enough) or in the metal puzzle when removing the core, and seeing the maze for the first time. I was fortunate enough to be able to borrow one of the few metal versions from a good friend, however due to the way I create my maps, I didn’t see the hidden secret in my map until I opened the core (although I had my suspicions!). Once open not only are is the stunning engineering to create the curves revealed, but the maze also contains a the company name! Now it’s obvious why Chris liked the black so much, and decided to produce it and allow the public the joy of solving the puzzle as well.

As a note on mapping the mazes, the map you create depends on how you view the puzzle. Either the pin can move through the maze, as though it were a person walking inside a huge static maze, or as though the pin were hanging from the ceiling, and the maze were navigated around it. In the puzzle, the pin is fixed in the sleeve, and the maze moves around it, not the other way around. This has two effects, your directions are inverted and also your start and end points are reversed. If you think about the maze itself, the start is actually in the middle of the core, and you work toward the end of the core (the leftmost point is the end). When most people think about a maze, the start at the outside and either work to the other end or the centre depending on the maze, so starting in the middle may not be natural for most.

Personally I map from the viewpoint of walking around inside the maze, and as a result all my maps are mirror images of the real maze. At one point when creating a map for the Silver, I took a wooden dowel, and carved the maze onto the dowel, using my excel map as the source. Of course this meant that my map is back to front compared with the real maze, however it did let me think around the problems I was trying to solve!

Black is a great puzzle, and really fun to solve. If you’re lucky enough to own, or be able to borrow a metal version, the core is really the highlight, but if not, don’t pass up the chance of trying a very fun puzzle with the plastic version.