Tag Archives: Wood

Tetraxis at IPP 32

During the Design competition at this year’s IPP I was able to play around with some of Jane and John Kostick’s new designs. In total there were three new designs from Jane this year, and despite not winning any awards, they are all great to play with, and much like the Tetraxis I wrote about yesterday, have a quality that makes you want to take them apart and put them back together. A lot.

This year there were many more puzzling elements to the offerings so rather than just making the complete structure, you could spend a lot of time trying to make the other structures mentioned. First up is the 3 Layer Tetraxis array.

Kostick's 3 Layer Tetraxis array on a bronze star

Kostick’s 3 Layer Tetraxis array on a bronze star

3 layer Tetraxis array

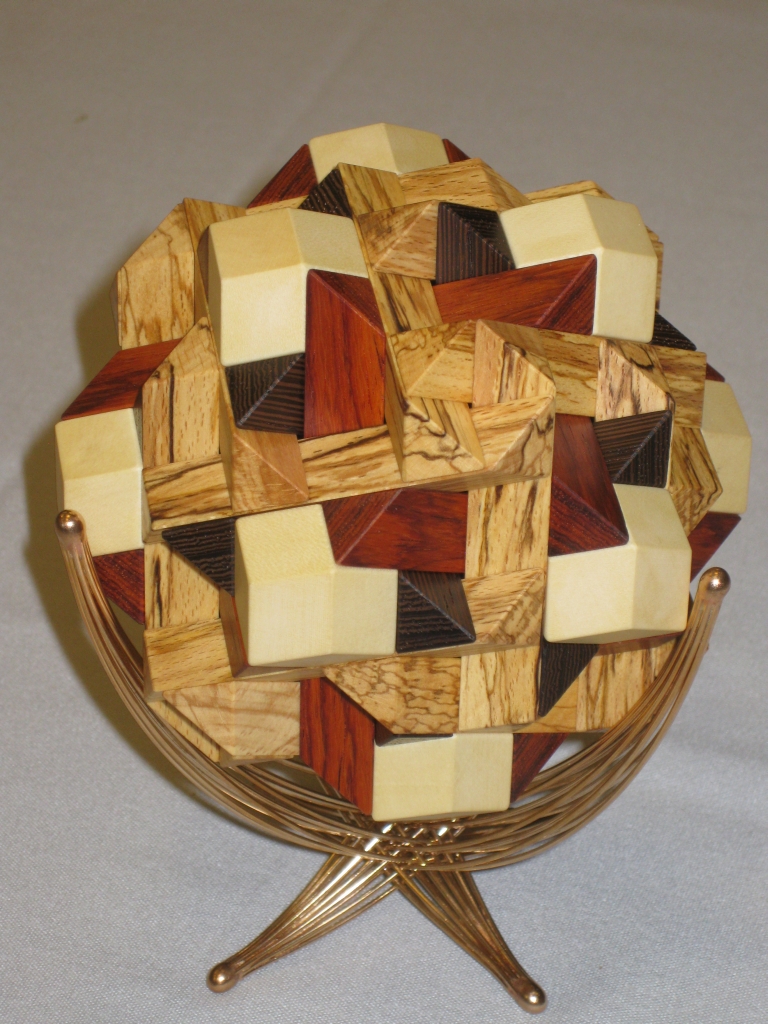
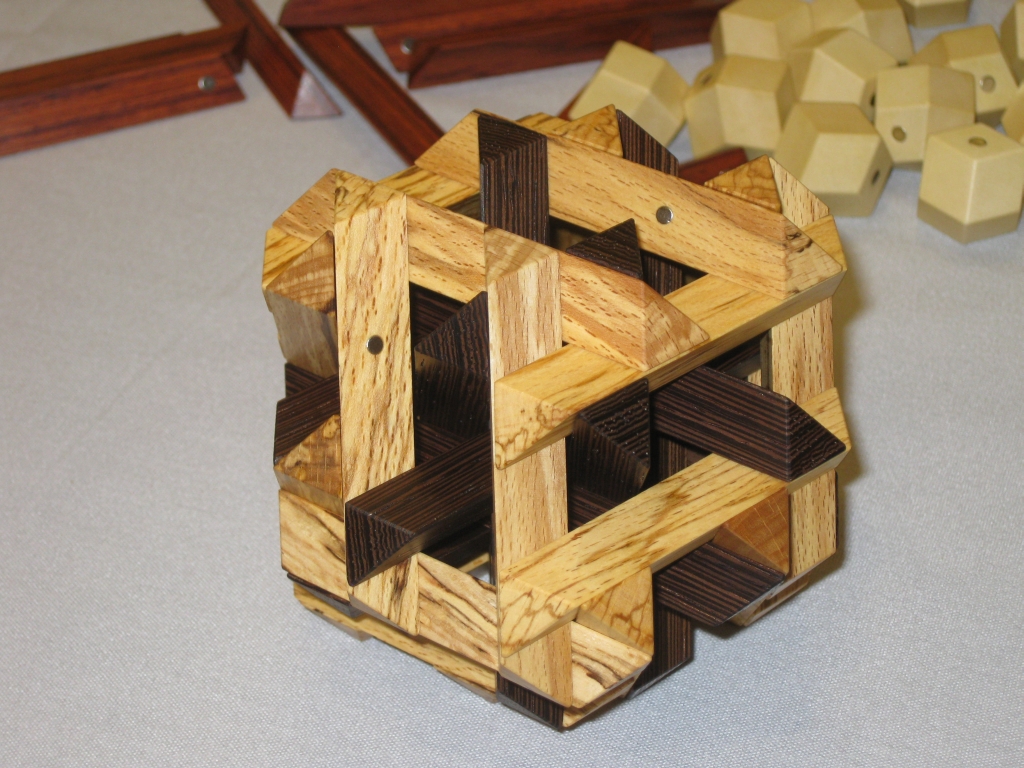
This is the largest of the three structures, measuring 4.5″ when fully assembled. (Thanks Allard for the correct size) Made from a number of exotic woods including Wenge, Maple, and at a guess Bubinga and Spalted Apple, the puzzle looks stunning. Jane’s top quality finish on the pieces is clear and the fit is excellent. As with the Tetraxis array I wrote about yesterday the pieces are embedded with magnets which hold the structure together, and help lead you to the solution.

I had a lot of fun playing with this puzzle. It has the initial appearance that it’s much harder than it looks which may have put some people off, but it’s so much fun to play with that you’re really missing out if you don’t.

There were seven challenges with the 61 sticks and blocks. None were overly difficult, however each creates a stunning structure which would look great in any display. Also it’s worth noting that all of the first three solutions can be made at the same time.

The challenges were to use the set of 61 sticks and blocks to put together seven compositions that symmetrically surround a center:

1. Using one block and the 12 longest sticks
2. Using the 12 blocks and the 12 mid-length sticks
3. Using the 24 shortest sticks
4. Combine 1 & 2
5. Combine 1 & 3
6. Combine 2 & 3
7. Combine 1, 2 & 3

Below are a few images showing some possible combinations, but I’m not going to show all the solutions, you can work them out for yourself!

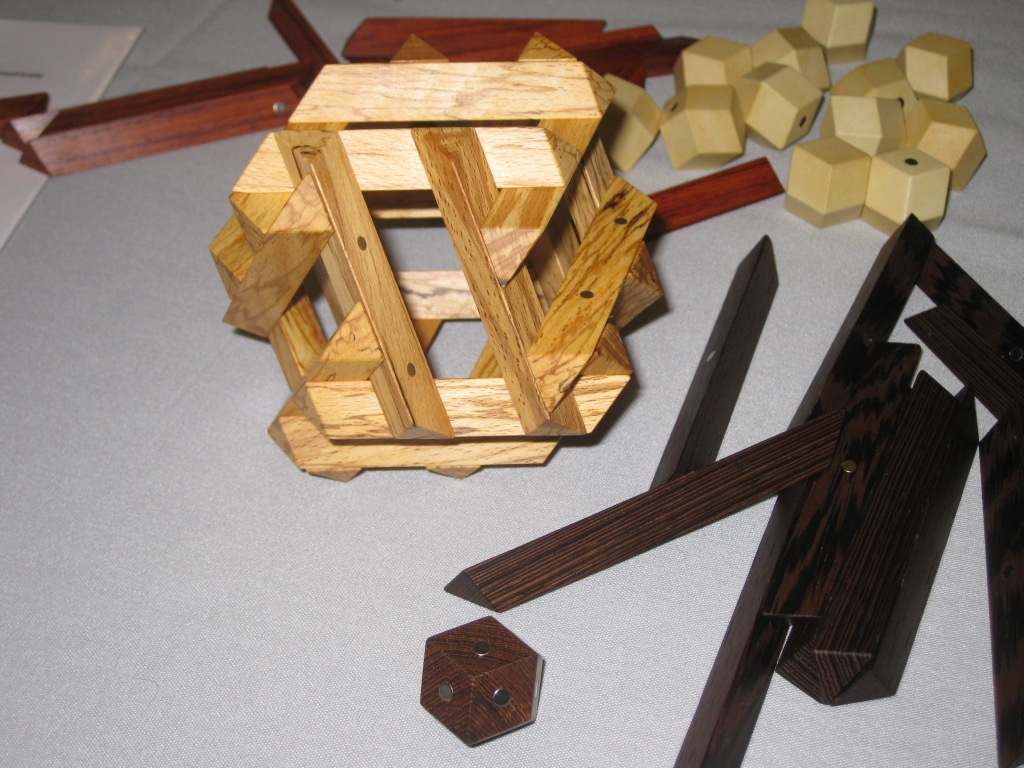
Tetraxis, outer later removed.

Tetraxis, outer later removed.

The outer ‘layer’ removed showing the inner structure.

Tetraxis, inner cage

Tetraxis, inner cage

The Wenge ‘core’ disassembled leaving the inner cage. As you can see the magnets and the lattice hold the structure together without any support.

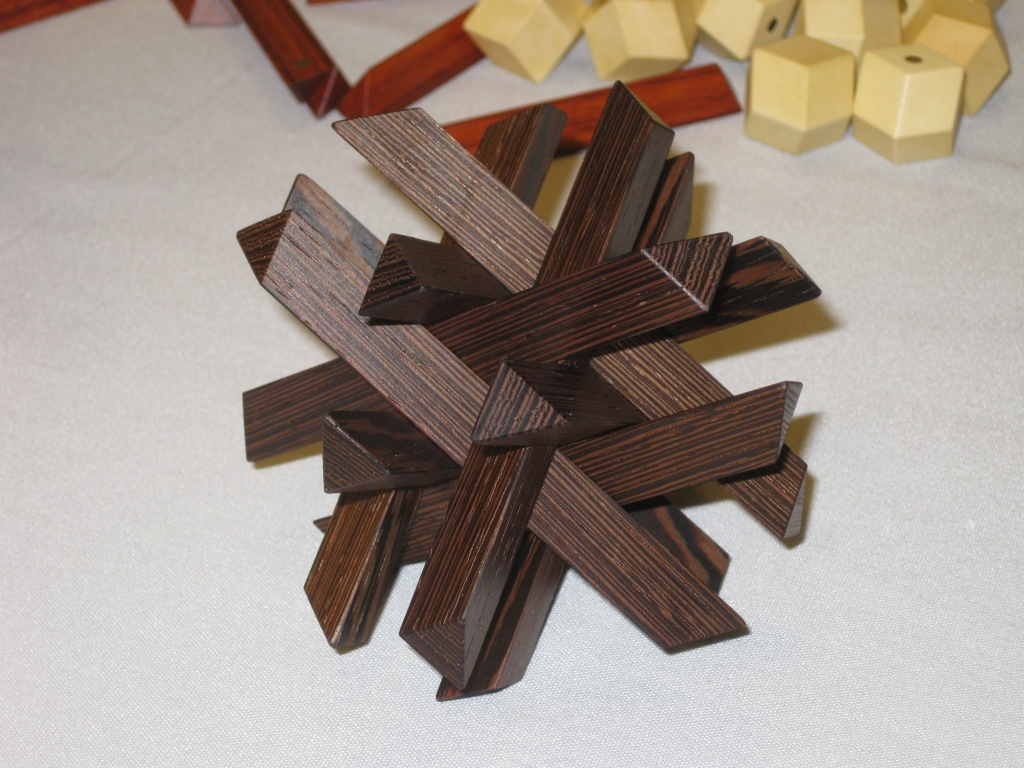
Tetraxis core

Tetraxis core

The Inner symmetric core. I love this structure.

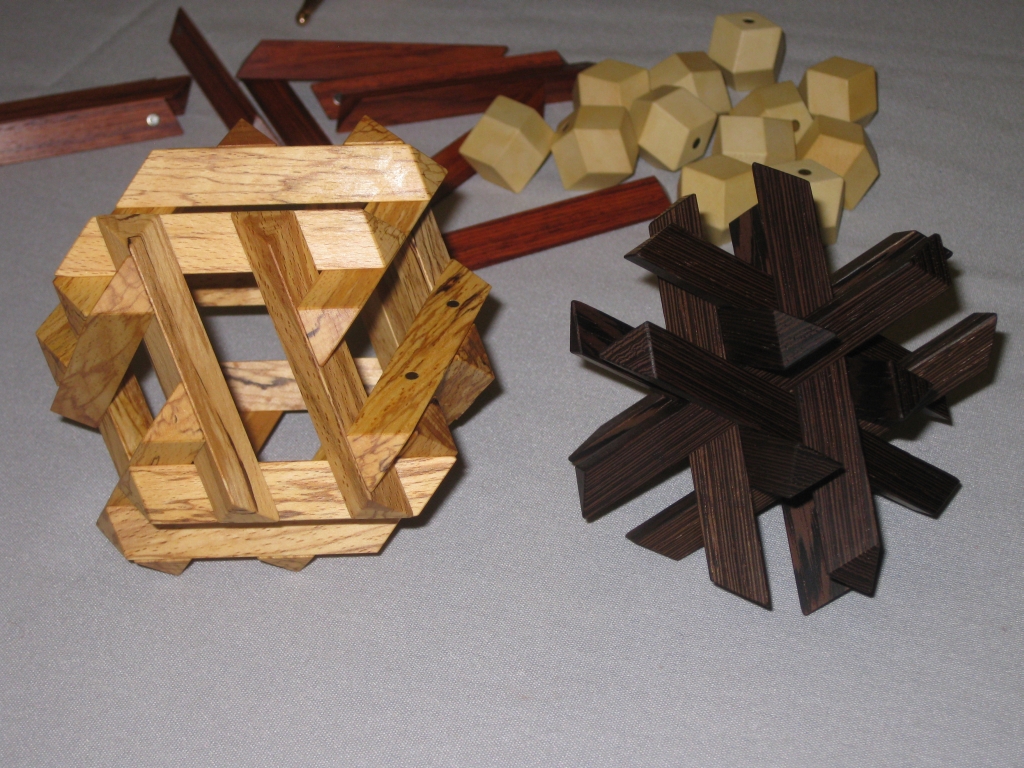
Tetraxis

Tetraxis

Both parts of the inner core assembled separately. If you look closely, you can see the three sticks in each plane.

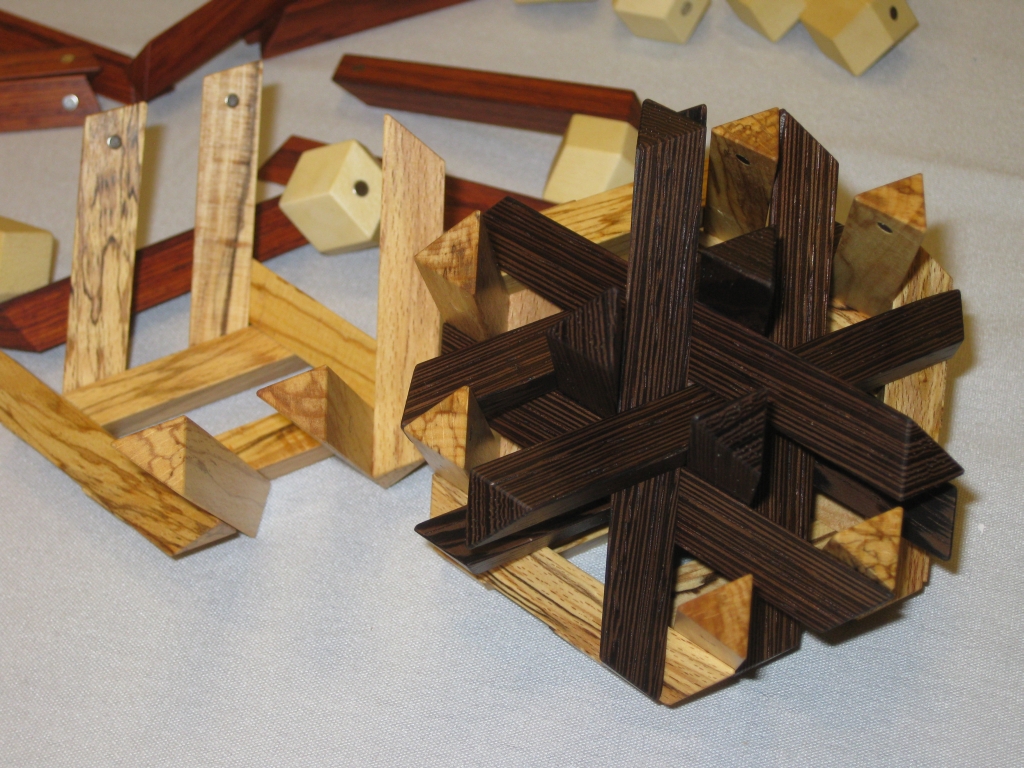
Tetraxis, assembling the core inside the cage.

Tetraxis, assembling the core inside the cage.

Here you can see how the inner code is nested inside the cage.

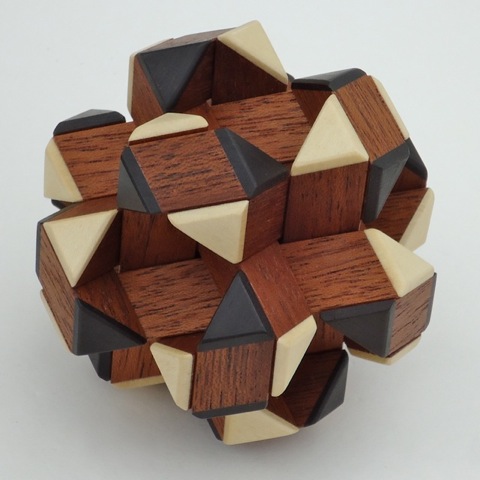
Chamfered Cube

Chamfered Cube

Chamfered Cube

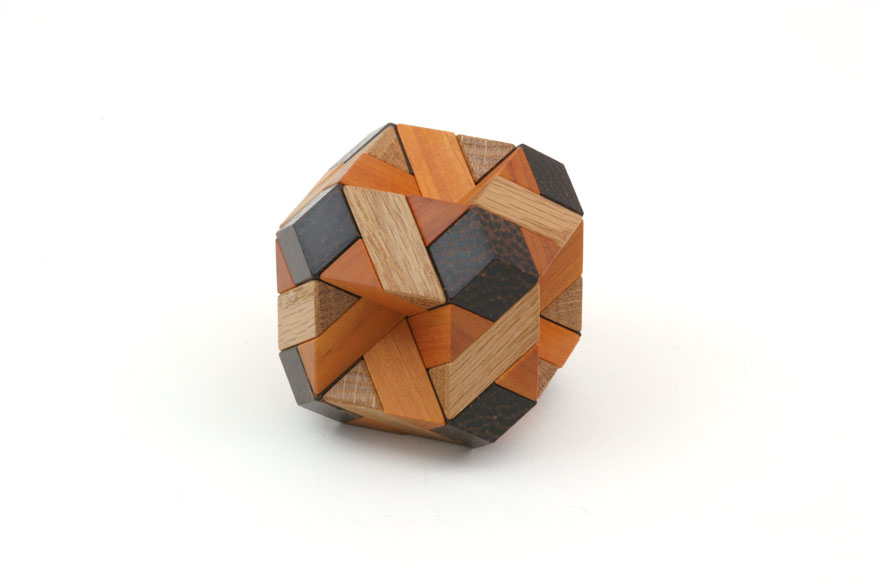
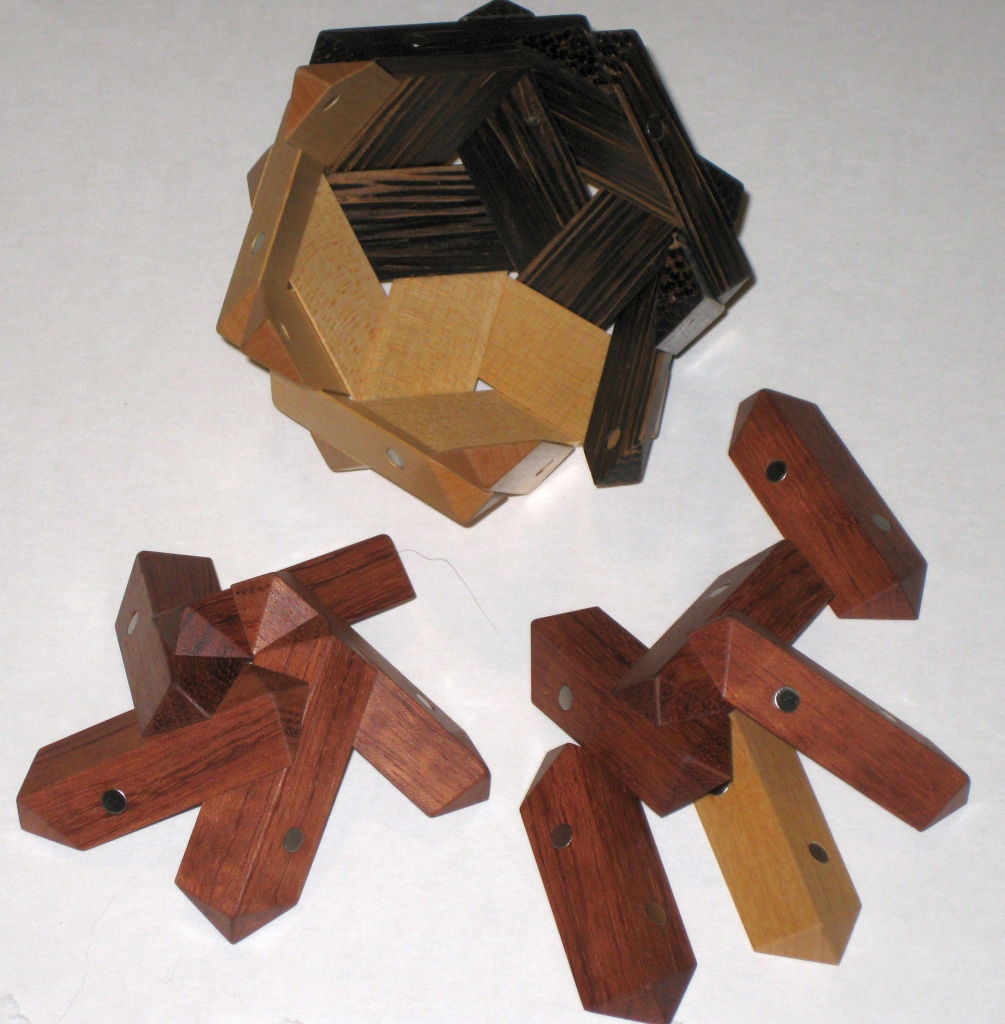
Next up is the Chamfered Cube. This much smaller structure looks exactly as the name suggests, and really stands out with the pyramid shaped indents in each side of the cube. For some reason my photos of the remaining two puzzles didn’t turn out very well, so I’m having to use the competition photos from John Rausch’s site.

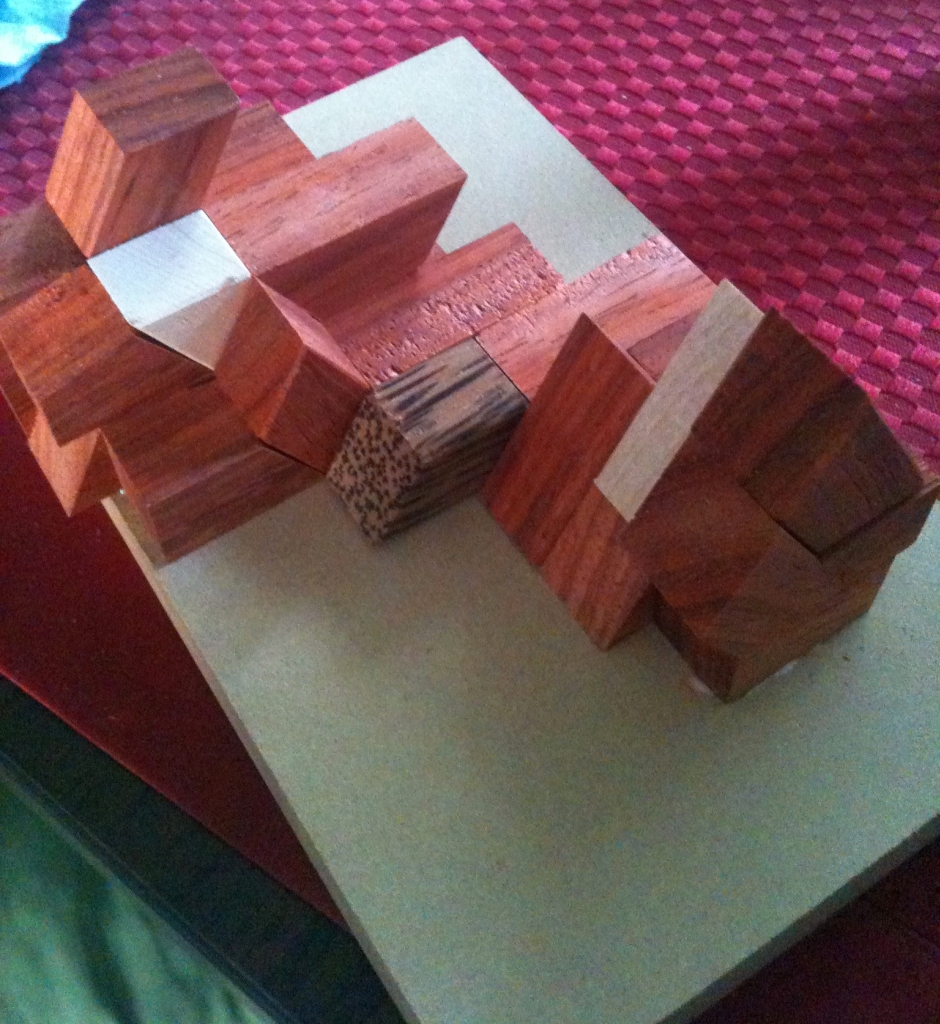
The goal for this puzzle is to use either set of 12 sticks to hold the 8 blocks in place at the corners of a cube and then to add the other set of sticks to make a large chamfered cube, which is the shape of the small white block that can fit in the center of the arrangement. This isn’t a difficult challenge as the shape of the ends of the sticks, and the blocks themselves guide you toward the correct solution. Made from Black Palm, Red Oak, and at a guess Chakte Viga it’s a striking looking puzzle.

Double Duals

Double Duals

Double Duals

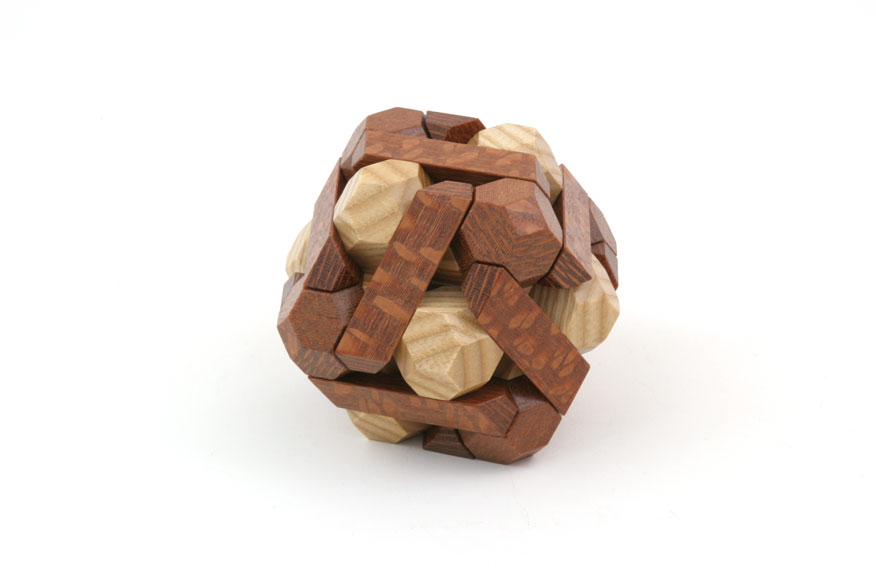
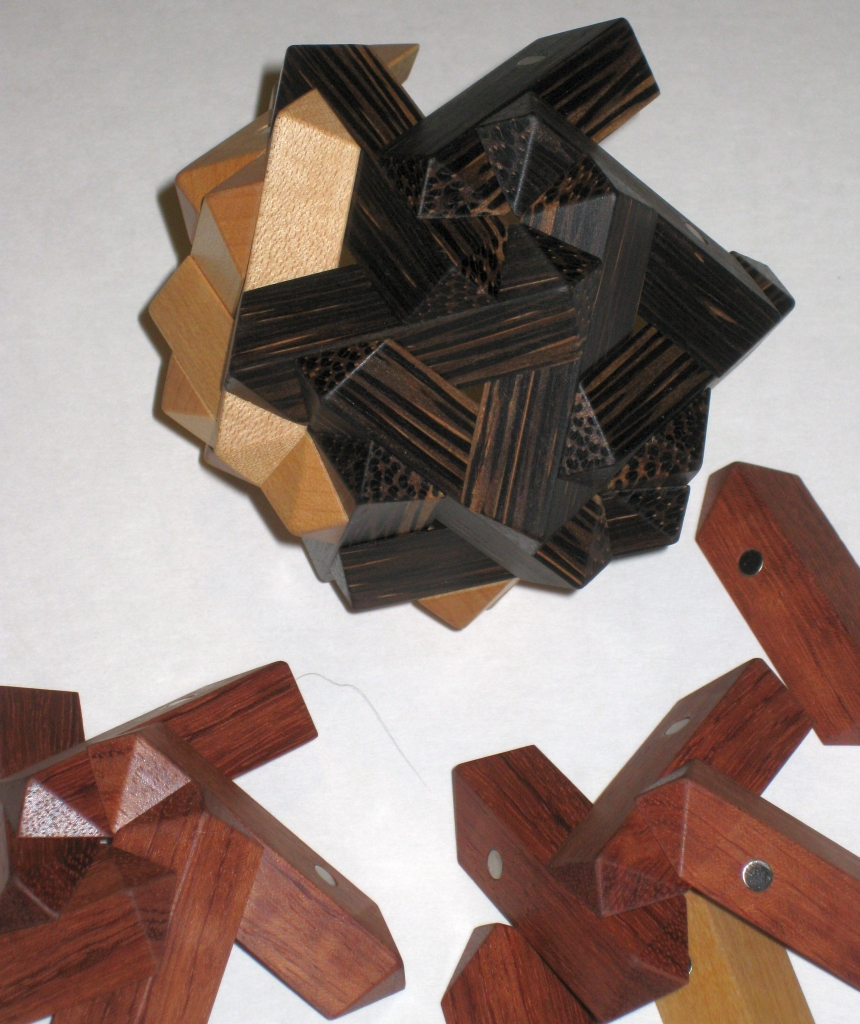
The third entry is Double Duals. Around the same size as the Chamfered Cube, this is another stunning looking puzzle. Made from Leopardwood, and possibly red oak (not sure on the lighter wood), this puzzle is almost an inverse construction of the previous puzzle. Rather than the sticks crossing through the centre of the structure, here they form the outer shell.

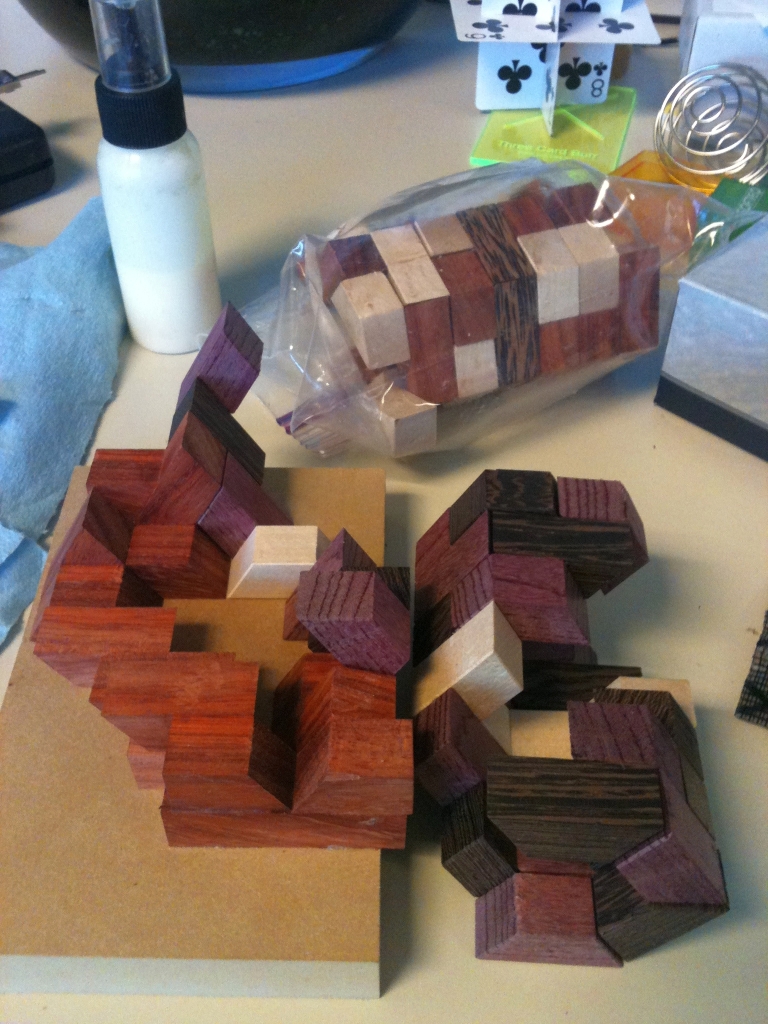
The goal of the puzzle is to make a pair of complementary arrangements such that each one contains blocks and 12 sticks symmetrically surrounding a center. Then put them together so that one is inside the other, and they both surround the block without magnets. Then repeat the entire process with each set of sticks making the opposite arrangement.

The clever part here is that as is hinted at, you can swap the sticks between the inner and outer construction. It’s a clever arrangement, and really needs to be played with to be appreciated.

Other KoStick Puzzles from IPP

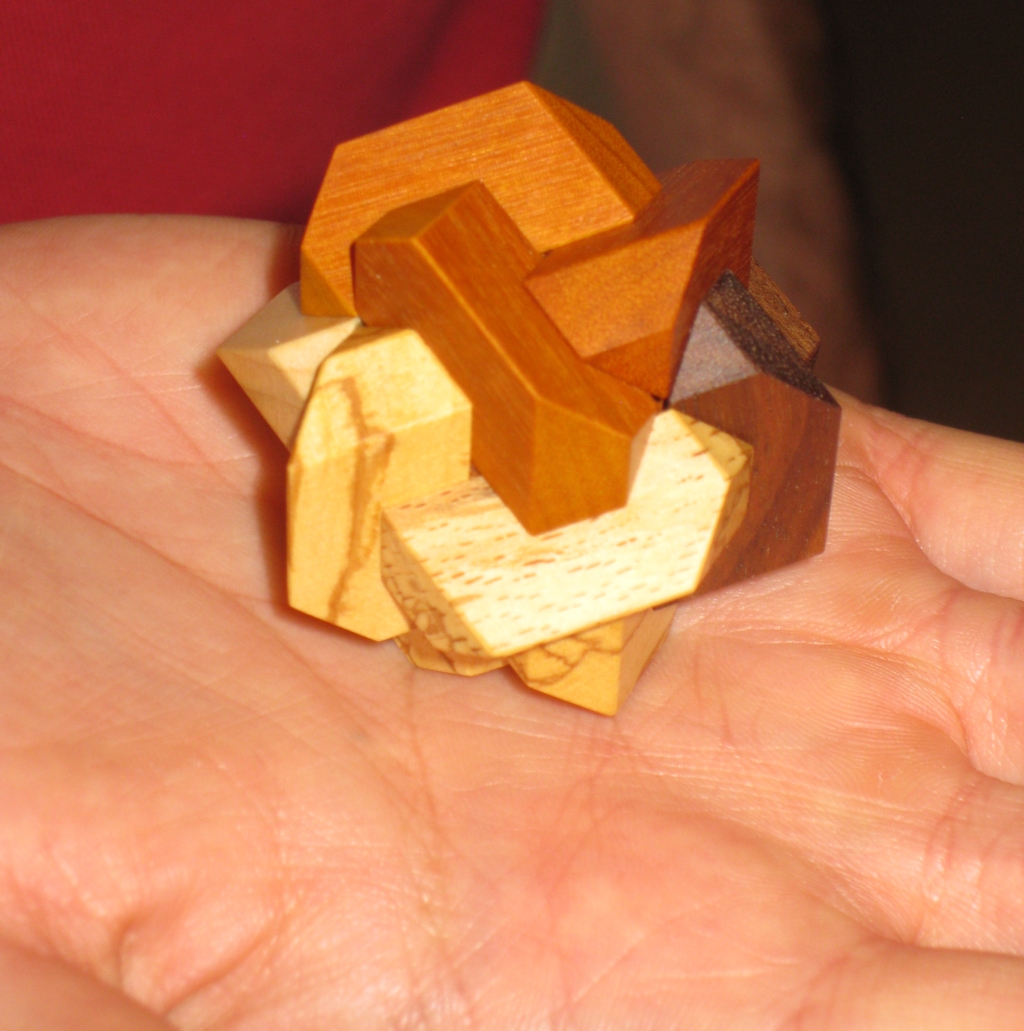
The competition entries weren’t the only appearance of Jane’s work over the weekend. It turns out that the IPP committee had arranged for Jane to make a very special little puzzle for each of the people who helped run and organise the events over the weekend. That came in the form of a tiny little Tetraxis puzzle.

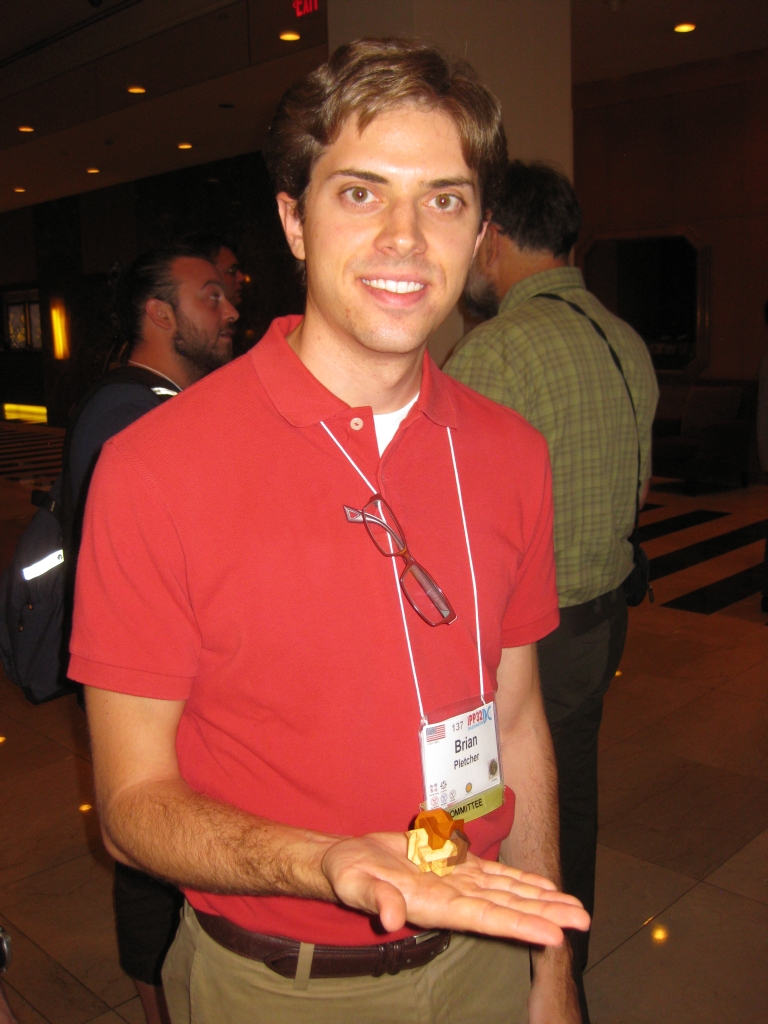
Brian with his Kostick puzzle as thanks for helping

Brian with his Kostick puzzle as thanks for helping

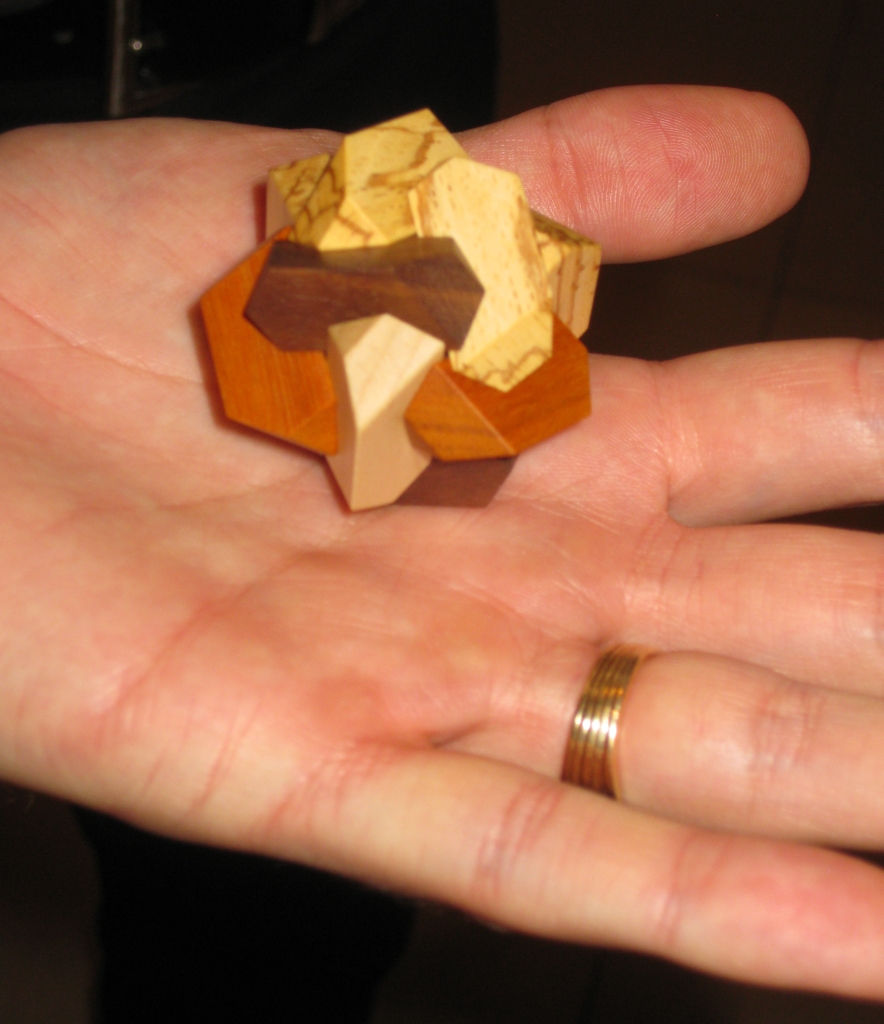
Brian Pletcher was one of the people helping out and was given one of these beautiful little puzzles. as such I was lucky enough to be able to get a good look at it. It’s not a challenging assembly, however the way the blocks have been cut, there are multiple ways to assemble the pieces.

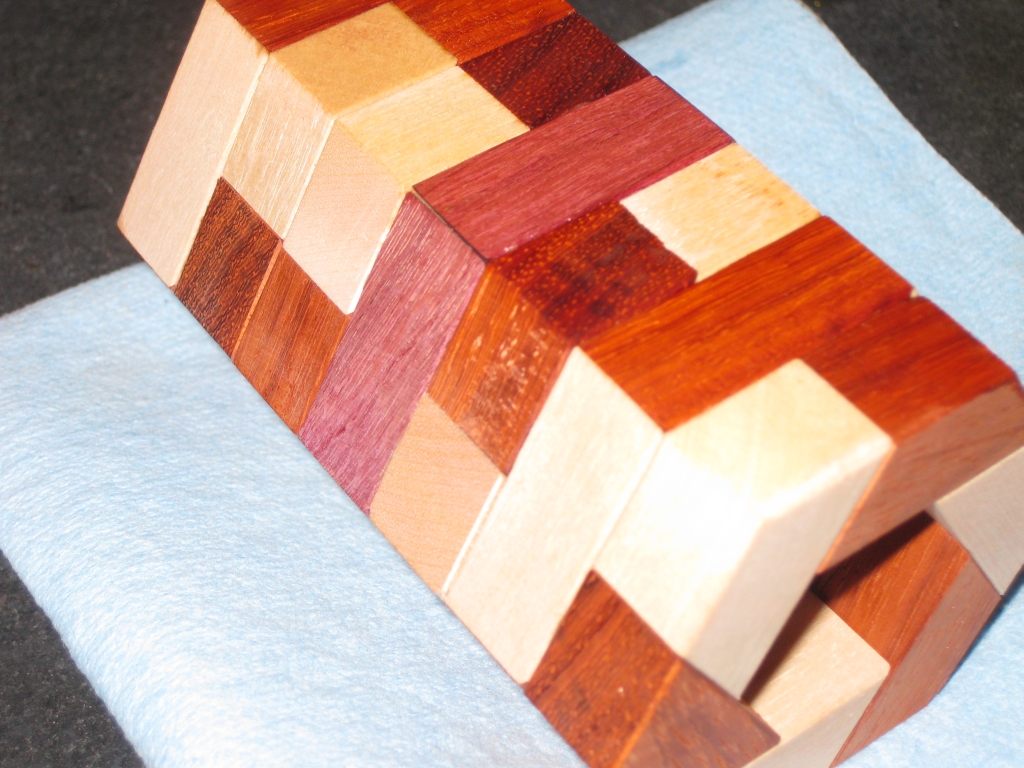
A closeup of the Tetraxis gift made by Jane Kostick

A closeup of the Tetraxis gift made by Jane Kostick

A closeup of the Tetraxis gift made by Jane Kostick

A closeup of the Tetraxis gift made by Jane Kostick


It’s a great looking puzzle, and something I’m sure the IPP organisers will be very happy to have in their collections.

There was one final puzzle from the KoStick range which I played with over the weekend, which was thanks to John Rausch pulling a tube with some of Jane’s pieces out of his pocket and handing them to me. It turns out having talked with Jane that the puzzle was a 2 Layer Tetraxis array, knows as 4P1S. Now I have no idea what the code stands for, but for me it was probably the most challenging of the Tetraxis puzzles that I played with over the weekend.

Tetraix 2 layer Array 4P1S

Tetraix 2 layer Array 4P1S

The version John had was in a single wood, however when I spoke to Jane about the puzzle she mentioned that she had two versions available. Seeing the puzzle above in Mahogany with Ebony and Holly tips I was quick to buy it from Jane. The puzzle is very similar to the Chamfered Cubes puzzle however there are no corner blocks to help with the assembly. As such this is a much harder puzzle to put together and as such I found it a lot of fun.

In total there are 24 sticks, 12 long and 12 short which need to be combined to make the shape above. It may look fairly simple, but it’s not as easy as it looks. Starting off, you make two sub-assemblies which you need to interlock, and then build up from there. Seeing how the first two interlock is the real challenge, and once they are in place, the rest comes together fairly quickly from there.

If I were to recommend one of the puzzles to get, it would be this last puzzle. I did!

Overall, Jane’s work is incredible, and really the photos don’t do it justice. It needs to be seen to be appreciated, and the movement of the pieces only really becomes magical when you have it in your hands. The wooden versions are well priced for the work that goes into them, but if you want a cheap version to be able to play with and get a feel for how the pieces interact before spending a lot of money, then I’d recommend some of the plastic versions which you can buy on their web shop.
Tetraxis and Six-Axis

Wow, doesn’t time fly. It’s nearly the end of 2012, and I realise that I still haven’t sat down and written up the Tetraxis puzzles that I received from Jane Kostick over a year ago. Worse that that, I created the video review back in October (last year)! Not only that but after being at IPP and playing with more of Jane Kostick’s excellent puzzles, I’ve bought more from her and really need to review that too. So with all the procrastination out of the way, I hope you enjoy the review of this fine puzzle set.

Some time before IPP31 I came across Jane and John Kosticks website, and really liked the look of their puzzles. Digging around a little, I found that as well as the mass produced plastic versions of the puzzles, Jane also made some rather unique versions from wood as well. So chancing my arm, I got in touch and asked if she would make me a set.

Jane and I chatted back and forth for a while via email, and eventually agreed on some woods to use from Jane’s fairly large stock, and she set about making the puzzle pieces for me. I have to admit that I really enjoyed talking with her about the puzzle itself, how the magnets were attached to the sticks, her experiences with different woods, and many other topics, including IPP. In the year that has passed since then I still talk to Jane via email occasionally and on returning from IPP 32 I threw her another email commenting both on the great puzzles that she had in the Design competition, and also a particular puzzle that John Rausch had given me to play with, but more on that later.

Unbeknown to me, fellow puzzler Allard was also having a set of Jane’s sticks made and unlike me he wrote about them in a much more timely fashion.

Tetraxis

Tetraxis

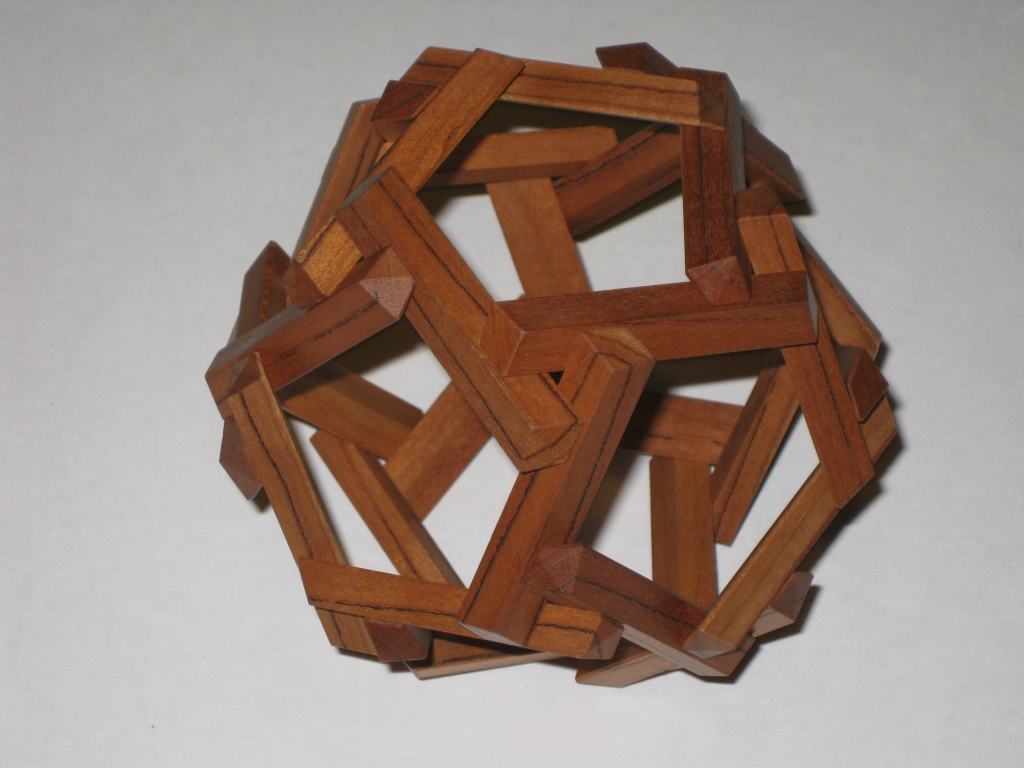
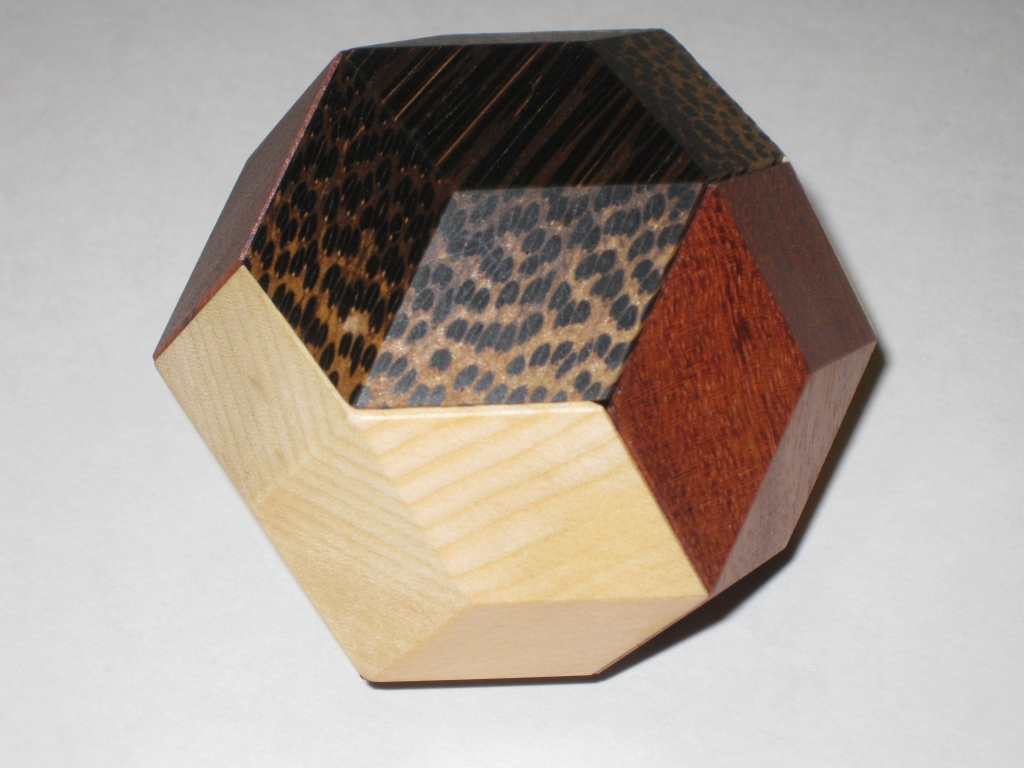
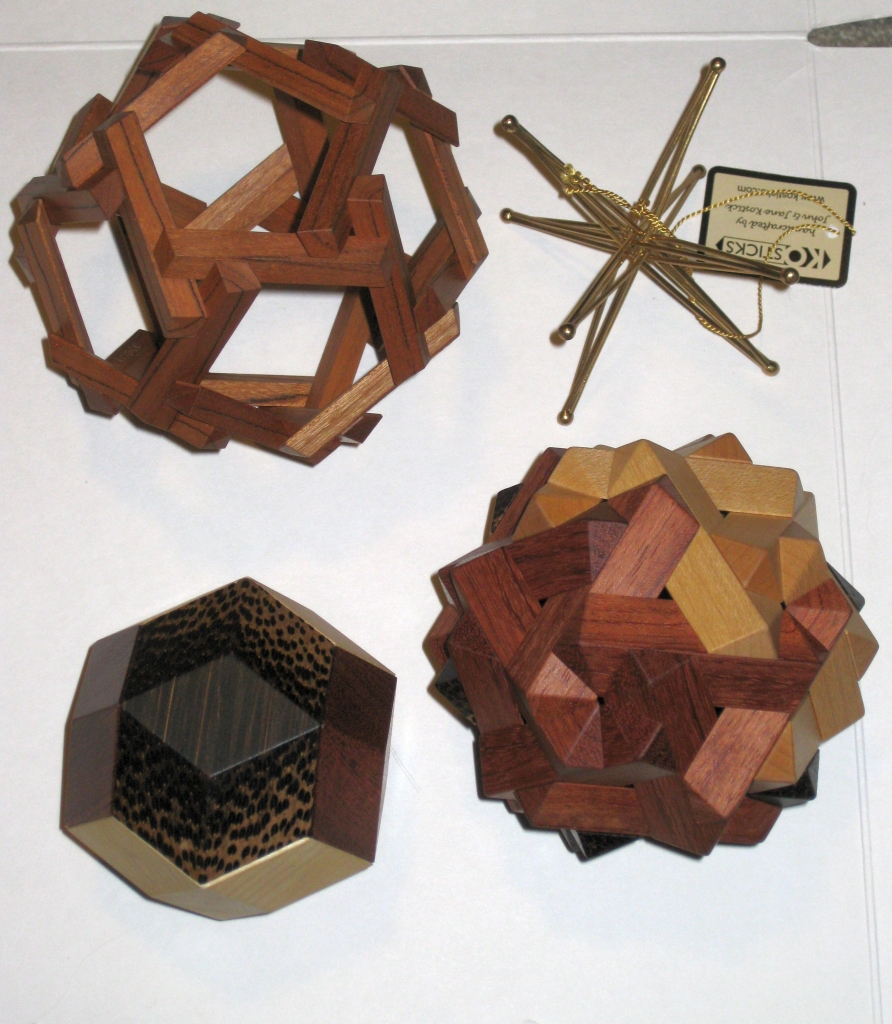
My copy is a three layer puzzle with a rhombic triacontahedron in the centre, then Jane and John’s Six-axis in the middle and a Ten-axis Tetraxis frame on the outside. The inner parts are made from Bubinga, Black Palm and Maple, and the outer Ten-axis is Cherry. They have trademarked the name Tetraxis, and use it to cover all of the puzzles they make including the Tetraxis Star, Tetraxis toy/puzzle, and Tetraxis magnetic sculptures in wood.

The whole structure shows the fantastic geometric relationships that are found in John’s stars and really helps you to visualise the geometry in play. So many puzzles are based on the geometry here, and you’ll probably recognise the shape of the six-axis Tetraxis as the same shape as Stewart Coffin’s Jupiter puzzle (amongst others).

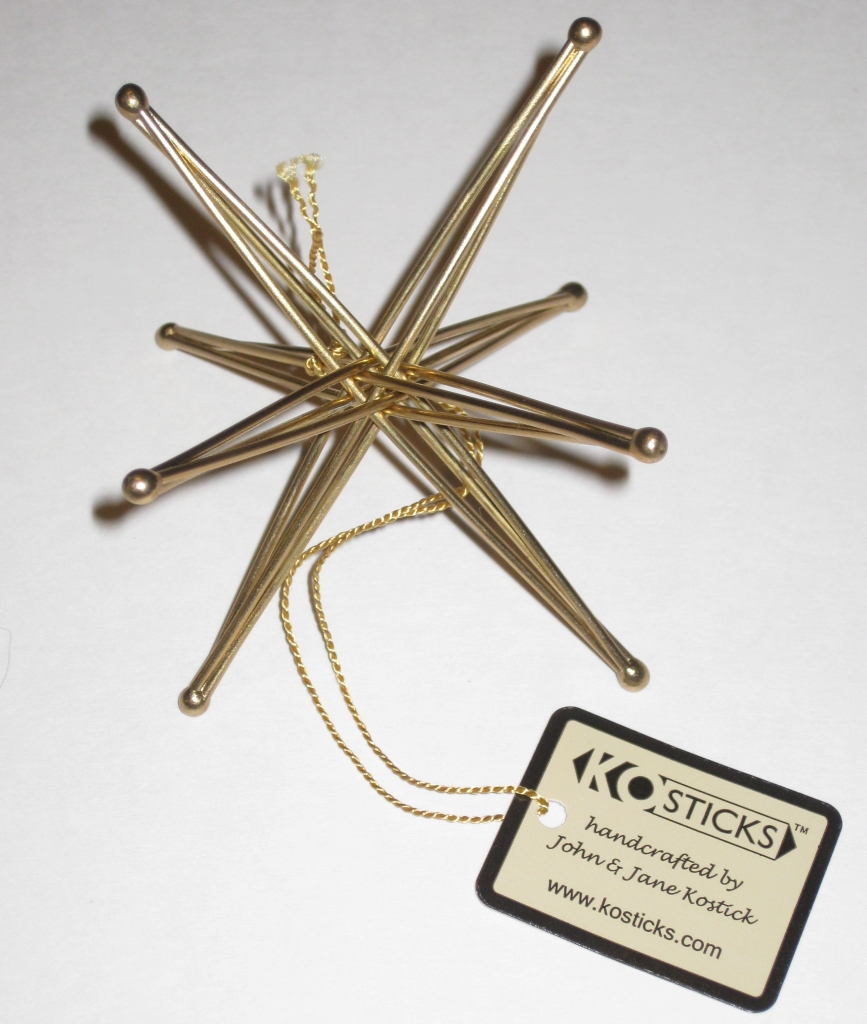
Tetraxis Bronze Star

Tetraxis Bronze Star

When I originally ordered the puzzle from Jane, things took a little longer than she would have liked due to some dull saw blades, so she ended up sending me one of her husbands Tetraxis stars (4 axis) as a little extra to say sorry for the delay. Now given that this was a custom order I really don’t think it took long at all, and the craftsmanship is superb. To my mind there was no delay and really it wasn’t an issue at all, so thanks for the little extra Jane, it’s beautiful too.

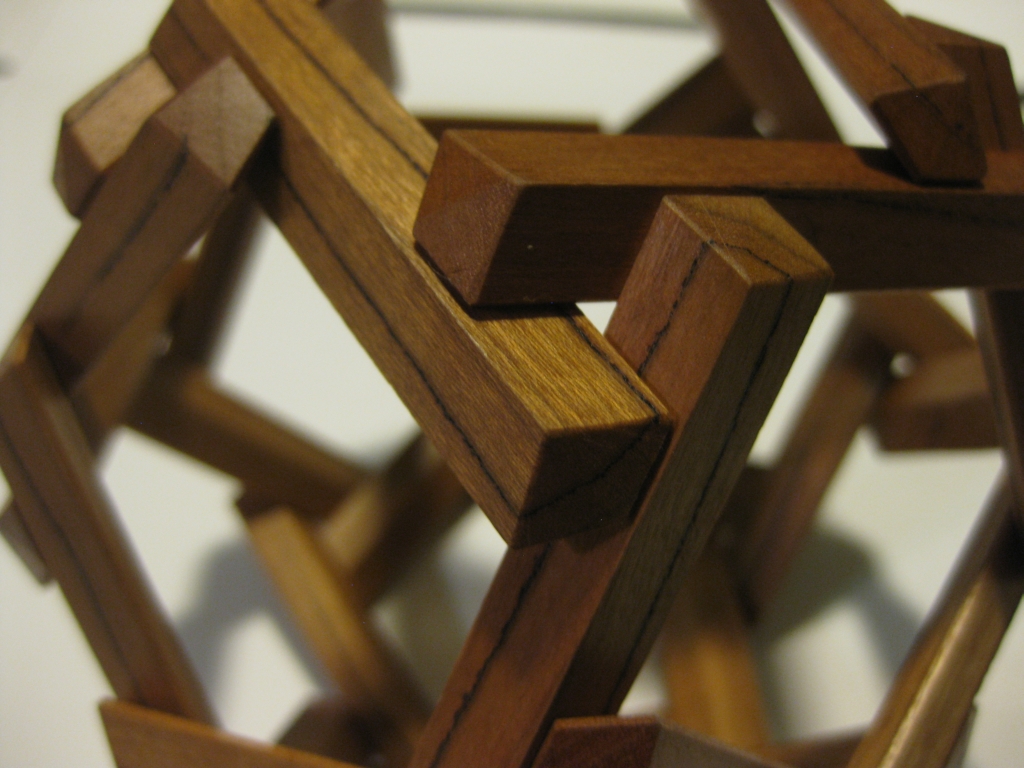
Tenaxis Closeup

Tenaxis Closeup

The Sixaxis partially solved

The Sixaxis partially solved

Sixaxis showing the five sticks coming together

Sixaxis showing the five sticks coming together


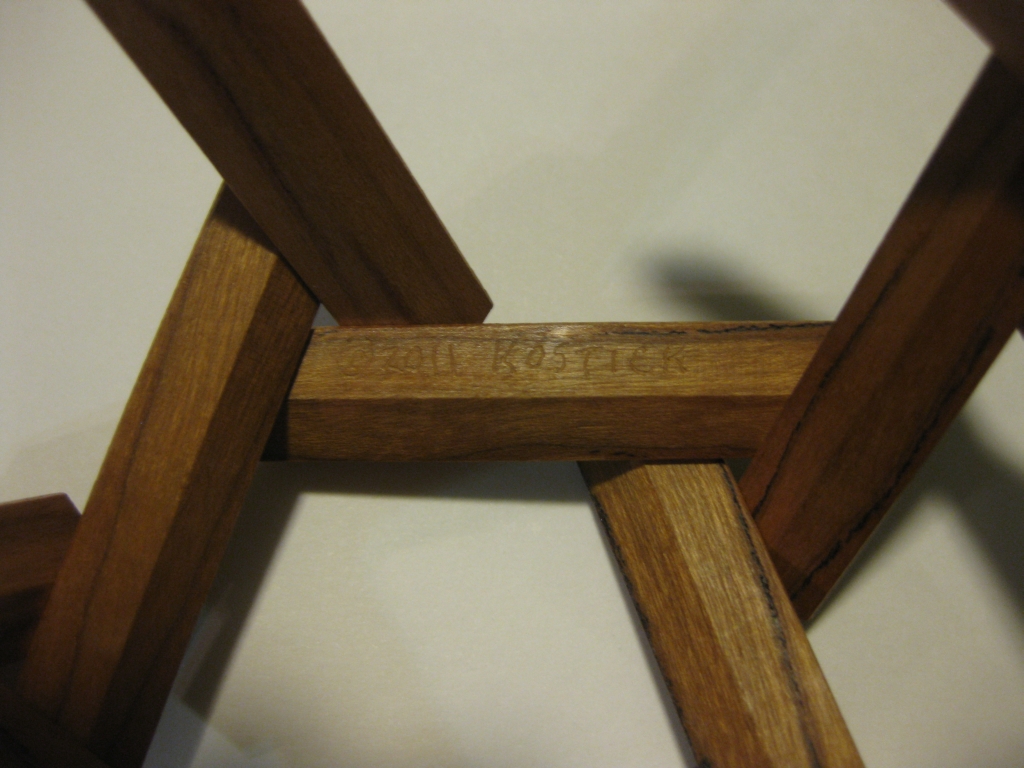
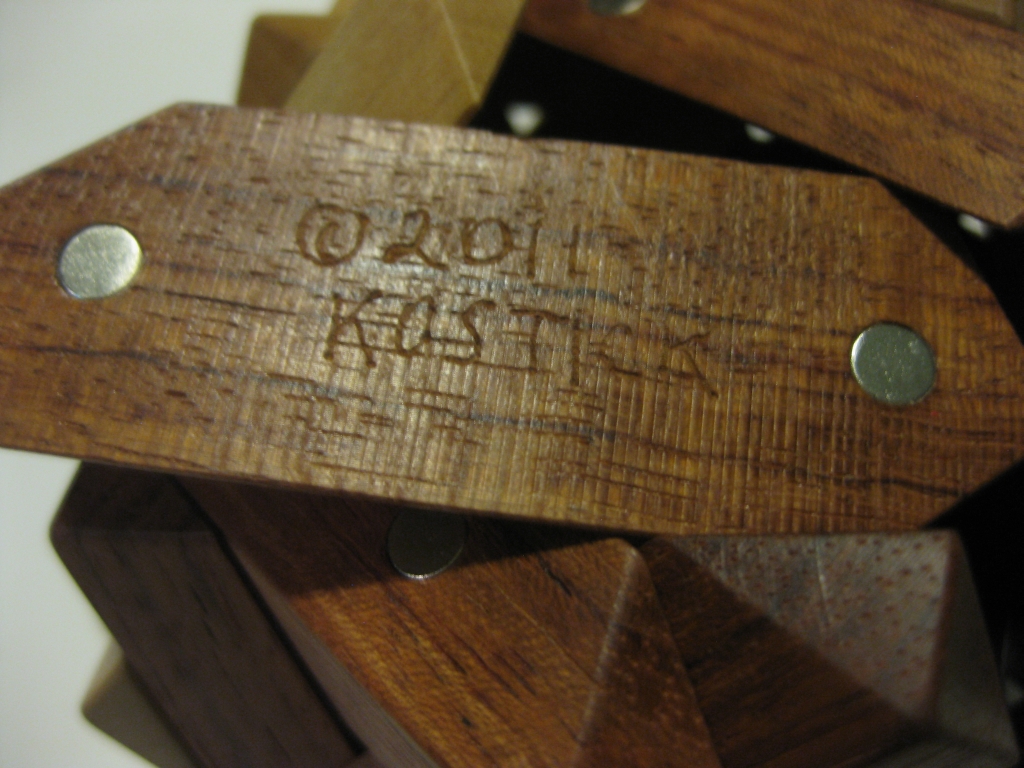
As you can see from the closeup pictures, the fit and finish of the sticks is excellent, and Jane has even signed the pieces which on this scale is no easy task. The overall structure may be fairly large as you can see in the video, measuring 4″ however each stick is just 0.25″ thick on the outer Ten-axis assembly.

Tenaxis Signed

Tenaxis Signed

Sixaxis Signed

Sixaxis Signed

Putting the pieces together isn’t overly challenging, and the magnets pull everything into place nicely so in terms of a challenge, this isn’t the most difficult puzzle you’ll play with, however it is remarkably relaxing to just start putting the pieces together and hear them snap into place. The resulting shape has a sculpture like quality which sits very proudly on my puzzle shelves, and gets a lot of attention from visitors.

Tenaxis Puzzle

Tenaxis Puzzle

The inner Rhombic Triacontrahedron

The inner Rhombic Triacontrahedron

Tetraxis layers

Tetraxis layers

It’s a beautiful puzzle, and truly a work of art. This year at IPP, Jane and John had a number of new designs entered which I was fortunate enough to play with. Not only that but John Rausch had a one off puzzle Jane had made which he handed me to play with. Having talked to Jane about this puzzle after IPP, I now have a copy of that too, so come back tomorrow to read about her IPP entries and a new design that I fell in love with.

Hex Stair (Part 3) – Finishing

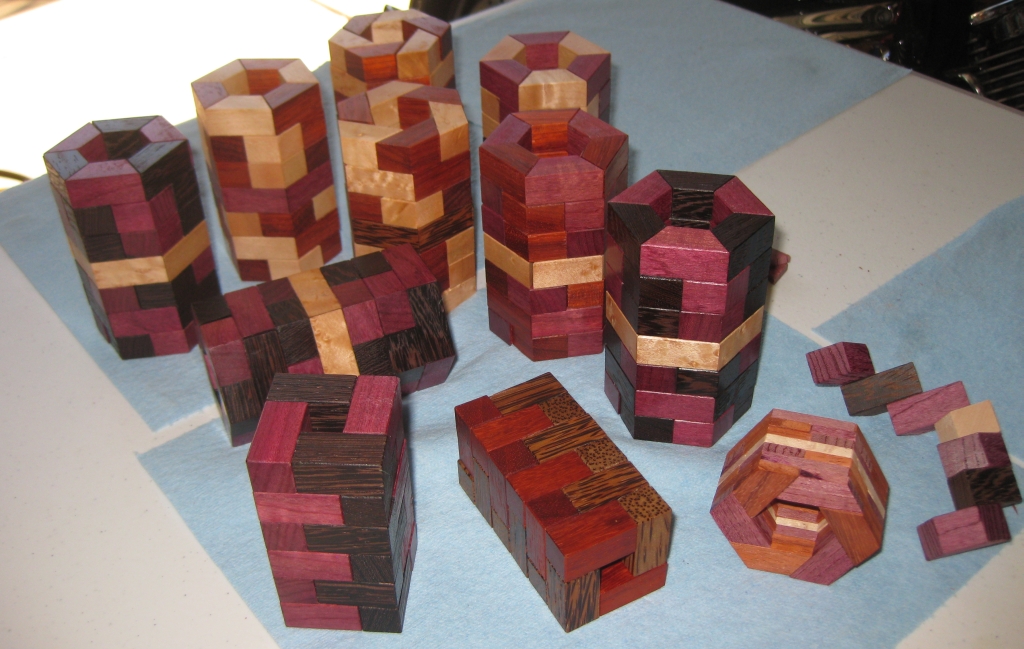
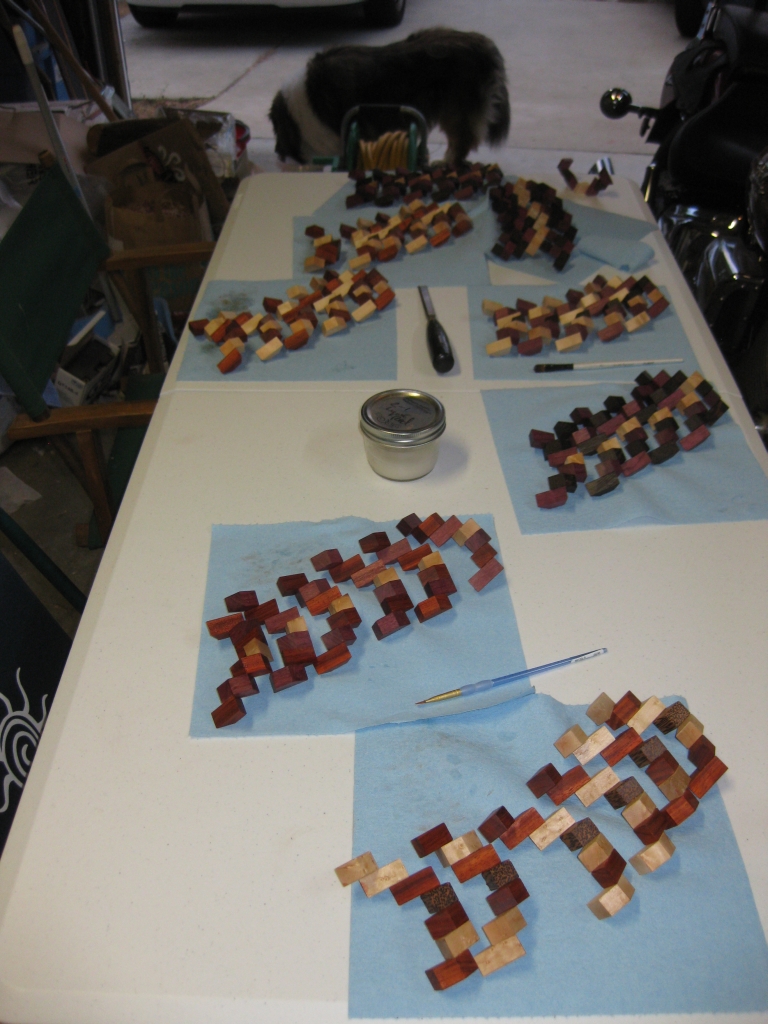
After the quick interlude as I prepare for IPP, here’s the third part of the Hex Stair saga. Despite only having 11 puzzles made in the last month, it feels like I’ve been working on this project a fair bit longer. Still seeing all the puzzles finished and ready to go to IPP with me I’m really pleased with the results.

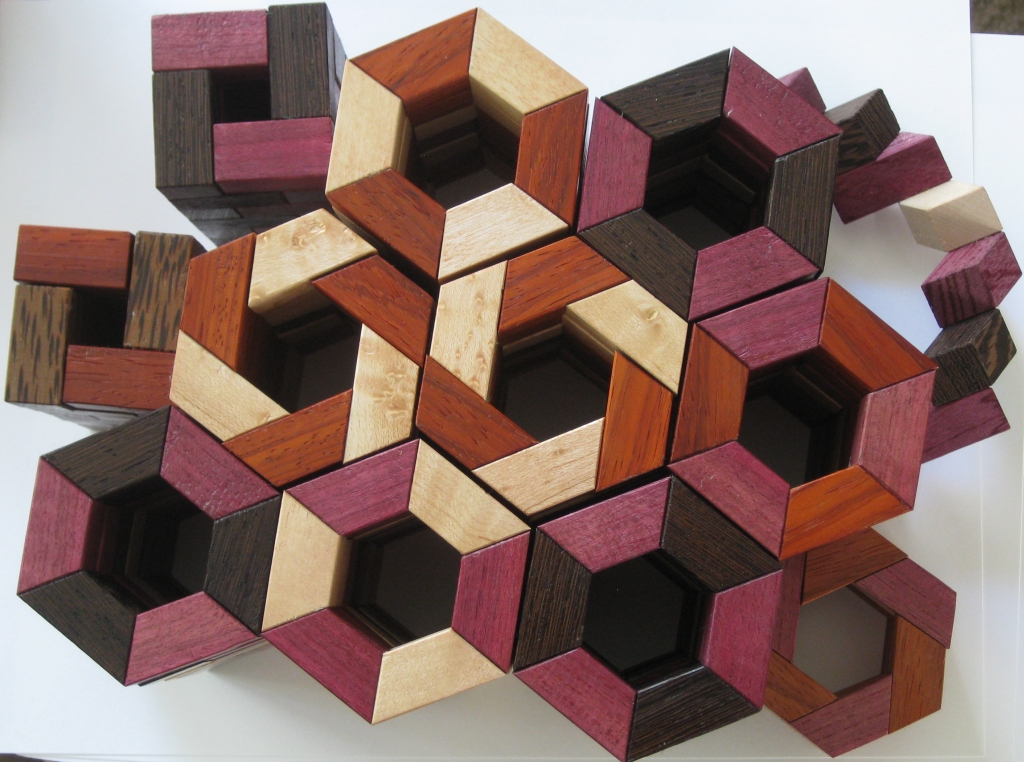
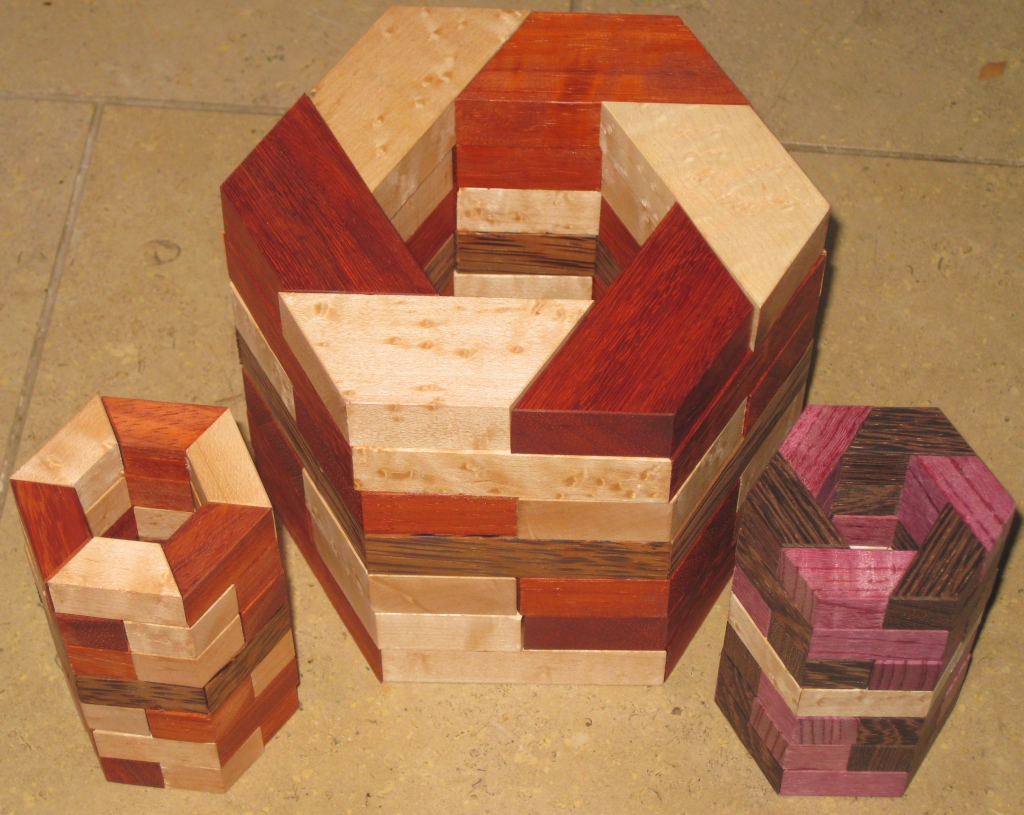
A Collection of Hex Stair's (and a couple of Domino Towers too)

A Collection of Hex Stair’s (and a couple of Domino Towers too)

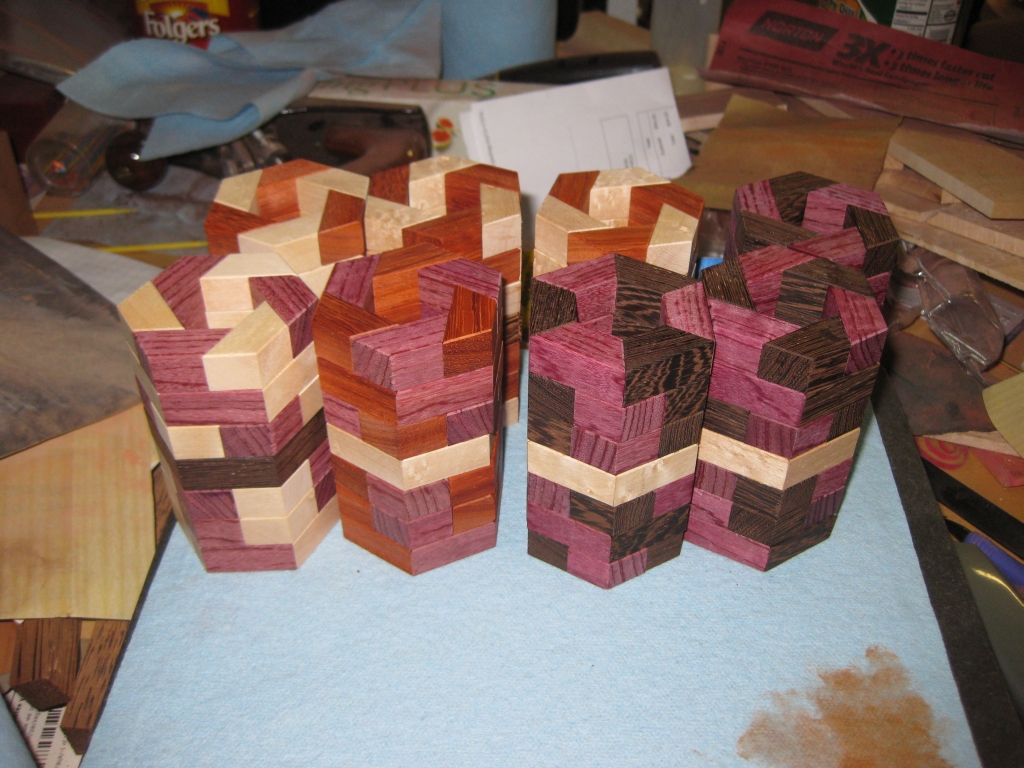
Another view of the set of puzzles finished and ready to go

Another view of the set of puzzles finished and ready to go

I’m not sure how anyone else views the finishing process, but for me it starts long before you ever get out a brush or some lacquer. Much of the look of a finished puzzle, or any wooden object really comes from the choices you make when you’re putting it together. There are subtle details which really help to ‘finish’ a project. For the Hex Stair (and the Domino Tower) puzzles, adding the very slight 45 degree bevel to the edges of the pieces really adds to the overall look. Without it, the puzzle looks incomplete. So for me that’s the first part in the finishing process. After each of the blocks are cut to size, I add a tiny bevel to each piece. It’s a time consuming process, but without it the pieces just lack that little edge that they’d otherwise have.

The puzzles pre-finishing.  Here they are unsanded.

The puzzles pre-finishing. Here they are unsanded.

Getting ready, each of the puzzles are assembled, as I will be sanding only the outside of the pieces. The reason for this is that I send a lot of time ensuring that the pieces are all the exact same size, to ensure a tight fit on the assembled puzzle. If I were to sand the pieces, then I’d lose that fit, and the puzzle would become too loose, or not fit at all! You’ll remember that I aim for one thousandth of an inch tolerance between pieces. Sanding will remove much more than that!

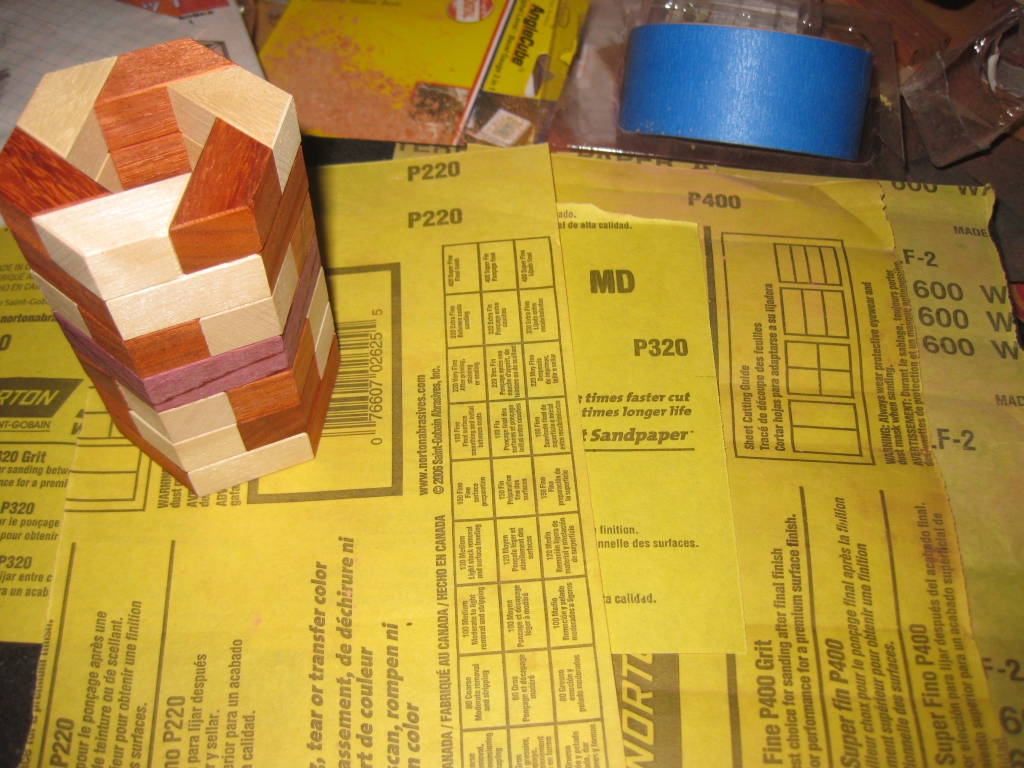
Each grit will be used from lowest to highest.

Each grit will be used from lowest to highest.

Given the finish I get from the blade of the saw, you could ask why sand the puzzle at all? The main reason is the feel of the puzzle in your hands when it’s sanded. Although the puzzle if perfectly dimensioned, the feel of the wood can still be a little rough. By working up through the various grit of sandpaper, we’ll take the wood to being silky smooth to the touch, and make it something that you’ll want to hold. Given that I’m starting off with something which is close to a finished surface, I’ll start sanding at 220 grit, then move up to 320, 400, and eventually 600 grit. The last two grits are more polishing the wood than removing imperfections, so very light passes are all that’s required at that stage.

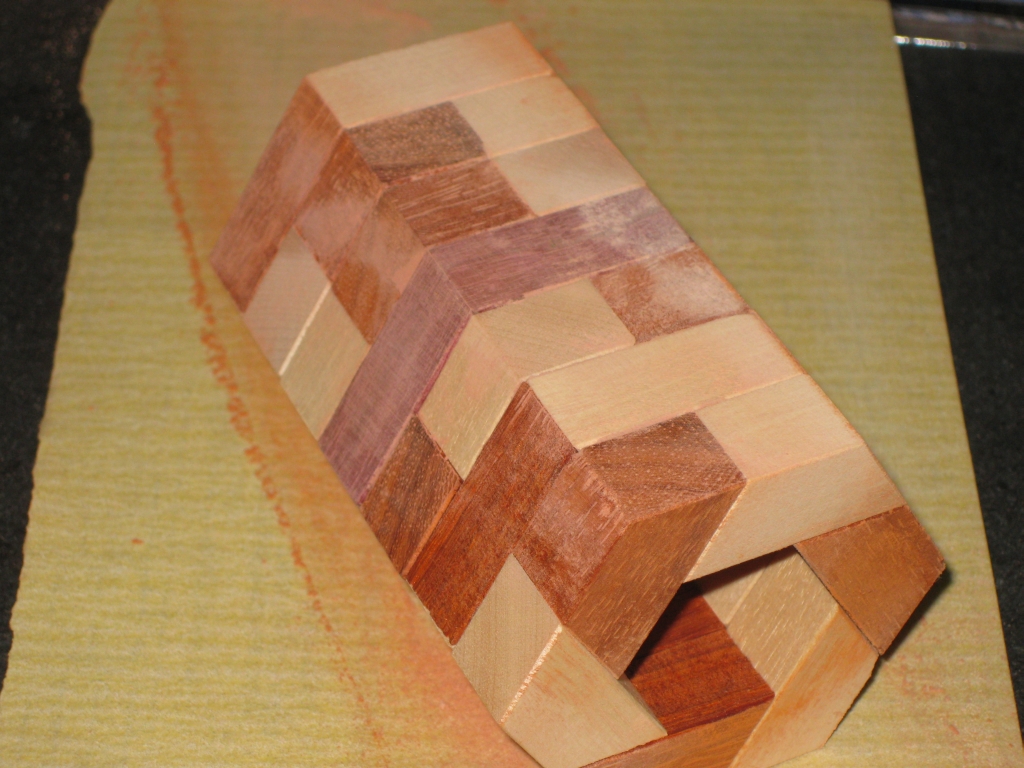
First pass sanding is done, and the dust needs cleaned off before continuing

First pass sanding is done, and the dust needs cleaned off before continuing

With each of the sides, and both top and bottom sanded, the puzzle is left coated in a fine sawdust. You’ll notice that I’m working with the sandpaper attached to my granite block. I work the puzzle across the paper rather than take the paper in my hand and bring it to the puzzle. The former ensure that the surface is dead flat, and I don’t over sand any particular area, where there latter, the different pressure from my fingers would lead to imperfections. Before moving to the next grit, the dust has to be taken off, otherwise it will be ground into the surface of the wood, and you will end up working harder to get the surface you’re looking for. To do this I use two processes. First up, I have an air compressor with a fine nozzle on it. Using that at about 60 PSI, I blow most of the dust off the surface, taking care to ensure I get any dust out of the pores of the wood. On wood like the Paduak I’m using which has fairly deep pores, the air easily clears them out.

The Tacky Cloth used to remove dust from the surface.

The Tacky Cloth used to remove dust from the surface.

Once I’ve blown the dust and cobwebs away, I use a Tacky cloth to take care of anything that’s left on the surface. The Tacky cloth is has an almost waxy feel to it, and does a great job of taking anything loose off the surface. With that done, I can continue up through the grit until I finally reach 600. All in all it takes about forty minutes per puzzle, but since I was working with all the puzzles, around 3 hours in total.

The puzzle sanded up to 600 grit.

The puzzle sanded up to 600 grit.

It may be a little hard to tell the difference from the photograph, but this is the puzzle sanded up to 600 grit. The real difference is in the feel of the wood. Now much smoother, the finish is almost like glass.

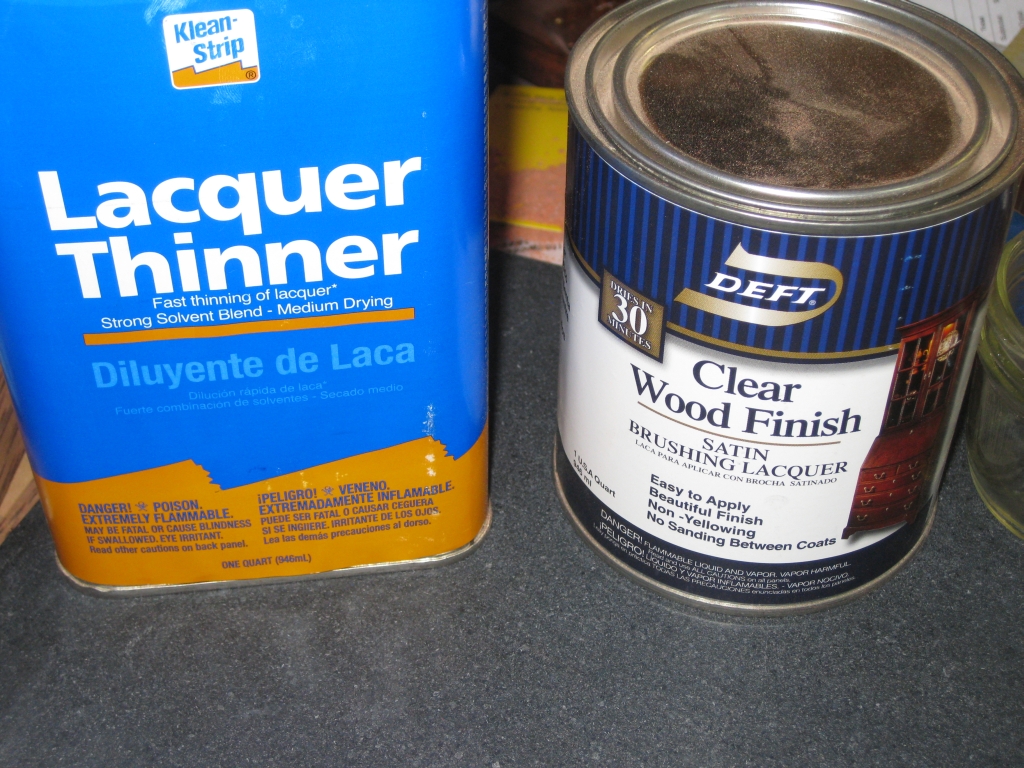
The Satin Laquer for finishing

The Satin Laquer for finishing

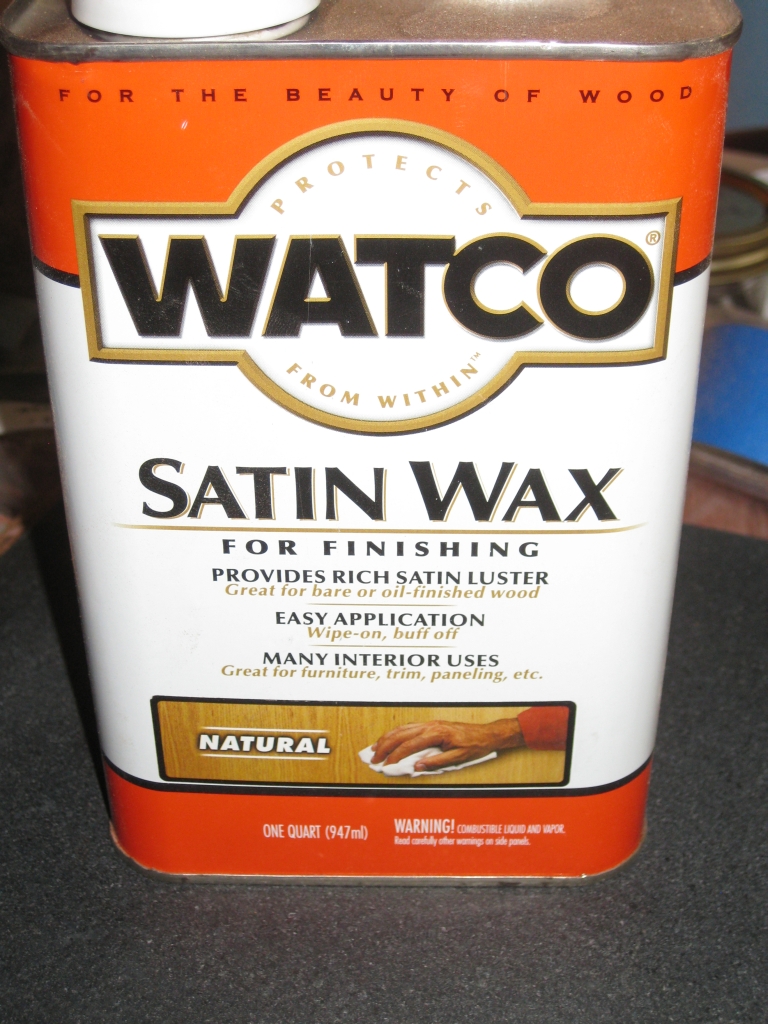
Watco Finishing Wax

Watco Finishing Wax

Next up in the process is to apply the finish. I use a three stage process currently. First up is to apply a couple of thin coats of lacquer. I mix the lacquer 50/50 with thinner, and apply two coats to the puzzle pieces. Working with the lacquer thinned like this, I have found I don’t end up with runs or drips. Given the size of the pieces I’m working with I use a small brush to apply the finish which could leave brush stokes with a thicker mixture. Each coat is applied and allowed to dry overnight before adding the next coat in the morning.

End of day one in the finishing process

End of day one in the finishing process

It takes around 20 minutes per puzzle to apply a coat of finish, and then it’s left to dry. I’ll show side by side photos below, so you can see the difference after each stage. It will probably not be too obvious, however the before and after shot shows worlds of difference!

First coat applied, and the pieces left to dry

First coat applied, and the pieces left to dry

After the two coats of lacquer are applied, I take a good look at each of the pieces. Sometimes the wood absorbs the lacquer more in certain areas, and the finish can appear uneven. If that’s the case, I’ll go back and apply a third, or even fourth coat of lacquer until the wood has absorbed the lacquer evenly. After each coat, the lacquer is left to soak in for around thirty minutes, and then I’ll come back and rub off any excess with a clean cloth. If the lacquer pools on the surface, it will dry hard and uneven, which can affect the fit of the puzzle, and certainly doesn’t make it look any better!

Once I’m happy, I’ll apply a liberal coat of the Watco finishing wax. This helps the pieces to slide past each other, and adds another layer of protection for the puzzle. After all these will be played with, so I want the wood to be protected. I leave the wax on the puzzle for around 15-20 minutes, then with another clean cloth, rub the excess off. Part of this process I also buff the pieces as I work the wax into the surface, but mostly I’m removing the excess.

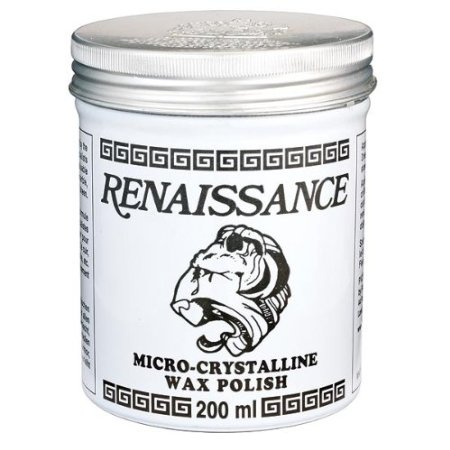
Renaissance Wax is used to apply the final coat to the finish

Renaissance Wax is used to apply the final coat to the finish

The final part to the finishing process is to apply a coat of Renaissance Wax. This incredible substance (which is not cheap!) brings up an amazing shine on the wood. Applying it leaves the wood with a slightly tacky feel, and a finish which is less than mirror. I apply the wax as evenly as possible, and then let it sit for 20 minutes. After that I take a clean cloth and start buffing the surface. It takes about 20 minutes per puzzle, but the wax really polishes up the surface and starts to make the wood shine.


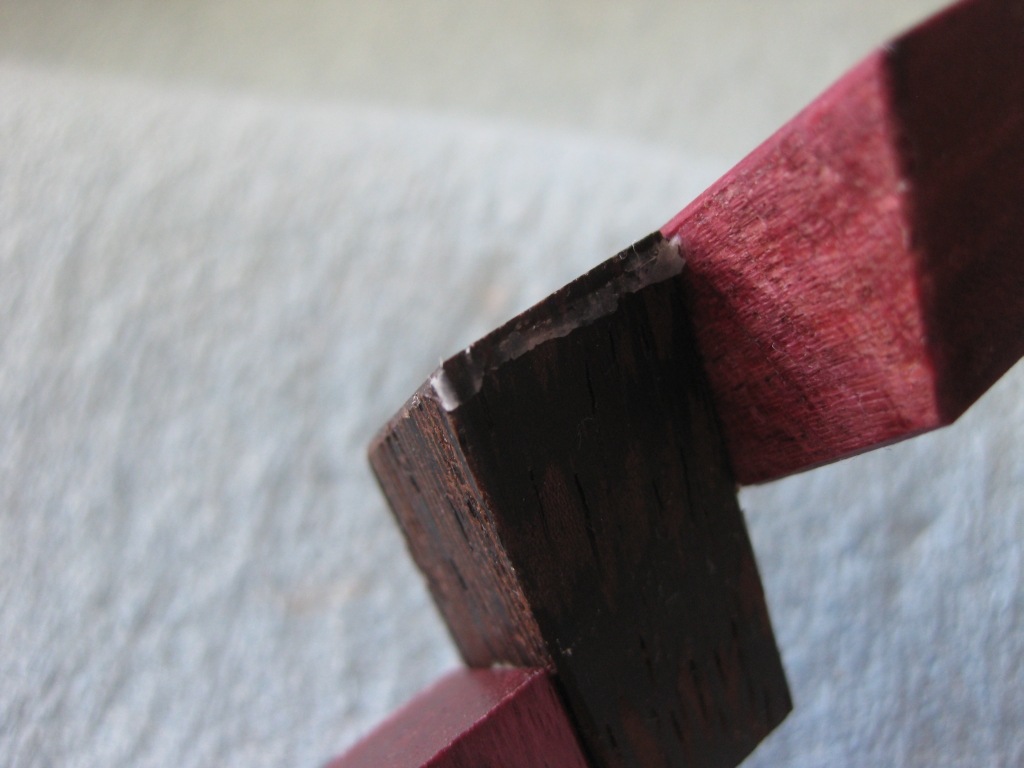
The Ren Wax gets inside the puzzle, and needs to be cleaned out

The Ren Wax gets inside the puzzle, and needs to be cleaned out

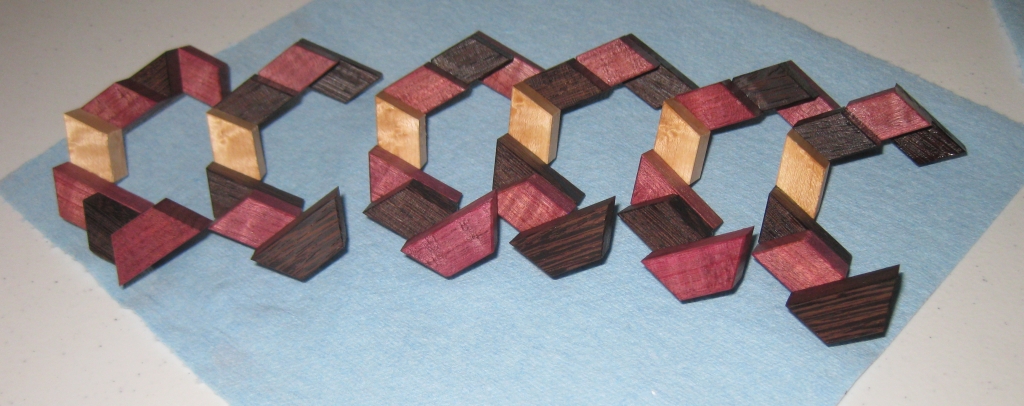
After the initial buffing, I take the puzzle apart, as the wax gets pushed into every little gap. This needs to be cleaned out before the puzzle is re-assembled and given another buffing. All told the process takes nearly 45 minutes per puzzle, but as you will see below, the results are worth every minute of it!
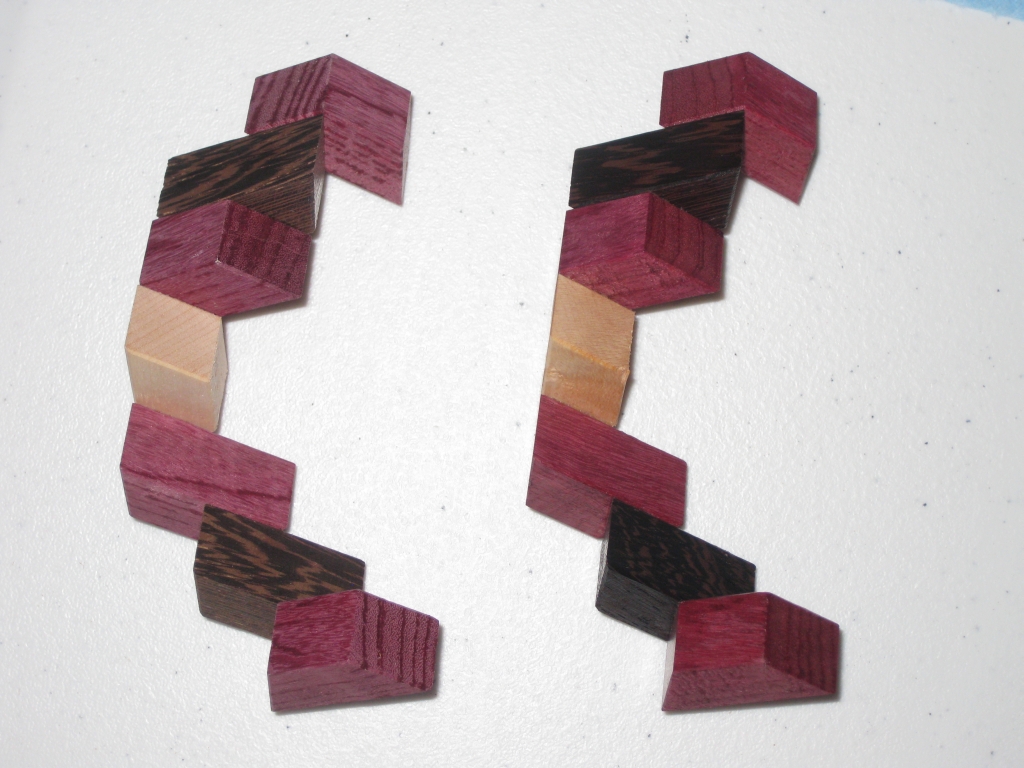
The finished finish, next to an unfinished piece

The finished finish, next to an unfinished piece

As you can see the difference from start to finish is dramatic. The surface ends up being quite reflective, and really brings out the grain in the wood. It may take ~4 hours per puzzle but the results speak for themselves.

The images below show each stage of the process compared with the unfinished puzzle. It may not be too easy to see the difference, as the changes are subtle.

Both coats of lacquer applied to the piece on the right

Both coats of lacquer applied to the piece on the right

The coat of wax applied to the piece on the right.

The coat of wax applied to the piece on the right.


I hope you’ve enjoyed the writeup of my finishing process. I freely admit that I’m no expert, and I’m learning as I go, however several of my readers have asked so hopefully this is useful to you. This is by no means the definitive guide to finishing, and certainly isn’t appropriate for all applications, however it does work for me when finishing puzzles, and I’m happy with the results. From the feedback I’ve had from those who’ve bought my puzzles, they seem to agree that I’m doing something right!

Hex Stair (Part Two)

Following on from by first post on the Hex Stair (Part One), I’m moving from the initial copy which I made for myself and realised it was far too big, onto a smaller version, which I’ll be making a small run of puzzles to sell. Making things smaller adds new challenges so read on to see what I had to do to overcome them.

The original and the new scaled down versions

The original and the new scaled down versions

As you can see above, I have seriously scaled down the size of the pieces, which makes for a much more manageable puzzle size. I am slightly torn in all honesty; I love the big solid chunky copy I made initially, but also appreciate that it’s far too big for most people, and the more compact size is far easier to work with … or is it?

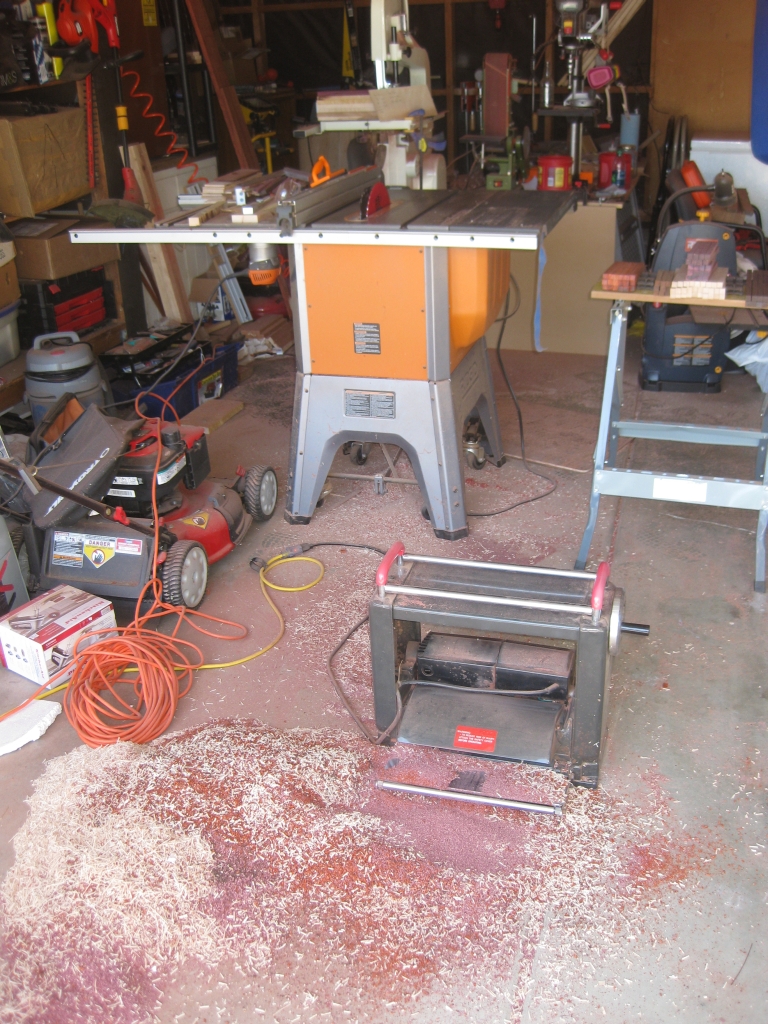
Lots of cleanup required after milling the boards

Lots of cleanup required after milling the boards

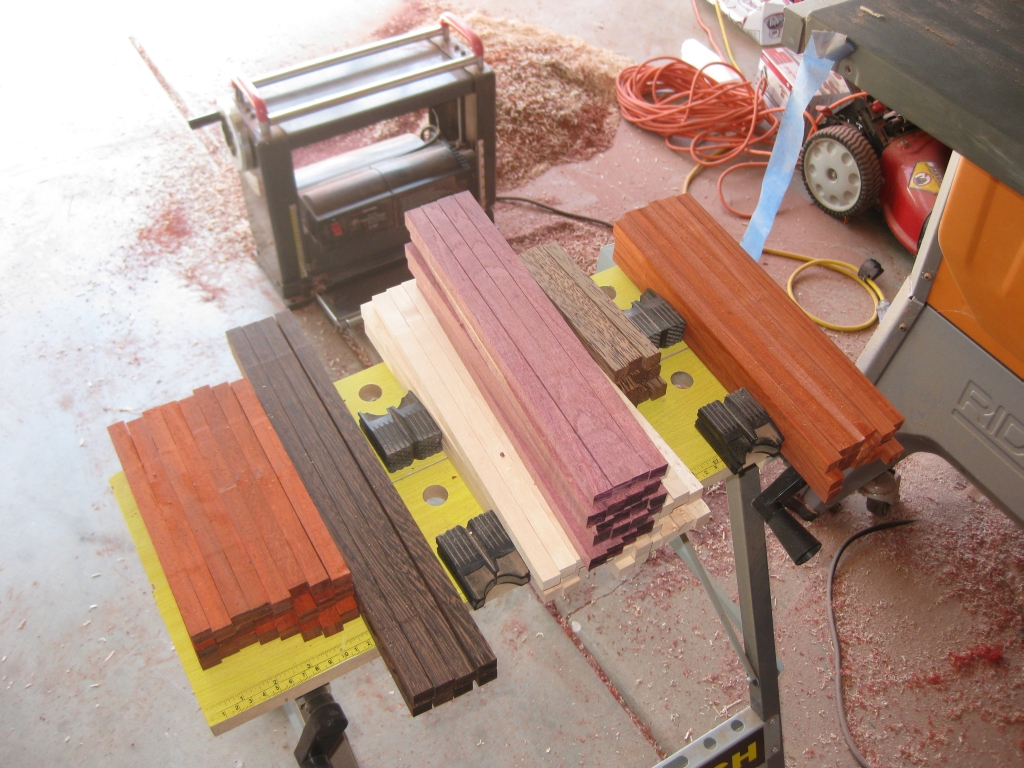
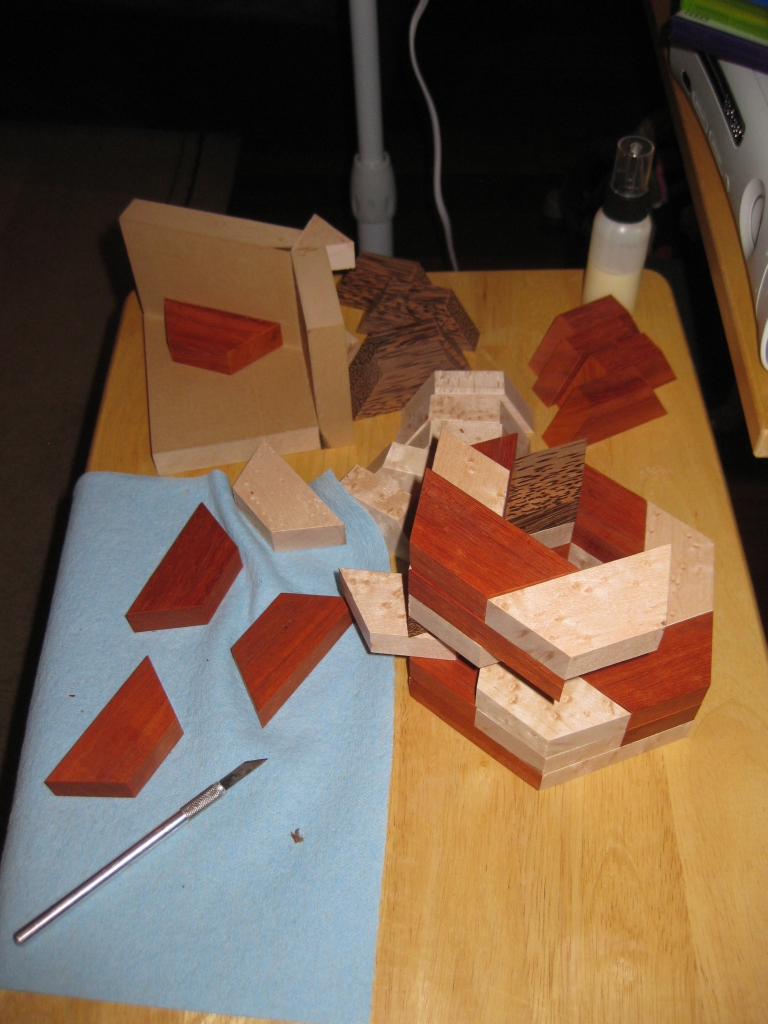
Having decided on the dimensions for this smaller version, I cut and milled my stock, cutting what I hoped would be enough sticks to make a reasonable run of puzzles. The pile of sticks looks like a lot, but I have no doubt that I’ll get through them pretty quickly. If you’re interested, the woods are (from left to right) Paduak, Wenge, Curly Maple, Purpleheart (on top), Birdseye Maple, Red Palm, Paduak.

All the sticks cut and sized ready for making into blocks

All the sticks cut and sized ready for making into blocks

I didn't have paper handy so some curly maple left over from the rough cutting worked great

I didn’t have paper handy so some curly maple left over from the rough cutting worked great

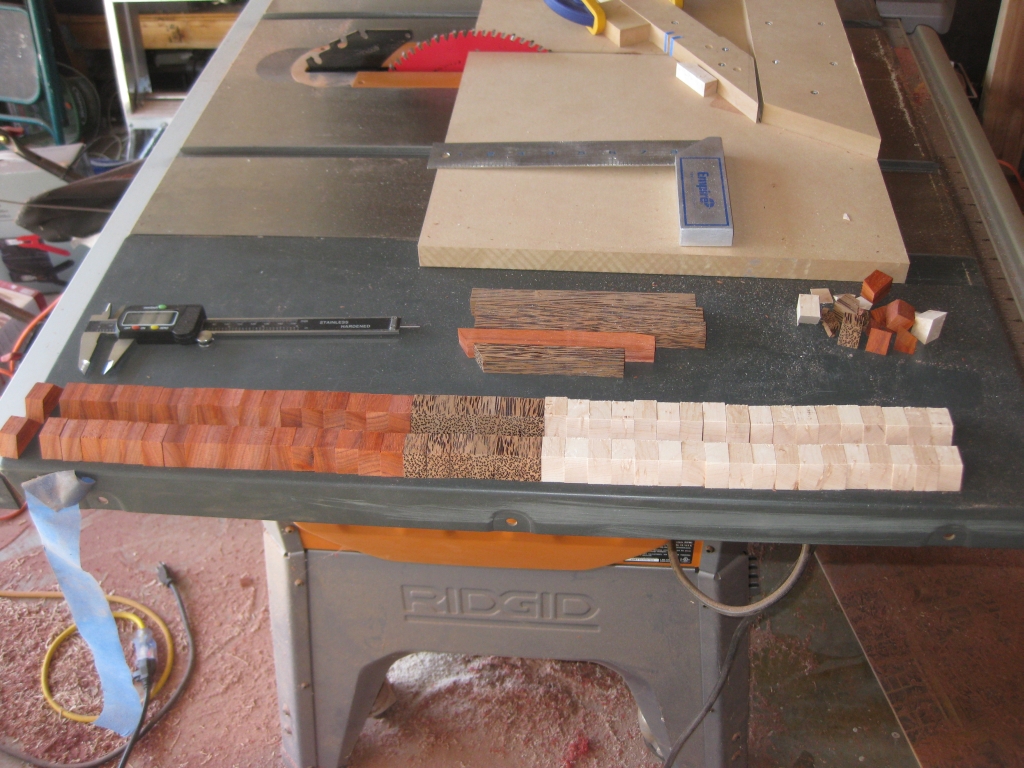
With everything setup, I started batching through the cutting of the pieces, and despite needing 42 pieces per puzzle, once everything is setup, this goes fairly quickly. I keep my digital calipers beside me and keep checking the cuts as I go to make sure I’ve not had any errors introduced, as the biggest reason I have found for a puzzle not fitting correctly is tiny differences in the tolerances of cuts. Anything more than about five thousands of an inch between pieces and the fit will not be good enough. Ok, five thousands is pretty small I hear you cry, but I try to get my pieces to less than two thousandths to make sure I don’t have problems. Sadly I’ve learned from experience that even small margins like this make the world of difference and cause a lot of frustration when gluing pieces together in the type of puzzles I’m making.

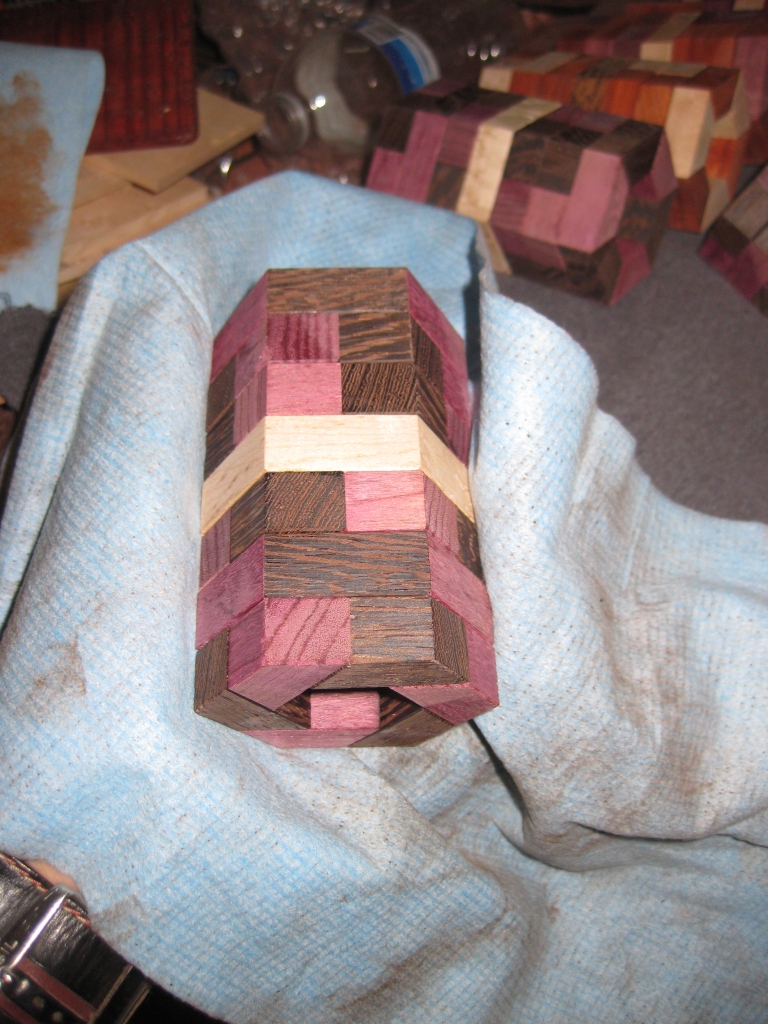
Several puzzles worth of pieces cut and ready to be beveled.

Several puzzles worth of pieces cut and ready to be beveled.

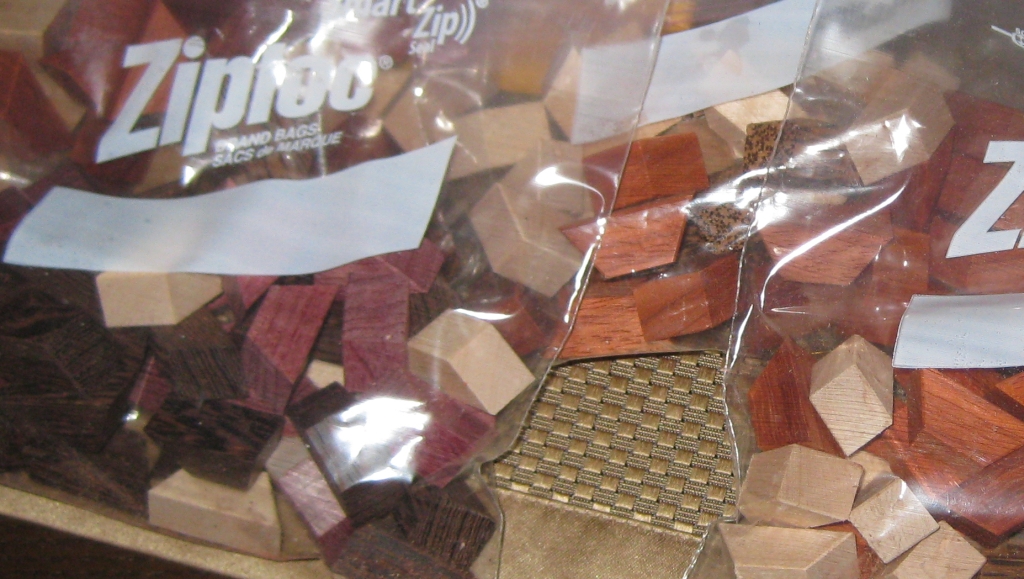
Having batched out a good few pieces; enough to make a few puzzles; I take a break from cutting the pieces and move to the router to add the bevel to the edges of the pieces. I find that taking a break like this keeps me focused and alert, rather than becoming complacent as the motions get repetitive, and it’s all too easy to lose focus … and as I have already experienced, a tiny lapse can be very costly!

Bags of blocks beveled and counted out per puzzle.

Bags of blocks beveled and counted out per puzzle.

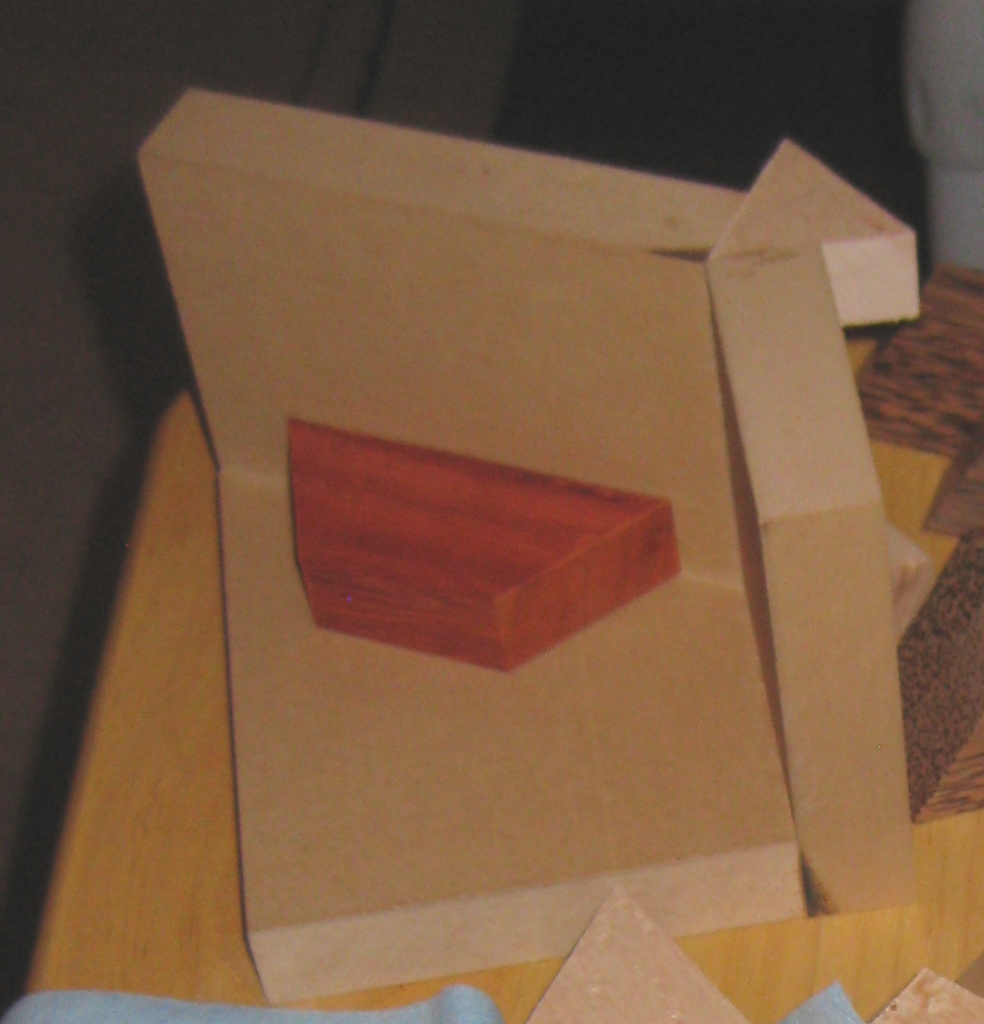
With all the pieces cut and beveled, it’s time to start gluing the puzzles together. You’ll remember the crude jig that I made for the initial puzzle, which worked pretty well. I found out though that with the smaller pieces, there’s not a lot of gluing surface, and I made the pieces almost as tall as the are wide. (They’re not perfectly square!) Because of this, it’s easy for the pieces to get misaligned, so I felt I needed a better jig…

Hex Stair Speciality Jig

Hex Stair Speciality Jig

Speciality Jig showing piece in place

Speciality Jig showing piece in place

Speciality Jig showing piece completed

Speciality Jig showing piece completed


As you can see this jig is a little more advanced than the original, however the main drawback is that it will only work for this puzzle, and only for pieces cut to the exact sizes that I have used. While that may seem like something of a waste, for the most part, the jig is made from offcuts from the sticks I used so really it’s putting small cuts which would otherwise be used in my fireplace to good use. The jig is a very snug fit for each piece, and as you can see each piece is well supported meaning that each completed piece I make in the jig will be identical and it’s also very quick to use, since there’s no way to misalign a piece. With this jig, it takes around 15 minutes to make each individual puzzle piece, meaning that I can make a complete puzzle in around 2 hours (allowing for the curing time of the glue). This as nearly 2.5 times faster than previously. While it may seem like it still takes a long time, I’d rather take my time than rush and end up with a useless pile of firewood. After all, a high quality puzzle doesn’t get made in a minute.

With the jig doing all the hard work for me, it doesn’t take too long to make a copy of the puzzle, to the point where the outside faces get sanded and then finish applied. In Part Three, I’ll cover some of the finishing process.

One thing I noticed when assembling this version of the puzzle is that it’s actually easier to put together than my original version. One of the reasons is that I’ve found a particular rotational move which allows the alignment of the pieces to happen much more easily. I didn’t find this on my original version, I think partly because it is much more squat than the new dimensions. The extra height makes it easier to do this move (although I have gone back and found that it is also possible on the original copy).

Hex Stair (Part One)

Not too long ago, I posted a few pictures of some of the puzzles I’d been making on Facebook. One of those was a copy of Oskar van Deventer’s design “Oskar’s Domino Tower”. I’ll write about that in another post, however when I did, my good friend Derek Bosch got in touch about a similar design he’d created called Hex Stair. To his knowledge, the design had never been made, and I decided that it would be a fun puzzle to try to build after seeing the design.

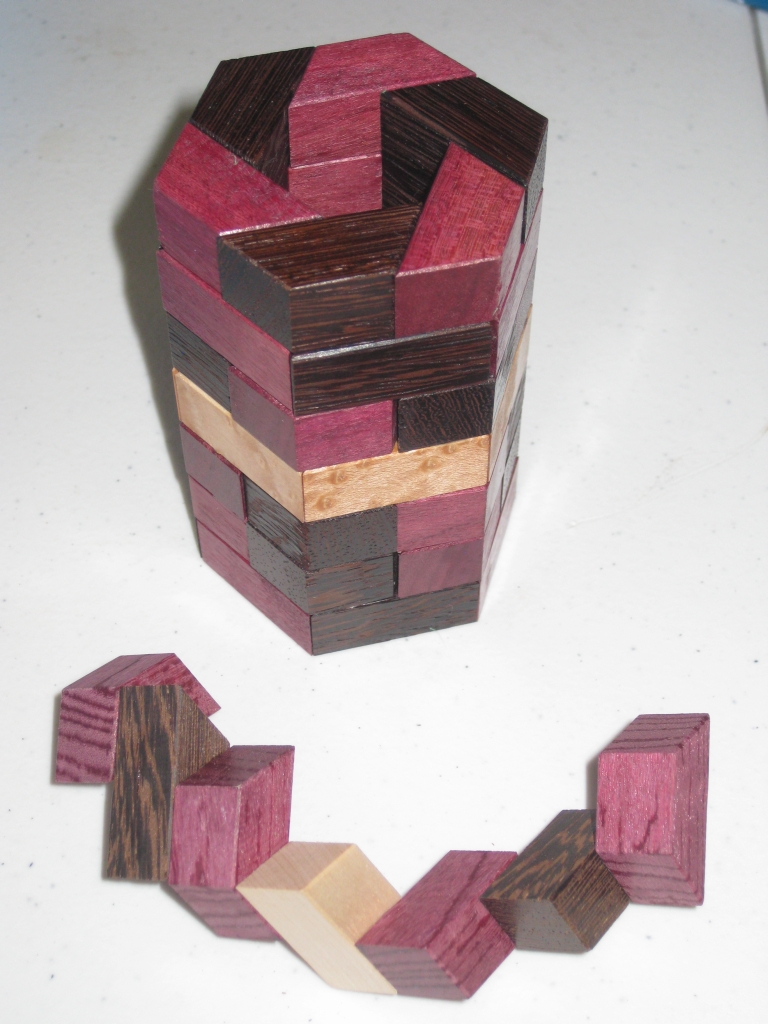
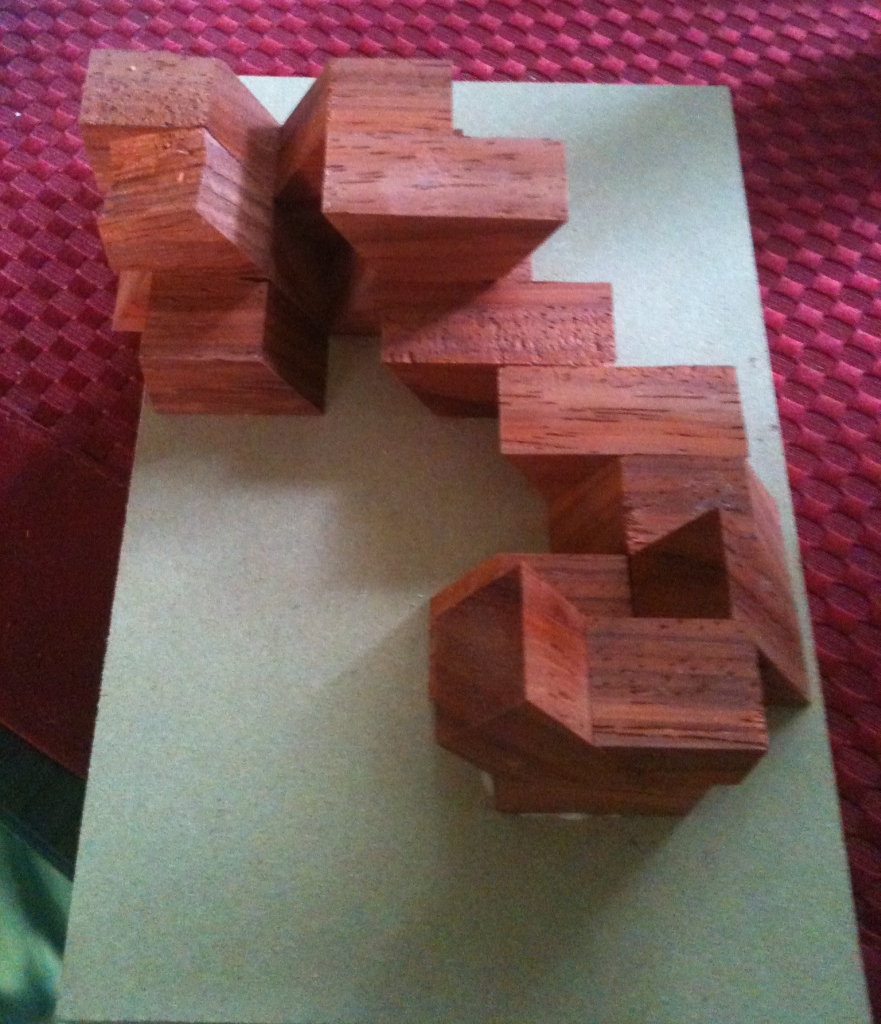
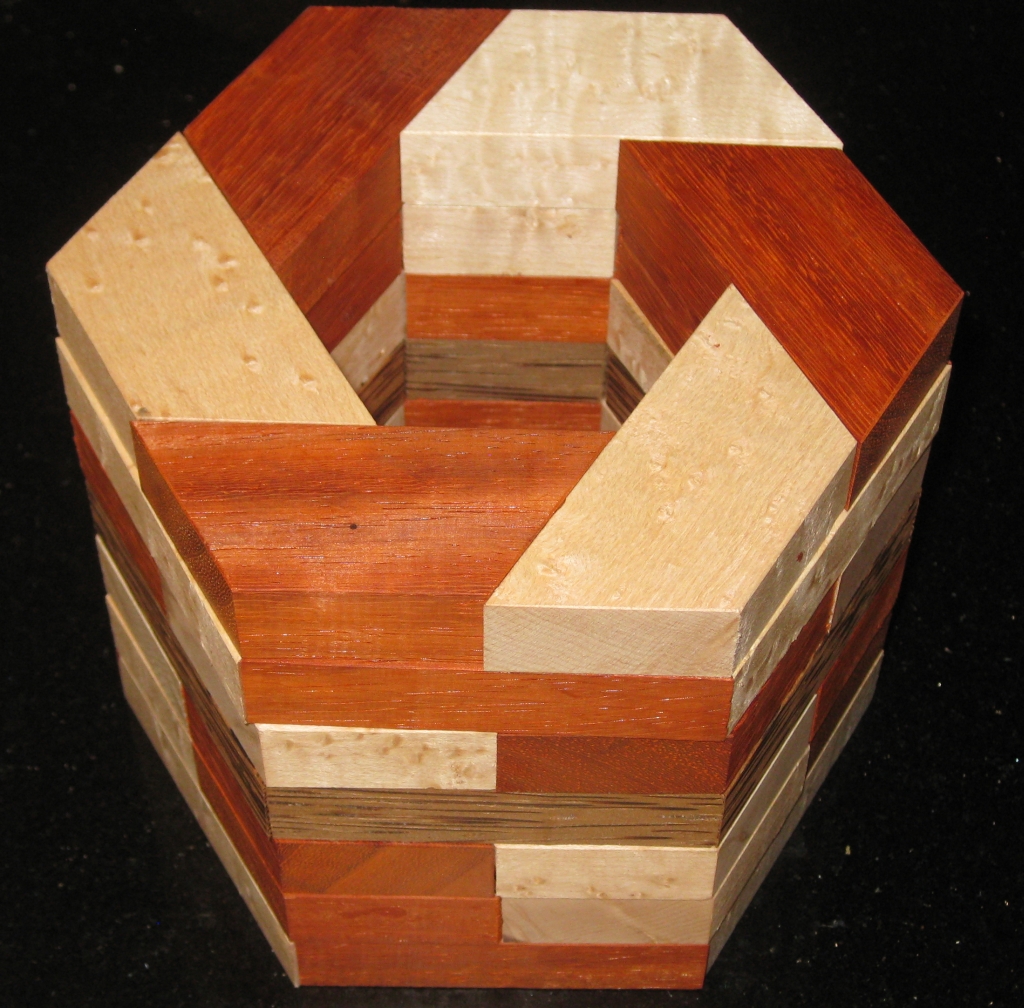
Hex Stair Solved

Hex Stair Solved

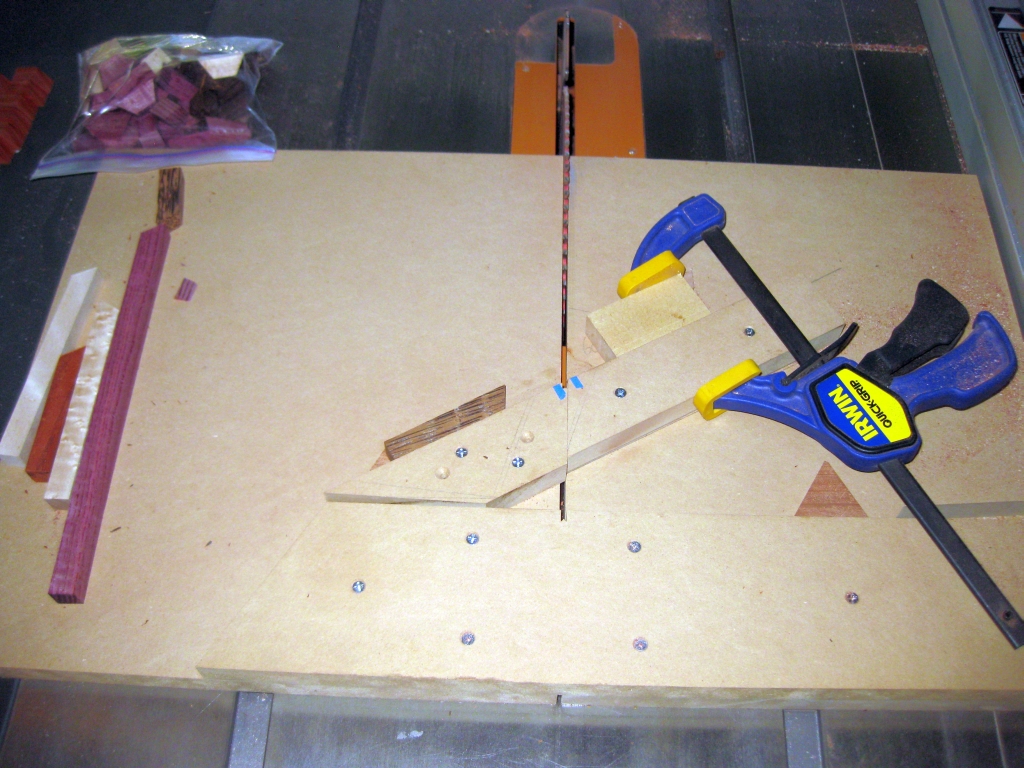
As you can see the design is based on a hexagon. So that means making cuts at a 60 degree angle. To do so repeatedly, I was going to need a new jig, specifically a cross cut sled setup for that angle. I’ve gone through the process to create a cross cut sled before, so I’m not going to go over that again here. I used the same basic MDF construction using 3/4″ boards, and I cut myself some maple runners as guides for the sled. If you want more info about creating the sled, then have a look at my post about going From Square Sticks to Cubes. Clearly rather than a 90 degree angle on the sled I was looking for 60 degrees, and with a little tuning, and a few practice cuts, I had the sled producing perfect angles.

60 degree Crosscut Sled.

60 degree Crosscut Sled.

To do that, there’s no point in measuring just one cut. Rather it’s better to make 6 cuts, creating a hexagon frame, and bring those pieces together. If they come together with no gaps, then you’re golden. If not then you need to adjust the angle of the backstop on the sled. Ed: The reason for doing this is that it multiplies any error in your sled by a factor of 6. I didn’t get things perfect on my first attempt, so I adjusted slightly and then re-cut the test pieces. This time I was pretty close and didn’t think I was going to get much better so I called it good. To make tiny adjustments, a strip of tape can be used to adjust the angle. Obviously I could create a sled with a variable back stop, and have screws to push or pull it for a perfect fit, but for now I’m not looking at spending too much time. If I find many puzzles which require 60 degree angles that I want to make, then I’ll consider making a more advanced jig. Ed: What is it about us that we’re never happy with what we have, we always want it to be better?

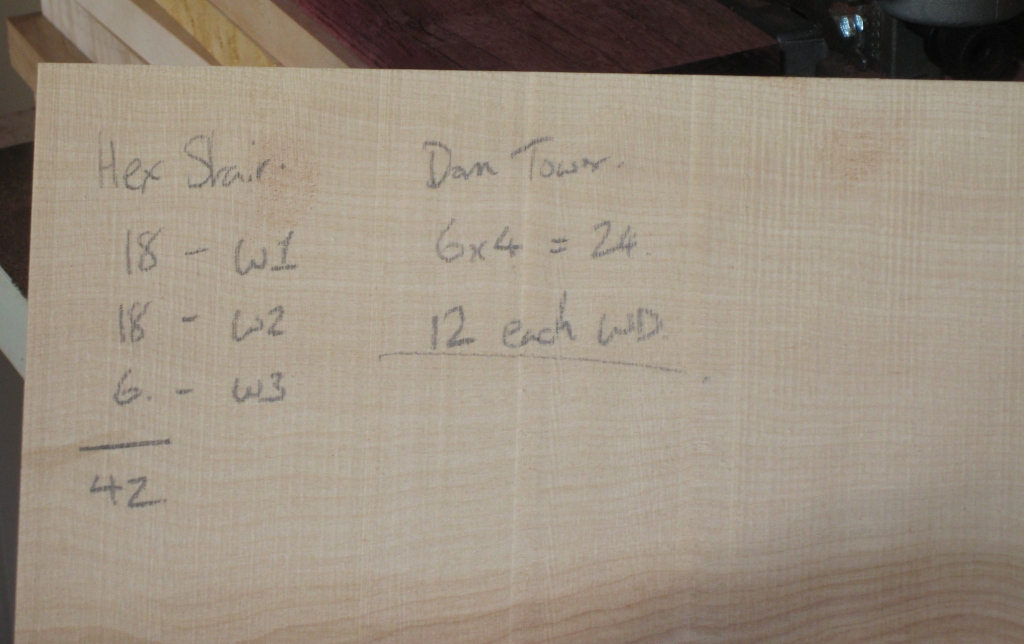
With the sled ready, I milled my stock, selecting some Paduak, Birdseye Maple and Red Palm that I’d had sitting for a while, and got to work on the new jig. There are 42 pieces required to make this puzzle and given that there are 7 layers, I decided to create a band in the centre of the puzzle. Since it’s never been made before, I’m not biased by something someone else has done, and I thought it would look fairly good. You can be the judge, based on the photos! I got to work cutting 18 pieces each of the two main woods, and 6 pieces for the centre ring. With that done, I took the pieces to the router and added a very subtle bevel to the long edges. I quickly found out here that beveling the pointed edges can’t be done on the router as there is nothing for the guide to reference off, and given the thin nature of the pieces, this would be a fairly dangerous cut, so I opted not to bother. I think in the finished puzzle, it works out very well, as it makes it look as though there’s seven rings, rather than 42 individual pieces. Again it’s all personal taste, but I’m happy with the results!

Gluing the pieces together into a finished puzzle presented me with a few interesting challenges. Firstly, it’s not square, so my current gluing jigs are no use. Also the puzzle is fairly tall, with each individual piece of the puzzle having a very small footprint, making it unstable without a lot of support, so ensuring that everything is glued up perfectly alighted is an interesting challenge.

60 degree basic gluing jig

60 degree basic gluing jig

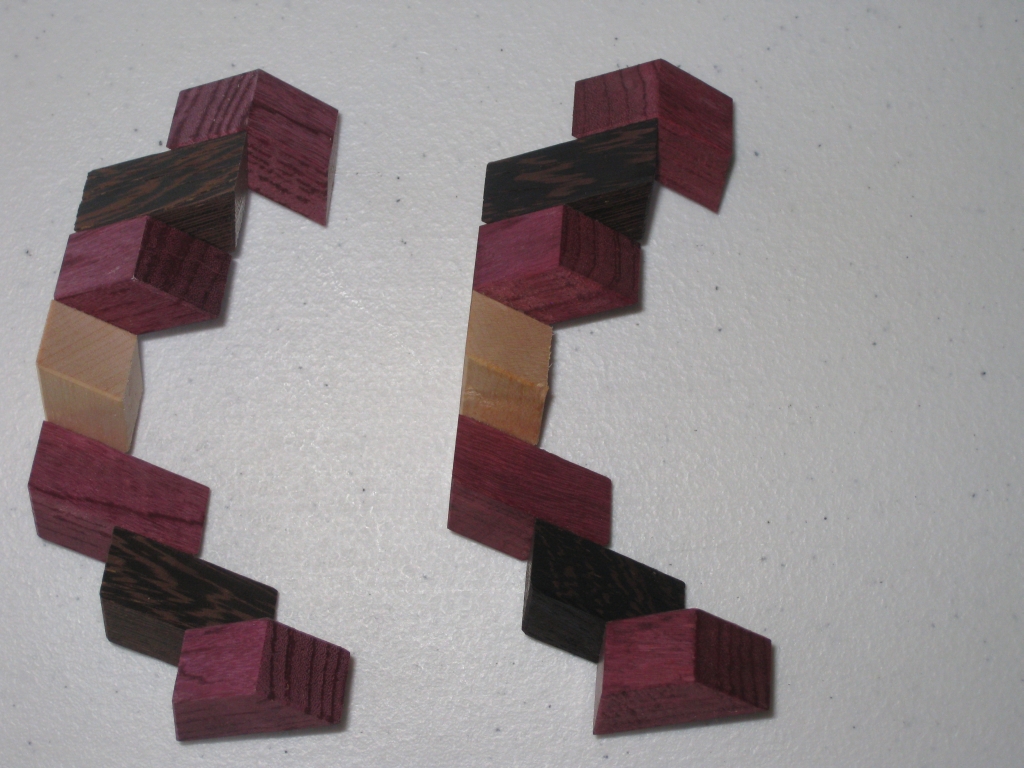
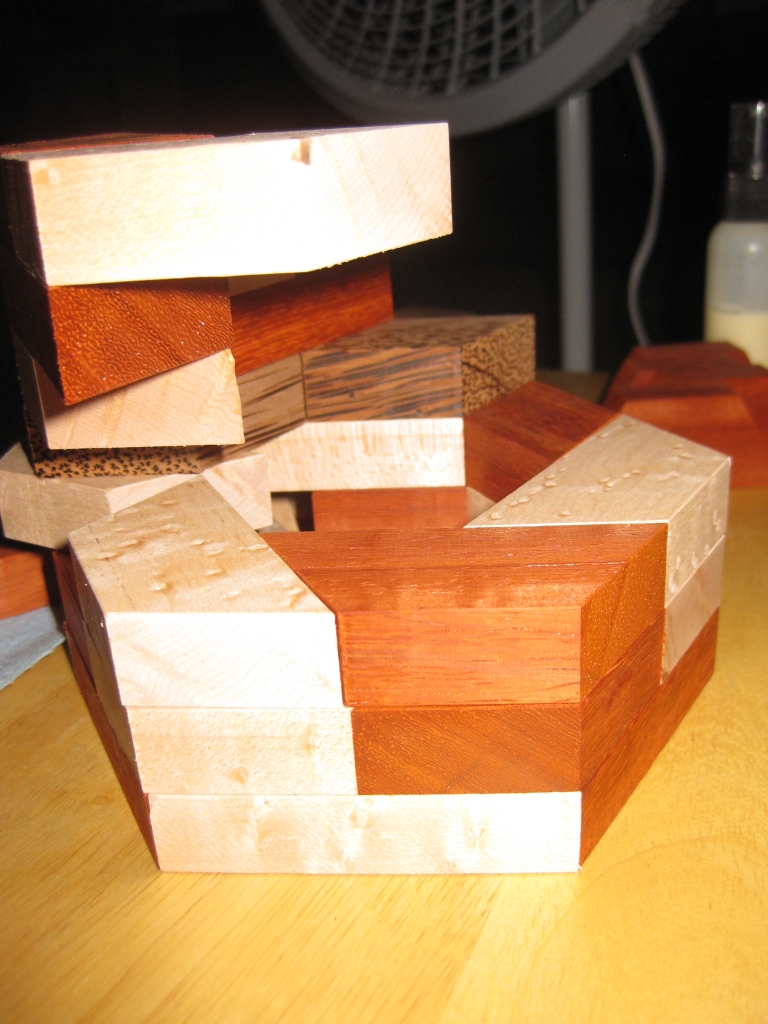
My first gluing jig was a pretty simple progression from my square corner gluing jig. Using the 60 degree crosscut sled I was able to create a simple base and walls at the correct angles, and re-inforced the centre angle with a couple of the equilateral triangles I’d cut when I was cutting the original pieces. The inner surface was waxed to prevent glue sticking to it (and hence sticking the pieces to the jig) while I was working. This worked pretty well, and I created the original puzzle using this jig, and the pieces I’d not glued in place to support and align the piece I was gluing.

Supporting the pieces while gluing

Supporting the pieces while gluing

Supporting the pieces while gluing

Supporting the pieces while gluing

All said it worked fairly well, and the end result was reasonable. I did find that there were a couple of pieces which hadn’t lined up perfectly. But I used an interesting trick to fix that. With the six pieces of the puzzle together in the solution shape, I put the whole thing in the microwave for about a minute and a half on high. With my now warm puzzle, the glue is softened enough to allow the pieces to shift slightly if enough pressure is applied. By doing this I was able to re-align the couple of pieces I wasn’t happy with and get a near perfect fit. Now I’m not suggesting that this is a solve all for bad initial gluing as it really isn’t, bit in the few hundredths of an inch that I was misaligned on one or two pieces it can be corrected, rather than throwing away an entire piece.

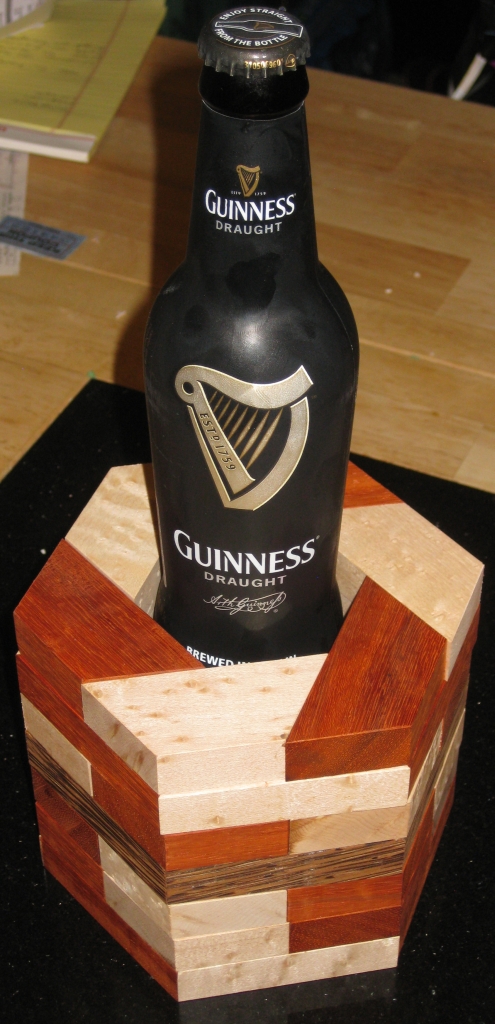
Puzzles and Beer...

Puzzles and Beer…

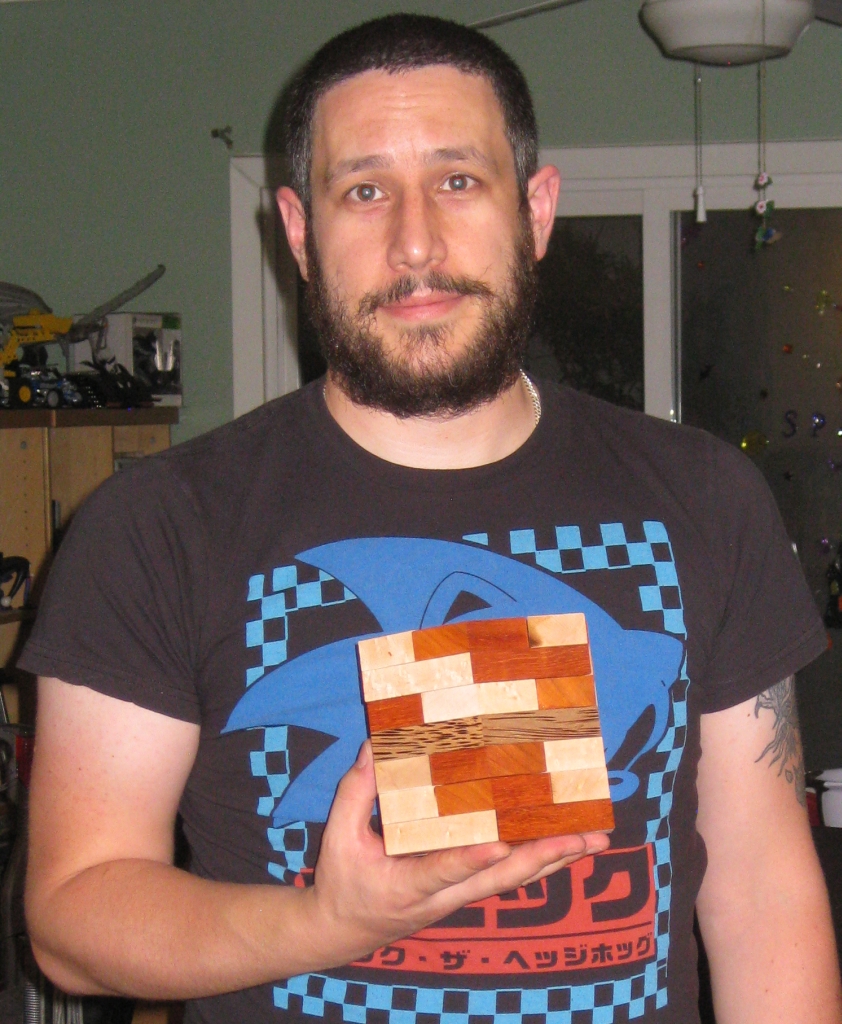
Me holding the puzzle

Me holding the puzzle

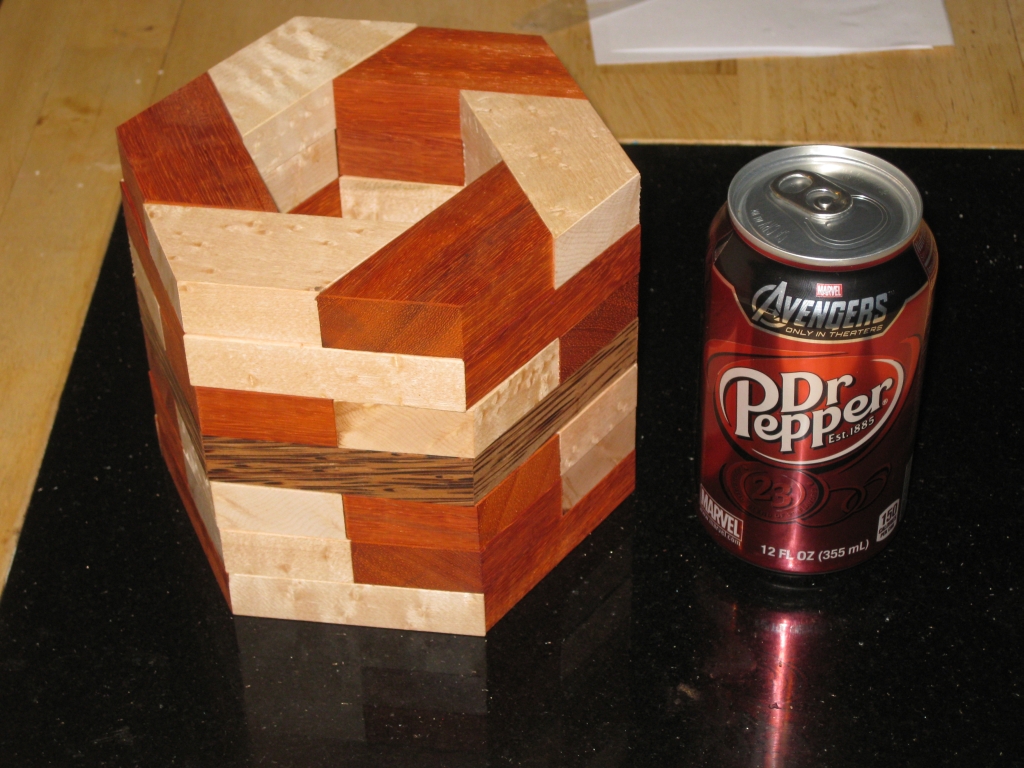
Scale next to a soda can

Scale next to a soda can


Overall I’m pretty happy with the results, although the size is certainly an issue. As you can see it’s a big puzzle, and not really realistic in terms of making them in a production run. It seems that I’m pretty good at forgetting how big a puzzle ends up when you glue all these ‘small’ pieces together. Part of the learning curve I’m on just now, but it’s all valuable information.

In part two I’ll look at making the puzzle in a more sensible size, and talk about the unique jig I built to help. Since I’ve had several requests, in part three I’ll talk a little about finishing.

The Opening Bat

The Opening Bat by Mr Puzzle is a pretty serious sequential discovery puzzle which was ten years in the making. When the puzzle was first released in 2010 I looked longingly at it, but had to resist the urge to buy one as I couldn’t justify it at the time. A year later, and Brian still had a few copies available. Well the money was burning a hole in my pocket, and even though I’m not a huge cricket fan (despite playing in my youth) I’d heard a lot of good things about the puzzle, so took the plunge and ordered a copy.

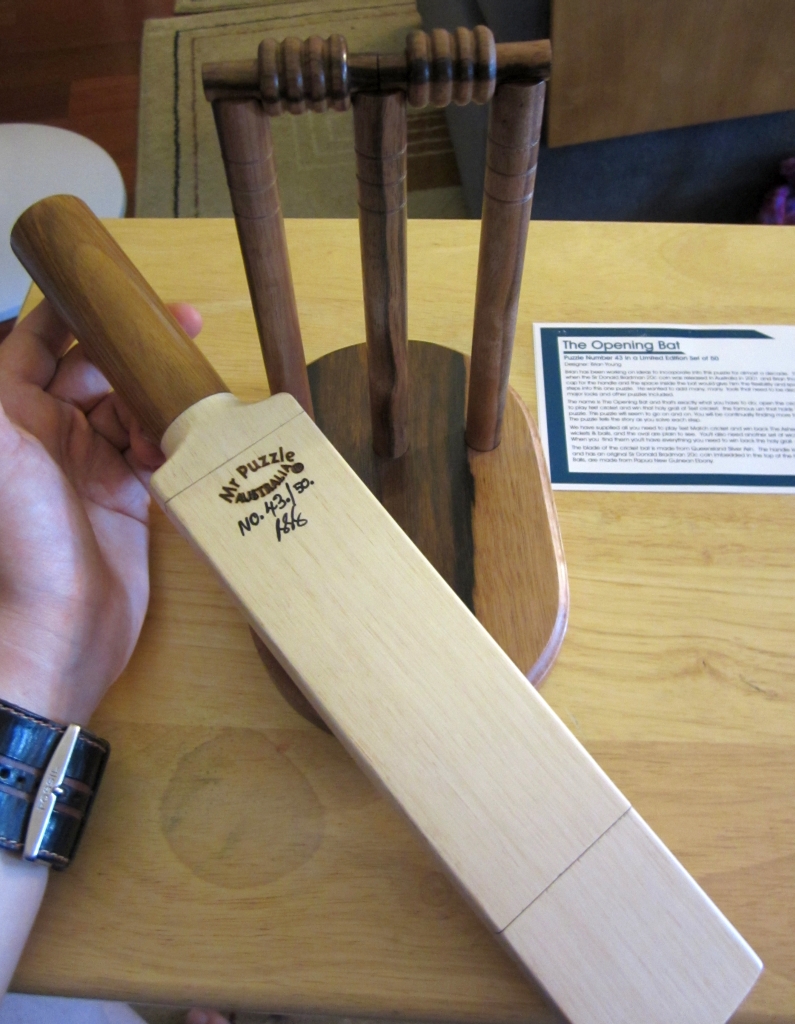
The Opening Bat by Mr Puzzle

The Opening Bat by Mr Puzzle

A few weeks later, the puzzle arrived very carefully wrapped and I excitedly opened the box to find the bat, and wickets securely stowed along with a couple of other puzzles I’d ordered at the same time. To give you an idea of scale and the look and feel of the puzzle, I’ve put together the video below. Read on for my full thoughts, and a rather scary moment when I was solving the puzzle for the first time.

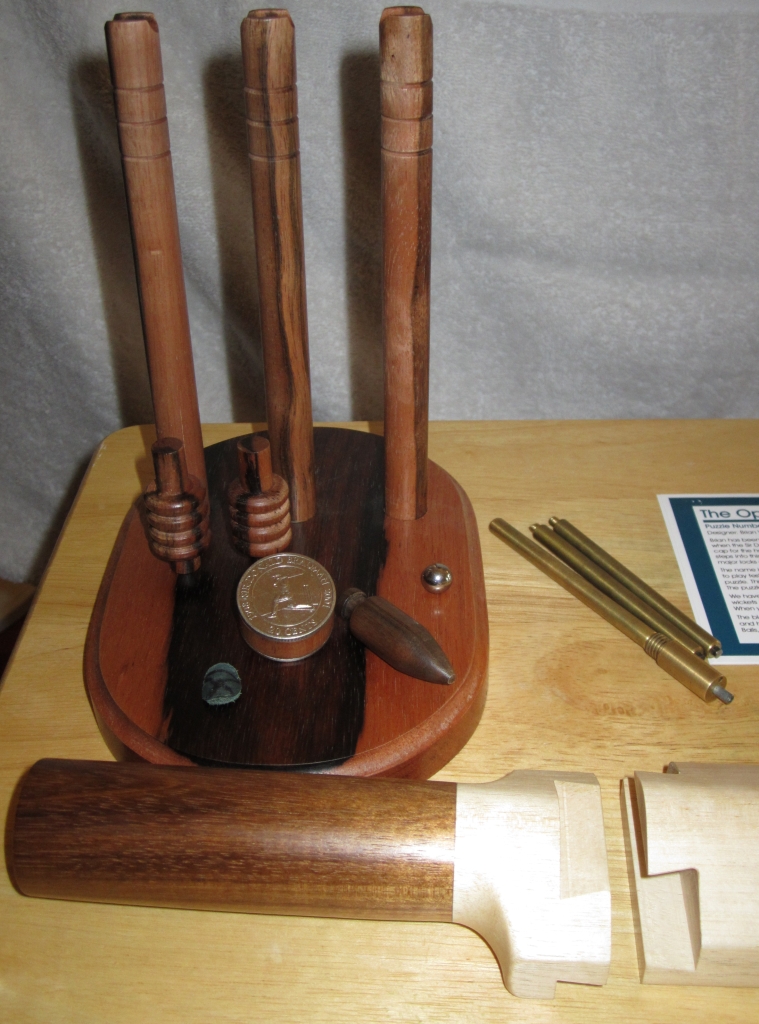
As you can see from the video, the puzzle is not small. The Bat measures 13.75″ x 2.3″ x 1.3″, the Oval is 7.25″ x 5″ and the wickets stand 7.9″ tall. Limited to just 50 copies, there’s not too many of these around, so I’m pleased to have been able to get one. Brian tries to use local Australian woods wherever possible, and The Opening Bat is no exception. Normally cricket bats are made from willow, as it stands up well to the impacts from the hard cricket ball. Unfortunately it’s not a great wood for making puzzles from. Brian uses Queensland Silver Ash for the blade of the bat in the puzzle. The handle is Tasmanian Blackwood and the Oval, Wickets and Bails are all Papua New Guinean Ebony. Overall it’s a stunning looking puzzle, and given it’s size certainly has a presence on my puzzle shelves. (Not to mention that I had to re-arrange the shelves somewhat to accommodate its height!) There is a small brass pin embedded in the base of the oval which matches with a similar hole in the bottom of the bat, which allows the bat to sit as though it is resting against the wickets. It’s a nice touch and makes for a great display piece.

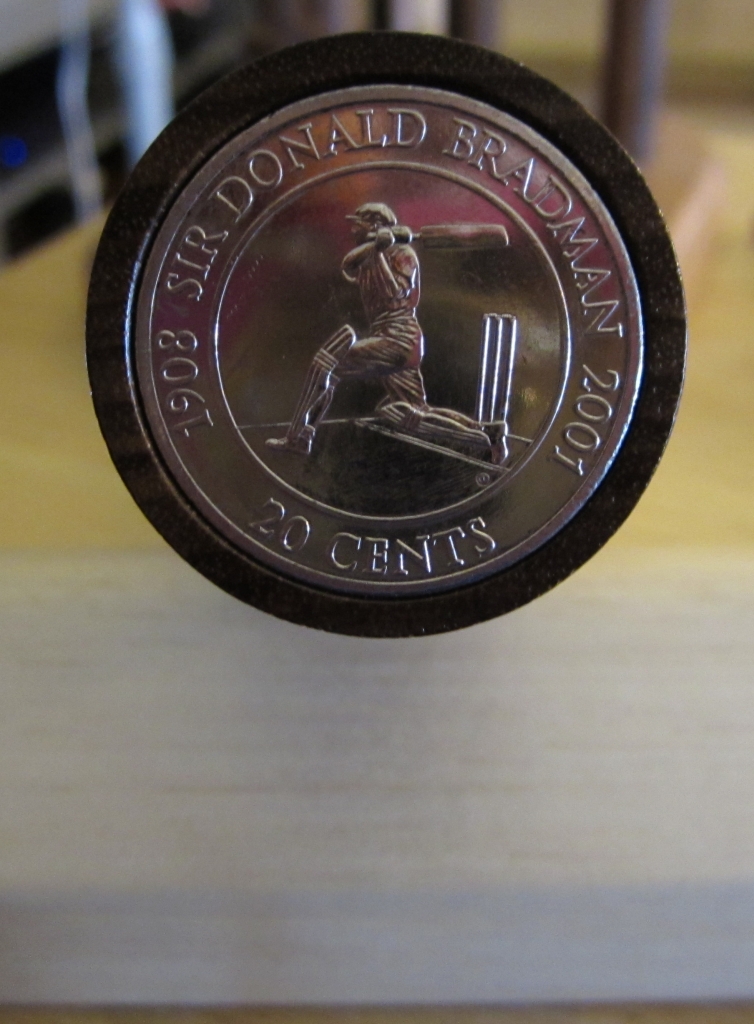
Sir Donald Bradman coin crowns the handle

Sir Donald Bradman coin crowns the handle

The final goal of the puzzle is to remove the Sir Donald Bradman coin from the top of the handle. There’s no chance of prising the coin out of its current spot, and certainly not without damaging the handle, so I’ll save you the trouble of thinking like that and tell you to forget that idea now. Besides, if you could get to the end of the puzzle without taking the journey then you’d really be missing out.

The coin itself is really the inspiration for the puzzle and according to Brian, the first ideas for the puzzle came around when the coin was released in 2001. From that point, it seems like Brian’s mind went into overdrive and he continued to add elements to the puzzle. Now some people may disagree given the difficulty, but I for one am pretty happy with all the work Brian put into the puzzle. The size and shape of the bat has given Brian a lot of space to work with, and he’s crammed a lot of steps into that space. The puzzle consists of three main puzzle locks, which must be solved to release the coin at the top of the handle. However there are many more steps along the way to find all the tools required to open each lock. In Brian’s own words, “As far as sequential discovery puzzles go this one’s on steroids!”

When it came to solving the puzzle, I’ll admit it took around two months for me to solve the puzzle with probably around 5-6 hours of time actually spent working on the puzzle. Why so long? Well sadly work had been hectic and I simply didn’t have the time to sit and play with puzzles. As a result there were long periods where the puzzle and the tools I’d found sat on a table taunting me with my lack of progress.

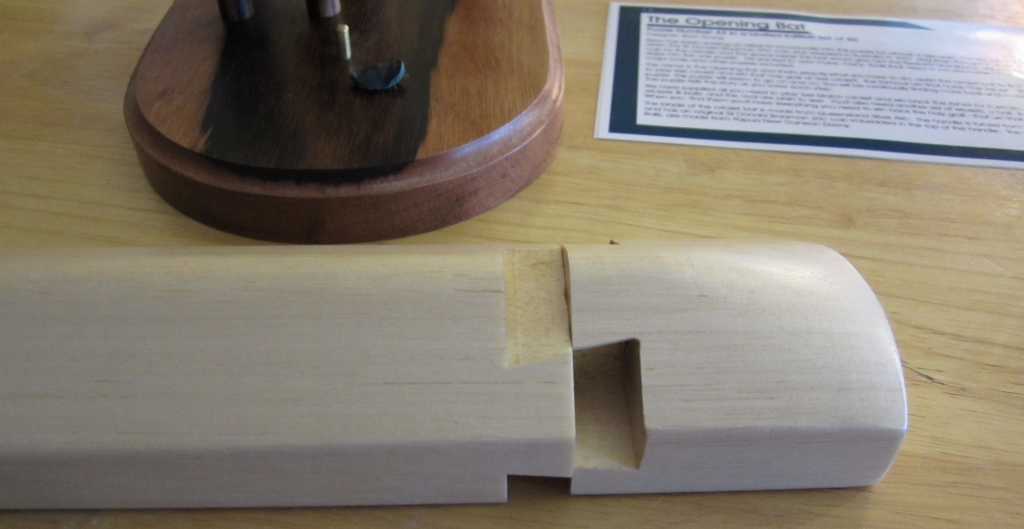
The first lock defeated

The first lock defeated

Nothing in the puzzle is quite what it seems. Brian has managed to conceal tools in every possible part of the puzzle, and some very close attention is required to be able to find everything you need. I was fairly lucky and found the first hidden tool fairly quickly, which also revealed the Baggy Green Cap. Another ten minutes or so, and I’d successfully navigated the first lock, and removed the bottom of the bat.

With the first piece of the bat removed, it can be set aside. There’s nothing else useful in there. What you’re presented with now is the head of two hex bolts and the lock from the first stage, neatly hiding in holes drilled into the main section of the bat. Now being a good puzzler, I know that external tools are not required, so I didn’t go hunting in my tool box for a way to remove those bolts. Instead, more investigation of the puzzle is required. As it happens, I was remarkably lucky, and stumbled upon the tool I needed by pure luck.

I was sitting with the pieces of the puzzle on my table, and happened to have a folding knife sitting on the table. At one point I must have nudged one of the pieces, and it rolled across the table, un-noticed by me. After a while fiddling, I looked across and found that the piece was stuck to the blade of the knife!

Well Brian mentioned that there were lots of magnets used in the puzzle, and it seems I’d found one! As it happens this piece if the puzzle is so well disguised, I have no idea how long it would have taken me to find this tool had it not been for that piece of luck. I have to commend Brian here, as the grain matching, and fit of the particular piece is incredible!

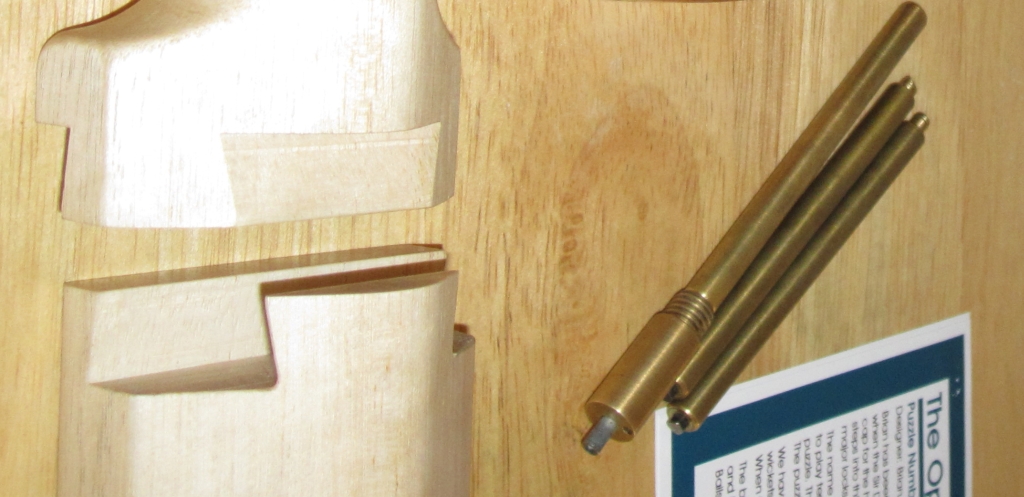
So with a new tool found, I quickly removed the rods on either side of the second section of the bat, before hitting another dead end. I had no idea how to remove the central rod, but there is a small clue as to what you might need to help with that process. It took probably another half an hour, or more for me to find the well disguised tool needed and be able to remove the third rod. At this point I’ve now managed to discover the three extra wickets needed to play Cricket, but I’m still no closer to opening that second lock!

From here I sent several hours trying to combine the various tools I’d found up to this point, along with a torch to try to see to the bottom of those long holes in an attempt to open the second lock. I lost count of the number of combinations of things I’d tried, and none of them seemed to help. In a fit of desperation, I placed a particular tool I’d found into the hole, thread first, and then used a different tool to reach to the bottom of the hole, and turn it. Now, that was a pretty bad idea, as the first tool ended up stuck and I was pretty sure at this point that I’d gone wrong.

I sent an email to Brian who helped me confirm exactly what I’d done then gave me a few suggestions as to how to fix the problem, and the assurance that regardless of what I’d done, in the worst case, I could send it back to him and he’d fix it. Now I appreciate that I’ve been remarkably vague here, but I’m trying not to give anything away. As it happens Brian’s suggestion worked, and I was back in business. If you want to see what I did, then click here. And if you have this puzzle yourself, don’t drop anything down the holes that you can’t reach to pull back out! as it turns out, I’m not the only person to have put something into the puzzle that wasn’t intended… at least I used something that came with the puzzle.

The second lock defeated

The second lock defeated

So with my panic over, I was back on track to solve the puzzle, however I still hadn’t opened the second lock. Fortunately, it didn’t take too much more time to be able to remove the final piece holding that dovetail joint in place and I had the second lock open!

All that remained now was the handle of the bat, and the third lock. Now I already knew that the puzzle here was the same as the one contained in “Houdini’s Torture Cell” as Brian had noted that the reason he made the Torture cell was so that more people could have access to this little puzzle, however that didn’t make solving it any easier. Unlike the Torture Cell where you can see what’s going on, here everything is blind. That said, you can figure out what’s going on fairly easily, and with a little luck, you’ll have that coin rising out of the handle fairly quickly.

The puzzle fully solved

The puzzle fully solved

True to Brian’s word, when you open the last lock, not only is the coin removed, but you’ll find you have a second set of wickets (brass rods), the cricket ball (silver ball bearing) and at this point, you should be good for that game of cricket to win back the Urn containing the ashes, which is also there.

For the observant amongst the readers, you’ll notice that I’m not really showing many of the tools in the pictures, and that is entirely deliberate. I don’t want to give anything away, that might spoil the discovery should you get a chance to play with this puzzle yourself. I’ve also been very careful not to give any clues when it comes to how things are hidden in the puzzle. Really a huge part of this puzzle is the journey of discovery as you find each element, and I’d hate to spoil that. It’s too good a puzzle to ruin it for you.

Overall, I really enjoyed the puzzle, and highly recommend it should you get the chance to own one, or if someone is willing to let you play with their copy, don’t pass on the opportunity. Brian has done a great job and there’s clearly a lot of time and care went into the puzzle. Hat’s off to you sir, it’s a great puzzle!

Allard and Brian have also reviewed the puzzle on their blogs, so if you want another opinion, then go read what they have to say.